1
WarmwasserWärmepumpe für
Innenaufstellung
Installation and
Operating Instructions
English
Instructions d’installation
et d’utilisation
Français
Montage- und
Gebrauchsanweisung
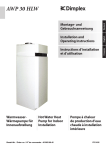
Hot Water Heat
Pump for Indoor
Installation
Bestell-Nr. / Order no. / No de commande : 451902.66.47
Deutsch
BWP 30 HLW
BWP 30 H
Pompe à chaleur
de production d’eau
chaude à installation
intérieure
FD 8803
Table of contents
1
Please Read Immediately .............................................................................................................E-2
1.1 Important Information.............................................................................................................................. E-2
1.2 Regulations / Safety Information............................................................................................................. E-2
Description.....................................................................................................................................E-3
2.1
2.2
2.3
2.4
3
General Information ................................................................................................................................ E-3
Refrigerant Circuit (Heat Pump Operating Principle).............................................................................. E-3
Water Circuit ........................................................................................................................................... E-3
Safety and Control Devices .................................................................................................................... E-4
Storage and Transport..................................................................................................................E-4
3.1 General Information ................................................................................................................................ E-4
3.2 Fork-Lift Truck (or Lift Truck) Transport.................................................................................................. E-4
3.3 Manual Transport.................................................................................................................................... E-4
4
Set-Up.............................................................................................................................................E-5
4.1 Installation Location ................................................................................................................................ E-5
4.2 Set-Up..................................................................................................................................................... E-5
5
Installation .....................................................................................................................................E-5
5.1 Connecting the Water Pipes ................................................................................................................... E-5
5.2 Connecting the Condensed Water Pipe ................................................................................................. E-6
5.3 Electrical Connection .............................................................................................................................. E-6
6
Start-Up ..........................................................................................................................................E-6
6.1 Hot-Water System .................................................................................................................................. E-6
6.2 Hot-Water Heat Pump Operation............................................................................................................ E-7
7
Maintenance...................................................................................................................................E-8
7.1 Water Circuit / Condensate Outflow ....................................................................................................... E-8
7.2 Air Circuit ................................................................................................................................................ E-8
7.3 Corrosion Protection Anode.................................................................................................................... E-8
8
Faults / Trouble-Shooting (for Users)..........................................................................................E-9
9
Shut-Down .....................................................................................................................................E-9
10 Environmental Requirements ......................................................................................................E-9
11 Technical Data .............................................................................................................................E-10
Anhang / Appendix / Annexes ............................................................................................................ A-I
www.dimplex.de
E-1
English
2
1
1
Please Read
Immediately
1.1
Important Information
ATTENTION!
The device cover cannot be used for carrying (the cover cannot withstand
larger forces!)
ATTENTION!
English
When installing the on-site pipework, ensure the pipes do not get
contaminated (flush pipes before connecting hot-water heat pump)!
ATTENTION!
Only operate hot-water heat pump when filled with water!
ATTENTION!
Disconnect the power supply before opening the hot-water heat pump;
observe possible coasting of ventilator.
ATTENTION!
Ensure water does not come into contact with the operator controls.
Unplug mains plug/disconnect the power supply before beginning any
cleaning work.
1.2
Regulations / Safety
Information
ATTENTION!
Read these installation and operating instructions before start-up!
The hot-water heat pump is exclusively used to heat water
for domestic use and drinking water within the specified operating temperature limits! Heating fluids other than domestic water is not permitted. Observe the technical regulations
for domestic water installation (DIN 1988).
Exhaust air should not fall below +15 °C (evaporator may
freeze). Sinking exhaust air temperatures reduce economical heat pump operation.
It is not permitted to
operate the pump with solvent-laden or explosive exhaust
air
- use exhaust air containing fat, dust or sticky
aerosols
- to connect extractor hoods to the
ventilation system
Installation of the device is not permitted
- outdoors
- in rooms which are exposed to frost
- in wet rooms (e.g. bathrooms)
- in rooms with air which is potentially explosive
because of gases, vapours or dust
Operation of the device is not permitted
- with an empty cylinder
- during building construction
The construction and design of the hot-water heat pump
complies with all relevant EG directives (see also CE declaration of conformity).
The technician must ensure that the refrigerant is flushed
adequately to allow maintenance and repair work on refrigerant circuit components without risk. Refrigerant must be
properly used and disposed of; it must not be released into
the environment! (The refrigerant R134a is CFC-free, noninflammable and not ozone depleting.)
When working on the hot-water heat pump, always disconnect the power supply.
When connecting the hot-water heat pump to the power supply, the relevant VDE, EN and IEC standards are to be fulfilled. Also observe the technical connection requirements of
the electrical utility companies.
ATTENTION!
Work on the hot-water heat pump is to be performed by qualified
personnel only!
Observe accident prevention regulations!
E-2
2.3
Description
2.1
General Information
The hot-water heat pump is a ready-to-use heating device and
mainly consists of hot water cylinders, the components for the refrigerant, air and water circuits, as well as all of the control, regulation and monitoring devices required for automatic operation.
Using electrical energy, the hot-water heat pump heats water
using the heat stored in the air which is sucked in. The hot-water
heat pump with internal heat exchanger can be connected to additional heat generators such as heat boilers or solar installations. A vertical cladding tube (inner ∅ ≥ 12 mm) houses an external temperature sensor. The devices are standard equipped
with an electric heating element (1.5 kW).
The temperature of the air sucked in (the heat source) is used as
reference value for energy consumption and DHW preparation
heat-up time.
For this reason, an air duct system (DN 160, max. length 10 m)
can be connected to the standard spigot of the hot-water heat
pump for specific waste heat recovery. In principle, effective operation of the heat pump requires that there is no air short-circuit
between the air that is sucked in and the air that is blown out.
This can, for example, be achieved by a flexible air hose on the
intake and outlet side.
Falling outlet air temperatures reduce heat pump performance
and increase heat-up time. Air inlet temperature should not fall
below 15 °C for economical heat pump operation. If the air inlet
temperature falls below 8 °C ±1.5 (dead-band value 3 K), the
heat pump is switched off and the DHW is heated by the standard heating element (1.5 kW).
The electric heating element fulfils four functions:
Supplementary heating
The heating-up period is approx. halved by switching on the
heating element (using the “Heating Element” switch, see
Point 2.3) in addition to the heat pump.
Frost protection
If the air temperature falls below 8 ±1,5 °C (dead-band value
3 K), the electric heating element switches on automatically
and (nominally) heats the water up to the set hot water temperature. The hot-water temperature generated by the heating element in antifreeze mode can exceed the set value!
Emergency heating
The water supply is maintained by the electric heating element if the heat pump is out of order.
Higher water temperature
If the required hot water temperature is higher than the temperature achievable by the heat pump (approx. 60 °C), it can
be raised to a max. of 85 °C by using the heating element.
ATTENTION!
When the hot water temperature reaches > 60 °C, the heat pump switches
off and the hot water is heated solely by the heating element. The heating
element controller is factory set to 65 °C (see 3.3.3).
2.2
Refrigerant Circuit (Heat Pump
Operating Principle)
The refrigerant circuit is a closed-loop system in which the refrigerant R134a is the energy source. The finned heat exchanger extracts heat from the air sucked in at a low evaporation temperature, and transfers it to the refrigerant. The vaporous refrigerant
is sucked in by a compressor where it is compressed to a higher
pressure and temperature level before being transported to the
liquifier, where the heat taken up in the evaporator and part of the
compressing energy is transferred to the water. Subsequently,
the high condensation pressure is lowered to the evaporation
pressure via a throttle mechanism (expansion valve). In the
evaporator, the refrigerant will again take up heat from the air
that is sucked in.
2.3
Water Circuit
The hot-water heat pump water circuits depend on the pump type
(with or without internal heat exchanger). They must be installed
on site. The water connections (see illustration) are at the rear of
the unit.
&DEOHHQWU\IRU
FRQQHFWLQJDVHFRQG
KHDWJHQHUDWRU
+RWZDWHURXWOHW
5³H[WHUQDOWKUHDG
&RQGHQVHGZDWHU
KRVHRXWOHW
&LUFXODWLRQSLSH
5³H[WHUQDOWKUHDG
+HDWLQJZDWHUIORZ 5³H[WHUQDOWKUHDG
+HDWLQJZDWHUUHWXUQIORZ
5³H[WHUQDOWKUHDG
$SSUR[
&ROGZDWHULQOHW
5³H[WHUQDOWKUHDG
*
Hot-water heat pumps with internal tube heat exchanger only
** Nominal width ⇒ outer diameter 160 –2
Important information:
Circulation pipe
For energy efficiency reasons, the circulation pipe circuit
type should not be used. When installing a circulation pipe in
the hot water distribution system, provide a valve or a similar
device as shut-off facility. Circulation is enabled according to
use (time or requirement control).
Condensate outflow
See Point 5.2 "Connecting the Condensed Water Pipe".
www.dimplex.de
E-3
English
2
2.4
2.4
Safety and Control Devices
The hot-water heat pump has the following safety features:
High-pressure switch
The high-pressure switch protects the heat pump against impermissibly high operating pressure in the refrigerant circuit. In the
event of fault, the pressure switch will switch off the heat pump.
The heat pump is restarted automatically if there has been a
pressure drop in the refrigerant circuit.
Safety temperature limiter for heating element
(STL)
English
The STL protects the hot-water installation against impermissible
temperature increases.
The heating element is switched off if the set switching value
(99°C) is exceeded.
The heating element cannot be re-started until the hot-water temperature has decreased to ≤ 90 °C and the reset button (see illustration) on the STL is pressed (this may be done by qualified
personnel only).
3DUWLWLRQ
67%
%
)
5HVHWEXWWRQ
&RQWUROSDQHO
The hot-water heat pump is equipped with the following regulation and control devices:
Heating element temperature controller (TC)
The heating element temperature controller regulates the hot
water temperature during heating element operation. The maximum controller temperature is factory set to 65 °C (the controller
and the STL are installed together in a casing). Temperature settings can be changed using suitable tools (see illustration).
Changes to this setting may be carried out by qualified personnel
only!
In automatic operation (activated via air temperature thermostat),
the water is heated by the heating element until the set value has
been reached (by the heat pump temperature controller). In contrast to heat pump operation only, a smaller amount of water is
heated up in order to minimise heating element operating periods. In continuous manual operation, the hot water is heated until
the set maximum temperature of the heating element has been
reached. The heating element may optionally be controlled via
an external switch (see Point “Electrical Connection”). The water
is again heated until the set maximum temperature of the heating
element controller has been reached.
E-4
Heat pump temperature controller
Temperature control in the water cylinder and the regulation for
compressor operation is carried out by the temperature controller. This controller measures the hot-water temperature via a
sensor and controls it in relation to the set value. The desired
temperature level (set value) is set via the rotary knob on the
control panel.
Air temperature thermostat
This thermostat sensor measures the hot-water heat pump temperature directly upstream of the evaporator (air inlet temperature). If the temperature falls below the set value (8 ±1,5 °C,
dead-band value 3 K), hot water preparation automatically
switches from heat pump operation to heat element operation.
3
3.1
Storage and Transport
General Information
The hot-water heat pump should generally be stored and transported wrapped up, upright and containing no water. If handled
carefully, the unit can be transported over short distances with a
max. tilt angle of 45°. Ambient temperatures between -20 and
+60 °C are permissible during transport and storage.
3.2
Fork-Lift Truck (or Lift Truck)
Transport
The hot-water heat pump must remain installed on the pallet during fork-lift transport. The pump should be lifted slowly. Because
of its high centre of mass, the hot-water heat pump must be secured against canting. To prevent damage, the hot-water heat
pump must be lowered onto a level surface.
3.3
Manual Transport
Use the wooden pallet for manual transport. A second or third
carrying position can be determined with the help of ropes or carrying slings (these may be positioned around the ventilator case
and fixed to the water pipe nipples). If the pump is transported in
this manner (or with a sack barrow), the max. tilt angle of 45°
must not be exceeded (see illustration). If the pump can only be
transported in a tilted position, the hot-water heat pump ("heat
pump" switch) should not be operated until at least one hour after
installation in its final location.
5.1
'UDZQLQDLU
%ORZQRXWDLU
P
ATTENTION!
The device cover cannot be used for carrying (the cover cannot withstand
larger forces!)
4
4.1
Set-Up
*
8VHEXVKLQJ
'1
DFFRUGLQJ
WRQHHG
English
$SSUR[P
$SSUR[P ZLWKRXWDLUKRVHVDQGDLUFLUFXLWEHQGV
P
Minimum clearance between the exhaust air outlet in the air circuit bend and
the wall is 1.2 m
Minimum room height for “free venting” is approx. 2.5 m
Installation Location
4.2
Installation location criteria:
The hot-water heat pump must be installed in a frost-free
and dry room. The room temperature / air sucked in by the
hot-water heat pump should be within a temperature range
of 15 °C to 35 °C (required for heat pump operation).
Furthermore, installation and air intake is not permitted in
rooms with air which is potentially explosive because of
gases, vapours or dust.
In order to prevent damage to interior walls caused by
dampness, it is recommended to provide good thermal insulation between the room into which the exhaust air is released and the neighbouring rooms.
Condensate drainage (with a siphon) must be provided.
The air sucked in must not be excessively contaminated or
contain large amounts of dust.
The load-bearing capacity of the foundation must be sufficient (weight of the filled hot-water heat pump approx.
410 kg!).
To ensure smooth operation and facilitate repair and maintenance work there should be a minimum clearance of 0.6 m on all
sides of the device, as well as a minimum room height of approx.
2.50 m for operation without air ducts/hoses or bends (Î "free
venting") when the hot-water heat pump is installed (see illustration). Hot-water heat pump connection is (optionally) performed
with insulated ductwork of the NW 160, which must not exceed a
total length of 10 m.
To ensure effective operation, an air circuit bend (90° NW 160)
must be installed on the blow-out side in rooms with lower ceilings and without ductwork. If the air circuit bend is used, place it
onto the spigot (nominal width DN 160) of the outlet side so that
the exhaust air outlet of the air circuit bend is as far away from
the unit's intake opening as possible. Also observe the minimum
clearances as shown in the illustration. The hot-water heat pump
air connection stubs ("intake stub" and "outlet stub") are labelled
with stickers.
www.dimplex.de
Set-Up
Remove the three M12 transport restraint screws fixing the
unit to the pallet.
Remove pallet and install the three M12 supporting feet (in
plastic bag attached to the cylinder barrel nipple).
Position the hot-water heat pump and align vertically by adjusting the device feet! Then tighten the counternuts on the
device feet.
5
Installation
5.1
Connecting the Water Pipes
The nominal pipe widths for the on-site sanitary installation must
be determined by taking into account the available water pressure and any pressure drops expected to occur in the pipework.
Water installations must be executed according to DIN 1988 (see
Appendix – for example, a pressure reducing valve must be used
if water pipe pressure is impermissibly high); also observe local
regulations for domestic water installations!
Both rigid and flexible water pipes are possible. Observe corrosion behaviour of the pipework materials to prevent damage
caused by corrosion (see Section: Start-Up).
ATTENTION!
When installing the on-site pipework, ensure the pipes do not get
contaminated (flush pipes before connecting hot-water heat pump)!
E-5
5.2
5.2
Hot-water heat pump without heat exchanger
3(
1
/
3(
1
/
Connecting the Condensed
Water Pipe
The condensed water hose is fed through the foil cladding at the
rear of the device. It should be routed so that the condensate
produced (during heat pump operation) can flow away freely.
English
There is a pressureless seal valve which must also be relocated
when shortening the condensed water hose (valve can be easily
removed and replaced into the hose). This valve is of special importance if longer air hoses are fitted to the device or if a filter is
installed on the exhaust air side. The condensate should be
drained into a siphon (see maintenance information 7.1).
6
5.3
6.1
Electrical Connection
The hot-water heat pump is wired ready for use; power is supplied via connection cables plugged into an earthed wall socket
(~230 V, 50 Hz). This socket has to remain accessible after installation.
To control external devices for the second heat generator (hotwater heat pumps with internal heat exchanger only), a separate
cable has to be connected to the device via an available cable
union and be strain relieved. (For this electrical connection, the
hot-water heat pump plastic cover has to be removed.) The cable
must then be led through the available cable feedthrough provided, and guided through the partition. The electrical connection
terminal (X5 – 4/5/PE) with a floating contact to control (ON/OFF)
the external ancillary devices (pump, solenoid valve etc.) is located on the rear of the partition in the device.
External heating element control
It is possible to optionally control the heating element via an external switch (e.g. timer), in parallel to the “Heating Element”
switch on the hot-water heat pump operator panel. For this connection, a floating contact on the external switchgear is required.
2
Furthermore, an additional cable (min. 2 x 1.0 mm / max. cable
outside diameter 10 mm) must be inserted into the device and attached to connection 6 and 7 of terminal strip X5.
Hot-water heat pump with heat exchanger
;
;
Start-Up
Hot-Water System
ATTENTION!
Only operate hot-water heat pump when filled with water!
Hot-water system requirements
The following materials may be found in the consumer's hotwater system:
Copper
Stainless steel
Brass
Plastic
Depending on the materials used in the hot-water system (customer installation), material incompatibility may lead to corrosion
damage. This especially applies to zinc-plated and aluminous
materials. If there is a risk of water contamination during operation, the installation of a filter may be required.
Hot-water system start-up
All installations at the water circuit, air circuit, as well as all
electrical installations must have been performed correctly
and fully completed
Filling hot-water system via external connection.
De-aerate hot water system (open hot-water taps at the
highest extraction points until there are no more traces of
air).
Check entire hot-water system for leaks.
Supply voltage.
Switch on “Heat Pump” switch (see illustration).
X3
Internal wiring only
X5 (4 + 5)
X5 (6 + 7)
Connection terminal with floating contact for second
heat generator
Connection for external heating element control (optional)
X5 (8 + 9)
External release contact
Heat pump operation is blocked if the factory-mounted copper
bridge between pole terminals 8 and 9 is removed (see Section
6.2).
E-6
The desired hot-water temperature is infinitely adjustable
(up to 60 °C) via the temperature control button (see illustration). A certain heat-up time should always be allowed for,
until the desired temperature level has been reached.
6.2
Hot-Water Heat Pump
Operation
Hot-water temperature controller (rotary controller)
The rotary button is used to set the desired hot-water temperature. If the cylinder temperature is lower than the set hot-water
temperature, the heat pump is switched on (if the heat pump
switch is in the “Heat Pump Operation ON” position).
Control panel
Temperature indicator
The thermometer sensor (analogue distance thermometer)
measures the hot-water temperature in the upper part of the
hot-water cylinder. The indicator is located on the control
panel.
The maximum hot-water temperature that can be attained with
the heat pump is 60 °C ±1.5 K. The standard heating element
can be used if higher temperatures are required.
Notes on economical use of energy:
To achieve a high COP with the integrated heat pump while
cutting water level losses, the hot-water heat pump should
normally not be operated at a hot-water temperature of more
than 45 °C (see illustration).
Only set the temperature controller to higher values or manually switch on the heating element if necessary.
To ensure optimum compressor operating times and downtimes, it is important to avoid manual and repeated switching
on and off of the heat pump!
a&
a& PLQ
PD[ a&
1 "Heat Exchanger" switch
The switch position “I” allows a second heat generator to be connected 1
"Heat Pump" switch
2 "Heating Element" switch
When the switch is in “I” position, the heating element is permanently switched
on. In the “ ” position, the heating element switches into automatic operation
The heat pump is ready for operation when the “Heat Pump”
switch is in the “ ” position. If the hot-water temperature in the
cylinder drops below the set value, the heat pump will be activated until the desired hot-water temperature has been reached.
3 "Heat Pump" switch
Switch position “O” → heat pump “OFF”,
"Heating Element" switch
in switch position “
” → heat pump “ON”
4 Temperature indicator
5 “Hot-Water Temperature” rotary controller
Hot-water temperature switch (set-value generator)
Left-hand stop → min. temperature
Right-hand stop → max. temperature
1. The illustration shows the hot-water heat pump control panel with internal heat
exchanger. The “Heat Exchanger” switch is not required for hot-water heat
pumps without internal heat exchanger.
If more hot water is needed or if a higher water temperature
(> 60 ±2 °C) is desired, the "Heating Element" switch can be
used to switch on the integrated 1.5 kW radiator.
If the "Heating Element" switch is in the "I" position, the approx.
upper third of the cylinder will be heated up to the maximum temperature of the heating element controller (factory setting 65 °C);
at hot-water temperatures > 60 °C, DHW preparation is done by
heating element only. It is possible to optionally control the heating element via an external switch (see point 5.3). If the "Heating
Element" switch is in the " " position (automatic operation) and
the air temperature is 8 ±1.5 °C (dead-band value 3 K), the cylinder volume is heated up (nominally only) to the setpoint temperature of the hot-water temperature controller.
Note → Heating element controller
The heating element controller is a second control unit for the operating range of the electric heating element, and independent of
the hot-water controller. The factory set switch-off temperature of
65 °C can be changed by a technician (see Point 2.4)
"Heat Exchanger" switch (hot-water heat pumps
with internal heat exchanger only)
When this switch is operated, external heat exchanger operation
is enabled, i.e. hot water can be prepared (e.g. in winter) using a
second heat generator (e.g. boiler, solar installation etc. - if the
necessary electrical connection is established at the heat pump).
Hot-water temperature is controlled using the hot-water heat
pump temperature controller.
www.dimplex.de
E-7
English
6.2
7
English
Heat pump operation can be blocked as required if domestic hot
water is to be prepared using a second heat generator. This is
achieved by removing the factory-mounted copper bridge A2 (at
terminal strip X5, see Section 5.3) and integrating a floating contact from the second heat generator regulation in the same position. An external regulation must not lead to the maximum
switching frequency (12 operations/h) of the heat pump being exceeded. It may be necessary to take the local utility company
(EVU) specifications into consideration in this regard.
7.1
Relay for heat exchanger operation
Relay with a floating contact (hot-water heat pumps with internal
heat exchanger only) to control the ancillary devices (pump, solenoid valve etc.) for operation with a second heat generator. The
relay contact is closed when the "Heat Exchanger" switch is activated and a hot water request from the hot-water heat pump temperature controller is present.
7.2
Sensor pipe for external temperature sensors
A vertical sensor pipe ∅i 12mm (opening in the bottom plate
sealed with a leading-in tube) for an external heat sensor is fitted
in the rear of the hot-water heat pump and a cable feedthrough is
available in the rear panel.
Water Circuit / Condensate
Outflow
The water circuit check is limited to filters that may have been installed on-site, and possible leakage. Dirty water filters should be
cleaned and replaced if necessary. Occasionally check the seal
valve in the condensed water hose for contamination; replace if
necessary.
Air Circuit
Maintenance work is limited to cleaning the evaporator on a regular basis, and as needed.
ATTENTION!
Risk of injury caused by sharp-edged fins. Fins must not be deformed or
damaged!
If air filters are used, they should be regularly checked for contamination and cleaned and replaced if necessary.
7.3
Corrosion Protection Anode
The corrosion protection anode installed in the hot water cylinder
should be electrically checked on a regular basis, at least every
two years after start-up, and be replaced if necessary. Electrical
checking is carried out by means of a suitable ammeter, without
draining the tank.
Procedure:
External temperature sensor installation position
(device cover removed)
7
Maintenance
ATTENTION!
Disconnect the power supply before opening the hot-water heat pump;
observe possible coasting of ventilator.
General information
The hot water heat pump is virtually maintenance-free. A one-off
visual inspection for possible leakage in the water system or
stopping-up of the condensate outflow should take place a few
days after the maintenance work has been carried out.
Do not carry out any maintenance work on the refrigerating circuit of the heat pump.
Only use a damp cloth and soap solution for cleaning the hotwater heat pump.
ATTENTION!
Ensure water does not come into contact with the operator controls.
Unplug mains plug/disconnect the power supply before beginning any
cleaning work.
E-8
1)
Unplug PE cable from protection anode tab.
2)
Connect ammeter (0...50mA) between PE cable and tab.
3)
Evaluation of protection anode wear:
Measured value > 1 mA ⇒ protection anode is in working
order.
Measured value < 1 mA ⇒ protection anode must be tested
or replaced.
If electrical testing does not provide any clear results, a visual inspection of the protection anode by a technician is recommended.
Should replacement of the protection anode [by a technician] be
necessary, the tank must be drained via the valve provided (fitted
during installation - see Appendix).
ATTENTION!
Malfunctioning protection anodes reduce the operating life of the device!
(Reactive anode: electrically insulated magnesium anode with selenium
according to DIN 4753 Part 6)
10
Faults / TroubleShooting (for Users)
ATTENTION!
Work on the hot-water heat pump is to be performed by qualified
personnel only!
Observe accident prevention regulations!
The heat pump will not run!
Please check whether
the plug is plugged in
the operating switch is switched on
the socket has voltage
air inlet temperature or ambient temperature is ≥ 12.5 °C
heat pump has not been switched off via the temperature
controller
9
Shut-Down
Tasks to be carried out:
Disconnect hot-water heat pump from power source.
Completely shut off water circuit (hot water, cold water and
circulation pipe) and drain hot water cylinder.
10 Environmental
Requirements
During start-up and shut-down of the hot-water heat pump, all
environmental requirements regarding recovery, recycling and
disposal of materials and components should be observed in accordance with DIN EN 378.
the hot water temperature has already reached (or exceeds)
60 °C
The heat pump switches off prematurely (set
temperature has not been reached)
Please check whether
ducts have been bent or their openings have been sealed,
or whether any air filters are heavily contaminated (clogged).
Condensate cannot flow away (there is water under
the device)
Please check whether
the seal valve in the condensed water hose is contaminated
or clogged - clean if necessary; the valve can be easily removed and replaced.
ventilation is extremely reduced (bent duct / clogged air filter)
If the above questions cannot help you eliminate these faults,
please contact your technician or customer services.
www.dimplex.de
E-9
English
8
11
11 Technical Data
1
Type and order code
BWP 30H
BWP 30HLW
Without additional internal heat
exchanger
With additional internal heat
exchanger
2
Design
2.1
Casing
Foil cladding
Foil cladding
2.2
Colour
White, similar to RAL 9003
White, similar to RAL 9003
2.3
Nominal cylinder volume
l
300
290
Enamelled steel according to DIN
4753
Enamelled steel according to DIN
4753
10
10
English
2.4
Cylinder material
2.5
Nominal cylinder pressure
3
Model
3.1
Dimensions height (max.) x cross-section (max.)
mm
1695 x 700
1695 x 700
3.2
Weight
kg
Approx. 110
Approx. 125
3.3
Electrical connection (plug-in - lead length approx. 2.7 m)
1/N/PE ~ 230 V, 50 Hz
1/N/PE ~ 230 V, 50 Hz
3.4
Fuse
A
3.5
Refrigerant / total filling weight
- / kg
bar
4
Operating conditions
4.1
Selectable water temperature (heat pump operation ±1.5 K) °C
4.2
Air temperature operating range of heat pumps
1
2
°C
16
16
R134a / 1.0
R134a / 1.0
23 to 60
23 to 60
8 to 35
8 to 35
4.3
Sound pressure level
dB(A)
53
53
4.4
Air flow during heating-only heat pump operation
m3/h
450
450
4.5
External compression
Pa
100
100
4.6
Maximum length of pipe that can be used for the air duct m
10
10
5
Connections
5.1
Diameter of the air duct connection (inlet/outlet)
mm
160
160
5.2
Transfer area of the internal tube heat exchanger
m2
-
1,45
5.3
Sensor pipe Dinternal
(for sensor – heat exchanger operation)
mm
-
12
R 1“
R 1“
R 3/4"
R 3/4"
-
R 1“
5.4
Water connections - cold water / hot water
5.5
Circulation pipe
5.6
Heat exchanger flow / return flow
6
Performance data
6.1
Power consumption supplementary electrical heating
W
1500
1500
6.2
3
W
615
615
at 45 °C
W
Mean power consumption at 60 °C
4
6.3
Mean heat output
1870
1870
6.4
COP(t) according to EN 255 at 45 °C
-
3,5
3,5
6.5
Stand-by energy consumption at 45 °C/24h
(W)
47
47
6.6
Max. mixed water volume at 40 °C
l
300
290
6.7
Heating-up period from 15 °C to 60 °Cth
h
9,1
9,1
Vmax.
1. Temperatures below 8 °C (+/- 1.5 °C) will cause the heating element to switch on and the heat pump module to switch off automatically; the dead-band value of the controller is 3 K
2. At a distance of 1 m (free-standing installation without inlet and outlet ducting or without 90° pipe bends on the outlet side)
3. Heating up of the nominal volume from 15 °C to 60 °C at an air inlet temperature of 15 °C and 70 % relat. humidity
4. Heating up of the nominal volume from 15 °C to 45 °C at an air inlet temperature of 15 °C and 70 % relat. humidity
E-10
Anhang / Appendix / Annexes
1
Hydraulische Prinzipschemen / Hydraulic Plumbing Diagram / Schémas hydrauliques ...... A-II
1.1
1.2
1.3
1.4
1.5
2
Kältemittelkreislauf / Refrigerant Circuit / Circuit réfrigérant ................................................................... A-II
Legende / Legend / Légende.................................................................................................................. A-II
Hydraulisches Einbindungsschema / Hydraulic Block Diagram / Schéma d’intégration hydraulique .... A-III
Legende / Legend / Légende................................................................................................................. A-III
Einbindungsschema Wärmetauscher an thermische Solaranlage / Heat Exchanger Integration Diagram
for Thermal Solar Installation / Schéma d’intégration échangeur therm. à installation solaire therm. ...A-IV
Stromlaufpläne / Circuit Diagrams / Schémas électriques....................................................... A-V
2.1 Warmwasser-Wärmepumpen mit innerem Wärmetauscher / Hot-Water Heat Pumps with Internal Heat
Exchanger / Pompes à chaleur pour eau chaude à échangeur thermique intégré.................................A-V
2.2 Warmwasser-Wärmepumpen ohne innerem Wärmetauscher / Hot-Water Heat Pumps without Internal
Heat Exchanger / Pompes à chaleur pour eau chaude sans échangeur thermique intégré .................A-VI
2.3 Legende / Legend / Légende................................................................................................................A-VII
Konformitätserklärung / Declaration of Conformity / Déclaration de conformité ............... A-VIII
Anhang · Appendix · Annexes
3
www.dimplex.de
A-I
1
1 Hydraulische Prinzipschemen / Hydraulic Plumbing
Diagram / Schémas hydrauliques
1.1
Kältemittelkreislauf / Refrigerant Circuit / Circuit réfrigérant
7,&2/
7&
Anhang · Appendix · Annexes
7,
7,
&2+
&,/
7,&2+
7,
1
2
3
4
5
6
7
8
9
10
11
12
13
14
15
16
17
18
A-II
3$&2+
&2+
&,/
IUHLH7DXFKKOVH
$YDLODEOHLPPHUVLRQVOHHYH
'RLJWGHJDQWQRQXWLOLVp
1.2
Legende / Legend / Légende
Verdichter
Pressostat HD
Verflüssiger
Warmwasserspeicher
Wärmetauscher (nicht alle Typen)
Heizstab
Korrosionsschutzanode
Temperaturregler WP
Schutztemperaturbegrenzer
Temperaturregler Heizstab
Temperaturanzeige
Filtertrockner
Expansionsventil
Lufttemperaturthermostat
Verdampfer
Ventilator
Rückschlagventil
Isolierung
Compressor
High-pressure switch
Liquifier
Hot water cylinder
Heat exchanger (not all types)
Heating element
Corrosion protection anode
HP temperature controller
Protection temperature limiter
Heating element temperature controller
Temperature indicator
Filter dryer
Expansion valve
Air temperature thermostat
Evaporator
Ventilator
Check valve
Insulation
Compresseur
Pressostat HP
Condenseur
Ballon d’eau chaude
Echangeur thermique (pas sur tous les types)
Cartouche chauffante
Anode anticorrosion
Régulateur de température PC
Limiteur de température de protection
Régulateur de température cartouche chauffante
Indicateur de température
Sèche-filtre
Détendeur
Thermostat de température de l’air
Evaporateur
Ventilateur
Clapet anti-retour
Isolation
1.4
1.3
Hydraulisches Einbindungsschema / Hydraulic Block Diagram /
Schéma d’intégration hydraulique
:DUPZDVVHU
'RPHVWLFKRWZDWHU
(DXFKDXGH
=LUNXODWLRQZHQQHUIRUGHUOLFK
&LUFXODWLRQ LIQHFHVVDU\
&LUFXODWLRQ VLQpFHVVDLUH
+HL]ZDVVHUUFNODXI
+HDWLQJZDWHUUHWXUQIORZ
&LUFXLWUHWRXUHDXGHFKDXIIDJH
1.4
1
2
3
4
5
6
7
8
9
*
.DOWZDVVHUDQVFKOXQDFK',1
&ROGZDWHUFRQQHFWLRQDFFRUGLQJWR',1
5DFFRUGHPHQWDXFLUFXLWG¶HDXIURLGHVXLYDQW',1
Legende / Legend / Légende
Absperrventil
Druckminderventil
Prüfventil
Rückflussverhinderer
Manometeranschlussstutzen
Entleerungsventil
Membran-Sicherheitsventil
Zirkulationspumpe
Abfluss
bei Warmwasser-Wärmepumpen ohne innerem
Wärmetauscher entfallen die Anschlüsse für den
zweiten Wärmeerzeuger (d.h. kein Heizwasservorlauf und kein Heizwasserrücklauf)
www.dimplex.de
Shutoff valve
Pressure reducing valve
Test valve
Return flow inhibitor
Pressure gauge connecting stubs
Drain valve
Diaphragm safety valve
Circulation pump
Outlet
No connections for second heat generator required
(i.e. no heating water flow and no heating water
return flow) for hot-water heat pumps without internal heat exchanger
Robinet d’arrêt
Réducteur de pression
Soupape de contrôle
Clapet anti-reflux
Tubulures de raccordement manomètre
Vanne de vidange
Soupape de sécurité à membrane
Pompe de circulation
Ecoulement
les pompes à chaleur pour eau chaude sans
échangeur thermique intégré ne possèdent pas de
raccords pour le deuxième générateur de chaleur
(c-à-d. qu’ils n’ont ni circuit départ ni circuit retour
eau de chauffage)
A-III
Anhang · Appendix · Annexes
+HL]ZDVVHUYRUODXI
+HDWLQJZDWHUIORZ
&LUFXLWGpSDUWHDXGHFKDXIIDJH
1.5
1.5
Einbindungsschema Wärmetauscher an thermische Solaranlage / Heat
Exchanger Integration Diagram for Thermal Solar Installation / Schéma
d’intégration échangeur therm. à installation solaire therm.
(QWOIWXQJ'HDHUDWLRQ3XUJH
Anhang · Appendix · Annexes
:lUPHWDXVFKHU
+HDWH[FKDQJHU
(FKDQJHXUWKHUPLTXH
5FNVFKODJNODSSH
&KHFNYDOYH
&ODSHWDQWLUHWRXU
+DKQ
7DS
5RELQHW
7KHUPRPHWHU
7KHUPRPHWHU
7KHUPRPqWUH
9RUODXI
)ORZ
'pSDUW
YRP.ROOHNWRU
)URPWKHFROOHFWRU
HQSURYHQDQFHGXFROOHFWHXU
6LFKHUKHLWVYHQWLO
6DIHW\YDOYH
6RXSDSHGHVpFXULWp
:lUPHWDXVFKHU
+HDWH[FKDQJHU
(FKDQJHXUWKHUPLTXH
5FNODXI
5HWXUQIORZ
5HWRXU
'XUFKIOXVVPHVVHU
)ORZPHWHU
'pELWPqWUH
+lKQH
7DSV
5RELQHWV
5FNVFKODJNODSSH
&KHFNYDOYH
&ODSHWDQWLUHWRXU
8PZlO]SXPSH
&LUFXODWLQJSXPS
&LUFXODWHXU
0DQRPHWHU
3UHVVXUHJDXJH
0DQRPqWUH
$XIIDQJEHKlOWHU
&DWFKPHQWWDQN
3XLVDUG
]XP.ROOHNWRU
7RWKHFROOHFWRU
YHUVOHFROOHFWHXU
+DKQ
7DS
5RELQHW
)OOSXPSH
)LOOLQJSXPS
3RPSHGHUHPSOLVVDJH
$XVGHKQXQJVJHIl
([SDQVLRQYHVVHO
9DVHGH[SDQVLRQ
A-IV
2.1
2 Stromlaufpläne / Circuit Diagrams / Schémas
électriques
Warmwasser-Wärmepumpen mit innerem Wärmetauscher / Hot-Water
Heat Pumps with Internal Heat Exchanger / Pompes à chaleur pour eau
chaude à échangeur thermique intégré
Anhang · Appendix · Annexes
2.1
www.dimplex.de
A-V
A-VI
3(
1
/
)
.
3!
EDU
6
$
$
0
.
0
;
;
;
&
% 7
0
$
&
7!
0
&
%
3
)
JUQJHOE
*UHHQ\HOORZ
YHUWMDXQH
VFKZDU]
%ODFN
QRLU
&
9HUGLFKWHU
&RPSUHVVRU
&RPSUHVVHXU
&
1
3(
/
EO
.
EQ
%
)
75
67%
(
&
7!
&
&
6
(OHNWUR+HL]VWDE
(OHFWULFKHDWLQJHOHPHQW
&DUWRXFKHFKDXIIDQWHpOHFWULTXH
;
;
9$&PLQ$
&RQWDFWOLEUHGHSRWHQWLHO
SRXUFRPPDQGHFDUWRXFKHFKDXII
)ORDWLQJFRQWDFW
IRUKHDWLQJHOHPHQWFRQWURO
3RWIUHLHU.RQWDNW
IU+HL]VWDEDQVW
2.2
/13(9$&+]
;
;
9HQWLODWRU
9HQWLODWRU
9HQWLODWHXU
Anhang · Appendix · Annexes
:lUPHSXPSH
+HDWSXPS
3RPSHjFKDOHXU
2.2
Warmwasser-Wärmepumpen ohne innerem Wärmetauscher / HotWater Heat Pumps without Internal Heat Exchanger / Pompes à chaleur
pour eau chaude sans échangeur thermique intégré
2.3
Legende / Legend / Légende
A2
Brücke Sperre extern – Brücke muss bei Verwendung der Sperre entfernt werden
(Kontakt offen = Wärmepumpe gesperrt)
External bridge block - bridge must be removed if
block is used (contact open = heat pump blocked)
Pont de câble externe - lorsqu'un blocage est
requis, retirer le pont (contact ouvert = PAC bloquée).
B1
B2
B3
Betriebsthermostat
Lufttemperaturthermostat
Regelthermostat E1
Operating thermostat
Air temperature thermostat
Control thermostat for E1
Thermostat de service
Thermostat de température de l’air
Thermostat de régulation - E1
C1
C2
Anlaufkondensator M1
Betriebskondensator M2
Starting condenser for M1
Operating condenser for M2
Condensateur de démarrage - M1
Condensateur de service - M2
E1
Elektroheizung
Electric heater
Chauffage électrique
F1
F2
F3
Hochdruckpressostat
Sicherheitstemperaturbegrenzer E1
Klixon M1
High-pressure switch
Safety temperature limiter E1
Klixon M1
Pressostat haute pression
Limiteur de température de sécurité E1
Klixon M1
K1
K2
K3
K4
Relais externe Pumpe
Anlaufrelais M1
Schaltrelais F1
Relais Heizstab
Relay, ext. Pump
Starting relay for M1
Switching relay for F1
Relay, heating element
Relais - ext. pompe
Relais de démarrage - M1
Relais de commutation - F1
Relais cartouche chauffante
M1
M2
Verdichter
Ventilator
Compressor
Ventilator
Compresseur
Ventilateur
N2
Fernbedienung
Remote control
Télécommande
S1
S2
S3
Schalter „EIN/AUS“ Wärmepumpe
Schalter „EIN/AUS“ Elektroheizung
Schalter „EIN/AUS“ externe Pumpe - Wärmetauscher
"ON/OFF" switch, heat pump
"ON/OFF" switch, elec. heating
"ON/OFF" switch, external pump - heat exchanger
Commutateur « Marche / Arrêt » pompe à chaleur
Commutateur « Marche / Arrêt » chauffage électr.
Commutateur « Marche / Arrêt » pompe externe échangeur thermique
X1
X2
X3
X5
Netzstecker
Anschluss Fernbedienung
Klemmleiste intern
Klemmleiste Netz / potentialfreie Kontakte
Mains plug
Remote control connection
Terminal strip, internal
Terminal strip, mains / floating contacts
Fiche
Raccordement de la télécommande
Bornier interne
Bornier réseau / contacts libres de potentiel
www.dimplex.de
A-VII
Anhang · Appendix · Annexes
2.3
3
3 Konformitätserklärung / Declaration of Conformity /
Déclaration de conformité
Anhang · Appendix · Annexes
A-VIII
Anhang · Appendix · Annexes
3
www.dimplex.de
A-IX
Glen Dimplex Deutschland GmbH
Geschäftsbereich Dimplex
Am Goldenen Feld 18
D-95326 Kulmbach
Irrtümer und Änderungen vorbehalten.
Subject to alterations and errors.
Sous réserve d’erreurs et modifications.
+49 (0) 9221 709 565
www.dimplex.de