1
OPERATING
RNSTRUCTIONS
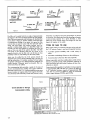
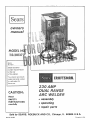
We feel that welding with your new Craftsman dual range
arc welder is as simple as A B C
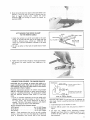
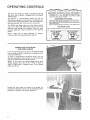
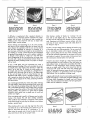
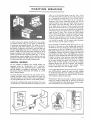
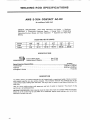
A Determine what diameter electrode should be used by
gauging the piece to be welded on the material thickness
gauge The fractional number directly beneath the bar
chart dictates what the proper electrode diameter is for
given thicknesses of metals You will note that a specific
diameter
of electrodes
can be used on varying
thicknesses
of material. This is accomplished
by
adjusting the heat selector for more or less amperage•
B Next verify the electrode diameter, by placing the bare
portion of the electrode into the electrode diameter
gauge on the right side of the cabinet
Because electrodes are mass produced, there may be
small burrs on the bare ends of the electrode Make sure
the bare end of the rod is as clean as possible for
accurate sizing,
C, Finally,
determine
the type of electrode
by the
identification
on the package or by the American
Welding Society number stencilled on the coated portion
of the electrode, bearing in mind the type of electrode
you have chosen - E6013 or E7014, and also its'
diameter (as previously determined)_
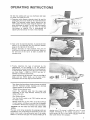
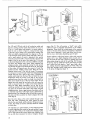
Locate that band on the amp scale There are two E6013
bands and two E7014 bands, use the band which
coordinates with the amp range you have selected•
Now loosen the heat selector knob and move the pointer
until the fractional
number matching your electrode
diameter appears in the pointer window
Tighten the heat selector knob
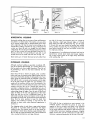
Insert
the electrode
cable into the proper jack
(depending on the range selected), Connect the work
clamp to the work.
Wear Welding Helmet,
Turn the On-Off switch to the "ON"
are ready to weld
position
and you
Because metals vary in their make up and the technique
of each operator is different, you may find it necessary
to increase or decrease the amperage output accordingly,
CAUTION:
Do not loosen and move heat selector while
welding
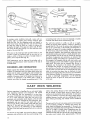
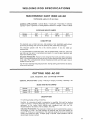
The duty cycle ratings bracketing the amperage scales are
provided for your convenience and protection of your new
welder_ Duty cycle is the performance level of the welder
based on a 10 minute time span. For example welding for 6
minutes out of 10 minutes is a 60% duty cycle To avoid
possible overheating of the welding transformer,
which
could shorten the life of your welder, Do Not exceed the
duty cycles listed on the nameplate
7