1
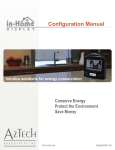
Configuration
Manual
Aztech Second Generation In-Home Display
Conserve Energy
Protect the Environment
Save Money
D 097-0905 A01
myaztech.ca
CONTENTS
REGULATORY INFORMATION ................................................................................................................... 3
FCC Notices ....................................................................................................................................... 3
Copyright .......................................................................................................................................... 3
Patents ............................................................................................................................................. 3
Notices.............................................................................................................................................. 3
WELCOME ................................................................................................................................................... 4
FEATURES OF YOUR IN-HOME DISPLAY (IHD) ....................................................................................... 5
Light Arc............................................................................................................................................ 5
Buttons ............................................................................................................................................. 5
Status Line ........................................................................................................................................ 5
POWERING YOUR IN-HOME DISPLAY ...................................................................................................... 6
Powering Up ..................................................................................................................................... 6
Battery Operation ............................................................................................................................. 6
Powering Down ................................................................................................................................. 6
MENU NAVIGATION .................................................................................................................................... 7
CONFIGURATION OVERVIEW .................................................................................................................... 8
1. PERSONALIZING YOUR IHD (PREFERENCE MENU) ........................................................................... 8
Setting your language preference ...................................................................................................... 8
Setting your IHD sight and sound preferences .................................................................................... 9
Setting your number format preference ........................................................................................... 10
Setting your time format preference ................................................................................................ 10
2. SYSTEM SETUP FOR YOUR IHD.......................................................................................................... 10
Connecting to your meter (Meter Setup Menu) ................................................................................ 11
Viewing or updating your electricity rates ........................................................................................ 12
Resetting your summary views ........................................................................................................ 14
Setting time and date on your IHD ................................................................................................... 15
3. TROUBLE SHOOTING YOUR IHD (ABOUT MENU) ............................................................................. 17
To obtain system information .......................................................................................................... 17
If your display is blank ..................................................................................................................... 17
If your display is not updating information on the screen ................................................................. 17
D 097-0905 A01
2
myaztech.ca
Regulatory Information
FCC Notices
This equipment has been tested and found to comply with the limits for a Class B digital device, pursuant to Part 15 of the
FCC Rules. These limits are designed to provide reasonable protection against harmful interference in a residential
installation. This equipment uses and generates radio frequency energy and, if not installed and used in accordance with
the instructions, may cause harmful interference to radio communications. However, there is no guarantee that
interference will not occur in a particular installation. If this equipment does cause harmful interference to radio or
television reception, which can be determined by turning the equipment off and on, the user is encouraged to try and
correct the interference by one or more of the following measures:
• Reorient or relocate the receiving antenna.
• Increase the separation between the equipment and receiver.
• Connect the equipment into an outlet on a circuit different from that to which the receiver is
• Consult the dealer or an experienced radio / TV technician for help.
Changes or modifications not expressly approved by the party responsible for compliance could void the user's authority to
operate the equipment. To comply with FCC RF exposure compliance requirements, a separation distance of at least 20 cm
(7.88”) must be maintained between the antenna of this device and all persons. This device must not be located in colocated or operated in conjunction with any other antenna or transmitter.
Copyright
Copyright © 2013 by Aztech Associates Inc. All rights reserved. No part of this manual may be reproduced, distributed,
or transmitted in any form or by any means, including photocopying, recording, or other electronic or mechanical methods,
without the prior written permission of Aztech Associates Inc.
Patents
This product is protected under the following patents: United States Patent 8325057, China Patent 101765758, Japan
Patent 5026530 and New Zealand patent 579331. Other patents pending.
Notices
This manual has not been created to be specific to any individual’s or organizations’ situation or needs. This manual reflects
features available in the Aztech In-Home Display. Your display may not have all the features shown. Every effort has been
made to make this manual as accurate as possible. However, there may be typographical and/or content errors.
Although efforts have been made to provide accurate electricity cost information, all electricity cost data displayed by
the In-Home Display is estimated for informational and educational purposes only and not for billing.
D 097-0905 A01
3
myaztech.ca
Welcome
Congratulations on the purchase of your Aztech In-Home Display (IHD), also known as an Energy Information
Display (EID). This Configuration Manual describes how to set your user preferences, configure and trouble
shoot your IHD.
Your Aztech In-Home Display provides you with intuitive, actionable and timely information about your whole
home electricity usage. Your display communicates wirelessly to the Smart electricity meter installed on your
home to present electricity used, its estimated cost, and historical usage information. Your display is designed to
provide your entire family with easy to understand information about how much electricity you are consuming
and how much it costs.
Aztech understands that people learn in different ways, and we make a concerted effort to use a wide range of
presentation methods including lights, icons, text and graphics. To help you monitor your progress toward
meeting your energy efficiency and budgetary goals, the Aztech In-Home Display provides graphics that clearly
communicate not only how much electricity you consumed but when it was consumed and how much it costs.
Graphical feedback provides evidence of success and identifies times of high cost or use to promote further
targeted conservation action.
The In-Home Display is crowned by a patented light arc that alerts you to current electricity price and usage
levels, and enables you to make immediate changes to reduce energy consumption. The light arc’s easy to
understand color code engages even the youngest preschooler in your household in conservation. The speed at
which the colored light moves along the arc correlates to your energy consumption (turn off an appliance and
watch it slow down); and the color of the light reflects your electricity rates. Electricity rates are at their lowest
when the light is green; they have risen when the light is yellow and are at their highest when the light is red.
While a 120V AC power adapter is provided to power your In-Home Display under normal operation, your
display also supports battery powered operation so that you can take the display through your home and
explore how the use of different appliances impacts your energy use. For more information about this feature,
see the Quick Read section of the User Manual. Before operating on batteries, the IHD must be plugged into AC
power for at least 4 hours to charge the batteries.
This manual provides instructions for setting user preferences, configuring the system setup, and
troubleshooting the In-Home Display. A separate User Manual for this product can be found on
www.myaztech.ca that describes the operation and features of the In-Home Display.
D 097-0905 A01
4
myaztech.ca
Features of Your In-Home Display (IHD)
Light Arc
The light arc color reflects the relative price of electricity:
green/lowest; yellow/mid; red/highest.
If your utility only uses a single price for all electricity use,
the light arc will glow green.
The light on the arc moves from left to right as energy is used.
The faster the movement, the more electricity you are using.
Buttons
Navigation Select
Navigation buttons:
•
•
Mode Power/Menu
Status Line
Use the up and down Navigation buttons to scroll through menus.
Use the right and left Navigation buttons to scroll between edit fields within configuration screens.
Select button:
•
Press the center Select button to select a menu option.
Mode button:
•
Press the Mode button to toggle between cost ($) and usage (kWh - electrical units).
Power/Menu button:
•
•
When off, press once to turn the IHD on.
Press once to access the menus.
Status Line
5:03p
Label alternates between current time and date.
Antenna icon
Icon is displayed when your IHD connects wirelessly to your electricity meter.
• When flashing, the signal strength is weak.
• When the signal has been lost, the three bars are replaced with an X.
Battery icon
Icon shows the approximate battery level. Before operating on batteries, the IHD
must be plugged into 120V AC power for at least 4 hours to charge.
$$$ Rate indicator
D 097-0905 A01
Icon or label that indicates the current price of electricity (some utility companies will
use $ symbols, others with use different symbols).
5
myaztech.ca
Powering Your In-Home Display
Powering Up
Plug the power adapter into a 120V electrical outlet.
Press the Power/Menu button on the far right to turn the
device on.
Battery Operation
Your IHD also supports battery powered operation for short periods so that you can take the display throughout
your home and explore how the use of different appliances impacts your energy consumption.
Before operating on batteries, the IHD must be plugged into 120V AC power for at least 4 hours to charge the
batteries.
To conserve battery life, the IHD will automatically turn the backlight and light arc off when the IHD is inactive.
The light arc and backlight will turn on for 30 seconds to illuminate the screen when the up or down Navigation
buttons are pressed.
Powering Down
Press the Power/Menu on the right to access the menu.
Use the down navigation button to scroll to the Shut Down option.
Use the Select button to choose Shut Down.
Select
D 097-0905 A01
6
Power/Menu
myaztech.ca
Menu Navigation
Scroll through menu options and
between editable fields
Access menus
Select an option
Press the Power/Menu button on the right to access menus.
Use the up and down Navigation buttons on the left to scroll through menu options.
Use the right and left Navigation buttons to scroll between editable fields within a configuration screen.
Use the Select button to select an option.
Select the Exit menu option or press the menu button again to return to the previous menu.
The Information screens will be displayed after exiting the main menu.
Configuration Overview
This configuration manual describes how to personalize, configure and trouble shoot your IHD.
1.
•
•
•
•
Options for personalizing your IHD are found in the Preference menu and include setting your:
language preference: English or French
sight and sound preferences for the light arc, screen and audible tones
number format preference: European or North American
time format preference: 24 hour or 12 hour format
2.
•
•
•
•
Options for configuring your IHD are found in the System Setup menu and include:
meter setup including joining or leaving your Smart meter
electricity rates: adjusting Time of Use (TOU) rates (where available)
summary and detailed summary views reset
time/date options including setting time and date, time zone, and daylight savings time transitions
Once an editable configuration option is selected, you will be provided the opportunity to change it.
• If you choose not to change it, the display will revert to the menu when you select Exit Without Saving.
• If you choose to change it, the display will present the available options or provide an entry field(s).
Once you select an option or populate the field(s), you may be asked to:
• confirm your choice by selecting Save and Exit,
• request to modify your selection or entry again by selecting Change or
• return to the original value by selecting Exit Without Saving.
3.
•
•
•
•
Screens to support trouble shooting your IHD are found in the About menu and include:
radio: identifies the radio type and firmware versions
meter: identifies the meter that the IHD is communicating with
IHD: identifies the device serial number and hardware and firmware version numbers
meter reading: presents the total energy value and tier values from the Smart meter
D 097-0905 A01
7
myaztech.ca
1. Personalizing your IHD (Preference Menu)
Your Aztech In-Home Display provides the opportunity to personalize
key features.
Options for personalizing your IHD found in the Preference menu
include setting your:
• language preference: English or French
• sight and sound preferences for the light arc, screen and audible
tones
• number format preference: European or North American
• time format preference: 24 hour or 12 hour format
Press the menu button to access the Main menu and then select the
Preferences menu option to get started.
Setting your language preference
To customize your IHD to use your preferred language, select the
Language menu option.
Options include: English and French
This selection only impacts labels on the information screens and
menus, not any messages that may be sent by your utility company.
D 097-0905 A01
8
myaztech.ca
Setting your IHD sight and sound preferences
To customize your IHD’s sight and sound settings for the light arc,
screen and audible tones, select the Sight and Sound menu.
Your options for customization include:
• adjusting your display contrast,
• adjusting your display backlight,
• adjusting the light arc brightness and
• turning the sound on or off.
Preference options
Contrast
Contrast refers to the difference between the text and the
background.
If the text presented on the display is difficult to read, adjust the
contrast level using the up and down Navigation buttons.
Contrast level 1 – lightens the background relative to the text
Contrast level 10 – darkens the background relative to the text
Backlight
Adjust the brightness of the display’s backlight to make the text easier
to read using the up and down Navigation buttons.
Backlight level Off – turns the backlight off
Backlight level 1 – dims or minimizes the backlight
Backlight level 10 – maximizes the backlight
Light Arc
Adjust the brightness of the display’s light arc using the up and down Navigation buttons.
Light arc level Off – turns the light arc off
Light arc level 1 – minimizes the brightness of the light arc
Light arc level 10 –maximizes the brightness of the light arc
It is recommended that the light arc remain on to provide at-a-glance feedback about your current electricity use
and price and increase conservation awareness.
Sound
Your IHD is equipped with audible tones that are audible each time you press a button on your IHD.
The sound may be turned on or off from this menu option.
D 097-0905 A01
9
myaztech.ca
Setting your number format preference
To customize your IHD to use your preferred number format, select
the Number Format menu option.
Options include: North American or European
Example:
One thousand dollars is presented as:
• $1,000.00 if the North American format is selected or as
• 1 000,00$ if the European format is selected.
This selection only impacts labels on the information screens.
Setting your time format preference
To customize your IHD to use your preferred time format, select the
Clock Format menu option.
Options include: 24 hour or 12 hour time formats
Example:
6:36 in the evening is presented as:
• 18:36 if the 24 hour format is selected or as
• 6:36p if the 12 hour format is selected.
This selection only impacts labels on the information screens.
2. System Setup for your IHD
The System Setup menu provides additional options for configuring
your IHD. In many cases, you may never need to adjust these
configuration options as many utilities will manage these functions via
your Smart meter.
System Setup configuration options include:
• meter setup including joining or leaving your Smart meter
• electricity rates
• summary and detailed summary views reset
• time/date options including setting time and date, time
zone, and daylight savings time transitions
Press the menu button to access the Main menu and then select
the System Setup menu option to get started.
D 097-0905 A01
10
myaztech.ca
Connecting to your meter (Meter Setup Menu)
To begin your meter setup configuration, you may be prompted to enter a password (please enter the password
provided by your utility).
•
•
•
If so, use the up and down Navigation buttons to scroll through the available selection options.
Once the desired number or letter is displayed, press the right navigation button to move to the next field.
Once you have entered the entire password, press the Select button to:
• confirm your choice by selecting Save and Exit,
• request to modify your selection or entry again by selecting Change or
• return to the original value by selecting Exit Without Saving.
To enable joining
If a new Smart electricity meter is placed on your home, your utility
may request that you allow your IHD to accept a connection request
from your new meter.
To enable your utility to connect your Smart meter to your IHD, select
Enable Joining.
Warning: Only select Enable Joining if your utility instructs you to do
so. Otherwise, you may lose valuable information loaded into your
IHD at time of manufacturing that may be required for your IHD to
connect to or communicate with your Smart meter.
During the time that your IHD is scanning for and connecting to
your Smart meter, your IHD will display a message indicating that it is waiting for the utility.
To join meter
If your utility does not support the capability to send a connection request to your IHD via your Smart meter, they
may provide you with an activation code.
To connect your IHD to your Smart electricity meter, select Join Meter.
Enter each digit of the activation code and press the select button.
Warning: Only select Join Meter if your utility instructs you to do so, to prevent loss of valuable information
that may be required for your IHD to connect to or communicate with your Smart meter when an activation
code is entered.
During the time that your IHD is scanning for and connecting to your Smart meter, your IHD will display a
message indicating that it is looking for the meter.
To leave meter
If you no longer wish to have your IHD from communicate with your Smart electricity meter (for example, when
you are moving) or if the utility needs to replace your meter, you may instructed by your utility to select Leave
Meter.
Warning: Only select Leave Meter if your utility instructs you to do so, to prevent loss of information that has
been collected or that may be required for your IHD to connect to or communicate with your Smart meter.
D 097-0905 A01
11
myaztech.ca
Viewing or updating your electricity rates
The electricity rates in your IHD were configured at the time of manufacturing or transmitted by your utility via
your Smart meter.
In many cases, you may never need to adjust the electricity rates in your In-Home Display as many utility
companies will update these rates in your IHD via your Smart meter. If your utility does not support this feature,
you may adjust the electricity rates by selecting the Electricity Rates option. If your utility supports this feature,
the utility’s settings will override rates you enter into the IHD or that were configured at the time of
manufacturing.
Electricity rates are used to estimate the costs shown on the IHD’s informational screens.
Costs are calculated and stored using the IHD’s rate in effect at the time the electricity is consumed.
New electricity rates sent by the utility will impact electricity costs as of their effective date and time. Rates
updated from the IHD menu are effective upon saving. New pricing will not alter previously stored electricity
costs.
Costs are for informational purposes only and will not exactly match your electricity bill.
Time of Use Rates
Your IHD supports Time of Use (TOU) rates. TOU rates are based on when you use electricity.
The time of the day, day of the week, and season of the year all impact your TOU rates.
Under a Time of Use rate structure, you will benefit from minimizing your electricity use during periods of high
cost. In the example below, electricity is most expensive in the summer between the hours of 11 AM and 5 PM
and during the winter during the hours of 7 AM and 11 AM and 5 PM and 7 PM.
In these three tier seasonal TOU examples, the On-Peak tier (red) is most expensive, the Mid-Peak tier
(yellow) is less expensive, and the Off-Peak tier (green) is the least expensive.
D 097-0905 A01
12
myaztech.ca
In the above 24 hour TOU rates sample and on the IHD screen to
the right, your electricity price is:
• 6.7¢ Off-Peak (during the night from 7 PM to 7 AM),
• increases to 10.4¢ Mid-Peak (during morning hours and evening
hours, 7 AM to 11 AM and 5 PM to 7 PM),
• and finally increases to 12.4¢ On-Peak (during mid-day and
afternoon hours (11 AM to 5 PM).
The values shown are examples only and may differ from those
your utility uses.
Updating your electricity rates
To customize your tier pricing, select the Electricity Rates menu option.
Rates may range from $0.00 to $9.999999.
• Use the up and down Navigation buttons to scroll to the desired tier to be modified.
• Press the Select button to begin editing a value.
• Once the number is highlighted, use the up and down Navigation buttons to increase or decrease the
value.
• Use the right and left Navigation buttons to scroll between digits.
• When the value has been updated, press the Select button.
• Proceed to the next tier to be modified or select Save and Exit.
• For unused tiers set the value to Inactive using the Mode button.
On your screen the unused tier is labeled Critical, an industry standard, and in no way implies a warning.
Note: Pressing the Mode button again will change the inactive status to active ($0.00) and allow a new value to
be entered.
D 097-0905 A01
13
myaztech.ca
Resetting your summary views
Your utility may periodically reset the Summary and the Detailed
Summary views via the Smart meter. These views provide a summary
of your electricity usage and cost since the summary was reset. When
these summaries are reset, the values will begin accumulating from
zero.
If the utility does not support this feature, you may reset these
summaries by selecting the Summary Reset option.
If your utility supports this feature, the utility’s settings will override
the settings configured from the display.
Your options include resetting these views:
• on a specific day of the week by selecting Day of Week,
• on a specific day of the week but not before a certain day of the month by selecting Day of Week Advanced,
• on a specific day within the month by selecting By Date,
• after a specific number of days by selecting Fixed Period, or
• to elect not to reset the views by selecting Never.
To specify the day of the week
You may select a specific day of the week when your summaries will be reset. Choices include: Sunday, Monday,
Tuesday, Wednesday, Thursday, Friday, or Saturday.
You may also select whether your summaries will be reset on the first, second, third, fourth, fifth or last
occurrence of the selected day of the week in each month.
For example: If you selected Monday and the first occurrence, then your summaries will be reset on the first
Monday of each month.
If a month has fewer occurrences than the selected value, the summaries will be reset in the next month.
For example: If you selected Friday and the fifth occurrence, then your summaries will be reset the first
Friday of the next month if the current month has only four Fridays.”
To specify the day of the week with advanced options
This option is designed for those special cases, where the reset needs to occur on a specific day of week but not
before a certain day of the month. For example, this option should be used to reset the summaries on the first
Monday of the month that occurs on or after the 5th day of the month.
You may select a specific day of the week when your summaries will be reset. Choices include: Sunday, Monday,
Tuesday, Wednesday, Thursday, Friday, or Saturday.
You may also select the number of days that must pass in the month before your summaries will be reset.
D 097-0905 A01
14
myaztech.ca
If a month has fewer occurrences than the selected value, the summaries will be reset on the last occurrence in
the month.
To specify the date
You may select a specific date within the month when your summaries will be reset. Choices include: 1-31.
For example: If you selected the 10th, then your summaries will be reset on the tenth day of each month.
If a month has fewer days than the selected value, the summaries will be reset on the last day of the month.
To specify the fixed period
You may select a specific number of days between resets. Choices include: 1-99 days.
You may also select the start date and time for computing when the summaries will be reset.
To clear the summary reset date
If you choose not to reset your summaries or would like to clear a previously entered summary reset date,
you may select Never.
Setting time and date on your IHD
In most cases, your utility will provide enough information through
your Smart meter for your IHD to maintain proper time.
If your utility does not provide this information, you can enter the
necessary information by selecting the Time/Date option.
If your utility supports this feature, the utility’s settings will override
the settings configured from the display.
Your options include:
• setting the time and date,
• specifying the time zone, and
• setting the daylight saving time transitions.
To specify the time and date
You may specify the current year, month and day as well as the hour, minute and seconds.
To specify the time zone
You may enter the time zone offset for your location. The time zone offset is the number of hours and minutes
between the local time and the time in London, England or UTC (Greenwich Time). Typical examples include:
• for Eastern Time zone (New York, Toronto), enter -05:00
• for Central Time zone (Chicago, Winnipeg), enter -06:00
• for Mountain Time zone (Denver, Calgary), enter -07:00 or
• for Pacific Time zone (San Francisco, Vancouver), enter -08:00.
D 097-0905 A01
15
myaztech.ca
To set the daylight savings time transitions
You may choose to enable or disable daylight savings time transitions
by selecting DST Enable.
If the IHD is enabled to follow daylight savings time transitions, set the
daylight savings time transitions by selecting DST Starts and DST Ends.
DST Enable
If daylight saving time transitions will not be used, select DST Disabled.
If daylight saving time transitions will be used, select DST Enabled.
DST Starts
To specify when daylight savings time will begin,
• select a specific day of the week; choices include: Sunday, Monday, Tuesday, Wednesday, Thursday,
Friday, or Saturday,
• select whether the transition will occur on the first, second, third, fourth, fifth or last occurrence of the
selected day of the week in the month,
• select a specific month and
• select the specific time when the transition will occur by specifying the hour, minute and seconds.
If a month has fewer occurrences than the selected value, the daylight saving time transition will occur on the
last occurrence in the month.
DST Ends
To specify when daylight savings time will end,
• select a specific day of the week; choices include: Sunday, Monday, Tuesday, Wednesday, Thursday,
Friday, or Saturday,
• select whether the transition will occur on the first, second, third, fourth, fifth or last occurrence of the
selected day of the week in the month,
• select a specific month and
• select the specific time when the transition will occur by specifying the hour, minute and seconds.
If a month has fewer occurrences than the selected value, the daylight saving time transition will occur on the
last occurrence in the month.
D 097-0905 A01
16
myaztech.ca
3. Trouble shooting your IHD (About Menu)
Your Aztech In-Home Display comes equipped with an About menu
that provides important information that may be useful when
troubleshooting your IHD. If you have a warranty issue or require
assistance, you may be asked to access these screens and to provide
certain information to the Aztech team and / or your utility.
To obtain system information,
•
press the menu button to access the Main menu and then select
the About menu option to get started.
The following screens support trouble shooting your IHD, and are
found in the About menu:
•
•
•
•
About Radio: identifies the radio type, status and firmware
versions
About Meter: identifies the meter that the IHD is communicating
with
About IHD: identifies the device serial number and hardware and
firmware version numbers
Meter reading: presents the total energy value and tier values
from the Smart meter
If your display is blank,
•
•
please power your IHD with the provided AC adapter to recharge the batteries and
press the Power button to turn it on.
If your display is not updating information on the screen,
•
verify that your IHD is still communicating with your Smart meter
• The
Antenna icon is displayed when your IHD connects wirelessly to your electricity meter.
• When flashing, the signal strength is weak.
• When the signal has been lost, the three bars are replaced with an X.
• If the signal has been lost or is weak, please relocate the IHD closer to your meter until the antenna
icon is solid and the information displays are updating.
If your display has never displayed information on the screen,
•
follow the steps described in the Quick Start Setup Guide (see myaztech.ca).
D 097-0905 A01
17
myaztech.ca