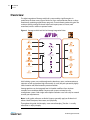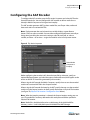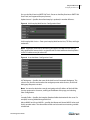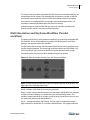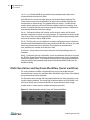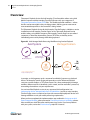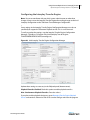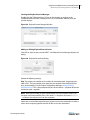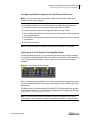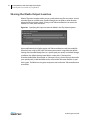
1
Avid Integration Guide Avid Integration Guide Version 1.1 For Vantage 6.0 and later 160329 May 2015 2 Avid Integration Guide 3 Copyrights and Trademark Notices Copyright © 2015 Telestream, LLC. All rights reserved worldwide. No part of this publication may be reproduced, transmitted, transcribed, altered, or translated into any languages without the written permission of Telestream. Information and specifications in this document are subject to change without notice and do not represent a commitment on the part of Telestream. Telestream. Telestream, CaptionMaker, Episode, Flip4Mac, FlipFactory, Flip Player, Lightspeed, ScreenFlow, Switch, Vantage, Wirecast, GraphicsFactory, MetaFlip, and Split-and-Stitch are registered trademarks and Pipeline, MacCaption, and e-Captioning are trademarks of Telestream, LLC. All other trademarks are the property of their respective owners. Adobe. Adobe® HTTP Dynamic Streaming Copyright © 2014 of Adobe Systems All right reserved. Apple. QuickTime, MacOS X, and Safari are trademarks of Apple, Inc. Bonjour, the Bonjour logo, and the Bonjour symbol are trademarks of Apple, Inc. Avid. Portions of this product Copyright 2012 Avid Technology, Inc. Dolby. Dolby and the double-D symbol are registered trademarks of Dolby Laboratories. Fraunhofer IIS and Thomson Multimedia. MPEG Layer-3 audio coding technology licensed from Fraunhofer IIS and Thomson Multimedia. Google. VP6 and VP8 Copyright Google Inc. 2014 All rights Reserved. MainConcept. MainConcept is a registered trademark of MainConcept LLC and MainConcept AG. Copyright 2004 MainConcept Multimedia Technologies. Manzanita. Manzanita is a registered trademark of Manzanita Systems, Inc. MCW. HEVC Decoding software licensed from MCW. MediaInfo. Copyright © 2002-2013 MediaArea.net SARL. All rights reserved. THIS SOFTWARE IS PROVIDED BY THE COPYRIGHT HOLDERS AND CONTRIBUTORS “AS IS” AND ANY EXPRESS OR IMPLIED WARRANTIES, INCLUDING, BUT NOT LIMITED TO, THE IMPLIED WARRANTIES OF MERCHANTABILITY AND FITNESS FOR A PARTICULAR PURPOSE ARE DISCLAIMED. IN NO EVENT SHALL THE COPYRIGHT HOLDER OR CONTRIBUTORS BE LIABLE FOR ANY DIRECT, INDIRECT, INCIDENTAL, SPECIAL, EXEMPLARY, OR CONSEQUENTIAL DAMAGES (INCLUDING, BUT NOT LIMITED TO, PROCUREMENT OF SUBSTITUTE GOODS OR SERVICES; LOSS OF USE, DATA, OR PROFITS; OR BUSINESS INTERRUPTION) HOWEVER CAUSED AND ON ANY THEORY OF LIABILITY, WHETHER IN CONTRACT, STRICT LIABILITY, OR TORT (INCLUDING NEGLIGENCE OR OTHERWISE) ARISING IN ANY WAY OUT OF THE USE OF THIS SOFTWARE, EVEN IF ADVISED OF THE POSSIBILITY OF SUCH DAMAGE. Microsoft. Microsoft, Windows NT|2000|XP|XP Professional|Server 2003|Server 2008 |Server 2012, Windows 7, Windows 8, Media Player, Media Encoder, .Net, Internet Explorer, SQL Server 2005|2008|2012|2014, and Windows Media Technologies are trademarks of Microsoft Corporation. Avid Integration Guide 4 SharpSSH2. SharpSSH2 Copyright (c) 2008, Ryan Faircloth. All rights reserved. Redistribution and use in source and binary forms, with or without modification, are permitted provided that the following conditions are met: Redistributions of source code must retain the above copyright notice, this list of conditions and the following disclaimer. Redistributions in binary form must reproduce the above copyright notice, this list of conditions and the following disclaimer in the documentation and/or other materials provided with the distribution. Neither the name of Diversified Sales and Service, Inc. nor the names of its contributors may be used to endorse or promote products derived from this software without specific prior written permission. THIS SOFTWARE IS PROVIDED BY THE COPYRIGHT HOLDERS AND CONTRIBUTORS “AS IS” AND ANY EXPRESS OR IMPLIED WARRANTIES, INCLUDING, BUT NOT LIMITED TO, THE IMPLIED WARRANTIES OF MERCHANTABILITY AND FITNESS FOR A PARTICULAR PURPOSE ARE DISCLAIMED. IN NO EVENT SHALL THE COPYRIGHT OWNER OR CONTRIBUTORS BE LIABLE FOR ANY DIRECT, INDIRECT, INCIDENTAL, SPECIAL, EXEMPLARY, OR CONSEQUENTIAL DAMAGES (INCLUDING, BUT NOT LIMITED TO, PROCUREMENT OF SUBSTITUTE GOODS OR SERVICES; LOSS OF USE, DATA, OR PROFITS; OR BUSINESS INTERRUPTION) HOWEVER CAUSED AND ON ANY THEORY OF LIABILITY, WHETHER IN CONTRACT, STRICT LIABILITY, OR TORT (INCLUDING NEGLIGENCE OR OTHERWISE) ARISING IN ANY WAY OUT OF THE USE OF THIS SOFTWARE, EVEN IF ADVISED OF THE POSSIBILITY OF SUCH DAMAGE. Telerik. RadControls for ASP.NET AJAX copyright Telerik All rights reserved. VoiceAge. This product is manufactured by Telestream under license from VoiceAge Corporation. x264 LLC. The product is manufactured by Telestream under license from x264 LLC. Xceed. The Software is Copyright ©1994-2012 Xceed Software Inc., all rights reserved. ZLIB. Copyright (C) 1995-2013 Jean-loup Gailly and Mark Adler. Other brands, product names, and company names are trademarks of their respective holders, and are used for identification purpose only. Avid Integration Guide 5 MPEG Disclaimers MPEGLA MPEG2 Patent ANY USE OF THIS PRODUCT IN ANY MANNER OTHER THAN PERSONAL USE THAT COMPLIES WITH THE MPEG-2 STANDARD FOR ENCODING VIDEO INFORMATION FOR PACKAGED MEDIA IS EXPRESSLY PROHIBITED WITHOUT A LICENSE UNDER APPLICABLE PATENTS IN THE MPEG-2 PATENT PORTFOLIO, WHICH LICENSE IS AVAILABLE FROM MPEG LA, LLC, 4600 S. Ulster Street, Suite 400, Denver, Colorado 80237 U.S.A. MPEGLA MPEG4 VISUAL THIS PRODUCT IS LICENSED UNDER THE MPEG-4 VISUAL PATENT PORTFOLIO LICENSE FOR THE PERSONAL AND NON-COMMERCIAL USE OF A CONSUMER FOR (i) ENCODING VIDEO IN COMPLIANCE WITH THE MPEG-4 VISUAL STANDARD (“MPEG-4 VIDEO”) AND/ OR (ii) DECODING MPEG-4 VIDEO THAT WAS ENCODED BY A CONSUMER ENGAGED IN A PERSONAL AND NON-COMMERCIAL ACTIVITY AND/OR WAS OBTAINED FROM A VIDEO PROVIDER LICENSE IS GRANTED OR SHALL BE IMPLIED FOR ANY OTHER USE. ADDITIONAL INFORMATION INCLUDING THAT RELATING TO PROMOTIONAL, INTERNAL AND COMMERCIAL USES AND LICENSING MAY BE OBTAINED FROM MPEG LA, LLC. SEE HTTP://WWW.MPEGLA.COM. MPEGLA AVC THIS PRODUCT IS LICENSED UNDER THE AVC PATENT PORTFOLIO LICENSE FOR THE PERSONAL USE OF A CONSUMER OR OTHER USES IN WHICH IT DOES NOT RECEIVE REMUNERATION TO (i) ENCODE VIDEO IN COMPLIANCE WITH THE AVC STANDARD (“AVC VIDEO”) AND/OR (ii) DECODE AVC VIDEO THAT WAS ENCODED BY A CONSUMER ENGAGED IN A PERSONAL ACTIVITY AND/OR WAS OBTAINED FROM A VIDEO PROVIDER LICENSED TO PROVIDE AVC VIDEO. NO LICENSE IS GRANTED OR SHALL BE IMPLIED FOR ANY OTHER USE. ADDITIONAL INFORMATION MAY BE OBTAINED FROM MPEG LA, L.L.C. SEE HTTP://WWW.MPEGLA.COM. MPEG4 SYSTEMS THIS PRODUCT IS LICENSED UNDER THE MPEG-4 SYSTEMS PATENT PORTFOLIO LICENSE FOR ENCODING IN COMPLIANCE WITH THE MPEG-4 SYSTEMS STANDARD, EXCEPT THAT AN ADDITIONAL LICENSE AND PAYMENT OF ROYALTIES ARE NECESSARY FOR ENCODING IN CONNECTION WITH (i) DATA STORED OR REPLICATED IN PHYSICAL MEDIA WHICH IS PAID FOR ON A TITLE BY TITLE BASIS AND/OR (ii) DATA WHICH IS PAID FOR ON A TITLE BY TITLE BASIS AND IS TRANSMITTED TO AN END USER FOR PERMANENT STORAGE AND/OR USE. SUCH ADDITIONAL LICENSE MAY BE OBTAINED FROM MPEG LA, LLC. SEE HTTP://WWW.MPEGLA.COM FOR ADDITIONAL DETAILS. Avid Integration Guide 6 Limited Warranty and Disclaimers Telestream, LLC (the Company) warrants to the original registered end user that the product will perform as stated below for a period of one (1) year from the date of shipment from factory: Hardware and Media—The Product hardware components, if any, including equipment supplied but not manufactured by the Company but NOT including any third party equipment that has been substituted by the Distributor for such equipment (the “Hardware”), will be free from defects in materials and workmanship under normal operating conditions and use. Software—If software is supplied as part of the product, the Company does not warrant that the software will operate uninterrupted or error-free, will meet your requirements, or that software errors will be corrected. Warranty Remedies Your sole remedies under this limited warranty are as follows: Hardware and Media—The Company will either repair or replace (at its option) any defective Hardware component or part, or Software Media, with new or like new Hardware components or Software Media. Components may not be necessarily the same, but will be of equivalent operation and quality. Software Updates Except as may be provided in a separate agreement between Telestream and You, if any, Telestream is under no obligation to maintain or support the Software and Telestream has no obligation to furnish you with any further assistance, technical support, documentation, software, update, upgrades, or information of any nature or kind. Restrictions and Conditions of Limited Warranty This Limited Warranty will be void and of no force and effect if (i) Product Hardware or Software Media, or any part thereof, is damaged due to abuse, misuse, alteration, neglect, or shipping, or as a result of service or modification by a party other than the Company, or (ii) Software is modified without the written consent of the Company. Limitations of Warranties THE EXPRESS WARRANTIES SET FORTH IN THIS AGREEMENT ARE IN LIEU OF ALL OTHER WARRANTIES, EXPRESS OR IMPLIED, INCLUDING, WITHOUT LIMITATION, ANY WARRANTIES OF MERCHANTABILITY OR FITNESS FOR A PARTICULAR PURPOSE. No oral or written information or advice given by the Company, its distributors, dealers or agents, shall increase the scope of this Limited Warranty or create any new warranties. Avid Integration Guide 7 Geographical Limitation of Warranty—This limited warranty is valid only within the country in which the Product is purchased/licensed. Limitations on Remedies—YOUR EXCLUSIVE REMEDIES, AND THE ENTIRE LIABILITY OF TELESTREAM, LLC WITH RESPECT TO THE PRODUCT, SHALL BE AS STATED IN THIS LIMITED WARRANTY. Your sole and exclusive remedy for any and all breaches of any Limited Warranty by the Company shall be the recovery of reasonable damages which, in the aggregate, shall not exceed the total amount of the combined license fee and purchase price paid by you for the Product. Damages TELESTREAM, LLC SHALL NOT BE LIABLE TO YOU FOR ANY DAMAGES, INCLUDING ANY LOST PROFITS, LOST SAVINGS, OR OTHER INCIDENTAL OR CONSEQUENTIAL DAMAGES ARISING OUT OF YOUR USE OR INABILITY TO USE THE PRODUCT, OR THE BREACH OF ANY EXPRESS OR IMPLIED WARRANTY, EVEN IF THE COMPANY HAS BEEN ADVISED OF THE POSSIBILITY OF THOSE DAMAGES, OR ANY REMEDY PROVIDED FAILS OF ITS ESSENTIAL PURPOSE. Further information regarding this limited warranty may be obtained by writing: Telestream, LLC 848 Gold Flat Road Nevada City, CA 95959 USA You can call Telestream, LLC via telephone at (530) 470-1300. Avid Integration Guide 8 Avid Integration Guide 9 Contents Introduction 15 Overview 16 Licensing Requirements 17 Supported Avid Products 17 Supported Vantage Components 18 AAF Encoder Support for Avid Interplay 18 Interplay Notifier (Notify Action) Support for Avid Interplay 19 Telestream Transfer Engine Send to Playback 19 Telestream Transfer Engine Ingest 19 Network Adapters for Use with Avid Shared Storage 20 International Character Support 20 Vantage to Avid—Delivering Encoded Media to Avid Systems 21 Avid AAF Encoder 23 TransferManager/Transfer Engine Encoder 23 MXF Encoder 23 MXF Formats 24 Final Cut / Avid QuickTime Encoder and QuickTime (Telestream) Encoder Transcoding and Direct Convert Formats 24 Legacy Avid-Compatible Encoders 25 Notify Action 25 Avid to Vantage—Exporting Media to Vantage 26 Accessing Avid Unity Storage 27 Using the Telestream Playback Service for Avid Interplay Transfer Engine Avid Data Track Support 27 Transcode/Direct Convert Formats 27 Processing QuickTime Movies Exported from Media Composer 28 QuickTime Reference Movie Export Requirements 28 Processing MXF OP1a Files Exported from Media Composer 28 Avid Export (Media Composer 7 and later) 28 Avid AMA File Export (Media Composer 8 and later) 28 Processing Simplified AAF Files Exported from Media Composer 29 Pipeline—Network Video Capture and Playout 30 Encoding Formats 30 24 27 10 Contents Using the AAF Encoder 31 Overview 32 Transcode/Direct Convert Formats 33 Transcode-only Formats 33 Software Requirements 34 Licensing Requirements 34 Configuring the AAF Encoder 35 Interplay Container Configuration 36 Media Composer Container Configuration 40 Using the Avid AAF Encoder with Interplay 41 Required Avid Components 41 Required Information 42 Creating Interplay Master Assets 42 Using Notify to Create a Master Asset Prior to an AAF Encoder Flip Action Using an AAF Encoder Flip Action to Automatically Create a Master Asset Example Workflows 44 Simple, Single-Resolution Workflow 44 Multi-Resolution and Keyframe Workflow (Parallel workflow) 45 Multi-Resolution and Keyframe Workflow (Serial workflow) 46 Processing a News Feed with XML Workflow 47 42 43 Using the Notify Action 51 Configuring the Interplay Web Services Host Connection Performing Interplay Operations 53 Using MOB IDs in Workflows 54 Creating a Master Clip in a Notify Action 55 52 Using Telestream Playback Service for Interplay | Transfer 57 Overview 58 Version Requirements 59 Avid Data Track Support 59 Transcode/Direct Convert Formats 59 Send to Playback & QuickTime Export Options 59 Implementing Avid-to-Vantage Media Processing Workflows 61 Supported Avid Interplay | Transfer Configurations 61 Avid Client & Transfer Engine on Dedicated Computers in Interplay ISIS Workgroup 61 Avid Client & Transfer Engine on One Computer—Shared Storage 61 Avid Client & Transfer Engine on One Computer—Local Storage 62 Installation Tasks 63 Installing the Telestream Playback Service 63 Configuring the Interplay Transfer Engine 65 Managing Transfer Engine Playback Devices 66 Managing The Telestream Playback Service 68 Configuring Media Composer for the Playback Service 71 Avid Integration Guide Contents Setting up an Avid-Export Vantage Workflow 71 Transferring Sequences to Vantage 72 Troubleshooting 73 Telestream Intermediary Format (TIFO) 74 Workflow Considerations 74 Usage Considerations 74 Uninstalling Old Versions of the Telestream Playback Service 75 Uninstalling Playback Service V2.0 or Earlier 75 Uninstalling Playback Service Version 2.1 or Newer 75 Supported Avid Media Formats 77 Media Formats 77 Ingesting Media into Avid via Interplay Transfer Engine 83 Overview 84 Features 85 Transcode/Direct Convert Formats 85 Software Version Requirements 85 Licensing Requirements 86 Supported Interplay Transfer Engine Configurations 87 Avid Client & Transfer Engine in Interplay ISIS Workgroup 87 Avid Client & Transfer Engine with ISIS Shared Storage 87 Avid Client & Transfer Engine with Local Storage 88 Implementing Avid-Telestream Media Processing Workflows 89 Installing the Avid Interplay Transfer Client 90 Installing the Telestream Transfer Manager Interplay Components 91 Meeting Prerequisites 91 Obtaining the Installer 92 Performing the Installation 92 Moving the Telestream Receiver to the Interplay Transfer Engine Server Interplay Transfer Engine 3.0.5 Only—Installing Hot Fix 94 Configuring the Transfer Engine 95 Specifying Interplay vs. Standalone Mode Delivery 95 Adding or Editing Ingest Devices 96 Deleting Ingest Devices 96 Configuring the Telestream TransferManager Client 97 Configuring the Primary Workgroup 97 Managing Multiple Transfer Engine Servers 98 Sharing the Media Output Location 100 Setting up a Vantage Transfer Engine Workflow 101 Prototypical Transfer Engine Workflow 101 Configuring the Flip Action 101 Configuring the Deploy Action 102 Smart SD/HD Transcoding Workflow 104 Troubleshooting 106 Supported Avid Media Formats 107 AVCI Media 107 DNxHD Media 108 Avid Integration Guide 93 11 12 Contents DV, DVCPRO, and IMX Media 109 DVCPRO HD Media 110 Sony XDCAM 4:2:2 50Mb Media 110 Sony XDCAM 4:2:0 Media 110 Avid Integration Guide 13 Telestream Contact Information To obtain product information, technical support, or provide comments on this guide, contact us using our web site, email, or phone number as listed below. Table 1. Telestream Contact Information Resource Contact Information Telestream Customer Service Web Site: http://www.telestream.net/telestream-support Telestream, Inc. Web Site: www.telestream.net Support Email: [email protected] Sales and Marketing Email: [email protected] Telestream, Inc. 848 Gold Flat Road, Suite 1 Nevada City, CA. USA 95959 International Distributor Support Web Site: www.telestream.net Telestream Technical Writers Email: [email protected] See the Telestream Web site for your regional authorized Telestream distributor. If you have comments or suggestions about improving this document, or other Telestream documents—or if you've discovered an error or omission, please email us. 14 Telestream Contact Information Avid Integration Guide Introduction Introduction The Avid Integration Guide helps Telestream’s Vantage users understand, implement, and utilize Vantage to perform media transcoding and other digital media workflows in conjunction with Avid’s editorial and asset management products. This chapter provides an overview of how Vantage workflows are used in key Avid import and export applications: importing media into Avid from Vantage for editing, and exporting media from Avid to Vantage for encoding. The remainder of the guide focuses on implementation and application details. Topics Overview Licensing Requirements Supported Avid Products Supported Vantage Components Network Adapters for Use with Avid Shared Storage International Character Support Vantage to Avid—Delivering Encoded Media to Avid Systems Avid to Vantage—Exporting Media to Vantage Pipeline—Network Video Capture and Playout Avid Integration Guide 15 16 Introduction Overview Overview The tight integration of Vantage with Avid systems enables significant gains in productivity for almost every type of Avid user, from small production houses to large broadcasters producing national news programs. These dramatic productivity gains are made possible by making file-based import and export processes faster, more automated, and less reliant on operator action. Figure 1. Vantage-to-Avid and Avid-to-Vantage Integration Points Avid’s editing systems are used throughout the broadcast, sports, and entertainment industries to edit and produce high value media. As such, they are operated by highlyskilled creative staff, often located in premium facilities. Vantage products can be integrated into Avid media workflows from simple to complex, from standalone Media Composer edit systems to Interplay asset management systems. Both single and multiple resolution assets can easily be created to meet your requirements. Note: In this guide, references to Media Composer generally apply to all three Avid editors: Media Composer, Newscutter, and Symphony. Throughout this guide, Avid Interplay—now named Interplay | Transfer—is usually referred to as simply Interplay. Avid Integration Guide Introduction Licensing Requirements Licensing Requirements These Vantage components are enabled only with specific licenses: • AAF Encoder—requires the following licenses: – For Media Composer: Vantage Transcode Pro – For Interplay: Vantage Transcode Pro Connect with Avid Advanced option • TransferManager/Transfer Engine Encoder—requires Vantage Transcode Pro Connect with Avid Advanced option. • MXF Encoder—requires Vantage Transcode Pro. • Final Cut/Avid QuickTime Encoder—requires Vantage Transcode Pro. • Notify Actions Interplay Notifier—requires Vantage Transcode Pro Connect with Avid Advanced option. • Post Producer Compose and Conform Actions—requires Post Producer. The following Vantage components and capabilities are enabled without specific licenses in all Vantage products: • The Telestream Playback Service • Processing media files exported from Avid Media Composer Please contact your Telestream account manager or Telestream Customer Service (see Telestream Contact Information) for information about purchasing Vantage licenses. Supported Avid Products Vantage workflows can be integrated with the following Avid system implementations: • Stand-alone Avid editing systems with local storage • Avid editing systems with network attached shared storage such as Avid ISIS • Avid editing systems with Interplay. Vantage workflows can be integrated with the following Avid products: • Avid Interplay Transfer Engine (Interplay | Transfer)—Interplay Transfer Engine (often referred to as Interplay Transfer or Transfer Manager) automates the transfer of media files in and out of Avid environments. • Avid Interplay Asset Management Products: – PAM (Production Asset Management) —Vantage seamlessly integrates directly with PAM for both import and export. – MAM (Media Asset Management)—Vantage workflows can ingest media exported from MAM. Contact Avid for further information about submitting media from MAM to Vantage workflows. • Avid ISIS—Avid’s shared storage environment, a proprietary NAS device. The term ISIS as used in this guide should not be confused with older Avid Unity products. Avid Integration Guide 17 18 Introduction Supported Vantage Components Supported Vantage Components Vantage 6.0 and above (including Update Packs) can be integrated with certain Avid Interplay versions, depending on the Vantage components you are utilizing. You can use supported versions of the Telestream Media Transcoder and Telestream Transfer Engine Components in supported Vantage domains running on Windows Server 2008 R2 or later, or Windows Server 2012 or later. Vantage can be integrated with Avid Interplay using the following components: AAF Encoder (implemented in the Flip action)—see AAF Encoder Support for Avid Interplay The Interplay Notifier (Implemented in the Notify action)—see Interplay Notifier (Notify Action) Support for Avid Interplay Telestream Transfer Engine components—see Telestream Transfer Engine Send to Playback and Telestream Transfer Engine Ingest. Use the following topics to determine which versions of Interplay, Interplay Web Services, and Telestream Transfer Engine components you can utilize, based on the Vantage features you are using. Note: Telestream recommends that you use the latest version of the Media Transcoder possible, constrained by the version of Avid Interplay or Interplay Web Services you are using. Contact Telestream Technical Support for the latest released version. For the latest supported components see the Avid Vantage and FlipFactory Product Sheet on the Telestream Web site. AAF Encoder Support for Avid Interplay When utilizing the AAF Encoder, use the following table to identify which version of the Media Transcoder you can utilize, based on the version of Interplay you are using. Table 2. AAF Encoder Support for Interplay by Version Interplay Version Media Transcoder Version 2.7 3.0.5 3.1* 3.2 2013.02-2013.05 2013.16-2014.07 2014.14 and later * You must use Interplay Web Services 3.0.9 in conjunction with Interplay 3.1. Avid Integration Guide Introduction Supported Vantage Components Interplay Notifier (Notify Action) Support for Avid Interplay When utilizing the Notify action, use the following table to identify which versions of Interplay Web Services you can utilize. Table 3. Interplay Notifier Support for Interplay by Version Interplay Web Services Version Vantage Version 2.7 3.0.5 3.0.9* 3.1 3.2** Vantage 6.0 and later * You must use Interplay Web Services 3.0.9 in conjunction with Interplay 3.1. ** The Create Master Clip option with the frame size and rate set to 720p/59.94 or 720p/ 50 will fail. As a work around for this issue, Telestream recommends that you select 30i NTSC, 1080i 59.94, or 25i PAL, 1080i50, followed by adding media clips through the AAF Encoder’s Interplay container. The result is a Master Clip with the correct frame rate. Note: Stress-testing of the Vantage Notify Action’s Avid Web service requests has shown the possibility (less than 1%) of response time out failures occurring. Add a Retry to the Notify Action to resolve this failure. Telestream Transfer Engine Send to Playback Telestream's Transfer Engine Components have been qualified for use with the following Avid Interplay versions for Send to Playback Export: Table 4. Send to Playback Export Support for Interplay Interplay Version Vantage Version 2.7 3.0.5 3.1 3.2 Vantage 6.0 and later Telestream Transfer Engine Ingest Telestream's Transfer Engine Components have been qualified for use with the following Avid Interplay versions for ingest to Interplay: Table 5. Send to Playback Export Support for Interplay Interplay Version Vantage Version Vantage 6.0 and later Avid Integration Guide 2.7 3.0.5 3.1 3.2 19 20 Introduction Network Adapters for Use with Avid Shared Storage Network Adapters for Use with Avid Shared Storage Vantage domain servers being used with Avid shared storage must be equipped with an Avid-approved network adapter. Contact your Avid system administrator or contact Avid directly for guidance on recommended network adapters. Lightspeed servers implemented for use with Avid shared storage must be ordered with one of the following network adapters: • Intel Pro 1000 PT Quad Port Server Adapter (Telestream Part #- V-ETH-LS-QUAD) • MYRICOM 10G-PCIE-8B-S+E (Telestream Part # - V-MYRICOM-SGL) • MYRICOM 10G-PCIE2-8B2 (Telestream Part #- V-MYRICOM-DUAL) International Character Support Vantage’s underlying internal architecture fully supports multiple byte characters. However, some third party components or interfaces used within Vantage do not. These actions may impose practical limits when used in Vantage workflows: • AAF Encoder—The Avid Media Toolkit utilized in the Vantage AAF encoder does not fully support multiple byte characters. • Notify and Deploy Actions—Some Avid Interplay components have restricted multiple byte character support, which affects how Notify and Deploy actions can interact with them. See the following Avid Interplay publications for more details: • • • • Avid International Character Support (ICS) Media Composer Interplay Production v3.0.x Read Me Document Interplay Production v3.1.x Read Me Document Avid Integration Guide Introduction Vantage to Avid—Delivering Encoded Media to Avid Systems Vantage to Avid—Delivering Encoded Media to Avid Systems Media and its associated metadata can arrive for processing in many ways and in— often unpredictable—formats. An ever increasing challenge is keeping up with content arriving from news agency/wire feeds, bureau and stringer file deliveries, tapeless cameras, archive retrievals, and user-generated media and crowd sourcing, enabled by the ubiquitous cell phone. Figure 2. Vantage Delivers Media to Avid Systems, from Simple to Complex The media usually requires transcoding for conversion to house standards. Media may also require aspect ratio, frame rate conversion, or other modifications. Vantage offers unparalleled transcoding/re-wrapping functionality and quality for automated ingest and export of heterogeneous media files. Vantage offers a comprehensive set of codecs and components that you can combine and configure in workflows to solve your media transcoding challenges, making Vantage an excellent choice for automated transcoding of source media to Avid platforms. Figure 3. Vantage Transcodes Media for Ingest into Avid Systems Avid Integration Guide 21 22 Introduction Vantage to Avid—Delivering Encoded Media to Avid Systems Topics The following Vantage encoders and actions can be implemented in Vantage workflows to support your Avid media processing requirements: Avid AAF Encoder TransferManager/Transfer Engine Encoder MXF Encoder Final Cut / Avid QuickTime Encoder and QuickTime (Telestream) Encoder Legacy Avid-Compatible Encoders Notify Action Avid Integration Guide Introduction Vantage to Avid—Delivering Encoded Media to Avid Systems Avid AAF Encoder The Avid AAF encoder is implemented in Vantage in the Flip action. You can use the Avid AAF encoder in workflows to produce single and multi-resolution Avidcompatible MXF OP-Atom media. The media is delivered to Media Composer or Avid shared storage using the same Vantage workflow. In a multi-resolution workflow, after the media is fully ingested into Avid, an operator can switch to low-res format to conduct edits. The AAF encoder can be configured to operate with Media Composer or Interplay. • Media Composer—the AAF encoder creates Avid MXF Op-Atom media (video, audio and data) files along with an accompanying AAF file. The media files can be added to a project bin by importing the AAF file using Media Composer’s Media Tool. • Interplay—you can encode and save Avid MXF Op-Atom media files directly to Avid shared storage (such as ISIS and automatically check them into Interplay. Edit While Ingest/Frame Chase editing is also supported. In addition media created by the Interplay container contain MOB-ID data that can be extracted for use by downstream AAF Encoder actions or other Vantage actions that require them. The AAF encoder offers direct integration with an Avid Interplay environment and can be used as a functional alternative to the Telestream Transfer Engine Encoder. Note: For format support, and implementation and application details, see Using the AAF Encoder. TransferManager/Transfer Engine Encoder The TransferManager/Transfer Engine encoder, implemented in the Flip action, is a legacy encoder for creating temporary video, audio and data files for delivery to Avid TransferManager or Transfer Engine, without requiring Avid Interplay. Delivery is performed via a Deploy action in the workflow, and requires an additional Telestream TransferManager component to be installed. Note: For format support, and implementation and application details, see Ingesting Media into Avid via Interplay Transfer Engine. MXF Encoder The MXF encoder is implemented in the Flip action. The MXF encoder creates media that can be imported in to an Avid editorial environment. Files created by the MXF encoder in a Generic OP1a, IMX (D10), or Sony XDCAM HD MXF containers can be added to an Avid bin using Avid’s MXF AMA plug-in. Ancillary data in source files can be preserved as an MXF (SMPTE 436M) data track. Avid’s AMA MXF plug-in reads SMPTE 436M and places it in the clip’s data track. Avid Integration Guide 23 24 Introduction Vantage to Avid—Delivering Encoded Media to Avid Systems MXF Formats Note: These may be restricted by your container selection. • • • • • • AVC Intra 100 720p/1080i DNxHD 720p/1080i/1080p DV/DVCPRO NTSC/PAL DVCPRO HD 720p/1080i IMX 30/40/50 NTSC/PAL XDCAM HD 4:2:0/4:2:2 Note: For information on using this encoder, display the associated help topic. In Workflow Designer, open a workflow with a Flip action (or create one and add a Flip action). Click the Inspector icon (upper left corner of the Flip action) to display the inspector. Select the MXF encoder and click the M button (upper right corner). Final Cut / Avid QuickTime Encoder and QuickTime (Telestream) Encoder The Final Cut / Avid QuickTime encoder and the QuickTime (Telestream) encoder are implemented in the Flip action to create QuickTime media intended for use in Avid and Final Cut Pro editing systems. Files created by these encoders can be added to an Avid bin through the Avid QuickTime AMA plug-in or via an Import function. The Avid QuickTime AMA plug-in does not read or import Closed Caption tracks. Transcoding and Direct Convert Formats • • • • • • • • AVC Intra 50/100 720p/1080i DNxHD 720p/1080i/1080p DV/DVCPRO NTSC/PAL DVCPRO HD 720p/1080i IMX 30/40/50 NTSC/PAL ProRes 422 XDCAM HD 4:2:0/4:2:2 X.264 (H.264) Note: For information on using these encoders, display the associated help topic. In Workflow Designer, open a workflow with a Flip action (or create one and add a Flip action). Click the Inspector icon (upper left corner of the Flip action) to display the inspector. Select either encoder and click the M button (upper right corner). Avid Integration Guide Introduction Vantage to Avid—Delivering Encoded Media to Avid Systems Legacy Avid-Compatible Encoders This guide describes the most commonly utilized Vantage encoders used for producing Avid-compatible media. Vantage also provides several other encoders that are capable of creating Avid-compatible QuickTime and MXF media files. (Other encoders that produce Avid-compatible media may also be used in your Avid workflows.) The best method for selecting the proper encoder and codec for a given application is to create a test workflow and run several test jobs through it, making modifications as necessary to see if it meets your encoding and delivery requirements. In addition to the encoders discussed in this guide, Vantage provides encoders for supporting legacy Avid formats. • Avid MediaStream encoder—creates files in MSS format, which are used by Avid MediaStream video servers. • Avid OMF encoder—generates OMF files for use with Avid editing systems. • Avid Vortex encoder—creates AVI files that are compatible with the Vortex News editing system. • QuickTime Encoder—includes legacy Avid codecs and many other codec types, including 1:1x, AVmp, DV, DV100, ABVB Board, Meridien Interlaced, Meridien Interlaced, Meridien Progressive, and NuVista Board codecs. Note: These encoders are not described in this guide. For details about their use and implementation, open Workflow Designer, and create a workflow. In a Flip action, select the codec. Open the inspector and display its help page by clicking the M button in the upper right corner of the main window. Notify Action Use the Notify action, configured with an Interplay Notifier, to use Web Services to perform the following Interplay Web Services functions. • Create a master clip in Interplay • Add metadata to an Interplay clip • Extract clip metadata from the master asset for use in Vantage workflows is now available as a patch—contact Customer Service to obtain it. • • • • Set a head frame in an Interplay clip Copy a clip in Interplay Move a clip in Interplay Delete a clip from Interplay Note: For implementation and application details, see Using the Notify Action. Avid Integration Guide 25 26 Introduction Avid to Vantage—Exporting Media to Vantage Avid to Vantage—Exporting Media to Vantage Once an edit is complete, the finalized sequence is ready to be sent to a play-out system, to syndication, or for online publication as quickly as possible. Vantage can be used to create media in all distribution platform formats for Broadcast, cable/VOD, IPTV, online/mobile, and multi-screen viewing. Figure 4. Vantage Automates Transcoding and Delivery to All Distribution Platforms The output of Avid editorial can be processed in Vantage workflows in a variety of ways. By exporting media directly to Vantage, you can easily automate the creation of all required file types. Topics Accessing Avid Unity Storage Using the Telestream Playback Service for Avid Interplay Transfer Engine Processing QuickTime Movies Exported from Media Composer Processing MXF OP1a Files Exported from Media Composer Processing Simplified AAF Files Exported from Media Composer Avid Integration Guide Introduction Avid to Vantage—Exporting Media to Vantage Accessing Avid Unity Storage Access to legacy Avid Unity storage systems is implemented in Vantage workflows via the Watch and Associate actions. You configure them to use the Avid File Detector. These Avid monitors are typically used for monitoring shared storage, generally in a mixed platform (OSX and Windows) environment, for media to be processed in Vantage. You can use these actions to ingest QuickTime, OMF, OMFI, and MXF files from Editorial. (The Avid File Detector automatically flattens QuickTime reference movies.) Using the Telestream Playback Service for Avid Interplay Transfer Engine The Telestream Playback Service for Avid Interplay Transfer Engine is a Windows service installed on an Avid Transfer Engine server, for sending I-Frame media to Vantage workflows. Telestream Playback Service enables editors using Avid editorial products with Interplay Transfer Engine to save edit sequences as Telestream Intermediary Format (TIFO) files so that they can be processed by Vantage while the file is being written. Avid Data Track Support • 608/708 captions • XDS data – Program Name – V-Chip/Content Advisory Information – Ratings • Active Format Description Transcode/Direct Convert Formats • AVC Intra 50/100 720p, 1080i, 1080p • DNxHD 720p/1080i/1080p • DV/DVCPRO NTSC/PAL • DVCPRO HD 720p/1080i • IMX 30/40/50 NTSC/PAL • Up to 16 audio channels Note: 10-bit mastering quality video is processed as Full Quality (8-bit) by Vantage. Note: For implementation and application details, see Using Telestream Playback Service for Interplay | Transfer. Avid Integration Guide 27 28 Introduction Avid to Vantage—Exporting Media to Vantage Processing QuickTime Movies Exported from Media Composer You can export clips or sequences from Avid edit systems as fully-contained QuickTime movies or as QuickTime reference movies for transcoding in Vantage. QuickTime Reference Movie Export Requirements When exporting reference movies, the following requirements apply: • • • • • • Audio is restricted to 2 channels Enable Flatten Video Tracks Enable Fill Spaces with Black Enable Render All Video Effects Enable Premix Audio Tracks Clips and sequences must contain a single video or audio essence type—mixedcodec sequences are not supported. • The timeline must not contain long-GOP media, such as XDCAM clips. Note: Data tracks are not exported in Avid QuickTime movies. Processing MXF OP1a Files Exported from Media Composer You can export clips or sequences from Media Composer as MXF OP1a files such as XDCAM, AS-11, or DNxHD for transcoding in Vantage. An MXF OP1a export can be performed using Media Composer's Export, AMA File Export, and Send to FTP functions. For details on configuring and using these Media Composer functions consult the appropriate Avid documentation or your Avid representative. The following MXF OP1a file types exported by Avid Media Composer methods can be processed in Vantage workflows: Avid Export (Media Composer 7 and later) • XDCAM HD, with 8 channels of audio Avid AMA File Export (Media Composer 8 and later) • AS-11 • DNxHD Note: These media format can include an Avid Data track as a SMPTE 436M track. Avid Integration Guide Introduction Avid to Vantage—Exporting Media to Vantage Processing Simplified AAF Files Exported from Media Composer You can export flattened, mixed-down and simplified AAF files from Media Composer for processing by Vantage workflows designed with Post Producer (Edit) Compose and Conform actions. The features of these actions were designed in collaboration with Avid to meet the requirements of processing simplified AAF files. The Compose action configured with a Simple AAF composer parses the AAF files and the Conform action transcodes the video, processing audio and data track (D-Track) MXF Op-Atom media referenced in the file ingested from storage. Note: See the Post Producer Developer’s Guide for general information on using Post Producer in Vantage, and for detailed information about exporting Simple AAF files. Avid Integration Guide 29 30 Introduction Pipeline—Network Video Capture and Playout Pipeline—Network Video Capture and Playout Telestream’s Pipeline is a network-based SDI video capture device that provides a platform for ingesting live or tape sources into Vantage to simultaneously create a high-res file for storage while creating a low-res proxy plus any number of additional file formats. Pipeline provides direct support for MXF OP-Atom and OP1a media, and can connect directly into Avid Interplay/ISIS systems. Encoding Formats • • • • • DV25/50 DVCPRO25/50/HD IMX 30/40/50 Apple ProRes 422 SD/HD Avid DNxHD, up to 220Mb 10-bit. Avid Integration Guide 31 Using the AAF Encoder This application note describes the AAF encoder, and how to use it. The AAF encoder produces Avid-compatible MXF OP-Atom media for delivery to Avid edit programs and Interplay systems. Topics Overview Software Requirements Licensing Requirements Configuring the AAF Encoder Using the Avid AAF Encoder with Interplay Example Workflows Note: To create, configure and manage workflows in Vantage, use Vantage Workflow Designer. If you are not familiar with Vantage workflows, refer to the Vantage User’s Guide, which you can access from the Help menu in Workflow Designer. 32 Using the AAF Encoder Overview Overview The AAF encoder is implemented in the Flip action to produce single and multiresolution assets consisting of Avid-compatible MXF OP-Atom media. The AAF encoder features integrated delivery to Media Composer and check-in to Interplay using Web Services. The AAF encoder may also be used in Avid environments without Interplay. In single-resolution workflows, Edit While Ingest is supported. SMPTE 436 data is also supported. In multi-resolution workflow, when the files are ingested into Avid, an operator can switch low-res format to conduct edits. The AAF encoder can be configured to integrate with Interplay and Media Composer. • Interplay—the asset’s media file sets are delivered to the ISIS workspace in an Interplay environment and checked in automatically. • Media Composer—the asset’s media file sets are delivered to a Media Composeraccessible file system (local drive, SAN/NAS or share) via a Transport action (Move or Copy). You import the asset into Media Composer to link media to an active editing project. To create multi-resolution assets, multiple Flip actions can be used in a single workflow, either in parallel or in serial. It is common to place three Flip actions in a workflow in parallel: two configured with the AAF encoder to produce a high-resolution file and a proxy file. The third Flip action is configured with the Keyframe encoder to extract and save a JPEG file, for display as a headframe in Interplay Access. Note: Telestream recommends that you only use the AAF encoder with Transcoder version 2014.11 or later. Avid Integration Guide Using the AAF Encoder Overview Transcode/Direct Convert Formats You can encode or direct convert media in the following media formats using the AAF encoder: • • • • • • AVC Intra 50 (4:2:0) and 100 (4:2:2) at 720p/1080i DNxHD 720p/1080i/1080p DV25 DVCPRO 25/50 NTSC/PAL IMX 30/40/50 NTSC/PAL XDCAM HD 4:2:0/4:2:2 Transcode-only Formats You can encode media in the following media formats using the AAF encoder: • H.264 Proxy 800kbps • H.264 Proxy 1.5 | 2Mbps (Available when using the 2014.14 or later Transcoder.) • JFIF (JPEG Interchange Format) NTSC/PAL Preservation of Ancillary data is not supported with the AAF Encoder’s H.264 Proxy codec. CAUTION: Direct convert processing of XDCAM HD 4:2:2 with the decoder set to Auto has been known to fail intermittently, depending on the input media content. This intermittent failure can be eliminated by setting the decoder to Telestream. Avid Integration Guide 33 34 Using the AAF Encoder Software Requirements Software Requirements The AAF encoder is implemented in Vantage 6.0 and later versions. To identify the Vantage Media Transcoder versions and Interplay versions you can use together, see AAF Encoder Support for Avid Interplay. Licensing Requirements The AAF encoder requires the following licenses: • Media Composer—Vantage Transcode Pro • For Interplay—Vantage Transcode Pro Connect with Avid Advanced option Please contact your Telestream account manager or Telestream Customer Service (see Telestream Contact Information) for information about purchasing Vantage licenses. Avid Integration Guide Using the AAF Encoder Configuring the AAF Encoder Configuring the AAF Encoder To configure the AAF encoder, open the Flip action’s inspector and select AAF Encoder from the Encoder list. You can configure the AAF encoder to deliver media for use directly in Media Composer or for ingest into Interplay. The AAF encoder generates MXF Op-Atom media files, one file per video, audio and data tracks and an associated AAF file. Note: Each parameter that can be bound to a variable displays a green Browse button. Click it to select a variable. You can either configure the parameter manually at design time (providing the same static setting or value for each job), or select a variable, and then—at run-time—assign the variable’s value in an upstream action. Figure 5. Flip Action Inspector Select Media Composer or Interplay. Before configuring the encoder itself, select the input file by nickname, specify an optional filename pattern, and select the output media nickname (which applies to the entire set of MXF OP-Atom files generated by this encoder). When using the AAF encoder for Media Composer, specify where to save the encoded media and associated AAF file in the Output Location. When using the AAF encoder for Interplay, do NOT specify where to save the encoded media using the Output Location. Instead, specify the location in Physical File Location (see Figure 10, Physical File Locations Configuration Panel below.) Note: When the Interplay container is selected, the Output Location settings are not used. The media files are always delivered to the workspace and folder specified in Physical File Location. Note: Media files should be delivered to a subdirectory of the Avid MediaFiles directory, such as: \\avidisis\MyWorkspace\Avid MediaFiles\MXF\Vantage. Avid Integration Guide 35 36 Using the AAF Encoder Configuring the AAF Encoder You can click each component of the media (Decoder, Video Stream, Video Codec, Audio Stream, Audio Codec, and Container) to configure it. Only the Container configurations are specific to Avid. For specific details about each panel, display the context help by clicking the M button at the top right. For each attribute, you can always hover over the control to display its tool tip. Select Media Composer or Interplay from the menu in the Container component (far right) and proceed to the appropriate topic. Interplay Container Configuration Media Composer Container Configuration Note: In the context of the AAF encoder, selection of the Interplay and Media Composer containers do not change the wrapper or file format; instead, they are used to specify the selected product as the target, and to configure the encoder to interoperate correctly with it. Interplay Container Configuration Select Interplay as the container (at the far right) in the media stream building blocks to configure the encoder to inter-operate with your Interplay system. The encoder displays the container’s configuration details panel: Figure 6. AAF Encoder Configuration Panel The configuration panel is comprised of individual panels, to make configuration tasks easier. Open the each panel to configure it. Figure 7. General Configuration Panel Avid Integration Guide Using the AAF Encoder Configuring the AAF Encoder Preserve Ancillary Data into SMPTE 436 Track—Preserves Ancillary Data into a SMPTE 436 Data Track (not supported for proxy formats). Update Interval—Specifies how often Interplay is updated, in number of frames. Figure 8. Avid Interplay Web Services Configuration Panel Avid Interplay Web Services—Enter your Interplay Web Service Host, TCP Port, and login credentials. Note: Telestream recommends connecting to Interplay and Web Services using a fully-qualified DNS name, which is registered with Forward and Reverse look up tables in DNS. IP addresses may also be used. Figure 9. Asset Attributes Configuration Panel ASF Workgroup—Specifies the name of the Avid Service Framework Workgroup. This value is case sensitive and matches the workgroup name under Services, in the Avid Workgroup Properties window. Note: You can also obtain the name by navigating to the IP address of the Avid Web Services computer in a browser, scrolling to the bottom of the page, and selecting View Configuration. Interplay Folder—Specifies the Interplay Database folder destination for the asset. For example, Incoming Media/Vantage Newsfeed. Master MOB ID and Source MOB ID—specifies the Master and Source MOB ID to be used for this encode action. The value of these fields can be bound to an incoming variable or left blank. Avid Integration Guide 37 38 Using the AAF Encoder Configuring the AAF Encoder • In Multiple Resolution Workflows: For workflows that generate multiple resolutions in parallel it is required that the MOB-IDs be generated by a preceding Notify action configured with the Create Master Clip function and then passed to the Flip action’s AAF encoder as a variable. For workflows that generate multiple resolutions serially, the MOB-ID fields can be auto-generated from the first AAF encoder Flip action and then passed to any downstream action that requires them (see sample workflows for details). • In Single Resolution Workflows: For workflows that generate a single resolution, the MOB-IDs can be generated automatically by leaving the value blank or can be populated with the MOB-ID values passed via variables. MOB-ID variables can be populated by using a Notify action or other actions that have extracted them from a previous AAF Encoder Flip action (see sample workflows for details). Note: MOB ID’s are dynamically generated by Avid Interplay, and should only be entered manually under unique circumstances—for example, to correct a one-time file error in an existing asset. Tape—Specifies the tape name to be added to this asset’s metadata. Drop Frame Timecode Format—When checked, specifies media as a drop-frame timecode asset. Figure 10. Physical File Locations Configuration Panel AAF File Location—Specifies the UNC path to shared storage to which the AAF file will be written. MXF File Location—Specifies the UNC path to shared storage to which the selected codec’s MXF OP-Atom media files will be written. Delete Avid AAF and XML Support Files—When checked, the AAF and XML support files deleted from their physical location after the media has been checked into Interplay. Figure 11. Physical Directory Control Configuration Panel Physical Directory Control—When enabled, determines the maximum number of MXF files per directory. When the maximum is reached, a new directory is created with a numerical suffix (<dirname>.1, etc.), to store the next set of files. Avid Integration Guide Using the AAF Encoder Configuring the AAF Encoder Note: MXF files are written to a sub-folder under the workspace’s Avid MediaFiles folder: for example, the \Avid MediaFiles\MXF folder. Telestream recommends that your Vantage workflow save the MXF files to \Avid MediaFiles\MXF \Vantage or a similar folder structure. See your Avid Interplay administrator to assure that any new folders created by Vantage are properly indexed so your media will be viewed as online. Example: If the path is \\avidisis\Workspace\Avid MediaFiles\MXF\Vantage, new folders will be created beneath the \MXF folder as \MXF\Vantage.0, Vantage.1, etc. The directory structure that the Media Composer encoder creates can not be modified. The MXF files are saved in the \1 directory, and the XML file is auto-deleted. Avid Integration Guide 39 40 Using the AAF Encoder Configuring the AAF Encoder Media Composer Container Configuration Select Media Composer as the container (at the far right) in the media stream building blocks to configure the encoder to inter-operate with Media Composer. The encoder displays the container’s configuration details panel below: Figure 12. Container Configuration Panel The configuration panel is comprised of individual panels, to make configuration tasks easier. Open the each panel to configure it. Figure 13. General Configuration Panel Preserve Ancillary Data into SMPTE 436 Track—Preserves Ancillary Data into a SMPTE 436 Data Track (not supported for proxy formats). Figure 14. Asset Attributes Configuration Panel Tape—Specifies the tape name to be added to this asset’s metadata. Drop Frame Timecode Format—When checked, specifies the asset as drop-frame timecode. Avid Integration Guide Using the AAF Encoder Using the Avid AAF Encoder with Interplay Using the Avid AAF Encoder with Interplay To use the AAF encoder with Interplay, certain Avid components must be installed and configured. Certain information is also required, when you create Vantage workflows. Note: When the Interplay container is selected, the Output Location settings are not used. The media files are delivered to the workspace and folder specified in Asset Attributes. Required Avid Components Required Information Creating Interplay Master Assets Required Avid Components • • • • • Avid Interplay must be installed, configured, and running. Avid Interplay Web Services must be installed, configured, and running. Avid shared storage, such as ISIS, must be installed and configured. The ISIS workspace/directory must be indexed by the Avid Media Indexer. An AAF directory and an Avid MediaFiles directory must exist in the Avid storage workspace. • The Avid MediaFiles\MXF directory for the Workspace must be indexed by the Avid Media Indexer. Note: To avoid potential problems, the AAF folder should not be in a folder or path that is indexed by the Interplay Media Indexer. • The Avid ISIS client must be installed and configured on all Vantage domain servers deploying to Interplay, with proper credentials for read/write access to the required Avid workspaces. • Workspaces must be mounted as UNC paths. Note: The Avid ISIS client requires an interactive session to the desktop. This means that the user must be logged in, and that the logged in user must be the same user that is used for the Vantage Services. The credentials must match in Interplay as well as ISIS, and must include administrative rights. • Interplay output folders must have already been created. Vantage cannot create Interplay folders. Note: Telestream recommends connecting to Interplay and Web Services using a fully-qualified DNS name, which is registered with Forward and Reverse look up tables in DNS. Avid Integration Guide 41 42 Using the AAF Encoder Using the Avid AAF Encoder with Interplay Required Information When designing and implementing AAF encoder workflows, you should have the following information at hand: • • • • • Avid shared storage (ISIS) username and password Avid shared storage (ISIS) workspace/directory Interplay Web Services host name and port number Interplay username and password (might not match the ISIS username/password.) Avid Service Framework Workgroup (ASF Workgroup) name. Note: When you are installing software or otherwise modifying Avid programs or systems, always confer and coordinate with your Avid systems administrator to make these changes, including restarting any systems. Always refer to Avid documentation if you have questions about the use of Avid products. Creating Interplay Master Assets When using the AAF encoder in an Interplay environment, you can generate master assets in two ways. Each method creates the master clip and MOB-IDs used in the AAF Encoder. The first method uses a Notify action prior to any AAF Encoder Flip action in the workflow. The second method uses the first AAF Encoder Flip action to autogenerate the required MOB IDs in the first AAF Encoder Flip action of a workflow. Each method has benefits and limits. Using Notify to Create a Master Asset Prior to an AAF Encoder Flip Action This type of workflow uses a Notify action preceding all AAF Encoder Flip actions. The Notify action’s Create Master Clip function (Interplay Notifier Notification type) will create a master clip in Interplay and return the Master and Source MOB IDs as two variables, to be used by downstream AAF Encoder Flip actions or other actions that require them. The benefit of this method is that you can generate multiple media resolutions, all associated with the same master asset, in parallel. This is possible since the Notify action immediately passes the master asset's MOB-ID variables to all downstream actions. With a Vantage array and sufficient Transcode services, all of the encoding can be performed faster than real-time, thus making the workflow time as short as possible. In this type of workflow—using Notify to create the master asset—Edit While Ingest / Frame Chase editing is not supported. If you want transcoding speed at the expense of Edit While Ingest / Frame Chase editing, implement your workflow using this method. See example workflows for details. Avid Integration Guide Using the AAF Encoder Using the Avid AAF Encoder with Interplay Using an AAF Encoder Flip Action to Automatically Create a Master Asset An AAF Encoder can auto-generate a master asset and associated Master MOB-ID by leaving the Master MOB-ID and Source MOB-ID fields blank (see Interplay Container Configuration). When this method is used the Master MOB-ID cannot be passed to any downstream action until the AAF Encoder action's processing in complete. By using an Identify action following the first AAF Encoder Flip action you can extract and assign the Master MOB ID a variable, and pass it to one or more (often parallel) AAF Encoder actions or any other action that requires the MOB-ID. The benefit of this method is that Edit While Ingest / Frame Chase editing can be performed on the media encoded in the first AAF Encoder action. After the first AAF Encoder action is complete, you can generate additional media in parallel by using the Master MOB-ID passed to it via variable. The disadvantage of this method is that other resolutions required for this asset can only be created after the first AAF Encoder action finishes. However all subsequent actions can be executed in parallel. If Edit While Ingest / Frame Chase editing is a requirement implement your workflow using this method. See Example Workflows for details. Avid Integration Guide 43 44 Using the AAF Encoder Example Workflows Example Workflows The following topics describe a prototype AAF workflow prototype and several AAF encoder application examples. Simple, Single-Resolution Workflow Multi-Resolution and Keyframe Workflow (Parallel workflow) Multi-Resolution and Keyframe Workflow (Serial workflow) Processing a News Feed with XML Workflow Simple, Single-Resolution Workflow The purpose of this simple, prototype single-resolution workflow is to create Avidcompatible MXF OP-Atom files, written to a specified storage location. An AAF reference file and temporary XML file is also generated. The AAF file contains a reference to the absolute location of the MXF media files. Note: This workflow supports Edit While Ingest/Frame Chase editing, because a Notify action is not used to create the master asset. This workflow is the simplest example, and forms the basis for more complex AAF encoder workflows that you can create to meet your encoding requirements. Figure 15. Basic AAF Encoder Workflow Note: For help configuring each action, open the Inspector and click on the M icon in the upper right corner to display context help. Watch—Monitors a file folder for an incoming media file. Flip—Configured with the AAF encoder, the Flip action creates a low-res or highresolution file in supported formats (see Overview). In Interplay mode, Avid Web Services are used to deliver the files to Interplay. The Output Location is ignored. The media files are delivered to the workspace and folder specified in Asset Attributes. The master asset and MOB-IDs are auto-generated by leaving the Master MOB-ID and Source MOB-ID fields blank. Avid Integration Guide Using the AAF Encoder Example Workflows The master video asset (Avid-compatible MXF OP-Atom) and associated audio files are written direct to Avid storage. Two additional files are written to storage-an XML file that contains format attributes, and an AAF file that initializes check-in to Interplay. Once check-in is complete the files are no longer required. Vantage provides a UI checkbox to automatically delete these files from Avid storage. In Media Composer mode, the MXF files are written to a location specified in the Output Location, which is accessible to Media Composer. Multi-Resolution and Keyframe Workflow (Parallel workflow) The purpose of this basic, multi-resolution workflow is to create Avid-compatible MXF OP-Atom files, and an Avid headframe, in parallel. Edit-While-Ingest/Frame Chase editing is not supported within this workflow. The Flip action communicates with the Interplay Web Services host to check the asset into the Interplay database. The master high resolution video asset (XDCAM HD 4:2:2), Avid Proxy (H.264) and associated audio files are written directly to Avid storage. Two Notify actions are used to perform additional Interplay operations Figure 16. Multi-Resolution and Key Frame AAF Encoder Workflow Note: For help configuring each action, open the Inspector and click on the M icon in the upper right corner to display context help. Watch—Monitors a file folder for an incoming media file. Notify—creates a master clip (the Master Asset) and obtains the MOB IDs from Interplay via Web Services for binding as a variable for use in subsequent Flip actions. This workflow creates both the hi-res and low-res files that are part of the master asset and are dynamically linked by the Master MOD ID. Flip #1—Configured with the AAF Encoder, this Flip action is configured to create a high-resolution in XDCAM HD 4:2:2 (or other selected format—for supported formats, Avid Integration Guide 45 46 Using the AAF Encoder Example Workflows see Overview). Bind the MOB-IDs passed from the preceding Notify action to the respective Master and Source ID fields. Avid Web Services are used to check the asset into to the Interplay database. The master video asset (Avid-compatible MXF OP-Atom) and associated audio files are written direct to shared storage. Two additional files are written—an XML file that contains format attributes, and an AAF file that initializes check-in to Interplay. Once check-in is complete the files are no longer required. Vantage provides a checkbox to automatically delete these files from storage. Flip #2—Configured with the AAF encoder and H.264 Proxy codec, the Flip action generates a proxy file and writes it to shared storage. To associate this resolution to the same asset as Flip #1, bind the Master MOB-ID value passed from the preceding Notify action to this encoder’s Master MOB-ID field. Flip #3—The Flip action uses the Keyframes encoder, configured to extract a keyframe from the media file at 00:00:01:00 and create a thumbnail JPEG file. (Of course, any valid frame size and timecode can be specified.) The keyframe can be nicknamed avid_headframe, for example, and stored in a share. Synchronize—Delays downstream action execution until all preceding actions are complete. Notify—Configured with the Avid Notifier, use the Set Headframe function to associate the JPEG file created from the Keyframe encoder with the master asset in Interplay for viewing in Interplay Access. To associate the Keyframe to this, bind the Master MOB-ID value passed from the preceding Notify action to the Master MOB-ID field in the Set Headframe dialog. Multi-Resolution and Keyframe Workflow (Serial workflow) This multi-resolution workflow is functionally the same as the parallel example described above, however this workflow allows Edit-While-Ingest/Frame Chase editing to be performed on the first relolution. The Flip action communicates with the Interplay Web Services host to check the asset into the Interplay database. The master high resolution video asset (XDCAM HD 4:2:2), Avid Proxy (H.264) and associated audio files are written directly to Avid storage. A Notify action is used to perform additional Interplay operations. Figure 17. Multi-Resolution and Key Frame AAF Encoder Workflow Avid Integration Guide Using the AAF Encoder Example Workflows Note: For help configuring each action, open the Inspector and click on the M icon in the upper right corner to display context help. Watch—Monitors a file folder for an incoming media file. Flip #1—Configured with the AAF Encoder, this Flip action is configured to create a high-resolution in XDCAM HD 4:2:2 (or other selected format-for supported formats, see Overview). My leaving the Master MOB-ID and Source MOB-ID blank the AAF Encoder action auto-generates the asset and associated Master MOB-ID. Avid Web Services are used to check the asset into to the Interplay database. The master video asset (Avid-compatible MXF OP-Atom) and associated audio files are written direct to shared storage. Two additional files are written-an XML file that contains format attributes, and an AAF file that initializes check-in to Interplay. Once check-in is complete the files are no longer required. Vantage provides a checkbox to automatically delete these files from storage. Edit-While-Ingest/Frame Chase editing can be performed on this asset. Identify—Configured to extract the Master MOB-ID from Media Properties of the XDCAM output media attachment of the preceding AAF Encoder and assign it to a variable. Use this Master MOB-ID variable for downstream actions. Flip #2—Configured with the AAF encoder and H.264 Proxy codec, the Flip action generates a proxy file and writes it to shared storage. To associate this resolution to the same asset as Flip #1, bind the Master MOB-ID variable passed from the preceding Identify action to this encoder's Master MOB-ID field. Flip #3—The Flip action uses the Keyframes encoder, configured to extract a keyframe from the media file at 00:00:01:00 and create a thumbnail JPEG file. (Of course, any valid frame size and timecode can be specified.) The keyframe can be nicknamed avid_headframe, for example, and stored in a share. Synchronize—Delays downstream action execution until all preceding actions are complete. Notify—Configured with the Avid Notifier, use the Set Headframe function to associate the JPEG file created from the Keyframe encoder with the master asset in Interplay for viewing in Interplay Access. To associate the Keyframe to this asset bind the Master MOB-ID value passed from the preceding Identify action to the Master MOB-ID field in the Set Headframe dialog. Processing a News Feed with XML Workflow The purpose of this workflow is to process news feeds and their associated metadata file as a single job and check them into Interplay for editorial. When a video file and associated XML file are identified by the Watch action and Associate action, a job is started. The workflow extracts the metadata and populates a label, creates a key frame file for use in Interplay Access, and transcodes the media file into both high-resolution and low-resolution files, checking the asset into Interplay. Avid Integration Guide 47 48 Using the AAF Encoder Example Workflows Figure 18. News Feed with XML Metadata Workflow Note: For help configuring each action, open the Inspector and click on the M icon in the upper right corner to display context help. Watch—Monitors a target file folder for an incoming media file, nicknamed Original. Associate—Monitors a file folder for an attachment file—the media file’s associated metadata XML file—and submits the job for processing. At a minimum, you supply a nickname (Metadata, for example) and an accept pattern (*[Name]*.xml, for example). Transform—The Transform and Populate actions are used to extract metadata. The Transform action is configured with the Attachment to Label function, and uses a suitable XSLT style sheet which you supply to transform the metadata in the XML file (Metadata) acquired from the preceding Associate action into a predefined label (news_summary_label, for example). The label is passed to the Populate action for conversion to variables. Populate—Configured with the Variable from Label Parameters function, populates a metadata story variable with text obtained from the label in the Transform action. Notify—Creates a master clip (the Master Asset) and obtains the MOB IDs from Interplay via Web Services for binding as a variable for use in subsequent Flip actions. Flip—The first Flip action, configured with the AAF encoder and Interplay container appropriately configured (for the Web Services host, and under Asset Attributes, the workgroup, Interplay folder, and variables for MOB IDs), creates an XDCAM HD 4:2:2 high-resolution file. Flip—The second Flip action, also configured with the AAF encoder and Interplay container appropriately configured (for the Web Services host, and under Asset Attributes, the workgroup, Interplay folder, and variables for MOB IDs), creates an H.26 4 proxy file. Avid Integration Guide Using the AAF Encoder Example Workflows Flip—The third Flip action uses the Keyframes encoder, configured to extract a keyframe from the media file and create a thumbnail JPEG file. The keyframe can be nicknamed avid headframe, for example, and stored in a share. Notify—The first Notify, configured with the Set Headframe function, attaches the headframe file (by nickname) to the proper ASF workgroup, using the master MOB ID variable, to pick up and ingest the keyframe file for viewing with the asset in Interplay Asset. Figure 19. Displaying the Headframe of an Asset Notify—The second Notify, configured with the Add Metadata to Clip function, configured with the ASF workgroup and master MOB ID variable, uses the metadata file to set user properties and locators. Avid Integration Guide 49 50 Using the AAF Encoder Example Workflows Locators are added from a separate XML file, and the story summary is added from the summary variable created in the Populate action. Figure 20. Viewing Locators in Interplay Access Avid Integration Guide 51 Using the Notify Action This chapter describes how to use Notify actions in Vantage workflows to interact with various Avid products. The Notify action uses Web Services to perform a variety of Interplay operations including copying media created by the AAF encoder to the Interplay system. Topics Configuring the Interplay Web Services Host Connection Performing Interplay Operations Using MOB IDs in Workflows Creating a Master Clip in a Notify Action Note: The Notify action can be added to any Vantage workflows. To create, configure and manage workflows in Vantage, use Vantage Workflow Designer. If you are not familiar with Vantage workflows, refer to the Vantage User’s Guide, which you can access from the Help menu in Workflow Designer. 52 Using the Notify Action Configuring the Interplay Web Services Host Connection Configuring the Interplay Web Services Host Connection To configure the Notify action to connect to your Interplay Web Services host, display the Inspector and follow these steps: 1. Select the Interplay Notifier. 2. Click Next to configure connection details for Interplay Web Services: 3. Configure the following parameters for your system: WS Host—Specifies the URL or IP address of the Avid Interplay Web Services host. TCP Port—Specifies the port number of the Web Services host you’re connecting to. Username and Password—Specifies the username and password to connect with. Note: The Password field cannot be bound to a variable. Test Connection—Tests your WS Host settings. If the settings are correct and the Web Service is available, Vantage reports success. Otherwise, determine the prob- Avid Integration Guide Using the Notify Action Performing Interplay Operations lem and test the connection again.You cannot continue until you have a successful connection. Note: Optionally, click Browse on any variable-enabled control to assign a variable, which you will configure upstream in another action to supply the run-time value. 4. After configuring this panel, click Test Connection to verify your configuration and availability of the Avid Interplay Web Service. Then, click Next to configure the action to perform the Interplay operation you require. Performing Interplay Operations After you have successfully configured the Notify action to connect to your Interplay Web Service, you can configure the action to perform various Interplay operations. Except for Create Master Clip, these operations all use a specific MOB ID (see Using MOB IDs in Workflows). Here are the Interplay operations you can perform: • Create Master Clip—Creates a new master asset. • Add Metadata to Clip—Adds metadata to the master asset (locators, user properties set in the UI and from XML attachments). • Extract Clip Metadata—Extracts metadata from the master asset, now available as a standalone patch (available beginning in Vantage 7.0). • • • • Set Headframe—Creates a headframe image from the specified source. Copy Clip—Copies the master asset. Move Clip—Moves the master asset. Delete Clip—Deletes the master asset. (The media files are not deleted.) To perform a specific operation, select it. Next, complete the form for the operation you selected. Click Next and then click Finish to save and close the inspector. Note: Optionally, click Browse on any variable-enabled control to assign a variable, which you will configure upstream in another action to supply the run-time value. Avid Integration Guide 53 54 Using the Notify Action Using MOB IDs in Workflows Using MOB IDs in Workflows A MOB ID is a unique identifier in Avid systems. In the context of Vantage, there are two ways to create a MOB ID: • Explicitly, using the Create Master Clip operation in a Notify action (see Creating a Master Clip in a Notify Action). • Automatically, via the Interplay container in the AAF encoder. The purpose of a MOB ID is to uniquely identify an Interplay asset, which often is comprised of a set of files of the same content in different formats, plus head frames, XML files, etc., all associated with the primary asset. The MOB ID is retrieved from Avid via Web Services and assigned to the associated media files that are being transcoded in a Vantage workflow. In the context of a Vantage workflow, the Vantage Notify action’s Create Master Clip function, returns a MOB ID that can be assigned a variable, which can be used in downstream actions. For example, you can pass it to a subsequent Notify action to interact perform a variety of operations on an asset by its MOB ID. Note: Only in unusual circumstances should a MOB ID be entered manually. For example, rectifying an error such as a failed transcode. When you manually enter a MOB ID, that workflow can only be used to modify assets of the MOB ID specified. Avid Integration Guide Using the Notify Action Creating a Master Clip in a Notify Action Creating a Master Clip in a Notify Action Use the Create Master Clip to create a Master Asset on the Interplay server with a unique MOB ID and return it. Master and Source MOB IDs: The files are dynamically linked in the Interplay system by the MOB IDs that are retrieved from the Create Master Clip function when bound to the MOB ID variables. The MOB IDs are retrieved by a Web Service call. The MOB IDs act as a unique identifier for the media and metadata in the Interplay system that ties all the assets together for further Interplay actions and editing in Media Composer. Once a MOB ID has been inserted into media generated you can also extract it for use in other actions. For example, you can pass it to another Flip action to create other media files using the same MOB ID. Or, you can pass it to a Notify action to interact with Interplay and perform a variety of operations on an asset by its MOB ID. The figure below illustrates the configuration of the Interplay notifier to create a MOB ID in an ASF workgroup and return a MOB ID. Figure 21. Using Notify Action’s Interplay Notifier to Create a Master Clip Change the text to indicate the fields can be bound by a variable.n this example, the ASF workgroup is specified manually. The clip name, Interplay folder, and tape are all supplied by variables, whose value may change for each job. The Master and Source MOB IDs are returned in variables which can be used by downstream actions. Avid Integration Guide 55 56 Using the Notify Action Creating a Master Clip in a Notify Action Avid Integration Guide 57 Using Telestream Playback Service for Interplay | Transfer This application note focuses on setting up and implementing Vantage media processing workflows for transcoding and publishing I-frame media delivered by operators using Avid Media Composer and Interplay | Transfer. Note: Topics in this chapter apply to Interplay | Transfer versions 2.7, 3.0.5, and 3.2. Where there are differences, they are noted. Topics Overview Version Requirements Send to Playback & QuickTime Export Options Transferring Sequences to Vantage Troubleshooting Telestream Intermediary Format (TIFO) Uninstalling Old Versions of the Telestream Playback Service Supported Avid Media Formats Note: When you are installing software or modifying Avid programs or systems, always confer and coordinate with your Avid systems administrator or manager to make these changes, including restarting any services. Always refer to Avid documentation if you have questions about the use of their products. 58 Using Telestream Playback Service for Interplay | Transfer Overview Overview Telestream’s Playback Service for Avid Interplay | Transfer enables editors using Avid Media Composer with the Interplay Transfer Engine to easily save sequences as Telestream Intermediary Format (TIFO) files. This enables open file workflows—where the files can be transcoded as they are being written, allowing you to create one or more encoded output files as the source file is being written. The Telestream Playback Service for Avid Interplay Transfer Engine is a Windows service installed on an Avid Interplay Transfer Engine server. Telestream Playback Service enables editors using Media Composer with Interplay Transfer Engine to save edited sequences as Telestream Intermediary Format (TIFO) files so that they can be immediately processed by Vantage while being exported. Figure 22. Avid-Vantage Media Processing Workflow using Send to Playback Avid System Vantage Domain Sequences Avid Media Composer Avid Interplay Transfer Engine HD Files Vantage Playback Service TIFO Files Vantage Workflow SD Files Orange: Vantage Components Purple: Avid Components In practice, an Avid operator sends a sequence from Media Composer to a playback device. The Interplay Transfer Engine transparently uses the Telestream Playback service to save the media as a TIFO file and store it in a share monitored by a Vantage workflow. When a new file is identified, a job is started, and the media file is processed, transcoding the media to suit your requirements. You can install the Playback service in any supported Avid configuration (see Implementing Avid-to-Vantage Media Processing Workflows ) and on as many Interplay Transfer Engine servers as required, and you can create multiple playback devices and Vantage workflows to suit your media processing requirements. When you have completed the implementation steps outlined in Setting up an AvidExport Vantage Workflow, please proceed to Transferring Sequences to Vantage to learn how to utilize your Avid-Telestream media processing system. If you have problems with your system, review the Troubleshooting topic for assistance. Avid Integration Guide Using Telestream Playback Service for Interplay | Transfer Version Requirements Version Requirements The following versions are required: Vantage 6.2 or later Telestream Playback Service version 2.7 | 3.0.5 | 3.2 (Must match the Interplay | Transfer version you are using) Avid Interplay | Transfer version 2.7 | 3.0.5 | 3.2 Microsoft .Net Framework 4.0 Avid Media Composer 7.0 or later or NewsCutter 10.0 or later Avid Data Track Support • 608/708 captions • XDS data – Program Name – V-Chip/Content Advisory Information – Ratings • Active Format Description Transcode/Direct Convert Formats • • • • • • AVC Intra 50/100 720p, 1080i, 1080p DNxHD 720p/1080i/1080p DV/DVCPRO NTSC/PAL DVCPRO HD 720p/1080i IMX 30/40/50 NTSC/PAL Up to 16 audio channels Note: 10-bit mastering quality video is processed as Full Quality (8-bit) by Vantage. Send to Playback & QuickTime Export Options Understanding your workflow requirements and choosing the right process for the job at hand is an important aspect in assessing which approach is best for your facility. You can use either Send to Playback transfers or QuickTime exports, depending on your workflow requirements. Workflows implemented with Send To Playback transfers or QuickTime exports of QuickTime reference movies are limited to I-Frame media; QuickTime exports of self-contained QuickTime movies are not bound by this limit. Avid Integration Guide 59 60 Using Telestream Playback Service for Interplay | Transfer Send to Playback & QuickTime Export Options Note: When exporting QuickTime reference movies, there should be no source media on local drives, you should use black instead of Avid Filler, and render all effects. In Media Composer, you can use the Send To Playback command to transfer sequences to Vantage for transcoding. This eliminates the need to perform a QuickTime export and is simpler, in that you don’t need to check export settings, for example. Send to Playback transfers preserve the composition timecode and support up to 8 audio channels. The process is slightly different in Avid Assist, the viewing and logging application. In Avid Assist, you can directly select a single clip (or a series of shots) and then use the Send to Playback command to transfer the clip to Vantage. (In the background, the selected clip is added a sequence before the transfer occurs.) Avid Integration Guide Using Telestream Playback Service for Interplay | Transfer Implementing Avid-to-Vantage Media Processing Workflows Implementing Avid-to-Vantage Media Processing Workflows Before you can submit media to Vantage workflows for processing, you need to make sure your Avid system is operational, install Telestream software, perform some configuration tasks, and create and activate a Vantage workflow. Supported Avid Interplay | Transfer Configurations Installation Tasks Supported Avid Interplay | Transfer Configurations Avid Interplay | Transfer supports three configurations (as noted in the Avid ReadMe): • A dedicated Interplay | Transfer server connected to an Interplay environment with a shared storage system, such as ISIS (see Figure 23 below). • Standalone Interplay | Transfer software installed on an Avid editing system, connected to Avid shared storage without an Avid Interplay Engine. Each client must install both Interplay | Transfer and Interplay | Transfer client software (see Figure 24, next page). • Standalone Interplay | Transfer software installed on an Avid editing system with local storage (see Figure 25, next page). The following diagrams depict these Avid systems, including key software components. Avid Client & Transfer Engine on Dedicated Computers in Interplay ISIS Workgroup In this configuration, the Interplay Transfer Engine is hosted on a dedicated computer, separate from Media Composer client computers. Figure 23. Avid Client & Transfer Components on Dedicated Computers Avid Client Workstation Avid ISIS Shared Storage Media Composer NewsCutter Transfer Engine Client Avid Interplay Transfer Server Avid Transfer Engine Telestream Vantage Domain Telestream Playback Service Avid Client & Transfer Engine on One Computer—Shared Storage In this configuration, Avid editing clients are on a computer that also hosts Interplay Transfer Engine, utilizing Avid shared storage. Avid Integration Guide 61 62 Using Telestream Playback Service for Interplay | Transfer Implementing Avid-to-Vantage Media Processing Workflows Figure 24. Avid Client & Transfer Components on an Edit Workstation with ISIS Avid Client Workstation Telestream Vantage Domain Media Composer NewsCutter Avid ISIS Shared Storage Transfer Engine Client Avid Interplay Transfer Server Avid Transfer Engine Telestream Playback Service Avid Client & Transfer Engine on One Computer—Local Storage In this configuration, Avid editing clients are on a computer that also hosts Interplay Transfer Engine, utilizing only local storage. Figure 25. Avid Client & Transfer Engine Components on an Edit Workstation—Local Storage Avid Client Workstation Local Storage Media Composer Telestream Vantage Domain NewsCutter Transfer Engine Client Avid Interplay Transfer Engine Server Avid Transfer Engine Telestream Playback Service Avid Integration Guide Using Telestream Playback Service for Interplay | Transfer Implementing Avid-to-Vantage Media Processing Workflows Installation Tasks This set of steps assumes that your Avid system— Avid Interplay Transfer Engine and/or Media Composer clients—is already installed and fully operational. If not, complete that task. Proceed with these steps: 1. Installing the Telestream Playback Service—Installing the Playback service on your Interplay Transfer Engine computer. 2. Configuring the Interplay Transfer Engine—Configuring the Interplay Transfer Engine to work with the Playback service. 3. Managing Transfer Engine Playback Devices—Creating a playback device entry in the Playback service. 4. Managing The Telestream Playback Service—Creating a playback device for the Interplay Transfer Engine. 5. Configuring Media Composer for the Playback Service—Configuring Media Composer to work with the Playback service. 6. Setting up an Avid-Export Vantage Workflow—Creating a workflow where the Watch action monitors the storage location identified by the playback device entry. Installing the Telestream Playback Service Note: Be sure to coordinate with your Avid systems administrator to make these changes or restart any computers. Use this topic to install the Telestream Playback service on computers running Interplay | Transfer including Avid components for Avid shared storage support. Microsoft .NET 4.0 must also be installed. Make sure that the Telestream Playback service version matches the version of Interplay | Transfer you are using. Note: If your system has an older version of the Playback service on it, review Uninstalling Old Versions of the Telestream Playback Service before proceeding. The Telestream Playback service V3.0.5 or later installer installs 64-bit software for compatibility with the Avid Interplay Transfer Engine V3.0.5 or later. (Previous versions were32-bit.) Follow these steps to install the Telestream Playback service: Stopping AvSony & Pluto PlayServer Services Obtaining the Playback Service Installer Installing the Playback Service Stopping AvSony & Pluto PlayServer Services If these services are running on an Avid Transfer server where you are installing the Telestream Playback service, you should stop and disable them before using Vantage Avid Integration Guide 63 64 Using Telestream Playback Service for Interplay | Transfer Implementing Avid-to-Vantage Media Processing Workflows with Avid systems. They conflict with the Telestream Playback service, preventing it from functioning properly. 1. Open the Services control panel (Control Panel > Administrative Tools > Services). 2. Locate the service in the list. For each service, follow steps 3, 4, and 5 to stop and modify their startup property: 3. If the service is running, stop it. 4. Right-click on the service and select Properties. 5. Change the Startup type to Manual, click Apply and close the window. When you’re done, close the Services window. Obtaining the Playback Service Installer To obtain the Playback Service installer, follow these steps: 1. Go to the Telestream Web site Vantage Downloads page and log in. 2. Click on the Vantage > Downloads link and scroll down to view the tabbed area— click on the Additional Components tab. 3. Click on the Download Now link for the Playback Service for Avid Interplay | Transfer installer of the required version and download it. 4. Copy the installer to the computer where the Interplay Transfer Engine is installed or to a shared location that the computer can access. Installing the Playback Service The Playback service is typically installed on each computer running the Avid Transfer Engine which is going to be used to transfer media to Vantage. To install the Telestream Playback Service, follow these steps: 1. Open/unzip the installer Zip file and run the TE Component Prerequisites installer to install all required DLL library files. 2. Now, run the Playback Service installer. 3. If an Open File security warning displays, click Run to continue. 4. The installer displays the Welcome panel. Click Next. 5. License Agreement Panel—Select I Agree (if you do), and click Next. 6. Select Installation Folder—Accept the default folder or select another location and click Next. 7. Confirm Installation—Click Next to start installation. 8. Installing Playback Service—Wait for installation to complete. 9. When the Playback Service Manager window displays, do not enter any information at this time. Just click Exit to close the window. 10. Installation Complete—Click Close to exit the installer. 11. After installation, double-click the TSInstallPlaybackService icon on the desktop to run the bat file, which deletes temporary files after installation. 12. Restart the computer. Avid Integration Guide Using Telestream Playback Service for Interplay | Transfer Implementing Avid-to-Vantage Media Processing Workflows Configuring the Interplay Transfer Engine Note: Be sure to coordinate with your Avid systems administrator to make these changes. Always restart the Interplay Transfer Engine after making changes to the Avid Interplay Configuration or the Telestream TransferManager Configuration. Some settings in the Interplay Transfer Engine Configuration Manager must be set specifically to support the Telestream Playback service. This is a one-time task. To verify or update the settings, start the Interplay Transfer Engine Configuration Manager. (Typically at C:\Program Files\Avid\Interplay Transfer Engine\ TRANSFERMGRSERVERCONFIG\tmconfig.exe.) Figure 26. Avid Interplay Transfer Engine Configuration Manager Update these settings as necessary in the Playback panel (bottom center): Playback Transfers Enabled. Check this option to enable playback transfers. Max. Simultaneous Playback Transfers. Enter the value 4. If you plan to add a playback device now, go to Managing Transfer Engine Playback Devices and continue. Otherwise Click OK to save the changes and close the program. Avid Integration Guide 65 66 Using Telestream Playback Service for Interplay | Transfer Implementing Avid-to-Vantage Media Processing Workflows Managing Transfer Engine Playback Devices Note: Be sure to coordinate with your Avid systems administrator to make these changes or restart any computers. For each destination folder you plan to use in your workflows, you must update the Interplay Transfer Engine to provide a dedicated playback device. (Typically, one destination folder for each workflow.) Each playback device must have a unique name and use a dedicated port number. Note: You’ll set up at least one playback device initially, then add or modify devices as your workflow requirements change. For each playback device you have, you need to create a corresponding playback device entry in the Telestream Playback Service Manager. Always restart the Playback service after making changes. Adding or Editing Playback Devices Deleting Playback Devices Restarting the Interplay Transfer Engine Adding or Editing Playback Devices To manage playback devices, start the Interplay Transfer Engine Configuration Manager. (C:\Program Files\Avid\Interplay Transfer Engine\ TRANSFERMGRSERVERCONFIG\tmconfig.exe.) Figure 27. Interplay Transfer Engine Configuration Manager Window Avid Integration Guide Using Telestream Playback Service for Interplay | Transfer Implementing Avid-to-Vantage Media Processing Workflows In the Playback panel (bottom center), click Add, or select a playback device and click Edit to display this dialog: Figure 28. Adding or Editing Playback Devices Enter/update the following settings: Profile Name. A descriptive phrase. For example, the destination share name or the media format for this workflow. Device Name. The name of the device. This name should describe the purpose of the playback device or the workflow in which it is utilized. It cannot contain spaces. Service Host. The name of the computer where the Transfer Engine and the Telestream Playback service is running. Service Port. The port number to be used for this file destination. Suggested ports: 8001-65535. This port number must match the port entered in the Playback Device entry in the Telestream Playback Service Manager (Adding or Editing Playback Device Entries). This is the parameter that ties the two entries together. Catalog. Check these two options as appropriate for your requirements: Click OK to save the playback device and close the dialog. When you have created the playback device entry, the name is auto-generated and listed in the Playback panel’s Playback devices list (item 2, above: <Profile Name>{<ingest service computer:port/<device name>}. When adding a device, be sure to add the corresponding playback device entry in the Playback Service Manager (see Adding or Editing Playback Device Entries). Restart both the Interplay Transfer Engine and the Playback service. Deleting Playback Devices Select the playback device you want to remove from the list in the Playback Devices list, and click Delete to remove the playback device. Save and close the configuration program. Avid Integration Guide 67 68 Using Telestream Playback Service for Interplay | Transfer Implementing Avid-to-Vantage Media Processing Workflows Be sure to delete the corresponding playback device entry in the Playback Service Manager (see Deleting a Playback Device Entry). Restart both the Interplay Transfer Engine and the Playback service. Restarting the Interplay Transfer Engine Each time you make changes to your playback device list, you need to re-start the Interplay Transfer Engine program (not the Transfer Engine server) to obtain and publish the new list of Avid playback devices and ports. Managing The Telestream Playback Service Note: Be sure to coordinate with your Avid systems administrator to make these changes or restart any computers. You use the Playback Service Manager (also referred to as the Playback Service Configuration Utility) to manage playback device entries—providing one playback device entry for each playback device you have in the Interplay Transfer Engine. You’ll typically set up at least one playback device entry initially, then add or modify entries in the Playback Service Manager as your playback device and workflow requirements change. Recall that for each playback device you have, you need to create a corresponding playback device entry in the Interplay Transfer Engine Configuration Manager. The Playback Service Manager publishes these device entries for use by the Playback service under control of the Interplay Transfer Engine. Starting the Playback Service Manager Adding or Editing Playback Device Entries Deleting a Playback Device Entry Restarting the Playback Service Note: Each time you add, delete, or modify playback device entries, you need to restart the Playback service in order to obtain the current set of device entries. (See Restarting the Playback Service). Always restart the Interplay Transfer Engine after making changes to the Avid Interplay Configuration or the Telestream TransferManager Configuration. Avid Integration Guide Using Telestream Playback Service for Interplay | Transfer Implementing Avid-to-Vantage Media Processing Workflows Starting the Playback Service Manager Double-click the TSPlaybackService_IF icon on the desktop, or navigate to the installation folder and start TSPlaybackService_IF.exe from there. When it starts, this window displays: Figure 29. Playback Service Manager Window Adding or Editing Playback Device Entries Click ADD or select an entry and click EDIT—the Playback Service Manager displays this dialog: Figure 30. Playback Device Entry Dialog Update the following settings: Port. The unique port number to be used for this destination path. Suggested ports: 8001-65535. This port number must match the port entered in the Playback Device entry in the Interplay Transfer Engine Configuration Manager (Adding or Editing Playback Devices). This is the parameter that ties the two entries—playback device and destination path—together. Note: While you’re unlikely to select a port already in use and create a conflict, you can open a command window (Start > Run, enter cmd and press OK) and run netstat -a to obtain a list of ports in use on this computer. Select one or more of these Name choices (at least one must be selected) to use these values when composing the file name for all files sent to this destination: Avid Integration Guide 69 70 Using Telestream Playback Service for Interplay | Transfer Implementing Avid-to-Vantage Media Processing Workflows VideoID in Name. Unique material identifier specified in TapeID or VideoID attributes in the Interplay environment. NameID in Name. Display name of the associated sequence in the Interplay environment. MobID in Name.The internal system identifier used by Interplay to track the video sequence. TIFO File Destination. Click Browse to navigate and select a server and folder or manually enter a fully-qualified path where the files are to be stored for retrieval by the target Vantage workflow, which monitors the destination path when the workflow is activated. The path may be a local path—although it is unlikely that all systems (Avid and Vantage) are running on the same computer—or a network server path. It should be a share with full read/write privileges, so that Vantage can access the media. This path must be the same path configured in the Watch action of your target Vantage workflow (Setting up an Avid-Export Vantage Workflow). When you’re done, click OK. Deleting a Playback Device Entry If you delete an Interplay Transfer Engine playback device, you should also delete the associated playback device entry in the Playback Service Manager. Restarting the Playback Service After modifying playback device entries in the Playback Service Manager, you must restart the Playback service to pick up the current set of entries for use by the Interplay Transfer Engine. To restart the Telestream Playback service, choose one of these options: • In the Playback Service Manager, click the Restart TS_PlaybackService button. —OR— • Open the Windows Services (Control Panel > Administrative Tools > Services) panel, locate the TS_PlaybackService service, and click Restart. Note: If you attempt to exit the Playback Service Manager after making changes to playback device entries, the program will display a restart dialog to remind you. Click Yes to confirm that you want to restart the service. Avid Integration Guide Using Telestream Playback Service for Interplay | Transfer Implementing Avid-to-Vantage Media Processing Workflows Configuring Media Composer for the Playback Service Note: Be sure to coordinate with your Avid systems administrator to make these changes or restart any computers. To set up Media Composer to use the Playback service, follow these general steps: 1. Run Media Composer and display the Settings tab in the Bin window. 2. Double-click the Transfer item to display the Transfer Settings dialog. 3. In the Settings tab, select Direct Channel Output. Other settings may be configured per your requirements. 4. In the TMClient.ini tab, make sure that the settings are appropriate for your network environment. 5. Click OK when finished. Note: For complete details on configuring Avid Media Composer, see its guide. Setting up an Avid-Export Vantage Workflow For each playback device you use, you need to create one or more Vantage workflows to monitor the destination folder. When the workflow is activated, it polls the directory and—for each new file delivered—it starts a job to process the media through the workflow. Figure 31. Playback Device Entry Dialog Here is a simple, prototype workflow. Yours will be designed and configured to process the media exported from Media Composer to Vantage, to suit your media processing requirements. The Watch action should be configured to poll the TIFO file destination path specified in the playback device entry in the Telestream Playback Service Configuration Manager (Managing The Telestream Playback Service). Note: You can enable the Submit Immediately option in the Watch if you want to start the job as soon as the file is created, and encode the media as it is being written. Avid Integration Guide 71 72 Using Telestream Playback Service for Interplay | Transfer Transferring Sequences to Vantage Transferring Sequences to Vantage This topic describes a typical method (among others) of using Media Composer to send sequences to the Telestream Playback service for processing by a Vantage workflow. 1. In Media Composer, select a sequence from a bin directory. 2. Select Transfer > Send To Playback > <Playback Device> or right-click the sequence and select Send To Playback > <Playback Device>. 3. Provide the sequence with a tape ID (no spaces allowed). The Interplay Transfer Engine won’t transfer the sequence without a Tape ID. 4. Click OK to send the clip. The sequence is sent to the Interplay Transfer Engine, which sends it to the selected playback device. (If you attempt to send a sequence with the same tape ID as one already in the Transfer Engine an error displays. To overwrite the tape ID name, select the Overwrite option.) The Interplay Transfer Engine connects with the Playback service to save the media as a TIFO file in the destination path specified by the playback device you selected. Note: If there are un-rendered effects in the timeline, Media Composer renders the sequence automatically before the transfer starts. When the sequence has been transferred, the TIFO file in the target folder is ingested by the Watch action in your workflow for processing. Avid Integration Guide Using Telestream Playback Service for Interplay | Transfer Troubleshooting Troubleshooting If you are having problems successfully transferring a sequence to a workflow in Vantage, review these tips. Note: If you are still having problems, contact Telestream Customer Service for assistance. Confirm that the target Transfer Engine is running. Confirm that the Telestream Playback service is running. (Sometimes you have to start Playback service using the Windows control panel.) Make sure to restart the Playback service after adding or modifying a Playback device entry. Be sure to enter a Tape ID in a sequence. Confirm that Media Composer is connected to the Interplay | Transfer server (Transfer > Connect to Server). Confirm that your Vantage workflow is active in Workflow Designer. Confirm that your Vantage workflow’s Watch action is monitoring the correct share. Confirm that the destination path in your playback devices is a share. Confirm that the share has full rights for everyone. Confirm that you are not referencing a local drive letter directory instead of a share. In the TMClient.ini tab, make sure that the settings are appropriate for your network environment. Avid Integration Guide 73 74 Using Telestream Playback Service for Interplay | Transfer Telestream Intermediary Format (TIFO) Telestream Intermediary Format (TIFO) Telestream Intermediary Format (TIFO) is a proprietary, intermediate media wrapper format designed by Telestream as a lightweight, uniform, interchangeable file format to ensure interoperability among Telestream’s media processing solutions including Vantage, FlipFactory, Episode, and Pipeline. TIFO provides a low-overhead wrapper that is essence-agnostic, with metadata, timecode, and closed caption support. TIFO improves the ability to move media files between Telestream products with all media essence elements & metadata intact, preserving the widest range of transcoding options. Workflow Considerations TIFO format should be used when you are encoding your files with Vantage, FlipFactory or Episode. TIFO files are unique, in that they can be transcoded as they are being written, allowing you to create multiple different output files much faster. TIFO files can also contain metadata such as closed captions and time code, which can be processed by Vantage, FlipFactory or Episode. Usage Considerations TIFO files are a Telestream proprietary format and aren’t playable or readable by nonTelestream applications. You should only use TIFO format if your workflow requires transcoding by Telestream workflow automation applications. The maximum length of a TIFO file is 12 hours. Avid Integration Guide Using Telestream Playback Service for Interplay | Transfer Uninstalling Old Versions of the Telestream Playback Service Uninstalling Old Versions of the Telestream Playback Service Note: Be sure to coordinate with your Avid systems administrator to make changes. To determine if an old Telestream Playback service is installed on a Media Composer computer, display the Add/Remove Programs | Programs and Features control panel. Locate the Playback service and note the version. Or, locate the PlaybackService_IF.exe file and display its properties to determine the version. Proceed to the appropriate topic for uninstallation, following. Uninstalling Playback Service V2.0 or Earlier To uninstall the Playback service version 2.0 or earlier, follow these steps: 1. Open a command window and navigate to the folder where the Playback service files are located. Enter cd <path to files> and press the Enter key. (For example: cd C:\Program Files\Telestream\Telestream_Avid_PlaybackService). 2. Run the command: TS_PlaybackService.exe -Install /u. This runs the uninstall function and you should see about thirty lines of text, followed by the phrase Uninstalled successfully. 3. Delete the following files: – TS_PlaybackService.exe – PlaybackService_IF.exe – TS_AvidPlaybackVC7.dll file 4. To make sure you have removed all files, in Windows Explorer run a search on the C drive with the search string: *Playback*.*. Delete all occurrences of these files. 5. Restart your computer. Uninstalling Playback Service Version 2.1 or Newer To uninstall Playback Service v2.1 or later, follow these steps: 1. Close all applications. 2. Run the TS_UnInstallPlaybackService bat file—double-click the icon to uninstall the Playback service correctly (typically located on the desktop or in C:\Program Files (x86)\Telestream\Telestream_Avid_PlaybackService). 3. Locate and run the PlaybackServiceInstaller_TE_x.x_Vxx.x.msi file. If. 4. Select Remove, and click Finish. 5. If you can’t locate the file, display the Add/Remove Programs | Programs and Features control panel, locate the program and double-click it. Click Yes to remove the program. 6. When it finishes, restart your computer. Avid Integration Guide 75 76 Using Telestream Playback Service for Interplay | Transfer Supported Avid Media Formats Supported Avid Media Formats The following I-Frame media formats can be processed by Vantage via the Telestream Playback service. Note: 10-bit mastering quality video is processed as Full Quality (8-bit) by Vantage. Support for ancillary data tracks includes: • 608/708 captions • XDS – Program Name – V-Chip/Content Advisory Information – Ratings • Active Format Description Media Formats HD Formats 720P Media Formats 1080i Media Formats 1080p Media Formats SD Formats 480i Formats 480p Formats 576i Formats 576p Formats Table 6. 720P Media Formats Format Rate (fps) Frame Size DNxHD 60 MXF 23.976 1280x720 DNxHD 90 MXF 23.976 1280x720 DNxHD 90 X MXF 23.976 1280x720 AVC Intra 100 23.976 1280x720 AVC Intra 50 23.976 960x720 DNxHD 60 MXF 25 1280x720 DNxHD 90 MXF 25 1280x720 Avid Integration Guide Using Telestream Playback Service for Interplay | Transfer Supported Avid Media Formats Table 6. 720P Media Formats Format Rate (fps) Frame Size DNxHD 90 X MXF 25 1280x720 DVCPRO HD MX 25 1280x720 AVC Intra 100 25 1280x720 DVCPRO HD MXF 25 960x720 AVC Intra 50 25 960x720 DNxHD 75 MXF 29.97 1280x720 DNxHD 110 MXF 29.97 1280x720 DNxHD 110 X MXF 29.97 1280x720 DVCPRO HD MXF 29.97 1280x720 AVC Intra 100 29.97 1280x720 DNxHD 120 MXF 50 1280x720 DNxHD 185MXF 50 1280x720 DNxHD 185 X MXF 50 1280x720 DVCPRO HD MXF 50 1280x720 AVC-Intra 100 50 1280x720 DVCPRO HD MXF 50 960x720 AVC Intra 50 50 960x720 DNxHD 145 MXF 59.94 1280x720 DNxHD 220 MXF 59.94 1280x720 DNxHD 220 X MXF 59.94 1280x720 DVCPRO HD MXF 59.94 1280x720 AVC Intra 100 59.94 1280x720 DVCPRO HD MXF 59.94 960x720 AVC Intra 50 59.94 960x720 Avid Integration Guide 77 78 Using Telestream Playback Service for Interplay | Transfer Supported Avid Media Formats Table 7. 1080i Media Formats Format Rate (fps) Frame Size DNxHD 120 MXF 50 1920x1080 DNxHD 185MXF 50 1920x1080 DNxHD 185 X MXF 50 1920x1080 DVCPRO HD MXF 50 1920x1080 AVC Intra 100 50 1920x1080 DNxHD TR 120 MXF 50 1440x1080 DVCPRO HD MXF 50 1440x1080 AVC Intra 50 50 1440x1080 DNxHD 145 MXF 59.94 1920x1080 DNxHD 220 MXF 59.94 1920x1080 DNxHD 220 X MXF 59.94 1920x1080 DVCPRO HD MXF 59.94 1920x1080 AVC Intra 100 59.94 1920x1080 DVCPRO HD MXF 59.94 1280x1080 AVC Intra 50 59.94 1440x1080 DNxHD TR 145 MXF 59.94 1440x1080 Table 8. 1080p Media Formats Format Rate (fps) Frame Size DNxHD 36 MXF 23.976 1920x1080 DNxHD 115 MXF 23.976 1920x1080 DNxHD 175 MXF 23.976 1920x1080 DNxHD 175 X MXF 23.976 1920x1080 AVC Intra 100 23.976 1920x1080 AVC Intra 50 23.976 1440x1080 DNxHD 36 MXF 24 1920x1080 DNxHD 115 MXF 24 1920x1080 DNxHD 175 MXF 24 1920x1080 Avid Integration Guide Using Telestream Playback Service for Interplay | Transfer Supported Avid Media Formats Table 8. 1080p Media Formats Format Rate (fps) Frame Size DNxHD 175 X MXF 24 1920x1080 DNxHD 36 MXF 25 1920x1080 DNxHD 120 MXF 25 1920x1080 DNxHD 185 MXF 25 1920x1080 DNxHD 185 X MXF 25 1920x1080 AVC Intra 100 25 1920x1080 DNxHD 45 MXF 29.97 1920x1080 DNxHD 145 MXF 29.97 1920x1080 DNxHD 220 MXF 29.97 1920x1080 DNxHD 220 X MXF 29.97 1920x1080 AVC Intra 100 29.97 1920x1080 Format Rate (fps) Frame Size DV25 411 MXF 30 720x480 DV50 MXF 30 720x480 MPEG 30 (IMX) MXF 30 720x512 MPEG 40 (IMX) MXF 30 720x512 MPEG 50 (IMX) MXF 30 720x512 Format Rate (fps) Frame Size DV25p 411 MXF 23.976 720x480 DV50p MXF 23.976 720x480 DV25p 411 MXF 24 720x576 DV50p MXF 24 720x576 Table 9. 480i Formats Table 10. 480p Formats Avid Integration Guide 79 80 Using Telestream Playback Service for Interplay | Transfer Supported Avid Media Formats Table 11. 576i Formats Format Rate (fps) Frame Size DV25 420 MXF 25i 720x576 DV25 411 MXF 25i 720x576 DV50 MXF 25i 720x576 MPEG 30 (IMX) MXF 25i 720x608 MPEG 40 (IMX) MXF 25i 720x608 MPEG 50 (IMX) MXF 25i 720x608 Format Rate (fps) Frame Size DV25P 420 MXF 25p 720x576 DV25P 411 MXF 25p 720x576 DV50P MXF 25p 720x576 Table 12. 576p Formats Avid Integration Guide 81 Ingesting Media into Avid via Interplay Transfer Engine This application note describes how to set up and implement media processing workflows for automatically transferring Vantage-originated media into an Avid system for import into Media Composer via Interplay Transfer Engine. Note: This application note applies to Interplay Transfer Engine V2.7.0 and V3.0.5. Where differences apply, they are noted. Topics Overview Software Version Requirements Licensing Requirements Supported Interplay Transfer Engine Configurations Implementing Avid-Telestream Media Processing Workflows Troubleshooting Supported Avid Media Formats Note: When you are installing software or otherwise modifying Avid programs or systems, always confer and coordinate with your Avid systems administrator to make these changes, including restarting any systems. Always refer to Avid documentation if you have questions about the use of Avid products. 82 Ingesting Media into Avid via Interplay Transfer Engine Overview Overview To facilitate the automatic ingest of media from Vantage workflows into Avid systems via Interplay Transfer Engine, Vantage provides these Vantage Transfer Manager Interplay Components: • Avid Transfer Manager/Transfer Engine encoder • Telestream Receiver—an Avid Transfer Engine Data Handler Module (DHM) Note: Avid’s DHM toolkit enables Vantage to create a plug-in to work with Interplay Transfer and Transfer Engine for playback and ingest transfers. These transfers are distinct from standard file transfers in that they convert a sequence to/from a stream of video frames and audio samples that are transferred over a network. For example, during an ingest, the Transfer program accepts a multiplexed stream of video and audio frames and converts the stream into an Avid-compatible clip by wrapping it in MXF, AAF, or OMF format and checking the metadata into the Interplay Engine. Figure 32. Logical Vantage-Avid Media Processing Workflow Vantage Domain Avid Systems Orange: Vantage Components Purple: Avid Components HD Streams Telestream Receiver Vantage Workflow SD Streams Sequences Avid Interplay Transfer Engine Avid Media Composer These components work together to enable Vantage workflows to automatically submit transcoded media to an Interplay Transfer Engine for background clip ingest, rewrapping, and writing to an Avid editing storage volume (ISIS or DAS) for import into Media Composer by operators. During Vantage workflow execution, the raw media stream is generated by the Avid Transfer Manager/Transfer Engine encoder (executing in a Flip action), and transmitted to the Telestream Receiver via a Deploy action, which passes it on to the Avid Transfer Engine as it is being encoded. The encoder creates the media in a video compression supported by Transfer Engine. Thus, no re-encoding is required when writing the media files to Avid storage. The Avid Integration Guide Ingesting Media into Avid via Interplay Transfer Engine Software Version Requirements Transfer Engine direct-converts the media to an Avid-compatible MXF OP-Atom file, and writes the media file in the correct directory for an Avid editing client to import. Features The Transfer Manager/Transfer Engine encoder and Receiver provide several features: • • • • Background ingest of media to the directory managed by the Avid linking model Deploys into standalone, network storage, and Interplay-equipped environments Works for both Direct Attached Storage and shared storage users Deploys into an Interplay PAM environment when the Transfer Engine is configured to notify the Interplay system upon receipt of media from a Vantage workflow. • The Vantage Avid Transfer Manager/Transfer Engine encoder supports a broad set of media formats (see Supported Avid Media Formats). These media processing workflows may require a dedicated Avid Transfer Engine server for deployment into an Interplay Production Asset Management system. Transcode/Direct Convert Formats You can encode media in the following media formats using the Transfer Manager/ Transfer Engine encoder: • • • • • • AVC Intra 100 720p/1080i DNxHD 720p/1080i/1080p DV/DVCPRO NTSC/PAL DVCPRO HD 720p/1080i IMX 30, 40, & 50 NTSC/PAL XDCAM HD 4:2:0/4:2:2 Software Version Requirements The following software versions are required: Vantage version 6.0 or later Avid Interplay Transfer Engine version 2.7.0* or 3.0.5 Avid Interplay Transfer Client 32-bit installer that matches the Telestream version. Avid Media Composer 6.5 or later or NewsCutter 10.0 or later Note: *Interplay Transfer Engine 2.7.5 or other 2.7 versions is not supported. Avid Integration Guide 83 84 Ingesting Media into Avid via Interplay Transfer Engine Licensing Requirements Licensing Requirements The use of the Vantage Avid Transfer Manager/Transfer Engine encoder requires a Vantage ProConnect License. Please contact your Telestream account manager or Telestream Customer Service (see Telestream Contact Information) for information about purchasing Vantage licenses. Avid Integration Guide Ingesting Media into Avid via Interplay Transfer Engine Supported Interplay Transfer Engine Configurations Supported Interplay Transfer Engine Configurations Avid Interplay Transfer Engine supports the following configurations: • Avid Client & Transfer Engine in Interplay ISIS Workgroup • Avid Client & Transfer Engine with ISIS Shared Storage • Avid Client & Transfer Engine with Local Storage The following diagrams depict these Avid systems, including key software components from both Avid and Telestream. Avid components are indicated in purple; Vantage components in orange. Avid Client & Transfer Engine in Interplay ISIS Workgroup In this configuration, Interplay Transfer Engine is hosted on a dedicated Interplay Transfer server connected to an Interplay environment that includes an Avid ISIS shared storage system. Figure 33. Avid Client & Transfer Engine Components on Dedicated Computers Avid Client Workstation Telestream Vantage Domain Avid Interplay Transfer Engine Server Media Composer Avid ISIS Shared Storage Newscutter Avid Transfer Engine Avid Interplay Transfer Client Avid Interplay Transfer Client Telestream TransferManager Client Avid Interplay Transfer Client (32-bit) Telestream Receiver DLL The Media Composer systems are on separate workstations, all sharing ISIS storage. Avid Client & Transfer Engine with ISIS Shared Storage In this configuration, Avid edit clients are on a single, standalone computer that also hosts Interplay Transfer Engine, connected to Avid shared storage. Each client must also have Interplay Transfer Client installed. Figure 34. Avid Client & Transfer Engine Components on an Edit Workstation with ISIS Avid Client Workstation Media Composer Newscutter Avid ISIS Shared Storage Avid Interplay Transfer Client Avid Interplay Transfer Engine Server Telestream Vantage Domain Telestream TransferManager Client Avid Interplay Transfer Client (32-bit) Avid Transfer Engine Telestream Receiver DLL As in the previous illustration, all Avid components share ISIS storage. Avid Integration Guide 85 86 Ingesting Media into Avid via Interplay Transfer Engine Supported Interplay Transfer Engine Configurations Avid Client & Transfer Engine with Local Storage In this configuration, Avid edit clients are also on a single, standalone computer that hosts Interplay Transfer Engine. Figure 35. Avid Client & Transfer Engine Components on an Edit Workstation—Local Storage Avid Client Workstation Local Storage Media Composer Newscutter Avid Interplay Transfer Client Avid Interplay Transfer Engine Server Telestream Vantage Domain Telestream TransferManager Client Avid Interplay Transfer Client (32-bit) Avid Transfer Engine Telestream Receiver DLL In this case, however, the Avid clients utilize local storage. Avid Integration Guide Ingesting Media into Avid via Interplay Transfer Engine Implementing Avid-Telestream Media Processing Workflows Implementing Avid-Telestream Media Processing Workflows Before you can process media in Vantage workflows and automatically deliver it to an Interplay Transfer Engine, your Avid system must be operational and be configured appropriately. You must also install Telestream software, perform some configuration tasks on both systems, and create and configure one or more Vantage workflows. Note: These procedures assumes that your Avid system is already installed and is fully operational. Ensure that your Avid system is operational before proceeding. Tasks include: 1. Installing the Avid Interplay Transfer Client—Installing the Avid Interplay Transfer Client on both the Avid and Vantage systems. 2. Installing the Telestream Transfer Manager Interplay Components—Installing the Telestream Receiver and the Configuration for the Telestream TransferManager Client program. 3. Interplay Transfer Engine 3.0.5 Only—Installing Hot Fix—Installing the Avid Hot Fix. 4. Configuring the Transfer Engine—Configuring the Interplay Transfer Engine to work with the Telestream TransferManager Client. 5. Configuring the Telestream TransferManager Client—Setting up the Vantage domain to identify the Transfer Engine servers you are utilizing. 6. Sharing the Media Output Location—Setting up the media output folder as a share. 7. Setting up a Vantage Transfer Engine Workflow—Creating a Vantage workflow to encode your media and deploy it to a specific destination folder that is monitored by the Telestream Receiver for automatic ingest via Avid’s Transfer Engine. Avid Integration Guide 87 88 Ingesting Media into Avid via Interplay Transfer Engine Implementing Avid-Telestream Media Processing Workflows Installing the Avid Interplay Transfer Client Use this topic to install the Avid Interplay Transfer Client. Note: The Avid Interplay Transfer Client is presumed to already be installed on each Avid Transfer Engine server being used to transfer assets to another workgroup or playback device. Install the appropriate version of the Avid Interplay Transfer Client on all Vantage servers running the Vantage Transport Service. Use the Avid Interplay Transfer Client 32-bit installer to install the 32-bit version on either a 32 or 64-bit operating system. Avid Integration Guide Ingesting Media into Avid via Interplay Transfer Engine Implementing Avid-Telestream Media Processing Workflows Installing the Telestream Transfer Manager Interplay Components Use this topic to install the Telestream Transfer Manager Interplay components on each Vantage domain computer running the Vantage Transport Service. The installer installs DLL library files, a configuration utility, a ReadMe file, and other miscellaneous files. In an All-in-One domain, you install them on the Vantage domain computer. In a distributed domain (Vantage array), you need to identify each computer in the domain where the Vantage Transport Service is running. Typically, the Vantage Transport Service is running on the database server. However, in a large domain where the database is hosted on a dedicated server, the Vantage Transport Service may be installed and running on multiple servers. Note: Be sure to coordinate with your Avid systems administrator to make these changes or restart any computers. Perform these tasks to install the Telestream components: Meeting Prerequisites Obtaining the Installer Performing the Installation Moving the Telestream Receiver to the Interplay Transfer Engine Server Meeting Prerequisites Review and meet these prerequisites before proceeding with installation: 1. Have the following information available: • The name of the Transfer Engine server • The name you plan to assign the ingest device 2. Determine if the Transfer Engine is on the same domain/workgroup as the Vantage domain. If not, you should know the domain/workgroup name that the Transfer Engine is running in. 3. If any target computer has an older version of the Telestream Receiver DLL (Telestream_Receiver.dll.) on it, delete it. Avid Integration Guide 89 90 Ingesting Media into Avid via Interplay Transfer Engine Implementing Avid-Telestream Media Processing Workflows Obtaining the Installer To obtain the Vantage Components for Interplay Transfer Engine installer, follow these steps: 1. Go to the Telestream Web site Download Vantage page and log in with your Telestream customer credentials. 2. Scroll down to view the tabbed area and display the Additional Components tab. 3. Under Avid Updates, click the Download Now link for the version you want: Vantage Component for Interplay Transfer Engine version 2.7 or version 3.0.5. 4. Copy the zip file to the target computer or to a share that the server can access. Performing the Installation Note: You must stop the Vantage Transport Service prior to installation. To install the Vantage Components for Interplay Transfer Engine, follow these steps: 1. Open Add/Remove programs and look for the Vantage TM Interplay Components. If present, remove it. 2. Stop the Vantage Transport Service (either in Windows Services or in the Vantage Management Console). 3. Unzip the installer Zip file. 4. Run the TE Component Prerequisites installer (TE_Component_Prerequisites.msi) to install all required DLL library files. 5. Now, run the Vantage Interplay installer (the Vantage.Interplay.<Version #>.msi file). 6. If the Open File security warning displays, click Run to continue. 7. The installer displays the Welcome panel. Click Next. 8. License Agreement Panel—Read the license, click I Agree (if you do), and click Next. 9. Pre-Install Check Panel—make sure the Vantage Transport Service is stopped. Click Next to continue. 10. Select Installation Folder Panel—(default: C:\Program Files (x86)\Telestream\Vantage\) or click Browse to select the path where Vantage is installed. Click Next to continue. 11. Confirm Installation panel—Click Next to continue. 12. Installing Vantage TM Interplay Components—wait until complete, and click Next. Avid Integration Guide Ingesting Media into Avid via Interplay Transfer Engine Implementing Avid-Telestream Media Processing Workflows 13. The installer launches the Telestream Transfer Manager Client. Provide the following information in the Primary Work Group panel to configure Interplay Transfer Engine: Workgroup Name. Domain/workgroup name of the Transfer Engine server. Host Name. Computer name of the Transfer Engine server. (If you do not have this information at this time, it can be added later. See Configuring the Telestream TransferManager Client.) If you are using more than one Transfer Engine servers add them to the Other Transfer Engine list. Use the Add, Edit, and Delete buttons to create a list of all the other Transfer Engine Servers that will be used. Note: Since the servers in the Other Servers list obtain licensing information from the primary server, it must always be running. Make sure that the servers in the Other Servers list are running to prevent Vantage workflows from slowing down searching for servers. 14. Click Save to continue. 15. Component Installation Almost Complete—click Next to continue. 16. Installation Complete—Click Close to quit the installer. 17. Restart the Vantage Transport Service. Moving the Telestream Receiver to the Interplay Transfer Engine Server Note: If a Telestream_Receiver.DLL file already exists, always delete it first. The Telestream_Receiver.dll file must be copied to each Transfer Engine you plan to use (those listed in the Primary Workgroup and Other Transfer Managers in WorkGroup list). Follow these steps to copy the Telestream_Receiver.dll file to each Interplay Transfer Engine server you plan to include in Vantage-Avid media processing workflows: 1. In Windows Explorer, browse to the Vantage installation folder (default: C:\Program Files (x86)\Telestream\Vantage) and locate the file named Telestream_Receiver.dll. 2. Copy this file. 3. For Interplay version 2.7.0 only—in Windows Explorer, navigate to the Interplay Transfer Engine server, open the C:\Windows\sysWOW64 directory and paste the file into the directory. For Interplay version 3.0.5 only—navigate to the Interplay Transfer Engine server, open the C:\Windows\System32 directory and paste the file into the directory. Repeat this process for every Transfer Engine in your list. Avid Integration Guide 91 92 Ingesting Media into Avid via Interplay Transfer Engine Implementing Avid-Telestream Media Processing Workflows Interplay Transfer Engine 3.0.5 Only—Installing Hot Fix Note: Be sure to coordinate with your Avid systems administrator to make these changes or restart any computers. For Interplay Transfer Engine 3.0.5 only, use this topic to install an Avid Hot Fix on each Transfer Engine you plan to use (those listed in the Primary Workgroup and Other Transfer Managers in WorkGroup list). 1. Locate the unzipped Vantage Components for Interplay Transfer Engine Version 3.0.5 installer folder. 2. Run the Avid Interplay Transfer Engine Patch 3.0.7.msp installer to install the required Avid Hot Fix. 3. Restart the computer. Avid Integration Guide Ingesting Media into Avid via Interplay Transfer Engine Implementing Avid-Telestream Media Processing Workflows Configuring the Transfer Engine Note: Be sure to coordinate with your Avid systems administrator to make these changes or restart any computers. After copying the Telestream_Receiver.dll file to your primary Transfer Engine (and other Transfer Engines as appropriate), each Transfer Engine configuration must be updated. To manage ingest devices when using Interplay Transfer Engine delivery, start the Interplay Transfer Engine Configuration Manager (double-click the desktop icon): Figure 36. Sample Configuration Window for Transfer Engine Use these steps to configure each Transfer Engine: Specifying Interplay vs. Standalone Mode Delivery Adding or Editing Ingest Devices Deleting Ingest Devices Specifying Interplay vs. Standalone Mode Delivery The Transfer Engine provides two methods for media file delivery: Interplay and Standalone Mode Delivery. To use the Interplay method, check the Interplay Enabled checkbox in the Workgroup Settings panel in the upper left corner (as shown above) and configure the associated controls appropriately. To use the Standalone Mode Delivery method, uncheck it. Avid Integration Guide 93 94 Ingesting Media into Avid via Interplay Transfer Engine Implementing Avid-Telestream Media Processing Workflows Adding or Editing Ingest Devices Note: In the main panel, note the Ingest devices list in the top right Ingest panel. In the Ingest panel, click Add or select an Ingest Device and click Edit to display this dialog: Figure 37. Adding Ingest Devices to a Transfer Engine Enter/update the name of the Ingest Device. The Ingest Device name must match the name of the Transfer Engine server. Save and close the configuration program. Restart the Interplay Transfer Engine to obtain and publish the new list of Avid ingest devices. Deleting Ingest Devices Select the device you want to remove from the list and click Delete to remove it. Save and close the configuration program. Restart the Interplay Transfer Engine to obtain and publish the new list of Avid ingest devices. Avid Integration Guide Ingesting Media into Avid via Interplay Transfer Engine Implementing Avid-Telestream Media Processing Workflows Configuring the Telestream TransferManager Client To identify the Transfer Engine servers to the Vantage domain, start the Telestream TransferManager Client. To start the program, double-click the shortcut icon named TS_TMClientConfig. Note: You should have installed this program on the Vantage server in an All-in-One domain, or in a Vantage array on every server running the Vantage Transport Service. The purpose is to enable the Deploy action to communicate with the required Transfer Engine server or servers during workflow execution. (The Deploy action utilizes the Vantage Transport Service to perform its tasks.) Use these steps to configure the Telestream TransferManager Client: Configuring the Primary Workgroup Managing Multiple Transfer Engine Servers Configuring the Primary Workgroup To configure the primary workgroup, follow these steps: Figure 38. Configuring the Primary Workgroup in the TransferManager Client In the Workgroup Name field, enter the domain or workgroup name of the Primary Transfer Engine server. In the Host Name field, enter the host name of the primary Transfer Engine server. Click Save and close the program. Avid Integration Guide 95 96 Ingesting Media into Avid via Interplay Transfer Engine Implementing Avid-Telestream Media Processing Workflows Managing Multiple Transfer Engine Servers In an environment with more than one Transfer Engine, the primary Avid Transfer Engine Server must be running in order for secondary servers to work. If the primary server is not running, then media file transfers from Vantage to the Avid Transfer Engine will fail. Each of the Vantage domain server (or servers) where the Vantage Transport Service is running require that their Transfer Engine Client Configuration identify the primary server as well as each of the secondary servers. Figure 39. TransferManager Client Main Window Adding/Editing Secondary Transfer Engine Servers In each Telestream TransferManager Client in your Vantage domain, click Add or select a Transfer Engine server, and enter/update the name of each secondary Transfer Engine Server. (TE Servers 2, and 3, for example.) Avid Integration Guide Ingesting Media into Avid via Interplay Transfer Engine Implementing Avid-Telestream Media Processing Workflows Figure 40. Adding Secondary Transfer Engine Servers to the TransferManager Client Click Save and close the program. Deleting Secondary Transfer Engine Servers Select the secondary Transfer Engine server you want to remove from the list and click Delete to remove it. Click Save and close the program. Avid Integration Guide 97 98 Ingesting Media into Avid via Interplay Transfer Engine Implementing Avid-Telestream Media Processing Workflows Sharing the Media Output Location When a Flip action encodes media, you can specify where new files are written. You can write the file to an available store, specific Vantage store or folder, or other location where the files have been moved, as long as the Telestream Receiver can access the location as a share, with read access. Figure 41. Specifying the Output Location for Media in the Flip Action Inspector Upon notification by the Deploy action, the Telestream Receiver reads the media file from the share, using its UNC path. Telestream recommends using either the default Vantage Store (named VantageStore) or a specific path you specify. In a default Vantage installation, the default Vantage store folder is at the path: C:\VantageStore. Share the media folder (for example, as \\Vantage\store or a share name you choose for your specific path) so that the folder can be accessed the Telestream Receiver in your Avid system. The folder must be given read permission to allow the Telestream Receiver to read files. Avid Integration Guide Ingesting Media into Avid via Interplay Transfer Engine Implementing Avid-Telestream Media Processing Workflows Setting up a Vantage Transfer Engine Workflow For each Transfer Engine you target, you should create a separate Vantage workflow to encode your media and deploy it to a specific destination folder that is monitored by the Telestream Receiver on behalf of the Transfer Engine. Prototypical Transfer Engine Workflow Configuring the Flip Action Configuring the Deploy Action Smart SD/HD Transcoding Workflow After configuring the workflow, you must activate it before you can start processing media for ingest into your Avid system. Note: When an in-process Avid TransferManager/TransferEngine Deploy action is stopped, the job state transitions to Stopped By User, but the Avid system doesn't stop ingesting the file until completion, and the progress bar continues to display progress. Prototypical Transfer Engine Workflow Here is a simple prototype workflow, depicted in Figure 42, below. Your workflow of course, should be designed and configured to meet your media processing requirements. The essential actions are the Flip and Deploy actions. Figure 42. Prototypical Workflow for Transcoding and Deployment to Transfer Engine The basic workflow includes a Watch action to pick up new media, a Flip action with the Avid Transfer Manager/Transfer Engine Encoder configured to encode media per Avid requirements, and a Deploy action to deliver the encoded media to the proper location. When the workflow is activated, it polls a directory and—for each new file delivered—it starts a job to process the media through the workflow. The only requirements for this workflow is that it has a Flip action configured with an Avid Transfer Manager/Transfer Engine encoder, and a Deploy action to deliver the media to the target destination. Configuring the Flip Action The Flip action must be configured with the Avid Transfer Manager/Transfer Engine encoder, with specific settings, as shown below in the Flip action Inspector. Avid Integration Guide 99 100 Ingesting Media into Avid via Interplay Transfer Engine Implementing Avid-Telestream Media Processing Workflows Figure 43. Flip Action Inspector Configure the Flip action as follows: • Encoder—Avid Transfer Manager/Transfer Engine Encoder • Input Media File Nickname—Original or other to match the nickname specified in the Watch action • Output Media File Nickname—Output or other to match the nickname specified in the Deploy action • Output Location—Specified as required for your system. The location must be a share, and accessible as a UNC path by the Telestream Receiver on the target Transfer Engine server (see Sharing the Media Output Location for details). • Decoder—Auto • Container & Video Codec—see Supported Avid Media Formats for details. • Audio Codec—PCM—see Supported Avid Media Formats for details. Configuring the Deploy Action In order for the Deploy Action to successfully deliver media to your Transfer Engine, it must be configured with certain settings, as shown below in the Deploy action Inspector. Configure the Deploy action as follows: Avid Integration Guide Ingesting Media into Avid via Interplay Transfer Engine Implementing Avid-Telestream Media Processing Workflows In the first panel (Copy and Deliver Files): • Deployment Type—Avid Interplay Transfer Engine In the second panel: Figure 44. Deploy Action Inspector Final Panel • Media File Nickname to Deploy—Output, or other to match the nickname specified in the Flip action • Unity/LAN Share Workspace—The name of the workspace that the deployed media should be placed in. – Leave blank to deliver to the default workspace that you set in the Transfer Engine Configuration utility under Workgroup Settings (top left)—for example, Workspace1—see Figure 36. – Enter another workspace when you want to override the setting in the Transfer Engine Configuration utility’s No-login Workspace for Incoming Transfers field for the purpose of delivering media to this workspace. – Optionally, bind this setting to a variable to specify the workspace name on a job-by-job basis. An upstream action must extract and supply the workspace name in the Vantage workflow. • Transfer Engine Host Name—The hostname of the server where the primary Transfer Engine/Transfer Manager is running. (Listed in the Ingest Devices list, in the Avid Interplay Transfer Engine Configuration Utility window). Avid Integration Guide 101 102 Ingesting Media into Avid via Interplay Transfer Engine Implementing Avid-Telestream Media Processing Workflows • Ingest Type—Specify the format of the output media to be deployed into Avid: AAF: Advanced Authoring Format (AAF) is a file format for post production and authoring. It supports audio, video, image, graphics, text, animation, and other forms of media. It also supports metadata that describes how to combine or modify individual sections of media, and supplementary media information. OMF: OMF Interchange (OMFI) is a platform-independent file format that stores both media (video, audio, graphics, animation) and the information describing how the media is edited together to form a sequence, referred to as a composition. • Metadata Tags—Click Add New Item to create a new metadata item, and insert metadata tags and their values into the media file. • Insert Locators—Click Add New Item to create a new comment locator, and insert a comment into the media file at the specified timecode. These locators display in the timeline and the comments display in the Markers window of the sequence in Media Composer. Smart SD/HD Transcoding Workflow By binding the Unity/LAN Share Workspace field to a variable, multiple transcode actions in a workflow (each followed by a Deploy action) can dynamically deliver encoded media to different workspaces. This flexibility makes it easier to process media and automatically deliver it to the proper Avid workspace for further processing. For example, in a smart SD/HD transcoding workflow you can process and deliver both HD and SD files to different workspaces from a single workflow, on a job-by-job basis. Figure 45. Smart Avid SD/HD Transcoding Workflow When you bind the workspace to a variable, you need to specify the workspace name that you want to deliver to on a job-by-job basis. Use an upstream action to supply the workspace name to the Deploy action. Avid Integration Guide Ingesting Media into Avid via Interplay Transfer Engine Implementing Avid-Telestream Media Processing Workflows In this example workflow, the Identify and Examine actions determines the height of the video and whether curtains or letterhead are used, and the Decide actions act on SD and HD video, respectively, to route it to either an SD or HD Flip action. After transcoding, each Deploy action delivers the media to the appropriate workspace. Avid Integration Guide 103 104 Ingesting Media into Avid via Interplay Transfer Engine Troubleshooting Troubleshooting If you are having problems ingesting media into Media Composer from your Vantage workflow, review these tips. Note: If you are still having problems, contact Telestream Customer Service (Table 1, Telestream Contact Information) or your Avid systems administrator for assistance. Confirm the following: • The target Transfer Engine is running. • For Interplay Transfer Engine version 3.0.5 only, the Avid Interplay Transfer Engine Patch 3.0.7.msp must be installed on the machine hosting the Avid Transfer Engine. • The primary Transfer Engine is set and configured in the Avid Transfer Engine Configuration utility as well as the Telestream TransferManager client(s). • Your Vantage workflow is active in Workflow Designer. • Your Vantage workflow’s Watch action is monitoring the correct folder or share for media that you are processing and sending to the Avid system. • The Vantage media output location is set to the correct UNC path and that the share is properly configured. • The Avid Interplay Transfer Client version matches the Telestream installer version. • The Avid Interplay Transfer Client installed on the Vantage domain server is the 32bit version. • The Deploy Action Transfer Engine Host Name matches the value entered in the Telestream TransferManager Client Host Name field. • The Vantage Transport Service is running. • Media Composer is configured to the Primary Transfer Engine. (Settings>Transfer>TMClient.ini (tab). • The 32-bit Telestream Receiver (Telestream_Receiver.dll) for Interplay Transfer Engine V2.7.0 is installed in the correct directory (C:\Windows\SysWOW64 folder). • The 64-bit Telestream Receiver (Telestream_Receiver.dll) for Interplay Transfer Engine V3.0.5 is installed in the correct directory (C:\Windows\System32 folder). • Authenticate all servers and workstations in the Avid and Vantage environment (Transfer Engine, Vantage & Media Composer). • Interplay Delivery: – Confirm that the Avid Interplay Transfer Configuration settings are set appropriately for your environment. – Confirm that the appropriate ISIS Workspace is mounted. • Security and firewall settings aren’t preventing Vantage domain server access. Avid Integration Guide Ingesting Media into Avid via Interplay Transfer Engine Supported Avid Media Formats Supported Avid Media Formats The following media formats can be processed by Vantage using the Avid Transfer Manager/Transfer Engine Encoder. 10-bit mastering-quality video is processed as Full Quality (8-bit) by Vantage. Audio is Uncompressed PCM at 48kHz, saved as a WAV file. All formats except for AVC Intra can use Direct Convert encoders. AVCI Media DNxHD Media DV, DVCPRO, and IMX Media DVCPRO HD Media Sony XDCAM 4:2:2 50Mb Media Sony XDCAM 4:2:0 Media AVCI Media Supported audio: Uncompressed 48kHz PCM with 2, 4, 6, 8 or 16 channels, 16 or 24-bit, saved as a WAV file. Table 13. AVCI 4:2:2 100Mb Video Format Rate (fps) Frame Size 1080i 29.97 1920x1080 1080i 25 1920x1080 720p 50 1280x720 720p 59.94 1280x720 Table 14. AVCI 4:2:0 50Mb Video Format Rate (fps) Frame Size 1080i 29.97 1440x1080 1080i 25 1440x1080 720p 50 960x720 720p 59.94 960x720 Avid Integration Guide 105 106 Ingesting Media into Avid via Interplay Transfer Engine Supported Avid Media Formats DNxHD Media Supported audio: Uncompressed 48kHz PCM with 2, 4, 6, 8 or 16 channels, 16 or 24-bit, saved as a WAV file. Table 15. DNxHD Video Format Rate (fps) Mb Frame Size 1080i 29.97 220 1920x1080 1080i 29.97 145 1920x1080 1080i 25 185 1920x1080 1080i 25 120 1920x1080 1080p 29.97 220 1920x1080 1080p 29.97 145 1920x1080 1080p 25 185 1920x1080 1080p 25 120 1920x1080 720p 59.94 220 1280x720 720p 59.94 145 1280x720 720p 50 185 1280x720 720p 50 120 1280x720 720p 29.97 110 1280x720 720p 29.97 75 1280x720 720p 25 90 1280x720 720p 25 60 1280x720 Avid Integration Guide Ingesting Media into Avid via Interplay Transfer Engine Supported Avid Media Formats DV, DVCPRO, and IMX Media Supported audio: Uncompressed 48kHz PCM with 2, 4, 6, 8 or 16 channels, 16 or 24-bit, saved as a WAV file. Table 16. DV 25Mb Video Format Rate (fps) Frame Size DV25 SD NTSC 29.97 720x480 DV25 SD PAL 25 720x576 Table 17. DVCPRO 25 and 50Mb Video Format Rate (fps) Frame Size DVCPRO25 NTSC 29.97 720x480 DVCPRO25 PAL 25 720x576 DVCPRO50 NTSC 29.97 720x480 DVCPRO50 PAL 25 720x576 Format Rate (fps) Frame Size IMX 30Mb NTSC 29.97 720x512 IMX 40 Mb NTSC 29.97 720x512 IMX 50 Mb NTSC 29.97 720x512 IMX 30 Mb PAL 25 720x608 IMX 40 Mb PAL 25 720x608 IMX 50 Mb PAL 25 720x608 Table 18. IMX Video Avid Integration Guide 107 108 Ingesting Media into Avid via Interplay Transfer Engine Supported Avid Media Formats DVCPRO HD Media Supported audio: Uncompressed 48kHz PCM with 2, 4, or 8 channels, 16-bit, saved as a WAV file. Table 19. DVCPRO HD 100Mb Video Format Rate (fps) Frame Size DVCPRO HD 720p 60 960x720 DVCPRO HD 720p 50 960x720 DVCPRO HD 1080i 59.94 1280x1080 DVCPRO HD 1080i 50 1280x1080 Sony XDCAM 4:2:2 50Mb Media Supported audio: Uncompressed 48kHz PCM with 8 channels, 16 or 24-bit, saved as a WAV file. Table 20. Sony XDCAM 4:2:2 50MbVideo Format Rate (fps) Frame Size Sony XDCAM 4:2:2 60i 1920x1080 Sony XDCAM 4:2:2 50i 1920x1080 Sony XDCAM 4:2:2 60p 1280x720 Sony XDCAM 4:2:2 50p 1280x720 Sony XDCAM 4:2:0 Media Supported audio: Uncompressed 48kHz PCM with 4 or 8 channels, 16 or 24-bit, saved as a WAV file. Table 21. Sony XDCAM 4:2:0 Video Format Rate (fps) Mb/sec Frame Size Sony XDCAM 4:2:0 60i 35Mb 1440x1080 Sony XDCAM 4:2:0 50i 35Mb 1440x1080 Sony XDCAM 4:2:0 60i 25Mb 1440x1080 Sony XDCAM 4:2:0 50i 25Mb 1440x1080 Sony XDCAM 4:2:0 60i 17.5Mb 1440x1080 Sony XDCAM 4:2:0 50i 17.5Mb 1440x1080 Avid Integration Guide Ingesting Media into Avid via Interplay Transfer Engine Supported Avid Media Formats Avid Integration Guide 109 110 Ingesting Media into Avid via Interplay Transfer Engine Supported Avid Media Formats Avid Integration Guide