1
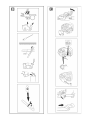
A If it is possible to turn the log you should stop
cutting about 2/3 of the way through.
B Turn the log and finish the cut from the opposite side.
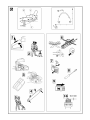
2 The log is supported at one end. There is a high
risk that it will split.
A Start by cutting from below (about 1/3 of the
way through).
B Finish by cutting from above so that the two cuts
meet.
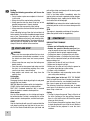
3 The log is supported at both ends. There is a high
risk that the chain will jam.
A Start by cutting from above (about 1/3 of the
way through).
B Finish by cutting from below so that the two cuts
meet.
TREE FELLING TECHNIQUE
It takes a lot of experience to fell a tree.
Inexperienced users of chain saws should not fell
trees. NEVER ATTEMPT A TASK YOU ARE UNSURE OF.
A
Safe distance
The safe distance between a tree that is to be felled
and anyone else working nearby is at least 21/2 tree
lengths.
Make sure that no-one else is in this “risk zone”
before or during felling.
B
Felling direction
The aim is to fell the tree in the best possible position
for subsequent limbing and cross-cutting. You want it
to fall on ground where you can move about safely.
The main point to avoid is letting the tree fall onto another tree. It can be both difficult and dangerous to remove
a tree in such a position (see point 4 in this section).
Once you have decided which way you want the tree
to fall you must judge which way the tree would fall
naturally.
Several factors affect this:
• Lean of the tree
• Bend
• Wind direction
• Arrangement of branches
• Weight of snow
Another very important factor, which does not affect
the felling direction but does affect your safety, is to
make sure the tree has no damaged or dead branches that might break off and hit you during felling.
C
Clearing the trunk and preparing your retreat
Remove any branches that are in the way. To do this
it is best to work from the top down and keep the
trunk between you and the chain saw. Never limb
above shoulder height.
Remove any undergrowth from the base of the tree
and check the area for obstacles (stones, branches,
holes, etc.) so that you have a clear path of retreat
when the tree starts to fall. Your path of retreat should
be roughly 135 degrees behind the intended felling
direction.
g
D
Felling
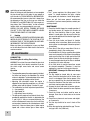
Felling is done using three cuts. First you make the
DIRECTIONAL CUTS, which consist of the TOP CUT
and the BOTTOM CUT; followed by the FELLING CUT.
By placing these cuts correctly you can control the
felling direction very accurately.
DIRECTIONAL CUT
To make the DIRECTIONAL CUT you begin with the
TOP CUT. Stand to the right of the tree and cut downwards at an angle.
Next make the BOTTOM CUT so that it finishes at the
end of the TOP CUT.
The directional cut should run 1/4 of the diameter
through the trunk and the angle between the TOP
CUT and BOTTOM CUT should be 45°.
The line where the two cuts meet is called the DIRECTIONAL CUT LINE. This line should be perfectly horizontal and at right angles (90°) to the chosen felling
direction.
FELLING CUT
The felling cut is made from the opposite side of the
tree and it must be perfectly horizontal. Stand on the
left side of the tree and cut with the bottom edge of
the bar.
Make the FELLING CUT about 3-5 cm (1.5-2 inches)
above the flat section of the DIRECTIONAL CUT.
Set the spike bumper (if one is fitted) in behind the
breaking strip. Use full throttle and bring the bar and
chain slowly into the tree. Make sure the tree does
not start to move in the opposite direction to your
intended felling direction. Drive a WEDGE or BREAKING BAR into the cut as soon as it is deep enough.
Finish the FELLING CUT parallel with the DIRECTIONAL CUT LINE so that the distance between them is at
least at least 1/10 of the trunk diameter. The uncut
section of the trunk is called the BREAKING STRIP.
The BREAKING STRIP act as hinges that control the
felling direction of the falling tree.
All control over the felling direction is lost if the
BREAKING STRIP is too narrow or if the directional cut
5