1
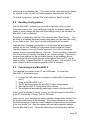
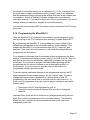
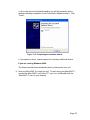
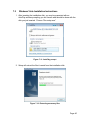
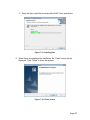
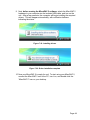
Multi-Channel Reference Canceller USER’S MANUAL Version 1.5 MicroDAC 5 Multi-Channel Reference Canceller USER’S MANUAL Version 1.5 July 20, 2007 Document Number 061103JW Phone: Fax: 919 572 6767 919 572 6786 [email protected] www.dacaudio.com Copyright © 2006-2007 by Digital Audio Corporation All rights reserved. Table of Contents 1 Overview............................................................................................................1 1.1 Introduction.............................................................................................1 1.2 Original Factory Configuration ................................................................1 1.3 Customization with the Software Utility...................................................2 1.4 Programming Custom Settings for Standalone Use ...............................2 2 Rear Panel Connectors......................................................................................3 2.1 Audio I/O.................................................................................................3 2.2 Using Digital Input Audio for Reference Cancellation .............................4 2.3 Other Connectors ...................................................................................4 3 Standalone Controls ..........................................................................................5 3.1 Front Panel .............................................................................................5 3.1.1 Audio I/O Format .............................................................................5 3.1.2 Headphone Controls........................................................................5 3.1.3 Input Level Controls.........................................................................6 3.1.4 Filter Controls ..................................................................................6 3.1.5 Lock/Unlock Unit..............................................................................8 3.2 Rear Panel..............................................................................................8 3.2.1 External Clear Switch ......................................................................8 3.2.2 External Freeze Switch....................................................................8 4 Specifications.....................................................................................................9 4.1 Power .....................................................................................................9 4.2 Analog Audio ..........................................................................................9 4.3 Digital Audio ...........................................................................................9 4.4 Physical ................................................................................................10 5 MicroDAC 5 Configuration Utility Overview......................................................11 5.1 Introduction...........................................................................................11 5.2 Main Screen .........................................................................................11 5.3 Filters....................................................................................................12 5.4 System Bandwidth ................................................................................12 5.5 Clearing and Freezing Filters................................................................13 5.6 Channel Configurations ........................................................................13 5.6.1 Mono Configurations .....................................................................13 5.6.2 Stereo Configurations....................................................................16 5.6.3 Audio Line Out Configuration ........................................................19 5.7 Storing Configurations ..........................................................................19 5.8 Recalling Configurations.......................................................................20 5.9 Connecting to the MicroDAC 5 .............................................................20 5.10 Programming the MicroDAC 5..............................................................21 5.10.1 Locked Standalone Behavior after PC Programming ....................22 5.10.2 Unlocked Standalone Behavior after PC Programming.................22 5.11 Synchronizing to the MicroDAC 5.........................................................24 5.12 Updating MicroDAC 5 Firmware ...........................................................24 6 Filters ...............................................................................................................25 6.1 Reference Canceller (nCH) Filter .........................................................25 6.2 1CH Filter .............................................................................................27 6.3 Highpass Filter......................................................................................30 6.4 Automatic Gain Control.........................................................................30 7 Installation........................................................................................................33 7.1 Windows XP/2000 Installation Instructions...........................................33 7.2 Windows Vista Installation Instructions.................................................40 Table of Figures Figure 2-1: MicroDAC 5 Rear Panel .....................................................................3 Figure 3-1: MicroDAC 5 Front Panel.....................................................................5 Figure 5-1: Main Configuration Utility Screen .....................................................11 Figure 5-2: Stereo 2CH Filter plus AGC..............................................................12 Figure 5-3: Mono sub-menu................................................................................14 Figure 5-4: Mono 2CH with Reference on LRef Input .........................................15 Figure 5-5: Mono 3CH with References on Right and LRef Inputs .....................15 Figure 5-6: Mono 4CH ........................................................................................16 Figure 5-7: Stereo sub-menu ..............................................................................17 Figure 5-8: Stereo 2CH.......................................................................................18 Figure 5-9: Stereo 3CH.......................................................................................18 Figure 6-1: nCH Filter Dialog ..............................................................................26 Figure 6-2: 1CH Filter Dialog ..............................................................................28 Figure 6-3: Highpass Filter Dialog.......................................................................30 Figure 6-4: Automatic Gain Control Dialog .........................................................31 Figure 7-1: Extracting necessary files .................................................................33 Figure 7-2: Installing Microsoft .NET 2.0.............................................................34 Figure 7-3: Welcome screen...............................................................................35 Figure 7-4: Installing files ....................................................................................35 Figure 7-5: Finish screen ....................................................................................36 Figure 7-6: Windows driver compatibility warning. ..............................................36 Figure 7-7: Hardware wizard welcome screen. ...................................................37 Figure 7-8: Starting the hardware wizard. ...........................................................38 Figure 7-9: Windows driver compatibility warning. ..............................................38 Figure 7-10: Completing the hardware wizard. ...................................................39 Figure 7-11: AutoPlay prompt .............................................................................40 Figure 7-12: Extracting necessary files ...............................................................40 Figure 7-13: Welcome screen .............................................................................41 Figure 7-14: Windows Vista "unidentified program" warning ..............................41 Figure 7-15: Installing files ..................................................................................42 Figure 7-16: Finish screen ..................................................................................42 Figure 7-17: Windows Vista "unidentified program" warning ..............................43 Figure 7-18: Windows Vista driver installation warning.......................................43 Figure 7-19: Installing drivers..............................................................................44 Figure 7-20: Driver installation complete.............................................................44 1 Overview 1.1 Introduction MicroDAC 5 is the latest generation of DAC's most popular tactical digital adaptive filter. The MicroDAC 5 is designed to complement your tactical surveillance efforts, packaging the most commonly used filters in a powerful and easy-to-operate unit. MicroDAC 5 contains four different filters for removing common noise problems in surveillance audio. The four filters are: A Multi-Channel Adaptive filter. This filter can be used as a reference canceller to remove up to three reference signals. This filter can also be configured as a one-channel adaptive filter, or deconvolver, to remove common noises such as power hum, tones, and echoes. A One-Channel adaptive filter. Following the reference canceller, this second adaptive filter removes any remaining tonal noise or reverberations. A Highpass filter. This filter removes low-frequency rumble that lies below the range of normal speech. An Automatic Gain Control. This filter boosts low-level speech for easier hearing while leaving unaffected the parts of the signal that are already at a comfortable listening level. The MicroDAC 5 is suitable for processing recorded audio or for use in live listening situations, but it is specifically designed for easy use in a tactical environment. The unit comes programmed with default settings that are appropriate for the most common audio situations. The software utility that accompanies the MicroDAC 5 allows finer control of the filtering behavior of the unit, and can be used to build a configuration that works best for your recorded audio or listening environment. Your configuration can then be programmed into the unit for tactical use. 1.2 Original Factory Configuration In the factory configuration, the two adaptive filters are always running at default settings that are appropriate for cancellation of most common noises. Sensible adaptive filter lengths and delays are chosen. A sensible adapt rate is selected so that the filter can adapt in reasonable time to most noises without becoming unstable. Auto-scaling of the adapt rate based on the signal power aids filter Page 1 stability, and automatic crash detection is enabled to allow recovery in the event that the filter does crash. The highpass filter (HPF) and automatic gain control (AGC) can be enabled or disabled using push buttons on the front panel. The factory default HPF has a cutoff of 200 Hz (meaning all frequencies below 200 Hz will be removed). The factory default AGC can add up to 10 dB of gain to the audio. 1.3 Customization with the Software Utility The software utility allows you to configure the individual filters in the system. You can change settings such as filter sizes, adapt rates, and delays for the adaptive filters. You can change the HPF cutoff frequency and the maximum gain that can be applied by the AGC. Although only one of these custom configurations can be programmed into the hardware at a given time, you can save multiple configurations to files on your PC for later recall and reuse. 1.4 Programming Custom Settings for Standalone Use Although the front panel controls don't allow the fine-grained adjustments to filter behavior that the software provides, you can still use your custom settings when operating the MicroDAC 5 in tactical situations. With the unit connected to a PC running the configuration software, you can program your custom configuration into the unit. The custom settings are stored in nonvolatile memory so that the MicroDAC 5 will continue to use your custom settings even after it is disconnected from the PC and power cycled. After programming, you can still change the settings provided on the front panel of the unit, but the custom settings (those not configurable from the front panel) will be preserved and used where applicable. See section 5.10 for more information. Page 2 2 Rear Panel Connectors The rear panel contains the following connectors: Audio input o Four ANALOG inputs o S/PDIF input o TOSLINK optical input Audio output o Two ANALOG line outputs o TOSLINK optical output External filter control connectors o External filter freeze (EXT FRZ) o External filter clear (EXT CLR) USB 2.0 connector POWER connector Figure 2-1: MicroDAC 5 Rear Panel 2.1 Audio I/O The rear panel contains several audio I/O connectors for a variety of ways to get audio into and out of the MicroDAC 5 unit. There are three input options: ANALOG INPUTS, S/PDIF DIGITAL INPUT, and TOSLINK DIGITAL INPUT. Only the LEFT and RIGHT input channels are selectable from among these options; regardless of the INPUT SELECT setting; the LREF and RREF inputs are always ANALOG. There are two output options: ANALOG OUTPUTS and TOSLINK DIGITAL OUTPUT. Regardless of the INPUT SELECT setting, both analog and digital outputs are enabled at all times. Page 3 2.2 Using Digital Input Audio for Reference Cancellation The S/PDIF and TOSLINK inputs always receive two channels of audio, LEFT channel and RIGHT channel. For reference cancellation, these two channels may contain a stereo primary signal, a mono primary and a reference signal, or only a mono primary. This means that if you want to cancel more than one reference from a mono digital signal, or if you want to apply reference cancellation to a stereo digital signal, you will need to use a combination of digital and analog inputs. For example: To cancel one reference from a stereo S/PDIF primary, select S/PDIF on the front panel INPUT SELECT, and choose STEREO and 2CH in the Filter Controls. Use the S/PDIF input connector to feed the primary channels into the unit. Use the LREF ANALOG input to feed the reference signal into the unit. To cancel three references from a mono TOSLINK primary, select TOSLINK on the front panel INPUT SELECT, and choose MONO and 4CH in the FILTER CONTROLS. Use the TOSLINK input connector to feed the primary and one of the references into the unit. Use the LREF and RREF ANALOG inputs to feed the other two references into the unit. To cancel a single reference from a mono S/PDIF primary, put the primary signal on the left S/PDIF channel, and choose MONO in the FILTER CONTROLS. You may put the reference signal on either the S/PDIF right channel OR the ANALOG LREF input, setting the FILTER CONTROLS to the 2CH mode, where the red LED is lit on the reference channel you are using. See section 3.1.4 for more information on how to define your use of primary and reference channels. 2.3 Other Connectors The POWER connector should be connected to +12V DC, 2A. The USB 2.0 connector is used to connect the unit to the PC for use with the MicroDAC 5 configuration software. Two external switch connectors are available for remotely clearing and freezing the adaptive filters. See section 3.2 for more information on these controls. Page 4 3 Standalone Controls Controls on the MicroDAC 5 unit are used to configure the audio I/O and also to provide a limited set of filter controls. While the PC software provides much finer control of the filtering in the MicroDAC 5 unit, these panel controls can be used to configure the MicroDAC 5 unit when not connected to the PC. These “standalone” controls are described below. 3.1 Front Panel Figure 3-1: MicroDAC 5 Front Panel 3.1.1 Audio I/O Format Use the INPUT SELECT switch in the upper left corner to select ANALOG, S/PDIF, or TOSLINK audio format for the primary inputs. This selection affects only the LEFT and RIGHT input signals. Regardless of the selection, reference signals can be input on the LREF and RREF ANALOG inputs. Also regardless of the selection, the output audio is sent to both the ANALOG OUTPUTS and the TOSLINK OUTPUT. 3.1.2 Headphone Controls Use the controls in the lower left corner to control the audio you listen to on the headphones. Use the INPUT/OUTPUT switch to select the audio you want to listen to on the headphones (via the 3.5mm jack). When INPUT is selected, you will hear the primary input signals – left and right for the stereo modes, or left in both ears for the mono modes. When OUTPUT is selected, you will hear the processed output audio. Use VOLUME to adjust the listening level on the headphones. By default, these controls affect only the headphone audio, and the ANALOG OUTPUTS and TOSLINK OUTPUT always contain output audio. However, using the MicroDAC 5 Configuration Utility software, you can enable a “Line Out Toggle” mode in which the rear panel audio outputs toggle along with the headphone output. Regardless of whether rear-panel output toggling is enabled, Page 5 the VOLUME knob always controls only the headphone level; the rear-panel output level is not adjustable. 3.1.3 Input Level Controls The center section of the front panel contains INPUT LEVELS controls for the input signals. The four LEDs above each knob provide level bargraphs for each of the input signals. The red LED in each bargraph indicates that the audio is overdriving. In general, it is a good idea to make your input signals fairly loud but without overdriving. Ideally, your input signals will light the yellow “-6dB” LED at their loudest parts, but never the red “OL” LED. Also, note that each of the four inputs has an associated ACTIVE LED, in order to indicate whether that particular input is in use in the selected filtering mode, and what it is being used for. GREEN illumination indicates the input is being used as a primary input for the multi-channel adaptive filter, while RED illumination indicates the input is being used as a reference. When the LED is not illuminated, the input is not in use in the selected mode. For the ANALOG INPUTS, the level adjustment is applied to the analog signal using the analog amplifier, with a range of +/- 30 dB. For the digital inputs, the level adjustment is applied digitally, with exactly the same adjustment range. 3.1.4 Filter Controls The right-hand section of the front panel contains FILTER CONTROLS used to change the behavior of the filtering applied by the MicroDAC 5. The individual controls are described in more detail below. 3.1.4.1 Channel Selection Controls There are two controls on the front panel that can be used to define the input audio channels. The MONO/STEREO select is used to specify whether there are one or two primary channels. The nCH selection is used to specify the number of reference signals, and which inputs those references are found on. Choose 1CH for no reference cancellation, 2CH for a single reference, 3CH for two references, and 4CH for three references (available only when the primary is MONO). Together, these two controls allow a total of 9 channel modes, shown in the table below: Page 6 MONO/STEREO Selection nCH Selection MONO 1CH Description Mono input, no references. MONO 2CH, Option A Mono primary, one reference on LREF. MONO 2CH, Option B Mono primary, one reference on RIGHT. MONO 3CH, Option A Mono primary, two references on LREF and RREF. MONO 3CH, Option B Mono primary, two references on RIGHT and LREF. MONO 4CH Mono primary, three references on RIGHT, LREF, and RREF. STEREO 1CH Stereo input, no references. STEREO 2CH Stereo primary, one reference on LREF. STEREO 3CH Stereo primary, two references on LREF and RREF. Table 1: Filter Input Configurations As you press the MONO/STEREO and nCH selection buttons, the LEDs next to each input gain dial will indicate the use of each channel. Cycle through the modes until you reach the one you want. Note that only the legal nCH modes are shown based on the MONO/STEREO section. For instance, you cannot select 4CH if STEREO is selected, because STEREO 4CH is not a valid mode. The LEDs light green for primary channels and red for reference channels. For instance, in the MONO 2CH Option A mode, the LEFT channel LED is green and the LREF LED is red. In the STEREO 3CH mode, the LEFT and RIGHT channel LEDs are green and the LREF and RREF LEDs are red. 3.1.4.2 Bandwidth Control Use the BW selection to choose the bandwidth at which audio will be processed. The 5 kHz bandwidth uses a sample rate of 9.8 kHz, the 10 kHz bandwidth uses a sample rate of 22.05 kHz, and the 20 kHz bandwidth uses a sample rate of 44.1 kHz. Regardless of the sample rate at which audio is processed, the TOSLINK output always uses a 44.1 kHz sample rate. 3.1.4.3 Highpass Filter Use the HPF button to turn the highpass filter on and off. When the button is in, the HPF is applied. 3.1.4.4 Automatic Gain Control Use the AGC button to turn the automatic gain control on and off. When the button is in, the AGC is applied. Page 7 3.1.4.5 Clear Filters Use the CLEAR button to clear the solution of all adaptive filters. 3.1.5 Lock/Unlock Unit As marked on the front panel, the BW and nCH select buttons can be used to lock the filter controls. To LOCK or UNLOCK the unit, hold these buttons down together for three seconds; the MEM/LOCK LED in the upper right corner of the front panel will turn on or off to indicate when the state has changed. The LED is on when the unit is locked and off when the unit is unlocked. When the unit is locked, the FILTER CONTROLS section of the front panel is disabled. These controls include the MONO/STEREO selector, the BW and nCH selectors, the AGC and HPF enable/disable buttons, and the CLEAR button. Pressing these buttons will have no effect when the unit is locked. The EXT FRZ (external freeze) and EXT CLR (external clear) switch-closure connectors on the rear panel are also disabled and have no effect when the unit is locked. The INPUT LEVELS, INPUT SELECT, and headphone controls remain active even when the unit is locked. When the user unlocks the MicroDAC 5, it will keep running at the locked settings, except that the current state of the AGC and HPF buttons will be applied. For example, if you lock the unit with the AGC button “in” (enabled), then toggle the AGC button to the OUT position (disabled) while the unit is locked, then unlock the unit, the AGC will automatically be disabled when the unit is unlocked. This guarantees that when the unit is unlocked, the filtering behavior and the front panel controls are always in agreement. 3.2 Rear Panel Two connectors on the back panel (EXT CLR and EXT FRZ) can be used to connect external switches for additional filter controls. 3.2.1 External Clear Switch An external pushbutton switch wired to the EXT CLR connector can be used to remotely clear the filter solution. Function is identical to the CLEAR switch on the front panel; when the button is pressed, the filters are cleared. 3.2.2 External Freeze Switch An external switch (slide or toggle switch recommended) wired to the EXT FRZ switch can be used to freeze the adaptive filters. When the switch is closed, the filters are frozen; when open, the filters are adapting. When the filters are frozen, the ADAPT LED on the front panel goes out. Page 8 4 Specifications 4.1 4.2 4.3 Power 9-18VDC input, 2A 2.1mm “barrel” connector, positive tip Universal AC adaptor supplied Analog Audio Line Inputs (4); o Standard RCA jack o -39dBV to +6dBV input level, adjustable gain o Zin = 25kΩ, AC coupled Line Outputs (2): o Standard RCA Jack o +6dBV output level o Zout = 100Ω, AC-coupled Headphone Jack (1): o Standard 3.5mm stereo headphone jack o INPUT/OUTPUT monitoring selection o VOLUME control LED Indicators: o Four-LED bar graph for each input channel o “Active” LEDs to indicate use of the four input channels o Status LEDs to indicate ADAPT, USB and MEM/LOCK condition Bandwidth Options: o 5kHz, 9.8kHz processing sample rate o 10kHz, 22.05kHz processing sample rate o 20kHz, 44.1kHz processing sample rate Analog Conversion: o Four channels of 24-bit, 256x-oversampling, sigma-delta stereo A/D conversion o Two channels of 24-bit, 256x-oversampling, delta-sigma stereo D/A conversion o >90dB SINAD, >100dB dynamic range Digital Audio Audio Inputs (2): o TOSLINK optical interface, 16-24 bit data resolution and 32-192kHz sample rates supported o S/PDIF coaxial interface, RCA jack, 16- to 24-bit data resolution and 32-192kHz sample rates supported Page 9 4.4 Audio Output (1): o TOSLINK optical interface, constant 24-bit data resolution and 44.1kHz sample rate Control Interface (1): o USB 2.0 full-speed interface o Windows-based interactive control and programming utility Processor Functions (DSP #1): o 4500-tap (at 5kHz BW option) adaptive FIR stage, configurable as: 4500-tap monaural 2CH filter 2 x 2100-tap monaural 3CH or stereo 2CH filter 3 x 1400-tap monaural 4CH filter 4 x 1050-tap stereo 3CH filter o Adaptive filters derate to 2100 and 1000 total filter taps at 10kHz and 20kHz bandwidths, respectively Processor Functions (DSP #2): o 2048-tap at 5kHz BW, 1024-tap at 10kHz BW, 512-tap at 20kHz BW stereo 1CH adaptive predictive deconvolver stage o Stereo highpass filter stage with cutoff at 200, 250, or 300 Hz o Stereo automatic gain control (AGC) with maximum boost of 40dB Algorithms: o Time-domain, continuous adjustment, Normalized Least Mean Square (NLMS) for all 1CH, 2CH, 3CH, and 4CH adaptive filters o Automatic “crash detection” and clearing for all adaptive filters o Fourth-order Butterworth IIR implementation for 200Hz highpass filter o Time-domain, peak-sensitive, envelope tracking compressor with “lookahead” for AGC Cancellation Capability: o >70dB for 1kHz sine wave (1CH mode) o >60dB for white noise (2CH, 3CH, 4CH modes) Processors: o Dual 300MHz TMS320C6713 floating point DSP, 4.8 billion instructions/second peak speed, 3.6GFLOPS o 109 million floating-point adaptive filter taps/second Computation Precision: o 32-bit IEEE floating-point, single precision Signal Delays: o 4096 total samples available for primary or reference channels on DSP #1 o 64 total samples available for 1CH prediction span on DSP #2 Physical 8.5”W x 1.7”H x 6.6”D chassis, 8lbs. 1U rack mounting kit available Page 10 5 MicroDAC 5 Configuration Utility Overview 5.1 Introduction The MicroDAC 5 Configuration Utility allows for complete setup and intuitive, interactive control of all the audio processing on the MicroDAC 5, via USB connection between the hardware and a Windows®-based PC. The software can be used to control the MicroDAC 5 unit in real time. Once you have decided on the appropriate settings for your target audio, all processing settings can be saved in nonvolatile memory on the MicroDAC 5 for stand-alone operation without the computer connection. In addition, favorite configurations can be saved on the PC and subsequently recalled. 5.2 Main Screen An image of the main window for the MicroDAC 5 Configuration Utility is shown below in Figure 5-1. The signal diagram represents the flow of the audio signal going from left to right. On the right hand side, you can select which filters you want in the signal chain and the system bandwidth. Figure 5-1: Main Configuration Utility Screen Page 11 5.3 Filters Four different filters are available to place into the signal chain. These are selectable on the right-hand side of the main screen. Figure 5-2 is a sample showing only the reference canceller filter and AGC selected. With this configuration, the audio signal is only processed by these two filters; the 1CH and Highpass (HPF) filters are excluded. Figure 5-2: Stereo 2CH Filter plus AGC The same filters are applied to both left and right channels of input. You cannot have a different set of filters on the left channel versus the right channel. To configure the settings for a filter, simply click on that filter in the audio flow diagram to open the filter configuration window. The same settings are applied to both left and right channels in stereo configurations, so clicking on either the left or right channel filter takes you to the same configuration window, and the settings changes made there are applied to both channels. 5.4 System Bandwidth The available bandwidths are 5, 10 and 20 kHz and are selectable on the righthand side of the main screen (see Figure 5-1). Select a bandwidth by clicking on the radio button next to the desired bandwidth. The new bandwidth selected will be effective immediately on the hardware. Page 12 5.5 Clearing and Freezing Filters The reference canceller and 1CH filters are adaptive filters. This means that their filter coefficients are constantly changing to adapt to new signal conditions. If you want to reset the filter coefficients and have them adapt from a fresh start, then click the “Clear Filter Solution” button. This will clear ALL the adaptive filters in both channels. To “freeze” the filters, which prevents them from further updating their coefficients, click the “Disable Adaptation” button. This will change the text of the button to read “Enable Adaptation”. The text of the button is an indication of the action that will be taken if you press it, not the current status. So, to allow the filters to continue to adapt again, press the “Enable Adaptation” button (and again, the text will revert to “Disable Adaptation”). 5.6 Channel Configurations The MicroDAC 5 can operate in a mono or stereo configuration. Different reference canceling options are available depending on which configuration you are working with. The channel configurations can be accessed via the “Channels” menu. 5.6.1 Mono Configurations To configure the unit for a mono signal, click the “Channels” menu and select the “Mono” sub-menu, as shown in Figure 5-3. In mono mode, the primary signal is always the Left Input and the output is sent to both the Left and Right Outputs. Page 13 Figure 5-3: Mono sub-menu In mono mode, there are six options available, three of which are shown in the following figures: 1CH: This is a single channel without any reference cancellation. 2CH with reference on Right Input 2CH with reference on LRef Input (see Figure 5-4) 3CH with references on Right and LRef Inputs (see Figure 5-5) 3CH with references on LRef and RRef Inputs 4CH with references on Right, LRef and RRef Inputs (see Figure 5-6) Page 14 Figure 5-4: Mono 2CH with Reference on LRef Input Figure 5-5: Mono 3CH with References on Right and LRef Inputs Page 15 Figure 5-6: Mono 4CH 5.6.2 Stereo Configurations To configure the unit for a stereo signal, click the “Channels” menu and select the “Stereo” sub-menu, as shown in Figure 5-7. Page 16 Figure 5-7: Stereo sub-menu In stereo mode, there are three options available, two of which are shown in the following figures: 1CH: This places an additional 1-CH filter on both the Left and Right Inputs and provides no reference cancellation. 2CH: Reference for both signals is LRef Input (see Figure 5-8) 3CH: References for both signals are LRef and RRef Inputs (see Figure 5-9) Page 17 Figure 5-8: Stereo 2CH Figure 5-9: Stereo 3CH Page 18 5.6.3 Audio Line Out Configuration By default, the audio line outputs on the rear panel (labeled ANALOG OUTPUTS and DIGITAL OUTPUT) always contain output audio. This default behavior allows the user to toggle between input and output on the headphones without affecting the line output. However, it may at times be desirable to have the line outputs toggle along with the headphones. To make this possible, a “Toggle Line Out with Headphones” option is available in the Channels menu, as shown in Figure 5-10. Figure 5-10: Toggle Line Out with Headphones When this item is checked, the INPUT/OUTPUT button on the front panel toggles both the headphones and the rear-panel outputs. When the item is unchecked, only the headphones toggle and the rear-panel outputs always contain output audio. 5.7 Storing Configurations With the MicroDAC 5 software you can store configurations into files on your PC’s hard drive for later recall and reuse. These files contain the settings for the configuration including system bandwidth, channel configuration and filter settings. The adapt/freeze settings are not stored in the configuration files, because storage of adaptive filter coefficients is not supported. New configurations Page 19 always load to an adapting state. (If you want to clear a filter and leave it cleared for a period of time, you can first freeze adaptation and then clear the filter.) To store a configuration, click the “File” menu and then “Save Config As…”. 5.8 Recalling Configurations With the MicroDAC 5 software you can recall configurations that you have previously saved to files. Upon recalling a config file, the software screen will update to those settings and also send those settings down to the hardware if a MicroDAC 5 unit is connected. To restore a configuration, click the “File” menu and then “Open Config…”. This will bring up a standard Windows browse dialog where you can select the config file you want to load. Click “Open” and the configuration will be loaded. Important Note: Recalling a configuration is not the same as “programming” settings into the unit! Recalling a configuration file will change the current operating behavior of the unit (if one is connected), but it will not change the settings stored in nonvolatile memory on the unit. Think of recalling configuration files as a shortcut to manually changing all your software settings. If you want to program these settings into the nonvolatile memory in the hardware (so that those settings will be used after the unit is disconnected from the PC), you still need to choose “Program MicroDAC 5” from the File menu. See section 5.10 for more information about programming the MicroDAC 5 hardware. 5.9 Connecting to the MicroDAC 5 The hardware is connected to the PC via a USB cable. To connect the MicroDAC 5, follow these steps: 1. Connect the USB cable that is provided to the MicroDAC 5 hardware and the PC. 2. Power on the MicroDAC 5 unit. 3. The PC should recognize the MicroDAC 5 within a few seconds. 4. Start the MicroDAC 5 Configuration Utility software. 5. The software will automatically detect and connect to the MicroDAC 5. If the Controller software is already running, you can still connect a MicroDAC 5 to the PC by selecting “Connect” from the File menu. Upon connect, is it is likely that the current software settings will be different from the programmed settings in the hardware. When these settings do not match, the user is prompted to load the current hardware configuration into the software. If the user selects “Yes,” then the software will read the programmed settings from the MicroDAC 5 unit. (This is the easiest way to determine what settings Page 20 are stored in nonvolatile memory on an unknown unit.) If “No” is selected, then the most recent software configuration will be “pushed” down to the hardware, and the hardware will begin running at the settings that were in the software prior to connection. Note that “pushing” software settings will not overwrite the nonvolatile memory – if you were to disconnect, the unit would return to its stored settings unless you explicitly re-program its nonvolatile memory. You can only have one MicroDAC 5 powered up and connected to the PC at any given time. 5.10 Programming the MicroDAC 5 Once the MicroDAC 5 is connected to the software, you can program it at any time by clicking on the “File” menu and then selecting “Program MicroDAC 5”. By programming the MicroDAC 5, you are taking the current settings in the software and storing them in the nonvolatile memory of the hardware. This enables the MicroDAC 5 to be disconnected from the PC, turned off, and deployed. Now, when the unit powers on, it will reload the settings that you programmed into its memory. If you attempt to disconnect from the hardware without programming the latest settings, the software will display a prompt asking if you wish to do so. This is to help prevent the user from accidentally neglecting to program the unit upon disconnect. If you choose to program, the latest software settings will be programmed and the unit will continue to run at these settings after it is disconnected. If you choose not to program, the unit will revert to its programmed settings upon disconnect. To protect against inadvertent changes in the programmed settings, the PC always programs the nonvolatile memory into the “locked” state. In order to change the channel mode or bandwidth in a tactical situation after PC programming, the user would have to unlock the device (see section 3.1.5). Once a unit is programmed, there are only two ways to change its nonvolatile memory state: 1. Reconnect to the PC and reprogram the unit, or 2. Unlock the unit and use the front panel filter controls to change the behavior. Important Note: Once the unit is unlocked, any changes made using the front panel filter controls are preserved in the nonvolatile memory. This behavior allows the unit to maintain its current operational state in the event of an unexpected power loss. Page 21 5.10.1 Locked Standalone Behavior after PC Programming After PC programming, the unit will power up in the locked state. As long as the unit is never manually unlocked, it will power up in the locked state each time power is cycled, and it will always run at the programmed settings. Note that the INPUT LEVELS controls, INPUT SELECT, and headphone controls are NOT programmed, and their controls remain fully functional even when the unit is locked. 5.10.2 Unlocked Standalone Behavior after PC Programming If a programmed unit is unlocked, it will continue to use the programmed settings to whatever extent is sensible, but it will choose default values where necessary. BW Changes If only the BW (Bandwidth) setting is changed, then the filter behavior is preserved as closely as possible. For the adaptive filters, three of the settings are time-dependent and therefore scaled for bandwidth changes; these are the filter length, the adapt rate, and the delay. When the bandwidth is changed, the filter length and delay are changed proportionally, and the adapt rate is changed inverse-proportionally. These scalings preserve filter behavior in relation to time (if your delay at 10 kHz bandwidth was 5 ms, then your delay at 20 kHz bandwidth should also be 5 ms, which now requires twice as many delay taps.) These scalings are subject to the maximum and minimum possible settings for a given bandwidth, so after a bandwidth change the settings may not be able to be perfectly scaled. For instance, consider the case where the user programs a maximum-length filter at 5 kHz bandwidth. If the unit is later unlocked and the bandwidth is changed to 10 kHz, then the hardware will not be capable of running twice as many taps to achieve the same effective filter duration. The unit will run at its maximum filter length, but this will correspond to a shorter time in milliseconds than the 5 kHz setting. MONO/STEREO Changes If the MONO/STEREO setting is changed, then again the filter behavior is preserved as closely as possible. The 1CH adaptive filter, highpass filter, and AGC will continue unchanged. However, if a reference canceller is running, the maximum possible filter size will change. If the change is from stereo to mono, the ceiling is actually increased, so the filter will continue running at the programmed settings. If the change is from mono to stereo, however, the ceiling is decreased and the length of the filter will be shortened as necessary. Filter In/Out Changes If the HPF or AGC setting is changed, then the filters will continue to run at their programmed settings when they are “in,” and the filters will not be applied when Page 22 they are “out.” Taking one of these filters out and then putting it back in does not overwrite the programmed cutoff (for the HPF) or maximum gain (for the AGC) settings. The two adaptive filters always use their programmed enable/disable setting. There is no way to enable or disable these filters in standalone mode, so if you program the unit with one or both of these filters disabled, then it can never be enabled again until the unit is re-connected to the PC. There is no way to specify that an adaptive filter should be run in some channel modes but not in others. nCH Setting Changes Changes in the nCH setting produce the largest chance of diverging from the programmed settings. If a reference canceller mode (2CH, 3CH, or 4CH) is programmed and the unit is changed to another reference canceller mode, then the behavior is just like a mono/stereo change – the stored settings will be used, although they will be clamped as necessary to stay within the legal range for the new channel mode. If a reference canceller mode is programmed and the unit is changed to a 1CH filter, then the stored settings are no longer meaningful and are ignored; the 1CH runs at factory default settings. Similarly, if a 1CH is programmed and the unit is changed to a 2CH, 3CH, or 4CH mode, the 1CH settings are ignored and factory defaults are used for the reference canceller. Lock State Changes When the unit is powered down, its lock state is always preserved in nonvolatile memory. When the unit is programmed from the PC, it is always programmed to power up locked. But, if later in standalone mode it is unlocked and powered down in the unlocked state, then it will power up unlocked the next time. Similarly, if the unit is powered down locked, it will power up locked the next time it is turned on. Preservation of Programmed Settings Only settings that are controllable from the front panel can be overwritten in unlocked standalone mode. This means that, if a programmed unit is unlocked and its front panel settings are changed, then it can be returned to its exact programmed state by using the front panel controls to return to the original mode settings. For instance, say the unit is programmed to use a maximum length mono 2CH reference canceller. If the unit is unlocked and changed to a stereo mode, then a ceiling will be applied to the filter size to accommodate the second filter stage that is required. However, the new clamped filter size is NOT stored in the nonvolatile memory, so if the mode is later changed back to mono, then the original programmed size is used. In short, filter controls available on the front panel WILL overwrite their nonvolatile memory values once the unit is unlocked. These are: Page 23 MONO/STEREO setting BW setting nCH setting HPF in/out AGC in/out LOCK/UNLOCK state Other settings cannot be overwritten in nonvolatile memory unless the unit is connected to the PC and explicitly reprogrammed. 5.11 Synchronizing to the MicroDAC 5 Whenever the software connects to a MicroDAC 5 hardware unit, synchronization MUST occur to maintain consistency between what is displayed in the interface and what is currently running on the unit. The user has two choices; either the software will push down to the hardware its current settings (changing what is currently running on the unit) OR the software will retrieve the current settings directly from the hardware and update its interface accordingly (leaving the hardware essentially unchanged). Regardless of which option is selected, after the synchronization occurs the PC software is in control and any changes made will be sent down to the hardware unit. The user will be prompted to make a choice between these options each time a connection is made. Upon disconnecting, the hardware will always revert to running whatever is stored in its nonvolatile memory. This may have the unintended side effect of resetting any adaptive filters. 5.12 Updating MicroDAC 5 Firmware Whenever the software connects to a MicroDAC 5 unit, it will automatically check to see if that unit is running the latest firmware. If the unit is not running the latest firmware, the user will be prompted to update the firmware. The firmware update will take a few minutes. Also, the user can verify that the unit is running the latest firmware by choosing Update Firmware from the File menu, which will check the firmware version and notify if an update is available. Page 24 6 Filters To configure a specific filter, click on that filter in the signal flow diagram on the main window. Doing so will open the configuration window for that filter. Note that, in stereo configurations, the selected settings are always applied to both channels; you cannot choose different filter settings for the left and right channels. 6.1 Reference Canceller (nCH) Filter The Reference Canceller (nCH) adaptive filter is used to automatically cancel from the “primary” channel(s) any audio which matches one of the “reference” channels. For example, consider a signal containing microphone audio with the desired voices masked by radio or TV sound. The radio/TV interference can be cancelled in real-time if the original broadcast audio, usually available from a second receiver, is simultaneously connected as a reference channel. As described in section 3.1.4, controls on the front panel can be used to define which input channels are primaries and which are references. These same selections are available in the Channels menu within the PC software. When the MicroDAC 5 is running standalone (not connected to the PC), the filter runs at whatever settings are stored in the nonvolatile memory. When running connected to the PC, finer control is available. Figure 6-1 shows the filter controls available for the reference canceller. The window shown is for a 2CH filter, but the same controls are available for 3CH and 4CH filters as well. If desired, this first filter can be run as a 1CH adaptive filter instead of a reference cancellation filter. If so, its available controls are identical to those described in section 6.2. Page 25 Figure 6-1: nCH Filter Dialog Description of the controls pictured in Figure 6-1 follows: Filter Size Used to set the number of FIR filter taps in the adaptive filter. Filter size is indicated both in taps (filter order) and in milliseconds. Minimum filter size is 16 taps, but can be set as high as 4500 taps depending on the channel configuration and system bandwidth. Adapt Rate Used to set the rate at which the adaptive filter adapts to changing signal conditions (mathematically known as Mu). A Mu of 1 x 2-18 provides very slow adaptation, while a Mu of 5884 x 2-18 provides fastest adaptation. Slower adapt rates take longer to reach a solution or to adapt to changing signal characteristics. Faster adapt rates are more susceptible to filter crashes. Delay Sets the amount of delay to be applied to the input. The delay can be applied to either the primary or the reference channel(s). Delay is indicated both in Page 26 samples and in milliseconds. Minimum Delay is 1 sample, but can be set to as high as 2250 samples depending on the channel configuration. Filter Output Selects the output of the filter. The normal output, or “residue,” is the primary signal that remains after the reference has been cancelled. The prediction, or rejected output, is the part of the primary signal that is removed by the reference canceller. This setting provides a way to hear what is being cancelled from the signal. For most situations, the Normal output should be selected. Adapt Mode When Auto Adapt Mode is enabled, the specified Adapt Rate is continuously scaled based upon the input signal level. This generally results in faster convergence for a given adapt rate setting without greatly increasing the risk of a filter crash. When Fixed is selected, the specified Adapt Rate is used at all times without scaling. Auto is the recommended setting. Enable Crash Detect When checked, enables the Crash Detect algorithm in the MicroDAC 5. Coefficients of adaptive filters have the potential of diverging instead of converging; this is most likely to happen for faster adapt rates or when there is a quick and dramatic change in the input signal such as a sudden loud noise. When the filter diverges, it is called a filter “crash” and the audio becomes distorted. Since MicroDAC 5 is designed for unmanned deployment, a filter crash would be unacceptable. A good choice of adapt rate coupled with the Auto adapt mode should make crashes extremely rare, but with Crash Detection enabled the filter will automatically detect any crash and then clear the filter so it can reconverge to a good solution. Clear Filter Solution The Clear Filter Solution button is used to restart the adaptive filters as deemed necessary. This function is sometimes used in the case of a filter crash, although this use should be unnecessary if Crash Detection is enabled. Another example of when to press the Clear Filter Solution button is when the audio scene changes suddenly, requiring a new filter solution; this may occur when the microphone is moved, or when processing tape recorded conversations that occurred at different locations. 6.2 1CH Filter The 1CH Adaptive filter is used to automatically cancel predictable noises and effects from the input audio. Predictable noises include tones, hum, buzz, engine/motor noise, and, to some degree, music. Predictable effects include echoes, reverberations, and room acoustics. Page 27 When the MicroDAC 5 is running standalone (not connected to the PC), the filter runs at whatever settings are stored in the nonvolatile memory. When running connected to the PC, finer control is available. Figure 6-2 shows the filter controls available for the 1CH adaptive filter. Figure 6-2: 1CH Filter Dialog Description of the controls pictured in Figure 6-2 follows: Filter Size Used to set the number of FIR filter taps in the adaptive filter. Filter size is indicated both in taps (filter order) and in milliseconds. Minimum Filter Size is 16 taps, but can be set to as high as 2048 taps depending on the system bandwidth. Small filters are most effective with simple noises such as tones and music. Larger filters should be used with complex noises such as severe reverberations and raspy power hums. Adapt Rate Used to set the rate at which the adaptive filter adapts to changing signal conditions (mathematically known as Mu). A Mu of 1 x 2-18 provides very slow adaptation, while a Mu of 5884 x 2-18 provides fastest adaptation. Page 28 Slower adapt rates take longer to reach a solution or to adapt to changing signal characteristics, but a slow rate is still quite effective for stable tones and reverberations and slow adapt rates make filter crashes less likely. Faster adapt rates may be required for changing noises, but a fast adapt rate can also affect the quality of the target speech as the filter may attack sustained vowel sounds. Prediction Span Sets the number of samples in the prediction span delay line. Prediction span is indicated both in samples and in milliseconds, and can be adjusted from 1 to 64 samples. Shorter prediction spans allow maximum noise removal, while longer prediction spans preserve voice naturalness and quality. A prediction span of 2 or 3 samples is normally recommended. Filter Output Used to select the output of the filter. The Normal output, or “residue,” is the signal that remains after predictable noises have been removed. The Prediction (rejected) output contains the predictable noise that is removed. The Prediction setting isn’t typically used in normal operation, but it allows you to hear the noise that the filter is removing, which can be useful when configuring the filter settings. For most situations, the Normal output should be selected. Adapt Mode When Auto Adapt Mode is enabled, the specified Adapt Rate is continuously power scaled based upon the input signal level. This generally results in faster convergence for a given adapt rate setting without greatly increasing the risk of a filter crash. When Fixed is selected, the specified Adapt Rate is utilized at all times without power scaling. Auto is the recommended setting. Enable Crash Detect When checked, enables the Crash Detect algorithm in the MicroDAC 5. Coefficients of adaptive filters have the potential of diverging instead of converging; this is most likely to happen for faster adapt rates or when there is a quick and dramatic change in the input signal such as a sudden loud noise. When the filter diverges, it is called a filter “crash” and the audio becomes distorted. Since the MicroDAC 5 is meant for unmanned deployment, a filter crash would be unacceptable. A good choice of adapt rate coupled with the Auto adapt mode should make crashes extremely rare, but with Crash Detection enabled the filter will automatically detect any crash and then clear the filter so it can reconverge to a good solution. Clear Filter Solution The Clear Filter Solution button is used to restart the adaptive filters as deemed necessary. This function is sometimes used in the case of a filter crash, although this use should be unnecessary if Crash Detection is enabled. Another example of when to press the Clear Filter Solution button is when the audio scene Page 29 changes suddenly, requiring a new filter solution; this may occur when the microphone is moved, or when processing tape recorded conversations that occurred at different locations. 6.3 Highpass Filter The Highpass filter is used to attenuate all signal frequencies below a specified cutoff frequency. This filter is used to reduce low-frequency noises, such as tape or acoustic room rumble, from the input audio. The Highpass filter is sometimes called a "rumble filter." Figure 6-3 shows the filter configuration window for the Highpass filter. Figure 6-3: Highpass Filter Dialog The only adjustable setting available for the Highpass filter is the cutoff frequency. Any signal frequencies below this cutoff frequency will be attenuated. 6.4 Automatic Gain Control The Automatic Gain Control, or AGC, is used to boost low-level output signals to a good listening level. The AGC monitors the signal level, and if it drops below a minimum reference level, gain is gradually applied to bring the signal back up to the reference level. The gain continues to be applied until the signal level again rises above the reference level or until the maximum allowable gain is applied. If the output signal level is above the reference level, the AGC has no effect on the output audio. Figure 6-4 shows the filter configuration window for the Automatic Gain Control. Page 30 Figure 6-4: Automatic Gain Control Dialog The only adjustable setting available for the Automatic Gain Control is the maximum possible gain to be applied. In the example above, the maximum gain is set to 10 dB. If the output signal falls more than 10 dB below the reference level, then a 10 dB gain will be applied but the output level will still be below the reference level. The AGC is useful in near party/far party conversations where one party’s voice is much softer than the other. The AGC can be used to boost the softer speaker without boosting the louder speaker. The AGC can also be used to compensate for losses in signal level which may have occurred as a result of the preceding filters. For most near party/far party applications, max gain of 10-15 dB is the recommended setting, as a larger maximum gain may elevate background noises too much during pauses in speech. A “soft AGC” of 5 dB is often useful even when large voice level differences are not present. Page 31 Page 32 7 Installation To install the MicroDAC 5 software, insert the MicroDAC 5 Installation CD into your CD-ROM drive. If the installation software does not automatically run after several seconds you will need to manually start the installation as follows: With the MicroDAC 5 Installation CD in your CD-ROM drive click on the Start menu and then the Run option. In the window that appears type: X:\setup.exe where “X” is the drive letter of your CD-ROM. Then click OK or press Enter to start the installation. 7.1 Windows XP/2000 Installation Instructions The MicroDAC 5 software requires Microsoft .NET Framework 2.0 be installed. If it is not yet installed on your computer, the setup package will install it for you. The following steps assume you need to install the .NET Framework 2.0. 1. Setup will first examine your system to make sure it meets the minimum requirements. Next it will extract the files it needs from the installation disk. Figure 7-1: Extracting necessary files Page 33 2. If .NET 2.0 is not already installed on your machine, it will be installed automatically. NOTE: The .NET 2.0 Framework is large and takes about 10 minutes to install. During this time the installation may appear to hang, or “freeze” on your system. This is normal. Do not attempt to stop the installation; just let it work and do not reboot the system. Figure 7-2: Installing Microsoft .NET 2.0 Page 34 3. After the .NET install completes, you will get a “Welcome” screen. If there is a MicroDAC 5 unit connected to your computer, make sure it is turned off. Then click “Next” to continue. Figure 7-3: Welcome screen 4. Setup will then install the necessary MicroDAC 5 files and drivers. Figure 7-4: Installing files Page 35 5. When Setup has completed the installation, the “Finish” screen will be displayed. Click “Finish” to close the window. Figure 7-5: Finish screen 6. After clicking Finish, you may be presented with a warning window regarding Windows XP compatibility. Click “Continue Anyway” each time this window appears. Figure 7-6: Windows driver compatibility warning. Page 36 7. Next, before running the MicroDAC 5 software, attach the MicroDAC 5 hardware to your computer via the included USB cable, and turn on the unit. After a few moments, the computer will begin the Found New Hardware setup. If you are running Windows XP: a. You will see a window asking if Windows should use Windows Update to search for software. Select “No, not this time”, then click “Next”. Figure 7-7: Hardware wizard welcome screen. Page 37 b. You will see a window asking if the software should be installed automatically. Select “Install the software automatically”, then click “Next”. The driver will begin to load. Figure 7-8: Starting the hardware wizard. c. You may again see the driver compatibility warning(s) from step 6. Again, click “Continue Anyway”. Figure 7-9: Windows driver compatibility warning. Page 38 d. Once the driver has finished installing you will be presented with a window indicating completion of the Found New Hardware wizard. Click “Finish”. Figure 7-10: Completing the hardware wizard. e. If prompted to do so, repeat steps a-d to load any additional drivers. If you are running Windows 2000: The drivers should load automatically with no intervention from you. 8. Now your MicroDAC 5 is ready for use! To start using your MicroDAC 5, connect the MicroDAC 5 unit to the PC, turn it on, and double click the “MicroDAC 5” icon on your desktop. Page 39 7.2 Windows Vista Installation Instructions 1. After inserting the installation disk, you may be presented with an AutoPlay window prompting you do choose what should be done with the disk you just inserted. Choose “Run setup.exe”. Figure 7-11: AutoPlay prompt 2. Setup will extract the files it needs from the installation disk. Figure 7-12: Extracting necessary files Page 40 3. You will be presented with a “Welcome” screen. If there is a MicroDAC 5 unit connected to your computer, make sure it is turned off. Then click “Next” to continue. Figure 7-13: Welcome screen 4. You may see a Windows Vista security warning similar to that shown below. Choose “Allow” to continue installation. Figure 7-14: Windows Vista "unidentified program" warning Page 41 5. Setup will then install the necessary MicroDAC 5 files and drivers. Figure 7-15: Installing files 6. When Setup as completed the installation, the “Finish” screen will be displayed. Click “Finish” to close the window. Figure 7-16: Finish screen Page 42 7. You may see another “unidentified program” warning window; again, choose “Allow”. Figure 7-17: Windows Vista "unidentified program" warning 8. You may see a security warning about a driver with an unverifiable publisher. Choose “Install this driver anyway”. Figure 7-18: Windows Vista driver installation warning Page 43 9. Next, before running the MicroDAC 5 software, attach the MicroDAC 5 hardware to your computer via the included USB cable, and turn on the unit. After a few moments, the computer will begin installing the required drivers. This will happen automatically, with notification balloons indicating the status. Figure 7-19: Installing drivers Figure 7-20: Driver installation complete 10. Now your MicroDAC 5 is ready for use! To start using your MicroDAC 5, connect the MicroDAC 5 unit to the PC, turn it on, and double click the “MicroDAC 5” icon on your desktop. Page 44