1
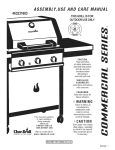
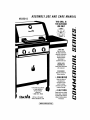
4632215
ASSEMBLY, USE AND CARE MANUAL
THISGRILLIS
FOROUTDOOR
USEONLY
CAUTION:
Read and follow
€¢
all safetystatements,
assemblyinstructions,
and useand care
directionsbefore
attemptingto
assembleand cook,
INSTALLER]
ASSEMBLER:
Leavetheseinstructions
with consumer.
Keepthis manualfor
future reference,
CONSUMER:
_WARNING
Failureto follow all
manufacturer's
instructionscould
resultin sedous
_rsonai injury and/or
propertydamage.
If you haveany questions
or needassistance
during assembly,
pleasecall
1-B00-241-7548,
_CAUTION
Somepartsmay contain
sharpedges- especially
as notedin the manuait
Wearprotectivegloves
if necessary.
Visit us onthe webat:
www._harbroil .corn
_.4632215/P47C2A(12-12-01)
I
_l
Installation
WARNING
FOR YOUR SAFETY
1. Do not store or use gasoline or other
flammable vapors and liquids in the
vicinity of this or any other appliance.
2. An LP Tank not connected for use
FOR YOUR SAFETY
Warranty
Z223.1. Handling and storage of LP cylindersmust
conformto LP Gas Code NFPNANSI 58. Grill is not for
use in or on recreationalvehicles and/or boats.
Safety
call
Information
Symbols
• The symbolsand boxesshownbelowexplainwhat each
headingmeans.Read and follow all of the messagesfound
throughoutthe manual,
Businesshours:Open 24 hours- Seven daysa week.
• To order non-warrantyreplacementpartsor accessories(grill
cover,cleaners,paint) call 1.800-993-2677or send a FAX to
1-706-565-2121.
Fill out Warranty
• Use grillonlywith LP (propane)gasand the regulator/valve
assembly supplied.
• Grill installation mustconform with local codes,or in their
absence withNational Fuel Gas Code, NFPA 54 / ANSI
• This grill is safety certified for use in the United Statesonly,
Do not modify for use in any other location. Modification
will result in a safety hazard.
Call Grill Service Center For Help And Parts
• If you need help or warrantyparts call 'J11-800-241-7548,or
send a FAX to 1-706-576-6355.
Important:
Precautions
• All electrical accessories (such as rotisserie) must be
electrically grounded in accordance with local codes,or
National Electdcal Code, ANSI I NFPA 70. Keep any
electricalcordsand/orfuel supply hosesawayfrom any
hot surfaces.
shall not be stored in the vicinity of
this or any other appliance.
If you smell gas:
1. Shut offgas to the appliance.
2. Extinguish any open flame.
3. Open lid.
4. If odor continues, immediately
your gas supplier or your fire
department.
Safety
below
Information
ModelNumber
DANGER
DANGER: Indicates an imminently hazardous
situation which, if not avoided, will result in death or
serious injury.
WARNING
• WARNING:Be alertto the possibilityof serious
bodily injury if the instructionsare notfollowed.Be
sure to read andcarefullyfollow allof the messages.
Lot Number (oncartonlabel)
SerialNumber
CAUTION
DatePurchased
CAUTION
For residential use only.Do not use for commercial
cooking.
2 • 4632215
• CAUTION:Indicatesa potentiallyhazardous
situationwhich,if not avoided, may result in minor
or moderateinjury.
ForYour Safety .........................................................................
2
Call Grill Service Center For Help And Parts ...........................2
Installation Safety Precautions.................................................
2
SafetySymbols .........................................................................
2
Char-Broilwarrantstotheoriginalconsumer-purchaserthat
this product shallbefreefrom defectsinworkmanshipand
materialsundernormaland teasortableuseand correct
assembly(ifassembledbyconsumer-purchaser),from dateof
purchase,
Table of Contents .....................................................................
3
Warranty....................................................................................
3
Before Beginning Assembly .....................................................
4
Stainless steel and die cast parts. 99 years
Electronic ignition and bumers - 10 years
Remaining parts. 2 years
Parts List ...................................................................................
4
Exploded View ..........................................................................
5
Assembly ................................................................................
6-9
Use and Care ........................................................................
9.14
Storing Your Grill .....................................................................
13
Indirect Cooking ......................................................................
14
Food Safety ..............................................................................
14
Troubleshooting ......................................................................
15
Char-Broilwill,at its option,refinish or replace any
product or part found to be defective during the warranty
leriod. Char-Broilwill require you to return the pert(s)
claimed to be defective,for its inspection,freight or postage
prepaid.
Ifyouwishto obtainperformanceofanyobligationunderthis
limited warranty,you shouldwrite to:
CHAR-BROIL
ConsumerWarranty / P.O. Box 1240
Columbus, GA 31902-1240
Char-Broilmayrequirereasonableproofofpurchaseand
wesuggestyoukeepyourreceipt.InthestateofCaliforniaonly,
ifrefinishing
orreplacement
oftheproductisnotcommercially
)racticable,theretailersellingthisproductorChar-Broilwill
refundthepurchasepricepaidfortheproduct,lesstheamount
directlyattributable
tousebytheoriginal
consumer.purchaser
)dortodiscovery
ofthenonconformity.
Inaddition,
inthestateof
California
only,you maytaketheproducttotheretail
establishment
fromwhichitwaspurchased
ortoanyretail
establishment
sellingthisproductinordertoobtainperformance
underthis
warranty.
Thiswarrantydoesnotincludethecostonany
inconvenienceorproperty
damageduetofailureoftheproduct
anddoesnotcoverdamagedueto misuse,abuse,accident,
damagearisingoutoftransportation
oftheproduct,ordamage
incurredthroughcommercialuse
oftheproduct.
Thisexpress
warrantyisthesolewarrantygivenbythemanufacturer
andisin
lieuofallotherwarranties,
expressor implied,including
implied
warrantyofmerchantability
orfitnessfora particular
purpose.
NeitherChar-Broildealersnortheretailestablishment
sellingthis
Jmducthasanyauthority
tomakeanywarranties
ortopromise
remediesinaddition
toorinconsistent
withthosestatedabove.
Char-Broirsmaximumliability,
inanyevent,shallnotexceedthe
purchasepriceofthe productpaidbythe original
consumerJurchaser.Somestatesdonotallowthe exclusion
orlimitation
of
incidentalorconsequential
damages.Sotheabovelimitations
or
exclusions
may notapplytoyou.
Thiswarrantygivesyouspecific
legalrights
andmayalsohaveotherrightswhichvaryfromstate
tostate.
4632215• 3
Necessarytools for assemblyof yourgrill include:
Phillips®screwdriver,pliersand adjustablewrench.
Key
A
B
C
D
E
Qty
1
1
1
1
1
Description
Lid Plate
Lid SidePanel,Left
LidSidePanel,Right
HeatIndicator
PlasticLidHandle
Part#
P0176A
P0177A
P0178A
P0616A
PD256A
F
G
H
I
J
K
L
M
N
1
1
2
3
1
3
1
3
1
LogoRate
WarmingRack
Cooking Grid
Flame Tamer
Griddle
Burner
Burner Bracket
Gas CollectorBox with Electrode
ElectricWire set
P0474A
P1531A
P1666B
P1744A
P5747B
P2056A
P2238A
P2623B
P2649A
O
P
1
1
ElectricIgnitor(4 port)
Bowl Side Panel,Left
P2503G
P0if86A
Q
R
S
T
1
1
1
1
Bowl Side Panel,Right
BowlFrontPanel
Bawl Rear Panel
RearWindShield
P0787A
P0788A
PO789A
P2988A
U
V
W
X
Y
Z
AA
BB
1
1
1
3
1
1
3
3
GreaseDrainingTray
Grease Receptacle
Gas Manifold
Gas Valvefor Main Burner
HeatShieldfor ControlPanel
ControlPanel
ControlKnob
ControlKnobSeat
P2745B
P2717C
P5047A
P32D7A
P2987A
P2986A
P3431C
P3430C
CC
DO
4
1
Spring
Sideburne_
Frame(Left)
P55G7A
P1163A
EE
FF
GG
HH
I
dJ
KK
LL
MM
NN
O0
1
1
2
1
2
1
2
1
1
2
2
SideShelf,Rk_ht
Bracketfor Side Shelf- Left Front
Bracketfor BideShelf- L_ Rear,RightFront
Bracketfor Side Shelf- RightRear
FrontPanel,Bide Shelf,LeO
Cart BottomShelf
Cart SidePanel
Cart RearPanel
DoorBracket
DOorFrontPlate
DoorHandle
P1162A
P1423E
P1423A
P1423B
P7428A
P1066A
P4318A
P4350A
P4411A
P4351A
P0258A
PP
QQ
RR
SS
TT
UU
VV
WW
XX
YY
ZZ
AAA
BBB
2
1
1
1
1
4
4
1
2
1
2
1
1
Bowl SupportBracket
LeotSide Cart Leg, Front
LootSideCart Leg, Rear
RightSideCart Leg, Fmht
RightSideCart Leg,Rear
Caete_Seat
3" Caster
Pull-OutTank Tray
Bracketfor Pull-OutTankTray
Handlefor Pull*OutTankTray
SlideSet
SideburnerLid
Lid KnobforSideburner
P1343A
POBSOA
PDOt50B
P0850C
FO850D
P4525B
P5120A
P403BA
P403lfB
P0259A
P55HSA
P0191A
P3405C
A_sanCollec_ byCkar-B_il_e,C3andDeign Cder_reilandDesign
TM ,FlameDesign ,
Flaw'TentsTM ,Grilla GoTM, Gdllin'Stick
TM, Keeper
of the Rame KeepersoftheFlameTM,
NaturalGrip OutdoorCoolingCo0ec_mandDesign
TM, PaSo
Bis_oTM, PmckionFlamo Pm-C_eck
Qu_l_SetGrillsandDesignTM, SrnokerTents
TM, _le BigEasyTM, _le Minute
Gr_l "i_e Edge
]_e TuscanC_ledJonTM, andThe UrbanGrilP
_ areTrademarksofthe WC. BradleyCon_any
UniversalG_I Partsand Design is a h'adernark
of_e _lermos Company
anditsaniliates,
CCC
DDO
EEE
FFF
GGG
HHH
1
1
1
1
1
1
PotSupport
Electrode
Sideburner
Gas Valvefor Sideburner
ControlKnob
ConnectionTube
PS00ZA
PaB32B
P1922A
P32DSA
P3409B
P3983J
Fl_ot_ted
underoneormoreofthe follo_ngU.S,Patents:4,598,692;4,624,240;4,747,391;4,747,391;
4,817,583;4,924,845;4,989,579;5,003,960;5,076,056,5,076,257;
5,090,398;5,1_,B34; 5,224,575;
5,277,106;5,421,319;5,441,226;
5,452,707;5,458,309;5,566,606;5,566,606:5,570,755;
5,582,094;
5,613,486;5,649,475;
6,706,797;5,711,663;
5,765,543;5,931,149;5,996,573;6,095.132;
6,135,104;
6,279,566;
D282,619;D339,714;
D341,292;D343,337;D358J_59,
D361,466;
D364,535;D372,637;
[}373,701;D377,735;
D383,035;
D397,910;D405,643;D405,643;
D406,005;D406,009;D4t 3,043;D416,029;
D416,229;
D414,987.D415,388;D416,164;D416,441;
D41&441;D417,587;
D422,516,D423.274;
D425,876;
D426,3_3;[3435,395;D436,004;
D438,059,D438,060;D438,427;13439,110;
D442.505;D443,179;
D443,354;
D447,384;
D¢47,385;D447,909;D448.610;
D448,614;D448,el5;D446,el6;andD448975.
OtherPof_lts Pan_ng.
II I
JJJ
KKK
LLL
MMM
1
1
1
1
1
1
1
1
RegulatorwithHose (27")
AA Battery
FrontPanel,SideShelf,Right
Sideporner
Control KnobSeat
MatchLightingStickwith Chain
CasterWrench
GrateLifter
HardwarePack
P3632Q
PS08OA
P7427A
P34ifgA
P5540A
P55L4A
P8007A
Pd179A
Ceded Gd! PartsAndAccessories®,
Dilar-BroilandDeign®,Char-BIoil(GasGn0Bdqueaes)®,
Char-Diamonds®,
CoddngZoneandDesign@,
DiamondFMirm®,
Execu_ Chefe, Faststart®,
FlareFighter
s, Fla_rMa_,
GasGdl SHouelte
andDedg_®_HaOSrnoker_,La_ Flame®,
MasterFlame®,
MasterFlame
PreddonC_kingSysten_,_rk®,
Duan_m®,VIP®,
Pred_onFlameandDesign®,SJerk®,andTruFlame®arereg_erndTrademarks
oftheW.C.8rnd_
CompanyThermos®
isa registernd
trndema_et BieTne_
Company
anditsa01nates,
TM,
TM
TM,
TM,
TM,
TM,
TM,
TM,
TM
4 • 463221=;
BBB
AAA--
i
--TT
--SS
.w
_--UU
_'_--
HH
UU--_
oo--
I
VV--(_
O0--1
4632215• 5
,
each cartleg, Turn the threadedcasterstem by hand,
clockwiseuntilit stops.Fullytightenwiththe wrench
provided,See Fig. 2,
• Unpack and remove all protective packaging,
1.
Positionbottomshelfwiththe 4-hole patternto the leftside,
See Fig. 1.
The labelson the cart legs
indicatetheirassemblypositionto the bottomshelf.LF=Left
Front, LR=Left Rear, RF=Right Front, and RR=Right
Rear. Labelsshouldface inwardtowardeachother when
Screwthe 4 castersintothe casterseatsin the bottomof
5,
Installthe twoside panelsand one rear panelto the cartby
using4 of the 3/16xl/2" Phillips-headscrewson each
panel,Leaverear panelscrewsloose.See Fig. 2,
FIGURE 2
Side
Rear
correctlyassembled.Remaining components cannot be
assembled if leg positions are incorrect.
2.
Installthe four cartlegsto the indicatedcornersof the
bottomshelf using8 of the 1/4xZ-1/Z"Phillips-headscrews
provided.Do notfully tightenscrews,
3.
Installcross braces,facing inward,to cart legson both
sides using8 of the 1/4xl/2" Phillips-headscrews.Fully
tighten.See Fig. 1,
/
/
FIGURE 1
.4b
panel
Cross
Brace
.
7.
Bottom
Shelf
USE CAUTION when handling the pull-out tank tray.
Slide rails have sharp edges. Installthe handle on the
pull.outtankusing 2 ofthe 1/4" nuts. Fully tighten.See
Fig. 3.
Fullyextendthe pull-outtanktrayand attachthe sliderails
to the 4,holepatternin the bottomshelfusing4 ofthe
1/4xl/2" Phillips-headscrews.Fullytighten.See Fig. 3.
FIGURE 3
Handle
[
6 • 4632215
Pull-out
tank tray
.
.
Attach the doorbracketto the lower holes in the front legs
withthe end tabspointingupwardand theflangeto the rear,
pointingdownward.Use 2 of the 114xl/2" Phillips-head
screws, Do notfull,] tighten.See Fig. 4,
Place doorsintothe hingeholesof the bottomshelf and
doorbracket.Push doorbracketdownuntildoorsare
secure and can openand closefreely. Do not fully tighten
doorbracketscrews, See Fig. 4.
FIGURE 5
13. Attachmatchlightingsflck
and chainto the rightrear
leg, belowshelf bracket.
usingone 3/16"xl/2",
self-tapping, Phillips-head
screw, See Fig. 5,
j
Match
lighting
stick
10, Removeprotectivefilmfrom doors.Installdoor handlesto
doorsusing4 of the 3/16x3/8" Phillips-headscrews. See
Fig. 4.
11. Attachthe 4 side shelf bracketsto the topsof the cartlegs
using8 of the 1/4xl/2" Phillips-headscrews.
IMPORTANT: Bracket with cut.out installs on front left
leg. Be sure the flat side of each bracket faces outward,
Fullytighten.See Fig. 4,
12, Place the sideburner shelf overthe leftbracketsand cross
brace.Be sure ignitorwire is hangingloose.Be sure the
inside shelf holesalignwith crossbrace holes, Secure
shelf firmlyto theends ofthe bracketsusing2 ofthe
1/4xl/2" Phillips-head screws. Repeat this procedure for
the side shelf on the rightside of thecart. See Fig. 4.
To reducethe weightof the grillhead,openthe grilllidand
remove the packed components.This step requires 2 people
to lift and position the grill head onto the cart.
14. HINT: Slide grillhead intocartfrom the front. Use care to
avoid scratchingtops of side shelves, Alignthe 2 holes
beneaththe hangledgeon each side of the grillhead with
the 2 holes in the side shelf and crossbraceon the cart.
Raisethe grilllidand insert 4 ofthe 1/4xl/2" Phillips-head
screws. Beneaththe side shelves, add 1/4'_nuts, Do not
fully tighten.See Fig. 6.
15. Attach heat indicatorto grilllidusingnutprovided.Make
FIGURE 4
sure graphicson heat indicatorare properlyorientedbefore
tighteningnut. See Fig. 6.
,,,----,.
FIGURE 6
!""
!
/
-,,,
/
/
Sideburner
Side
shelf
Grill
head,
Align
ledge
cut-out
;
i
i
Lower
Hang
ledges
rest on
/
outward
bracket ;/
.,/
Handle
/
bole
/
/
film
Hinge'7_i
4632215 • 7
16. Firmlyattachignitor wirefrom sideburnerto front of valve.
See Fig. 7a. Beneath left shelf, insert sidebumer valve into
sideburner tube. See Fig. 7 for proper engagement.
Attach sideburnervalve to shelf using 2 of the M4xl0
Phillips-headscrews and washers. Place knob seat, spring,
and sideburner knob over valve stem.
20, Place your LP gas tank (not included ontothe poll-outtank
tray and push tray into cart. Be sure the tank valve is facing
forward. See. Fig. 9. READ USE & CARE SECTION
BEFORE A'FI'ACHINGREGULATOR TO LP TANK.
FIGURE 9
FIGURE 7
-Spring
LPgas
tank
21. Unscrew the ignitorcap located on the control paneland
remove the contact and spring from the ignitorslot.
See Fig. 10.
wire
22. Placethe suppliedAA batteryintothe ignitorslot withthe
positive pole facing toward you.
23, Placethe spring withcontactover the battery. Screw the
ignitor cap back onto the control panel,
17, Secure grillhead to all cart legs using 4 of the 1/4x2.112"
Phillips-headscrews and 1/4" nuts. See Fig. 8.
FIGURE 10
18. Fully tighten all leg screws, rear panel screws, door
bracket screws, and grill head screws.
ing
19. From the back of the cart, slide the greasedrainingtray into
the grill head. Place the grease receptacle into the notches
on the bottom ofthe tray.See Fig. 8.
FIGURE 8
Grease
draining
Contact,
Ignitor_
cap
_.
_
24. Attachpanel to front of sideburnershelfby placingtop lip of
panelABOVE bottom lip of shelf. Secure usingthree
3/16"x3/8" Phillips-headscrews and 3/16" nuts. Fully
Tighten,See Fig. 11.
FIGURE 11
receptacle
lip
Attach grill head
to ell 4 legs
8 • 4632215
AA
25. Placethe 3 flametamerson the lowerledgeabove
burners.See Fig. 12. They shouldmeet in the center.
26. Place the cookinggridsor griddleon the ledgeabovethe
flame tamers.
LP Tank
27, Placethe secondary cooking rackintothe slots on the
upperleftand upperrightof the grillbowlpanels.
• The LPtank usedwith your grill mustmeet thefollowing
requirements:
• PurchaseLP tanksonlywiththese requiredmeasurements:
12" (30.5cm)(diameter)x 18" (45.7 cm) (tall)with 20 lb. (9
FIGURE 12
kg.) capacitymaximum.
• Be constructedand markedin accordancewith
Secondary
rack
specificationsfor LP tankofthe U.S. Departmentof
Transportation
(DOT). See LP tank collarfor marking.
• LP tankvalvemusthave:
• Typo1outletcompatible
withregulatororgrill.
• Safetyreliefvalve.
• ULlistedOverfillProtectionDevice(OPD).
Flame
Lower
9
grid
ThisOPDsafetyfeature
isidentified
bya
uniquetriangular
handwheel.Useonly
OPDHandWheel
tanksequippedwiththis type ofvalve.
• Supply systemmustbe arrangedfor vaporwithdrawaland
includecollarto protectLP tankvalve.
LP (Liquefied
Petroleum
Gas)
• Isnontoxic,odorless
andcolorless
whenproduced.ForYour
Safety,LPgashasbeengivenan odor(similartorotten
cabbege)sothatitcanbesmelled.
• LP gas is highlyflammableand may igniteunexpectedly
when mixedwith air.
LP Tank Filling
Before Your First Cookout
Performthe leaktest as indicatedin the use and care
section.
Wash the cookinggrids,griddle,cookingrack, and all
stainlesssteelsurfaces withwarm,soapywater.Rinseand
drythoroughly.
Light burners.Checkto make suretheyare lit,then close
the lidand warmthe grillon HI for 15 minutes.Curingof
paintand partswill producean odoronlyon firstlighting.
• Useonlylicensedandexperienced
dealers.
• LP tank must be purged beforefilling.
• DealershouldNEVER fillLP tankmorethan 80% of LP tank
volume.Volumeofpropaneintankwillvaryhytemperature.
• A frosty regulatorindicatesgas overfill.ImmediatelycloseLP
tankvalveand call localLP gas dealerfor assistance.
• Do not releaseliquidpropane(LP) gas intothe atmosphere.
This is a hazardouspractice.
• To removegas from LP tank, contactan LP dealeror calla
localfire departmentfor assistance.Checkthe telephone
directoryunder"Gascompanies"for nearestcertifiedLP
dealers.
LPtank Exchange:You may chooseto replaceyour emptyLP
tank throughan exchangeservice.Use onlythose reputable
exchangecompaniesthat inspect,precisionfill, test and
certifytheircylinders. Exchangefor OPD safety feature
equipped tank as described in LP Tank
• Alwayskeep LP tankin uprightpositionduringuse, transitor
storage.
Leak test LP tank BEFORE connecting to grill.
4632215• 9
LP Tank
Leak Test
Foryour safety
• LeaktestmustberepeatedeachtimeLPt_nkisexchangedor
refilled.
• Do notsmokeduringleaktest.
• Donotuseanopenflametocheckforgasleaks.
• GriUmustbeleakcheckedoutdoorsinwell-ventjlatedarea,
away
fromignitionsourcessuchasgasfiredorelectricalappliances.
Duringleaktest,keepgrillawayfromopenflamesorsparks.
Usea cleanpaintbrushand50/50soapandwater
solution.
Usemildsoapandwater.
• Do not use householdcleaningagents.
Damagetogastraincomponents
canresult.
_1__
Nipplehasto be
centeredintothe
LPtankvalve
Hold couplingnut
and regulatoras
shownfor pmper
connectionto LP
tank valve.
/
The Regulator
To The LP Tank
1. LPtankmustbe properlysecured ontogrill.
2. Turnallcontrolknobsincluding
sidebumer(iffeatured)totheOFF
posilion.
3. TurnLPtank OFF bytuming hand-wheel
clockwiseto a fullslop.
4. Removethe protectivecapfrom
LPtank valve.Alwaysusecapand
OPDHand
strapsuppliedwithvalve.
Wheel
Safety ReliefValve
Type 1 outlet with threadon outside
Strap and Cap
Use of this POL transport plug
(A) (plastic part with extemal
threads) will defeat safety
feature of valve.
10 • 4632215
thread the connection.
131
Brushsoapysolution
ontotheshadeda
Connecting
5. Hold regulator, insert nipple (B) into LP tank valve.
Hand tighten coupling nut, holding regulator in a
straight line (C) with LP tank valveso as not to cross
6. Turn the coupling nut clockwiseto tighten to a full solid stop.
The regulatorwillseal on the back-checkfeature in LP tank
valve, resultingin some resistance. An additional one-hell
to three quarters turn is required to complete
connection. Tighten by hand only - do not use tools.
NOTE: If youcannotcomplete
connection,
disconnectregulatorand
repeatsteps5 and6. Ifyouarestillunabletocompletethe
connection,
do not usethis regulator!
WARNING
• Do not insert any foreign objects into the valve
outleL You may damage the valve and cause a leak.
Leaking propane may result in explosion, fire, severe
personal injury, or death.
• Never attempt to attach this grill to the self-contained
LP gas system of a camper trailer or motor home.
• Do not use grill until leak checked.
• If leak is detected at any time, STOP and call the Fire
Department.
• If you cannot stop a gas leak, immediately close LP
tank valve and call LP gas supplier or your fire
department!
4. Brush soapy
solution onto
A DANGER
following
connections:
NEVER store a spare LP tank under or near grill or in
enclosed areas.
Never fill the cylinder beyond 80% full. An overlilled
spare LP tank is hazardous due to possible gas
released from the safety relief valve. The safety relief
valve on a LP tank could activate releasing gas and
cause a fire.
If you see, smell or hear escaping gas, immediately
get away from the LP tank/grfll and call your fire
department.
All spare LP tanks must have safety caps installed on
the LP tank outlet.
LP Tank
Removal,
Transport
And Storage
• TurnOFFallcontrolknobs
andLPtankvalve.Tum coupling
nut
counterclockwise
byhandonly-donotusetoolstodisconnect.
Lif_
LPtankwireupwardoffofLP tankcollar,liftLPtankupandoffof
supportbracket.Installsafety
capontoLPtankvalve.Alwaysuse
capandstrapsuppliedwithvalve,Failureto use safetycapas
directed may resultin seriouspersonalinjuryand/or
property damage
- -
II
.
valveimmediatelyand retighten
connections.If leaks cannot
be stopped "do not try to
repair." Call for replacement parts.
Ordernewparts bygivingthe serial, modelnumberand
name of itemsneededto the Grill Service Center at
'J_1-800-241-7548,
r
fJ
\
/
,
\ \
LP Tank
Valve
_
jJ
-o _
Retainer
Safety
Cap
Strap
• A disconnectedLP tank in storageor beingtransportedmust
have a safetycapinstalled(as shown).Do not store an LP
tank in enclosedspacessuchas a carport,garage,porch,
coveredpatioor otherbuilding.Never leave a LP tankinsidea
vehiclewhichmay becomeoverheatedbythe sun.
• Do not store LP tankin an areawhere childrenplay,
"If growing" bubbles appear,
thereis a leak, Close LPtank
AlwayscloseLP tankvalveafterperformingleaktest by
turninghand wheel clockwise.
Safety Tips
•
•
Beforeopening LP tankvalve,checkthecouplingnut for
tightness.
When grillis notin use,turnoffall controlknobsand LP tank
valve.
•
•
Never movegrillwhilein operationor stillhot.
Whenmovingthe grillpushitforward, do notpullfrom
behind,
•
Use long-handledbarbecueutensilsto avoidburnsand
splatters.
Do not remove grease receptacleor tray until grill has
completelycooled.
If you notice grease or other hot material dripping from grill
onto valve, hose or regulatorturn off gas supply at once.
Determinethe cause,correct,clean and inspect valve, hose
and regulator before continuing. Perform a leak test.
The regulator may make a humming or whistling noise
during operation. This will not affect safety or use of grill.
If you have a grill problemsee the "TroubleshootingSection':
Leak Testing Valves, Hoses and Regulator
•
1. Tum all grill control knobs to OFF.
2. Be sure regulatoristightlyconnectedto LP tank.
3. CompletelyopenLP tankvalveby turninghandwheelcounter •
clockwise.If you heara rushing sound, turngas off
immediately,There is a majorleak at the connection.Correct
before proceeding.
•
•
4632215• 11
a, WARNING
For Safe Use Of Your
Grill:
Donotletchildrenoperateor playneargrill.
Keepgrillareaclearandfreefrom materialsthatburn.
DonotblockholesinbottomorbackofgrilL
Checkburnerflamesregularly.
Usegrillonlyinwell-ventilated
space.NEVERusein
enclosedspacesuchascarport,garage,porch,covered
patio,orundera surfacethatcancatchfire.
• Usegrillat least3 ft. fromanywallorsurface.Maintain10ft.
clearance
toobjectsthatcancatchfireorsourcesofignition
suchaspUotlights
onwaterheaters,liveelectrical
appliances,
etc.
Match Lighting
• Do not lean over grillwhile lighting.
1.Open lid duringlighting.
2. Place lit match into match
lighting stick, then into lighting
holeon right side of grill.
3. Push in and turn far right burner
knob to HI, Be sure burnerlights
andstays lit.
4, Lightadjacentburners in sequenceby pushing knobs in
and turning to HI.
•
•
•
•
•
Donot usecharcoal,briquetsorlavarock inthis grill.
WARNING
• If burner does not light turn knobs to OFF, wait 5
minutes, tryagain.
• Apartment Dwellers:
Checkwithmanagementtolearntherequirements
andfire
codesfor usingan LP GasGrill inan apartment.Ifallowed
useoutsideonthe groundfloorwitha three(3)foot clearance
from wallsorrails, Do notuse onorunder balconiesmadeof
wood.
NEVERattemptto light burnerwith lid closed. A
buildupof non-ignitedgas insidea closedgrillis
hazardous.
Never operate grillwith LP tank out of correctposition.
Alwaysclose LP tank valveand removecouplingnut
beforemoving LP tank from specifiedoperating
portion.
CAUTION
• Putting out grease fires by closing the lid is not
possible.Grillsarewell ventilatedfor safetyreasons.
• Do not usewater on a grease fire. Personalinjurymay
result.If a greasefire developsturn knobsand LP tank
off.
• Do not leavegrill unattendedwhilepreheatingor
burningoff on high.If grillhas not been regularly
cleaneda greasefire can occurthatmay damagethe
product.
Ignitor Lighting
•
Do nut lean over grillwhile lighting.
1. Open lid duringlighting
2. To igniteany burner,turnknobto HI, pushand hold
ELECTRONIC IGNITOR button for 5 seconds.
3.
4.
If ignitiondoes nottake placewithin5 seconds, turnall
burnerknobsto OFF, wait 5 minutes,then repeat lighting
procedure.
If IGNITOR does not work,follow matchlighting
instructions.
12 • 4632215
Sideburner
Ignitor Lighting
•
Do nut lean over grill while lighting.
1. To igniteSIDEBURNER, opensideburner cover.
2. Pushin sideburnerknoband turncounter-clockwise
until
3.
4.
click.Repeatup to 5 times. Be suregap betweenelectrode
wire and gas portopeningis 1/8"-3/16".
If sideburnerdoes NOT light,turn knobto OFF, wait5
minutes,then repeat lightingprocedure.
If iGNITOR does not work,follow matchlighting
instructions.
Match Lighting
1. To matchlight SIDEBURNER.open
sideburner cover.
2.
3.
Place lit match near burner.
Push in and turn sideburner
knob counter.clockwise, Be
sure burner lights and stays lit.
Burner
Flame
Check
Removegratesand flametamers. Lightburners,rotate knobs
from HI to LOW.You shouldsee a smallerflame in LOW
positionthan seen on HI. Alwayscheckflame pdorto each
use. Perform flamecheckfor sideburner. If onlylowflame is
seenreferto "Soddendropor lowflame"in
the Troubleshooting
Section,
LOW
Turning Grill Off
Turn all knobs to OFF position.Turn LP tank OFF by turning
hand-wheelclockwise to a full stop.
Ignitor Check
• Turn gas off at LP tank. Push and hold electronicignitor
buttonor pushin and turnsideburnerknobcounterclockwise."Clicks" shouldbe heardand sparkseen each
time betweencollectorbox or burnerand electrode.See
"Troub/eshooting"if no click or spark.
Valve
Check
• Important: Make sure gas is OFF at LP tank before
checking valves. Knobslock in OFF position.To check
valves,firstpushin knobsand release,knobs shouldspdng
back. if knobsdon'tspringback,replacevalveassembly
beforeusinggrill.Turn knobsto LOW positionthenturn back
to OFF position.Valvesshouldturnsmoothly.
General Grill Cleaning
Do not mistakebrownor blackaccumulationof greaseand
smokefor paint. Interiorsofgas grillsare notpaintedat the
factory (and should never be painted), Applya strong
solutionof detergentand wateror usea grillcleanerwith
scrubbrushto insidesof grilllidand bottom.Rinseand allow
to completelyair dry. Do not apply a caustic grill/oven
cleaner to painted surfaces.
• Plastic parts: washwithwarmsoapywaterand wipedry,
• Do not usecitrisol,abrasivecleaners,degreasersor a
concentratedgrillcleaneron plasticparts. Damageto and
failure of partscanresult.
CAUTION
Hose Check
• Beforeeachuse, checkto see if hosesare cut or worn.
Replacedamagedhosesbeforeusinggrill.Use onlyvalve/
hose/regulatorspecifiedby manufacturer.
Cleaning
The Burner Assembly
Followtheseinstructions
to cleanand/orreplaceparts of burner
assemblyor if you havetroubleignitinggdlL
1. Turn gas off at controlknobsand LP tank.
2. Removecookinggrates,flametamers,greasetrayand grease
receptacle.
3. Removecotterpinsfrom beneatheachburner'=foot"
usinga
screwdriver
or needlenose pliers,
4. Carefullylifteach burnerup and awayfrom valveopenings,
We suggestthree waysto cleanthe burnertubes.Usetheone
easiestfor you.
(A) Benda stiff wire(a lightweightcoathangerworkswell)
intoa smallhook.Runthe hookthrougheachburnertube
and burnerseveraltimes.
Clean burners
_on
5,
6.
(C) Weareye protection:Use an air hosetoforceair intothe
burnertube and outthe burnerports.Checkeachpert to make
sureair comesout eachhole.
Wirebrushentireoutersurfaceofburnerto removefood
residueand dirt.
Cleanany blockedports witha stiff wiresuch as an openpaper
clip.
7. Checkburner for damage,due to normalwear and corrosion
some holesmay becomeenlarged.If any largecracks or holes
are found replace bumer.
VERY IMPORTANT:Burnertubes must reengage valve
openings.
8. Carefullyreplaceburners.
9. Replacecotterpinbeneatheach burner.
10. Replacegreasetray and receptacle,flametamers,
and
cooking grates.
the
beginning of grilling
season
periodaoft
prior to
use or astoring,
e month not being used. Spidersand insects like to
build nests in burner tubes (especiallyduring colder
months).These nests can cause fires in burner tubes or
under grill.
• Porcelain surfaces: because of glass-like composition,
mostresiduecan be wipedaway withbakingsoda/water
solutionor speciallyformulated cleaner.Use nonabrasive
scouring powderfor stubborn stains.
• Painted surfaces: Wash with milddetergentor nonabrasive
cleanerand warmsoapywater,wipe drywitha soft
nonabrasivecloth.
• Stainless steel surfaces: To maintainyour grill'shigh.
qualityappearance,wash withmilddetergentand warm
soapy water,wipedrywitha softclothaftereach use.Bakedon greasedepositsmayrequirethe use ofan abrasive plastic
cleaningpad.
Storing
(B) Usea narrowbottlebrushwitha flexiblehandle(do not
usea brasswirebrush),runthe brushthrougheachburner
tubeandburnerseveraltimes.
after
Your Grill
• Clean cookinggrates
• Store in dr] location.
• When LP tank is connectedto grill, store outdoors in wellventilated space and out of reach of children.
• Cover grill if stored outdoors. Choosefrom a variety of grill
covers offered by Char-Broil.
• Store grill indoors ONLY if LP tank is turned Qffand
disconnected,removed from grill and stored outdoors.
• When removing grill from storage follow "Cleaningthe Burner
Assembly"instructions before starting grill.
4632215 • 13
Indirect Cooking
Poultryand largecutsof meat cookslowlyto perfectionon the
grillby indirectheat. The heatfrom selectedburnerscirculates
gentlythroughoutthe grill,cookingmeat or poultrywithoutthe
touchof a directflame.This methodgreatlyreduces flare-ups
when cookingextrafatty cuts becausethere is no directflame to
ignitethe fats andjuices that dripduringcooking.
Indirect Cooking Instructions
Alwayscookwiththe lidclosed,
Due to weatherconditions,cookingtimesmay vary.During
coldand windyconditionsthe temperaturesettingmay
need to be increasedto insuresufficientcooking
Food Safety
• Foodsafety isa veryimportantpartofenjoyingtheoutdoor
cookingexperience.To keep food safe from harmful
bacteria,follow thesefour basicsteps:
Clean: Wash hands,utensils,and surfaceswithhotsoapy
waterbeforeand after handlingraw meatand poultry.
Separate: Separateraw meatsand poult_ from ready-to-eat
foods to avoidcrosscontamination.
Use a cleanplatterand
utensilswhen removingcookedfoods.
Cook: Cookmeat and poultrythoroughlyto killbacteria.Use a
thermometerto ensureproperinternalfood temperatures.
Chill: Refrigeratepreparedfoods and leftoverspromptly.
temperatures,
How To Tell If Meat Is Grilled Thoroughly
• Meat and poult_ cookedon a grilloftenbrownsveryfast on
the outside.Use a meat thermometerto be sure food has
•
•
•
•
1 BurnerCooking
Cook with direct or indirectheat.
Best for smaller meals or roods.
Consumes less fuel.
V
2 Burner Cooking
Great indirect cooking on low.
Produces slow, even heating.
Ideal for slow roasting and baking.
14,4632215
reacheda safe internaltemperature,and cutintofood to
checkfor visualsignsof doneness.
Whole poultryshouldreach1800 F; breasts,1700F. Juices
shouldrunclear and fleshshouldnotbe pink.
Hamburgersmadeof any groundmeat or poultryshould
reach1600 F, and be brownin the middlewith no pinkjuices.
Beef,veal and lambsteaks,roastsand chopscanbe cooked
to 1450F.All cutsof porkshould reach160o F.
NEVER partiallygrillmeator poultryand finishcookinglater.
Cookfood completelyto destroyharmfulbacteria,
Whenreheatingtakeoutfoodsor fully cookedmeatslike hot
dogs,grillto 165° F, or untilsteaminghot.
Problem
Possible Cause
Prevention/Cure
Burnerwill not
light usin9 ignitor.
Wiresand/orelectrodecoveredwith
cookingresidue.
Cleanwiresand/orelectrodewithrubbingalcohol
and cleanswab.
Electrode
crackedor broken"sparksat
crack"
Replaceelectrode(s).
Electrode
tipnot inproperposition
MainBurners:
Tipofelectrode
should
bepointing
toward
tipofcollector
box.Thedistance
should
be1/8"to1/4",adJust
ifnecessary.
Sidebumer:
Tipofelectrode
should
bepointing
toward
gasportopening
onburner.Thedistance
should
be1/8"to3/16",adjust
ifnecessary.
Wiresarelooseordisconnected.
Reconnect
wiresorreplace
electrode/wire
assembly.
Wireisshorting(sparking)
between
ignitorandelectrode.
Replace
ignitor
wire/electrode
assembly.
Deadbattery,
Replace
witha newAAbattery.
Nogasfiow.
Turngasonatsource.
Obstruction
ofgasflow.
Clearburner
tubes.
Disengagement
ofburnertovalve.
Reengage
burnerandvalve.
Flamesblow out.
Highorgustingwinds.
Turnfrontofgrilltofacewindorincrease
flameheight.
Flare-up.
Greasebuildup.
Cleangdll,
Excessive
fatinmeat.
Trimfatfrommeatbefore
grilling.
Excessive
cooking
temperature.
Adjust
(lower)
temperature
accordingly
oruseindirect
cooking.
Persistentgrease
fire.
Greasetrappedbyfoodbuilduparound
bumersystern.
Turnknobs
toOFF.Turngasoffatgassource.Leavelidinposition
andletfireburnout.Aftergril/cools,removeandcleanallparts.
Flashback...
(firein burnertubes)
Burnerand/orburnertubesare blocked.
Cleanburner
and/orburner
tubes.
Burnerswill not
matchlight.
4632215 • 15
A DivisionofW.C.BradleyCo.
P.O.Box1240
Columbus,GA 31902-1240