Download Kenmore 415.16218 Gas Grill User Manual
Transcript
NO
AssemblyInstructions/Useand Care Manual
TOOLS
®
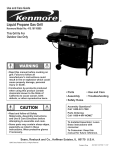
LiquidPropaneGasGrill
with Grill@NightTM Night Light
Model No. 415.162180
ASSEMBLY
This Grill Is For
OutdoorUse Only
• Read this manual before cooking on
grill. Failure to follow all
manufacturer's
instructions could
result in fire or explosion which could
cause property damage, personal
injury or death.
• Combustion by-products
produced
when using this product contain
chemicals known to the State of
California to cause cancer, birth
defects, or other reproductive
harm.
• Parts
• Use and Care
• Assembly
• Troubleshooting
• Safety Rules
Assembly Questions?
Call 1-800-4-MY-HOME
• Read and follow all Safety
Statements, Assembly Instructions
and Use & Care Directions before
attempting to assemble and cook.
=%
• Some parts may contain sharp edges,
especially as noted in these
instructions. Wear protective gloves
if necessary.
Sears, Roebuck
and Co., Hoffman
Parts Ordering:
Call 1-800-366-PART
_
(7278)
To Installer/Assembler:
Leave
these instructions with
consumer.
To Consumer: Keep this
manual for future reference.
Estates, IL 60179
U.S.A.
FOR YOUR SAFETY
1. Do not store or use gasoline or other
flammable vapors and liquids in the
vicinity of this or any other appliance.
2. An LP tank not connected for use shall
not be stored in the vicinity of this or any
other appliance.
FOR YOUR SAFETY
If you smell gas:
1. Shut off gas to the appliance.
2. Extinguish any open flame.
3. Open lid.
4. If odor continues, immediately call your
gas supplier or your fire department.
Safety Symbols
The symbols and boxes shown below explain what each heading
means. Read and follow all of the messages found throughout
the manual.
DANGER: Indicates an imminently hazardous situation
which, if not avoided, will result in death or serious injury.
WARNING: Be alert to the possibilityof serious bodily injury
if the instructions are not followed. Be sure to read and
carefully follow all of the messages.
Call Grill Service Center For Help And Parts
If you have questions or need assistance during assembly,
please call 1-800-241-7548. You will be speaking to a
representative of the grill manufacturer and not a Sears
employee. To order new parts call Sears at 1-800-4-MY-HOME_.
Installation Safety Precautions
ProductRecord
• Use grill only with LP (propane) gas and the regulator/valve
assembly supplied.
iMPORTANT:
Fillouttheproductrecordinformation
below,
Model Number
Serial Number
See ratinglabelon grill forserialnumber.
Date Purchased
CAUTION: Indicates a potentially hazardous situation which,
if not avoided, may result in minor or moderate injury.
Grill installation must conform with local codes, or in their
absence with National Fuel Gas Code, NFPA 541 ANSI
Z223.1. Handling and storage of LP cylinders must conform to
LP Gas Code NFPNANS158. Grill is not for use in or on
recreational vehicles and/or boats.
All electrical accessories (such as rotisserie) must be
electrically grounded in accordance with localcodes, or
National Electrical Code, ANSI I NFPA 70. Keep any
electrical cords and/or fuel supply hoses away from any hot
surfaces.
• This grill is safety certified for use in the United States only. Do
not modify for use in any other location.Modification will result
in a safety hazard.
CAUTION
For residenUal use only. Do not use for commercial
cooking.
CARBON MONOXIDE HAZARD
Burning charcoal releases carbon monoxide which has no
odor and can cause serious injury or death. Never burn
charcoal inside homes, vehicles or tents.
2 • 463845504
For Your Safety ......................................
2
Grill Service Center ...................................
2
KENMORE GRILL WARRANTY
Product Record Information ............................
2
Full 1-Year Warranty on Grill
Safety Symbols ......................................
2
Installation Safety Precautions ..........................
2
For one year from the date of purchase Sears will repair or
replace, at our option, any grill part (except for paint finish)
that is defective in material or workmanship.
Kenmore Grill Warranty ...............................
3
Parts List ...........................................
4
Parts Diagram .......................................
5
Assembly ........................................
Use and Care ...................................
6-16
17-27
Cooking Chart...............................
Troubleshooting...........................
25
26-27
Repair Protection Agreements
Limited Warranty on Selected Grill Parts
From one year after the date of purchase for the designated
time periods listed below, Sears will replace the following grill
parts if they are defective in material or workmanship. You
will be charged for labor.
• Lifetime of Grill: Aluminum Top and Bottom Castings
(except for paint finish)
• 9 years: Electronic Ignition System
(except for ignitor battery)
Congratulations on making a smart purchase. Your new
Kenmore_ product is designed and manufactured for years of
dependable operation. But like all products, it may require repair
from time to time. That's when having a Repair Protection
Agreement can save you money and aggravation.
• 2 years: Burner Assembly
Purchase a Repair Protection Agreement now and protect
yourself from unexpected hassle and expense.
Warranty service is available by contacting Sears at
Here's what's included in the Agreement:
[]
[]
[]
[]
[]
Expert service by our 12,000 professional repair specialists
Unlimited service and no charge for parts and labor on all
covered repairs
Product replacement if your covered product can't be fixed
Discount of 10% from regular price of service and servicerelated parts not covered by the agreement; also, 10% off
regular price of preventive maintenance check
Fast help by phone - phone support from a Sears
technician on products requiring in-home repair, plus
convenient repair scheduling
Once you purchase the Agreement, a simple phone call is all that
it takes for you to schedule service. You can call anytime day or
night, or schedule a service appointment online.
WARRANTY SERVICE
1-800-4-MY-HOME_.
WARRANTY RESTRICTIONS
This warranty is void if grill is used for commercial or rental
purposes.
This warranty applies only when the grill is used in the United
States.
This warranty gives you specific legal rights, and you may
also have other rights which vary from state to state.
Sears, Roebuck and Co., Dept. 817WA,
Hoffman Estates, IL 60179
Sears has over 12,000 professional repair specialists, who have
access to over 4.5 million quality parts and accessories. That's
the kind of professionalism you can count on to help prolong the
life of your new purchase for years to come. Purchase your
Repair Protection Agreement today!
Some limitations and exclusions apply,
For prices and additional information call 1-800-827-6655.
Sears Installation Service
For Sears professional installation of home appliances, garage
door openers, water heaters, and other major home items, in the
U.S.A. call 1-8OO-4-MY-HOME
_
463845504• 3
Part#
Key
1
Otv
2
Leg Assembly.......................
4503239
27
Otv
2
#10-24x1-1/4"CarriageBolt ............
4080074
2
1
Base ..............................
4502463
28
1
TankWire ..........................
4151019
3
1
Midshelf ...........................
4151035
29
1
V-bar..............................
4500327
4
11
#10-24x2° CarriageBolt ...............
4080064
30
4
End Cap ...........................
4080065
5
12
#10-24 PlasticTee Knob...............
4080091
31
1
Side Shelf ..........................
4154372
6
2
WheelAssembly.....................
4310002
32
5
#10-12xl-7/8" Wing Screw.............
4080096
7
4
1"Hitch Pin.........................
4080062 STD624001
33
1
ToolHolder.........................
4154376
8
2
Leg Extender .......................
4154577
34
1
SidebumerBody.....................
4526185
9
Upper FrontPanel ...................
4154428
35
1
SidebumerFrame....................
4501705
10
Lower FrontPanel ...................
4154609
36
2
#10-24Wing Nut. ....................
4080063 STD541610
Sidebumer .........................
5068026
Part#
11
Upper PanelWire ....................
4156095
37
12
CondimentWire .....................
4151039
38
SidebumerKnob.....................
4154471
13
Grill Bottom.........................
4580640
39
SidebumerGrate ....................
4156376
14
BurnerAssembly ....................
4505078
40
Grill Ud ............................
4580709
15
CollectorBox .......................
4500278
41
TemperatureGaugewith Wing Nut ......
4157171
16
#10-16xl/2" Self-TapScrew............
4080059 STD611005
42
TemperatureGaugeBezel .............
4157169
17
Electrode ..........................
5156119
43
Logo Plate .........................
4156081
18
ControlPanel .......................
4526191
44
2
3/16" Pal Nut........................
4153096
2
1/4x1-1/8° Hinge Pin..................
4156513
19
4
#10xl/2", %20, Self-TapScrew .........
4080043
45
2O
1
Valve/Hose/RegulatorAssembly ........
4524194
46
Grill@NightTM HandleAssembly.........
4154619
21
1
Electronicignition ModulewithWires.....
4153175
47
Lower SwingAway ...................
4152125
22
1
ignition Mcduie LockingRing...........
4157145
48
Upper SwingAway ...................
4156449
23
2
ControlKnob........................
4154559
49
CookingGrate ......................
4152741
24
2
ValveCtip ..........................
4151043
50
GreaseClip.........................
5156607
25
2
1/4-20xl-1/4"CardageBolt ............
4080615 STD532512
51
AAA Battery ........................
4153177
26
2
1/4-20WingNut .....................
4080221 STD541625
52
ignition Button Assembly..............
4157156
4 • 463845504
44
J
43
41
49
42
39
47
45
31
7
37
45
7
'v
_25
25_
35
30_
32
21
33
@
&
5
4
10
463845504 • 5
CartAssemblyStep 1
[] Positionbaseon edgewith tankholeto left side.
[] Insertlegs intobaseandattachwith carriagebolts
and plasticwingnuts.Usetop holeson left side.
DO NOTFULLYTIGHTEN.
[] Insertmidshelfwire intoholeson insidesof legs,
long wirestowardleft side.Fullytightencarriage
boltsand plasticwingnuts.
5
Qty.8
4
Qty.8
Leg Assembly\
\\\\\\\\\\\
"4
Longmidshelf wire
to leftside.
_Base
6.463845504
CartAssemblyStep 2
[] Insertwheel/hubcapassembliesinto
bottomholeson left legs.
[] Securebeneathbasewith hitchpins.
See inset below.
[] Push leg extendersintoright legs.
Qty. 2
Wheel/HubcapAssembly
7
_Leg Extender
with
hitchpin in axle bolt.
463845504* 7
UpperAndLowerFrontPanelAssembly
[] Snapthe upperand lowerfront panelstogether.
[] Insertthe two pinson lowerpanelintoholesin
front of cartbase.
[] Snapthe upperpaneloverthe midshelf wire.
UpperFront Panel
LowerFrontPan_
Upperpanel
snapsonto
midshelfwire.
NOTE-" Rearview of cart.
Wheels are to right side.
8,463845504
UpperPanelWireAndCondimentWireAssembly
[] Insertpanelwire throughupperpaneland intoleg,
then bendwire slightlyto insertoppositeend.
[] Hookouterwiresof condimentwire intoholesin
upperpanel,rotatecondimentwire down,and insert
remainingwiresintoholesin front of lowerpanel.
NOTE-"
Rearview of cart.
Wheels are to right side.
CondimentWire
NOTE; front view of cart.
Wheels are to left side.
463845504* 9
Grill Bottom/ControlPanelAssemblyand TankWire
[] Carefullyplacegrillbottom/controlpanelassemblyonto cart,so as
not to scratchpainton legs.Makesure controlpanelbracketfits over
supportbar on eachside.
[] Insertcarriageboltsthroughgrill bottomand centerholein support
bar.Threadmetalwingnutsonto boltsbutdo notfully tighten.
[] Insertcarriageboltsthroughcontrolpanelbracketand front holesin
supportbar.Securewith plasticwingnuts.
[] Fullytightenmetalwingnuts.
[] Press controlknobsontovalvestems.
[] Insertendsof tankwire intoslots on eachside oftank holein base.
Leantank wiretowardmidshelf.
5
Qty.2
25
27
p/n4080615 p/n4080074
Qty.2
Qty. 2
26
Qty.2
p/n 4080615
_/n4080615
27
pin 4080074
Front Hole
Grill Bottom/
ControlPanel
Assembly
TankWire
/
MOTE= Front view
of cart. Wheels are
to left side.
10 • 463845504
NOTE= Rear view
of cart. Wheels are
to right side.
End Cap,Side Shelf,Tool HolderandV-bar Assembly
[] Insertend capsintoendsof leg tubes.
[] Position sideshelf ontoright legsas shown
belowand securewithfour wingscrews.
[] Position tool holderonto leftfront leg and
securewithtwo carriageboltsand plastic
wingnuts.Usethetwo outerholes.Do not
usethe middlehole.
[] Place V-barintogrill bottom,restingon supports
at eachend.
5
Qty.2
4
Qty. 2
32
Qty.4
Side Shelf
V-bar
\\\\
\\\\\\\\\
"4
_4
End Cap
_l
Holder
i
i
\\\
"32
5/
463845504.11
SidebumerAssembly
[] Placesidebumerbodyonto legs.Secureat front with one wingscrewthroughleg,tool holder,and intobody.
[] Inserttab on sideburnerframe intohole in body.At roarleg,insertcarriageboltthroughframe, body, andmiddleleg hole.
Securewith metalwingnut.
[] Insertsideburnertube intolargeframe hole.Insertburner'sthreadedstud intosmallframe hole.Attachmetalwingnut to
stud,but do notfully tighten.
[] Insertsideburnervalveinto burnertube andsnapvalvecup intobody.Note propertube-to-valveengagementin figure A.
Onceproperengagementis made,fully tightenmetalwing nutbeneathburner.
[] Attachsideburnerignitorwire (longwire behindcontrolpanel)to electrodebeneathsideburner.See figureB.
[] Press sideburnerknobfirmlyontosideburnervalveand placesideburnergrate ontobody.
Inserttab
intohole.
Sideburner
Frame
"Sideburner
Body
4
Qty. 1
IRear view of grill.1
32
Qty. 1
Sideburner
G_
Sidebumer
IgniterWire
SideburnerT_
Sideburne
ValveCup
12 • 463845504
view of grill.
Grill Lid,TemperatureGaugeand BezelAssembly
[] Attachgrill lidto grillbottomwith
hingepinsand hitchpins.
[] Removewingnut from temperature
gauge,insertgaugeintobezel,then
intohole in grill lid. Securewith wingnut.
Qty.2
_5
p/n 4156513
Qty.2
_Temperature
Gauge
_Bezel
jF
Grill Lid
Temperature
GaugeWing Nut
_J-45
p/n4156513
463845504.13
Grill@Night
TM Night LightHandleAssembly
Note: On the undersideof the lampassembliesare%" for leftside and "R" for rightside.Matchto letteron the handle.
[] Lampassembliesinstallinsidegrilllid. Insertthumbscrews(providedwith handle)throughlampassembliesand grilllid,
then intohandle.
[] Removethe two batterydoorscrewsandinstallthe sixC-sizebatteriesas indicatedinsidebatterycompartment.
[] Replacebatterydoor and screws.
Note: Twoextra bulbsare
containedinsidethe bulb
holders,attachedto the
bottomof the handle.
Bulb
Holder~
Grill@Night_M
€_L 2_
/jNight
Loft
BulbHolder
RightLamp
Assembly
LeftLamp
Assembly
CAUTION:
To prevent a shorting
condition, make sure thelamp
assemblies are fully inserted into grill lid.
Screw
Grill lid
Batterydoor_
Screw
Grill lid
C-Size
Batteries(6)__
_
II _
14 • 463845504
_
Z
LightHandle
J
Battery
Door
Screws
/v
SwingAway
AndCooking
Grate
Assembly
[] InsertlowerSwingAwaypivotwires intobottom
holesin sides of grilllid.
[] InsertlowerSwingAwayleg wires intotop holes
in sidesof grillbottom.
[] InsertupperSwingAwaypivotwires intomiddle
holesin sides of grilllid.
[] InsertupperSwingAwaylegwires intoloops on
side of lowerSwingAway.
[] Place cookinggrate ontograte restsin
grillbottom.
NOTE:
Backsof SwingAwaysshouldbe pointingupward.
J PivotWire
UpperSwingAway
J LowerSwingAway
\\
CookingGrate
463845504o15
• LP GASTANKIS SOLDSEPARATELY.Fill and leak-check
TankWire, LPTank,GreaseClip and Battery
and ignitorButtonAssembly
tankbeforeattachingto grill and regulator.See Useand
Care sectionfor instructions.
[] Place LPtank intoholein basewithtankvalvefacing
towardfront of grill.
[] To secureLPtank, pull tankwire overthe side ofthe tank,
towardthetank collar.
[] See Useand Care sectionfor connectionof regulatorto LPtank.
[] Hanggreaseclipbeneathgrillbottom.See inset below.To collect
grease,hangan emptysoupcan(not included)from greaseclip.
[] InsertAAAbattery('+" end first) intoignitionmodule,then twist
ignitorbuttonontomodule.
• Tankcollaropeningmustface to frontof cart once
tank is attached.
Failureto installtankcorrectlymay allowgas hoseto
be damagedin operation,resultingin the riskof fire.
Collar
LPTank
(Sold
Separately)
IgnitionModule
AAABattery
CAUTION
Failureto installcanin clipwill causehot
greaseto dripfrom bottomof grillwith risk of
fire or propertydamage.
16 • 463845504
IgnitorButton
LP Tank
• The LP tank used with your grill must meet the following
requirements:
• Never fill the cylinder beyond 80% full,
An overfilled
spare LP tank is hazardous due to possible gas
released from the safety relief valve.
• The safety relief valve on the LP tank could activate
releasing gas and cause an intense fire with risk of
property damage, serious injury or death.
• NEVER store a spare LP tank under or near grill or in
enclosed areas.
• If you see, smell or hear escaping gas, immediately get
away from the LP tank/grill and call your fire
department.
• All spare LP tanks must have safety caps installed on
the LP tank outlet.
LP Tank Removal, Transport And Storage
• Turn OFF all control knobs and LP tank valve. Turn coupling
nut counterclockwise by hand only - do not use tools to
disconnect. Lift LP tank wire upward off of LP tank collar, then
lift LP tank up and off of support bracket. Install safety cap onto
LP tank valve. Always use cap and strap supplied with valve.
Failure to use safety cap as directed may result in serious
personal injury and/or property damage.
• Use LP tanksonly with these required measurements: 12"
(30.5cm) (diameter) x 18" (45.7 cm) (tall) with 20 lb. (9 kg.)
capacity maximum.
• LP tanks must be constructed and marked in accordance with
specifications for LP tank of the U.S. Department of
Transportation (DOT). See LP tank collar for marking.
• LP tank valve must have:
•Type 1 outlet compatible with
regulator or grill.
• Safety relief valve.
• UL listedOverfill Protection
OPDHandWheel
Device (OPD). This OPD safety
feature is identified by a unique triangular hand wheel. Use
only LP tanks equipped with this type of valve.
• LP tank must be arranged for vapor withdrawal and include
collar to protect LP tank valve.
LP (Liquefied Petroleum Gas)
• LP gas is nontoxic, odorless and colorless when produced. For
Your Safety, LP gas has been given an odor (similar to rotten
cabbage) so that it can be smelled.
• LP gas is highly flammable and may ignite unexpectedly when
mixed with air.
LP Tank Filling
LPTank Valve
• Use only licensed and experienced dealers.
• LP dealer must purge tank before filling.
l
• Dealer should NEVER fill LP tank more than 80% of LP tank
volume. Volume of propane in tank will vary by temperature.
• A frosty regulator indicates gas overfill. Immediately close LP
tank valve and call local LP gas dealer for assistance.
t
SafetyCap
RetainerStrap
• Do not release liquid propane (LP) gas into the atmosphere.
This is a hazardous practice.
• To remove gas from LP tank, contact an LP dealer or call a
local fire department for assistance. Check the telephone
directory under "Gas Companies" for nearest certified LP
dealers.
• A disconnected LP tank in storage or being transported must
have a safety cap installed (as shown). Do not store an LP tank
in enclosed spaces such as a carport, garage, porch, covered
patio or other building. Never leave an LP tank inside a vehicle
which may become overheated by the sun.
• Do not store an LP tank in an area where children play.
463845504.17
LPTank Exchange
Connecting
• Many retailers thatsell grills offer you the option of replacing
your empty LP tank through an exchange service. Use only
those reputable exchange companies that inspect, precision fill,
test and certify their cylinders. Exchange your tank only for
an OPD safety feature-equipped tank as described in the
"LP Tank" section of this manual.
1, LP tank must be properly secured onto grill. (Refer to
assembly section.)
2, Turn all control knobs to the OFF position.
• Always keep new and exchanged LP tanks in upright position
during use, transit or storage.
4, Remove the protective cap from LP tank valve. Always use
cap and strap supplied with valve.
Regulator To The LP Tank
3, Turn LP tank OFF by turning OPD hand wheel clockwise to a
full stop.
• Leak test new and exchanged LP tanks BEFORE
connecting to grill,
LP Tank Leak Test
~OPD HandWheel
For your safety
• Leak test must be repeated each time LP tank is exchanged or
refilled.
threadon outside
• Do not smoke during leak test.
SafetyReliefValve
• Do not use an open flame to check for gas leaks.
• Grill must be leak tested outdoors in a well-ventilated area,
away from ignition sources such as gas fired or electrical
appliances. During leak test, keep grill away from open flames
or sparks.
Strapand Cap
• Use a clean paintbrush and a 50/50 mild soap and water
solution. Brush soapy solution onto areas indicated by arrows
in figure below.
Do not use a POL transport plug
(plastic part with external threads)!
It will defeat the safety feature of
the valve.
If "growing" bubbles appear do not use or move the LP tank.
Contact an LP gas supplier or your fire department!
•
Do not use household cleaning agents. Damage to gas
train components can result.
5, Hold regulator and insert nipple into LP
tank valve. Hand-tighten the coupling
nut, holding regulator in a straight line
with LP tank valve so as not to crossthread the connection.
Nipplehasto be centered
intothe LP tankvalve.
J
18 • 463845504
Leak Testing Valves, Hose and Regulator
1. Turn all grill control knobs to OFF.
,
Be sure regulator is tightly connected to LP tank.
3, Completely open LP tank valve by turning OPD hand wheel
counterclockwise. If you hear a rushing sound, turn gas off
immediately. There is a major leak at the connection. Correct
before proceeding.
,
Hold couplingnut and regulator
as shownfor properconnection
to LPtankvalve.
Brush soapy solution onto areas where bubbles are shown in
picturebelow:
• Never remove threaded
orifice at end ofvalve.
6. Turn the coupling nut clockwise and tightento a full stop. The
regulator will seal on the back-check feature in the LP tank
valve, resulting in some resistance. An additional one-half to
three-quarters turn is required to complete the
connection. Tighten by hand only - do not use tools.
NOTE:
If you cannot complete the connection, disconnect regulator and
repeat steps 5 and 6. If you are still unable to complete the
connection, do not use this regulator!
Valve
• Do not insert any foreign objects into the valve outlet. You
may damage the valve and cause a leak. Leaking propane
may result in explosion, fire, severe personal injury, or
death.
• Never attempt to attach this grill to the self-contained LP gas
system of a camper trailer or motor home.
• Do not use grill until leak-tested.
• If a leak is detected at any time, STOP and call the fire
department.
• If you cannot stop a gas leak, immediately close LP tank
valve and call LP gas supplier or your fire department!
5. If "growing" bubbles appear, there is a leak. Close LP tank
valve immediately and retighten connections. If leaks cannot
be stopped do not try to repair. Call Sears for replacement
partsat 1-800-4-MY-HOME_.
6. Always close LP tank valve after performing leak test by
turning hand wheel clockwise.
463845504.19
Safety Tips
•
Before opening LP tank valve, check the coupling nut for
tightness.
•
When grill is not in use, turn off all control knobs and LP tank
valve.
•
Never move grill whilein operation or still hot.
•
Use long-handled barbecue utensils and oven mitts to avoid
bums and splatters.
•
Maximum load for shelves is 10 Ibs.
•
Asoup can must be attached to grease clip and emptied
after each use. Do not remove soup can until grill has
completely cooled.
For Safe Use Of Your Grill And To Avoid Serious
Injury:
• Do not let children operate or play near grill.
• Keep grill area clear and free from materials that burn.
• Do not block holes in bottom or back of grill.
• Check burner flames regularly.
• Use grill only in well-ventilated space. NEVER use in
enclosed space such as carport, garage, porch, covered
patio, or under an overhead structure of any kind.
• Do not use charcoal or ceramic briquets in a gas grill.
(Unless briquets are supplied with your grill.)
• Use grill at least 3 ft. from any wall or surface. Maintain
10 ft. clearance to objects that can catch fire or sources of
ignition such as pilot lights on water heaters, live electrical
appliances, etc.
If you notice grease or other hot material dripping from grill
onto valve, hose or regulator, turn off gas supply at once.
Determine the cause, correct it, then clean and inspect valve,
hose and regulator before continuing. Perform a leak test.
The regulator may make a humming or whistling noise during
operation. This will not affect safety or use of grill.
If you have a grill problem see the "Troubleshooting Section".
If the regulator frosts, turn off grill and LP tank valve
immediately. This indicates a problem with the tank and it
should not be used on any product. Return to supplier!
• Apartment Dwellers:
Check with management to learn the requirements and fire
codes for using an LP gas grill in your apartment complex. If
allowed, use outside on the ground floor with a three (3) foot
clearance from walls or rails. Do not use on or under
balconies.
• NEVER attempt to light burner with lid closed. A buildup
of non-ignited gas inside a closed grill is hazardous.
• Never operate grill with LP tank out of correct position
specified in assembly instructions.
• Always close LP tank valve and remove coupling nut
before moving LP tank from specified operation
position.
20 • 463845504
Match-Lighting
•
• Putting out grease fires by closing the lid is not
possible. Grills are well ventilated for safety reasons.
• Do not use water on a grease fire. Personal injury may
result. If a grease fire develops, turn knobs and LP tank
off.
• Do not leave grill unattended while preheating or
burning off food residue on high. If grill has not been
regularly cleaned, a grease fire can occur that may
damage the product.
Do not lean over grill while lighting.
1, Open lid, Turn on gas at LP tank.
2, Place lit match into match-lighting hole from beneath grill
bottom (as shown below).
3, Push in and turn right knob to •
burner lights and stays lit.
(ignite position). Be sure
4, Light left burner by pushing left knob in and turning to 9)
(ignite position).
After Lighting: Turn knobs to HI for warm-up.
Ignitor Lighting
•
Do not lean over grill while lighting.
hole is
beneathgrillbottom.
1, Open lid, Turn on gas at LP tank.
2, Turn left knob to O (ignite position).
3, Push and hold ignitor button to light. Be sure burner lights and
stays lit.
4, If burner does not light, turn knobs to _,
try again.
wait 5 minutes,
5, Once left burner is lit, turn right knob to O to light right
burner.
6, If ignitor does not work, wait 5 minutes, then follow match
lighting instructions.
After Lighting: Turn knobs to HI position for warm-up. Do not
warm up grill with knobs on _ (ignite position).Knobs and
handle will become uncomfortably hot if left in 9) (ignite
position).
m
CAUTION
m
Ignitor Lighting The Sideburner
1, Turn on gas at LP tank.
2, Push in and turnsideburner knob to HI.
3, Press and hold ignitor button to light. Be sure burner lights and
stays lit.
4, If burner does not light, turn sideburner knob to OFF, wait 5
minutes, try again.
Match Lighting
1, Turn on gas at LP tank.
2, Hold a lit match to any port on the sideburner. Push in and
turn the sidebumer knob to HI. Be sure burner lights and stays
lit.
If burner does not light, turn knobs to_,
wait 5
minutes, and try again. If the burner does not ignite with
the valve open, gas will continue to flow out of the burner
and could accidentally ignite with risk of injury.
463845504o21
Before Your First Cookout
Repainting Your Grill
• Light burners, check to make sure theyare lit, close the lid and
warm up grill on HIGH for 15 minutes. Curing of paint and parts
will produce an odor only on first lighting.
• After extended use and exposure to weather, paint on grill may
deteriorate or become spotted. Although this detracts from
grill's appearance, it will not impair its performance.
Burner Flame Check
• Light burner, rotate knobs from HI to LO. You should see a
smaller flame in LO position than seen on HI. Always check
flame prior to each use. Perform flame check on sideburner. If
only low flame is seen refer to "Sudden drop or low flame" in
the Troubleshooting Section.
To refinish your grill brush outside of grill lid and bottom with
wire brush and lightly sand with fine grit sandpaper. Sanding
allows new paint to adhere more easily. Wash grill lid and
bottom with soap and water to remove dust and grease. Do not
use a grill cleaner on outside of grill. Wipe with vinegar.
Refinish outside with heat-resistant paint. Do not paint inside
of grill.
NATURAL
Turning Grill Off
• Turn all knobs to _
position. Turn LP tank off by turning
OPD hand wheel clockwise to a full stop.
Ignitor Check
• Turn gas off at LP tank. Press and hold ignitor button. "Click"
should be heard and spark seen each time between collector
box or burner and electrodes. See "Troubleshooting" if no click
or spark.
HAZARD
• SPIDERS
FACT: Sometimes spiders and other small insects climb into
the burner tubes attached to the burners. The spiders spin
webs, build nests and lay eggs. The webs or nests can be
very small, but they are very strong and can block the flow of
gas. Clean burners prior to use after storing, at the beginning
of grilling season or after a period of one month not being
used.
Valve Check
• Important: Make sure a_.=asis
off at LP tank before checking
valves. Knobslock in _
position. To checkvalves, first
push in knobs and release, knobs should spring back. If knobs
do not spring back, replace valve assembly before using grill.
Turn knobs to LO position then turn back to _
position.
Valves should turn smoothly.
Hose Check
• Before each use, check to see if hoses are cut or worn.
Replace damaged hoses before using grill. Use only identical
Kenmore replacement valve/hose/regulator assembly.
Typicalspiderwebsinside burner.
Spider guards are on the air intakes in an effort to reduce this
problem, but it will not eliminate it! An obstruction can result
in a "flashback" (a fire in the burner tubes). The grill may still
light, but the obstruction does not allow full gas flow to the
burners.
IF YOU EXPERIENCE THE FOLLOWING:
General Grill Cleaning
1. Smell gas.
• Do not mistake brown or black accumulation of grease and
smoke for paint. Interiors of gas grills are not painted at the
factory (and should never be painted). Apply a strong solution
of detergent and water or use a grill cleaner with scrub brush
on insides of grill lid and bottom. Rinse and allow to completely
air dry. Do not apply a caustic grill/oven cleaner to painted
surfaces,
2. Burner(s) will not light.
• Plated wire grates: Wash grates and V-bar with concentrated
grill cleaner or use soap and water solution. Dry thoroughly and
store indoors between cookouts.
• Plastic parts: Wash with warm soapy water and wipe dry.
• Do not use citrisol, abrasive cleaners, degreasers or a
concentrated grill cleaner on plastic parts. Damage to and
failure of parts can result.
• Porcelain grates: Because of glass-like composition, most
residue can be wiped away with baking soda/water solution or
specially formulated cleaner. Use nonabrasive scouring powder
for stubborn stains.
22 • 463845504
3. A small yellow flame from burner (should be blue).
4. Fire coming from around or behind control knob.
STOP!
Immediately turn off gas at LP tank!
•
After a burner tube fire, you must inspect the hose and
do a "Leak Test" to assure no damage has occured to
the parts,
SOLUTION:
Wait for grill to cool.
Follow the "Cleaning The Bumer Assembly" instructions.
Clean burners often. Use a 12" pipe cleaner to clean out the
burner tubes. You may also force a stream of water from a
hose nozzle through burner tubes to clean them.
Cleaning The Burner Assembly
Follow these instructions to clean and/or replace parts of bumer
assembly or if you have trouble igniting grill.
1. Turn gas off at control knobs and LP tank,
2. Remove cooking grate and V-bar.
3. Remove grease can from beneath grill. Beneath grill bottom,
disconnect ignitor wire from electrode.
4. Remove screw holding collector box. Note which hole on
collector box used for attaching to burner. Remove collector
box and clean ceramic portion of electrode with rubbing
alcohol and cloth.
5. Under control panel, disengage burner springs from burner
tubes. Do not remove springs from valves.
6. To remove burner, slide backwards, lift up and out of grill.
7. Clean outside of burner with soap and water. Lay burner
upside down on fiat surface. Force a stream of water through
tubes. Make sure water comes out of all burner holes. Open
clogged holes with a thin wire. Shake out excess water and
examine holes. Due to normal wear and corrosion, some
holes may become enlarged. If any largecracks or holes are
found replace burner.
,
If grill is to be stored, coat burner lightlywith cooking oil.
Wrap in protective cover to keep insects out. If not storing grill
after cleaning, hold burner at an angle and insert into grill
bottom.
9. After cleaning, insert electrode into hole in grill bottom.
Reattach collector box to burner with screw. Be sure to use
correct hole.
Burner
10.Place end of spring into hole on underside of burner tube, as
before, to secure burner. See figure A.
VERY IMPORTANT: Burner tube must engage valve opening
as shown in figure A.
Collector..-_
Box
'_
11. Reattach ignitor wire to electrode.
12. Reposition V-bar and cooking grate. Reattach clean can to
grease clip.
13. Before cooking again on grill, follow "Burner Flame Check".
• Do not use charcoalwith this grill.
Ignitor
Wire
463845504°23
Storing Your Grill
Food Safety
• Clean cooking grates.
Food safety is a very important part of enjoying the outdoor
cooking experience. To keep food safe from harmful bacteria,
follow these four basic steps:
• Store in dry location.
• When LP tank is connected to grill, store outdoors in wellventilated space and out of reach of children.
• Cover grill if stored outdoors.
• Store grill indoors ONLY if LP tank is turned off and
disconnected, removed from grill and stored outdoors.
• When removing grill from storage follow "Cleaning Bumer
Assembly" instructions
before starting grill.
Direct Cooking
Use both burners to heat the grill for searing of the meat. Once
the meat has been seared, turn the burners to LO to cook meat
thoroughly.
Indirect Cooking
Once the grill is preheated, turn one of the burners off and place
your meat on the grate above the burner that is NOT burning.
This indirectmethod of cooking allows you to slow cook poultry
or large cuts of meat without the touch of a direct flame.
• Always cook with the lid closed.
• Due to weather conditions, cooking times may vary. During cold
and windy conditions the temperature setting may need to be
increased to insuresufficient cooking temperatures.
1. Ignitethe LEFT burner. For slow cooking, adjust the control
knob to the LO setting. For faster cooking, adjust the control
knob to the HI setting.
2. Place the food on the RIGHT side of the cooking grate.
3. Because the heat source is only on one side, the food should
be rotated at least once during cooking to insureeven
cooking. Use a meat thermometer to determine when the food
is done.
24 • 463845504
Clean: Wash hands, utensils, and surfaces with hot soapy water
before and after handling raw meat and poultry.
Separate: Separate raw meats and poultryfrom ready-to-eat
foods to avoid cross contamination. Use a clean platter and
utensils when removing cooked foods.
Cook: Cook meat and poultry thoroughly to kill bacteria. Use a
thermometer to ensure proper internal food temperatures.
Chill: Refrigerate prepared foods and leftoverspromptly.
For more information call: USDA Meat and Poultry HoUine at
1-800-535-4555 In Washington, DC (202) 720-3333, 10:00 am4:00 pm EST.
HowTo Tell If Meat Is Grilled Thoroughly
• Meat and poultry cooked on a grill often browns very fast on the
outside. Use a meat thermometer to be sure food has reached
a safe internal temperature, and cut intofood to check for
visual signs of doneness.
• Whole poultry should reach 180° F; breasts, 170° E Juices
should run clear and flesh should not be pink.
• Hamburgers made of any ground meat or poultry should reach
160° F, and be brown in the middle with no pink juices. Beef,
veal and lamb steaks, roasts and chops can be cooked to 145°
E All cuts of pork should reach 160° E
• NEVER partially grill meat or poultry and finish cooking later.
Cook food completely to destroy harmful bacteria.
• When reheating takeout foods or fully cooked meats like hot
dogs, grill to 165° F, or until steaming hot.
Cooking Chart
Cooking times and temperatures may vary according to specific recipes, cooking conditions or barbecue equipment used. Take these
factors into consideration to insure best results. If you use the indirect cooking method (indirect cooking is lighting only one burner and
placing food on opposite side of cooking grate), allow more grilling time.
Temperatures: High = 650°F / Medium = 450°F / Low = 300°F,
Food
Setting
Cooking Time
Beef
Hamburger 1/2" thick
Medium
Med: 7-10 rain./Well done: 10-15 rain.
Steak 1/2"
Medium-Hot
Rare: 3-6 rain.t Med: 6-9 rain. / Well done: 9-12 rain.
Roast
Low
Rare: 18-22rain. per lb. / Med: 22-28 rain. per lb. / Well done: 28-32 rain. per lb.
Pork
Chops 1/2"
Medium
Well done: 15-20 rain.
Ribs 5-6 Ibs.
Low-Medium
Well done: 45-90 rain.
Roast 3-5 Ibs.
Low-Medium
Well done: 18-23 rain. per lb.
Ham Steak 1/2"
Medium-Hot
12-15 rain.
Ham 5 lb. fully cooked
Low-Medium
20 rain. per lb.
Lamb
Chops 1/2"
Medium
6-12 rain.
Poultry
Chicken 2-1/2 to 3-1/2 Ibs.
Low
1 hr., 15 rain. to 1 hr., 30 rain.
Chicken halved or quertered
Low
40-60 rain.
Turkey
Low-Medium
18-20 rain. per lb.
Seafood
Steaks 1" thick
Medium-Hot
Well done: 10-25 rain.
Fillets 6-8 oz.
Medium-Hot
8-12 rain.
Shrimp large or jumbo
Low-Medium
8-12 rain.
Venison
Steak 1" thick
Medium
Rare: 8-10 rain.t Med: 10-12 rain.
Burgers 1/2"
Medium
Rare: 10-12 rain.t Med: 12-15 rain.
Roast 34 Ibs.
Low-Medium
Rare: 20-22 rain. per lb. / Med: 22-25 rain. per lb.
V_etables
Baking Potato whole
Low
Wrap vegetables in foil
55-60 rain.
Onions whole
Low
45 rain.
Tomatoes half
Medium
3040 rain.
Corn whole
Low
3545 rain.
Mushrooms
Medium
15-20 rain.
463845504°25
Troubleshooting
Problem
PossibleCause
Prevention/Solution
Burner(s)will not light
usingignitor.
• Wire andlorelectrodecoveredwith
cookingresidue.
• Electrodeand burnerarewet.
• Electrodecrackedor broken"sparksat
crack"
• Wire is looseor disconnected.
• Wire is shorting(sparking)between
ignitorand electrode.
• Bad ignitor.
• Cleanwire and/orelectrodewith rubbingalcoholand cleanswab.
• Nogas flow.
• Checkto see if LP tank isempty.If LP tank isnotempty,referto
"Suddendrop in gas flow"below.
• Turn thecouplingnut aboutone-halfto threequartersadditional
turn untilsolid stop.Tightenby handonly-donot usetools.
• Clearburnertube(s).
• Reengageburnerand valve.Reattachspringclips.
• Checkstepsin assemblyinstructions.
Burner(s)will not
matchlight.
• Couplingnutand regulatornotfully
connected.
• Obstructionof gas flow.
• Disengagementof burnerto valve.
• Is grill assembledcorrectly?
• Wipedry with cloth.
• Replaceelectrode.
• Reconnectwiresor replaceelectrode/wireassembly.
• Replaceignitorwire/electrodeassembly.
• Replaceignitor.
Suddendrop ingas
flow or low flame.
• Outof gas.
• Excessflow valvetripped.
• Checkfor gas inLP tank.
• Turn off knobs,wait 30 secondsand lightgrill. If flamesare still low,
turn off knobsand LPtank valve. Disconnectregulator.Reconnect
regulatorand leaktest.Turnon LP tankvalve,wait 30 secondsand
then lightgrill.
Flamesblowout.
• Highor gustingwinds.
• Lowon LPgas.
• Excessflow valvetripped.
• Turn frontof grill to face windor increaseflame height.
• RefillLPtank.
• Referto "Suddendropin gas flow"above.
Flare-up.
• Greasebuildup.
• Excessivefat in meat.
• Excessivecookingtemperature.
• Cleangrill.
• Trim fat from meat beforegrilling.
• Adjust (lower)temperatureaccordingly.
Persistentgreasefire
(candamagethe
appearanceof
aluminumcastings
on the grill).
• Greasetrappedby foodbuilduparound
burnersystem,
• Turn knobsto OFRTurn gasoff at LPtank. Leavelid in positionand
letfire burnout. Aftergrill cools,remove,cleanall parts and replace
greasecan.
Flashback...
(firein burnertube(s).
• Burnerand/orburnertubes are blocked.
• Turn knobsto OFR Cleanburnerandlorburnertubes.
Unableto fill LP tank.
• Somedealershaveolder fill nozzles
with wornthreads,
• The worn nozzlesdon'thaveenough"bite"to engagethevalve.Try
a secondLP dealer.
26 • 463845504
Troubleshooting - Electronic Ignition System
Problem
Possible Cause
CheckProcedure
Prevention/Solution
Nosparksappearat
anyelectrodeswhen
ignitionbuttonis
pushed;no noisecan
be heardfrom spark
module.
• Batterynot installed
properly.
• Checkbattery
orientation.
• Installbattery(makesurethat "+"and "--" connectors
are orientedcorrectly,with "+" end downand "--" end
up.)
• Deadbattery.
• Has batterybeen
usedpreviously?
• Replacebatterywith newAAA-sizealkalinebattery.
• Buttonassemblynot
installedproperly.
• Checkto insure
threadsare properly
engaged.Button
shouldtravelup and
downwithoutbinding.
• Unscrewbuttoncapassemblyand reinstall,makingsure
threadsare alignedand engagedfully.
• Faul_spark module.
• If no sparksare
generatedwith new
batteryand goodwire
connections,module
is faulty.
• Replacespark moduleassembly.
Nosparksappearat
anyelectrodeswhen
ignitionbuttonis
pushed;noiseCAN be
heardfrom spark
module.
• Outputlead
connectionsnot
complete.
• Are output
connectionson and
tight?.
• Removeand reconnectall outputconnectionsat module
andelectrodes.
Sparksare presentbut
not at all electrodes
and/ornot at full
strength.
• Outputlead
connectionsnot
complete.
• Are output
connectionson and
tight?.
• Removeand reconnectall outputconnectionsat module
andelectrodes.
• Arcingto grill away
from burner(s).
• If possible,observe
grill in dark location.
Operateignition
systemand lookfor
arcingbetween
outputwires and grill
frame.
• If sparksare observedotherthanfrom burner(s),wire
insulationmay bedamaged.Replacewires.
• Weak battery.
• All sparkspresentbut
weak or at slowrate.
• Replacebatterywith a newAAA-sizealkalinebattery.
• Electrodesarewet.
• Has moisture
accumulatedon
electrodeand/orin
burnerports,
• Use papertowelto removemoisture.
• Electrodescrackedor
broken"sparksat
crack".
• Inspectelectrodesfor
cracks.
• Replacecrackedor brokenelectrodes.
463845504.27
Your Home
Forrepair-in your home-of all major brandappliances,
lawnand gardenequipment,or heatingand coolingsystems,
no matter who made it, no matter who sold it!
Forthe replacementparts,accessoriesand
owner's manualsthat you need to do-it-yourself.
For Searsprofessionalinstallationof homeappliances
and items like garagedoor openersand water heaters.
1-800-4-MY-HOME ® (1-800-469-4663)
Call anytime, day or night (U.S.A. and Canada)
www.sears.com
www.sears.ca
Our Home
For repairof carry-initems like vacuums,lawn equipment,
and electronics,call or go on-linefor the locationof your nearest
Sears Parts & Repair Center.
1-800-488-1222
Call anytime, day or night (U.S.A. only)
www.sears.com
Topurchasea protectionagreement(U.S.A.)
or maintenanceagreement(Canada)on a productservicedby Sears:
1-800-827-6655 (U.S.A.)
1-800-361-6665 (Canada)
Para pedir servicio de reparaci6n
a domicilio, y para ordenar piezas:
1-888-SU-HOGAR sM
Au Canada pour service en fran(_ais:
1-800-LE-FOYER Mc
(1-888-784-6427)
(1-800-533-6937)
www.sears.ca
S /ARS
® Registered Trademark / Trademark /
Service Mark of Sears, Roebuck and Co.
1M
sM
® Marca Registrada / Marca de F&brica / Marca de Servicio de Sears, Roebuck and Co.
_c
tad
Marque de commerce / Marque d6posee de Sears, Roebuck and Co.
© Sears, Roebuck and Co.


