1
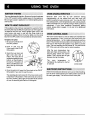
ABOUT YOUR RV APPLIANq;E
Congratulations on your choice of this Magic Chef RV
appliance.As you useyournew appliance,we knowyou will
appreciate the many features that provide excellent
performance, ease of cleaning, convenience and
dependability.
New features have dramatically changed today's cooking
appliances and the way we cook. It is therefore very
important to understand hew your new appliance operates
BEFORE you use it for the first time.
In this Owner's Guide, you willfind a wealth of information
regarding all aspects of your RV cooktop or range. By
carefully following the instructions, you will be able to fully
enjoy and properly maintain your new appliance. NOTE:
Your appliance may not be equipped with some of the
features referred to in this manual,
106%
_
Should you have any questions about using your new gas
appliance, pleasewriteto us at this address:
Magic Chef
Customer Assistance
P.O. Box 2370
Cleveland, TN 37320-2370
Be sure to include the model and serial numbers of your
appliance. For your convenience, we have provided space
on the front cover to record this information.
In our continuing effort to improve the quality and customer
satisfactionof our cooking products, it may be necessary to
rnake changes to our line of RV appliances without revising
the Owner's Guide.
_%PBST,_mUB
HSB
NES"SPAP_S,
MAgAZiNB
&CATALOa
IMP(IRTANTSAFETY INSTRUCTIONS
Read all instructions
before using this
appliance,
The following instructions are based on Safety
considerations
and mustbe strictlyfollowedto eliminatethe
potentialrisksof fire, electricshock,or personalinjury.
WARNING
FOR YOUR
SAFETY
'
To ensure proper operation and "avoidpossible mjury or
damage to unitdo not attempt to adjust,repair,service,or
replace any part of your applianceunless it is specifically
recommendedin this book. All other servicingshould be
referredto a qualifiedinstalleror servicer.
Be sure al! packing materials are removed from the
appliancebeforeoperatingit.
"
IF YOU SMELL GAS:
1. Open windows,
2. Don't touch electrical switches.
3. Extinguish any open flame.
4. Immediately call your gas supplier,
Keepareaaroundapplianceclearandfreefr°mc°mbustible
materials, gasoline, and other flammable vapors and
materials.
If applianceis installednear a window, properprecautions
should be taken to prevent curtains from blowing over
burners.
Do notleaveany itemson the cooktop.The hotair fromthe
ventmay igniteflammableitems and may increasepressure
in closed containerswhichmay causethem to burst.
Many aerosol-type spray cans are EXPLOSIVE when
exposedto heat and may be highlyflammable.Avoidtheir
FOR
YOUR
SAFETY
Do not store or use gasoline or other
flammable vapors and liquids in the
vicinity
of this or any other appliance,
use orstorage near an appliance.
Many plastics are vulnerableto heat. Keep plasticsaway
from parts of the appliancethat may become warmor hot.
Do not leave plasticitemson the cooktopasthey may melt
or soften if left too close to the vent or a lightedsurface
burner.
Toeliminatethe hazardofreachingoverhotsurfaceburners,
WARNING:
Improper installation,
adjustment,
alteration,
service,
or
maintenance can cause injury or property
damage. Refer to this manual. For
assistance or additional information
consult a qualified installer, service
agency, manufacturer (dealer), or the gas
supplier.
Have your appliance installed and properly grounded by a
qualified installer according to the installation instructions.
Have the installer show you the location of the gas shut off
valve and how to shut it off in an emergency.
Always disconnect power to appliance before servicing,
cabinetstorageshouldnotbeprovideddirectlyaboveau
Ifsuch storage is provided, itshould belimited toitemswhich
are usedinfrequentlyand whicharesafelystoredin an area
Subjectedto heatfrom an appliance.Temperaturesmay be
unsafe for some items, suchas volatileliquids,cleanersor
aerosolsprays.
_i=_#:
_....
............................
Turn off appliance and ventilatinghood to avoidspreading
the flame. Extinguishflame then turn on hood to remove
smokeand odor.
Use dry chemical or foam-type extinguisher or baking soda
to smother fire or flame. Never use water on a grease'fire.
If
fire is in the oven or broiler pan, smother by closing oven
door.
If fire is in a pan on the surface burner, cover pan. Never
attempt to pick up or move a flaming pan.
IMPORTANTSAFETYINSTRUCTIONS
Use caution when wearing garments made of flammable
material to avoid clothing _
_.L_
fires. Loose fitting or long
hanging-sleeved
apparel
should not be worn while
Never leta pan boil dry as this could damage the utensil and
the appliance.
cooking. Clothing may ignite
or catch utensil handles,
Only certain types of glass, glass/ceramic, ceramic, or
glazed utensils are suitable for cooktop or oven usage
without breaking due to the sudden change in temperature.
Always place oven racks in the desired positions while oven
is cool. Slide oven rack out to add or remove food, using dry
sturdy pot holders. Always avoid reaching into the oven to
add or remove food. If a rack must be moved while hot, use
a dry pot holder. Always turn the oven off at the end of
cooking,
Use care when opening the oven door. Let hot air or steam
escape beforeremovingorrep_acingfood,
PREPARED FOOD WARNING: Follow food manufacturer!s
instructions.Ifa plasticfrozenfoodcontainerand/oritscover
distorts, warps, or is otherwise damaged during cooking,
immediatelydiscard the food and its container.The food
couldbe contaminated,
Use pans with flat bottoms and handles that are easily
graspedand stay cool.Avoidusing unstable,warped,easily
tippedor loosehandledpans. Pans thatare heavyto move
when filledwith foodmay also be hazardous.
Be sureutensilis large enoughto properlycontainfoodand
avoid bellowers.Pan size is particularlyimportantin deep fat
frying. Besure pan will accommodate the volume offood that
is to be added as well as the bubble action of fat,
Follow the manufacturer's directions when using oven
cooking bags.
This appliance has been tested for safe performance using
conventional cookware. Do not use any devices or
accessories that are not specifically recommended in this
manual. Do not use eyelid covers for the surface units, stove
top grills, or add-on oven convection systems. The use of
devices or accessories that are not expressly recommended
fn this manual can create serious safety hazards, result in
performance problems, and reduce the life of the
components of the appliance.
................
L_
NJ!_G
Turnoffallcontrolsandwaitforapp/iancepartstocoolbefore
touchingorcleaningthem. Do nottouchtheburnergratesor
surroundingareas untiltheyhave hadsufficienttimeto cool.
Cleanappliancewithcaution.Use careto avoidsteamburns
if a wet spongeor clothisusedtowipespillsona hotsurface.
Some cleanerscanproducenoxiousfumes ifappliedto a hot
surface.
spillagedueto
unintentional
contactwiththeutensil,do not
extend handles
over
The California Safe Drinking Water and Toxic Enforcement
Act of 1986 (Proposition 65) requires the Governor of
California to publish a list of substances known to the State
of California to cause cancer or reproductive harm, and
requires businesses to warn customers of potential
exposuresto suchsubstances.
burners. Always turn
pan handlestoward the
side or back of the
appliance, not out into
the room where they
are easily hit or
adjacent by surface
reached
small
children,
of gas can result in low-level exposure to some of the listed
substances, including benzene, formaldehyde and soot, due
primarily to the incomplete combustion of natural gas or liquid
petroleum (LP) fuels, Properly adjusted burners will minimize
incomplete combustion. Exposure to these substances can
also be minimized by properly venting the burners to the
Users of this
appliance
hereby and/or
warneddoor
that in
thethe
burning
outdoors
by opening
theare
windows
room
where the appliance is located.
To minimize bums, ignition of flammable materials and
_
_.__
SAVETHESEINSTRUCTIONS
4
USING THE COOKTOP
The surface burners will feature either matchlit ignition or
To light surface burner with Piezo ignition:
Piezo
pilotless ignition. Be sure
all control knobs are insure
the
OFF positionbeforesupplying
gastotheappliance.Be
gas supplyto applianceis on before I ghtingburner
1. Place a pan on the burner grate.
2. Pushin andturnthesurfaceburner
controlknobto the LITE position.
Ifthe appliancehas notbeen operatedfor a periodof time,
thesurfaceburnermaybedifficulttolightduetoairinthegas
line.Tobleedoffairfromtheline,holda lightedmatchnextto
the burnerand turn the surface burner controlknobto the
ON position.When the burnerlights,turnthe knob backto
the OFF positionand proceedas directedbelow.
IMPORTANT:
face burnerat aOnly
time.light one sur-
Topreventdamagetothecooktoporpan, neveroperatethe
surface burnerwithouta pan in place, never allowa pan to .
boil dry, and never operate a surface burner on HIGH for
extended periods of time.
CAUTION: If the burnerdoes not lightwithin about 4
secondsor iftheflameshouldgooutduringcooking,turn
the burneroff. If gas has accumulatedand a stronggas
odorisdetected, opena windowand wait5 minutesfor
the gas odorto disappearbeforerelightingthe burner.
To light surface burner with matchlit ignition:
3. Immediately,rotatethe TopBurner
Ignitorknobto the right(clockwise)
several clicksuntiltheburnerlights.
The burner should light within 6
clicks or one full rotation of the
knob.
4. When the burner lights, adjust the surface burner
control knob between OFF and HI to select the desired
flame size.
5. After cooking,turnthe surfaceburner controlknobto the
OFF position.
To operate burner if the Piezo ignitor is not functional:
1. Be sureall controlsare in the OFF position.
2. Holda lightedmatchto thedesiredsurfaceburnerhead.
1. Placea pan on the burnergrate.
CAUTION: Do notturnthecontrolknobon and allowgas
2. Hold a lightedmatch next to the desiredsurface burner
to escape before ghtng the match.
head.
3. Push in and turnthe surface burner controlknob to the
LITE position.
CAUTION: Do notturnthe controlknobon andallowgas
to escape beforelightingthe match.
3. Push in and turn the surface
burner control knob to the LITE
position.
_
4. When the burner lights, adjust
the knob between OFF and HI to
select the desired flame size.
5. After cooking,turn the surface burner control knob to the
OFF position.
4. Whentheburnerlights,adjusttheknobbetween OFF and
HI to selectthe desiredflame size.
5. After cooking, turn the knob to the OFF position.
When the recreational vehicle is not inuse or while traveling,
turn all knobs to the OFF position and turn off the main gas
supply.
USING THE COOKTOP
Use a HIGHflame settingto quicklybring liquidsto a boil or
to begin a cooking or canning operation. Then reduce to a
lower setting to continue cooking. Never leave food
unattended when using a HIGH flame setting,
I
5
Adjust the flame size so it
does not extend beyond
the edge of the cooking
utensil. This is for
personal safety and to
preveht possibledamage
___ _,_,_
cabinets
_...___
appliance. This also improves cooking efficiency.
._._
above
_"I_11_
the
to the appliance, pan, or
An intermediate flame size is used to continue a cooking
operation. Food will not cook any faster when a higher
flame setting is used than needed to maintain a gentle
boil. Remember, water boils at the same temperature
whetherboilinggentlyorvigorously.
Use LO to simmer or keep foods at serving temperatures,
Cookware which extends more than one inch beyond the
grate, rests on two grates, or touches the cooktop will cause
a buildup of heat and resultin damage to the the burner
grate, burnerand cooktop.
CAUTION: Topreventdamageto thecooktop,do notuse
oversized cookware. The pan should not be more than
one inch larger than the burner grate. The maximum pan
size is a 10-inch skillet.
I
__
" .
air circulationaround the burner will cause heat to build up
and may result in damage to the burner grate, burner or
cooktop.
..,/_
If a knob is turned very quickly from the HI to the LO setting,
the flame may go out, particularly if the burner is cold. If this
occurs, turn the knob to the OFF position. Wait several
seconds, then light the burner again,
Foods cook faster
cookware
covered because
Cookware,such
aswhen
a wokthe
witha
supportisring,which
restricts
more heat is retained. Lower the flame size when cookware
is covered. This also improves cooking efficiency.
The cooking performance is greatly affected by the type of
cookware used. Proper cookwarewill reduce cookingtimes,
useless energy and produce more even cooking results. For
best results use a heavy gauge metal pan with a smooth flat
bottom, straight sides and a tight fitting lid. Select a material,
such as aluminum or copper,that conducts heat quickly and
evenly.
USING THE OVEN
Theoveqfeaturespilotignition. Besure allcontrolknobs are
in the OFF positionbeforesupplyinggasto the appliance,
Be suregassupplyto applianceis on beforelightingpilotor
oven burner,
If the appliancehasnot been operatedfora periodof time,
theovenpilotmaybe difficultto lightduetoairinthegas line.
To bleed airfrom the line,holda lightedmatchnext to the
oven burner and push in and turn the Oven knob to a
temperaturesetting.When the burnerlights,turnthe knob
back to the OFF positionand proceedas directed below.
To light oven pilot:
1. Be sure all controls are in
_
The Oven Controlknob is used to selectand maintainthe
oven temperature.Push in and turn this knob just to the
desiredtemperature- notto a highertemperatureand then
back. This provides more accurate oven temperatures. Turn
oven. The oven standby pilot will remain lit. Turn the knob to
OFF if the oven will not be used or when traveling.
2. Push
in and
turn
the
Oven knob
to the
PILOT
ON position.
OFF
@
3. the
Open
theposition.
oven door and
light oven pilot with a j__,_
match. The oven pilot is _
_
locatedbeneath the oven
bottom, on the left side of
o o° ° °
the burner. The pilot is lit
when a small flame is visible at the top of the pilot
burner.
Because each oven has its own personal baking
characteristics,do not expect that your new oven will
performexactlylike your previousoven. You may find that
the cookingtimes, oventemperatures,and cookingresults
differsomewhatfromyourpreviousrange.Allowa periodof
adjustment. If you have questions concerning baking
results,please refer to pages 7, 8, 9 and 16 for additional
information.
I
,
__J
4. Once the pilot is lit, leave the Oven knob in the PILOT
ON position if you wish to use the oven.
The standing pilot will remain lit if the Oven knob is left
in the PILOT ON position. If the Oven knob is turned to
the OFF position, gas supply to the pilot will be turned
off and the standing pilot flame will extinguish.
After the oven temperature has
been set, there will be about a 45
f
u_ ,_.'_X
this
knob
to
the
PILOT
ON
position
if
you
wish
to use the
second delay before the burner
ignites. This is normal and no gas
escapes during this delay.
The
oven
temperature
is
maintained by cycling the burner
on and off.
OVENKNOB
Whenthe recreational vehicle is not in use or while traveling,
turn the Oven Control knob to the OFF position and turn off
the main gas supply. This will turn off the oven pilot.
USING THE OVEN
1. When cool,positionthe rack in the oven.
2. Push in and turn the Oven knob to the desired
temperature for baking or roasting or to BR (broil) for
broiling,
For baking: Selecting a temperature higher than desired
will NOT preheat the oven any faster, and may have a
negative effect on baking results,
For broiling: The Oven knob can be turned to a lower
temperature (400 to 450°F) for broiling longer cooking
meats or poultry or if excessive smoking or splattering
occurs,
3. For baking: Place the food in the center of the oven,
allowing one to two inches between the utensil and the
ovenwalls.
7
Use the correct rack position. Model 18 has 2 rack
positions;model22 has 3 rackpositions.Baking resultsmay
be affectedifthe wrongrackpositionisused.
• Use the lower rack position for most baking
operations. When baking cookies or biscuitson a
cookie sheet use the upper rack position.
Top browning may be darker if food is located
toward the top of the oven.
_ Bottom browning may be darker if food is located
toward the bottom of the oven.
Cookware material and size play an important part in
baking results. Always use the type and size of pan called
for in the recipe. Cooking times or cooking results may be
affected if the wrong size is used.
The maximum recommended pan size is a 13 x 9 x
2- rich cake pan or a 14 x 10 x 2- rich cookie sheet.
For broiling:Place the broiler pan in the broilerarea
directlybelow the ovenburner,
When the oven is in use, the oven vent area may feel
warm or hotto the touch. Do notblockthisarea or the vent
openingas this may affectcookingresults,
• Shiny metal pan reflects heat awayfromthefood,
produceslighterbrowningand a softer crust. Use
shiny pans for baking cakes or cookies. For
optimum baking results, bake cookies and biscuits
ona flat cookiesheet. If thepan has sides, suchas
a jelly roll pan, browningmay not be even.
4. Check the food for doneness at the minimum time in the
recipe. Cook longer if necessary,
5. Remove the food from the oven and turn the Oven knob
to the PILOT ON or the OFF position,
* Dark metal pan or a pan with an anodized (dull)
bottom absorbs heat, produces darker browning
and a crisper crust. Use this type of pan for pies, pie
crusts or bread.
If using oven-proof glassware, or dark pans
such as Baker's Secret reduce the oven
temperature by 25°F except when baking pies or
Preheating is necessary for baking. Turn the Oven knob to
the desired temperature and allow about 10to 15minutes for
bread. Use the same baking time as called for in the
recipe.
the oven to preheat.Selecting a highertemperature will not
shortenthepreheattime and mayaffectbakingresults.It is
notnecessaryto preheatfor roastingor broiling,
Allow hot air to flow freely through the oven for optimum
bakingresults. Large pans or improperplacementof pans
in the oven wilt block air flow and may result in uneven
browning.Foroptimumbrowningand even cookingresults:
Do not cover the oven bottom or the entire oven rack
with foil.
Do not crowd a rackby placing several pans on a
rack.Also, do not blockair flow by usingtoo !arge
of a pan.
• Allow one to two inches between the pan and the
ovenwalls.
Use a reliable recipe and accurately measure fresh
ingredients. Carefully follow directions for oven
temperature and cooking time. Preheat oven if
recommended,
Check the cooking progress at the minimum time
recommendedintherecipe, lf necessary,continuechecking
at intervalsuntilthefoodis done.Ifthe oven dooris opened
toofrequently,heatwillescapefromthe oven;this can affect
bakingresultsand wastes energy.
If you add additional ingredients or alter the recipe,
expectcookingtimesto increaseor decrease slightly.
USING THE OVEN
Roastingisthemethodforcookinglarge, tendercutsofmeat
uncovered, without adding moisture. Most meats are
roastedat 325°F. It is not necessaryto preheatthe oven.
Broiling is a method of cooking tender meats by direct
radiantheat.The cookingtimeisdeterminedbythedistance
betweenthe meat and the ovenburner,the desireddegree
of donenessand the thicknessof the meat.
Use tender cuts of meat weighingthree pounds or more.
Some good choicesare: Beef rib, ribeye,top round,high
qualitytip and rumproast,porkloinroast, leg of lamb,veal
shoulderroastand curedor smokedhams.
Broilingrequiresthe use of the broilerpan and insert.The
broilerinsertmustbeinplacetoallowfatandliquidtodrainto
the pan belowto preventspatters, smoke and flare-ups.
Improperuse may causegreasefires.
Season meat,if desired,eitherbeforeor afterroasting.Rub
intothe surfaceof the roast ifadded beforecooking,
For easier clean up, linethe broilerpan with foiland spray
theinsertwitha non-stickvegetablespray.Donotcoverthe
broiler insert with aluminumfoil as this prevents fat from
Placethe meat fat-side-up on a rack in a shallowroasting
pan.Placingthe meat ona rackholdsitoutofthedrippings,
thusallowingbetter heatcirculationfor evencooking.Asthe
fat on top of the roast melts,the meat is bastednaturally,
eliminatingthe needfor additionalbasting.
draininginto pan below.
Trim excessfat and slash remainingfat to help keep meat
from curlingand to reducesmokingand spattering.Season
meat after cooking.
The cookingtime is determinedby the weight of the meat
and the desired doneness.For more accurateresults,use
a meatthermometer,lnsert itsothetip isinthe centerof the
thickestpart of the meat. It shouldnot touchfat or bone.
Remove the roast from the oven when the thermometer
registersapproximately5°F belowthedonenesswanted.As
the meatstands,the temperaturewill rise.
l=
It is possibleto broil longer cookingfoods such as pork
chopsat a lowertemperatureto preventoverbrowning.Turn
the knob to 400° or 450°1=,rather than BROIL, for low
temperaturebroiling.Reducethebroiltemperatureto4OOto
450°F ifexcessivesmokingor splatteringoccurs.
Meat should be turned once about halfway through its
cookingtime. Check the donenessby cutting a slit in the
meat nearthe centerto checkthe color.
See Care and CleaningChart on page 13for instructions on
cleaning the broiler pan and insert.
NOTE: For more information about food safety, call I
USDA's Meat & Poultry Hotline at 1-800-535-4555. For I
c°°king inf°rmati°n write t° the Nati°nal Live St°ck and I
NOTE: To purchase a two-piece broiler pan for your RV I
range, fill out the purchaseorder form that came with your
IllinoisMeat
Board,60611.
444 North Michigan Avenue, Chicago, jl
RV1_800_544_5513.range.
If you did not receve the form ca
USING THE OVEN
Cakes are uneven.
• Pans too close or touching each other or oven walls. • Batter uneven in pans.
• Temperature set too low or baking time too short. • Oven not level • Undermixing. • Toe
much liquid.
Cake falls.
• Too much shortening or sugar. • Too much or too little liquid. • Temperature set too low.
• Old or too little baking powder. • Pan too small. • Oven door opened frequently. • Added
incorrect type of oil to cake mix. • Added additional ingredients to cake mix or recipe.
Cakes, cookies, biscuits
too brown on bottom.
• Oven not preheated. • Pans touching each other or oven walls. • Incorrect rack position.
• Incorrect use of aluminum foil, • Placed 2 cookie sheets on one rack. • Used glass, dark,
stained warped or dull finish metal pans. (Use a shiny cookie sheet.)
Follow cookware manufacturer's instructions for oven temperature. Glassware and dark
cookware such as Ecko's Baker's Secret require lowering the oven temperature by 25°F.
Excessive shrinkage.
• Too little leavening. • Overmixing. • Pan too large. • Temperature set too high. • Baking
time too long, • Pans too close to each other or oven walls.
Cakes have tunnels.
• Not enough shortening. ° Too much baking powder. ° Overmixing or at too high a speed.
• Temperature set too high.
Pie crust edges too
brown,
• Temperature set too high. • Pans touching each other or oven walls. • Edges of crust too
thin; shield with foil.
Pies have soaked crust.
• Temperature too low at start of baking. • Filling too juicy. • Used sh(ny metal pans.
10
MAINTENAN(;E
£
CAUTION: Topreventdamageto the cooktop,do not use
oversizedcookware.The pan should not be more than
one inchlargerthanthe burnergrate. The maximumpanI
size is a 1O-inch skillet.
J
CAUTION: Do not operate a surface burnerwithout a
pan on the grate.The porcelainfinishon the grate may
chipwithouta pan to absorb the intenseheat fromthe
burner flame,
To preventstaining or discoloration,clean cooktop after
each use. Wipe acidorsugarstainsas soon as the cooktop
has cooled as these stains may discolor or etch the
porcelain,
To remove: When cool, graspthe twofrontcornersand lift
up. Release the sloton the left rear corner of the cooktop
flangefrom the tab onthe burner boxwall. Then movethe
cooktop toward the left to release the slot on the cooktop
flange from the tab on the burner box wall.
To install grates: Place grateon cooktop,locatingeach of
thefourgrate legson topof the four black plasticgrommets.
Press down at each corner to secure burner grate to
cooktop.To preventdamageto the grommets,do notpress
downon allfourcornersat thesametime. Installone sideof
the gratethen installthe otherside.
Slot
To replace: Insert the slot on the right rear corner of the
cooktopflange over the tab on the burner boxwall. Lowerthe
rear of the cooktop into place, inserting the slot on the left
rear corner of the cooktop flange over the tab on the burner
box wall. Lower the top into place and apply slight pressure
at the two front comers to secure the cooktop in place.
Due to certain atmospheric conditions, the cooktop on your
appliance may show signs of rust on the underneath side.
This is especially true in areas of high humidity and salt air
areas.
To help eliminate this condition, caution should be taken to
make sure that the underneath side of the main top is kept
dry. This is especially important in areas of high humidity
where moistureaccumulates. If you detect signs of rust, we
have found it helpful to spraythe underneath side with a coat
of high-heat tested rustolium or silicone paint.
CAUTION: Remove top from appliance and spray in a
well vented area.
_
MAINTENAN( :E
Depending on your model, your RV range or cooktop will
featurethreeorfoursurfaceburners. Eachburnerissecured
in place with a screw. When burner is cool, remove the screw
before removing the burner. When re-installing the surface
burner be sure to replace the screw.
Ifthesufface burnerdoesnotlight, checktoseeiftheburner
ports are clogged. If so, clean with a straight pin or small
metal paper clip. Be sure the standing pilot is lit. Check to be
sure that the burner is correctly installed.
Toinstall surface burner: The air shutterend onthe burner
shouldfitoverthe orificehood.
11
Do not place excessive weight on an open oven door or
stand on an open oven door as, in some cases, it could
cause the range to tip over, breakthe door, or cause senous
injury to the user.
When opening the oven door, allow steam and hot air to
escape before reaching in oven to check, add or remove
food.
YourRV rangefeaturesone oven rackwitha choiceoftwoor
three rackpositions.The ovenrackisdesignedwitha safety
lock-stoppositionto keep the rackfrom accidentlycoming
remove food. The rack also features two tabs to keep the
\_\.
rack from rattling during travel.
"\\
er
_tt
completely out ofthe oven when pullingthe rackout toadd or
To install surface burner with Piezo ignition: The two
tabson eachflashtubeshouldbe securelyinsertedintothe
two slotson each burnerhead,
Slo_
_
....._"_i
__'_
I CAUTION: DOnot attempt to change the rack position
t when the oven is hot.
Tabs
)
_, ,,
until it stops. This releases the two tabs on the sides of the
rack. Tilt the front end of the rack up, then push the rack to
the
back of the
of Pull
the rack
up, then
remove
To remove:
Beoven.
sure Liftthe
rack isrear
cool.
the rack
straight
out
it from the oven.
Two
The flashtube "hold down" clips should secure the flashtube
in place. The clips are located under the metal shield.
Flash
(_
_Flash..._
e_
_.u_b
Hold down"
_"Hold
down"
To replace: Place the oven rack in the oven, on _ of the
racksupports.Pushtheracktothe backofthe ovento allow
the rackto drop intoplace. Pull the rackforward to the stop
position.Then,
you push
the
rack
back, lowerthetwo
tabs
under
the rack as
support.
Th!s
will
anchorthe
rack intoplace
and prevent it from rattling during travel.
12
MAINTENANCE
Protect the oven bottom against excessive spillovers,
especially acid or sugary spillovers, as they may discolorthe
porcelain. Use the correct size cooking utensil to avoid
boilovers. Never place utensils or aluminum foil directly on
the oven bottom,
Before replacing the light bulb, DISCONNECT POWER TO
RANGE.
To turn on oven light: Push the switch located on the
manifold panel.
To replace oven light: Be sure the bulb iscool. Use a dry
cloth as the bulb may break.
carefully unscrewbulb. Do nottouch a hot bulb with a damp
_
_._!_
To remove: When cool, push the oven bottom toward the
back of the ovenagainstthespringson the backwall. This
willreleasethe oven bottomfromthe twotabs on the oven
walls.Then liftthe ovenbottom upand outof the oven.
To replace: Positionthe oven bottom so the holeson the
flange are locatedat the frontof the oven. Slide the oven
bottomto thebackof theovenuntilthe rearedge isinserted
intothe bracketacrossthe backof theoven. Then, pushthe
oven bottombackagainstthe springsand lowerinto place.
Be sureeach slot onthe side-front cornersecurely fitsover
thetabsonthe ovenwall.Thiswilllockthe ovenbottominto
placeand preventit from rattlingduring travel.
p°th°lder' t° prevent p°ssible harm tihands'
and very
Replacewith a 40 watt appliance bulb and reconnectpower
to range.Reset theclock.
CARE AND CLEANING CHART
Because of the many new cleaning products introduced in
the marketplaceeach year, it is not possibleto list all
productsthat can be safely usedto cleanthis appliance.
ALWAYS
READ
THE
MANUFACTURER'S
INSTRUCTIONSto be sure the cleaner can be safely used
on this appliance. Also, read and carefully follow the
manufacturer'sdirectionswhenusinganycleaningproduct.
13
Non-Abrasive Cleaners -Bon Ami, paste of baking soda
and water.
Mildly Abrasive Powder or Liquid Cleansers - Ajax,
Barkeepers Friend, Cameo, Comet, Soft Scrub.
Non-Abrasive or Scratchless Plastic or Nylon Scouring
Pads or Sponges - Chore Boy Plastic Cleaning Puff,
Scrunge Scrub, Sponges, or Scotch-Brite No Scratch,
To determine if a cleaning productis safe, test a small
Cookwareor KitchenSponge.
inconspicuousarea usinga very lightpressureto see if the
surfacemayscratchordiscolor.Thisisparticularlyimportant
for porcelainenamel,metal,pasticor highlypolished,shiny,
Abrasive Scouring Pads - S.O.S., BrilloSteelWool Soap,
or Scotch-BriteWool Soap Pads.
or paintedsurfaces,
The foliowing brandsmay help you make an appropriate
selection:
(Brandnames for the above cleaningproductsare registered
trademarksof the respectivemanufacturers.)
Glass Cleaners -Bon Ami, Cinch,Glass Plus,Windex.
Be sure applianceis off and all parts are cool before
handlingorcleaningtoavoiddamageand possibleburns.
If a part isremoved,be sureit is correctlyreplaced.
Dishwashing LiquidDetergents - Dawn, Dove,Ivory,Joy.
Mild Liquid Spray Cleaners - Fantastik,Formula409.
To prevent staining or discoloration, clean appliance
after each use.
Baked enamel
• Oven door
• Side panels
• Soap and water
• Mildliquidcleaner
• Glass cleaner
Usea drytowelor clothtowipe up spills,especiallyacid (milk,lemonjuice, fruit,mustard,
tomatosauce) or sugaryspills.Surfacemay discoloror dullif soil is not immediately
removed.Thisis especiallyimportantfor whitesurfaces.
When surfaceiscool,washwithwarmsoapywater,rinseanddry. Forstubbornsoil,use
non-abrasivecleaningagentssuchas bakingsoda pasteor BonAmL If desired,a thin
coatof mildappliancewax canbeusedto protectthe sidepanels.Aglasscleanercanbe
used to add"shine"to the surface.
NOTE: Donotuseabrasive,causticorharshcleaningagentssuchas steelwoolpadsor
oven cleaners.These productswill scratchor permanentlydamagethe surface.
NOTE: Never wipe a warm or hot surfacewith a damp clothas thismay damage the
surface andmay cause a steam burn.
Burner box
•
•
•
•
•
Soap and water
Paste of baking soda and water
Non-abrasive plastic pad or sponge
Liquid cleaner
Glass cleaner
Burner boxislocatedunder lift-up cookfop.Cleanfrequentlyto remove spillovers.If soil
is not removed and isallowed to accumulate, it may damage the finish. Toclean remove
grates and surface burners and clean with soap and water, rinse and dry.
_
removem_ld_
Ri_
d_ and _p!ace Tum QN e_
buraer to _
_ _b_
(Continued next page)
14
CARE AND CLEANING
PARTS
Glass
Oven window
[_
I _loth
I _,
I
CHART
after cleaning. Remove
wrung out in clea!
steel wool or powdered
do notoversaturate
I _ass,
cloth.
Grates
of porcelain#coatedsteel.They cartbecleaned atthe sink withs0ap ahd
Metal finishes
• Trim parts
• Manifold panel
• CooJdop
• Soap and water
• Glass cleaner
Wash with soap and water.Use a glass cleaner and a softcloth to remove fingermarks or
smudges. Do not use oven cleaners, abrasive or caustic agents. They will damage the
finish.
,
CAUTION: Protectaluminum gas tubing from exposure to causticcleaners such asoven
J c eaners.
Oven bottom
Oven rack
•
•
•
•
Soap and water
Cleansing powders
Plastic pad
Soap filled scouring pad
s
Clean with soapy water. Remove stubborn soil with cleansing powder or soap filled
scouring pad. Rinse and dry.
_i
_n
;
I" Overlays
with_ap andwatt; rinse;a_d_i Use a glas_cleaner anda ]
;
]
powderedC,ean_e;SOn|
I "Kn°bs
I
Porcelain enamel
• Cooktop
• Oven cavity
• Soap and water
• Mildabrasive cleaners
* Plasticpad
• Oven cleaner,ovenonly
• Soap filledscouringpad
Silicone rubber
• D00r gasket
,Soap and waiei
Surface burners
* Soap and water
• Paste of baking sodaand water
• Plasticscouring spongeor pad
• Mildly abrasive cleaner
fati grebe qt:Bold (tom_toi:fe_n;]
Clean porcelainwithsoapand water;rinse. Use cleansingpowdersor a plasticscouring
padto removestubbornsoil.Wipe acid or sugarstainsas soon as area is coolas these
stainsmay discolor or etchthe porcelain.Do not use metallicscouringpadsas they will
scratchthe porcelain.
To make cleaning the oveneasier, place 1/2 cup householdammoniain a shallowglass
containerand leave in a cold oven overnight.The ammonia fumes wit( help loosenthe
burnedongreaseandfood.Ovencleanerscanbe usedonthe porcelainovenonly.Follow
manufacturer'sdirections.If oven cleaner was used, thoroughlyrinse ovencavity and
capillarytube which is locatedat the top ofthe oven.
:
;
d_. De not_emovbdb0r gasket.
=
::
For ease ofcleaning,removesoilfromthe burneras soonas burner has cooled.If food
boils over,remove panto another burner.Then, coolsoiledburnerand clean.
Clean, when cool, after each use with warm soapy water. Remove stubbornsoil by
scouring with a non-abrasive plastic scouring pad and a pasteof bakingsoda and water.
Clean ports with a straight pin. Do not enlarge or distortthe ports, Do not use a wooden
toothpick. It may break off and clog port. Surface burners can be dried in the oven set at
170°F£Burner must be dry before use,
SERVI(;E INFORMATION
,,
PROBLEM
,,,,
; ..........
Surface burner fails to light,
CAUSE
........
a. clogged burner port(s)
b. surfacecontrolnot completelyturnedto
the LITE position or turned too quickly
from the LITE position
c. incorrectly installed
Burner flame is uneven;
' a Cloggedburner port(s) :
15
CoRREcTION
a, clean ports with straight pin.
b. turn controlto the LITE position until the
burner ignites, then turn control to desired
flame size.
c. see page 11.
a: clean pbrts withstraight pin.
Surface burner flame lifls off port or
a. air/gas mixturenot proper
a. call servicemanto adjustburner.
is yellow in color,
NOTE: Some yellow tippingwith LP gas is
normaland acceptable,
NOTE: Be sure installer properly adjusted
range at time of installation.
Oven burner fa is
]ght
=
i
.....
;
a
incorre_y set
.... ,,,,,=I =,,ilb ovenp _ ,,,;,shot
it i ....il
,
:
Popping sound heard when burner
extinguishes,
MoistuTecondensatiOn:on oven ,
window, if eqUal
w_nenovenJSi_
:
......
,
:',
Baking results are not satisfactory,
• browning is too pale, too dark or
is uneven,
• food cooks unevenly,
• food is underdone or overdone,
Oven slow to heat, poor baking
results, poor ignition of burner, pilot
won't stay lit, popping sound from
surface burner, carbon on pilot
shield, burner flame too lowhigh.
il
Gas odor
,
_
,
"
, ¸= ¸¸¸¸¸¸¸!¸¸¸i¸¸i¸¸=
,
.........
.......
,,;
a; see page 7 .
i b: ght pik_t_
See page i;6;
,i
,i,,,
,,i,,
i
,........
I This is a normalsound that occurswith some types of gas when a hot burner is turned off.
i The poppingsound is nota safety hazard and will not damage the appliance.
ia.it i__al?br theWindowto fogdBfingthe I al leave door ajar for one or two minutes to
: ali0w _oiStu_t0 escape:
b
I b, US_ adamp clbth to clean: Window to l
the Wrldow:
: :....
I : p_even_excess water from seeping
i
==
===
:,==
I
the ps_e!s of g!_ss. ......
a. oven not preheated or set at correct
a. preheat oven 10 to 15 minutes.
temperature.
b. used incorrect rack position
b, see page 7.
c. incorrect use of aluminum foil
c. see page 7.
d. oven bottom incorrectly replaced
d, replace oven bottom correctly.
e. too many pans on one rack or pan is too e, see page 7.
large
f. reiostall thermostat sensing device.
f. oventhermostatsensingdeviosisoutofthe
See Problem Chart on page 9 for additional
holding clip(s).
I information,
a. gas pressure regulator
a. hove gas dealer test regulator.
,
a. possible leak or loose fittings
a, see boxed statement on page 1.
Because of vibrations due to travel
connections on a recreat/onal vehicle may
Loosen. Therefore, periodically check all
connections for leaks. See the installation
instructions for proper procedures on leak
testing, NEVER use a match or flame to
' check for leaks.
16
SERVIq:E INFORMATI()N
Do not attempt to service the appliance yourself unless
directed to do so in this manual. Contact the dealer who
sold you the appliance for service.
If your appliance should require service or replacement
parts,contactyourdealerorauthorizedservicer.Be sureto
have the model and serial numbers of the appliance
available.The modeland serialnumbersare found on the
ratingplatewhichis locatedunderthe cooktop.
Ifyouare notsatisfiedwiththelocalresponseto yourservice
requirements,write to Magic Chef CustomerAssistance,
P.O. Box 2370, Cleveland, TN 37320-2370 or call
1-800-544-5513. Include your name, address, phone
number,the complete model and serial numbers of the
appliance,the name and addressof the dealerfrom whom
you purchased the appliance, the date of purchase and
detailsconcerningyour problem.
Ifyou do not receivesatisfactoryservice,you may contact
the Major ApplianceConsumerAction Program by letter.
Includethe informationlistedabove.
MajorApplianceConsumerActionProgram
20 NorthWacker Drive
Chicago,IL 60606
MACAP (MajorApplianceConsumerActionProgram)is an
independentagencysponsoredbythreetradeassociations
as a court of appealson consumercomplaintswhichhave
notbeenresolvedsatisfactorilywithinareasonableperiodof
time.