1
BEFORE STARTING INSTALLATION
" WHERE TO INSTALL THE SOFTENER . . . . . . . . . . . . . . . . . . . . . . . . . . . . . . . . . . . . . . . . . . . . . . . .
Place the softener as close as possible to the
pressure tank (well system) or water meter (city
water).
Place the softener as close as possible to a floor
drain, or other acceptable drain point (laundry
tub, sump, standpipe, etc.).
Connect the softener to the main water supply
pipe BEFORE or AHEAD OF the water heater.
DO NOT RUN HOT WATER THROUGH THE
SOFTENER.
Temperature of water passing
through the softener must be less than 120 _F
(49 _C).
Keep outside faucets on hard water to save soft
water and salt.
Do not install the softener in a place where it
could freeze. Damage caused by freezing is
not covered by the warranty.
Put the softener in a place water damage is least
likely to occur if a leak develops. The manufacturer will not repair or pay for water damage.
A 120 volt electric outlet, to plug the included
transformer into, is needed within 10 feet of the
softener. The transformer has an attached 10
foot power cable. Be sure the electric outlet
and transformer are in an inside location, to
protect from wet weather.
If installing in an outside location, you must take
the steps necessary to assure the softener,
installation plumbing, wiring, etc., are as well
protected from the elements, contamination,
vandalism, etc., as when installed indoors.
Keep the softener out of direct sunlight.The
sun’s heat may soften and distort plastic parts.
" TOOLS, PIPE and FITTINGS, OTHER MATERIALS YOU WILL NEED (see page 6) . . . . . . . .
In and out fittings included with the softener are 1”
(nominal) copper sweat tubes. To maintain full valve
flow, 1” pipes to and from the softener fittings are
recommended. You should maintain the same, or
larger, pipe size as the water supply pipe, up to the
softener inlet and outlet.
Drain hose (3/8” inside diameter) is needed for the
valve drain. See step 5 on page 8. A 15’ length of
hose is included with some models.
Use copper, brass, or galvanized pipe and fittings.
Some codes may also allow PVC plastic pipe.
A length of 3/8” or 7/16” inside diameter hose is
needed for the salt tank drain. A 7’ length of hose is
included with some models. If a longer length is
needed, you can buy good quality, thick--wall, flexible hose at most hardware stores or supply houses.
ALWAYS install the included bypass valve, or 3
shut-offvalves. Bypass valves let you turn offwater
to the softener for repairs if needed, but still have
water in the house pipes.
If a rigid valve drain is needed, to comply with
plumbing codes, you can buy the parts needed (see
page 8) to connect a 1/2 in. copper tubing drain.
Nugget or pellet water softener salt is needed to fill
the brine tank (see page 9, 10 and 16).
" PLAN HOW YOU WILL INSTALL THE SOFTENER . . . . . . . . . . . . . . . . . . . . . . . . . . . . . . . . . . . . .
You must first decide how to run in and out pipes to
the softener. Look at the house main water pipe at
the point where you will connect the softener. Is the
pipe soldered copper, glued plastic, or threaded
brass/galvanized? What is the pipe size?
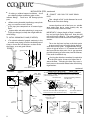
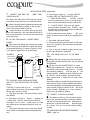
Now look at the typical installation illustration on
page 6. Use it as a guide when planning your particular installation. Be sure to direct raw, hard water
to the softener valve inlet fitting.
The valve is
marked IN and OUT.
5