1
CONTENTS
Ken
SAFETY
USE AND
CARE
Your Range and Its Features ..................................... 5
Range Control .....................................................................
6-8
Cooktop Cooking ................................................................................
9
Cooktop Controls ................................................................................
9
Burner Ignition .......................................................................................
9
Oven Cooking Tips .........................................................................................
11
Broiling ..............................................................................................................
12
CLEANING
The Self-Clean Cycle ...................................................
13, t4
Cleaning Tips .......................................................................
,,,_,,
I5
Removable Range Parts ........................................ 16-19
SERVDCE
What to Do Before Calling for Service .....................
20, 21
Thermostat Adjustments ...............................................22
WARRANTY
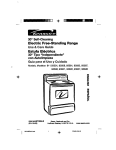
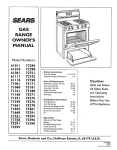
MODELS
36725, 36729
@
TJ
TY
SAVE
Read
all instructions
appliances,
WARNING:
basic
safety
before
THESE
using
precautions
INSTRUCTIONS
this
shouldi
appBiance.
be followed,
When
using
Uncluding
electrical
the
follow,rig.
M
If the information in this manual is
not followed exactly, a fire or explosion may result
causing property damage, personal injury or death.
Do not store or use gasoline or other flammable vapors and liquids in the vicinity of this or
any other appliance.
WHAT 1"O DO IF YOU SMELL GAS
• Do not try to light any appliance!
• Do not touch any electrical switch; Do not use
any phone in your building!
Teach children not to play with control
knobs or any other part of the range.
Never leave children alone or unattended
where a range is in use.
• Immediately call your gas supplier from a
neighbor's phone. Follow the gas suppiler's
instructions!
• If you cannot reach your gas supplier, call the
fire department.
Installation and service must be performed by
a qualified Installer, service agency or the gas
supplier.
WARNING:
L. P. Burner Adjustments
The adjustments in the Installation Instructions must be made before you try to use
your range.
If you are using Liquefied Petroleum Gas
(bottled gas) all L P. adjustments in the
Installation Instructions must be made before use.
Ifyour range Is not properly adjusted, flames
may be too high, or the range may use too
much fuel, release toxic fumes or cook
poorly_
Never let anyone climb, sit or stand on an
open oven door or any part of the range.
WARNING:
To prevent accidental
tipping of the
range from abnormal usage, including
excess loading of the oven door, at.
tach it to the wall or floor by installing
the anti-tip
device
supplied,
if the
range is moved for cleaning, servicing
or any reason, be sure anti-tip device
is re-engaged properly when the range
is replaced,
Failure to take this pre.
caution could result in tipping of the
range and cause injury.
NGSAF17
:.To insure safety for YOurself and your home, please read your Owner's Manual
carefully. Keep it handy for quick easy reference. Pay close attention to the
safety sections of your manual.
loOking for the i_
You can recognize the safety sections by
symbol or the word "Safety".
Never leave cooktop elements/
burners unwatched at high heat
settings. Boilovers cause smoking and greasy spiilovers could
catch fire,
Never use a towel or other bulky cloth
as a potholder. Such cloths could catch
fire_
Always keep the range area clear
and free from things that will burn.
CAUTION:
Never store things in an oven
or near cooktop elements/burners. These things may catch fire
and plastic items could melt.
Never wear loose clothing when using
your range. Such clothing could catch
fire.
Never use your range for warming or heating a room, You could
be burned or seriously injured,
Such misuse could also cause
damage to the range.
Never leave the oven door open
when you are not watching the
range.
Never store things children might
want above a range.
CAUTION:
Never let pot handles stick out over the
front of the range, Turn handles in so
that they cannot be bumped into° Keep
the handles away from other hot surface elements/burnerso
2
Do Not store items of interest to
children above a range or on the
backguard of a range.
Children climbing on a range to
reach such items could be seriously injured.
NGSAF18
Never block the flow of combustion and ventilation air
Keep this book for later use.
Be sure your range is installed and grounded
by a qualified technician.
through oven vents and cooktop burners.
properly
Never try to move a pan of hot fat, especially a deep fat
fryer. Wait until the fat has cooled.
Always keep the range area clear and free from things
that will burn, gasoline and other flammable vapors and
liquids.
Never tryto remove burnerbowIs from glasstop ranges.
Never operate the burners unless the burner tops are in
place.
Only some kinds of glass or ceramic pans can be used
for cooktop cooking. Be sure that the pan you use will
not break when heated on the cooktop burners.
Never rub, move or damage the door gasket on selfcleaning ranges° The gasket is essential for a good seal.
Only clean the gasket as described in the self-clean
section of this manual.
After broiling,
always take the broiler pan out of the
oven and clean it. Leftover grease in the broiler pan can
catch on fire next time you use the pan.
Always keep the range and oven clean by following
instructions in this book. Food and grease are easy to
ignite° Clean the range, oven and vent hood regularly.
Always use dry potholders when removing pans from
the oven or cooktop. Moist or damp potholders can
cause steam burns°
Always keep combustible wall coverings, curtains or
drapes, wooden utensils, plastic utensils or canned
food a safe distance away from your range.
Always use care when opening oven door_ Let hot air
and steam out before moving food.
Place oven racks in desired position while oven is cool.
Always remove the broiler pan and other utensits from
the oven before a self-clean cycle.
Always
Never clean cooktop surface when it is hot. Some
cleaners produce noxious fumes and wet cloths could
cause steam burns if used on a hot surface.
follow cleaning instructions in this book.
DO NOT USE ANY TYPE
OF COMMERCIAL
OVEN
Never try to clean utensils, cookware or removable
parts of your range in the oven during the self.,clean
cycle.
CLEANER or oven liner protective coating in or around
your oven.
If the self-cleaning
mode malfunctions,
turn off
and disconnect
power and gas supply. Have serviced
by a qualified technician.
Always
Never operate the burners unless the burner tops are in
place.
Never try to repair or replace any part of the oven
unless instructions
are given in this book. All other
work should be done by a qualified technician.
Always keep dish towels, dish cloths, potholders and
other linens a safe distance away from your range.
Never store such items on your range.
Never heat unopened food containerso Pressure buildup
may make container burst and cause injury.
Do not use a wok on the cooking surface if the wok has
a round metal ring which is placed over the burner grate
to support the wok. This ring acts as a heat trap which
may damage the burner grate and burner head. Also, it
may cause the burner to work improperly.
This may
cause a carbon monoxide level above that allowed by
current standards, resulting in a health hazard. Exposure to carbon monoxide may cause birth defects or
other reproductive harm according to the California
Safe Drinking Water and Toxic Enforcement Act.
Never leave jars or cans of fat or drippings on or near
the range.
Never let grease build up on your range. You can keep
grease fires from starting if you clean up grease and
spills after each oven use.
Never
use aluminum
foil to line oven bottoms,
use care when touching the cooktop.
Im-
proper use of foil could start a fire and cause incomplete
combustion.
3
NGSAF19
mMPORTANT
BH CASE
SAFETY
|NSTRUCT|OHS
iMPORTANT
OF FIRE..
Never use water on a grease fire _ it will only spread the
flames,
GREASE
Never pick up a flaming
FaRE
pan...
Instead:
1.
Turn off the burner.
2.
Smother the fire with a tightly fitting pan lid, baking
soda or wit h a dry chemical or foam type extinguisher.
OVEN
SAFETY
NOTICI
The California Safe Drinking Water and Toxic Enforcement Act requires the Governor of California to publish
a list of substances known to the state to cause cancer,
birth defects, or other reproductive harm and requires
businesses to warn customers of potential exposure to
such substances. Gas appliances can cause minor
exposure to four of these substances, namely benzene,
carbon monoxide, formaldehyde and soot, caused primarily by the incomplete combustion of natural gas or
L.P. fuels. Properly adjusted ranges, indicated by a
bluish rather than a yellow flame, will minimize incomplete combustion. Exposure to these substances can
be minimized further by venting with an open window or
using a ventilation fan or hood.
Be sure everyone
an your home knows what to do
Hncase of fire!! Read and understand this information
NOW! Should you ever need it, you will not have time for
reading.
COOKTOP
(continued)
FaRE
DO not try to move the pan.
1.
Close oven door and turn controls off.
2.
If fire continues, throw baking soda on the fireoruse
a dry chemical foam or haion type extinguisher.
4
NGSAF20
YO
NOTE: The model and serial number of your range can be found on a tag, located on
the range front frame. To locate tag, open the storage drawer.
OVEN VENT
(Area may get hot
during range use;
NOT block vent)
BURNER GRATE
(See page 18)
BURNER
(See page 9)
GLASS COOl(TOP
(See page 15)
RANGE CONTROL
(See pages 6-8)
OVEN LIGHT SWITCH
Push to turn Itght on and off.
REMOVABLE COOKTOP
CONTROL KNOB
(See page 9)
SELF-CLEANING OVEN
(See pages 13 & 14)
REMOVABLE OVEN BOTTOM
(See page 17)
REMOVABLE OVEN RACKS
(See pages 15 & 16)
DOOR GASKET
MODEL & SERIAL NUMBER
PLATE LOCATION
(See pages 3 & 15)
REMOVABLE STORAGE DRAWER
(See page 18)
REMOVABLE OVEN DOOR
WITH WINDOW (See page 16)
BROILER PAN & GRID
(See pages 12 & 15)
5
NGSIF02
ange
Control
CLOCK /
'TEMPERATURE
TIMER
DISPLAY
DISPLAY
PROGRAM
STATUS
DISPLAY
CANCELS BAKE,
BROIL OR
CLEAN OPERATION
I
PRESS TO TURN
TIMER ON AND OFF
DOWN ARROW PAD
(DECREASES TIME
OR TEMPERATURE)
SET AUTOMATIC
OVEN OPERATIONS
The TIMER display will increase as follows:
Your range control is touch controlled.
To set BAKE,
BROIL, TIMER or CLEAN, touch the desired function pad
and select the temperature o r time by touching the arrow
pad.
:10
t:00
1HR:00
TO SET THE
Press CLOCK.
will flash
in the
See Fig. 2
ONE MINUTE .......................
See Fig. 3 ........
ONE HOUR
See Fig. 4 .......
will
DISPLAYS TEN SECONDS
display.
2_
TEN SECONDS
When the display reaches one hour, the display
change. "HR" will appear in the display.
CLOCK:
The word "TIME"
UP ARROW PAD
(INCREASES TIME
OR TEMPERATURE)
FUNCTION
DISPLAY
Press the UP or DOWN arrow pad to select the correct
time of day. Hold your finger on the arrow pad to
change display numbers quickly. Touch and release
the arrow pad to change the time slowly. See Fig. 1.
INCREASE OR
DECREASE TIME
(_
Fig. 2
DISPLAYS ONE MINUTE ZERO SECONDS
(_
INCREASE OR
DECREASE TIME
Fig° 1
TO
SET
NOTE:
THE
T|MER:
The TIMER does not control oven operations.
The maximum time setting is 9 hours and 55
minutes.
1. Press TIMER.
"TIMER"
(_)
Fig, 3
INCREASE TIME
OR
DECREASE
DISPLAYS ONE HOUR ZERO MINUTES
will flash In the display.
2o Press the UP or DOWN arrow pad to select the
amount of time. Hold your finger on the arrow pad to
change thetime quickly. Touch and release the arrow
pad to change the time slowly.
The TIMER will
automatically
begin counting down after a few
seconds.
3. When the time is up, the end-of-cycle tone will beep.
Press CLOCK to return the time of day to the display.
(_)
6
Fig, 4
HOLD
TO CANCEL TIMER
INCREASE OR
DECREASE TIME
NCERC08
TO
=
"TIMER"
counting
the UP or
time and
continue
TO CANCELBAKE
will stop flashing and the TIMER will start
down a few seconds after you stop touching
DOWN arrow, if you pause while selecting the
the timer activates, press TIMER again and
to set the time.
After TIMER begins to count down, press 'TIMER and
hold TIMER in at least four seconds until "TIMER" quits
flashing and time of day returns to display.
FIG,_6
TI ilED BAKING:
TO SET BROIL;
AUTOMATIC
1. Press BROIL, "BROIL"will
flash and (- - -) will appear
in the display. See Fig. 5.
is complete,
OVEN
1. Press COOK TIME,
2. Press UP or DOWN arrow to set how long you want
to bake.
press CLEAR/OFF.
3. Press BAKE.
TO CANCEL BROIL
4. Select temperature
See Fig. 7.
FIG,, 5
OFF:
You can begin baking now and set the oven to turn OFF
automatically.
2. Select LO Broil by pressing the UP arrow once. Select
Ht Broil by pressing the UP arrow twice. To change
from HI Broil to LO Broil, press the DOWN arrow_
3. After cooking
INCREASE OR DECREASE(
TEMPERATURE
using UP or DOWN arrow.
PRESS ONCE TO SET LO BROIL
PRESS TWICE TO SET HI BROIL
INCREASE
TO
RO L".
If you do not select LO or HI Broil the function
go blank. Repeat Steps '1 and 2.
Press BAKE.
"BAKE"
OR DECREASETIME(
INCREASE OR DECREASE(
TEMPERATURE
display will
NOTE: You should consider that food will continue
to cook after controls turn OFF unless you remove
the food immediately.
will flash°
2. Select the desired temperature by touching the UP or
DOWN arrow pad. "]'he last used bake temperature
will appear in the temperature display. Increase the
temperature
with the UP arrow°
Decrease the
temperature with the DOWN arrow°
If you do not set a temperature after you press BAKE, the
display will go blank° Repeat steps I and 2.
3. After baking
See Fig. 6.
is complete,
press CLEAR/OFFo
7
NCCTL18
DELAYED
ON AND
OFF:
Never let food, such as dairy products,
fish, meat, poultry, etc., sit for more
than 1 hour before cooking starts when
you set your oven for a delay start.
Room temperature
promotes
the
growth of harmful bacteria. Be sure the
oven light is off because heat from the
bulb will speed bacteria growth.
You can set the oven to turn on and off automatically.
The control will calculate the ttme to start cooking.
Press COOK TIME.
2. Press UP or DOWN arrowto
to bake.
set how long you want
3. Press STOP TIME. The earliest stop time you can set
will appear in the display.
DliSPLAY:
4. Set STOP TIME (the time of day when you want the
oven to turn OFF) by pressing the UP or DOWN
arrow.
5. Press BAKE.
6. Select temperature by pressing UP or DOWN arrow.
See Fig. 8.
Once you have programmed
your control
for any
operation, you can display the setting by pressing the
appropriate pad. For example, if you are using the
TIMER and want to see the time of day, press CLOCK.
The display will show the time of day.
You cannot set BAKE, BROIL or COOK TIME while the
oven door Is in the locked position. If you try, the word
"door" will appear in the display. The oven door lock is
to be used for Self-Cleaning only.
TONES:
INCREASE
The end-oFcycle tone will sound at the end of timer use
and automatic oven functions. The end-of-cycle tone is
3 short beeps followed by 1 beep every 6 seconds that
repeat until you press any operatiom If you would like
to eliminate the repeating beeps, push and hold CLEAR/
OFF for ten seconds.
To return the 1 beep every 6
seconds, push and hold CLEAR/OFF for 10 seconds.
OR DECREASE TIME (
INCREASE OR DECREASE(
TO SET STOP TIME
Fig.8
INCREASE OR DECREASE (
TO SET TEMPERATURE
NOTE:
To cancel the end-of-cycle tone, press CLOCK,
If the control beeps, you have not completed your timed
oven setting. Press CLEAR!OFF and start again with
Step 1.
F=CODE:
If the time display beeps continuously
and flashes an
"F" followed by a number, you have a function error
code. Notethe number after the "F". Press CLEAR/OFF.
Allow oven to cool for 1 hour.
If problem repeats,
disconnect all power and gas to the range and call for
service. Advise your service technician of the number
following the "F" in the display.
The low temperature zone of this range
(between 150°F and 200°F) is available to
keep hot cooked foods warm. Food kept
longer than two hours at these low
temperatures
may spoil.
8
NGCTL01
T©
TH[iN $
©OI T©P
C@OKmNG
COOKt NG
BURNER
BGNtT OH
TO OPSRATE
COOKTOP
CONTROLS
- The sign
near each cooktop control knob shows which burner is
turned on by that knob_
COOKTOP
SPARK _GN_T_ON - When you turn the
cooktop knob to LITE, the spark igniter makes a series
of electric sparks (ticking sound) which lights the burner.
Push to turn knobs to LiTr_ position. After the burner
ignites, the ticking sound of the spark will stop. Set
knob to desired flame setting. Read additiona!
infer_on
aboutL coektop
spark _gnit_en on _his
You may occasionally hear the igniter ticking, even
though the burner is lit. This is normal and is caused by
drafts or by air disturbances from nearby objects. For
your safety, the burner will attempt to relight whenever
it senses that the flame is distorted.
During a power failure the burners will not light
automatically, in an emergency, a cooktop burner may
be lit with a match by following the steps below.
COOKTOP
CONTROL
As a safety precaution
you should set
contvo,s so _la_e heats pan bottom
o_Ry and does not l_ck pan sides.
Ftames _icking pan sides are unsafe
and waste heat,
Avoid leaving any burneron without a utensil. Doing so
can overheat the grate and cause the enamel finish of
the grate to become damaged.
if a cooktop burner fails to light within five seconds, turn
the knob to OFF and wait five minutes before trying
again. If the buJ'ner still will not light, check the service
section in this manual.
Watch foods when heating them quickly on HL As soon
as the food reaches cooking temperature, turn down the
heat to the lowest setting that will keep it cooking.
The lowest setting of the burner has a very small flame
to provide simmering capability. To simmer foods, set
the cooktop control knob to the lowest setting that will
maintain the desired simmer. If simmering on one burner
and other burners are turned on, the gas flow of the
simmering burner may have to be adjusted.
Lighting gas burners with a ma_tch
is dangerous.
You sheuBd match
_ight the cooktop
burners on_y _n
emergency.
1. Light a match and hold the flame near the burner you
want to light. Wooden matches work best.
2. Push in and turn the control knob slowly. Be sure
you are turning the correct knob for the burner you
are lighting°
NOTE:
tfthe burner does not light within five seconds, turn the
knob off and wait five minutes before trying again.
OVEN GLOW BAR BGNITIION - When you turn the
Oven Control on, the glow bar igniter begins to
heat. When the Igniter is hot enough, in about I minute,
the gas flows into the burner and is ignited.
The igniter glows bright orange when hot. It cycles on
and off with the thermostat and will glow whenever the
burner is on.
During abe
power
the overt
cannot
lit andfa_l_ure
you shoultd
netburner
try to
do so.
If your simmering burner goes out when the other
burners are on, adjust the simmering burner control
knob until burner re-lgniteso After re-lg nition, set cooktop
control knob to the lowest setting that will retain a flame
on the burner.
During burner use, the area of _he
g_ass cooktop
around the burners
could get hot, Use caution
See the cleaning chart for important information about
cleaning the cooktopo
NGMTCO8
@VEN VENT
WOK COOKgNG
When the oven is on, heated air moves through a vent
behind the cooktop. On the cooktop, this hot air may
make pot handles hot or melt plastic items left too near
the vent.
We recommend that you use only a flat-bottomed wok.
Fiat-bottomed woks are available at your local retail
store.
Do not use woke which have support rings. Use of these
types of woks, with or without the ring in place, can be
dangerous° Placing the ring over the burner grate may
damagethe burner grate and burner head. Also, placing
the ring over the burner grate may cause the burner to
work improperly, resulting in carbon monoxide levels
above allowable current standards. This could be dan-
The vent is necessary for proper air circulation in the
oven and good baking results. Do not block this
vent, Doing so may cause cooking failure, tire or
damage tLo the range.
gerous to your health. See the Safety Section of this
manual. Do not try to use such woks without the ring.
You could be seriously burned if the wok tipped over.
MOISTURE
As your oven heats up, the temperatu re change of the air
in the oven may cause water droplets to form on the door
or door glass. To prevent this, open the oven door for
the first minute of oven heating to let the moist air out.
OVEN VENT AREA
/
High flame may be used to boil large quantities quickly_
it is also used to start food cooking quickly in large pans.
STOVE
TOP
GRILLS
Do not use stove top grills on your sealed gas unit. If you
use the stove top grill on your sealed gas range it will
cause incomplete combustion and can r_sult in exposu re to carbon monoxide levels above allowable current
standards_ This can be hazardous to YoU_health.
Medium flame may be used for even browning with
little spattering. It is also used to maintain a boil with
large quantities of food.
Low flame may be used for melting or warming food.
It is also best for cooking small quantities of food.
10
NGMTC09
OVEN COOKING
When cooking a food for the first time in your new
oven, use time given on recipes as a guide.
Cakes, cookies, muffins, and quick breads should
be baked in shiny pans -- to reflect the heat -because they should have a light golden crust.
Yeast breads and pie crusts should be baked in
glass or dull (non-shiny) pans --to absorb the heat
-- because they should have a brown, crisp crust.
Your new oven has been set correctly at the factory
and is more apt to be accurate than the oven it
replaced.
After you have used your oven for awhile, if you feel
your oven should be hotter or cooler, you can adjust
it yourself. See THERMOSTAT ADJUSTMENTS in
this manual.
-
Always follow recipe carefully.
•
Measure ingredients
.
Use proper pan placement°
•
Place pans on the oven racks with 1" to 1 1/2" of air
space on all sides of each pan. Avoid overcrowding
the oven.
Be sure the underside of the pan is shiny, too.
Darkened undersides will absorb the heat and may
cause over browning on the bottom of your food.
properly.
Pans too close to each other, to oven walls or to the
oven bottom, block the free movement of air. Iraproper air movement causes uneven browning and
cooking.
Oven temperatures should be reduced 25 degrees
below recommended temperatures if exterior of pan
is predarkened, darkened by age or oven proof
glass.
2 cake layers
There may be some odor when the oven is first used+
This is caused by the heating of new parts and
insulation.
Do not cover an entire oven rack with foil. The foil
can block normal heat flow and cause poor baking
results. Do not place any foil directly on the oven
bottom. Foil used on the oven bottom may damage
the oven surface; therefore, it should not be used.
4 cake layers
Cookies should be baked on flat cookie
sheets
without sides to allow the air to circulate properly.
When baking several items stagger pans so that no
pan is directly above another.
When recipes require preheating, have food nearby
before you open the oven door. if the oven door is
allowed to remain open for more than a brief time,
the preheat temperature will be lost.
Let the oven preheat thoroughly before cooking
baked products. Allow 15 minutes for preheating.
Opening the door too often to check food during
baking will allow heat loss and may cause poor
baking results_
11
NGOVC05
BROILmNG
To BroUn:
t
Never leave a soiled bro_ier pan in the range.
Grease in the pan may smoke or burn the next time
the oven is used.
2
Be sure you know tLhe correct procedure
putting out a grease fire, See the section
safety,
Press once for LO
for
on
Press twice for H!
Do not cover the entire broiler grid
with foil. Poor drainage of hot fat
may cause a broiler
fire.
Df a fire starts, close the oven door
and turn controls off. if fire con.
tinues,
throw
baking soda on the
fire.
Do not put water on the fire.
After broiling, press
Most foods can be broiled at the Ht setting. Select the LO
broil setting to avoid excessive browning or drying of
foods that should be cooked to the well-done stage
(such as thick pork chops or poultry).
POSiTiONiNG
Broiling is cooking by direct heat from the broil
burner. Tender cuts of meat or marinated meat
should be selected for broiling. For best results,
steaks and chops should be at least 3/4" thick.
After placing food on the broiler pan, put the pan on
the rack in the oven. The recommended rack
position and cooking time can be found in the chart
at right.
BROILER
Rack
Position
4 = Highest
t = Lowest
Food
.....
|
.....................
_
while browning outside.
Side one should
cooked 1 - 2 minutes longer than side two.
be
Total Time
(minutes}
-"
i
_
Steak - 1" Thick
Rare
4
10-12
Medium
3
14-16
Well Done
2
20-22
Medium
3
11-13
Well Done
3
13-15
Lamb Chops - 1" Thick
3
16-20
Pork Chops - 1" Thick
3
20-25
Pork Shoulder Steaks
3
15-20
Ham Slice - 1/2" Thick
3
14-16
Fish (Fillets)
3
10-15
1
40-60
,,,,
The closer the food is to the broil burner, the faster
the meat browns on the outside, yet stays red to
plnk in the center. Moving the meat farther away
from the burner lets the meat cook to the center
PAN
,,,,,,,, ,,,,
Ground Beef Patties
Your
doorwhile
should
be completely oven
closed
broiling.
Use only the broiler pan and grid that came with
your range for broiling.
They are designed for
properdratnage of fat and liquids and help prevent
spatter, smoke or fire°
Do not preheat when broiling. Preheating may
cause the thermostat to cycle the broi! burner off
and on. For even broiling on both sides, start the
food on a cold pan.
, ,
,,,
,,,,
,,,,,,,,
For maximum juiciness, salt the first side just
before turning the meat. Salt the second side just
before serving.
Brush chicken and fish with butter several times as
they broil. When broiling fish, grease the grid to
prevent sticking and broil with skin side down. It is
not necessary to turn fish.
....
, ,
Chicken (Halves)
....
Trim the outer layer of fat from steaks and chops.
Slit the fatty edges to keep the meat from curling.
,
, ,,, ,,
,,
,:
Frankfurters
3
10-15
Bacon
3
5-7
Open-face Sandwiches
2
6-10
This chart is a general guide. The size, weight, thickness, and starting temperature of the food, as well as
your own personal preference, will affect the cooking
time. Times in the chart are based on the food being at
12 refrigerator temperature,
NGBRL06
BEFORE
.
A CLEAN
AFTER
CYCLE
If white spots remain, remove them with a soap-filled
steel wool pad. Be sure to rinse thoroughly
with a
vinegar and water mixture. These deposits are usually a
salt residue that cannot be removed by the clean cycle.
tf the oven is not clean after one clean cycle, the cycle
may need to be repeated.
Note:
Soil on the oven front frame, under the front edge of
the cooktop (does not apply to built-in ovens), the
door liner outside the door seal and the front edge of
the oven cavity (about 1" into the oven) will not be
cleaned during a clean cycle (see illustration). Clean
these areas by hand before starting a clean cycle.
AND ANSWERS
Q. if my oven clock is not set to correct time o_'
day, can ! still self-clean
my oven?
A. Yes, however, if you desire to set a delay self-clean
cycle to end at a specific time of day your clock
should be set to the correct time of day.
Wipe up heavy spiltovers on the oven bottom. Too
much soil may cause smoking during the clean
cycle.
.
Your oven light should be OFF during a selfclean cycle to prolong the life of the bulb.
@UESTIONS
Use hot water with a soap-filled steel wool pad, then
rinse well
3_
CYCILE
After a clean cycle, you may notice some white ash in the
oven° Just wipe it up with a damp cloth.
Remove the broil pan and grid, oven racks, all utensils
and any foil that may be in the oven. Do not try to
clean utensils orany other objects in the oven during
a self-clean cycle, nf oven racks are Deft in the
range during a cnean cycle, they willl darken,
lose their luster and become
hard to shale. If
you choose to leave the racks in the oven, you can
polish the edges of the racks with steel wool and
apply a small amount of vegetable oil to the rack
edges after the self-clean cycle. This will make the
racks easier to slide.
2_
A CLEAN
Q. Can Duse commercial
oven cBeaners on any
part of my self.cleaning
oven?
A. No cleaners or coatings should be used on or around
any part of this oven.
Clean the door seal by using a clean sponge to soak
the soiled area with hydrogen peroxide. Repeated
soaking may be needed depending on the amount of
soil. Frequent cleaning will help prevent excessive
soil buildup. Do not rub the door seal. The fiberglass
material of the seat has an extremely low resistance
to abrasion. An intact and well fitting oven door seal
is essential for energy efficient oven operation and
good baking results. If you noticethe seal becoming
worn, frayed or damaged in any way or if it has
become displaced on the door, you should replace
the sealo
Q. Can Bclean the woven gasket around the oven
door?
A. You can soak it with hydrogen peroxide as explained
in the Cleaning Tips section of this manual. Be
careful not to rub, move, or damage the gasket.
Q. Bs it normal to hear "crackming
sound" during
cleaning?
A. Yes. This is the metal heating and cooling.
Q. Why do ! have ash left
in rny oven after
cleaning?
A, Some types of soil will leave a deposit, It can be
removed with a damp sponge or cloth,
FRONT FRAME
i
What should ! do if excessive
smoking occurs
during cleaning?
A_ This is caused by excessive soil and you should
press CLEAR/OFF.
Open windows to rid room of
smoke. Allow the oven to cool for at least one hour
before opening the door. Wipe up excess soil and
reset the clean cycle.
Qm
Should there be any odor during the cleaning?
A. Yes, there may be a slight odor during the first few
cleanings. Failure to wipe out excessive soil might
also cause an odor when cleaning.
Q_
DOOR SEAL
DOOR LINER
13
HGSCL05
TO SET SELF=CLEAN
CYCLE:
TO BNTERRUPT
1, Close oven door. The door locks automatically after
the control is set.
2. Push CLEAN,
Fig. t.
A CLEAN
©YCLE:
1. Push CLEAR.
Follow instructions under '%rtVHENA CLEAN
CYCLE IIS FSNBSHE_'.
Thetlme display will show ( .... ). See
TO SET DELAYED
CYCLE:
SELFoCLEAN
Follow steps 1-3 under "TO
CYCLE", THEN:
SET
SELF-CLEAN
4, Press STOP TIME,
@
Fig_1
5. Set the time of day when you want the clean cycle to
end. See Fig. 4.
3_ Press the UP or DOWN arrow pad to set the desired
The control will calculate the start clean time.
length of clean time. Clean time is normally 3 hours.
You can change it between 2 and 4 hours, depending
on how dirty the oven is. See Fig. 2.
INCREASE OR DECREASE
CLEAN TiME
Fig. 4
INCREASE OR DECREASEq
CLEAN TIME
Fig°2
SET TIME OF DAY YOU
WANT CLEAN CYCLE TO END
YOU can push STOP TItME to find out when the cycle
will end. Push CLEAN to return to countdown,
Note:When
selecting
a stop
time
for
a
dellayed
clean
cycle,
you must allow
time foe' the 2-4 hour clean time,
WHEN
"Door"
door.
A CLEAN
CYCLE
JS
will flash in display if you forget to close the
FliNNSHED:
NOTE:Your
oven _ight shougd be OFF during a
self.cllean
cyclle to prolong the life of the
bu]ib.
1. Wait until the LOCK display goes out. The oven
temperature must drop to a safe level before the door
can be opened. See Fig, 3.
(_)WAIT
UNTIL LOCK
GOES OUT
Fig., 3
14
NCSCL06
CLEANING
T F$
On the following pages, all removable parts on your range are shown.
Warm water, a mild detergent
Do not use metal scouring
Refer to those pages when cleaning your range.
and a soft cloth are safe to use on all cleanable
parts of your range.
pads, except where recommended.
PART
CLEANING
REMARKS
MATERnALS
Control panel, knobs
All-purpose, non-abrasive cleaner,
warm water, soft cloth
Do not scour.
cleaning.
Burner bowls, grates, tops,
trim rings
Detergent, warm water and/or soapfilled steel wool pad
See next page for information on removable burner
tops. Soak stubborn
soil. Rinse and dry completely.
Take
care not to catch cleaning cloths on
spark igniter when burner tops are removed.
Leave burner caps in place
when cleaning burner bowls.
Do
not use
cooktop
unless
burner
tops burners
are _n
peace.
Glass
Single-edged
razor scraper,
Sears
Cooktop Cleaning Creme® (Stock Nor
40079, available at Sears, Roebuck and
Co.) or other all-purpose, non-abrasive
cleaner
Note: If you need additional cleaning
to eliminate spotting, wash with equal
parts white vinegar and warm water;
Rinse well and dry
Knobs pull off for easier
Wipe surface clean after each use. We
recommend regular cleaning with Sears
Cooktop Cleaning Creme®. Do not use
a dishtowel or sponge to wipe up the
cooktop. They may leavea film of detergent which can discolor your cooktop
when heated. You should use paper
towels or a clean cloth which is used
only for cooktop cleaning° Remove
burned-on
spillovers
with
razor
scraper. Hold the scraper at a 30 ° angle
to the cooktop
and scrape
off
spot. NEVER USE ABRASIVE SCOURING
PADS
OR
POWDERS
ON
COOKTOP. Plastic mesh pads such as
Dobbie® may be used.
Oven interior
Detergent, warm water and/or soap
filled steel wool pad; Do not use
oven cleaner in or around any part of
the oven
Cleaning inside the oven need only be
done as an optional touch-up between
self-clean cycles. Rinse oven interior
thoroughly after cleaning.
Oven door gasket
Hydrogen
Soak with hydrogen peroxide, using a
sponge. Frequent soaking helps prm
vent soil buildup. Do not rub. See selfclean section for more information.
Oven racks
Detergent, warm water and/or soapfilled steel wool pad
Remove from
thoroughly.
Broiler pan and grid
Detergent, water, soap-filled scouring
pad, commercial oven cleaner (pan
only)
Remove soiled pan from oven to cool.
Drain fat or drippings.
Fill pan with
warm water. Sprinkle g rid with detergent
and cover with damp cloth or paper
towels. Let pan and grid soak for a few
minutes. Rinse or scour as needed. Dry
well_ Grid and pan may be washed in a
dishwasher.
peroxide
15
oven to clean.
Rinse
NGCCH03
REMOVABLE
OVEN
DOOR
To replace:
1. Hold the door over the hinges with the slots at the
bottom edge of the door lined up with the hinges.
The hinge arms must still be in the stop
position.
To remove:
1. Open the door to the stop position
(see Illustrat[on),
2. Grasp the door at each side and lift up and off the
hinges,
STOP {BR_
POSITION
NOTE: When the door is removed and
hinge arms are at stop position,
do
not bump or try to move the hinge
arms.
The hinges could snap back
causing
an injury to the hands or
damage to the porcelain
on the front
of the range.
Cover the hinges with
toweling
or empty towel roils while
working in the oven area,
REMOVABLE
OVEN
HINGE
2. Slide the door down onto the hinges as far as it will
go and close the door°
RACKS
Be careful not to scratch
the oven finish
installing
or removing
oven racks.
To install:
when
1. Set the raised back edge of the rack on a pairof rack
guides.
2. Push the rack in until you reach the bump in the rack
guide, then lift the front of the rack a bit and push the
rack all the way in.
To remove:
Note: If oven racks are left in the range during a
clean cycle, they will darken,
lose their luster
and become hard to slide, if you choose to leave
the racks in the oven, you can polish the edges
of the racks with steel wool and apply a small
amount of vegetable
oil to the rack edges after
the self.clean
cycle,
This will make the racks
easier to slide.
1, Pull the oven rack out, then up,
Some models have one standard oven rack and one
folding oven rack.
The folding rack can be conveniently
not in use°
stored away when
16
NGMNT11
REMOVABLE
OVEN
BOTTOM
The oven bottom may be removed for cleaning heavy
spillovers or to reach the oven burner.
Be careful not to scratch the oven finish
removing
or replacing
the oven bottom.
when
To remove:
UNLOCK_-_.LOCK
1o Slide the tab at the center front of the oven bottom to
the left.
2, Lift the oven bottom up and out.
To replace:
.
1. Slip the oven bottom into the oven so the tabs in the
rear of the oven bottom fit into the slots In the oven
back.
OVEN
SHU%OFF
AND
ELECTRICAL
Lower the front of the oven bottom Into place and
slide the tab at the front right to lock the oven bottom
into place.
DISCONNECT
GAS SHUT-OFF
VALVE
The pressure regulator (on range back) contains a lever
which turns on or shuts off the gas supply to the oven.
The lever is accessible from the front of the range by
removing the storage drawer and reachlng through the
storage compartment and the range back. See the
installation section for more _nformatton.
The electrical disconnect Is located behind the storage
drawer In the lower compartment.
Remove storage
drawer to access° Squeeze tabs and pull to disconnect,
ELECTRICAL
DISCONNECT
17
NGMNT12
REMOVABLE
COOKTOP
BURNER
COMPONEHTS
3. Place burner
burner bowl.
g rate ringers
In the burner
Be sure that all controls are turned off and that the unit
is cool.
To remove;
Lift off burner grate, burner top and trim ring_ Do not
remove burner bowl.
grate over burner assembly and into
The bottoms of the four larger burner
fit Into four corresponding Indentations
bowl.
See the Cleaning Tips Chart in this manual
Be sure to
dry burner tops completely before re.assembling burner.
BURNER
G RATE
The electrode
of the spark igniter is
exposed
beyond
the top of the
burner.
When cBeaning the burner
bowl, be careful
not to snag the
electrode
of the spark igniter with
your cleaning cloth. Damage to the
igniter could occur.
Be careful not
to turn on any cooktop controls while
cleaning
burner
bowls.
A slight
electrical
shock might result, which
could cause you to knock over hot
cookware,
SPARK
IGNITER
BURNER
\
BURNEF
BODY
TRIM
I
BURNER
)WL
To replace:
1. Place the trim ring on the burner body.
2. Position the burner top on the burner body. To correctly
seat the burner top, examine the four notches on the
underside of the burner top. One of them is shaped
differentlythan the other three, tt includesan indexlng key
for the spark igniter. The notch with the indexing key
fits over the spark tgniterwhen positioning burner top.
REMOVABLE
STORAGE
DRAWER
STOP
This drawer gives you space for keeping cookware and
bakewareo Plastics and flammable material should not
be kept in this drawer.
Do not overload the storage drawer, if the drawer Is too
heavy, it may slip off the track when opened. To open
the drawer, grasp the center of the handle and pull
straight out.
To remove:
guide stops.
pull drawer straight out and lift over the
To replace:
into place.
lift over the guide stops and slide drawer
18
NGMNT22
ANTB-TSP
DEVICE
NOTE: To insure the device
Rfyour range is removed for cleaning,
servicing or any reason, be sure anti.
tip device
is re-engaged
properly
when the range is replaced.
Failure
to take this precaution
could result in
tipping of the range and cause injury.
BRACKET/_
OPTIONAL
CHAIN _"
BRACKET/"_:
::_;:::::::::::::
FACTORY ;i!:::ili!i::::f:i::i:::,i!
LOCATION
Slide the range all the way back into the counter°
Once the range is pushed back in place, there wilt be
a small amount of slack in the chain. This is normal.
REPLACIING
THE
OVEN
(Electric model shown;
Opposite side used for Gas models)
LIGHT
3. Replace the gasket, glass cover and glass retainer.
Tighten screws securely.
Be sure that the light switch is in the OFF position.
Do not touch hot oven bulb with wet
hands.
Do not wipe oven light area
with wet cloth, Unplug or disconnect
the electrical
supply to range before
removing,
Never touch the electrically
replacing it.
jii!!i
LOCATION
Hook the loose end of the chain onto the bracket by
slipping the nearest link of the chain into the slot in
the bracket, making sure the chain is pulled as tight
as possible and that there is no excess slack in the
chain after chain is attached to the brackeL
• Excess slack in the chain could allow the range to
tip over.
2_
and re-en-
gaged properly, carefully try to tip the range
forward. The device should secure the range
and not allow it to tip.
When replacing the range:
,
is installed
GLASS
RETAINER
live collar on the bulb when
Electrical
power must be shut off if you have to
replace a broken bulb.
1. Removethethreescrewsandliftofftheg]assretainer,
glass cover and gaskeL
BULB
/
BULB
2. Replace the bulb with a 40 watt appliance bulb. An
appliance bulb is smaller than a standard 40 watt
household bulb.
/
j
1
,t_
COLLAR
19
NGMNT14
Save time
and money
-- Check
this
list before
you call for service,
To eliminate unnecessary service calls, first, read all the instructions in this manual carefully. Then, if you have a
problem, always check this list of common problems and possible solutions before you call for service.
if you do have a problem you cannot fix yourself, call your nearest Sears Store or Service Center for help. When
calling, have this manual, the Repair Parts List, model number and purchase date handy.
PROBLEM
t
•
Range does not work;
totally inoperative
Cooktop burners and oven
burners do not work
POSSIBLE
L.--NO power:0
CAUSE
range
DON'T CALL FOR SERVICE
UNTIL YOU CHECK
•
Check power cord to be sure it is
plugged in.
• Range not properly
grounded or polarized; This
can affect spark ignition
•
Checklnstallationlnstructionspacked
with your range.
• Controls not set correctly
•
Check operating instructions
manual.
• Gas not turned on
• To check if:he gas isturned on, light the
cooktop burners with a match by following the steps in the ignition section
of this manual, if the burners do not
light, check the shut-off valve in the
lower compartment
(see installation
section) and the main gas shut-off valve
Oven
not be burners
lit duringcana
power failure,
_
Warning:
burners
with
dangerous,
.............................................
Lighting
a match gas
is
You should
match
light the cooktop
burners only in emergency,
in this
to be sure they ,are in the open position.
• Cooktop burner does not
work; oven OK
.
Foods do not bake properly
• Soil clogging holes (ports) in
burner or burner not assembled properly
• Improper operation of control
• See the removable cooktop burner section and the cleaning tips in this manual.
,
Be sure to PuSh knob in while turning.
• Oven not preheated long
enough
•
Be sure to preheat:
.
• Maintain uniform air space around pans
and utensils;
see oven cooking section.
Improper rack or pan placement
• Oven vent blocked
ered
• Improper
useof foil
• Be sure
cooktop)
oven vent (in
is not blocked.
tone sounds.
panel
behind
• Foil use not recommended.
• tmproper temperature setting
for utensil used
• Reducetemperature
25 degrees for glass
or dull/darkened
pans.
• Recipe not followed
•
• Improper thermostat calibration
• Check oven temperature
procedures (next page).
•
• Check installation
Instructions.
Range and oven rack not
level
• Using improper
• "F" and any number flash In
display and control beeps
or cov-
until preheat notification
• Possible
cookware
oven malfunction
2O
Is recipe tested and reliable?
• See oven cooking
•
section
adjustment
for leveling
section.
Press CLEAR/OFF. Allow oven to cool 1
hour. Place back into operation. If problem repeats, disconnect
power and gas
supply. Call for service.
NGSER12
BEFORE
CALUNG
FOR SERVBCE
PROBLEM
Foods do not broil
properly
POSSIIBLE
(continued)
DON'T CALL FOR SERVICE
UNTEL YOU CHECK
CAUSE
.
Oven door not closed
•
Improper rack position
•
•
,
Oven preheated
Improper utensilused
Improper broiling time
•
•
•
Close oven door.
Check broil pan placement; see Broiling
section.
Do not preheat when broiling.
Use broiler pan and grid supplied with
range,
Check broiling chart,
Dirty oven
Broiler pan full of grease left
in oven
o
•
Check for heavy spillover.
Clean pan and grid after each use.
Oven smokes
Oven light does not
work
•
•
Light switch in off position
Light bulb burned out
Oven does not clean
or poor cleaning
results (Self-clean
models only)
,
•
Controls not set properly
Clean cycle interrupted too
•
•
Check switch setting,
Check or replace light bulb or fluorescent
light starter;
See use and care instructions.
.
,
soon
.
Oventoo
dirty
•
Check self-clean instructions.
Heavily soiled ovens require a 3 1/2 hr.
clean cycle,
Heavy spillovers should be removed
before setting clean cycle.
Oven door will not
unlock (Self-clean
models only)
Clean cycle not complete
• Oven must cool below lock temperature.
Tone does not repeat
Tone has been altered by
pushing and holding CLEAR/
OFFbutton
•
Push and hold CLEAR/OFF
activate tone.
Heavily soiled or
stained cooktop
cannot be satisfactorily cleaned
Spills were not wiped up
promptly
•
See the instructions, under Cleaning
Tips.
Ticking sound of
spark igniter persists
after burner lights
Spark igniter
•
Turn burner off and relight. Some
ticking is normal. If ticking is excessive,
call for service.
not de-activated
21
button to
NGSER13
THERMOSTAT
ADJUSTU_HT$
The temperature in your new oven has been set correctly
at the factory, so be sure to follow the recipe temperatures
and cooking times the first few times you bake in your
4. The temperature can be adjusted ur_tO +35°F hotter
or-35°F cooler. Use _]
or _
to select the
temperature adjustment you want.
oven.
See Fig. 3. The
temperature you select is the new preset oven display.
If you think the oven should be hotter or cooler, you can
adjust the oven temperature yourself° To decide how
much to change the temperature,
set the oven
temperature 25°F higher or lower than the temperature
In your recipe, then bake. The results of this "test"
should give you an idea of how much the temperature
should be changed.
Step 4:
PRESET OVEN
DISPLAY
To adjust temperature follow these instructions:
1. Push BAKE,
SET BETWEEN -35°F
AND +35°F
2. Select a temrmrmr_erature
between 500°F and 550°F by
pressing
L_ . See Fig. 1.
Fig, 3
3. IMMEDIATELY, press BAKE again and hold for about
4 seconds, This display wlll show"ON"
and "BAKE"
will flash in the display,
Step 1:
PRESS
NOTE: This adjustment
will not affect Broil or
Clean temperatures.
It will
be remembered
when power is removed.
Step 2:
SET BETWEEN
500°F AND 550°F
5. When you have made the adjustment, push CLOCK
to return the display to the time of day. Use you r oven
as you would normally.
Step 5:
The adjustment you have made to the oven temperature
will be remembered by t he control and will automatically
adjust the oven temperature.
Step 3:
iMMEDiATELY,
PRESS AND
HOLD
Fig, 1
Continue to hold BAKE until the display changes to
show the preset oven temperature adjustment,
See Fig. 2_
PRESET OVEN DISPLAY
Fig, 2
22
NGSER05
KEN
E WARRANTY
...........
f
"
f
i,i
_1, H ,i
FULL ONE YEAR WARRANTY
ON THE FUNCTIONING
PARTS EXCEPT GLASS PARTS
OF ALL
if, within one year from the date of installation, any part, other than a glass
part, fails to function properly due to a defect in material or workmanship,
Sears will repair or replace it, free of charge.
Dear Customer:
FULL 30.DAY WARRANTY ON GLASS PARTS AND FINISH OF PORCELAIN ENAMEL, PAINTED OR BRIGHT METAL FINISHED PARTS
Our constant efforts are
directed toward making
sure your new Kenmore
Range will arrive at your
if, within 30 days from the date of installation, any glass part or the finish
on any porcelain enamel, painted or bright metal part is defective in
material or workmanship, Sears will replace the part, free of charge.
FULL 90-DAY WARRANTY
ON MECHANBCAL
ADJUSTMENTS
home in perfect condition
and will give you proper
performance.
As part of
For 90 days from the date of installation, Sears will provide, free of charge,
any mechanical adjustments necessary for proper operation of the range,
except for normal maintenance.
these efforts, we feel it is
our responsibility to provide you with this warranty
If the range is subjected to other than private family use, the above
warranty coverage is effective for only 90 days.
WARRANTY
SERVICE iS AVAILABLE
BY CONTACTIING
THE
for your ranger
NEAREST
SEARS SERVICE CENTERJDEPARTMENT
UNITED STATES
i_:i!:!
i!::ii!i
BN THE
iS:i:i:i
This warranty applies only while this product is in use in the United States.
This warranty gives you specific legal rights, arid you may also have other
rights which vary from state to state.
SEARS;"ROEBUCK and CO.
._Dept. 731 CR*W
Sears
J
.....................
........... .j
_
,._
Tower
Chicago, IL 60684
.....................................
WE SERVICE
J
_7"_--_,.,_
WHAT
lille
SELL
"We Service What We Sell" is our assurance to you that you can depend on Sears for service because Sears
service is nationwide.
Your Kenmore Range has added value when you consider that Sears has a service unit near you staffed by
Sears trained techntcians_., professional technicians specifically trained on Sears appliances, having the
parts, tools and equipment to ensure that we meet our pledge to you -- "We Service What We Sell!"
TO FURTHER ADD TO THE VALUE OF YOUR RANGE, BUY A SEARS MAINTENANCE AGREEMENT.
,
,,
, .,,,,,,,
Coverage
1st Year
RepTacamant
ofDefect|re
PadsotherthanPorcelafn
orGlass
1
!ii:_;_
I
......
Years of Ownership
Kenmore Rangesare designed,manufactured and
tesledforyearsofdependableoperationo Yet, any
modern appliance may require service from time
to time. The Sears warranty plus the Sears Matn-
i:ii:?i
J
2nd Year
3rd Year
iVlA MA
W
i!i;:;i
90 DAYS
"...............
tenance Agreement provides protection from unexpected repair bills and assures you of enjoying
maximum range efftciency_
2
Mooha._o.,A_].at_.o°,
Here's a comparative warranty and Maintenance
Agreement chart showing you the benefits of a
Sears Range Maintenance Agreement.
3
Porc_lafn
andGlassparts
W
MA
MA
30DAYS
MA MA
W
Annual
Preventive
Malnton-
4
a.0eChecker
your
request
MA
MA
MA
I?:
W - Warranty
MA - M_lnt_n,,nce
Agreemon!
CONTACT YOUR SEARS SALESPERSON OR LOCAL SEARS SERVICE
CENTER TODAY AND PURCHASE A SEARS MAINTENANCE AGREEMENT.
........
___._'. ,,,;:........
eFl[" o{ e®
America's
Sold by SEARS, ROEBUCK
Best Sellling
AND CO., Chicago_
Appliance
IL 60684
Brand
ii_;:?i
ii_!::i