1
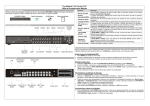
DynaGuardTM 100 Genie
MPEG-4 DVR
User’s Manual
00-3DG100DSEA1
Version 1.1
00-3DG100DSEA1
User’s Manual
2
www.dynacolor.com.tw
All rights reserved
User’s Manual
Notice
The information given in this manual was current when published. DynaColor, Inc. reserves the
right to revise and improve its products. All specifications are subject to change without notice.
Copyright
Under copyright laws, the contents of this user manual may not be copied, photocopied,
translated, reproduced or reduced to any electronic medium or machine-readable format, in
whole or in part, without prior written permission of DynaColor, Inc.
© Copyright 2005 DynaColor, Inc.
Trademarks
DynaGuardTM and DynaRemoteTM Lite are trademarks of DynaColor, Inc.
ThumbDrive® is a registered trademark of Trek 2000 International Ltd.
Windows® is a registered trademark of Microsoft Corporation.
Trademarked names are used throughout this manual. Trademarked names are indicated with
initial capitalization, rather than place a symbol at each occurrence. Inclusion or exclusion is
not a judgment on the validity or legal status of the term.
www.dynacolor.com.tw
All rights reserved
3
User’s Manual
Caution and Preventive Tips
•
Take care not to drop the unit or subject the unit to major shocks or jolts.
•
Do not place this unit on an unstable stand, bracket or mount.
•
This unit is designed for indoor use only. Do not place the unit near water or in other
extremely humid conditions.
•
This unit should not be placed in a built-in installation unless proper ventilation is provided.
•
Please check the used type of power source before you plug and operate the unit;
AC110V ~AC240V is acceptable.
•
If the clearing is necessary, note to plug the unit from the outlet before uncovering the top
cover. Do not use liquid cleaners or aerosol cleaners. Use only a damp cloth for cleaning.
•
Always power down the system prior to connecting and disconnecting accessories, with
the exception of USB devices.
•
Lithium battery: Danger of explosion if battery is incorrectly replaced. Replace with the
same or equivalent type recommended by the battery manufacturer. Dispose of used
batteries according to the battery manufacturer’s instructions.
•
Do not block the fan on the bottom of the unit for air ventilation.
This symbol intends to alert the user to the presence of important operating and
maintenance (servicing) instructions in the literature accompanying the
appliance.
This symbol intends to alert the user to the presence of unprotected “Dangerous
Voltage” within the product’s enclosure that may be strong enough to cause a
risk of electric shock.
4
www.dynacolor.com.tw
All rights reserved
User’s Manual
Important Information
Before proceeding, please read and observe all instructions and warnings in this manual.
Retain this manual with the original bill of sale for future reference and, if necessary, warranty
service. When unpacking your unit, check for missing or damaged items. If any item is missing,
or if damage is evident, DO NOT INSTALL OR OPERATE THIS PRODUCT. Contact your
dealer for assistance.
Rack Mounting
Consult with the supplier or manufacturer of your equipment rack for the proper hardware and
procedure of mounting this product in a safe fashion. Avoid uneven loading or mechanical
instability when rack-mounting units. Make sure that units are installed to get enough airflow for
safe operation. The maximum temperature for rack-mounted units is 40 °C. Check product
label for power supply requirements to assure that no overloading of supply circuits or over
current protection occurs. Mains grounding must be reliable and uncompromised by any
connections.
www.dynacolor.com.tw
All rights reserved
5
User’s Manual
End-user License Agreement
Read this License Agreement before opening the package or installing the software. The
License Agreement describes your rights and obligations. By breaking the seal on the package
or installing the software, you agree to all the terms in this agreement.
Software License
The Software includes the computer software, the associated media, any printed material, and
any electronic documentation and may be provided to you installed on a hard drive (the media)
as part of a system. The Software is licensed, not sold.
Grant of License
This agreement between you and DynaColor, Inc. allows you to use the Software you
purchased. Once you have purchased the number of copies you require, you may use the
Software and accompanying material no more than the licensed number of copies at one time.
The Software is only licensed for use with specified DynaColor, Inc. supplied equipment.
Copyright
The Software is a proprietary product of DynaColor, Inc. and is protected by copyright laws.
Other Rights and Limitations
A demonstration copy of the Software is considered purchased and is covered by this license
agreement.
•
You may not sub-license, rent or lease the Software, but you may transfer the Software to
another party by delivering the original disk and material as well as this license to the other
party. Initial use of the Software and accompanying material by the new user transfers the
license to the new user and constitutes the new user's acceptance of its terms and
conditions.
•
You may not de-compile, disassemble, reverse engineer, copy, transfer, or otherwise use
the Software except as stated in this agreement.
•
The hardware/software key, where applicable, is your proof of license to exercise the
rights granted herein and must be retained by you.
•
DynaColor, Inc. reserves the right to revoke this agreement if you fail to conform the terms
and conditions of this agreement. In that case, you must destroy all copies of the Software,
and all of its component parts (e.g., documentation, hardware box, software key).
6
www.dynacolor.com.tw
All rights reserved
User’s Manual
•
The Software may contain software from third parties that is licensed under a separate
End User License Agreement. Read and retain any license documentation that may be
included with the Software. Comply with the terms of any third party End User License
Agreement is required as a condition of this agreement.
Failure to comply with these restrictions will result in automatic termination of this license and
will make available to DynaColor, Inc. other legal remedies.
Upgrades
If the Software is an upgrade from another software version, you may use or transfer the
Software only as specified in this agreement. If the Software is an upgrade of a component of a
package of Software programs that you licensed as a single product, the Software may be
used and transferred only as part of that single product package and may not be separated for
use on more than one computer.
Limited Warranty
Company’s warranty for security product is limited to the repair or comparable replacement of
any merchandise proved defective in material or workmanship (except normal wear and tear)
for a period of two years, except for HDD and CD-RW component which carry a 6 month
guarantee.
The warranty does not apply to the appearance of the product or accessory items and does not
cover damage which occurs in shipment or failure which results from alternation, accident,
misuse, neglect, voltage fluctuation, lightning water damage, faulty installation or adjustment of
controls, interfacing with non-standard or custom equipment, or improper maintenance.
No Other Warranties
The above warranty substitutes for all other warranties, including express or implied, but not
limited to the implied warranties of merchantability and fitness for a particular purpose. No oral
or written information or advice given by DynaColor, Inc., its distributors or dealers shall create
any other warranty, and you may not count on such information or advice.
No Liability for Consequential Damages
In no event will DynaColor, Inc. be liable to you for damages, including any loss of data, loss of
profits or other incidental or consequential damages cause of your use of the Software or its
documentation. This limitation will apply even if DynaColor, Inc. or an authorized distributor or
dealer has been advised of the possibility of such damages. Further, DynaColor, Inc. does not
warrant that the operation of the Software will be uninterrupted or error free.
www.dynacolor.com.tw
All rights reserved
7
User’s Manual
General
If any clause of the agreement is found to be unlawful, void, or impracticable for any reason,
then that clause shall be detached from this agreement and shall not affect the validity and
enforceability of the remaining provisions.
You should keep proof of the license fee paid, including model number, serial number and date
of payment, and present such proof of payment when service or assistance covered by this
warranty is requested.
8
www.dynacolor.com.tw
All rights reserved
User’s Manual
Table of Content
DynaGuardTM 100 Unit
1. Overview .....................................................................................................................13
1.1 Product Key Features ........................................................................................13
1.2 Product Application Diagram..............................................................................14
2. Unit Installations.........................................................................................................15
2.1 Position the Unit.................................................................................................15
2.2 Selecting Video Format......................................................................................15
2.3 Connecting Devices to the Unit..........................................................................15
2.4 Rear Panel Connections....................................................................................16
3. General System Setup ...............................................................................................18
3.1 Front Panel ........................................................................................................19
3.1.1
LED Definition ......................................................................................19
3.1.2
Function Keys.......................................................................................20
3.2 Power Up / Down the Unit .................................................................................22
3.3 Entering OSD Setup Menu ................................................................................23
3.4 System Date / Time Setting ...............................................................................24
3.4.1
Set Date / Time.....................................................................................24
3.4.2
Daylight Saving Time............................................................................25
3.5 Record Schedule / Quality Setting .....................................................................26
3.5.1
Record Mode........................................................................................26
3.5.2
Schedule Setup ....................................................................................27
3.5.3
Preset Record Configuration ................................................................27
3.6.4
To Record Event Video Only ................................................................28
4. Basic Operation..........................................................................................................28
4.1 Viewing Live / Playback Video ...........................................................................28
4.1.1
Viewing Modes .....................................................................................28
4.1.2
Digital Zoom .........................................................................................29
4.1.3
Viewing Live Cameras..........................................................................29
To Freeze Live Image..............................................................................29
4.1.4
Viewing Recorded Video ......................................................................30
Key Usage in Playback ...........................................................................30
Pause Playback and Single Step Forward ..............................................31
Viewing Live Image in Playback Mode....................................................31
4.2 Sequence Setup ................................................................................................31
4.2.1
Sequence with Main Monitor ................................................................32
4.2.2
Sequence with Call Monitor ................................................................32
www.dynacolor.com.tw
All rights reserved
9
User’s Manual
4.3
4.4
4.5
4.6
Searching Recorded Video ................................................................................33
4.3.1
Searching by Time................................................................................33
4.3.2
Searching by Event ..............................................................................34
Video Export ......................................................................................................35
4.4.1
ezBurn Introduction ..............................................................................35
4.4.2
To export normal video .........................................................................36
4.4.3
To Export event video...........................................................................37
Deleting Recorded Video ...................................................................................37
Dome Control.....................................................................................................38
4.6.1
Dome Connection.................................................................................38
4.6.2
Dome Protocol Setup ...........................................................................39
4.6.3
RS485 Setup ........................................................................................39
4.6.4
Dome Controlling Keys.........................................................................40
4.6.5
Setting Preset Points ............................................................................42
4.6.6
Calling Preset Points ............................................................................43
5. Advanced System Configuration ..............................................................................43
Key Usage in OSD Menu ........................................................................44
Key Usage in Virtual Keyboard ...............................................................44
5.1 System Setup > .................................................................................................45
5.1.1
Version > ..............................................................................................46
5.1.1.1 Hardware Version > ................................................................46
5.1.1.2 Software Version >..................................................................46
5.1.1.3 Software Upgrade via Local Device > .....................................46
5.1.2
Language > ..........................................................................................47
5.1.3
Date / Time >........................................................................................47
5.1.3.1 Date / Time Setting > ..............................................................48
5.1.3.2 Date / Time Display >..............................................................48
5.1.3.3 Date Display Mode >...............................................................48
5.1.3.4 Time Display Mode > ..............................................................48
5.1.3.5 Date/Time Order > ..................................................................48
5.1.3.6 Daylight Saving Time > ...........................................................49
5.1.3.7 DST Start / End > ....................................................................49
5.1.3.8 DST Bias >..............................................................................49
5.1.4
Unit Name > .........................................................................................50
5.1.5
Password > ..........................................................................................50
5.1.5.1 Admin / User Password > .......................................................51
5.1.5.2 Enable Password > .................................................................51
5.1.5.3 Load Factory Password > .......................................................51
5.1.6
Network Setup >...................................................................................51
5.1.6.1 LAN Setup > ...........................................................................52
10
www.dynacolor.com.tw
All rights reserved
User’s Manual
5.2
5.3
5.4
DHCP >...................................................................................52
IP > .........................................................................................53
Netmask >...............................................................................53
Gateway >...............................................................................53
DNS > .....................................................................................53
Connect At Booting > ..............................................................54
Network Restart > ...................................................................54
5.1.6.2 Trigger Port > ..........................................................................54
5.1.7
RS485 Setup >.....................................................................................54
5.1.7.1 Unit ID >..................................................................................54
5.1.7.2 Baud Rate >............................................................................54
5.1.7.3 Bits >.......................................................................................55
5.1.7.4 Stop >......................................................................................55
5.1.7.5 Parity >....................................................................................55
5.1.8
Key Beep >...........................................................................................55
Monitor Setup > .................................................................................................55
5.2.1
Show Camera Title > ............................................................................55
5.2.3
Monitor Contrast >................................................................................56
5.2.4
Monitor Chrominance > ........................................................................56
5.2.5
Screen Center Adjust > ........................................................................56
5.2.6
Show Color Bar > .................................................................................56
5.2.7
VGA Resolution >.................................................................................57
Camera Setup > ................................................................................................57
5.3.1
Camera Select > ..................................................................................57
5.3.2
Dome Protocol > ..................................................................................58
5.3.3
Dome ID > ............................................................................................58
5.3.4
Camera Title >......................................................................................58
5.3.5
Covert >................................................................................................59
5.3.6
Termination >........................................................................................59
5.3.7
Brightness > .........................................................................................59
5.3.8
Contrast >.............................................................................................59
5.3.9
Saturation >..........................................................................................60
5.3.10 Hue >....................................................................................................60
Record Setup >..................................................................................................60
5.4.1
Record Mode >.....................................................................................61
5.4.2
Schedule Setup >.................................................................................61
5.4.2.1 Day / Night Time Start > ..........................................................61
5.4.2.2 Weekend Schedule >..............................................................62
5.4.2.3 Weekend Start / End > ............................................................62
5.4.3
Preset Record Configuration > .............................................................62
www.dynacolor.com.tw
All rights reserved
11
User’s Manual
5.4.4
5.4.5
5.4.6
5.5
5.6
5.7
5.8
5.9
ezRecord Setup >.................................................................................64
Circular Recording >.............................................................................65
Purge Data > ........................................................................................65
5.4.6.1 Purge All Data > ......................................................................65
5.4.6.2 Purge All Event Data >............................................................65
5.4.6.3 Purge Event Before >..............................................................65
5.4.6.4 Start to Purge > .......................................................................66
Sequence Setup > .............................................................................................66
5.5.1
Main / Call Monitor Dwell >...................................................................66
5.5.2
Main / Call Monitor Schedule > ............................................................66
Event Setup > ....................................................................................................67
5.6.1
Internal Buzzer > ..................................................................................67
5.6.2
Event Icon > .........................................................................................68
5.6.3
Event Duration > ..................................................................................68
5.6.4
Per Channel Config > ...........................................................................68
5.6.4.1 Channel Select >.....................................................................68
5.6.4.2 Video Loss Detect >................................................................69
5.6.4.3 Motion Detect >.......................................................................69
5.6.4.4 Detection Configuration > .......................................................69
Detected Area Setup >............................................................70
Sensitivity >.............................................................................70
Area Threshold > ....................................................................70
Detected Area Percentage >...................................................70
5.6.4.5 Alarm In > ...............................................................................71
5.6.4.6 Alarm Out >.............................................................................71
Database Setup > ..............................................................................................71
5.7.1
Total / Free Size of HDD >....................................................................71
5.7.2
Avail REC Time > .................................................................................72
5.7.3
Internal / External Disks > ....................................................................72
Configuration > ..................................................................................................73
5.8.1
Load Factory Default > .........................................................................73
5.8.2
Import Configuration >..........................................................................73
5.8.3
Export Configuration >..........................................................................74
5.8.3.1 Copy Destination >..................................................................74
5.8.3.2 Configuration Name > .............................................................74
5.8.3.3 Begin Export > ........................................................................74
Shutdown >........................................................................................................75
Appendix A: Technical Specifications ...........................................................................76
Appendix B: Record Duration.........................................................................................78
12
www.dynacolor.com.tw
All rights reserved
User’s Manual
1.
Overview
The DynaGuardTM 100 MPEG-4 DVR is an integrated digital video recorder
that combines the features of a time-lapse audio / video recorder, a
multiplexer, and a video server to create a single security CCTV solution.
Its outstanding triplex operation enables users to view live or playback
recorded video, and remote access through network simultaneously, while
recording other video, and to view wanted recorded video instantly by
entering the time and date or selecting recorded video from the event list.
DynaGuardTM 100 MPEG-4 DVR includes DynaRemoteTM Lite, the remote
viewing software that is a Web-browser plug-in, allows user to view live or
recorded video images. The remote software is stored in DynaGuardTM 100
MPEG-4 DVR and deployed over a LAN, WAN or Internet connection to
remote Windows-based computers. This simplifies the installation and
maintenance of the software components so all remote users are kept up to
date.
1.1
Product Key Features
The DynaGuardTM 100 MPEG-4 DVR offers advanced features not typically
found in standard multiplexers; it integrates the full features of a DVR,
multiplexer and video server (by using the software DynaRemoteTM Lite).
The key features of DynaGuardTM 100 MPEG-4 DVR are listed as follows.
•
•
•
MPEG-4 high quality compression, 5~10 times smaller than MJPEG
Triplex operation (recording, playback and network access)
Remote monitoring, instant recording and dome camera control via
Ethernet
•
•
•
•
•
•
•
•
•
Support VGA main output (optional)
Live display: 480pps (NTSC)/ 100pps (PAL)
1 Channels, in & out, for audio recording
Support up to internal 1 Optical drive + 2 HDD
USB2.0 port for video clip exporting, support USB ThumbDrive®
Easy software upgrade via USB TumbDrive®, or CD-RW
Export DVR file which can be played via DynaPlayer™
DynaPlayer™ application software will be attached with exported disks
Multiple built-in dome camera protocol: DynaColor, Pelco D, Pelco P, and
AD422
www.dynacolor.com.tw
All rights reserved
13
User’s Manual
•
•
•
•
•
•
•
1.2
Digital Zoom 2X2, available in live mode
Programmable call-monitor switching sequence
Pre-Alarm recording
IR Remote controller (Optional)
Multiple language on-screen menus
Network software supports static IP and DHCP
Support RS-485 remote control keyboard (Optional)
Product Application Diagram
Connect the unit with other devices as shown in the system diagram to
complete a video surveillance solution. The figure shows also the
expandability and flexibility of this digital recording system.
14
www.dynacolor.com.tw
All rights reserved
User’s Manual
2.
Unit Installations
The notices and introduction on system installation will be described
particularly in this chapter. Please follow the description to operate the unit.
In order to prevent the unit from data loss and system damage that caused by
a sudden power fluctuation, use of an Uninterruptible Power Supply (UPS) is
highly recommended
2.1
Position the Unit
Firstly, note to position / mount the DynaGuardTM 100 MPEG-4 DVR in a
proper place and be sure to power off the unit before making any connections.
The placed location should avoid hindering or blocking the unit from airflow.
Enough airflow is needed to protect the unit from overheating. The maximum
allowable temperature of operating environment is 40°C.
The unit utilizes heat-conducting techniques to transfer internal heat to the
case, especially to the bottom side of the unit.
NOTE: Be sure not to remove the rubber feet, and always leave a
space for air ventilation on the unit’s bottom side.
2.2
Selecting Video Format
The DynaGuardTM 100 MPEG-4 DVR is designed to operate under either
NTSC or PAL video formats. The switch is positioned on the rear panel.
2.3
Connecting Devices to the Unit
This section lists some notices that should be given before making any
connections to the DynaGuardTM 100 MPEG-4 DVR.
NOTE: Connect short-term devices, such as USB ThumbDrive®,
USB CD-ROM, USB Hard Disk Drive, etc., only after the unit is
successfully powered up.
www.dynacolor.com.tw
All rights reserved
15
User’s Manual
Connecting Required Devices
Before power up the unit, you should connect cameras and a main monitor to
the unit for basic operation. If needed, connect a call monitor for displaying
full screen video of all installed cameras in sequence.
Connecting Short-term Device
If you plan to install any short-term devices to the DynaGuardTM 100 MPEG-4
DVR and use them as part of the unit system, such as USB CD-ROM, USB
Hard Disk Drive, etc. Make sure connecting those devices only during the
unit is powered up. Because DynaGuardTM 100 MPEG-4 DVR can recognize
the external devices only after the power-up process is done completely.
2.4
Rear Panel Connections
There are various connectors on the rear panel used for DynaGuardTM 100
MPEG-4 DVR installations. The following figure shows the connectors by
name; and followed by the detailed description of each connector.
Main Monitor (S-Video / BNC/ VGA)
S-Video , BNC and VGA output connectors are offered for connecting to a
main monitor. The main monitor displays live image and playback recorded
video in either full-screen or split-window format. VGA output connector is
optional.
Call Monitor (BNC)
The call monitor is used to display full screen video of all installed cameras in
sequence. The BNC call monitor connector allows user to connect the
DynaGuardTM 100 MPEG-4 DVR with an optional call monitor.
16
www.dynacolor.com.tw
All rights reserved
User’s Manual
Video Input
16 BNC connectors are offered for video input streams from installed
cameras. The number of connectors is equal to the number of channels.
Video Looping
Plenty of BNC connectors are positioned on the real panel for looping out the
video input.
Alarm I/O & RS485
The unit provides an alarm I/O and RS485 port that offers user the flexibility
required to connect the unit to the other device. The definitions of pins are
listed in the below table:
Pin
Definition
Pin
Definition
1
RS485 D+
17
Alarm In 1
2
RS485 D-
18
Alarm In 2
3
Ground
19
Alarm In 3
4
Normal Close 1
20
Alarm In 4
5
Common Node 1
21
Alarm In 5
6
Normal Open 1
22
Alarm In 6
7
Ground
23
Alarm In 7
8
Normal Close 2
24
Alarm In 8
9
Common Node 2
25
Alarm In 9
10 Normal Open 2
26
Alarm In 10
11 Ground
27
Alarm In 11
12
N/A
28
Alarm In 12
13
N/A
29
Alarm In 13
14
N/A
30
Alarm In 14
15
Ground
31
Alarm In 15
16
Ground
32
Alarm In 16
Audio In / Out
The DynaGuardTM 100 MPEG-4 DVR provides two channels of audio
recording and playback. Audio In RCA connector is offered for connecting an
audio source device (e.g. external amplified microphone) to the unit; Audio
Out RCA connector is offered for connecting an audio output device (e.g.
amplified speakers) to the unit.
www.dynacolor.com.tw
All rights reserved
17
User’s Manual
LAN Connector (RJ-45)
The DynaGuardTM 100 MPEG-4 DVR is capable of networking. The LAN port
opens the door of DynaGuardTM 100 MPEG-4 DVR to Ethernet.
USB Connector (x2)
There are two USB2.0 ports on the rear panel for users to connect external
USB devices to the unit, such as ThumbDrive® or CD-ROM.
Power Jack
The DynaGuardTM 100 MPEG-4 DVR has a free voltage AC power
connection jack. Please connect the power supply that ships with the unit.
NOTE: Use of other power supply may cause overloading.
Power Switch
Used to power up and shut down the unit.
3.
General System Setup
The DynaGuardTM 100 MPEG-4 DVR allows user to access some general
operations through the front panel easily. The following subsections introduce
the general operations of the unit.
The regular displayed OSD information and its displayed positions are shown
as following figure. The channel title will be displayed on the top-left side of
the window, either in full screen mode or in multiple channel mode. The
current operating mode, including Call mode, Dome-Control mode, Playback
mode. Freeze mode and Sequence mode, will be displayed on the
bottom-left side of the screen. And the date/ time information will be display
on the bottom-right side.
Ch4
Playback
18
2005/11/09 PM04:31:22
www.dynacolor.com.tw
All rights reserved
User’s Manual
3.1
Front Panel
The front panel controls enable user to control the unit and preset the
programmable functions.
3.1.1
LED Definition
The DynaGuardTM 100 MPEG-4 DVR LEDs on the front panel are described
as follows.
Power LED (Green)
The LED lit during the period when the correct power is connected.
Network LED (Green)
The LED should be lit when DynaGuardTM 100 MPEG-4 DVR is connected to
a network and blink when the data is being transferred.
Alarm LED (Red)
The LED should be lit during an alarm is triggered.
REC LED (Green)
The LED should blink while the DynaGuardTM 100 MPEG-4 DVR is
recording.
HDD LED (Yellow)
The LED should be lit while the HDD is processing data to or from the HDD.
www.dynacolor.com.tw
All rights reserved
19
User’s Manual
3.1.2
Function Keys
The DynaGuardTM 100 MPEG-4 DVR functional keys on the front panel for
normal operation are described as follows.
CHANNEL
• When in both Live and Playback modes, press the CHANNEL key to view
the corresponding video in full screen.
• When in dome control mode, the key named “1” is used to access the
Set/Go preset menu; the key named “2” is used to hide or display the
dome setting parameters.
DOME
Press the key to enter dome control mode.
MODE
Press repeatedly to select for wanted main monitor display format. There are
three available view modes: full screen, 4-window (2×2) and 16-window (4×4).
Refer to Section 4.1.1 Viewing Modes for detailed information.
SEQ (Sequence)
Press to start automatic sequencing of the video coming from the installed
cameras.
MENU
Press the key to call the OSD setup menu.
20
www.dynacolor.com.tw
All rights reserved
User’s Manual
ESC
Press to cancel or exit from certain mode or OSD menu without changing the
settings made previously.
ZOOM/ENTER
• In OSD menu or selection interface, press the key to make the selection
or save settings.
• In live full screen view mode, press to view a 2× zoom image; press it
again to exit zoom mode.
CALL
• In Live mode, press to enter call monitor control mode; press ESC to exit.
• In Playback mode, press CALL to select the start and end point of the
video you want to export. More detailed information refer to Section 4.4
Video Export.
PLAY/STOP
Press this key to switch between live image and playback video.
FREEZE
• Press FREEZE while viewing live image, the live video will be frozen. The
date / time information shown on the monitor will continue updating. Press
FREEZE again to return to live mode.
• Press FREEZE while playing the recorded video, the playback video will
be paused. Press LEFT / RIGHT to move the recorded video reverse /
forward by single step. Press FREEZE again to continue playing video.
SEARCH
In both Playback and Live mode, user can press SEARCH to call the Search
menu for searching and playing recorded video by date and time or events.
Direction Keys
• In Zoom mode, these keys function as Direction keys.
• In the OSD menu, the Direction keys are used to move the cursor to
previous or next fields. To change the value in the selected field, press UP
/ DOWN.
www.dynacolor.com.tw
All rights reserved
21
User’s Manual
3.2
Power Up / Down the Unit
If you must shut down the DynaGuardTM 100 MPEG-4 DVR for any reason,
please use the proper shut down and power up procedures to avoid
damaging your DVR unit.
To Power Up the Unit
Check the used type of power source before plug in your DVR first (the unit
accepts the power input between AC110V to AC240V), and turn on the unit
using the power switch on the rear panel.
The color bar and system checking information will be shown on the monitor
and disappear when the unit has been completely powered up.
To Restart / Shutdown the Unit
Press MENU and input the administrator password to access the OSD Main
menu. Select <Shutdown> in Main Menu and press ENTER to enter the
Shutdown menu, which displays as follows.
Shutdown
1. Power Off
2. Reboot
<Power Off>
Select this item to shut down the unit. Do not remove the power during
shut down until the message “You can safely turn off DVR now!”
displays.
<Reboot>
Select this item to reboot the unit. The color bar and system checking
information are displayed on the monitor until the unit is completely
restarted.
22
www.dynacolor.com.tw
All rights reserved
User’s Manual
3.3
Entering OSD Setup Menu
The OSD Main menu contains a list of items that are used to configure the
DynaGuardTM 100 MPEG-4 DVR. To enter the Main menu, press MENU and
then enter Administrator or User password. The Password Verification screen
displays as follows.
Password Verification
________
Press Channel Keys To Enter Password
(4-8 Digits)
Press ◄ Key To Delete
The default passwords are shown in the following table. The same passwords
are used for entering the remote viewing software DynaRemoteTM Lite.
Administrator Password
User Password
1234
4321
NOTE: It is strongly suggested to change the passwords to prevent
unauthorized access to the unit.
After entering the correct password, the Main menu is displayed.
Main Menu
1. System Setup
2. Monitor Setup
3. Camera Setup
4. Record Setup
5. Sequence Setup
6. Event Setup
7. Database Setup
8. Configuration
9. Shutdown
Move the cursor up / down over the OSD items using the Direction keys and
press ENTER to enter the selected sub-menu.
www.dynacolor.com.tw
All rights reserved
23
User’s Manual
3.4
System Date / Time Setting
User can set the current date, time and other OSD parameters in Date/Time
menu. The administrator’s privileges are required for entering the submenu.
In OSD Main menu, select <System Setup> and press ENTER, then select
<Date/Time> to access the Date/Time menu; the menu displays as follows.
Date/Time
1. Date
2. Time
3. Date/Time Display
4. Date Display Mode
5. Time Display Mode
6. Date/Time Order
7. Daylight Saving Time
8. DST Start
9. DST End
10. DST Bias
3.4.1
2005/02/21
10:39:26
1 Row
Y/M/D
24 HR
Date First
ON
Apr, 1 st Sun, 02:00
Apr, Last Sun, 02:00
60 Min
Set Date / Time
Set Date / Time
Select <Date> / <Time> and press ENTER for adjusting the settings.
LEFT / RIGHT keys are used to move the cursor to previous or next field,
ENTER is for selecting, and UP / DOWN are used to change the value in
the selected field.
NOTE: The reset date / time setting applies to record new video,
the date and time of previously recorded video will not be
changed.
NOTE: If you have to change data/ time settings in any cases,
we strongly recommend you to format the HDDs in order to
avoid the recorded database corruption.
Date / Time Display
Users are allowed to choose to set the date / time OSD displays in 1 or 2
rows. Use the UP / DOWN keys to change the setting. The default is to
display the date / time OSD in one row.
24
www.dynacolor.com.tw
All rights reserved
User’s Manual
Date Display Mode
This function allows user to set the OSD display type of the date / time.
There are three options to select from: <Y/M/D>, <M/D/Y> or <D/M/Y>.
“Y” represents “Year”, “M” represents “Month” and “D” represents “Day”.
Move to the item and press ENTER, the option starts blinking. Use UP /
DOWN keys to change the setting. The default setting is <Y/M/D> in
both NTSC / PAL formats.
Time Display Mode
User can choose to set the time format to <12 hour> or <24 hour>. Use
the UP / DOWN keys to change the format. The default setting is <24
hour>.
Date / Time Order
The item is used to set the order of date / time display to <Date First> or
<Time First>. Use UP / DOWN keys to change the setting.
3.4.2
Daylight Saving Time
Daylight Saving Time
The item is for those people who live in certain regions to observe Daylight
Saving Time. Select <ON> to enable, or <OFF> to disable the function.
If the function is disabled, the DST Start / End time and DST Bias will be
grayed out and cannot be accessed.
NOTE: If this function is enabled, the date/time information will be
shown on the screen with a DST icon when playing back recorded
video or searching video in the event list. “S” indicates summer time
and “W” indicates wintertime.
DST Start / End
The items are used to program the daylight saving duration. Use Direction
keys to move the cursor to the next or previous field, UP / DOWN to change
the settings in the selected field.
www.dynacolor.com.tw
All rights reserved
25
User’s Manual
DST Bias
The item allows user to set the amount of time to move forward from the
standard time for daylight saving time. The available options are <30>, <60>,
<90> and <120> minutes.
3.5
Record Schedule / Quality Setting
The Record Setup menu allows user to set recording quality, recording
schedules, and other recording parameters. Administrator's password is
required to use Record Setup menu. In the Main menu, move the cursor to
<Record Setup> and press ENTER; the following menu is displayed.
Record Setup
1. Record Mode
2. Schedule Setup
3. Preset Config
4. ezRecord Setup
5. Circular Recording
6. Purge Data
3.5.1
720×240@60PPS
Standard
ON
Record Mode
The Record Mode is for selecting resolution and recording rate. The relative
record settings, such as preset configuration, will follow the record mode
setting. In normal circumstance, we recommend you to select
<720x240@60PPS>, the default, for this item.
Move the cursor to <Record Mode> and press ENTER, then select a Record
mode using UP / DOWN keys.
NOTE: After changing the Record Mode setting, the warning
message “This will FORMAT ALL HARDDISKS and LOAD THE
FACTORY DEFAULT CONFIG!” will be shown on the screen. Press
ENTER to confirm the selection, then the unit starts to format the hard
disks and load the factory default settings, or press ESC to abort.
We strongly recommend to backup your programmed configuration
before making any changes on Record Mode settings.
26
www.dynacolor.com.tw
All rights reserved
User’s Manual
3.5.2
Schedule Setup
The Schedule Setup is used to set the day and night time, or weekend
recording schedule. Select <Schedule Setup> from the Record Setup menu
and press ENTER; the following menu is displayed.
Schedule Setup
1. Day Time Start
2. Night Time Start
3. Weekend Schedule
4. Weekend Start
5. Weekend End
06:00
18:00
YES
Fri 18:00
Mon 06:00
• Make appropriate changes of the start time of Day and Night Time using
Direction keys.
• Press ENTER to confirm the settings or ESC to cancel.
• If you want to have a weekend record, choose <YES> to enable the
Weekend Schedule in advance and then set the Weekend Start/End time.
• Press ESC to back to previous page.
3.5.3
Preset Record Configuration
The <Preset Config> is used to select the preset recording quality and frame
rate. In normal circumstances, we strongly suggest you set the item to
<Standard>, the default. Below tables show the PPS and picture size under
<Standard> in Full-D1 mode, Half-D1 mode and CIF mode, respectively:
Halfl-D1 mode (NTSC: 720x240@60PPS; PAL: 720x288@50PPS)
Normal PPS
Normal Size
3.75 NTSC
(3.125 PAL)
Event PPS
Event Size
15 NTSC
11 KB
(12.5 PAL)
17 KB
Detailed settings offered in the <Preset Config> menu, please refer to
Section 5.4.3 Preset Record Configuration.
www.dynacolor.com.tw
All rights reserved
27
User’s Manual
3.6.4
To Record Event Video Only
If you want your DVR unit to start recording only under the alarm is triggered
and , follow the steps:
• Enter the OSD setup menu with correct password.
• In the OSD setup menu, select <Record Setup> menu. Move the cursor to
the item <Preset Config>, and select <Event only>.
Refer to Section 5.4.3 Preset Record Configuration for more detailed
information.
4.
Basic Operation
The DynaGuardTM 100 MPEG-4 DVR allows user to access some general
operations through the front panel easily. The following sections introduce the
general operations of the unit.
4.1
Viewing Live / Playback Video
The general functions in live and playback mode are described in the
following sections.
4.1.1
Viewing Modes
The DynaGuardTM 100 MPEG-4 DVR supplies user versatile ways of viewing
both live and recorded video. Following presents these view formats.
Viewing in Full Screen
Press any CHANNEL key directly to view the corresponding camera image in
full view format.
Viewing in Multi-window
Various multi-window view formats are offered for selecting. To switch
between available viewing formats, press MODE repeatedly.
28
www.dynacolor.com.tw
All rights reserved
User’s Manual
The available view formats are illustrated as the following figure.
4.1.2
Digital Zoom
Users are able to view a 2× full screen in live mode. To view the 2× full
screen, follow the steps.
• Press a CHANNEL key to view the corresponding camera in full screen.
• Press ZOOM to enter a 2× full screen zoom mode of the selected camera.
• If you need to view specific area of the 2× zoomed screen, use Direction
keys to pan / tilt the zoomed area around the original image.
• Either press ZOOM again or ESC to leave the zoom mode.
4.1.3
Viewing Live Cameras
Users are allowed to view live camera in versatile view modes, including
full-screen, 2×2 and 4×4. The general operation under live mode is described
as follows.
To Freeze Live Image
Press FREEZE while viewing live image, the image pauses but the date /
time information does not, and the system clock continues running.
Press FREEZE to pause the live image; press FREEZE again to resume the
live camera view.
www.dynacolor.com.tw
All rights reserved
29
User’s Manual
4.1.4
Viewing Recorded Video
To view recorded video, user can press PLAY/STOP key directly. When press
the PLAY/STOP key, the unit starts to continue playing back the recorded
video from the suspended point of record. If it is the first time to use the
PLAY/STOP key, the unit will playback from the very beginning of the record.
Alternatively, user can select records from the Search menu to play specific
video. Refer to section 4.3 Searching Recorded Video for more information.
The Forward or Reverse speed indicator will be shown on the bottom-left of
the screen, when in the playback mode.
The general operations in playback mode are described as follows.
Key Usage in Playback
The key usage is slightly changed in playback mode. Following is the key
usage found in playback mode.
LEFT (Reverse Playback)
The key is used to reverse the recorded video while the unit is playing back.
Press the key repeatedly to increase the speed of reverse playback by 1×, 2×,
4×, 8×, 16×, or 32×.
RIGHT (Forward Playback)
The key is used to play the recorded video fast forward. Press the key
repeatedly to increase the speed of forward playback by 1×, 2×, 4×, 8×, 16×,
or 32×.
FREEZE
Press FREEZE to pause the playback video. When the recorded video is
paused, press LEFT / RIGHT to resume playback video single step reverse /
forward, respectively. Press FREEZE again to continue playing video.
PLAY/STOP
Press to start playing back video, or to exit current mode or stop playing back
video and back to live mode.
30
www.dynacolor.com.tw
All rights reserved
User’s Manual
Pause Playback and Single Step Forward
To pause and resume recorded video, follow these steps.
• Press one of the CHANNEL keys to display the corresponding camera in
full screen.
• Press FREEZE to pause the current playback image.
• Press RIGHT / LEFT Direction keys to move the video single step reverse
/ forward. Press and hold RIGHT / LEFT keys to reverse / forward the
video single step continuously.
• Press FREEZE again to resume the playback operation.
Viewing Live Image in Playback Mode
Press the MODE key repeatedly in playback mode, a 16-window viewing
mode contains both live and playback image appears. This view mode is
illustrated as the following figure.
The eight windows on the top side of the screen are used to view the Live
video from channel 1 to channel 8 respectively, and the other windows allow
user to view Playback image from channel 1 to channel 8.
4.2
Sequence Setup
This section introduce you how to view in sequence mode with both Main
Monitor and Call Monitor, if connected. Sequence function can avoid
manually backtracking and give more flexibility while surveillance.
www.dynacolor.com.tw
All rights reserved
31
User’s Manual
4.2.1
Sequence with Main Monitor
Automatic sequence function can be used in any view mode with the Main
Monitor. Select certain view format and press SEQ to toggle the automatic
sequential sequence, press ESC to stop sequencing. The figure below
displays the 4-camera sequencing view modes.
To assign cameras to certain sequence, refer to Section 5.5.2 Main/ Call
Monitor Schedule.
4.2.2
Sequence with Call Monitor
Users are allowed to use the DynaGuardTM 100 MPEG-4 DVR front panel to
control a call monitor display without having to access the Main menu. Two
viewing modes can be displayed on call monitor: Sequence display and
Single camera display. To program the call monitor sequence, see section 5.5
Sequence Setup.
Follow the steps to control the call monitor.
• Press the CALL key on the front panel to enter call monitor control mode,
the message “Call Mode” will be shown on the bottom-left of the screen.
Press 1-8 Key To Select Channel
Press SEQ To Enable Sequence
Call Mode
• Press CHANNEL key to display the associated camera on call monitor.
• Alternatively, press SEQ repeatedly to display the sequence of cameras
previously programmed in Call Monitor Schedule menu.
• Press ESC to return the front panel to Main monitor control mode.
32
www.dynacolor.com.tw
All rights reserved
User’s Manual
4.3
Searching Recorded Video
The DynaGuardTM 100 MPEG-4 DVR is capable of searching and playing
back recorded video by date and time or events. Entering the specific date
and time of the wanted video, the unit will then search for the matched video
and play it on the monitor. Alternatively, user can search event video by
selecting channel as well.
In live or playback mode, press SEARCH to enter the Search menu, which is
shown as follows.
Search
----------Search By Time---------From:
2005/01/01 00:00:00
End:
2005/05/01 00:00:00
Start Time:
2005/01/01 00:00:00
Begin Playback
----------Search By Event---------Select Channel: CH1 CH2 CH3 CH4
Event List
4.3.1
Searching by Time
Follow the steps to search video by date and time.
• Press SEARCH key to enter the Search menu; the From Time and End
Time of the available video is listed on top of the screen. The value is
unchangeable.
• Use Direction keys to move the cursor for setting the Start Time; adjusting
the date and time values by UP / DOWN keys.
• Press ENTER to confirm the settings or ESC to abort.
• Move the cursor to <Begin Playback> and press ENTER to start playing
back the selected video.
• Either press PLAY/STOP again to return to live video.
NOTE: If there is no available recorded video that matches your
specified time and date, the unit starts playback from the next
available video.
NOTE: The date/time information will be shown on the screen with a
DST icon if the Daylight Saving Time function is enabled. “S”
indicates summer time and “W” indicates wintertime.
www.dynacolor.com.tw
All rights reserved
33
User’s Manual
4.3.2
Searching by Event
“Event List” allows you to search wanted video by event. The Event List is
displayed as below figure:
Event List
Date
2005/03/17
2005/03/17
2005/03/16
2005/03/15
2005/03/12
2005/03/12
2005/03/11
2005/03/10
2005/03/08
2005/03/08
2005/03/08
Time
11:26:50
09:53:03
16:14:42
03:45:31
22:27:56
10:09:29
12:18:20
05:16:00
17:11:37
16:29:10
03:22:17
Ch.
2
5
3
1
1
7
6
4
2
8
2
Type
Motion
Alarm
Alarm
Motion
Alarm
Motion
Motion
Alarm
Motion
Motion
Alarm
The list displays each event by date, time, triggered camera and alarm type.
As some events are deleted, others are displayed. The latest recorded event
video will be listed on the top.
Follow these steps to search event video through Event List:
• Press SEARCH to enter the Search menu.
• To search event video that has been recorded on a specific camera, use
LEFT / RIGHT to move the cursor and press ENTER to select or de-select
a channel.
• Move the cursor to <Event List> and press ENTER to list the event video
of the selected channels. The Event List displays.
•
To exit the event list, press ESC.
Follow the steps to playback video from Event List.
• Press and hold UP / DOWN to scroll through the Event List.
• Press ENTER to play back the selected event record.
• Press PLAY/STOP to return to live mode.
34
www.dynacolor.com.tw
All rights reserved
User’s Manual
4.4
Video Export
The unit allows you to export wanted video to the built-in CD-RW or an
external device, such as a USB ThumbDrive®, and save the video to *.drv file.
If you want to export video to an external device, make sure the external
storage has been connected to the DVR unit and the port has been set
appropriately for video export.
NOTE: Once an external device has been connected to the DVR
unit, the device has priority over the built-in CD-RW; which means
that the wanted video will be exported to the external device instead
of the built-in CD-RW.
According to the size of video, the export may take you about 10 minutes to 1
hour.
4.4.1
ezBurn Introduction
Built with the ezBurn technology, ezBurn function provides users the easier
way to export desired video with CD-RW built in or to an external device
connected, such as an USB ThumbDrive®.
TWO keys (SEARCH and CALL) and THREE touches are all you need for
completing the export. The whole exporting process will be done through the
front panel, but no need to enter the OSD setup menu.
The ezburn export process is illustrated as below figure:
www.dynacolor.com.tw
All rights reserved
35
User’s Manual
The whole process is described step by step in the following sections.
4.4.2
To export normal video
To Export normal video to external device, follow these step:
• Press SEARCH and play wanted normal video by entering date and time.
Note if you are viewing in multiple channel mode, please make sure there
is no window displaying in Live mode. Otherwise, the export won’t work.
• After entering playback mode, plays the video and press CALL on the
point that you want to start the export. The playback continues.
• Press CALL again on the point that you want to end the export. Now, the
“ezBurn” window displays as below figure. The information shown on the
window is for read only.
ezBurn confirmation
Selected Device: Built-in-CD-RW
All data on the disc will be erased.
Exported Required Size = 11 MB
Real Export Range:
From: 2005/11/07 AM10:41:13
To: 2005/11/07 AM10:41:21
Enter: YES ESC: NO
• If there is no any exportable external device connected to the DVR unit,
then a warning message will be shown on the screen, as below figure:
No exportable device detected.
Please install the target device/media
to the DVR.
Enter: Retry ESC: Exit
• Press ENTER to start the export; or, press ESC to abort.
36
www.dynacolor.com.tw
All rights reserved
User’s Manual
4.4.3
To Export event video
To export event video, follow these steps:
• Press SEARCH and play wanted event video. To play event video, refer to
Section 4.3 Searching Recorded Video.
• After entering the playback mode, press CALL. The “ezBurn” window
displays as below figure. The information shown on it is for read only.
Data
205/11/07
ezBurn confirmation
Selected Device: Built-in-CD-RW
All data on the disc will be erased.
Exported Required Size = 11 MB
Export Event Info:
Time
Ch
AM10:42:35
13
Enter: YES ESC: NO
Type
Motion
• If there is no any exportable external device connected to the DVR unit, a
warning message will be shown on the screen
• Press ENTER to start the export the whole event video to the connected
device; or, press ESC to abort.
4.5
Deleting Recorded Video
User can delete the Normal and Event recorded video in Purge Data menu.
The administrator password is required to access the function. Select
<Record Setup> from Main menu, and then in Record Setup menu, move the
cursor to <Purge Data> and press ENTER; the Purge Data menu is
displayed.
Purge Data
1. Purge All Data
2. Purge All Event Data
3. Purge Event Before
4. Start to Purge
NO
NO
2000/01/01
NO
The first four items are used to select the data that should be purged. The
items are described as follows. After select the data you want to purge, set
the fifth item <Start to Purge> to <YES> and press ENTER to start the
deleting process.
Purge All Data
Select the item to delete all recorded video from database.
www.dynacolor.com.tw
All rights reserved
37
User’s Manual
Purge All Event Data
Select the item to delete all event video from database.
Purge Event Before
The item is used to delete event video that recorded before a specific date.
The default of this item is <2000/01/01>.
4.6
Dome Control
DynaGuardTM 100 MPEG-4 DVR allows user to control a dome camera by
the front panel.
In Live mode, user can press CHANNEL key to display the desired dome
camera in full view. To enter Dome Control mode, press the DOME key and
press channel key 2 to display the hint screen; to exit the Dome Control mode
and back to live mode, press ESC or DOME.
To configure the dome controls settings, see the following sections.
4.6.1
Dome Connection
Follow the steps to install dome camera.
• See section 2.4 Rear Panel Connections for RS-485 port pin definition.
• Refer to the following figure. Connect the R+, R- terminals on the dome
camera to the D+, D- terminals on the RS-485 port by RS-485 cable
respectively.
38
www.dynacolor.com.tw
All rights reserved
User’s Manual
4.6.2
Dome Protocol Setup
The Dome Protocol item lists the available dome protocols for communicating
with dome cameras connected to the DynaGuardTM 100 MPEG-4 DVR. From
the Main menu, select <Camera Setup> and press ENTER. The following
menu is displayed.
Camera Setup
1. Camera Select
2. Dome Protocol
3. Dome ID
4. Camera Title
5. Covert
6. Termination
7. Brightness
8. Contrast
9. Saturation
10. Hue
CH1
None
0
NO
NO
0
0
0
0
To configure dome protocol, select a camera first and set the communications
protocol associated with dome camera using the Direction keys and ENTER.
The available protocol includes <DynaColor>, <Pelco D>, <Pelco P>,
<AD422> and <None> (default).
NOTE: The settings become effective after saving the changes and
exiting from the menu.
4.6.3
RS485 Setup
DynaGuardTM 100 MPEG-4 DVR controls the domes via RS-485
communication protocol. The RS-485 parameters in DynaGuardTM 100
MPEG-4 DVR must be set to the same parameters as the protocol for
RS-422 setup of the dome.
Users are allowed to change the RS-485 settings of the DynaGuardTM 100
MPEG-4 DVR. Select <System Setup> in Main menu, then select <RS485
Setup> from the System Setup menu and press ENTER. The following menu
is displayed.
RS485 Setup
1 Unit ID
2 Baud Rate
3 Bits
4 Stop
5 Parity
www.dynacolor.com.tw
All rights reserved
224
9600
8
1
None
39
User’s Manual
The ID number must match the ID address set by the dome. The Unit ID is in
the range of 1 to 255. The default ID is 224. Note that no two devices on the
same bus should be given the same ID address, or a conflict may occur.
The default DynaGuardTM 100 MPEG-4 DVR RS-485 settings are 9600 Baud,
8 Data Bits, 1 Stop Bit and No Parity.
NOTE: The settings become effective after saving the changes and
exiting from the menu.
4.6.4
Dome Controlling Keys
The function keys used in Dome Control are described as follows.
Set / Go Preset
This key is used to enter the Dome Preset menu to set up certain position as
a preset and go to the predetermined preset positions for viewing.
Toggle Hint Screen
This function is used to avoid viewing the dome parameter information while
controlling dome camera. Press this key to hide the screen. Press it again to
redisplay the screen.
Iris Open
Use to open the Iris on the dome camera.
Focus Near
Use to focus the dome camera near.
40
www.dynacolor.com.tw
All rights reserved
User’s Manual
Zoom In
Use to zoom the dome camera in. This function is for user to choose the
viewing area, more or less of it.
ESC
Use to leave dome control mode and return to live and full screen viewing
mode.
Auto / Enter
• In OSD Menu mode, the key is used to make selection.
• In dome control mode, this key is used to activate automatic focus and iris
function.
Iris Close
Use to close the Iris on the dome camera.
Focus Far
Use to focus the selected dome camera far.
Zoom Out
Use to zoom the dome camera out. This function is for user to choose the
viewing area, more or less of it.
Pan / Tilt
Use to pan and tilt dome camera.
www.dynacolor.com.tw
All rights reserved
41
User’s Manual
4.6.5
Setting Preset Points
The DynaGuardTM 100 MPEG-4 DVR allows user to set preset positions; the
amount of preset points depends on the dome manufacturer.
Follow the steps to set preset points.
•
•
•
•
Press a Channel key to view the corresponding camera in full screen.
Then press DOME to enter dome control mode.
Use Direction keys to position the dome camera to desired position.
Press 2 to view the dome control Hint Screen; press 2 again to toggle the
Hint Screen.
Hint Screen
DOME / ESC: Exit
MODE / PLAY: Iris Open / Close
SEQ / FREEZE: Focus Near / Far
MENU / SEARCH: Zoom In / Out
ENTER: Auto Focus / Iris
◄▲▼►: Pan / Tilt
CH1: Set / Go Preset
CH2: Hint Screen On / Off
Dome Control
• Press 1 to access the Set/Go Preset function. The Dome Preset menu is
displayed.
Index
1
2
3
4
5
6
7
Dome Preset
Set Preset
NO
NO
NO
NO
NO
NO
NO
Go Preset
NO
NO
NO
NO
NO
NO
NO
• Use UP / DOWN keys to select the desired preset number from the menu.
• Set the <Set Preset> of the selected preset number to <YES>, and press
ENTER to save the position. Now the preset is set and ready to call.
42
www.dynacolor.com.tw
All rights reserved
User’s Manual
4.6.6
Calling Preset Points
Follow the steps to call preset points.
• Press a Channel key to view the corresponding camera in full screen.
• Then press DOME to enter dome control mode.
• Press 2 to view the dome control Hint Screen; press 2 again to toggle the
Hint Screen.
• Press 1 to access the Set/Go Preset function.
Index
1
2
3
4
5
6
7
Dome Preset
Set Preset
NO
NO
NO
NO
NO
NO
NO
Go Preset
NO
NO
NO
NO
NO
NO
NO
• Use UP / DOWN keys to select the desired preset number from the menu.
• Set the <Go Preset> of the selected preset number to <YES>, and press
ENTER to call the preset point.
• Now the selected dome camera rotates to the preset position
automatically.
5.
Advanced System Configuration
The detailed functions and settings of DynaGuardTM 100 MPEG-4 DVR can
be set using the hierarchical OSD menu. This chapter particularizes the items
and options in the OSD menu.
To enter the Main menu, press MENU and then enter Administrator or User
password. The default passwords are shown in the following table. The same
default passwords are used for entering the remote viewing software
DynaRemoteTM Lite.
Administrator Password
User Password
1234
4321
It is strongly suggested to change the passwords to prevent unauthorized
access to the unit.
www.dynacolor.com.tw
All rights reserved
43
User’s Manual
After entering the correct password, the Main menu is displayed.
Main Menu
1. System Setup
2. Monitor Setup
3. Camera Setup
4. Record Setup
5. Sequence Setup
6. Event Setup
7. Database Setup
8. Configuration
9. Shutdown
Key Usage in OSD Menu
Direction Keys
In the OSD menu, Direction keys are used to move the cursor to previous or
next fields. UP / DOWN are used to change the value in the selected field.
ENTER
In OSD menu or selection interface, press the key to make selection or save
settings.
ESC
Press to cancel or exit from certain OSD menu without saving any changes.
Key Usage in Virtual Keyboard
A virtual keyboard shows when edit the settings, such as camera title, etc.
The virtual keyboard displays as follows.
A
B
C
D
E
F
G
H
I
K
L
M
N
O
P
Q
R
S
T
U
V W X
Y
Z
a
b
c
d
e
f
g
h
i
j
k
l
m
n
o
p
q
r
s
t
u
v
w
x
y
z
0
1
2
3
4
5
6
7
8
9
.
!
@
#
−
_
◄
►
Cancel
44
Backspace
J
Delete
OK
www.dynacolor.com.tw
All rights reserved
User’s Manual
To input characters
Move the cursor by pressing Direction keys and press ENTER to select
characters.
To move the cursor in title entry
Press MODE and LEFT / RIGHT simultaneously to move the cursor to left /
right in the title entry.
To delete previous character
Select <Backspace> and press ENTER, or press MODE and UP
simultaneously.
To delete current character
Select <Delete> and press ENTER, or press MODE and DOWN
simultaneously.
To exit the virtual keyboard
Select <OK> and press ENTER to save the settings and exit, or press ESC to
exit without saving changes
5.1
System Setup >
Select <System Setup> from the Main Menu and press ENTER to enter the
System Setup menu.
System Setup
1. Version
2. Language
3. Date/Time
4. Unit Name
5. Password
6. Network Setup
7. RS485 Setup
8. Key Beep
English
DVR
YES
The items in the System Setup menu are described in the following sections.
www.dynacolor.com.tw
All rights reserved
45
User’s Manual
5.1.1
Version >
The Version menu allows user to view system information such as hardware
and software version. From the System Setup menu, select <Version> and
press ENTER. The following menu is displayed.
Version
Hardware
Software
Software Upgrade via Local Device
V1.0
xxxx-xxxx-xxxx-xxxx
The items in this menu are described in the following subsections.
5.1.1.1
Hardware Version >
The item identifies the hardware version for this unit.
5.1.1.2
Software Version >
The item identifies the software version installed on this unit.
5.1.1.3
Software Upgrade via Local Device >
This item is used for updating the DynaGuardTM 100 MPEG-4 DVR software
by local device. The menu is displayed as follows.
Software Upgrade via Local Device
Upgrade Version
xxxx-xxxx-xxxx-xxxx
Select
NO
Connect an USB drive contains upgrade software to the unit; the available
upgrade files will be listed in the menu. To update the system, select a file
and use UP / DOWN keys to choose <YES>. Press ENTER to confirm the
selection and start the upgrade process. The DynaGuardTM 100 MPEG-4
DVR uploads the software, updates the system files, and reboots
automatically.
The upgrade may take several minutes to save the changes in the memory of
the system. After reboot the unit, please check the software version again.
46
www.dynacolor.com.tw
All rights reserved
User’s Manual
NOTE: No power interruption is allowed during the software update.
Ensure that no power interruption can occur until the unit is
completely rebooted.
NOTE: Do not remove the external USB ThumbDrive®/CD-ROM
before the unit has completely shut down (hard drive and fan are off).
Removing the external USB ThumbDrive®/CD-ROM before shut down
can cause the system to update improperly.
5.1.2
Language >
The Language item allows user to select the language for the OSD menu and
screen messages. Language selection takes effect immediately when the
selection is done. Press UP / DOWN to select from listed languages and
press ENTER to confirm.
5.1.3
Date / Time >
User can set the current date, time and other OSD parameters in this menu.
The Administrator’s privileges are required for entering the submenu. In
System Setup menu, select <Date/Time> and press ENTER; the Date/Time
menu displays as follows.
Date/Time
1. Date
2. Time
3. Date/Time Display
4. Date Display Mode
5. Time Display Mode
6. Date/Time Order
7. Daylight Saving Time
8. DST Start
9. DST End
10. DST Bias
2005/02/21
10:39:26
1 Row
Y/M/D
24 HR
Date First
ON
Apr, 1 st Sun, 02:00
Apr, Last Sun, 02:00
60 Min
NOTE: The reset date / time setting applies to record new video, the
date and time of previously recorded video will not be changed.
NOTE: To avoid record database corruption, after changed
Date/Time setting, clear the database is recommended.
www.dynacolor.com.tw
All rights reserved
47
User’s Manual
5.1.3.1
Date / Time Setting >
Select <Date> or <Time> and press ENTER for adjusting the settings. LEFT /
RIGHT keys are used to move the cursor to previous or next field, ENTER is
for selecting, and UP / DOWN are used to change the value in the selected
field.
5.1.3.2
Date / Time Display >
Users are allowed to choose to set the date / time OSD displays in 1 or 2
rows. Use the UP / DOWN keys to change the setting. The default is to
display the date / time OSD in one row.
5.1.3.3
Date Display Mode >
This function allows user to set the OSD display type of the date / time. There
are three options to select from: <Y/M/D>, <M/D/Y> or <D/M/Y>. “Y”
represents “Year”, “M” represents “Month” and “D” represents “Day”.
Use UP / DOWN keys to change the setting. The default setting is <Y/M/D> in
both NTSC / PAL formats.
5.1.3.4
Time Display Mode >
User can choose to set the time format to <12 hour> or <24 hour>. Use the
UP / DOWN keys to change the format. The default setting is <24 hour>.
5.1.3.5
Date/Time Order >
The item is used to set the order of Date/Time display to <Date First> or
<Time First>. Select this item and press ENTER, then use UP / DOWN keys
to change the setting.
48
www.dynacolor.com.tw
All rights reserved
User’s Manual
5.1.3.6
Daylight Saving Time >
The item is for people who live in certain regions to observe Daylight Saving
Time. Select <ON> to enable, or <OFF> to disable the function.
If the function is disabled, the DST Start / End time and DST Bias will be
grayed out and cannot be accessed. If this function is enabled, the date/time
information will be shown on the screen with a DST icon when playing back
recorded video or searching video in the event list. “S” indicates summer time
and “W” indicates wintertime.
5.1.3.7
DST Start / End >
The items are used to set the daylight saving duration. Use LEFT / RIGHT to
move the cursor to the next or previous field, UP / DOWN to change the
settings.
5.1.3.8
DST Bias >
The item allows user to set the amount of time to move forward from the
standard time for daylight saving time. Available options are <30>, <60>,
<90> and <120> minutes.
www.dynacolor.com.tw
All rights reserved
49
User’s Manual
5.1.4
Unit Name >
Users are allowed to assign a unit name, up to 11 characters, to the
DynaGuardTM 100 MPEG-4 DVR.
Follow the steps to edit the unit name.
•
Select <Unit Name> from System Setup menu and press ENTER. A
virtual keyboard displays.
Unit Name
A
B
C
D
E
F
G
H
I
K
L
M
N
O
P
Q
R
S
T
U
V W X
Y
Z
a
b
c
d
e
f
g
h
i
j
k
l
m
n
o
p
q
r
s
t
u
v
w
x
y
z
0
1
2
3
4
5
6
7
8
9
.
!
@
#
−
_
◄
►
Backspace
Cancel
•
•
•
5.1.5
J
Delete
OK
Use Direction keys to move the cursor to the wanted character.
Press ENTER to add the character to the entry field (up to 11 characters).
When done, move the cursor to <OK> and press ENTER to save the
settings and exit.
Password >
The Password menu allows administrator to change the password settings
for accessing the unit. Select <Password> in System Setup menu and press
ENTER; the menu displays as follows.
Password
1. Admin Password
2. User Password
3. Enable Password
4. Load Factory Password
50
NO
None
www.dynacolor.com.tw
All rights reserved
User’s Manual
5.1.5.1
Admin / User Password >
Only the administrator is allowed to change the user and administrator
password to any 4~8 digit number. Use the UP / DOWN Direction keys to
select the desired account and press ENTER, the following menu is
displayed.
Admin Password
________
Press Channel Keys To Enter Password
(4-8 Digits)
Press ◄ To Delete
Use CHANNEL keys to input the new password and confirm the new
password. After setting the new password, press ENTER to save the settings
and exit.
5.1.5.2
Enable Password >
The item is used to determine if the password is required for accessing the
OSD menu. Select <YES> to demand entering password when accessing the
OSD menu; if not, select <NO>.
5.1.5.3
Load Factory Password >
This item allows the administrator to reload the factory password in case that
the administrator cannot remember the password. There are three options to
select from: <Admin> (reload the Admin password only), <User> (reload the
User password only), and <All> (reload the Admin and User passwords). The
factory password is 1234 for administrator and 4321 for user.
5.1.6
Network Setup >
The Network Setup menu allows the administrator to configure the network
by specifying the network related settings, such as IP address and Netmask,
etc.
See your network administrator and/or network service provider for more
specific information.
www.dynacolor.com.tw
All rights reserved
51
User’s Manual
From the System Setup menu, select <Network Setup> and press ENTER.
The following menu displays.
Network Setup
1. LAN Setup
2. Trigger Port
80
Items in this menu are described in the following sections.
5.1.6.1
LAN Setup >
The network related settings in the LAN Setup menu should be associated
with the network service type.
Select <LAN Setup> in Network Setup menu and press ENTER for setting
the parameters; the menu displays as follows.
LAN Setup
1. DHCP
2. IP
3. Netmask
4. Gateway
5. DNS
6. Connect At Booting
7. Network Restart
-
ON
xxx.xxx.xxx.xxx
xxx.xxx.xxx.xxx
xxx.xxx.xxx.xxx
xxx.xxx.xxx.xxx
YES
NO
DHCP >
This item allows user to obtain a dynamic IP address from DHCP (Dynamic
Host Configuration Protocol) server during the unit boots up. When using
DHCP, the settings are dynamic and they will change every time you power
up and power off the unit; depending on your network's setup.
If the item is enabled (ON), a dynamic IP will be assigned to DynaGuardTM
100 MPEG-4 DVR. In this case, user does not need to configure a static IP
and the Ethernet settings including IP address, Netmask, Gateway, and DNS
settings will be read-only. The default setting is <ON>.
If you are using permanent addressing, set DHCP to <OFF> for setting the IP
Address, Netmask, Gateway, and DNS. See your network system
administrators or IT personnel for appropriate values for these settings.
52
www.dynacolor.com.tw
All rights reserved
User’s Manual
-
IP >
The item is used to configure the IP (Internet Protocol) address of the unit.
The IP address is the identifier for your computer or device on a TCP/IP LAN
or WAN. Please note that to set a static IP address, DHCP must be set to
<OFF>.
-
Netmask >
A netmask is a 32-bit mask used to divide an IP address into subnets and
specify the networks available hosts. Its value is defined by your network
administrator. It takes the form as ***.***.***.***, for example,
255.255.255.255.
This item allows user to enter the value of the Netmask for the unit. Please
note that to configure the item, DHCP must be set to <OFF>.
-
Gateway >
Gateway is a node on a network that serves as an entrance to another
network.
Users are allowed to specify the IP address of the gateway or router
associated with this unit. To configure this item, DHCP must be set to <OFF>.
-
DNS >
DNS is the abbreviation for “Domain Name Server”, which is an Internet
service that translates domain names into IP addresses. Because domain
names are easier to remember.
The item allows user to specify the IP address of the Domain Name System
associated with the unit. To configure this item, DHCP must be set to <OFF>.
If the server is unavailable when using DHCP, the unit searches for the
network server and boots up more slowly. This network search continues until
it times out.
www.dynacolor.com.tw
All rights reserved
53
User’s Manual
-
Connect At Booting >
The unit is allowed to connect to the internet automatically when powered up.
Select <YES> to connect at booting, otherwise select <NO>. The default
setting is <YES>.
-
Network Restart >
Network restart is required after changing network settings. Select <YES> to
restart the network device.
5.1.6.2
Trigger Port >
To avoid the default service port (port 80) to be blocked, the item enables
user to change port 80 into another port.
To change the trigger port, move the cursor over <Trigger Port> and press
ENTER, then adjust the setting by UP / DOWN keys.
5.1.7
RS485 Setup >
This menu allows setting up the parameters of the unit’s RS-485
communications port. From the Main menu, select <RS485 Setup> and press
ENTER. The following menu is displayed.
RS485 Setup
1. Unit ID
2. Baud Rate
3. Bits
4. Stop
5. Parity
5.1.7.1
224
9600
8
1
None
Unit ID >
This item is used to change the RS-485 ID address of the unit. The ID is in
the range of <1> to <255>. The default is <224>.
5.1.7.2
Baud Rate >
The Baud rate options for associated with the protocol are <2400>, <4800>,
<9600>, <19200> and <38400>. The default is <9600> baud.
54
www.dynacolor.com.tw
All rights reserved
User’s Manual
5.1.7.3
Bits >
User can specify the bits in a word that are associated with this protocol. The
available options are <6>, <7> and <8> bits. The default is <8> bits.
5.1.7.4
Stop >
User can specify the stop bit associated with this protocol. Options are <1>
and <2> stop bits. The default is <1> stop bit.
5.1.7.5
Parity >
This item is used to specify the parity associated with this protocol. Options
are <ODD>, <EVEN>, and <NONE>. The default is <NONE>.
5.1.8
Key Beep >
The item is used to enable or disable the key tone. Select <YES> to enable
the key tone, or <NO> to disable.
5.2
Monitor Setup >
The Monitor Setup menu allows user to tune the quality of the displayed
image. Select <Monitor Setup> from the Main menu and press ENTER. The
following menu is displayed.
Monitor Setup
1. Show Camera Title
2. Monitor Brightness
3. Monitor Contrast
4. Monitor Chrominance
5. Screen Center Adjust
6. Show Color Bar
7. VGA Resolution
YES
0
0
0
800x600
The following sections describe the items found in the Monitor Setup menu.
5.2.1
Show Camera Title >
This item allows user to choose whether to display the camera title on the
screen or not. The default is <YES>, which displays the camera titles with the
video.
www.dynacolor.com.tw
All rights reserved
55
User’s Manual
5.2.2
Monitor Brightness >
The function allows user to adjust the brightness of image displayed on the
monitor. Move the cursor to the item then press ENTER, and use UP / DOWN
keys to adjust the numeric value. The range of brightness values is <-128> to
<127>. The default setting is <0>.
5.2.3
Monitor Contrast >
The item is used to adjust the color contrast of image. The range of contrast
values is <-128> to <127>; the default setting is <0>.
5.2.4
Monitor Chrominance >
Move the cursor over the item and press ENTER for adjusting the
chrominance of image displayed on the monitor. Use UP / DOWN keys to
adjust the numeric value. The range of chrominance values is <-128> to
<127>; the default setting is <0>.
5.2.5
Screen Center Adjust >
The item is used to adjust the screen center of the main monitor display area.
Follow the steps to set the center point.
• Select <Screen Center Adjust> from the Monitor Setup menu and press
ENTER. The adjusting screen is as follows.
Screen Center Adjust
▲
◄
+
►
▼
• Position the screen center position using the Direction keys.
• Press ENTER to exit when finished.
5.2.6
Show Color Bar >
Choose this item to display a color bar pattern on the screen. The color bar
helps to adjust the monitor hue, saturation, text color, and display options.
Press ESC to exit the color bar pattern and return to the OSD menu.
56
www.dynacolor.com.tw
All rights reserved
User’s Manual
5.2.7
VGA Resolution >
The item allows user to select appropriate VGA resolution for the VGA
monitor connected to the unit. The options are <800×600> (default), <1024×
768> and <1280× 1024>.
NOTE: If the selected VGA resolution is too high for the monitor, the
message “No Signal’’ will be shown on screen. Then please press
ESC on the front panel to restore the original setting.
5.3
Camera Setup >
The items in the Camera Setup menu enable user to set camera parameters,
including camera title, dome protocol and ID for each connected camera. The
menu is shown as below.
Camera Setup
1. Camera Select
2. Dome Protocol
3. Dome ID
4. Camera Title
5. Covert
6. Termination
7. Brightness
8. Contrast
9. Saturation
10. Hue
CH1
None
0
CH1
NO
NO
0
0
0
0
Items in this menu are described in the following subsections.
5.3.1
Camera Select >
The item is used to select a camera for setting the parameters. The related
settings will follow the selected camera, such as dome protocol and camera
title.
Move the cursor to <Camera Select> and press ENTER, then select a
channel using UP / DOWN keys.
www.dynacolor.com.tw
All rights reserved
57
User’s Manual
5.3.2
Dome Protocol >
Select the communications protocol associated with your dome camera using
the ENTER and Direction keys. The available protocol includes <DynaColor>,
<Pelco D>, <Pelco P>, <AD422> and <None> (default).
5.3.3
Dome ID >
This item is used to assign an ID number to the selected dome camera. Note
that ID number must match the ID address set by the dome.
5.3.4
Camera Title >
This item allows the user to change the title of each camera connected to the
unit. By default, the titles of cameras are numbered from 1 through 16
respectively. The title is displayed on screen after the changes of the titles are
set.
Follow these steps to enter a new title for a camera.
• In the Camera setup Menu, move the cursor to Camera Title and press
ENTER. A virtual keyboard with alphanumeric characters is displayed.
Camera Title
A
B
C
D
E
F
G
H
I
K
L
M
N
O
P
Q
R
S
T
U
V W X
Y
Z
a
b
c
d
e
f
g
h
i
j
k
l
m
n
o
p
q
r
s
t
u
v
w
x
y
z
0
1
2
3
4
5
6
7
8
9
.
!
@
#
−
_
◄
►
Cancel
Backspace
J
Delete
OK
• Use Direction keys to position the cursor in the title entry field above the
virtual keyboard.
• Use Direction keys to move the cursor through the lists of characters to
the one you need. Press ENTER to select a character. Continue until the
name is established. Each title can contain up to 11 characters in it.
58
www.dynacolor.com.tw
All rights reserved
User’s Manual
• After title entry is finished, move the cursor to <OK> and press ENTER;
otherwise, either press ESC, or move the cursor to <Cancel> and press
ENTER to abort.
5.3.5
Covert >
This function allows user to choose certain camera to be covert while the unit
is continuing recording video. Choosing <YES> means to cover the selected
camera; and <NO> to remain the selected camera non-covert. The default
setting is <NO>.
To make a camera be covert, follow these steps:
• Select the channel that you want it to be covert from the <Channel
Select> item.
• After selecting the channel, move the cursor to <Covert> item and select
<YES>.
5.3.6
Termination >
This item is used to enable / disable the 75-termination resistor inside the unit
to adjust the image quality of each camera. <YES>= termination resistor
enabled (default), <NO> = termination resistor disabled.
NOTE: If the camera loop-out connectors have not been used, the
termination resistor should be enabled for appropriate signal
termination.
5.3.7
Brightness >
Move the cursor to the item and press ENTER for adjusting the brightness of
the camera. Use UP / DOWN keys to adjust the numeric value. The range of
brightness values is <-128> to <127>. The default setting is <0>.
5.3.8
Contrast >
Move the cursor to the item and press ENTER for adjusting the contrast of
the camera. Use UP / DOWN keys to adjust the value.
www.dynacolor.com.tw
All rights reserved
59
User’s Manual
5.3.9
Saturation >
Move the cursor to the item and press ENTER to adjust the color saturation
of the camera using UP / DOWN keys. This value will be ignored on
monochrome monitors. The range of saturation values is <-128> to <127>.
The default setting is <0>.
5.3.10
Hue >
Move the cursor to the item and press ENTER for adjusting the hue of the
camera. Use UP / DOWN keys to adjust the value.
5.4
Record Setup >
The following three factors will effect the total record time of DynaGuardTM
100 MPEG-4 DVR:
• HDD capacity
• Recording Rate (Picture per Second)
• Image quality settings
The greater the recording rate and the higher the quality setting, the shorter
the recording time. Most of the related factors can be set here in this
submenu.
The Record Setup menu allows user to set recording quality, recording
schedules, and other recording parameters. Administrator's password is
required to access Record Setup menu. In the Main menu, move the cursor
to <Record Setup> and press ENTER. The following menu is displayed.
Record Setup
1. Record Mode
2. Schedule Setup
3. Preset Config
4. ezRecord Setup
5. Circular Recording
6. Purge Data
60
720×240@60PPS
Standard
ON
www.dynacolor.com.tw
All rights reserved
User’s Manual
5.4.1
Record Mode >
The item is for selecting resolution and recording rate. The relative record
settings, such as preset configuration, will follow the record mode setting.
The options are <720 × 480@30PPS>, <720 × 240@60PPS> and <360 ×
240@120PPS> in NTSC (<720×576@25PPS>, <720×288@50PPS>, <360×
288@100PPS>in PAL).
Move the cursor to this item and press ENTER, then select a Record mode
using UP / DOWN keys.
NOTE: After changing the Record Mode setting, the warning
message “This will FORMAT ALL HARDDISKS and LOAD THE
FACTORY DEFAULT CONFIG!” will be shown on the screen. Press ENTER
to confirm the selection, then the unit starts to format the hard disks and load
the factory default settings, or press ESC to abort. We strongly recommend to
backup your programmed configuration before making any changes on
Record Mode settings.
5.4.2
Schedule Setup >
This submenu is used to set the day and night time, or weekend recording
schedule.
The Night and Day schedules are used to define daytime and nighttime; the
Weekend schedule is tailored for weekends and holidays.
Select <Schedule Setup> from the Record Setup menu and press ENTER;
the following menu is displayed.
Schedule Setup
1. Day Time Start
2. Night Time Start
3. Weekend Schedule
4. Weekend Start
5. Weekend End
5.4.2.1
06:00
18:00
YES
Fri 18:00
Mon 06:00
Day / Night Time Start >
The Day/Night Start Time determines the beginning of day/night recording
time. Time is indicated in 1-minute increments. The time display format in this
menu is based on the setting of Time Display Mode.
www.dynacolor.com.tw
All rights reserved
61
User’s Manual
5.4.2.2
Weekend Schedule >
The Weekend Schedule determines whether a weekend schedule is in effect.
Choose <YES> to take effect the related weekend settings.
5.4.2.3
Weekend Start / End >
The Weekend Start Time indicates the specific day and time that a weekend
begins, for example, FRI 18:00. The Weekend End Time indicates the
specific time and day that a weekend ends, for example, MON 06:00. Time is
indicated in 1-minute increments.
Note that the value you have set indicates when the regular Day and Night
scheduling ends, and Weekend recording begins.
5.4.3
Preset Record Configuration >
The <Preset Config> is used to select the preset recording quality and frame
rate. Different default recording quality levels are offered for user to choose:
<Best Quality>, <Standard>, <Extended Record>, <ezRecord >, <512Kbps
DSL>, <256Kbps DSL> and <128Kbps DSL >.
According to various Record modes, the preset configuration options for
normal and event status are described in terms of relative recording rate
(PPS) and recording size for each channel in the table below.
These preset conditions override any other quality and rate settings. The
default Preset Configuration setting is <Standard>.
Record Mode: Full-D1 mode (NTSC: 720×480@30PPS) (PAL: 720×576@25PPS)
Preset
Normal
Normal
Event
Event
Event Active
Configuration
PPS
Size
PPS
Size
3.75 NTSC
15 NTSC
Both
Best Quality
20 KB
20 KB
(3.125 PAL)
(12.5 PAL)
(Alarm+Motion)
Standard
3.75 NTSC
15 NTSC
14 KB
20 KB
Both
(Default)
(3.125 PAL)
(12.5 PAL)
ezRecord
Auto
Extended
Record
3.75 NTSC
(3.125 PAL)
3 NTSC
(3 PAL)
3 NTSC
(3 PAL)
3 NTSC
(3 PAL)
512Kbps DSL
256Kbps DSL
128Kbps DSL
62
Auto
8 KB
3 KB
2 KB
1 KB
Auto
15 NTSC
(12.5 PAL)
3 NTSC
(3 PAL)
3 NTSC
(3 PAL)
3 NTSC
(3 PAL)
Auto
Auto
20 KB
Both
3 KB
Both
2 KB
Both
1 KB
Both
www.dynacolor.com.tw
All rights reserved
User’s Manual
Record Mode: Half-D1 mode (NTSC: 720×240@60PPS) (PAL: 720×288@50PPS)
Preset
Normal
Normal
Event
Event
Event Active
Configuration
PPS
Size
PPS
Size
3.75 NTSC
15 NTSC
Both
Best Quality
17 KB
17 KB
(3.125 PAL)
(12.5 PAL)
(Alarm+Motion)
Standard
3.75 NTSC
15 NTSC
11 KB
17 KB
Both
(Default)
(3.125 PAL)
(12.5 PAL)
Extended
Record
3.75 NTSC
(3.125 PAL)
5 KB
15 NTSC
(12.5 PAL)
17 KB
Both
ezRecord
Auto
Auto
Auto
Auto
Auto
512Kbps DSL
3 NTSC
(3 PAL)
3 KB
3 NTSC
(3 PAL)
3 KB
Both
256Kbps DSL
3 NTSC
(3 PAL)
2 KB
3 NTSC
(3 PAL)
2 KB
Both
128Kbps DSL
3 NTSC
(3 PAL)
1 KB
3 NTSC
(3 PAL)
1 KB
Both
Record Mode: CIF mode (NTSC: 360×240@120PPS) (PAL: 360×288@100PPS)
Preset
Normal
Normal
Event
Event
Event Active
Configuration
PPS
Size
PPS
Size
7.5 NTSC
15 NTSC
Both
Best Quality
14 KB
14 KB
(6.25 PAL)
(12.5 PAL)
(Alarm+Motion)
Standard
7.5 NTSC
15 NTSC
8 KB
14 KB
Both
(Default)
(6.25 PAL)
(12.5 PAL)
Extended
7.5 NTSC
15 NTSC
2 KB
14 KB
Both
Record
(6.25 PAL)
(12.5 PAL)
ezRecord
512Kbps DSL
256Kbps DSL
128Kbps DSL
www.dynacolor.com.tw
All rights reserved
Auto
3 NTSC
(3 PAL)
3 NTSC
(3 PAL)
3 NTSC
(3 PAL)
Auto
3 KB
2 KB
1 KB
Auto
3 NTSC
(3 PAL)
3 NTSC
(3 PAL)
3 NTSC
(3 PAL)
Auto
Auto
3 KB
Both
2 KB
Both
1 KB
Both
63
User’s Manual
5.4.4
ezRecord Setup >
This item aims to avoid the complicated record settings, and to make the
setup much easier. Note that the item can be reached only when you select
<ezRecord> as the option for <Preset Config>.
Select <ezRecord Setup> from <Record Setup> and press ENTER, the
sub-menu appears as below figure:
ezRecord Setup
How Many Days To Record
Daytime Record
Night Record
Weekend Record
The Quality will Be
2 Days
Yes
Yes
Yes
Fair
To have the ezRecord Setup done, follow these steps:
• Select <How Many Days To Record> and press ENTER, then press
UP/DOWN to choose the option you want. The maximum of days
depends of the size of your HDD, in the other words, the larger the HDD
installed, the more days the unit can record.
• Move to <Daytime Record> and press ENTER. This item is for you to
select whether you want the DVR to record during daytime. If yes, using
UP/DOWN to select <Yes> as option; or, select <No> for not recording
during daytime.
• Repeat the same procedures through the 3rd and 4th item, respectively.
Note that <Weekend Record> will be not accessible if you select <NO> for
the item <Weekend Schedule> in <Schedule Setup>.
• According to upper item you have set, the quality will be automatically
accounted and shown on the screen. This item is for read-only. Five
options, including <Best>, <High>, <Mid>, <Fair> and <Low>, you may
see on this item. We strongly recommend to keep the quality higher than
“Middle”.
NOTE: The current number of connected cameras will affect the
recording quality automatically calculated through the <ezRecord
Setup>. Therefore, once you disconnect cameras or connect more
cameras to the unit, you should reset the <ezRecord Setup>.
64
www.dynacolor.com.tw
All rights reserved
User’s Manual
5.4.5
Circular Recording >
User can choose to record video in circular mode or in linear mode. If you
choose to record in circular mode, then the unit begins to overwrite the oldest
recorded video; and stores new video over the HDD spaces. If you choose to
record in linear mode in stead, the unit stops recording when the HDD is full.
From the Record Setup menu, move the cursor to <Circular Recording> and
press ENTER, then select <ON> / <OFF> using UP / DOWN keys.
5.4.6
Purge Data >
This item is used to delete the Normal or Event recording video. In Record
Setup menu, move the cursor to <Purge Data> and press ENTER; the Purge
Data menu is displayed.
Purge Data
1. Purge All Data
2. Purge All Event Data
3. Purge Event Before
4. Start to Purge
5.4.6.1
NO
NO
2005/01/01
NO
Purge All Data >
The item is used to delete all video from database(s). Using UP / DOWN keys
to select <YES> and start the deleting by setting the <Start to Purge> to
<YES>.
5.4.6.2
Purge All Event Data >
The item is used to delete all event video from database(s). Using UP /
DOWN keys to select <YES> and start the deleting by setting the <Start to
Purge> to <YES>.
5.4.6.3
Purge Event Before >
The item is used to delete event video before a specific date. Use LEFT /
RIGHT keys to move the cursor to next or previous field, ENTER to select the
item and UP / DOWN to adjust the value.
www.dynacolor.com.tw
All rights reserved
65
User’s Manual
5.4.6.4
Start to Purge >
After selecting the video you want to delete or setting the date for deletion,
set this item to <YES> for start the deleting or choose <NO> to cancel.
5.5
Sequence Setup >
The Sequence Setup menu allows setting the camera sequence schedule
and dwell time for main and call monitor. Select <Sequence Setup> in Main
menu and press ENTER; the menu displays as follows.
Sequence Setup
1. Main Monitor Dwell
2. Main Monitor Schedule
3. Call Monitor Dwell
4. Call Monitor Schedule
5 Sec
5 Sec
Items in the Sequence Setup menu are described in the following
subsections.
5.5.1
Main / Call Monitor Dwell >
The Main / Call Monitor can be set to display full screen video of all installed
cameras in sequence. This item is used to set the Main / Call Monitor dwell
time, which is the amount of time elapsed between switching images. The
dwell time is in the range of 1 to 120 seconds. The default value is 5 seconds.
5.5.2
Main / Call Monitor Schedule >
This item is used to set the Main / Call Monitor camera sequence in full
screen format. Move the cursor to <Main Monitor Schedule> and press
ENTER; the menu is displayed as follows.
Main Monitor Schedule
_►_►_►_►_►_►_►_►
_►_►_►_►_►_►_►_
Press 1-16 Key To Select Channel
Press ◄ To Delete
66
www.dynacolor.com.tw
All rights reserved
User’s Manual
Follow these steps to set a sequence:
• Press LEFT direction key to delete the original setting.
• Press the desired Channel keys to assign a camera to that location in the
sequence.
• Continue the steps until the sequence is completed.
A sequence can have up to 16 entries. User can select fewer than 16 entries
for camera sequence and leave the remaining entries blank. The sequence
can include a specific camera or cameras multiple times.
5.6
Event Setup >
This menu allows user to determine DynaGuardTM 100 MPEG-4 DVR
behavior in response to an alarm event. In the Main menu, move the cursor
to <Event Setup> and press ENTER. The following menu is displayed.
Event Setup
1. Internal Buzzer
2. Event Icon
3. Event Full Alarm
4. Event Duration
5. Per Channel Config
ON
ON
OFF
5 sec
Items in the Event Setup menu are described in the following subsections.
5.6.1
Internal Buzzer >
This item allows user to enable / disable the DynaGuardTM 100 sMPEG-4
DVR internal buzzer. If set to <ON>, the buzzer is activated in response to an
alarm. If set to <OFF>, the buzzer is not activated. The default setting is
<ON>.
www.dynacolor.com.tw
All rights reserved
67
User’s Manual
5.6.2
Event Icon >
The item enables (ON) / disables (OFF) the display of Event Icon on the main
monitor when an alarm event occurs. The default setting is <ON> (enable).
The event types are represented by a character respectively; the descriptions
are as below table.
Event type
5.6.3
Description
A
Alarm in event
M
Motion detection event
L
Video loss event
Event Duration >
This item determines the duration of the buzzer and Alarm Out relay function
after an alarm is triggered. The available event duration range is from 1
second to 100 seconds. The default setting is 5 seconds.
5.6.4
Per Channel Config >
This menu is used to set the Video Loss Detect, Motion Detect and Alarm In /
Out function for each channel. The menu is displayed as below.
Per Channel Config
1. Channel Select
2. Video Loss Detect
3. Motion Detect
4. Detection Config
5. Alarm In
6. Alarm Out
5.6.4.1
CH1
ON
ON
OFF
None
Channel Select >
The item is used to select a desired channel for setting the parameters. Move
the cursor to <Channel Select> and press ENTER, then select a channel
using UP / DOWN keys. Press ENTER again to confirm the setting.
68
www.dynacolor.com.tw
All rights reserved
User’s Manual
5.6.4.2
Video Loss Detect >
This item allows user to enable / disable Video Loss as an alarm event.
Select <ON> to enable Video Loss alarm events, <OFF> to disable. The
default setting is <ON>.
5.6.4.3
Motion Detect >
Use to enable or disable the motion detection function of the DynaGuardTM
100 MPEG-4 DVR. By default, the value is <OFF>.
If motion detection function is enabled, it is required to define the motion
detection parameters such as detection area and sensitivity settings.
5.6.4.4
Detection Configuration >
If motion detection function is enabled, it is required to define the motion
detection parameters such as detection area and sensitivity settings. Select a
channel for setting the parameters, move the cursor to <Detection Config>,
and press ENTER. The Detection Configuration menu displays as follows.
Detection Config
1. Detected Area Setup
2. Sensitivity
3. Area Threshold
75%
60%
----- Detected Area Percentage ----40%
▲
www.dynacolor.com.tw
All rights reserved
69
User’s Manual
-
Detected Area Setup >
The Detect Area is displayed as follows after selecting this item. The
detection area consists of 273 (21×13) detection grids in NTSC video format
or 336 (21×16) grids in PAL format.
■
■
■
■
■
■
■
■
■
■
■
■
■
■
■
■
■
■
■
■
■
■
■
■
■
■
■
Use the Direction keys to move the cursor and press ENTER to enable or
disable a grid. Press MODE to select all of the grids for detection; press
MODE again to de-select all of the grids.
-
Sensitivity >
The item is used to set the sensitivity of detection grids for the camera. A
greater value indicates more sensitive motion detection. A motion alarm will
be triggered, once the amount of motion detected exceeds the Threshold
value
Move the cursor to <Sensitivity> and press ENTER, and then use UP /
DOWN keys to adjust the value. The value is indicated in 4% increment.
-
Area Threshold >
<Area Threshold> means the motion alarm triggered level; if the percentage
of triggered grids to total detection area is greater than the set value, the
motion alarm will be triggered.
For example, if 10 grids are selected and the < Area Threshold > value is
70%, the motion alarm will be triggered when 7 grids are motion detected.
Move the cursor to < Area Threshold > and press ENTER, and then use UP /
DOWN keys to adjust the value. The value is indicated in 4% increment.
-
Detected Area Percentage >
The part shows the percentage and variation of the detected volume.
70
www.dynacolor.com.tw
All rights reserved
User’s Manual
5.6.4.5
Alarm In >
This item allows user to enable / disable alarm input detection. According to
your application, select <N/O> (Normal Open) or <N/C> (Normal Close) to
enable the alarm input detection or select <OFF> to disable the detection.
The default setting is <OFF>.
If you set this item to <N/C> but did not install any device to the unit, the
alarm will be triggered and the Event Icon displayed continually until this item
is changed to <N/O>, <OFF> or install a device to the unit.
5.6.4.6
Alarm Out >
This item allows user to assign an alarm on certain channel to activate the
relays. These signals can be used to drive a light or siren to caution an alarm
event.
Select from the options: <A Only > indicates “Alarm Out A”, <B Only>
indicates “Alarm Out B”, <A+B> indicates “A and B Alarm Out” and <None>
indicates “No Alarm Out”. The default setting is <None>.
5.7
Database Setup >
The menu displays information of internal and external disks. In the Main
menu, move the cursor to <Database Setup> and press ENTER. The
following menu is displayed.
Database Setup
1. Total Size
2. Free Size
3. Avail REC Time
4. Internal Disks
5. External Disks
xxx GB
xxx GB
3Days 7Hrs
NOTE: If the hard disk is failed detected, the message “HDD fail”
will display.
5.7.1
Total / Free Size of HDD >
The Total Size of HDD shows the total capacity of HDD that has been added
into database. The Free Size of HDD indicates the free space for recording of
the HDD added in database. The information is read-only.
www.dynacolor.com.tw
All rights reserved
71
User’s Manual
5.7.2
Avail REC Time >
The Avail REC Time indicates the available duration for recording. If the unit
is set to record in circular mode, the item will show “Circular”. The information
is read-only.
5.7.3
Internal / External Disks >
Select <Internal Disks> or <External Disks> to see information on the storage
devices connected to the unit. The submenu is displayed as below.
Internal Disks
Name
xxx xxxxxxx-xxxxxx
Active
YES
Action
None
The information of built-in HDD and external storage device will be listed by
model name and status. If no storage device connects to the unit, the
message “No Available Items!” will show on screen.
NOTE: If the file system of the internal HDD is not compatible for
the DVR, the system will format the internal HDD automatically
without notice.
<Active>
The item indicates if the storage device is added into database or not. <YES>
means the device has been added into database.
<Action>
The item allows user to add storage device into database or remove device
from database.
The options are <None> (no action), <Add> (add the selected device into
database), <Remove> (remove the selected device from database),
<Format> (format the selected device).
NOTE: Before removing external devices from the unit, remember
to remove the device from database.
72
www.dynacolor.com.tw
All rights reserved
User’s Manual
5.8
Configuration >
The Configuration menu can be used to restore the default factory settings,
import and export configuration.
Select <Configuration> from the Main menu and press ENTER. The following
menu is displayed.
Configuration
1. Load Factory Default
2. Import Config
3. Export Config
NO
Items in this menu are described in the following subsections.
5.8.1
Load Factory Default >
This item is used to load the factory setting; select <YES> to recall the factory
default setup configuration from the read-only memory, or <NO> to cancel.
5.8.2
Import Configuration >
This item allows user to load a unit configuration that was saved in an
external drive. To import a configuration that was previously exported, make
sure the device that saved the configuration is connected to the unit. Select
<Import Config> from the Configuration menu and press ENTER. The
following menu is displayed.
Import Config
Config Name
xxxx-xxxx
xxx-xx
Select
NO
NO
Press UP / DOWN to select one of the listed available configuration files, and
choose <YES> to start import.
NOTE: If the imported configuration has different record mode from
the unit’s, the warning message “This config has different record
mode. This will FORMAT ALL HARDDISKS.” will show.
NOTE: Remove the ThumbDrive® used for importing configuration
after the unit restarts, or it will be formatted as well.
www.dynacolor.com.tw
All rights reserved
73
User’s Manual
5.8.3
Export Configuration >
The Administrator is allowed to save a unit configuration by exporting it to an
external drive, such as a USB Flash Drive. Before exporting the configuration,
make sure the device in which the configuration will be saved is attached to
the unit appropriately. Select <Export Config> from the Configuration menu
and press ENTER. The following menu is displayed.
Export Config
1. Copy Destination
2. Config Name
3. Begin Export
NO
Items in this menu are described in the following sections.
5.8.3.1
Copy Destination >
Select this item to list available destinations (external memory devices) to
which the configuration can be exported. Press UP / DOWN to set a
destination. Please note that saving a different configuration to the same
copy destination with the same file name will overwrite the previous
configuration file without warning.
NOTE: The DVR doesn’t support CD-RW as a copy destination.
5.8.3.2
Configuration Name >
This item allows user to assign the exported configuration file a name. Use
the virtual keyboard to enter the configuration file name. Note that the file
name can contain up to 15 characters, with no spaces.
5.8.3.3
Begin Export >
Select <YES> to begin exporting the configuration file, or <NO> to abort the
export.
NOTE: We strongly recommend users to export configuration before
upgrading your system, and back it up routinely, just in case for
unexpected situation.
74
www.dynacolor.com.tw
All rights reserved
User’s Manual
5.9
Shutdown >
The item is used to shut down or reboot the unit. If you must shut down the
DynaGuardTM 100 MPEG-4 DVR for any reason, please use the proper shut
down and power up procedures to avoid damage to your unit.
Select <Shutdown> in Main menu and press ENTER to access the Shutdown
menu, which displays as follows.
Shutdown
1. Power Off
2. Reboot
Power Off
Select this item to shut down the unit. Do not remove the power during
shut down until the message “You can safely turn off DVR now!”
displays.
Reboot
Select this item to reboot the unit. The color bar and system checking
information are displayed on the monitor until the unit is completely
restarted.
www.dynacolor.com.tw
All rights reserved
75
User’s Manual
Appendix A: Technical Specifications
All specifications are subject to change without notice.
Specifications
DG108
Operation System
Video Stand
Video Operation
Resolution- Live Video
Outputs
NTSC/PAL switch selectable
Triplex+ (Live, Record, Playback, Remote, and
Internet access)
NTSC: 720x480 pixels; PAL: 720x576 pixels
Main Monitor
BNCx1, S-Videox1, 1.0Vp-p/75 ohm
Call Monitor
BNCx1, 1.0Vp-p/75 ohm
Loop
VGA Output
Picture Refresh Rate
Digital Zoom
Camera Installation
Input
Output
Recording Mode
Audio
Embedded (Linux)
BNCx16, 1.0Vp-p/75 ohm
Input
Video
DG116
Compression Method
File Size
BNCx8, 1.0Vp-p/75 ohm BNCx16, 1.0Vp-p/75 ohm
800x600, 1024x768, 1280x1024 pixels @ 60Hz
(Optional)
NTSC: 480PPS (16 CH); PAL: 400PPS (16CH)
2x2
Plug & Play
RCAx1, Line-In
RCAx1, Line-Out
Always Real Time Record, Synchronized w/ Video
ADPCM, G.726
8KB/Sec
Operation
Remote + VCR mode
Playback
Only for Video Original Speed
Compression Method
MPEG-4 Advanced Simple Profile
Recording Mode
Schedule, Alarm, Motion Detection
NTSC: 30PPS@720x480 pixels; PAL:
25PPS@720x576 pixels
Recording
Resolution & Rate
NTSC: 60PPS@720x240 pixels; PAL:
50PPS@720x288 pixels
NTSC: 120PPS@360x240 pixels; PAL:
100PPS@360x288 pixels
Recording Quality
Image Size
Storage Mode
Playback
76
Playback
Playback Speed
5 levels presets, adjustable
2K to 20K Byte/Picture
Linear/Circular
Play, Stop, Pause, Rewind, Forward, Search
Yes (1x, 2x, …32x)
www.dynacolor.com.tw
All rights reserved
User’s Manual
Adjustment
Retrieve
Build-in Storage
Storage
Built-in HDD
Export
Alarm Input
Alarm Detection
Auditory Alert
Alarm
Motion Detection
Video Loss Detection
Alarm Relay Output
Network Connectivity
Remote Control
Communication
Date/Time, Event
X2 ATA 133/ UDMA 133 IDE, HDD/CD-RW
Up to 2 built-in HDDs
X3 USB2.0 ports, support ThumbDrive® and CD-RW
X16, Terminal Block
N.C./N.O., Programmable
Built-in Buzzer
21x13 (NTSC), 21x16 (PAL) Grid Array,
Sensitivity, Trig Level Adjustable
Programmable
X2, Terminal Block, 1.0A/24V (Programmable)
Ethernet RJ-45 connector, 10/100Mbps, supports
DHCP
DynaRemoteTM Lite
Software
Access Control
Remote Operation
RS485
Dome Control Protocol
Unit Dimension
2 Level Password
Monitoring, Instant Recording, Dome Camera Control
Terminal Block
DynaColor, Pelco P, Pelco D, AD422
440x90x345mm (17.3x3.45x13.58 inches)
(WxHxD)
Unit Weight
Package Dimension
General
5.7Kg (12.56 Ibs) w/ CD-RW
590x210x460 mm (23.2x8.27x18.1 inches)
(WxHxD)
Package Weight
8.2Kg (18.06 Ibs)
Operation Temperature
0°C - 40°C (32°F - 104°F)
Relative Humidity
5% - 85% Non-condensing
Power Consumption &
AC 100 ~ 240V, 50-60Hx, 80W
Input
www.dynacolor.com.tw
All rights reserved
77
User’s Manual
Appendix B: Record Duration
The record duration relates to recording rate, image quality and HDD capacity. Refer to the
following table.
NOTE: Record duration times are based on actual tests and represent average
file sizes. Performance may vary depending on specific installations and use.
Audio recording requires 8 KB per second (or 0.7 GB per day) for data storage.
Number of Days of Recording @30PPS (without Audio)
Recording Rate
Total
Recording Picture Quality Mode
Total
Images Per Images Per
Second
Second
NTSC
PAL
Low
NTSC
(8 KB)
Fair
PAL
NTSC
Mid
PAL
NTSC
High
PAL
NTSC
Best
PAL
NTSC
PAL
(8 KB) (11 KB) (11 KB) (14 KB) (14 KB) (17 KB) (17 KB) (20 KB) (20 KB)
160 GB Internal Storage
30
25
7.5
9.0
5.5
6.6
4.3
5.2
3.6
4.3
3.0
3.7
15
12.5
15.0
18.0
11.0
13.2
8.7
10.4
7.2
8.6
6.1
7.3
7.5
6.25
29.9
35.9
21.9
26.3
17.3
20.8
14.3
17.2
12.2
14.6
300 GB Internal Storage
30
25
14.0
16.8
10.3
12.3
8.1
9.7
6.7
8.1
5.7
6.9
15
12.5
28.1
33.7
20.6
24.7
16.2
19.5
13.4
16.1
11.4
13.7
7.5
6.25
56.1
67.3
41.2
49.4
32.5
39.0
26.8
32.2
22.9
27.4
600 GB Internal Storage
78
30
25
28.1
33.7
20.6
24.7
16.2
19.5
13.4
16.1
11.4
13.7
15
12.5
56.1
67.3
41.2
49.4
32.5
39.0
26.8
32.2
22.9
27.4
7.5
6.25
112.2
134.7
82.3
98.8
65.0
78.0
53.7
64.4
45.7
54.9
www.dynacolor.com.tw
All rights reserved
User’s Manual
Number of Days of Recording @60PPS (without Audio)
Recording Rate
Total
Recording Picture Quality Mode
Total
Images Per Images Per
Second
Second
NTSC
PAL
Low
Fair
NTSC
PAL
NTSC
(5 KB)
(5 KB)
(8 KB)
Mid
PAL
NTSC
High
PAL
NTSC
Best
PAL
NTSC
PAL
(8 KB) (11 KB) (11 KB) (14 KB) (14 KB) (17 KB) (17 KB)
160 GB Internal Storage
60
50
5.9
7.1
3.7
4.5
2.7
3.3
2.2
2.6
1.8
2.1
30
25
11.8
14.1
7.5
9.0
5.5
6.6
4.3
5.2
3.6
4.3
15
12.5
23.5
28.2
15.0
18.0
11.0
13.2
8.7
10.4
7.2
8.6
7.5
6.25
47.0
56.4
29.9
35.9
21.9
26.3
17.3
20.8
14.3
17.2
300 GB Internal Storage
60
50
11.0
13.2
7.0
8.4
5.1
6.2
4.1
4.9
3.4
4.0
30
25
22.0
26.5
14.0
16.8
10.3
12.3
8.1
9.7
6.7
8.1
15
12.5
44.1
52.9
28.1
33.7
20.6
24.7
16.2
19.5
13.4
16.1
7.5
6.25
88.2
105.8
56.1
67.3
41.2
49.4
32.5
39.0
26.8
32.2
600 GB Internal Storage
60
50
22.0
26.5
14.0
16.8
10.3
12.3
8.1
9.7
6.7
8.1
30
25
44.1
52.9
28.1
33.7
20.6
24.7
16.2
19.5
13.4
16.1
15
12.5
88.2
105.8
56.1
67.3
41.2
49.4
32.5
39.0
26.8
32.2
7.5
6.25
176.4
211.6
112.2
134.7
82.3
98.8
65.0
78.0
53.7
64.4
Number of Days of Recording @120PPS (without Audio)
Recording Rate
Total
Recording Picture Quality Mode
Total
Images Per Images Per
Second
Second
NTSC
PAL
Low
Fair
Mid
NTSC
PAL
NTSC
PAL
NTSC
(2 KB)
(2 KB)
(5 KB)
(5 KB)
(8 KB)
High
PAL
NTSC
Best
PAL
NTSC
PAL
(8 KB) (11 KB) (11 KB) (14 KB) (14 KB)
160 GB Internal Storage
60
50
13.7
16.5
5.9
7.1
3.7
4.5
2.7
3.3
2.2
2.6
30
25
27.4
32.9
11.8
14.1
7.5
9.0
5.5
6.6
4.3
5.2
15
12.5
54.9
65.8
23.5
28.2
15.0
18.0
11.0
13.2
8.7
10.4
7.5
6.25
109.7
131.7
47.0
56.4
29.9
35.9
21.9
26.3
17.3
20.8
300 GB Internal Storage
60
50
25.7
30.9
11.0
13.2
7.0
8.4
5.1
6.2
4.1
4.9
30
25
51.4
61.7
22.0
26.5
14.0
16.8
10.3
12.3
8.1
9.7
15
12.5
102.9
123.5
44.1
52.9
28.1
33.7
20.6
24.7
16.2
19.5
7.5
6.25
205.8
246.9
88.2
105.8
56.1
67.3
41.2
49.4
32.5
39.0
www.dynacolor.com.tw
All rights reserved
79
User’s Manual
600 GB Internal Storage
80
60
50
51.4
61.7
22.0
26.5
14.0
16.8
10.3
12.3
8.1
9.7
30
25
102.9
123.5
44.1
52.9
28.1
33.7
20.6
24.7
16.2
19.5
15
12.5
205.8
246.9
88.2
105.8
56.1
67.3
41.2
49.4
32.5
39.0
7.5
6.25
411.5
493.8
176.4
211.6
112.2
134.7
82.3
98.8
65.0
78.0
www.dynacolor.com.tw
All rights reserved