1
1039b80o.book Page 1 Monday, December 17, 2001 2:00 PM
1039b80o.book Page 2 Monday, December 17, 2001 2:00 PM
1039b80o.book Page 3 Monday, December 17, 2001 2:00 PM
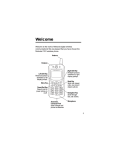
Motorola V101 Personal Communicator
Quick Reference Card
Control Buttons
,
Press and hold to turn the communicator on and off.
( Accept and end a call, setting, or option.
ª Reject or cancel a call, setting, or option. Press and release
to return to previous screen. Press for 2 seconds to go to
Standby screen. When entering text, press to delete
previous characters.
¢ Press to enter Quick Access menu.
! Scroll through messages and text, increase and decrease
volume.
# Press to read a message.
. Press to write a message.
£ Used to enter numbers and ALT symbols. Press once for
single number/symbol, press twice for multiple numbers/
symbols. Press twice to stop entering numbers/symbols.
ƒ
Press once to capitalize a letter. Press twice for continuous
capitalization, press twice again to stop capitalization.
] Smart Button. Use to answer, make, and end calls. Press to
go to Contacts and recall a phone number using Voice Tags.
} Press to answer and end a call when communicator is
closed or in the holster.
& Press to record Voice Notes, press again to stop recording.
Sending a Text Message
1. Press ., type your message, press (.
2. Follow the prompts to enter or select the phone number.
3. When the phone number is displayed, press (.
1039b80o.book Page 4 Monday, December 17, 2001 2:00 PM
Making a Call
Use the headset. Use ! on keypad to adjust the volume.
Press ] to go to Contacts (or say Voice Tag name), select the
number, press (.
Note: Press and release ª to erase the last character, press
and hold ª to erase multiple characters.
Ending a Call
Press ( or ª.
Receiving a Call
Use the headset. Use ! on keypad to adjust the volume.
Press ( to answer the call.
When the communicator is closed or in the holster, press } to
answer or end a call.
SIM Card and Battery Installation
1. Remove the battery cover.
2. With the gold contacts facing down, insert the SIM card into
the card recess area. Align the SIM card so the notch in the
card lines up with the notch in the recess area.
3. Align the battery contacts with the contacts in the battery
compartment. Press down on the battery until it clicks into
place.
4. Replace the battery cover.
Note: If the SIM card is inserted incorrectly, Check Card is
displayed. Remove the SIM card and re-insert it. If the card does
not work, contact your service provider.
Charging your Battery
Insert the adapter plug into the charging port on the
communicator and plug the adapter into a wall outlet.
1039b80o.book Page 1 Monday, December 17, 2001 2:00 PM
Congratulations! You are now the proud owner of a Motorola V101 Personal
Communicator. Your Personal Communicator combines advanced calling and
messaging capabilities in a small compact unit that is easy to use and convenient to
carry with the holster accessory.
Your Personal Communicator provides cool and exciting ways to keep in contact with
your family and friends. Just review this user’s guide carefully and you will be ready
to start using your new Personal Communicator.
A detachable Quick Reference Card is included with this guide.
Personalized Control
You can set up your Personal Communicator to access important messages, phone
numbers, and features quickly. You can even answer calls with just one push of a
button, even when your Personal Communicator is closed. When you are performing
routine tasks, your Personal Communicator provides prompts and messages that
assist you with the next task or confirms your selection.
• You can add 9 of the features you use the most to your Quick Access menu so
you can get to them with just a couple of button presses.
• Voice Tags let you use voice-activated commands to call phone numbers stored
in your Personal Communicator. You can also add voice commands to Quick
Access options.
Introduction
Introduction
1
1039b80o.book Page 2 Monday, December 17, 2001 2:00 PM
•
•
•
Introduction
•
•
With voice notes, you can record notes to yourself or record parts of a call.
Note: Recording of phone calls is subject to varying State and Federal laws
regarding privacy and recording of phone conversations.
The Smart button ] lets you quickly display the entries stored in your
Contacts list.
When your Personal Communicator is closed or in the holster, you can answer
a call quickly and easily by pressing }.
With VibraCall® alert, your Personal Communicator vibrates when you get new
messages or calls to avoid disturbing others or when in a noisy environment.
You can personalize the menus by choosing the features you want readily
available and storing the ones you use less frequently out of sight.
MOTOROLA, the Stylized M Logo, and all other trademarks indicated as such herein are trademarks of
Motorola, Inc. ® Reg. U.S. Pat. & Tm. Off.
All other product or service names are the property of their respective owners.
© 2001 Motorola, Inc. All rights reserved.
Personal Communications Sector
1500 Gateway Blvd., Boynton Beach, FL 33426-8292
6881039B80-O
Printed in the United States 12/01
2
1039b80o.book Page 3 Monday, December 17, 2001 2:00 PM
Contents
Introduction........................................ 1
Personalized Control ....................... 1
Safety and General Information ....... 7
European Union Directives
Conformance Statement............ 17
Getting Started................................. 18
Optional Features .......................... 18
Installing the SIM Card and
Battery ........................................ 19
Charging the Battery ...................... 20
Turning Your V101 Personal
Communicator On and Off.......... 20
Entering Your SIM Card Personal
Identification Number (PIN) ........ 21
Entering Your Unlock Code ........... 21
Setting Your Service Center
Numbers ..................................... 21
Additional Message Settings ......... 22
Testing Your V101 Personal
Communicator ............................ 23
Using the Control Buttons .............. 24
The Display .................................... 28
Using the Menus ..............................29
The Main Menu ..............................29
Getting Around in the Menus .........29
Exiting the Menus to the Standby
Screen.........................................30
Using the Quick Access Menu .......30
Short and Extended Menus............31
Menu Map .........................................32
Text Messaging................................37
Sending Text Messages.................37
How to Create and Edit Text
Messages....................................41
Inserting Messaging Emoticons .....42
Canned Message Text ...................45
Receiving and Reading Text
Messages....................................47
Making a Call....................................48
Ending a Call..................................48
International Phone Calls ...............49
911 Emergency Calls .....................50
Redialing the Last Number
Called from Standby Mode .........50
1039b80o.book Page 4 Monday, December 17, 2001 2:00 PM
Answering a Call..............................50
In-call Menu ......................................51
Put Calls on Hold ...........................51
Turn Mute On or Off .......................52
Restrict My Phone Number ............52
End Active Call...............................52
Reconnect ......................................53
Reconnect Held Call ......................53
End Held Call .................................53
End Current Call and Held Call ......53
Conference Calls............................53
Transfer Calls.................................54
Split Call .........................................55
Reject Incoming Call ......................56
Voice Activation...............................56
Create a Voice Tag for a Phone
Number .......................................57
Add or Edit a Voice Tag .................57
Delete a Voice Tag.........................58
Using Voice Activation to Make
Phone Calls.................................58
Using Voice Activation to Access
Quick Access Features ...............59
Messages Menu............................... 60
Call Voicemail................................ 60
Received Messages ...................... 61
Outgoing Messages....................... 64
Message Editor.............................. 67
Voice Notes ................................... 68
Cell Broadcast ............................... 72
Message Settings............................ 73
Auto Signature............................... 74
Voicemail Number ......................... 74
Service Center............................... 74
E-mail Service Center.................... 74
E-mail @ Symbol........................... 75
Expiry Period ................................. 75
Icon Messaging ............................. 75
Outgoing Message Type ............... 75
Contacts........................................... 76
Personal Numbers......................... 76
Voice Dialing.................................. 82
Last Ten Calls................................ 83
My Phone Numbers....................... 83
Fixed Dialing.................................. 84
Set Up One-Touch Dialing............. 85
1039b80o.book Page 5 Monday, December 17, 2001 2:00 PM
One-Touch Dialing from Phone
Memory ...................................... 86
One-Touch Dialing Using the
Smart Button .............................. 86
Chat .................................................. 87
Starting a Chat Session ................. 87
Add Chat Members........................ 88
View Member List .......................... 89
Start Chat ...................................... 90
Chat View ...................................... 90
Send Chat Message ...................... 90
Switch View ................................... 91
View Member List .......................... 91
Disable Chat Message Tone ......... 94
Received Messages ...................... 94
Exit Chat ........................................ 94
Alarm Clock ..................................... 95
Set an Alarm .................................. 95
Show Alarm Status ........................ 96
Call Related Features...................... 97
Show Battery Meter ....................... 97
Restrict My Phone Number ........... 97
Call Forwarding ............................. 97
Call Waiting ..................................100
Call Barring ..................................100
Phone Setup...................................103
Adjust Ring Volume......................103
Ring or Vibrate .............................103
Downloadable Ring Tone.............103
Set Ringer Tone ...........................104
Set Alarm Ringer Tone.................104
Set Message Alert Tone...............104
Message Popup Alert...................105
Quick Access Setup .....................106
Phone Lock ..................................106
Adjust Contrast ............................107
Require SIM Card PIN .................107
Change SIM PIN Code.................107
Change SIM PIN2 Code...............108
Unblocking Your V101 Personal
Communicator ..........................108
New Security Code ......................108
Extended Menus ..........................109
Show Time and Date....................109
Set Time and Date .......................109
Set Time Format ..........................109
1039b80o.book Page 6 Monday, December 17, 2001 2:00 PM
Backlight.......................................109
Language Selection .....................110
Battery Saving Mode....................110
Select Keypad Tones ...................110
Phone Status................................110
Network Selection..........................112
Change Band ...............................112
Available Networks.......................113
Network Search............................113
Preferred Networks ......................114
Find New Network........................115
Call Meters Menu ...........................115
Show Call Charges ......................115
Show Call Timers .........................116
Set Audible Call Timers................116
Set In-Call Display........................116
Call Charge Settings ....................117
Lifetime Timer ..............................118
Calculator .......................................118
Perform Basic Mathematical
Calculations ..............................119
Convert Currency .........................119
Quick Access Menu ......................120
Add Features to the Quick
Access Menu............................ 121
Add or Edit a Quick Access
Voice Tag ................................. 121
Delete a Quick Access Voice
Tag ........................................... 122
Games ............................................ 123
Closing and Saving a Game........ 123
Towers of Hanoi .......................... 123
Baccarat ...................................... 124
Bricks........................................... 126
Special Symbols............................ 128
Troubleshooting............................ 130
Use and Care ................................ 134
Motorola Limited Warranty........... 149
Product Registration..................... 159
Wireless Phone Safety Tips ......... 161
Index............................................... 165
1039b80o.book Page 7 Monday, December 17, 2001 2:00 PM
IMPORTANT INFORMATION ON SAFE AND EFFICIENT
OPERATION
READ THIS INFORMATION BEFORE USING YOUR PERSONAL
COMMUNICATOR
The information provided in this document supersedes the general
safety information contained in user guides published prior to
July 2000. For information regarding radio use in a hazardous
atmosphere please refer to the Factory Mutual (FM) Approval Manual
Supplement or Instruction Card, which is included with radio models
that offer this capability.
This device complies with Part 15 of the FCC Rules. Operation is
subject to the following two conditions: (1) this device may not cause
harmful interference, and (2) this device must accept any interference
received, including interference that may cause undesired operation.
Safety and General Information
Safety and General Information
RF Operational Characteristics
Your Personal Communicator contains a transmitter and a receiver.
When it is ON, it receives and transmits radio frequency (RF) energy.
7
Safety and General Information
1039b80o.book Page 8 Monday, December 17, 2001 2:00 PM
8
The Personal Communicator operates at a frequency 900, 1800, or
1900 MHz and employs digital modulation techniques.
When you communicate with your Personal Communicator, the
system handling your call controls the power level at which your
Personal Communicator transmits. The output power level may vary
over a range from 1.0 to 2.0 watts.
Exposure To Radio Frequency Energy
Your Motorola Personal Communicator is designed to comply with the
following national and international standards and guidelines
regarding exposure of human beings to radio frequency
electromagnetic energy:
• United States Federal Communications Commission, Code of
Federal Regulations; 47 CFR part 2 sub-part J
• American National Standards Institute (ANSI) / Institute of
Electrical and Electronic Engineers (IEEE) C95. 1-1992
• Institute of Electrical and Electronic Engineers (IEEE) C95.11999 Edition
• National Council on Radiation Protection and Measurements
(NCRP) of the United States, Report 86, 1986
1039b80o.book Page 9 Monday, December 17, 2001 2:00 PM
International Commission on Non-Ionizing Radiation
Protection (ICNIRP) 1998
• Ministry of Health (Canada) Safety Code 6. Limits of Human
Exposure to Radiofrequency Electromagnetic Fields in the
Frequency Range from 3 kHz to 300 GHz, 1999
• Australian Communications Authority Radiocommunications
(Electromagnetic Radiation - Human Exposure) Standard
1999 (applicable to wireless phones only)
To assure optimal Personal Communicator performance and make
sure human exposure to radio frequency electromagnetic energy is
within the guidelines set forth in the above standards, always adhere
to the following procedures:
PORTABLE PERSONAL COMMUNICATOR OPERATION
AND EME EXPOSURE
Antenna Care
Use only the supplied or an approved replacement antenna.
Unauthorized antennas, modifications, or attachments could damage
the Personal Communicator and may violate FCC regulations.
Safety and General Information
•
9
Safety and General Information
1039b80o.book Page 10 Monday, December 17, 2001 2:00 PM
10
DO NOT hold the antenna when the Personal Communicator is
“IN USE”. Holding the antenna affects call quality and may cause the
Personal Communicator to operate at a higher power level than
needed.
Phone Operation
When placing or receiving a phone call, hold your Personal
Communicator as you would a wireline telephone. Speak directly
into the microphone.
Body-worn Operation
To maintain compliance with FCC/Health Canada RF exposure
guidelines, if you wear a Personal Communicator on your body when
transmitting, always place the Personal Communicator in a Motorola
supplied or approved clip, holder, holster, case, or body harness for
this product. Use of non-Motorola-approved accessories may exceed
FCC/Health Canada RF exposure guidelines. If you do not use one of
the Motorola-supplied or approved body-worn accessories, and are
not using the Personal Communicator held in the normal use position,
ensure the Personal Communicator and its antenna are at least
one inch (2.5 cm) from your body when transmitting.
Data operation
When using any data feature of the Personal Communicator, with or
without an accessory cable, position the Personal Communicator
and its antenna at least one inch (2.5 cm) from the body.
Approved Accessories
For a list of approved Motorola accessories visit our website at
www.mot.com.
ELECTROMAGNETIC INTERFERENCE/COMPATIBILITY
NOTE: Nearly every electronic device is susceptible to
electromagnetic interference (EMI) if inadequately shielded, designed
or otherwise configured for electromagnetic compatibility.
• FACILITIES
To avoid electromagnetic interference and/or compatibility
conflicts, turn off your Personal Communicator in any facility
where posted notices instruct you to do so. Hospitals or health
care facilities may be using equipment that is sensitive to external
RF energy.
Safety and General Information
1039b80o.book Page 11 Monday, December 17, 2001 2:00 PM
11
1039b80o.book Page 12 Monday, December 17, 2001 2:00 PM
Safety and General Information
•
12
•
AIRCRAFT
When instructed to do so, turn off your Personal Communicator
when on board an aircraft. Any use of a Personal Communicator
must be in accordance with applicable regulations per airline crew
instructions.
MEDICAL DEVICES
Pacemakers
The Advanced Medical Technology Association recommends that
a minimum separation of 6 inches (15 centimeters) be maintained
between a handheld wireless Personal Communicator and a
pacemaker. These recommendations are consistent with the
independent research by, and recommendations of, the United
States Food and Drug Administration.
Persons with pacemakers should:
• ALWAYS keep the Personal Communicator more than six
inches (15 centimeters) from their pacemaker when the
Personal Communicator is turned ON.
• not carry the Personal Communicator in the breast pocket.
1039b80o.book Page 13 Monday, December 17, 2001 2:00 PM
use the ear opposite the pacemaker to minimize the potential
for interference.
• turn the Personal Communicator OFF immediately if you have
any reason to suspect that interference is taking place.
Hearing Aids
Some digital wireless Personal Communicators may interfere with
some hearing aids. In the event of such interference, you may
want to consult your hearing aid manufacturer to discuss
alternatives.
Other Medical Devices
If you use any other personal medical device, consult the
manufacturer of your device to determine if it is adequately
shielded from RF energy. Your physician may be able to assist you
in obtaining this information.
SAFETY AND GENERAL
• USE WHILE DRIVING
Check the laws and regulations on the use of Personal
Communicators in the area where you drive. Always obey them.
Safety and General Information
•
13
Safety and General Information
1039b80o.book Page 14 Monday, December 17, 2001 2:00 PM
14
When using your Personal Communicator while driving, please:
• Give full attention to driving and to the road.
• Use hands-free operation, if available.
• Pull off the road and park before making or answering a call if
driving conditions so require.
OPERATIONAL WARNINGS
•
•
FOR VEHICLES WITH AN AIR BAG
Do not place a portable Personal Communicator in the area over
an air bag or in the air bag deployment area. Air bags inflate with
great force. If a portable Personal Communicator is placed in the
air bag deployment area and the air bag inflates, the Personal
Communicator may be propelled with great force and cause
serious injury to occupants of the vehicle.
POTENTIALLY EXPLOSIVE ATMOSPHERES
Turn off your Personal Communicator prior to entering any area
with a potentially explosive atmosphere, unless it is a Personal
Communicator type especially qualified for use in such areas as
“Intrinsically Safe.” Do not remove, install, or charge batteries in
•
such areas. Sparks in a potentially explosive atmosphere can
cause an explosion or fire resulting in bodily injury or even death.
NOTE: The areas with potentially explosive atmospheres
referred to above include fueling areas such as below decks on
boats, fuel or chemical transfer or storage facilities, areas where
the air contains chemicals or particles, such as grain, dust or
metal powders, and any other area where you would normally be
advised to turn off your vehicle engine. Areas with potentially
explosive atmospheres are often but not always posted.
BLASTING CAPS AND AREAS
To avoid possible interference with blasting operations, turn off
your Personal Communicator when you are near electrical
blasting caps, in a blasting area, or in areas posted: “Turn off twoway radio”. Obey all signs and instructions.
OPERATIONAL CAUTIONS
•
ANTENNAS
Do not use any portable Personal Communicator that has a
damaged antenna. If a damaged antenna comes into contact
with your skin, a minor burn can result.
Safety and General Information
1039b80o.book Page 15 Monday, December 17, 2001 2:00 PM
15
1039b80o.book Page 16 Monday, December 17, 2001 2:00 PM
Safety and General Information
•
16
BATTERIES
All batteries can cause property damage and/or bodily injury such
as burns if a conductive material such as jewelry, keys, or beaded
chains touch exposed terminals. The conductive material may
complete an electrical circuit (short circuit) and become quite hot.
Exercise care in handling any charged battery, particularly when
placing it inside a pocket, purse, or other container with metal
objects.
ITC01-100
1039b80o.book Page 17 Monday, December 17, 2001 2:00 PM
Hereby, Motorola declares that this product is in compliance with
• The essential requirements and other relevant provisions of Directive
1999/5/EC
• All other relevant EU Directives
IMEI: 350034/40/394721/9
0168
Type: MC2-41H14
Product Approval
Number
The above gives an example of a typical Product Approval Number.
You can view your product’s Declaration of Conformity (DoC) to Directive 1999/5/EC
(to R&TTE Directive) at www.motorola.com/rtte. To find your DoC, enter the product
Approval Number from your product’s label in the “Search” bar on the web site.
European Union Directives Conformance
European Union Directives Conformance Statement
17
1039b80o.book Page 18 Monday, December 17, 2001 2:00 PM
Getting Started
Getting Started
18
Before you can send or receive messages or calls, you need to install your SIM
(Subscriber Identity Module) card and the battery. The SIM card supplied by your
service provider is a “smart” card that contains your Personal Communicator’s
phone number, service details, and memory for storing phone numbers and
messages. Do not bend or scratch it and do not expose it to static electricity or water.
Note: Some networks let you make emergency calls without a SIM card. Check
with your service provider.
Optional Features
Features marked with this label are optional network and/or
subscription-dependent features. These features may not be
offered by all service providers in all geographical areas.
Contact your service provider for information about availability.
1039b80o.book Page 19 Monday, December 17, 2001 2:00 PM
Battery
Compartment
Slide Battery
Door Lock
to Open
Turn the Personal Communicator off
before inserting or removing the SIM
card.
Slide to
Remove
1. Remove the battery cover.
Battery
2. With the gold contacts on the SIM Door
card facing down, slide the card
into the SIM card recess so the
Notched Corner
Battery
notched corner of the card lines
for Aligning SIM SIM Card
Charger
up with the notch in the card
Card
Recess
Port
recess area (see illustration).
3. Insert the battery, printed arrows first, into the battery compartment. Align the
contacts on the battery with the contacts in the battery compartment and press
downward toward the contacts until the battery clicks into place.
4. Replace the battery cover.
If you insert the SIM card incorrectly, Check Card is displayed. Remove the SIM
card and re-insert it. If the card does not work, contact your service provider.
Getting Started
Installing the SIM Card and
Battery
19
1039b80o.book Page 20 Monday, December 17, 2001 2:00 PM
Getting Started
Charging the Battery
New batteries are shipped partially charged. Before you can use your Personal
Communicator, you need to install and charge the battery, as indicated in the
following instructions. Some batteries perform best after several full
charge/discharge cycles.
To charge the battery:
• Insert the adapter plug into the battery charger port and plug the adapter into a
wall outlet. Insert the adapter plug into the charger port so the top of the plug
(labeled TOP) faces up toward the display screen.
• Charge the battery at room temperature and never leave it in really hot, cold, or
wet places.
• Charge only Motorola batteries in your Personal Communicator.
The batter indicator is located in the upper right corner of the screen when the
Personal Communicator is on. When the battery is fully charged, the indicator looks
like >. As the battery strength decreases, the solid lines begin to disappear, for
example, =.
Turning Your V101 Personal Communicator On and Off
20
To turn your Personal Communicator on or off, press and hold , until the device
vibrates or makes a sound.
If the SIM card is not installed or is installed incorrectly, Check Card is displayed.
Turn your Personal Communicator off and install the SIM card.
1039b80o.book Page 21 Monday, December 17, 2001 2:00 PM
Entering Your SIM Card Personal Identification Number (PIN)
Entering Your Unlock Code
When prompted, enter your unlock code and press (.
When your Personal Communicator displays a network name, it is ready for use.
Note: If you forget your unlock code, press ™(, enter your security code, enter
a new unlock code, and press (.
Setting Your Service Center Numbers
Getting Started
When prompted, enter your PIN and press (.
If you make a mistake, press and release ª to erase the last character, or hold
down ª to erase multiple characters.
Note: If you do not enter the correct PIN in 3 attempts, the SIM card locks up. See
“Unblocking Your V101 Personal Communicator” on page 108.
Before you can send text and email messages, you must enter your service
provider’s message and email service center numbers into your Personal
Communicator, if they have not already been set for you.
Note: For international phone numbers, you must add the + symbol and the
appropriate country code prefix to the phone number, see “International Phone
Calls” on page 49 for more information.
21
1039b80o.book Page 22 Monday, December 17, 2001 2:00 PM
Getting Started
Message Service Center Number
1. Select Messages from the Main menu and press (.
2. Select Message Settings and press (.
3. Select Service Center and press (.
4. Enter your service provider’s message service center number and press (.
Email Service Center Number
1. Select Messages from the Main menu and press (.
2. Select Message Settings and press (.
3. Select E-mail Service Center and press (.
4. Enter your service provider’s email message service center number and
press (.
Additional Message Settings
For other optional message settings, such as text that can be appended to your
outgoing messages, see “Message Settings” on page 73.
22
1039b80o.book Page 23 Monday, December 17, 2001 2:00 PM
It's a good idea to test your service by sending a text message or calling a friend
or family member from your Personal Communicator. Start by using the phone
number or email address (and a PIN, if required) your service provider gave you,
then try making a call. When you reach a friend or family member, ask them to send
you a message or call you back. See the sections starting on page 37 for information
on sending messages and making and receiving calls.
If your Personal Communicator does not send or receive messages or calls, contact
your service provider. After you've tested your phone and message service, read the
rest of this guide to learn about the many useful features of your new Personal
Communicator.
Getting Started
Testing Your V101 Personal Communicator
23
1039b80o.book Page 24 Monday, December 17, 2001 2:00 PM
Getting Started
Using the Control Buttons
24
This guide shows control buttons as graphics that look like the buttons on your
Personal Communicator. For example, a sequence of button presses might be
shown as: ™ ( ª. This means you would press ™, press (, and then
press ª in sequence, not at the same time.
Your Personal Communicator responds to the buttons you press by displaying easy
to understand prompts to guide you to the next action, or simple messages
confirming that your action is complete.
Your Personal Communicator’s backlight turns on any time you press a button and
remains on during keyboard activity. To change the backlight settings, use the Phone
Setup menu, see “Backlight” on page 109.
Note: Prolonged use of the backlight may shorten battery life depending on your
setting.
The V101 Personal Communicator keypad is shown on the next page. For a
description of the control key functions, see page 26.
Getting Started
1039b80o.book Page 25 Monday, December 17, 2001 2:00 PM
]
}
25
1039b80o.book Page 26 Monday, December 17, 2001 2:00 PM
,
(
Getting Started
ª
¢
™
!
#
.
£
£¥
]
26
Press and hold to turn the Personal Communicator on and off.
Press to accept and end a call, setting, or option.
Press to reject or cancel a call, setting, or option. Press and hold
for 2 seconds to go to the Standby screen. Press and release to
return to the previous screen. When entering text, press to
delete the previous character.
Press to enter the Quick Access menu.
Press to access the Main menu and to scroll through menus.
Use to scroll through menus and text, and to increase and
decrease the volume when wearing the headset.
Press to read a message.
Press to write a message.
Press to enter ALT symbols and numbers. Press twice to enter
multiple ALT symbols and numbers, press twice again to return
to normal input mode.
Use to enter special symbols (see page 128).
Smart Button. Press to access your Contacts list and make calls
using Voice Tags.
ƒ
}
&
Press once to capitalize a single letter. Press twice for
continuous capitalization, press twice again to stop
capitalization.
Press to answer and end a call when the Personal
Communicator is closed or in the holster.
Press to start and stop recording voice notes.
Note: Recording of phone calls is subject to varying State and
Federal laws regarding privacy and recording of phone
conversations.
Getting Started
1039b80o.book Page 27 Monday, December 17, 2001 2:00 PM
27
1039b80o.book Page 28 Monday, December 17, 2001 2:00 PM
The Display
/
Getting Started
k
l
:
I
J
\
>
o
p
q
m
28
Signal Strength. The more segments displayed, the stronger the
signal.
A call is in progress or hanging up.
Displayed when on a system other than your home system.
Home Zone. Availability depends on your service provider.
Displayed when you receive a text message. Flashes when you have
an unread text message or your message storage area is full.
Note: Text Messaging is a network and subscription-dependent
feature and may not be available in all areas.
Displayed when you have voice mail. Availability depends on your
service provider.
Displayed when Call Ringer is on.
Battery Charge Indicator. The more segments displayed, the
stronger the battery charge.
Displayed when you press ƒ to enter a capital letter.
Displayed when you press ƒ twice to enter multiple capital letters.
Displayed when you press £ to enter a number or ALT symbol.
Displayed when you press £ to multiple numbers or ALT symbols.
1039b80o.book Page 29 Monday, December 17, 2001 2:00 PM
Using the Menus
Main
Messages
Contacts
Chat
View Options?
Main Menu Example
The Main Menu
The Main menu is the starting point for access to the
features of your Personal Communicator. After you
turn your Personal Communicator on, press ™ to
display the Main menu. See the Menu Map on page 32
for a list of the menu structure.
Using the Menus
Many of your Personal Communicator’s features are accessed by using menus
and submenus for selection, change, and cancellation. This section describes how
to use the menu system. When you understand how to navigate through the menus
and make selections from menus, you will be able to access the many features of
your Personal Communicator easily and quickly.
Getting Around in the Menus
Use !or ™ to scroll through the list of selections in a menu.
Once the item you want to select is highlighted, press (.
When View Options? is displayed, a submenu exists for the highlighted selection.
Press ( to enter the submenu.
To return to the previous screen, press ª.
29
1039b80o.book Page 30 Monday, December 17, 2001 2:00 PM
When z is displayed next to an option or setting, the checked item is currently set.
This occurs mainly in menus selections that have on/off settings.
Exiting the Menus to the Standby Screen
Using the Menus
Press and hold ª for 2 seconds to exit any menu or screen and return to the
Standby screen.
30
Using the Quick Access Menu
While the features in your Personal Communicator are available through easy-to-use
menus, some of the most commonly used features are also available in the Quick
Access menu. The Quick Access menu bypasses the Main menu structure by
presenting 9 commonly used features as icons. Each icon also has a location
number.
To display the Quick Access menu, press ¢.
You can select an item from the Quick Access menu by:
• Using ! to highlight the feature and pressing (.
• Saying the feature’s Voice Tag name (see page 121).
• Entering the feature’s location number.
You can change the features represented in the Quick Access menu and also their
positions on the screen. See “Quick Access Menu” on page 120.
1039b80o.book Page 31 Monday, December 17, 2001 2:00 PM
As you become accustomed to the menus you use the most, you can set up your
Personal Communicator to display the menus you want readily accessible, and hide
the ones you don’t use.
To store menus you don’t use out of view, highlight the menu and press and hold (
until you are prompted for a decision. You can choose to:
• Move or keep the feature in the short menu
• Move or keep the feature in the extended menu
Note: If a feature cannot be moved to the short menu, Cannot Move Menu Item
is displayed.
When you remove a feature from the short menu, it will not be displayed until you
turn extended menus on. With extended menus on, all features are always
displayed. The extended menus are turned on and off from the Phone Setup menu.
Using the Menus
Short and Extended Menus
31
1039b80o.book Page 32 Monday, December 17, 2001 2:00 PM
Menu Map
Menu Map
32
* These features are network and/or
subscription-dependent and may not be
available on your V101 Personal
Communicator.
Messages
• Call Voicemail*
• Received Messages
• Outgoing Messages
• Message Editor
• Voice Notes
• Play Voice Notes
• Show Time Available
• Erase All Voice Notes
• Cell Broadcast
• On/Off
• Channel List
• Language List
• Message Settings
• Auto Signature
• Voicemail Number
• Service Center
• E-mail Service Center
• E-mail @ Symbol
• Expiry Period
• Icon Messaging
• Outgoing Message Type
Contacts
• Voice Dialing*
• Personal Numbers
• Find Entry by Name
• Find Entry by Location
• Add Entry
• Check Capacity
• Prevent Access
• Last Ten Calls
• Missed Calls
• Answered Calls
• Made Calls
• Erase All Numbers
• My Phone Number(s)
•
Fixed Dialing*
• View Fixed Dial List
• Setup Fixed Dialing
• One-Touch Dial Setting
• To Phone Memory
• To SIM Card Memory
• To Fixed Dial List
Chat
• Add Chat Members
• View Member List
• Start Chat
Alarm Clock
• Set Alarm
• One Time
• Daily
• Weekly
• Mon-Fri
• Mon-Sat
• Show Alarm Status
Call Related Features
• Show Battery Meter
•
•
•
•
Restrict My Phone Number*
• Show ID on Next Call
• Restrict ID on Next Call
Call Forwarding*
• Forward Voice Calls
• Forward Data Calls
• Cancel All Forwarding
Call Waiting*
• On/Off
Call Barring
• Bar Outgoing Calls
- Int’l Calls
- Int’l Calls Except Home
- All Calls
- Off
• Bar Incoming Calls
- When Roaming
- All Calls
- Off
• Cancel All Barring
• Change Bar Password
Menu Map
1039b80o.book Page 33 Monday, December 17, 2001 2:00 PM
33
1039b80o.book Page 34 Monday, December 17, 2001 2:00 PM
•
Menu Map
•
•
•
•
•
•
34
Phone Setup
• Adjust Ring Volume
Ring or Vibrate
• Ring Only
• Vibrate Only
• Vibrate then Ring
• No Ring or Vibrate
Set Ringer Tone
• List of available tones
Set Alarm Ringer Tone
• On/Off
Set Message Alert Tone
• List of available tones
Edit Music Tone
Message Popup Alert
• On/Off
Quick Access Setup
• Based on user settings
•
•
•
•
•
•
•
•
•
•
Phone Lock
• Automatic Lock
• Lock Now
• Change Unlock Code
Adjust Contrast
Require SIM Card PIN
• On/Off
• Change SIM PIN Code
Change SIM PIN2 Code
New Security Code
Extended Menus
• On/Off
Show Time and Date
Set Time and Date
Set Time Format
• 12 Hour
• 24 Hour
Backlight
• Off
• Normal
• Continuous
•
Language Selection
• List of available languages
• Battery Saving Mode
• On/Off
• Select Keypad Tones
• Normal Tones
• Single Tone
• No Tones
• Phone Status
• Status Review
• Master Reset
• Master Clear
Network Selection
• Change Band
• Change to 900/1800
• Change to1900
• Available Networks
• List of networks
•
•
•
Network Search
• Registration Preferences
- Automatic Search
- Manual Search
• Frequency of Search
- Slow Search
- Medium Search
- Fast Search
- Continuous Search
Preferred Networks
• Add Network to List
- Choose From Available
- Choose From Known
- Add New Network Code
• Show List of Networks
- List of networks
Find New Network
Menu Map
1039b80o.book Page 35 Monday, December 17, 2001 2:00 PM
35
Menu Map
1039b80o.book Page 36 Monday, December 17, 2001 2:00 PM
36
Call Meters
• Show Call Timers
• Show Last Call
• Total for All Calls
• Reset All Timers
• Set Audible Call Timers
• Single Alert Timer
• Repetitive Timer
• Set In-Call Display
• Show Time Per Call
• No In-Call Display
• Lifetime Timer
Calculator
Games
• Towers of Hanoi
• Baccarat
• Bricks
1039b80o.book Page 37 Monday, December 17, 2001 2:00 PM
Text Messaging
Sending Text Messages
The Message Editor is used to compose message text. Press . from any screen
to enter the Message Editor.
Once you type your message, you can send it to a phone number or email address,
or store it and send it at a later time. Contact your service provider to see if they
support email messaging.
Notes:
• Your service provider’s message and email service center numbers must be set
in the Message Settings in order to send outgoing messages, see page 21 for
more information.
• If you send and receive a lot of text messages, battery life could be shortened.
Text Messaging
Your Personal Communicator can send and receive text messages up
to 160 characters. Your service provider transmits messages sent to
your Personal Communicator for a limited amount of time. If a memory
location is not available before the message is removed from the
network, the message is not stored.
37
Text Messaging
1039b80o.book Page 38 Monday, December 17, 2001 2:00 PM
38
Sending a Text Message to a Phone Number
1. Press . to enter the Message Editor. The last message you entered or
edited is displayed.
2. Type your message.
3. When you are finished typing your message, press (.
4. Select Send Message and press (.
5. Enter a phone number, or follow the prompts to select the phone number from
your Contacts list. See page 77 for information on adding and finding numbers
in your Contacts list.
6. Once you have entered or selected the phone number, press ( to send the
message.
Sending an Email Message
1. Press . to enter the Message Editor. The last message you entered or edited
is displayed.
2. Type your message.
3. When you are finished typing your message, press (.
4. Select Send Message and press (.
5. To manually enter an email address:
• Select E-mail Address Entry.
• When prompted, type the email address and press (.
6. To select the email address from your Contacts list:
• Select Find Entry by Name or Find Entry by Location.
• Select the name/number from your Contacts list and press (.
• Select Send as E-mail and press (.
Verify that the Personal Communicator is displaying Sending. If No E-mail
Service Center is displayed, enter you service provider’s email service center
number in the Message Settings (see page 21) and resend your message.
Storing a Text Message
When you type a message, you can choose to store it rather than send it
immediately. Outgoing messages are stored on the SIM card.
1. Press . to enter the Message Editor. The last message you entered or edited
is displayed.
2. Type your message.
3. When you are finished typing your message, press (.
4. Select Store Message and press (.
Text Messaging
1039b80o.book Page 39 Monday, December 17, 2001 2:00 PM
39
Text Messaging
1039b80o.book Page 40 Monday, December 17, 2001 2:00 PM
40
Sending a Stored Text Message
The Outgoing Messages option under the Messages menu is used to view and
manage your outgoing (stored) messages. See “Outgoing Messages” on page 64
for information on the full range of options available for outgoing messages.
1. Select Messages from the Main menu and press (.
2. Select Outgoing Messages and press (. The number of stored messages is
displayed, followed by the message list.
3. Select the message from the list and press (.
4. Select Send Message and press (.
5. Enter a phone number, or follow the prompts to select the phone number from
your Contacts list. See page 77 for information on adding and finding numbers
in your Contacts list.
1039b80o.book Page 41 Monday, December 17, 2001 2:00 PM
Your Personal Communicator is in text input mode when you are using the
Message Editor to enter or edit message text. When you enter the Message Editor,
the last message that was created or edited is displayed.
Use the following conventions to enter uppercase text, numbers, and to erase text
while in text input mode.
• To type an uppercase letter, press and release ƒ, then type the letter.
• To type multiple uppercase letters, press ƒ ƒ. The indicator p is
displayed in the bottom left corner of the screen. To switch back to lowercase
letters, press ƒ ƒ again.
• If you make a mistake while typing, press ª to erase the previous character.
To erase multiple characters, press and hold ª. Use ! to move to a character
or line to make a correction.
• To type a single number or ALT symbol, press £ and type the number or
symbol.
• To type a series of numbers or ALT symbols, press £ £. The indicator m
is displayed in the bottom left corner of the screen. To stop entering numbers
and ALT symbols, press £ £ again.
• To enter special symbols, see page 128.
Text Messaging
How to Create and Edit Text Messages
41
1039b80o.book Page 42 Monday, December 17, 2001 2:00 PM
Text Messaging
Inserting Messaging Emoticons
42
This feature allows you to insert emoticons into a text message. The emoticons
are selected from a predefined list.
Note: Icon Messaging must be turned on in the Message Settings in order to use
this feature, see page 75 for more information.
Emoticons can be inserted into a message in 2 ways:
• Type a space, type the 3 ASCII characters that represent the icon, then type
another space (see the Messaging Emoticons table on page 43). For example,
type :-) for a smiley face.
• Or, while in the Message Editor:
1. Press ™ and select Insert Picture.
2. Two rows of icons are shown on the screen. Use ! to scroll to additional
rows to see more icons.
3. Select the icon and press (. The icon is shown as its ASCII
representation. The Message Editor automatically inserts a space before and
after the icon.
Because icons must be preceded and followed by a space, each icon counts as
5 characters toward the 160-character message limit (3 characters and 2 space
characters).
1039b80o.book Page 43 Monday, December 17, 2001 2:00 PM
Messaging Emoticons
Ball
Icon
ASCII
Characters
(I)
Icon
Name
Grrrr
Icon
ASCII
Characters
:-/
_Y_
BOOM!
>*<
Holidays
Broken
Heart
(X)
Hooray
iii
Cloudy
;:;
Love
(O)
Cool
B-)
Lunch
(II)
Deadly
%-I
Magic
=:I
Drink
>-I
Meow!
:<*
Flower
@>-
Party
O<I
Text Messaging
Icon
Name
43
1039b80o.book Page 44 Monday, December 17, 2001 2:00 PM
Text Messaging
Icon
Name
44
Icon
ASCII
Characters
Icon
Name
Icon
ASCII
Characters
Pfrrt
:-P
Teddy
8<)
Sad
:-(
Well
done!
==b
Smiley
Face
:-)
Wink
;-)
Sunny
>o<
1039b80o.book Page 45 Monday, December 17, 2001 2:00 PM
Your Personal Communicator is preprogrammed with 10 short messages known
as canned messages. They can save you time when you write a message or reply
to a message. There are also 10 blank canned message slots in which you can
create your own customized canned messages.
Note: The characters in a canned or personal message are counted as part of the
160-character message limit.
The 10 canned messages are:
• Yes
• On My Way
• Will Call Later
• Please Call Me
• Thank you
• You’re Welcome
• Where are you?
• Will arrive in 15 minutes
• I am waiting for you
• Don’t wait for me
Text Messaging
Canned Message Text
45
Text Messaging
1039b80o.book Page 46 Monday, December 17, 2001 2:00 PM
46
Inserting a Canned Message
1. While in the Message Editor, press ™.
2. Select Canned Message.
3. Use ! to scroll through the list of canned messages.
4. When the canned message you want to insert is displayed, press (.
You can modify the canned message once it is in your message. For example, after
you insert Will arrive in 15 minutes, you can change the 15 to 30 so the
message reads Will arrive in 30 minutes.
Creating Personal (Canned) Messages
To create up to 10 personal (canned) messages:
1. Enter the Message Editor, type your short message, and press (.
2. Select Store Personal Message.
3. At the prompt, enter a location number (0 to 9). The message is stored as that
Personal Message number. If a personal message already occupies that
location, the new message replaces the old message.
Inserting Personal Messages
1. While in the Message Editor, press ™.
2. Select Personal Message and press (.
3. Use ! to scroll through the list of personal messages.
4. When the text you want to insert is displayed, press (.
1039b80o.book Page 47 Monday, December 17, 2001 2:00 PM
When you receive a text message, your Personal Communicator alerts, displays
I, and stores the message. The I flashes until you read the message. If there is
not enough memory to store the message, the I flashes after you read the
message. You must delete one or more messages before you can store the
message.
To read a message:
1. Press #. The number of new and old messages is displayed, followed by the
message list.
2. Select the message you want to read and press (.
3. Select Switch View and press (. The Switch View option allows you to view
the entire message. Use ! to scroll through the message if it does not fit on
one screen.
4. When you are finished reading the message, press (, select Switch View,
and press ( to return to the list of received messages.
5. You can choose to delete, edit, or reply to the message, see “Received
Messages” on page 61 for information on the full range of options available for
received messages.
Text Messaging
Receiving and Reading Text Messages
47
1039b80o.book Page 48 Monday, December 17, 2001 2:00 PM
Making a Call
Making a Call
Don’t forget to use the headset so you can hear your call. When using the headset,
use ! to decrease or increase the volume level.
The simplest way to make a call is to enter the number using the digits on the
keypad, then press (. If you make a mistake, press and release ª to erase the
last character. To erase multiple characters, hold down ª.
You can also make a call by selecting the number from your Contacts list:
1. Select Contacts from the Main menu and press (.
2. Select Personal Numbers and press (.
3. Find the number by name or location.
4. When the number is displayed, press (.
5. Select Call Number and press (.
See page 77 for information on how to add and find numbers in your Contacts list.
Note: If you have at least one Voice Tag assigned in your Contacts list, press ]
and say the Voice Tag name at the prompt, then press ( to call the displayed
number. For more information, see “Voice Activation” on page 56.
Ending a Call
Press ( or ª. The display returns to the Standby screen.
48
If the number you just called is not saved in your Contacts list, you can add it after
ending the call.
1. End the call by pressing ( or ª. The display returns to the Standby screen.
2. From the Standby screen, press (. A list of the last 10 calls you made is
displayed, with the most recent made call at the top.
3. Select the number you want to add and press (.
4. You can add the number to phone memory or to the SIM card memory, see
“Add a Personal Number to Your Contacts List” on page 77 for more
information.
International Phone Calls
1. Press and hold 0 (zero) until + is displayed.
2. Enter the country code and the phone number. The country code follows the
conventional format (for example, 44 for the UK, 46 for Sweden).
Just like a conventional international call, remove the first 0 in the area code when
you dial.
Making a Call
1039b80o.book Page 49 Monday, December 17, 2001 2:00 PM
49
1039b80o.book Page 50 Monday, December 17, 2001 2:00 PM
911 Emergency Calls
Answering a Call
Calls to the 911 emergency number can be made without security codes and,
depending on the network, without a SIM card installed. The Personal
Communicator directs 911 emergency calls to a central operator.
To dial the emergency number, enter 911 and press (.
50
Redialing the Last Number Called from Standby Mode
Press (((.
Answering a Call
Don’t forget to use the headset so you can hear your call. When using the headset,
use ! to decrease or increase the volume level.
Press ( to answer the call.
Note: When your Personal Communicator is closed or in the holster, press } on
the outside of the unit to answer a call right away.
1039b80o.book Page 51 Monday, December 17, 2001 2:00 PM
The In-call menu provides access to features that are available while you are on a
call, such as putting a call on hold and transferring a call.
The In-call menu display changes according to the status of your current call(s) to
provide options that you might want to use while on a call. The following sections
describe the options that are available.
Note: Other conditions may apply depending on the type and setting of your SIM
card and your subscription to these services.
When you want to access the In-call menu, press ™ while on a call. To exit the
menu, press ª.
Put Calls on Hold
You can place a call on hold and accept an incoming call or make a new call.
In-call Menu
In-call Menu
Put the Current Call on Hold
Press ™ (. To reconnect to the call, press (.
Accept an Incoming Call While on a Call
Press ( at the display prompt to answer the new call. The active call is
automatically placed on hold.
51
1039b80o.book Page 52 Monday, December 17, 2001 2:00 PM
In-call Menu
Reject an Incoming Call While on a Call
Press ª, or press ™ and select the Reject option.
Put a Call On Hold and Make a New Call
1. Put the active call on hold by pressing ™(™.
2. Select the option to make a new call from the menu.
3. Enter the number and press (.
4. To end the new call and return to your first call, press ™(.
Switch Between an Active Call and a Held Call
Press ™ and select the Call Switch option.
Turn Mute On or Off
Select this option to turn the microphone on or off during a call.
Restrict My Phone Number
Prevents your Personal Communicator’s number from being sent for the next call.
End Active Call
52
If a call comes in while you are already on a call, you can end the active call.
1. Press ( to put the active call on hold.
2. Press ™, select End Active Call, and press (.
Note: If you already have a call on hold, the held call becomes your active call.
1039b80o.book Page 53 Monday, December 17, 2001 2:00 PM
Reconnect
Use this option to go back to a call that is on hold.
Reconnect Held Call
This option is similar to Reconnect. If you have a call on hold and a call waiting,
select this option to connect with your held call.
Press ™ and select the End Held Call option.
End Current Call and Held Call
Select this option to say bye to everyone.
Conference Calls
You must subscribe to both Conference Calling and Call Waiting in order to
conference call with other people. You can add up to 5 people on one call.
Starting a Conference Call
1. Make the first call.
2. Place the first call on hold by pressing ™ (.
3. Dial another phone number and press (.
4. Press ™ and select Conference Call.
Note: If your request for a conference call is not successful, wait a short time
and then repeat the request.
In-call Menu
End Held Call
53
1039b80o.book Page 54 Monday, December 17, 2001 2:00 PM
In-call Menu
Adding a Person to Your Conference Call
1. Place the conference call on hold by pressing ™ (.
2. Dial the number to add and press (.
Note: You can also add another call by selecting the new call, answering call
waiting, or by recalling a number from your Contacts list.
3. Select In-Call, then Conference Call to add the new call.
Ending a Conference Call
Press ™, select End Active Call, and press (.
Transfer Calls
The Transfer Call feature allows you to transfer a call to another phone number.
There are 2 ways to transfer a call: before or after the third party is connected.
You must subscribe to both Conference Calling and Call Waiting in order to transfer
calls.
Initiating Transfer Call Before the Third Party is Connected
1. Press ™ and select Transfer Call from the In-call menu.
2. Enter the number you want the call transferred to and press (.
54
1039b80o.book Page 55 Monday, December 17, 2001 2:00 PM
Initiating Transfer Call After the Third Party is Connected
If you already have an active call and a call on hold, press ™ and select Transfer
Call from the In-call menu. The Personal Communicator will attempt to transfer the
call to the call on hold. The display will show Transferring Call, followed by
Call Transferred if the call is transferred successfully. After the call is
transferred, you are automatically disconnected.
Split Call
The Split Call feature allows you to separate an individual from the main conference
call.
Note: You cannot use Split Call if you have any calls on hold.
1. Press ™ and select Split Call.
2. Press ! until the phone number of the person you want to separate from the
conference call is displayed, then press (. You can now talk privately to the
person.
3. To rejoin both of you to the conference call, select Conference Call from the Incall menu.
In-call Menu
The Personal Communicator will attempt to transfer the call. The display will show
Transferring Call, followed by Call Transferred if the call is transferred
successfully. After the call is transferred, you are automatically disconnected.
Note: If your request to transfer the call is not successful, wait a short time and
then repeat the request.
55
1039b80o.book Page 56 Monday, December 17, 2001 2:00 PM
Reject Incoming Call
Too busy to talk? If you are already on a call and another call comes in, press and
hold ª to reject the incoming call.
Voice Activation
Voice Activation
56
Voice Activation lets you dial a phone number or access a feature with a single
spoken command called a Voice Tag.
You can assign Voice Tags to up to 25 of the phone numbers in your Contacts list,
and up to 9 Quick Access features. For information on creating your Contacts list,
see “Add a Personal Number to Your Contacts List” on page 77. For information on
the Quick Access menu and creating Voice Tags for Quick Access features, see
page 120.
Notes:
• You cannot assign Voice Tags to phone numbers stored in SIM card memory.
• For best results, make sure there is no background noise and speak in a clear,
natural voice when you record a Voice Tag.
• You must have the headset attached to record and play Voice Tags.
• Each Voice Tag can be 2 seconds.
• You cannot record Voice Tags if you have selected to prevent access to phone
memory, see “Check Capacity” on page 81.
1039b80o.book Page 57 Monday, December 17, 2001 2:00 PM
This option is available when you create a new Contacts list entry. After you enter
the details for the entry, the message Add Voice Tag? is displayed.
If you do not want to add a Voice Tag, press ª.
To add a Voice Tag to the Contacts list entry:
1. Press ( at the Add Voice Tag? prompt.
Note: If you already have 25 Voice Tags in your Personal Communicator, you
must delete one before you can add another.
2. At the prompt, press ( and record after the tone.
If the recording is not successful, the Personal Communicator prompts you to record
again.
Add or Edit a Voice Tag
To add a Voice Tag to an entry that already exists in your Contacts list, or to edit a
Voice Tag:
1. Select Contacts from the Main menu and press (.
2. Select Personal Numbers and press (.
3. Find the entry in your Contacts list by either name or location, see “Searching
for Personal Numbers in Your Contacts List” on page 78.
4. Once the entry is displayed, press ( and select Add or Edit Voice Tag.
5. At the prompt, press ( and record after the tone.
Voice Activation
Create a Voice Tag for a Phone Number
57
1039b80o.book Page 58 Monday, December 17, 2001 2:00 PM
Delete a Voice Tag
Voice Activation
1.
2.
3.
58
4.
Select this option to delete a Voice Tag from a Contacts list entry.
Select Contacts from the Main menu and press (.
Select Personal Numbers and press (.
Find the entry in your Contacts list by either name or location, see “Searching
for Personal Numbers in Your Contacts List” on page 78.
Once the entry is displayed, press (, select Delete Voice Tag, and press (
again.
Using Voice Activation to Make Phone Calls
You can easily access Contacts list entries that have Voice Tags.
Voice Activation Using the Smart Button
1. Press ].
2. At the prompt, say the Voice Tag name. The matching entry in the Contacts list
is highlighted. If there is no matching entry, an alternate entry is highlighted.
3. Press ( to make the call, ª to cancel, or use ! to select a different entry.
Voice Activation from the Contacts Menu
1. Select Contacts from the Main menu and press (.
2. Select Voice Dialing and press (.
1039b80o.book Page 59 Monday, December 17, 2001 2:00 PM
3. At the prompt, press ].
4. At the prompt, say the Voice Tag name. The matching entry in the Contacts
list is highlighted. If there is no matching entry, an alternate entry is highlighted.
5. Press ( to make the call, ª to cancel, or use ! to select a different entry.
Voice Tags can also be used to access Quick Access features. See “Quick Access
Menu” on page 120 for information on how to create Voice Tags for Quick Access
features.
To activate a Quick Access feature that has a Voice Tag:
1. Press ¢.
2. At the prompt, say the Voice Tag name. The matching entry in the Quick
Access Setup list is highlighted. If there is no matching entry, an alternate entry
is highlighted.
3. Press ( to access the feature, ª to cancel, or use ! to select a different
feature.
Voice Activation
Using Voice Activation to Access Quick Access Features
59
1039b80o.book Page 60 Monday, December 17, 2001 2:00 PM
Messages Menu
The Messages menu is used to call your voice mail number, view and manage
your incoming (received) and outgoing (stored) messages, access the Message
Editor, play and delete voice notes, manage cell broadcast messages, and set
various messaging settings.
Messages Menu
Call Voicemail
60
You can enter your voice mail number into the Message Settings, then
use this option to call your voice mail.
To enter or modify your voice mail number:
1. Select Messages from the Main menu and press (.
2. Select Message Settings and press (.
3. Select Voicemail Number and press (.
4. Enter or modify your voice mail number and press (.
Note: If using an international phone number, remember to add the + symbol
and the appropriate country code prefix to the phone number, see
“International Phone Calls” on page 49 for more information.
To call your voicemail, select Call Voicemail from the Messages menu.
1039b80o.book Page 61 Monday, December 17, 2001 2:00 PM
Received Messages
Switch View
Select this option to display a message in its entirety.
While in the full message view, press ( to access the list of options that allow you
to reply to the message, delete the message, return the call (if the message contains
an attached phone number), retrieve the numbers from the message, edit the
message, go to the next message, or delete all messages.
Select Switch View again to return to the list of received messages.
Messages Menu
This option lets you view and manage the messages you have received on your
Personal Communicator. After you select Received Messages from the Messages
menu, the Personal Communicator displays the number of new and old messages,
then displays the message list. Use ! to scroll through the message list.
Note: For quick access to your received messages, press #.
Reply to Message
If you select this option, the Message Editor screen displays so you can type your
message. After entering your message, press ( to send it.
See “How to Create and Edit Text Messages” on page 41 for information on using
the Message Editor.
61
1039b80o.book Page 62 Monday, December 17, 2001 2:00 PM
Messages Menu
Delete Message
Select this option to delete a received message.
Note: Before you delete a message, make sure you have the correct message
selected in the received message list.
62
Return Call
When a message contains an attached phone number, select this option to call the
number.
Retrieve Numbers
This option retrieves the first 20 characters of each number embedded in a text
message so that you can easily call the number or add it to your Contacts list.
Note: Space and - (dash) are not counted as part of the 20-character limit.
1. Select the message in the list of received messages and press (, or if you
are in the full message screen, press (.
2. Select Retrieve Numbers and press (. The list of retrieved numbers is
displayed.
3. Select a number from the list and press (.
4. Select one of the following options:
• Call Number - to call the number.
• Add to Phone Memory - to store the number in your Personal
Communicator’s phone memory.
• Add to SIM Card Memory - to store the number in the SIM card memory.
Edit Message
If you select this option, the Message Editor screen displays so you can edit the
message. The cursor is positioned at the end of the message.
See “How to Create and Edit Text Messages” on page 41 for information on using
the Message Editor.
After editing the message, press ( and select one of the following options:
• Send Message - to send the message.
• Store Message - to store the message on the SIM card, see “Storing a Text
Message” on page 39 for more information.
• Store Personal Message - store the message as a personal (canned)
message, see “Creating Personal (Canned) Messages” on page 46 for more
information.
Go to Next Message
Select this option to go to the next received message. If you are in the list of received
messages, the next message in the list is selected. If you are in the full (Switch View)
message screen, the next message is displayed in its entirety.
Messages Menu
1039b80o.book Page 63 Monday, December 17, 2001 2:00 PM
63
1039b80o.book Page 64 Monday, December 17, 2001 2:00 PM
Delete All Messages
Select this option to delete all of your received messages, even messages you
have not read yet.
Note: Deleted messages cannot be recovered, so make sure you have read all of
your messages before deleting them.
Messages Menu
Outgoing Messages
64
This option lets you view and manage the outgoing messages stored on the SIM
card. A message is stored on the SIM card when you select Store Message after
typing the message in the Message Editor.
After you select Outgoing Messages from the Messages menu, the Personal
Communicator displays the number of outgoing messages followed by the list of
messages. Use ! to scroll through the message list.
Switch View
Select this option to display a message in its entirety.
While in the full message view, press ( to access the list of options that allow you
to send the message, edit the message, delete the message, or go to the next
message.
Select Switch View again to return to the list of received messages.
Send Message
Select this option to send a previously stored message.
Note: The Service Center number must be set in the Message Settings in order to
send outgoing messages, see page 21 for more information.
To send the message to an email address in your Contacts list:
1. Select Find Entry by Name or Find Entry by Location.
2. Follow the prompts to select the name/number from your Contacts list and
press (.
3. Select Send as E-mail and press (.
To manually enter the email address:
1. Select E-mail Address Entry and press (.
2. At the prompt, enter the email address and press (.
To send the message to a phone number:
• Enter a phone number, or follow the prompts to select the phone number from
your Contacts list.
See page 77 for information on adding and finding numbers in your Contacts list.
Messages Menu
1039b80o.book Page 65 Monday, December 17, 2001 2:00 PM
65
Messages Menu
1039b80o.book Page 66 Monday, December 17, 2001 2:00 PM
66
Edit Message
If you select this option, the Message Editor screen displays so you can edit the
message. The cursor is positioned at the end of the message.
See “How to Create and Edit Text Messages” on page 41 for information on using
the Message Editor.
After editing the message, press ( and select one of the following options:
• Send Message - to send the message.
• Store Message - to store the message on the SIM card, see “Storing a Text
Message” on page 39 for more information.
• Store Personal Message - store the message as a personal (canned)
message, see “Creating Personal (Canned) Messages” on page 46 for more
information.
Delete Message
Select this option to delete a stored message.
Note: Before you delete a message, make sure you have the correct message
selected in the outgoing message list.
Go to Next Message
Select this option to go to the next outgoing message. If you are in the list of outgoing
messages, the next message in the list is selected. If you are in the full (Switch View)
message screen, the next message is displayed in its entirety.
1039b80o.book Page 67 Monday, December 17, 2001 2:00 PM
The Message Editor is used to compose text messages.
The Message Editor can be started in any one of the following ways:
• By selecting Message Editor from the Messages menu.
• By pressing . from any screen.
• By replying to a message.
• By editing a message.
The Message Editor always displays the last message you entered or edited.
After typing your message, press ( to access menu options for sending the
message (see “Sending Text Messages” on page 37), storing it so you can send it
at a later time (see “Storing a Text Message” on page 39), or storing it as a personal
(canned) message (see“Creating Personal (Canned) Messages” on page 46).
By pressing the ™ key while composing a message, you can access menu
options for inserting emoticons and personal messages into your message, see
“Inserting Messaging Emoticons” on page 42 and “Inserting Personal Messages” on
page 46.
For more information on using the Message Editor, see “How to Create and Edit Text
Messages” on page 41.
Messages Menu
Message Editor
67
1039b80o.book Page 68 Monday, December 17, 2001 2:00 PM
Messages Menu
Voice Notes
68
The voice notes feature allows you to record up to 3 minutes of personal voice
messages or to record part of a call. This feature is useful when you don’t have a
pen or paper handy for things like jotting down directions or taking a message.
You can record voice notes when your Personal Communicator is idle, when you are
on a single call, or when you are on an active call with a call waiting.
Note: Recording of phone calls is subject to varying State and Federal laws
regarding privacy and recording of phone conversations.
Record a Voice Note
To record a voice note, press &. You will hear a short tone to indicate that recording
has started. The display will show the message Recording and the remaining
recording time.
To stop recording, press & again.
Notes:
• When you record a call, both parties are recorded and the other party hears a
tone every 10 seconds.
• Recording stops automatically if you accept or make a call.
• While recording, your Personal Communicator alerts you at 10 seconds before
it reaches recording capacity, and again at 1 second before recording capacity.
Once time is up, recording automatically stops.
Play a Voice Note
To play back a voice note:
1. Select Messages from the Main menu and press (.
2. Select Voice Notes and press (.
3. Select Play Voice Notes and press (.
If you do not make a selection, the highlighted voice note starts to play after a
2-second delay. Press ª to stop playback.
4. To play another voice note, select it and press (.
Show Time Available for Recording Voice Notes
To see how much time is available for recording voice notes:
1. Select Messages from the Main menu and press (.
2. Select Voice Notes and press (.
3. Select Show Time Available and press (.
Messages Menu
1039b80o.book Page 69 Monday, December 17, 2001 2:00 PM
69
Messages Menu
1039b80o.book Page 70 Monday, December 17, 2001 2:00 PM
70
Erase a Voice Note
To erase a voice note:
1. Select Messages from the Main menu and press (.
2. Select Voice Notes and press (.
3. Select Play Voice Notes and press (.
If you do not make a selection, the highlighted voice note starts to play after a
2-second delay. Press ª to stop playback.
4. Scroll to the voice note you want to erase and press (.
5. Press (, select Erase Voice Note, and press (.
Erase All Voice Notes
To erase all voice notes:
1. Select Messages from the Main menu and press (.
2. Select Voice Notes and press (.
3. Select Erase All Voice Notes and press (.
4. At the confirmation prompt, press (.
Set An Alarm on a Voice Note
This option allows you to attach an alarm to up to 5 voice notes. You can set the
frequency of the alarm and the time when the alarm will expire. The alarm can be
set to a specific day and time (One-Time), daily, weekly, every Monday through
Friday, or every Monday through Saturday.
When the alarm expires, you are notified with an alert and Alarm Expired
message, and the Voice Notes menu containing the voice note is displayed.
To set an alarm on a voice note:
1. Select Messages from the Main menu and press (.
2. Select Voice Notes and press (.
3. Select Play Voice Notes and press (.
If you do not make a selection, the highlighted voice note starts to play after a
2-second delay. Press ª to stop playback.
4. Select the voice note you want to attach an alarm to and press (.
5. Select Set Alarm and press (.
6. Follow the prompts to select the alarm type, time, and for One-Time alarms, the
date. When entering the time, use 24-hour format. For example, for 2:30 PM,
enter 14:30. When entering the date, use dd/mm/yy format.
Note: If a voice note alarm is set to the same time as an Alarm Clock alarm, the
voice note alarm is adjusted to expire one minute later.
Messages Menu
1039b80o.book Page 71 Monday, December 17, 2001 2:00 PM
71
1039b80o.book Page 72 Monday, December 17, 2001 2:00 PM
Messages Menu
Cell Broadcast
72
These are general messages that your service provider broadcasts in numbered
channels in a geographic area. The broadcasts can be news, weather, sports, travel,
and more. Contact your service provider for a list of channels and the information
they provide.
Note: Your Personal Communicator can receive broadcast messages only when it
is in Standby mode.
While a cell broadcast message is scrolling across the screen, you can:
• Press ! to stop and start the message.
• Press ª to remove the message.
Note: The function of the ! button changes while you are receiving a cell
broadcast message. You must remove the message before ! returns to normal.
When the message is complete, the beginning of the message remains displayed
until you remove it, a new message arrives, or you leave the geographic area.
From the Cell Broadcast submenu, select On to receive these messages, or Off to
stop receiving them.
Note: Selecting Off deletes all stored cell broadcast messages.
1039b80o.book Page 73 Monday, December 17, 2001 2:00 PM
Language List
This option is used to select a different language for cell broadcast messages.
Availability depends on the type and settings of the SIM card, and/or your
subscription to this feature.
Message Settings
Message Settings are used to set various messaging options.
To access the Message Settings, select Message Settings from the Messages
menu.
Note: Your message service center number and email service center number must
be set in the Message Settings before you can send text and email messages from
your Personal Communicator. See “Setting Your Service Center Numbers” on
page 21 for more information.
Message Settings
Channel List
• Channel Index - allows you to edit a channel. Enter the channel number and
press (. The channel details are stored and your Personal Communicator
returns to the Channel Index list.
Note: Editing a channel removes any message associated with the channel.
• Delete All Channels - deletes all channels.
73
1039b80o.book Page 74 Monday, December 17, 2001 2:00 PM
Auto Signature
Message Settings
This option allows you to create text, up to 20 characters, that is appended to all
outgoing text messages, typically your name or other information.
Note: The number of characters in your auto signature counts toward the
160-character maximum allowed per message.
Voicemail Number
Select this option to enter, modify, or delete your voice mail number. If your voice mail
number is set, you can quickly call it by selecting Call Voicemail from the Messages
menu. See “Call Voicemail” on page 60 for more information on how to enter and call
your voice mail number.
Service Center
This option is used to enter, modify, or delete your service center number, and must
be set in order to send messages from your Personal Communicator.
See “Setting Your Service Center Numbers” on page 21 for more information.
E-mail Service Center
This option is used to enter, modify, or delete your email service center number, and
must be set in order to send email messages from your Personal Communicator.
See “Setting Your Service Center Numbers” on page 21 for more information.
74
1039b80o.book Page 75 Monday, December 17, 2001 2:00 PM
E-mail @ Symbol
Depending on your service provider, the @ symbol used in most email addresses
may be replaced by an alternate symbol. Check with your service provider for more
information.
This setting lets you specify the maximum time, in hours, that your unforwarded
messages remain with the message service center before they are deleted. The
default is 24 hours. The maximum value for this setting depends on your message
service provider.
Icon Messaging
If the Icon Messaging setting is On, icons can be inserted into a message from the
Message Editor’s Insert Picture menu. If Icon Messaging is Off, the Insert Picture
menu does not appear on the screen when you press ™ while in the Message
Editor. For information on inserting icons into a text message, see page 42.
Message Settings
Expiry Period
Outgoing Message Type
This option is network-dependent and can be used to specify the format for your
outgoing messages: Text (default), Fax, X400, Paging, E-Mail, or Voice.
75
1039b80o.book Page 76 Monday, December 17, 2001 2:00 PM
Contacts
•
•
The Contacts menu is used to:
• Maintain your personal list of names, phone numbers and email
addresses for quick retrieval.
• Call a phone number with a voice-activated command (Voice Tag).
View a list of the last 10 calls you made, missed, and answered.
Set up fixed dialing and one-touch dialing features.
Contacts
Personal Numbers
76
The Personal Numbers feature allows you to store names and phone numbers in
your Personal Communicator’s phone memory or in SIM card memory. Once stored,
you can retrieve the numbers quickly and easily when you want to make a call.
Your Personal Communicator can store up to 100 entries, and the SIM card can store
up to 250 entries. The number of entries you can store on the SIM card depends on
the type of SIM card issued by your service provider.
Each Personal Number entry contains:
• A telephone number - up to 32 digits if stored in phone memory, 20 digits if
stored on the SIM card.
• A name - up to 16 characters if stored in phone memory, 50 characters if
stored on the SIM card.
• An email address - (can be added to phone memory only) up to 80 characters
• A location label (1 - 255 )
Add a Personal Number to Your Contacts List
1. Select Contacts from the Main menu.
2. Select Personal Numbers and press (.
3. Select Add Entry and press (.
4. Select either Add to Phone Memory or Add to SIM Memory and press (.
5. At the prompt, enter the name, phone number, email address (phone memory
only), and location number. If you do not specify a location number, the entry is
stored in the next available location.
6. For entries stored in phone memory, the Personal Communicator asks if you
want to create a Voice Tag. Voice Tags allow you to retrieve or call a number by
saying the Voice Tag name. Voice Tags cannot be assigned to entries stored in
SIM memory.
7. If you don’t want to add a Voice Tag, press ª.
8. To add a Voice Tag, press ( at the Add Voice Tag? prompt.
Note: If you already have 25 Voice Tags in your Personal Communicator, you
must delete one before you can add another.
9. At the prompt, press ( and record after the tone.
If the recording is not successful, the Personal Communicator prompts you to record
again. For information on editing, deleting, and using Voice Tags, see “Voice
Activation” on page 56.
Contacts
1039b80o.book Page 77 Monday, December 17, 2001 2:00 PM
77
Contacts
1039b80o.book Page 78 Monday, December 17, 2001 2:00 PM
Inserting Pauses into Phone Numbers
When entering phone numbers into your Contacts list, you can insert pauses into
a string of numbers to allow the called number time to react to certain activities such
as going into voice mail or entering a password.
To insert a 3-second pause in a phone number, press and hold * until Ü is displayed
when you are entering a phone number.
For example, if you have voice mail on 555-6911 with mailbox number 1066 and
password 2001, you would enter the number in your Contacts list as
5556911Ü1066Ü2001. The first part of the number calls the voice mail system. When
voice mail answers the call, the Personal Communicator pauses for 3 seconds
before it sends the tones for your mailbox 1066. The Personal Communicator then
pauses for again for 3 seconds before it sends the tones for your password 2001.
Searching for Personal Numbers in Your Contacts List
Once you have added names and numbers to your Contacts list, you can retrieve a
number by the entry name or its location number. The Find Entry by Name and Find
Entry by Location selections appear in many of the Personal Communicator’s
menus. Use the following procedures to retrieve numbers when presented with these
menu selections.
Note: Entries that have Voice Tags are preceded by )) in your Contacts list.
78
Find Entry by Name
This option is used to select a phone number by the name of the entry.
1. Select Find Entry by Name and press (.
2. The prompt Enter Name: is displayed. You can enter a maximum of
3 characters, but you do not have to enter all 3 characters to begin the search.
Press ( to begin the search.
The Contacts list entries will be searched and the matching entry displayed. If
there is no matching entry, the closest alphabetically matching entry will be
displayed. Use ! to navigate through the list.
3. Once the correct entry is highlighted, press (.
4. When accessing the Personal Numbers features from the Contacts menu, the
following menu selections are available:
• Switch View - to display the entire entry. Select Switch View again to return
to the list screen.
• Call Number - to call the number.
• Modify Name or Details - to modify the name, number, or email address
(email addresses can be added to phone memory only).
• Erase Name and Number - to delete the entry.
• Add or Edit Voice Tag - to add or edit the entry’s Voice Tag. See page 57
for more information on adding and editing Voice Tags.
• Delete Voice Tag - to delete the entry’s Voice Tag.
Contacts
1039b80o.book Page 79 Monday, December 17, 2001 2:00 PM
79
Contacts
1039b80o.book Page 80 Monday, December 17, 2001 2:00 PM
80
Find Entry by Location
This option is used to select a phone number from your Contacts list by the entry’s
location number.
1. Select Find Entry by Location and press (.
2. The prompt Enter Location: is displayed. Enter the location number and
press (.
3. The Contacts list entries will be searched and the matching entry displayed. If
there is no entry in the location you entered, the message Location x is
Empty is displayed (where x is the location number you entered). Enter a valid
location number and press (.
4. Once the correct entry is highlighted, press (.
5. When accessing the Personal Numbers features from the Contacts menu, the
following menu selections are available:
• Switch View - to display the entire entry. Select Switch View again to return
to the list screen.
• Call Number - to call the number.
• Modify Name or Details - to modify the name, number, or email address
(email addresses can be added to phone memory only).
• Erase Name and Number - to delete the entry.
1039b80o.book Page 81 Monday, December 17, 2001 2:00 PM
•
Add or Edit Voice Tag - to add or edit the entry’s Voice Tag. See page 57
for more information on adding and editing Voice Tags.
Delete Voice Tag - to delete the entry’s Voice Tag. See page 58 for more
information on deleting Voice Tags.
Check Capacity
Select this option to find out how many unused locations are available in your
Personal Communicator’s phone memory and in the SIM card memory for adding
names and numbers to your Contacts list. Up to 100 entries can be stored in phone
memory, and up to 250 entries can be stored in SIM memory.
Note: The number of entries you can store on the SIM card depends on the type of
SIM card issued by your service provider.
Prevent Access
Use this option to prevent access to the phone numbers in your Personal
Communicator’s phone memory, in the SIM card memory, in both, or to turn off
access restrictions.
Note: You cannot record Voice Tags if you prevent access to phone memory.
Contacts
•
81
1039b80o.book Page 82 Monday, December 17, 2001 2:00 PM
Voice Dialing
Contacts
The Voice Dialing option allows you to quickly access and call a phone number
that has a Voice Tag assigned to it. Entries that have Voice Tags are preceded by ))
in your Contacts list.
Voice dialing can also be accomplished when your Personal Communicator is in
Standby mode using the Smart button ].
82
Voice Activation from the Contacts Menu
To retrieve a number in your Contacts list from the Contacts menu:
1. Select Voice Dialing from the Contacts menu and press (.
2. At the prompt, press ].
3. At the prompt, say the Voice Tag name. The matching entry in your Contacts list
is highlighted. If there is no matching entry, an alternate entry is highlighted.
4. Press ( to make the call, ª to cancel, or use ! to select a different entry.
Voice Activation from Standby Mode
To retrieve a number in your Contacts list from the Standby screen:
1. Press ].
2. At the prompt, say the Voice Tag name. The matching entry in your Contacts list
is highlighted. If there is no matching entry, an alternate entry is highlighted.
3. Press ( to make the call, ª to cancel, or use ! to select a different entry.
1039b80o.book Page 83 Monday, December 17, 2001 2:00 PM
This option lets you review the last 10 calls you missed, answered, and made.
Once you select one of the lists, use the Switch View option to view details about an
entry (phone number, time, date). Other View Options allow you to redial a phone
number, store a phone number, or erase a phone number.
A quick way to view the Last Ten Calls Made list is to press ( from the Standby
screen. From here you can easily add a number to your Contacts list by selecting the
number and pressing (. You can add the number to the phone memory or SIM card
memory. See “Add a Personal Number to Your Contacts List” on page 77 for more
information.
Note: The Last Ten Calls lists are erased when you install a new SIM card.
Erase All Numbers
Select this option from the Last Ten Calls menu to erase all the numbers in your last
10 calls missed, answered, and made lists.
Contacts
Last Ten Calls
My Phone Numbers
This option allows you to access a list of your personal phone numbers for reference
purposes or to modify them. For example, if you have difficulty remembering your
Personal Communicator’s phone number, you can store it in this list and retrieve the
number as needed.
83
1039b80o.book Page 84 Monday, December 17, 2001 2:00 PM
Contacts
Note: The My Phone Numbers list is stored on the SIM card. Depending on your
service provider, one or more of the entries in the list may already be defined and
you may not be able to modify them.
Modify Name or Details
To retrieve or modify a name or number in your My Phone Numbers list:
1. Select My Phone Numbers from the Contacts menu.
2. Select the entry in the list and press (.
3. Select Modify Name or Details and press (.
4. Modify the name or number. Press ª to backspace and erase characters.
Switch View
This option lets you view an entry in the My Phone Numbers list in its entirety. Select
Switch View again to return to the list screen.
Fixed Dialing
84
Use this option to limit the use (typically third-party) of your Personal
Communicator to a list of predefined telephone numbers, country codes,
area codes, or other prefixes. When this option is On, the Personal
Communicator does not allow dialing of any number other than an
emergency number. This option may be affected by the setting of the Call Barring
option, see page 100.
Set Up Fixed Dialing
Use this option to turn fixed dialing on or off and to set up or change the Fixed Dial
list.
1. At the prompt, enter your PIN2 code and press (.
2. Select one of the following options:
• On - to turn Fixed Dialing on.
• Off - to turn Fixed Dialing off.
• Edit Entry - to modify the Fixed Dial list. Scroll to the entry you want to
change and press ( to edit it or ª to erase it.
• Add Entry - to add an entry to the Fixed Dial list. If you do not specify a
location number, the entry is stored in the next available location.
• Erase Entry - scroll to the entry you want to delete and press (.
Contacts
1039b80o.book Page 85 Monday, December 17, 2001 2:00 PM
View Fixed Dial List
This option allows you to scroll through the numbers in the Fixed Dial list.
Use ! to scroll through the list. Press ( to make a call.
Set Up One-Touch Dialing
You can easily set up which phone number list your Personal Communicator will use
for One-Touch dialing.
To access this feature, select One-Touch Dial Setting from the Contacts menu.
85
1039b80o.book Page 86 Monday, December 17, 2001 2:00 PM
To Phone Memory
Changes One-Touch Dialing to the Contacts list stored in the phone memory
(locations 1 to 9).
Contacts
To SIM Card Memory
Changes One-Touch Dialing to the Contacts list stored in the SIM card memory
(locations 101 to 109).
To Fixed Dial List
Changes One-Touch Dialing to your Fixed Dial list (locations 1 to 9).
One-Touch Dialing from Phone Memory
To quickly dial a number stored in one of the first 9 locations of your Contacts list,
press and hold the appropriate number key. For example, press and hold 2 to call the
phone number stored in location 2.
One-Touch Dialing Using the Smart Button
•
•
86
Press ] and say the Voice Tag name after the tone.
If there are no Voice Tags in your Contacts list, press ] and scroll to the entry,
or press ] and enter a location number.
1039b80o.book Page 87 Monday, December 17, 2001 2:00 PM
The Chat feature allows you to have a “chat-like” experience on your Personal
Communicator. During a chat session, you can send and receive messages with up
to five other people. The series of messages exchanged between the chat members
are visible to all members of the chat session, allowing each member to scroll
through the conversation.
Note: Non-V101 users can be included in a chat session. However, these users
receive each message separately (they cannot scroll through the entire
conversation history, but can view the conversation by reading each message
individually). In addition, any replies sent by a non-V101 user are sent only to the
originator of the message and not to the entire chat group.
During the course of the conversation, you can send a private message to a member
of the chat group and block specific members from receiving messages.
Text messages sent to you while in Chat mode are not placed in your received
messages folder. You have to end the chat session to receive text messages.
Chat
Chat
Starting a Chat Session
1. Select Chat from the Main menu and press (.
2. At the prompt, enter your name (up to 5 characters), and press (.
87
1039b80o.book Page 88 Monday, December 17, 2001 2:00 PM
Chat
Add Chat Members
88
The Chat Menu allows you to specify the phone numbers of the people you want
to invite to participate in the chat session, view the member list, and start the chat
session. Up to 6 people can participate in a chat session, including yourself.
The Chat menu is displayed after you select Chat from the Main menu and enter your
chat name.
To select the members you want to chat with:
1. Select Add Chat Members from the Chat menu and press (.
2. Follow the prompts in the Contacts Entry menu to enter a phone number or to
select a phone number by name or location from your Contacts list. See
page 78 for information on selecting numbers from your Contacts list.
3. Once the phone number is displayed, press (.
4. At the prompt, enter your friend’s name (up to 5 characters), and press (.
This name will be used to identify this person’s messages in the Conversation
view.
Continue to add members until you have added all the members for the chat session
(maximum of 6, including yourself).
1039b80o.book Page 89 Monday, December 17, 2001 2:00 PM
View Member List
Switch View
This option allows you to view a chat member’s name and phone number.
1. Select the member in the member list and press (.
2. Select Switch View and press (.
3. To return to the member list, select Switch View again.
Modify Details
This option allows you to change a chat member’s name or phone number.
1. Select the member in the member list and press (.
2. Select Modify Details and press (.
3. Modify the name and/or number as desired and press ( when you have
completed your changes.
Note: Press ª to backspace and erase the previous character.
Remove Entry
This option allows you to remove someone from the member list.
1. Select the member in the member list and press (.
2. Select Remove Entry and press (.
Chat
This option lets you view the members you have selected for the chat session.
Select View Member List from the Chat menu and press (.
89
1039b80o.book Page 90 Monday, December 17, 2001 2:00 PM
Chat
Start Chat
Once you have added the members for the chat session:
1. Select Start Chat and press (.
2. Enter the text for the invitation to be sent to each member you have selected for
the chat session and press (.
The invitation is sent to the member list. While the invitation is being sent, an
animated envelope icon and Sending Chat Invitation message are
displayed. If any members do not receive the invitation, the Personal Communicator
displays their names in the Chat Message(s) Failed List. Press ( to resend the
invitation.
Chat View
Once the chat invitation is sent, the Chat View screen displays. The Chat View
shows the messages from each chat member. Each message is preceded by the
member’s chat name. The newest messages are placed at the top of the screen.
Use ! to view messages that have scrolled off the screen.
Send Chat Message
90
To send a chat message:
1. While in the Chat View, press ( and select Send Chat Msg.
2. Enter the text for the message and press (.
1039b80o.book Page 91 Monday, December 17, 2001 2:00 PM
Switch View
This option lets you see individual messages in their entirety.
1. Select the message in the Chat View screen and press (.
2. Select Switch View and press (. The selected member’s name and message
are displayed.
3. To return to the full Chat View, select Switch View again.
This option displays each member’s chat name and phone number. From this
member list, you can send a private message, block a member from receiving chat
messages, and modify a member’s chat name.
Note: The member list includes all members invited to participate in the chat
session, even if they did not receive the invitation or join the chat session.
1. While in the Chat View, press (.
2. Select View Member List and press (.
3. Select the member and press (. The Member List (ML) Entry screen is
displayed.
Chat
View Member List
91
1039b80o.book Page 92 Monday, December 17, 2001 2:00 PM
Chat
Send a Private Message
This option allows you to send a private message to a member of the chat group.
The message is sent only to that person, and not to other members of the group.
1. From the Chat View, press (.
2. Select View Member List and press (.
3. Select the name in the member list and press (.
4. Select Send Private Msg and press (.
5. Enter the text for the message and press (.
92
Switch View
This option lets you switch between viewing member names and phone numbers,
and viewing the member list screen.
1. From the Chat View, press (.
2. Select View Member List and press (.
3. Select the name in the member list and press (.
4. Select Switch View and press (. The member’s chat name and phone
number are displayed.
5. Each member has a separate screen. Press the down arrow key to scroll
through the other member screen.
6. Select Switch View again to return to the full member list.
1039b80o.book Page 93 Monday, December 17, 2001 2:00 PM
Disable
This option prevents a member from receiving chat messages.
1. From the Chat View, press (.
2. Select View Member List and press (.
3. Select the name in the member list and press (.
4. Select Disable and press (.
An asterisk (*) appears next to the member's name in the member list.
5. To add the member back into the chat session, select Enable.
Chat
Modify Name
This option allows you to modify a member’s name as it appears in the Chat View.
1. From the Chat View, press (.
2. Select View Member List and press (.
3. Select the name in the member list and press (.
4. Select Modify Name and press (.
5. Modify the name and press ( when you have completed your changes.
Note: Press ª to backspace and erase the previous character.
93
1039b80o.book Page 94 Monday, December 17, 2001 2:00 PM
Disable Chat Message Tone
This option disables the audible tone that alerts you when a new chat message is
received.
1. While in the Chat View, press (.
2. Select Disable Chat Msg Tone and press (.
3. To turn the tone back on, select Enable Chat Msg Tone.
Chat
Received Messages
This option displays the messages received during the chat session.
1. While in the Chat View, press (.
2. Select Received Messages and press (.
3. Scroll through the messages to view them.
Exit Chat
Select this option to end the chat session.
94
1039b80o.book Page 95 Monday, December 17, 2001 2:00 PM
Alarm Clock
You can set up to 5 alarms on your Personal Communicator. A 41-character memo
can also be attached to an alarm.
To access the alarm functions, select Alarm Clock from the Main menu.
1. Select Set Alarm from the Alarm Clock menu and press (.
2. At the prompt, select the type of alarm to set:
• One-Time
• Daily
• Weekly
• Every Monday to Friday
• Every Monday to Saturday
3. When prompted, enter the alarm time in 24-hour format. For example, for
2:30 PM, enter 14:30.
4. For a One-Time alarm, you are prompted to enter the date for the alarm in
dd/mm/yy format.
5. If you do not want to attach a memo to the alarm, press ( to set the alarm.
Otherwise, enter the text for the alarm when prompted, then press (.
Alarm Clock
Set an Alarm
95
1039b80o.book Page 96 Monday, December 17, 2001 2:00 PM
Show Alarm Status
Select this option to review, edit, or cancel (delete) an alarm. Use ! to select an
alarm from the list.
Alarm Clock
Switch View
Use this option to view the details for an alarm (date, time, and memo). Select Switch
View again to return to the alarm list screen.
96
Edit Alarm
Use this option to change the date, time, and memo for an alarm.
Cancel Alarm
Select this option to delete an alarm.
1039b80o.book Page 97 Monday, December 17, 2001 2:00 PM
Call Related Features
Show Battery Meter
Restrict My Phone Number
This option is used to control the sending of your Personal
Communicator’s ID with the next call you make.
Show ID on Next Call
Select this option to send your Personal Communicator ID number with the next call.
Restrict ID on Next Call
This option prevents your Personal Communicator from sending its ID number with
the next call. You must select this option each time you want to restrict sending your
Personal Communicator’s ID number with a call.
Call Related Features
This option displays the approximate amount of remaining battery capacity. For
information on charging the battery, see page 20.
Call Forwarding
This feature allows you to forward your incoming calls to other phone
numbers.
You cannot set Call Forwarding when you are out of your network
coverage area.
97
Call Related Features
1039b80o.book Page 98 Monday, December 17, 2001 2:00 PM
98
Forward Voice Calls
Use this option to set up the details for forwarding voice calls.
1. Select Call Related Features from the Main menu and press (.
2. Select Call Forwarding and press (.
3. Select Forward Voice Calls and press (.
4. Select one of the following options:
• Forward When Unavailable - to forward incoming voice calls to a single
number when your Personal Communicator is unavailable. This option has
the same effect as turning all Detailed Forwarding options On and takes
priority over the Detailed Forwarding settings.
• Forward All Voice Calls - to forward incoming voice calls to a single
number. This option takes priority over all other Forward Voice Call settings.
• Detailed Forwarding - to forward voice calls to different numbers based on
whether your Personal Communicator is busy (in use), not reachable by the
network, or if it can be reached but you do not answer an incoming call.
5. When the Toggle menu appears, select On and press (.
6. Follow the prompts in the Contacts Entry screen to manually enter or select the
forwarding phone number. See “Searching for Personal Numbers in Your
Contacts List” on page 78 for more information.
Forward Data Calls
Use this option to set up the details for forwarding data calls.
1. Select Call Related Features from the Main menu and press (.
2. Select Call Forwarding and press (.
3. Select Forward Data Calls and press (.
4. When the Toggle menu appears, select On and press (.
5. Follow the prompts in the Contacts Entry screen to manually enter the
forwarding phone number or select it from your Contacts list. See “Searching
for Personal Numbers in Your Contacts List” on page 78 for more information.
Forward Fax Calls
Use this option to set up the details for forwarding fax calls.
1. Select Call Related Features from the Main menu and press (.
2. Select Call Forwarding and press (.
3. Select Forward Fax Calls and press (.
4. When the Toggle menu appears, select On and press (.
5. Follow the prompts in the Contacts Entry screen to manually enter the
forwarding phone number or select it from your Contacts list. See “Searching
for Personal Numbers in Your Contacts List” on page 78 for more information.
Call Related Features
1039b80o.book Page 99 Monday, December 17, 2001 2:00 PM
99
1039b80o.book Page 100 Monday, December 17, 2001 2:00 PM
Cancel All Forwarding
Select this option to turn Call Forwarding off for all incoming calls.
Call Related Features
Call Waiting
100
When the Call Waiting option is On, an audible alert and a call waiting
message notify you of a waiting call. Press ( to answer the call or ª
to reject it.
If you have Caller Line Identification, the caller’s number or name is
displayed instead of the Call Waiting message.
Call Barring
Call Barring allows you to block outgoing and incoming calls. If you change this
setting, you may be asked to enter your bar password. The initial bar password is
supplied by your service provider (to change this password, see “Change Bar
Password” on page 102). There is a short delay while the Personal Communicator
notifies the network of the new setting. When the change is made, the Personal
Communicator displays a confirmation message.
Note: This option may be affected by the setting of the Fixed Dialing feature.
Note: Call Barring is also known as Call Blocking.
Bar Outgoing Calls
1. Select Call Related Features from the Main menu and press (.
2. Select Call Barring and press (.
3. Select Bar Outgoing Calls and press (.
4. Select which calls you want to bar:
• Int’l Calls - bars all outgoing international calls.
• Int’l Calls Except Home - bars all outgoing international calls except those to
your home country.
• All Calls - bars all outgoing non-emergency calls.
• Off - turns Call Barring off for all calls.
5. If prompted for a password, enter your bar password (initially provided by your
service provider, see page 102 for information on changing it).
Bar Incoming Calls
1. Select Call Related Features from the Main menu and press (.
2. Select Call Barring and press (.
3. Select Bar Incoming Calls and press (.
4. Select which calls you want to bar:
• When Roaming - bars incoming calls when you are roaming.
• All Calls - bars all incoming calls.
• Off - turns Call Barring off for all calls.
5. If prompted for a password, enter your bar password (initially provided by your
service provider, see page 102 for information on changing it).
Call Related Features
1039b80o.book Page 101 Monday, December 17, 2001 2:00 PM
101
1039b80o.book Page 102 Monday, December 17, 2001 2:00 PM
Call Related Features
Cancel All Barring
Select this option to turn Call Barring off for all incoming and outgoing calls.
102
Change Bar Password
This option is used to change your bar password. The initial bar password is supplied
by your service provider.
1. Select Call Related Features from the Main menu and press (.
2. Select Call Barring and press (.
3. Select Change Bar Password and press (.
4. When prompted, enter the current bar password and the new 4-digit password.
You will be asked to enter the new password a second time for confirmation.
1039b80o.book Page 103 Monday, December 17, 2001 2:00 PM
Phone Setup
This menu is used to set up various features of your Personal Communicator, such
as security settings, alert tones, screen contrast, and Quick Access menus.
Adjust Ring Volume
Ring or Vibrate
When you receive a message or voice call, your Personal Communicator can alert
you by ringing, vibrating, or ringing and vibrating.
You can also set the Personal Communicator to No Ring or Vibrate. If you set No
Ring or Vibrate, you will not be notified when you receive an incoming voice call and
the Personal Communicator is closed.
Phone Setup
Select this option to increase or decrease the ringer volume of your Personal
Communicator. The ringer sounds as you use ! to adjust the volume level.
Downloadable Ring Tone
In addition to the standard ring tones, you can download one customized
ring tone to the Personal Communicator by sending the ring tone in a text
message. The ring tone can then be stored on the SIM card.
103
1039b80o.book Page 104 Monday, December 17, 2001 2:00 PM
Set Ringer Tone
Use this option to select a musical alert or standard ringing tone for incoming calls.
Each selection plays as you scroll through the list. Press ( to make your selection.
Set Alarm Ringer Tone
Use this option to turn the ringer tone for alarms on or off.
Phone Setup
Set Message Alert Tone
104
Use this option to select a musical alert or standard ringing tone for incoming text
messages. Each selection plays as you scroll through the list. Press ( to make
your selection.
Edit Music Tone
This option allows you to compose a musical alert and
send it via Text Messaging to another compatible
A A a A
C
G F G
Motorola phone. The alert can have up to 35 notes and
A5 A5 a2 A2 G2 F2 G5 C5
3 octaves.
• A to G on the keyboard are musical notes A to G.
r
View Options?
• R (rest) adds a pause. Press and hold R to extend
Edit Music Tone Example
the length of the pause.
• Add a P between a note and the duration to change the pitch to either Flat or
Sharp. Add a P anywhere else to change the pitch for all notes.
1039b80o.book Page 105 Monday, December 17, 2001 2:00 PM
Change the duration of a note or rest by placing the cursor between the note
and the duration indicator and entering a duration length (1 is the shortest, 6
is the longest and equals 1 second).
• Change the octave of the note by placing the cursor on the note and use ! to
increase or decrease it.
• Change the tempo of your tune to 1 (slowest), 4 (fastest), or 2 or 3 for
somewhere in between.
Now you are ready to listen (play) to your new tune. If you like it, you can save it, or
go back and edit it or erase it and compose a new one.
Send as a Text Message
Select this option to send your musical alert in a text message to another Motorola
phone. If you receive a music tone, you can play, save, or delete it.
Message Popup Alert
Phone Setup
•
When the Message Popup Alert setting is On, an animated envelope icon and
Message-Read Now screen are displayed when you receive a text message. You
can read the message immediately by pressing (.
When Message Popup Alert is Off, you can to continue using your Personal
Communicator without interruption and read new messages later.
105
1039b80o.book Page 106 Monday, December 17, 2001 2:00 PM
Phone Setup
Quick Access Setup
The Quick Access menu makes commonly used features of your Personal
Communicator available quickly through the use of icons, location numbers, and
Voice Tags rather than through the Main menu structure.
You can customize which features are represented in the Quick Access menu so you
can quickly get to the features you use the most. The Quick Access Setup option is
used to perform this customization.
To access the Quick Access menu, press ¢ from any screen.
For more information on customizing and using the Quick Access menu, see “Quick
Access Menu” on page 120 .
Phone Lock
You can lock your Personal Communicator to prevent others from using it.
Automatic Lock
When this setting is On, your Personal Communicator is locked automatically when
it is turned on. To use it, enter the unlock code.
Lock Now
Select this option to immediately lock your Personal Communicator. To use it again,
enter the unlock code.
106
1039b80o.book Page 107 Monday, December 17, 2001 2:00 PM
Change Unlock Code
Use this option to change your unlock code. Select Phone Lock from the Phone
Setup menu, then follow the prompts to enter a new unlock code. The code set by
the manufacturer is 1234. If this code does not work, check with your service
provider.
This option allows you to lighten or darken the display screen.
Require SIM Card PIN
When this setting is On, you must enter your SIM card PIN each time the SIM card
is inserted or your Personal Communicator is turned on.
Note: This option is not available if the SIM card does not support PIN code
disabling.
Phone Setup
Adjust Contrast
Change SIM PIN Code
To change your SIM card PIN:
1. Select Phone Setup from the Main menu and press (.
2. Select Require SIM Card PIN and press (.
3. Select Change SIM PIN Code and press (.
4. Follow the prompts to enter the current and new SIM card PIN codes.
107
1039b80o.book Page 108 Monday, December 17, 2001 2:00 PM
Change SIM PIN2 Code
You can change your SIM PIN2 code just like your standard SIM code
by selecting this option from the Phone Setup menu.
Caution: If you enter your SIM PIN2 code incorrectly 3 times in a row,
the Personal Communicator locks up, see “Entering Your Unlock
Code” on page 21.
Phone Setup
Unblocking Your V101 Personal Communicator
If you are blocked from accessing your V101 Personal Communicator, use the
following key sequence and the 8-digit PIN unblocking code provided by your service
provider to unblock it. The new PIN code must contain 4 to 8 digits.
† † ‡ … †
Unblock Code ( New PIN Code ( New PIN Code (
Caution: If the unblocking operation is performed incorrectly 10 times in a row, the
SIM card will become permanently blocked. Contact your service provider if this
happens.
New Security Code
108
Use this option to change your security code. Select New Security Code from the
Phone Setup menu, then follow the prompts to enter a new code. The security code
must be 6 digits.
The security code set by the manufacturer is 000000. If this code does not work,
check with your service provider.
1039b80o.book Page 109 Monday, December 17, 2001 2:00 PM
Extended Menus
This option turns extended menus on or off. When Extended Menus are off, you
cannot access any of the extended features. See “Short and Extended Menus” on
page 31 for more information.
Select this option to display the current time and date. Press any key to exit this
screen.
Set Time and Date
Select this option to set the current time and date. Enter the date in the international
date format (day/month/year).
Set Time Format
Phone Setup
Show Time and Date
Use this option to change the time to either 12-hour or 24-hour format.
Backlight
This option controls the keypad backlight. The Normal setting sets the backlight to
come on any time you press a button to remain on during keyboard activity. The
Continuous setting keeps the backlight on until you select either Normal or Off.
Selecting Off helps your battery last longer by preventing the backlight from coming
on during keyboard activity.
109
1039b80o.book Page 110 Monday, December 17, 2001 2:00 PM
Language Selection
This option allows you to select a language for all prompts and help messages.
Battery Saving Mode
Set this feature to On to help your battery last longer. All status indicators and the
backlight for incoming Cell Broadcast messages are turned off.
Phone Setup
Select Keypad Tones
110
Set this feature if you want to hear tones when you press the buttons on your
Personal Communicator. Select No Tones to make button presses silent.
Phone Status
The Phone Status option lets you review your Personal Communicator settings and
perform Master Clear and Master Reset operations.
Status Review
Select this option to list the menus that have been changed from the default settings.
Master Reset
Caution: Using Master Reset restores certain options to their default settings.
A Master Reset:
• Cancels automatic answer, audible call timers, in-call display meter, battery
saver, auxiliary alert, automatic hands-free, automatic lock, and cell broadcast.
1039b80o.book Page 111 Monday, December 17, 2001 2:00 PM
Restores language selection, band selection, and extended menus to their
default settings.
• Restores keypad tones to normal, ringer tones to standard, text message alert
tones to standard, volume level to medium, and network search frequency to
medium.
Master Clear
Caution: A Master Clear deletes all of the entries in your Contacts list.
A Master Clear performs the same operations as a Master Reset and also:
• Clears the Contacts list from the phone memory (but not from SIM memory).
• Clears the last 10 calls you made, received, and missed.
• Clears the Message Editor.
• Resets call timers.
• Erases all recorded voice notes and Voice Tags.
Master Clear does not clear:
• Fixed Dial list
• My Phone Number(s) list
• Charge meters
• Received and outgoing messages list
• Voice mail number
• Service center number
• Lifetime timer
Phone Setup
•
111
1039b80o.book Page 112 Monday, December 17, 2001 2:00 PM
Network Selection
Network Selection
The Network Selection menu is used to set the band required to operate the
Personal Communicator and to search for and register with a service network.
To make and receive calls, your Personal Communicator must be registered with a
network.
Your Personal Communicator automatically searches for the last network used. If
this network is not available, your Personal Communicator attempts to register with
a different network.
When your Personal Communicator attempts to register with a different network, it
generates a list of networks sorted in the following order:
• The Home network.
• Networks from a preferred list.
• A random list of other networks found above a certain signal strength.
• All remaining networks in descending order of signal strength.
Change Band
This option is used to set the band required to operate your Personal Communicator:
• Select 1900 when using the Personal Communicator in the U.S.
• Select 900/1800 when using the Personal Communicator outside of the U.S.
112
1039b80o.book Page 113 Monday, December 17, 2001 2:00 PM
This option lists the networks operating in your area. When scanning is complete,
a list is displayed. When you find a network you want to register with or store in the
preferred network list, press (. Follow the prompts to register and store your
selection.
Note: The menu options to Register Now, Make Preferred, and Switch View are
displayed only if a network is available in your area.
Network Search
The setting of this option determines how often your Personal Communicator
attempts to register with a network and how the attempt is made.
Registration Preferences
Set this option to Automatic Search (performed by your Personal Communicator) or
to Manual Search (performed by you).
• Automatic Search - Your Personal Communicator automatically generates a
list of networks and then tries to register with the first network in the list. If
registration fails, it tries to register with the next listed network. If registration
totally fails, it starts searching all over again.
• Manual Search - Your Personal Communicator provides a list of networks from
which to choose. If registration is successful, the network name is displayed. If
registration fails, the list is displayed so you can select another network.
Network Selection
Available Networks
113
1039b80o.book Page 114 Monday, December 17, 2001 2:00 PM
Frequency of Search
You can set how quickly your Personal Communicator tries to re-register: slow,
medium, fast, or continuous search.
Note: Fast and continuous searches may use up a lot of battery power.
Network Selection
Preferred Networks
114
Add Network to Preferred List
You can add networks to your preferred list.
• If you choose from the available list, the Personal Communicator scans for the
networks in your area, then displays the list. To store one in your preferred list,
follow the instructions provided by your Personal Communicator.
• You can select from a list of known networks, then store it in your preferred list.
• To add a new network code, follow the instructions provided by your Personal
Communicator to enter the service provider number before storing it in your
preferred list.
Show List of Networks
You can have your Personal Communicator display a list of preferred networks. From
the list, you can select one, move it, delete it, or have your Personal Communicator
display the information for the network.
Note: The menu options Move to New Location, Delete Selection, and Switch View
are displayed only if you have one or more preferred networks stored. Otherwise,
Empty is displayed.
1039b80o.book Page 115 Monday, December 17, 2001 2:00 PM
Find New Network
When you select this option, your Personal Communicator attempts to register
with a network other than your current network. If the attempt fails, your Personal
Communicator tries to register with the previous network.
You can have your Personal Communicator keep track of your calling time and
charges. You can also have audible alert tones tell you how long you have been on
a call. Your Personal Communicator can accept values up to 21 digits, although
during calls it can display only the last 12 digits. You can also set a maximum charge
limit so your Personal Communicator monitors either the number of units used or the
call charges, and does not allow the limit to be exceeded.
Note: Call cost information is available only if you receive the Advice of Charge
service. If you do not receive this service, then only time meters are available.
Call Meters Menu
Call Meters Menu
Show Call Charges
You can find out the charges for last call, the total for all your calls, and
how much credit you have left.
Note: If you do not have the Advice of Charge service, your Personal
Communicator keeps track of only the length of the call.
115
1039b80o.book Page 116 Monday, December 17, 2001 2:00 PM
Show Call Timers
Call Meters Menu
Find out how long you talked during your last call, or the total time for all your calls.
You can also reset all your timers to 0.
Note: If you do not receive the Advice of Charge service, either all calls or only
outgoing calls are timed.
Set Audible Call Timers
You can set single or repetitive audible alerts at preset times to help you keep track
of your time and charges. When the timer is set, your Personal Communicator
sounds an alert 10 seconds before the end of the programmed time.
Set In-Call Display
Set this option to display the time or charge meters during a call.
Note: If you have a total charge limit set, your remaining credit is always displayed.
Show Time Per Call
Displays the time meter during your calls.
Note: If you have the Advice of Charge service, your chargeable calls are always
displayed.
116
Show Charge Per Call and Show Total Call Charges
These two options display the call charges meter during and after
chargeable calls. The meter shows phone units or currency depending
on your charge type setting (unit or currency).
Note: If you do not receive the Advice of Charge service, either all calls
or only outgoing calls are timed, depending on the Personal Communicator model
you have.
No In-Call Display
Use this feature to turn off the display of time and charges.
Call Charge Settings
If you receive the Advice of Charge service, you can customize your settings.
Reset Call Charges
Use this to reset all your meters to 0.
Call Meters Menu
1039b80o.book Page 117 Monday, December 17, 2001 2:00 PM
Set Total Charge Limit
You can set a maximum limit for call charges. When your limit is reached, the network
does not allow you to receive any more chargeable calls.
If you turn this option on, you are prompted to enter a new limit. Enter the amount as
either units or currency, depending on the Set Charge Type setting. Units must be
117
1039b80o.book Page 118 Monday, December 17, 2001 2:00 PM
entered as whole numbers and currency is entered by name, for example, USD for
US dollars.
Once the limit is reached, reset call charges or turn this option off to make more
chargeable calls.
Calculator
Lifetime Timer
118
Displays the total time of all calls that have been made on your Personal
Communicator.
Note: This timer cannot be reset.
Calculator
The calculator performs basic mathematical calculations (addition, subtraction,
multiplication, and division) and provides currency conversions. To open the
calculator, select Calculator from the Main menu.
Note: When using the calculator, press ª to clear the most recent number from
the upper right corner of the screen. Press and hold ª, or select CE, to clear the
entire calculation.
1039b80o.book Page 119 Monday, December 17, 2001 2:00 PM
1. Enter the first number for the calculation. To enter a decimal point, use ! to
select the decimal point symbol, press (, and continue to enter the rest of the
number.
2. Use ! to move left or right until the correct function symbol is selected, then
press (.
3. Enter the second number for the calculation.
4. Use ! so that = is selected and press (. The result of the calculation is
displayed in the upper right corner of the screen.
Convert Currency
To set the exchange rate:
1. Use ! to move left or right until $ is selected and press ™.
2. When prompted, enter the exchange rate and press (. Press # to enter a
decimal point in the exchange rate.
Note: The exchange rate can be up to 10 digits (including the decimal point).
Once you enter an exchange rate, the Personal Communicator uses that rate until
you change it.
Calculator
Perform Basic Mathematical Calculations
119
1039b80o.book Page 120 Monday, December 17, 2001 2:00 PM
Quick Access Menu
To calculate the exchange rate:
1. Enter the amount you want to convert. To enter a decimal point, use ! to
select the decimal point symbol, press (, and continue to enter the rest of the
number.
2. Use ! to move left or right until $ is selected and press (. The converted
rate is displayed in the upper right corner of the screen.
120
Quick Access Menu
a1 W2 O3
While the features in your Personal Communicator
are available through easy-to-use menus, some of
R4 K5 L6
the most commonly used features are also available
Read Messages?
in the Quick Access menu. Each Quick Access
Quick Access Menu Example
feature is represented by an icon and is assigned a
location number from 1 to 9. A selected icon has a
dark background, and the feature name is displayed at the bottom of the screen.
Press ¢ to display the Quick Access menu. The example represents some of the
features you can set up in your Quick Access menu.
With appropriate setup, you can use a Quick Access feature by:
• Pressing ¢ and saying the Voice Tag name.
• Pressing ¢ and entering the location number.
• Pressing ¢, using ! to highlight the icon, and pressing ( to select it.
You can change the features represented in the Quick Access menu and also their
positions.
1039b80o.book Page 121 Monday, December 17, 2001 2:00 PM
1. From the Phone Setup menu, select Quick Access Setup.
2. Use ! to scroll to the feature you want to add, then press (.
3. Select Assign Key to Feature and press (.
4. When prompted, press any number from 1 to 9.
Note: If a feature is already stored in the location number you choose, the new
feature takes that location and the older feature is automatically removed.
Add or Edit a Quick Access Voice Tag
You can assign a Voice Tag to each of the 9 Quick Access Menu features.
1. From the Phone Setup menu, select Quick Access Setup.
2. Highlight the feature and press (.
3. Select Add or Edit Voice Tag and press (.
4. When prompted, record a Voice Tag name. If there is a matching Voice Tag, the
Personal Communicator repeats the name and displays the entry.
5. When recording is successful, your Personal Communicator displays a
message that the tag has been stored and returns to the Quick Access Setup
menu. If the recording is not successful, your Personal Communicator prompts
you to record the Voice Tag again.
Quick Access Menu
Add Features to the Quick Access Menu
121
1039b80o.book Page 122 Monday, December 17, 2001 2:00 PM
Quick Access Menu
Important Notes:
• If a Quick Access feature has a Voice Tag assigned to it and you attempt to
display the Quick Access menu while wearing your headset, you must say the
tag name, or your Personal Communicator returns to the Standby screen.
• If you are not wearing your headset, your Personal Communicator prompts for
a tag name, then displays the Quick Access menu after a few seconds.
122
Delete a Quick Access Voice Tag
Note: Highlight the Quick Access feature that has the Voice Tag you want to delete
and press (. This option is not displayed if there are no Voice Tags to delete.
1039b80o.book Page 123 Monday, December 17, 2001 2:00 PM
A
Games
You can play three different games on your Motorola V101 Personal
Communicator when you select Games from the Main menu. Your choices are
Towers of Hanoi, Baccarat, and Bricks. When you select a game, you can start a new
game, continue with a saved game, or see what your best score is for that game.
Note: Prolonged playing of games may shorten battery life.
You can close a game at any time by pressing ª. At the End Game prompt, press
ª to return to the game or ( to save the game so you can finish it later.
While playing a game, the playing state can be interrupted when you receive an
incoming call, the alarm expires, or the battery is discharging. Press ª to return to
the game or ( to save the game so you can finish it later.
Games
Closing and Saving a Game
Towers of Hanoi
This game involves skill and logic and is intended for only one player. The skill levels
range from 3 to 7 and indicate the number of disks in the game. The more disks in a
game, the more difficult the game. When you start the game, disks of different
lengths are stacked on a center pole. The object of the game is to stack the disks in
ascending order with the smallest disk at the top and the largest disk at the bottom.
123
1039b80o.book Page 124 Monday, December 17, 2001 2:00 PM
When you successfully move all disks from the center pole to any other pole, you
win the game.
A
Games
Game Rules
• Only one disk can be moved at a time.
• You can move only the top disk on the stack.
• Larger disks cannot be stacked onto smaller disks.
How to Play
When you select a new game, enter the skill level you want to play (3 - 7).
1. Press the up portion of ! to select a disk. A gap between disks indicates that
disk has been moved up.
2. Press the left or right portions of ! to move to another pole. A square cursor
above the pole indicates your location.
3. Press the down portion of ! to move a selected disk to a new pole.
4. Continue with steps 1 - 3 until you move all disks to a new pole.
Baccarat
The object of this game is to predict which hand will get closest to 9 points, or if there
will be a tie game. The two hands are P for player and B for banker.
124
1039b80o.book Page 125 Monday, December 17, 2001 2:00 PM
Games
How to Play
1. When a new hand is started, select hand B, P, or a tie, then press (.
2. Enter the amount of the wager, then press (. The wager should be from 5 to
500 points, or your current balance.
3. At the prompt, press ( to deal the cards. The cards for both B and P hands
flash and are displayed for a limited time.
A
Game Rules
The game starts by placing a wager on hand P, B, or whether there will be a tie.
Each player is given 2 cards. A third card may be given to P and/or B.
• The hand with points closest to 9 wins the game. If points total more than 10,
subtract 10 and the remainder is the number of points. For example, 8 (for P) +
8 (for P) = 16; subtract 10 from 16 for a total of 6.
• If either P or B wins, all winning wagers pay evenly. If you win by betting on B,
then B receives a 5% commission. If you win by betting on a tie, you get 8 times
the amount of your wager, otherwise, the wager is returned.
• Ace cards equal one point, tens and face cards (Kings, Queen, and Jacks)
equal zero. All other cards equal the point value stated on the card.
125
1039b80o.book Page 126 Monday, December 17, 2001 2:00 PM
A
Games
Bricks
This fun game is intended for a single player. In this game, there is a set of bricks
at the top of the display, a paddle at the bottom, and a moving ball. The object of the
game is to strike the ball with the paddle, causing the ball to move diagonally and hit
the bricks at the top, without letting the ball hit the bottom boundary. The direction of
the ball is determined by the angle when the paddle hits it, head on or sideways. The
ball can hit more than one brick at a time. When a brick is hit by the ball, it
disappears, increasing the game score by the number of points assigned to that
brick.
The bricks in the fifth row have a point value of 30, the fourth-row bricks are
25 points, third-row bricks are 20 points, second-row bricks are 15 points, and the
first-row bricks are 10 points.
Game Rules
• The game ends if the ball hits the bottom boundary or if all bricks are hit.
• The paddle area is determined by the left and right boundaries. The paddle will
not wrap around the screen to the other side.
How to Play
• When a new game is started, the paddle is located in the center of the screen
in the lower boundary. The ball is located just above the paddle.
126
1039b80o.book Page 127 Monday, December 17, 2001 2:00 PM
•
Games
•
•
The first movement of the ball is automatic and happens at a random angle.
Thereafter, it moves according to the way in which it hits any surface.
Use the left and right portion of ! to move the paddle to the left and right.
The object of the game is to hit all bricks without letting the ball touch the
bottom boundary.
When a game ends, the screen flashes and the game results are displayed.
A
•
127
1039b80o.book Page 128 Monday, December 17, 2001 2:00 PM
Special Symbols
Special Symbols
To enter a special symbol, press £ ¥ and the keyboard character from the
following table. Multiple presses of the key may be required to access the symbol.
For example, to type è, press £ ¥, then press E twice.
128
Keyboard
Character
E
T
Y
U
I
O
P
A
S
F
G
£
¥
1 time
é
θ
ψ
ü
ì
ö
Π
ä
Σ
Φ
Γ
£
¥
4 times
£
¥
5 times
£
¥
6 times
ò
Ω
Ö
Ø
à
æ
Ä
Å
£
¥
2 times
è
£
¥
3 times
É
¥
ù
Ü
ø
å
§
£
¥
7 times
Æ
1039b80o.book Page 129 Monday, December 17, 2001 2:00 PM
L
Z
C
B
N
?/
!:
£
¥
1 time
Λ
Ξ
Ç
β
ñ
¿
i
£
¥
2 times
Ñ
£
¥
3 times
£
¥
4 times
£
¥
5 times
£
¥
6 times
£
¥
7 times
Special Symbols
Keyboard
Character
129
1039b80o.book Page 130 Monday, December 17, 2001 2:00 PM
Troubleshooting
Troubleshooting
What to do if...
130
Personal
Communicator
does not turn on
• Check the battery. Is it charged, properly fitted, and are
the contacts clean and dry?
You can’t make
calls
• Check the signal strength meter. If the signal is weak,
move to an open space or, if in a building, move close to
a window.
• Check your network settings. Try to select another
network.
• Check your coverage map. Are restrictions set?
• Check your Call Barring and Fixed Dialing settings.
• Have you reached your call charge limit? Reset your
limit or contact your service provider.
• Have you inserted a new SIM card? Make sure no new
restrictions have been imposed.
You can’t cancel
Call Forwarding or
Call Barring
• Wait until you are in an area with good network
coverage and try again.
You can’t receive
calls
• Check the signal strength meter. If the signal is weak,
move to an open space or, if in a building, move closer
to a window.
• Check Call Forwarding and Call Barring settings. Check
Ringer and VibraCall® settings. If both are off, there is no
audible alert.
Personal
Communicator
won’t unlock
• Have you inserted a new SIM card? Enter the new PIN
code.
• Do you have a replacement Personal Communicator?
Enter the default unlock code of 1234.
• Did you forget your unlock code? Press ™ to change it
(you will need your security code).
Your PIN is blocked • Enter the PIN unblocking code supplied with your SIM
card.
Your PIN2 is
blocked
• Enter the PIN2 unblocking code supplied with your SIM
card.
The I symbol is
flashing
• There is not enough memory available to store another
text message. Use the Messages menu to delete one or
more existing messages.
Troubleshooting
1039b80o.book Page 131 Monday, December 17, 2001 2:00 PM
131
Troubleshooting
1039b80o.book Page 132 Monday, December 17, 2001 2:00 PM
132
Your SIM card
won’t work
• Is the card inserted correctly?
• Is it chipped, scratched, or visibly damaged? Return it to
your service provider.
• Check the SIM contacts. If dirty, clean them with an
antistatic cloth.
You can’t make
international calls
• Some service providers block the ability to make
international calls. Contact your Service Provider.
• Have you included the correct codes? Press and
hold 0 (zero) to display the international dialing prefix (+)
and then enter the country code followed by the phone
number.
The battery won’t
charge
• Check the charger. Is it properly connected? Are its
contacts clean and dry?
• Check the battery contacts. Are they clean and dry?
• Check the battery temperature. If it is warm, let it cool
before recharging.
• Is it an old battery? Replace the battery.
• Are you using a Motorola original battery? Your charging
system may not be able to communicate with your
battery.
The battery icon
and meters are
missing
• Are you using a Motorola original battery? Your charging
system may not be able to communicate with your
battery.
The battery loses
charge faster than
normal
• Are you in an area of variable coverage? This uses extra
battery power.
• Is it a new battery? A new battery needs two to three
charge/discharge cycles to attain normal performance.
• Is it an old battery? Battery performance declines after
several years of use.
• Is it a battery that hasn’t been completely discharged?
Allow the battery to fully discharge (until the Personal
Communicator turns itself off) and then charge the
battery overnight.
• Check that the Frequency Of Search feature in the
Network Selection menu has not been set to Fast or
Continuous.
• Check that the Battery Saving Mode feature has not
been set to Off.
• Are you using your Personal Communicator in extreme
temperatures? At extreme hot or cold temperatures,
battery performance is significantly reduced.
Troubleshooting
1039b80o.book Page 133 Monday, December 17, 2001 2:00 PM
133
1039b80o.book Page 134 Monday, December 17, 2001 2:00 PM
Use and Care
glub
Use and Care
XXX
134
Clean with a soft cloth
dampened with
soap and water.
Do not immerse in water.
Do not use alcohol or other
cleaning solutions.
Do not expose to
excessive heat ...
... or extreme shock ...
... or moisture.
Questions?
If you have any questions about the use of your Motorola Personal Communicator,
please call:
USA
1-800-331-6456
TTY (Text Telephone)
1-888-390-6456
Canada
1-800-461-4575
TTY (Text Telephone)
1-888-390-6456
Use and Care
1039b80o.book Page 135 Monday, December 17, 2001 2:00 PM
If you have questions about your text messaging service, contact your text
messaging service provider. For information about other Motorola products, visit our
web site at www.motorola.com, or in Canada www.motorola.ca.
135
1039b80o.book Page 136 Monday, December 17, 2001 2:00 PM
Radio Waves Exposure Statement
Radio Waves Exposure Statement
136
THIS MODEL PHONE MEETS THE GOVERNMENT’S REQUIREMENTS FOR
EXPOSURE TO RADIO WAVES.
Your wireless phone is a radio transmitter and receiver. It is designed and
manufactured not to exceed limits for exposure to radio frequency (RF) energy set
by the U.S. Federal Communications Commission for the United States and by
Health Canada for Canada. These limits are part of comprehensive guidelines and
establish permitted levels of RF energy for the general population. The guidelines
are based on standards that were developed by independent scientific organizations
through periodic and thorough evaluation of scientific studies. The standards include
a substantial safety margin designed to assure the safety of all persons, regardless
of age or health.
The exposure standard for wireless mobile phones employs a unit of measurement
known as the Specific Absorption Rate, or SAR. The SAR limit set by the FCC and
by Health Canada is 1.6W/kg.1 Tests for SAR are conducted using standard
operating positions accepted by the FCC and by Industry Canada with the phone
transmitting at its highest certified power level in all tested frequency bands.
Although the SAR is determined at the highest certified power level, the actual SAR
level of the phone while operating can be well below the maximum value. This is
because the phone is designed to operate at multiple power levels so as to use only
1039b80o.book Page 137 Monday, December 17, 2001 2:00 PM
Before a phone model is available for sale to the public in the U.S. and Canada, it
must be tested and certified to the FCC and Industry Canada that it does not exceed
the limit established by each government-adopted requirement for safe exposure.
The tests are performed in positions and locations (e.g., at the ear and worn on the
body) reported to the FCC and available for review by Industry Canada. The highest
SAR value for this model phone when tested for use at the ear is 0.14 W/kg2 and
when worn on the body, as described in this user guide, is 0.04 W/kg.2 (Body-worn
measurements differ among phone models, depending upon available accessories
and regulatory requirements). While there may be differences between the SAR
levels of various phones and at various positions, they all meet the governmental
requirements for safe exposure.
The FCC and Industry Canada have granted an Equipment Authorization for this
model phone with all reported SAR levels evaluated as being in compliance with the
FCC and Health Canada RF exposure guidelines. SAR information on this model
phone is on file with the FCC and can be found under the Display Grant section of
http://www.fcc.gov/oet/fccid after searching on FCC ID IHDT6AW1. You may also
refer to Motorola's website: www.motorola.com/rfhealth. Additional information on
Specific Absorption Rates (SAR) can be found on the Cellular Telecommunications
Radio Waves Exposure Statement
the power required to reach the network. In general, the closer you are to a wireless
base station antenna, the lower the power output.
137
1039b80o.book Page 138 Monday, December 17, 2001 2:00 PM
& Internet Association (CTIA) website at http://phonefacts.net or the Canadian
Wireless Telecommunications Association (CWTA) website, http://www.cwta.ca.
Radio Waves Exposure Statement
ITC01-064
138
______________________________________________________
1 In the United States and Canada, the SAR limit for mobile phones used by
the public is 1.6 watts/kg (W/kg) averaged over one gram of tissue. The
standard incorporates a substantial margin of safety to give additional
protection for the public and to account for any variations in measurements.
2
Additional related information includes the Motorola testing protocol,
assessment procedure, and measurement uncertainty range for this product.
ITC01-064
1039b80o.book Page 139 Monday, December 17, 2001 2:00 PM
The U.S. Food and Drug Administration's
Center for Devices and Radiological
Health Consumer Update on Mobile
Phones
FDA has been receiving inquiries about the safety of mobile phones, including
cellular phones and PCS phones. The following summarizes what is known--and
what remains unknown--about whether these products can pose a hazard to health,
and what can be done to minimize any potential risk. This information may be used
to respond to questions.
Why the concern?
Mobile phones emit low levels of radiofrequency energy (i.e., radiofrequency
radiation) in the microwave range while being used. They also emit very low levels
of radiofrequency energy (RF), considered non-significant, when in the stand-by
mode. It is well known that high levels of RF can produce biological damage through
heating effects (this is how your microwave oven is able to cook food). However, it is
not known whether, to what extent, or through what mechanism, lower levels of RF
might cause adverse health effects as well. Although some research has been done
to address these questions, no clear picture of the biological effects of this type of
FDA Update for Mobile Phones
FDA Update for Mobile Phones
139
1039b80o.book Page 140 Monday, December 17, 2001 2:00 PM
FDA Update for Mobile Phones
radiation has emerged to date. Thus, the available science does not allow us to
conclude that mobile phones are absolutely safe, or that they are unsafe. However,
the available scientific evidence does not demonstrate any adverse health effects
associated with the use of mobile phones.
140
What kinds of phones are in question?
Questions have been raised about hand-held mobile phones, the kind that have a
built-in antenna that is positioned close to the user's head during normal telephone
conversation. These types of mobile phones are of concern because of the short
distance between the phone's antenna--the primary source of the RF--and the
person's head. The exposure to RF from mobile phones in which the antenna is
located at greater distances from the user (on the outside of a car, for example) is
drastically lower than that from hand-held phones, because a person's RF exposure
decreases rapidly with distance from the source. The safety of so-called “cordless
phones,” which have a base unit connected to the telephone wiring in a house and
which operate at far lower power levels and frequencies, has not been questioned.
How much evidence is there that hand-held mobile phones
might be harmful?
Briefly, there is not enough evidence to know for sure, either way; however, research
efforts are on-going. The existing scientific evidence is conflicting and many of the
studies that have been done to date have suffered from flaws in their research
methods. Animal experiments investigating the effects of RF exposures
characteristic of mobile phones have yielded conflicting results. A few animal
studies, however, have suggested that low levels of RF could accelerate the
development of cancer in laboratory animals. In one study, mice genetically altered
to be predisposed to developing one type of cancer developed more than twice as
many such cancers when they were exposed to RF energy compared to controls.
There is much uncertainty among scientists about whether results obtained from
animal studies apply to the use of mobile phones. First, it is uncertain how to apply
the results obtained in rats and mice to humans. Second, many of the studies that
showed increased tumor development used animals that had already been treated
with cancer-causing chemicals, and other studies exposed the animals to the RF
virtually continuously--up to 22 hours per day.
For the past five years in the United States, the mobile phone industry has supported
research into the safety of mobile phones. This research has resulted in two findings
in particular that merit additional study:
In a hospital-based, case-control study, researchers looked for an association
between mobile phone use and either glioma (a type of brain cancer) or acoustic
neuroma (a benign tumor of the nerve sheath). No statistically significant association
was found between mobile phone use and acoustic neuroma. There was also no
association between mobile phone use and gliomas when all types of gliomas were
FDA Update for Mobile Phones
1039b80o.book Page 141 Monday, December 17, 2001 2:00 PM
141
FDA Update for Mobile Phones
1039b80o.book Page 142 Monday, December 17, 2001 2:00 PM
142
considered together. It should be noted that the average length of mobile phone
exposure in this study was less than three years.
When 20 types of glioma were considered separately, however, an association was
found between mobile phone use and one rare type of glioma,
neuroepithelliomatous tumors. It is possible with multiple comparisons of the same
sample that this association occurred by chance. Moreover, the risk did not increase
with how often the mobile phone was used, or the length of the calls. In fact, the risk
actually decreased with cumulative hours of mobile phone use. Most cancer causing
agents increase risk with increased exposure. An ongoing study of brain cancers by
the National Cancer Institute is expected to bear on the accuracy and repeatability
of these results.(1)
Researchers conducted a large battery of laboratory tests to assess the effects of
exposure to mobile phone RF on genetic material. These included tests for several
kinds of abnormalities, including mutations, chromosomal aberrations, DNA strand
breaks, and structural changes in the genetic material of blood cells called
lymphocytes. None of the tests showed any effect of the RF except for the
micronucleus assay, which detects structural effects on the genetic material. The
cells in this assay showed changes after exposure to simulated cell phone radiation,
but only after 24 hours of exposure. It is possible that exposing the test cells to
radiation for this long resulted in heating. Since this assay is known to be sensitive
to heating, heat alone could have caused the abnormalities to occur. The data
already in the literature on the response of the micronucleus assay to RF are
conflicting. Thus, follow-up research is necessary.(2)
FDA is currently working with government, industry, and academic groups to ensure
the proper follow-up to these industry-funded research findings. Collaboration with
the Cellular Telecommunications Industry Association (CTIA) in particular is
expected to lead to FDA providing research recommendations and scientific
oversight of new CTIA-funded research based on such recommendations.
Two other studies of interest have been reported recently in the literature:
Two groups of 18 people were exposed to simulated mobile phone signals under
laboratory conditions while they performed cognitive function tests. There were no
changes in the subjects' ability to recall words, numbers, or pictures, or in their
spatial memory, but they were able to make choices more quickly in one visual test
when they were exposed to simulated mobile phone signals. This was the only
change noted among more than 20 variables compared.(3)
In a study of 209 brain tumor cases and 425 matched controls, there was no
increased risk of brain tumors associated with mobile phone use. When tumors did
exist in certain locations, however, they were more likely to be on the side of the head
where the mobile phone was used. Because this occurred in only a small number of
cases, the increased likelihood was too small to be statistically significant.(4)
FDA Update for Mobile Phones
1039b80o.book Page 143 Monday, December 17, 2001 2:00 PM
143
FDA Update for Mobile Phones
1039b80o.book Page 144 Monday, December 17, 2001 2:00 PM
144
In summary, we do not have enough information at this point to assure the public that
there are, or are not, any low incident health problems associated with use of mobile
phones. FDA continues to work with all parties, including other federal agencies and
industry, to assure that research is undertaken to provide the necessary answers to
the outstanding questions about the safety of mobile phones.
What is known about cases of human cancer that have been
reported in users of hand-held mobile phones?
Some people who have used mobile phones have been diagnosed with brain cancer.
But it is important to understand that this type of cancer also occurs among people
who have not used mobile phones. In fact, brain cancer occurs in the U.S. population
at a rate of about 6 new cases per 100,000 people each year. At that rate, assuming
80 million users of mobile phones (a number increasing at a rate of about 1 million
per month), about 4800 cases of brain cancer would be expected each year among
those 80 million people, whether or not they used their phones. Thus it is not possible
to tell whether any individual's cancer arose because of the phone, or whether it
would have happened anyway. A key question is whether the risk of getting a
particular form of cancer is greater among people who use mobile phones than
among the rest of the population. One way to answer that question is to compare the
usage of mobile phones among people with brain cancer with the use of mobile
phones among appropriately matched people without brain cancer. This is called a
case-control study. The current case-control study of brain cancers by the National
1039b80o.book Page 145 Monday, December 17, 2001 2:00 PM
Cancer Institute, as well as the follow-up research to be sponsored by industry, will
begin to generate this type of information.
Under the law, FDA does not review the safety of radiation-emitting consumer
products such as mobile phones before marketing, as it does with new drugs or
medical devices. However, the agency has authority to take action if mobile phones
are shown to emit radiation at a level that is hazardous to the user. In such a case,
FDA could require the manufacturers of mobile phones to notify users of the health
hazard and to repair, replace, or recall the phones so that the hazard no longer
exists.
Although the existing scientific data do not justify FDA regulatory actions at this time,
FDA has urged the mobile phone industry to take a number of steps to assure public
safety. The agency has recommended that the industry:
• support needed research into possible biological effects of RF of the type
emitted by mobile phones;
• design mobile phones in a way that minimizes any RF exposure to the user that
is not necessary for device function; and
• cooperate in providing mobile phone users with the best possible information
on what is known about possible effects of mobile phone use on human health.
FDA Update for Mobile Phones
What is FDA's role concerning the safety of mobile phones?
145
1039b80o.book Page 146 Monday, December 17, 2001 2:00 PM
FDA Update for Mobile Phones
•
146
At the same time, FDA belongs to an interagency working group of the federal
agencies that have responsibility for different aspects of mobile phone safety to
ensure a coordinated effort at the federal level. These agencies are:
• National Institute for Occupational Safety and Health
• Environmental Protection Agency
• Federal Communications Commission
• Occupational Health and Safety Administration
• National Telecommunications and Information Administration
The National Institutes of Health also participates in this group.
In the absence of conclusive information about any possible
risk, what can concerned individuals do?
If there is a risk from these products--and at this point we do not know that there is-it is probably very small. But if people are concerned about avoiding even potential
risks, there are simple steps they can take to do so. For example, time is a key factor
in how much exposure a person receives. Those persons who spend long periods
of time on their hand-held mobile phones could consider holding lengthy
conversations on conventional phones and reserving the hand-held models for
shorter conversations or for situations when other types of phones are not available.
People who must conduct extended conversations in their cars every day could
switch to a type of mobile phone that places more distance between their bodies and
the source of the RF, since the exposure level drops off dramatically with distance.
For example, they could switch to:
• a mobile phone in which the antenna is located outside the vehicle,
• a hand-held phone with a built-in antenna connected to a different antenna
mounted on the outside of the car or built into a separate package, or
• a headset with a remote antenna to a mobile phone carried at the waist.
Again, the scientific data do not demonstrate that mobile phones are harmful. But if
people are concerned about the radiofrequency energy from these products, taking
the simple precautions outlined above can reduce any possible risk.
Where can I find additional information?
For additional information, see the following websites:
Federal Communications Commission (FCC) RF Safety Program (select
“Information on Human Exposure to RF Fields from Cellular and PCS Radio
Transmitters”): http://www.fcc.gov/oet/rfsafety
World Health Organization (WHO) International Commission on Non-Ionizing
Radiation Protection (select Qs & As): http://www.who.int/emf
United Kingdom, National Radiological Protection Board:
http://www.nrpb.org.uk
FDA Update for Mobile Phones
1039b80o.book Page 147 Monday, December 17, 2001 2:00 PM
147
FDA Update for Mobile Phones
1039b80o.book Page 148 Monday, December 17, 2001 2:00 PM
148
Cellular Telecommunications Industry Association (CTIA):
http://www.wow-com.com
U.S. Food and Drug Administration (FDA) Center for Devices and Radiological
Health: http://www.fda.gov/cdrh/consumer/
1. Muscat et al. Epidemiological Study of Cellular Telephone Use and Malignant
Brain Tumors. In: State of the Science Symposium;1999 June 20; Long Beach,
California.
2. Tice et al. Tests of mobile phone signals for activity in genotoxicity and other
laboratory assays. In: Annual Meeting of the Environmental Mutagen Society;
March 29, 1999, Washington, D.C.; and personal communication, unpublished
results.
3. Preece, AW, Iwi, G, Davies-Smith, A, Wesnes, K, Butler, S, Lim, E, and Varey,
A. Effect of a 915-MHz simulated mobile phone signal on cognitive function in
man. Int. J. Radiat. Biol., April 8, 1999.
4. Hardell, L, Nasman, A, Pahlson, A, Hallquist, A and Mild, KH. Use of cellular
telephones and the risk for brain tumors: a case-control study. Int. J. Oncol., 15:
113-116, 1999
1039b80o.book Page 149 Monday, December 17, 2001 2:00 PM
Motorola Limited Warranty
I.
What This Warranty Covers
Defects in materials and workmanship in the following new “Products”
manufactured, sold or certified by Motorola, with which this limited warranty is
included in/on the package: (a) wireless cellular telephones, pagers and two-way
radios that operate via “Personal Radio Service” (such as Family Radio Service and
General Mobile Radio Service), together with software imbedded in any of these
products, and (b) subject to the following exceptions, accessories or software sold
for use with these products.
• Battery Exception. This limited warranty extends only to batteries in which the
fully-charged capacity falls below 80% of rated capacity and batteries that leak;
• Software Exceptions. This limited warranty extends only to physical defects in
the media (such as CD-ROM) that tangibly embodies each copy of any software
sold and/or certified by Motorola for use with Products. Software that is not
tangibly embodied in media and that is purchased separately from Products
(such as software that is downloaded from the internet) comes “as is” and
without warranty.
Motorola Limited Warranty
Limited Warranty for Motorola Personal Communications Products and
Accessories Purchased in the United States and Canada
149
1039b80o.book Page 150 Monday, December 17, 2001 2:00 PM
Motorola Limited Warranty
II.
What the Period of Coverage Is
Subject to the following exceptions, one year from the date the Products are purchased by the first end-user:
• 90-Day Warranty Exception. The warranty is for 90 days for: (a) any software
tangibly embodied in media or (b) any accessories for two-way radios that are
covered by this warranty, as described in Section I, above.
• Limited Lifetime Warranty Exception. The warranty is a limited lifetime warranty
for the lifetime of ownership by the first end-user of the following products, only:
(a) decorative covers, including bezel, PhoneWrap™ or case (any model); and
(b) ear buds and boom headsets that transmit mono sound through a wire connection (this does not include ear buds or boom headsets that either transmit
stereo sound or that are wireless, or both).
• Repair / Replacement Exception. The warranty is for the balance of the original
warranty or for 90 days from the date returned and delivered to the first enduser, whichever is longer.
III. Who is Covered
This warranty extends to you only if you are the first end-user purchaser.
150
1039b80o.book Page 151 Monday, December 17, 2001 2:00 PM
At no charge to you, we have the option to repair or replace the Products that do not
conform to the warranty, or to refund the Products’ purchase price. We may use
functionally equivalent reconditioned/refurbished/pre-owned or new Products or
parts. No software updates are provided.
V.
How to Get Warranty Service
PLEASE CALL US – DO NOT SHIP:
USA
Cellular 1-800-331-6456
Paging 1-800-548-9954
FRS Radios 1-800-353-2729
TTY (Text Telephone)
1-888-390-6456
Canada
All Products 1-800-461-4575
TTY (Text Telephone)
1-888-390-6456
Motorola Limited Warranty
IV. What We Will Do to Correct Warranty Problems
Accessories and software -- call the number designated for the product with which
they are used.
You will receive instructions on how to ship the Products to Motorola or our designated resource. If instructed to ship the Products, you must ship them with freight,
151
Motorola Limited Warranty
1039b80o.book Page 152 Monday, December 17, 2001 2:00 PM
152
duties and insurance prepaid. Regardless of where you are instructed to return the
Products, you must include: (a) a copy of your receipt, bill of sale or other comparable proof of purchase; (b) a written description of the problem; (c) the name of your
service provider (if this Product requires subscription service); (d) the name and location of the installation facility (if applicable) and, most importantly; (e) your address
and telephone number. If requested, you must also return all detachable parts such
as antennas, batteries and chargers. RETAIN YOUR ORIGINAL PROOF OF PURCHASE.
For Products we ask you ship to us, we will ship repaired or replacement Products
at our expense for the freight and insurance, but at your expense for any duties. If
additional information is needed, please contact us at the telephone number listed
above.
VI. What This Warranty Does Not Cover
•
Products that are operated in combination with ancillary or peripheral
equipment or software not furnished or otherwise certified by Motorola for
use with the Products (“ancillary equipment”), or any damage to the Products or ancillary equipment as a result of such use. Among other things,
“ancillary equipment” includes batteries, chargers, adaptors, and power
•
•
•
•
supplies not manufactured or supplied by Motorola. Any of these voids the
warranty.
Someone other than Motorola (or its authorized service centers) tests, adjusts,
installs, maintains, alters, modifies or services the Products in any way. Any of
these voids the warranty.
Rechargeable batteries that: (a) are charged by other than the Motorolaapproved battery charger specified for charging such batteries; (b) have any
broken seals or show evidence of tampering; (c) are used in equipment other
than the Product for which they are specified; or (d) are charged and stored at
temperatures greater than 60 degrees centigrade. Any of these voids the warranty.
Products that have: (a) serial numbers or date tags that have been removed,
altered or obliterated; (b) board serial numbers that do not match each other, or
board serial numbers that do not match the housing; or (c) nonconforming or
non-Motorola housings or parts. Any of these voids the warranty.
Defects or damage that result from: (a) use of the Products in a manner that is
not normal or customary; (b) improper operation or misuse; (c) accident or
neglect such as dropping the Products onto hard surfaces; (d) contact with
water, rain, extreme humidity or heavy perspiration; (e) contact with sand, dirt or
the like; or (f) contact with extreme heat, or spills of food or liquid.
Motorola Limited Warranty
1039b80o.book Page 153 Monday, December 17, 2001 2:00 PM
153
1039b80o.book Page 154 Monday, December 17, 2001 2:00 PM
•
Motorola Limited Warranty
•
•
•
Physical damage to the surface of the Products, including scratches, cracks or
other damage to a display screen, lens or other externally exposed parts.
Failure of Products that is due primarily to any communication service or signal
you may subscribe to or use with the Products.
Coil cords that are stretched or that have any broken modular tabs.
Leased Products.
Flat-rate repair rates may apply to Products not covered by this warranty. To obtain
information about Products needing repairs that are not covered by this warranty,
please call the telephone number previously listed. We will provide information on
repair availability, rates, methods of payment, where to send the Products, etc.
VII. Some Other Limitations
This is Motorola’s complete warranty for the Products, and states your exclusive remedies. This warranty is given in lieu of all other express warranties.
Implied warranties, including without limitation, the implied warranties of merchantability and fitness for a particular purpose, are given only if specifically
required by applicable law. Otherwise, they are specifically excluded.
No warranty is made as to coverage, availability, or grade of service provided
by the Products, whether through a service provider or otherwise.
154
1039b80o.book Page 155 Monday, December 17, 2001 2:00 PM
In no event shall Motorola be liable, whether in contract or tort (including negligence) for damages in excess of the purchase price of the Product, or for any
indirect, incidental, special or consequential damages of any kind, or loss of
revenue or profits, loss of business, loss of information or data, or other financial loss arising out of or in connection with the ability or inability to use the
Products, to the full extent these damages may be disclaimed by law.
VIII. Patent and Software Provisions
At Motorola’s expense, we will defend you, and pay costs and damages that may be
finally awarded against you, to the extent that a lawsuit is based on a claim that the
Products directly infringe a United States patent. Our obligation is conditioned on:
(a) you notifying us promptly in writing when you receive notice of the claim; (b) you
giving us sole control of the defense of the suit and all negotiations for its settlement
or compromise; and (c) should the Products become, or in Motorola's opinion be
likely to become, the subject of a claim of infringement of a United States patent, you
permit us, at our option and expense, either to: procure for you the right to continue
Motorola Limited Warranty
No warranty is made that the software will meet your requirements or will work
in combination with any hardware or applications software products provided
by third parties, that the operation of the software products will be uninterrupted or error free, or that all defects in the software products will be corrected.
155
1039b80o.book Page 156 Monday, December 17, 2001 2:00 PM
Motorola Limited Warranty
using the Products; replace or modify them so that they become non-infringing; or
grant you a credit for such Products, as depreciated, and accept their return. The depreciation will be an equal amount per year over the lifetime of the Products, as established by Motorola.
156
Motorola will have no liability to you with respect to any claim of patent infringement
that is based upon the combination of the Products or parts furnished under this limited warranty with ancillary equipment, as defined in VI., above.
This is Motorola’s entire liability with respect to infringement of patents by the
Products.
IX. State Law and Other Jurisdiction Rights
Some states and other jurisdictions do not allow the exclusion or limitation of incidental or consequential damages, or limitation on the length of an implied warranty,
so the above limitations or exclusions may not apply to you.
This warranty gives you specific legal rights, and you may also have other rights,
which vary from jurisdiction to jurisdiction.
1039b80o.book Page 157 Monday, December 17, 2001 2:00 PM
USA
Cellular 1-800-331-6456
Paging 1-800-548-9954
FRS Radios 1-800-353-2729
TTY (Text Telephone)
1-888-390-6456
Canada
All Products 1-800-461-4575
TTY (Text Telephone)
1-888-390-6456
Accessories and software -- call the telephone number designated above for the
product with which they are used.
DO NOT SHIP PRODUCTS TO THESE ADDRESSES – INSTEAD PLEASE CALL.
To correspond with Motorola about the Products, please write us at
http://www.motorola.com or at:
In the USA:
Motorola, Inc.
600 North U.S. Highway 45
Libertyville, IL 60048
ITC01-078
Motorola Limited Warranty
To obtain information on Motorola Personal Communications Products, including
warranty service, accessories and optional Extended Warranties on selected Products, please call:
In Canada:
Motorola Canada Limited
5875 Whittle Road
Mississauga, ON L4Z 2H4
157
1039b80o.book Page 158 Monday, December 17, 2001 2:00 PM
Patents
Patents
This Motorola product is manufactured under one or more Motorola U.S. patents.
Other U.S. patents for this product are pending.
158
4,128,740
4,590,473
4,636,791
4,654,867
4,742,514
4,799,253
4,833,701
4,872,204
4,887,265
4,905,301
5,036,531
5,253,269
5,434,947
5,570,453
5,826,224
4,517,561
4,591,851
4,644,351
4,696,027
4,754,450
4,811,380
4,852,090
4,873,683
4,893,327
5,029,233
5,127,100
5,265,219
5,502,752
5,675,702
6,006,104
1039b80o.book Page 159 Monday, December 17, 2001 2:00 PM
Online Product Registration: http://www.motorola.com/warranty
Product registration is an important step toward enjoying your new Motorola
Personal Communicator. Registering helps us facilitate warranty service, and
permits us to contact you should your Personal Communicator require an update or
other service. Registration is not required for warranty coverage.
Please retain your original dated sales receipt for your records. For warranty service
of your Motorola Personal Communications Product you will need to provide a copy
of your dated sales receipt to confirm warranty status.
Thank you for choosing a Motorola product.
Product Registration
Product Registration
159
1039b80o.book Page 160 Monday, December 17, 2001 2:00 PM
Export Law Assurances
Export Law Assurances
160
This product is controlled under the export regulations of the United States of
America and Canada. The Governments of the United States of America and
Canada may restrict the exportation or re-exportation of this product to certain
destinations. For further information contact the U.S. Department of Commerce or
the Canadian Department of Foreign Affairs and International Trade.
1039b80o.book Page 161 Monday, December 17, 2001 2:00 PM
“Safety is your most important call!”
Your Motorola wireless telephone gives you
the powerful ability to communicate by voice—almost anywhere, anytime,
wherever wireless phone service is available and safe conditions allow. But an
important responsibility accompanies the benefits of wireless phones, one that
every user must uphold.
When driving a car, driving is your first
responsibility. If you find it necessary to use your wireless phone while behind the
wheel of a car, practice good common sense and remember the following tips:
1. Get to know your Motorola wireless phone and its features such as speed
dial and redial. If available, these features help you to place your call without
taking your attention off the road.
Wireless Phone Safety Tips
✂
Wireless Phone Safety Tips
161
1039b80o.book Page 162 Monday, December 17, 2001 2:00 PM
Wireless Phone Safety Tips
162
3. Position your wireless phone within easy reach. Be able to access your
wireless phone without removing your eyes from the road. If you receive an
incoming call at an inconvenient time, if possible, let your voice mail answer it
for you.
4. Let the person you are speaking with know you are driving; if necessary,
suspend the call in heavy traffic or hazardous weather conditions. Rain,
sleet, snow, ice, and even heavy traffic can be hazardous.
5. If you receive an incoming call at an inconvenient time do not take notes
or look up phone numbers while driving. Jotting down a “to do” list or going
through your address book takes attention away from your primary
responsibility—driving safely.
6. Dial sensibly and assess the traffic; if possible, place calls when you are
not moving or before pulling into traffic. Try to plan calls when your car will
be stationary. If you need to make a call while moving, dial only a few numbers,
check the road and your mirrors, then continue.
✂
2. When available, use a hands-free device. If possible, add an additional layer
of convenience to your wireless phone with one of the many Motorola
Original™ hands-free accessories available today.
1039b80o.book Page 163 Monday, December 17, 2001 2:00 PM
8. Use your wireless phone to call for help. Dial 9-1-1 or other local emergency
number in the case of fire, traffic accident or medical emergencies.
9. Use your wireless phone to help others in emergencies. If you see an auto
accident, crime in progress or other serious emergency where lives are in
danger, call 9-1-1 or other local emergency number, as you would want others
to do for you.
10. Call roadside assistance or a special non-emergency wireless assistance
number when necessary. If you see a broken-down vehicle posing no serious
hazard, a broken traffic signal, a minor traffic accident where no one appears
injured, or a vehicle you know to be stolen, call roadside assistance or other
special non-emergency wireless number.
Wireless Phone Safety Tips
✂
7. Do not engage in stressful or emotional conversations that may be
distracting. Make people you are talking with aware you are driving and
suspend conversations which have the potential to divert your attention away
from the road.
163
1039b80o.book Page 164 Monday, December 17, 2001 2:00 PM
Wireless Phone Safety Tips
164
ITC00-011
For more information,
please call
1-888-901-SAFE
or visit the
CTIA Web site at
www.wow-com.com™
✂
Check the laws and regulations on the use of wireless telephones and their
accessories in the areas where you drive.
Always obey them. The use of these devices may be prohibited or restricted in
certain areas.
1039b80o.book Page 165 Monday, December 17, 2001 2:00 PM
Index
B
Backlight .................................24, 109
Bar Password ................................ 102
Battery
Charge ........................................ 20
Install ...........................................19
Saving Mode ..............................110
Show Meter .................................97
C
Calculator ......................................118
Call Barring ....................................100
Change Bar Password ...............102
Call Blocking ..................................100
Call Charges ......................... 115, 117
Call Forwarding ...............................97
Call Meters Menu ..........................115
Call Related Features ......................97
Call Timers ........................... 116, 118
Call Waiting ...................................100
Caller ID ................................... 52, 97
Calls
Answer .................................. 50, 51
Index
A
Alarms
Alarm Clock Menu ....................... 95
Delete .......................................... 96
Edit .............................................. 96
Ringer Tone .............................. 104
Set ............................................... 95
Set on a Voice Note .................... 71
Show Status ................................ 96
Animated Icons .........................43, 75
Answer a Call .................................. 50
Auto Signature ................................ 74
165
Index
1039b80o.book Page 166 Monday, December 17, 2001 2:00 PM
166
Bar Incoming ............................. 101
Bar Outgoing ............................. 101
Cancel Barring .......................... 102
Cancel Forwarding .................... 100
Charges for .......................115, 117
Emergency .................................. 50
End ................................. 48, 52, 53
Forward ....................................... 97
Hold ............................................. 51
International ................................ 49
Last Ten ...................................... 83
Make .....................................48, 52
Reconnect to Call on Hold .......... 53
Redial Last Number Called ......... 50
Reject Incoming .......................... 56
Return ......................................... 62
Ringer Tone .............................. 104
Split ............................................. 55
Timers for .................116, 117, 118
Transfer .......................................54
Canned Message Text ....................45
Chat .................................................87
Add Members ..............................88
Disable Chat Member ..................93
Disable Chat Message Tone .......94
Exit ...............................................94
Message ............................... 90, 92
Message Alert ..............................94
Modify Chat Name ................ 89, 93
Modify Chat Name or Number .....89
Remove Member .........................89
Send Chat Message ............. 90, 92
Send Private Message ................92
Start Chat Session ................ 87, 90
View .............................................90
View Chat Messages ...................91
1039b80o.book Page 167 Monday, December 17, 2001 2:00 PM
E
Email
Send ......................................38, 65
Service Center ......................22, 74
Settings ....................................... 75
Emoticons ....................................... 43
End a Call .......................... 48, 52, 53
F
Find Entry by Location .................... 80
Find Entry by Name ........................ 79
Fixed Dialing ................................... 84
Forward Calls .................................. 97
Cancel Forwarding .................... 100
Data Calls ................................... 99
Fax Calls ......................................99
Voice Calls ...................................98
G
Games ...........................................123
Baccarat ....................................124
Bricks .........................................126
Towers of Hanoi ........................123
H
Hold Call ..........................................51
Accept Incoming Call ...................51
End ..............................................53
Make a New Call .........................52
Reconnect to Held Call ................53
Index
View Member List ..................89, 91
Conference Calls ............................ 53
Contacts Menu ................................ 76
Convert Currency .......................... 119
I
In-Call Menu ....................................51
International Phone Calls ................49
167
1039b80o.book Page 168 Monday, December 17, 2001 2:00 PM
Index
K
Keypad
Backlight ..............................24, 109
Button Descriptions ..................... 26
Illustration .................................... 25
Set Tones .................................. 110
Using ........................................... 24
L
Language Selection ...................... 110
Lock Phone ................................... 106
Change Unlock Code ................ 107
M
Master Clear ................................. 111
Master Reset ................................. 110
Menus
Call Meters ................................ 115
Exiting ......................................... 30
Extended .............................31, 109
168
In-Call Menu ................................51
Main .............................................29
Menu Map ....................................32
Navigating ....................................29
Phone Setup ..............................103
Quick Access ...................... 30, 120
Short ............................................31
Message Editor ...............................67
Messages
Alert Tone ..................................104
Animated Icons ............................43
Auto Signature .............................74
Canned Text ................................45
Cell Broadcast .............................72
Delete .............................62, 64, 66
Edit .................................63, 66, 67
Insert Emoticons Into ............ 42, 75
Insert Picture ........................ 42, 75
1039b80o.book Page 169 Monday, December 17, 2001 2:00 PM
N
Network Selection Menu ............... 112
O
One-Touch Dialing
From Phone Memory ...................86
Setup ...........................................85
Using the Smart Button ...............86
P
Patents ..........................................158
Phone Numbers
Add to Phone Memory .................77
Add to SIM Card Memory ............77
Check Capacity for ......................81
Create Voice Tags for ........... 57, 77
Insert Pauses Into ........................78
International .................................49
Modify ................................... 79, 80
Prevent Access to ........................81
Search for ....................................78
Phone Setup ..................................103
Index
Message Editor ........................... 67
Outgoing ...............................64, 75
Popup Alert ............................... 105
Read ........................................... 47
Receive ....................................... 47
Reply to ....................................... 61
Retrieve Numbers from ............... 62
Send ............................... 37, 40, 65
Send as Email .......................38, 65
Settings .......................... 21, 22, 73
Store .....................................39, 64
Microphone ..................................... 52
Musical Alerts ................................ 104
Mute Microphone During a Call ...... 52
My Phone Numbers ........................ 83
169
Index
1039b80o.book Page 170 Monday, December 17, 2001 2:00 PM
170
Adjust Contrast .......................... 107
Adjust Ring Volume ................... 103
Alarm Ringer Tone .................... 104
Battery Saving Mode ................. 110
Edit Music Tone ........................ 104
Keypad Tones ........................... 110
Language Selection .................. 110
Message Alert Tone .................. 104
Phone Lock ............................... 106
PIN ....................................107, 108
Ring or Vibrate .......................... 103
Ringer Tone .............................. 104
Set Time and Date .................... 109
Set Time Format ....................... 109
Show Time and Date ................. 109
Unblocking Operation ................ 108
Phone Status ................................ 110
PIN
Change PIN Code .....................107
Change PIN2 Code ...................108
Enter ............................................21
Require ......................................107
Q
Quick Access Menu ................ 30, 120
Add Features to .........................121
Setup .........................................106
Voice Tags ..................59, 121, 122
R
Read a Text Message .....................47
Received Messages ........................61
Receiving a Call ..............................50
Reject Call .......................................56
S
Security Code ................................108
Service Center Numbers .......... 21, 74
SIM Card
1039b80o.book Page 171 Monday, December 17, 2001 2:00 PM
T
Text Messages ................................ 37
Read Incoming ............................ 47
Send ............................................ 38
Send as Email ............................. 38
Time and Date Options ................. 109
Transfer Calls .................................. 54
U
Unblock Code ............................... 108
Unlock Code ........................... 21, 107
V
Voice Dialing ......................56, 58, 82
Create Voice Tag .........................57
From Contacts Menu ............ 58, 82
From Standby Mode ............. 58, 82
Voice Notes .....................................68
Erase ...........................................70
Play ..............................................69
Record .........................................68
Set Alarm .....................................71
Show Time Available ...................69
Voice Tags
Create ..........................................57
For Quick Access Features .......121
Voicemail .................................. 60, 74
Index
Add Phone Numbers to ............... 77
Install ........................................... 19
PIN ............................. 21, 107, 108
Prevent Access to ....................... 81
Store Messages on ...............39, 64
Special Symbols ........................... 128
Split Call .......................................... 55
Standby Screen .............................. 30
Status Review ............................... 110
171
Notes
1039b80o.book Page 172 Monday, December 17, 2001 2:00 PM
1039b80o.book Page 173 Monday, December 17, 2001 2:00 PM
6881039B80-O
@6881039B80@
English/Canadian
1039b80o.book Page 174 Monday, December 17, 2001 2:00 PM