1
Getting Started
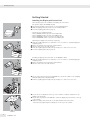
Connecting the Device to AC Power
$ Check the voltage rating and plug design
$ The equipment is powered through the installed power cord. The power supply is integrated into the indicator. The device can be operated with a
voltage of 100 V to 240 V.
Make sure that the voltage rating printed on the manufacturer’s ID label is identical to
that of your local line voltage. If the voltage specified on the label or the plug design
of the AC adapter do not match the rating or standard you use, please contact your
Sartorius office or dealer. The power connection must be made in accordance with the
regulations applicable in your country.
In order to connect the equipment to the power supply (protection class 1), use a
correctly installed wall outlet with a protective grounding conductor (PE) and a fuse of
a maximum 16 A. The power plug or a different, suitable disconnecting device for the
power must be easily accessible.
Safety Precautions
If you use an electrical outlet that does not have a protective grounding conductor,
ensure that an equivalent protective conductor is installed by a certified electrician (as
specified in the applicable regulations for installation in your country). The protective
effect must not be negated by using an extension cord without a protective grounding
conductor.
Warm-up Time
To return precise results, the scale must warm up for at least 30 minutes after initial
connection to the power supply. Only after this time will the scale have reached the
required operating temperature.
Using a verified scale in legal metrology:
$ Ensure that there is a warm-up time of at least 24 hours after initial connection to the
power supply.
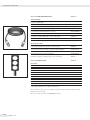
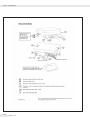
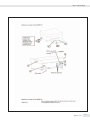
Connecting a Barcode Scanner (Accessory; Order No. YBR02FC)
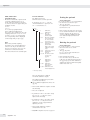
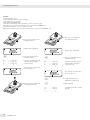
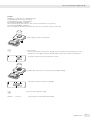
!Disconnect the indicator from AC power (unplug the AC adapter)
$ Installation:
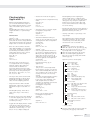
please see “Pin Assignment Charts" in this manual (implemented via the YCC02-BR02 connecting cable or as Option M8)
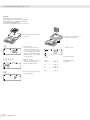
Leveling the Weighing Platform SIWABBP, SIWSBBP, SIWSBBS, SIWRDCP, SIWADCP,
SIWSDCP, SIWSDCS
Purpose:
– To compensate for uneven areas at the place of installation
– To ensure that the equipment is placed in a perfectly horizontal position for consistently
reproducible weighing results
Always level the weighing platform again any time after it has been moved to a different
location.
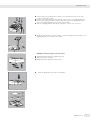
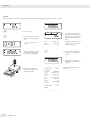
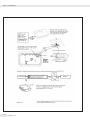
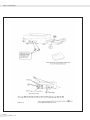
§ Level the weighing platform using the four leveling feet. Turn the feet until the air
bubble is centered in the level indicator.
§ Check to ensure that all leveling feet rest securely on the work surface.
> Each of the leveling feet must support an equal load.
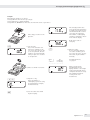
Level the Weighing Platform SIWAEDG
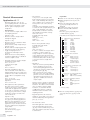
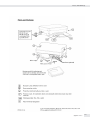
§ Use an open-jawed wrench to loosen the lock nuts on the leveling feet.
> Adjusting the leveling feet:
To raise the weighing platform, extend the leveling feet (turn counterclockwise).
To lower the weighing platform, retract the leveling feet (turn clockwise).
§ Tighten the lock nuts after adjusting the weighing platform.
8
Signum 1-2-3