1
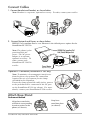
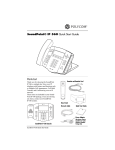
Wallmount Method
Remove the button from the slot
behind the hookswitch, rotate it
180 degrees, and then place it
back in the slot (as shown).
Using wall anchors, fasten the base stand with the
mounting tab facing up
(as shown).
For more information,
see “SoundPoint IP
Telephone Wallmount
Installation” at
www.polycom.com/
Align the base stand tabs
with their corresponding insertion points on
the phone, and then snap
the phone into place (as
shown).
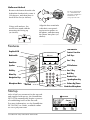
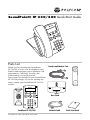
Features
LED Indicator
Graphical LCD
Context-Sensitive
Soft Keys
Hookswitch
Line 1 Key
Handsfree
Speaker
Dial
Line 1
Menu
Line 2
LED Indicators
Line 2 Key
Dial Key
1
Menu Key
ABC
DEF
2
3
4
JKL
5
MNO
PQRS
TUV
WXYZ
Hold
GHI
Navigation Keys
7
8
6
9
Hold Key
Headset Key
Speakerphone Key
OPER
Microphone Mute
0
Dial Pad
Startup
After it has been connected to the network
and supplied with power, the SoundPoint
IP 330/320 automatically begins a process
of establishing itself on the network.
For more information, see the SoundPoint
IP 330/320 User Guide, available online
at: www.polycom.com/
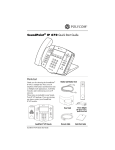
SoundPoint IP 330/320 Quick Start Guide
Volume Up/Down
Handsfree Microphone