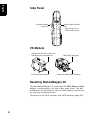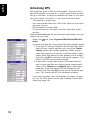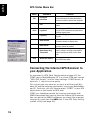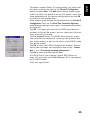
1
™
MobileMapper CE
NETWORK GENERATION
Getting Started Guide
English
Copyright Notice
Copyright 2005-2006 Magellan Navigation Inc. All rights reserved.
Trademarks
All product and brand names mentioned in this publication
are trademarks of their respective holders.
FCC Notice
This equipment has been tested and found to comply with the
limits for a class B digital device, pursuant to part 15 of the
FCC Rules. These limits are designed to provide reasonable
protection against harmful interference in a residential installation. This equipment generates, uses and can radiate radio
frequency energy and if not installed and used in accordance
with the instructions, may cause harmful interference to radio
communications. However, there is no guarantee that interference will not occur in a particular installation. If this equipment does cause harmful interference to radio or television
reception, which can be determined by turning the equipment
off and on, the user is encouraged to try to correct the interference by one or more of the following measures:
• Reorient or relocate the receiving antenna.
• Increase the separation between the equipment and
receiver.
• Connect the equipment into an outlet on a circuit different from that to which the receiver is connected.
• Consult the dealer or an experienced radio/TV technician
for help.
Changes or modifications not expressly approved by Magellan
Navigation could void the user's authority to operate this
equipment.
CAUTION: To comply with FCC RF exposure compliance requirements, a separation distance of at least 20 cm must be
maintained between the antenna of this device and all persons.
In the presence of RF field, the receiver's satellite signal
strength may degrade. When removed from the RF field, the
signal strength should return to normal.
This device has been found compliant with the Canadian RSS210 specification, issue 5, November 2001 which stipulates
that operation is subject to the following two conditions: (1)
this device may not cause interference, and (2) this device
must accept any interference, including interference that may
cause undesired operation of the device.
Magellan Professional Products - Limited Warranty (North,
Central and South America)
Magellan Navigation warrants their GPS receivers and hardware accessories to be free of defects in material and workmanship and will conform to our published specifications for
the product for a period of one year from the date of original
purchase. THIS WARRANTY APPLIES ONLY TO THE ORIGINAL PURCHASER OF THIS PRODUCT.
In the event of a defect, Magellan Navigation will, at its option, repair or replace the hardware product with no charge to
the purchaser for parts or labor. The repaired or replaced product will be warranted for 90 days from the date of return shipment, or for the balance of the original warranty, whichever is
longer. Magellan Navigation warrants that software products or
software included in hardware products will be free from defects in the media for a period of 30 days from the date of
shipment and will substantially conform to the then-current
user documentation provided with the software (including updates thereto). Magellan Navigation's sole obligation shall be
the correction or replacement of the media or the software so
that it will substantially conform to the then- current user doc-
umentation. Magellan Navigation does not warrant the software will meet purchaser's requirements or that its operation
will be uninterrupted, error-free or virus-free. Purchaser assumes the entire risk of using the software.
PURCHASER'S EXCLUSIVE REMEDY UNDER THIS WRITTEN WARRANTY OR ANY IMPLIED WARRANTY SHALL BE
LIMITED TO THE REPAIR OR REPLACEMENT, AT MAGELLAN NAVIGATION'S OPTION, OF ANY DEFECTIVE PART OF
THE RECEIVER OR ACCESSORIES WHICH ARE COVERED
BY THIS WARRANTY. REPAIRS UNDER THIS WARRANTY
SHALL ONLY BE MADE AT AN AUTHORIZED MAGELLAN
NAVIGATION SERVICE CENTER. ANY REPAIRS BY A SERVICE CENTER NOT AUTHORIZED BY MAGELLAN NAVIGATION WILL VOID THIS WARRANTY.
To obtain warranty service the purchaser must obtain a Return
Materials Authorization (RMA) number prior to shipping by
calling 1-800-229-2400 (press option #1) (U.S.) or 1-408615-3981 (International), or by submitting a repair request
on-line at:
http://professional.magellangps.com/en/support/rma.asp. The
purchaser must return the product postpaid with a copy of the
original sales receipt to the address provided by Magellan Navigation with the RMA number. Purchaser’s return address and
the RMA number must be clearly printed on the outside of the
package.
Magellan Navigation reserves the right to refuse to provide service free-of-charge if the sales receipt is not provided or if the
information contained in it is incomplete or illegible or if the
serial number is altered or removed. Magellan Navigation will
not be responsible for any losses or damage to the product incurred while the product is in transit or is being shipped for
repair. Insurance is recommended. Magellan Navigation suggests using a trackable shipping method such as UPS or FedEx when returning a product for service.
EXCEPT AS SET FORTH IN THIS LIMITED WARRANTY, ALL
OTHER EXPRESSED OR IMPLIED WARRANTIES, INCLUDING THOSE OF FITNESS FOR ANY PARTICULAR PURPOSE,
MERCHANTABILITY OR NON-INFRINGEMENT, ARE HEREBY DISCLAIMED AND IF APPLICABLE, IMPLIED WARRANTIES UNDER ARTICLE 35 OF THE UNITED NATIONS
CONVENTION ON CONTRACTS FOR THE INTERNATIONAL
SALE OF GOODS. Some national, state, or local laws do not
allow limitations on implied warranty or how long an implied
warranty lasts, so the above limitation may not apply to you.
The following are excluded from the warranty coverage: (1) periodic maintenance and repair or replacement of parts due to
normal wear and tear; (2) batteries and finishes; (3) installations or defects resulting from installation; (4) any damage
caused by (i) shipping, misuse, abuse, negligence, tampering,
or improper use; (ii) disasters such as fire, flood, wind, and
lightning; (iii) unauthorized attachments or modification; (5)
service performed or attempted by anyone other than an authorized Magellan Navigations Service Center; (6) any product, components or parts not manufactured by Magellan
Navigation; (7) that the receiver will be free from any claim for
infringement of any patent, trademark, copyright or other proprietary right, including trade secrets; and (8) any damage due
to accident, resulting from inaccurate satellite transmissions.
Inaccurate transmissions can occur due to changes in the position, health or geometry of a satellite or modifications to the
receiver that may be required due to any change in the GPS.
(Note: Magellan Navigation GPS receivers use GPS or
GPS+GLONASS to obtain position, velocity and time information. GPS is operated by the U.S. Government and GLONASS
is the Global Navigation Satellite System of the Russian Federation, which are solely responsible for the accuracy and
maintenance of their systems. Certain conditions can cause
inaccuracies which could require modifications to the receiver. Examples of such conditions include but are not limited to
changes in the GPS or GLONASS transmission.) Opening, dismantling or repairing of this product by anyone other than an
MAGELLAN NAVIGATION SHALL NOT BE LIABLE TO PURCHASER OR ANY OTHER PERSON FOR ANY INCIDENTAL
OR CONSEQUENTIAL DAMAGES WHATSOEVER, INCLUDING BUT NOT LIMITED TO LOST PROFITS, DAMAGES RESULTING FROM DELAY OR LOSS OF USE, LOSS OF OR
DAMAGES ARISING OUT OF BREACH OF THIS WARRANTY
OR ANY IMPLIED WARRANTY EVEN THOUGH CAUSED BY
NEGLIGENCE OR OTHER FAULT OFMAGELLAN NAVIGATION
OR NEGLIGENT USAGE OF THE PRODUCT. IN NO EVENT
WILL MAGELLAN NAVIGATION BE RESPONSIBLE FOR
SUCH DAMAGES, EVEN IF MAGELLAN NAVIGATION HAS
BEEN ADVISED OF THE POSSIBILITY OF SUCH DAMAGES.
This written warranty is the complete, final and exclusive
agreement between Magellan Navigation and the purchaser
with respect to the quality of performance of the goods and
any and all warranties and representations. This warranty sets
forth all of Magellan Navigation's responsibilities regarding
this product. This limited warranty is governed by the laws of
the State of California, without reference to its conflict of law
provisions or the U.N. Convention on Contracts for the International Sale of Goods, and shall benefit Magellan Navigation,
its successors and assigns.
This warranty gives the purchaser specific rights. The purchaser may have other rights which vary from locality to locality (including Directive 1999/44/EC in the EC Member States) and
certain limitations contained in this warranty, including the
exclusion or limitation of incidental or consequential damages
may not apply.
For further information concerning this limited warranty,
please call or write:
Magellan Navigation, Inc., 960 Overland Court, San Dimas,
CA 91773, Phone: +1 909-394-5000, Fax: +1 909-3947050 or
Magellan Navigation SA - ZAC La Fleuriaye - BP 433 - 44474
Carquefou Cedex - France Phone: +33 (0)2 28 09 38 00,
Fax: +33 (0)2 28 09 39 39.
Magellan Professional Products Limited Warranty (Europe,
Middle East, Africa)
umentation. Magellan Navigation does not warrant the software will meet purchaser's requirements or that its operation
will be uninterrupted, error-free or virus-free. Purchaser assumes the entire risk of using the software.
2. PURCHASER'S REMEDY
PURCHASER'S EXCLUSIVE REMEDY UNDER THIS WRITTEN WARRANTY OR ANY IMPLIED WARRANTY SHALL BE
LIMITED TO THE REPAIR OR REPLACEMENT, AT MAGELLAN NAVIGATION'S OPTION, OF ANY DEFECTIVE PART OF
THE RECEIVER OR ACCESSORIES WHICH ARE COVERED
BY THIS WARRANTY. REPAIRS UNDER THIS WARRANTY
SHALL ONLY BE MADE AT AN AUTHORIZED MAGELLAN
NAVIGATION SERVICE CENTER. ANY REPAIRS BY A SERVICE CENTER NOT AUTHORIZED BY MAGELLAN NAVIGATION WILL VOID THIS WARRANTY.
3. PURCHASER'S DUTIES
To obtain service, contact and return the product with a copy
of the original sales receipt to the dealer from whom you purchased the product.
Magellan Navigation reserves the right to refuse to provide service free-of-charge if the sales receipt is not provided or if the
information contained in it is incomplete or illegible or if the
serial number is altered or removed. Magellan Navigation will
not be responsible for any losses or damage to the product incurred while the product is in transit or is being shipped for
repair. Insurance is recommended. Magellan Navigation suggests using a trackable shipping method such as UPS or FedEx when returning a product for service.
4. LIMITATION OF IMPLIED WARRANTIES
EXCEPT AS SET FORTH IN ITEM 1 ABOVE, ALL OTHER EXPRESSED OR IMPLIED WARRANTIES, INCLUDING THOSE
OF FITNESS FOR ANY PARTICULAR PURPOSE OR MERCHANTABILITY, ARE HEREBY DISCLAIMED AND IF APPLICABLE, IMPLIED WARRANTIES UNDER ARTICLE 35 OF THE
UNITED NATIONS CONVENTION ON CONTRACTS FOR THE
INTERNATIONAL SALE OF GOODS.
Some national, state, or local laws do not allow limitations on
implied warranty or how long an implied warranty lasts, so the
above limitation may not apply to you.
5. EXCLUSIONS
All Magellan Navigation global positioning system (GPS) receivers are navigation aids, and are not intended to replace
other methods of navigation. Purchaser is advised to perform
careful position charting and use good judgment. READ THE
USER GUIDE CAREFULLY BEFORE USING THE PRODUCT.
The following are excluded from the warranty coverage:
1. MAGELLAN NAVIGATION WARRANTY
(3) finishes;
Magellan Navigation warrants their GPS receivers and hardware accessories to be free of defects in material and workmanship and will conform to our published specifications for
the product for a period of one year from the date of original
purchase or such longer period as required by law. THIS WARRANTY APPLIES ONLY TO THE ORIGINAL PURCHASER OF
THIS PRODUCT.
(4) installations or defects resulting from installation;
In the event of a defect, Magellan Navigation will, at its option, repair or replace the hardware product with no charge to
the purchaser for parts or labor. The repaired or replaced product will be warranted for 90 days from the date of return shipment, or for the balance of the original warranty, whichever is
longer. Magellan Navigation warrants that software products or
software included in hardware products will be free from defects in the media for a period of 30 days from the date of
shipment and will substantially conform to the then-current
user documentation provided with the software (including updates thereto). Magellan Navigation's sole obligation shall be
the correction or replacement of the media or the software so
that it will substantially conform to the then- current user doc-
(1) periodic maintenance and repair or replacement of parts
due to normal wear and tear;
(2) batteries;
(5) any damage caused by (i) shipping, misuse, abuse, negligence, tampering, or improper use; (ii) disasters such as fire,
flood, wind, and lightning; (iii) unauthorized attachments or
modification;
(6) service performed or attempted by anyone other than an
authorized Magellan Navigations Service Center;
(7) any product, components or parts not manufactured by
Magellan Navigation,
(8) that the receiver will be free from any claim for infringement of any patent, trademark, copyright or other proprietary
right, including trade secrets
(9) any damage due to accident, resulting from inaccurate satellite transmissions. Inaccurate transmissions can occur due
to changes in the position, health or geometry of a satellite or
modifications to the receiver that may be required due to any
change in the GPS. (Note: Magellan Navigation GPS receivers
use GPS or GPS+GLONASS to obtain position, velocity and
English
authorized Magellan Navigation Service Center will void this
warranty.
English
time information. GPS is operated by the U.S. Government
and GLONASS is the Global Navigation Satellite System of the
Russian Federation, which are solely responsible for the accuracy and maintenance of their systems. Certain conditions can
cause inaccuracies which could require modifications to the
receiver. Examples of such conditions include but are not limited to changes in the GPS or GLONASS transmission.).
Opening, dismantling or repairing of this product by anyone
other than an authorized Magellan Navigation Service Center
will void this warranty.
6. EXCLUSION OF INCIDENTAL OR CONSEQUENTIAL DAMAGES
MAGELLAN NAVIGATION SHALL NOT BE LIABLE TO PURCHASER OR ANY OTHER PERSON FOR ANY INDIRECT, INCIDENTAL OR CONSEQUENTIAL DAMAGES WHATSOEVER,
INCLUDING BUT NOT LIMITED TO LOST PROFITS, DAMAGES RESULTING FROM DELAY OR LOSS OF USE, LOSS OF
OR DAMAGES ARISING OUT OF BREACH OF THIS WARRANTY OR ANY IMPLIED WARRANTY EVEN THOUGH CAUSED
BY NEGLIGENCE OR OTHER FAULT OFMAGELLAN NAVIGATION OR NEGLIGENT USAGE OF THE PRODUCT. IN NO
EVENT WILL MAGELLAN NAVIGATION BE RESPONSIBLE
FOR SUCH DAMAGES, EVEN IF MAGELLAN NAVIGATION
HAS BEEN ADVISED OF THE POSSIBILITY OF SUCH DAMAGES.
Some national, state, or local laws do not allow the exclusion
or limitation of incidental or consequential damages, so the
above limitation or exclusion may not apply to you.
7. COMPLETE AGREEMENT
This written warranty is the complete, final and exclusive
agreement between Magellan Navigation and the purchaser
with respect to the quality of performance of the goods and
any and all warranties and representations. THIS WARRANTY
SETS FORTH ALL OF MAGELLAN NAVIGATION'S RESPONSIBILITIES REGARDING THIS PRODUCT.
THIS WARRANTY GIVES YOU SPECIFIC RIGHTS. YOU MAY
HAVE OTHER RIGHTS WHICH VARY FROM LOCALITY TO LOCALITY (including Directive 1999/44/EC in the EC Member
States) AND CERTAIN LIMITATIONS CONTAINED IN THIS
WARRANTY MAY NOT APPLY TO YOU.
8. CHOICE OF LAW.
This limited warranty is governed by the laws of France, without reference to its conflict of law provisions or the U.N. Convention on Contracts for the International Sale of Goods, and
shall benefit Magellan Navigation, its successors and assigns.
THIS WARRANTY DOES NOT AFFECT THE CUSTOMER'S
STATUTORY RIGHTS UNDER APPLICABLE LAWS IN FORCE
IN THEIR LOCALITY, NOR THE CUSTOMER'S RIGHTS
AGAINST THE DEALER ARISING FROM THEIR SALES/PURCHASE CONTRACT (such as the guarantees in France for latent defects in accordance with Article 1641 et seq of the
French Civil Code).
For further information concerning this limited warranty,
please call or write:
Magellan Navigation SA - ZAC La Fleuriaye - BP 433 - 44474
Carquefou Cedex - France.
Phone: +33 (0)2 28 09 38 00, Fax: +33 (0)2 28 09 39 39
Introduction..................................................................1
Key Features....................................................................... 1
Software Provided as Standard ............................................. 2
About Windows CE .NET ...................................................... 2
Receiver Description.....................................................3
Front Panel......................................................................... 3
Back Panel ......................................................................... 3
Side Panel.......................................................................... 4
I/O Module ......................................................................... 4
Resetting MobileMapper CE ................................................. 4
Preparing for First-Time Use..........................................5
Charging the battery ............................................................ 5
Turning the Receiver On ...................................................... 6
Calibrating the Screen ......................................................... 7
Automatic System Time Update............................................ 7
Adjusting the Backlight........................................................ 7
Regional Settings ................................................................ 8
Establishing a Connection with your PC ................................. 9
Installing Software .............................................................. 9
Working in Windows CE .NET Environment .......................... 10
User Interface For Text Input ......................................... 10
Using the Integrated Alphanumeric Keypad..................... 10
Using the Stylus ........................................................... 11
Initializing GPS................................................................. 12
Setting Up GPS................................................................. 13
Viewing Current GPS Status ............................................... 14
Signal Quality/Navigation Window (Sig/Nav) .................... 15
Azimuth and Elevation Graph (Azmth/Elvn) ..................... 15
Panel Window (Panel) ................................................... 15
Statistics Window (Stats)............................................... 15
GPS Status Menu Bar ................................................... 16
Connecting the Internal GPS Receiver to your Application ..... 17
Step-by-Step Procedure for Establishing
a GPRS Connection Via Bluetooth ................................18
Introduction...................................................................... 18
The First Time You Use MobileMapper CE ........................... 20
Step1: Ask MobileMapper CE to Be Paired
with the Cell Phone....................................................... 21
Step 2: Allow the Cell Phone to Be Paired
with MobileMapper CE .................................................. 22
Step 3: Re-Boot MobileMapper CE’s Bluetooth Manager... 23
Step 4: Establish a Bluetooth Link Between
MobileMapper CE and the Cell Phone ............................. 23
Step 5: Prepare the GPRS Connection ............................ 24
Step 6: Establish the GPRS Connection .......................... 25
Troubleshooting............................................................ 26
Subsequent Uses .............................................................. 27
Standard Re-Start Procedure ......................................... 27
Disconnecting GPRS ..................................................... 28
English
Table of Contents
Selecting a DGPS Mode .............................................. 29
English
Introduction...................................................................... 29
SBAS ............................................................................... 31
Beacon............................................................................. 31
Direct IP........................................................................... 35
NTRIP.............................................................................. 37
Other RTCM Source........................................................... 40
Returning to Autonomous GPS Mode................................... 41
Subsequent Uses .............................................................. 41
Power & Memory Management .................................... 42
Power Modes .................................................................... 42
Turning Off MobileMapper CE Manually............................... 43
Checking Battery Status..................................................... 43
LED Indicators .................................................................. 43
Memory Management......................................................... 43
GPS Utilities............................................................... 44
DGPS Configuration........................................................... 44
GPS Initialization .............................................................. 44
GPS Ports Configuration..................................................... 45
GPS Reset ........................................................................ 46
GPS Settings .................................................................... 47
GPS Status ....................................................................... 47
Mission Planning............................................................... 47
Switching Between Two Utilities ......................................... 49
Bluetooth Manager Module ......................................... 50
Introduction...................................................................... 50
Host and Inquiring Devices................................................. 50
Bluetooth Range ............................................................... 51
First Steps with Bluetooth Manager..................................... 51
Starting Bluetooth Manager ........................................... 51
Minimizing/Maximizing the Bluetooth Window ................. 51
Turning Off Bluetooth ................................................... 51
Detecting Bluetooth-Enabled Devices ............................. 51
PIN Code, Detectability & Authentication ............................ 52
Local Services................................................................... 53
Introduction ................................................................. 53
Using the Serial Port Service ......................................... 54
Using the File Transfer Service....................................... 55
Creating Shortcuts for Remote Services ............................... 57
Optimizing Accuracy ................................................... 58
General Guidelines ............................................................ 58
Recording Data for Post-Processing ..................................... 59
Appendices ................................................................ 61
Updating MobileMapper CE OS Firmware ............................ 61
Updating MobileMapper CE GPS Firmware .......................... 62
About Almanac Files.......................................................... 64
Choosing the Appropriate Real-Time Correction Age Limit ..... 64
Assessing MobileMapper Beacon Reception Quality .............. 65
Bluetooth Manager Toolbar Memo ....................................... 66
Index ......................................................................... 67
Thank you for purchasing a MobileMapper CE from Magellan.
This Getting Started guide will give you useful information
about your Windows CE GPS handheld computer. It will also
guide you in your first steps using the system.
MobileMapper CE is a handheld device that integrates submeter GPS with Microsoft Windows CE .NET in a rugged design suitable for mobile mapping applications.
Being an open-platform Windows CE device, MobileMapper
CE allows you to choose the GIS software that is right for you.
Key Features
- Integrated GPS with real-time, sub-meter accuracy using
SBAS or external real-time RTCM differential corrections
- Integrated Bluetooth wireless technology
- Ready for RTCM real-time corrections
- Full color, daylight readable, transflective TFT display with
320 x 240 resolution and touch screen
- Integrated Secure Digital memory card slot
- Rugged and waterproof design
- Built-in alphanumeric keyboard
- Built-in speaker and microphone
- Advanced power management
- All-day rechargeable, removable Li-ion battery
- Embedded Microsoft Windows CE .NET operating system
- Off-the-shelf industry standard Mobile GIS software applications support.
1
English
Introduction
English
Software Provided as Standard
- GPS utilities - provide initialization and setup, current
GPS status view, mission planning and configuration of
reception mode for differential corrections
- Bluetooth Manager - full-featured Bluetooth connectivity
configuration utility
- Microsoft WordPad, Internet Explorer®, Windows Explorer,
Terminal, ActiveSync®, Windows Media Player and Inbox
- Microsoft File Viewers: Excel, Word and Image Viewers
- EZ Recorder - sound record and playback program
- Software Development Kit (SDK) and GPS Application
Programming Interface (API) delivered free of charge
when a Business Partner Agreement has been approved.
Please contact Magellan to discuss your software development project.
About Windows CE .NET
Windows CE is a version of the Windows operating system designed for small devices such as personal digital assistants
(PDAs) or handheld PCs. The Windows CE graphical user interface (GUI) is very similar to desktop Windows operating systems. MobileMapper CE is embedded with Windows CE .NET
4.2 Professional version.
Like most Windows CE devices, the MobileMapper CE handheld has a touch screen. To interact with the MobileMapper
CE, use the stylus to tap on the touch screen.
2
English
Receiver Description
Front Panel
GPS Receiver includes:
• Integrated GPS accurate
to sub-meter with SBAS
• Ready for RTCM real-time
corrections
Touch screen Display:
• Full color transflective liquid crystal display (LCD)
• ¼ VGA
Power button
Power indicator
Microphone
Battery indicator
Scrolling button
Alphanumeric
keypad
Back Panel
Power/Communication
connectors:
• Connects to the I/O
module with power
supply and communication ports
Speaker
Battery door screws:
• Unscrew to open the
battery door
Handstrap
3
English
Side Panel
External Antenna
Connector
Secure Digital Card Slot
Door:
• Open the door to access the SD card slot
I/O Module
USB host port (Type A), connect to a
USB flash drive, card reader etc.
DC Power Input connector
Mini USB (Type B) port
Serial port (COM1) DB-9 connector
Resetting MobileMapper CE
To reset MobileMapper CE, hold down the ESC, Enter and Power keys simultaneously until the screen goes blank. The MobileMapper CE switches off. You can then power on the device
by pressing the power button.
To reset only the GPS receiver, (see GPS Reset on page 45).
4
English
Preparing for First-Time Use
Charging the battery
Before using your MobileMapper CE handheld PC, you must
first charge the battery:
1. Locate the removable battery.
2. Open the battery door.
3. Insert the battery into the battery compartment in the
back of the MobileMapper CE handheld as shown below:
4. Close the battery door and tighten the screws.
5. Attach the Clip-on I/O module to the MobileMapper CE
handheld as shown below (insert lower part first):
5
English
6. Connect the AC adapter (see below) and then let it charge
the battery for up to six hours.
Connect cable from AC
adapter to this input
7. To detach the clip-on I/O module, press the release button
on the module.
Turning the Receiver On
Once you have charged the battery in your MobileMapper CE,
press the red power button to turn it on.
Power button
6
For the first-time use, you need to align your display screen so
the cursor on the touch screen align with the tip of your stylus.
Use the stylus pen to tap the center of each target that appears on the Calibration screen with the tip of the stylus. Tap
anywhere on the display when finished.
To re-calibrate your screen at anytime, select the
tab, then
Settings>Control panel>Stylus>Calibration to launch the calibration screen.
Automatic System Time Update
MobileMapper CE will automatically update the system date
& time using the GPS time determined by the integrated GPS
receiver and the time zone that you specify. To set the time
zone:
• In the task bar, double tap the clock icon:
This opens the Date/Time Properties screen.
• Set the time zone field (see opposite) and then select OK
on top of the screen. Please note that you should wait for a
while, after turning on MobileMapper CE, before system
time can effectively be updated.
Adjusting the Backlight
To switch the backlight on/off for both the keypad and display,
or to adjust the brightness and screen contrast, double tap the
Backlight Control icon in the control panel.
To conserve battery power, we recommend you to switch the
backlight off whenever possible.
7
English
Calibrating the Screen
English
Regional Settings
MobileMapper CE supports code sets and languages supported by Windows CE operating system. These include European
languages as well as multibyte languages such as simplified
Chinese and Japanese.
- From MobileMapper CE Companion CD, copy the appropriate language install files (.CAB) to your MobileMapper
CE device. Use either an SD Card or download the files to
the unit using ActiveSync.
- On the device, double tap on the .CAB file.
- The default location for installation is "\MyDevice\Intl\####\" (where #### is the language number).
You must install to this default location when the dialog box
appears asking where to install.
- Select the
tab, then Settings>Control panel>Regional Settings.
- Select your preferred locale and user interface language as
shown on the screen below (left).
- Once the language is installed, shut down the unit by
selecting successively the
tab, then Suspend to open
the Shut Down menu, then the OK button (see screen
below, right).
- Next time you boot the MobileMapper CE device, the
selected language will be used.
8
Using Microsoft ActiveSync, you can connect a desktop computer to your MobileMapper CE handheld via the USB data cable. This allows you to install software and transfer files to/
from MobileMapper CE.
To connect to a PC:
1. Install ActiveSync on the desktop computer. (Microsoft
ActiveSync is included on the MobileMapper CE Companion CD. You may also download it from the Microsoft web
site at www.microsoft.com/mobile/downloads/activesync.asp).
2. Attach the I/O module to the MobileMapper CE handheld.
Connect the USB data cable to the USB port (the miniconnector) on the I/O module (see opposite).
3. Connect the other end of the USB data cable to a USB
port on the desktop computer.
4. Follow the ActiveSync instructions to establish a connection.
Installing Software
Once the connection is established with a PC using ActiveSync, you may install any supported software you need. It is
very important to make sure you install your program in the
non-volatile memory, under “MyDevice” or on an SD card.
Installing off-the-shelf Windows CE software: Please refer to
the software documentation for more information and detailed
instructions.
9
English
Establishing a Connection with your PC
English
Working in Windows CE .NET
Environment
User Interface For Text Input
MobileMapper CE comes with an integrated physical keypad
and like most Windows CE devices, you may also use an onscreen keyboard to enter text. To activate the on-screen (or
“virtual”) keyboard, tap the keyboard icon
in the taskbar
and then tap Keyboard. The virtual keyboard appears on the
screen.
Using the Integrated Alphanumeric Keypad
MobileMapper CE uses a telephone-style alphanumeric keypad. The cursor keys are used to move the cursor left, right,
up and down on the screen.
Buttons 2-9 contain alphanumeric characters. By pressing the
key continuously, all characters on that key will be scrolled.
For example, the letters a, b, and c are associated with the
“2” key. Tapping the key once enters an “a,” twice enters a
“b,” three times enters a “c” and four times enters a “2.”
10
Dot-Shift Key
English
The keyboard default is lower-case alphanumeric letters.
- Press the Dot-Shift key to toggle from numeric lock to
caps lock and default mode.
- Press the Dot-Shift key twice to lock the keypad in
numeric mode.
The
icon appears in the task bar indicating that the
numeric lock mode is enabled.
- Press the Dot-Shift key three times to activate the uppercase lock.
The
icon appears in the task bar indicating that the
caps lock mode is enabled.
- Press the Dot-Shift key four times to bring it back to the
default lower-case alphanumeric mode.
Using the Stylus
The stylus is used for menu selection or data input on the
touch-screen.
- Tap: Touch the screen once with the stylus to select the
item, tap twice to open the selected item.
- Drag: Hold the stylus on the screen and drag it across to
select text and images. Drag in a list to select multiple
items.
- Tap and hold: Tap and hold the stylus on an item to see a
list of functions available for that item. On the pop-up
menu that appears, tap the function you want to perform.
In Bluetooth Manager, the “Tap and Hold” action is
slightly different: you must remove the stylus to let the
menu pop up.
When you operate the touch screen of the MobileMapper CE,
use the supplied stylus.
If the tip of the stylus is damaged, do not use it. If you operate
the touch screen with a damaged stylus or a ballpoint pen, the
touch screen may be damaged.
When the stylus is damaged, please use the extra stylus or buy
a new one.
11
English
Initializing GPS
GPS satellites are 12,000 miles overhead. The first time a
new GPS receiver is turned on, it might have difficulty calculating its position. To help the receiver calculate its first position, you should “initialize” it. You have to do this when:
- The receiver is brand new.
- You have moved more than 500 miles from the last place
you were using it.
- GPS receiver has been reset.
- Or the receiver has not been used for more than a few
months.
Take the MobileMapper CE to a location where there is a clear
view of the sky, then:
- Select the
tab, then Programs>GPS Utilities>GPS Initialization
- Initialize the receiver using one of the two methods below:
1.If you don’t have the slightest idea of what the coordinates of your current position are, check the Choose
Country option (see screen opposite), select respectively your region and country in the two fields underneath, enter the date and time (bottom of the screen)
and then tap OK to start the initialization process. This
closes the GPS Initialization window.
2.If you have a rough idea of what the coordinates of
your current position are, directly enter these coordinates in the Latitude and Longitude fields (see screen
opposite), enter the date and time (bottom of the
screen) and then tap OK to start the initialization process. This closes the GPS Initialization window.
- If you want to check that initialization has been successful, run the GPS Status utility (see Viewing Current GPS
Status on page 14).
12
The GPS Settings tool is used to set the environmental conditions in which the unit is to be used. These settings have an
impact on both the availability and accuracy of the position
computed by the unit.
Select the
tab, then Programs>GPS Utilities>GPS Settings to
run the GPS Settings utility. The following parameters are displayed (see screen opposite):
• Open Sky: Check this option if you are working in an open
sky area.
• Tree Canopy: Check this option if you are working in a forested area.
• Urban Canyon: Check this option if you are working in an
urban area with high buildings in the vicinity.
• Custom: Check this option if you want to set each of the
GPS parameters individually. Do not use this option unless
you are very familiar with these parameters. When checking this option, a new dialog box opens (see opposite) in
which you can set the following parameters:
- DOP type: Choose the DOP type on which to set an
upper limit (see next field).
The position of GPS satellites in orbit determine the
DOP values for a given site. The higher the DOP value,
the less accurate the position solution. PDOP (Position
Dilution of Precision) is the DOP value for the three
dimensional position solution. HDOP (Horizontal Dilution of Precision) is the DOP value for the two dimensional horizontal position.
- Maximum DOP [PDOP or HDOP]: DOP values considered “good” are less than 3. Values greater than 7 are
considered poor. Thus, small DOP is associated with
widely separated satellites. No position will be computed when the selected DOP type exceeds the
entered Maximum DOP.
13
English
Setting Up GPS
English
- Minimum SNR: SNR stands for Signal-to-Noise Ratio.
Ensure your SNR mask is not set too low (less than
20). GPS signals with lower SNRs will be very noisy
and contribute to accuracy degradation.
- Elevation Mask: Angle that specifies that any satellite
must be at least a specified number of degrees above
the horizon before the signals from the satellite are to
be used. Ensure that the elevation mask set in your
receiver is high enough to avoid using satellites near
the horizon as they are often noisier than satellites
higher overhead.
Tap Apply after making your choice and then tap OK to close
the GPS Settings window and quit this utility. By default, the
GPS is configured to track satellites in normal conditions of
reception (Open Sky).
NOTE: The first three options (Open Sky, Tree Canopy and Urban
Canyon) in fact use preset values for Maximum DOP, Minimum
SNR and Elevation Mask.
Viewing Current GPS Status
The GPS Status utility allows you to quickly see if the GPS receiver is calculating the position from the currently visible
GPS constellation. It can also be used to log and playback
NMEA data. Do the following to launch GPS Status:
- Select the
tab, then Programs>GPS Utilities>GPS Status.
This opens the GPS Status window.
Regardless of the displayed tab, the bar at the bottom of the
screen displays the following, from left to right:
- The type of position being calculated (Fix Not Available,
Autonomous GPS or Differential GPS).
- The data logging status (No Log or Log:x.. xK where x.. x is
the current size of the file being logged, in kbytes).
- Position indicator light (Blue: Differential GPS position
computed; Green: Autonomous GPS position computed;
Red: No position computed).
14
This window allows you to monitor Signal/Noise ratios for received satellites. This information is shown in graphical form
(see opposite).
The signal quality window will grow or shrink to accommodate
the number of satellites in view.
The Position pane provides the coordinates of the current GPS
position, including elevation or altitude, and the number of
satellites (used and received).
Azimuth and Elevation Graph (Azmth/Elvn)
This graph shows all the satellites currently in view.
Each satellite is identified by its pseudo-random number
(PRN), its azimuth and elevation angles.
Panel Window (Panel)
This window displays the following parameters relevant to the
MobileMapper CE unit:
- Speed
- Altitude
- Heading
- Vertical speed.
Statistics Window (Stats)
This window provides the averaged coordinates of the computed position and shows the accuracy figures corresponding to
the GPS receiver used in static mode. The Dilution of Precision (DOP) values are also displayed.
The data displayed on this tab may be controlled from the Log
menu (see page 16).
15
English
Signal Quality/Navigation Window (Sig/Nav)
English
GPS Status Menu Bar
Menu
File
Tools
Help
Sub-Menu
Function
Configuration>Units
Allows you to set the units used for distance and speed, for altitude/elevation
and the format for latitude and longitude.
Exit
Use this command to quit the GPS Status
utility.
Log>Start
Starts logging of NMEA data. Asks for a
log file to be created and opened before
starting logging data.
Log>Stop
Stops data logging and closes the open
log file.
Stats>Enable
When checked, this option enables the
Statistics window to display data.
Stats>Reset
Resets the data shown in the Statistics
window (zeroes all results).
Stats>Setup Avg
Thresholds
Sets data thresholds (see screen opposite) involved in averaging calculations
whose results are shown on the Stats
tab.
About GPS Status...
Displays the current software version of
the GPS Status utility.
Connecting the Internal GPS Receiver to
your Application
As explained in GPS Ports Configuration on page 44, the
COM2 port in MobileMapper CE is a virtual COM port named
“GPS VSP Output” and has fixed settings: 57600 bauds, 8
data bits, 1 stop bit and no parity.
This virtual port may serve as an input to off-the-shelf Windows CE mobile mapping applications running on MobileMapper CE. To do this, you just have to select “COM2” in your GIS
application as the source of GPS data.
COM2 can therefore provide the running application with
NMEA-formatted data coming from the internal GPS receiver.
You can define the NMEA sentences you would like to output
through this port from the NMEA tab in the GPS Ports Configuration utility (see page 44).
16
Introduction
You will use a cell phone associated with MobileMapper CE to
operate in NTRIP or Direct IP mode via a GPRS connection.
The cell phone should be a Bluetooth-enabled device fitted
with a SIM card that allows GPRS operation.
You will need the following information from your GPRS operator when configuring the GPRS connection:
Parameter
Definition
See
Modem command,
GPRS call number
Both parameters are used for a physical
connection to the Internet via GPRS
page 24
User Name
APN Login
page 24
Password
APN password
page 24
Domain
APN domain
page 24
The GPRS call number is hardware-dependent. You may have
to inquire from the phone manufacturer if the GPRS operator
cannot give you this number for the cell phone model you are
using.
As examples, a few GPRS call numbers and modem commands are given in the table below for some popular cell
phone models available today and for a connection to “Orange”, a European GPRS operator.
Cell Phone Model
Call Number
Modem Command
(for “Orange” operator only)
Sony Ericsson T68i
*99***10#
+cgdcont=10,”IP”,”internet-entreprise”
Nokia 6021
Motorola V500
...
*99#
+cgdcont=1,”IP”,”internet-entreprise”
Siemens S55
*99***1#
+cgdcont=1,”IP”,”internet-entreprise”
17
English
Step-by-Step Procedure for
Establishing a GPRS Connection
Via Bluetooth
English
GPRS Call number *99# is suitable for most cell phones unless otherwise mentioned. The modem command is tied to the
GPRS operator used.
Note that the Domain parameter (1st table above) and the Modem command (1st and 2nd tables above) are redundant data. We recommend that you type in the modem command and
let MobileMapper CE automatically fill in the Domain field
once you have entered the modem command line (see Step 6:
Establish the GPRS Connection on page 24).
When first implementing a GPRS connection, you will have to
go through a relatively long procedure. But if you strictly follow this procedure, re-establishing this connection next time
you use your MobileMapper CE will only take a few seconds.
18
Please carefully read the procedure outlined in the table below. This procedure is described in detail in the continuation
of this chapter. Please strictly follow the order in which the instructions are given.
Note that the procedure was tested for several popular mobile
phone brands and for a European GPRS operator. The procedure should normally apply for any other manufacturer, phone
model and GPRS operator although this cannot be guaranteed.
Step
Task
Ask MobileMapper CE to be
paired with the cell phone.
On MobileMapper CE:
- Start Bluetooth Manager
- Detect the cell phone
- Ask for a paired Bluetooth link
- Enter a Pin code.
Allow the cell phone to be
paired with MobileMapper CE
On the cell phone, select the appropriate
command and then enter the same Pin code as
in Step 1.
1
2
3
Detail
Re-boot Bluetooth Manager on On MobileMapper CE, exit from Bluetooth
MobileMapper CE
Manager and then re-launch this program.
Establish a Bluetooth link
between MobileMapper CE
and the cell phone
On MobileMapper CE:
- List the cell phone’s local services
- Establish a Bluetooth link
- Create a shortcut for future connections.
Prepare the GPRS connection
5
On MobileMapper CE
- Start creating a new connection icon
- Enter the GPRS call number
- Finish creating the new connection icon.
6
Establish the GPRS connection On MobileMapper CE:
- Double-tap the new connection icon
- Enter GPRS operator identification data
- Start the GPRS connection.
4
19
English
The First Time You Use MobileMapper CE
English
Step1: Ask MobileMapper CE to Be Paired with
the Cell Phone
Start Bluetooth Manager
1. On MobileMapper CE, tap
>Settings>Control Panel and
then double-tap the Bluetooth Manager icon. The Bluetooth
window appears on the screen after a few seconds.
Note the presence of the
icon in the task bar. For a
quick overview of the Bluetooth Manager toolbar, please
refer to Bluetooth Manager Toolbar Memo on page 65. For
more details about Bluetooth Manager, please refer to
Bluetooth Manager Module on page 49
Detect the Cell Phone
Caution! MobileMapper CE and the cell phone should not be
too close to each other. Keep a minimum distance of 60 cm
(2 feet) between the two devices.
1. Turn on your cell phone.
2. Activate its Bluetooth device. Refer to the instructions
manual of your cell phone to do this.
3. Make its local Bluetooth device discoverable from external
Bluetooth devices such as MobileMapper CE. Again, refer
to the instructions manual of your cell phone to do this.
4. On MobileMapper CE, tap
to search for the Bluetooth-enabled devices present in the vicinity, including
your cell phone.
At the end of this sequence, the icon representing your
cell phone should be visible in the Bluetooth Manager
window (see example opposite). Other Bluetooth devices
may have been detected during this search sequence.
NOTE: Tap
, not
, if for any reason you need to
resume the search sequence.
20
This procedure is for securing and quickly re-establishing the
Bluetooth connection between the two units.
1. Tap and hold the cell phone icon.
2. When a dotted circle appears, remove the stylus and, in
the menu that pops up, select Pair. A new window opens in
which you should enter a pin number to secure the connection to the cell phone (see below).
Enter a Pin Code
1. Tap inside the Pin field and type in any number. A two- to
four-figure number is recommended. (Press the Shift key
twice to lock the keypad in numeric.) You will have to
remember this number in step 2 below.
Note that this number may be different from the one
entered in the Bluetooth Properties dialog (see PIN Code,
Detectability & Authentication on page 51).
2. Tap OK to enter the pin code and close the dialog box.
This causes the cell phone to display a message or menu
following the pairing request from MobileMapper CE.
Step 2: Allow the Cell Phone to Be Paired with
MobileMapper CE
On the cell phone, following the message triggered by the
pairing request from MobileMapper CE, allow a new pair of
Bluetooth devices to be created between MobileMapper CE
and the cell phone:
1. Select the appropriate function depending on the cell
phone used. For example on the Sony/EricssonT68i, select
“Add to Paired”.
2. You will then be asked to enter the pin number you have
previously defined in MobileMapper CE (see Step 1).
When the units have successfully been paired, a yellow
circle containing a padlock will appear on the cell phone
icon on MobileMapper CE (see example opposite).
21
English
Ask for a Paired Bluetooth Link
English
Step 3: Re-Boot MobileMapper CE’s Bluetooth
Manager
This step is required for all the changes you have just made to
take effect.
1. In the task bar, tap
and then select Exit. This instantly
stops Bluetooth Manager and closes the window.
2. Double-tap the Bluetooth Manager icon in the still open
Control Panel window. The Bluetooth window appears on
the screen after a few seconds.
NOTE: Keep the cell phone on during this step.
Step 4: Establish a Bluetooth Link Between MobileMapper CE and the Cell Phone
List the Cell Phone’s Local Services
1. Tap
. The cell phone icon appears instantly and you
can see a yellow circle included indicative of an active
pair of Bluetooth devices.
2. Double-tap the cell phone icon. The Bluetooth Manager
window now shows the Bluetooth services offered by your
cell phone (see screen example opposite).
Establish a Bluetooth Connection
1. Double-tap the Dial-Up Networking icon. As a result, a
connection is automatically implemented using the first
Bluetooth virtual port available on MobileMapper CE. The
message “Connection succeeded on communication port
COMx:” is displayed.
22
Create a Shortcut for Future Connections
This shortcut will allow you to save time for future connections
as you won’t have to list the local services of the cell phone to
re-activate the Bluetooth link. Instead you will just have to
double-tap the shortcut.
1. Tap and hold the Dial-Up Networking icon. When a dotted
circle appears, remove the stylus and, in the menu that
pops up, select Create Shortcut. A message “Shortcut successfully saved” appears after a few seconds.
2. Tap OK to close the message window.
3. Tap
to view the shortcut you have just created.
4. Tap
to minimize the Bluetooth Manager window.
Step 5: Prepare the GPRS Connection
1. In the task bar, tap
>Settings>Network and Dial-up Connections.
2. In the window that opens, double-tap the Make New Connection icon.
3. Name the new connection (for example “My Cell Phone”)
using the virtual keyboard, keep Dial-Up Connection
checked on and then tap Next>.
23
English
NOTE: COM1 is the only physical COM port on
MobileMapper CE. COM2 is an internal virtual port and
COM3 is automatically assigned as the first Bluetooth virtual port at power on. So when you double-tap the Dial-Up
Networking icon, COM4 is normally the port used for that
connection.
2. Tap OK to close the message window. Note the presence of
a plug in a green circle on the Dial-Up Networking icon
showing that the connection is effective (see opposite).
English
4. In the Select a modem field, select the port used on
MobileMapper CE (i.e. the port assigned previously) to
communicate with the Bluetooth modem of the cell phone
(see screen example opposite; the selected modem should
be in the form “BT Modem on <CellPhoneName> COMx”).
5. Tap Configure and then enter the data line settings on the
Port Settings tab (recommended higher speed: 57600 bd).
6. Tap on the Call Options tab. In the Special modem commands... field, then enter the modem command that is
suitable for your operator. (See table on page 17).
7. Tap OK to close the Device Properties window. Ignore the
warning message, if any. Simply tap OK to close this message.
8. In the Modem window, tap Next>.
9. In the Phone Number field, type the GPRS call number
according to your mobile phone model (see table on
page 17).
10. Tap Finish. A new icon appears in the Connection window
(see example opposite).
Step 6: Establish the GPRS Connection
1. Double-tap the icon you have just created in the connection window.
2. Enter the following parameters:
• User Name
• Password
• Domain: This parameter was automatically filled in
when entering the modem command (see Step 5).
Keep this field unchanged, even if it looks apparently
blank.
3. Enable the Save password option.
4. Tap on the Dial Properties button and then on the Edit button. This opens the Edit Dialing Patterns window.
5. Correct the content of this window in order to read “G” in
the three fields.
24
9. Tap
to close the Connection window.
10.Now it’s time to select your DGPS mode (refer to Selecting a DGPS Mode on page 28).
Troubleshooting
You may encounter problems when attempting to establish the
GPRS connection (Step 6 above). The table below may help
you solve the problem.
Message
“No Carrier Detected. Verify phone
number and then try again.”
“You have been disconnected from
the remote computer you dialed. Retry
the connection.”
“The port is not available: it is either
configured incorrectly or another program is using it.”
Action
- Double-tap connection icon
- Tap Dial Properties button
- Tap Edit button
- Reset all fields to “G”.
On the cell phone, check that the
GPRS connection capability is
activated.
Check all data entries performed
during steps 5 and 6.
Important! The Password and Domain fields (see Step 6) are
intentionally corrupted when next opening the Dial-up connection. This is done for safety purposes. You don’t need to retype these parameters. The correct values are stored in the
unit.
25
English
6. Tap OK twice to return to the Dial-up Connection window.
7. Tap on the Connect button. The following messages appear
successively: “Opening Port”, “Dialing...”,... “User
Authenticated” and “Connected”. The GPRS connection
is now established.
8. Tap Hide to close the message window.
English
Subsequent Uses
Standard Re-Start Procedure
Next time you turn on MobileMapper CE and the cell phone,
the procedure for re-establishing the GPRS connection will be
significantly shorter, as explained below. Because the two devices were paired when first using them, you don’t need to
make the cell phone discoverable.
1. On MobileMapper CE, tap
>Settings>Control Panel and
double-tap Bluetooth Manager to re-start Bluetooth Manager.
to list the existing shortcuts.
2. Tap
3. Double-tap the Dial-Up Networking icon. This re-establishes the Bluetooth connection between the cell phone
and MobileMapper CE. Tap OK to close the message window.
4. Tap
to minimize the Bluetooth Manager window.
5. Tap
>Settings>Network and Dial-up Connections.
6. Double-tap the “My Cell Phone” icon you have created in
the initial procedure (see page 23).
7. Tap on the Connect button. The following messages appear
successively: “Opening Port”, “Dialing...”,... “User
Authenticated” and “Connected”. The GPRS connection
is now established.
8. Tap Hide to close the message window.
9. Tap
to close the Connection window.
10.Select your DGPS mode (see Selecting a DGPS Mode on
page 28).
26
You may want to disconnect the GPRS connection. Follow the
instructions below to do this from the MobileMapper CE:
1. In the task bar, tap
>Settings>Network and Dial-up Connections.
2. Tap on the icon representing the currently active GPRS
connection.
3. Do one of the following:
- Tap
in the menu bar (top of the screen).
- Or Tap Connection in the menu bar (top of the screen)
and then select Disconnect. This instantly cuts off the
GPRS connection.
27
English
Disconnecting GPRS
English
Selecting a DGPS Mode
Introduction
MobileMapper CE can be operated in one of the following
DGPS modes:
1. SBAS: Differential corrections from SBAS satellites
(SBAS) are received by MobileMapper CE itself through
one of its GPS reception channels. This is the most
straightforward technique to implement DGPS in
MobileMapper CE.
2. Beacon: Differential corrections are received by the beltcarried Magellan MobileMapper beacon. This unit is connected to the MobileMapper CE via Bluetooth or a serial
cable.
3. Direct IP: Differential corrections are taken from the Internet at a fixed IP address. They are routed to MobileMapper CE via a GSM/GPRS cell phone and Bluetooth.
4. NTRIP (=Networked Transport of RTCM via Internet Protocol): Same as Direct IP except that the DGPS correction
provider uses the NTRIP protocol to route correction data.
5. Other RTCM Source: Differential corrections are received by
third-equipment delivering RTCM2.3 message types #1,
#3 and #9. This third equipment is connected to
MobileMapper CE via a serial cable or Bluetooth.
The table below summarizes the connection and identification
data needed when operating in the NTRIP or Direct IP mode.
Parameter
Direct IP
NTRIP
Host IP Address
•
•
•
•
•
•
Port Number
Login
Password
28
Step #
DGPS Mode
SBAS
Beacon via
Bluetooth
Beacon via
COM1
Direct IP
NTRIP
Other RTCM
Source
via COM1
Step 1
Step 2
Step 3
Step 4
Select SBAS
mode
Establish Bluetooth Connection
Connect Serial
Data Cable
Establish Bluetooth Connection
Establish Bluetooth Connection
Enable SBAS
mode
Select and set
(tune) beacon
Select and set
(tune) beacon
Establish GPRS
connection
Establish GPRS
connection
Enable Beacon
mode
Enable Beacon
mode
Select and set Direct
IP
Select and set
NTRIP
Enable
Direct IP
Enable
NTRIP
Connect Serial
Data Cable
Select and set
RTCM source
Enable Other RTCM
Source mode
To choose and enable a DGPS mode, use the DGPS Configuration utility as explained in detail in the continuation of this
chapter.
Once a DGPS mode is used, any accidental disruption in the
flow of incoming data packets will trigger a warning message
of the type “No differential corrections received over xx sec! Correction age limit = xx sec”. This will happen after a time tied to
the value you will have assigned to the Real Time Correction Age
Limit parameter. When this warning message appears, MobileMapper CE will automatically switch to Autonomous GPS
mode.
29
English
The table below lists the different steps you have to go through
before MobileMapper CE can operate in a given DGPS mode,
depending on whether the mode relies on the use of a COM
port, Bluetooth or GPRS.
English
SBAS
- Tap on
, then Programs>GPS Utilities>DGPS Configuration.
- Tap on the Select Mode button.
- In the Select Differential Mode window, enable the SBAS
option.
- Tap OK to close the window. This takes you back to the
DGPS Configuration window where you can read the
choice you have just made.
- Tap OK again. The window is closed and MobileMapper CE
starts operating instantly in SBAS DGPS mode, which
means it will dedicate two of its reception channels to
SBAS satellites, whenever visible and received, and only
the best one will be involved in the DGPS processing.
- Start your application.
Beacon
Two different connections to MobileMapper CE are possible
with MobileMapper Beacon: via Bluetooth (preferred) or using
a wire connection (RS232). For more information about MobileMapper Beacon, please refer to its Getting Started Guide.
1. If you are using Bluetooth:
- Place MobileMapper Beacon between 60 cm (two feet)
and 10 meters (about 30 feet) of the MobileMapper CE.
Do not stand squarely between the two. Bluetooth requires
line of sight, though you may place the Beacon on your
belt.
- Switch on both MobileMapper Beacon and MobileMapper
CE.
- On MobileMapper CE, tap on
, then Settings>Control
Panel and double-tap Bluetooth Manager. The Bluetooth
window appears on the screen after a few seconds.
30
- Tap
to minimize the Bluetooth window.
- Tap
again to close the Settings window.
- Then go to point 3. below.
2. If you are using COM1 on MobileMapper CE to communicate with MobileMapper Beacon (RS232 wire connection):
- Attach the I/O module to MobileMapper CE.
- Connect the serial cable provided with MobileMapper Beacon between the two units. See diagram below.
COM1 on I/O module
Data Connector
DB9-female
Round 7-pin connector
- Switch on both MobileMapper Beacon and MobileMapper
CE.
31
English
- Tap
. Bluetooth Manager starts searching for any
Bluetooth device present in the vicinity. At the end of the
search sequence, a MobileMapper Beacon icon should be
present in the list of found devices.
- Double-tap the MobileMapper Beacon icon. The screen
lists the only service available from MobileMapper Beacon
which is its Serial Port service.
- Double-tap the Serial Port service icon. A dialog box opens
prompting you to associate MobileMapper CE’s COM4 with
MobileMapper Beacon.
- Just tap OK. A message box appears confirming that a link
is now established with MobileMapper Beacon via Port
COM4 on MobileMapper CE. On MobileMapper Beacon,
the blue indicator light is on.
- Tap OK.
English
3. Choose MobileMapper Beacon as the DGPS data source:
- Tap on
, then Programs>GPS Utilities>DGPS Configuration.
- Tap on the Select Mode button.
- In the Select Differential Mode window, enable the Beacon
option and then tap OK. The Settings window opens to let
you configure both the beacon and the connection to this
beacon.
- In the Port field, on top of the screen, set the port through
which you will communicate with the MobileMapper beacon. Typically, you will select:
• COM1, if you are using a wire connection to
MobileMapper Beacon.
• COM4, if you are using Bluetooth.
Note that the Update button allows you to update the list of
available ports attached to the Port field. When selecting
Beacon and tapping OK, this update function is automatically run so you don’t need to tap this button. Typically,
you need to use this button after you have changed the virtual port in Bluetooth Manager and the Settings window is
already open.
Note that the Configuration button allows you to display the
settings of the selected port. But when selecting Beacon as
the DGPS data source, the settings of the selected port
are in fact forced to 4800 Bd, no parity, 8 data bits and 1
stop bit.
- Tap on the Tune button.
- Choose one of the following options to tune the
MobileMapper Beacon receiver:
• Tune Automatically (automatic method; default choice).
• Tune by Frequency (manual method: you have to specify
the frequency to which you want the receiver to tune).
• Tune By Site (manual method: you have to specify the
region, country and name of the DGPS source, i.e. the
reference station, you want MobileMapper Beacon to
receive) (see screen example opposite).
- Tap OK.
32
33
English
- Tap OK again after the message “Beacon Tuned Successfully!” appears. This takes you back to the previous screen.
- Tap Details to read the current settings and performance
indicators of the MobileMapper Beacon. The current tuning settings include reception frequency, MSK rate and
station ID of the reference station being received. The performance indicators are the lock status (No/Yes), the signal strength, measured in dBµV, and the Signal-to-Noise
Ratio (SNR) in dB. See screen example opposite. Refer to
page 64 for more detail.
- Tap OK to close this window and return to the previous
screen (Settings screen).
- On this screen, set the Real-Time Correction Age Limit
parameter (see recommendations on page 63).
- Tap OK for all the settings to take effect. The DGPS Configuration screen is now displayed.
- Tap Connect to allow MobileMapper Beacon to send its
correction data. When connection is effective and corrections are being sent, the Connect button is changed into a
Disconnect button and the status bar at the bottom of the
screen indicates the amount of incoming data packets
since you tapped the Connect button. The top of the
screen gives general status information on the DGPS mode
currently selected.
NOTE: If you had to use the now inactive Select Mode and
Settings buttons, you should have first to re-activate them
by tapping on the Disconnect button. This would disconnect the source of DGPS data from MobileMapper CE and
so would stop the flow of incoming data packets.
- Tap OK to close the DGPS Configuration window. The following two messages are displayed successively: “Please
wait...” and “Processing incoming data packets...”.
- Tap OK to close the message window.
- Run GPS Status (see Viewing Current GPS Status on
page 14) and check that MobileMapper CE is now operating in GPS Differential mode.
- Start your application.
English
Direct IP
Warning! Using Direct IP requires that you have previously followed the entire procedure described in Step-by-Step Procedure for Establishing a GPRS Connection Via Bluetooth on
page 17.
Then do the following to implement the Direct IP DGPS mode:
- Tap on
, then Programs>GPS Utilities>DGPS Configuration.
- Tap on the Select Mode button.
- In the Select Differential Mode window, enable the Direct
IP option.
- Tap OK. The Direct IP Settings window opens in which you
can store several Direct IP configurations and also set the
Real-Time Correction Age Limit parameter.
Each Direct IP configuration holds the key information
allowing MobileMapper CE to connect to a given corrections provider. Having the capability to save several Direct
IP configurations in MobileMapper CE will therefore allow
you to quickly change the corrections provider without
having to re-enter the relevant connection parameters
each time you do that.
- To enter your first Direct IP configuration, with New
selected in the Direct IP Configuration field, tap on the Add
button and then enter the following parameters:
• Name: Direct IP Configuration Name (freely choose a
name)
• Host: IP address
• Port: Port number
(The last two parameters should have been passed on
to you by the correction provider.)
- Tap OK. The name of the configuration you have just created is now pre-selected in the Direct IP Configuration field.
Two new buttons (Edit and Delete) are shown under this
field allowing you to respectively edit or delete this configuration. When you edit an existing configuration, note that
you cannot change its name.
34
-
-
-
-
-
-
35
English
To create a second Direct IP configuration, you would tap
the down arrow to the right of the Direct IP Configuration
field and select New. The Add button would appear again
under the field. You would then tap this button, enter the
three parameters of the second configuration and tap OK
to save this new configuration.
After selecting the desired configuration from the Direct IP
Configuration field, set the Real-Time Correction Age Limit
parameter according to your needs (see recommendations
on page 63).
Tap OK. This takes you back to the DGPS Configuration
window. On top of the screen, you can read part of the settings you have just made.
Tap the Connect button. The DGPS Configuration screen
now indicates the amount of incoming data packets (bottom of the screen) as well as the status of the DGPS mode
(top of the screen).
Tap OK to close the DGPS Configuration window. The following two messages are displayed successively: “Please
wait...” and “Processing incoming data packets...”.
Tap OK to close the message window.
Run GPS Status (see Viewing Current GPS Status on
page 14) and check that MobileMapper CE is now operating in DGPS mode.
Start your application.
English
NTRIP
Warning! Using NTRIP requires that you have previously followed the entire procedure described in Step-by-Step Procedure for Establishing a GPRS Connection Via Bluetooth on
page 17.
Then do the following to implement the NTRIP DGPS mode:
- Tap on
, then Programs>GPS Utilities>DGPS Configuration.
- Tap on the Select Mode button.
- In the Select Differential Mode window, enable the NTRIP
option.
- Tap OK. The first time you select NTRIP, the message No
NtripCaster specified appears.
- Tap OK to close the message window. This opens the
NTRIP Settings window.
- Tap the NtripCaster button on top of the screen. The NtripCaster Connection window opens in which you can store
several NTRIP configurations.
Each NTRIP configuration holds the key information
allowing MobileMapper CE to connect to a given NTRIP
caster. Having the capability to save several NTRIP configurations in MobileMapper CE will therefore allow you to
quickly change the NTRIP caster without having to reenter the relevant connection parameters each time you
do that.
- To enter your first NTRIP configuration, with New selected
in the NTRIP Configuration field, tap on the Add button and
then enter the following parameters:
• Name: NTRIP Configuration Name (freely choose a
name)
• Host: Host IP address
• Port: Port number
• Login: User name
• Password: User password
(The last four parameters should have been passed on
to you by the NTRIP provider.)
36
37
English
- Tap OK. The name of the configuration you have just created is now pre-selected in the NTRIP Configuration field.
Two new buttons (Edit and Delete) are shown under this
field allowing you to respectively edit or delete this configuration. When you edit an existing configuration, note that
you cannot change its name.
To create a second NTRIP configuration, you would tap
the down arrow to the right of the NTRIP Configuration field
and select New. The Add button would appear again under
the field. You would then tap this button, enter the five
parameters of the second configuration and tap OK to save
this new configuration.
- After selecting the desired configuration from the NTRIP
Configuration field, tap OK. MobileMapper CE connects to
the NTRIP caster. The NTRIP Settings window is displayed again on which you can choose a network and station (corrections source) from the caster.
- The best choice is to use the station the nearest to your
current location. Tap on the Find Nearest button to find and
select this station. This causes the Network and Station
fields to be automatically updated. The distance to this
station is indicated just underneath the Station field. A
second parameter in the same line tells you whether the
selected station provides VRS corrections data or not (VRS
for “Virtual Reference Station”; if VRS, the station provides corrections data for a virtual station that would be
located where you are. If not VRS, the corrections data are
computed for the true location of the station).
English
-
-
-
-
-
38
Note that the screen includes a More Details button allowing you to view the properties of the selected station. Tap
on this button. The NTRIP Station Details screen is displayed on which you can use the following buttons:
• Previous and Next to view the properties of respectively
the previous and next stations from the list of stations
provided by the caster.
• Select to select the station whose properties are currently displayed. This takes you back to the NTRIP
Settings screen on which you can now see the name of
this station in the Station field.
• Cancel to return to the NTRIP Settings screen without
changing the choice made in the Station field.
Set the Real-Time Correction Age Limit parameter (see recommendations on page 63).
Tap OK. This takes you back to the DGPS Configuration
window. On top of the screen, you can read part of the settings you have just made.
Tap the Connect button. The DGPS Configuration screen
now indicates the amount of incoming data packets (bottom of the screen) as well as the status of the DGPS mode
(top of the screen).
Tap OK to close the DGPS Configuration window. The following two messages are displayed successively: “Please
wait...” and “Processing incoming data packets...”.
Tap OK to close the message window.
Run GPS Status (see Viewing Current GPS Status on
page 14) and check that MobileMapper CE is now operating in DGPS mode.
Start your application.
- Switch on the external device providing RTCM corrections
data.
If you want to use COM1 on MobileMapper CE to communicate with the external device, connect the adequate
serial cable between the two units.
- Tap on
, then Programs>GPS Utilities>DGPS Configuration
- Tap on the Select Mode button
- In the Select Differential Mode window, enable the Other
RTCM Source option. The Settings window opens to let you
configure the connection to the external source.
- In the Port field, on top of the screen, set the port through
which you will communicate with the external device. By
default, two ports are available:
• COM1, the only “physical” COM port available on the
MobileMapper CE. Note that COM1 will not be available from the list if it’s used by another application
• COM3, a Bluetooth port that is automatically set at
power on (see also Local Services on page 52).
Note that the Update button allows you to update the list of
available ports attached to the Port field. When selecting
Other RTCM Source and tapping OK, this update function is
automatically run so you don’t need to tap this button.
Typically, you need to use this button after you have
changed the virtual port in Bluetooth Manager and the
Settings window is already open.
- Tap the Configuration button to edit or view the settings of
the selected port. A Test button allows you to test the
availability of the port.
- Tap OK to close the Port Configuration window. This takes
you back to the Setting window.
- On this screen, set the Real-Time Correction Age Limit
parameter (see recommendations on page 63)
- Tap OK and then Connect.
39
English
Other RTCM Source
English
- Tap OK to close the DGPS Configuration window. The following two messages are displayed successively: “Please
wait...” and “Processing incoming data packets...”.
- Tap OK to close the message window.
- Run GPS Status (see Viewing Current GPS Status on
page 14) and check that MobileMapper CE is now operating in DGPS mode.
- Start your application.
Returning to Autonomous GPS Mode
- Tap on
, then Programs>GPS Utilities>DGPS Configuration.
- Tap on the Select Mode button.
- In the Select Differential Mode window, enable the None
option.
- Tap OK to close the window. This takes you back to the
DGPS Configuration window where you can read the
choice you have just made.
- Tap OK again. The window is closed and MobileMapper CE
starts operating instantly in Autonomous GPS mode.
Subsequent Uses
Next time you turn on MobileMapper CE and you run the
DGPS Configuration utility, you will be prompted to run the
same DGPS mode as the one you last used. If it was Direct IP
or NTRIP, the configuration you last used is preset. If it was
MobileMapper Beacon, the last used station is preset.
This means the only thing you will have to do to get the MobileMapper CE running, and provided you agree with all the
default choices, is to tap on the Connect button and then start
using the corrections received by tapping OK.
CAUTION! For Direct IP or NTRIP, you will have to re-establish
the GPRS connection via Bluetooth (see Subsequent Uses on
page 26) before running the DGPS Configuration utility. For
MobileMapper Beacon via Bluetooth, you will have to re-establish the Bluetooth link before running the DGPS configuration utility.
40
Power Modes
MobileMapper CE comes with a removable/rechargeable battery, which provides enough energy for a full working day –provided you start your day with a fully charged battery. In order
to ensure a longer battery life, use the external power whenever possible. When used, the external power source also automatically recharges the internal battery.
The built-in advanced power saving features also help to optimize power consumption while the system is idle. The MobileMapper CE system has three power saving modes when
the battery power is used:
1. User Idle mode: Backlights for both the display and keypad
are switched off. Press any key or tap on the screen to
switch on the backlights again.
To switch off the backlights, tap
(backlight) in Control
Panel. In the Backlight Control dialog that opens (see figure
opposite), tap the Backlight OFF button.
2. System Idle mode: The display as well as the backlights are
switched off, but all the processes are still running. The
power LED is on. Press any key or tap on the screen to
switch on the display again.
3. Full Shut Down Mode: The system is shut down. The
MobileMapper CE is switched off. The Power LED is off.
You can configure the MobileMapper CE handheld to automatically enter each mode when it has been idle for a specified
time.
To change the idle time, tap
Power in the Control Panel.
Then make the necessary changes in the Schemes tab (see opposite.)
41
English
Power & Memory Management
English
Turning Off MobileMapper CE Manually
Tap
, then Suspend. In the Shut Down window that opens,
just tap OK. After a few seconds, the MobileMapper CE will
shut down.
Checking Battery Status
To check the battery level, tap
, then Settings>Control panel>Power. See screen example below.
LED Indicators
Power
Power LED (Green)
Off
Solid Green
Indicates:
Device Switched Off
Power On
Charge LED (Amber)
Off
Solid Amber
Charge
Blinking Amber
Indicates:
Not charging
Battery is fully charged
Battery is charging
The charge LED will give charging information only if the receiver is on.
Memory Management
The MobileMapper CE has three types of memory:
- The Nand Flash memory (“MyDevice”), a non volatile
memory.
- The removable SD Card memory, a non-volatile memory.
- The RAM (volatile memory), mainly used for running programs.
Programs or data that are saved in the RAM will be erased
when the system is switched off!
We recommend that you install programs on “MyDevice” and
store your data on SD card.
42
The set of GPS utilities provided in the Start menu allows you
to configure and monitor MobileMapper CE’s internal GPS receiver. This chapter describes the full set of GPS Utilities,
which includes the following items:
- DGPS Configuration
- GPS Initialization
- GPS Ports Configuration
- GPS Reset
- GPS Settings
- GPS Status
- Mission Planning
Note that some of these utilities have been described earlier
in this guide (see Preparing for First-Time Use chapter).
DGPS Configuration
The DGPS Configuration utility contains the latest MobileMapper CE enhancements. It is indeed through this utility
that you can implement the .NET capabilities of the unit,
namely NTRIP and Direct IP.
- Tap on
, then Programs>GPS Utilities>DGPS Configuration.
The DGPS Configuration window opens showing the current status of the DGPS configuration (top of the screen;
see example opposite).
At the bottom of the screen, a message indicates whether
correction data is being received or not.
- Tap on the Select Mode button. A new screen is displayed
on which you can select the Differential mode you would
like to use. For more information about DGPS Configuration, see Selecting a DGPS Mode on page 28.
GPS Initialization
See Initializing GPS on page 12.
43
English
GPS Utilities
English
GPS Ports Configuration
Using the GPS Ports Configuration utility, you can ask MobileMapper CE to output data messages to another device
through the GPS auxiliary output port or to the application
running on MobileMapper CE through the GPS VSP output
port (VSP=Virtual Serial Port; this port is also known as
COM2).
Using this utility, you can therefore:
• Enable or disable the GPS auxiliary output port.
• Change the settings of the GPS auxiliary output port.
• Read the settings of the GPS VSP output port (these settings cannot be changed).
• Define the content of the unique output message sent to
both the GPS VSP output port (this port is always enabled)
and the GPS auxiliary output port (if enabled).
Follow the instructions below to output a message via COM1:
- Tap on
, then Programs>GPS Utilities>GPS Ports Configuration.
- In the GPS Auxiliary Output pane, check the Enable Messages option and then make sure “COM1” is selected in
the Port field.
- Tap Configure Port to configure the selected port. Enter its
baud rate, number of start and stop bits and set its parity
and flow control parameters. Then tap OK.
- To read the settings of virtual port COM2, tap Port Status in
the GPS VSP Output pane. You can only read these settings and not change them.
- Tap on the NMEA tab on top of the screen.
44
NOTE: To output GPS from MobileMapper CE to another computing device via serial port (RS232), you must connect the
two devices using a null modem cable.
GPS Reset
Use the Reset GPS utility to cause the internal GPS receiver
to re-initialize. You may need to run this utility if for example
you want to force the GPS receiver to acquire new almanac
data from the GPS constellation and then use this data in the
position computation process.
- Tap on
, then Programs>GPS Utilities>GPS Reset. A warning message appears explaining that you are about to run
a cold reset (see screen opposite).
When you use this utility, in fact you clear the GPS
receiver’s memory. That’s why the time to first fix will be
longer after a cold reset than after a normal reset. Normal
reset takes place every time you turn on the unit.
- Tap on Cold Reset.
- After a few seconds, the message “Reset successful” is displayed. Tap OK to close the GPS Reset utility.
45
English
- Check all the NMEA data strings you want to include in
the output message and for those strings, choose an output rate in seconds. Clear all the NMEA data strings you
do not want to include in the output message (see screen
example opposite). The available messages are: GGA,
GLL, GSA, GSV, RMC, RRE, VTG and ZDA.
- Tap Apply and then OK. This closes the GPS Port Configuration window. MobileMapper CE is now set to output a
message via COM1 and virtual port COM2.
English
As explained in the GPS Reset window, you may reduce
the time to first fix by running the GPS Initialization utility
(see Initializing GPS on page 12). Until a new almanac
file is received from the GPS constellation, MobileMapper
CE uses a non-erasable almanac file stored in its memory
to start the satellite acquisition process.
GPS Settings
See Setting Up GPS on page 13.
GPS Status
See Viewing Current GPS Status on page 14.
Mission Planning
The Mission Planning utility enables you to view the visibility
and availability of the constellation of satellites and determine
the dilution of precision (DOP) for any location on the Earth.
It allows you to plan the best time of the day for data collection and maximize productivity.
To be able to determine the configuration of satellites, an almanac file is used in Mission Planning. This file is generated
and loaded automatically when you get the first GPS fix.
- Tap on
, then Programs>GPS Utilities>Mission Planning.
The Mission Planning window appears (see opposite) with
the sky plot and PDOP (satellite geometry) graphs. Top left
of the screen is the name of the almanac file used to make
the satellite prediction (alm<year (last two digits)><day in
year (1-365)>).
- Instructions for proper use of Mission Planning are summarized in the table below.
46
Function
English
Icon
Screen
Tap this icon to close the Mission Planning utility window.
- Tap this icon to choose the location on Earth for which Mission
Planning will determine the GPS constellation.
- You can key in the exact coordinates of your site or directly tap
on the map to indicate where this site is (see screen example
opposite). Tapping on the map automatically updates the
coordinates in the Latitude and Longitude fields.
- Then tap OK to validate these coordinates. This takes you
back to the Mission Planning window on which you can see
the GPS constellation for this location.
Tap this icon to set the exact date & time for which you want
Mission Planning to determine the GPS constellation for the
selected location.
Tap this icon to open the Setup window. This window allows you
to set the cut-off angle, the maximum PDOP value and whether
or not to include elevation for the GPS position (2D or 3D).
Tap this icon to access the sky plot graph settings. The following
two items can be shown or hidden:
- Grid: Grid lines intersecting at the center of the graph
- Track: Color curve showing satellite orbit versus time.
Tap this icon to access the PDOP graph settings. The following
three items can be shown or hidden:
- Grid: Grid lines
- PDOP: PDOP value versus time
- Availability: Count of visible satellites versus time.
Tap this icon to read the software version of the Mission Planning utility.
47
English
Switching Between Two Utilities
Use the icon located at the far right in the task bar to switch
from a running application to another.
For example if DGPS Configuration and GPS Status are both
running in the background while using Mission Planning, the
menu opposite will pop up when you tap this button.
Just tap the name of the application you want to go to.
48
This chapter gives general information on MobileMapper CE’s
Bluetooth Manager module. For detailed information on how
you can establish a GPRS connection via Bluetooth Manager,
please refer to Step-by-Step Procedure for Establishing a
GPRS Connection Via Bluetooth on page 17.
Introduction
MobileMapper CE is equipped with built-in Bluetooth technology that allows short-range connections to other Bluetooth-enabled devices such as cellular phones, personal digital
assistants (PDA), desktop or notebook computers.
Bluetooth offers fast, reliable, and secure wireless communication.
Host and Inquiring Devices
In any communication between two Bluetooth-enabled devices, one of them is the inquiring device and the other the host
device:
• The inquiring device is the one that detects and uses one
of the local services of the other device.
• Reciprocally, the host device is the one that is discoverable and that makes its local services available for the
inquiring device.
Here are two typical examples in which MobileMapper CE is
successively the inquiring device and the host device:
• When you operate MobileMapper CE in NTRIP or Direct IP
DGPS mode, the cell phone used is the host device and
MobileMapper CE is the inquiring device. The local service used in the cell phone is the Dial-Up Networking service.
• When you output GPS data via the auxiliary port,
MobileMapper CE is the host device and the external
device receiving the data via Bluetooth is the inquiring
device. The local service used in MobileMapper CE is the
Serial Port Service.
49
English
Bluetooth Manager Module
English
Bluetooth Range
The maximum range in class 2 devices is 10 meters (30 feet)
typically. A minimum distance of about 60 cm (two feet)
should be observed between any two Bluetooth-enabled devices.
First Steps with Bluetooth Manager
Starting Bluetooth Manager
- Tap
>Settings>Control Panel and double-tap Bluetooth
Manager. The Bluetooth window appears on the screen
after a few seconds.
Note the presence of the
icon in the task bar.
For a quick overview of the functions accessible from the
Bluetooth Manager toolbar, please refer to the table in
Bluetooth Manager Toolbar Memo on page 65.
Minimizing/Maximizing the Bluetooth Window
- Tap
in the upper-right corner. This minimizes the Bluetooth window (but Bluetooth is still running).
- In the task bar, tap
and then select Show from the popup menu. This opens the Bluetooth window on the screen.
Turning Off Bluetooth
- In the task bar, tap
and then select Exit from the popup menu. This turns off Bluetooth.
Detecting Bluetooth-Enabled Devices
Use the following two buttons to let MobileMapper CE’s local
Bluetooth controller detect the Bluetooth-Enabled devices
present nearby:
50
- Tap
every time you need to refresh the list of Bluetooth-enabled devices present nearby.
NOTE 1:
is only active after
has been tapped.
NOTE 2: At the end of a search, the name or class of a
detected device may not have been found. In this case,
tap and hold the “Unknown” icon and then select Update
in the pop-up menu to let Bluetooth Manager determine
these parameters.
PIN Code, Detectability & Authentication
- Tap
in the Bluetooth Manager toolbar. This opens the
Properties window on which you can read or edit the properties of the local Bluetooth controller.
- Tap on the Security tab. The bottom of the window shows
the default PIN code. This code should be entered in any
remote device that attempts to pair itself with MobileMapper CE.
- To change the PIN code, enter the desired code in the
Default PIN field.
- To make the device discoverable (or detectable), enable
the Let other devices discover check box. Otherwise disable
this option (default setting: enabled).
51
English
- Tap
the first time you run a search. The message
“Searching...” is displayed in the status bar (bottom of the
screen) during the search.
The search sequence first focuses on paired peripherals
and then searches for distant peripherals. “Ready” is displayed at the end of the search. When next tapping this
button, you will just list all the Bluetooth-enabled devices
that were detected during the last search, regardless of
whether these devices are still present or not.
English
- To demand that a remote device be allowed to access the
local services only after pairing itself with MobileMapper
CE, check the Enabled box underneath Authentication. Otherwise keep this option disabled (check box cleared).
Caution! This option is automatically disabled every time
you start Bluetooth Manager.
- Tap OK on top of the window for the changes to take
effect.
Local Services
Introduction
The local services offered by MobileMapper CE’s Bluetooth
controller are the following:
• Serial Port Service. The Serial Port service allows you to
exchange data with a remote device via a virtual Bluetooth
serial port. This service is used when outputting GPS data
via an auxiliary output (see GPS Ports Configuration on
page 44).
• File Transfer Service. This service allows any two Bluetooth-enabled devices to exchange files.
• Object Push Service. This service is required to run the
File Transfer Service but is not usable as such in MobileMapper CE.
To list the local services offered by MobileMapper CE:
• Tap
located in the Bluetooth Manager toolbar. The
Bluetooth window shows the three icons representing its
three local services.
Note that all the services are made active at power up (a
small green circle containing a plug symbol is visible on
each of the icons; see screen opposite).
52
• Tap
in the Bluetooth Manager toolbar.
• Tap and hold the icon representing the local service
you want to deactivate and then select Stop. This
instantly stops the concerned local service.
Note that when you deactivate the File Transfer Service or Object Push Service, you automatically deactivate these two services.
To re-activate a local service:
• Tap
in the Bluetooth Manager toolbar.
• Just tap and hold the concerned icon and then select
Start.
When you re-activate the Serial Port Service, Bluetooth
Manager asks you to select the COM number you want
to assign to the virtual port. Choose any port from the
list and then tap OK. A message indicates that the port
is now ready. Tap OK to close the message window.
To change the identification of the Bluetooth virtual port used
by the Serial Port service, the Serial Port Service must be
stopped first. When you re-start it, you can change the port
used as explained above.
Using the Serial Port Service
Assuming you want to send the NMEA messages coming out
from your MobileMapper CE to a computer screen, follow the
procedure below, based on the use of MobileMapper CE’s Serial Port Service:
- On MobileMapper CE, make sure:
• The Serial Port Service is activated and a COM port is
assigned to it (COM3 for example).
• NMEA messages are enabled (see GPS Port Configuration, page 45).
53
English
To deactivate a local service:
English
• GPS output is enabled via the COM port assigned to
the Serial Port Service (COM3 in our example) (see
GPS Port Configuration, page 44).
• Remember ALL the COM3 settings as you will need
them on the computer (see GPS Port Configuration,
page 44).
- On
•
•
•
•
•
•
•
the computer:
Run Bluetooth.
Detect MobileMapper CE.
If required, pair the two devices (you’ll need to enter
the PIN code defined in the MobileMapper CE Bluetooth properties; see page 51).
List the local services offered by MobileMapper CE
Use the listed Serial Port Service icon to connect the
computer to the MobileMapper CE Serial Port Service
through one of its virtual ports (COM4 for example).
Run HyperTerminal, name the session, select the computer port used to communicate with the external
device (COM4 in our example). Click OK.
Enter the same port settings as those used by the COM
port on MobileMapper CE (COM3 in our example).
Click OK. You can now see the NMEA messages in the
HyperTerminal window as they are output from
MobileMapper CE.
Using the File Transfer Service
Assuming you want to transfer files between two MobileMapper CE units, follow the procedure below, based on the use of
MobileMapper CE’s File Transfer Service:
- On the host MobileMapper CE, make sure:
• Its File Transfer Service is activated.
• Its File Transfer Service properties include the path
and name of the folder containing the files you want to
transfer to the inquiring MobileMapper CE (for example the folder path and name are: \Application
Data\Job101\).
54
- On the inquiring MobileMapper CE:
• Run Bluetooth.
• Display the properties of its File Transfer Service as
explained above for the host device.
• Enter the path and name of the local folder through
which files will be exchanged with the host (for example the path and folder name are: \Application
Data\Job547\).
• Detect the host MobileMapper CE.
• If required, pair the two devices (you’ll need to enter
the PIN code defined in the host MobileMapper CE
Bluetooth properties; see page 51).
• List the local services offered by the remote (host)
MobileMapper CE.
• Double-tap the remote File Transfer Service icon to
connect the inquiring unit to the host’s File Transfer
Service. As a result the Bluetooth Manager window
now lists the content of the remote folder (in our example, the window would show the content of \Application Data\Job101\ on the host MobileMapper CE).
If the remote folder contains a sub-folder (\Application
Data\Job101\Day1\ for example), you can double-tap
on the sub-folder icon to list the content of this subfolder and then download files from this subfolder.
Tap
in the toolbar when you want to go up to the
initial folder (\Application Data\Job101\).
• To download files from the host to the inquiring
device, tap and hold the icon corresponding to the file
you want to download and then select Get file. This
starts the file transfer. Once the transfer is complete,
the downloaded file can be found in the preset folder
on the inquiring device (in our example, the file would
be found in \Application Data\Job547\).
55
English
To change this parameter, tap and hold the File Transfer
Service icon and then select Properties. A window opens in
which you can edit this parameter.
English
• To upload files from the inquiring device to the
host, tap and hold the stylus on a blank area (i.e. not
on a file icon) within the Bluetooth Manager window.
When a dotted circle appears, remove the stylus and
then select Add file in the pop-up menu. This opens a
browser.
Open the local folder containing the file you want to
upload, select this file and tap OK. This starts the file
transfer. Once the transfer is complete, the uploaded
file can be found in the selected folder on the host
MobileMapper CE (in our example, in \Application
Data\Job101\). As the inquiring MobileMapper CE is
still listing the content of this remote folder, the name
of the uploaded file is now also visible in the Bluetooth
Manager window (new file icon added following the file
transfer).
Creating Shortcuts for Remote Services
Once a service in a detected remote device has been found,
you can create a shortcut for this service. This means you will
no longer have to ask MobileMapper CE to find this service to
be able to use it.
- To create a shortcut, tap and hold the service icon and
then select Shortcut in the popup menu. This instantly creates the shortcut.
- To view the shortcut icon, tap
56
.
English
Optimizing Accuracy
General Guidelines
There are five basic rules for recording MobileMapper CE rover
data so as to achieve the optimal accuracy:
1. Allow the receiver to have full “view” of the sky the entire
time a job is open, not just when logging data to a feature.
There are three things you can do to improve signal reception:
• While you do not need a survey-grade external antenna
for sub-meter accuracy, using one will yield better
accuracy in all environments.
• If you are not using an external antenna, keep the
MobileMapper CE receiver at a 45-degree angle the
entire time a job is open (or as long as possible).
• If you are not using an external antenna, keep the
MobileMapper CE receiver as high as possible the
entire time a job is open (or as long as possible).
2. When you record a point feature, remain stationary for 10
seconds both before opening the feature and after closing
the feature.
3. Average all point features for at least 30 seconds.
4. Make sure you are using the latest firmware (both the
Operating System firmware and GPS firmware) for the
MobileMapper CE receiver and the latest version of
MobileMapper Office).
5. Adjust the SNR, PDOP and Elevation masks on the
receiver to reflect your environment.
57
English
Recording Data for Post-Processing
There is one additional rule for optimizing MobileMapper CE
accuracy when recording rover data that will be differentially
corrected by MobileMapper Office in post-processed mode:
All features must be logged while the receiver is continuously
tracking at least 5 satellites with a PDOP less than 4 for at
least 20 minutes.
You need to record only a single “epoch” of GPS data to get a
position, but you need to record at least 20 minutes of data to
post-process it for sub-meter accuracy. All features recorded
within a 20-minute portion of a job file will be correctable to
submeter accuracy.
For example, if you record a job over a one-hour period and
lose lock on (i.e. fail to continuously track) the available GPS
satellites at Minute 20 and Minute 40, all of the features in
this job were recorded during a 20-minute period of continuous GPS signal lock, and so all can potentially be post-processed for submeter accuracy.
But if you record a 60-minute job and lose lock at Minute 20,
Minute 30 and Minute 40, any feature recorded between
Minute 20 and Minute 40 may not be sub-meter because they
were recorded during 10-minute periods of continuous satellite tracking.
Without knowing a lot of other factors, it is hard to say how accurate a feature recorded during a 10-minute period of continuous lock will be, but it will be more accurate than a realtime corrected position.
58
59
English
If the period of continuous lock is less than 5 minutes, the
SBAS-corrected position may be more accurate.
When recording a job for post-processing, the receiver records
GPS measurements the entire time the job is open – not just
when you’re recording data into a feature.
Therefore, you do not need to record each feature for more
than 20 minutes. Each feature has to be recorded during a
portion of the job file where you maintained lock on the satellites for at least 20 minutes.
If you open a job, open a point feature 19 minutes later,
record the point feature for 60 seconds and close the feature
and the job, the feature will be recorded during a period lasting 20 minutes and you should have sub-meter accuracy.
For this reason, it is best to open the job as soon as you are in
a position to maintain constant satellite lock and close it more
than 20 minutes later.
Lastly, logging a series of GPS raw measurement files instead
of just one degrades accuracy. So unless there is some special
need to open and close multiple raw measurement files, we
recommend you start logging GPS raw measurements before
you log data into the first shapefile and stop logging raw measurements after you close the last shapefile.
For a further discussion of MobileMapper CE accuracy performance, please read "MMCEPerformanceWhitePaper.PDF" and
“GPSDifferentialPaper.pdf” found at ftp.magellangps.com in
the \Mobile Mapping\MM CE\Application Notes\ folder.
English
Appendices
Updating MobileMapper CE OS Firmware
The current version of MobileMapper CE Operating System
(OS) firmware can be downloaded from ftp.magellangps.com
in the /Mobile Mapping/MM CE/Firmware/OS Firmware/ folder.
1. Turn on MobileMapper CE and either attach it to external
power or make sure that there is at least a 25% charge in
the battery (tap Start>Settings>Control Panel>Power).
2. Copy the OS firmware file with the *.nbx file extension
(e.g., NK_x_xx.nbx) to an SD card.
Note that OS firmware must be loaded from an SD card.
Do not copy the *.nbx file to MobileMapper CE’s MyDevice
folder.
3. With the SD card inserted into MobileMapper CE, doubletap the My Computer icon on the desktop and then the Windows folder.
4. Scroll to the bottom of the Windows folder and double-tap
the OSLoader icon to launch the program (OSLoader.exe).
You will see a message saying: “Please choose a new image
file. The image file cannot be in the MyDevice directory.”
5. Tap OK.
6. On the Open file screen, browse to the SD card, tap the
OS firmware file and tap OK in the upper right of the
screen.
7. When you see the “Are you certain that you want to update the
operating system?” message, tap Yes.
You will now see a progress bar on the OS Loader screen.
It takes a few minutes to upload the firmware.
60
9. Tap
in the upper right of the Windows screen to exit
back to the desktop.
10.Turn off the receiver by tapping
, then Suspend and
then OK button.
11.After a few seconds, MobileMapper CE’s green LED will
shut off. You may then press the power button to turn the
receiver back on.
12.You may verify that the new OS firmware has been successfully uploaded by tapping:
>Settings>Control Panel
13.Scroll down to the Thales System Info icon. Double-tap on
this icon. Confirm that the OS F/W Version is that which you
just uploaded.
Updating MobileMapper CE GPS Firmware
1. Go to ftp.magellangps.com and copy the GPS firmware zip
file (beginning with an “E” such as “E024.zip”) from the /
Mobile Mapping/MM CE/Firmware folder to any folder on
your PC.
2. Open the GPS firmware zip file on your PC and extract the
files to the same directory.
3. Copy the extracted files to MobileMapper CE’s SD card by
using either a card reader or ActiveSync. To use ActiveSync, turn on MobileMapper CE and connect it to your PC
using the USB cable that runs between MobileMapper
CE’s I/O module and your PC’s USB port. This causes
ActiveSync to launch on your PC and connect to
MobileMapper CE as a “Mobile Device.”
Note: Most MobileMapper CE users do NOT set up a partnership when connecting to the PC with ActiveSync, but
you can if you wish.
61
English
8. When you see a message saying, “Operating system updated
successfully,” tap OK on the OS Loader window.
English
4. Copy all the files extracted from the GPS firmware zip file
from your PC to the MobileMapper CE’s SD card using
ActiveSync’s Explore utility. The Explore button is located
in Microsoft Active Sync window’s taskbar (third button
from the left).
5. Some versions of ActiveSync require that you click the
Explore utility’s Folders button (in the task bar) in order to
copy/paste files from one location to another.
6. With the files copied to the SD card, tap the My Computer
icon on the desktop and select the SD card.
7. Double-tap baldur.exe (located on the SD card) to launch
the firmware loader.
8. On the firmware loader screen, tap the "Connect GPS" button and wait until the message "GPS connected at 4800"
is displayed in the firmware loader‘s white message field.
9. Tap the GPS firmware loader’s "Load" button and wait
until the message "FLASH upload complete" is displayed
at the bottom of the screen.
10.Tap "X" on the top right corner of the GPS firmware loader
to close the application.
11.Tap “X” on the top right corner of Windows Explore.
12.Completely turn off MobileMapper CE by tapping:
>Suspend and tapping OK.
13.Once MobileMapper CE’s power light goes off, restart it,
tap
>Settings>Control Panel and scroll down to the Thales
System Info icon.
14.Double-tap the Thales System Info icon and confirm that
the GPS F/W version is that which you just uploaded.
15.To update another MobileMapper CE receiver with the latest GPS firmware, remove the SD card and insert it into
the other receiver. Repeat Steps 6 through 14.
62
When first using your MobileMapper CE, and because there is
no recent almanac file available yet in the unit, the internal
GPS receiver (or Mission Planning if used at that time) will use
a default almanac file stored in its protected memory.
After receiving GPS satellites for about 12 to 25 minutes, the
internal GPS receiver will be able to create a new almanac file.
This file will be stored in the “Windows” folder and named as
follows:
almyy.ddd
Where alm is the filename header
yy are the last two digits of the year (“06” for 2006)
ddd is the file extension and stands for the day in year
(001 to 365).
You can also store your own almanac files in the “Windows”
folder using the same naming convention as the one described
above.
The internal GPS receiver and Mission planning will always
use the most recent almanac file stored in the Windows folder.
To force the use of a certain almanac file, rename this file (or
rename the others) so that it can be seen as the most recent
almanac. If you do that, don’t forget to rename the files after
use.
Choosing the Appropriate Real-Time Correction Age Limit
When selecting a DGPS mode, you have to set a parameter
called Real-Time Correction Age Limit. Here are a few recommendations to help you set this parameter to the appropriate value.
The default value is 2 minutes. This is a good value to work
with in most cases. If for any reason, the reception of DGPS
corrections is of poor quality, you can increase this time limit
up to 10 minutes without significantly impairing the position
accuracy normally achieved with DGPS.
63
English
About Almanac Files
English
Assessing MobileMapper Beacon
Reception Quality
As long as the green lock indicator light on MobileMapper
Beacon stays on, you can be certain that MobileMapper CE
can readily deliver a DGPS solution using the incoming correction data packets from MobileMapper Beacon.
You can verify this by running the GPS Status utility (see Viewing Current GPS Status on page 14; In the status bar at the
bottom of the screen, “Differential GPS” should be displayed
and the indicator light should flash in blue.)
But if you notice that the green indicator light on MobileMapper Beacon sometimes temporarily turns off, this means the
signal received is not as strong as it should be. The reasons
for this are the following:
- Too many obstructions between you and the station. See
how you can limit these obstructions.
- Or you are nearly out of range of the station. Consider
working with a closer station, if possible.
- Or atmospheric noise has significantly increased thus
reducing the SNR. Consider working with a station that
would give a better SNR.
MobileMapper CE gives you the ability to analyze the key reception parameters of the MobileMapper Beacon. You can do
this anytime, when setting the DGPS beacon mode, or later
while using the beacon provided you first ask MobileMapper
CE to stop processing the incoming correction data packets.
This is done by tapping the Disconnect button in the DGPS
Configuration window. You can then tap on the Settings button
and then on the Details button to view the Beacon Details
screen. (See also page 32.)
Among all the parameters displayed on this screen is the Signal to Noise Ratio (SNR). This is the most important parameter
to look at.
64
SNR
SNR<10 dB
10 <SNR<20 dB
SNR>20 dB
DGPS Data Reception Quality
Very Critical; DGPS mode steadiness is very unlikely.
Good but critical; if signal deteriorates, even slightly,
MobileMapper CE won’t be able to maintain DGPS mode.
Excellent; there is signal level “in reserve”, which means even
if the signal slightly deteriorates, DGPS mode will be maintained.
Bluetooth Manager Toolbar Memo
Icon
Function
Terminates the search sequence in progress.
Launches a search sequence (“Searching...” is displayed in the status
bar) to find all the Bluetooth devices present in the vicinity. New icons
appear in the window as new devices are detected. “Ready” is displayed in the status bar at the end of the sequence.
NOTE:
is only active after
has been tapped.
Allows you to list the content of the parent folder. Valid when using the
File Transfer service of a remote MobileMapper CE after you have
opened a subfolder.
Lists the shortcuts you created for the Bluetooth services found in the
detected remote devices. Any shortcut can be deleted from the list.
Is initially used to search all the remote Bluetooth devices present in
the vicinity.
Tapping this button after a search has been performed simply lists the
Bluetooth devices that were detected during the last search sequence.
Tap
to refresh the list of detected Bluetooth devices.
Provides access to all Bluetooth local services available in the
MobileMapper CE unit.
Allows you to view or edit the properties of MobileMapper CE’s Bluetooth device: General, Security and Options.
Returns the software version of Bluetooth Manager software.
Minimizes the Bluetooth Manager window (but keeps Bluetooth Manager running).
65
English
The table below gives indications on how safe DGPS operation
with MobileMapper Beacon will be, depending on the value of
the SNR.
English
Index
GSA 45
GSM/GPRS 28
GSV 45
Symbols
H
,
*99# 17 18
Handstrap 3
Host 34 49
Host IP address 28 36
,
A
AC adapter 6
ActiveSync 9 61
Almanac data 63
Authentication 52
Automatic tuning 32
Autonomous GPS 14
Azmth/Elvn 15
, ,
I/O module 3 5 9
Initialize GPS 12
Inquiring device 49
L
B
Backlight 7
Battery door 3 5
Beacon 28 30 31
Bluetooth Manager 20 22 49
65
,
, ,
, , ,
C
Calibrating the screen 7
Carrier 25
CD 9
Charging 5
Cold Reset 45
COM2 16 44
Custom 13
,
LED Indicators 42
Local services (Bluetooth) 22
Lock status 33
Log NMEA Data 16
Login 28 36
,
M
Manual tuning 32
Maximum DOP 13
Message types #1 and #3 28
Microphone 3
Mini USB 4
Minimum distance (between
Bluetooth-enabled devices) 20
Minimum SNR 14
Mission Planning 46
Modem command 17 18
Motorola V500 17
MSK rate 33
MyDevice 9 42 60
,
D
DC Power Input 4
DGPS Configuration 30 32 34
36 39 40
Dial-up Networking 22
Differential GPS 14
Direct IP 28 34 43
Disconnect GPRS 27
Distance to station 37
Domain 17 18
DOP type 13
Dot-Shift key 11
Download files 55
Drag 11
, , ,
, ,
, ,
,
E
Elevation Mask 14
External Antenna 4
EZ Recorder 2
F
File Transfer Service 52
Find Nearest 37
Fix Not Available 14
Full Shutdown mode 41
G
GGA 45
GLL 45
GPRS 28
GPRS call number (GPRS
numbering) 17 18
GPRS operator 19
GPS auxiliary output 44
,
66
,
I
,
, ,
N
Nand Flash memory 42
NMEA 44
NMEA data 16 45
Nokia 6021 17
NTRIP 28 36 43
NtripCaster 36
,
, ,
O
Object Push Service 52
On-screen keyboard 10
Open Sky 13
OSLoader 60
Other RTCM Source 28
P
Paired peripherals 51
Pairing Bluetooth-enabled devices
21
Panel 15
Password 17 28 36
PDOP 46
Phone number 24
Pin code 21 51
Port number 28 36
Power button 6
Properties (Bluetooth Properties)
51
, ,
,
,
RAM 42
Real-Time Correction Age Limit
33 38 39 63
Real-time corrections 3
Removable SD Card memory 42
Reset 4
RMC 45
RRE 45
RS232 45
RTCM 3
RTCM source 39
RTCM2.3 28
, , ,
S
Save password 24
SBAS 3 28 30
Scrolling button 3
SD card slot 4
SDK 2
Security 51
Select a modem 24
Select Mode 30 43
Serial port (COM1) 4
Serial Port Service 52 53
Shortcut 23 56
Siemens S55 17
Sig/Nav 15
Sky plot 46
SNR 33 64
Sony Ericsson T68i 17
Speaker 3
Station 38
Station ID 33
, ,
,
,
,
,
Stats 15
Stylus 2 7 11
System Idle mode 41
English
R
, ,
T
Tap 11
Tap and hold 11
Text Input 10
Thales System Info 61
Thresholds 16
Tree Canopy 13
Tune by site 32
U
Update GPS firmware 61
Update OS firmware 60
Upload files 56
Urban Canyon 13
USB 9 61
USB flash drive 4
USB host port 4
User Idle mode 41
User Name 17
,
V
VRS 37
VSP 44
VTG 45
W
Windows CE .NET 10
Z
ZDA 45
67
MobileMapper™ CE
Getting Started Guide
Magellan
Mobile Mapping Solutions Contact Information:
In USA +1 408 615 3970 ■ Fax +1 408 615 5200
Toll Free (Sales in USA/Canada) 1 800 922 2401
In South America +56 2 273 3214 ■ Fax +56 2 273 3187
Email [email protected]
In Singapore +65 6235 3678 ■ Fax +65 6235 4869
In China +86 10 6566 9866 ■ Fax +86 10 6566 0246
Email [email protected]
In France +33 2 28 09 38 00 ■ Fax +33 2 28 09 39 39
In Germany +49 81 6564 7930 ■ Fax +49 81 6564 7950
In Russia +7 495 956 5400 ■ Fax +7 495 956 5360
In the Netherlands +31 78 61 57 988 ■ Fax +31 78 61 52 027
Email [email protected]
www.magellangps.com
Magellan follows a policy of continuous product improvement; specifications and descriptions are thus subject to change without notice. Please contact Magellan for the latest product information.
©2005-2006 Magellan Navigation, Inc. All rights reserved. MobileMapper is a trademark of Magellan Navigation, Inc. All other product and brand names are trademarks of their respective holders.
Aerial photo ©CNES 2002 - Distribution Spot Image. P/N 631188-01C