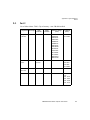
1
8580/8590 Vehicle-Mount Computer User Manual June 14, 2011 ISO 9001 Certified Quality Management System Part No. 8000119.C © Copyright 2011 by Psion Inc., Mississauga, Ontario 2100 Meadowvale Boulevard, Mississauga, Ontario, Canada L5N 7J9 http:\\www.psion.com This document and the information it contains is the property of Psion Inc. This document is not to be used, reproduced or copied, in whole or in part, except for the sole purpose of assisting in proper use of Psion manufactured goods and services by their rightful owners and users. Any other use of this document is prohibited. Psion, the Psion logo, 8580/8590 and the names of other products and services provided by Psion are trademarks of Psion Inc. Windows® and the Windows Logo are trademarks or registered trademarks of Microsoft Corporation in the United States and/or other countries. Windows® and the Logo are trademarks or registered trademarks of Microsoft Corporation in the United States and/or other countries. The Bluetooth word mark and logos are owned by Bluetooth SIG, Inc. and any use of such marks by Psion Inc. is under license. All trademarks and trade names are the property of their respective holders. Return-To-Factory Warranty Psion Inc. provides a return to factory warranty on this product for a period of twelve (12) months in accordance with the Statement of Limited Warranty and Limitation of Liability provided at: www.psion.com/warranty The warranty on Psion manufactured equipment does not extend to any product that has been tampered with, altered, or repaired by any person other than an employee of an authorized Psion service organization. See Psion terms and conditions of sale for full details. Important: Psion warranties take effect on the date of shipment. Support Services Psion provides a complete range of product support services to its customers. For detailed information, please refer to Appendix A: “Support Services And Worldwide Offices”. You can also locate your local support services by going to the following web site: www.psion.com/service-and-support.htm To access further information on current and discontinued products, please go to our Teknet site and log in or tap on “Not Registered?”, depending on whether you have previously registered for Teknet: http://community.psion.com/support A section of archived product information is also available online: http://www.psion.com/products Waste Electrical and Electronic Equipment (WEEE) Directive 2002/96/EC This Product, and its accessories, comply with the requirements of the Waste Electrical and Electronic Equipment (WEEE) Directive 2002/96/EC. If your end-of-life Psion product or accessory carries a label as shown here, please contact your local country representative for details on how to arrange recycling. For a list of international subsidiaries, please go to: http://www.psion.com/environmental-compliance.htm Restriction on Hazardous Substances (RoHS) Directive 2002/95/EC What is RoHS? The European Union has mandated that high environmental standards be met in the design and manufacture of electronic and electrical products sold in Europe, to reduce hazardous substances from entering the environment. The “Restriction on Hazardous Substances Directive (RoHS)” prescribes the maximum trace levels of lead, cadmium, mercury, hexavalent chromium, and flame retardants PBB and PBDE that may be contained in a product. Only products meeting these high environmental standards may be “placed on the market” in EU member states after July 1, 2006. RoHS Logo Although there is no legal requirement to mark RoHS-compliant products, Psion Inc. indicates its compliance with the directive as follows: The RoHS logo located either on the back of the product or underneath the battery in the battery compartment (or on a related accessory such as the charger or docking station) signifies that the product is RoHS-compliant as per the EU directive. Other than as noted below, a Psion product that does not have an accompanying RoHS logo signifies that it was placed on the EU market prior to July 1, 2006, and is thereby exempt from the directive. Note: Not all accessories or peripherals will have a RoHS logo due to physical space limitations or as a result of their exempt status. Disclaimer Every effort has been made to make this material complete, accurate, and up-to-date. In addition, changes are periodically incorporated into new editions of the publication. Psion Inc. reserves the right to make improvements and/or changes in the product(s) and/or the program(s) described in this document without notice, and shall not be responsible for any damages including, but not limited to, consequential damages, caused by reliance on the material presented. APPROVALS AND SAFETY SUMMARY Declaration of Conformity CE Markings When used in a residential, commercial or light industrial environment the product and its approved UK and European peripherals fulfil all requirements for CE marking. R&TTE Directive 1999/5/EC This equipment complies with the essential requirements of EU Directive 1999/5/EC (Declaration available: www.psion.com). Cet équipement est conforme aux principales caractéristiques définies dans la Directive européenne RTTE 1999/5/CE. (Déclaration disponible sur le site: www.psion.com). Die Geräte erfüllen die grundlegenden Anforderungen der RTTE-Richtlinie (1999/5/EG). (Den Wortlaut der Richtlinie finden Sie unter: www.psion.com). Questa apparecchiatura è conforme ai requisiti essenziali della Direttiva Europea R&TTE 1999/5/CE. (Dichiarazione disponibile sul sito: www.psion.com). Este equipo cumple los requisitos principales de la Directiva 1995/5/CE de la UE, “Equipos de Terminales de Radio y Telecomunicaciones”. (Declaración disponible en: www.psion.com). Este equipamento cumpre os requisitos essenciais da Directiva 1999/5/CE do Parlamento Europeu e do Conselho (Directiva RTT). (Declaração disponível no endereço: www.psion.com). Ο εξοπλισμός αυτός πληροί τις βασικές απαιτήσεις της κοινοτικής οδηγίας EU R&TTE 1999/5/EΚ. (Η δήλωση συμμόρφωσης διατίθεται στη διεύθυνση: www.psion.com) Deze apparatuur voldoet aan de noodzakelijke vereisten van EU-richtlijn betreffende radioapparatuur en telecommunicatie-eindappa-ratuur 199/5/EG. (verklaring beschikbaar: www.psion.com). Dette udstyr opfylder de Væsentlige krav i EU's direktiv 1999/5/EC om Radio- og teleterminaludstyr. (Erklæring findes på: www.psion.com). 8580/8590 Vehicle-Mount Computer User Manual I Approvals and Safety Summary Dette utstyret er i overensstemmelse med hovedkravene i R&TTE-direktivet (1999/5/EC) fra EU. (Erklæring finnes på: www.psion.com). Utrustningen uppfyller kraven för EU-direktivet 1999/5/EC om ansluten teleutrustning och ömsesidigt erkännande av utrustningens överensstämmelse (R&TTE). (Förklaringen finns att läsa på: www.psion.com). Tämä laite vastaa EU:n radio- ja telepäätelaitedirektiivin (EU R&TTE Directive 1999/5/EC) vaatimuksia. (Julkilausuma nähtävillä osoitteessa: www.psion.com) PSION tímto prohlašuje, že 8580/8590 je ve shodě se základními požadavky a dalšími příslušnými ustanovenímisměrnice 1995/5/ES (NV č. 426/2000 Sb.) a Prohlášení o shodě je k dispozici na www.Psion.com. Toto zařízení lze provozovat v České republice na základě generální licence č. GL - 12/R/2000. PSION týmto vyhlasuje, že 8580/8590 spĺňa základné požiadavky a všetky príslušné ustanovenia Smernice 1995/5/ES (NV č. 443/2001 Z.z.) a Vyhlásenie o zhode je k dispozícii na www.Psion.com. Toto zariadenie je možné prevádzkovať v Slovenskej republike na základe Všeobecného povolenia č. VPR-01/2001. Настоящото устройство е в съответствие с основните изисквания на европейската Директива 1999/5/EC (Декларацията за съответствие може да бъде намерена на адрес: www.psion.com) Acest echipament satisface cerinţele esenţiale ale Directivei UE 1999/5/EC (Declaraţia poate fi gasitã pe site-ul: www.psion.com) Įranga atitinka pagrindinius EU direktyvos 1999/5/EC reikalavimus (Deklaraciją galima rasti www.psion/xyz) Käesolev seade vastab EU Direktiivile 1999/5/EC (selgitus saadaval: www.psion.com/xyz) Šī aparatūra nodrošina nepieciešamas ES Direktīvas prasības (Deklarācija ir pieejama: www.psion.com/xyz) Dan l-apparat huwa konformi mal-kriterji tad-direttiva ta' l- EU 1999/5/EC. (Din id-dikjarazzjoni tista ssiba fuq is sit www.psion/abc) Oprema je skladna z bistvenimi zahtevami EU direktive 1999/5/EC (Deklaracija je na voljo: www.psion.com/xyz) II 8580/8590 Vehicle-Mount Computer User Manual Approvals and Safety Summary Az eszköz megfelel az EU 1999/5/EC fő direktíváinak (a nyilatkozat megtalálható: www.psion.com/xyz) To urządzenie spełnia wymagania zasadnicze dyrektywy Unii Europejskiej 1999/5/EC (Deklarację zgodności można znaleźć pod adresem internetowym www.psion.com/declaration/xyz Use of the 802.11 8580/8590 vehicle-mount in France: Owing to French Government restrictions, the 802.11 8580/8590 vehicle-mounts are limited to indoor use. They may be used outdoors, on private property, only with prior authorization from the French Ministry of Defense. Regulatory Summary FCC Information to Users Federal Communication Commission Interference Statement This equipment has been tested and found to comply with the limits for a Class B digital device, pursuant to Part 15 of the FCC Rules. These limits are designed to provide reasonable protection against harmful interference in a residential installation. This equipment generates, uses and can radiate radio frequency energy and, if not installed and used in accordance with the instructions, may cause harmful interference to radio communications. However, there is no guarantee that interference will not occur in a particular installation. If this equipment does cause harmful interference to radio or television reception, which can be determined by turning the equipment off and on, the user is encouraged to try to correct the interference by one of the following measures: • Reorient or relocate the receiving antenna. • Increase the separation between the equipment and receiver. • Connect the equipment into an outlet on a circuit different from that to which the receiver is connected. • Consult the dealer or an experienced radio/TV technician for help. This device complies with Part 15 of the FCC Rules. Operation is subject to the following two conditions: (1) This device may not cause harmful interference, and (2) this device must accept any interference received, including interference that may cause undesired operation. FCC Caution: Any changes or modifications not expressly approved by the party responsible for compliance could void the user's authority to operate this equipment. 8580/8590 Vehicle-Mount Computer User Manual III Approvals and Safety Summary IMPORTANT NOTE: FCC Radiation Exposure Statement: This transmitter must not be co-located or operating in conjunction with any other antenna or transmitter. Some equipment in hospitals and aircraft are not shielded from radio frequency energy. Do not use the 8580/8590 onboard aircraft, or in hospitals, without first obtaining permission. Do not use near pacemakers. The product may affect the operation of some medically implanted devices such as pacemakers, causing them to malfunction. Avoid placing your product next to such devices. Keep a minimum distance of 20 cm between the device and the product to reduce the risk of interference. If you have any reason to suspect that interference is taking place, turn off the 8580/8590 and contact your cardiologist for assistance. Note: In August 1996 the Federal Communications Commission (FCC) of the US adopted an updated safety standard for human exposure to radio frequency energy emitted by FCC regulated transmitters. The design of this product complies with the FCC guidelines and those standards. To maintain compliance with the FCC RF exposure guidelines, ensure the antenna is at least 20 cm from your body when transmitting. Emissions Information for Canada This Class B digital apparatus meets all requirements of the Canadian InterferenceCausing Equipment Regulations. When using the 802.11 radio option, to prevent radio interference, this device is intended to be operated indoors and away from windows to provide maximum shielding. Equipment (or its transmit antenna) that is installed outdoors is subject to licensing. Cet appareil numérique de la classe B respecte toutes les exigences du Règlement sur le matériel brouilleur du Canada. En cas d’utilisation du module radio 802.11, afin d'éviter toute interférence radio avec le service autorisé, l'appareil doit être utilisé à l'intérieur, tout en tant éloigné de toute fenêtre afin de garantir le maximum de protection. Si cet équipement (ou son antenne émettrice) est installé à l'extérieur, il est alors soumis à licence. IV 8580/8590 Vehicle-Mount Computer User Manual Approvals and Safety Summary Safety Summary Important Safety Notices The 8580/8590 vehicle-mounts were designed and built according to modern technology and accepted safety regulations. However, the operation of the vehiclemounts can endanger personnel or third parties and cause damage to the device and other material assets when for example the device is: • operated by untrained or uninformed personnel • not operated correctly • operated and maintained incorrectly The operator commitments in regards to safety (accident prevention regulations, work protection) are to be followed. Initial Operation of the Device Area of Application The device is not designed for use in life-support systems or critical safety systems where system malfunction can lead to the direct or indirect endangerment of human life. The operator shall take full responsibility for using the device in these situations. The device cannot be used in combination with safety functions for machines and equipment which have to conform to the requirements of EN 954-1. Installation of the 8580/8590 on a vehicle must be performed in accordance with Chapter 4. Specifically, special attention must be paid to the various electrical potentials of the vehicle. Some vehicles have a chassis that is connected to one of the battery supply lines (DC+ or DC-), while most electrically driven forklifts vehicles have floating chassis, connected to neither DC+ or DC-. Refer to Chapter 4.4 for required wiring of vehicle power and fusing for the 8580/8590. Choice of Location The ambient conditions at the point of installation must comply with the device's protection class. Installation/Initial Operation The device is not supplied with a disconnector (switch) that can be accessed externally. The power supply connector is therefore used as a disconnector. Therefore it needs to be easily accessible. If it is necessary to establish a fixed 8580/8590 Vehicle-Mount Computer User Manual V Approvals and Safety Summary connection, an easily accessible disconnecting device (e.g. a switch such as a circuit breaker) should be installed close to the device. Ensure that the power cable is laid so that it is mechanically protected. The power supply cables must be laid in accordance with the applicable local installation regulations. Installation of the 8580/8590 on a vehicle must be performed in accordance with Chapter 4. Specifically, special attention must be paid to the various electrical potentials of the vehicle. Some vehicles have a chassis that is connected to one of the battery supply lines (DC+ or DC-), while most electrically driven forklifts vehicles have floating chassis, connected to neither DC+ or DC-. Refer to “Vehicle Applications (such as Forklifts)” on page 46 for required wiring of vehicle power and fusing for the 8580/8590. Radio Performance Do not exceed the maximum permissible transmitting power which is specified by each separate country. 8580/8590 users must verify this themselves. Risk of Injury The unit could fall during transit or installation and cause injury. Always ensure that there are two persons available when installing or removing the device. Supply of Fresh Air The 8580/8590 is based on a passive cooling concept. As a result, the waste heat which is produced inside the device is emitted over the surface of the housing. For this system to function properly, sufficient fresh air circulation is required. Never install the system in a closed environment where the cooling air is unable to dissipate accumulated heat to the outside. If the 8580/8590 is not able to draw in fresh cooling air, this may cause overheating and severe damage to the unit. The maximum allowed ambient temperature for the system needs to be taken into account for the concrete application area. Power Supply/External Peripheral Devices Operation in an Emergency In case of emergency (such as damage to the power cable, or housing, or ingress of liquid or other foreign bodies), the device must be disconnected immediately from the power supply. Contact technical support staff at once. VI 8580/8590 Vehicle-Mount Computer User Manual Approvals and Safety Summary Protection of the Power Supplies THERE ARE TWO POWER INPUT VERSIONS OF THE 8580/8590, AND SPECIAL PRECAUTIONS MUST BE CONSIDERED WHEN CONNECTING THE POWER TO THE TERMINAL! If 12V is connected to a 24/48 V 8580/8590, the unit will not start up, but the unit will not be damaged in any way. If more than 16V is connected to a 12V 8580/8590, the unit WILL BE damaged; THE VEHICLE-MOUNT WILL NO LONGER FUNCTION. Danger of Electrocution When Cleaning/Servicing the Device In order to avoid electrocution always disconnect the vehicle-mount from the power supply before cleaning or servicing the device. Charging the Vehicle Battery While charging the vehicle battery, either the 8580/8590 must be disconnected from the battery, or the operator must determine that the maximum allowed input voltage of the vehicle-mount is not exceeded. (see “Power Supply” on page 15 and “Power Supply” on page 45). Wiring Do not use the 8580/8590 when a cable or plug is damaged. Have the damaged parts replaced immediately! Connecting or Disconnect Cables During Storms Never connect or disconnect cables during an electrical storm. External Peripheral Devices The use of additional wiring and other peripheral devices, which are not recommended or sold by the manufacturer can result in fire, electrocution or personal injury. If a power supply is used, only use the power supply recommended by the manufacturer. Before connecting or disconnecting peripheral devices (exception: USB devices), the 8580/8590 must be disconnected from the power supply! Otherwise, this could seriously damage both the vehicle-mount and the connected devices! Make sure that external peripheral devices with their own power supply are switched on at the same time or after you start the 8580/8590. If this is not possible, please ensure that the 8580/8590 is adequately protected from power leakage caused by an external device. VII 8580/8590 Vehicle-Mount Computer User Manual Approvals and Safety Summary Repairs Only Through Psion Never carry out repairs on the device yourself. Always contact Psion technical support and send in your unit for repair if necessary. On the back of the unit, you will find the device's type plate which has important information about the device which you must quote for technical service. It provides important information about the configuration and manufacture of the device in abbreviated form. Always provide technicians with the full model name and serial number. For a service location near you, refer to Appendix A: Support Services & Worldwide Offices in this manual. 8580/8590 Vehicle-Mount Computer User Manual VIII PROGRAM LICENSE AGREEMENTS Microsoft's End User License Agreement You have acquired a device (“DEVICE”) that includes software licensed by Psion Inc. from Microsoft Licensing Inc. or its affiliates (“MS”). Those installed software products of MS origin, as well as associated media, printed materials, and “online” or electronic documentation (“SOFTWARE”) are protected by international intellectual property laws and treaties. The SOFTWARE is licensed, not sold. All rights reserved. IF YOU DO NOT AGREE TO THIS END USER LICENSE AGREEMENT (“EULA”), DO NOT USE THE DEVICE OR COPY THE SOFTWARE. INSTEAD, PROMPTLY CONTACT PSION INC. FOR INSTRUCTIONS ON RETURN OF THE UNUSED DEVICE(S) FOR A REFUND. ANY USE OF THE SOFTWARE, INCLUDING BUT NOT LIMITED TO USE ON THE DEVICE, WILL CONSTITUTE YOUR AGREEMENT TO THIS EULA (OR RATIFICATION OF ANY PREVIOUS CONSENT). GRANT OF SOFTWARE LICENSE. This EULA grants you the following license: • • • • You may use the SOFTWARE only on the DEVICE. NOT FAULT TOLERANT. THE SOFTWARE IS NOT FAULT TOLERANT. PSION INC. HAS INDEPENDENTLY DETERMINED HOW TO USE THE SOFTWARE IN THE DEVICE, AND MS HAS RELIED UPON PSION INC. TO CONDUCT SUFFICIENT TESTING TO DETERMINE THAT THE SOFTWARE IS SUITABLE FOR SUCH USE. NO WARRANTIES FOR THE SOFTWARE. THE SOFTWARE is provided “AS IS” and with all faults. THE ENTIRE RISK AS TO SATISFACTORY QUALITY, PERFORMANCE, ACCURACY, AND EFFORT (INCLUDING LACK OF NEGLIGENCE) IS WITH YOU. ALSO, THERE IS NO WARRANTY AGAINST INTERFERENCE WITH YOUR ENJOYMENT OF THE SOFTWARE OR AGAINST INFRINGEMENT. IF YOU HAVE RECEIVED ANY WARRANTIES REGARDING THE DEVICE OR THE SOFTWARE, THOSE WARRANTIES DO NOT ORIGINATE FROM, AND ARE NOT BINDING ON, MS. Note on Java Support. The SOFTWARE may contain support for programs written in Java. Java technology is not fault tolerant and is not designed, manufactured, or intended for use or resale as online control equipment in hazardous environments requiring fail-safe performance, such as in the operation of 8580/8590 Vehicle-Mount Computer User Manual IX End-User License Agreement • • • • nuclear facilities, aircraft navigation or communication systems, air traffic control, direct life support machines, or weapons systems, in which the failure of Java technology could lead directly to death, personal injury, or severe physical or environmental damage. Sun Microsystems, Inc. has contractually obligated MS to make this disclaimer. No Liability for Certain Damages. EXCEPT AS PROHIBITED BY LAW, MS SHALL HAVE NO LIABILITY FOR ANY INDIRECT, SPECIAL, CONSEQUENTIAL OR INCIDENTAL DAMAGES ARISING FROM OR IN CONNECTION WITH THE USE OR PERFORMANCE OF THE SOFTWARE. THIS LIMITATION SHALL APPLY EVEN IF ANY REMEDY FAILS OF ITS ESSENTIAL PURPOSE. IN NO EVENT SHALL MS BE LIABLE FOR ANY AMOUNT IN EXCESS OF U.S. TWO HUNDRED FIFTY DOLLARS (U.S. $250.00). Limitations on Reverse Engineering, Decompilation, and Disassembly. You may not reverse engineer, decompile, or disassemble the SOFTWARE, except and only to the extent that such activity is expressly permitted by applicable law notwithstanding this limitation. SOFTWARE TRANSFER ALLOWED BUT WITH RESTRICTIONS. You may permanently transfer rights under this EULA only as part of a permanent sale or transfer of the Device, and only if the recipient agrees to this EULA. If the SOFTWARE is an upgrade, any transfer must also include all prior versions of the SOFTWARE. EXPORT RESTRICTIONS. You acknowledge that SOFTWARE is subject to U.S. export jurisdiction. You agree to comply with all applicable international and national laws that apply to the SOFTWARE, including the U.S. Export Administration Regulations, as well as end-user, end-use and destination restrictions issued by U.S. and other governments. For additional information see http://www.microsoft.com/exporting/. Psion Inc. End User License Agreement IMPORTANT - READ CAREFULLY: This License Agreement (“Agreement”) is a legal agreement between you and Psion (“we”), the licensor of this software package (“Software”), for your use of the Software only as authorized in this Agreement. By clicking on the “Accept” or other appropriate assent button and/or installing the Software, you agree to be and are hereby bound by the terms and conditions of this Agreement. If you do not agree with this Agreement, we do not grant you a license to the Software, and you may not install or use the Software or any accompanying documentation. X 8580/8590 Vehicle-Mount Computer User Manual End-User License Agreement The Software is the property of Psion Inc. or its licensors and is protected by copyright laws and international copyright treaties, as well as other intellectual property laws and treaties. The Software is licensed, not sold. Psion Inc. provides the Software and licenses its use worldwide. You assume responsibility for the selection of the Software to achieve your intended results, and for the use and results obtained from it. 1. GRANT OF LICENSE We hereby grant you and you hereby accept a non-exclusive, non-transferable, limited license to install and use the Software in object code form only, subject to the terms and restrictions set forth in this Agreement. Except as explicitly set forth below, (i) you are not permitted to copy, sell, lease or rent, distribute or sublicense the Software or to use the Software in a time-sharing arrangement or in any other unauthorized manner; (ii) no license is granted to you in the human readable code of the Software (source code); and (iii) this Agreement does not grant you any rights to patents, copyrights, trade secrets, trademarks, intellectual property or any other ownership rights with respect to the Software. 2. DESCRIPTION OF REQUIREMENTS, RESTRICTIONS, RIGHTS AND LIMITATIONS a. Copy. The right and license granted to you shall be limited to installation and use of the Software up to but not exceeding the number of copies you have licensed. However, you may make a copy of the Software for backup or archival purposes. You shall not remove any copyright notice or proprietary notices, labels or marks in or on the Software. b. Evaluation. As part of evaluation, you may install and use the Software only during the specified evaluation period. Unless you register the license as described below, the evaluation license shall expire upon the expiration of the evaluation period. c. License Registration. You will be required to provide a license ID, unique to each device, for registering your Software license. As part of your software license registration, we will provide you a corresponding license key for each device. d. No Modifications. You may not modify or create any derivative work of the Software or any copy or portion thereof nor may you remove any Software identification, copyright or other notices. e. No Distribution. You may not distribute the Software, in whole or in part, to any other third party. 8580/8590 Vehicle-Mount Computer User Manual XI End-User License Agreement f. Virus Program. You may not develop or knowingly incorporate any virus program that may be harmful to a computer or a network in conjunction with the Software, or use the Software for any other purpose as which may be harmful to a third party. g. Assignment. You may not assign or transfer the Software to a third party or allow a third party to use the same. h. Reverse Engineering. Modification, reverse engineering, reverse compiling, disassembly, unbundling or extraction of the Software is expressly prohibited. i. Export Restrictions. You agree to comply with all applicable laws and regulations and that you will not export or re-export the Software, or any part or copies thereof, or any products utilizing the Software in violation of applicable laws or regulations of the United States or the country in which you obtained them. 3. HIGH RISK ACTIVITIES The Software is not fault-tolerant and is not designed, manufactured or intended for use or resale as on-line control equipment in hazardous environments requiring failsafe performance, such as in the operation of nuclear facilities, aircraft navigation or communication systems, air traffic control, direct life support machines, or weapons systems, in which the failure of the Software could lead to death, personal injury, or severe physical or environmental damage (“High Risk Activities”). We specifically disclaim any express or implied warranty of fitness for High Risk Activities. 4. DISCLAIMER OF WARRANTY We do not warrant uninterrupted or error free operation of the Software nor do we warrant that the Software will meet your requirements. THE SOFTWARE IS PROVIDED “AS-IS” WITHOUT ANY WARRANTY WHATSOEVER AND WITHOUT ANY TECHNICAL SUPPORT OF ANY KIND. WE DISCLAIM ANY AND ALL REPRESENTATIONS, WARRANTIES AND CONDITIONS, WHETHER EXPRESS OR IMPLIED, INCLUDING, BUT NOT LIMITED TO, THE IMPLIED WARRANTIES OR CONDITIONS OF MERCHANTABLE QUALITY OR FITNESS FOR A PARTICULAR PURPOSE. WE DO NOT WARRANT OR MAKE ANY REPRESENTATIONS REGARDING THE USE OR THE RESULTS OF THE USE OF THE SOFTWARE IN TERMS OF ITS CORRECTNESS, ACCURACY, RELIABILITY, USE WITH FUTURE PSION DEVICES INTRODUCED, OR OTHERWISE. YOU EXPRESSLY ACKNOWLEDGE AND AGREE THAT USE OF THE SOFTWARE IS AT YOUR SOLE RISK AND YOU ARE RESPONSIBLE FOR INSTALLATION OF THE SOFTWARE ON YOUR COMPUTER. XII 8580/8590 Vehicle-Mount Computer User Manual End-User License Agreement 5. LIMITATION OF LIABILITY We are liable for no more than the value of the license fee that you paid for the Software. This limitation is cumulative and our responsibility for multiple claims will not exceed in aggregate this limit. Under no circumstances are we or our third party suppliers liable for damages of third parties claimed against you, or for harm to your records or data, or special, incidental, indirect, or consequential damages, including but not limited to lost profits, lost business revenue or failure to realize expected savings, loss of data, loss of use of the Software or any associated equipment, downtime and user's time, even if you informed us of their possibility, or for breach of any express or implied warranty, breach of contract, negligence, strict liability or any other legal theory related to the Software. This limitation applies whether you are entitled to claim damages from us or our third party suppliers as a matter of contract or tort. 6. COPYRIGHTS, OWNERSHIP AND PROPRIETARY RIGHTS All title and copyrights in and to the Software, and any copies thereof, are owned by Psion Inc. or its suppliers. The Software also contains copyrighted material licensed from our suppliers or obtained from open source and all rights to such copyrighted material rests with such suppliers. Additional third party license terms and conditions may apply. We retain title to the Software and any copies made from it. Any copies of the Software you made are subject to the restrictions of this Agreement. WE DISCLAIM ALL WARRANTIES AND INDEMNITIES, EXPRESS, IMPLIED OR STATUTORY, FOR PATENT OR COPYRIGHT INFRINGEMENT. 7. CONFIDENTIALITY You agree not to use or disclose any proprietary information provided by us, except for the purposes of this Agreement. You agree not to reproduce any of the copyrighted materials unless expressly permitted by this Agreement. 8. ENDING THIS AGREEMENT We may terminate this Agreement and your license immediately without notice if (a) you fail to comply with any term of this Agreement, or (b) your rights are assigned by you, by operation of law or otherwise. In such event, you must return or destroy all copies and component parts of the Software and documentation, as well as any other Psion proprietary information in your possession, within fourteen (14) days of the date of termination. Any rights and obligations under this Agreement that by their nature continue after it ends will remain in effect until they are completed. 8580/8590 Vehicle-Mount Computer User Manual XIII End-User License Agreement 9. GENERAL The laws of the Province of Ontario and the federal laws applicable therein, excluding the conflict of laws provisions, govern this Agreement. If any provision of this Agreement is deemed invalid or unenforceable by any country, that particular provision will be deemed modified to the extent necessary to make the provision valid and enforceable, and the remaining provisions will remain in full force and effect. Failure by us to insist on strict performance or to exercise a right when entitled, does not prevent us from doing so at a later time, either in relation to that default or any subsequent one. No modifications of this Agreement shall be effective unless in writing and approved by us. You acknowledge that you have read this Agreement, understand it, and that it is the complete agreement between you and Psion with respect to the subject matter hereof and supersedes all prior agreements, oral or written. XIV 8580/8590 Vehicle-Mount Computer User Manual TABLE OF CONTENTS Approvals and Safety Summary . . . . . . . . . . . . . . . . . . . . . . . . . . . I Program License Agreements . . . . . . . . . . . . . . . . . . . . . . . . . . . . IX Chapter 1: Introduction 1.1 1.2 1.3 About This Manual . . . . . . . . . . . . . . . . . . . . . . . . . . . . . . . . . . . . . . . . . . . . . . . . . . . . . . . . . . . . . . . . . . . . . . 3 Text Conventions . . . . . . . . . . . . . . . . . . . . . . . . . . . . . . . . . . . . . . . . . . . . . . . . . . . . . . . . . . . . . . . . . . . . . . . . 5 For Qualified Personnel. . . . . . . . . . . . . . . . . . . . . . . . . . . . . . . . . . . . . . . . . . . . . . . . . . . . . . . . . . . . . . . . . . 5 Chapter 2: Basic Checkout 2.1 2.2 2.3 2.4 2.5 8580/8590 Description. . . . . . . . . . . . . . . . . . . . . . . . . . . . . . . . . . . . . . . . . . . . . . . . . . . . . . . . . . . . . . . . . . . 9 Intended Use. . . . . . . . . . . . . . . . . . . . . . . . . . . . . . . . . . . . . . . . . . . . . . . . . . . . . . . . . . . . . . . . . . . . . . . . . . . . . 9 The Models: 8580 and 8590 . . . . . . . . . . . . . . . . . . . . . . . . . . . . . . . . . . . . . . . . . . . . . . . . . . . . . . . . . . . . 10 Abbreviations Used For 8580/90s & Accessories . . . . . . . . . . . . . . . . . . . . . . . . . . . . . . . . . . . . . . . 10 Technical Specifications . . . . . . . . . . . . . . . . . . . . . . . . . . . . . . . . . . . . . . . . . . . . . . . . . . . . . . . . . . . . . . . . 10 2.5.1 Mechanical. . . . . . . . . . . . . . . . . . . . . . . . . . . . . . . . . . . . . . . . . . . . . . . . . . . . . . . . . . . . . . . . . . . . . 10 2.5.2 Motherboard . . . . . . . . . . . . . . . . . . . . . . . . . . . . . . . . . . . . . . . . . . . . . . . . . . . . . . . . . . . . . . . . . . . 11 2.5.3 LCD/CRT Interface . . . . . . . . . . . . . . . . . . . . . . . . . . . . . . . . . . . . . . . . . . . . . . . . . . . . . . . . . . . . 13 2.5.4 Touchscreen. . . . . . . . . . . . . . . . . . . . . . . . . . . . . . . . . . . . . . . . . . . . . . . . . . . . . . . . . . . . . . . . . . . .13 2.5.5 Network Interface . . . . . . . . . . . . . . . . . . . . . . . . . . . . . . . . . . . . . . . . . . . . . . . . . . . . . . . . . . . . . . 14 2.5.6 PCI Express® MiniCard Interface For WLAN (Optional) . . . . . . . . . . . . . . . . . . . . . .14 2.5.7 Power Supply . . . . . . . . . . . . . . . . . . . . . . . . . . . . . . . . . . . . . . . . . . . . . . . . . . . . . . . . . . . . . . . . . . 15 2.5.8 Maximum Power Available for Peripheral Devices . . . . . . . . . . . . . . . . . . . . . . . . . . . . . 16 2.5.9 Power Supply Fuses . . . . . . . . . . . . . . . . . . . . . . . . . . . . . . . . . . . . . . . . . . . . . . . . . . . . . . . . . . . . 17 2.5.10 Ambient Conditions . . . . . . . . . . . . . . . . . . . . . . . . . . . . . . . . . . . . . . . . . . . . . . . . . . . . . . . . . . . . 17 2.5.11 Test Marks . . . . . . . . . . . . . . . . . . . . . . . . . . . . . . . . . . . . . . . . . . . . . . . . . . . . . . . . . . . . . . . . . . . . . 18 2.5.12 8580/8590 Dimensions . . . . . . . . . . . . . . . . . . . . . . . . . . . . . . . . . . . . . . . . . . . . . . . . . . . . . . . . . 19 2.5.13 8580/8590 VESA Drill Holes. . . . . . . . . . . . . . . . . . . . . . . . . . . . . . . . . . . . . . . . . . . . . . . . . . . 22 2.6 2.7 2.8 Unpacking the 8580/8590. . . . . . . . . . . . . . . . . . . . . . . . . . . . . . . . . . . . . . . . . . . . . . . . . . . . . . . . . . . . . . . 22 Packaging . . . . . . . . . . . . . . . . . . . . . . . . . . . . . . . . . . . . . . . . . . . . . . . . . . . . . . . . . . . . . . . . . . . . . . . . . . . . . . 23 Putting Your 8580/8590 in Operation . . . . . . . . . . . . . . . . . . . . . . . . . . . . . . . . . . . . . . . . . . . . . . . . . . . 23 2.8.1 Cooling Through Unobstructed Air Circulation. . . . . . . . . . . . . . . . . . . . . . . . . . . . . . . . . 23 2.8.2 Pin Configuration . . . . . . . . . . . . . . . . . . . . . . . . . . . . . . . . . . . . . . . . . . . . . . . . . . . . . . . . . . . . . . 23 2.8.3 External Connectors . . . . . . . . . . . . . . . . . . . . . . . . . . . . . . . . . . . . . . . . . . . . . . . . . . . . . . . . . . . . 24 8580/8590 Vehicle-Mount Computer User Manual i Contents 2.9 Connecting External Devices . . . . . . . . . . . . . . . . . . . . . . . . . . . . . . . . . . . . . . . . . . . . . . . . . . . . . . . . . . . 26 2.10 Powering Down the 8580/8590 . . . . . . . . . . . . . . . . . . . . . . . . . . . . . . . . . . . . . . . . . . . . . . . . . . . . . . . . . 27 2.10.1 Powering Up the 8580/8590 . . . . . . . . . . . . . . . . . . . . . . . . . . . . . . . . . . . . . . . . . . . . . . . . . . . . 27 2.11 WLAN Settings. . . . . . . . . . . . . . . . . . . . . . . . . . . . . . . . . . . . . . . . . . . . . . . . . . . . . . . . . . . . . . . . . . . . . . . . . 28 2.11.1 Radio Performance . . . . . . . . . . . . . . . . . . . . . . . . . . . . . . . . . . . . . . . . . . . . . . . . . . . . . . . . . . . . . 28 2.11.2 8580/8590 Antenna Solutions for EU Countries . . . . . . . . . . . . . . . . . . . . . . . . . . . . . . . . 28 2.12 Removing the Protective Film from the Display. . . . . . . . . . . . . . . . . . . . . . . . . . . . . . . . . . . . . . . . . 29 2.13 Powering Up the 8580/8590 . . . . . . . . . . . . . . . . . . . . . . . . . . . . . . . . . . . . . . . . . . . . . . . . . . . . . . . . . . . . 29 2.14 Protecting the TFT Display from Memory Effect. . . . . . . . . . . . . . . . . . . . . . . . . . . . . . . . . . . . . . . . 29 Chapter 3: Accessories 3.1 Keyboards . . . . . . . . . . . . . . . . . . . . . . . . . . . . . . . . . . . . . . . . . . . . . . . . . . . . . . . . . . . . . . . . . . . . . . . . . . . . . . 33 3.1.1 The SMALL Keyboard. . . . . . . . . . . . . . . . . . . . . . . . . . . . . . . . . . . . . . . . . . . . . . . . . . . . . . . . . 33 3.1.2 The 24-Key Keypad . . . . . . . . . . . . . . . . . . . . . . . . . . . . . . . . . . . . . . . . . . . . . . . . . . . . . . . . . . . . 34 3.2 3.3 Mouse . . . . . . . . . . . . . . . . . . . . . . . . . . . . . . . . . . . . . . . . . . . . . . . . . . . . . . . . . . . . . . . . . . . . . . . . . . . . . . . . . . 34 External CD-ROM Drive . . . . . . . . . . . . . . . . . . . . . . . . . . . . . . . . . . . . . . . . . . . . . . . . . . . . . . . . . . . . . . . 35 3.3.1 Operation . . . . . . . . . . . . . . . . . . . . . . . . . . . . . . . . . . . . . . . . . . . . . . . . . . . . . . . . . . . . . . . . . . . . . . 35 3.3.2 Resources And Drivers . . . . . . . . . . . . . . . . . . . . . . . . . . . . . . . . . . . . . . . . . . . . . . . . . . . . . . . . . 35 3.4 3.5 USB Stick . . . . . . . . . . . . . . . . . . . . . . . . . . . . . . . . . . . . . . . . . . . . . . . . . . . . . . . . . . . . . . . . . . . . . . . . . . . . . . 36 Scanner . . . . . . . . . . . . . . . . . . . . . . . . . . . . . . . . . . . . . . . . . . . . . . . . . . . . . . . . . . . . . . . . . . . . . . . . . . . . . . . . . 36 Chapter 4: 8580/8590 Installation ii 4.1 Complying with Protection Standard IP65 . . . . . . . . . . . . . . . . . . . . . . . . . . . . . . . . . . . . . . . . . . . . . . 39 4.1.1 Parts List for Cable Cover Kit . . . . . . . . . . . . . . . . . . . . . . . . . . . . . . . . . . . . . . . . . . . . . . . . . . 39 4.1.2 Cable Cover, Grounding Bar & Cables – Assembling. . . . . . . . . . . . . . . . . . . . . . . . . . . 40 4.2 Mounting Options for the 8580/8590. . . . . . . . . . . . . . . . . . . . . . . . . . . . . . . . . . . . . . . . . . . . . . . . . . . . 43 4.2.1 Mounting Bracket Toolkit . . . . . . . . . . . . . . . . . . . . . . . . . . . . . . . . . . . . . . . . . . . . . . . . . . . . . . 44 4.2.2 Permitted Mounting Positions . . . . . . . . . . . . . . . . . . . . . . . . . . . . . . . . . . . . . . . . . . . . . . . . . . 44 4.2.3 Mechanical Dynamic Loading. . . . . . . . . . . . . . . . . . . . . . . . . . . . . . . . . . . . . . . . . . . . . . . . . . 44 4.3 Power Supply. . . . . . . . . . . . . . . . . . . . . . . . . . . . . . . . . . . . . . . . . . . . . . . . . . . . . . . . . . . . . . . . . . . . . . . . . . . 45 4.3.1 DC Power Pack . . . . . . . . . . . . . . . . . . . . . . . . . . . . . . . . . . . . . . . . . . . . . . . . . . . . . . . . . . . . . . . . 45 4.3.2 Installing Connecting Cables . . . . . . . . . . . . . . . . . . . . . . . . . . . . . . . . . . . . . . . . . . . . . . . . . . . 46 4.4 Vehicle Applications (such as Forklifts) . . . . . . . . . . . . . . . . . . . . . . . . . . . . . . . . . . . . . . . . . . . . . . . . . 46 4.4.1 Wiring Vehicle Power to the 8580/8590 . . . . . . . . . . . . . . . . . . . . . . . . . . . . . . . . . . . . . . . . 48 4.5 Cable Cover (Splash Guard) . . . . . . . . . . . . . . . . . . . . . . . . . . . . . . . . . . . . . . . . . . . . . . . . . . . . . . . . . . . . 49 4.5.1 Protection Class IP65. . . . . . . . . . . . . . . . . . . . . . . . . . . . . . . . . . . . . . . . . . . . . . . . . . . . . . . . . . . 49 8580/8590 Vehicle-Mount Computer User Manual Contents Chapter 5: Operation of the 8580/8590 5.1 5.2 5.3 5.4 Operation . . . . . . . . . . . . . . . . . . . . . . . . . . . . . . . . . . . . . . . . . . . . . . . . . . . . . . . . . . . . . . . . . . . . . . . . . . . . . . . 53 4-Key Front Panel . . . . . . . . . . . . . . . . . . . . . . . . . . . . . . . . . . . . . . . . . . . . . . . . . . . . . . . . . . . . . . . . . . . . . . 53 10-Key Front Panel (Discontinued) . . . . . . . . . . . . . . . . . . . . . . . . . . . . . . . . . . . . . . . . . . . . . . . . . . . . . 54 25-Key Front Panel . . . . . . . . . . . . . . . . . . . . . . . . . . . . . . . . . . . . . . . . . . . . . . . . . . . . . . . . . . . . . . . . . . . . . 55 5.4.1 Power Key . . . . . . . . . . . . . . . . . . . . . . . . . . . . . . . . . . . . . . . . . . . . . . . . . . . . . . . . . . . . . . . . . . . . . 56 5.4.2 Manual Brightness Control (Optional) . . . . . . . . . . . . . . . . . . . . . . . . . . . . . . . . . . . . . . . . . . 56 5.4.3 LEDs. . . . . . . . . . . . . . . . . . . . . . . . . . . . . . . . . . . . . . . . . . . . . . . . . . . . . . . . . . . . . . . . . . . . . . . . . . .56 5.4.4 Function and Number Keys . . . . . . . . . . . . . . . . . . . . . . . . . . . . . . . . . . . . . . . . . . . . . . . . . . . . 57 5.4.5 Special Keys . . . . . . . . . . . . . . . . . . . . . . . . . . . . . . . . . . . . . . . . . . . . . . . . . . . . . . . . . . . . . . . . . . . 57 5.4.6 [ESCAPE] Key, [ENTER] Key and Scroll Keys. . . . . . . . . . . . . . . . . . . . . . . . . . . . . . . . 58 5.4.7 Operating States. . . . . . . . . . . . . . . . . . . . . . . . . . . . . . . . . . . . . . . . . . . . . . . . . . . . . . . . . . . . . . . . 58 Chapter 6: Operating System & Software Apps 6.1 Operating System. . . . . . . . . . . . . . . . . . . . . . . . . . . . . . . . . . . . . . . . . . . . . . . . . . . . . . . . . . . . . . . . . . . . . . . 63 6.1.1 OS Pre-installed on Hard Drive/Compact Flash. . . . . . . . . . . . . . . . . . . . . . . . . . . . . . . . . 63 6.1.2 Installing on the Hard Drive/Compact Flash . . . . . . . . . . . . . . . . . . . . . . . . . . . . . . . . . . . . 63 6.1.3 Special Features of the Operating System. . . . . . . . . . . . . . . . . . . . . . . . . . . . . . . . . . . . . . . 64 6.2 Psion Teklogix Config Tool . . . . . . . . . . . . . . . . . . . . . . . . . . . . . . . . . . . . . . . . . . . . . . . . . . . . . . . . . . . . .65 6.2.1 Overview of the Config Functions . . . . . . . . . . . . . . . . . . . . . . . . . . . . . . . . . . . . . . . . . . . . . . 65 6.2.2 Installation . . . . . . . . . . . . . . . . . . . . . . . . . . . . . . . . . . . . . . . . . . . . . . . . . . . . . . . . . . . . . . . . . . . . . 66 6.2.3 Psion Teklogix Config Menus . . . . . . . . . . . . . . . . . . . . . . . . . . . . . . . . . . . . . . . . . . . . . . . . . . 69 6.3 The Software Keyboard. . . . . . . . . . . . . . . . . . . . . . . . . . . . . . . . . . . . . . . . . . . . . . . . . . . . . . . . . . . . . . . . . 84 6.3.1 Psion Teklogix Config and Software Keyboard . . . . . . . . . . . . . . . . . . . . . . . . . . . . . . . . . 84 6.3.2 Logon with the Software Keyboard. . . . . . . . . . . . . . . . . . . . . . . . . . . . . . . . . . . . . . . . . . . . . 85 6.3.3 Installation . . . . . . . . . . . . . . . . . . . . . . . . . . . . . . . . . . . . . . . . . . . . . . . . . . . . . . . . . . . . . . . . . . . . . 85 6.3.4 Launching the Program. . . . . . . . . . . . . . . . . . . . . . . . . . . . . . . . . . . . . . . . . . . . . . . . . . . . . . . . . 87 6.3.5 Operation . . . . . . . . . . . . . . . . . . . . . . . . . . . . . . . . . . . . . . . . . . . . . . . . . . . . . . . . . . . . . . . . . . . . . . 91 6.3.6 Configuring the Software Keyboard . . . . . . . . . . . . . . . . . . . . . . . . . . . . . . . . . . . . . . . . . . . . 92 6.3.7 Keyboard_Maximize Section . . . . . . . . . . . . . . . . . . . . . . . . . . . . . . . . . . . . . . . . . . . . . . . . . .101 Chapter 7: Serial Ports 7.1 Serial Ports . . . . . . . . . . . . . . . . . . . . . . . . . . . . . . . . . . . . . . . . . . . . . . . . . . . . . . . . . . . . . . . . . . . . . . . . . . . .105 7.1.1 Resources . . . . . . . . . . . . . . . . . . . . . . . . . . . . . . . . . . . . . . . . . . . . . . . . . . . . . . . . . . . . . . . . . . . . .105 7.1.2 COM1 Options . . . . . . . . . . . . . . . . . . . . . . . . . . . . . . . . . . . . . . . . . . . . . . . . . . . . . . . . . . . . . . . .105 7.1.3 COM1 as a Power Supply . . . . . . . . . . . . . . . . . . . . . . . . . . . . . . . . . . . . . . . . . . . . . . . . . . . . .105 7.1.4 Serial Port Printers . . . . . . . . . . . . . . . . . . . . . . . . . . . . . . . . . . . . . . . . . . . . . . . . . . . . . . . . . . . .106 7.1.5 Serial Port Bar Code Scanners . . . . . . . . . . . . . . . . . . . . . . . . . . . . . . . . . . . . . . . . . . . . . . . . .106 8580/8590 Vehicle-Mount Computer User Manual iii Contents 7.1.6 Tips & Tricks . . . . . . . . . . . . . . . . . . . . . . . . . . . . . . . . . . . . . . . . . . . . . . . . . . . . . . . . . . . . . . . . .106 Chapter 8: Internal Devices 8.1 Chipset . . . . . . . . . . . . . . . . . . . . . . . . . . . . . . . . . . . . . . . . . . . . . . . . . . . . . . . . . . . . . . . . . . . . . . . . . . . . . . . .109 8.1.1 Installing Chipset Drivers Under Windows XP . . . . . . . . . . . . . . . . . . . . . . . . . . . . . . . .109 8.2 VGA Adaptor. . . . . . . . . . . . . . . . . . . . . . . . . . . . . . . . . . . . . . . . . . . . . . . . . . . . . . . . . . . . . . . . . . . . . . . . . .110 8.2.1 VGA Driver Installation Under Windows XP. . . . . . . . . . . . . . . . . . . . . . . . . . . . . . . . . .110 8.3 Network Adaptor (10/100) . . . . . . . . . . . . . . . . . . . . . . . . . . . . . . . . . . . . . . . . . . . . . . . . . . . . . . . . . . . . .111 8.3.1 Network Driver Installation Under Windows XP . . . . . . . . . . . . . . . . . . . . . . . . . . . . . .111 8.4 Onboard Sound Adaptor . . . . . . . . . . . . . . . . . . . . . . . . . . . . . . . . . . . . . . . . . . . . . . . . . . . . . . . . . . . . . . .113 8.4.1 Installing Onboard Sound Adaptor Drivers–Windows XP . . . . . . . . . . . . . . . . . . . . .113 8.5 8.6 8.7 PCI Cards . . . . . . . . . . . . . . . . . . . . . . . . . . . . . . . . . . . . . . . . . . . . . . . . . . . . . . . . . . . . . . . . . . . . . . . . . . . . .114 Cardbus Interface . . . . . . . . . . . . . . . . . . . . . . . . . . . . . . . . . . . . . . . . . . . . . . . . . . . . . . . . . . . . . . . . . . . . . .115 Touchscreen . . . . . . . . . . . . . . . . . . . . . . . . . . . . . . . . . . . . . . . . . . . . . . . . . . . . . . . . . . . . . . . . . . . . . . . . . . .115 8.7.1 Touch (Serial) for Windows XP & XP Embedded . . . . . . . . . . . . . . . . . . . . . . . . . . . . .116 8.7.2 Touch (PS2) for Windows XP & XP Embedded . . . . . . . . . . . . . . . . . . . . . . . . . . . . . . .117 8.7.3 Resistance of the Touchscreen. . . . . . . . . . . . . . . . . . . . . . . . . . . . . . . . . . . . . . . . . . . . . . . . .118 8.8 Automatic Switch-Off and Heating . . . . . . . . . . . . . . . . . . . . . . . . . . . . . . . . . . . . . . . . . . . . . . . . . . . .120 8.8.1 Automatic Shutdown Process. . . . . . . . . . . . . . . . . . . . . . . . . . . . . . . . . . . . . . . . . . . . . . . . . .121 8.8.2 Automatic Shutdown with UPS. . . . . . . . . . . . . . . . . . . . . . . . . . . . . . . . . . . . . . . . . . . . . . . .124 8.8.3 Drivers . . . . . . . . . . . . . . . . . . . . . . . . . . . . . . . . . . . . . . . . . . . . . . . . . . . . . . . . . . . . . . . . . . . . . . . .124 8.8.4 General Notes About Automatic Shutdown Software . . . . . . . . . . . . . . . . . . . . . . . . . .124 Chapter 9: Maintenance 9.1 Maintenance . . . . . . . . . . . . . . . . . . . . . . . . . . . . . . . . . . . . . . . . . . . . . . . . . . . . . . . . . . . . . . . . . . . . . . . . . . .129 9.1.1 Cleaning the Housing . . . . . . . . . . . . . . . . . . . . . . . . . . . . . . . . . . . . . . . . . . . . . . . . . . . . . . . . .129 9.1.2 Cleaning the Touchscreen . . . . . . . . . . . . . . . . . . . . . . . . . . . . . . . . . . . . . . . . . . . . . . . . . . . . .129 Chapter 10: Common Mistakes & Helpful Tips 10.1 Common Mistakes in Usage . . . . . . . . . . . . . . . . . . . . . . . . . . . . . . . . . . . . . . . . . . . . . . . . . . . . . . . . . . .133 10.1.1 Powering Up/Down . . . . . . . . . . . . . . . . . . . . . . . . . . . . . . . . . . . . . . . . . . . . . . . . . . . . . . . . . . .133 10.1.2 Cable Cover . . . . . . . . . . . . . . . . . . . . . . . . . . . . . . . . . . . . . . . . . . . . . . . . . . . . . . . . . . . . . . . . . . .133 10.1.3 Installation . . . . . . . . . . . . . . . . . . . . . . . . . . . . . . . . . . . . . . . . . . . . . . . . . . . . . . . . . . . . . . . . . . . .133 10.1.4 Mobile Application on Vehicles . . . . . . . . . . . . . . . . . . . . . . . . . . . . . . . . . . . . . . . . . . . . . . .134 10.1.5 Using the Touchscreen . . . . . . . . . . . . . . . . . . . . . . . . . . . . . . . . . . . . . . . . . . . . . . . . . . . . . . . .134 10.1.6 Use/Storage . . . . . . . . . . . . . . . . . . . . . . . . . . . . . . . . . . . . . . . . . . . . . . . . . . . . . . . . . . . . . . . . . . .134 10.1.7 Disposal. . . . . . . . . . . . . . . . . . . . . . . . . . . . . . . . . . . . . . . . . . . . . . . . . . . . . . . . . . . . . . . . . . . . . . .134 iv 8580/8590 Vehicle-Mount Computer User Manual Contents Appendix A: Support Services & Worldwide Offices A.1 A.2 A.3 Technical Support. . . . . . . . . . . . . . . . . . . . . . . . . . . . . . . . . . . . . . . . . . . . . . . . . . . . . . . . . . . . . . . . . . . . . A-1 Product Repairs. . . . . . . . . . . . . . . . . . . . . . . . . . . . . . . . . . . . . . . . . . . . . . . . . . . . . . . . . . . . . . . . . . . . . . . A-1 Worldwide Offices. . . . . . . . . . . . . . . . . . . . . . . . . . . . . . . . . . . . . . . . . . . . . . . . . . . . . . . . . . . . . . . . . . . . A-2 Appendix B: Pre-Regulator (PS1320) Installation Appendix C: UPS (PS1110/PS1120) Installation Appendix D: System Resources D.1 D.2 Part 1 . . . . . . . . . . . . . . . . . . . . . . . . . . . . . . . . . . . . . . . . . . . . . . . . . . . . . . . . . . . . . . . . . . . . . . . . . . . . . . . . . D-1 Part 2 . . . . . . . . . . . . . . . . . . . . . . . . . . . . . . . . . . . . . . . . . . . . . . . . . . . . . . . . . . . . . . . . . . . . . . . . . . . . . . . . . D-3 Appendix E: Pinouts – External Connectors E.1 E.2 E.3 E.4 E.5 Keyboard and Mouse . . . . . . . . . . . . . . . . . . . . . . . . . . . . . . . . . . . . . . . . . . . . . . . . . . . . . . . . . . . . . . . . . .E-1 USB . . . . . . . . . . . . . . . . . . . . . . . . . . . . . . . . . . . . . . . . . . . . . . . . . . . . . . . . . . . . . . . . . . . . . . . . . . . . . . . . . . .E-1 Serial Port COM1. . . . . . . . . . . . . . . . . . . . . . . . . . . . . . . . . . . . . . . . . . . . . . . . . . . . . . . . . . . . . . . . . . . . . .E-2 Serial Port COM2. . . . . . . . . . . . . . . . . . . . . . . . . . . . . . . . . . . . . . . . . . . . . . . . . . . . . . . . . . . . . . . . . . . . . .E-2 Network Connector . . . . . . . . . . . . . . . . . . . . . . . . . . . . . . . . . . . . . . . . . . . . . . . . . . . . . . . . . . . . . . . . . . . .E-3 Appendix F: Mechanical Dynamic Loading F.1 F.2 F.3 F.4 F.5 F.6 F.7 F.8 Introduction . . . . . . . . . . . . . . . . . . . . . . . . . . . . . . . . . . . . . . . . . . . . . . . . . . . . . . . . . . . . . . . . . . . . . . . . . . . F-1 Units without Vibration Isolation (tuned to high frequency) . . . . . . . . . . . . . . . . . . . . . . . . . . . . F-2 Passive Vibration Isolation (tuned to low frequency) . . . . . . . . . . . . . . . . . . . . . . . . . . . . . . . . . . . F-2 Dimensioning Example 8580 . . . . . . . . . . . . . . . . . . . . . . . . . . . . . . . . . . . . . . . . . . . . . . . . . . . . . . . . . . F-3 Approximate Solution for Elastomer Spring Selection. . . . . . . . . . . . . . . . . . . . . . . . . . . . . . . . . . F-4 Further Possible Steps For Optimization . . . . . . . . . . . . . . . . . . . . . . . . . . . . . . . . . . . . . . . . . . . . . . . F-6 Determining Insulating Effects. . . . . . . . . . . . . . . . . . . . . . . . . . . . . . . . . . . . . . . . . . . . . . . . . . . . . . . . . F-7 Determining Natural Frequencies . . . . . . . . . . . . . . . . . . . . . . . . . . . . . . . . . . . . . . . . . . . . . . . . . . . . . . F-8 Index . . . . . . . . . . . . . . . . . . . . . . . . . . . . . . . . . . . . . . . . . . . . . . . I 8580/8590 Vehicle-Mount Computer User Manual v 1 INTRODUCTION 1.1 About This Manual . . . . . . . . . . . . . . . . . . . . . . . . . . . . . . . . . . . . 3 1.2 Text Conventions . . . . . . . . . . . . . . . . . . . . . . . . . . . . . . . . . . . . . 5 1.3 For Qualified Personnel . . . . . . . . . . . . . . . . . . . . . . . . . . . . . . . . . 5 8580/8590 Vehicle-Mount Computer User Manual 1 Chapter 1: Introduction About This Manual 1.1 About This Manual This manual contains important information about using the 8580/8590 safely and efficiently. Instructions in this manual will help you avoid dangerous situations, reducing repair costs and breakdown times and increasing the reliability and lifespan of the 8580/8590. Psion Inc. will not assume responsibility for any damage caused by improper use of the 8580/8590 vehicle-mount and/or by ignoring instructions provided in this manual. This manual strives to provide all the information required to effectively use your 8580/8590. However, because this is a versatile product that can be used in many different scenarios, we cannot guarantee that the information contained in this manual will cover every possible use. If you require further information, or if you have questions or issues needing clarification, please contact your nearest Psion representative. Refer to Appendix A: “Support Services & Worldwide Offices” in this manual, or go to: http://community.psion.com/support/ Chapter 1: Introduction provides a basic overview of this manual. Chapter 2: Basic Checkout outlines the setup features of the 8580/8590. Chapter 3: Accessories describes the accessories available with your 8580/8590. Chapter 4: 8580/8590 Installation describes the assembly of the cable cover and provides information about mounting options. Chapter 5: Operation of the 8580/8590 describes the front panel options and how to operate them. Chapter 6: Operating System & Software Apps describes the 8580/8590 operating system and software applications. Chapter 7: Serial Ports details 8580/8590 serial ports. Chapter 8: Internal Devices provides details about the internal chipset, VGA adaptor, network adaptor, touchscreen, and so on. 8580/8590 Vehicle-Mount Computer User Manual 3 Chapter 1: Introduction About This Manual Chapter 9: Maintenance provides steps to safely clean and maintain your 8580/8590. Chapter 10: Common Mistakes & Helpful Tips provides some helpful troubleshooting tips. Appendix A: Support Services & Worldwide Offices provides the help desk phone number at the Mississauga, Ontario, Canada office and details the support services available. This appendix also lists the worldwide head office addresses and phone numbers. Appendix B: Pre-Regulator (PS1320) Installation directs you to Psion personnel for assistance with the installation of preregulators. Appendix C: UPS (PS1110/PS1120) Installation directs you to Psion personnel for assistance with the installation of uninterrupted power supplies (UPS). Appendix D: System Resources lists system resources for reference values. These may be useful as a guide and for troubleshooting. Appendix E: Pinouts – External Connectors provides tables of terminal (pin) assignments. Appendix F: Mechanical Dynamic Loading provides information addressing the varied mechanical environmental conditions of the 8580/8590 in terms of vibrations, collisions and shocks and the options available to counter these. 4 8580/8590 Vehicle-Mount Computer User Manual Chapter 1: Introduction Text Conventions 1.2 Text Conventions Note: Notes highlight additional, helpful information. Important: These statements provide particularly important instructions or additional information that is critical to the operation of the equipment. Warning: These statements provide critical information that may prevent physical injury, equipment damage or data loss. 1.3 For Qualified Personnel This manual was written for qualified personnel. The information is intended exclusively to complement the expertise of qualified personnel, not to replace it. For a list of offices, refer to Appendix A: “Support Services & Worldwide Offices” in this manual, or go to: http://community.psion.com/support/ 8580/8590 Vehicle-Mount Computer User Manual 5 2 BASIC CHECKOUT 2.1 8580/8590 Description . . . . . . . . . . . . . . . . . . . . . . . . . . . . . . . . . . 9 2.2 Intended Use . . . . . . . . . . . . . . . . . . . . . . . . . . . . . . . . . . . . . . . 9 2.3 The Models: 8580 and 8590 . . . . . . . . . . . . . . . . . . . . . . . . . . . . . . 10 2.4 Abbreviations Used For 8580/90s & Accessories . . . . . . . . . . . . . . . . . . . 10 2.5 Technical Specifications . . . . . . . . . . . . . . . . . . . . . . . 2.5.1 Mechanical . . . . . . . . . . . . . . . . . . . . . . . . . 2.5.2 Motherboard . . . . . . . . . . . . . . . . . . . . . . . . 2.5.3 LCD/CRT Interface . . . . . . . . . . . . . . . . . . . . 2.5.4 Touchscreen . . . . . . . . . . . . . . . . . . . . . . . . 2.5.5 Network Interface . . . . . . . . . . . . . . . . . . . . . 2.5.6 PCI Express® MiniCard Interface For WLAN (Optional) 2.5.7 Power Supply. . . . . . . . . . . . . . . . . . . . . . . . 2.5.8 Maximum Power Available for Peripheral Devices . . . . 2.5.9 Power Supply Fuses . . . . . . . . . . . . . . . . . . . . 2.5.10 Ambient Conditions. . . . . . . . . . . . . . . . . . . . 2.5.11 Test Marks. . . . . . . . . . . . . . . . . . . . . . . . . 2.5.12 8580/8590 Dimensions . . . . . . . . . . . . . . . . . . 2.5.12.1 8580 Front and Back Dimensions . . . . . . . . 2.5.12.2 8580 Side Dimensions . . . . . . . . . . . . . . 2.5.12.3 8590 Front and Back Dimensions . . . . . . . . 2.5.12.4 8590 Side Dimensions . . . . . . . . . . . . . . 2.5.13 8580/8590 VESA Drill Holes. . . . . . . . . . . . . . . 2.6 Unpacking the 8580/8590 . . . . . . . . . . . . . . . . . . . . . . . . . . . . . . . . . . . . . . . . . . . . . . . . . . . . . . . . . . . . . . . . . . . . . . . . . . . . . . . . . . . . . . . . . . . . . . . . . . . . . . . . . . . . . . . . . . . . . . . . . . . . . . . . . . . . . . . . . . . . . . . . . . . . . . . . . . . . . . . . . . . . . . . . . . . . . . . . . . . . . . . . . . . . . . . . . 10 10 11 13 13 14 14 15 16 17 17 18 19 19 19 20 21 22 22 2.7 Packaging. . . . . . . . . . . . . . . . . . . . . . . . . . . . . . . . . . . . . . . . 23 2.8 Putting Your 8580/8590 in Operation . . . . . . . . . . . 2.8.1 Cooling Through Unobstructed Air Circulation . 2.8.2 Pin Configuration. . . . . . . . . . . . . . . . . 2.8.3 External Connectors . . . . . . . . . . . . . . . 2.8.3.1 DC Voltage Supply . . . . . . . . . . . 2.8.3.2 8580/8590 Adaptor Cables . . . . . . . . . . . . . . . . . . . . . . . . . . . . . . . . . . . . . . . . . . . . . . . . . . . . . . . . . . . . . 8580/8590 Vehicle-Mount Computer User Manual . . . . . . . . . . . . . . . . . . . . . . . . . . . . . . 23 23 23 24 25 25 7 2.9 Connecting External Devices . . . . . . . . . . . . . . . . . . . . . . . . . . . . . . 26 2.10 Powering Down the 8580/8590 . . . . . . . . . . . . . . 2.10.1 Powering Up the 8580/8590 . . . . . . . . . . . 2.11 WLAN Settings . . . . . . . . . . . . . . . . . . . . . . 2.11.1 Radio Performance. . . . . . . . . . . . . . . . 2.11.2 8580/8590 Antenna Solutions for EU Countries 2.12 Removing the Protective Film from the Display . . . . . . . . . . . . . . . . . . . . . . . . . . . . . . . . . . . . . . . . . . . . . . . . . . . . . . . . . . . . . . . . . . . . . . . . . . . . . . . . . . . . 27 . 27 . 28 . 28 . 28 . 29 2.13 Powering Up the 8580/8590 . . . . . . . . . . . . . . . . . . . . . . . . . . . . . . 29 2.14 Protecting the TFT Display from Memory Effect . . . . . . . . . . . . . . . . . . . 29 8 8580/8590 Vehicle-Mount Computer User Manual Chapter 2: Basic Checkout 8580/8590 Description 2.1 8580/8590 Description Warning: IT IS CRITICAL that this information be reviewed and that any guidelines applicable to your vehicle-mount be strictly followed. Thank you for choosing the 8580/8590 vehicle-mount computer. The 8580/8590 is a multi-function computer designed for stationary and mobile use. Thanks to its rugged design (aluminum housing), this vehicle-mount provides effective protection against mechanical, electrical and chemical influences and extreme ambient temperatures. It is designed without an external fan to reduce maintenance requirements. The 8580/8590 offers flexible functionality combined with compact design. In addition, superior display and touchscreen technology ensures excellent image quality with straight forward operability. 2.2 Intended Use The 8580 and 8590 are multifunction vehicle-mount computers designed for stationary and mobile use in commercial applications (for example logistics, storage, manufacturing). A different or extraordinary usage is not permitted. Should these units be used in unauthorized ways, the user/operator is solely responsible for any resulting damage. This condition also applies to any changes you make to the 8580/8590. 8580/8590 Vehicle-Mount Computer User Manual 9 Chapter 2: Basic Checkout The Models: 8580 and 8590 It is critical that you comply with the safety regulations described in this manual in order to safely operate the 8580/890. Review the Approvals and Safety Summary section at the beginning of this manual. 2.3 The Models: 8580 and 8590 This manual applies to the following models: • 8580 with 10.4" display, and • 8590 with 12.1" display Any differences between the devices will be clearly noted in this manual. 2.4 Abbreviations Used For 8580/90s & Accessories Please note that to save space on the 8580/8590 and supplied accessories, the following abbreviations have been used: 2.5 Abbreviation Explanation + DC+ - DC- Ign Ignition Technical Specifications This section lists technical information for these vehicle-mount computers. 2.5.1 Mechanical • Housing: Rugged aluminium-cast housing with integrated heat sink. Protection class IP65 ESD safe Weight of the 8580/8590 with a 10.4" front panel: approx. 4.0 kg (depending on configuration) • 10 Display Panel: 8580 – 10" SVGA, 400 cd/m2, 4-wire resistive touchscreen with brightness adjustment. 8580/8590 Vehicle-Mount Computer User Manual Chapter 2: Basic Checkout Motherboard 8590 is available with two display variants: - Standard 12.1" XGA, 400 cd/m2, 8-wire resistive touchscreen with brightness adjustment - Optional 12.1" XGA, 800 cd/m2, 8-wire resistive touchscreen with brightness adjustment • • 2.5.2 Bottom: Cable cover (splash guard) Top: Optional antenna fitting for wireless LAN Motherboard • CPU: Two variants are available. Standard Intel® Celeron® M 800 MHz, ULV Optional Intel® Celeron® M 373, 1 GHz, ULV • Chipset: Two variants are available. Standard Intel® 82915 GM Northbridge and graphic chip Optional Intel® 82801 FBM (ICH6-M) Southbridge • • Bus Interface: PCI bus (PCI 2.1) Cache: 64 kB level 1 cache: internal in the CPU 0 kB level 2 cache on the 800 MHz CPU: CPU-internal 512 kB level 2 cache on the 1 GHz CPU: CPU-internal • RAM: 256 to 1024 MBytes in one SO-DIMM slot Fully cacheable DDR2 technology • BIOS: AMIBIOS8® -1 MByte Flash BIOS with ACPI, PnP Programmable in the system BIOS POST self test • Slots for standard plug-in cards: A riser card is available for expansions: PCI slot 32 bit 5 V • Real-time clock: Real-time clock with a power reserve of up to 10 years 8580/8590 Vehicle-Mount Computer User Manual 11 Chapter 2: Basic Checkout Motherboard • IDE Interface: Supports up to two IDE devices from PIO Mode 3/4 to UDMA/33. Connection via a 44-pin connector (2 mm grid). Connectable devices: 2.5" hard drives (enquire which capacities are currently available) 2.5" Flash disks (IDE) (enquire which capacities are currently available) Compact Flash type I/II Important notes for Compact Flash Cards: Only use Compact Flash Cards approved and released by Psion to ensure the device functionality. Otherwise data loss could increase. The Compact Flash Cards used in the 8580/8590 must be industrial and non-removable models. • Floppy disk drive: Supports an external 3.5" USB floppy disk drive Protected to ESD level 4 (according to EN 61000-4-2) • Serial Ports: Ist Serial Port: Pin 9 can be configured to provide +5 V or +12 V power to an external device. This option must be specified at ordering time. 115,200 Baud max (16550A compatible, 16 byte FIFO), supports RS-232 on an external 9-pin D-Sub connection ESD level 4 protected (acc. to EN 61000-4-2) 2nd serial port: 115,200 Baud max (16550A compatible, 16 bytes FIFO), 115,200 Baud max (16550A compatible, 16 bytes FIFO), ESD level 4 protected (acc. to EN 61000-4-2) 3rd serial port: 115,200 Baud max (16550A compatible, 16 bytes FIFO), internal for the integrated environment controller 115,200 Baud max (16550A compatible, 16 bytes FIFO), internal for integrated touch controller 12 8580/8590 Vehicle-Mount Computer User Manual Chapter 2: Basic Checkout LCD/CRT Interface • Keyboard/mouse connection: Keyboard/mouse: 6-pin mini DIN connector, combination connector, Y cable for PS/2 keyboard and mouse required Internally-protected power supply for keyboard and mouse ESD level 4 protected (acc. to EN 61000-4-2) • USB-connection: 2 stacked USB connections (USB 2.0 HiSpeed) with 0.5 A per port protected by fuse ESD level 4 protected (acc. to EN 61000-4-2) • Software compatibility: Windows XP Professional Windows XP Embedded • 2.5.3 Audio: SoundBlaster 16 compatible on-board Sound Card, AC’97, optional line-in/lineout connectors LCD/CRT Interface • VGA controller: Integrated Intel® Graphics Media Accelerator 900 with maximum 224 MByte Dynamic Video Memory Technology (DVMT 3.0) Shared memory architecture Resolution up to 1600 x 1200 (UXGA) Up to 24 bit colour depth, depending on which LCD is used Simultaneous use of LCD/CRT Multiple LCDs are supported Drivers available for Windows XP Professional and XP Embedded 2.5.4 Touchscreen • Analog touch controller: 12 bit touch controller for 4/5/8-wire resistive touchscreens with RS232 and PS/2 interface Drivers available for Windows XP Professional and XP Embedded 8580/8590 Vehicle-Mount Computer User Manual 13 Chapter 2: Basic Checkout Network Interface • • Analog touchscreens: Available for 10.4" and 12.1" LCD displays, others on request Analog touch connection: Internal plug-in connector Interface is ESD level 4 protected (acc. to EN 61000-4-2) 2.5.5 Network Interface • Network controller: Intel® ICH6M with PHY Intel® 82562 controller: 10/100 MB/s Drivers available for Windows XP Professional and XP Embedded • Network connection: RJ45 plug-in connector Integrated transmitter Two integrated status LEDs 2.5.6 PCI Express® MiniCard Interface For WLAN (Optional) • PCI Express MiniCard slot: 1 USB 2.0 High Speed 1x x1 PCI Express® Lane No SIM card mounts available, therefore, for example, no GSM, UMTS etc. cards can be used Driver support through Windows XP Professional and XP Embedded (only operating system support, plug-in card drivers from the manufacturer) 14 8580/8590 Vehicle-Mount Computer User Manual Chapter 2: Basic Checkout Power Supply 2.5.7 Power Supply The device model is displayed on the device type plate. • DC power pack 24/48 VDC 60 W internal type: DC-2: 24/48 VDC nominal (down to 11V for 20s max.) Voltage range: 18 to 60 VDC Covers power outages up to 5 ms Electrically-isolated Maximum output 60 W Optional automatic shutdown software, supports Windows Optional temperature display Withstands bursts up to 2 kV Nominal current of 3.7 A Connection to SELV circuit1) only • DC power pack 24/48 VDC 100 W internal type: DC-3: 24/48 VDC nominal (down to 11 V for 20 s max.) Voltage range: 18-60 VDC Covers power outages up to 5 ms Electrically-isolated Maximum output 100 W Optional automatic shutdown software, supports Windows Optional temperature display Withstands bursts up to 2 kV Nominal current 6.2 A Connection to SELV circuit2) only • DC power pack 12 VDC 100 W internal type: DC-1: 12 VDC nominal (down to 6 V for 20 s max.) Voltage range from 9 to 16 VDC Covers power outages up to 5 ms Electrically-isolated Maximum output 100 W (at 9 to 16 VDC) 8580/8590 Vehicle-Mount Computer User Manual 15 Chapter 2: Basic Checkout Maximum Power Available for Peripheral Devices 80 W (at 6 to 9 VDC) Optional automatic shutdown software, supports Windows Optional temperature display Withstands bursts up to 2 kV Nominal current of 15 A Connection to SELV circuit3) only • Power consumption: Type: 30 W (8580 SVGA with Compact Flash) Max. 100 W (8580 VGA with Compact Flash in heating mode) Standby 1 W (8580 with DC power pack in standby mode) 1,2,3 The SELV circuit is a secondary circuit that is designed and protected so that its voltages will not exceed a safe value both when operating correctly or if a single error occurs. 2.5.8 Maximum Power Available for Peripheral Devices Power Supply 16 Motherboard Power Available DC-1 800 MHz 24 W DC-1 1 GHz 16 W DC-3 800 MHz 13.2 DC-3 1 GHz 5W 8580/8590 Vehicle-Mount Computer User Manual Chapter 2: Basic Checkout Power Supply Fuses 2.5.9 Power Supply Fuses The symbol for the fuse is FA. You will find the exact position on the sticker located on the connection plate (see “External Connectors” on page 24). Power Supply Fuse Type Examples DC-1, DC-5 5x20 mm T 16 A L/250 V Wickmann 195-2160 16A/250 V Siba 179120 (SIBA #. 7000135) 16 A/250 V or similar devices produced by other manufacturers DC-2 5x20 mm T 6.3 A H/250 V Bussman S505-6.3 A Wickmann 181-6.3 A Littelfuse 215 06.3 Schurter 0001.2512 Siba 70 007 65 6.3 A Elu 179200 6.3 A or similar devices produced by other manufacturers DC-3, DC-4 5x20 mm T 12.5 A L/250 V Wickmann 195-2125 12.5 A/250 V Siba 179120 (SIBA Nr. 7000135) 12.5 A/250 V or similar devices produced by other manufacturers 2.5.10 Ambient Conditions • Operating temperature: All specifications in accordance with EN 60068-2-1/2 The permissible ambient temperature depends on the display used: Display • Operating Temperature [° C] Operating Temperature with Heating [° C] 10.4" SVGA -20 to +50 -30 to +50 12.1" XGA -10 to +50 -30 to +50 Storage temperature: All specifications in accordance with EN 60068-2-1/2 The permissible ambient temperature depends on the display used: 8580/8590 Vehicle-Mount Computer User Manual 17 Chapter 2: Basic Checkout Test Marks Display Storage Temperature [° C] 10.4" SVGA -20 to +80 12.1" XGA -20 to +80 Note: The lower limit of the storage temperature may exceed the permissible operating temperature range. In such cases, the unit may be powered up to the minimum storage temperature and used in the full range of operating temperatures after the heating phase. • Relative humidity: 10% to 90% at 40° C, non-condensing In accordance with EN 60068-2-3 • Mechanical vibration & shock resistance: Class 5M3 according to EN 60721-3-5: 1998 (land vehicles), 5 hrs. with 3.6 g effective noise and 36 vibrations with 30 g peaks or US highway truck according to MIL-STD 810F: 2000 (Department of Defense), 3 hrs with 1 g effective noise and 600 vibrations with 20 g peaks in operation, with Flash disk 2.5.11 Test Marks • CE: EN 55022 Class B EN 55024, EN 61000-3-2, EN61000-3-3, EN 61000-6-2 IEC 60950-1, EN 60950-1, UL 60950-1 EN 300328-1 and EN 301489-17, in case Psion data transmission devices operating in the 2.4 GHz spectrum have been installed 18 8580/8590 Vehicle-Mount Computer User Manual Chapter 2: Basic Checkout 8580/8590 Dimensions 2.5.12 8580/8590 Dimensions Note: All dimensions are represented in millimeters. 2.5.12.1 8580 Front and Back Dimensions 2.5.12.2 8580 Side Dimensions 8580/8590 Vehicle-Mount Computer User Manual 19 Chapter 2: Basic Checkout 8580/8590 Dimensions 2.5.12.3 8590 Front and Back Dimensions 20 8580/8590 Vehicle-Mount Computer User Manual Chapter 2: Basic Checkout 8580/8590 Dimensions 2.5.12.4 8590 Side Dimensions 8580/8590 Vehicle-Mount Computer User Manual 21 Chapter 2: Basic Checkout 8580/8590 VESA Drill Holes 2.5.13 8580/8590 VESA Drill Holes The VESA drill holes on the 8580/8590 are visible on this diagram. Dimensions without add-ons (in mm): 2.6 Unpacking the 8580/8590 The delivery includes at least the following: • • • • 8580/8590 with strain relief rail Ordered assembly set Cable cover (standard – IP65 with strain relief rail) One DC and Ignition connecting cable, or one DC and Screen Blanking connection cable. (See “8580/8590 Adaptor Cables” on page 25.) Please verify the delivery contents immediately on receipt! 22 8580/8590 Vehicle-Mount Computer User Manual Chapter 2: Basic Checkout Packaging 2.7 Packaging The packaging material has been selected to protect your device while simultaneously offering the best possible ecological compatibility. We therefore kindly request that you store the original packaging material or ensure it is used for another suitable purpose such as transporting the unit or returning shipment. Important: If you repack the device, please ensure that the cling wrap in the cardboard frame is positioned over the front display of the device to provide proper protection. 2.8 Putting Your 8580/8590 in Operation 2.8.1 Cooling Through Unobstructed Air Circulation The 8580/8590 employs a passive cooling concept whereby the waste heat generated inside the device is emitted from the surface of the housing. To ensure that this cooling system functions properly, sufficient fresh air circulation is required. Never install the system in a closed environment where accumulated heat cannot be dissipated. Important: If the 8580/8590 does not have access to fresh cooling air, the unit may overheat, severely damaging the computer. It is important to take into account the ambient temperature of the area in which the vehicle-mount is used. 2.8.2 Pin Configuration This section describes the pin configuration for all 8580/8590 plug-in connectors. 8580/8590 Vehicle-Mount Computer User Manual 23 Chapter 2: Basic Checkout External Connectors 2.8.3 External Connectors Figure 2.1 24/48VDC 60W Version See GND designation note below. Figure 2.2 24/48VDC 100 W Version See GND designation note below. Figure 2.3 12VDC 100W Version See GND designation note below. Note: DC- is connected to the vehicle chassis (GND) ONLY on negative ground systems; for other vehicle ground systems, the external wire of the adaptor cable must be connected between the ground lug and the vehicle chassis. Refer to “Wiring Vehicle Power to the 8580/8590” on page 48 for details. 24 8580/8590 Vehicle-Mount Computer User Manual Chapter 2: Basic Checkout External Connectors 2.8.3.1 DC Voltage Supply Version: Phoenix Combicon, 3-pin. Figure 2.4 DC Power Supply Connector – Exterior View Explanation: ‘Ignition on’ means that a control signal must be routed to this connection (e.g., ignition of a vehicle) that matches the supply voltage level and is able to supply at least 2 W to the 8580/8590. The signal reference is DC-. 2.8.3.2 8580/8590 Adaptor Cables Two types of adaptor cables are available for use with the 8580/90. An extension power cable (PN 13985–301) is available as an accessory. The power extension cable is connected to the vehicle on one side and the adaptor cable on the other side. All cables can be used with every voltage. Psion offers an ‘ignition’ and a ‘screen blanking’ (display-off) adaptor cable. The external wire of the adapter cable must be connected to the ground lug of the terminal and to the vehicle chassis. Note: Refer to “Wiring Vehicle Power to the 8580/8590” on page 48 for details about ‘ignition’ and ‘screen blanking’ installation instructions. If you require Pre-Regulator or UPS installation instructions, please contact Psion personnel for assistance. The ‘ignition’ adaptor cable is connected to the power input of the 8580/8590 only; the ‘screen blanking’ cable must be connected to the power input and COM1 or COM2. If you require both the ‘screen blanking and the ‘ignition’ options, you will need to contact Psion personnel for assistance. 8580/8590 Vehicle-Mount Computer User Manual 25 Chapter 2: Basic Checkout Connecting External Devices Figure 2.5 8580/8590 Adaptor Cable Options Ignition Adaptor Cable PN 1616302-001 2.9 Screen Blanking Adaptor Cable PN 1616303-001 Connecting External Devices Warning: Do not connect external devices without ensuring that they are properly isolated, taking into account the electrical system of the vehicle (positive, negative or floating chassis). 26 8580/8590 Vehicle-Mount Computer User Manual Chapter 2: Basic Checkout Powering Down the 8580/8590 Warning: The 8580/8590 must be disconnected from the power supply: - before external devices (e.g., scanner, keyboard) can be connected or disconnected, and - before the 8580/8590 can be connected to a network. All connections and interfaces on the 8580/8590 are located on the underside of the unit. Important: Before connecting or disconnecting peripheral devices (exception: USB devices), the 8580/8590 must be disconnected from the power supply! If the 8580/8590 is equipped with an optional UPS battery, open the device only after the power LED has switched off. Ignoring these guidelines could seriously damage both the 8580/8590 and the connected devices! Make sure that external peripheral devices with their own power supply are switched on at the same time as the 8580/8590 or after you start the 8580/8590. If this is not possible, please ensure that the 8580/8590 is adequately protected from power leakage caused by an external device. 2.10 Powering Down the 8580/8590 Always shut down the 8580/8590 according to the configuration set up in the Automatic Shutdown software. To access this setup: • Tap on Start>Programs>PsionTeklogix>PTX Config. Refer to “Automatic Switch Off” on page 71 for details. The power LED switches off when 8580/8590 is shut down. 2.10.1 Powering Up the 8580/8590 Power up the 8580/8590 only after all devices have been connected and the vehicle-mount has been closed correctly (remember the cable cover!). Otherwise, you may damage the 8580/8590! 8580/8590 Vehicle-Mount Computer User Manual 27 Chapter 2: Basic Checkout WLAN Settings 2.11 WLAN Settings 2.11.1 Radio Performance Warning: Do not exceed the maximum permissible transmitting power which is specified by each separate country. The maximum permissible power setting for the U.S.A. is 62 mW. 8580/8590 users in other countries must verify the power limit themselves. Please keep the configuration for the transmitting power in mind: • Maximum output power configured in the WLAN card (To locate this information, tap on the desktop ATHEROS shortcut icon, and then tap on the Help menu.) • Connecting cables • Antenna A help table with the correct settings is provided below: 2.11.2 8580/8590 Antenna Solutions for EU Countries The integrated 8580/8590 antenna solutions are based on the prevailing IEEE.802.11b standard, which allows wireless data transfer at rates from 54 Mbps to 1 Mbps using the 2.4 GHz band. Warning: According to regulations published in the gazette 89/2003 of the RegTP (regulating body for telecommunications and mail): Federal network agency for electricity, gas, telecommunications, post and railway, the maximum permissible transmitting power, EIRP (equivalent isotropically radiated power), in the 2.4 GHz frequency band is set at 20 dBm. The transmitting power of the two integrated antennas (4 dBi or 5 dBi) must be set to 30 mW (15 dBm) so that the EIRP limit value is adhered to when using the antenna. To set the transmitting power of the wireless card: • 28 Tap on the desktop ATHEROS shortcut icon, and then tap on the Help menu. 8580/8590 Vehicle-Mount Computer User Manual Chapter 2: Basic Checkout Removing the Protective Film from the Display 2.12 Removing the Protective Film from the Display The 8580/8590 display is protected during transport by a transparent film. This film should remain on the display during assembly to avoid damage. Remove the film only after all assembly work has been completed. 2.13 Powering Up the 8580/8590 Power up the 8580/8590 only after connecting all of the devices. If 18V or more is connected to a 12V 8580/90, the vehicle-mount WILL BE DAMAGED AND WILL NO LONGER FUNCTION. The unit is powered up by connecting it to an appropriate power supply and then, depending on the version of the device, either using the power switch or the ignition signal. 2.14 Protecting the TFT Display from Memory Effect A motionless image may remain on the display for a maximum of 12 hours. Exceeding 12 hours may result in a “memory effect” – the motionless image may be permanently burned into the display. After-image damage can be avoided by regularly turning off the display or by using a screen saver with shifting images. You can define the screen shutdown behaviour in the power management center of the operating system installed in your unit. In Windows XP for example, look in: Control Panel>Power Options. Important: The following is important to the lifespan of the backlight: Choose a turn off time of no less than 30 minutes. Frequently turning on the backlight will noticeably reduce its lifespan, especially at low temperatures. In cold environments, the display backlight should never be switched off; instead, a screen saver should be used to achieve the maximum lifespan of the backlighting. 8580/8590 Vehicle-Mount Computer User Manual 29 3 ACCESSORIES 3.1 Keyboards . . . . . . . . . . . . 3.1.1 The SMALL Keyboard. 3.1.2 The 24-Key Keypad . . 3.2 Mouse. . . . . . . . . . . . . . . . . . . . . . . . . . . . . . . . . . . . . . . . . . . . . . . . . . . . . . . . . . . . . . . . . . . . . . . . . . . . . . . . . . . . . . . . . . . . . . . . . . . . . . . . . . . . . . . . . . . . . . . . . . . 33 33 34 34 3.3 External CD-ROM Drive. . . . . 3.3.1 Operation . . . . . . . . 3.3.2 Resources And Drivers . 3.4 USB Stick. . . . . . . . . . . . . . . . . . . . . . . . . . . . . . . . . . . . . . . . . . . . . . . . . . . . . . . . . . . . . . . . . . . . . . . . . . . . . . . . . . . . . . . . . . . . . . . . . . . . . . . . . . . . . . . . . . . . . . . . . 35 35 35 36 3.5 Scanner . . . . . . . . . . . . . . . . . . . . . . . . . . . . . . . . . . . . . . . . . 36 8580/8590 Vehicle-Mount Computer User Manual 31 Chapter 3: Accessories Keyboards 3.1 Keyboards On the 8580/8590, any keyboard with a 6-pin Mini-DIN plug can be connected (PS/2). Resources for the keyboard controller are pre-defined in the system architecture and automatically managed by the BIOS. All keyboards can be used with all operating systems. No additional drivers are required. 3.1.1 The SMALL Keyboard A mountable, SMALL keyboard (English, German and French) is available for the 8580/8590, protection class IP 65. The following SMALL keyboards are available through Psion: • • Desktop SMALL keyboard (English, German and French versions) Add-on version. This add-on version can be attached to a stationary or mobile mounting bracket with a mounting kit. 8580/8590 Vehicle-Mount Computer User Manual 33 Chapter 3: Accessories The 24-Key Keypad 3.1.2 The 24-Key Keypad Psion also provides a 24-key keypad which can be mounted onto the device, with a protection class IP 65. 24-Key Keypad 3.2 Mouse Any PS/2-compatible mouse with a standard Mini-DIN plug, USB connector or RS-232 port can be connected to the 8580/8590. If the mouse has a PS/2 connection, a Y-cable is also required Note: By default, the touchscreen is configured to use PS/2 mode – a PS/2 mouse cannot be used. If a PS/2 mouse is required, Contact Psion; the unit will need to be returned to the depot so that existing jumpers can be replaced and required drivers installed. Psion recommends using a USB mouse and keyboard as an alternative to the PS/2 mouse. Resources for the PS/2 mouse controller are pre-defined in the system architecture and automatically managed by the BIOS. This is also true for RS-232 and USB mouse devices. Special functions such as those provided by wheel mouse devices frequently require additional drivers, which must be supplied by the manufacturer. 34 8580/8590 Vehicle-Mount Computer User Manual Chapter 3: Accessories External CD-ROM Drive 3.3 External CD-ROM Drive An external CD-ROM drive can be attached to the 8580/8590. It is connected via the USB port. Important: When connecting an external USB CD-ROM drive which has its own external power supply, the 8580/8590 must be disconnected from the power supply. The CD-ROM must be powered up simultaneously or after the 8580/8590. Ignoring these guidelines may cause start-up problems, malfunctions, or even the permanent damage to the device. Keep in mind also that not every device classified as a USB CD-ROM is a proper USB CD-ROM drive. Use only those devices approved by Psion to ensure compatibility. Warning: The External USB CD-ROM drive must have a galvanically isolated power supply. 3.3.1 Operation The CD-ROM drive port is provided via USB. The drive, which is supplied in a separate housing, is connected to one of the sockets on the back of the 8580/8590. Depending on the model, the external drive is powered either via the vehicle-mount connecting cable or through a separate, external power supply. If USB has been activated in the BIOS, the CD-ROM drive is automatically recognized and made available by the BIOS. The CD-ROM drive is bootable once it has been properly installed. To boot from a CDROM, insert a bootable CD and start the system. Note: In the BIOS USB CD-ROM must be entered as a boot device. 3.3.2 Resources And Drivers Resources for the USB port are pre-defined in the system architecture and automatically managed by the BIOS. Drivers for the various operating systems need to be supplied by the drive manufacturer. 8580/8590 Vehicle-Mount Computer User Manual 35 Chapter 3: Accessories USB Stick 3.4 USB Stick You can connect a USB stick to the 8580/8590 with a USB-A connector. 3.5 Scanner You can connect scanners to either the USB, PS/2 or serial port. If connected to COM1, the scanner can be powered through the port (optional). Be sure to use only scanners that have been approved by Psion. 36 8580/8590 Vehicle-Mount Computer User Manual 4 8580/8590 INSTALLATION 4.1 Complying with Protection Standard IP65 . . . . . . . . . . . . 4.1.1 Parts List for Cable Cover Kit . . . . . . . . . . . . . 4.1.2 Cable Cover, Grounding Bar & Cables – Assembling . 4.2 Mounting Options for the 8580/8590 . . . . . . . . . . . . . . 4.2.1 Mounting Bracket Toolkit . . . . . . . . . . . . . . . 4.2.2 Permitted Mounting Positions . . . . . . . . . . . . . 4.2.3 Mechanical Dynamic Loading . . . . . . . . . . . . . 4.3 Power Supply. . . . . . . . . . . . . . . . . . . . . . . . . . . 4.3.1 DC Power Pack. . . . . . . . . . . . . . . . . . . . . 4.3.2 Installing Connecting Cables. . . . . . . . . . . . . . 4.4 Vehicle Applications (such as Forklifts) . . . . . . . . . . . . . 4.4.1 Wiring Vehicle Power to the 8580/8590 . . . . . . . . 4.5 Cable Cover (Splash Guard) . . . . . . . . . . . . . . . . . . . 4.5.1 Protection Class IP65. . . . . . . . . . . . . . . . . . . . . . . . . . . . . . . . . . . . . . . . . . . . . . . . . . . . . . . . . . . . . . . . . . . . . . . . . . . . . . . . . . . . . . . . . . . . . . . . . . . . . . 8580/8590 Vehicle-Mount Computer User Manual . . . . . . . . . . . . . . . . . . . . . . . . . . . . . . . . . . . . . . . . . . . . . . . . . . . . . . . . . . . . . . . . . . . . . . 39 39 40 43 44 44 44 45 45 46 46 48 49 49 37 Chapter 4: 8580/8590 Installation Complying with Protection Standard IP65 4.1 Complying with Protection Standard IP65 Warning: To comply with the IP65 protection standards, you must install the 8580/8590 cover guard, secure the cables and seal the unit BEFORE mounting the unit using a mounting bracket. The 8580/8590 is sealed against dust and protected against water jets (IP65), provided that the following conditions are fulfilled: • • • • • 4.1.1 The cable cover is fitted. The sealing rings supplied are used for mounting the cables, and are sealed with silicone. The unused cable sockets are blocked with sealing plugs and are sealed off with silicone. The cables are secured in the cable cover with grounding plates. The pressure equalisation element (PEE) in the cable cover should not be sealed or otherwise made airtight. Parts List for Cable Cover Kit You’ll need the following parts in order to comply with IP65 standards (from left to right in the Figure 4.1 on page 40): • • • • • • • • 1 cable cover with pressure equilisation element (7 partially threaded screws are already fitted) 1 grounding bar 3 special screws 2 grounding plates 8 M3 screws 1 Silicone syringe 4 sealing rings 3-6.5 mm 2 sealing rings 5.5-9 mm 8580/8590 Vehicle-Mount Computer User Manual 39 Chapter 4: 8580/8590 Installation Cable Cover, Grounding Bar & Cables – Assembling Figure 4.1 You will need the following tools: • • • 4.1.2 Size 3 screwdriver (for slotted screws) Size 1 screwdriver (Phillips) Knife Cable Cover, Grounding Bar & Cables – Assembling 1. Mount the grounding bar to the cable cover using the 3 screws included. Grounding Bar Cable Cover 2. Prepare the sealing rings: • First, check how many cables are to be connected to the 8580/8590. • Choose the sealing rings according to the cable diameter (3-6.5 mm or 5.5-9 mm). 40 8580/8590 Vehicle-Mount Computer User Manual Chapter 4: 8580/8590 Installation Cable Cover, Grounding Bar & Cables – Assembling • Next, prepare the corresponding number of sealing rings. Do this by making an incision with a knife at the mark (only to the midpoint of the sealing rings). • Make certain that the remaining sealing rings are not cut open! • Put the correct sealing rings around the cables. 3. Fit cables to the 8580/8590. • Connect all required cables (maximum 6) to the computer interface. • Place the 8580/8590 onto a soft base. Important: The surface of the touchscreen should always be kept free of dirt, dust, finger marks and s on to ensure full visibility of the display. Make sure the screen does not get scratched or otherwise damaged before placing the device face down. 4. Prepare cables and cable cover. • Position the cable cover for mounting, slightly away from the computer. • Loosely place the cables in loops in the cable sockets of the cable cover, not in a straight-through position, but transposed, (see diagram). At this point, push the sealing rings into the cable sockets. 5. Fix grounding plates and insert sealing plugs: • Lightly fix the cables in the cable cover using the earthing plates. • Test the fit of the cable cover relative to the equipment. • Release the cables from the sealing rings so that the silicone can be applied. 8580/8590 Vehicle-Mount Computer User Manual 41 Chapter 4: 8580/8590 Installation Cable Cover, Grounding Bar & Cables – Assembling • Insert the sealing rings and cables with silicone in the cable openings of the cable cover. • Fix the cables firmly to the grounding plate. 6. Insert sealing plugs into the unused cable openings, and seal each one with silicone. (See Figure 4.2.) 7. Install cable, fixing clamps as required. • Crossover the incoming cables to the left and right as illustrated in Figure 4.2 and secure them in place using cable fixing clamps. A cable fixing clamp is a plastic clamp that is used to secure an incoming cable to the grounding plate, a metal strap attached to the inside of the plastic cover. Cable fixing clamps, when installed in combination with cable crossover as shown in Figure 4.2, provide the necessary strain relief protection. Figure 4.2 Attach cable fixing clamp Attach cable fixing clamp Insert sealing plugs with silicone Insert sealing plugs with silicone 8. Affix cable cover: • Affix the cable cover to the 8580/8590. • Carefully follow each critical point described below during this operation: 42 8580/8590 Vehicle-Mount Computer User Manual Chapter 4: 8580/8590 Installation Mounting Options for the 8580/8590 Warning: The grounding bar is equipped with a spade lug at each end. This may be used to connect the bar to the 8580/8590 ground point if necessary. Do not connect the grounding bar to the 8580/8590 chassis without being sure that the potentials of cable shields that contact it are at the same potential as the vehicle chassis. Important: Excessive force is not required to fit the cable cover over the equipment's cable duct. There must be no damage to the lid seal of the cable cover. The partially threaded screws must be tightened 5 turns at a time, preferably diagonally opposed. Retighten the screws after 2 days. Important: Please retain these mounting instructions. Always remove the cable cover before connecting any other equipment, and replace the cover after connection. Ensure that these guidelines are followed when attaching the cable cover. The protection class cannot be guaranteed if the cable cover is attached incorrectly. 4.2 Mounting Options for the 8580/8590 The 8580/8590 can be mounted in a variety of ways: • Horizontally – The unit can be positioned horizontally on a desk or mounted on a steering wheel and vehicle console. • Wall mounted – Wall mounts are available so that the unit can be mounted on machines and operating panels. • Roof mounted – The vehicle-mount can also be mounted on the roof, for example, under the vehicle roof. Depending on the vibration resistance and pivoting demands, mounting brackets, clamp foots or RAM mount elements can also be used to attach the device. Please contact your Psion sales office (refer to Appendix A: “Support Services & Worldwide Offices”) for information about the installation options available. Important: Risk of injury – The unit could fall during transit or installation and cause injury. Always ensure that there are two people available when installing or removing the device. 8580/8590 Vehicle-Mount Computer User Manual 43 Chapter 4: 8580/8590 Installation Mounting Bracket Toolkit 4.2.1 Mounting Bracket Toolkit The following tools are required for positioning the 8580/8590 mounting bracket: 5 mm Allen Key 6 mm Allen Key • • 4.2.2 For mounting and positioning the stationary mounting bracket: Hexagonal socket wrench (Allen key) sizes 5 mm and 6 mm For mounting and positioning the mobile mounting bracket: Hexagonal socket wrench (Allen key) size 6 mm Permitted Mounting Positions The permitted mounting positions of the 8580/8590 are defined as follows: From a minimum of -90° Up to a maximum of +90° Important: The unit can only be mounted in a range of 180° as illustrated. 4.2.3 Mechanical Dynamic Loading Since the 8580/8590 is a weighted structure, the unit will be subject to mechanical dynamic effects. Therefore optimizing the mounting can be very helpful. Refer to Appendix F: “Mechanical Dynamic Loading” for details. 44 8580/8590 Vehicle-Mount Computer User Manual Chapter 4: 8580/8590 Installation Power Supply 4.3 Power Supply An integrated, electrically isolated DC power supply is available for the 8580/8590. The power pack is designed to fulfill the requirements for the full range of operating temperatures of a 8580/8590 with standard extension modules. In a system with a 800 MHz CPU, 512 MB RAM, HDD, a 10" display and an external keyboard, this leaves approximately 20W for plug-in cards and external devices. 4.3.1 DC Power Pack Three different DC power packs, each fully integrated and electrically isolated, are available for the 8580/8590: • DC power packs with 18 to 60VDC input voltage, maximum output 60 W • DC power pack with 18 to 60VDC input voltage, maximum output 100 W • DC power pack with 9 to 16VDC input voltage, maximum output 100 W The heating option requires a 100 W power pack. Power is connected to the underside of the unit using a Phoenix Contact plug. There is no power switch. Important: In DC applications the 8580/8590 must only be connected to a SELV (Safety Extra Low Voltage) circuit.*) Ensure that there is a suitable disconnecting device such as a power switch or circuit breaker in the power supply circuit. Ensure that the disconnecting device isolates all supply voltage lines. See Appendix B: Pin configuration. The DC+/- connecting cables must be protected by a fuse (30AT maximum). The ignition connecting cables must be protected by a fuse of the following type: 5x20mm T 125mA L/250V, for example, a Wickmann 195125mA/250V. * The SELV circuit is a secondary circuit that is designed and protected so that its voltages will not exceed a safe value both when operating correctly or if a single error occurs. 8580/8590 Vehicle-Mount Computer User Manual 45 Chapter 4: 8580/8590 Installation Installing Connecting Cables THERE ARE TWO POWER INPUT VERSIONS FOR THE 8580/8590; SPECIAL PRECAUTIONS MUST BE CONSIDERED WHEN CONNECTING POWER TO THE TERMINAL! If 12V is connected to a 24/48 V 8580/8590, the vehicle-mount will not start up, but the unit will not be damaged. If more than 16V is connected to a 12V 8580/8590, the vehicle-mount WILL BE DAMAGED; THE UNIT WILL NO LONGER FUNCTION. 4.3.2 Installing Connecting Cables If possible, use the connecting cables supplied to connect the 8580/8590 to the power supply. Make sure that the connecting cables are laid without kinks and are protected. 4.4 Vehicle Applications (such as Forklifts) Pay special attention to the various electrical potentials when installing the unit on a vehicle (such as a forklift). In the 8580/8590, the logic ground and the device enclosure are galvanically connected. The “logic ground” is the earth line (GND) for all of the internal electrical components, such as the hard drive and the CPU. It is also the ground reference for supply and signal voltages that the 8580/8590 provides to external devices via the COM port, the USB connectors and the keyboard/mouse connector. 46 8580/8590 Vehicle-Mount Computer User Manual Chapter 4: 8580/8590 Installation Vehicle Applications (such as Forklifts) Warning: Carefully read the following warnings! • Never connect a 12 VDC device to a 24/48 VDC vehicle! The device model is identified on the device type plate, and a warning sticker is affixed to the unit and on the external connector strip. • Some vehicles have a chassis that is connected to DC+; therefore, the 8580/8590 chassis is also connected to DC+. If you use peripheral devices that are not isolated, short circuits can occur. This will inevitably lead to malfunctions or even a total system failure. • Most electrically driven forklift vehicles have a floating chassis, connected to neither DC+ or DC-. However, electrical faults can cause the battery + or to be connected to the chassis via low resistance paths. All connected peripherals must be completely isolated. • Refer to “8580/8590 Adaptor Cables” on page 25 and Figure 2.5 on page 26 for a description of the 8580/8590 adapter cables (PN 1616302-001 & 1616303-001). When routing the adaptor cable, ensure that the power cable and the chassis ground cable are routed through separate cable ducts in the rear cover panel. • Always ensure that the external wire of the power adapter cable is connected to the ground lug of the terminal connector bay and to the vehicle chassis. Grounding Lug Make sure that the 8580/8590 connecting cable is attached as close to the battery as possible. Connecting the vehicle-mount to large electrical loads, such as converters for the forklift motor may result in random restarts, malfunctions and/or irreparable damage to the device. If you want to connect devices fed by other power sources to the 8580/8590, such as certain PS/2-Wedges, printers and so on, be sure to power up the peripheral devices at the same time or after the vehicle-mount. Otherwise, you may encounter start-up problems, malfunctions or even irreparable damage to the device. 8580/8590 Vehicle-Mount Computer User Manual 47 Chapter 4: 8580/8590 Installation Wiring Vehicle Power to the 8580/8590 4.4.1 Wiring Vehicle Power to the 8580/8590 Warning: Applying a voltage above the input voltage rating or reversing polarity may result in permanent damage to the 8580/8590 and will void the product warranty. A 1.8 meter (6 ft.) extension power cable (PN 13985–301) is available which should be used to wire the 8580/8590 to the truck battery. This cable needs to be ordered separately. This cable should be wired to a filtered, fused (maximum 10A) accessory supply on the vehicle. On negative chassis vehicles, the positive lead should be fused. On positive chassis vehicles, the negative lead should be fused. On floating chassis vehicles, the positive and negative leads must be fused. Any additional wiring (minimum 18 gauge), connectors or disconnects used should be rated for at least 90 VDC, 10 A. When connecting PN 13985-301, ensure that the screen blanking wires (clearly labelled) and the power wires (red/black leads) are reliably secured away from each other, or are separated with reliably secured certified insulation. Minimum 2.8 mm distance, or 0.4mm distance through insulation is required for the separation. The red lead of the power cable attaches to the positive vehicle supply. The black lead connects to the negative supply – this should be connected to a proper terminal block and not to the vehicle body. The external wire of the power adapter cable is connected to the ground lug of the 8580/8590 terminal connector bay and to the vehicle chassis. You have the option of connecting power before or after the ‘key’ switch. The 8580/8590 should not be shut off by simply removing the power. If it is wired after the key switch, the operator must shut down the 8580/8590 using the Windows shutdown procedure before turning off the vehicle. If it is wired before the key switch, then to avoid excessive drain on the vehicle battery, either the operator should shut it down when the vehicle is to be left off for an extended period, or the ignition cable shutdown wire should be connected and the 8580/8590 configured to shutdown automatically. If an unfused power source must be used, a fuse assembly (PN 19440-300) and diode/choke assembly (PN 30723-301A) must be added to the extension power cable (the fuse, diode/choke and instructions are supplied with the cable). Use only a 10A slow blow UL approved fuse in the fuse assembly. The fuse assembly must be located as close as practical to the DC supply, and shall connect to either the positive, or negative side of the DC supply, depending on the chassis grounding scheme. For floating chassis vehicles, an additional 10 A slow blow UL approved fuse (fuse assembly PN 19440-300) should be installed on both power supply lines. 48 8580/8590 Vehicle-Mount Computer User Manual Chapter 4: 8580/8590 Installation Cable Cover (Splash Guard) To safely wire power to the 8580/8590, review these guidelines and follow the instructions that apply to your needs: • When connecting the cable (PN 13985-301) to the screen blanking cable (PN 1616303001), the wire pair on the 13985-301 labelled “screen blanking” connect to the screen blanking control device, which must provide an isolated relay closure across the pair. • When connecting the cable (PN 13985-301) to the ignition cable (PN 1616302-001), the wire pair labelled “screen blanking” on the 13985-301 has a different function; the red wire must connect to a DC+ voltage source switched on by the ignition, while the black wire may connect to DC- or be taped off. • Note that only the ignition function is supported by the UPS (PN PS1110/PS1120), not screen blanking. If both screen blanking and ignition are to be used on the same 8580/8590, a separate cable must be provided to connect the screen blanking relay closure to COM2. Contact Psion for details about the Pre-regulator, model number PS1320 and the Interrupted Power Supply (UPS), model number PS1110 and PS1120 (freezer unit). 4.5 Cable Cover (Splash Guard) Warning: For safety reasons, the cable cover supplied for the external ports must be installed prior to using the 8580/8590. Refer to “Cable Cover, Grounding Bar & Cables – Assembling” on page 40 for details about installing the cable cover. 4.5.1 Protection Class IP65 Warning: In order to comply with protection class IP65, please use the optionally available IP65 assembly kit from Psion. Carefully follow the installation instructions under the heading “Cable Cover, Grounding Bar & Cables – Assembling” on page 40. After finishing the mounting process, the cables must be affixed using the strain relief rail supplied with your unit. 8580/8590 Vehicle-Mount Computer User Manual 49 Chapter 4: 8580/8590 Installation Protection Class IP65 Figure 4.3 Cable with Strain Relief Warning: Take care not to damage the opening seal of the cable cover! Do not use force when attaching the cable cover to the cable duct. The neck collar screws should be firmly secured, preferably diagonally and always using 5 rotations. The screws must be retightened after 2 days. 50 8580/8590 Vehicle-Mount Computer User Manual 5 OPERATION OF THE 8580/8590 5.1 Operation . . . . . . . . . . . . . . . . . . . . . . . . . . . . . . . . . . . . . . . . 53 5.2 4-Key Front Panel . . . . . . . . . . . . . . . . . . . . . . . . . . . . . . . . . . . 53 5.3 10-Key Front Panel (Discontinued) . . . . . . . . . . . . . . . . . . . . . . . . . . 54 5.4 25-Key Front Panel. . . . . . . . . . . . . . . . . . . . . 5.4.1 Power Key . . . . . . . . . . . . . . . . . . . . 5.4.2 Manual Brightness Control (Optional) . . . . . . 5.4.3 LEDs . . . . . . . . . . . . . . . . . . . . . . . 5.4.4 Function and Number Keys . . . . . . . . . . . 5.4.5 Special Keys . . . . . . . . . . . . . . . . . . . 5.4.6 [ESCAPE] Key, [ENTER] Key and Scroll Keys 5.4.7 Operating States . . . . . . . . . . . . . . . . . . . . . . . . . . . . . . . . . . . . . . . . . . . . . . . . . . . . . . . . . . . . . . . . . . . . . . . . . . . . . . . . . . . . . . . . . 8580/8590 Vehicle-Mount Computer User Manual . . . . . . . . . . . . . . . . . . . . . . . . . . . . . . . . . . . . . . . . 55 56 56 56 57 57 58 58 51 Chapter 5: Operation of the 8580/8590 Operation 5.1 Operation The 8580/8590 is available with various types of front panels: • • • 25-key front panel 10-key front panel 4-key front panel Note: All front panel buttons are described under “25-Key Front Panel” on page 55 5.2 4-Key Front Panel An 8580/8590 with a 4-key front panel is equipped with the following controls: • • • POWER ON/OFF toggle button to switch the unit on and off Manual brightness control indicated with the ‘+’ and ‘-’ symbols Backlight on/off toggle button (‘light bulb’ icon) 8580/8590 Vehicle-Mount Computer User Manual 53 Chapter 5: Operation of the 8580/8590 10-Key Front Panel (Discontinued) 5.3 10-Key Front Panel (Discontinued) The 8580/8590 with a 10-key front panel has the following controls: • • • • • 54 POWER ON/OFF toggle button to switch the unit on and off Manual brightness control indicated with the ‘+’ and ‘-’ symbols Backlight on/off toggle button (‘light bulb’ icon) Arrow keys [ESC] and [ENTER] 8580/8590 Vehicle-Mount Computer User Manual Chapter 5: Operation of the 8580/8590 25-Key Front Panel 5.4 25-Key Front Panel The layout of the keys is the same for 10.4" and 12.1" displays. Note: For all units equipped with brightness control, even after manually turning off the backlighting, the 8580/8590 will continue to respond to interaction via the keyboard, mouse or touchscreen. This means that you can continue to enter commands and data even if the display lighting is off. 8580/8590 Vehicle-Mount Computer User Manual 55 Chapter 5: Operation of the 8580/8590 Power Key 5.4.1 Power Key Turning the 8580/8590 on and off: Psion has preconfigured this button by default: 8580/8590 with DC power supply and automatic shutdown software running. By default, the power key is used to switch the unit on and off. This behaviour may be altered using the automatic shutdown parameters. Refer to “Automatic Switch Off” on page 71 for details. 8580/8590 with DC power Power key is used to power up the unit. supply without automatic Pressing this button while the unit is operatshutdown software disabled. ing results in a HARD shutdown. This may lead to data loss! 5.4.2 Manual Brightness Control (Optional) + Button used to manually increase brightness (optional). - Button used to manually decrease brightness (optional). Turning the display backlight on and off. 5.4.3 LEDs Temp (red) LED indicates excessively high or low temperature inside the unit. HD (green) LED indicates access of the hard drive/Compact Flash drive. Power (green) LED indicates an available internal power supply. 56 8580/8590 Vehicle-Mount Computer User Manual Chapter 5: Operation of the 8580/8590 Function and Number Keys 5.4.4 Function and Number Keys Yellow LED: indicates the status of the [SHIFT] key. [0]/[F1]: digit [0] or function key [F1] if the [SHIFT] key is pressed to [9]/[F10]: digit [9] or function key [F10] if the [SHIFT] key is pressed. [.]/[F11]: decimal point or function key [F11] if the [SHIFT] key is pressed. [ ]/[F12]: [BKSP] or [F12] if the [SHIFT] key is pressed. 5.4.5 Special Keys [S1] Special key: Pressing this key has the same effect as simultaneously pressing the [CTRL] and [+] key on the keypad. [S2] Special key: Pressing this key has the same effect as simultaneously pressing the [CTRL] and [-] key on the keypad. 8580/8590 Vehicle-Mount Computer User Manual 57 Chapter 5: Operation of the 8580/8590 [ESCAPE] Key, [ENTER] Key and Scroll Keys 5.4.6 [ESCAPE] Key, [ENTER] Key and Scroll Keys [ESC] key [ENTER] key, also called the [RETURN] key /[PgUp] – “Cursor Up” or “Page Up” when pressing the [SHIFT] key /PgDn – “Cursor Down” or “PageDown” when pressing the [SHIFT] key /Home – “Cursor Left” or all the way left on that line when pressing the [SHIFT] key /End – “Cursor Right” or all the way right on that line when pressing the [SHIFT] key 5.4.7 Operating States The following operating states are possible for he 8580/8590: Status of Internal LED Power (green) 58 Temp (red) 8580/8590 Status OFF OFF Initial state, idle time - waiting for a new ignition signal after switch off; no power supply. OFF FLASHING Temperature sensor malfunctioning. OFF ON Heating is on at temperatures < 0 °C, or overheating warning at temperatures > 62 °C. The computer will not start until the temperature inside the unit is between 0 and 62 °C again. 8580/8590 Vehicle-Mount Computer User Manual Chapter 5: Operation of the 8580/8590 Operating States Status of Internal LED Power (green) Temp (red) 8580/8590 Status ON OFF Computer is starting up; normal operational state; shutdown delay time is running. ON ON Temp. < -25° C or Temp. > 70° C. ON FLASHING Temperature sensor malfunctioning; automatic shutdown software configuration. 8580/8590 Vehicle-Mount Computer User Manual 59 OPERATING SYSTEM & SOFTWARE APPS 6 6.1 Operating System. . . . . . . . . . . . . . . . . . . . . . . . . . . 6.1.1 OS Pre-installed on Hard Drive/Compact Flash . . . . . . 6.1.2 Installing on the Hard Drive/Compact Flash . . . . . . . . 6.1.2.1 Operating Systems Supplied on CD-ROM . . . . 6.1.2.2 Operating System Images . . . . . . . . . . . . . 6.1.2.3 Operating Systems on Floppy Disk . . . . . . . . 6.1.3 Special Features of the Operating System . . . . . . . . . 6.1.3.1 Windows XP Embedded . . . . . . . . . . . . . 6.2 Psion Teklogix Config Tool . . . . . . . . . . . . . . . . . . . . . 6.2.1 Overview of the Config Functions . . . . . . . . . . . . . 6.2.2 Installation . . . . . . . . . . . . . . . . . . . . . . . . . 6.2.2.1 System Requirements . . . . . . . . . . . . . . . 6.2.2.2 Preinstalled Software . . . . . . . . . . . . . . . 6.2.2.3 Subsequent Installation . . . . . . . . . . . . . . 6.2.2.4 Automatic Installation of the Software Keyboard 6.2.2.5 Files . . . . . . . . . . . . . . . . . . . . . . . . 6.2.2.6 Launching the Program . . . . . . . . . . . . . . 6.2.2.7 Password Check . . . . . . . . . . . . . . . . . . 6.2.2.8 Loading Language Files. . . . . . . . . . . . . . 6.2.3 Psion Teklogix Config Menus . . . . . . . . . . . . . . . 6.2.3.1 Hardware Monitor. . . . . . . . . . . . . . . . . 6.2.3.2 Environment. . . . . . . . . . . . . . . . . . . . 6.2.3.3 Automatic Switch Off . . . . . . . . . . . . . . . 6.2.3.4 Special Switch-On/Off Features . . . . . . . . . 6.2.3.5 Front Panel Keyboard . . . . . . . . . . . . . . . 6.2.3.6 Common System Settings. . . . . . . . . . . . . 6.2.3.7 Network Settings . . . . . . . . . . . . . . . . . 6.2.3.8 Enhanced Write Filter . . . . . . . . . . . . . . . 6.2.3.9 Settings . . . . . . . . . . . . . . . . . . . . . . 6.3 The Software Keyboard . . . . . . . . . . . . . . . . . . . . . . . 6.3.1 Psion Teklogix Config and Software Keyboard . . . . . . 6.3.2 Logon with the Software Keyboard . . . . . . . . . . . . 6.3.3 Installation . . . . . . . . . . . . . . . . . . . . . . . . . . . . . . . . . . . . . . . . . . . . . . . . . . . . . . . . . . . . . . . . . . . . . . . . . . . . . . . . . . . . . . . . . . . . . . . . . . . . . . . . . . . . . . . . . . . . . . . . . . . . . . . . . . . . . . . . . . . . . . . . . . . . . . . . . . . . . . . . . . . . . . . . . . . . . . . . . . . . . . . . . . . . . . 8580/8590 Vehicle-Mount Computer User Manual . . . . . . . . . . . . . . . . . . . . . . . . . . . . . . . . . . . . . . . . . . . . . . . . . . . . . . . . . . . . . . . . . . . . . . . . . . . . . . . . . . . . . . . . . . . . . . . . . . . . . . . . . . . . . . . . . . . . . . . . . . . . . . . . . . . . 63 63 63 63 64 64 64 65 65 65 66 66 66 66 67 67 67 67 68 69 69 70 71 74 75 76 77 80 81 84 84 85 85 61 6.3.3.1 System Requirements . . . . . . . . . . . . . . . . . 6.3.3.2 Pre-Installed on the 8580/8590. . . . . . . . . . . . . 6.3.3.3 Subsequent Software Keyboard Installation . . . . . . 6.3.3.4 Standard Delivery Items . . . . . . . . . . . . . . . . 6.3.4 Launching the Program . . . . . . . . . . . . . . . . . . . . . 6.3.4.1 Call Parameters. . . . . . . . . . . . . . . . . . . . . 6.3.4.2 Creating a Registry Key . . . . . . . . . . . . . . . . 6.3.4.3 Desktop Shortcut . . . . . . . . . . . . . . . . . . . . 6.3.4.4 Autostart Folder . . . . . . . . . . . . . . . . . . . . 6.3.4.5 Special Keys on the 8580/8590 . . . . . . . . . . . . 6.3.4.6 Exiting the Program . . . . . . . . . . . . . . . . . . 6.3.4.7 Software Keyboard and Taskbar . . . . . . . . . . . . 6.3.5 Operation . . . . . . . . . . . . . . . . . . . . . . . . . . . . 6.3.5.1 Keyboards Included in the Standard Delivery Version 6.3.5.2 Keys with Special Functions . . . . . . . . . . . . . . 6.3.6 Configuring the Software Keyboard . . . . . . . . . . . . . . 6.3.6.1 Structure Of The Keyboard.cfg File . . . . . . . . . . 6.3.6.2 Rules for Editing the Keyboard.cfg File . . . . . . . . 6.3.6.3 General Options . . . . . . . . . . . . . . . . . . . . 6.3.6.4 Defining the Keys . . . . . . . . . . . . . . . . . . . 6.3.7 Keyboard_Maximize Section . . . . . . . . . . . . . . . . . . 6.3.7.1 MaxiMode and ExcludeChain Options . . . . . . . . 62 8580/8590 Vehicle-Mount Computer User Manual . . . . . . . . . . . . . . . . . . . . . . . . . . . . . . . . . . . . . . . . . . . . . . . . . . . . . . . . . . . . . . . . . . . . . . . . . . . . . . . . . . . . . . . . . . . . . . . . . . . . . . . . . . . . . . . . . . . . . . . . . . . . . . . . . . . . . 86 . 86 . 86 . 86 . 87 . 87 . 88 . 88 . 89 . 89 . 90 . 90 . 91 . 91 . 92 . 92 . 92 . 93 . 93 . 95 101 101 Chapter 6: Operating System & Software Apps Operating System 6.1 Operating System Units can be shipped with or without the operating system installed on your 8580/8590. This section outlines how to work with each of these scenarios. 6.1.1 OS Pre-installed on Hard Drive/Compact Flash When a 8580/8590 with a pre-installed operating system is started, this operating system is loaded following the BIOS boot messages. System-specific device drivers such as those for display, audio and network adaptors, and touchscreens are also pre-installed. Refer to the relevant operating system manual for specific operating instructions. In 8580/8590 units with a pre-installed operating system, the system is located on the C partition. The size of this partition will not always be the same as the size of the entire hard drive/Compact Flash. It is up to you to organize the remaining hard drive/Compact Flash capacity. With Windows XP Embedded, a small EWF partition (Enhanced Write Filter) is required for the EWF functions. The remaining free space is available on the C drive. 6.1.2 Installing on the Hard Drive/Compact Flash When an 8580/8590 is started up for the first time without a pre-installed operating system, the operator will need to carry out a number of steps that will vary depending on the system to be installed. Refer to the relevant operating system manual for specific instructions. Note: The installation and configuration of the operating system should only be carried out by professionals familiar with the system environment. 6.1.2.1 Operating Systems Supplied on CD-ROM There are two ways to install an operating systems supplied on a CD-ROM: • • Using an external CD-ROM drive connected to a USB port. This drive can be used to install, for example, Windows XP Embedded or Windows XP Pro. Initializing the hard drive/Compact Flash using a bootable floppy disk and then copying the operating system CD and driver CD contents onto the hard drive/Compact Flash using the right network/CD drivers. The operating system can then be installed directly from the hard drive/Compact Flash. 8580/8590 Vehicle-Mount Computer User Manual 63 Chapter 6: Operating System & Software Apps Special Features of the Operating System Note: The installation CD must include Service Pack 1 or higher if Windows XP is to be installed via a USB-connected CD-ROM. Service Pack 2 is included with all current installation CDs from Psion. 6.1.2.2 Operating System Images If you have created an image of a master installer, there are many ways to copy it to another computer: From CD-ROM For installation via USB CD-ROM a bootable image CD must be available The operating system image can then simply be installed from the USB-connected CD-ROM drive. Via Memory Stick For installation via a USB memory stick a bootable memory stick with an image must be available. The operating system can then be installed from the memory stick. Via The Network When installing via a network, you need to have an external USB floppy disk drive and a bootable disk with the right network driver. The operating system image can then be installed from the network server. 6.1.2.3 Operating Systems on Floppy Disk Operating systems supplied on floppy disk can be installed from an external USB floppy disk drive. There are three ways to install additional system-specific device drivers such as those for display and network adaptors or touchscreens: • • • 6.1.3 If the 8580/8590 is equipped with a floppy disk drive only, the device drivers need to be copied from the IPC/HPC/MPC Drivers CD-ROM to a floppy disk. If a CD-ROM drive is available for the USB connection on the 8580/8590, it is possible to install from the IPC/HPC/MPC Drivers CD-ROM. If a network connection is available, copy the IPC/HPC/MPC Drivers CD-ROM to the network server and install the device drivers from there. Special Features of the Operating System Always review the documentation provided by the operating system manufacturer when using a custom operating system. 64 8580/8590 Vehicle-Mount Computer User Manual Chapter 6: Operating System & Software Apps Psion Teklogix Config Tool 6.1.3.1 Windows XP Embedded If the 8580/8590 is running Windows XP Embedded, not all USB devices will be supported. 6.2 Psion Teklogix Config Tool Psion Teklogix Config is used for the configuration of 8580/8590 vehicle-mounts. Important: Psion Teklogix Config software requires the COM3 port to communicate with the environment controller; do not connect any cables, devices or machines while this software is operating. Devices and machines connected to the COM3 port could be severely damaged. Psion Teklogix Config contains important settings for your vehicle-mount. Incorrect settings, such as those in the Automatic Switch off menu, can disable the functions of your unit. Only qualified technical personnel (e.g. persons qualified in computer/network/system administration) may perform Psion Teklogix Config settings. If unqualified personnel make improper changes to Psion Teklogix Config settings, Psion is released from all liability for warranty claims. 6.2.1 Overview of the Config Functions These functions are detailed in “Psion Teklogix Config Tool” on page 65 8580/8590 Vehicle-Mount Computer User Manual 65 Chapter 6: Operating System & Software Apps Installation Menu 6.2.2 Function Hardware Monitor Information display: e.g. serial number of the device and current operating temperature. Environment Information display: Statistics and data on the environment controller, such as ‘hard’ switch-offs. Automatic Switchoff Configures the automatic switch-off behaviour (delay time, ignition, etc.). Front Panel Defines the assignment of Psion 8580/8590 optional front panel keys. System Settings Configures Windows logon, taskbar display etc. Network Manages IP address and DNS server. Software Activation Activates licenses for automatic switch-off and software keyboard and releases them for use on this computer. Enhanced Write Filter Exclusively for MS Windows XP Embedded: administers write protection function. Settings Sets password, language and further default settings for the Psion Teklogix Config Tool. Installation This section outlines the requirements and the steps you’ll need to follow to install the Psion Teklogix Config tool. 6.2.2.1 System Requirements The following operating systems are supported on the 8580/8590: • • Microsoft Windows XP Microsoft Windows XP Embedded 6.2.2.2 Preinstalled Software In most cases, Psion Teklogix Config is pre-installed on the 8580/8590. 6.2.2.3 Subsequent Installation An installation program is available for subsequent installation. 66 8580/8590 Vehicle-Mount Computer User Manual Chapter 6: Operating System & Software Apps Installation • Start the PTXConfig.exe in the Tools/software directory on the 8580/8590 hard disk/PTX Restore DVD. c:\Psion Teklogix is suggested as the standard installation directory. However, this path can be modified. • Restart your computer once installation is complete. Psion Teklogix Config will only be operable following rebooting. 6.2.2.4 Automatic Installation of the Software Keyboard The Psion software keyboard is automatically installed as part of the Psion Teklogix Config installation. For further information about the software keyboard, please refer to “The Software Keyboard” on page 84. 6.2.2.5 Files The following important files are located in the Psion Teklogix Config installation directory: PTXCfg.exe Main Program For Configuration PTXCFG_Local.CFG Configuration file with Psion Teklogix Config settings - all local settings that are not saved directly in the hardware are saved here. PTXKEYBOARD.EXE Software keyboard main program. KEYBOARD.CFG The layout and functionality of the software keyboard are set here. 6.2.2.6 Launching the Program • Launch Psion Teklogix Config through Start>Programs. Important: Psion Teklogix Config software requires the COM3 port to communicate with the environment controller; do not attach cables, devices, or machines while this software is running. Devices and machines connected to the COM3 port could be severely damaged. 6.2.2.7 Password Check If a password was entered in the Psion Teklogix Config Settings menu, it will be requested when the program is launched. The password is case-sensitive; the program terminates after three incorrect entries. The default password is gold. 8580/8590 Vehicle-Mount Computer User Manual 67 Chapter 6: Operating System & Software Apps Installation • Change the default password in the Settings menu to suit your needs. 6.2.2.8 Loading Language Files Text files for Psion Teklogix Config are loaded when the program is started. If a text file is not available in the desired language, the system default text is used for dialogs and other user interface elements. Supported Language Codes The following language codes are supported during text file loading. Currently only ENG and GER are available. Other languages can be created as needed. (Refer to Command line parameters in the table below.) ENG English CHS Chinese GER German KOR Korean FRA French DNK Danish ESP Spanish JPN Japanese SWE Swedish GRC Greek ITA Italian Only ASCII files can be loaded at this time. UNICODE is not supported. Command Line Parameters The parameter MAKETEXT is available to support translation of text files into foreign languages. In a DOS command window: • Change the directory to c:\Psion Teklogix, and enter PTXcfg.exe maketext. The configuration program will export all the required text files to *.txt files. Each time a file is created, a message appears prompting the user to acknowledge it. The program terminates once the text files have been generated. Add the language code to the end of this newly generated text file, and replace the text strings therein with the required translations. For example, Psion TeklogixCfg_.txt would then be Psion TeklogixCfg_GER.txt if it contained the German text. During text file generation, files with the same name are automatically overwritten. English is the system default language. It does not need to exist as a text file. 68 8580/8590 Vehicle-Mount Computer User Manual Chapter 6: Operating System & Software Apps Psion Teklogix Config Menus 6.2.3 Psion Teklogix Config Menus 6.2.3.1 Hardware Monitor In the Hardware Monitor menu, system information is displayed: the Psion serial number, model, installed processor, firmware version and BIOS version. Temperature information is also displayed here, including the inside temperature of the computer and an indication of the heating status (on/off). 8580/8590 Vehicle-Mount Computer User Manual 69 Chapter 6: Operating System & Software Apps Psion Teklogix Config Menus 6.2.3.2 Environment The environment controller in the 8580/8590 features monitoring and statistics functions. The Environment menu provides information on the measured values. Environment Description Total running time of Total time the device was on. device Backlight running time Total time that backlighting was on. Power key switch-on count Indicates how often the computer was switched on with the power key. Ignition switch-on count Indicates how often the computer was switched on via the vehicle ignition. Power key switch-off Indicates how often the computer was switched off with count the power key. Automatic switch-off Indicates how often the computer was switched off via the count ignition. APM switch-off count Indicates how often the computer was switched off via Windows Advanced Power Management (automatically following Windows shutdown). 70 8580/8590 Vehicle-Mount Computer User Manual Chapter 6: Operating System & Software Apps Psion Teklogix Config Menus Environment Description Hard switch-off count Indicates how often the computer was turned off using ‘hard’ switch-off. Last switch-off reason The cause of the last switch-off. Excess temp. switch-off Indicates how often the computer switched off due to count excess temperature. Insufficient temp. switch- Indicates how often the computer switched off due to inoffs sufficient temperature. Errors temperature sensor Indicates how often temperature sensor errors occurred. If this error message occurs frequently, please send your unit in to be serviced. 6.2.3.3 Automatic Switch Off The behaviour of computer switch-on and switch-off is defined in the Automatic Switch off menu. The top-left portion of the menu indicates whether the option Automatic Switch off is available and activated. The option can be activated in the Software Activation menu (after purchasing the option). • Save these settings with the Save button. 8580/8590 Vehicle-Mount Computer User Manual 71 Chapter 6: Operating System & Software Apps Psion Teklogix Config Menus Settings After-run time and Timeout to terminate programs on shutdown If you do not want the computer to shut down immediately after switching it off using the ignition or power key, but rather require it to remain on for a time, enter an after-run time (in seconds) here. (If you are using an UPS (PS1110), the after-run time should be no longer than 3 minutes.) Shutdown times The length of time until shutdown consists of two counters: 1. After-run time The after-run time begins with the switching off of the ignition. The shutdown counter is displayed on the monitor (according to the settings). In this countdown the after-run time is counted down. If the after-run time has elapsed, a message for the shutdown is displayed in the Shutdown dialog. During this time, the computer can be returned to normal operating status with the ignition. 2. Timeout to terminate programs Next, all applications are informed that Windows will shutdown. After this, the timeout begins counting down - but a counter is no longer displayed in the Shutdown dialog. When the timeout elapses, there will be a ‘hard’ switch-off of all applications that were still running. Then the system shutdown begins. Switch-off time In order to allow enough time for the system shutdown after the program timeout, set the switch-off time to at least 20 s plus the program timeout. Settings lower than this value will cause a warning to appear when data is being saved. Block input if ignition is off If the ignition of the connected vehicle is off, all input to the computer may be blocked. Show taskbar icon Selecting this options creates a symbol for Psion Teklogix Config in the taskbar. The symbol indicates the power status as follows: Green: Power status is OK; ignition is on. Flashing yellow and red: The ignition has been switched off and the after-run time is counting down. Red: The computer is in shutdown or switch-off mode. 72 8580/8590 Vehicle-Mount Computer User Manual Chapter 6: Operating System & Software Apps Psion Teklogix Config Menus Unable to read power status. Double-click or right-click with the mouse to open a popup menu where Psion Teklogix Config can be started. Switch-On with ignition The computer switches on automatically when the ignition is started. It cannot be switched on with the power key. with ignition and power key The computer can be switched on with the power key if the ignition is on. It cannot be switched on with the power key alone. with power key The computer can be switched on with the power key. always on The 8580/8590 switches on as soon as it is supplied with power. It is not necessary to press the power key or start the ignition. Switch-Off with ignition (only for DC devices with automatic switch-off) Automatic switch-off is activated when the ignition is switched off. with ignition and power key (only for DC devices with automatic switch-off) Automatic switch-off is activated when the ignition is switched off. The power key shortens the defined after-run time and initiates computer shutdown. with power key The computer is shut down or switched off with the power key (if no automatic switch-off is available, a ‘hard’ switch-off takes place). only by system shutdown The computer cannot be switched off using the ignition or the power key; it has to be shut down in the Start menu. 8580/8590 Vehicle-Mount Computer User Manual 73 Chapter 6: Operating System & Software Apps Psion Teklogix Config Menus Shutdown to hibernation mode If the computer is switched off using the ignition or the power key, it goes into hibernation mode. When this happens, a copy of the main memory is written to a file, accelerating the startup of the computer. This option must be activated in the power management centre of the computer (Power Properties). 6.2.3.4 Special Switch-On/Off Features This message is displayed upon activating a switch-on option with ignition: Figure 6.1 Automatic Switch-On Message This information appears for safety reasons each time a switch-on with ignition option is activated. Without Automatic Switch-Off The following symbol is displayed in the uppermost line of the dialog if the automatic switch-off software is not functioning properly: All switch-on options are available; however, when switching off, the options with ignition cannot be selected. With Automatic Switch-Off When the automatic switch-off option is functioning, the following symbol is displayed in the dialog: When the switch-on option with ignition or always on is chosen, switching off using the power key is not possible. If the option Switch-off with power key was previously selected, a corresponding message is displayed to the user. Then the switch-off option is automatically set to only by system shutdown and the option with power key cannot be selected. 74 8580/8590 Vehicle-Mount Computer User Manual Chapter 6: Operating System & Software Apps Psion Teklogix Config Menus 6.2.3.5 Front Panel Keyboard In the Front Panel menu, the keys (also called soft keys) located on the 8580/8590 front panel can be programmed. This does not apply to the keys Power on/off, +/- Brightness and Backlight on/off! All keys depicted in grey/white can have two assignments. Use [SHIFT] to switch between the assignments. Character strings cannot be assigned to single keys. Only one character per key is possible. The keys [ALT], [CTRL] and [SHIFT] may be used in combination, e.g. [CTRL] [ALT] [F1]. Procedure: 1. Select the key to be changed. It appears in the Current assignment field. 2. Tap the Change key button. The Define key input dialog appears. 3. Tap the desired key assignment. This selected key assignment appears in the New assignment field. 4. Tap Save to save these new settings. Note: In order to launch a program with a front panel key, create a link on the desktop and define a key combination in Properties, e.g. [ALT] + 1. Then program an 8580/8590 front panel key with this combination. 8580/8590 Vehicle-Mount Computer User Manual 75 Chapter 6: Operating System & Software Apps Psion Teklogix Config Menus 6.2.3.6 Common System Settings In the Common System Settings menu, parts of the Windows System can be configured. Automatic Windows Logon 76 Logon automatically as Enable or disable the Automatic Windows Logon. Domain name / User name / Password Logon data for the Automatic Windows Logon must be entered. 8580/8590 Vehicle-Mount Computer User Manual Chapter 6: Operating System & Software Apps Psion Teklogix Config Menus Logon with Software Keyboard Show software keyboard at logon If this check box is selected, the software keyboard is always available to the user upon logging in. Keyboard definition for the logon A CFG file and hence a particular keyboard layout can be specified for the logon (it may differ from the default keyboard). Changes to this setting are activated only after the computer has been restarted. Common Activate this option only This setting is only useful for Microsoft Windows XP Embedded! if the write protection Use this setting to define whether the following options relating to (EWF) is active the taskbar, task manager and system keys are to be valid only when EWF write protection is active. For example: When the system administrator is working on the computer and has deactivated EWF write protection, the taskbar, task manager and system keys are available. These cannot be accessed by users working with EWF write protection. Hide taskbar Taskbar is hidden. Lock Windows task manager Task manager cannot be accessed. Lock system keys The keys [CTRL-ESC], [ALT-ESC], [ALT-TAB] and the left Windows key are locked. 6.2.3.7 Network Settings Network Settings | Common In the Common menu under Network Settings, you can assign settings for the network adaptor (LAN and WLAN). You can find information about settings for the network adapter currently selected in the Current settings window. 8580/8590 Vehicle-Mount Computer User Manual 77 Chapter 6: Operating System & Software Apps Psion Teklogix Config Menus The System Settings button opens the Windows dialog for networks. Computer Name The 8580/8590 computer name can be changed. 78 8580/8590 Vehicle-Mount Computer User Manual Chapter 6: Operating System & Software Apps Psion Teklogix Config Menus Network Adaptor Selection list Select the Network adaptor Obtain address automatically (DHCP) With this setting, the network configuration is obtained from a DHCP server. Use the following IP address Here the IP address, subnet mask and default gateway can be entered manually. Use the following DNS server addresses Here the DNS servers to be used can be entered manually. Network Settings | Automatic Computer Renaming The settings in the Automatic Computer Renaming menu under Network Settings are used for the automatic assignment of computer names. Allocation of different computer names is supported by entering the MAC address. 8580/8590 Vehicle-Mount Computer User Manual 79 Chapter 6: Operating System & Software Apps Psion Teklogix Config Menus 6.2.3.8 Enhanced Write Filter Note: The Enhanced Write Filter menu is only relevant for the Microsoft Windows XP Embedded operating system! If EWF is not installed, no changes can be performed. Write protection is disabled by default. Use the Enhanced Write Filter menu to enable and manage it. This allows you to protect the system against modification of any kind. All write accesses or modifications on an activated EWF drive will be discarded with the next restart. EWF settings are not saved or loaded to import/export configurations (see “Settings” on page 72). The computer's EWF drives are displayed in the EWF Drives field (usually only one). The settings below apply to the EWF drive selected here. 80 8580/8590 Vehicle-Mount Computer User Manual Chapter 6: Operating System & Software Apps Psion Teklogix Config Menus Set boot command (BootCmd) • • No command The set boot commands are deactivated again. Activate write protection (ENABLE) Activates write protection: All system changes are written exclusively to the main memory; they are discarded when the computer is restarted. To activate this setting, reboot the computer! Deactivate write protection (DISABLE) Disables write protection. To activate this setting, reboot the computer! Deactivate and take over (DISABLE+COMMIT) This setting is a combination of Deactivate write protection and Take over changes: Write protection is deactivated; changes are applied. Take over changes Temporarily deactivates write protection in order to commit current changes to the system. Once finished, write protection is immediately active again. Tap Set Command to apply the settings. Tap the Exec. Restart button to restart the computer and activate the settings. 6.2.3.9 Settings In this menu, Psion Teklogix Config is configured with respect to password, language etc. 8580/8590 Vehicle-Mount Computer User Manual 81 Chapter 6: Operating System & Software Apps Psion Teklogix Config Menus Password Protection Use password protection for Psion Teklogix Config A password can be activated to allow access to programs. Enter a password and repeat the entry in the Repeat password field. This is case-sensitive. Allow read access without password: Reading all data Psion Teklogix Config can be started without a password. It is possible to read all data, but no changes may be made to the settings. Limited to data without COM port access A password is not required to start Psion Teklogix Config. Reading of data is limited: The Environment, Automatic Switchoff and Front Panel menus are not available. Language Language setting The language of the Psion Teklogix Config menus is defined. The default is always the system language of the computer. If no language file is available for this language, texts will be displayed in German. The selection menu includes only those languages for which language files (Psion TeklogixCfg*_*.txt) are available in the Config EXE directory. Defaults 82 Export customer settings All Psion Teklogix Config settings can be exported to a Config text file. Each export file is displayed with an info header (“Info Header” on page 84). The export file can be imported to other 8580/8590 units to maintain identical settings on all computers. Import customer settings The files generated with the export function can be selected for import. It is not possible to import the local Psion TeklogixCfg_Local.cfg Before the import, a message tells you not to mix ACDC configurations, as this can block the device. In the event that a mandatory software key for activating diverse options on a PC is missing, this is reported in a corresponding error message. 8580/8590 Vehicle-Mount Computer User Manual Chapter 6: Operating System & Software Apps Psion Teklogix Config Menus Important: During import, not all data is checked for validity; rather, the data is saved in the way in which it is defined in the import file. False information could lead to failure of 8580/8590 (such as malfunctions, data loss, equipment damage etc.). Load factory defaults Default settings can be loaded that are saved in a file named FactoryDefault_<Serial number>.cfg. This file can only be generated by Psion service with a Psion-internal program. The AC-DC configuration warning does not appear, as it is assumed that this is taken into account at installation. If the file is not available, an error message about a ‘defect’ file appears. Common Show/hide the software keyboard automatically on input fields in Psion Teklogix Config The software keyboard starts automatically when Psion Teklogix Config is started. When the cursor is placed in an input field, it is always displayed. A file named Keyboard.cfg must exist in the software keyboard installation directory; otherwise an error message appears. If the keyboard is started by Psion Teklogix Config, it is also terminated when Psion Teklogix Config is closed. The software keyboard version 1.5 or higher is mandatory for this. An error message is displayed when errors occur. The message is only visible after logging on. Warning with query on import of static network data (computer name, IP addresses) If static IP addresses (when DHCP is disabled) and/or a computer name are imported, a warning with corresponding security query may appear. 8580/8590 Vehicle-Mount Computer User Manual 83 Chapter 6: Operating System & Software Apps The Software Keyboard Info Header The info header of an export file contains the following information: ;-----------------------------------------------------; Psion Teklogix Config export file ; ; Exported from computer: 85808590XPEMBSP2 ; Hardware serial-number: 205004056587 ; Export timestamp (YMD): 2005/06/18 20:30:13 ;-----------------------------------------------------[General] Psion TeklogixCfgExportVer=1 Psion TeklogixCfgExportSNR=205004056587 6.3 The Software Keyboard The Psion Software Keyboard is an onscreen, touch keyboard that allows the operator to use a standard, alphanumeric keyboard without connecting a physical keyboard. It is equipped with all the standard keyboard keys along with function keys and a numeric pad. Overview of Important Functions All of the keys found on a standard keyboard are available (alphanumeric, function keys etc.) on the Software Keyboard. • • • • 6.3.1 Several keyboards can be defined. Two different keyboard colours offer additional design options. Switching between various keyboards is possible. The keyboard can be quickly displayed and hidden again. Psion Teklogix Config and Software Keyboard The Software Keyboard starts automatically when Psion Teklogix Config is launched. When the cursor is placed in an input field, the keyboard is always displayed. 84 8580/8590 Vehicle-Mount Computer User Manual Chapter 6: Operating System & Software Apps Logon with the Software Keyboard If the file Keyboard.cfg cannot be located by the system in the Software Keyboard installation directory, an error message appears. If the keyboard is started by Psion Teklogix Config, it is also terminated when Psion Teklogix Config is closed. 6.3.2 Logon with the Software Keyboard The Software Keyboard (version 1.5 and higher) can be used to log on to the Microsoft Windows system. The logon settings are stored in one of the following locations: • • In the Psion Teklogix Config Menu System settings, parameter Logon with Software Keyboard (e.g., on Psion devices with Psion Teklogix Config program), or In the file Psion TeklogixCfg_Local.cfg (e.g., on Psion devices without Psion Teklogix Config program). Psion Teklogix Config Setting Psion Teklogix Config menu System settings, parameter Logon with Software Keyboard: Show Software Keyboard at logon If this check box is selected, the Software Keyboard is already available to the user upon logging in. This is the default setting. Keyboard definition A CFG file and hence a particular keyboard layout can be specified for the logon (it may differ from the default keyboard). Changes to this setting are activated only after the computer has been restarted. Psion TeklogixCfg_Local.cfg Setting In 8580/8590s without Psion Teklogix Config, the setting can be implemented in the file PTXCfg_Local.cfg: [Psion TeklogixCfgSystem] LogonKeyboardShow=1 LogonKeyboardCfg=C:\Psion Teklogix\Keyboard.cfg 6.3.3 Installation This section outlines the requirements and the steps you’ll need to follow to install the Psion Software Keyboard. The Software Keyboard operates on both the 8580 and 8590 vehiclemounts. 8580/8590 Vehicle-Mount Computer User Manual 85 Chapter 6: Operating System & Software Apps Installation 6.3.3.1 System Requirements The following operating systems are supported: • • Microsoft Windows XP Microsoft Windows XP Embedded 6.3.3.2 Pre-Installed on the 8580/8590 If the software keyboard was ordered together with the new vehicle-mount, the program is installed by Psion prior to shipping. The associated files are located in the directory c:\Psion Teklogix. 6.3.3.3 Subsequent Software Keyboard Installation An installation program is available to help you upload additional software. New software is automatically installed in the directory c:\Psion Teklogix; however, this destination can be modified. 6.3.3.4 Standard Delivery Items Important Software Keyboard Files PTXKEYBOARD.EXE Main program, which can be automatically started using the Autostart folder or a registry run key. Alternatively, the program can be launched using a desktop shortcut or keyboard shortcut. For details, refer to “Launching the Program” on page 87. KEYBOARD.CFG In the configuration file (Default name: Keyboard.cfg), the layout and functionality of the software keyboard are defined. The program searches for this file in the same directory as the EXE file. Languages The default CFG file is the English layout file Keyboard.cfg. This file may also be found in the directory c:\Psion Teklogix\gr under the name Keyboard_de+24er.cfg. CFG files are currently available in the following languages: • English • French • German If you require a different language, please contact your Psion sales agent. 86 8580/8590 Vehicle-Mount Computer User Manual Chapter 6: Operating System & Software Apps Launching the Program To activate a CFG file other than the default version: 1. Rename the file Keyboard.cfg in the directory c:\Psion Teklogix, for example, to Keyboard_english.cfg. 2. Copy the required CFG file for example C:\Psion Teklogix\ENG\Keyboard.cfg (English) or C:\Psion Teklogix\GER\Keyboard.cfg (German) to directory C:\Psion Teklogix. 3. Restart the software keyboard. The new layout is displayed. 6.3.4 Launching the Program The Software Keyboard can be launched using one of the following methods: • • • • • Using the Windows Start menu Creating a registry key Using a desktop shortcut Using the Autostart folder Using special keys on the 8580/8590 6.3.4.1 Call Parameters The call parameters listed in the table below can be set; keep in mind that settings are not case sensitive: CFG=Filename Use this parameter if the configuration file (Keyboard.cfg) for the software keyboard is not located in the same directory as the EXE file, or if you want a different name to be used. File names and directories that contain spaces should be placed in inverted commas. SWITCHVIEW Allows an active software keyboard to be enabled/disabled on the screen using a desktop shortcut, which can be invoked with a keyboard shortcut. EXIT Ends an active software keyboard program. A shortcut for exiting the program can, for example, be created on the desktop. Call Example PTXKeyboard.exe SHOWCTRL CFG=C:\MyKeyboard.txt 8580/8590 Vehicle-Mount Computer User Manual 87 Chapter 6: Operating System & Software Apps Launching the Program 6.3.4.2 Creating a Registry Key If a registry key is created for the software keyboard, the program will launch automatically when your computer is started. Various call parameters can be set here. Follow the steps outlined below: 1. In the Windows Start menu, choose the Run command. 2. Type regedit and confirm with OK. 3. Switch to the following key: HK_LOCAL_MACHINE / SOFTWARE / MICROSOFT / WINDOWS / CURRENTVERSION / RUN 4. Right-click with your mouse, and then choose New>String Value. 5. Create the new RegSZ text Psion TeklogixSWKeyboard. 6. Double-click this text to open the Edit String dialog box. 7. Enter the EXE file and the required call parameters. The following screen illustrates the result: 8. To check the new program call, restart your computer. 6.3.4.3 Desktop Shortcut The software keyboard can be started using a desktop shortcut. Here, various call parameters (see section of the same name) can be set. Note: In order to start the software keyboard with a shortcut, at least one software keyboard must be activated with the ShowOnStart=1 switch in the Keyboard.cfg file. 88 8580/8590 Vehicle-Mount Computer User Manual Chapter 6: Operating System & Software Apps Launching the Program To create the shortcut: 1. Go to the PTX Keyboard program using Start>All Program>Psion Teklogix. 2. Right-click PTX Keyboard. A shortcut menu opens. 3. Choose the Properties command. 4. Switch to the Shortcut tab. 5. For Target, enter the call parameter switchview after the EXE file (and after one space). 6. Apply the settings. Set path name In the Psion Keyboard Properties dialog box, the path and name of the configuration file can also be set for the Target parameter. In this case, the default name Keyboard.cfg in the default directory c:\Psion Teklogix need no longer be used. Define Keyboard Shortcut In the Psion Keyboard Properties dialog box, you can specify a key combination for the Keyboard shortcut parameter. The software keyboard can be started and ended again with this keyboard shortcut. 6.3.4.4 Autostart Folder If you want the software keyboard to launch immediately at every computer start, you’ll need to define it in the Autostart folder: 1. Right-click the Start menu. 2. Open Explorer. 3. Drag the PTXKeyboard.exe program to the Autostart folder using your right mouse button, and then choose Create Shortcut. 4. If necessary, set the required call parameters in the Properties menu. 6.3.4.5 Special Keys on the 8580/8590 If your 8580/8590 is equipped with special keys, you can start the software keyboard using one of them. To prepare this: 1. Go to the PTX Keyboard program using Start>All Programs>Psion Teklogix. 8580/8590 Vehicle-Mount Computer User Manual 89 Chapter 6: Operating System & Software Apps Launching the Program 2. Right-click the program, and then select the Properties command on the shortcut menu. 3. Switch to the Keyboard shortcut parameter, and press the required special key on the Psion device. 4. Apply the setting. 5. If necessary, set the required call parameters in the Properties menu. 6.3.4.6 Exiting the Program The software keyboard can be exited in the following ways: • • With a keyboard shortcut that contains the exit call parameter in the Properties definition. With the keyboard shortcut that was defined in the Properties menu. Minimize Program to Icon Size The software keyboard can be hidden and displayed as an icon with this key: 6.3.4.7 Software Keyboard and Taskbar The software keyboard can be automatically adjusted to the size and position of the taskbar so that it is not concealed. However, this depends however on how the taskbar options have been set. To set the taskbar options: 1. Right-click the taskbar. 2. Choose the Properties command on the shortcut menu. 3. On the Taskbar tab, you can hide the taskbar using the Auto-hide feature; you can choose whether you want the taskbar to be covered by other windows using the Keep the taskbar on top of other windows check box. Recommendations for Taskbar Configuration If you want the taskbar to be visible at all times: • Auto-hide the taskbar = OFF • Keep the taskbar on top of other windows = ON If you do not want the taskbar to be visible at all times: • • 90 Auto-hide the taskbar = ON Keep the taskbar on top of other windows = ON 8580/8590 Vehicle-Mount Computer User Manual Chapter 6: Operating System & Software Apps Operation Please note the following special features: • Auto-hide the taskbar = OFF Keep the taskbar on top of other windows = OFF The software keyboard positions itself over the visible taskbar. However, if an application is maximized or moved over the taskbar, the keyboard will appear to be hanging in the air (since the taskbar does not automatically change its position). To prevent this, one of the two taskbar options must be enabled. • Auto-hide the taskbar = ON If automatic hiding of the taskbar is enabled, the software keyboard always positions itself along the extreme edge of the screen. If the taskbar is then automatically shown on the screen, the position of the software keyboard remains unchanged. With the option Keep the taskbar on top of other windows = OFF, the software keyboard covers the shown taskbar; the covered parts cannot be selected. With the option Keep the taskbar on top of other windows = ON, the shown taskbar covers the software keyboard. With the next key press on the visible portion of the software keyboard, the software keyboard returns to the foreground again. 6.3.5 Operation The software keyboard is controlled using a touch pen or your finger tips on the touchscreen. All key presses are passed to the currently active application program. 6.3.5.1 Keyboards Included in the Standard Delivery Version The standard delivery version offers the user the following software keyboards: Figure 6.2 Standard Software Keyboard 8580/8590 Vehicle-Mount Computer User Manual 91 Chapter 6: Operating System & Software Apps Configuring the Software Keyboard Figure 6.3 24-key terminal emulation keypad 6.3.5.2 Keys with Special Functions Alongside the standard keyboard keys, the following keys are available: Hide software keyboard and minimize to icon size (function VK_KB_HIDE, bitmap BMP_Minimize) Move position of the software keyboard up/down on the screen (function VK_KB_UPDOWN, bitmap BMP_MoveUpDown) Switch between the keyboards available (function VK_KB_SWITCHNEXT, bitmap BMP_SwitchNext) 6.3.6 Configuring the Software Keyboard The design of the software keyboard is defined in the configuration file Keyboard.cfg. The keys are defined and many other settings are made in the various sections and keys of this file. While the CFG file largely conforms to the INI standard, separate parsing is carried out specifically for the definitions of the individual keys. 6.3.6.1 Structure Of The Keyboard.cfg File In the Keyboard.cfg file, several software keyboards can be defined which can be shown on the screen as required. Every software keyboard requires: 1. A [Keyboard_xxx] section with general settings for size and position of the software keyboard. 92 8580/8590 Vehicle-Mount Computer User Manual Chapter 6: Operating System & Software Apps Configuring the Software Keyboard 2. A [Keys] section that follows, in which the individual keys of this software keyboard are defined. 6.3.6.2 Rules for Editing the Keyboard.cfg File To edit the CFG file, editors such as Windows Notepad can be used. • • • Redundant spaces should be avoided as they can lead to errors. Incorrect lines are ignored. As is customary, a semicolon in the first column of a line can be used for comment lines. 6.3.6.3 General Options Name of the section: [Keyboard_xxx] In the [Keyboard_xxx] section, you make general settings for the respective software keyboard. This section must be explicitly available for every software keyboard. xxx represents the name of the software keyboard. This name should indicate the function of the respective keyboard. The entry specified after the keys displays the default value or an example value. Keys of the [Keyboard_xxx] Section StdKeySize=45.40 • Defines the standard key size X,Y in pixels. This size is used as the default size for all keys of this software keyboard. Font=Tahoma,24,B • Sets font name, font size and boldface type for the key labelling. Boldface type can be disabled by omitting the B. • In general, the fonts are generated with activated anti-aliasing. With small font sizes, however, anti-aliasing is ignored by the system. ShowOnStart=0 • Normally the software keyboards should not be visible at program start, so the default value here is 0. With the value 1, the software keyboard is displayed immediately when the program launches. BorderSize=3.3 • Defines the width of the border between the keys and the Windows border in the X,Y direction. Pattern=B • Two key layouts are pre-defined: 8580/8590 Vehicle-Mount Computer User Manual 93 Chapter 6: Operating System & Software Apps Configuring the Software Keyboard • Pattern=W (white) and Pattern=B (blue) Pattern=W: Figure 6.4 Key Layout with Pattern=W Pattern=B: Figure 6.5 Key Layout with Pattern=B Position=24 • Defines the position of the software keyboard. The following position specifications are possible as numeric values: 24 Bottom edge, centre 17 Top edge, centre 18 Left edge, centre 20 Right edge, centre 3 Top left 5 Top right 10 Bottom left 12 Bottom right 94 8580/8590 Vehicle-Mount Computer User Manual Chapter 6: Operating System & Software Apps Configuring the Software Keyboard The value 32 (=Fixed Position) can be added to these values (specify total). In this case, the position of the keyboard is not changed when a switch is made to the next keyboard (see VK_KB_SWITCHNEXT). Otherwise, the newly activated keyboard is displayed by default with the same position code as the previous one. ShowTitle=0 • • 1 = Show title bar of the keyboard window 0 = Do not show title bar In the title bar, the name of the software keyboard, which was specified for Keyboard_xxx in the section designation, is also displayed. Keep in mind, however, that hiding the title bar is not recommended. With the title bar visible, the software keyboard can gain focus if you click the title bar – the current input window would lose focus. ShowTaskWin=0 • • 1 = Show in the taskbar 0 = Do not show Here, you can make the individual software keyboard windows visible in the taskbar and in task switching with ALT-TAB. Background=R,G,B Definition of the window background with RGB values; this entry has priority over the Pattern specification. 6.3.6.4 Defining the Keys Name of the section: [Keys] In the [Keys] section, you define the individual keys of the software keyboard. The overall size of the keyboard results from the arrangement of the keys. An entry for a key definition contains the following, mostly optional fields: Labelling Normal/Shift/AltGr| Keycode VirtualKeycode| Pattern PatternBitmap, Size X-Len,Y-Len, Position X-Pos,Y-Pos Labelling The first three fields (up to the first | character) are used to label keys: 1. Normal field, labelling without [SHIFT] and without [ALT Gr] 8580/8590 Vehicle-Mount Computer User Manual 95 Chapter 6: Operating System & Software Apps Configuring the Software Keyboard 2. Shift field, labelling with the [SHIFT] key pressed 3. AltGr field, labelling with the [ALT Gr] key pressed The following combinations are permissible, for example: A| In all three modes, the upper-case A is always displayed a/A/| Normal = a, with [SHIFT] = A, with [ALT Gr] = no display A//| Normal = A, with [SHIFT] or [ALT Gr] = no display (blank key) If the / or | character, or other characters that are difficult to enter, are being specified for the labelling, then this can be done with the hexadecimal operator $: Character / displayed through $2F Character | displayed through $24 Bitmaps Bitmaps can also be used for the key display. The pre-defined standard keyboard symbols may already be found in the resources of the software keyboard program. Alternatively, the bitmap files can also be specified directly: $BMP_Shift| Display of the Shift arrow from the program resource $BMP_MySymbol.bmp| Display of the bitmap file MySymbol.bmp Please note the following: • • • 96 The special character $ must be specified in front of the bitmap name. The bitmap files must either be located in the current working directory of the program or they must be specified with full path name. For all bitmap files, the Color RGB = 140,195,255 is permanently defined as the transparent colour. 8580/8590 Vehicle-Mount Computer User Manual Chapter 6: Operating System & Software Apps Configuring the Software Keyboard Bitmap Definitions for Label Symbols (Examples) BMP_RETURN RETURN symbol BMP_TAB TAB symbols BMP_CAPS CAPS LOCK, continuous Shift symbol BMP_SHIFT SHIFT symbol BMP_BACK BACKSPACE symbol BMP_APPKEY APPLICATION key BMP_INSERT Small “INSERT” text BMP_END Small “END” text 8580/8590 Vehicle-Mount Computer User Manual 97 Chapter 6: Operating System & Software Apps Configuring the Software Keyboard 98 BMP_DELETE Small “DELETE” text BMP_NEXT Small “PAGE DOWN” text BMP_PRIOR Small “PAGE UP” text BMP_HOME Small “HOME” text BMP_MoveUpDown Special symbol for SWITCH POSITION (see VK_KB_UPDOWN) BMP_SwitchNext Special symbol for SWITCH KEYBOARD (see VK_KB_SWITCHNEXT) BMP_Keyboard Special symbol for the MAXIMIZE function BMP_Minimize Special symbol for the MINIMIZE function 8580/8590 Vehicle-Mount Computer User Manual Chapter 6: Operating System & Software Apps Configuring the Software Keyboard Virtual-Key Codes Apart from certain special codes, the Windows virtual-key code (alternatively the scan code with #, see below) is specified as the text name here. Currently, only one basic key code can be set for each key; in combination with [SHIFT]+[ALT Gr], this then automatically gives the other assignments. Therefore, for the key code E, the euro symbol € is automatically produced with the [ALT Gr] key pressed. The virtual-key code names can be obtained from Microsoft MSDN (Microsoft Developer Network). Examples: e/E/€|E Assignment of label and code = E to a key For the assignment of the standard ASCII characters, no special virtual-key code is necessary; the character can be specified directly as a code. ,/;/|VK_COMMA Assignment to a standard comma key As an alternative to the virtual-key code, the numerical scan code of a key can also be entered directly. This is made possible through the # character. If, for example, you want to specify the scan code of the [ESC] key, you must specify the value #1 in the VirtualKeycode field; for the A key, you must specify the value #30. This is necessary in particular for keys with national special characters, since no virtual-key code definitions generally exist for these keys. Key Codes for Special Functions VK_KB_UPDOWN This key code is not used as a keyboard value, but instructs the program internally to change the keyboard position (from bottom edge to top edge, and vice versa). VK_KB_SWITCHNEXT Keys with this key code cause a switch to the next defined software keyboard. See also the ExcludeChain parameter. VK_KB_HIDE If a key with this key code is pressed, then the associated keyboard window is removed from the screen. In addition, the Maximize keyboard (Keyboard_Maximize) is activated if available. 8580/8590 Vehicle-Mount Computer User Manual 99 Chapter 6: Operating System & Software Apps Configuring the Software Keyboard Key Codes for Special Characters Virtual-Key Codes Hardware Key Codes VK_NUMRET <Return> on numeric keypad VK_CIRCUMFLEX 220 VK_SHARP_S 219 VK_ACCENT 221 VK_PLUS 187 VK_GER_UE 186 VK_GER_OE 192 VK_GER_AE 222 VK_NUMSIGN 191 VK_COMMA 188 VK_POINT 190 VK_SMALLER 226 VK_MINUS 189 VK_ALTGR VK_RMENU PatternBitmap Here, you can set a different bitmap pattern for the key; at present, only the entry $ExtBmp1 is possible for keys highlighted in colour, for example, the [RETURN] or [TAB] key. If this entry is not used, then the entry including comma must be omitted. X-Len,Y-Len,X-Pos,Y-Pos Here, you define the size and positioning of the key. For parameters left blank (,,,) or parameters that are not available, the default value is always set. The default value for the size is defined through the StdKeySize entry in the Keyboard_xxx section. The default value for the positioning is always the next X-position after the previously defined key in accordance with its size. A minus sign in front of the value is a reference to the standard key size: • 100 An X-Len of -2 produces a key that is twice as wide. A Y-Pos of -5 positions the key in the fifth key row. 8580/8590 Vehicle-Mount Computer User Manual Chapter 6: Operating System & Software Apps Keyboard_Maximize Section • • 6.3.7 A plus sign in front of the value adds the value relative to the current standard position; with X-Pos = +5, the key is positioned at a distance of 5 pixels from the previous one. Values with no -/+ sign are used as absolute pixel positions within the keyboard window. Keyboard_Maximize Section [Keyboard_Maximize] is reserved as a special section for the keyboard definition. This software keyboard contains only one key, to which the VK_KB_SWITCHVIEW function should be assigned. All the parameters listed in “General Options” on page 93 can be used for the definition of this software keyboard. Example of a Maximize Keyboard definition: [Keyboard_Maximize] StdKeySize=40,40 Font=Tahoma,22,B Pattern=W ExcludeChain=1 BorderSize=0,0 Position=12 ;MaxiMode=0 [Keys] $BMP_Keyboard|VK_KB_SWITCHVIEW 6.3.7.1 MaxiMode and ExcludeChain Options The options MaxiMode and ExcludeChain were introduced specially for this software keyboard. They allow specific configurations to be made. MaxiMode=1 This is a special parameter valid only for Keyboard_Maximize. 1 = AutoHide (default). If any software keyboard is visible on the screen, then Keyboard_Maximize is automatically made invisible. If there is no longer any (normal) software keyboard visible on the screen, then Keyboard_Maximize reappears automatically. 0 = Always visible. Keyboard_Maximize is always visible on the screen, irrespective of the other software keyboards. 8580/8590 Vehicle-Mount Computer User Manual 101 Chapter 6: Operating System & Software Apps Keyboard_Maximize Section ExcludeChain=0 If you set this parameter to 1, the associated software keyboard is excluded from general commands; the software keyboard remains unaffected by this. This applies, for example, to the successive switching through of the keyboards with VK_KB_SWITCHNEXT. 102 8580/8590 Vehicle-Mount Computer User Manual 7 SERIAL PORTS 7.1 Serial Ports . . . . . . . . . . . . . . . . 7.1.1 Resources . . . . . . . . . . . . 7.1.2 COM1 Options . . . . . . . . . 7.1.3 COM1 as a Power Supply . . . 7.1.4 Serial Port Printers . . . . . . . 7.1.5 Serial Port Bar Code Scanners . 7.1.6 Tips & Tricks . . . . . . . . . . . . . . . . . . . . . . . . . . . . . . . . . . . . . . . . . . . . . . . . . . . . . . . . . . . . . . . . . . . . . . . . . . . . . . . . . . . . . . . . . . . . . . . . . . . . . . . . . . . . . . . . . . . . . . . . . . . . . . . . . . . . . . . . 8580/8590 Vehicle-Mount Computer User Manual . . . . . . . . . . . . . . . . . . . . . . . . . . . . .105 .105 .105 .105 .106 .106 .106 103 Chapter 7: Serial Ports Serial Ports 7.1 Serial Ports By default, the 8580/8590 is equipped with 4 serial ports. COM1 and COM2 are accessible from the outside. COM3 and COM4 are used internally for communication with the environment controller and the touch controller. Warning: Please refer to “Vehicle Applications (such as Forklifts)” on page 46 for information regarding isolation of external devices. 7.1.1 Resources Resources for the serial ports are pre-defined in the system architecture and automatically managed by the BIOS. The resources for COM1, COM2, COM3 and COM4 can be defined via the BIOS. The standard resources for serial ports are: 7.1.2 COM1 Address 0x3F8 - 0x3FF (hexadecimal), Interrupt IRQ4 COM2 Address 0x2F8 - 0x2FF (hexadecimal), Interrupt IRQ3 COM3 Address 0x3E8 - 0x3EF (hexadecimal), Interrupt IRQ10 COM4 Address 0x2E8 - 0x2EF (hexadecimal), Interrupt IRQ11 COM1 Options ThIS section outlines guidelines that should be observed when using the COM1 port to supply power to external equipment. The resources required for the COM1 controller module are automatically reserved by the BIOS. 7.1.3 COM1 as a Power Supply The COM1 port can optionally supply externally connected equipment with +12 V or +5 V of power. A label is applied near the port identifying the voltage if so configured. The voltages are protected by internal fuses which limit the total consumed current to 1.1 A at 5 V (including keyboard and mouse). The current consumption at 12 V is also limited to 1.1 A by a reversible fuse. Depending on the specific system configuration, the maximum current consumption at +12 V may be significantly lower. Note: Keep in mind that pin 9 can be configured to provide +5 V or +12 V power to an external device. This option must be specified at ordering time. 8580/8590 Vehicle-Mount Computer User Manual 105 Chapter 7: Serial Ports Serial Port Printers Changes to the setting must be done by an authorized repair centre. 7.1.4 Serial Port Printers Printers with a serial port can be connected to the 8580/8590. 7.1.5 Serial Port Bar Code Scanners To activate the integrated scanner software wedge under Windows XP Embedded: 1. Open the Start menu and navigate to Settings>Control Panel>Accessibility. 2. Choose the General tab. 3. Choose Support accessibility options. 4. Click Settings. 5. Configure the desired COM port and BAUD rate. 6. Confirm the change with OK. 7. Click OK again for the changes to take effect. Important: Keep in mind that you must configure the scanner correctly to RS-232 and the above set BAUD rate, following the scanner manufacturer's guidelines. Otherwise the software wedge will not function properly. 7.1.6 Tips & Tricks Note that according to the EIA-232-E specification, the maximum cable length is 15 m at 19,200 bps. RS-232 connection malfunctions are frequently caused by ground loops. If both end devices establish a ground connection via RS-232 but do not share the same ground potential in their power supply circuits, compensation currents may result. This is particularly noticeable with long cables. These compensation currents, which are also present at the ground point of the RS-232 connection, may significantly degrade signal quality and effectively stop the data flow. In challenging environments, electrically-isolated connections (via external converters) are strongly recommended. 106 8580/8590 Vehicle-Mount Computer User Manual 8 INTERNAL DEVICES 8.1 Chipset . . . . . . . . . . . . . . . . . . . . . . . . . . . . . . . . 8.1.1 Installing Chipset Drivers Under Windows XP . . . . . . 8.2 VGA Adaptor. . . . . . . . . . . . . . . . . . . . . . . . . . . . . 8.2.1 VGA Driver Installation Under Windows XP . . . . . . . 8.3 Network Adaptor (10/100) . . . . . . . . . . . . . . . . . . . . . . 8.3.1 Network Driver Installation Under Windows XP . . . . . 8.4 Onboard Sound Adaptor . . . . . . . . . . . . . . . . . . . . . . . 8.4.1 Installing Onboard Sound Adaptor Drivers–Windows XP 8.5 PCI Cards . . . . . . . . . . . . . . . . . . . . . . . . . . . . . . . . . . . . . . . . . . . . . . . . . . . . . . . . . . . . . . . . . . . . . . . . . . . . . . . . . . . . . . . . . . . . . . . . . . . . . . . .109 .109 . 110 . 110 . 111 . 111 . 113 . 113 . 114 8.6 Cardbus Interface . . . . . . . . . . . . . . . . . . . . . . . . . . . . . . . . . . . . 115 8.7 Touchscreen . . . . . . . . . . . . . . . . . . . . . . . . . . . 8.7.1 Touch (Serial) for Windows XP & XP Embedded. . . 8.7.1.1 Installation. . . . . . . . . . . . . . . . . . . 8.7.1.2 Calibration. . . . . . . . . . . . . . . . . . . 8.7.2 Touch (PS2) for Windows XP & XP Embedded. . . . 8.7.2.1 Installation. . . . . . . . . . . . . . . . . . . 8.7.2.2 Calibration. . . . . . . . . . . . . . . . . . . 8.7.3 Resistance of the Touchscreen . . . . . . . . . . . . . 8.8 Automatic Switch-Off and Heating . . . . . . . . . . . . . . . 8.8.1 Automatic Shutdown Process . . . . . . . . . . . . . 8.8.1.1 Program Flowchart . . . . . . . . . . . . . . 8.8.2 Automatic Shutdown with UPS . . . . . . . . . . . . 8.8.3 Drivers . . . . . . . . . . . . . . . . . . . . . . . . . 8.8.4 General Notes About Automatic Shutdown Software . . . . . . . . . . . . . . . . . . . . . . . . . . . . . . . . . . . . . . . . . . . . . . . . . . . . . . . . . . . . . . . . . . . . . . . . . . . . . . . . . . . . . 8580/8590 Vehicle-Mount Computer User Manual . . . . . . . . . . . . . . . . . . . . . . . . . . . . . . . . . . . . . . . . . . . . . . . . . . . . . . . . . 115 . 116 . 116 . 117 . 117 . 117 . 118 . 118 .120 .121 .122 .124 .124 .124 107 Chapter 8: Internal Devices Chipset 8.1 Chipset The 8580/8590 computer is equipped with a chipset which controls the communication between all function modules. The chipset converts the signals it receives from the CPU into memory access, hard drive access and other similar actions. Likewise, it transmits requests from peripheral devices to the CPU. Input devices such as the mouse or keyboard also communicate with the system via this chipset. Resources The chipset does not require any resources for its core functions – unlike the internal peripheral units, which are also described in this manual. 8.1.1 Installing Chipset Drivers Under Windows XP Important: Install the chipset drivers before all other drivers; otherwise the system will not function properly! The chipset drivers to be used can are stored on the Compact Flash or hard drive under Util/chipset/<verNR> by default. In addition, you will find the drivers on the driver CD shipped with your unit. To install the chipset driver: 1. Open the corresponding folder and run Setup.exe. 1. Tap on Next. 8580/8590 Vehicle-Mount Computer User Manual 109 Chapter 8: Internal Devices VGA Adaptor 2. In the following window, tap on Yes. 3. Tap on Next again. 4. Restart your computer. 8.2 VGA Adaptor The 8580/8590 is equipped with a VGA-compatible adaptor. This adaptor controls the integrated display. The VGA adaptor generates all the control signals required for the integrated displays. Resources The VGA adaptor is a Plug and Play component for the PCI bus. All resource allocation and management is therefore performed by the BIOS. 8.2.1 VGA Driver Installation Under Windows XP The graphic card driver to be used can be found by default on the Compact Flash or hard drive under Util/vga/<verNR>. In addition, you will find the drivers on the driver CD included with your unit. To install the VGA driver: 1. Open the corresponding folder and run Setup.exe. 1. Tap on Next. 2. In the following window, tap on Yes. 110 8580/8590 Vehicle-Mount Computer User Manual Chapter 8: Internal Devices Network Adaptor (10/100) 3. Restart your computer. 8.3 Network Adaptor (10/100) The 8580/8590 is equipped with a 10/100 Mbit network adaptor. This adaptor is available on the back of the device and features an RJ45 port. The network controller undertakes the entire task of connecting the hardware to the network. The RJ45 connection port features two integrated status LEDs. They display the following messages: Left LED (green) Right LED (orange) LED off: not connected, no activity LED off: 10 Mbit network LED on: connected, no activity RJ45 Network Port LED on: 100 Mbit network LED flashes: connected, activity Resources The network adaptor is a true Plug and Play component. All resource allocation and management is therefore performed by the BIOS. 8.3.1 Network Driver Installation Under Windows XP The network drivers to be used can be found by default on the Compact Flash or hard drive under Util/Lan/<verNR>. In addition, you will find the drivers on the included driver CD. 8580/8590 Vehicle-Mount Computer User Manual 111 Chapter 8: Internal Devices Network Driver Installation Under Windows XP 1. Open the corresponding folder and run Setup.exe. 2. Choose the menu option I accept the terms in the license agreement, and tap on Next. 3. In the following window, tap on Next. 4. Tap on Install Drivers. 5. After the installation, tap on Exit. 112 8580/8590 Vehicle-Mount Computer User Manual Chapter 8: Internal Devices Onboard Sound Adaptor 6. Restart your computer. 8.4 Onboard Sound Adaptor The 8580/8590 is equipped with an onboard sound adaptor. Optional Line out/Mic in connectors are available. Resources The onboard sound adaptor is a true Plug and Play component. All resource allocation and management is therefore performed by the BIOS. 8.4.1 Installing Onboard Sound Adaptor Drivers – Windows XP Sound card drivers are stored on the Compact Flash or hard drive under Util/Sound/<verNR> by default. In addition, you can find the drivers on the driver CD included with your 8580/8590. To install the onboard sound adaptor drivers: 1. Open the corresponding folder and run Setup.exe. 8580/8590 Vehicle-Mount Computer User Manual 113 Chapter 8: Internal Devices PCI Cards 2. Tap on Next. 3. In the following window, tap Continue Anyway. 4. Restart your computer. 8.5 PCI Cards A riser card with a single bus master-capable PCI slot is available as an option for the 8580/90. This card allows you to upgrade the system with conventional, ultra-short expansion cards (max. length: 141 mm). The riser card routes the onboard PCI bus signals from the P22 of the motherboard to a standard plug-in slot. Resources The riser card itself does not require any system resources. However, to avoid conflicts with the standard system resources, you should be familiar with the resource requirements of the plug-in card. Total power consumption of all added plug-in cards must not exceed 20 W. Remember to include the power requirements of external peripheral equipment (keyboard, mouse, scanner, etc.) in your calculations. 114 8580/8590 Vehicle-Mount Computer User Manual Chapter 8: Internal Devices Cardbus Interface Drivers The riser card is fully transparent for all operating systems – i.e. drivers are not required. Some plug-in cards that are inserted into riser cards may require additional drivers. These drivers must be supplied by the respective card manufacturers. 8.6 Cardbus Interface The optional Cardbus slot is located beneath the antenna dome at the top of the 8580/8590. It can be used for both PC Card (16 bit) and Cardbus (32 bit) cards. The Cardbus slot has two options: 8.7 • Card Extender and Radio Dome This option is designed to accommodate longer radio cards with integrated antenna (e.g. WWAN cards). • Cover This option is designed to accommodate short cards. Touchscreen An optional resistive touchscreen is available for the 8580/8590. The touchscreen can be operated with or without a keyboard and is compatible with a mouse. Important: If the touch controller is configured as PS/2 touch (via jumpers), a mouse cannot be connected to the external PS/2 mouse. Note: Of course it is always possible to use a serial or a USB mouse at the same time as the touchscreen. Explanation of Functions A touchscreen controller for resistive touchscreens is integrated into the motherboard to analyze the sensor line state changes caused by touching. The touchscreen controller calculates and formats this data and then sends it to the touchscreen software driver via the COM4 port or optionally the mouse-PS/2 port (interrupt-controlled). The driver converts the data into pointer commands. The analog touchscreen controller used for analysis provides a resolution of 4096 x 4096 pixels (12-bit horizontal and vertical). 8580/8590 Vehicle-Mount Computer User Manual 115 Chapter 8: Internal Devices Touch (Serial) for Windows XP & XP Embedded 4-wire touchscreens (10.4" front panel) and also 8-wire touchscreens (12.1" front panel) are supported. Resources By default the resources for the touchscreen controller are the same as those for the COM4 port. If the appropriate configuration exists, these may also be the same as for the PS/2 mouse. With the exception of ensuring that the jumpers are set correctly J6 (open = Touch active) and J13 (closed=PS/2, open=COM4), no further configuration is required. 8.7.1 Touch (Serial) for Windows XP & XP Embedded 8.7.1.1 Installation By default, the touch drivers to be used can be found on the Compact Flash or hard drive under Util/atouch/<verNR>. In addition, you will find the drivers on the driver CD shipped with your unit. 1. Open the corresponding folder and run Setup.exe. 2. In the Welcome dialog, tap Next. 3. In the Software License Agreement window, choose I accept all of the terms of the above License Agreement, and then tap Next. 4. In the Select Controller dialog, choose serial (RS/232) and tap Next. 5. In the Serial Configuration dialog, choose COM4 and 9600 Baud and tap Next. 6. Deselect the option on the Configuration Complete dialog and close by tapping Finish. 7. Two Files Needed windows will appear querying the path to the tsufiltr.sys file. 8. Select Browse to navigate to the installation folder indicated above, then choose the Serial folder and tap OK. 9. Confirm the final message Setup is now complete by tapping OK. 116 8580/8590 Vehicle-Mount Computer User Manual Chapter 8: Internal Devices Touch (PS2) for Windows XP & XP Embedded The computer does not need to be restarted. 8.7.1.2 Calibration The touchscreen must be calibrated so that it functions correctly. 1. Start the touch configuration tool under Start/Programs/Hampshire TSHARC Control Panel. 2. Choose the Calibration tab and tap the Touch field. 3. Once calibration is complete, finish by tapping Accept. 4. Choose the Click Settings tab and choose Enable right click emulation. Enter the following values: Right-Click Area + Double-Click Area each to 13; Right-Click Delay + Double-Click Delay each to the third line. 5. Exit the tool with OK. 8.7.2 Touch (PS2) for Windows XP & XP Embedded 8.7.2.1 Installation The touch drivers is stored on the Compact Flash or hard drive under Util/atouch/<verNR> by default. In addition, you will find our drivers on the driver CD included with your unit. 1. Open the corresponding folder and run Setup.exe. 2. In the Welcome dialog tap Next. 3. In the Software License Agreement window, choose I accept all of the terms of the above License Agreement and then tap Next. 4. In the Select Controller dialog choose PS/2 and tap Next. 5. Deselect the option in the Configuration Complete dialog and end by tapping Finish. 6. In the following window, confirm the dialog by tapping OK. 8580/8590 Vehicle-Mount Computer User Manual 117 Chapter 8: Internal Devices Resistance of the Touchscreen 7. Restart your computer. 8.7.2.2 Calibration The touch must be calibrated so that it functions correctly. 1. Start the touch configuration tool under Start/Programs/Hampshire TSHARC Control Panel. 2. Choose the Calibration tab and tap the Touch field. 3. Once calibration is complete, finish by tapping Accept. 4. Choose the Click Settings tab and choose Enable right click emulation. Enter the following values: Right-Click Area + Double-Click Area each to 13; Right-Click Delay + Double-Click Delay each to the third line. 5. Exit the tool with OK. 8.7.3 Resistance of the Touchscreen Resistance to chemical substances The transparent coating of the 8580/8590 touchscreen surface is resistant to most chemical substances that are normally used at home or in the industrial sector. As the majority of chemicals react more intensely at higher temperatures, the screen has been designed for normal room temperatures as well as extreme operating temperatures. Important: The data listed here applies exclusively to Psion resistive touchscreens. 118 Household Chemicals Reaction time:24 hours Visible Effect at 29°C, 90% Relative Humidity (RH) Visible Effect at 50°C, dry Coffee none none Ketchup none none Cleaning agents (liquid) none none 8580/8590 Vehicle-Mount Computer User Manual Chapter 8: Internal Devices Resistance of the Touchscreen Milk none none Mustard none slight yellow stain Strong Tea none none Vinegar none none Solvents/Industrial Chemicals Visible Effect at 29°C, 90% Relative Humidity (RH) Visible Effect at 50°C, dry Acetic acid none none Acetone/MEK, 50/50 none none Brake fluid none none Butyl acetate none none Cellosolve none none Ethanol/isopropanol, 50/50 none none Gasoline none none Concentrated sulfuric acid none none Petrol-based oil none none Mineral oil none none 40% sodium hydroxide none slight corrosion 111 trichlorethane none none Turpentine none none Vm & P Naphtha none none Pencil Hardness Test ASTM D 3363.74 The resistive 8580/8590 touchscreens have a hardness > 4H. Test scale (from softest to hardest): 6B, 5B, 4B, 3B, 2B, B, HB, F, H, 2H, 3H, 4H, 5H, 6H, 7H, 8H, 9H 8580/8590 Vehicle-Mount Computer User Manual 119 Chapter 8: Internal Devices Automatic Switch-Off and Heating Adhesion Test scale: 0B=100% delamination, 5B=no delamination 8.8 Automatic Switch-Off and Heating 8580/8590 models with DC voltage can be equipped with either an automatic shutdown module or an automatic shutdown and heating module. If the heating option is implemented, the 8580/8590 can be operated at temperatures ranging from maximum -30º C to +50º C. Modes Of Operation If wired accordingly, the 8580/8590 conveniently switches off together with the vehicle’s ignition. Because disconnecting the power supply during operation can lead to data loss, the operating system needs to be shut down normally using the appropriate hardware and software installed on the system when the ignition is switched off. The 8580/8590 is connected to the vehicle with three supply cables. DC+ and DC- are directly connected to the power supply of the vehicle, the connection is run through fuses (refer to “DC Power Pack” on page 45). Therefore make sure that the cables are connected directly to the battery and not to high-interference supply lines (for example, motor supply) or to supply lines already used by other consumers. The supply voltage connected is then linked to the 8580/8590 ignition input via a switch, for example, the key switch of the ignition (also with a fuse, see “Power Supply Fuses” on page 17). Heating is required if you want to operate the 8580/8590 at ambient temperatures below 0º C. In the following two sections, the main functions of the automatic heating and shutdown modules are described. For detailed information on the automatic shutdown and heating modules - complete with pre-defined thresholds - refer to the program flowchart diagrams (part 1 and 2) below. Resources The automatic switch-off/heating module requires the COM3 port for configuration. In normal use the LPT1 port is used for communication. 120 8580/8590 Vehicle-Mount Computer User Manual Chapter 8: Internal Devices Automatic Shutdown Process 8.8.1 Automatic Shutdown Process When the ignition is switched on, the 8580/8590 is supplied with power and begins checking its internal temperature and automatic shutdown function. Once the ambient conditions have been verified as acceptable, the 8580/8590 starts the operating system just like normal. During the first three minutes of the start-up phase, none of the ambient conditions, such as the internal temperature or the Ignition input status, are checked. This allows the operating system and the operating software for the automatic shutdown module to fully load without interruption. Following this three-minute period, the internal temperature of the unit and the status of the Ignition input are checked continuously. If the inner temperature of the 8580/8590 reaches a critical range, the operating system is shut down normally and the computer remains switched off until the temperature returns to an acceptable operating range. If the Ignition input is switched to DC- or a potential-free source during normal operation, the unit switches to shutdown delay time. In this state, the device continues to operate normally until the delay time (for example, 15 minutes) has elapsed. • • If the ignition is switched to DC+ again during this time, the 8580/8590 resumes normal operation. If, however, the delay time elapses, the operating system is shut down normally by the 8580/8590 operating software and the unit is automatically switched off (for example, after three minutes, or after a signal from the operating software). 8580/8590 Vehicle-Mount Computer User Manual 121 Chapter 8: Internal Devices Automatic Shutdown Process 8.8.1.1 Program Flowchart Figure 8.1 Automatic Shutdown Program Flowchart – Part 1 OFF DC+ on MAIN POWER ON R Temp. Sensor faulty Ignition off G PC OFF Heating MPC 6 T = Temperature t = Time OFF= Ignition = DC+ switched ON= G = Power LED R = Temp. LED Flashing = PC ON = Computer is power supplied PC OFF = Computer without power Ignition on Temp.Sensor faulty R G Ignition off PC OFF Yes R flashing Yes Temp. Sensor faulty ? Excessive high temperature No G 0°C...62°C Ignition off R PC OFF > 62°C Temperature ? < 0°C No Heating available? T<62°C Yes Heating Low temperature G R G T > 0°C R Ignition off PC OFF PC OFF t Heat > 15 min T > 0°C Sensor faulty G Computer switched on Startup R PC ON ACTION 3 min Start time elapsed T < 5°C Heating off Heating available? T > 10°C Temp. Sensor faulty EVENT No Yes Heating on STATUS NORMAL 122 Heating off R flashing Branching 8580/8590 Vehicle-Mount Computer User Manual Chapter 8: Internal Devices Automatic Shutdown Process Figure 8.2 Automatic Shutdown Program Flowchart – Part 2 RUN No Normal RUN R G Yes Heating available? T < 5° C PC ON Ignition off T > 70° C Heating off R Temp. Sensor faulty T < -25° C R T > 10° C Heating off R flashing Heating on Delay condition G R PC ON Ignition on Delay time elapsed R T > 70° C T < -25° C R R Temp. sensor faulty Heating off R flashing Heating MPC 6 T = Temperature t = Time DC+ = Ignition switched G = Power LED R = Temp. LED Waiting for switch-off R OFF = G PC ON ON= Flashing = PC ON = Computer is power supplied PC OFF = Computer without power Shut down time (switch off time) elapsed Sensor faulty R flashing Device off G R PC OFF 20s Dead time elapsed MAINPOWER ON 8580/8590 Vehicle-Mount Computer User Manual 123 Chapter 8: Internal Devices Automatic Shutdown with UPS 8.8.2 Automatic Shutdown with UPS When a Psion UPS is in use, the automatic shutdown must be configured to Switch-Off “with ignition” or “with ignition and power key” and to Switch-On “with ignition only” or “with ignition and power key”. If the ignition signal is wired to the input of the UPS, the signal is passed through so that the unit will automatically switch on and off with the ignition. However, if the UPS loses power to both the power and ignition inputs (for example, if the vehicle battery is removed, or runs down), the UPS will not only continue supplying power to the unit, but it will also keep the ignition signal to the vehicle-mount active. Approximately three minutes before the UPS battery discharges to the shutdown level, the UPS turns off the ignition to the unit to allow it to shutdown cleanly before complete power loss. 8.8.3 Drivers DLoGPwrw.sys driver V1.0 for Windows XP Standard setting: I/O port 0x379, length 2 Bytes The 8580/8590 and the automatic shutdown module communicate via the motherboard control port, which consists of the two I/O ports described above. 8.8.4 General Notes About Automatic Shutdown Software The Config program must be installed for the automatic shutdown module to function correctly. If the Config has not been started, the 8580/8590 will carry out a hard shutdown once the delay time and shutdown time set by the hardware has elapsed. In this case, the operating system is not shut down normally before the power is switched off. The current application is unable to save its data, and the file system becomes increasingly unstable and inconsistent. If the Config has been started, the program can recognize when the operating system needs to be shut down. Firstly, the Windows message “WM_QUERYENDSESSION” is sent to all running applications to inform them of the impending shutdown. Now every application has to respond within the time that is set in the registry. If a response is not sent in the specified time, the application is forced to quit. If there are any open programs with unsaved changes, it may not be possible to automatically quit them (for example, an unsaved document in WORDPAD.EXE, a program supplied with Windows). In this case WORDPAD.EXE responds to the Windows message “WM_QUERYENDSESSION” with a user query to confirm if the current file is to be 124 8580/8590 Vehicle-Mount Computer User Manual Chapter 8: Internal Devices General Notes About Automatic Shutdown Software saved. Applications that can be quit with the key combination [ALT] and [F4] (that is, without a final user query) generally send the required response to the “WM_QUERYENDSESSION” message and are not shutdown “hard”. To ensure that vital data is always saved correctly, applications need to be able to properly respond to the “WM_QUERYENDSESSION” message, that is, without user queries and within the set time period. 8580/8590 Vehicle-Mount Computer User Manual 125 9 MAINTENANCE 9.1 Maintenance . . . . . . . . . . . . . . . . . . . . . . . . . . . . . . . . . . . . . .129 9.1.1 Cleaning the Housing . . . . . . . . . . . . . . . . . . . . . . . . . . . .129 9.1.2 Cleaning the Touchscreen . . . . . . . . . . . . . . . . . . . . . . . . . .129 8580/8590 Vehicle-Mount Computer User Manual 127 Chapter 9: Maintenance Maintenance 9.1 Maintenance Follow the guidelines below when cleaning your 8580/8590. 9.1.1 Cleaning the Housing • • • 9.1.2 Use a damp cloth to clean the housing of the 8580/8590. Do not use compressed air, a high-pressure cleaner or vacuum cleaner, as this can damage the surface. Do not use a high-pressure cleaner; this poses the additional risk of water entering the device and damaging the electronics or display. Cleaning the Touchscreen The touchscreen surface should always be kept clean of dirt, dust, fingerprints etc. to ensure full display visibility. • • • Use a damp, non-abrasive cloth with any commercially-available window cleaner that does not contain ammonia. Apply the window cleaner to the cloth – do not spray it directly onto the touchscreen surface. Do not use abrasive cleaning agents as these may scratch the surface and lead to a deterioration in image quality. Do not use sulphurous agents. 8580/8590 Vehicle-Mount Computer User Manual 129 COMMON MISTAKES & HELPFUL TIPS 10 10.1 Common Mistakes in Usage . . . . . . . 10.1.1 Powering Up/Down . . . . . . . 10.1.2 Cable Cover . . . . . . . . . . . 10.1.3 Installation. . . . . . . . . . . . 10.1.4 Mobile Application on Vehicles 10.1.5 Using the Touchscreen . . . . . 10.1.6 Use/Storage . . . . . . . . . . . 10.1.7 Disposal . . . . . . . . . . . . . . . . . . . . . . . . . . . . . . . . . . . . . . . . . . . . . . . . . . . . . . . . . . . . . . . . . . . . . . . . . . . . . . . . . . . . . . . . . . . . . . . . . . . . . . . . . . . . . . . . . . . . . . . . . . . . . . . . . . . . . . . . . . . . . . . . . . . . . 8580/8590 Vehicle-Mount Computer User Manual . . . . . . . . . . . . . . . . . . . . . . . . . . . . . . . . .133 .133 .133 .133 .134 .134 .134 .134 131 Chapter 10: Common Mistakes & Helpful Tips Common Mistakes in Usage 10.1 Common Mistakes in Usage The items listed in this section provide some helpful tips to point you in the right direction if you run into problems. 10.1.1 Powering Up/Down • • Please note that the function of the 8580/8590 power switch varies depending on how the device is configured (depending on the power supply and integrated automatic shutdown). Disconnect the computer from the power supply only after the computer has been properly shut down and switched off. Otherwise file errors may occur on the storage device (in operating systems that have no activated write protection filter). 10.1.2 Cable Cover • The supplied cable cover for the external ports must be installed prior to using the 8580/8590. In order to comply with protection class IP65, please use the optionally available IP65 assembly kit from Psion. 10.1.3 Installation • • • • • • • • Use only the mounting brackets and screws recommended by Psion. Ensure that ball-and-socket bases and fastening arms are securely attached. Follow the instructions carefully when attaching all outgoing cables to the strain relief rail. The top cover hood of the wireless card is designed to protect the card; it should not be used as a handle when turning the vehicle-mount. The fastening brackets and mounting parts supplied by Psion are only meant to be used to mount 8580/8590s and peripheral devices. They are not designed for any other purpose. Varied conditions during installation may result in operating states where it may be necessary to optimize the mounting process. Carefully follow the Appendix F: “Mechanical Dynamic Loading”. When mounting peripheral devices, follow the manufacturer’s instructions. This is particularly important when welding or drilling supporting parts. To avoid accidents, make sure your field of vision is not restricted when mounting peripheral devices. Observe all accident prevention regulations. 8580/8590 Vehicle-Mount Computer User Manual 133 Chapter 10: Common Mistakes & Helpful Tips Mobile Application on Vehicles 10.1.4 Mobile Application on Vehicles • • • • • • • • • • Never connect a 12 VDC device to vehicles with 24/48 VDC! Never connect a 24/48 VDC device to vehicles with 12 VDC! Never connect a 12 VDC device to vehicles with more than 16 VDC voltages. Never connect a 24/48 VDC device to vehicles with more than 60 VDC voltages. Ensure that supply lines are fused correctly as described in “Vehicle Applications (such as Forklifts)” on page 46. Lay the supply cable so that it will not get crushed or frayed. Read the labelling on the cable and connect the supply cable with the correct polarity. Observe the vehicle manufacturer's instructions for connecting additional loads, for instance, in conjunction with an emergency shut-off switch. Connect the supply cable to a suitable place. Ensure that the connecting cable has an adequate cross section and ampacity at the connection point. Before you start installation, be sure you know whether the vehicle is positive, negative or floating chassis, and follow the instructions in “Vehicle Applications (such as Forklifts)” on page 46. 10.1.5 Using the Touchscreen • • Please do not use sharp or abrasive objects on the 8580/8590 touchscreen. Do not use abrasive cleaning agents to clean the front of the device. Use a damp, nonabrasive cloth with any commercially-available window cleaner that does not contain ammonia. Apply the window cleaner to the cloth rather than spraying it directly onto the touchscreen surface. Do not use sulphurous agents. 10.1.6 Use/Storage Please observe the 8580/8590 maximum operating and storage temperatures. Make certain you are familiar with the type of 8580/8590 being used: • With or without heating module • The type of display The temperature ranges mainly depend on these two components. 10.1.7 Disposal The Psion general terms and conditions set out the obligations for disposal in accordance with official electronics regulations. 134 8580/8590 Vehicle-Mount Computer User Manual APPENDIX A SUPPORT SERVICES & WORLDWIDE OFFICES Psion provides a complete range of product support services to its customers worldwide. These services include technical support and product repairs. Technical Support A.1 Technical Support For technical support in North America: Call Toll free: +1 800 387 8898 Option 3, or For technical support in EMEA (Europe, Middle East and Africa), please contact the local office listed in the website below: http://community.psion.com/support/ For technical support in Asia, contact the local office listed in the website below: http://community.psion.com/support/ Technical Support for Mobile Computing Products is provided via e-mail through the Psion customer and partner extranets. To reach the website, go to www.psion.com, and click on the appropriate Teknet link on the home page. Then click on the “Login” button or the “Register” button, depending on whether you have previously registered for Teknet. Once you have logged in, search for the “Support Request Form” A.2 Product Repairs For repair service in North America: Call Toll free: +1 800 387 8898 Option 2 or Direct Dial: +1 905 813 9900 Ext. 1999 Option 2 For repair service in EMEA (Europe, Middle East and Africa), please contact the local office listed in the website below: http://community.psion.com/support/ 8580/8590 Vehicle-Mount Computer User Manual A-1 Appendix A: Support Services & Worldwide Offices Worldwide Offices For repair service in Asia, contact the local office listed in the website below: http://community.psion.com/support/ A.3 Worldwide Offices COMPANY HEADQUARTERS Psion Inc. 2100 Meadowvale Boulevard Mississauga, Ontario Canada L5N 7J9 Tel: +1 905 813 9900 Fax: +1 905 812 6300 E-mail: [email protected] NORTH AMERICAN HEADQUARTERS & U.S. SERVICE CENTRE Psion Corporation 3000 Kustom Drive Hebron, Kentucky USA 41048 Tel: +1 859 371 6006 Fax: +1 859 371 6422 E-mail: [email protected] INTERNATIONAL SUBSIDIARIES (www.psion.com/us/about/contact_psion-teklogix-offices.htm) Psion S.A. La Duranne 135 Rue Rene Descartes BP 421000 13591 Aix-En-Provence Cedex 3; France Tel:+33 4 42 90 88 09 A-2 8580/8590 Vehicle-Mount Computer User Manual Appendix A: Support Services & Worldwide Offices Worldwide Offices Fax:+33 4 42 90 88 88 E-mail: [email protected] Psion Espana S.L. Plaza de la Pau, s/n Edificio 3, 2º 08940 Cornella de Llobregat Barcelona, Spain Tel: +34 902 884 220 Fax: +34 934 750 230 E-mail: [email protected] 8580/8590 Vehicle-Mount Computer User Manual A-3 APPENDIX B PRE-REGULATOR (PS1320) INSTALLATION Please contact Psion for assistance. Refer to Appendix A: “Support Services & Worldwide Offices” to help locate an office near you. 8580/8590 Vehicle-Mount Computer User Manual B-1 APPENDIX C UPS (PS1110/PS1120) INSTALLATION Please contact Psion for assistance. Refer to Appendix A: “Support Services & Worldwide Offices” to help locate an office near you. 8580/8590 Vehicle-Mount Computer User Manual C-1 D APPENDIX SYSTEM RESOURCES D.1 Part 1 The resources listed here are reference values only. They may vary depending on the system configuration. These reference values are especially useful as a guide and for troubleshooting. Component Interrupt DMA Channel - Setup Default PCI/ISA Memory Range (Hex) FE28000 I/O Range (Hex) 03B0 – 03DF VGA controller IRQ 05 per PCI routing PCIe MiniCard slot IRQ 05 per PCI routing Network controller (Intel® ICH6M with PHY Intel® 82562) IRQ 05 per PCI routing - PCI/ISA PnP EE000000EE0000FF C000-C0FF Onboard Audio IRQ 05 per PCI routing - PCI/ISA PnP - - 1. IDE con- IRQ 05 troller per PCI routing - PCI/ISA PnP - 01F0 - 01F7 03F6 - 03F7 C400 - C407 Numeric IRQ13 coprocessor - PCI/ISA PnP - 00F0-00FF PCI/ISA PnP 8580/8590 Vehicle-Mount Computer User Manual D-1 Appendix D: System Resources Part 1 Component Interrupt D-2 DMA Channel Setup Default Memory Range (Hex) I/O Range (Hex) PS/2 Analog Touch (optional) IRQ12 - PCI/ISA PnP - 0060-0060 USB controller IRQ 05,05,15 - PCI/ISA PnP - C800-C81F CMOS/real IRQ 08 time clock - - - 0070-0071 LPT1 (only IRQ07 available internally) - PCI/ISA PnP - 0378-037F 0778-077A Floppy disk IRQ 06 drive (only available internally) 2 (8 bit) PCI/ISA PnP - 03F2-03F5 SCI IRQ ACPI bus IRQ 09 - PCI/ISA PnP - COM4 (Analog Touch) IRQ 11 - legacy ISA - 02E8-02EF COM3 IRQ 10 - legacy ISA - 03E8-03EF COM2 IRQ 03 - legacy ISA - 02F8-02FF COM1 IRQ 04 - legacy ISA - 03F8-03FF 8580/8590 Vehicle-Mount Computer User Manual Appendix D: System Resources Part 2 D.2 Part 2 List of abbreviations: TOM = Top of memory = max. DRAM installed. Component Interrupt DMA Channel Setup Default Memory Range (Hex) I/O Range (Hex) Graphic controller - - - 0000C0000000D400 000A0000000AFFFF 000B0000000BFFFF 000C0000000CDFFF E0000000E7FFFFFF EC000000EC00FFFF ED000000ED07FFFF 03B0-03BB 03C0-03DF DMA controller - 4 (16 bit) - - 0000-000F 0080-0090 0094-009F 00C0-00DF I/O read for ISA PnP - - - 0A00-0A0F PCI bus - - - 0CF8 0CFF 4000 - 407F 4080 - 40FF 5000 - 500F 6000 - 607F - 8580/8590 Vehicle-Mount Computer User Manual D-3 Appendix D: System Resources Part 2 D-4 Component Interrupt DMA Channel Motherboard resources - - Memory refresh - System speaker - Memory Range (Hex) I/O Range (Hex) - E0000 - FFFFF CC000 - DFFFF A0000 - CBFFF 9FC00 - 9FFFF (TOM-192kB) TOM (TOM-8MB192kB) - (TOM192kB) 1024kB - (TOM8MB-192kB) E0000000EFFFFFFF FED1C000FED1FFFF 04D0 04D1 0CF8 0CFF 0072 - 0075 0480 - 04BF 0800 - 087F 002E - 002F 0000 - 00FF 0100 - 010F 0 (8 bit) - - - - - - 0061-0061 8580/8590 Vehicle-Mount Computer User Manual Setup Default APPENDIX E PINOUTS – EXTERNAL CONNECTORS This appendix lists pin numbers and appropriate signals. The abbreviations used are: n.c. = not connected E.1 Keyboard and Mouse Version: Mini-DIN (PS2), 6-pin, motherboard reference P12. Keyboard only or keyboard and mouse connected via a Y cable. E.2 Pin Signal 1 KBDATA 2 MSDATA 3 GND 4 +5v fused 5 KBCLOCK 6 MSCLOCK USB Version: 8-pin, motherboard reference P13. Pin Signal 1 +5V fused 2 USB0 - 3 USB0 + 4 GND 5 +5V fused 6 USB1 - 8580/8590 Vehicle-Mount Computer User Manual E-1 Appendix E: Pinouts – External Connectors Serial Port COM1 E.3 Pin Signal 7 USB1 + 8 GND Serial Port COM1 Version: D-SUB-D, 9-pin, MALE, motherboard reference P15. E.4 Pin Signal Name 1 DCD Data Carrier Detect 2 RxD Receive Data 3 TxD Transmit Data 4 DTR Data Terminal Ready 5 GND Signal Ground 6 DSR Data Set Ready 7 RTS Request to Send 8 CTS Clear to Send 9 (default setting) RI Ring Indicate 9 (optional settings) +5 V or +12 V Under “Motherboard” on page 11, refer to Serial Ports. Serial Port COM2 Version: D-SUB-D, 9-pin, MALE, via adaptor cable to motherboard reference P16 E-2 8580/8590 Vehicle-Mount Computer User Manual Appendix E: Pinouts – External Connectors Network Connector RS232 Version (standard) E.5 Pin Signal Name 1 DCD Data Carrier Detect 2 RxD Receive Data 3 TxD Transmit Data 4 DTR Data Terminal Ready 5 GND Signal Ground 6 DSR Data Set Ready 7 RTS Request to Send 8 CTS Clear to Send 9 RI Ring Indicate Network Connector Version: RJ-45, 8-pin, motherboard reference P14. Pin Signal Name 1 TxP Transmit + 2 TxN Transmit - 3 RxP Receive + 4 CTTD Transmit Centre Termination 5 CTRD Receive Centre Termination 6 RxN Receive - 7 n.c. 8 TERM Termination 8580/8590 Vehicle-Mount Computer User Manual E-3 APPENDIX F MECHANICAL DYNAMIC LOADING F.1 Introduction The mechanical environmental conditions of the 8580/8590 can vary greatly in terms of vibrations, collisions and shocks. To complicate matters further, the random values for acceleration and their frequencies for a given location are often unknown. It is therefore useful to divide the values into three operation classes 5M3, 5M2 and 5M1 on the basis of standards, previous measurements and experience. The following standards offer a practical means of reference: • • DIN EN 60721-3-5: 1998 classification of environmental conditions, part 3, section 5: Use on and in ground vehicles. Military standard MIL-STD 810F: 2000. (5)M3 Mobile Use Operational environments with high energy vibrations and high energy shocks as well as rough handling/transport compliant with: • • • Operation class 5M3 according to DIN EN 60721-3-5 or equivalent. Category US Highway Truck according to MIL-STD 810F. Examples: Vehicles without shock absorption: Fork lifts, unbalanced machines: Combustion engine of a construction machine. (5)M2 Restricted Mobile Application Operational environments with low energy vibrations and high energy shocks as well as careful handling/transport compliant with: • • • Operation class 5M2 according to DIN EN 60721-3-5 or equivalent. Category US Highway Truck according to MIL-STD 810F. Examples: Vehicles with shock absorption: Driver's cab in a tractor, standing machines: Machine tools. 8580/8590 Vehicle-Mount Computer User Manual F-1 Appendix F: Mechanical Dynamic Loading Units without Vibration Isolation (tuned to high frequency) (5)M1 Stationary Use Operational environments with low energy vibrations and medium energy shocks as well as very careful handling/transport compliant with: • • F.2 Operation class 5M1 according to DIN EN 60721-3-5. Examples: Vehicles with very good shock absorption: Car dashboard, immobile mounting surfaces: Desk or wall. Units without Vibration Isolation (tuned to high frequency) Selection criteria: Stationary, partly mobile or fully mobile applications for which components offering isolation against vibrations cannot be used or are not required. Important: The 8580/8590 system can vibrate and should therefore be installed using the bracket as rigidly as possible. Because of variable mountings options, 8580/8590 units form a spring-mass system that can result in excitation by one or more random vibrations or shocks from the surroundings. This system reacts with natural oscillations, the amplitudes of which can be up to 20 times greater than the excitation amplitudes (resonance effects). The goal is therefore to remove resonance points of this kind or at least to tune the system to such a high frequency that they fall within the range of low excitation amplitudes. For an initial assessment, you can test the device by hand. Bring the system to excitation by gently hitting it with your hand. If the 8580/8590 starts to visibly oscillate and if the vibrations take a long time to die away, it is probable that the natural frequency is too low. In this case, we recommend reinforcing the fixing points to the maximum bending moments (through the use of rigid sections, for example). Practically speaking, natural frequencies above 100 Hz are sufficient. However, those below 50 Hz are likely to lead to damaging amplitudes during resonance which may result in fatigue fractures along the outer mounting parts or on the internal electronic components or even a loosening of the connections. F.3 Passive Vibration Isolation (tuned to low frequency) Selection criteria: Mobile use Note: The system can be tuned to a low frequency by installing a flexible bearing. For example, you can attach the mounting bracket to elastomer springs or rubber buffers. F-2 8580/8590 Vehicle-Mount Computer User Manual Appendix F: Mechanical Dynamic Loading Dimensioning Example 8580 The ideal total spring constant should be dimensioned in such a way so that the natural frequency of the system falls below the lowest excitation frequency. All excitations with a frequency greater than 1.4 times the natural frequency would then be dampened by a counter-phase effect. This is practically impossible if you consider that excitation accelerations within the range of around 10 Hz to 200 Hz or more may occur. Furthermore, the springs of the 8580/8590 would strongly deflect while static or visibly swivel while resonating (blurred display). Based on our experience, we have found that the natural frequencies of unsprung ground vehicles lie between 15 Hz and 25 Hz. Although the elastic bearing does create an interfering resonance, it can suppress high excitation frequencies to various degrees of success. F.4 Dimensioning Example 8580 Example for dimensioning an elastic bearing with mounting bracket for mobile application. The 8580 is screwed into a mobile position with a mounting bracket. Elastomer springs should be installed between the back of the mounting bracket and the assembly surface in the vehicle so that the depth can be adjusted. The point of resonance for the spatial axis with the greatest deflection should be 20 Hz. • • Which elastomer springs are suitable? Which insulating effects can be expected for different excitation frequencies? Mounting example for table-top attachment with elastomer springs: • • • • 8580 with mobile mounting bracket, adjustable to 15 degrees 3 elastomer springs Diameter 30 to 40 mm, 20 to 30 mm high Natural rubber 8580/8590 Vehicle-Mount Computer User Manual F-3 Appendix F: Mechanical Dynamic Loading Approximate Solution for Elastomer Spring Selection • F.5 Total vibrating weight of 8580: approx. 5 kg Approximate Solution for Elastomer Spring Selection Since ² = c / m, we obtain the following relationship: c 4 ² 2 2 m fe 0,039 m fe 78 N / mm 1000 Where: m fe c = oscillatory mass = natural frequency = spring constant in N/mm = 5 kg = 20 Hz This model applies to the oscillatory mass at the device’s center of gravity. This lies around 120 mm above the mounting surface of the group of springs and is also displaced from it. To determine the spring constant for an individual elastomer spring, the leverages and arrangement of the springs (here in a triangle) must also be considered. Furthermore, each of the 4 elastomer springs connected in parallel must deliver one third of the total spring constant, i.e., 78 N/mm / 3 = 26 N/mm. F-4 8580/8590 Vehicle-Mount Computer User Manual Appendix F: Mechanical Dynamic Loading Approximate Solution for Elastomer Spring Selection To simplify matters, of the 6 possible degrees of freedom, we will only consider those with the greatest deflection in the case of the 8580. In other words: We observe the display as it oscillates towards or away from us (a combination of rotational and longitudinal oscillation). Comparative measurements for the precise arrangement displayed in Table-top attachment with elastomer springs diagram on the previous page: Attachment (construction of the mounting bracket, quantity and position of the elastomer springs) show that the individual spring must be stiffer by a factor of 25 for the mathematical model stated above to be applied. Important: Factors for other mountings with elastomer springs must be calculated through testing! As a result, this model gives a value of 26 N/mm x 22.5 = 585 N/mm for the required single spring constant. The next step is to look through the manufacturer’s data sheets (such as those from gmtgmbh.de or simrit.de) to find the right types of elastomer springs and rubber buffers. Here we have decided to use springs with an M8 thread and cylindrical body made of natural rubber (NR). Based on the data sheet for a diameter of 30 mm and a height of 20 mm, for example, we arrived at the pressure load: Compressive force 539 N / Displacement 1 mm = 539 N/mm for a Shore hardness A 70. This value lies below the default value. What is the natural frequency? The following formula can be used to calculate the natural frequency: fe 5,03 c 19.1Hz m Where: fe = natural frequency in Hz c = total spring constant m = oscillatory mass = 539 N/mm (calculated from datasheet values) * 3 (springs) / 22.5 (factor) = 71.9 N/mm = 5 kg 8580/8590 Vehicle-Mount Computer User Manual F-5 Appendix F: Mechanical Dynamic Loading Further Possible Steps For Optimization This theoretical value of 19.1 Hz lies in the range of 20 Hz to 5 Hz as measured in practice. The calculations depicted above are only approximations, which is why we recommend a final field test with the selected elastomer springs. F.6 Further Possible Steps For Optimization • If it turns out that the 8580/8590 resonance deflections could be greater, the natural frequency can be reduced. In our selected example, softer elastomer springs with the same construction could be used. In that case, it would still be possible that a Shore hardness of A55 activates approx. 13 Hz. • However, if the resonance deflections are too high (10 mm and more), the natural frequency should be increased. For example, using 3 elastomer springs with a diameter of 40 instead of 30 mm or using 4 instead of 3 springs. The number, form, material type and arrangement of the elastomer springs can be used to control the natural frequency. As a rule, constructions with vulcanized fittings are used. Important: Static tensile loads on the elastomer springs should be avoided, as the elastomer can tear easily. A 8580/8590 should therefore never be suspended from elastomer springs. F-6 8580/8590 Vehicle-Mount Computer User Manual Appendix F: Mechanical Dynamic Loading Determining Insulating Effects F.7 Determining Insulating Effects A transmission function can be used to reach an exact calculation. However, we will not detail this function here. The following equation is based on this transmission function (very small damping factors of approx. 0.05) and is good for making estimates: Excitation Frequency Natural Frequency Degree Of Isolation 10Hz 20Hz 0.5 -33% Warning! Amplification 20Hz 20Hz 1 Warning!Resonance, approx. – 500% and greater! High amplification! 20Hz 2 0, no isolation Approx. 28Hz 40Hz 20Hz 2 66% 60Hz 20Hz 3 88% 80Hz 20Hz 4 93% Based on this table, we can clearly expect very good isolation for excitation frequencies that are twice as high as the system's natural frequency. Consequently, the amplitude of the reaction accelerations of the 8580/8590 still only reaches 66% of the amplitude of the excitation accelerations, which actually have an effect twice that of the natural frequency. The table also demonstrates the costs of achieving this, namely that all excitation frequencies below the natural frequency are amplified - to a maximum when resonance occurs. 8580/8590 Vehicle-Mount Computer User Manual F-7 Appendix F: Mechanical Dynamic Loading Determining Natural Frequencies Implication For Designing Computer Mounts: • Suppose that high energy excitation frequencies occur mainly in the region of the natural frequency of the 8580/8590 with its mounting, which can be found, for example, in a vehicle chassis tuned to a low frequency. In this case a spring mounting of the 8580/8590 should be avoided. • However, if high energy excitation frequencies occur mainly above the natural frequency, it is recommended that you use passive vibration isolation for the computer. This applies to unsprung fork lifts with solid rubber tires or for unbalanced machines with relatively constant and correspondingly high operating speed. Random samples of fork lift rotors were taken and the field excitations measured: Track: Warehouses with loading thresholds, potholes and pallet splinters. Amplitude of the excitation accelerations: Mean value ±1g to ±2g for all three spatial axes with peak values ±5g approximately twice each minute and ±8g to ±13g occasionally. Excitation frequencies: 5Hz to 200Hz These values can be assigned to operation class 5M3. Important: The basic 8580/8590 is designed for operation class 5M3. Depending on the equipment (e.g. 24-key keyboard) and mounting types (e.g. with elastomer springs), the operation class can be reduced to 5M2 or 5M1. If you have any questions regarding the permissible operation class, please contact the Psion technical service department. F.8 Determining Natural Frequencies There are several ways of determining a system's natural frequencies: • F-8 Take field measurements with acceleration sensors and frequency analyses (very timeconsuming, but produces accurate results for all spatial axes) 8580/8590 Vehicle-Mount Computer User Manual Appendix F: Mechanical Dynamic Loading Determining Natural Frequencies • Calculating the known static spring deflection using the following quantity equation (minimal measurement work, very good approximation) fe 15,8 xSt Where: fe xst = natural frequency in Hz = static spring deflection in mm = deflection of the center of gravity in the direction of the gravitational force (for example using a mechanical timer) Note: Further technical information can be found in the product documents provided by the elastomer spring manufacturers. 8580/8590 Vehicle-Mount Computer User Manual F-9 INDEX A adaptor cables (ignition & screen blanking) 25 antennas 28 APM switch-off count (Environment Config menu) 70 automatic computer renaming 79 automatic shutdown 120, 121, 122, 124 automatic shutdown with UPS 124 automatic switch-off settings 72 switch-on 73 switch-on/-off features 74 automatic switch-off (Environment Config menu) 70, 71 automatic windows logon (Config menu) 76 autostart folder (software keyboard) 89 B backlight run time (Environment Config menu) 70 bar code scanners, serial port 106 BootCmd 81 brightness control 56 C cable ignition adaptor 25 screen blanking adaptor 25 supply 25 cable cover, installing 39 call parameters (software keyboard) 87 CD ROM, external 35 chipset 109 cleaning housing 129 touchscreen 129 components (system resources) D-1 COM1 options 105 Config menus 69 BootCmd 81 Enhanced Write Filter 80 Environment 70 Front Panel Keyboard 75 Hardware Monitor 69 Info Header 84 settings 81 connectors, external 24 D defaults (Config menu) 82 desktop shortcut (software keyboard) 88 drivers automatic shutdown 124 sound (onboard) 113 VGA 110 Windows XP 111 Win XP 116 Win XP Prof (PS2) 117 XP Embedded 116 XP Embedded (PS2) 117 dynamic loading, mechanical F-1 E elastomer springs, installing F-3 enhanced write filter (Config menus) 80 ENTER key 58 Environment Config menu APM switch-off count 70 automatic switch-off count 70, 71 backlight 70 excess temp switch-off 71 hard switch-off count 71 ignition switch-on count 70 insufficient temp switch-off 71 last switch-off 71 power key switch-on/off count 70 run time 70 Environment config menu 70 error temp sensor 71 ESCAPE key 58 external connector pins 8580/8590 Vehicle-Mount Computer User Manual I Index COM1 serial port E-2 COM2 serial port E-2 keyboard & mouse E-1 RS232 E-3 USB E-1 external connectors 24 external devices, connecting 26 F front panel 10-key 53 25-key 53 4-key 53 Front Panel Keyboard settings, common 75 Front Panel Keyboard (Config menu) system settings 76 Front Panel Keyboard (Config menus) 75 fuses (power supply) 17 G grounding bar, attaching to cable cover 39, 40 H hard switch-off (Environment Config menu) 71 Hardware Monitor 69 heating module 120 I ignition adaptor cable 25 ignition switch-on count (Environment Config menu) 70 info header 84 installation 133 insufficient temp switch-off (Environment Config menu) 71 IP54 46 IP65 compliance 39 K keyboard types 33 keys defining (software keyboard) 95 End 58 ENTER 58 ESCAPE 58 function 57 II 8580/8590 Vehicle-Mount Computer User Manual Home 58 number 57 PgDn 58 PgUp 58 power key 56, 57 Scroll 58 L language (Config menu) 82 last switch-off (Environment Config menu) 71 LCD/CRT Interface 13 LEDs 56, 58 logon, automatic windows (Config menu) 76 logon using software keyboard 76 M mechanical dynamic loading 44, F-1 mechanical specs 10 mounting options 43 toolkit 44 vehicle applications 46 mouse, description of 34 N network adaptor 111 Windows XP driver, installing 111 network connector pins E-3 network settings 77 adaptor 79 automatic computer renaming 79 O operating system 63 CD-ROM 63 floppy disk 64 images 64 installing on hard drive/compact flash 63 preinstalled 63 Windows XP embedded 65 OS 63 P password protection 82 pin configuration 23 pin numbers & signals E-1 power key 56 Index power key switch-on/off count (Environment Config menu) 70 power supply 15, 45, 133 power supply fuses 17 Pre-Regulator B-1 printers, serial port 106 R registry key, creating (software keyboard) 88 S safety instructions general I screen blanking adaptor cable 25 Scroll key 58 sealing rings, installing 40 sensor, error temp 71 serial port bar code scanners 106 printers 106 serial ports 105 COM1 105 shutdown, automatic 120, 121, 122, 124 shutdown, automatic with UPS 124 signals & pins E-1 software keyboard 84 autostart folder 89 call parameters 87 configuring 92 desktop shortcut 88 exiting the program 90 installation 85 keys, defining 95 launching the program 87 logging on 84, 85 maximizing 101 operating 90, 91 registry key, creating 88 special keys 89 taskbar 90 types of keyboards 91 sound adaptor 113 Windows XP driver, installing 113 splash guard (cable cover) 39 supply cable 25 support, technical A-1 support services A-1 switch-off count APM 70 automatic 70, 71 hard 71 last 71 temp, error sensor 71 temp, excess 71 temp, insufficient 71 switch-off count, automatic 70, 71 switch-on count ignition 70 power key 70 system resources D-1 keys special keys 57 57 T taskbar, software keyboard 90 taskbar (software keyboard) 90 technical specifications 10 technical support A-1 temp, excess switch-off (Environment Config menu) 71 temperature (operating) 17 temp sensor, error 71 TFT display, memory effect 29 toolkit mounting bracket 44 touchscreen 13, 115, 134 Win XP & XP embedded, installing & calibrating 116 Win XP Prof & XP Embedded driver (for PS2), installing & calibrating 117 troubleshooting 133 U Uninterrupted Power Supply (UPS) C-1 UPS, automatic shutdown with 124 UPS (Uninterrupted Power Supply) C-1 V VGA adaptor 110 Windows XP driver, installing 110 vibration elastomer springs, installing F-3 isolation F-2 vibrations, resolving F-1 8580/8590 Vehicle-Mount Computer User Manual III Index W Windows XP, embedded 65 Win XP & XP embedded driver, installing & calibrating 116 Win XP & XP Embedded driver (for PS2), installing 117 wireless LAN settings 28 WLAN settings 28 worldwide offices A-1 10-key front panel 53 25-key front panel 53 4-key front panel 53 8580/8590 dimensions 19 model descriptions 9 mounting options 43 IV 8580/8590 Vehicle-Mount Computer User Manual