1
8
Download
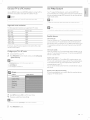
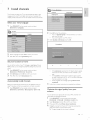
Update your TV software
t
Philips continuously
recommend
available.
tries to improve its products and we strongly
that you update theTV
_-
software when updates are
TV (e,g, 42PFL5603D/27)
Check
your
from
website. Use the type number of your
software
on the remote control and select [Installation]
[Current
info].
software
of the current software
>
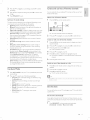
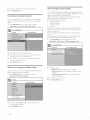
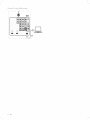
Copy the autorun.upg
t
?###################
file to the root directory
of the USB
software
upgrade (see 'Prepare for the software
upgrade' on page 27).
Connect
TV.
your USB device to the USB port on the side of your
TheTV scans the USB device for the updated software and
automatically
3
Installation
4
5
enters upgrade mode.
Read the on-screen instructions
continue with the installation.
When the software
device,
upgrade
and confirm
is complete,
that you want to
remove the USB
Turn the TV off and on again.
L_
for the software
related to your TV and download
the Zl P-file.
Prepare the software
L_
TV menu
:::ii_!!!!!!!!!!!!!!!!
device.
2
is
and go to www.phifips.com/
upgrade file to your PC.
Decompress
displayed.
Prepare
and software
4
Upgrade
version
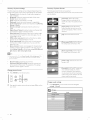
Press MENU/EXIT
L_ The version and a description
Find information
3
to find information,
current
i{i3iiiiii
On your PC, open a web browser
welcome.
the latest software
New software can be obtained from your dealer or downloaded
the www, phifips.com/welcome
the software
TheTV starts up with the new software.
upgrade
You require the following equipment:
A PC with web browsing capability.
•
•
An archive utility that supports
Windows
A USB memory
•
" Only
FAT/DOS
•
software
New
(e.g. WinZip
for
stick.
formatted
portable
can be obtained
www.philips.com/welcome
•
the ZIP-format
or Stufflt for Mac OS).
Use only software
memory
fi_om your
is supported.
dealer
or can be downloaded
fi_om the
website.
upgrades
that can be found
on the Philips
web site,
Warning
•
Do not
remove
•
If there
is a power
the USB device
drop
during
the TV, The TV continues
•
If you try to upgrade
confirmation
message
during
the
software
the upgrade,
the upgrade
to a software
is displayed,
do not
as soon
version
lower
Downgrade
upgrade.
remove
as the
the USB device
power
than the
to older
comes
currerlt
software
from
back.
version,
a
only in case of real
necessity.
•
If an error
occurs
during
the
upgrade,
retry
the procedure
or- contact
your
dealer
EN
27