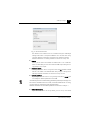
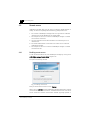
1
dLAN ® AVpro manager The Network Innovation dLAN®AVpro manager Version 6.0.0 © 2012 devolo AG, Aachen, Germany While the information in this manual has been compiled with great care, it may not be deemed an assurance of product characteristics. devolo shall be liable only to the degree specified in the terms of sale and delivery. The reproduction and distribution of the documentation and software supplied with this product and the use of its contents is subject to written authorisation from devolo. We reserve the right to make any alterations that arise as the result of technical development. Declarations and certificates of conformity for the products that were available at the time of going to press are included in the annex to this documentation. Trademarks dLAN® is a registered trademark of devolo AG. HomePlug® is a registered trademark of the HomePlug Powerline Alliance. Linux® is a registered trademark of Linus Torvalds. Mac® is a registered trademark of Apple Computer, Inc. Windows® and Microsoft® are registered trademarks of Microsoft Corp. devolo and the devolo logo are registered trademarks of devolo AG. All other names mentioned may be trademarks or registered trademarks of their respective owners. Subject to change by devolo without notice. devolo shall accept no liability for technical errors and/or omissions. Version (for detailed revision history, see Chap. 7.1) • dLAN AVpro manager Version 6.0.0 dated 2012-08-08 • dLAN 200 AVpro manager Version 5.2.1 dated 2011-10-21 • dLAN 200 AVpro manager Version 5 dated 2011-03-25 • dLAN 200 AVpro manager Version 4 dated 2010-01-29 • dLAN 200 AVpro manager Version 3 dated 2009-03-24 • dLAN 200 AVpro manager Version 2 dated 2008-11-10 • dLAN 200 AVmanager Version 1 dated 2008-04-14 devolo AG Charlottenburger Allee 60 52068 Aachen Germany www.devolo.com III Inhalt 1 Introduction ............................................................................................................3 1.1 What is dLAN? ........................................................................................................... 3 1.1.1 dLAN: Costs and transmission quality .......................................................... 3 1.1.2 Data security and radiation ......................................................................... 4 1.2 dLAN 'peer-to-peer' and 'MDU' operating modes ....................................................... 5 1.2.1 Compatibility mode ..................................................................................... 8 2 dLAN AVpro manager ............................................................................................9 2.1 Preliminary notes ....................................................................................................... 9 2.2 Installing and starting dLAN AVpro manager ............................................................ 10 2.2.1 First start .................................................................................................. 10 2.3 dLAN AVpro manager files ....................................................................................... 11 2.4 The dLAN AVpro manager user modes ..................................................................... 11 2.5 The user interface in simple mode ............................................................................ 12 2.5.1 Selection buttons ...................................................................................... 13 2.5.2 "Live View" window .................................................................................. 14 2.6 The user interface in expert mode ............................................................................. 15 2.6.1 The header bar menus ............................................................................... 17 2.6.2 The "dLAN network" window .................................................................... 26 2.6.3 The "Unused devices" list .......................................................................... 30 3 Profiles ..................................................................................................................31 3.1 About profiles .......................................................................................................... 31 3.2 Creating and editing profiles .................................................................................... 32 3.2.1 Default profile ........................................................................................... 33 3.3 Configuring profiles ................................................................................................. 33 3.3.1 Bandwidth ................................................................................................ 33 3.3.2 Setting transmitting power ........................................................................ 35 3.3.3 Transmission prioritisation ......................................................................... 37 3.3.4 Other settings ........................................................................................... 40 4 Network management .........................................................................................43 4.1 Managing dLAN networks using dLAN AVpro manager ............................................ 43 4.1.1 Notes on using database files .................................................................... 44 4.2 Creating networks .................................................................................................... 44 4.2.1 Entering devices into the database automatically ....................................... 45 4.2.2 Entering devices into the database using a text file .................................... 45 4.2.3 The components of a dLAN device ID ........................................................ 47 devolo dLAN AVpro manager IV 4.3 4.4 4.2.4 Creating a dLAN network .......................................................................... 49 4.2.5 Adding additional networks ...................................................................... 51 Managing networks ................................................................................................. 53 4.3.1 Finding dLAN devices ................................................................................ 53 4.3.2 Setting compatibility mode ........................................................................ 54 4.3.3 Updating firmware .................................................................................... 55 4.3.4 Assigning profiles ...................................................................................... 56 4.3.5 Update ..................................................................................................... 57 4.3.6 VLAN settings ........................................................................................... 60 Remote access ......................................................................................................... 62 4.4.1 Enabling remote access ............................................................................. 62 4.4.2 Calling up remote access ........................................................................... 63 4.4.3 Defining locations ..................................................................................... 64 4.4.4 Ending remote access ................................................................................ 64 4.4.5 Important notes on remote access ............................................................. 65 5 Troubleshooting ...................................................................................................67 5.1 Replacing defective devices ...................................................................................... 67 5.1.1 Replacing the device in the network (with the database of the network) ..... 67 5.1.2 Calling up the list of the replaced dLAN devices of the network .................. 68 5.1.3 Replacing the device in the network (without the database of the network ) 69 5.2 Resetting the dLAN device to factory defaults ........................................................... 71 6 Security and access protection ............................................................................73 6.1 Setting a network password ..................................................................................... 73 6.1.1 Default network password ......................................................................... 73 6.1.2 Individualised network password ............................................................... 74 6.1.3 Assigning the network password to a device .............................................. 75 6.2 Access protection ..................................................................................................... 76 6.2.1 Access protection for dLAN AVpro manager and databases ........................ 76 6.2.2 Access protection for devices ..................................................................... 77 7 Annex ....................................................................................................................79 7.1 Revision history ........................................................................................................ 79 7.2 Example of a device file ............................................................................................ 81 7.3 Status symbols of dLANs and dLAN devices .............................................................. 82 7.4 Keyboard commands ............................................................................................... 90 7.5 VLAN scenarios ........................................................................................................ 92 devolo dLAN AVpro manager V devolo dLAN AVpro manager 1 Before we get started What dLAN AVpro manager offers you Complex dLAN networks mean new challenges for you and other administrators when managing the devolo dLAN devices in the networks. Therefore, we have developed the devolo management software program dLAN AVpro manager, which supports you effectively while configuring and monitoring the various devolo dLAN devices in your dLAN network. dLAN AVpro manager determines the dLAN devices available on the transmission medium and manages them in a database. Aside from that, you can import dLAN devices via files in the database. In dLAN AVpro manager, you can map network architecture by means of "dragging and dropping" device icons without problems and true to reality. You can quickly and easily configure individual dLAN devices and network segments or networks by assigning them predefined configuration settings in the form of profiles. In addition, the dLAN AVpro manager shows you the status of the dLAN devices during live operation directly. The dLAN AVpro manager supports the following devolo devices: dLAN 200 AVpro 2 dLAN 200 AVpro WP dLAN 200 AVpro WP white dLAN 200 AVpro WP II dLAN 200 AVpro Wireless N dLAN 200 AVpro mini dLAN 200 AVpro DINrail dLAN 500 AVpro UNI dLAN 500 AVpro+ About this manual This manual contains six chapters, an annex and an index: Chapter 1 gives you an introduction to the basics of dLAN networking. Chapter 2 gives you an overview of the handling of the dLAN AVpro manager. Chapter 3 shows how you can set up and adapt configuration profiles. Chapter 4 explains the network administration with the dLAN AVpro manager. Chapter 5 provides notes on identifying and eliminating faults. devolo dLAN AVpro manager 2 Chapter 6 shows you how you can reliably secure transmission in the network and access to devices, networks and databases. In the Annex chapter, you can find additional useful information. The Index eases quick finding of necessary information. Icons Below, you will get to know some important symbols used in the manual which indicate the emphasis of certain text passages: This symbol indicates a very important message which you must observe in order to prevent risk of damage. This symbol indicates an important message. It is recommended to comply with it. This symbol indicates useful background information and tips. If you are happy with our dLAN AVpro manager, you should also get to know our other devolo products, which provide a very easy way to make your network more powerful and able to do more! If you have any further ideas or suggestions related to our products, please don't hesitate to contact us at: [email protected]! devolo on the Internet For detailed information on our products, visit www.devolo.com. Here you can download product descriptions, documentation and the current versions of the devolo software and the firmware for dLAN devices and find precise answers to frequently asked questions on devolo products, among other things. devolo dLAN AVpro manager Introduction 1 3 Introduction This chapter gives you a short overview of the various technologies for dLAN networking. 1.1 What is dLAN? dLAN ("direct LAN") is a high-performance alternative to the two currently widespread network technologies LAN and WLAN ("Wireless LAN"). dLAN, in contrast to ordinary LAN, requires no specially routed data cables, but rather uses the cable systems already locally available (mains electricity, TV/SAT coaxial networks, telephone/two-wire cabling) for very quick, secure and efficient data communication. 1.1.1 dLAN: Costs and transmission quality Because you do not need any network-specific data cables to operate dLANs, dLAN is a cost-effective and quickly implemented network technology. Depending on which transmission medium you use for your dLAN, every mains socket, coaxial socket or telephone connection socket can serve as a connection to the network. In this way, dLANs can be easily and comfortably implemented in any environment. The technology used in dLAN guarantees that the additional use of the lines by the dLAN has no repercussions on the additional applications on the respective lines. Alongside these advantages, dLAN provides a significantly higher transfer rate than current Fast Ethernet, an increased range and a higher network availability than all other current WLAN standards. The data to be transmitted are encoded by the dLAN device for transmission in the dLAN and modulated in a complex manner in a carrierband, which is transmitted by the dLAN devices over the already locally available lines (optionally electrical, coaxial or telephone lines) across a distance of many hundreds of metres. This transmission technology for digital data is widespread and reliable. It is put to use in different forms in many areas. The data in dLAN is transmitted according to the current "HomePlug AV / IEEE 1901" transmission standard. Similarly to the familiar "HomePlug 1.0" technology, "HomePlug AV" uses the household electrical or coaxial/telephone network to transmit data, audio and video, but provides a higher throughput than "HomePlug 1.0". "HomePlug AV" supports transfer rates up to 500 Mbps and moreover provides devolo dLAN AVpro manager 4 Introduction high-performance "Quality of Service" functions. Because of this, "HomePlug AV" is the ideal medium for all Triple Play services (data, language and video services) and for the wide range of online entertainment offered today. You can operate "HomePlug AV / IEEE 1901" and "HomePlug 1.0" alongside each other in the same line network. Data exchange between "HomePlug 1.0" networks and "HomePlug AV" networks is possible here by means of a bridge. You can create this bridge by plugging a "HomePlug 1.0" device and a "HomePlug AV" device into neighbouring mains sockets and connecting the two devices to one another via an Ethernet cable. 1.1.2 Data security and radiation The devolo dLAN devices encrypt the data transmission in accordance with the AESpro 128 standard. This standard combines a 128-bit triple AES encryption [AES=Advanced Encryption Standard] with a time lock when entering a new network password. AESpro 128 protects your dLAN network reliably from all unauthorised access. In principle, two possibilities for attack are conceivable. However, thanks to the AESpro encryption, these will always be unsuccessful: a) For example, a brute force attack could be launched as one way to determine the key for decrypting the data. This attack procedure systematically tests all possible combinations of letters and numbers in the chip. Due to the size of the keys used and the common transfer rate of a maximum of 100 Mbps ('Fast Ethernet') between chip and PC, statistically speaking, this method of attack only has any certainty of success after about 45,000 years on average. b) An additional attack possibility exists in systematic interception and analysis of the encrypted raw data. Through careful analysis of the encrypted raw data, you can determine the type of the key used and finally also determine the unencrypted raw data. This method cannot be used with dLAN technology, because the chip does not output any locked data on the network interface, but rather modulates the encrypted data before the output on the line. Even if the attacker manages to get access to the modulated data, this does not help him further, because he cannot demodulate the data. All devolo dLAN devices fulfil the currently valid, strict EU standards and conform to the current EMC standards for electromagnetic radiation. devolo dLAN AVpro manager Introduction 1.2 5 dLAN 'peer-to-peer' and 'MDU' operating modes There are two logical operating modes for dLANs. By default, dLANs are set up in "peer-to-peer" operating mode. Alternatively, there is also the 'MDU' operating mode, which you can configure with dLAN AVpro manager. a) In the dLAN peer-to-peer [P2P] operating mode, every dLAN device on the dLAN can communicate with every other dLAN device on the same dLAN directly. Within a P2P network, all dLAN devices are equal to each another in the hierarchy. In order to coordinate the communication between the individual end points of the network, the dLAN devices in the P2P network automatically determine the dLAN device which is easiest for all devices in this same dLAN network to reach. This device takes on the role of the Central Coordinator [CCo], which ensures efficient communication between the individual end points [peers] in the P2P network. In the graphic representation of the dLAN, the dLAN AVpro manager marks the CCo device with a special symbol (see Chapter 7.3). b) In the dLAN operating mode known as "Multiple Dwelling Unit" ["MDU"], one or more dLAN devices are assigned as 'slaves' to a single dLAN device as 'master', and together they form a shared, logical network segment. Each of these "MDU" dLAN segments always contains exactly one master and 1 to 63 slaves which are assigned to the master. In MDU operating mode, direct data communication is only between the slave and its master ["peer isolation"], and never from slave to slave. devolo dLAN AVpro manager 6 Introduction The following illustration shows an example of the differences between a P2P network architecture (left) and a MDU network architecture (right): Fig. 1: P2P network MDU network Depending on the capabilities of your dLAN devices to support different cable systems, you can use physically different cable systems as transmission mediums for dLAN networking, specifically power lines (PowerLine 'PLC'), TV/SAT coaxial wiring ('Coax') or telephone or two-wire cabling. Because these different cable systems have different transfer properties depending on their design, they are not compatible with one another. a) For dLAN networking via the existing mains supply ('PowerLine'), the 'HomePlug AV' standard is used. In this procedure, the respective dLAN device attenuates or blocks the transmission capacity in the critical areas of the commonly used frequency band between 1.8 to 30.0 MHz (or 1.8 to 67.5 MHz with the dLAN 500 AVpro UNI) as needed with notch filters, so that the dLAN cannot interfere with other wireless services (such as amateur radio). In addition, the effects of possible interference signals on the dLAN transmission are prevented by controlling the dLAN communication with a modulation table so that there is no dLAN transmission in the interference signal frequency bands. Additional filters (such as block filters) can be added as needed. By means of PowerLine, you can bridge distances of up to 200 metres, depending on the line quality and the attenuation factor. devolo dLAN AVpro manager The dLAN 200 AVpro Wireless N, dLAN 200 AVpro2, dLAN 200 AVpro WP, dLAN 200 AVpro mini and AVpro DINrail devices support transfer rates of up to 200 Mbps by PowerLine. The dLAN 500 AVpro UNI and dLAN 500 AVpro+ devices support dLAN transfer rates of up to 500 Mbps. Introduction 7 b) In coax networking, the existing TV/SAT antenna cable network is also used for dLAN transmission. Coax cables provide outstanding shielding due to their design. In comparison to PowerLine, they also enable a higher transfer rate, because with them, modifications to the transmission capacity are not required and neither can interference signals arise, the effects of which would otherwise have to be taken into account (for example, with corresponding settings in the modulation table). You can bridge distances of up to 600 metres with dLAN on a coax line. Networking via coax/TV is supported by dLAN 200 AVpro 2 and by dLAN 500 AVpro UNI, for example. c) When operating the dLAN via the telephone wiring and via two-wire lines (twisted pairs), distances of up to 600 metres can be bridged with good line quality. The quality of the shielding with this medium is usually below that of coaxial lines, but the signal quality is higher than that of PowerLine due to the twisted line wires. Networking via telephone wiring is supported by dLAN 200 AVpro 2 via F-RJ45 adapter and by dLAN 500 AVpro UNI, for example. The dLAN devices in a dLAN can commonly use only one transmission medium, which has to be identical for all dLAN devices of the respective dLAN. If you want to use multiple transmission media alongside one another at one location of use, you have to set up an individual dLAN on every individual transmission medium. You can connect these various dLANs via bridges with one another by connecting two dLAN devices, which each use different transmission mediums via an Ethernet cable. devolo dLAN AVpro manager 8 1.2.1 Introduction Compatibility mode dLAN AVpro manager enables not only the management of dLANs on the PowerLine and Coax/two-wire transmission mediums, but also provides a special compatibility mode, which simplifies the management of the dLANs substantially. You can use the compatibility mode to set which dLAN devices can be used in your dLAN: If you select the 'HomePlug AV mode' compatibility mode, only the devices that support dLAN via PowerLine continue to be provided in the dLAN AVpro manager for the respective network. If you select the compatibility mode 'Coax Mode' for the respective network, dLAN AVpro manager will only offer you dLAN devices which support dLAN via coaxial/two-wire line. The procedure for setting the compatibility mode is described in Chap. 4.3.2. devolo dLAN AVpro manager dLAN AVpro manager 2 dLAN AVpro manager 2.1 Preliminary notes 9 You have to install dLAN AVpro manager on a PC which is equipped with one of the following operating systems: Windows 8 Windows 7 Windows Vista Windows XP Ubuntu openSUSE The respective computer has to be equipped with an Ethernet interface. If the respective computer is connected to an Ethernet LAN, a second, independent Ethernet interface has to be configured for operation as management computer. dLAN AVpro manager supports the following devolo devices: dLAN 200 AVpro 2 dLAN 200 AVpro WP dLAN 200 AVpro WP white dLAN 200 AVpro WP II dLAN 200 AVpro mini dLAN 200 AVpro DIN rail dLAN 200 AVpro Wireless N dLAN 500 AVpro UNI dLAN 500 AVpro+ devolo dLAN AVpro manager 10 2.2 dLAN AVpro manager Installing and starting dLAN AVpro manager It is best to start the installation program for dLAN AVpro manager directly from the product CD. During the installation, follow the installation program instructions step by step. After the installation is finished, you can find the installed files in the directory tree Programs devolo dlanavpromanager. During the installation, a link is created on your desktop to dLAN AVpro manager in the program group devolo of the Windows Start directory. You can start dLAN AVpro manager by double-clicking on the program icon or by clicking on the entry in the program group. 2.2.1 First start During the first startup of dLAN AVpro manager, the following window opens: Fig. 2: Window upon first startup of dLAN AVpro manager Upon first startup of dLAN AVpro manager, it starts with the following default settings: Network name: "new AVpro network" Network mode: "peer-to-peer" Database file: "config.db" devolo dLAN AVpro manager dLAN AVpro manager 11 You have the following options here: You retain the default settings by simply clicking on OK. can change these settings: You can change the name of the network to be created. You can change the network mode ('MDU' or 'peer-to-peer') of the network to be created. You can select a different database file, which dLAN AVpro manager should use from now on. Upon every subsequent startup, the dLAN AVpro manager reopens the database that was open during the most recent closing of dLAN AVpro manager. Your settings are made effective by clicking on OK. You 2.3 dLAN AVpro manager files dLAN AVpro manager uses the following own files: dLAN AVpro manager creates the config.db database file the first time the application is started. From now on, the data of all dLAN devices managed is saved in this file until another database file is selected. The database file in Windows 7 is in the directory User <user name> AppData Roaming devolo dLAN AVpro manager. This directory will be called "data directory" in the following. When working with dLAN AVpro manager, you can create additional database files as needed. dLAN AVpro manager creates these database files in the data directory. In some versions of Windows, the Application Data directory is hidden by default. In Windows 7, you can make the directory visible by clicking in Windows Explorer on the menu item Folder and Search options in the Organizing menu and then scrolling under Folder options/View to files and folders hidden under the category Hidden Files and Folders, where you can activate Show hidden files, folders and drives. 2.4 The dLAN AVpro manager user modes dLAN AVpro manager offers two different user modes which differ from one another in their user interface and the configuration options offered. devolo dLAN AVpro manager 12 dLAN AVpro manager Simple mode is enabled by default (see Chap. 2.5). It provides an overview of the dLAN devices connected to the transmission medium in a "Live view" and shows which of them are connected with one another in dLANs and which do not belong to a dLAN. The expert mode is significantly more powerful (see Chap. 2.6). In this mode, you can open and create databases, configure networks and devices and create, edit and assign profiles for the configuration of networks and devices. To switch to the expert mode, the user clicks on the Expert mode button in simple mode. 2.5 The user interface in simple mode After its first startup, dLAN AVpro manager always starts in simple mode. This mode provides the user with a "Live View" window, which gives an overview of all manageable dLAN devices that are active on the local dLAN transmission medium. The view in this window is organised into the "connected devices" and "accessible devices" lists. The "connected devices" list: Here, all devices are displayed that belong to a network (peer-to-peer or MDU network), as well as all locally connected devices. This list shows the name, the MAC address, the data traffic currently possible for the device (in Mbps) and its product designation. If you move the mouse pointer to a device in the list, an information window will open for five seconds. It will show you the MAC address, the type, the software version and the firmware version for the device. The "accessible devices" list: Here, all devices are listed that are reachable via the dLAN transmission medium but do not belong to a network. This list shows the designation and the MAC address for every device. devolo dLAN AVpro manager dLAN AVpro manager 13 By clicking on the Refresh view button (see Chap.2.5.1), you update the representation of these lists. Fig. 3: User interface in the simple mode 2.5.1 Selection buttons In the simple mode of dLAN AVpro manager, the following selection buttons are available: Simple mode If the dLAN AVpro manager is not in simple mode, you can change it to simple mode by clicking on this button. This button is active after every startup of the manager by default. Expert mode By left-clicking on this button, the dLAN AVpro manager switches into expert mode. This mode enables the management of dLAN networks and the corresponding dLAN devices (see Chap. 2.6). Refresh view By left-clicking on this button, you update the view of the lists of dLAN devices in the "Live View" window. devolo dLAN AVpro manager 14 2.5.2 dLAN AVpro manager "Live View" window In simple mode of the dLAN AVpro manager, the "Live view" window is the most important element. It provides you with lists of all the connected, manageable dLAN devices on the local dLAN transmission medium and even sorts according to devices which form dLANs with each other ("connected devices") as well as according to devices which do not belong to any network, but can be accessed by the dLAN AVpro manager ("accessible devices"). You can open and close corresponding lists by left-clicking on the + symbol in front of the list designation. Fig. 4: "Live View" window in simple mode In the "Live View" window, the MAC address, transfer rate for sent/received data, and the type and software designation for every device is shown in the "Connected devices" list. In the "accessible devices" list, the designation (assuming it already exists) and MAC address are shown. The status symbol shows the current status of the respective device. You find the lists of status icons for the networks and the dLAN devices along with their explanations in Chap. 7.3. devolo dLAN AVpro manager dLAN AVpro manager 2.6 15 The user interface in expert mode If you click on the "Expert mode" selection button, dLAN AVpro manager switches the user interface to expert mode. Fig. 5: User interface in expert mode The expert mode user interface consists of the following elements: The header Shows the name of the SQL database file used by dLAN AVpro manager. (see Chap. 2.6.1.2). The header with the four menu buttons: Database (see Chap. 2.6.1.1) Network (see Chap. 2.6.1.3). Devices (see Chap. 2.6.1.4). Help (see Chap. 2.6.1.5). The centre strip with the six selection buttons Simple mode Here you change to simple mode (see Chap. 2.5) Expert mode Refresh view Edit/create profiles Here you can create, edit and delete configuration profiles. These functions can also be called up via the database menu (see Chap. 2.6.1.1) and via the context menu for the devices in the network (see Chap. 4.3.4.3). devolo dLAN AVpro manager 16 dLAN AVpro manager Add network Here you can create a new network. This function can also be called up via the network menu (see Chap. 2.6.1.3) Remote access Here you can start remote configuration access to your dLAN networks. This function can also be called up via the database menu (see Chap. 2.6.1.1) Detailed information on remote access can be found in Chap. 4.4. The three display windows: dLAN networks [left] In this window, you can select one of the networks saved in the database to be displayed, configure settings for the network and the devices contained in it, add or remove devices, and replace existing devices. "Live View" [above right] This window provides you with lists of all the devices connected to the local dLAN transmission medium, sorted by devices that are connected with each other in dLANs or that are locally available ("connected devices"), and by devices that belong to no network, but are accessible for the dLAN AVpro manager ("accessible devices"). You can also find this window on the user interface of the simple mode (see Chap. 2.5.2). "Unused devices" [below right] This window provides you with a list of all dLAN devices that are known in the opened database, but are not currently assigned to any dLAN and thus are "free". You can assign these devices to an existing dLAN, export them to a list to be able to transfer them to a different database, or delete them as needed. You can adapt the size of the display window by moving the mouse cursor on the window frame, which changes the cursor to a double arrow. By left clicking, you can move the frame however you like by pressing the left mouse button. devolo dLAN AVpro manager dLAN AVpro manager 2.6.1 17 The header bar menus You can also call up menu items in the menus described below (Database menu, Network menu, Device menu, Help menu) using keyboard commands. You can find the respective command in the description of the respective menu item. A complete list of the keyboard commands is found in the Annex (see Chap. 7.4). 2.6.1.1 The database menu By clicking on "Database" in the header bar, you open the Database menu. Fig. 6: Database menu This menu provides you with the following options: New By clicking on the menu item or using the key combination [Ctrl-N], you can create a new database file and save it in a directory of your choice. By default, the data directory is selected as the storage location (see Chap. 2.3). Open By clicking on the menu item or using the key combination [Ctrl-O], you can select and open a database file for working with the dLAN AVpro manager. The dLAN AVpro manager loads this database file upon every start, until you open another database file in this menu item. dLAN AVpro manager password By clicking on the menu item or using the key combination [Alt-W], you can define a database password for your dLAN AVpro manager (see Chap. devolo dLAN AVpro manager 18 dLAN AVpro manager 6.2.1). Fig. 7: Defining database password You have to enter the respective password in the "Password" and "Confirm password" lines. The OK button below the input fields is active only if both entries are identical. By clicking on OK, the password is applied. With the password, you simultaneously protect your dLAN AVpro manager, as from now on it will only boot up after the correct database password is entered if the password-protected database is selected in dLAN AVpro manager. Import device list By clicking on the menu item or using the key combination [ALT-I], you can import a device list into the database (see Chap. 4.2.2). The device list is a text file that contains the IDs of dLAN devices in a specified format (see example in Chap. 7.2). Export free devices By clicking on the menu item or using the key combination [ALT-E], you can export the IDs of the dLAN devices that are currently unassigned to a text file. You can find these devices in the "Unused devices" list. You can name this file whatever you like and save it in a directory of your choice. By default, the directory selected is My Documents. The file is a text file with the following structure: Security ID,MAC address[,description] You can find an example file in Chap. 7.2. devolo dLAN AVpro manager dLAN AVpro manager 19 Edit profile By clicking on this menu item or using the key combination [ALT-P], you can create, edit and delete profiles. A profile is a container for settings of various types and is identified by its unique name. In Chap. 3, you can find detailed descriptions on the configuration of profiles and on the setting options in profiles. You can configure as many profiles as you like. You can assign a profile of your choice to the selected network in the "dLAN network" window (see Chap. 4.3.4.1). In the selected network, you can assign devices a profile of your choice (see Chap. 4.3.4.3). Exit Clicking on this menu item or using the key combination [ALT-F4] closes the dLAN AVpro manager. 2.6.1.2 Some notes on the database files The dLAN AVpro manager stores all information on the networks, network segments, dLAN devices and profiles that have been registered with it in an SQL database file. This SQL database file is named config.db. The database file in Windows 7 is in the directory User <user name> AppData Roaming devolo dLAN AVpro manager. In this directory, the dLAN AVpro manager also saves all additional databases. Because the dLAN AVpro manager already writes all information upon their entry in the database file, the explicit saving of the database file upon closing the dLAN AVpro manager is omitted. You can create a new database based on an existing database by copying an existing database file. You can send database files, for example on a data carrier or by e-mail. devolo dLAN AVpro manager 20 dLAN AVpro manager The databases generated with the older versions of dLAN AVpro manager are automatically converted to the current database format upon opening them for the first time with the current dLAN AVpro manager. The dLAN AVpro manager produces a message about this process. Please note that the converted database then can only be used with the current version of dLAN AVpro manager. 2.6.1.3 Network menu Clicking on "Network" in the header opens the Network menu. Fig. 8: Network menu This menu provides you with the following options: Add Clicking on the menu item or using the key combination [Ctrl-T] creates a new dLAN network in the database. You must enter a name for the dLAN network and select the network mode for this dLAN (P2P or MDU). You can also access this function by clicking on the Add network button. devolo dLAN AVpro manager dLAN AVpro manager 21 Fig. 9: Add new dLAN network The network is then added in the list of networks that your dLAN AVpro manager administers in the opened database. You can select and configure these networks individually in the expert user interface for display. Detailed information on creating networks can be found in Chap. 4.2. Remove Clicking on the menu item deletes the dLAN shown in the "dLAN networks" window after you have confirmed the dLAN AVpro manager security prompts in this respect. Automatic update Clicking on the menu item or using the function key F7 updates all dLAN devices in all dLANs in the database after every change in settings automatically. Detailed information can be found in Chap. 4.3.5.3. Network password By clicking on the menu item or using the key combination [Ctrl-W], you can modify the network password for the dLAN. The network password is automatically generated by dLAN AVpro manager. It is the same for all dLAN devices on a dLAN, so that the dLAN devices can recognise each other as components of the respective dLAN. Detailed information on the network password can be found in Chap. 6.1. Remote maintenance If you are authorised to do so by devolo, you can call up the remote devolo dLAN AVpro manager 22 dLAN AVpro manager access to your dLAN network from another location by clicking on the menu item or using the key combination [Alt-R]. In the Location field, select the location of the respective dLAN network. Enter your devolo Connect ID and click on Connect. Fig. 10: Dialog for remote maintenance Additional information can be found in Chap. 4.4. Define location In this menu item, you define the location of the opened dLAN network. The possible locations are entered beforehand in the remote access dialog's location field (see Chap. 4.4.3). If no entries were made there, you cannot select anything in the menu item Define location; in this case, the network opened is always local. devolo dLAN AVpro manager dLAN AVpro manager 2.6.1.4 23 Device menu By clicking on "Devices" in the header bar, you open the Device menu. Fig. 11: Device menu This menu provides you with the following options: Add device Clicking on the menu item or using the key combination [Ctrl-+] inserts a dLAN device in the database which is not yet connected to the transmission medium. Fig. 12: Add device You add the device to the database by entering the ID of the device. This ID consists of the following components: devolo dLAN AVpro manager 24 dLAN AVpro manager The name and the description of the dLAN device (this information is optional) The security ID of the dLAN device The MAC address of the dLAN device The location of the device (for remote access) You can find the MAC address and the security ID of the device on the device label on the housing underside. The possible locations have to be predefined in the location field of the remote access dialog (see Chap. 4.4.3). If nothing has been entered there, you cannot select anything in the Location field of the device ID . Search devices ... By clicking on the menu item or using the key combination [Ctrl-F], you can search your network for the correct dLAN devices by selecting/inputting certain search criteria. List of replaced devices ... By clicking on the menu item or using the key combination [Ctrl-R], you can generate a list of dLAN devices which have been replaced by other dLAN devices in your dLAN. The replaced dLAN devices can then be deleted from the database. Reset device Use this menu item if you want to reset multiple locally connected dLAN devices that are not in the "Unused devices" menu list to their factory default settings. In this case, the MAC addresses of these locally connected devices are shown in a list. Select a device to reset it to its factory defaults by selecting its MAC address in the list. Devices that are not in the "Unused devices" list must be reset via their context menu (see Chap.5.2). Configure device This menu item cannot yet be activated in this menu. Its function corresponds to the menu item Configure device in the context menus of the device in the "Unused devices" list (see Chap. 5.1.3). Refresh The function of this menu item corresponds to the function key [F5]. With it, you can update the view of the devices in the lists. devolo dLAN AVpro manager dLAN AVpro manager 2.6.1.5 25 Help menu By clicking on "Help" in the header bar, you open the Help menu. Fig. 13 : Help menu This menu provides you with the following option: About dLAN AVpro manager By clicking on the menu item, you open a window which shows you the version information for your dLAN AVpro manager: Fig. 14: dLAN AVpro manager version information devolo dLAN AVpro manager 26 2.6.2 dLAN AVpro manager The "dLAN network" window The dLAN AVpro manager shows you the network structure for the selected dLAN in the "dLAN networks" window with the list of the corresponding dLAN devices. It also shows the tabs for the other networks which are available in the database and are opened by clicking on their tab. Depending on the network mode of the dLAN shown ('MDU' or 'P2P'), the network structure shown provides the following elements: a) The dLAN name This name is at the uppermost position of the structure and represents the logical root of the network tree. The default name is: new AVpro network You can change the name of the network by right clicking on the name or by selecting the option Rename from the context menu as desired. b) The network tree hierarchy of the dLAN It is dependent on the selected network mode ('MDU' or 'P2P'): devolo dLAN AVpro manager If the network is a MDU network, then a new dLAN network segment will always be opened on the second logical hierarchy level with a single dLAN device as master. All other dLAN devices in this segment are, by definition, slaves. In MDU mode, you can create as many new MDU segments as you want. The first dLAN device that is created in the new MDU segment is thus automatically the master of the respective MDU segment. The third logical hierarchy level in the MDU network tree includes exclusively dLAN devices that serve as slaves to the master. There are no additional sublevels in MDU mode. In MDU mode, you can open and close the detailed representation of the affected segment by clicking on '+' or '-' to the left next to the network name or the network segment (master). dLAN AVpro manager 27 Fig. 15: View of an MDU network segment with three slaves If a P2P dLAN contains a dLAN device which is connected to the dLAN AVpro manager computer via Ethernet, the respective dLAN device is highlighted in the network tree. This makes all remaining dLAN devices appear to be in a lower hierarchy level. Nevertheless, in this dLAN, all dLAN devices are completely equal to each other. One of the dLAN devices is however automatically assigned the role of the Central Coordinator [CCo] in dLAN. For this purpose, the various P2P dLAN devices automatically choose as the CCo the device that is easiest for all other devices as a whole to reach. This device is graphically highlighted in the network representation of dLAN AVpro manager by a unique symbol (see Chap. 7.3). Fig. 16: View of a P2P network If you create a dLAN with the dLAN AVpro manager, the manager then takes into account the structure of the respective dLAN automatically. If you for examdevolo dLAN AVpro manager 28 dLAN AVpro manager ple drag an available device from the "Unused devices" list onto the network name of a new, empty segment in MDU dLAN, the respective device automatically becomes master of that segment due to this action. If you would like to drag the device to a segment that already has a master, the device is automatically created as a slave in the respective segment. In the network tree, detailed information on the respective device is displayed on the right of the dLAN device icons: MAC addresses in the form of six hexadecimal numbers separated by colons Possible gross receive data rate [Rx] (Mbps) Possible gross data transmission rate [Tx] (Mbps) Profile name (if assigned) You sort the devices in the network tree by clicking on the MAC address or profile. Clicking again on the respective term reverses the sort direction. Even if the final location of use for a dLAN device in its dLAN is not yet established, you should immediately assign the device an individual description so that you can recognise it more easily. If you have not yet made these specifications when setting up the network in the dLAN AVpro manager, you can retrieve this description at any time by right-clicking on and opening the window for the device properties to edit the description or change the device name. The device icon for every dLAN device in the dLAN is automatically adapted to the current status of the device when starting dLAN AVpro manager. In this way, dLAN AVpro manager enables you to have a quick overview of the status of all dLAN devices in the selected network. The status display of the devices in the network is refreshed in the Device menu (click on Refresh) or click on the Refresh view action button, or use the F5 function key. devolo dLAN AVpro manager dLAN AVpro manager 29 Selecting the network to be displayed dLAN AVpro manager can manage many dLANs in a database. The names of these dLANs appear in the tabs on the upper edge of the "dLAN network" window. You open the representation of a dLAN by clicking on the respective tab. Alternatively, you can use the drop-down menu on the right upper edge of the Network window. You can change the order of the tabs by moving the tabs to the left and right. Fig. 17: Network selection Aside from that, you can browse through the tabs with the key command [CtrlTab] to move to the right or with [Ctrl-Shift-Tab] to move to the left. devolo dLAN AVpro manager 30 2.6.3 dLAN AVpro manager The "Unused devices" list The "Unused devices" list includes all dLAN devices that are not assigned to any of the networks which are managed in the opened database. In this list, the security ID is also displayed in addition to the MAC address of each device. If the device ID also contains the name of the device, the name is likewise displayed. By clicking on a column header on the list, it is sorted by the values in the respective column. You reverse the sorting sequence by clicking again on the same column header. devolo dLAN AVpro manager Profiles 3 Profiles 3.1 About profiles 31 The task of configuring complex dLAN networks can become a laborious and lengthy one due to the variety and quantity of the dLAN devices to be configured. In the individual dLAN devices of the same dLAN segment or network, sometimes devices must have the same and sometimes similar configurations. If a global change is to be carried out in the dLAN (for example, adapting the dLAN's internal transmitting power in order to prevent the interruption of another service network-wide), usually all dLAN devices have to be reconfigured individually. You can make this work significantly easier by creating suitable configuration profiles with dLAN AVpro manager and then saving every profile under its own unique name. Then you can quickly and easily assign these profiles as needed to individual dLAN devices, the MDU segments made up of one master and multiple slaves, or even complete network trees. In this, the dLAN AVpro manager provides an ideal basis for an effective application of profiles in all portions of the dLAN, because it inherently groups dLAN devices into networks and sets up network hierarchies. You can predefine the following basic properties of the dLAN devices in the network in configuration profiles: The limitation of the transfer bandwidth and the activation of the multisegment mode The attenuation of the transmitting power in certain dLAN frequency bands, in order to prevent interference with other services The prioritisation of data packets either using the VLAN header bits, or via the MAC address of the device or via the TCP/UDP port number. Disabling certain keys, LEDs and the PowerSave mode in some dLAN device families. Start by mapping the various requirements in your network or its segments to different configurations. Then save the settings for these configurations as profiles with a unique name. Then, assign these profiles to individual devices, certain dLAN segments or an entire dLAN network as needed. Chap.4.3.4 includes additional information on this topic. devolo dLAN AVpro manager 32 3.2 Profiles Creating and editing profiles To create a new profile or edit an existing one, open the dialog window for configuring profiles in the Database menu by clicking on the Edit profile menu item. Fig. 18: Profile dialog On the left side, you can see the list of existing profiles. Clicking on Create profile opens a new profile. Enter a name for the new profile and click on OK. A profile is deleted by selecting the profile name and clicking on Delete. If the profile to be deleted is currently assigned to networks, network segments or dLAN devices in the database, you first have to confirm a security prompt. With this confirmation, the respective dLAN devices are reset to their basic settings. If the profile to be deleted is currently not assigned to a network, network segment or dLAN device, it is deleted immediately. If the Automatic Update function is activated in the network menu, all changes that are carried out in the profile are effective immediately. devolo dLAN AVpro manager Profiles 3.2.1 33 Default profile With some dLAN devices, device actions can be queried (e.g. deactivating the PoE function, VLAN settings); to implement these, a profile has to be assigned to the respective devices. If the respective device has no profile assigned and a device action is called up for the device, the dLAN AVpro manager automatically generates a suitably configured "Default profile" and assigns it to the respective device. If the database already has a "Default profile", the dLAN AVpro manager uses this profile. If the respective device already has another profile assigned, this is used. Changes to the "Default profile" have effects on all device actions which are carried out in devices without assigned profiles. 3.3 Configuring profiles To configure a profile, select it from the list. If no profile exists yet, create a new profile. You can carry out settings in the following areas for the selected profile: Bandwidth Transmitting power priorities MAC addresses/port priorities Other These settings are presented in detail in the following: VLAN 3.3.1 Bandwidth 3.3.1.1 Multi-segment mode If there are multiple dLAN networks at the location divided logically into MDU segments operated independently of one another and the masters of these MDU segments are physically close to one another, this can lead to a crosstalk between neighbouring segments. So that this crosstalk does not lead to a reduction of the available transfer bandwidth, you can activate the multi-segment mode for the respective profile with the Activate multi-segment mode switch. It devolo dLAN AVpro manager 34 Profiles is an advanced management scheme with which the impending reduction of transfer bandwidth can be prevented. A side-effect of multi-segment mode can be a slight reduction of the attenuation budget, which can have adverse effects on the most distant slave's maximum permitted distance. 3.3.1.2 Limit bandwidth You can limit the bandwidth of dLAN devices depending on the profile assigned to them as needed in order to enable a uniform transmission quality of content to all dLAN devices. For this purpose, you can limit the data rates in data received by a dLAN AVpro (downstream) and data sent (upstream) separately. Fig. 19 : Bandwidth configuration You can set the values for the downstream and the upstream bandwidth separately. You can do so using either the arrow key at the right of the input field or the direct entry of the numerical value. Values between 64 and 16,384 kbps are allowed, in increments of 64 kbps. dLAN AVpro manager automatically rounds the numerical values entered. They disable the bandwidth limitation by entering the value '0'. This value is the default value. devolo dLAN AVpro manager Profiles 3.3.2 35 Setting transmitting power dLAN devices transmit their data according to the current HomePlug AV standard in the frequency band between 1.8 and 30 MHz (or 68 MHz for dLAN 500 AVpro devices). The emission of these signals via the power cables used for transmission can in some circumstances disrupt other sensitive services (such as amateur radio), which work in this frequency band. For that reason, in transmitting power management, you can attenuate or even completely block certain carrier frequencies and frequency bands ('notching') in the dLAN devices' transfer bandwidth in order to eliminate their disruptive effects. If dLAN is transmitted over coax lines ('Coax mode'), no radiation can be emitted due to the design, but interference in the frequency band above 30.0 MHz is conceivable. If such interference occurs here, you should use a coaxial filter. Clicking on transmitting power opens a diagram which shows you the complete frequency band occupied by HomePlug AV devices on the X axis and the currently set attenuation levels in this frequency band on the Y axis. Values > 0 dB are not possible. In the frequency input field, enter the frequency band for which the attenuation is to be changed in the format "xx.x - yy.y". Then establish the desired attenuation in the next input field to the right, Lowering [in dB]. The size of the attenuation always has to be entered relative to normal transmitting power (=0 dB attenuation/gain). Because the dLAN AVpro manager user interface is structured in accordance with international requirements, it uses a dot for the entry of decimal breaks instead of a comma. If decimal breaks are entered with a comma, the dLAN AVpro manager automatically changes the comma to a dot. devolo dLAN AVpro manager 36 Profiles Fig. 20: Configuring attenuation of carrier frequency ranges Examples: - If you want to decrease the transmitting power by 10 dB, enter the value "-10.0" in the Lowering field. - If you want to completely suppress the signal in a specified frequency band, enter the value "-30.0" in the Lowering field. The tab key conveniently moves the cursor from one input field to the next while entering the values. In order to remove an entry or to remove the entered attenuation, click the red X to the right next to the respective entry. Your changes are shown immediately in the frequency diagram. After clicking on OK, the settings are taken over in the profile and the profile is closed. devolo dLAN AVpro manager Profiles 3.3.3 37 Transmission prioritisation Some applications (such as IPTV and VoIP) place high demands on transmission quality in the dLAN network. In order to guarantee an uninterrupted transmission of this multimedia content, you can configure your dLAN network so that certain types of data packets are transmitted with priority [through corresponding Quality of Service settings]. 3.3.3.1 Priority levels and VLAN prioritisation The dLAN standard inherently includes four unique, basic priority levels for data packets to be transmitted. These are in ascending priority: "bulk" (lowest priority) effort" (priority is higher than "bulk") "video" (priority is higher than "best effort") "voice" (priority is higher than "video") You attain prioritised transmission of the corresponding data in the network by assigning these priority levels to the corresponding priority values of the Ethernet frames (VLAN). "best The default settings for the transmission prioritisation are optimally co-ordinated to the requirements of all typical application scenarios (for example, the triple play services Internet, VoIP and IPTV). You should make changes to these settings only if you possess the required detailed technical knowledge! The prioritised transmission of data in a network requires that the respective standard is supported by all the devices available in the network (such as switches, routers, etc.). By setting up VLANs, you can create virtual local networks which fulfil your security and performance requirements reliably. The three VLAN priority bits of the expanded standard Ethernet frame are used for this. With these bits, values '0' to '7' can be configured; therefore, within the dLAN network, up to eight different priority values are possible. devolo dLAN AVpro manager 38 Profiles You can assign each of these eight priority values to one of the four listed dLAN priority levels ("bulk", "best effort", "video", "voice") by selecting the priority level you would like in the drop-down menu for the corresponding VLAN. Fig. 21: Example of assigning the dLAN priority levels to the VLAN priority values '0' to '7' To confirm your entry, click on OK. Note that within the profile, the bandwidth settings, the assignment of the individual VLANs to the dLAN priority levels and the assignment of the dLAN priority levels for devices and ports have to be designed based on requirements and must match each other. devolo dLAN AVpro manager Profiles 3.3.3.2 39 Prioritisation via MAC address and port number Moreover, the dLAN offers additional options to configure a prioritisation. You can for example link the MAC addresses for dLAN devices with a dLAN priority individually. You can also link target port numbers with a dLAN priority in any way you like. Enter the desired target address and target port number and, from the corresponding drop-down menu, select the priority level for which the data transmission should be given preference. Fig. 22: Assignment of dLAN priority levels to certain devices / ports To confirm your entry, click on OK. To delete the entry for a target MAC address or for a target port number, rightclick on the red X at the respective entry. devolo dLAN AVpro manager 40 3.3.4 Profiles Other settings In the Other tab, you can activate/deactivate some functions of certain dLAN devices, such as the encryption button or all LEDs The Ethernet energy-saving feature. some For technical reasons, these functions are not available for all dLAN devices. 3.3.4.1 Switching off the encryption button Some dLAN devices have an encryption button with which secure communication can quickly and easily be set up in small networks. If such devices are used in large network environments and encryption is active in the device due to the button being pressed accidentally, network operation can be disrupted. You can deactivate the encryption button by setting the checkbox Deactivate encryption button and then assigning the profile to the affected device. Shutting off the encryption button is supported by the following dLAN devices: dLAN 200 AVpro Wireless N 200 AVpro WP II dLAN 200 AVpro mini dLAN 500 AVpro+ dLAN 200 AVpro DINrail dLAN devolo dLAN AVpro manager Profiles 41 Fig. 23: Profile dialog "Other" To confirm your entry, click on OK. 3.3.4.2 Dimming / deactivating LEDs Because the flashing status LED is sometimes unwanted, some dLAN devices have the option to dim or permanently shut off their status LEDs. To dim the LEDs, enable the Dim button. To turn off the LEDs, enable the Disable button. To turn on the LEDs, enable the Enable button. To confirm your entry, click on OK. devolo dLAN AVpro manager 42 Profiles Not all dLAN devices support dimming your LEDs. In addition, some dLAN devices do not allow all LEDs to be switched off. Details can be found in the manual for the respective device. 3.3.4.3 Turning off energy saving mode Some dLAN devices offer an energy saving mode ('Standby'). If the energy saving mode for the device is activated, its Ethernet interfaces are switched off if after a certain time there has been no further data transmission over the interfaces. This saves energy. In some scenarios, the dLAN devices have to continuously be accessible via Ethernet. In this case, you have to block the energy saving mode in these devices by checking the Disable energy saving mode box. To confirm your entry, click on OK. Switching off the energy saving mode is supported by the following dLAN devices: dLAN 200 AVpro Wireless N 200 AVpro WP II dLAN 200 AVpro mini dLAN 500 AVpro+ dLAN 200 AVpro DINrail dLAN 500 AVpro UNI dLAN If the energy saving mode in a dLAN device is activated, there is a risk that network component function will be negatively impacted by disabling the Ethernet interfaces. If the respective dLAN device is connected via Ethernet to the computer on which dLAN AVpro manager is running, the management system, for example, is disconnected from its dLAN and can consequentially neither be configured nor provide information on the status of the network. devolo dLAN AVpro manager Network management 43 4 Network management 4.1 Managing dLAN networks using dLAN AVpro manager You can organise dLAN devices into MDU networks and peer-to-peer networks (see Chap.1.2) very conveniently using dLAN AVpro manager. In MDU networks, you can split an entire dLAN into different logical dLAN segments by assigning dLAN devices (as master or slave). You can save the properties shared by the dLAN devices of these segments (data prioritisation, transmitting power, transmission mode, etc.) in the form of profiles (see Chap. 3). You can assign profiles to the dLAN network, specific dLAN segments or individual dLAN devices as needed by simply clicking a mouse. dLAN AVpro manager operates in a consistent, database-oriented manner: All information about created networks, the dLAN devices they contain and the available configuration profiles is stored in the currently opened database. dLAN AVpro manager can only manage a network if a dLAN device from the associated network is connected locally (i.e. via Ethernet) to the management computer. If a management computer is intended to manage multiple networks, a dLAN device has to be connected to the management computer for each network (ideally via an Ethernet switch). dLAN devices can only be connected to the management computer via the management computer's local connection to the dLAN. It must be ensured that there are no other bridges to other simultaneously operated networks (Fast Ethernet, WLAN, etc.) on the computers connected to the dLAN. Otherwise unintended simultaneous connections via other networks can be made, which can cause severe disruptions in the entire network (e.g. due to a broadcast storm). devolo dLAN AVpro manager 44 4.1.1 Network management Notes on using database files You can create multiple databases as needed to map different locations or sites separately. For more information on this topic, refer to Chap. 2.6.1.2. You can then make further configuration changes to dLAN networks structured this way as needed (e.g. defining the compatibility mode for the network and assigning the networks customised profiles). For more information on this topic, refer to Chap. 4.3. In order to secure data transmission in the dLAN and to structure logical dLAN segments, dLAN AVpro manager assigns each network a network-specific network password shared by all dLAN devices belonging to the same respective network. You can also adapt this network password to your own needs (see Chap. 6.1). Furthermore, you can protect databases and dLAN devices from unauthorised access by assigning a database password. You can find more detailed information on the important topics of security and access protection in Chap. 6. 4.2 Creating networks We recommend using the following procedure to create a dLAN network in dLAN AVpro manager: a) Enable expert mode (see Chap. 2.6). b) Create a new network in the Add menu item of the Network menu (see Chap. 2.6.1.3). You have to determine the network mode of the new dLAN network (MDU or peer-to-peer) in this process. c) Then register the existing or planned dLAN devices for the new dLAN network to dLAN AVpro manager. The devices already present in the database are listed in the "dLAN networks" window or "Live view" window. If the devices have not yet been connected to the dLAN, enter these into the list of "Unused devices" by entering the IDs of the individual devices (security ID, MAC address and, optionally, a device description) (see Chap. 2.6.1.2). This is entered automatically for each locally connected dLAN device. This information has to be entered manually and individually for each remaining device. Alternatively, you can enter a large number of dLAN devices very easily by importing the device information from a device list text file (see Chap. 4.2.2). devolo dLAN AVpro manager Network management 45 d) In the next step, fill the displayed dLAN network with dLAN devices by using the mouse to drag and drop dLAN devices from the list of "Unused devices" into the "dLAN networks" window (see Chap. 2.6). If you have selected the MDU operating mode for the network, generate the hierarchy of dLAN devices for the MDU network by dragging a device to the network root (this automatically makes it the master) in the "dLAN networks" window. All other devices that you then drag to the master or other devices of the respective MDU network automatically become slaves. One of these dLAN devices has to be connected to the management computer locally (i.e. over Ethernet) so that dLAN AVpro manager can manage the network! e) You can create additional networks in the "dLAN networks" window by clicking on the Add menu item in the Network menu and then proceeding as described in items b - d. All networks are saved in the currently opened database file. 4.2.1 Entering devices into the database automatically If dLAN AVpro manager has access to the local dLAN transmission medium over a local dLAN device connected via Ethernet, dLAN AVpro manager imports the IDs for the dLAN devices accessible via the transmission medium into the opened database file after starting and displays dLAN devices it has detected in the "Live view" window. 4.2.2 Entering devices into the database using a text file You can add a larger number of dLAN devices in the database by transferring a text file of the IDs for these dLAN devices into the database. This is done in the Database menu in the Import device list menu item (see Chap. 2.6.1.2). This adds the devices from the text file into the list of "Unused devices". The lines of the text file have to be structured as follows: Security ID,MAC address If the ID for a dLAN device has a description, the associated text line has to be structured as follows: Security ID,MAC address,Description You can find an example file in Chap. 7.2. devolo dLAN AVpro manager 46 Network management This function is designed as an initial, preparatory step before setting up a dLAN later on. You have to run it before connecting the manager to the local dLAN in order to use it. If you do not stick to this step sequence, dLAN AVpro manager imports the devices via the dLAN after it starts and ignores the specifications in the text file as a result. If you want to add a single device to the database, you can do this using the Device menu in the Add device menu item (see Chap. 2.6.1.4). devolo dLAN AVpro manager Network management 4.2.3 47 The components of a dLAN device ID The ID for each dLAN device consists of the following components: Description text The description text is irrelevant for dLAN AVpro manager but important for you because it allows you and your colleagues to recognise the device in the network view. Therefore, the description text has to be unique to prevent mix-ups with other devices. Security ID Each dLAN device receives an individualised security ID from the factory which cannot be modified. You can find the security ID on the device's rating plate. It consists of four groups of four letters, with each group separated by hyphens. dLAN AVpro manager cannot read out the security ID of a device. Instead, it displays the Device Access Key (DAK) of the device. This DAK is calculated in the device from its security ID. If a device is contained in the list of "Unused devices", the device's DAK is displayed in the list on the right next to the device's MAC address. MAC address The MAC address of a dLAN device includes six two-digit hexadecimal numbers, which are separated from each other by colons solely for improved legibility. The MAC addresses of devolo dLAN devices always start with a string of digits consisting of 00:0B:3B or BC:F2:AF. dLAN AVpro manager detects and identifies manageable devolo dLAN devices using their MAC addresses. If no description text is available for a dLAN device, you have to apply the device's MAC address as its unique identification. devolo dLAN AVpro manager 48 4.2.3.1 Network management Changing a dLAN device ID You can add description text in the ID for a dLAN device or edit existing text at any time. If the device is in the opened network in the "dLAN network" window, open the context menu for the device by right-clicking on the respective device. In the context menu, open the menu item Edit properties and enter or edit the description there. If the respective device is in the list of "Unused devices", do this by opening the context menu for the device by right-clicking on the respective device. In the context menu, open the menu item Modify device data and enter or edit the description. In the device ID, dLAN AVpro manager does not show the security ID from a device's label in the Security ID field, instead it shows the device's Device Access Keys (DAK). 4.2.3.2 Deleting a dLAN device from the list of "Unused devices" You can delete a device from the list of "Unused devices" (thus deleting it from the database) by selecting the device with a right-click and clicking on Delete. The device ID for the respective device is removed from the list of "Unused devices" after you confirm the subsequent security prompt. In order to delete a dLAN device that is part of a network, you first have to drag this device back to the list of "Unused devices" where you can then delete it. 4.2.3.3 Exporting "free devices" In the Database menu you can export the dLAN devices in the list of "Unused devices" as a text file (see above) by clicking on Export free devices. You have to specify a storage location and a name for this file to save it. You can adapt this file as needed later on using a text editor to be able to add it to the database of another dLAN AVpro manager. devolo dLAN AVpro manager Network management 4.2.4 49 Creating a dLAN network If your dLAN devices are in the list of "Unused devices", you can create a network architecture in the database quite easily. Use the mouse to move devices one-by-one from the list to the network opened in the "dLAN network" window by dragging and dropping them. The network mode (P2P or MDU) for the respective network determines its network hierarchy. You have to pay attention to this hierarchy when creating P2P networks and MDU networks. 4.2.4.1 Creating a P2P network By nature each P2P network has a flat network hierarchy because all of the dLAN devices in the P2P network communicate with each other at the same hierarchy level. Thus you can very easily map these kinds of networks in the database by using the mouse to drag dLAN devices from the list of "Unused devices" to the network opened in the "dLAN network" window. If a dLAN device is locally connected to your dLAN AVpro manager via Ethernet, this device is displayed in the network tree offset outwards to indicate the special role of the respective device. Dragging a device from the network tree back to the list of "Unused devices" removes the device from the network. This automatically resets the device to its factory default settings and makes it available as a "free device" once again. In order to rename your network, you have to perform a 'slow double-click' on the network name. This opens the input field for the network name. devolo dLAN AVpro manager 50 Network management Creating an MDU network MDU networks have two hierarchy levels: master and slave. Which device is a 'master' and which is a 'slave' depends on the position in the network tree that you drag the device to from the list of "Unused devices" in the open network. Therefore, an MDU network requires that you place the dLAN devices precisely, otherwise the dLAN device will not be added to the network! You have three different options for placing a dLAN device: a) Dragging a dLAN device to the network root (name of the network) creates a new MDU segment. The respective dLAN device automatically becomes the master of this segment in the process. b) If you drag the dLAN device to an existing master, the respective dLAN device becomes a slave in the master's dLAN segment. c) If you drag a dLAN device to an existing slave, the respective dLAN device becomes another slave in the same network segment. Fig. 24: Network tree structure of an MDU network with multiple segments You can freely move dLAN devices back and forth between different MDU segments within MDU networks. In the process, the respective dLAN device automatically becomes a master or slave based solely on the endpoint of the movement (see above). If you move one master onto another master, this makes the moved master itself a slave in the other master's MDU segment. The existing slaves of the moved master become slaves of the new master in the process. devolo dLAN AVpro manager Network management 51 This is why a warning notice appears when moving a master; you have to confirm this warning notice to have your changes take effect. By definition, there is a maximum of one master in each MDU network segment. Thus, setting up a new master automatically establishes a new MDU segment. You remove a device from a network by dragging it from the opened network to the list of "Unused devices". It is then once again available there as a "free device". Dragging a device to the list of "Unused devices" automatically resets the device to its factory default settings, with the exception of its network password. The existing network password is overwritten by a random sequence of characters in the process. You can rename your network after slowly double-clicking on the network name. 4.2.5 Adding additional networks You can manage multiple networks in parallel in one database file as needed using dLAN AVpro manager. This can be advantageous if, for instance, multiple application scenarios (e.g. rooms or buildings) have to be mapped in the database. Fig. 25: Adding a new dLAN network You can create a new network in the database by clicking on Add [Ctrl-T] in the Network menu. The network name is automatically assigned by dLAN AVpro manager and numbered in ascending order. However, you can also enter a net- devolo dLAN AVpro manager 52 Network management work name of your choice here. Select the network mode (MDU or peer-to-peer) and click on OK. The new network is created as a tab in the "dLAN network" window. Clicking on the corresponding tab displays the network in the dLAN network window. You can change the order of the networks that can be displayed by individually dragging the tabs for the networks to the left or right using the mouse. 4.2.6 Deleting a network You can delete the currently opened network by clicking on Remove in the Network menu. Confirming the subsequent security prompt with "YES" moves the dLAN devices contained in the network to the list of "Unused devices". In the process, the devices are automatically reset to their factory default settings, except for the network password, and the existing network password for the devices is overwritten by a random sequence of characters in each case. You can then assign these devices to other networks (see Chap. 4.2. You can export these devices as a text file (see Chap. 4.2.3.3). You can delete the devices individually (see Chap. 4.2.3.2). devolo dLAN AVpro manager Network management 4.3 Managing networks 4.3.1 Finding dLAN devices 53 In the Device menu, you can perform a targeted search for specific dLAN devices through all of the networks and lists available in the database after clicking on Search devices. This brings up a horizontally divided dialog window that lists all of the known dLAN devices (including their description, MAC address and, if assigned, the current network name and current profile assignment) in the lower area. Two input fields, Description and MAC address, are in the upper area. You can use them to filter the display of devices in the list. The list of dLAN devices that meet the specified search criteria is updated continually as search criteria are entered. Fig. 26: Searching for dLAN devices You can use upper and lower-case letters to enter search criteria. You can also enter the MAC address without using colons. devolo dLAN AVpro manager 54 4.3.2 Network management Setting compatibility mode If you have created a dLAN segment, you can set the compatibility mode for the respective segment. To do so, right-click on the network name at the root of the network tree and select the Compatibility mode option from the network's context menu. Here you can select between HomePlug AV mode and Coax mode. Fig. 27: Setting compatibility mode You can use compatibility mode to set which dLAN devices can be used in your dLAN: If you select 'HomePlug AV mode' compatibility mode, only the devices that support dLAN via PowerLine continue to be provided in dLAN AVpro manager for the respective network. If you select 'Coax mode' compatibility mode, only the devices that support dLAN via coaxial/two-wire lines continue to be provided in dLAN AVpro manager for the respective network. If you select a compatibility mode for a dLAN segment, all of the dLAN devices in the segment that do not communicate using the associated transmission medium become inaccessible. At the same time, all of the devices that cannot support the associated transmission medium are hidden in the list of "Unused devices". In addition, the "Coax/PLC" toggle switch on the dLAN devices has to be switched so that the device uses the transmission medium prescribed by the compatibility mode. If the dLAN is in MDU mode and the option Only search through one medium is disabled in the context menu for the respective network, the master automatically searches through its network segment for available slaves in both compatibility modes. This process can result in long wait times in some cases. devolo dLAN AVpro manager Network management 4.3.3 55 Updating firmware If new dLAN devices are registered with dLAN AVpro manager, their firmware is updated to the most up-to-date version automatically in the background as soon as a new firmware version is available to dLAN AVpro manager. Clicking on the Help menu opens the About dLAN AVpro manager window, which displays the version number of dLAN AVpro manager and the currently offered firmware states. Fig. 28: Display of supported firmware versions Devices with a firmware version of < 2.0 first must be manually updated to version 2.0 or higher so that dLAN AVpro manager can keep these devices updated to the latest firmware version in future. devolo dLAN AVpro manager 56 4.3.4 Network management Assigning profiles You can configure profiles in the Database menu or using the Edit/create profiles selection button (see Chap. 3). You can assign these profiles to individual dLAN devices, dLAN segments (MDU mode) or entire dLAN networks as your needs dictate. Special procedures are available to you for this. If a profile is assigned to a dLAN device, the profile name is displayed next to the respective device in the list for the network opened in the "dLAN network" window. As long as the settings for the profile assigned to the device are not yet active (e.g. due to Automatic update) in the respective device, the respective profile name is marked by an appended asterisk. 4.3.4.1 Assigning a profile to a network Right-click on the network name in the selected network in the "dLAN network" window. In the context menu, select the option Assign profile to the network; wait until the list containing the available profile names drops down and select the desired profile from it. Fig. 29: Profile selection for a dLAN network 4.3.4.2 Assigning a profile to a network segment (MDU mode) Right-click on the name of the master, which represents the head of the MDU network segment, in the selected MDU network in the "dLAN network" window. devolo dLAN AVpro manager Network management 57 In the context menu, select the option Assign profile to network; wait until the list containing the available profile names drops down and select the desired profile from it. The settings for the respective profile are immediately assigned to the dLAN devices for the segment. 4.3.4.3 Assigning a profile to a specific dLAN device Right-click on the name of the respective device to open its context menu. Select the menu item Edit properties. Fig. 30: Profile selection for a device Select the desired profile and click on OK. You can view and modify settings for the selected profile using the Edit profile button. If Automatic update is enabled (see Chap. 2.6.1.3), the selected profile is transferred to the device at the next planned update time and is activated there. If the selected profile in the device is to be active immediately, click on Assign profile in the context menu. 4.3.5 Update Each change that you make to a network, network segment or dLAN device using dLAN AVpro manager has to be transmitted to the respective network or to the respective device via an update in order to take effect. You can carry out a network update, update devices or activate the Automatic update function, which automatically takes care of all necessary updates. devolo dLAN AVpro manager 58 4.3.5.1 Network management Network update After you have made a change in a network using dLAN AVpro manager, enable this change by calling up the network's context menu by right-clicking on the network name in the opened network and clicking on Update network in the context menu. This function is not available if Automatic update (see Chap. 4.3.5.3) is active. The network is inaccessible during an update. The following message is output: Fig. 31: Network update message 4.3.5.2 Device update If you have modified the profile assigned to a device, update the device by clicking on Assign profile in the device's context menu. devolo dLAN AVpro manager Network management 4.3.5.3 59 Automatic update The Automatic update feature ensures that each change is immediately transmitted to the respective devices and is activated there. The feature works on all of the networks in the database. You can enable this function by clicking on the menu item Automatic update in the Network menu or pressing the function key F7. The following message appears: Fig. 32: Message during ongoing "Automatic update" process You have to confirm this message with OK. The respective network may be inaccessible for a few minutes while the Automatic update feature is running for a network. If this is undesirable, you should disable the Automatic update feature by removing the check mark in front of the Automatic update menu item in the Network menu by clicking on it. The network is updated after confirming with OK. dLAN AVpro manager outputs a message (see Chap. 4.3.5.1). You can cancel the ongoing Automatic update process at any time by clicking on Cancel. If this case, the current assignment in progress at a dLAN device continues until concluded, but afterwards all of the dLAN devices that have not yet been updated remain in the "old" state. devolo dLAN AVpro manager 60 4.3.6 Network management VLAN settings Some dLAN devices have special features for processing tagged VLAN data traffic in accordance with IEEE 802.1Q and IEEE 802.1p. You can also use this to take advantage of the various benefits of VLANs in your dLAN. VLAN is an abbreviation for Virtual Local Area Network. To change VLAN settings for a dLAN device in a network, open the device's context menu by right-clicking and click on the menu item Edit VLAN settings in the context menu. This menu item is only available for dLAN devices whose VLAN settings can be configured through dLAN AVpro manager. The VLAN settings for the dLAN 200 AVpro Wireless N can only be configured using the respective device's configuration website. You can get to the site via the "Open configuration website" menu item. Fig. 33: VLAN configuration dialog for dLAN 500 AVpro UNI You can activate a dLAN device's VLAN functions with dLAN AVpro manager by placing a mark in the VLAN configuration dialog next to Switch on VLAN. You can assign VLAN numbers to the VLAN IDs [1 to 4094] that you consider important in order to enable clearly arranged configuration. Since only a few of devolo dLAN AVpro manager Network management 61 the 4094 possible VLAN IDs are required in most applications, VLAN numbers are automatically numbered consecutively, making it much easier to maintain an overview during configuration. VLAN number 1 2 3 4 5 VLAN ID 1 140 30 50 55 Description Management network DMZ IP telephony Workstations Guest WLAN Table 1: Example assignment In the Edit VLAN settings dialog (see Fig. 33), you can configure the following settings for each communication connection (ETH1 to ETH4, dLAN): Checkbox for "Tx Force Untag" Any tag that exists on any of the Ethernet frames that leaves this connection is removed. "Permitted frame type" selection "All" Both tagged and untagged Ethernet frames are accepted. "Only with tag" Ethernet frames without a tag are discarded. ·PVID Using PVID (an abbreviation for "Port VLAN ID"), all of a connection's incoming Ethernet frames are provided automatically with a tag if the frames have not yet been tagged. If packets without a VLAN tag are received at a port, then the port VLAN ID specifies to which VLAN these packets are to be assigned. Thus the PVID is a VLAN ID and not a VLAN number! In addition, you can define per VLAN number and per connection, whether packets that have the VLAN ID stored for the corresponding VLAN number are allowed to pass this connection. The VLAN settings in this menu item are determined by the requirements of individual applications using the respective dLAN. devolo dLAN AVpro manager 62 4.4 Network management Remote access dLAN AVpro manager offers you the option of managing dLAN networks remotely. You have to completely meet the following prerequisites for this: 1. The instance of dLAN AVpro manager from which you want to undertake remote access has the database for this remote dLAN. 2. The computer on which this instance of dLAN AVpro manager is installed has an Internet connection. 3. You have received a Connect ID from devolo. This authorises you to run remote access. 4. The remote dLAN network is accessible at its location via an instance of dLAN AVpro manager. 5. The computer on which this instance of dLAN AVpro manager is installed has Internet access. 4.4.1 Enabling remote access In order to enable remote access, start dLAN AVpro manager by clicking on the dLAN AVpro manager Remote Server program icon. This opens the following window: Fig. 34 Enabling remote access Enter your devolo Connect ID and click on Connect. After clicking on Connect, the local dLAN AVpro manager establishes an Internet connection to the devolo Connect server. The devolo Connect server is the secure link for smooth and wireless communication between physically separate indevolo dLAN AVpro manager Network management 63 stances of dLAN AVpro manager. The devolo Connect server checks the Connect ID you have provided. If it is correct, you can continue with remotely accessing the dLAN networks you have at other locations. If the Connect ID you provided is incorrect, an error message is output and the connection to the devolo Connect server is closed. 4.4.2 Calling up remote access If you have been authorised to run remote access, you can call up remote access to your dLAN networks located elsewhere. You first have to switch to expert mode for this. Then click on either the Remote access action button or the Remote access menu item in the Network menu. Both of these actions open the start dialog for remote access. Fig. 35: Calling up remote access Start by selecting the location of the dLAN network that you want to configure via remote access. Then enable the option Connect over server, enter your Connect ID and click on Connect. The devolo Connect Server then checks the accessibility of the other end. If it is accessible, the server opens a communication channel. At the same time, the text on the "Connect" button changes to "Disconnect". devolo dLAN AVpro manager 64 Network management You can then exclusively access the dLAN network at the selected location remotely via this communication channel. You can access multiple dLAN locations remotely at the same time. No other authorised persons can access the respective dLAN network for configuration purposes while the communication channel to the dLAN network is occupied by your remote access connection at one location. 4.4.3 Defining locations You can define the locations of dLAN networks to be maintained using remote access by calling up the start page for remote access. Enter these locations into the Location field individually and click on Save. 4.4.4 Ending remote access You can end your remote access to the dLAN network at the remote location by calling up the start page for remote access and clicking on Disconnect there. devolo dLAN AVpro manager Network management 4.4.5 65 Important notes on remote access 1. The communication channel to the respective dLAN network is open for you if you are accessing it remotely. It remains reserved for you until you end remote access. You can leave remote access enabled continuously. 2. Protect your Connect ID from unauthorised use! 3. Note that, when remotely accessing a dLAN network at a remote location, the database of the dLAN AVpro manager instance at the remote location is not used but rather just the database of the dLAN AVpro manager instance running remote access. dLAN networks are managed separated by locations in the database of the respective dLAN AVpro manager instance. This is intended to prevent mix-ups with the dLAN networks of other locations when managing the dLAN networks of one location. 4. If multiple persons using different instances of dLAN AVpro manager are running remote access to dLAN networks of the same location at different times in sequence, they have to coordinate their work: Notify other persons authorised to run remote access before starting remote access. After ending remote access, ensure that all persons authorised to run remote access have access to this database and use it when carrying out their configuration activity. 5. If you are preparing configurations for a dLAN network of the respective location before a pending remote access session, you have to correctly select the location of this dLAN and the devices it encompasses. Do this for the respective network in the Network menu under Define location. Do this for the respective dLAN devices in the Edit device data menu item in the device's context menus. devolo dLAN AVpro manager 66 Network management 6. When remote access is in progress, there is a risk that configuration changes to the dLAN network can result in the connection to the devolo Connect server being severed accidentally. To minimise this risk, you have to tell dLAN AVpro manager which dLAN devices are being used to connect to the Internet. The Couple option is available in the context menu of devices in the respective network for this purpose. Clicking on Couple marks a device as required for remote access. As a result, from this point on, dLAN AVpro manager ensures that the devices are configured without the risk of a potential connection loss. dLAN AVpro manager marks a coupled device in the network view by putting an asterisk * in front of its name. devolo dLAN AVpro manager Troubleshooting 5 Troubleshooting 5.1 Replacing defective devices 67 If a dLAN device in a dLAN network (local or remote) fails and has to be replaced, you can configure a locally available dLAN device as a replacement device using dLAN AVpro manager by transferring the configuration of the defective device to the replacement device on a 1:1 basis. If you follow this procedure, no further configuration steps are needed onsite. The system integrator needs only to replace the defective device with the prepared replacement device in the respective dLAN. The practical procedure for the advance configuration of the replacement device depends on whether or not the database of the respective dLAN network is available: If the database of the respective network is available, you can transfer the configuration of the defective device from the database directly to a locally connected device in dLAN AVpro manager (see Chap. 5.1.1). If no database of the respective network is available, you have to configure a suitable locally connected dLAN device manually, so that it can later be exchanged for the defective device onsite without the need for additional configuration measures there (see Chap. 5.1.3). 5.1.1 Replacing the device in the network (with the database of the network) If the database of the respective network is available, you can call up this database and replace an existing dLAN device there with a dLAN device that is connected locally to the computer running your dLAN AVpro manager. a) To do so, right-click on the device to be replaced in the network tree of the network view. This opens the device's context menu. b) In the context menu, click on the menu item Replace device. This transfers the configuration of the defective device from the database to the locally connected dLAN device. At the same time, in the network view of the remote network, the MAC address of the defective dLAN device is replaced with the MAC address of the local dLAN device. devolo dLAN AVpro manager 68 Troubleshooting c) Finally, all that remains to be done onsite is to swap in the replacement device, which has already been logically integrated into the respective network, and swap out the defective device. In the database of the respective network, (r) (=’replaced’) is automatically appended to the description of the replaced dLAN device to indicate the replacement. 5.1.2 Calling up the list of the replaced dLAN devices of the network In the Device Menu (see Chap. 2.6.1.4), the menu item Replaced devices gives you an overview list of those dLAN devices that have been replaced by others in the selected network. Fig. 36: List of replaced devices You have two options here: 1. You can delete a replaced dLAN device from this overview list and thus remove it from its existing network allocation in the database by selecting it in the overview list and clicking on „Back to list of unused devices“. This action moves the respective device to the list of "Unused devices" (see Chap. 2.6). From there, you can add it to another network of your database as needed. 2. If the replaced device has since been integrated into a network managed in another database, you have to delete the respective dLAN device from the list of „Unused devices“ in your database. Select the device in the list and click on Delete. This deletes the device from the currently open database. devolo dLAN AVpro manager Troubleshooting 5.1.3 69 Replacing the device in the network (without the database of the network) If the database of the respective network is not available, you have to configure a locally connected dLAN device manually so that afterwards, it can replace the device to be replaced in the respective network on a 1:1 basis. There are multiple alternative approaches for doing this: a) You can register the device with dLAN AVpro manager as described in Chapter 4.2.2. The device will then appear with the correct ID in the list of „Unused devices“. Right-click on the device in the list to open the context menu of the respective device and click on the menu item Configure device. In the editing window of this menu item, configure the settings required for the replacement device. b) Where your local device had been connected previously, connect the replacement device to be configured to your computer running dLAN AVpro manager. This adds the replacement device to the list of „Unused devices“. Right-click on the device to open the context menu. Here, in the menu item Edit device data, enter the designation of the device to be replaced. Then, in the menu item Configure device, configure the settings to match those of the device to be replaced. If multiple dLAN devices can be reached locally from your computer running dLAN AVpro manager (e.g. using an Ethernet switch), the MAC addresses of these dLAN devices are listed in the device menu under the menu item Configure device. Here, select the MAC address of the device you want to configure. devolo dLAN AVpro manager 70 Troubleshooting From the five options offered, select the network mode and the function of the device to be replaced in its network. Fig. 37: Configuring local device Peer-to-Peer mode: The dLAN device is working in a P2P dLAN and there, has no preference regarding a separate role as CCo. Peer-to-Peer mode (always CCo): The dLAN device is working in a P2P dLAN, where it is the CCo. Peer-to-Peer mode (never CCo): The dLAN device is working in a P2P dLAN, where it is never the CCo. MDU mode master: The dLAN device is the master in the MDU dLAN. MDU mode slave: The dLAN device is the slave in the MDU dLAN. In the Key input field, enter the network password of the network in which the device to be replaced is located. Confirm the settings by clicking on OK . Then, these settings are transferred to the replacement device. A message appears indicating that the transfer is in progress. The device is then removed from the list of „Unused devices“. devolo dLAN AVpro manager Troubleshooting 5.2 71 Resetting the dLAN device to factory defaults Using the dLAN AVpro manager, you can reset a locally connected dLAN device to the factory settings. This can be necessary, for example, if the device can no longer be reached due to a configuration error. There are two alternatives for carrying out the device reset: a) First, register the corresponding device with dLAN AVpro manager (see Chap. 4.2.2). This causes the device to appear in the list of „Unused devices“. Here, open a device's context menu by right-clicking on it and select the option Reset device. b) Open the Device menu and select the menu item Reset device. There, the MAC address of the locally connected device is displayed, as long as it is not yet displayed in the list of „Unused devices“. You can carry out a device reset by selecting its MAC address. If multiple dLAN devices can be reached locally from your computer running dLAN AVpro manager (e.g. using an Ethernet switch), the MAC addresses of these dLAN devices are listed in the Device menu under the menu item Reset device. In the list, select the MAC address of the device you want to reset. The reset process of a dLAN device can take some time. While the reset is in progress, dLAN AVpro manager sends a message indicating that a device reset is being carried out. devolo dLAN AVpro manager 72 Troubleshooting devolo dLAN AVpro manager Security and access protection 6 Security and access protection 6.1 Setting a network password 73 dLAN AVpro manager automatically assigns a network-specific network password to all of the dLAN devices in a network. There are two reasons for this: Using a shared network password, a logical segment [a 'password sphere'] is defined. This password sphere provides the prerequisite for communication between a network's dLAN devices since only dLAN devices with the same network password can exchange data with each other in the network. In addition, the network password is a component used for encrypting the data to be transmitted in the respective network. Encryption provides interception protection for the dLAN connections. 6.1.1 Default network password The network password is generated automatically. It has the following structure depending on the selected network mode: P2P network mode: By default the network password for a P2P network is the same as the name for the respective network. MDU network mode: By default the network password for an MDU network is the same as the name of the network plus the master's MAC address. If an individualised network password has been assigned to the MDU network, the network password consists of both parts, the individualised network password plus the master's MAC address. devolo dLAN AVpro manager 74 6.1.2 Security and access protection Individualised network password You can replace the default network password with an individualised network password as desired; you can create and assign it as follows: a) Select the respective network by left-clicking on the name of the network in the "dLAN networks" window. b) In the Network menu, call up the menu item Network password. Enter the desired network password in both fields here. OK is enabled if there were no errors with the entry. Now confirm your input by clicking on OK. c) Right-click on the name of the network to which you would like to assign the network password. This opens the network's context menu. Select the menu item Assign network password in the context menu. This assigns the network password to all of the devices currently online in the network. Fig. 38: Defining a network password If the Automatic update (F7) item is enabled in the network menu, the network password is assigned to the currently active network automatically; as a result, you do not have to explicitly assign the password in the network's context menu. devolo dLAN AVpro manager Security and access protection 6.1.2.1 75 Notes for the dLAN 200 AVpro Wireless N Note the following if you are using a dLAN 200 AVpro Wireless N: the network password is set using dLAN AVpro manager or via the dLAN encryption button (pushbutton), the password is forwarded to the device automatically. In this case, all of the dLAN settings made in the dLAN 200 AVpro Wireless N's own configuration interface are irrelevant. However, if the network password is being set or modified in the configuration interface for the dLAN 200 AVpro Wireless N, you have to adjust the network password present in dLAN AVpro manager according to this change, since the network password is not forwarded from the device to dLAN AVpro manager automatically. If 6.1.3 Assigning the network password to a device dLAN devices normally receive their network password as soon as the devices have been entered in the respective dLAN network and the changes have been enabled in the devices using Update network or Automatic update. If the respective device is inaccessible for technical reasons at the time of the update (e.g. due to a power outage in the area of the dLAN device), it does not receive the network password. In this case, the network password can be sent to the device again by right-clicking on the device in the network view to open the device's context menu and clicking on the menu item Assign password. These steps have to be carried out for each of the devices that did not receive the network password during the update. devolo dLAN AVpro manager 76 6.2 Security and access protection Access protection In addition to the option of securing data transmission against interception by third parties using a network password, you can also protect dLAN AVpro manager, its databases and the dLAN devices from unauthorised access by third parties by using a password. 6.2.1 Access protection for dLAN AVpro manager and databases In order to secure the currently opened database, you can specify a database password for it in the Database menu in the AVpro manager password menu item; you will be prompted for this password each time the database is opened from this point on. If you always use the same database for dLAN AVpro manager, protecting access to this database also effectively protects dLAN AVpro manager, since it automatically calls up the database from the previous session each time it starts. If this database is protected by a password, dLAN AVpro manager only starts once the database password has been entered correctly. If a database is protected by a database password, the protection applies to each instance of dLAN AVpro manager. You can change or delete the database password as follows: a) In the Database menu, call up the menu item AVpro manager password. Fig. 39: Setting the database password b) Start by entering the password under Password. Enter it again under Confirm password. OK is enabled if both entries are the same. Now click on OK to enable the database password. devolo dLAN AVpro manager Security and access protection 77 c) If you want to delete or replace the existing database password, call up the menu item AVpro manager password in the Database menu and enter the existing password in the topmost input field. You can delete the existing database password by leaving both input fields empty and clicking on OK. You can replace the existing database password by entering a new database password in both input fields and clicking on OK. Fig. 40: Deleting or replacing the existing database password 6.2.2 Access protection for devices If a database password is defined for the opened database, an encryption key based on the database password is assigned to all of the dLAN devices of the networks managed in this database. You can use this to also protect the network's dLAN devices from unauthorised, configuring access in addition to protecting the database and dLAN AVpro manager. Without this protection, third parties could start another instance of dLAN AVpro manager. They could then locally connect to a dLAN device on the network and set up an independent database using these devices. This database could be used to configure and secure the dLAN devices on the transmission medium without notice and without allowing you to take action against it using the primary instance. You can change the encryption key assigned to a dLAN device as follows: a) Select the respective network in the "dLAN devices" window. b) Open the device's context menu by right-clicking on the respective dLAN device. In the context menu, select the menu item Change encryption key. devolo dLAN AVpro manager 78 Security and access protection This opens the following dialog: Fig. 41: Changing the encryption key for a dLAN device Enter the database password in the Password and Confirm password input fields. The OK button is enabled if both entries are the same. Now confirm your input by clicking on OK. c) Repeat step (b) for each additional dLAN device in the network that you would like to protect from being transferred into another database in this way. d) You have to click on Refresh view or press the F5 key to put the entries into effect. Note that the encryption key generated based on the database password is permanently saved in the dLAN device. If at some later point the respective device is to be managed in another database, the encryption key saved in the dLAN device has to be deleted beforehand. Otherwise the message "Access denied" appears when trying to access the device. You can delete the encryption key of a dLAN device as follows: a) Open the device's context menu by right-clicking on the respective dLAN device. In the context menu, select the menu item Change encryption key. This opens the dialog from Fig. 41. b) In both fields in the dialog, enter the database password for the database in which the dLAN device has been managed up to this point. This enables OK if there were no errors with the entry. Now confirm your input by clicking on OK. You can now once again use the device without any restrictions. devolo dLAN AVpro manager Annex 7 Annex 7.1 Revision history 79 Version 2.0 Support of peer-to-peer mode Access and password protection for databases and devices Remote firmware upgrade Multi-segment mode Version 3.0 Support of the dLAN 200 AVpro WP Automatic readout of the locally connected device when added to the list of "Unused devices" (earlier: adapter list) Coax mode and compatibility mode are now properties of the network, no longer of a profile Support for certain Linux operating systems Version 4.0 Bandwidth management Resetting and configuring devices (adapters) Preconfiguring devices (adapters) for use in another network Searching for certain devices (adapters) Version 5.0 Support of the products dLAN 200 AVpro WP II and dLAN 200 AVpro DINrail Ability to disable the encryption pushbutton, the LEDs and energy saving mode Discontinuation of ToS prioritisation devolo dLAN AVpro manager 80 Annex Version 5.2.1 Support of the dLAN 200 AVpro Wireless N product Version 6.0 Support of the configuration of the dLAN 500 AVpro UNI Two configuration levels: simple mode and expert mode Support of remote access to dLANs via a devolo Connect server devolo dLAN AVpro manager Annex 7.2 81 Example of a device file To make setting up networks easier, we recommend that you manage the identifier data of the dLAN devices of your network in a text file. You can quickly and easily import this device file in dLAN AVpro manager into the list of "Unused devices" in the database. Each line of this device file may contain only one entry for a device; this entry must consist of at least the security ID and the MAC address of the dLAN device. Optionally, you can already add a description of the respective dLAN device. You can also add this description later. You have to enter the two (or three) values of the identifier data of the dLAN device into one line, separated by commas (without spaces). The MAC address can be written either with or without colons and is not case-sensitive. Here is an example of a complete and correct device file: MLSG-REIF-SWAL-XMAS,00:0b:3b:1d:f1:9a,Foyer FMNA-GVIB-ZAJL-KEXG,00:0b:3b:1b:94:ad,Lobby DEVO-LOAA-CHEN-ROCK,00:0b:3b:1c:66:d1,Salon YROE-TKNW-VFNC-EQZS,000B3B1B918A,Zone 1 UJLP-HVKC-QNFK-JAWT,000B3B423871,Zone 2 CJGE-ZAFZ-UYCS-AMHH,000B3B1B94C5,Zone 3 RPCV-ZIGG-WYEA-FXZG,000B3B423868,Zone 4 UMYU-WRUV-TUIS-YITP,000B3B423869,Suite 1 OQXQ-JZHR-RVTA-TGED,000B3B42386F,Suite 2 devolo dLAN AVpro manager 82 7.3 Annex Status symbols of dLANs and dLAN devices From the status symbol that dLAN AVpro manager prefixes to the network/device name in the device lists, you can read out the type of each dLAN and the status of each dLAN device. The following is a list of status symbols with their respective meanings Table 2: Status symbols of dLANs Status symbol Meaning MDU network root (HomePlug AV) P2P network root (HomePlug AV) MDU network root (coax) P2P network root (coax) Table 3: Status symbols of unknown devices Status symbol Meaning Unknown device (offline) not manageable Unknown device (online) not manageable devolo dLAN AVpro manager Annex 83 Table 4: Status symbols of AVpro devices Status symbol Meaning Available AVpro device (in the list of "Unused devices") AVpro in the P2P dLAN (online) AVpro in the P2P dLAN (offline) AVpro in the P2P dLAN (busy, device is being updated) AVpro as CCo AVpro in the P2P dLAN: Incorrect database password, AVpro adapter not accessible. AVpro as MDU: AVpro only available locally as slave or not available locally as master AVpro as master (device status unknown) AVpro as master (online) AVpro as master (offline) devolo dLAN AVpro manager 84 Annex Table 4: Status symbols of AVpro devices Status symbol Meaning AVpro as master (busy, device is being updated) AVpro as slave (unknown status) AVpro as slave (online) AVpro as slave (offline) AVpro as slave (busy, device is being updated) Table 5: Status symbols of AVpro WP devices Status symbol Meaning Available AVpro WP device (in the list of "Unused devices") AVpro WP in the P2P dLAN (online) AVpro WP in the P2P dLAN (offline) AVpro WP in the P2P dLAN (busy, device is being updated) devolo dLAN AVpro manager Annex 85 Table 5: Status symbols of AVpro WP devices Status symbol Meaning AVpro WP as CCo AVpro WP in the P2P dLAN: Incorrect database password, AVpro WP device not accessible. AVpro WP as MDU: available only locally as slave or not available locally as master AVpro WP as master (unknown status) AVpro WP as master (online) AVpro WP as master (offline, e.g. due to update) AVpro WP as master (busy, device is being updated) AVpro WP as slave (unknown status) devolo dLAN AVpro manager 86 Annex Table 5: Status symbols of AVpro WP devices Status symbol Meaning AVpro WP as slave (online) AVpro WP as slave (offline) AVpro WP as slave (busy, device is being updated) Table 6: Status symbols of AVpro DINrail devices Status symbol Meaning Available AVpro DINrail device (in the list of "Unused devices") AVpro DINrail in the P2P dLAN (online) AVpro DINrail in the P2P dLAN (offline) AVpro DINrail in the P2P dLAN (busy, device is being updated) AVpro DINrail as CCo AVpro DINrail in the P2P dLAN: Incorrect database password, AVpro DINrail device not accessible. devolo dLAN AVpro manager Annex 87 Table 6: Status symbols of AVpro DINrail devices Status symbol Meaning AVpro only available locally as slave or not available locally as master AVpro DINrail as master (unknown status) AVpro DINrail as master (online) AVpro DINrail as master (offline) AVpro DINrail as master (busy, device is being updated) AVpro DINrail as slave (unknown status) AVpro DINrail as slave (online) AVpro DINrail as slave (offline) AVpro DINrail as slave (busy, device is being updated) devolo dLAN AVpro manager 88 Annex Table 7: Status symbols of AVpro Wireless N devices Status symbol Meaning Unknown AVpro Wireless N device (offline) AVpro Wireless N in the P2P dLAN (offline) AVpro Wireless N in the P2P dLAN (online) AVpro Wireless N in the P2P dLAN (busy) AVpro Wireless N as CCo AVpro Wireless N in the P2P dLAN: Incorrect database password, AVpro Wireless N device not accessible AVpro Wireless N as slave (unknown status) AVpro Wireless N as slave (offline) AVpro Wireless N as slave (online) AVpro Wireless N as slave (busy) devolo dLAN AVpro manager Annex 89 Table 7: Status symbols of AVpro Wireless N devices Status symbol Meaning AVpro Wireless N as master (offline) AVpro Wireless N as master (busy) AVpro Wireless N only accessible locally as a slave or not accessible locally as a master devolo dLAN AVpro manager 90 7.4 Annex Keyboard commands Many of AVpro manager's functions can be called up using keyboard shortcuts: Keyboard command Function Ctrl-N Create new database Ctrl-O Open database Alt-W AVpro manager password Ctrl-+ Add device Alt-I Import device list Alt-E Export list of free devices Alt-P Edit profiles Alt-F4 Exit AVpro manager Ctrl-T Add network F2 Enter network name F5 Update device status F7 Automatic update Ctrl-F Search devices Ctrl-R Manage replaced devices Ctrl-M Assign device to selected network Del When a device is selected: The device is moved back to the list of "Unused devices" as a free device; When a network is selected: The network is deleted Shift-F10 Call up the context menu for the current entry Ctrl-Tab Only if multiple networks can be selected: Select next network tab devolo dLAN AVpro manager Annex 91 Keyboard command Function Ctrl-Shift-Tab Only if multiple networks can be selected: Select previous network tab Ctrl-Num1* Jump to "dLAN network" window Ctrl-Num2* Jump to list of "Unused devices" * Numbers on the number pad devolo dLAN AVpro manager 92 7.5 Annex VLAN scenarios Different applications can logically and securely be separated from each other within a dLAN by using VLANs. If multiple organisation areas use the same dLAN, the network setup can ensure that each organisation area only has access to its own VLAN by configuring VLANs and assigning these VLAN to the different organisation areas. Scenario A: "Building with rented offices using interconnected infrastructure" application The following basic conditions apply to this scenario: Multiple companies are sharing the same infrastructure in a building (see Fig. 42) All of the companies are renters After expansion, the Schmitz Company has rented an additional office on the ground floor The Schmitz Company uses a VLAN The Bergmann Company uses another VLAN The dLAN is connected using coax (dLAN 500 AVpro UNI) In addition, dLAN 500 AVpro triple+ and dLAN 200 AVpro Wireless N devices are used in each of the companies devolo dLAN AVpro manager Annex 93 Fig. 42 : VLAN scenario with two VLANs devolo dLAN AVpro manager 94 Annex Scenario B: "VLAN home office" application The following basic conditions apply to this scenario: Private home data are transmitted via "VLAN 1"; business data are transmitted via "VLAN 2": in the office, the printer uses "VLAN 2", "VLAN 1" is for computers + personal data The router assigns rights accordingly dLAN 200 AVpro Wireless N in the residential rooms Private home computers also have access to the printer Fig. 43: Home office VLAN devolo dLAN AVpro manager Annex 95 Scenario C "Building with VLAN and WLAN" application The following basic conditions apply to this scenario: The dLAN includes a large building with multiple floors meeting rooms are located on different floors Guests have access to the Internet in the meeting rooms via a WLAN The WLAN is made available via a VLAN for being able to assign rights. A router is used to assign rights dLAN 200 AVpro Wireless N dLAN devices are being used Various Fig. 44: VLAN and WLAN in combined use devolo dLAN AVpro manager 96 Annex Scenario D "Building networking" application The following basic conditions apply to this scenario: Company XY is spread over two neighbouring buildings buildings are connected by means of dLAN using a two-wire line; dLAN 500 AVpro UNI devices are being used Alternatively, dLAN 200 AVpro Wireless N could also be used with bridge mode (Client – AP) Different departments are mapped Example: Development and IT have access to printers The departments are spread across both buildings Each department has its own VLAN A router or switch is used to assign rights Both Fig. 45: Networking of cross-building departments using department-specific VLANs devolo dLAN AVpro manager Annex 97 Scenario E "Medical practice" application The following basic conditions apply to this scenario: Medical practice with multiple treatment rooms (each with a computer, printer and telephone); office (computer, printer and telephone); reception (computer, printer and telephone); waiting room (TV); lab (computer and telephone) A VLAN is used for VoIP telephony, prioritised accordingly by the router Patient data are accessed as needed on the extranet via another VLAN with high priority There is no WLAN, only dLAN 500 AVpro triple+ devices Fig. 46: Medical practice with VoIP prioritisation via VLAN devolo dLAN AVpro manager 98 Access protection 44 Advanced Encryption Standard 4 AES 4 Attenuation budget 34 AVpro DINrail 6 devolo Connect ID 22 devolo Connect server 63 Disconnect 63, 64 dLAN 200 AVpro 2 7 dLAN 200 AVpro WP 6 dLAN 200 AVpro2 6 dLAN priority level 37 dLAN segment 31 dLAN 200 AVpro Wireless N 6 dLAN 500 AVpro UNI 6 Downstream bandwidth 34 B E Index Numerics 128-bit triple AES encryption 4 A Bandwidth limitation 34 Barrier filter 6 best effort 37 Broadcast storm 43 Brute force (attack method) 4 bulk 37 Enable VLAN 60 Encryption switch 40 Energy saving mode 42 Ethernet frames 61 Expert mode 12, 13 C F-RJ45 adapter 7 Carrierband 35 CCo 5, 70, 83 Central Coordinator 5 Coax mode 8 Coax networking 7 Coaxial filter 35 Compatibility mode 8 Connect 63 Connect ID 63 Connecting, remote maintenance 63 G D Data directory 11, 17 Defining locations 64 Device Access Key 47, 48 Device actions 33 devolo dLAN AVpro manager F Guest WLAN 61 H HomePlug 1.0 3 HomePlug AV 3 HomePlug AV mode 8 I Internet 37 IP telephony 61 IPTV 37 L Live view 12 Location 64 99 Location of the device 24 M MAC address 81 Master 5 Master's MAC address 73 MDU 5 Modulation table 6 Multiple Dwelling Unit 5 Multi-segment mode 31 Slave 5, 34 Standards 4 Standby 42 T Network menu 20 Network root 45 Network segment (logical] 5 Notch filter 6 Target address 39 Target MAC address 39 Target port number 39 Telephone cabling 6 Transfer bandwidth 35 Transmission capacity 6 Transmitting power 35 Triple play services 37 TV/SAT 6 Two-wire cabling 6 Tx Force Untag 61 P U Peer-to-peer 5 PLC' 6 Port VLAN ID 61 PowerLine 6 Prioritising MAC addresses 39 Prioritising target port numbers 39 PVID 61 Unknown device 82 Upstream bandwidth 34 N Q Quality of Service 4, 37 R Refresh view 13 V video 37 VLAN 37 VLAN configuration dialog 60 VLAN ID 60 VLAN number 61 VLAN priority bits 37 voice 37 VoIP 37 S Security 44 Security ID 81 selection 13 Selection button 13 Simple mode 12 devolo dLAN AVpro manager 100 devolo dLAN AVpro manager