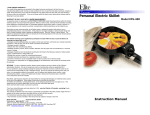
1
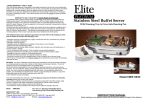
1 YEAR LIMITED WARRANTY*: Your small kitchen appliance is warranted to the original consumer purchaser to be free from any manufacturing defects under normal use and conditions for one (1) year from the date of purchase, except as noted. During that period, if you need to exchange the unit, please return the item with your sales receipt to the store where you purchased it. If you are no longer within the store’s return policy period, please read the following for warranty details: WARRANTY IS ONLY VALID WITH A DATED SALES RECEIPT. To guarantee repair or replacement without charge, a dated sales receipt showing purchase within the limited warranty period* must accompany the appliance. Without a sales receipt, warranty will be estimated according to the appliance's manufactured date. A comparable appliance should arrive within 2-3 weeks. However, in case an appliance is not covered by warranty, correspondence offering alternatives will be mailed to you. 3.5 Qt. Deep Fryer Model EDF-3500 During the one-year warranty period, we will either repair or replace this product with either a new or remanufactured product, at our discretion. If the product is no longer available, a similar product will be sent that is of equal or greater value to replace the defective product. (See the “Returns” section below). The repaired or replacement product will be in warranty for the remaining balance of the one-year warranty period and an additional one-month period. This limited warranty covers appliances purchased and used within the U.S.A. plus the District of Columbia and does NOT cover: - Damages caused by unreasonable use, neglect, normal wear and tear, commercial use, improper assembly of product, or Acts of God, such as fire, flood, hurricanes and tornadoes. - Damages caused in shipping. - Defects other than manufacturing defects. - Breakage caused by misuse, abuse, accident, alteration, lack of proper care and maintenance, or incorrect current or voltage. - Damages of parts that are not electrical; including but not limited to the following: cracked or broken plastic or glass, cutters/strainers, cutting blades, etc. - Damage from service or repair by unauthorized personnel. - Extended warranties purchased via a separate company or reseller. - Consumer’s remorse is not an acceptable reason to return a product to our Service Center. *The consumer is responsible for any delivery charges for all replacement units provided for exchange under the warranty. RETURNS: To return a defective product, please contact customer service to obtain an RA # (Return Authorization Number). We will not accept any returns of merchandise without an applicable RA #. For your protection, always carefully package the product for shipment and insure it with the carrier as we cannot assume responsibility for lost or damaged returns. Be sure to enclose the following items with your return: any accessories related to the problem, your full address and daytime phone number, a note describing the problem, a copy of the dated sales receipt or other proof of purchase and a valid RA#. C.O.D shipments cannot be accepted. Maxi-Matic, USA expressly disclaims all responsibility for consequential damages or incidental losses caused by the use of this appliance. Some states or provinces do not allow this exclusion or limitation of incidental or consequential losses, so the foregoing disclaimer may not apply to you. This warranty gives you specific legal rights, and you may also have other legal rights which vary from state to state, or province to province. *One Year Limited Warranty valid only within the U.S.A. plus the District of Columbia, excluding Puerto Rico and the Virgin Islands. This warranty is effective only if the product is purchased and operated in the USA; product usage which is in violation of the written instructions provided with the unit will void this warranty. For international warranty, please contact the local distributor. **Any instruction or policy included in this manual may be subject to change at any time. Model EDF-3500 3.5 Qt. Deep Fryer Distributed by: MAXI-MATIC® , USA 18401 E. Arenth Ave. Building B. City of Industry, CA 91748 Customer Service Department: (626) 912-9877 Ext. 120 MON-FRI 10am-5pm PST Email: [email protected] Website: www.maxi-matic.com INSTRUCTION MANUAL Before operating your new appliance, please read all instructions carefully and keep for future reference. KNOW YOUR DEEP FRYER .. PARTS & FEATURES.. Timer Control Knob – To preheat the fryer, turn the knob counter-clockwise to ON position (after you set a desired temperature). The indicator light will turn red. After the indicator light changes to green, rotate the knob to your desired temperature and set the Timer to the proper time as indicated in the particular recipe you are using. 2) Temperature Control Knob – Adjust the adjustable thermostat to your desired temperature. Please refer to the temperature in the particular recipe you are using. 3) Indicator Light - Red light indicates that the power is on. Green light indicates the deep fryer is heated and the set temperature has been reached. Note: You may need to preheat the fryer for 10-15 minutes before frying foods. 4) Oil Tank – Is removable. Constructed of stainless steel and easy to clean. 5) Body – Constructed of stainless steel and easy to clean. 6) Viewing Window – Allows you to see cooking process. 7) Filter – Carbon activated filter reduces odors. 8) Basket Handle – Easily attaches to wire basket to lower food into the fryer and to also lift out cooked food. 9) Basket – Can be hung on the edge of the deep fryer for food preparation before lowering into the oil. 10) Control Box Assembly & Heating Element – This piece is attached to each other. When lifting out the control box, the heating element will come out also. 1) 1 2 IMPORTANT SAFEGUARDS .. When using electrical appliances, basic safety precautions should always be followed, including the following: 1. Read all instructions before operating. 2. Do not touch hot surfaces. Use handles or knobs if applicable. 3. Remove all packaging plastics and other materials from unit before operating. 4. Wash all removable accessories before using for the first time. 5. To protect against electrical shock, do not immerse cord, plug or appliance itself in water or other liquids. 6. Close supervision is necessary when appliance is used by or near children. 7. Unplug from outlet when not in use and before cleaning. Allow to cool before putting on or taking off parts. 8. Do not operate any appliance with a damaged cord or plug or after the appliance malfunctions or has been damaged in any manner. Return the appliance to the nearest authorized service facility for examination, repair or adjustment. 9. The use of accessory attachments not recommended by the appliance manufacturer may cause injuries. 10. Do not use outdoors. 11. Do not let cord hang over edge of table or counter or touch hot surfaces. 12. Do not place on or near a hot gas or electric burner, or in a heated oven. 13. Always attach plug to appliance first, then plug cord into wall outlet. To disconnect, turn any control to OFF position, then remove plug from wall outlet. 14. Oversized foods or metal utensils must not be inserted in the appliance as they may cause a fire or risk of electrical shock. 15. A fire may occur if the appliance is covered or touching flammable material including curtains, draperies, walls and the like when in operation. 16. Do not clean with metal scouring pads. Pieces can break off the pad and touch electrical parts, involving a risk of electrical shock. 17. Extreme caution should be exercised when using containers constructed of other material other than metal or glass. 18. Do not store any materials other than manufacturer's recommended accessories in this unit when not in use. 19. Do not place any of the following materials in the unit: Paper, cardboard, plastic and the like. PREPARING YOUR FRYER .. BEFORE USING FOR THE FIRST TIME: Remove all printed documents and any other packaging materials. Pull out all removable parts and wash gently with hot water. Do not immerse the power cord and Control Box Assembly & Heating Element of the deep fryer into any liquids. Dry all parts thoroughly before assembling. Do not operate the fryer without enough oil in the oil tank. The Deep Fryer should always be placed on a flat surface where the power cord is out of reach of children and away from accidentally tripping over it. Tips: When you fry several different kinds of food, always fry the food that uses the lowest temperature setting first. Do not mix different types of oil for frying. Frying already pre-cooked foods may take less time to fry than completely raw food. Replace the oil after each 10-15 uses; or earlier if the oil becomes brown and thick. SAVE THESE INTRUCTIONS THIS PRODUCT IS FOR HOUSEHOLD USE ONLY! 3 4 OPERATING INSTRUCTIONS .. Make sure the Deep Fryer is UNPLUGGED. Remove the frying basket and attach the handle to the clip. Use only good quality frying oil such as Peanut oil, Vegetable oil, pure Corn oil, Sunflower oil, Canola oil, or Light Olive oil. Fill oil in the oil tank approximately between the MIN marking and the MAX marking. Do not fill over the MAX marking or lower than the MIN marking. Wipe the inside of the viewing window with a little oil to prevent condensation. Make sure the temperature control knob and the timer knob are set to the OFF position. PLUG the power cord into an outlet. Move the Timer knob to ON position or to the desired time, the indicator light will turn on RED. Adjust the temperature control knob to the desired temperature setting according to the particular recipe you are using. While the oil is preheating, prepare the food that is going to be fried. When placing the food into the basket, make sure it is as dry as possible. Do not add water, ice or wet food, it may cause HOT OIL SPLATTER. When frying Frozen food, clear off any ice particles and thaw food thoroughly. Do not overfill the basket. When the temperature has been reached, the indicator light turns GREEN. Set the Timer Knob to desired time. Lower basket of food into hot oil and cover fryer w/ lid. WARNING: DO NOT TOUCH THE CONTROL KNOBS WHEN THE FOOD IS FRYING. HOT STEAM MAY BE ESCAPING AND CAUSE BODILY HARM. Timer will sound when desired cooking time has been reached. The unit will shut off when the Timer reaches the OFF position. Remove food after 60 seconds before food starts soaking up too much oil. If the Timer is set to the STAY ON setting, the fryer will remain ON and at the set temperature. It will not automatically shut off. During the frying process, the oil temperature may drop when adding new food to be fried, the Green light will periodically change to the Red light and back. 5 FRYING GUIDE .. The frying times given in the chart are only a guide and should be adjusted accordingly to the quantity of food being fried. FOOD Temp. °F Shrimp Onion Mushrooms Fish Fillet Fish Fillet in batter Fish Cakes or Balls Sliced Meat Steak Chicken Strips st French Fries (1 time) nd French Fries (2 time) 265° 285° 285° 300° 300° 300° 340° 340° 360° 375° 375° *French Fries being fried a 2 nd Weight (grams) 250 150 300 250 400 400 400 400 500 500 250 Estimated Time 3-5 minutes 3-4 minutes 6-8 minutes 5-6 minutes 6-8 minutes 6-8 minutes 7-10 minutes 7-10 minutes 7-10 minutes 6-10 minutes 3-5 minutes time will be lighter and crispier. AFTER THE FOOD IS FRIED: 1. Make sure to turn the temperature control knob and Timer control knob to the OFF position and unplug the deep fryer. 2. Once food is done cooking, remove the lid, and hang the basket on the hook and let excessive oil drip into the oil pot. Warning: Removing the lid will release hot steam. Take extreme care when handling. Keep face and bare skin clear of the steam release. 3. Take out the basket and place the food on paper towels to absorb excess oil. Do not touch the basket while it is still hot. Always use the handle. 4. Transfer food to a clean dish without the paper towels. 5. Place the basket into the deep fryer. 6. Do not move the deep fryer until it is cooled entirely. 7. Unplug the power cord and store away. 6 CLEANING THE DEEP FRYER .. CARING FOR YOUR DEEP FRYER .. 1. Remove the lid and basket. WARNING: Before cleaning the deep fryer, make sure that it is disconnected from the power outlet, make sure the unit and the oil has completely cooled. Oil retains its temperature for a long period after use. Do not attempt to carry or move the deep fryer while the oil is hot. How to replace the filters: Your carbon filter should be changed every 6 months. The oil filter should be changed every 12 months. 1) Unclip and remove the filter cover. 2) Take out both white and black filter pieces. 3) Throw out old filters and replace with new filters. Make sure the White filter piece rests on the metal surface BELOW the carbon filter (black piece). 2. Wait for the fryer to cool, lift out the Control Box Assembly & Heating element. Remove the oil pot and pour out the oil. It is recommended to filter the oil after each use if you are to re-use the oil again. After removing the oil pot, the fryer can be divided into several separate assemblies to clean. The oil pot and the body can immerse into water to clean. If you are to immerse the lid of the deep fryer into water, it is recommended to remove the filter before doing so. The Control Box & Heating Element should be wiped clean with absorbent power towels. Then use a damp cloth and a mild soap to clean. WARNING: Do not immerse the Control Box & Heating Element into water to clean. Dry thoroughly all parts. Note: Do not use abrasive scrubbing brushes or chemical cleaners to clean the unit. STORING YOUR DEEP FRYER: Always allow the appliance to cool completely before storing. Store the appliance in a dry location. Keep the power cord out of reach of children. 3. 4. 5. 6. 7. .. SHORT CORD PURPOSE .. 1) 2) 3) A short power-supply cord is provided to reduce risks of injuring yourself from becoming entangled in or tripping over a longer cord. Longer extension cords are available and may be used if you exercise caution during use. If a longer cord is used please note the following: The marked electrical rating of the extension cord should be at least as great as the electrical rating of the appliance. The longer cord should be arranged so that it will not drape over the counter top of tabletop where it can be pulled on by children or tripped over unintentionally. - …POLARIZED PLUG … If this appliance has a polarized plug (meaning one blade is wider than the other one), please follow the below instructions: To reduce the risk of electric shock, this plug is intended to fit into a polarized outlet only in one direction. If the plug does not fit fully into the outlet, reverse the plug. If it still does not fit, contact a qualified electrician. Do not attempt to modify the plug in any way. This appliance is intended for Household Use Only. 7 8