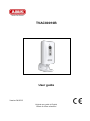
1
TVAC80010B User manual Instrukcja obsługi Brugerhåndbog E Manual del usuario You can find important information and FAQs about this and other products on the website www.abus.com/plug-and-play Version 04/2013 English This user guide contains important information on starting operation and using the device. Make sure that this user guide is handed over when the product is given to other persons. Keep this user guide to consult later! For a list of contents with the corresponding page numbers, see page 5. Polski Niniejsza instrukcja obsługi zawiera ważne wskazówki dotyczące uruchamiania i obsługi. Pamiętaj o tym, także przekazując produkt osobie trzeciej. Zachowaj instrukcję do wykorzystania w przyszłości! Wykaz treści znajdziesz w spisie treści z podaniem odpowiednich liczb stron na stronie 21. Dansk Denne betjeningsvejledning indeholder vigtige henvisninger til idriftsættelse og håndtering. Vær også opmærksom på dette, hvis produktet gives videre til en tredje person. Opbevar derfor denne betjeningsvejledning til senere brug! I indholdsfortegnelsen på side 37 findes der en liste over indholdet med angivelse af de pågældende sidetal. Español Este manual de instrucciones contiene indicaciones importantes para la puesta en funcionamiento y para la utilización. Tenga esto en cuenta, también cuando transfiera este aparato a terceras personas. Por este motivo, guarde este manual para poder consultarlo cuando lo necesite. El listado de los contenidos figura en el índice junto a las páginas correspondientes en la página 53. TVAC80010B User guide Version 04/2013 Original user guide in English. Retain for future reference! English Introduction Dear customer, Thank you for purchasing this product. This device complies with the requirements of the applicable EU directives. The declaration of conformity can be ordered from: ABUS Security-Center GmbH & Co. KG Linker Kreuthweg 5 86444 Affing GERMANY To ensure this condition is maintained and that safe operation is guaranteed, it is your obligation to observe these operating instructions! Read the entire user guide carefully before starting operation of the product, and pay attention to all operating instructions and safety information! All company names and product descriptions are trademarks of the corresponding owner. All rights reserved. In the event of questions, please contact your local maintenance specialist or dealer. Warning as required by §201 StGB (German Criminal Code): Whosoever unlawfully makes an audio recording of the privately spoken words of another; or uses, or makes a recording thus produced accessible to a third party, shall be liable to imprisonment or a fine. Whosoever unlawfully overhears with an eavesdropping device the privately spoken words of another not intended for his attention; or publicly communicates, verbatim or the essential content of, the privately spoken words of another, recorded or overheard, shall incur the same penalty. Disclaimer This user guide has been produced with the greatest of care. Should you discover any missing information or inaccuracies, please contact us under the address shown on the back of the manual. ABUS Security-Center GmbH does not accept any liability for technical and typographical errors, and reserves the right to make changes to the product and user guide at any time and without prior warning. ABUS Security-Center GmbH is not liable or responsible for direct or indirect damage resulting from the equipment, performance and use of this product. No forms of guarantee are accepted for the contents of this document. 2 English Explanation of symbols The triangular high voltage symbol is used to warn of the risk of injury or health hazards (e.g. caused by electric shock). The triangular warning symbol indicates important notes in these operating instructions which must be observed. This symbol indicates special tips and notes on the operation of the unit. Important safety information All guarantee claims are invalid in the event of damage caused by non-compliance with this user guide. We cannot be held liable for resulting damages. In the event of material or personal damage caused by improper operation or noncompliance with the safety information, we cannot be held liable. All guarantee claims are voided in such cases. This device has been manufactured in accordance with international safety standards. Please read the following safety instructions carefully. Safety information 1. Cleaning Only use a damp cloth to clean the device. Do not use corrosive cleaning materials. 2. Installation position This device is intended for protected outdoor areas as well as indoors. The product may be damaged if it is dropped, even from a low height. Install the device so that the image sensor is not subjected to direct sunlight. Pay attention to the installation instructions in the corresponding section of this user guide. Never place the device close to heaters, stoves, other sources of heat, or in direct sunlight. Only operate the device at locations with temperatures within the permitted ambient temperature range of -5 °C to +55°C. 3. Information on handling batteries Make sure that batteries are kept away from small children. Children may put batteries in their mouths and swallow them. This can cause serious harm to their health. If this happens, consult a doctor immediately. Do not charge normal batteries, heat them up or throw them into naked flames (they may explode). The battery must not be directly exposed to heat or sunlight, and must not be stored in a place with a very high temperature. The battery must not come into contact with water. The battery must not be dismantled, pierced or otherwise damaged. The battery contacts must not be short-circuited. Change low batteries in good time. Always change all the batteries at the same time and use batteries of the same type. Leaky or damaged batteries can cause chemical burns on contact with the skin. In this case, wear protective gloves. Clean the battery compartment with a dry cloth. 3 English Warnings Observe all safety and operating instructions before putting the device into operation for the first time. Avoid the following adverse conditions during operation: Temperatures outside the permitted range Direct sunlight Dust or flammable gases, vapors, or solvents Strong vibrations Strong magnetic fields (e.g. next to machines or loudspeakers) The camera must not be directed toward the sun, as otherwise the sensor may be destroyed. The time lapse/motion detector outdoor camera must not be installed on unstable surfaces Unpacking the device Handle the device with extreme care when unpacking it. If the original packaging has been damaged, inspect the device. If the device shows signs of damage, return it in the original packaging and inform the delivery service. 4 English Contents 1. Intended use ............................................................................................................................................... 6 2. Scope of delivery ....................................................................................................................................... 6 3. Features and functions .............................................................................................................................. 6 4. Information and FAQs ............................................................................................................................... 6 5. Device description ..................................................................................................................................... 7 6. Installing the camera ................................................................................................................................. 8 7. Operation .................................................................................................................................................. 10 8. Settings ..................................................................................................................................................... 13 9. Maintenance and cleaning ...................................................................................................................... 14 9.1 Maintenance.......................................................................................................................................... 14 9.2 Cleaning ................................................................................................................................................ 14 10. Disposal .................................................................................................................................................... 14 11. Tips for troubleshooting .......................................................................................................................... 15 12. Technical data .......................................................................................................................................... 15 5 English 1. Intended use The time-lapse/motion-triggered outdoor camera has two functions in one. It can be used as a time-lapse camera or for motion-triggered recordings indoors or outdoors. The weatherproof time-lapse camera is ideal for long-term surveillance. At intervals determined by you from 1 second to 24 hours, it saves an image on a micro SD card which you can then conveniently play as an AVI film on your PC. The camera has a PIR sensor for motion detection. As soon as the camera's PIR sensor detects body heat, the recording starts on the micro SD card. The recording can then be watched conveniently on a PC. For a detailed description of functions, refer to Section 3, “Features and functions”. 2. Scope of delivery Time-lapse/motion-triggered outdoor camera Camera mount including mounting material Fastening nut Hinge sleeve Hinge screw 4 x 1.5 V batteries 3. Features and functions Two functions in one device: time-lapse camera and motion-triggered outdoor camera Time-lapse camera with recordings at various intervals: ideal for long-term surveillance Motion detector: intelligent motion detection thanks to its integrated PIR sensor Integrated 2.4" LCD monitor Videos are saved to a micro SD card (not included) AVI video format makes playback on a PC easy Wireless and uncomplicated installation thanks to battery power (4 x AA batteries included) Weatherproof housing (protection class IP 65) 4. Information and FAQs You can find important information and FAQs about this and other products on the website www.abus.com/plug-and-play. You will find information for troubleshooting under item 11 of these instructions. 6 English 5. Device description Menu / Set / OK Micro SD card slot Menu: Open the menu Set: Change/confirm settings Power: Switch on the camera OK: Save the settings Up to max. 32 GB The device does not have an internal memory. A micro SD card is required to save the recording. Navigate between menu items Navigate between menu items Switch for Motion detector/time-lapse Left (PIR ON): Motion detection Right (PIR OFF): Time-lapse camera 1/4” thread Attachment on the camera mount 1/4” thread Attachment on the camera mount Monitor 2.4" LCD screen Battery compartment 4 x 1.5 AA batteries Microphone For recording sound Image sensor ¼" CMOS sensor LED On: Recording Off: Not recording PIR sensor For motion detection 7 English 6. Installing the camera Use a screwdriver to open the battery compartment. Insert a micro SD card (max. 32 GB, not included). Press the right switch to select between timelapse and motion detection recording (please see device description, no. 6). Insert four 1.5 V AA batteries. Make sure the polarity is correct. Close up the battery compartment again using the screwdriver. Put the hinge sleeve on the hinge screw. Now screw both parts together with the fastening nut. Do this by turning the cap clockwise. To attach the camera to a wall or ceiling, first use the mount as a drill template. Drill the holes and use the wall plugs and screws supplied to attach the mount. Then screw the mount onto the fixing plate. 8 English Then screw the camera onto the mount. Adjust the camera into the required position and tighten the screw. Please note: Mount the camera making sure that the ABUS logo can be seen and it is not the wrong way up. If it is mounted incorrectly, the recordings will be reversed horizontally! 9 English 7. Operation To operate the device, proceed as follows: Please note: The device begins recording as soon as the batteries are inserted. Select motiontriggered recording / time-lapse recording Switching on the device / opening the menu Setting the date and time First select the required mode by ensuring the switch in the battery compartment is in the correct position. Left (PIR ON): Motion-triggered recording Right (PIR OFF): Time-lapse recording Press the power button for three seconds and then release. You will receive the live picture. Press the Menu/Set button to open the menu. Menu guidance Set the time when starting the device for the first time: Press the menu button to open the submenu. You can change the digits using the arrow buttons. Use the Power/OK button to move to the next entry. Once the setting has been successfully made, return to the main menu with the Menu/Set button. Use the ▼▲ buttons to navigate between the menu items. Press the Menu/Set button again to change the settings. You can change the values using the arrow buttons and press the Power/OK button to save the setting. Return to the main menu with the Menu/Set button. After exiting the menu the settings are displayed again, the screen then switches itself off, the camera returns to normal operating mode and records again. Stopping recording Press the Power/OK button for 5 seconds to stop a recording. In the time-lapse mode, you receive the following message: “Complete Power Off”. The camera is now switched off. Playing back recordings In the motion-triggered recording mode, you receive the following message: “Complete power off. Please turn off PIR switch”. Set the switch (6) to time-lapse function to switch off the device completely. Now the device is turned off and you can remove the batteries and micro SD card. To watch the recordings, remove the micro SD card and use a suitable card reader to play back on the PC. A TIME-LAPSE folder is created for recordings in the time-lapse mode and a folder named “DCIM saved on the micro SD card” for motion-triggered recordings. Please note: After exiting the menu, the LCD screen switches off after 10 seconds. If no buttons are pressed in live picture after switching on, the monitor switches off again after 20 seconds. Please note: To go to the menu, the LED must not light up red. 10 English Menu Set Time 2012/12/01 12:02:15 Timelapse Interval 1,5 sec AVI Frame Rate 30 FPS Motion Record Life 30 sec Video Resolution 1280 x 720 2012/ 12/ 01 12: 02: 15 Band Filter 60 Hz Firmware Version S1 T0.12 Reset Setting No Exit 60 Hz 11 English Explanation of terms Set Time Time-lapse Interval AVI Frame Rate Motion Record Live Video Resolution Adjusting date and time. Defining the time-lapse interviews. You can choose between the following values: 1,5 seconds 5 seconds 10 seconds 30 seconds 1 minute 5 minutes 10 minutes 30 minutes 1 hour 5 hours 10 hours 24 hours Here you can set the frame rate for the video recording in AVI format. You can choose between the following frame rates: 1FPS, 10FPS, 30FPS Defining the recording duration for motion detection. You can choose between 10 frames or 30 seconds. 10 images = 10 images (1 image/ second) are recorded and saved as an AVI file. 30 seconds = a 30 second long video is saved in AVI format. Defining the resolution. Here you can choose between the following video resolutions: 1280 x 720, 640 x 480 Settings Here the current settings of the menu items are displayed. Band Filter Defining the network frequency Here you can make adjustments to the network frequency in your country to prevent flickering in the picture. You can choose between the following frequencies. 50Hz / 60Hz Firmware Version In the “Firmware Version”menu item, you can see the current version of the firmware. Reset Setting Restore default parameters. This function lets you reset the camera to the default settings and all the previous settings are deleted. To do so, select “Yes”, confirm with “OK” and then “Set”. Exit After exiting the menu the camera returns to normal operating mode and records again. Display information SD Full… Storage capacity Once your micro SD card is full, the “SD Full” message appears every 3 seconds on your screen. If an SD card has not been inserted “No SD” appears. No SD… Low Battery… PIR recording (Picture / Video) Check the storage capacity of the card regularly! Battery life As soon as the battery is running low, the “Low Battery” message appears. Check the batteries regularly! Recording mode If the “PIR recording (Picture / Video)” message appears, the camera is recording. 12 English 8. Settings Once the time-lapse setting has been made, the live picture appears after exiting the menu and the following message with your setting values. TimeLapse Mode Enable TimeLapse Interval: 1,5 sec AVI Frame Rate: 30 FPS Video Resolution: 1280 x 720 Band Filter: 60 Hz For the motion detection settings, the following screen appears after the settings have been made. PIR-Video Mode Enable Motion Record Live: 30 sec Video Resolution: 1280 x 720 Band Filter: 60 Hz To save the battery, the screen switches off after 10 seconds and starts with the recording. Please note: During motion-triggered recording, you cannot open the menu! After pressing a button, the “PIR recording (Picture / Video)” message appears in your display. Wait until the recording has finished (max. 30 seconds) before opening the menu. Please note: Motion-triggered recording is extremely sensitive to motion. Position the camera so that no unnecessary movement is detected. Please note: An audio recording is only made when motion detection is in the AVI format (30 seconds recording duration, the LED must not light up red). 13 English 9. Maintenance and cleaning 9.1 Maintenance Examine the technical safety of the product regularly, e.g. check the housing for damage. If it seems that it may no longer be possible to operate the device safety, stop using the product and protect it from unintentional use. It is likely that safe operation is no longer possible in the event that: The device shows signs of visible damage. The device no longer works correctly Please note: You do not need to perform any maintenance on this product. There are no components to service or anything inside the product to check. Never open it. 9.2 Cleaning Clean the device with a clean, dry cloth. The cloth can be dampened with lukewarm water if the dirt on the monitor is hard to remove. Do not allow any liquids to enter the device. Do not use any chemical cleaning agent, as they could damage the surface of the housing (discoloration). 10. Disposal Important information on device disposal The EU Directive 2002/96/EG regulates the proper return, treatment and recycling of used electronic devices. This symbol means that in the interest of environmental protection the device must be disposed of separately from household or industrial waste at the end of its service life in accordance with applicable local legal guidelines. Disposing of used devices can be done at official recycling centers in your country. Obey local regulations when disposing of material. Further details on returns (also for non-European countries) can be obtained at your local authority. Separate collection and recycling saves natural resources and ensures that all the provisions for protecting health and environment are observed when recycling the product. Important information on battery disposal Batteries with this label do not contain harmful substances such as cadmium, lead and mercury. However, used batteries must not be disposed of along with household waste in accordance with the battery directive. To protect natural resources and promote the recycling of materials, separate the batteries from other waste and deposit them at a local recycling center. An additional label with the chemical symbols for Hg, Cd or Pb means that the batteries contain quantities of mercury, cadmium or lead which exceed the restrictions set by the EU Directive 2006/66. If batteries are not disposed of properly, these substances can cause harm to human health or the environment. 14 English 11. Tips for troubleshooting No. Question Answer 1 Can I switch off the camera temporarily? No, the device begins recording as soon as the batteries are inserted. 2 Is the camera wind- and weatherproof? Yes, the camera has protection class IP65 and is intended for use both indoors and outdoors. 3 Which brightness will provide the best image? 10 lux and more are the best light conditions. 4 Does the camera have a night vision function? Because this is a battery-operated camera, night vision was not integrated. For the best images, good light conditions or, at night, sufficient illumination are needed. 5 What could be the reasons why the device does not record? If your device does not record, please check the following: 1. Have you inserted a microSD card? 2. Is the microSD card locked? (Lock/Unlock) 3. Have you formatted the microSD card? It must be formatted before it is first used. 12. Technical data Model number TVAC80010B Monitor Picture resolution 640 x 480 / 1280 x 720 Video resolution Sensor PIR range Video format Storage medium Audio Power supply IP protection class Dimensions Weight Max. operating temperature 2.4" LCD monitor 640 x 480 @ 30fps / 1280 x 720 @ 30fps 2 megapixel CMOS Max. 3 m MJPEG Micro SD card, max. 32 GB (not included) Yes, for motion detection 4 x AA batteries IP65 80 x 48 x 150 mm 350 g incl. batteries -5°C to +55°C 15 English Battery lifetime Time interval Battery lifetime 1,5 second Image recordings 43200 5 seconds 12960 14 hours 10 seconds 8640 24 hours 30 seconds 4320 2 days 1 minute 2880 3 days 5 minutes 1152 4 days 10 minutes 1152 8 days 30 minutes 768 16 days 1 hour 768 32 days 5 hours 312 65 days 10 hours 312 130 days 24 hours 270 270 days 14 hours Storage capacity 1GB 2GB 8GB 16GB 32GB Recording duration PIR // 640 x 480 // 30 seconds 51 minutes 102 minutes 408 minutes 816 minutes 1.632 minutes Recording duration PIR // 1280 x 720 // 30 seconds 17 minutes 34 minutes 136 minutes 272 minutes 544 minutes 16 Image recordings Image recordings Time-lapse camera // Time-lapse camera // 640 x 480 1280 x 720 13.185 4.395 26.370 8.790 105.480 35.160 210.960 70.320 421.920 140.640