1
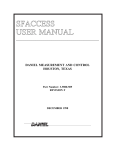
Table of Contents Elicom Electronic Ltd. PAGE 1. Warranty Card..................................... 3 2. Brief Description ................................ 4 3. Main Functions ................................... 4 4. Technical Data .................................... 4 Electronic Price Computing 5. Operating Instructions ...................... 5 Label Printing Scale 6. Scale Overview ................................... 6 7. Preparing For Use .............................. 7 8. Operation Modes ................................ 9 8.1. Weighing Mode ............................ 9 ETS 8.2. Label Printing ............................. 12 8.3. Service Mode.............................. 14 9. Error Mode ........................................ 23 10. ЕO Declaration of Conformity ......... 24 User’s Manual Scale Models Series ETS ETS xx L ETS xx S ETS xx B Elicom Electronic Ltd. 1. Warranty Card MODEL NAME: Electronic Scale Model: ETS DATE OF PURCHASE:……………………..… SERIAL №………………………………… LIMITED WARRANTY The warranty period for the Electronic Scale ETS is 12 months from the day of the purchase. To obtain and receive warranty service, you need to present the original Owner’s Manual along with Warranty Card in any authorized dealers and services. In order for the warranty to be valid, the product shouldn’t be opened; all stamps, lead seals and company logos on the scale should be untouched from any mechanical damages. Product damages should not be caused by any improper use of the scale. The warranty does not apply if: 1. The electronic scale has been opened or repaired by unauthorized services by Elicom Electronic Ltd. 2. The product does not operate correctly because of mechanical damage caused by improper use: damaged keyboard foil, broken display, mechanical hit or overload of the weighing platform or the load cell. ................................... (Date) Dealer:……………………. (Signature) Customer: ....................... (Signature) 2. Brief Description The information in the present instruction is given for electronic scales series ETS xx L1, L2, B1, B2, and S. The basic modifications of the scales from this series are: ETS xx L1 – Display Colum, User Display Window, Customer Display Window ETS xx L2 – Display Colum, User Display Window, Customer Display Window, Additional Keyboard with 56 buttons for direct choice of articles ETS xx B1 – User Display Windows, without Display Colum and Customer Display Window ETS xx B2 – User Display Colum, Additional Keyboard with 56 buttons for direct choice of articles, without Display Colum and Customer Display ETS xx S – Display Window with Keyboard for Self-Service * „хх” indicates the maximal load for the particular model The major function of electronic scales from series ETS is to determine the cost of the goods in correlation with their weight and price followed by printing the result on a label with barcode. The price can be determined by two ways: manually by using the digital keyboard or by using previously programmed commodity code or key for easy access. The scales allow storing information about the commodities in the form of names, price per unit, article code, expiration date and other text information. The build in memory allows storing more than 8,500 different articles. 3. Main Functions Weight determination of the weighed products Input of the price per 1 kg Storing data for price, Tare, name, expiration date and est. of more than 8,500 articles Displaying the information for the weight, price per unit and total value of the product on two widow displays one for the user and one for the customer Label printing of the chosen articles and their weight and price Redirecting the information to PC, cash registers Reports for the weighed goods Sound signals 4. Technical Data 4.1. General data for scales from series ETS 1. Dimensions: 350 х 300 х 130 mm 2. Shipping weight: 12 kg 3. Display: graphic LCD 240x64, displaying weight,price per unit, total price, information about the commodity 4. Printer – direct thermal print, width 75mm, print speed 50mm/sec III According to the Bulgarian State Standard EN 45501:2001 Classified Accuracy Error Limitation according to the Bulgaria State Standard EN 45501:2001 Number of check divisions: n = 3000 Working Conditions Power Supply - AC adapter ~ 220 V / ~ 24 V / 2,5A Maximum Power Consumption 60W Operating Temperature: -10 °C to +40 °C Air Humidity: 20 % to 80 % 9. Metal Platter: - Size 350 х 310 mm 5. 6. 7. 8. 5 Electronic Scales –models ETS хх L1, L2, B1, B2, S1, S2 4.2. Meteorological Specifications Type Manufacturer Classified Accuracy Maximal Load Minimal Load Value of the Real and Check Division Number of Check Divisions Range of TARE Power Supply Number of Measuring Intervals Operating Temperature ETS xx-x “Elicom electronic” Ltd , Bulgaria III 3 kg ≤ Max ≤ 30 kg 0,020 kg ≤ Min ≤ 0,200 kg 0,001 kg ≤ e ≤ 0,010 kg n ≤ 3000 for every partial measuring interval -Max1 – for dual range -Мах - for single range АС/DС adapter 220V AC/24V DC/ 3A 1 or 2 -10 ºС to 40 ºС 5. Operating Instruction 1. Open the box and take out its contents: Electronic Scale Display Window Display Colum AC adapter User’s Manual 2. Pass the Display Window cable through the metal Display Colum (tube). 3. Connect the Display window cable with the cable of the scale. 4. Insert the Display Colum (tube) into the display bracket in the back of the scale. Screw the Display column with the 2 assembly screws. 5. Fasten the Display Window to the Display Colum with the 2 assembly screws. 6. Place the scale onto horizontal surface (table). Level the scale by using the 4 adjustable legs at the bottom of the scale. Turn the legs clockwise or counterclockwise so the bubble of the leveling gauge is inside the indicated circle which is located under the metal platter in the left side of the scale. 7. Plug the scale AC adapter into a power outlet. 8. Turn On the scale using the ON/OFF switch located on the bottom left side of the scale. After the scale is turned on, an automatic self-check is started. Wait 10 minutes before you start using the scale. Turning the scale off is done by the same ON/OFF switch. 9. DO NOT place the scale on the following locations: Locations with quick changing temperature Locations on direct sun light Dusty places and location with high humidity Locations with direct path of oscillating fans, ventilation systems or vibrations 10. DO NOT leave loads on the platter for long periods of time 11. DO NOT place the scale near high magnetic fields or utilities generating electromagnetic filed 12. Keep the scale from spilling liquids because they can damage the electronics inside the scale 13. Avoid strong hits or shakes of the scale 6 Owner’s Manual 6. Scale Overview 6.1 Overview 6.2. Description 1. Measuring block 2. Barcode Label Printer: Printer type: direct thermal print Automatic unstuck of the label and winding of the main tape мах width of the label: 56mm ,203 dpi print speed: 75mm/sec 5 build in barcode print types: EAN13, EAN8, UPCA и др. 3. Main keyboard with User Display Window a. Display: Graphical LCD, 240x60, backlight Displaying information: Name of the commodity Weight: 5 digits Unit Price: 5 digits Total Price: 6 digits b. Keyboard: 32 keys, 9 keys for direct choice of PLU 4. Clients Display Window – Fig.8.1 Graphical LCD, 240x60, backlight Displaying information: Name of the commodity Weight: 5 digits Unit Price: 5 digits Total Price: 6 digit 5. 6. 7. 8. 9. 10. 11. 12. 13. 14. 15. Keyboard with 56 buttons for direct choice of articles Connector for additional devices: barcode scanner, PC keyboard Leveling gauge Collecting interface module Lead seal screws Display column (tube) Metal platter Power supply jack, interface connectors RS232, Ethernet Power switch ON/OFF Serial number plate, Metrological specifications, Control stamps Method of lead sealing 7 Electronic Scales –models ETS хх L1, L2, B1, B2, S1, S2 6.3. Stamps and Lead Sealing The scales from series ETS have ЕО certificate for approved type and correspond with the “Regulation for the main requirements and the measure of quality for scales with non-automatic operation” According to the requirements in appendix 8 from the Regulation, on the left side of the scales is placed a label with serial number, meteorological characteristics of the scale, CE logo for correspondence and the year of which the valuation for correspondence was done. The scales are also stamped with lead seal against unauthorized opening and disassemble. 7. Preparing For Use 7.1. Turn On the Power Source Before installing the scale is necessary to inspect the device for any mechanical damages that may have occurred during the transportation. After the inspection is done the scale is ready for installation. Place the scale onto horizontal surface. Level the scale by using the 4 adjustable legs at the bottom of the scale. Turn the legs clockwise or counterclockwise so the bubble of the leveling gauge is inside the indicated circle which is located under the metal platter in the left side of the scale. After the scale is properly placed for work, normal working conditions should be provided: Operating Temperature - 10 °C to +40 °C Air Humidity 20 % to 80 % Power Source 220V Power Source Frequency 50 Hz DO NOT plug the AC adapter in any power source different from the 220V/50Hz!!! Avoid overload of the scale with weights greater that the specified Maximal Load! ON/OFF switch Fig. 7.1 8 Owner’s Manual 7.2. Installation of the Label Roll 1. 2. 3. 4. 5. 6. 7. Open the top cover (platter) Place the label roll Unlock the thermal print head by pushing the button (Fig.7.2) Feed the paper tape through the slot between the 2 shafts and the thermal print head Fix the caring paper tape to the rolling mechanism with the Press Bracket (Fig.7.2) Close the thermal print head by pushing it against till you hear “CLICK” Press the PRN key with the top cover open. The printer should eject one or more blank labels 3. Unlocking the thermal print head 5. Press bracket Fig. 7.2 7.3. Connecting External PC Keyboard Connect the keyboard to the connector labeled „KEYB” located on the side of the Main Display block Fig. 7.3 7.4. Connecting External Devices On Fig.7.1 are shown all interface connectors of the ETS scale. 1. The scale can be connected via Ethernet Connection to network SWITCH or HUB by its standard 8 pin RJ45 connector labeled on Fig.7.1 as “Ethernet” 2. The connectors RS232 are labeled on Fig.7.1 as „RS232” and are designed as: a. RS1 – 4 pin RJ11 is situated in the middle next to the 8 pin RJ45 – designed for direct RS232 connection with PС. The speed of the transfer is setup in SERVICE MODE. b. RS2 - 4 pin RJ11 is situated on the far left end – designed for loop connection with scales type EVL or EEP. 9 Electronic Scales –models ETS хх L1, L2, B1, B2, S1, S2 8. Operation Mode The scale works in 2 major modes: “WEIGHING” and “SERVICE”. Both modes are managed by the main keyboard. 8.1. WEIGHING MODE 8.1.1 Operation of the keyboard buttons 1. Turn On the scale using the ON/OFF switch – located on the bottom part of the scale (13) Fig. 8.1 2. Key ZERO SETTING >0< – it is used for setting zero to the load indicator. If due to external conditions temperature change or leveling the readout is not zero the >0< key is used to set the scale to zero. 3. Key TARE T – it is used for entering the Tare value. The load, which is currently being weighed, is considered as Tare. 4. Keyboard buttons on white background 0 , 1 , 2 , 3 , 4 , 5 , 6 , 7 , 8 , 9 , C . These buttons are used in WEIGHING mode are used for entering article’s prices per kilogram. Wrong figures are deleted by pressing the C key and the price setting starts from the beginning. These keys are also used to call previously set article price – the number of the article is followed by push of the PLU key and are stored as article numbers: 01, 02...89, 90…8,500. 5. Article keys on green background: 1 , 2 , 3 , 4 , 5 , 6 , 7 , 8 , 9 They are used for previously set article prices and tare weight. The total number of the stored articles depends on the memory of the scale. Scale models L2 and В2 are equipped with additional 56 button keyboard for direct choice of articles. 6. Key PRN is used for label printing. In SERVICE MODE the key is used to confirm the entered information. The button is also used as a FEED key when the scale is free of load – The FEED function ejects empty label from the printer. 7. Functional keys. PRG - triple press of the key switches the scale from WEIGHING MODE to SERVICE MODE CP - switches the scale from WEIGHING MODE to SERVICE MODE 10 Owner’s Manual 8.1.2. Turn On the Scale After the scale is turned on, an automatic self-check of all modules is started. Information about the software version and the IP address is shown on the display. During the self-check process no objects should be placed on the scale’s platter. START … VERSION 0.03 WEIGHING MODULE TEST=A1/100 PC connection IP= 192.168.44.202 PRINTER VER=2.22F After all self-check processes are completed the scale is switching to WEIGHING MODE. On the main display are shown zeros and “>0<” sign is lit. >0< 09.12.08 16:23:20 kg EUR/kg EUR 0.000| 0.00| The scale is ready for work. If the scale is showing DIFFERENT value than „0.000” while no load is placed on the platter, the >0< button is pressed to ZERO the scale. IMPORTANT: 1. In the far left part of the display is shown the weighed values or the values of the Tare. 2. In the middle part of the display is shown the keyboard inputted price or the previously saved price per unit. 3. In the far right part of the display is calculated the total value according to the weight and the price per unit 8.1.3. Weighing of commodities with price entered by the keyboard (freely entered price). Weighing and using the Tare >0< kg 09.12.08 16:23:20 EUR/kg EUR Place the weighed load over the platter. 0.000| 0.00| kg 09.12.08 16:23:20 EUR/kg EUR The scale will display the weighed commodity. Type the desired price per unit via the keyboard (white background) Example: 2 , 8 , 0 . EUR If the entered price is wrong press the C clear, then enter the new price. Example: 1.700| 0.00| 09.12.08 16:23:20 kg EUR/kg 1.700| 2.80| 4.76 kg 09.12.08 16:23:25 EUR/kg EUR 1.700| 2.50| 4.25 >0< kg 09.12.08 16:23:20 EUR/kg 0.000| 2.50| P EUR key and it will 2 , 5 , 0 In the field for total value is calculated the price. In this case: 4,25 Take Take the load from the platter. In the field for price per unit is the last entered price. The field for the total price is empty and it stay like that till the load is minimal for the scale. 11 Electronic Scales –models ETS хх L1, L2, B1, B2, S1, S2 Note: When the load is less than the minimal load (see the Min symbol on the front panel) the scale doesn’t calculate total price Work with TARE kg 09.12.08 16:23:20 EUR/kg EUR To remember the current weight as a TARE press the Т . key. 2.000| 1.20| 2.40 NET 09.12.08 16:23:20 kg EUR/kg EUR 0.000| 0.00| >0< ТАРЕ 09.12.08 16:23:20 kg EUR/kg EUR - 2.000| 0.00| >0< NET kg 09.12.08 16:23:20 EUR/kg Now the weight is set to Zero. Above the weight is displayed the „NET” symbol as a sign that a TARE is being entered and is showing the net weight. By pressing the Т. key the scale is displaying the weight of the Tare. After approximately 5 seconds the scale is back to displaying the net weight. EUR After the load is removed from the platter the scale is displaying the weight of the active Tare again. EUR When placing additional load, the scale is displaying its net weight. - 2.000| NET kg 09.12.08 16:23:20 EUR/kg 1.420| 1.20| 1.70 NET 09.12.08 16:23:20 kg EUR/kg EUR You can save a new Tare over again with the R key. Displaying the value of the active Tare is done again by pressing the T. button EUR Setting the scale to Zero is done by pressing the when the scale is free of load. 0.000| 0.00| >0< kg 09.12.08 16:23:20 EUR/kg Т . key 0.000| 0.00| 8.1.4. Weighing commodities with previously set price/ price and tare Let’s set the commodity as article № 398. >0< kg 09.12.08 16:23:20 EUR/kg EUR 0.000| 0.00| kg 09.12.08 16:23:20 EUR/kg 2.284| 3.98| Place the load. Enter the desired article number by using the numeric keyboard (white background) and press the PLU key. Enter the 3 , EUR 9 , 8 . keys. The entered number is displayed in the Price per Unit field, press the PLU key. If the chosen article is set with numbers 1 to 9. The article can be directly called by using the buttons 1 to 9 (green background) For scale models L2,B2 and S is possible to use the corresponding keys for direct call of articles. 12 Owner’s Manual LEAN PORK 80% kg EUR/kg EUR 2.284|20.70| 47.28 >0< 09.12.08 16:23:20 kg EUR/kg EUR In the price per unit field is displayed the price. The total price is re-calculated. On the top part of the display is shown the name of the article (LEAN PORK 80%). After the load is removed the price per unit field is set to Zero. The total price field is blank. 0.000| 0.00| LEAN PORK 80% NET kg EUR/kg EUR 2.170|20.70| 44.92 LEAN PORK 80% kg EUR/kg EUR - 0.150| >0< kg 09.12.08 16:23:20 EUR/kg If the chosen PLU has previously set Tare it is deducted from the weight and Net weight is shown. The NET sign is displayed and shows that there is a set Tare for the corresponding article and only the net weigh is shown. After the load is removed from the platter. The scale displays the value of the set Tare with negative sign. Setting the Tare to zero is done by pressing the Т . key when the scale is free of load. EUR 0.000| 0.00| 8.2. Label Printing 8.2.1. Printing the labels with the weighed commodities After the commodity is being weighed by one of the methods described in p.8.1 – with freely entered or previously set price is possible to print a label with the result of the weighed article. If a label is being print by freely set price there will be no characteristics of the commodity such as Name, Expiration Date and est. The field for these characteristics will be left blank or with the “ * ” symbol. kg 09.12.08 16:23:20 EUR/kg EUR 1. Place the desired load. The scale is displaying the weight. ЛВ 2. Enter from the keyboard the PLU № or Article № of the placed load: Example 2023. 0.360| 0.00| 09.12.08 16:23:20 kg ЛВ/kg 0.720|20.23| 7.28 ROASTED CHICKEN kg ЛВ/kg ЛВ 0.360| 3.00| 1.08 ROASTED CHICKEN kg PRINT > ЛВ/kg ЛВ 0.360| 3.00| 1.08 3. Press the PLU or No art key depending on if you have entered before the PLU № or the Article №. The scale displays the name and the price of the chosen article. 4. After the weight is set, the label can be printed by pressing the PRN key. In the top right corner of the display is shown “PRINT>” – as an indication that the label is printing. 13 Electronic Scales –models ETS хх L1, L2, B1, B2, S1, S2 The design of the label and the information on it is determined by previously set form. A detailed description of the software “Label editor” is enclosed in the SERVICE MANUAL. 8.2.3. Label printing with manually set QUANTITY of articles You can enter PRINT MODE QUANTITY of articles by pressing the * key in WEIGHING MODE. QTY SELECT ARTICLE/PLU: The scale is in PRINT MODE QUANTITY of articles and you should enter PLU № or Article №. Enter the desired number and press the PLU or No art key depending on if the entered number is PLU № or Article № of the load. QTY N.ART=00027 CHEESE EMENTHAL The scale displays Article №, name, price per unit and 1 peace of the chosen commodity. By using the keyboard you can enter different values for quantity. To delete the numbers press *. 1*8.30 = 8.30 QTY N.ART=00027 CHEESE EMENTHAL Print the Label with the PRN key. Choose an article by pressing PLU or No art 10*8.30 = 83.00 To exit the mode press CP 8.2.3. Label printing with manually set weight – RE-LABELING MODE You can enter RE-LABELING MODE by pressing the CP key when the scale is in WIGHING MODE. RE-LABELING SELECT ARTICLE/PLU: The scale is in RE-LABELING MODE and you should enter PLU № or Article №. Enter the desired number and press the PLU or No art key depending on if the entered number is PLU № or Article № of the load. RE-LABELING N.ART=00231 GREEK SALAD PRICE= 4.60 ; ENTER WEIGHT= The scale displays the Article №, name, price per unit. Now you have to enter the desired weight that is going to be printed on the label. Enter the weight by using the keyboard. To delete the entered number press CP . 000.000 RE-LABELING N.ART=00231 GREEK SALAD PRICE= 4.60 ; ENTER WEIGHT= Print the Label with the PRN button. . Choose an article by pressing PLU or No art To exit the mode press CP 000.520 8.2.4.Setting the print parameters: batches, № label, № stand, № operator, № scale >0< kg 09.12.08 16:23:20 EUR/kg 0.000| 0.00| EUR Enter the MODE from WEIGHING MODE when the scale is free of load by pressing PRG and after that PRN . 14 Owner’s Manual PARAMETERS: Batch numbers Р1, Р2, Р3 are used to enter numeric information onto the printed labels. They are used for applying batch numbers to the produced goods. PARAMETER: LABEL – determines the number of the active label, which is in use at the moment and is about to enter the printer. Use the arrows to change the position of the desired parameter and to change its value. Label related data P1=000000 P2=000000 P3=000000 LABEL=00 To go to the next parameters press the key. L;NUMBER – Label counter. It’s necessary to add parameter “LABEL №”, after each print the count increases. By using this menu you can check or change its current value. Label related data L.NUMBER=000000 OPERATOR=02 SCALE=02 STAND=01 Parameter OPERATOR– Operator’s № - identification which can be printed on the label. Parameter SCALE – Scale № - identification which can be printed on the label. Parameter STAND – Stand № - identification which can be printed on the label. To go to the next parameters press the key. Parameter AUTO LABEL – ENABLE/DISABLE automatic label print when the weight is greater than the minimum. To change the parameter press the + key. SELECT OPERATOR=02 SCALE=02 STAND=01 AUTO LABEL=DISABLED To exit the mode at any time press the CP key. 8.3. Service Mode >0< kg 09.12.08 16:23:20 EUR/kg To enter SEVICE MODE press the PRG key three times. EUR 0.000| 0.00| ENTER PASSWORD: 000000 You need to enter password to access the SERVICE MODE. The factory password is „123456”. After you enter the password press the PRN key. FIRMWARE=0.3; SELECT FUNCTION1. REPORTS 2. PLU SETUP 3. SYSTEM SETUP 4. TEST To choose the corresponding mode press one of the keys from 1 to 4. 15 Electronic Scales –models ETS хх L1, L2, B1, B2, S1, S2 GENERAL VIEW of the functions of the SERVICE MODE Firmware=0, 3 Select function 1. 2. 3. 4. SELECT REPORT1. BY PLU 2. BY GROUP 3. BY DEPARTAMENT 4. TOTALS SELECT PLU SETUP 1. PLU EDIT 2. FAST KEY MODE 3. PLU HANDLING 4. COMMON SETUP PLU EDIT – setup parameters PLU – name 1..6, price, expiration date, article (barcode) number FAST KESY MODE 1. ENABLE/DISABLE SELFSERVICE KBD 2. EDIT SELFSERVICE KBD LAYOUT REPORTS PLU SETUP SYSTEM SETUP TEST SELECT SETUP 1. SYSTEM 2. PRINTING 3. TIME/DATE 4. TEXT LINES SYSTEM SETUP 1. INTERFACE 2. COUNTRY 3. DECIMAL POINT 4. WEIGH MODULE PRINTING SETUP MEDIA – LABELS DISPENSER– ENABLED AUTOPRINT– DISABLED DENSITY – 00% PLU HANDLING 1. UNLOAD AFTER PRN 2. CLEAR PLU AFTER PRN SETUP TIME/DATE DATE: 11-12-08 TIME: 14:03:20 COMMON SETUP 1. EDIT DEPARTAMENT 2. EDIT GROUP NAMES 3. EDIT PREFIXES ART 4. EDIT PREDEF.TARES TEXT LINES 1. COMMON TEXT LINES 2. MONTHS NAMES SELECT TEST 1. PRINTER 2. WEIGH MODULE 3. KEYBOARD 4. INTERFACES PRINTER TEST WEIGH MODULE TEST KEYBOARD TEST KBD1:#0#0#0#0#0>ZERO KBD2:#0#0#0#0#0 KBD2:#0#0#0#0#0 INTERFACE TEST 1. LOOP 2. MONITOR 16 Owner’s Manual 1.REPORTS – REPORTS MODE SELECT REPORT – 1. BY PLU 2. BY GROUP 3. BY DEPARTAMENT 4. TOTALS Choose the desired mode by pressing the keys from 1 to 4. To exit the mode press CP . 1.1. BY PLU – report by PLU (articles) – TOT.PLU N.ART=00016 PLU.NR=1; ART=GERMAN HAM WEIGHT=00012.880 SUM =000080.20 The scale displays the Article №, PLU № and the name of the article. On the last 2 lines are displayed the accumulated weigh and total price for the chosen article. Changing to NEXT/PREVIOUS PLU № can be done by using the + / - .keys. The scale will find the first PLU № with accumulation different than 0 and will display it. During the memory scanning for PLU № different than 0, the scale will display SEARCH and the number that scans at the time. TOT.PLU N.ART=? PLU.NR=8601; ART=FREE PRICE PLU WEIGHT=00002.000 SUM =000010.10 After it scans the last PLU №, the scale also check accumulation entered by freely entered price that are different by zero. The PLU № is the maximal number plus 1. ENTER PLU NUMBER: 0055 (0001..8600) You can check the next PLU № by pressing the PLU key. The scale will display a field to enter the desired number. Enter the desired PLU №. For example: 0055 and press the PLU key. TOT.PLU N.ART=00123 PLU.NR=55; ART=APPLES WEIGHT=00010.200 SUM =00004.40 The scale shows the information about the new PLU №. To exit the mode at any time press the CP key. 1.2. BY GROUP – reports by groups TOT.GROUP GROUP=0; =Group 0 WEIGHT=00002.440 SUM =000009.80 The scale displays the number and the name of the group. On the last 2 lines are displayed the accumulated article’s weigh and total price. TOT.GROUP GROUP=1; =Group 1 WEIGHT=00005.500 SUM =000013.20 To change to NEXT/PREVIOUS group number use the + / - keys. GROUP=05 (00..20) To go to next group number press the PLU key. The scale will display a field to enter the group number. For example: 05 and press the PLU key. 17 Electronic Scales –models ETS хх L1, L2, B1, B2, S1, S2 TOT.GROUP GROUP=5; =Group 5 WEIGHT=00009.900 SUM =000010.10 The scale displays information about the new group number. To exit the mode at any time press the CP key. 1.3. BY DEPARTAMENT – Reports by department TOT.DEPART. DEPT=0; =Department 0 WEIGHT=00002.440 SUM =000009.80 The scale displays the number and the name of the department. On the last 2 line are shown the accumulated article’s weigh and total price. TOT.DEPART. DEPT=1; =Департамент 1 WEIGHT=00005.500 SUM =000013.20 To change to NEXT/PREVIOUS department number use the + / - keys. DEPARTAMENT=11 (00..20) To go directly to other department number, press the PLU key. The scale will display a field to enter the number. Enter the desired department number. For example: 11 and press the PLU key. TOT.DEPART. DEPT=5; =Департамент 11 WEIGHT=00009.900 SUM =000010.10 The scale displays information about the new department number. To exit the mode at any time press the CP key. 1.4. TOTALS – Total accumulations TOTAL WEIGHT=00002.440 SUM =000009.80 (press “C” key to clear all…) The scale displays the total accumulation for weigh and price. To delete all accumulations press the C key. CLEAR TOTALS? Confirm with “*” key Confirm that you want to delete by pressing the * SELECT REPORT – 1. BY PLU 2. BY GROUP 3. BY DEPARTAMENT 4. TOTALS After the DELETE is over the scale is going back into REPORT MODE. To exit the mode at any time press the CP key. key. 18 Owner’s Manual 2. PLU SETUP – programming mode PLU(articles) 2.1. PLU EDIT – editing information about the articles. Entering the text information is done by the use of external PC keyboard. Saving the changes and going to the NEXT/PREVIOUS article is done by using the + / - .keys. Moving the pointer through the list of parameters is done by using the arrows of the PC keyboard or using the 2 4 5 6 keys from the main keyboard. EDIT PLU#1 ENG Rep PRICE=003.00 TARE=00.000/01.284 NAME1=CHICKEN WINGS NAME2=PORK,SEASONING NAME3= PRICE- price per unit; TARE=00.000/1.284 – the first numbers is the current saved tare, the second number is the weight of the load placed at the moment. NAME1..NAME3- name1.. name3 of the article Programming of the current parameter is done by positioning the blinking pointer and entering the desired information. EDIT PLU#1 ENG Rep PRICE=003.00 TARE=01.284/01.284 NAME1=CHICKEN WINGS NAME2=PORK,SEASONING NAME3= The Tare is programmed by placing the blinking pointer over the desired parameter. Place the load over the platter which will be used as a Tare. To save the load press the Т key. At the moment of placing the load, the weight will show on right part of the parameter TARE. After saving it the value will appear on the left part of the parameter. EDIT PLU#1 ENG Rep NAME4= EXPIR=DAYS =000 NUM1 =00017 NAME5= NAME4, NAME5- name4, name5 of the articleа EXPIR=DAYS=00 – defines in what units is measured the expiration of the products. Types of units: DAYS; MONTHS; YEARS; HOURS are defined by positioning the blinking pointer over the desired text followed by the + key NUM1 – article № – used in the barcode EDIT PLU#1 ENG Rep NAME6= GROUP=00 DEPRT =00 LABEL=00 NAME 6 – name of the article GROUP,DEPRT,LABEL,PART – Defines the article’s affiliation to Group, Department, Label number and batch number. EDIT PLU#1 ENG Rep PRICE=03.00 NAME1=CHICKEN WINGS NAME2=PORK, SEASONING NAME3= To change the PLU № press the PLU key. ENTER PLU NUMBER:0002 Enter the new number followed by the PRN key. EDIT PLU#11 ENG Rep PRICE=03.00 NAME1=CHICKEN WINGS NAME2=PORK, SEASONING NAME3= To change the input mode ENG REP (English) to BDS (Bulgarian) REP press both Shift+CTRL keys of the external PC keyboard. EDIT PLU#11 Phonetic Rep To change from BDS (Bulgarian) REP to Phonetic 19 Electronic Scales –models ETS хх L1, L2, B1, B2, S1, S2 PRICE=03.00 NAME1=CHICKEN WINGS NAME2=PORK, SEASONING NAME3= (Bulgarian phonetic) Rep press the Shift+Alt keys. To exit the mode press the ESC key from the РС keyboard or CP from the main keyboard. 2.2. FAST KEYS MODE FAST KEYS 1.ENABLED/DISABLE SELFSERVICE KBD 2.EDIT SELFSERVICE KBD LAYOUT 1.Activating the Self-service mode of the keyboard 2.Editing the keyboard keys in Self-service Mode ENABLE SELFSERVICE KBD DISABLED (change with key “+”) 1.Enable/Disable of the Self-service Mode is done by pressing the + key. SELFSERVICE KBD LAYOUT KEY=PLU1 PLU=000000 (press key “T” for help) 2.Setting the PLU № for every button in Self-service Mode. The editing is done by switching to PLU № mode and choosing a key from the keyboard which is being set up now. When the “press key “T” for help” appears the scale awaits to enter a PLU № from the keyboard (white background) SELFSERVICE KBD LAYOUT KEY=PLU1 PLU=000000 When the text is hidden the scale awaits to push the key we wish to set up. Switching between the 2 modes is done by the PRG key. Additional sign that the scale is in the right mode is the symbol in front the KEY and PLU 2.3.PLU HANDLING – additional control of the PLU settings for the label printing Position the pointer over the desired parameter by using the arrows. Additional index for the current parameter is the symbol in front of ENABLED/DISABLED UNLOAD AFTER PRINT – remember to unload the scale after the label print. PLU HANDLING (change with key “+”) UNLOAD AFTER PRINT ENABLED CLEAR PLU AFTER PRINT ENABLED CLEAR PLU AFTER PRINT – remember that the scale will set to zero automatically after the label is printed. 2.4.COMMON SETUP PLU COMMON SETUP PLU 1. EDIT DEPARTAMENT NAMES 2. EDIT GROUP NAMES 3. EDIT PREFIX FOR ARTICLE NUMBERS 4. EDIT PREDEFINED TARES Common Setup: 1. Edit names and departments 2. Edit group name 3. Edit prefix for article numbers 4. Edit predefined Tares 20 Owner’s Manual 2.4.1. EDIT DEPARTAMENT NAMES DEPARTAMENT=00 NAME=Department 0 Enter the desired name of the corresponding department number. You need external PC keyboard to perform this task. To change to NEXT/PREVIOUS department number use the + / - keys. DEPARTAMENT=11 (00..20) To go directly to other department number, press the PLU key. The scale will display a field to enter the number. Enter the desired department number. For example: 11 and press the PLU key. DEPARTAMENT=11 NAME=Department 11 Enter the desired department name. To exit press the CP key. 2.4.2. EDIT GROUP NAMES GROUP=00 NAME=Group 0 Enter the desired name for the corresponding group number. You need an external PC keyboard to perform this task. To change to NEXT/PREVIOUS group number use the + / - keys. GROUP=12 (00..20) To go directly to other group number, press the PLU key. The scale will display a field to enter the number. Enter the desired department number. For example: 12 and press the PLU key. GROUP=12 NAME=ГрупGroup 12 Enter the desired group name. To exit press the CP key. 2.4.3. EDIT PREFIX FOR ARTICLE NUMBERS – Example: If set article numbers are in the form of: 80хххх, means that all numbers start with „80”, this parameter can be set up to: 000080. As a result the operator will have to enter only 4 digits followed by the No art key. The scale will automatically add „ 80” at the beginning and after that will perform search in the memory. EDIT PREFIX FOR ARTICLE NUMBERS: 000000 Enter the desired prefix. Example: 000080 To exit press the CP key. 21 Electronic Scales –models ETS хх L1, L2, B1, B2, S1, S2 2.4.4. EDIT PREDEFINED TARES – Editing 50 previously saved Tares, independently those set to the PLU numbers. EDIT PREDEFINED TARE 01. TARE=00.000/01.284 The scale will show Tare number 0 and the current value of the weight on the right part. The 2 numbers are divided by the symbol: „ / „ To change to NEXT/PREVIOUS saved Tare use the + / - keys. EDIT PREDEFINED TARE 01. TARE=01.284/01.284 Place the desired load you wish save as a Tare. After the value is shown in the right part of the display press the Т key. As a result the saved value in the left part will change to the current value from the right part of the display. ENTER TARE NUMBER=15 (01..50) To go directly to other group number, press the PLU key. The scale will display a field to enter the number. Enter the desired department number. For example: 15 and press the PLU key. EDIT PREDEFINED TARE 15. TARE=00.720/01.200 If you want repeat the steps described above to set a new Tare. To exit the mode press CP 3.SYSTEM SETUP SYSTEM SETUP 1. INTERFACE 2. COUNTRY 3. DECIMAL POINT, MONEY 4. WEIGH MODULE Menu: SYSTEM SETUP 1. Interface Setup – RS232,IP address,printer 2. Language Setup – keyboard, display 3. Decimal Point and Currency Setup 4. Weigh Module Setup: CALIBRATION 3.1. SYSTEM 3.1.1 INTERFACE SETUP: serial port, scale number, IP address, serial port for printer connection Menu: Interface Setup SETUP INTERFACE: 1. Speed setup for RS232 1. PC,BAUD=038,4 2. Scale logical number setup 2. SCALE NUMBER=00 3. IP address 3. ETHERNET IP=192.168.0.79 4. Setup of the communication speed with the build in 4. PRN,BAUD=009.6 printer. 3.1.2 COUNTRY – language setup of the keyboard and the display; code page LANGUAGE – Regional settings of the keyboard CODEPAGE – Code page for the articles and labels data. By using the arrows move the blinking pointer over the desired parameter. To change the value use the + key. COUNTRY: LANGUAGE= BULGARIA CODEPAGE= MIK (change with key “+”) 3.1.3. DECIMAL POINT, MONEY – Setup of the currencies;correlation between the 2 currencies Menu: Setup of the decimal point and currency symbol SETUP DECIMAL POINT, MONEY Currency 1 – symbol;decimal point MONEY1= € X.XX Currency 2 - symbol;decimal point MONEY2= ?~~~ X.XX You need an external PC keyboard to add text symbols of MONEY1/MONEY2=0000/0000.0000 the currency 22 Owner’s Manual 3.1.4. WEIGH MODULE – Calibration of the scale – Detailed calibration instructions are attached in separate CALIBRATION INSTRUCTION 3.2. PRINTING – print setup – labels, automatic print, print density PRINTING SETUP MEDIA -LABELS DISPENSER - ENABLED AUTOPRINT – DISABLED DENSITY – 00% MEDIA –LABELS – by using the + key choose the print type on labels or thermal paper (LABELS/PAPER) DISPENSER – ENABLED AUTOPRINT –DISABLED – auto prints labels when the weight is defined. Use the + key to ENABLED/ DISABLED DENSITY – 100% 3.3. TIME/DATE – time setup – date, time SETUP TIME/DATE DATE: 15-12-2008 TIME: 14:04:30 Place the blinking pointer using the arrows to set DATE and TIME by using the digits from the main keyboard. To exit the mode press CP 3.4. TEXT LINES –abbreviations, months 3.4.1. COMMON TEXT LINES – Setup of advertising messages and common text lines Place the blinking pointer on the text by using the arrows. COMMON TEXT LINES ENG Rep By using the external PC keyboard type the text you want LINE1>ADVERTISING LINE1 to be printed on the label. Advertising line 1 shows on the WELCOME , DEAR CUSTOMER! display. The advertising line number is changed by using the + and * keys. To exit the mode press CP 3.4.2. MONTHS NAME – Setup of the month’s names and use of abbreviations Place the blinking pointer on the desired parameter by using the arrows. With the external PC keyboard type the month’s names and abbreviations for day, month, year, time. These names will be used for expiration dates in text form. MONTHS NAMES ENG Rep MONTH1= MONTH2= MONTH3= MONTH4= To exit the mode press CP 23 Electronic Scales –models ETS хх L1, L2, B1, B2, S1, S2 9. Error Mode 9.1. PRIMARY SELF-CHECK: With the initial start the display shows: START ….. VERSION 0..7 WEIGH MODULE TEST = A1/100 PC CONNECTION IP=192.168.0.202 PRINTER VER=2.22F Software version Test of the connection and WEIGHTING MODULE version Test of the Ethernet connection and IP address Test of printer connection and software version IMPORTANT: If there are no values on the right side of the equations on 2nd, 3rd and 4th line – most likely there is no connection with the corresponding module due to disconnected cable or damage in the module. The scale will still operate without Ethernet connection or failure of the printer module, in case of load cell failure the scale freezes. 9.2. ERROR MASSEGES WEIGH MODULE FAIL …. SYSTEM BLOCKED 21-01-09 22:10:05 ;0;ERR PRINTER ERROR: NO PAPER Due to lost connection with the load cell. The scale freezes. Possible cause: Disconnected cable Module failure ZERO SET ERROR. The scale freezes. Possible cause: Placed load during the scale start Opened top cover (platter) Damager connection or load cell failure PRINTER ERROR – NO PAPER Possible cause: The paper roll needs to be changed 9.3. WHAT TO DO WHEN AN ERROR MESSAGE APPEARS When an error message appears: Unload the scale Turn Off the scale Check for disconnected power supply or interface cable Open and close the top cover (platter) very carefully Turn On the scale again – if an error message appears again, please contact your nearest authorized service 24 Owner’s Manual Declaration of conformity The non-automatic weighing instrument class: Elicom electronic Ltd, Bulgaria, Silistra 7500 5th Saedinenie sq. ETS xx-x-x Manufacturer: Type/Model: Serial Number: № of the EC certificate type-approval NB1799 T050 Corresponds to the production model described in the EC type-approval certificate and tо the requirements of the following EC directives: 90/384/EEC 93/68/EEC 2004/108/EC In conformity with the following standards: БДС EN45501:2001 БДС EN61000-4-4:2006 БДС EN61000-4-3:2006 БДС EN61000-4-2+A1+A2:2004 БДС EN61000-4-11:2006 and to the following laws: Regulation for the main requirements and the measure of quality for scales with nonautomatic operation The CE verification has been made by manufacturer in conformity to the certificate of approval № BG-Q-07-001/31.07.2007 of the production system quality guarantee approved by "MEGACOMMERCE" Ltd. - Directorate "Conformity Assessment", Notified body №1863 The CE verification has been made in zone: Date: 20.01.2009 g=9,80539 m/sec² Signature: ELICOM ELECTRONIC Ltd eng. Todor Georgiev /Executive Director/ Electronic Scales –models ETS хх L1, L2, B1, B2, S1, S2 HEAD OFFICE 7500 Silistra, Bulgaria 5, Saidinenie sq. PO Box 188 Tel.: +359/ 86 /820 200, 882 255 Fax: +359/ 86 /820 555 e-mail: [email protected] OFFICE AND SERVICE 1784 Sofia, Bulgaria 131, Tsarigradsko shosse, "ATM Center", fl. 4, office 403 Tel.: +359/ 2 / 974 4391 Fax: +359/ 2 / 974 4391 e-mail: [email protected] www.elicom-bg.com 25