1
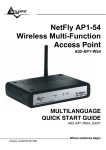
NetFly AP1-54
Wireless Multi-Function
Access Point
A02-AP1-W54
QUICK START GUIDE
A02-AP1-W54_GE01
Where solutions begin
ITALIANO
Questo prodotto è coperto da garanzia Atlantis Land
Fast
Swap della durata di 3 anni. Per maggiori dettagli in merito o
per accedere alla documentazione completa in Italiano fare
riferimento al sito www.atlantis-land.com.
ENGLISH
This product is covered by Atlantis Land 3 years Fast Swap
warranty. For more detailed informations please refer to the web
site www.atlantis-land.com.
For more detailed instructions on configuring and using this
device, please refer to the online manual.
FRANCAIS
Ce produit est couvert par une garantie Atlantis Land
Fast
Swap de 3 ans. Pour des informations plus détaillées, référezvous svp au site Web www.atlantis-land.com.
DEUTSCH
Dieses Produkt ist durch die Atlantis Land 3 Jahre Fast Swap
Garantie gedeckt. Für weitere Informationen, beziehen Sie sich
bitte auf Web Site www.atlantis-land.com.
ESPAÑOL
Este producto està cubierto de garantía Atlantis Land Fast Swap
por 3 años. Para una información más detallada, se refiera por
favor al Web site www.atlantis-land.com.
Where solutions begin
The award of the information is facultative, but its lack will
prevent ATLANTIS LAND® from starting the Guarantee process
requested.
R
R
g
o
u
p
o
d
u
Reeeg
giiisssttteeerrr yyyo
ou
urrr p
prrro
od
du
ucccttt!!!
w
w
w
w
n
n
d
o
m
ww
ww
w...aaatttlllaaan
ntttiiisss---lllaaan
nd
d...ccco
om
m
Registration
on
the
web
site
www.atlantis-land.com within 15 days
from the purchase of the product dismiss
the customer from showing a valid proof of
purchase (Sale Receipt or Invoice) in case
of the request of intervention. For further
information we invite you to look at our web
site at the section WARRANTY.
Copyright
The Atlantis Land logo is a registered trademark of Atlantis Land
SpA. All other names mentioned mat be trademarks or
registered trademarks of their respective owners. Subject to
change without notice. No liability for technical errors and/or
omissions.
Where solutions begin
NetFly AP1-54
INDEX
1.1 Package contents ................................................ 5
1.2 The Front Panel LEDs ........................................ 5
1.3 The Rear Ports..................................................... 6
1.4 Cabling .................................................................. 7
1.5 Default Settings.................................................... 7
1.6 IE Configuration ................................................... 8
1.7 TCP/IP Configuration .......................................... 9
Configuring PC (Windows 95/98/ME) ...................... 9
Configuring PC (Windows NT4.0) .......................... 9
Configuring PC (Windows 2000)........................... 10
Configuring PC (WindowsXP) .............................. 10
1.8 Browser configuration ....................................... 11
Quick Wizard Setup ............................................... 11
A02-AP1-W54_GE01(V1.0 May 2006)
NetFly AP1-54
For more detailed instructions on configuring and using
the Wireless Multi-Function Access Point, please refer
to the online manual.
1.1 Package contents
Atlantis Land WirelessMulti-Function Access Point, CDRom
with manual, Quick Start Guide, External 2 dBi Antenna,
Power Adapter AC-DC (7.5V, 1A).
1.2 The Front Panel LEDs
LED
POWER
WLAN
LAN
MEANING
This indicator lights green when the hub
is receives power, otherwise it is off.
This indicator lights green when there
are wireless devices connected and
transmitting data to the Wireless Access
Point.
These indicators light green when the
LAN ports were connected successfully.
These indicators blink green while the
LAN ports were transmitting data.
NetFly AP1-54
1.3 The Rear Ports
PORT
MEANING
POWER Jack
Connect the supplied
adapter to this jack.
LAN
Reset
Reverse SMA
Connect an
one of the
connecting
office/home
100Mbps.
power
UTP Ethernet cable to
four LAN ports when
to a PC or an
network of 10Mbps or
After the device has turned on,
press it to reset the device or
restore to factory default settings.
Use a pin-shape item to push to
reset this device to factory default
settings. It will be useful too when
the manager forgot the password
to login, but the setting will be back
to default setting.
There is one 2dBi Gain Antenna in
the rear panel for wireless
connection.
NetFly AP1-54
1.4 Cabling
Connect to the Switch/Hub
1.
Plug in one end of the RJ45 network cable to the
Switch/Hub port,
2.
Plug in the other end of the RJ45 network cable to
the Wireless Access Point.
Check the installation
The LEDs of the Access Point are clearly visible and the
status of the network link can be seen instantly:
• With the power source on, once the device is
connected, the Power, LAN and WLAN port LEDs
will light up indicating a normal status.
• If the LAN Port’s Link indicator does not light up then
check the RJ-45 cable if it is firmly feed to the RJ45
port, while the LAN is link up to the Switch/Hub, the
LAN port’s LED will light up.
1.5 Default Settings
The Wireless Multi-Function Access Point can be configured
with your Web browser. The web browser is included as a
standard application in following operation systems, UNIX,
Linux, Mac OS, Windows 95/98/NT/2000/Me, etc. The
product provides a very easy and user-friendly interface for
configuration.
NetFly AP1-54
Before Configuration
This section describes the configuration required by LANattached PCs that communicate with the Wireless MultiFunction Access Point, either to configure the device or for
network access. These PCs must have an Ethernet interface
(or wireless adapter) installed properly, be connected to the
Wireless Multi-Function Access Point either directly or
through an external repeater hub or by wireless, and have
TCP/IP installed and configured with a fixed IP address that
must be in the same subnet of the Wireless Multi-Function
Access Point. The default IP address of the Wireless MultiFunction Access Point is 192.168.1.1 and subnet mask is
255.255.255.0. For example, when the default network
address of the default IP address of the AP is 192.168.1.1,
then the manager PC should be set at 192.168.1.x (where x
is a number between 2 and 254), and the default subnet
mask is 255.255.255.0.
Please follow the steps below for PC’s network environment
installation. First of all, please check your PC’s network
components. The TCP/IP protocol stack and Ethernet
network adapter must be installed. If not, please refer to MS
Windows related manuals.
Before you configure this Wireless Multi-Function Access
Point, you need to know the following default settings:
• Username:admin
• Password:admin
• IP LAN address: (192.168.1.1), Subnet Mask
(255.255.255.0)
• DHCP Server: disable
• SSSID= default, Channel=6, WEP/WAP=disable
1.6 IE Configuration
Now open IE, go to Instruments menu, select the
Connections tab and select one of the following options:
•
•
NetFly AP1-54
Never use remote connection
Use remote connection if
connection isn’t available
another
network
1.7 TCP/IP Configuration
Configuring PC (Windows 95/98/ME)
1.
Go to Start / Settings / Control Panel. In the Control
Panel, double-click on Network and choose the
Configuration tab.
2.
Select TCP / IP -> NIC Compatible, or the name of
any Network Interface Card (NIC) in your PC.
3.
Click Properties.
4.
Select the IP Address tab. In this page, click the
Specify an IP address radio button (EG
IP=192.168.1.2 and subnet Mask=255.255.255.0).
Then select the DNS Configuration tab.
5.
6.
Select the Enable DNS radio button and click OK to
finish the configuration.
Configuring PC (Windows NT4.0)
1.
Go to Start / Settings / Control Panel. In the Control
Panel, double-click on Network and choose the
Protocols tab.
2.
Select TCP/IP Protocol and click Properties.
3.
Select the Obtain an IP address from a DHCP
server radio button and click OK.
NetFly AP1-54
4.
Select the IP Address tab. In this page, click the
Specify an IP address radio button (EG
IP=192.168.1.2 and subnet Mask=255.255.255.0).
Configuring PC (Windows 2000)
1.
Go to Start / Settings / Control Panel. In the Control
Panel, double-click on Network and Dial-up
Connections.
2.
Double-click LAN Area Connection.
3.
In the LAN Area Connection Status window, click
Properties.
4.
Select Internet
Properties.
5.
Select Use the Following IP Address (EG
IP=192.168.1.2 and subnet Mask=255.255.255.0).
6.
Click OK to finish the configuration.
Protocol
(TCP/IP)
and
click
Configuring PC (WindowsXP)
1.
Go to Start / Control Panel (in Classic View). In the
Control Panel, double-click on Network Connections.
7.
Double-click Local Area Connection.
2.
In the LAN Area Connection Status window, click
Properties.
NetFly AP1-54
3.
Select Internet
Properties.
Protocol
(TCP/IP)
and
click
4.
Select the Use the following IP address radio
buttons
(EG
IP=192.168.1.2
and
subnet
Mask=255.255.255.0).
5.
Click OK to finish the configuration
1.8 Browser configuration
Open the web browser, enter the local port IP address of this
Wireless Multi-Function Access Point, which default at
192.168.1.1, and click Go to get the login page.
The default username is admin, password admin and click
OK to continue. Click on the desired item to expand the
page with all settings in the main navigation panel.
Following next steps you can make operating Wireless
Multi-Function Access Point in short time using PCs in
DHCP mode. Refer to manual on Installation CD if you
need personalized configuration.
Setup wizard is provided as the part of the web
configuration utility. You can simply follow the step-by-step
process to get your wireless router configuration ready to
run in 6 easy steps by clicking on the Wizard button on the
function menu.
Quick Wizard Setup
The following screen will appear.
continue.
Please click Next to
NetFly AP1-54
Step 1: Set Password
You can change the password as you like and then click
Next to continue.
Step 2: Set Wireless LAN connection
Please type the SSID in the text box and select a
communications channel. The SSID and channel must be
the same as wireless devices attempting communication to
the router. Select a channel number and click on Next.
NetFly AP1-54
Step 3: Set WEP Encryption
If user wants to enable WEP, please click Enabled. Then,
select the key size of WEP encryption and enter the key
value in the key text box. Please click Next to continue.
Step 4: Restart
The Setup wizard is now completed. The new settings will
be effective after the Wireless Multi-Function Access Point
NetFly AP1-54
restarted. Please click Restart to reboot the router. If you
do not want to make any changes, please click exit to quit
without any changes. You also can go back to modify the
setting by clicking Back.
Then relaunch your Web browser, to link to your favorite
Web site to test your Internet connection.
For additional settings or information, refer to the
Manual located on the CD.
Atlantis Land S.p.A.
Viale De Gasperi, 122
Mazzo di Rho – MI – Italy
[email protected]
[email protected]
Where solutions begin
Company certified ISO 9001:2000