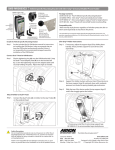
Download Ambient Air HPB-4E Specifications
Transcript
Users Manual
Panel Heater (HPB-4E)
Please read this manual carefully before use
IMPORTANT SAFEGUARDS
When using an electrical appliance, basic safety precautions should always be
observed, including the following:
READ ALL INSTRUCTIONS BEFORE USING
WARNING: To reduce the risk of fire, electrical shock, or injury to
person:
1. The product is for household use only.
2. Connect the appliance to single-phase AC supply of the voltage specified on
the rating plate.
3. In order to avoid overheating do not cover the heater.
4. Never leave the heater unattended while it is in use. Always turn the product
to the OFF position and unplug it from the electrical outlet when not in use.
5. Extreme caution is necessary when any heater is used by or near children,
and whenever the heater is left operating and unattended.
6. The heater must not be located immediately below an electrical
Socket-outlet.
7. Do not run the power flex under carpeting and do not cover. Arrange cord
away from traffic area and where it will not be tripped over.
8. Do not operate the heater with a damaged flex or plug, or after the heater
malfunctions, has been dropped, or damaged in any manner.
9. If the supply flex is damaged, it must be replaced by the manufacturer, its
service agent or a similarly qualified person in order to avoid a hazard.
10. Avoid the use of an extension cord as this may overheat and cause a risk
of fire.
11. Use the heater in a well-ventilated area. Do not insert or allow objects to
enter any ventilation or exhaust opening. To prevent a possible fire, do not
block air intakes or exhaust openings in any manner. Do not use on soft
surfaces, like a bed, where openings may become blocked. Use the heater on
flat, dry surfaces only.
12. Do not place this heater near flammable materials, surfaces or substances,
as there may be a risk of fire. Keep the above flammable materials, surfaces or
substances at least 1m from the front of the product and keep them away from
the sides and rear.
13. Do not use the heater in any areas where petrol, paint or other flammable
liquids are stored e.g. Garages or workshops as hot, arcing and sparking parts
are inside the heater.
14. Don’t use this heater in the immediate surroundings of a bath, a shower or
any other form of water.
15. Never touch the heater with wet hand. The heater should be installed so
that can not be touched by a person using a bath or shower.
16. This heater is hot when in use. To avoid burns and personal injury, do not
let bare skin touch hot surfaces.
17. Before moving the heater, please unplug it and let it cool down for 15
minutes. If provided, use handles when moving the product.
18. Be sure that no other appliances are in use on the same electrical socket
as your product as an overload can occur.
FOR HOUSEHOLD USE ONLY
SAVE THESE INSTRUCTIONS
SPECIFICATIONS
MODEL NO
NET SIZE
RATED VOLTAGE
HPB-4E
870X400X70MM
~230V/50Hz
STRUCTURE AND PARTS
RATED
POWER
1800W
CHARACTERISTIC
Over heating protection
Water proof IPX4
For wall-mount use or stand alone option
With digital LCD
Room temperature setting
Room temperature sensor
Digital clock, digital week calendar
Multi-running mode: daily program mode, weekly program mode, free use
mode
9. anti-frost function
1.
2.
3.
4.
5.
6.
7.
8.
INSTALLATION
NOTE:USED AS WALL-MOUNTED ONLY
a. Drill holes on the wall according to the picture (1).
Warning: Please insure that the heater is mounted 30mm above the
floor
b. Fasten the hanging rack on the wall as picture (2).
c. Hook the bottom first and then push the up hook in as picture (3).
d. Lock the up hook with screw as picture (4).
The distance of hanging hole is as follows:
Item
HPB-4E
M(mm)
620
L(mm)
207
INSTRUCTIONS FOR USE
Warning before using the heater make sure that it is mounted tightly on
the wall. Damage may occur if it is mounted on an incline or decline.
1. Control panel and LCD screen
Control panel:
There are total 5 buttons on the control box as follows:
------Power stand by button
------Date and time settings;
Room temperature setting
------Select running mode;
Set program
------Increasing of time, temperature;
Selecting working mode
------Decreasing of time, temperature;
Selecting working mode
Screen:
Date
Time
Program name
Target temperature
Comfort
Economic
Anti-frost
OFF
daily program running mode
program contents
weekly program running mode
heating
program setting
lock
solid time mark
2.Rationale:
(1)There are 3 working modes: comfort ,economic and anti-frost (5°C).
(2) There are in total 11 programs:
a. 9 daily programs(P1-P9)
b. weekly program(AU)
c. free program(Fr)
(3) there are 3 running modes for you to select:
a. daily program running mode(D)
b. weekly program running mode(AU)
c. free program running mode(Fr)
(4) every day(24hours) is divided into 48 segments evenly. Every segment will
be filled in with one working mode to combine a daily program or free program.
(All the settings for daily program will be kept in memory by the unit. All the
settings for free program will not be kept in memory and will finally return back
to anti-frost mode after running). Select one daily program (from daily
programs P1-P9) for every day in a week to combine a weekly program.
3. Turn on at the plug and switch on the unit. Press
display.
to start the
4. Set time
Press
, the date will start to flash. Press or to select date (1-Monday,
2-Tuesday, 3-Wednesday, 4-Thursday, 5-Friday, 6-Saturday, 7-Sunday).
Press
again the hour starts to flash. Press
to select hours.
Press
again, the minutes start to flash. Press
to select minute.
Finally confirm it by
.
5. Set target temperature
Press & hold
(for approximately 3 seconds) the original comfort target
temperature and comfort mark
will start to flash (which means you are
setting the comfort target temperature). Press
to select a new comfort
target temperature. Press
again the original economic target temperature
and economic mark
will start to flash (which means you are setting the
economic target temperature). Press
to select the new economic target
temperature. Confirm it by pressing
.
Note: range of comfort target temperature is 10°C - 50°C. Economic target
temperature minimum: 5°C maximum: 3°C less than the comfort target
temperature. Anti-frost temperature is 5°C which is not adjustable.
6. Select running mode
Press
, then press
or to select running mode as follows (showing on
screen):
a. P1-P9 plus D :daily program running mode
(Every day will repeat this program as running mode.)
b. Fr : free running mode
(You may set a program for today use. Then it will return to anti-frost
mode automatically after using.)
c. AU: weekly program running mode
(Every day will run the relevant daily program as selected, while setting
and repeating weekly).
Then confirm it with
.
7. Set daily program and weekly program
Confirm the current running mode is daily or weekly program. (if not, please
adjust it by the method of running mode selection).
Press & Hold
(for approximately 3 seconds), “Pro” will flash which
means you are ready to set the program. (during this period, unit will stop
heating)
(1) Set daily program
Press
to select daily program(P1-P9). At this moment, time will return
to 00:00 and first segment of program contents start to flash (this means you
will adjust this daily program from beginning of a day. Every segment means
half hour). Press
to select working mode(
mean economic;
and
and
mean comfort; and
mean anti-frost),then press
working mode one segment by one segment. Then press
and it will get into next daily program setting automatically.
to copy the
to confirm it
(2)set weekly program:
Press
to get into the weekly program setting. “AU” is shown and
program name start to flash. Press
to select daily program(P1-P9)
for this date. Press
automatically.
to confirm it and meanwhile get into next date
Press & hold
(for approximately 3 seconds) to finish the program
setting and unit return to normal running.
8. Set free program
Confirm the current running mode is free program. ( if not, please adjust it
by the method of running mode selection).
Press & Hold
(for approximately 3 seconds), “Pro” will flash which
means you are ready to set the program (during this period, unit will stop
heating)
Press
to select working mode(
economic; and
and
mean comfort; and
mean anti-frost),then press
mean
to copy the working mode
one segment by one segment. Press & Hold
(for approximately 3
seconds) to finish the program setting and unit will return to normal running.
Note: the contents of free program will not be kept in the memory and will
return to anti-frost working mode after running.
9. Factory pre-setting: (See below)
The unit is with a factory pre-setting as follows:
Please see the explanation below these are the times the heater operates in
comfort mode:
• P1
3.00pm – 11.00pm
• P2
7.00am – 12.00(Midnight)
• P3
7.00am – 11.00pm
• P4
5.00am – 7.00am then 9.00pm – 11.00pm
• P5
7.00am – 9.00am then 10.00pm – Midnight
• P6
7.00am – 9.00am then 9.00pm – 11.00pm
• P7
6.00am – 4.00pm
• P8
Frost Mode Only
• P9
Constant 24 hours
N.B When choosing a program For Example P4. The unit will heat on
comfort temperature 5.00am – 7.00am and then again at 9.00pm –
11.00pm. From 11.00pm – 5.00am it will be on economic setting.
From 7.00am – 9.00pm it will be on Anti Frost setting.
All these pre-settings can be altered with the method
mentioned in chapter 7 and will be kept in memory as
new settings.
If you want to return to a factory pre-setting, please operate as follows:
a. switch off the unit with power switch
b. Press the button
continuously for about 7 seconds, the unit will
call back the factory pre-setting. Then you can release the
button
.
10. Other notes:
(1) The screen will become dull after 1 minute when no buttons are pressed.
It will extinguish after 1 minute if you didn’t press any button. It will light
up if you press any button.
(2) Unit has a button lock function. The buttons will be locked (
) after 1
minute if none of the buttons are pressed.
To unlock: press
and
at same time for 3 seconds.
(3) Time will reset to 00:00 if you unplugged unit or cut off the power.
(4) This heater includes an overheat protection system that shuts off the
heater when parts of the heater are getting excessively hot.
MAINTENANCE
1. Always remove the plug from the socket-outlet and allow the heater to cool
down before clean it.
2. Wipe the exterior surface of the heater occasionally with a soft damp cloth
(not dripping wet) and dry the exterior surface before operating the heater.
WARNING:
Do not immerse the heater in water.
Do not use any cleaning chemicals such as detergents and abrasives.
Do not allow the interior to get wet as this could create a hazard.
3. Light dirt accumulation may be removed from the heater with a soft dry cloth.
4. To store the heater, put the heater back into its original package and store it
in a clean dry place.
5. In case of malfunction or doubt, do not try to repair the heater yourself, it
may result in a fire hazard or electric shock.
CONFORMITY WITH DIRECTIVES
This product is CE marked to denote conformity with Directives 73/23/EEC
(Low Voltage) and 89/336/EEC (Electromagnetic Compatibility), as amended.
Waste electrical products should not be disposed of with household
waste. Please recycle where facilities exist. Check with your Local
Authority or retailer for recycling advice.


