1
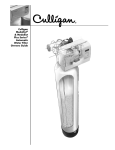
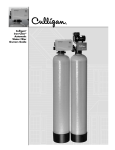
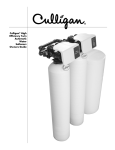
Cat. No. 01020480 Rev. A 2 11/15/07 DCO # 010173 Installation and Operation Instructions with Parts List Culligan Medallist and Medallist Plus Series® Automatic Water Filters with Cullar ®, Cullneu®, or Cullsan® Media Models from 2007 © 2007 Culligan International Company Attention Culligan Customer: Your local independently operated Culligan dealer employs trained service and maintenance personnel who are experienced in the installation, function and repair of Culligan equipment. This publication is written specifically for these individuals and is intended for their use. We encourage Culligan users to learn about Culligan products, but we believe that product knowledge is best obtained by consulting with your Culligan dealer. Untrained individuals who use this manual assume the risk of any resulting property damage or personal injury. Warning! Prior to servicing equipment, disconnect power supply to prevent electrical shock. Culligan International Company 9399 W. Higgins Road, Suite 1100 Rosemont, IL 60018 1-800-CULLIGAN or 847-430-2800 www.culligan.com Installation and Operation Instructions with Parts List Culligan Medallist and Medallist Plus Series® Automatic Water Filters with Cullar ®, Cullneu®, or Cullsan® Media Models from 2007 Table of Contents Page Introduction . . . . . . . . . . . . . . . . . . . . . . . . . . . . . . . . . . . . . . . . . . . . . . 1 Specifications . . . . . . . . . . . . . . . . . . . . . . . . . . . . . . . . . . . . . . . . . . . . 2 Component Description . . . . . . . . . . . . . . . . . . . . . . . . . . . . . . . . . . . . 3 Preparation . . . . . . . . . . . . . . . . . . . . . . . . . . . . . . . . . . . . . . . . . . . . . . 4 Filling Procedure . . . . . . . . . . . . . . . . . . . . . . . . . . . . . . . . . . . . . . . . . . 7 Installation . . . . . . . . . . . . . . . . . . . . . . . . . . . . . . . . . . . . . . . . . . . . . . . 9 Settings . . . . . . . . . . . . . . . . . . . . . . . . . . . . . . . . . . . . . . . . . . . . . . . . . 14 Programming . . . . . . . . . . . . . . . . . . . . . . . . . . . . . . . . . . . . . . . . . . . . . 16 Manual Cycling . . . . . . . . . . . . . . . . . . . . . . . . . . . . . . . . . . . . . . . . . . . 21 Service Check . . . . . . . . . . . . . . . . . . . . . . . . . . . . . . . . . . . . . . . . . . . 23 Start-Up Procedure . . . . . . . . . . . . . . . . . . . . . . . . . . . . . . . . . . . . . . . 25 Troubleshooting . . . . . . . . . . . . . . . . . . . . . . . . . . . . . . . . . . . . . . . . . . 26 Operation, Care & Maintenance . . . . . . . . . . . . . . . . . . . . . . . . . . . . . . 31 Electrical Schematic . . . . . . . . . . . . . . . . . . . . . . . . . . . . . . . . . . . . . . 33 Parts List . . . . . . . . . . . . . . . . . . . . . . . . . . . . . . . . . . . . . . . . . . . . . . . 34 Introduction This system and installation must comply with state and local regulations. For installations in Massachusetts, the Commonwealth of Massachusetts Plumbing code 248 CMR shall be adhered to. Consult with your licensed plumber for installation of this system. The use of saddle valves are not permitted. The Culligan Medallist Plus Series® with Cullar ® filter has been tested and certified by WQA against WQA S-200 for the effective reduction of chlorine taste and odor up to 180,000 gallons. The Culligan Medallist Plus Series® with Cullneu® Filter has been tested and certified by WQA against WQA S-200 for neutralization up to 21,750 gallons as verified and substantiated by test data. Safe Practices Throughout this manual there are paragraphs set off by special headings. NOTE: Note is used to emphasize installation, operation or maintenance information which is important, but does not present any hazard. Example: Note: The nipple must extend no more than 1 inch above the cover plate. Caution! Caution is used when failure to follow directions could result in damage to equipment or property. Example: Caution! Disassembly while under water pressure can result in flooding. WARNING! Warning is used to indicate a hazard which could cause injury or death if ignored. Example: Warning! Electrical shock hazard! Unplug the unit before removing the timer mechanism or coverplates! The Culligan water filter has two separate serial numbers; one for the control assembly and one for the media tank. The control assembly serial number can be found on the left rear side of the timer mounting plate. The media tank serial number is on the side of the tank. DO NOT REMOVE OR DESTROY THESE SERIAL NUMBER DECALS. THEY MUST BE REFERENCED IF EVER YOU REQUIRE REPAIRS OR PARTS REPLACEMENT UNDER WARRANTY. If you wish to service your system or maintain replacement components, please contact your local Culligan dealer or 1-847-2056000 for a dealer near you. This publication is based on information available when approved for printing. Continuing design refinement could cause changes that may not be included in this publication. Please read this booklet carefully before beginning the installation of the Culligan Medallist Series™ Water Filter. It contains important information about the unit, including the tools and materials needed for installation, accessories available for hook-up to the plumbing, and instructions covering installation, settings, start-up, and operation. The Culligan Medallist Water Filters have been thoughtfully designed and engineered to provide conditioned water for many years when properly applied, installed and operated. Culligan Medallist Series® Water Filters Specifications and Limitations General Mineral Tank Size1 Control Timer Temperature Limits Water Pressure Limits Electrical Requirements Electrical Power Consumption, Min./Max. Filtr-Cleer ® Rated Service Flow @ Initial Pressure Drop Minimum Practical Filtration Size Maximum Particulate Matter Maximum Suspended Solids Drain Flow, Maximum3 pH Limitation Recharge Time4 Recharge Water Consumption, Av.5 Freeboard2 Height Overall Cullar ® Rated Service Flow @ Pressure Drop Drain Flow, Maximum3 pH Limitation Recharge Time4 Recharge Water Consumption, Av.5 Cullar Media Volume Cullsan® Underbedding Media Amount Freeboard2 Height Overall Rated Capacity Cullneu® Rated Service Flow @ Pressure Drop Drain Flow, Maximum3 pH Limitation* Recharge Time4 Recharge Water Consumption, Av.5 Cullneu Media Volume Freeboard2 Height Overall 1 Bottom of tank to top of tank fittings. 2 Backwash at 120 psi line pressure. 3 Backwash at 120 psi line pressure. 4 Factory setting. 5 At factory setting and 120 psi line pressure. 8 Inch Medallist 10 Inch Medallist 10 Inch Medallist Plus 8 x 44 in. 3/4” Power Valve Electronic 33-120°F 20-125 psi 24V/60 Hz 3 Watts/35 Watts 10 x 54 in. 3/4” Power Valve Electronic 33-120°F 20-125 psi 24V/60 Hz 3 Watts/35 Watts 10 x 54 in. 1” Power Valve Electronic 33-120°F 20-125 psi 24V/60 Hz 3 Watts/35 Watts 7.8 gpm @ 15 psi 10 microns 150 NTU 150 mg/L 4.5 gpm 6.0 - 9.5 80 min. 100 gal. 10.5 ± 1 inches 51 in. 8.9 gpm @ 15 psi 10 microns 150 NTU 150 mg/L 7.0 gpm 6.0 - 9.5 80 min. 115 gal. 11.5 ± 1 inches 63 in. 12.0 gpm @ 15 psi 10 microns 150 NTU 150 mg/L 7.0 gpm 6.0 - 9.5 30 min. 140 gal. 19 ± 1.5 inches 60 in. 4.0 gpm @ 5.0 psi 2 gpm 5.0 - 11.0 80 min. 53 gal. 0.75 cu. ft. 10 lbs. (.1 ft3) 14 ± 1 inches 51 in. 100,000 gallons 4.0 gpm @ 5.0 psi 6.0 gpm 5.0 - 11.0 80 min. 83 gal. 1.0 cu. ft. 20 lbs. (.2 ft3) 24 ± 1 inches 63 in. 130,000 gallons 6.0 gpm @ 6.0 psi 6.0 gpm 5.0 - 11.0 30 min. 110 gal. 1.5 cu. ft. 20 lbs. (.2 ft3) 24 ± 1.5 inches 60 in. 180,000 gallons 2.7 gpm @ 3.0 psi 3.5 gpm 5.8 - 6.2 80 min. 53 gal. 1.0 cu. ft. 11 ± 1 inches 51 in. 4.0 gpm @ 4.0 psi 6.0 gpm 5.8 - 6.2 80 min. 83 gal. 1.5 cu. ft. 21 ± 1 inches 63 in. 6.0 gpm @ 5.0 psi 6.0 gpm 5.8 - 6.8 30 min. 110 gal. 1.6 cu. ft. 18 ± 1.5 inches 60 in. 6 Top of media to back top edge of port openings. * Under dynamic conditions, it may be necessary to mix five parts Cullneu with one part Cullneu C to effectively raise the pH. The combonation of Cullneu and Cullneu C is not certified by WQA. Specifications and Limitations Component Description Control Valve Assembly The reliable Power Valve directs the flow of water during recharge. Constructed of durable, non-corroding materials, the pistonoperated design assures positive, accurate positioning even on turbid problem water supplies. Time and frequency of recharge are controlled by an adjustable, yet simple, circuit board. The circuit board can be adjusted to suit a wide range of water types and family sizes. Media Tank The media tank contains the outlet manifold. Note: The media tank assemblies do not contain filter media, which is shipped separately. See the section on Installation Procedure (Page 9). Bypass Valve Includes the Cul-Flo-Valv ®, interconnecting coupling and screws or clips necessary for assembly. Culligan Medallist Series® Water Filters Preparation The success of the installation will depend to a great extent on advance planning and preparation. Careful attention to the unit’s location, accessibility to electrical and drain facilities, and the availability of the proper tools will ensure a professional looking installation. Of utmost importance is the assurance that the filter has been properly applied and meets all specifications. Application Correct application is directly associated with the performance and life expectancy of any water conditioner. It is important, therefore, to understand how your Culligan® Water Filter functions, and to know its capabilities and limitations so that a correct application can be made. By following the guidelines and recommendations set forth in this manual, you can be certain your conditioner is applied correctly. Filtr-Cleer® The Medallist Filtr-Cleer Water Filter is capable of reducing particulate matter down to 5 microns particle size. It will not remove color, organics, colloidal turbidity or dissolved solids. Some applications follow: • • • • Reduction of suspended matters in any water system. Reduction of particulate matter, such as clay, mud, etc. Prefiltration of oxidized iron ahead of an automatic or manual softener. Reduction of light sand. Note: If sands cannot be removed from the Filtr-Cleer tank during backwashing, a sand trap should be installed. • After the retention tank when a Cul-Cleer ® system is used to correct hydrogen sulfide or colloidal suspension problems. The quality and number of gallons filtered water between backwashes will depend upon the amount, type, and size of the particulate matter being filtered. If a water sample is sent to our laboratory, where application of a Filtr-Cleer unit is contemplated, write “Filtr-Cleer Analysis” on the sample tag. Send an additional sample of water for a standard water analysis. The laboratory will test for Nephelometric Turbidity Units (NTU) and suspended solids (mg/L). The sample will also be filtered through 10 micron filter paper and NTU run on a filtered sample. If the NTU of the raw water exceeds 150, suspended solids exceed 150 mg/L or the filtered water through the 10 micron filter paper is of an unacceptable quality, a Filtr-Cleer filter may not be applicable. As a guide, the U.S. Public Health Drinking Water standards states the turbidity should not exceed 1 NTU. The exact number of gallons filtered between backwashes cannot be given because of many variables. Cullar® Filter Medallist Water Filter with Cullar Media will reduce chlorine taste and odor and other common bad tastes and odors, and will also remove most objectional organic colors. It will not remove hydrogen sulfide. It is important to note that whenever the cause of an objectionable taste or odor has not been established, Health Authorities should determine if water is safe to drink. If bacterial contamination is present, a Cul-Cleer system is indicated. Do not use with water that is microbiologically unsafe or of unknown quality without adequate disinfection before or after the system. Cullneu® Filter Medallist Water Filter with Cullneu Media will neutralize slightly acid water (pH of 5.8 - 6.2) and thus help to prevent unsightly brown or green stains due to corrosion of household plumbing. If the pH is from 5 to 6, one part of Cullneu C media should be mixed with 5 parts of Cullneu media to provide additional neutralizing capability. If the water to be treated has a pH less than 5, a high hardness, or a high carbon dioxide level, Cullneu may not be applicable; a solution feeder should be used. Since Cullneu adds hardness, it should be used prior to a softener. In order to size and apply the equipment correctly, a complete analysis of the water supply should be obtained. This can best be accomplished by contacting the local Culligan dealer, who will be able to test the water supply right at the site, or arrange to have one or more water samples sent to the Culligan laboratory for a more detailed analysis. Culligan water filters may be applied alone or in conjunction with other equipment. They should only be applied, however, within the specifications listed in this manual. These specifications establish the boundaries within which the conditioner will perform most efficiently. Preparation Pressure The filter is designed to operate within a pressure range of 20 to 125 psi. Pressures below 20 psi may cause the unit to perform and recharge inefficiently, while pressures above 125 psi can cause damage and noisy operation of the control valve. Low pressure is generally not a problem with municipal water supplies, although some adjustments of the well pump system may be required on private supplies. Although uncommon, some municipal supplies may exceed the high pressure limit. A pressure reducing valve should be installed if such pressures are encountered. Keep in mind, also, that some municipal supplies have higher pressure during nighttime hours. Check the available water pressure with a gauge assembly to determine what adjustments, if any, are necessary (Figure 1). Place the gauge on a raw water line and open a nearby faucet. Adjust the faucet until the flow is about 5 gallons per minute and check the pressure. In the case of a private well system, allow water to run until the pump cuts in. If the pressure is less than 20 psi at this point, adjust the pump pressure switch as required to raise the cut-in pressure above 20 psi. Pressure Drop Figure 1 Whenever water is flowing, a certain amount of pressure is lost due to resistance from pipe, fittings, and appliances connected to the water supply. The amount of pressure drop encountered depends on how fast the water is flowing and how much resistance it meets. The amount of pressure available at a tap is also determined by its height above the source of the supply. For example, if water pressure in the basement is 50 psi, it will be about 45 psi on the ground floor, and about 40 psi on the second floor, or a reduction of about 5 psi for every 10 feet of elevation. Particularly in the case of private water supplies, it may be necessary to increase the pump pressure to overcome pressure drop through the conditioner so that adequate pressure is available at all taps. As the filter bed becomes loaded with the particulate matter it has removed, pressure drop will increase. The filter must be backwashed when the pressure drop reaches unacceptable levels. The filter should always be installed prior to the water heater. Caution! The use of a pressure reducing valve may limit the flow of water in the household. Temperature Do not install the unit where it might freeze, or next to a water heater or furnace or in direct sunlight. Outdoor installation is not recommended, and voids the warranty. If installing in an outside location, you must take the steps necessary to assure the filter installation plumbing, wiring, etc. areas well protected from the elements (sunlight, rain, wind, heat, cold), contamination, vandalism, etc. as when installed indoors. Culligan Medallist Series® Water Filters Location Space requirements - Allow 6-12 inches (15-30 cm) behind the unit for plumbing and drain lines. Floor surface - Choose an area with solid, level floor free of bumps or irregularities. Drain facilities - Choose a nearby drain that can handle the rated drain flow (floor drain, sink or stand pipe). Refer to the Drain Line Chart, Table 1 page 13, for maximum drain line length. Note: Most codes require an anti-siphon device or air gap. Observe all local plumbing codes and drain restrictions. The system and installation must comply with all state and local laws and regulations. For installations in Massachusetts, the Commonwealth of Massachusetts Plumbing code 248 CMR shall be adhered to. Consult with your licensed plumber for installation of this system. The use of saddle valves are not permitted. Electrical facilities - A 10-foot cord and wall mount plug-in transformer are provided. The customer should provide a receptacle, preferably one not controlled by a switch that can be turned off accidentally. Observe local electrical codes. Note: The filter works on 24 volt - 60 Hz electrical power only. Be sure to use the included transformer. Be sure the electrical outlet and transformer are in an inside location to protect from moisture. Properly ground to conform with all governing codes and ordinances. Note: P.N. 01012956 plug-in transformer is rated for indoor installations only. P.N. 01015972 plug-in transformer is rated for indoor/outdoor installations. Tools and Materials The following tools and supplies will be needed, depending on installation method. Observe all applicable codes. All Installations • Safety glasses • Phillips screwdrivers, small and medium tip • Gauge assembly (PN 00-3044-50 or equivalent) • Silicone lubricant (PN 00-4715-07 or equivalent) - DO NOT USE PETROLEUM-BASED LUBRICANTS • A bucket, preferably light-colored • Towels Special Tools • Torch, solder and flux for sweat copper connections • Threading tools, pipe wrenches and thread sealer for threaded connections • Saw, solvent and cement for plastic pipe connections Materials • Drain line, 1/2” (PN 00-3030-82, gray, semi-flexible; or PN 00-3319-46, black, semi-rigid; or equivalent) • Thread sealing tape • Pressure reducing valve (if pressure exceeds 125 psi) • Pipe and fittings suited to the type of installation • Plastic pipe (if permitted by local plumbing codes) — saw, solvent cement and rags If the household plumbing is galvanized and you intend to make the installation with copper, or vice versa, obtain dielectric unions to prevent galvanic (dissimilar metal) corrosion. All installations will require 1/2” drain line, (PN 00-3030-82, gray, semi-flexible; or PN 00-3319-46, black, rigid). Obtain slightly more than you think you will need to cover for the elevation over doorways and so on. Preparation Filling Procedure Filtr-Cleer® Water Filter The 8” Filtr-Cleer filters are shipped with one media pack and the 10” Filtr-Cleer filters are shipped with two media packs. Verify that the proper number of media packs are on site before loading the tank. Place the manifold inside the tank. Position the tip of the manifold in the recess located in the bottom of the tank. • Cover the top of the manifold with a clean rag. • Place a wide-mouth funnel in the tank opening. • Open the media pack(s) by cutting along the bottom of the carton and lifting up to expose the four individual media packages. See Figure 2. Note: The performance of the filter may be severely affected if the media is not added in the proper sequence shown. • With no water in the tank, slowly pour the Cullsan® U media into the tank. Note: The 10” filter uses only one bag of Cullsan U media pack. Shake tank to level the media. • With no water in the tank, slowly pour the Cullsan G-50 media into the tank and level. Note: The 10: filter requires the Cullsan G-50 from both of the media packs. • With no water in the tank, slowly pour the Cullsan A media into the tank and level. Note: The 10” filter requires the Cullsan A from both of the media packs. • With no water in the tank, slowly pour the Cullcite ® media into the tank and level. Note: The 10” filter requires the Cullcite from both of the media packs. Figure 2 Cullar® Filters Cullar filters are shipped with one cubic foot of carbon and a 20 lb bag of Cullsan underbedding. Verify that the proper amount of media is on site before loading the tank. • Place the manifold inside the tank. Position the tip of the manifold in the recess located in the bottom of the tank. • Cover the top of the manifold with a clean rag. • Place a wide mouth funnel in the tank opening. • Open the bag of Cullsan underbedding. On 8” Cullar units, slowly pour approximately half the contents of the bag into the tank. On 10” Cullar units, pour the entire contents into the tank. Shake the tank to level the media. • Open the bag of carbon. On 8” Cullar units, slowly pour the carbon into the tank via the funnel until the carbon is within 13” - 14” of the top of the tank. On 10” Cullar units, slowly pour the entire contents of the bag into the tank. Shake the tank to level the media. • Remove the rag from the manifold. • Fill the tank with water and allow the media to soak for 24-48 hours. The water level in the tank will decrease as the media soaks up water. Add water to the tank to keep the media submerged so all of the media gets saturated. Culligan Medallist Series® Water Filters Cullneu® Filters Cullneu filters are shipped with 2 bags of Cullneu with 8” filters and 3 bags of Cullneu with 10” filters. Verify that the proper amount of media is on site before loading. • Place the manifold inside the tank. Position the tip of the manifold in the recess located in the bottom of the tank. • Cover the top of the manifold with a clean rag. • Place a wide mouth funnel in the tank opening. The Cullneu media should be added with no water in the tank. • For 8” Cullneu filters, slowly pour the entire contents of one bag of media and enough media from the second bag to raise the level of media in the tank to within 11” of the top of the tank. • For 10” Cullneu filters, slowly pour the entire contents of two bags of media and enough media from the third bag to raise the level of media in the tanks to within 21” of the top of the tank. DO NOT OVERFILL. Overfilling will result in excess media being lost to drain during backwash, possibly plugging the control valve. Shake the tank to level the media. Filling Procedure Installation Placement Refer to Figure 3 for system placement. • Set the media tank on a solid, level surface near water, drain and electrical facilities. Place the outlet (black coupling) of the tank on the left. • Set the brine system on a flat, smooth, solid surface as near the media tank as possible. Figure 4 Figure 4 Install Decals Locate the data plate decals and model decals packed with the control valve. Adhere them to the cover and backplate as shown in figures 4 and 4a. Mount The Control Valve - 3/4” Control See figure 10 for a visual on mounting the control valve to the tank. As shipped from the factory the Culligan Medallist Series® 3/4” control is equipped as a 8” unit. 1. Remove the two plastic caps from the tank couplings and lubricate the coupling O-rings with silicone lubricant. Figure 4a Note: Do not use a petroleum base lubricant, for this will cause swelling of the rubber parts. Note: The black molded tank adapter is marked with “IN” and “OUT”, corresponding to the inlet and outlet of the tank. Position the tank with the inlet coupling on the right and the outlet coupling on the left as you face the front of the tank. 2. The control valve is marked also with “IN” and “OUT”. Place the control onto the tank with the inlet and outlet of the control corresponding with the inlet and outlet of the tank. Press firmly onto the couplings. 3. Remove the two u-clamps and screws from the parts pack. Install the clamps on both sides of the control as indicated in Figure 5 and secure them with the screws. 4. Peel off the protective film off the circuit board label. Figure 5 Culligan Medallist Series® Mount The Control Valve - 1” Control See Figure 6 for a visual on mounting the control valve to the tank. • Assemble the o-rings, located in the parts pack, to the tank adapter. • The valve adapter o-ring sits on the first step on the adapter. See Figure 7. Note: Do not push the top o-ring down to the flange surface on the adapter. Note: The larger of the two o-rings in the parts part goes between the adapter and the valve, do not stretch the smaller o-ring onto the top of the tank adapter. • Lubricate only the top o-ring on the tank adapter, and the outlet manifold o-ring with silicone lubricant. • Screw the adapter into the tank until the adapter bottoms out on the tank flange. Note: The adapter only needs to be tightened hand-tight to the tank flange. • Figure 6 Align the manifold with the center opening in the valve, and press the valve onto the adapter firmly. Note: Make sure to push the valve straight down onto the manifold. If the valve is cocked, it may cause the o-ring to slip off the manifold. • Assemble the tank clamp to the control, and tighten the clamp screw. Note: The clamp and valve will be able to rotate on the tank until pressure is applied. Do not try to rotate control valve if the clamp is tightened - you may cut the o-ring. Figure 7 Install the Flow Control As shipped from the factory, each control is equipped with a 2 gpm flow control for 8” Cullar ® filters. Additional flow controls are included with each unit for conversion for use with other filter tanks. Refer to Table 1 to select the proper flow control. Table 1 Filter Flow Control Color 8” Cullar 2.0 gpm Brown 10” Cullar 6.0 gpm Black Cullneu® 3.5 gpm Green 10” Cullneu 8” 6.0 gpm Black Filtr-Cleer ® 4.5 gpm Red 10” Filtr-Cleer 7.0 gpm* Black (Thin) 8” * Use with flow control spacer provided Installation 10 For backwash flow control conversion, refer to Figure 8 and instructions listed below. • Remove the u-clip of the drain elbow assembly and pull the drain elbow straight off. • Remove the back wash flow control located behind the elbow. Put the correct restrictor in its place. • Insert the flow control washer with the molded numbers facing toward the valve body. Refer to Table 1. For the 6.0 gpm flow control, insert the flow control with the molded “5.5” facing away from the valve body. Insert the plastic flow control spacer after the 7 gpm flow control washer on the 10” Filtr-Cleer. See Figure 8. • Replace the drain elbow assembly and secure it with the u-clip. Figure 8 Note: The number on the flow control should face into the valve body. Plumbing Connections General Instructions • Follow local plumbing & electrical codes. Failure to do so may result in your having to redo the installation at your expense. • Take the time to make a clean, professional looking installation. Use flux and solder sparingly when making sweat connections, and avoid excessive use of pipe compound. When using galvanized pipe, clean out excess cutting oil and metal chips before assembly. Foreign objects, if allowed to enter the control valve, can cause operating problems. • The main water supply line may then be reopened so that hard water will be available to the household throughout the remainder of the installation process. Set the Cul-Flo-Valve Bypass in the bypass position by screwing the stem all the way in against the body. Caution! Close the inlet supply line and relieve system pressure before cutting into the plumbing! Flooding could result if not done! Bypass Connections Shipped with each softener is a Culligan bypass valve, which is used to connect the softener to the plumbing system. The bypass allows the softener to be isolated from the water service line if service is necessary while still providing water to the home. The bypass valve can be directly plumbed into the system, or can be connected with the following optional sweat connection kits. 3/4” Medallist Control PN Description Medallist Plus PN Description P1019783 3/4” Sweat Copper Adapter Kit 01010783 1” Sweat Copper Adapter Kit P1019782 3/4” Elbow Sweat Copper Adapter Kit 01016564 3/4” Sweat Copper Adapter Kit 01016565 3/4” Elbow Sweat Copper Adapter Kit For installations in Massachusetts, Massachusetts Plumbing Code 248 CMR shall be adhered to. Consult your licensed plumber for installation of this system. This system and it’s installation must comply with state and local regulations. Caution! Close the inlet supply line and relieve system pressure before cutting into the plumbing! Flooding could result if not done! Caution! When making sweat connections, remove all plastic and rubber components which contact brass or copper. Damage to these components may result otherwise. 11 Culligan Medallist Series® Bypass Valve Installation - 3/4” Medallist Time Clock Units Only The bypass valve connects directly to the backplate of the valve with a pair of couplings and screws (Figure 9). To facilitate this connection, remove the plate by pulling up on the u-clip on the back of the valve and removing the two mounting screws. Lubricate all o-rings with silicone lubricant. Bypass Valve Installation - 3/4” Medallist Soft-Minder® Meter Only Figure 9 The Soft-Minder meter is placed between the bypass valve and the control in place of the couplings shipped with the Cul-Flo-Valv ® (Figure 10). Make sure the meter is on the outlet port of the control and that it is installed with the arrow pointing in the direction of water flow. Four elongated bolts are packaged with the meter to hold the bypass valve to the back plate of the control. Lubricate all o-rings with silicone lubricant. Caution! When reinstalling back plate to control valve, make sure the u-clip fully engages the two bottom holes of the bracket. Secure bracket from the top with the two mounting screws provided. Bypass Valve Installation - 1” Medallist Plus Units Figure 10 The bypass valve connects directly to the control valve with a pair of couplings and two assembly pins (Figure 11). Lubricate all o-rings on the couplings with silicone lubricant. On SoftMinder ® meter controls, the meter replaces the coupling on the outlet side of the control. The meter body fits in the same space as the coupling between the control valve and the bypass. Make sure that the arrow on the flow meter is pointing in the direction of flow (Figure 11). Note: If the ground from the electrical panel or breaker box to the water meter or underground copper pipe is tied to the copper water lines and these lines are cut during installation of the bypass valve, an approved grounding strap must be used between the two lines that have been cut in order to maintain continuity. The length of the grounding strap will depend upon the number of units being installed. In all cases where metal pipe was originally used and is later interrupted by the bypass valve to maintain proper metallic pipe bonding, an approved ground clamp c/w not less than #6 copper conductor must be used for continuity. Check your local electrical code for the correct clamp and cable size. Assembly Pin Coupling Brine Connection Coupling or Meter Body Bypass Assembly Pin Figure 11 Installation 12 To bypass, turn the blue knob clockwise (see directional arrow on end of knob) until the knob stops as shown. DO NOT OVERTIGHTEN! (Figure 12a). To return to service, turn the blue knob counter-clockwise (see directional arrow on the end of knob) until the knob stops as shown. DO NOT OVERTIGHTEN! (Figure 12b) Drain Line Connection Refer to Figure 8 and Table 2 & 3, under the applicable tank size for drain line length and height limitations. • Remove 1/2” pipe clamp from end of drain elbow. • Route a length of 1/2” drain line from the drain elbow to the drain. • Fasten the drain line to the elbow with the clamp. • Secure the drain line to the drain to prevent its movement during regeneration. A loop in the end of the tube will keep it filled with water and will reduce splashing at the beginning of each regeneration Figure 12a About 1-1/4” Note: Waste connections or drain outlets shall be designed and constructed to provide for connection to the sanitary waste system through an air gap of 2 pipe diameters or 1 inch, whichever is larger. A screwdriver shank may be used in the slot as a lever for extra turning force if needed. Note: Observe all plumbing codes. Most codes require an anti-siphon device or air gap at the discharge point. The system and installation must comply with state and local laws and regulations. Average Water Pressure psi Figure 12b Height of Drain Discharge Above Floor on Which Filter Sets 4” 1 ft. 2 ft. 3 ft. 4 ft. 5 ft. 6 ft. 7 ft. 8 ft. 9 ft. 10 ft. 30 56 50 40 30 20 10 50 112 106 96 86 76 66 56 46 36 26 16 70 143 137 127 117 107 97 87 77 67 57 47 90 153 147 137 127 117 107 97 87 77 67 57 120 159 153 143 133 123 113 103 93 83 73 63 Table 2 - Culligan® Average Water Pressure psi Automatic Water Filters, 8 Inch Height of Drain Discharge Above Floor on Which Filter Sets 4” 1 ft. 2 ft. 30 44 38 28 18 50 103 97 87 70 129 123 113 90 145 139 120 153 147 Table 3 - Culligan® 3 ft. 4 ft. 5 ft. 6 ft. 7 ft. 8 ft. 9 ft. 10 ft. 77 67 57 47 37 27 17 7 103 93 83 73 63 53 43 33 129 119 109 99 89 79 69 59 49 137 127 117 107 97 87 77 67 57 Automatic Water Filters, 10 Inch Electrical Connections The power cord needs to be connected to the plug-in transformer, wire orientation is not critical. Figure 13 shows the cord attachment to the transformer. Note: Observe all state and local electrical codes. Note: The plug-in transformer is rated for indoor installations only. 13 Culligan Medallist Series® Figure 13 Settings Your Culligan Medallist Water Filter is designed to perform efficiently on a wide range of water supplies. Before the unit can be recharged and put into service, several settings must be made. Backwash Backwash expands and loosens the media bed, and flushes away accumulated particulate matter. The backwash interval is preset at the factory for 10 minutes, which is adequate for most water supplies. It is recommended that backwash last just long enough so that the effluent from the drain line is clear. Backwash too long and water is wasted, not long enough and the tank becomes fouled with sediment. Refer to the Programming section to increase or decrease the backwash interval. Pause Cycle The Medallist Water Filter shares its timer with other water conditioning products which would use this period for the eduction and rinsing of salt, or other regenerant chemical. The pause cycle time is 2 minutes. Rapid Rinse Rapid rinse settles and compacts the media after backwashing and flushes any residual particulate matter from the bottom of the filter bed before returning the filter to service. Rapid rinse is set at the factory at 10 minutes. It may be extended, if desired. Refer to the Programming section to increase or decrease the rapid rinse interval. Settings 14 Circuit Board Circuit Board Connections Refer to Figure 14 for all circuit board connections. Power terminals are located along the side edge of the circuit board. The connection marked ‘MAIN’ is for the main wire harness. The Soft-Minder connection is located in the upper left side of the board. Next to the meter connection is a connection marked ‘BATT’, which is for the optional battery back-up. All terminals are clearly marked to ease installation. FLOW METER CONNECTION WIRE HARNESS CONNECTION (MICROSWITCHES AND MOTOR POWER OPTIONAL BATTERY CONNECTION POWER CONNECTION DIP SWITCHES MOUNTING HOLES ON 2 3 4 5 6 7 8 ON 1 2 3 4 5 6 7 8 R/T DE/IM SO/FI -/ TCB E/M 12/24 .75"/1" SL/FA 1 Build A 3107 BACKSIDE OF CIRCUIT BOARD Figure 14 15 Culligan Medallist Series® Water Filters Programming Dip Switch Definitions The circuit board is shipped with all DIP switches in the off position. Prior to programming the controller some DIP switches may need to be moved to the ON position. Because each switch serves a specific purpose, please review the following information, moving the required switches to an ON position as necessary for each controller in the system. The definitions and purpose are as follows: Note: Set DIP switch number 3 to the on position for filter applications. Switch # Abbreviation Definition 1 R/T Run / Test Purpose Off - Allows controller to function in a normal, operational mode. On - Places controller in test mode to verify operation of the board components & software. 2 D/I Off - Regeneration will occur at Delayed Time of Day upon a controller receiving a valid regeneration initiation signal. Delayed / Immediate On - Regeneration shall occur immediately upon a controller receiving a valid regeneration initiation signal, regardless of the time of day. 3 SO / FI Off - The unit shall be operated as a softener. Softener / Filter On - The unit shall function as a filter. The default time programmed for cycle #2 shall be 2 minutes. 4 - / TCB Time Clock Back-up Disabled / Enabled Off - The time clock backup option is not enabled. On - Allows the user to enable the time clock function of the control as a backup regeneration initiation option. This feature is used as a back up to a primary device such as a flow meter. 5 E/M Off - The unit will function in standard English dimensions. English / Metric On - The unit will function in standard metric dimensions. 6 12 / 24 Off - All time keeping functions shall be 12 Hour Clock / 24 Hour Clock based on an AM/PM basis. The PM icon shall be lit in the display as appropriate. On - Time keeping functions shall work on a 24-hour clock (military time). The AM/PM display icons will be disabled. 7 .75” / 1” 3/4” / 1” Control Off - 3/4” Medallist Control Valve On - 1” Medallist Plus Control Valve 8 S/F Off - The 0.45 gpm refill flow control is used to control the refill flow rate. Set in the off position for 8” and 10” units. Standard Refill / Fast Refill On - The 0.80 gpm refill flow control is used to control the refill flow rate. Set in the on position for 12” Programming 16 The programming menu for Medallist is outlined in the following table: Setting Display Time of Day Range Limits Default Comments 12:00 AM - 11:59 PM (12hr) 12:00 PM 00:00 - 23:59 (24hr) 12:00 12:00 AM - 11:30 PM (12hr) 2:00 AM 00:00 - 23:30 (24hr) 02:00 *Cycle 1 time 01 - 99 minutes 10 minutes -Always active in Time Clock Mode *Cycle 2 time 01 - 99 minutes - Filter: 02 minutes -Always active in Time Clock Mode *Cycle 3 time 01 - 99 minutes 10 minutes -Always active in Time Clock Mode (Filter) *Regeneration Interval Days - 01 to 99 days 03 days *Time of Regeneration 12 / 24 hour function set with dip #6 - Adjust time in 30 minute increments only Hidden Programming Menu (Accessed from service mode by holding the “+” key for 5 seconds) *Delay / Immediate Toggle Delay or Immediate Delay - Locks in a regen signal after a 3 hour or more power outage; regen can be set to go immediate or delay until the tor; - Only accessible from service mode, time of day display, by pressing and holding “+” for 5 seconds - (not in programming menu) *Lock / Unlock Toggle Lock & Unlock Unlock - Lock or unlock access to make program changes - Only accessible from service mode, time of day display, by pressing and holding “+” for 5 seconds - (not in programming menu) • To be saved in EEPROM Make sure either inlet water supply is turned off, then supply power to the timer. The display will power up flashing “12:00 PM” and the motor will energize and cycle the control, without stopping, to the home position. This is required to ensure that the control is in the home position. 17 Culligan Medallist Series® Water Filters The timer uses four buttons: Button Description Set-up / Enter Key (Status) Advance timer through display options Regeneration Key (REGEN) Initiate a regeneration Toggle Down Key (“-”) Decrease the setting Toggle Up Key (“+”) Increase the setting Time of Day This setting is used to program the current time of day. When in this step the display will first show “tod” for two seconds. After “tod” is displayed, “12:00 PM” will display (or the current set time if already programmed) and the minutes will flash. • The minutes are adjusted with the “+” or “key until the correct value is displayed. ” • Press the “Regen” key to flash the hours. Adjust with the “+” or “key until the correct time is displayed. ” Pressing the “Status” key will move to the next programming step. Pressing “Regen” will move back to the minutes adjust. Time of Regeneration This setting is used to program the time at which a regeneration is to occur in the delay mode, or in immediate mode with time clock backup on. The display will first show “tor” for two seconds. After “tor” is shown the display will then show the default of 2:00 AM (or the current programmed time of regeneration if already set). The time can be adjusted in 30 minute increments by pressing the “+” or “-” keys. Pressing the “Status” key will save the setting and move to the next programming step. Backwash Time This setting is used to program the cycle 1 time that is usually backwash. The time of the cycle is kept in minutes. The display will show “buu” in the display for two seconds and then the cycle time in the right most digits. Adjust the value with the “+” or “-” keys. Pressing the “Status” key will save the setting and move to the next programming step. Programming 18 Settline Time This setting is used to set the time in minutes for cycle 2. This cycle is a settling time for filters. The display will show “br” in the left most digits and the cycle time in the right most digits. Adjust the value with the “+” or “-” keys. Pressing the “Status” key will save the setting and move to the next programming step. Fast Rinse Time This setting is used to set the time in minutes for cycle 3. The display will show “Fr” in the left most digits and then the cycle time in the right most digits. Adjust the value with the “+” or “-” keys. Pressing the “Status” key will save the setting and move to the next programming step. Regeneration Interval This setting is used to set the days between regeneration in time clock mode. The display will show “REG” icon and “dAY” for two seconds and then display the numbers to change. Adjust the value with the “+” or “-” keys. Pressing the “Status” key will save the setting and move to the next programming step. Blank Display After the last programming menu is displayed (menu will vary depending on mode of operation), pressing status will move to a blank display screen. From the ‘blank display’, pressing the “+” key from the blank display will enter the diagnostics menu. From the ‘blank display’, pressing the “-” key will enter the statistics menu. From the ‘blank display’, pressing the “Status” key will exit programming mode and return to the service mode time display. The “regen” key is ignored while in the ‘blank display’. Hidden Programming Menu (Accessed from the regular time of day display in service mode by holding the “+” key for 5 seconds). Immediate Regeneration Override This setting is used to determine whether an immediate or delayed regeneration should occur after a power outage greater than 3 hours. It applies only when dip #2 is set for “delay”. The display will show the REG icon and “dEL” or Id” depending on the last saved setting (default to “dEL” if EEPROM has no saved value). Toggle between “dEL” and “Id” with the “+” or “-” key. If set to “dEL”, then after power outage greater than 3 hours the “regen” icon will light and the regeneration will begin when the timer reaches the next programmed time of regeneration. If set to “Id”, then after a power outage greater than 3 hours the regeneration will begin as soon as the control completes the homing cycle. Pressing the “Status” key will save the setting and go to the next Hidden Menu setting. 19 Culligan Medallist Series® Water Filters Screen Locking This setting is used to lock out the user from changing most of the program menu settings. When the “Loc” setting is saved, the only program menus that can be changed are “tod” and “tor”. The program menu settings will appear as normal but their values will not be able to be changed. (Note: The hidden menu can always be accessed and settings within the hidden menu can always be changed, even if “locked”.) The display will show “Loc” or UnL” depending on the last saved setting (default to “UnL” if EEPROM has no saved value. Toggle between “Loc” and UnL” with the “+” or “-” keys. Pressing the “Status” key will save the setting, exit the Hidden Menu and return to the regular time of day Service Mode display. Programming 20 Manual Cycling Manual Control Cycling The control can be manually cycled through a regeneration to troubleshoot the control or verify that the set-up is complete. When a control is manually cycled back to the service position, the statistical counters of capacity remaining, days since last regeneration and the number of regenerations is in the last 14 days and the life of the unit are not to be reset or updated. If the control is allowed to time out from the last position back to service (Home), the applicable statistical counters are to be reset or updated. A manual cycling of the control can be accomplished by following the steps as outlined below. 1. While in the service mode, press the “Status” key until the display goes blank. 2. Press the “+” key to display the current motor position. ress and hold the “Regen” key for 5 seconds until the regeneration is started. Once regeneration is active, the “Regen” key 3. P will be ignored until the control returns to the service or “home “ position. 4. The “REG” icon will flash and the motor will move the control to Backwash position. 5. Press the “+” key to cycle to the next position and remain there until the cycle times out or the control is manually indexed. ontinue to press the “+” key until the control returns to the service (Home) position. In order to step through the cycles 6. C again, repeat at step 3. Note: if the “-” key is pressed at any time, the control will move back to the first item in the statistics menu. Pressing the “+” key from the statistics menu would move the display back to the current diagnostic cycle. The “+” key will be ignored once the control returns back to the home position. While cycling the control basic diagnostics can be accomplished. • The display shows the “REG” icon solid (if a regeneration is pending) or flashing (if in regeneration). • he display is to show the current cycle (“H” for service, “1” for Backwash, “2” for Brine Rinse and “3” for Fast Rinse / Refill) T in the left most segment. • he status of the motor output is to be shown in the 3rd digit from the right. The center bar of the digit will light solid and the T LEDs will turn off when the motor output is on. • The cycle time remaining will be displayed in the two right most end digits. • If a flow meter is attached, the phone icon will show solid and flash if the control is getting a flow signal form the flow meter. If a chlorinator is attached, the top bar of third digit from the right will show solid and flash when the chlorinator (low, med, or high) signal is present. 21 Culligan Medallist Series® Water Filters 1. Press the status button to move past the programming steps until the display is blank. From blank display press the “+” key. An “H” will appear in the display. The control is in the HOME position. 2. Press and hold the regen button. The ‘REG’ icon will blink, and the motor will advance the control. A ‘1’ will appear. The unit is now in the BACKWASH position. The numbers to the right indicates the time remaining for the cycle. 3. Press the “+” key. A ‘2’ will appear in the display, along with the cycle time remaining. The control is in the Settline cycle. 4. Press “+” key. A ‘3’ will appear in the display, along with the cycle time remaining. The control is now in the FAST RINSE cycle. 5. Press the “+” key. An ‘H’ will appear in the display. The unit is in the HOME position. The ‘REG’ enunciator is no longer blinking. 6. Press the status key. Time-of-Day appears in the display. Note: If the “+” key is pressed to cycle the value from position “3” to “Home”, the # regen counters will not be updated. The control can be indexed through the various regeneration stages. For all steps, the cycle numbers do not appear or change, until the motor stops. Manual Cycling 22 Service Check The service mode allows one to view the number of regenerations in the past 14 days, the total number of regenerations the control has cycled through and the number of days since the last regeneration. The statistical functions are reached by pressing the “Status” key until the screen blanks and then pressing the “-” key. Repetitive presses of the “-” key will cycle through the statistics mode. Pressing the “Status” key will exit statistics and move to the time display. The following table outlines the statistic function display, range limits and default setting: Display • Number of Regenerations - Last 14 days Range Limits 0 to 99 Comments - Days counter is to be updated at 12:00 AM ONLY when dip #2 is on AND dip #4 is off; Otherwise update at whatever TOR is set for - Number of Regeneration is to be updated after a valid regeneration is complete (cycle 3 times out automatically) • Number of days since last Regeneration 0 to 99 - Days counter is to be updated at 12:00 AM ONLY when dip #2 is on AND dip #4 is off; Otherwise, update at whatever TOR is set for - After a valid regeneration is complete (cycle 3 times out automatically), the counter is to be reset to 0 • Number of Regenerations - Life of the Unit 0 to 9,999 Counter is to be updated after completion of valid regeneration cycle (cycle 3 times out automatically) • To be saved in EEPROM before the control is powered down during a power outage. Once the statistics menu is entered the information shown for each display is outlined below: • “Regen” key is always ignored in statistics mode; • Can enter directly into diagnostics mode by pressing the “+” key; • W hen returning to statistics mode directly from diagnostics mode, always display the first statistic in the list as if statistics mode was entered for the first time (don’t have to remember where it left off in the list); • Can exit back to service mode by pressing the “status” key; • Automatically times out back to service mode after 10 minutes of no key press activity; • Drop all leading zeros; Number of Regenerations in Last 14 Days This display will show the number of regenerations that have occurred in the last 14 days. The display will first show “14dY” for two seconds and then display the number of valid regenerations that have occurred. Number of Days since Last Regeneration This display shows the number of days that have elapsed since the last regeneration. The display will show “dAYS” for two seconds and then the number of days that have elapsed since the unit completed its last valid regeneration. Total Number of Regenerations for Life of Unit 23 Culligan Medallist Series® Water Filters This display will show the total number of regenerations that have occurred since installation. The display will show “totL” for two seconds and then display the total number of valid regenerations for the life of the unit. Statistical Function Timeout If no key activity occurs for a period of 600 seconds (10 minutes) while in statistics functions mode, the mode will time out and return to the time of day display. Pressing the “Status” key at any time will return he unit back to the time display. Service Check 24 Start-up Procedure Cullar® and Cullneu® Water Filters • Connect the transformer to a grounded, 120 Volt, 60 Hertz outlet. • Initiate an extra recharge by pressing and holding the “REGEN” button for approximately 5 seconds. • SLOWLY place the bypass valve(s) in the service position. • Place the filter in bypass as soon as water is observed flowing to drain, place the timer in the service position (refer to the SERVICE POSITION paragraphs in the SETTINGS section) and unplug the control. • Allow the media to soak for 24 to 48 hours for Cullar and Cullneu models. • Plug in the power cord, and set the timer to the correct time of recharge and time of day, place the bypass valve(s) in the service position. Caution! If a sudden rush of water enters the filter, some of the media could be thrown up into the control valve. Filtr-Cleer® Water Filter • Connect the transformer to a grounded, 120 Volt, 60 Hertz outlet. • Set the timer to the correct time of recharge and time of day. • Initiate an extra recharge by pressing and holding the “REGEN” button for approximately 5 seconds. • SLOWLY place the bypass valve(s) in the service position. Caution! If a sudden rush of water enters the filter, some of the media could be thrown up into the control valve. Warning! Although not normally necessary, should you need to disassemble any part of the control valve or remove the control from the tank assembly or associated plumbing, depressurize the unit first closing the main supply valve, then open a convenient faucet down stream from the water conditioner During the recharge cycle, unfiltered water will be available to all the lines in the household. Immediately following recharge, the water to service will be filtered. Recommended Preventative Maintenance Inspection Schedule The Culligan Gold Series water filter has been designed to provide a good, consistent service life. Routinely inspecting the system may help avoid potentially costly breakdowns related to circumstances outside of the control of the dealer and/or user. The filter is for prblem water use and routine maintenance is required. Contact your local Culligan dealer to perform routine maintenance. Component Suggested Inspection Frequency Reason for Maintenance Entire System At Start-up, after infrequent use (idle for one week or more) or every 3 - 6 months if on a private water supply. On private supplies, the appearance of off-tastes and odors, particularly if musty or “rotten egg” (caused by harmless sulfate-reducing bacteria) may indicate a need for the system to be sanitized. Backwash Flow Controller Every 12 months or every time service is performed on the system. Build up of sediment, iron and/or other foreign materials (found in some water supplies but not necessarily all) could negatively affect system performance. Monitor item for normal or unexpected wear. Media As needed. Cullneu Filter - As water passes through the Cullneu filter, the media slowly dissolves and neutralizes the water. The rate at which the Cullneu media dissolves depends on a number of factors such as temperature flow rate and pH. Add media when pH elevation no longer occurs. Cullar - Replace when taste odor or chlorine can no longer be removed. Filtr-Cleer - Media may need to be reconditioned or replaced depending on water characteristics. 25 Culligan Medallist Series® Water Filters Troubleshooting Guide Problem Cause Solution 1. Unit has blank display. A. Unit has no power. A. Verify that unit is connected to a constant power source (Not an outlet on a switch). B. Defective plug-in transformer. B. Replace plug-in transformer. A. Timer setting incorrect. A. Reset timer. B. Timer flashing. B. Reset timer and verify that unit is connected to a constant power source. C. Circuit board set to immediate regeneration. C. Set circuit board to delayed regeneration. Refer to ‘Programming the option settings’. D. Incorrect programming. D. Refer to the ‘Programming’ section and verify all settings. A. Jammed seal pack or brine piston. A. Replace the seal pack or brine piston as outlined in the ‘Parts Replacement Guide’ section. B. Defective cam microswitches B. Replace cam microswitches C. Defective motor. C. Replace the motor as outlined in the ‘Parts Replacement Guide’ section. A. Cul-Flo-Valv ® is open or o-rings on CulFlo-Valv bypass stem are cut. A. Close bypass valve or replace o-rings on bypass stem. B. Chemical storage tank is empty. B. Add chemical to storage tank and verify that proper level of salt or chemical is maintained. C. Incorrect programming. (Salt dosage too low for influent hardness) C. Refer to ‘Programming’ section and verify that settings are correct. D. Internal seal leak. D. Replace seal pack as outlined in the ‘Parts Replacement Guide’ section. E. Excessive water usage. E. Verify that programming is correct. For Time Clock units increase regeneration frequency. F. Unconditioned water in water heater tank. F. Flush water heater to fill tank with conditioned water. Note: Follow water heater manufacturer’s recommendation. A. Inadequate mineral in media tank. A. See problem 6 & 7. B. Control and/or resin bed plugged with debris or iron build-up. B. Clean control and increase frequency of regenerations or length of backwash. Plant recondition if necessary. C. Inlet manifold plugged. C. Remove control from tank and clean inlet manifold. Check if eductor screen/nozzle is also plugged. D. Control plugged with foreign material broken loose from recent plumbing work. D. Clean control. 2. Regeneration occurs at incorrect time. 3. Phone Icon is displayed. 4. Unconditioned water to service. 5. Loss of water pressure. Troubleshooting Guide 26 Problem Cause Solution 6. Loss of mineral to drain. A. Improper drain line flow control. A. Ensure that the control has the proper drain line flow control. (See Table 10) B. Air in water system. B. Ensure that system has proper air eliminator control. 7. Mineral to service. A. Control connected to tank backwards. A. Verify that control is properly mounted to the tank. B. Defective outlet manifold. B. Replace outlet manifold. 8. Continuous flow to drain. A. Internal seal pack leak. A. Replace seal pack as outlined in the ‘Parts Replacement Guide’ section. B. Seal pack or brine piston jammed in position. B. Replace the seal pack or brine piston as outlined in the ‘Parts Replacement Guide’ section. C. Power failure while unit was in regeneration. C. Restore power to unit. Verify that unit is connected to a constant power source. 27 Culligan Medallist Series® Water Filters Circuit Board Troubleshooting Error Mode When a failure is detected, the control will generate and display an error or alarm code, depending on the type of failure, as shown in the table below. In order to clear an error code (after correcting the problem), push and hold the “Status” key for 10 seconds. After the 10 seconds, the control will clear the error code and cycle the valve to service (Home). Other methods of clearing the error code are: powering down the control for 60 seconds, toggling a DIP switch or changing an input connection (adding or removing a Flow Meter). If the problem is still present after clearing the error code, the error code will again be displayed. While in error mode, the control will not function. When returning from Error mode, the control shall use the values stored in EEPROM unless a DIP switch was toggled or an input connection (Flow Meter) was changed. In those cases, the programmed values shall revert back to the defaults. For E2 and E3 errors, the control is to attempt to return to home and stop. If the control is successful in finding and stopping in the home position it is to display the error code but return to functioning as normal. If the next regeneration is successful without errors the error code is to be removed and the control will function as normal. Display Error Description Mode of Detection Clearing Error / Alarm Motor Failure to Start (No switch changes) If the valve fails to reach the desired state within 70 seconds of driving the motor. The control will attempt to start the motor 3 times for 70 seconds each time with a 60 second off period between each attempt. Press and hold ‘STATUS’ key for 10 seconds Motor Failure to Stop (unexpected switch changes) If the control detects changes in the Cam inputs when the motor is not supposed to be turning Press and hold ’STATUS’ key for 10 seconds Incorrect Cycle Position (switch changes out of sequences) The control expects to be in a different position than that indicated by the Cam switch closures Press and hold ‘STATUS’ key for 10 seconds Circuit Board Troubleshooting Most circuit board problems are caused by outside influences and it is not the board itself. Replacing the board may seem to work only because the cause hasn’t reappeared – yet. Let’s start with what to check when you come upon a circuit board problem: 1. Are those switches aligned too closely to the cam? There should be a small but obvious gap between the switches and the cam so that a “wobbling cam” doesn’t accidentally bump the switch. 2. Has the seal pack been checked for free movement? Feedback and experience has demonstrated that seal packs that are over-tightened create drag on the motor and delays that would result in an error code: If the motor never stops (still runs after the desired position is sensed, causing unexpected switch closures) OR if the motor gets stuck “timing out” and the control never sees any switch action. 3. Are all the wiring terminals tightly connected? Sometimes a loose or poorly connected wire can give feedback to the board that would result in an error code or default. 4. After checking all of these possibilities you should run the diagnostics (Test Mode) on the board Instructions are listed on page 29. Circuit Board Troubleshooting 28 Listed below are some other circuit board problems and their explanations: – Board skips the service position or only stops for a second in service before advancing to the backwash position Board has been armed for regeneration. Let the board time out of all three cycles or reset and reprogram the board. Resetting the board can be done by connecting or disconnecting the meter cable. – Motor goes round and round Only one of two things can happen when this is the case; it can find its desired position or it gives you an error code. So, LET IT RUN until you find out which will occur. • If the motor still runs or there is power to motor after the error code is displayed, then the triac is likely bad – change the board. • If the error code is displayed and the motor is stopped (no power to the motor), check switches, cam and wire harness – the board got a signal it wasn’t supposed to or a connection failed. A word about triacs – A triac is an electronic switch and can “latch on” when it becomes overheated from a laboring motor (tight seal pack). It may operate properly when it cools down. A continuously running motor could be caused by an overheated triac. Checking the seal pack and voltage draw and allowing the triac to cool down could give you favorable result and prevent the need to change the board. Otherwise, when it is sent to Returned Goods it could test good and be returned. You clear an error code and it starts into regeneration It was either in regeneration or has kept track of time since the error code occurred and it’s trying to finish the regeneration. Reset and reprogram the board. The board repeatedly defaults, resets or gains time Look at the power supply or source. Most of these issues are caused by the power source, so-called “dirty power” having noise interference or incorrect voltage. This could be erratic fluctuations caused by other heavy power draws, poor wiring, low voltage wiring running along high voltage, having active electrical storms that causes “corruption” of the EEPROM. Consider the use of a surge protector or an uninterruptible power supply after you see this repeatedly. If you suspect the power source is causing problems, take a voltage reading at the outlet, at the power connection on the board, and on the motor leads while the motor is running. We are looking for a consistent range of 108-132 volts at the receptacle and 22-28 volts on the board. Also, the wall transformer is only used to step down the voltage; it is not used for protection or filtering the power source. Test Mode In this mode the control can be put through a performance test to verify the operation of the board components. Moving dip #1 from service to test mode enters the test mode; the motor output should turn off (if it was on) upon entering test mode. When entering test mode all program settings and statistical data should be stored in EEPROM. The test sequence is to follow the description as found in the table below. Upon exiting test mode, if a device connection is different (flow meter connected or disconnected) or a DIP switch setting is changed from the condition that was present when entering test mode, the control should behave as if the change was made while out of test mode. For example, if a flow meter was added and not removed while in test mode, the control shall load the flow meter defaults when exiting test mode. 29 Culligan Medallist Series® Water Filters Test Description Display Information Action Trigger Start Test Mode All LCD segments lit DIP switch #1 set to on, all others off Software version Software version # Press a key after entering test mode as above Enter test mode Blank Display Press a key after displaying the software version #. DIP switch #2 Display to show “2” Turn on DIP switch #2 Display to Blank Turn off DIP switch #2 Display to show “3” Turn on DIP switch #3 Display to Blank Turn off DIP switch #3 Display to show “4” Turn on DIP switch #4 Display to Blank Turn off DIP switch #4 Display to show “5” Turn on DIP switch #5 Display to Blank Turn off DIP switch #5 Display to show “6” Turn on DIP switch #6 Display to Blank Turn off DIP switch #6 Display to show “7” Turn on DIP switch #7 Display to Blank Turn off DIP switch #7 Display to show “8” Turn on DIP switch #8 Display to Blank Turn off DIP switch #8 Status Key Display to show “11” Press Status Key + Key Display to show “12” and motor to run for 15 seconds Press + Key - Key Display to show “13” (and turns on Chlorinator output for 15 seconds IF chlorinator is connected) Press - Key Regen Key Display to show “14” Press Regen Key Home Switch Display to show “H” when Home switch closed Close Home Switch Display to Blank when open Open Home Switch Display to show “P” when Position switch closed Close Position Switch Display to Blank when open Open Position Switch Display to show “Phone” icon when flow meter is connected Connect Flow Meter Display to blink “Phone” icon when flow meter is sending pulses Spin Flow Meter Display to show “Colon” icon when chlorinator is connected Connect Chlorinator Display to blink “Colon” icon when chlorinator is turned on Turn on Chlorinator when the plus key is pressed. DIP switch #3 DIP switch #4 DIP switch #5 DIP switch #6 DIP switch #7 DIP switch #8 Position Switch Flow Meter Chlorinator When exiting test mode, if the dip switches or sensors have not changed, the control is to restore all values from EEPROM, and resume where it left off after homing. If the dip switch or sensors have change, the values should reset to factory defaults. In either case the valve should home itself upon exit of test mode. Circuit Board Troubleshooting 30 Operation, Care & Maintenance Cullneu® Water Filter Refill As water passes through the Cullneu Water Filter, the media slowly dissolves and neutralizes the water. The rate at which the Cullneu media dissolves depends on a number of factors such as temperature, flow rate, and pH. Because these factors are so variable, it is difficult to determine how often new Cullneu media should be added. Tables 4 and 5 show the recommended intervals for inspection and replenishment of Cullneu mineral. The following procedure should be used to determine when new media should be added. • Press and hold the “REGEN” button for approximately 5 seconds. Allow the control to move to the backwash position. Unplug the control. • Place the filter in bypass by screwing the blue knob of the Cul-Flo-Valv ® bypass fully inward or by closing the inlet and outlet valves and opening the bypass valve (three valve bypass). • Remove the Refill Port from the port opening for 10” tank. For 8” tanks, the control must be removed. Warning! Some water supplies contain potentially hazardous gases. Do not inspect the interior of the tank using a spark or heat source, or an explosion may result! • Using a yardstick, measure the distance between the top of the media and the back top edge of the port opening (this distance is the freeboard). For eight-inch units, if the freeboard is greater than 17 inches, add enough Cullneu media to decrease the freeboard to 11 inches. For ten-inch units, if the freeboard is greater than 27 inches, add enough Cullneu media to decrease the freeboard to 21 inches. • Wipe the port opening free of media and replace the Refill Port. Make certain the cap is securely locked into place for 10” tanks. Reassemble the control to the tank for 8” units. • Place the bypass valve(s) in the service position, plug in the control, and re-set the time of day. Allow the filter to continue the backwash and rinse cycles. The control will then return to the service position. Use of Bypass Valve Depending on where the particular installation was made, the outside sill cocks may or may not be served by filtered water. Ideally, all lines not requiring filtered water should be taken off upstream of the filter. This is not always possible, however, due to the construction of the house, or the difficulty or expense of rearranging the piping on older homes. You should bypass the filter: • If the outside lines do not bypass the water filter and you do not wish to waste filtered water on lawn sprinkling or other outside uses. • If no water will be used for several days and you want to save water by not allowing the unit to backwash. • If you wish to inspect or work on the valve. • If a water leak from the valve is evident. Cul-Flo-Valv Bypass With the blue knob screwed fully outward (knob up against the barrel of the valve, figure 17, page 13), water is routed through the water filter. Water may be bypassed around the filter by screwing the blue knob fully inward. Avoid overtightening the valve stem when shifting from one position to another. 31 Culligan Medallist Series® Water Filters Care and Cleaning Protect the operation and appearance of the water filter by following these precautions: • Do not place heavy objects on top of the control valve cover. • Use only mild soap and warm water to clean the exterior of the unit. Never use harsh abrasive cleaners or compounds which contain acid or bleach. • Protect the conditioner and drain line from freezing temperatures. • Reset the timer as soon as possible after any interruption of electrical power to keep the unit on its normal schedule. 8 Inch Neutralizers; Mineral Replenishment Interval CO2 (GPG) 2 Persons 3 4 150 gpd 225 300 3 4 6 3 5 6 3 7 8 3 Use 9 Chemical 10 Feed Table 4 10 Inch Neutralizers; Mineral Replenishment Interval CO2 (GPG) 2 Persons 3 4 5 150 gpd 225 300 375 3 A 4 6 5 3 6 7 6 3 8 9 10 6 450 Use Chemical Feed Table 5 A - check and replenish annually 6 - check and replenish every 6 months 3 - check and replenish every 3 months Operation, Care & Maintenance 32 BLK BRN BRN BLK YEL RED Wiring BLK Diagram POWER CORD BLK GEARMOTOR MOTOR POSITION SWITCH (TOP) MOTOR HOME SWITCH (BOTTOM) CIRCUIT BOARD BLK BLK BRN BRN RED YEL POWER CORD 33 Culligan Medallist Series® Water Filters Parts List 14 3/4” Filter Valve 3/4" FILTER VALVE 16 55 17 20 15 29 30 47 26 18 25 18 13 65 24 23 22 18 21 1 2 65 14 16 1” Filter 1"Valve FILTER VALVE 17 29 30 18 15 26 20 18 25 13 65 24 23 22 18 21 1 2 65 Parts List 34 1” Filter Valve 10 9 3 3 12 5 63 65 65 63 4 8 3 6 7 3 63 65 10 63 65 9 3 12 3 5 63 65 63 65 65 63 4 11 63 65 3/4” Filter Valve 8 3 6 48 49 7 63 65 63 65 11 63 65 35 Culligan Medallist Series® Water Filters 3 63 65 72 43 84 83 70 71 83 82A 82 72 85 72 84 59 58 55 59 53 56 51 50 52 54 57 60 57 Parts List 36 Power Valve Service Parts List Item # Part # DESCRIPTION Quantity/Pack Valve Size 3/4” Valve 1” Valve 1A 01013976 Control Valve Body 1” 1 Each X 1B 00449865 Control Valve Body 3/4” 1 Each X 2 01013083 Seal Pack Assembly 1 Each X X 3A 01014179 Drive Motor Kit 24V 1 Each X X 4 P1013031 Drive Cam 10 Each/Pack X X 5 P1013043 Retaining E-ring 10 Each/Pack X X 6 00445246 Pin 1 Each X X 7 P1013677 Bell Crank/Follower Kit 10 Each/Pack X X 8 P1001784 Screw, motor retaining, top 25 Each/Pack X X 9A P1003244 Microswitch 24v 10 Each/Pack X X 10 P0448686 Screw, Microswitch retaining 25 Each/Pack X X 11 P0318452 Screw, Motor retaining, bottom 25 Each/Pack X X 12 P0318455 Screw, Microswitch Plate 25 Each/Pack X X 13 P0444914 O-ring, Rear Seal 10 Each/Pack X X 14 P0448687 Screw, Eductor Cover 25 Each/Pack X X 15 P0447387 Clip, Drain Elbow 25 Each/Pack X X 16 P0401022 Eductor Cover 10 Each/Pack X X 17 P0445797 Seal, Eductor Port 10 Each/Pack X X 18 00448126 Plug, Body, Rear 1 Each X X 19 00448128 Clip, Body, Rear 1 Each X X 20 01017758 Drain Elbow Assembly 1 Each X X 21B P1001258 Repl Eductor Sleeve (Filter) 10 Each/Pack X X 22A P0447986 O-ring, Eductor Sleeve, Small 25 Each/Pack X X 23A P0308407 O-ring, Eductor Sleeve, Large 25 Each/Pack X X 25 P0451701 Hose Clamp, Drain 25 Each/Pack X X 26C P0331636 FC Washer, 3.5 GPM Green 10 Each/Pack X X 26E P0331637 FC Washer, 4.5 GPM Red 10 Each/Pack X X 26F P0401031 FC Washer, 5.5 GPM Black 10 Each/Pack X X 26G P0708008 FC Washer, 7.0 GPM Black 10 Each/Pack X X 27 P1014426 Spacer, Flow Control 10 Each/Pack X X 29 P0448668 Eductor Plug assy (Filters) w/O-rings 10 Each/Pack X X 30A P0308437 O-Ring, Eductor Throat/Plug, Large 25 Each/Pack X X 31A P0308438 O-Ring, Eductor Throat, Small 10 Each/Pack X X 44A P1014734 Wire Harness - CB Gold/Medallist 5 Each/Pack X X 45B P1014787 Power Cord - Medallist 5 Each/Pack X X 46 P1000372 Cord Grip (Power Cord) 25 Each/Pack X X 47 01004689 Bracket - 3/4” Medallist Rear 1 Each X 48 01005130 U-clamp - 3/4” Medallist 49 P0448687 Screw, U-clamp, 3/4” Medallist 50A 01013971 Tank Adapter Kit, ACME, Medallist 37 Culligan Medallist Series® Water Filters 1 Each X 25 Each/Pack X 1 Each X Item # Part # DESCRIPTION Quantity/Pack 52A 01013958 Tank Adapter, 1” Valve 1 Each Valve Size 3/4” Valve 1” Valve X 52B 00444808 Tank Adapter, 3/4” Valve, ACME threads 1 Each X 52C 00403523 Tank Adapter, 3/4” Valve, NPSM threads 1 Each X 53 P1013959 Tank Clamp, 1” Valve 10 Each/Pack X 54 P1013669 Tank Clamp Pin, 1” Valve 10 Each/Pack X 55 P0318383 Tank Clamp Screw, 1” Valve/3/4” bkt 10 Each/Pack X 56 P1014848 O-ring, Large, 1” Valve to Tank Adapter 25 Each/Pack X 57A P0440052 O-ring, 3/4”/1” Valve Adapter to ACME Tank 25 Each/Pack X 57B P0308447 O-ring, 3/4” Valve Adapter to NPSM Tank 10 Each/Pack X 59 P0333957 O-ring, 3/4” Couplings to Tank 25 Each/Pack X 60 P0308427 O-ring, Manifold, 3/4” Valve 50 Each/Pack X 65A 01013777 Seal Pack/Sleeve/Cam (Filters) 1 Each X 67A 01018425 Bypass Valve - 3/4” / 1” Rotary 1 Each X 68B 01018755 Rebuild Kit - 1”/1-1/4” Rotary Bypass 1 Each X 70 P1009075 Retaining Clip, 1” Bypass valve 10 Each/Pack X 71A 01013985 Coupling Kit - 3/4” Bypass 1 Kit 71B 01014033 Coupling Kit - 1” Bypass 1 Kit 72A P0308427 O-ring, 3/4” Couplings/Meters 50 Each/Pack 72B P1009099 O-ring, 1” Couplings/Meters 50 Each/Pack 73 P0330667 Coupling, 3/4” (no O-rings) 10 Each/Pack X X X X X X X X 74 P0318546 Screw, 3/4” Couplings 25 Each/Pack 72B P1009099 O-ring, 1” Couplings/Meters 50 Each/Pack 73 P0330667 Coupling, 3/4” (no O-rings) 10 Each/Pack X 25 Each/Pack X X 74 P0318546 Screw, 3/4” Couplings 75A 01010783 1” Copper Adapter Kit, (1” Bypass) 1 Each X 75B 01016564 3/4” Copper Adapter Kit (1” Bypass) 1 Each X 75C P1019783 3/4” Copper Adapter Kit (3/4” Bypass) 76A 01016565 3/4” Elbow Copper Adapter Kit (1” Bypass) 76B P1019782 3/4” Elbow Copper Adapter Kit (3/4” Bypass) 10 Sets/Pack 10 Sets/Pack 1 Each X X 79 P1009856 Gasket, Copper Plumbing Adapters 25 Each/Pack X 81A 01018248 Plumbing Adapter Kit - 1” NPT 1 Each X 81B 01018249 Plumbing Adapter Kit - 1-1/4” NPT 1 Each 82A 01012905 Meter Kit - 3/4” w/wire harnes 1 Each 82B 01011188 Meter Kit - 1” w/wire harness 1 Each 83 01008070 Wire Harness, 3/4”/1” Meters 1 Each X 84 P1012820 Screw, 3/4” meter kit 25 Each/Pack X 85 P1013749 Quad Ring, 3/4” meter kit 50 Each/Pack X 86 01018133 Transformer, Dual Output 1 Each X X 87 01015972 Transformer, Outdoor Models, 120/24 1 Each X X 89 01013839 Backup Battery, Gold 1 Each X X X X X X Parts List 38 Filter Tank Part No. Description 00441897 Replacement Tank, 8”, w/ Manifold, Empty 01014892 Replacement Tank, 10” x 54”, w/ Manifold, Empty 01014572 Replacement Tank, 10” x 54”, w/ 1 1/4” Manifold, Empty 01014042 Replacement Tank, 10” x 54” w/ fillport and Manifold, Empty 01000819 Outlet manifold, 8” 01012829 Outlet manifold, 10” x 54” 01014539 1 1/4” Outlet manifold, 10” x 54” P0308427 O-ring (outlet manifold for 3/4” control) P1009099 O-ring (outlet manifold for 1” control) 01009847 Top Strainer, Fine Slot, Medallist Plus 01011195 Top Strainer, Wide Slot, Medallist Plus 01014508 Top Strainer, Fine Slot, Medallist 8” 01014507 Top Strainer, Wide Slot, Medallist 8” * Not Illustrated 39 Culligan Medallist Series® Water Filters