1
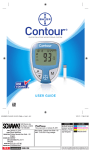
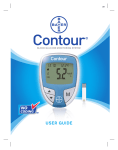
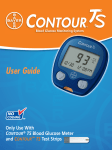
BLOOD GLUCOSE MONITORING SYSTEM
USER GUIDE
Thank you for choosing the CONTOUR ® blood glucose
monitoring system! We are proud to be your partner in
helping you manage your diabetes. Our goal is to make
this the simplest, most accurate meter you will ever use.
The CONTOUR blood glucose monitoring system is
intended for self-testing by people with diabetes and
by healthcare professionals to monitor glucose
concentrations in whole blood.
Additional Materials
• CONTOUR ® Test Strips—Use for blood glucose or control
solution testing. The test strips are supplied in a handy bottle
with an easy-to-open flip-top lid.
• MICROLET ®2 or Ascensia® MICROLET ® Lancing Device
with Adjustable Endcap and clear Alternative Site Testing (AST) Endcap—Use the Gray Adjustable Endcap for testing on the fingertip. Use the clear AST Endcap for testing on the
forearm or palm.
• Batteries—Uses two 3-volt (DL2032 or CR2032) lithium
batteries. Replace when necessary.
For the Free Batteries For Life program, call 1-800-348-8100.
For short simple instructions, a quick reference guide is also
provided. It can be more convenient when traveling.
Introduction
8
10
11
Set-up for Basic (L-1) and Advanced (L-2) Modes
Setting the Date, Time and Sound
Setting Advanced Mode (L-2) Features
Using Advanced Mode
Viewing Stored Results
14
15
18
19
24
Alternative Site Testing (Forearm or Palm)
Control Solution Testing
Transferring Results to a Computer
28
30
33
Error Codes and Symbols
Changing the Batteries
Caring for the System
Technical Information
Specifications
Warranty
Service and Supplies
34
37
39
40
41
42
44
Additional
Features
Getting Ready to Test
Getting the Blood Drop
Testing Your Blood
Options
2
3
4
5
6
7
Technical
Information
Your Testing Tools
Your Meter Display
Your Meter Features
Symptoms of High or Low Blood Sugar
Important Things to Know
Before You Begin Testing
Testing
Table of Contents
Introduction
Your CONTOUR® Meter:
Display
Your Testing Tools
Up/Down
Scroll Buttons
Test Strip Port
(On/Off, Memory
Recall, Enter)
Your CONTOUR® Test Strip:
Sample Tip
Blood sample
pulled in here.
MICROLET ®2 lancing device
and lancets
(Included with some kits)
OR
Ascensia® MICROLET ® adjustable
lancing device and lancets
(Included with some kits)
2
Memory Button
Please refer to the Ascensia
MICROLET device package insert
for complete instructions on using
this lancing device.
Gray End
Insert this end into
the test strip port.
While all characters are displayed, it is very important
to verify that
is fully displayed. If there are missing segments, see Error Codes and Symbols (page
34). This may affect the way you see your results.
Top area on
the display
presenting
date and time.
Indicates sound
is turned on.
Indicates the
batteries are low
and need to be
changed.
Pre-meal
result marker.
Post-meal
result marker.
Center area on the
display that shows either
your test result or any
error codes.
Indicates the meter is
ready to test.
Identifies a
Logbook entry.
Control result marker.
Indicates
an alarm has
been set.
or
will
appear if the meter
is in 12 hour setup.
Indicates it is too cold or
too hot for your meter to
test accurately.
Introduction
The picture below shows all the symbols that appear on your meter
display. To view, with the meter off, press and hold ▲ or ▼. All display segments will appear for 10 seconds. If you need more than
10 seconds to check the display, press and hold ▲ or ▼ again.
Your Meter Display
Your Meter Display:
Day/month format.
Results are
displayed as
mg/dL or mmol/L.
The 7 appears
when viewing 7 day
HI–LO summary.
Indicates Average.
3
Introduction
Your Meter Features:
Easy: The CONTOUR blood glucose monitoring system is
about simplicity. You will notice its uncomplicated approach
the first time you see it. Simple things like the use of three
large buttons and a clear display are sure to make this your
favorite meter right from the start.
Your Meter Features
Automatic: You no longer have to worry about coding* your
meter or marking a control test result. The CONTOUR meter
does it automatically. It will even tell you when a test strip is
under-filled.
Programmed: Your CONTOUR meter has been preset at
the factory with the standard date, time, and units of measure (mg/dL) used where you purchased your meter. To
change these settings or use advanced meter features, such
as meal markers or post-meal test alarm, read through the
Additional Features section of your user guide.
Customizable: The CONTOUR meter allows you to set
personal choices for some features. For more information,
please see pages 14–19.
*Your CONTOUR meter is designed with No Coding™ technology, so the meter codes itself every time you insert a test
strip. This means you do not have to worry about getting
inaccurate results due to miscoding or forgetting to code
your meter.
4
Need Help? Call toll free: 1-800-348-8100
According to the American Diabetes Association, some of
the most common symptoms are:1
High blood sugar
(Hyperglycemia):
•
•
•
•
•
•
frequent urination
excessive thirst
blurred vision
increased fatigue
extreme hunger
irritability
Low blood sugar
(Hypoglycemia):
•
•
•
•
•
•
•
shakiness
sweating
fast heartbeat
blurred vision
confusion
passing out
seizure
Ketones (Ketoacidosis):
• shortness of breath
• nausea and vomiting
• very dry mouth
CAUTION: If you are experiencing any of these
symptoms, test your blood glucose. If your test
result is below 50 mg/dL or above 250 mg/dL,
contact your doctor immediately.
Introduction
You can better understand your test results by being aware
of the symptoms of high or low blood sugar.
Symptoms of High or Low Blood Sugar
Symptoms of High or Low Blood Sugar:
For additional information and a complete list of symptoms,
contact your healthcare professional or refer to the website
for the American Diabetes Association: www.diabetes.org
www.bayerdiabetes.com/us
5
Introduction
Important Things to Know
6
Important Things to Know:
Always keep the test strips in the original bottle.
Tightly close the bottle immediately after removing a test strip. The bottle is designed to keep the test
strips dry. Exposure to room humidity from leaving the
bottle open or not storing them in the original bottle can
damage your test strips.
Your test strip is designed to easily “sip” the
blood into the sample tip. Do not drop blood directly
on the flat surface of the test strip.
Do not press the test strip against your finger
when testing. This may block the sample tip.
Test strips are for single use only. Do not use a test
strip that appears damaged or has been used.
Let the meter and test strips adjust to the temperature of the location where you are testing. Whenever the meter is moved from one location to another,
allow approximately 20 minutes for the meter to adjust to
the temperature of that new location before performing a
blood glucose test. The products have been designed to
give accurate results at temperatures between 41°F and
113°F.
Check the expiration dates on your test strips
and control solution. It is important to not use the test
strips or control solution if the expiration date printed on
the bottle label and carton has passed or it has been six
months (180 days) since you first opened the bottle. It
will help to write the six month discard date on the label
in the area provided when you first open the test strips or
control solution.
Need Help? Call toll free: 1-800-348-8100
Example:
or
Check your display to ensure that results are being
displayed in mg/dL. If they are not, contact Bayer Diabetes
Care Customer Service, 1-800-348-8100.
Before You Begin Testing:
Introduction
• Your meter has been preset and locked to display results
in mg/dL (milligrams of glucose per deciliter). In some
countries, the meters are preset to display units in mmol/L
(millimoles of glucose per liter);
• Results in mg/dL will never have a decimal point;
• Results in mmol/L will always have a decimal point.
Before You Begin Testing
IMPORTANT NOTE:
1. Read your user guide and all instructional materials provided in your meter kit before testing.
2. Have all the materials you will need ready before
you begin testing. This includes your CONTOUR ® meter,
the CONTOUR ® test strips, and the MICROLET ®2 or
Ascensia® MICROLET ® lancing device with MICROLET ®
lancets. You may also need CONTOUR ® control solution to
run a quality control check.
3. Wash your hands thoroughly with warm soapy
water and dry them well before testing.
www.bayerdiabetes.com/us
7
The following steps (pages 8–13) are shown in the
proper order for performing a blood glucose test.
Getting Ready to Test:
Testing
Your lancing device may not be the one shown here.
Please check your lancing device insert for complete
instructions on its use. Read the MICROLET 2 or the
Ascensia MICROLET insert for complete instructions. For
testing sites other than fingertip, see page 28.
Wash and dry your hands thoroughly before testing.
Getting Ready to Test
Remove the endcap from the
MICROLET2 lancing device
with your thumb on the grip
indent as shown.
Loosen the round protective
cap on a lancet by rotating
it ¼ turn, but do not remove
it. Always use MICROLET
lancets for best operation.
Insert the lancet firmly into
the lancing device until it
comes to a full stop. This will
cock the device. You can also
pull and release the cocking
handle.
8
Need Help? Call toll free: 1-800-348-8100
Remove a test strip from the
bottle. Tightly close the
bottle lid immediately
after you have removed
the test strip.
NOTE: Check the expiration and discard dates on the bottle.
Make sure the test strip does not appear torn or damaged.
Hold the test strip with the
gray end facing up.
Insert the gray end into the
test strip port on the meter.
Getting Ready to Test
Replace the gray endcap
prior to getting your blood
drop.
Testing
Twist off the round protective
lancet cap. Be sure to save
it for disposing of the used
lancet.
The meter will turn on. An image of a test strip with a flashing blood drop
will appear letting you know the meter
is ready to test.
www.bayerdiabetes.com/us
9
Getting the Blood Drop:
The puncture depth
depends on the endcap
setting and the amount of
pressure applied to the
puncture site. You will
determine which combination
works best for you.
Use the
Gray
endcap
Testing
Shallow
Puncture
Deep
Puncture
Getting the Blood Drop
Press the endcap firmly
against the puncture site and
press the blue release button
with your thumb.
Stroke your hand and finger
towards the puncture site
to form a drop of blood. Do
not squeeze around the
puncture site.
Test immediately after a good
blood drop has formed.
Suggested drop size
10
Need Help? Call toll free: 1-800-348-8100
Testing Your Blood:
Immediately touch the tip of
the test strip to the drop of
blood. The blood is pulled into
the test strip through the tip.
Fingertip Testing
After a beep, you will see the
meter count down 5 seconds.
Your test result will appear
and will be automatically
stored in the meter memory.
Remove the test strip to turn
your meter off.
www.bayerdiabetes.com/us
Testing Your Blood
Do not press the tip
against the skin or
place the blood on
top of the test strip.
Testing
Hold the tip of the test
strip in the blood drop
until the meter beeps.
11
You can set your meter to use special marker options by
using Advanced Mode (L-2). See pages 18–23.
Testing
Expected Values: Blood glucose values will vary depending on food intake, medication dosages, health, stress, or
exercise. Consult your healthcare professional for the target
value that is appropriate for you. According to the American
Diabetes Association standard medical practice goals for a
non-pregnant individual with diabetes:2
• Before a meal: 90 to 130 mg/dL
• 2 hours after a meal: less than 180 mg/dL
Testing Your Blood
•
•
CAUTION
If your test result is below 50 mg/dL, above
” or “
” on the
250 mg/dL, or you see “
meter display, call your physician or healthcare
professional immediately.
Do not change your medication based on CONTOUR
blood glucose results without the advice of your
physician or healthcare professional.
NOTE: If you want to mark
your result (Advanced Mode),
you will need to do it before
removing the test strip.
To turn your meter off, simply
remove the test strip. Carefully dispose of the used test
strip.
12
Need Help? Call toll free: 1-800-348-8100
Place the round protective lancet cap on a flat surface with
the Bayer logo facing down.
With the used lancet still in
the lancing device, push the
lancet needle completely into
the middle of the exposed
side of the cap.
While (a) pressing the blue
release button, (b) pull the
blue cocking handle, and the
lancet will drop into the
container you have selected.
Testing Your Blood
In one hand, hold the lancing
device with your thumb on the
grip indent, with your other
hand, hold the gray endcap
dial as shown, and gently
snap off the endcap.
Testing
Removing the used lancet:
Dispose of the used lancet
carefully to prevent injury or
contamination to others.
Do not reuse lancets. Use a
new MICROLET lancet each
time you test.
www.bayerdiabetes.com/us
13
Set-up for Basic (L-1) and Advanced (L-2) Modes:
Your new CONTOUR meter is pre-set for the Basic Mode
and offers the same easy test procedure in either the Basic
or Advanced Mode.
BASIC MODE (L-1)
Additional
Features
Set-up for Basic (L-1) and
Advanced (L-2) Modes
14
ADVANCED MODE (L-2)
• 7 day HI and LO summary
• 14 day average
• 480 test result memory
•
•
•
•
•
7 day HI and LO summary
7, 14, and 30 day averages
480 test result memory
Pre- and post-meal markers
30 day pre- and post-meal
averages
• Selectable post-meal alarms
(2.5, 2.0, 1.5, 1.0 hours)
• Personal HI and LO
test settings
Your meter is pre-set to Basic
Mode. If you have set your
meter to the Advanced Mode,
and want to return to Basic
Mode:
1. Press M to turn your
meter on. Wait to see the
flashing test strip.
2. Press and hold ▲ or ▼
for 3 seconds.
3. L-2 will flash.
4. Press ▲ or ▼ to change
to L-1.
5. Press M to set.
To set your meter to Advanced
Mode, and take advantage
of meal markers and other
functions available to you:
1. Press M to turn your
meter on. Wait to see the
flashing test strip.
2. Press and hold ▲ or ▼
for 3 seconds.
3. L-1 will flash.
4. Press ▲ or ▼ to change
to L-2.
5. Press M to set.
Please see page 18 for more
details.
Need Help? Call toll free: 1-800-348-8100
Setting the Date, Time and Sound:
Your CONTOUR meter allows you to set the date, time, and
sound as you like them.
• You can view 12 or 24 hour time;
• month/day or day.month, and;
• choose to have your meter beep or not.
To get into set-up mode when the meter is off, press and
hold M for 3 seconds. A complete display will briefly appear,
then numbers will flash in the top left corner of the display.
Press M to set.
The number in the hour position
will now flash. Press ▲ or ▼
until you reach the current hour.
Press M to set.
The minute will now flash.
Press ▲ or ▼ to select the
current minute.
Press M to set.
If you selected a 12 hour time
setting, the AM or PM will
now flash. Press ▲ or ▼ to
select AM or PM.
Setting the Date,
Time and Sound
With the 12H flashing on the
display, press ▲ or ▼ to select
the 12H (with AM and PM) or
24H setting (military time).
Additional
Features
Setting the Time:
Press M to set.
www.bayerdiabetes.com/us
15
Setting the Month and Day Format:
m/d will now flash on the
display. Press ▲ or ▼ to
select the format you wish
(m/d for month/day format or
d.m for day.month format).
Press M to set.
Setting the Date:
Additional
Features
Setting the Date,
Time and Sound
16
The year will be flashing.
Press ▲ or ▼ to select the
current year.
Press M to set.
The month will now flash.
Press ▲ or ▼ to select the
month.
Press M to set.
The day will now flash. Press
▲ or ▼ to select the day.
Press M to set.
Need Help? Call toll free: 1-800-348-8100
Setting the Sound:
The flashing bell symbol will
now appear on the display
along with the word “ ”.
This option controls whether
you want to hear the beep
sound during testing.
To turn the beep sound off
during testing, press ▲ or ▼
to display “
”.
If you are using Basic Mode
(L-1 will appear on your
display), you have completed
your meter set-up.
www.bayerdiabetes.com/us
Setting the Date,
Time and Sound
After setting the sound,
“
” will flash. To keep your
meter in Basic Mode, press
M to set. To change your meter to Advanced Mode, press
▲ or ▼ to change to “
”,
and press M to set.
Additional
Features
Press M to set.
17
Setting Advanced Mode (L-2) Features:
If you selected Advanced
Mode (L-2 on your display)
you can change your meter’s
personal low and high blood
glucose settings. By personalizing these settings, your
CONTOUR meter will help you
track these HI and LO results.
Additional
Features
Setting Advanced
Mode (L-2) Features
18
The LO setting will flash
(default 72). To change this
setting, press ▲ or ▼ until
you reach your desired LO
setting, and then press M to
set. (The range of values for
LO is 60-90 mg/dL.)
Your HI blood glucose setting
will now flash (default 180).
To change, press ▲ or ▼
until you reach your desired
HI setting. Press M to set.
(The range of values for HI
is 100–250 mg/dL.)
Post-Meal Test Alarm Set-up:
To change the alarm time for
post-meal testing, press ▲
or ▼ to display the options
available. Select 2.5, 2.0,
1.5, or 1.0 hour(s) to set your
post-meal alarm (default is
2.0 hours). Press M to set.
Need Help? Call toll free: 1-800-348-8100
You have now completed your
CONTOUR meter set-up for
Advanced Mode!
Pre-meal = Marks a
test result that was taken
before a meal.
Post-meal = Marks a
test result that was taken
after a meal.
Logbook = The logbook
marker can be used to mark any result as being unique
or different in some way, and for which you may want to
make notes in your Clinilog® logbook. Seeing a result
with this symbol next to it in the memory will help
remind you that there is more information recorded
about this test result.
Using Advanced Mode
If you have set-up your
meter in Advanced Mode,
your meter will display three
markers after you test your
blood.
Additional
Features
Using the Markers:
Please see the following pages to use these options.
www.bayerdiabetes.com/us
19
If you do not want to mark the test result:
Remove the used test strip to automatically save the test
result in the meter memory with no markers. Dispose of the
used test strip and lancet properly. This will also turn the
meter off.
If you want to mark the test result:
Before you remove your test
strip, press ▲ or ▼ to select
the marker you want to set. The
marker will flash.
To mark a result with the
pre-meal marker, press M
when the flashes.
Additional
Features
Using Advanced Mode
20
will then flash.
The
This feature allows you to set
an alarm to remind you to run a
post-meal test.
The alarm is available only after
setting a pre-meal marker.
If you want to set the alarm,
will appear
press M. The
and stop flashing.
If you do not want to set the
alarm, press ▲ or ▼ and the
will disappear. Press M
to set.
To mark a result with the post-meal marker, press ▲ or ▼
until the flashes. Press M to set.
To mark a result with the logbook, press ▲ or ▼ until the
flashes. Press M to set.
Need Help? Call toll free: 1-800-348-8100
Using the Alarm:
When the alarm sounds, the
meter will automatically turn
on. The alarm will beep 20
times, and the display will
show the pre-meal test result
you marked when you set the
alarm. Pressing any button will
silence the alarm.
If you decide not to test after the alarm sounds, press any
button to turn your meter off.
The meter will only set one alarm at a time. It will remember
the last alarm set.
www.bayerdiabetes.com/us
Using Advanced Mode
When you have completed
this test and the result is
shown on the display, will
flash. To mark this test as a
post-meal result, press M. If
you do not want to mark this
test, remove the test strip to
turn the meter off.
Additional
Features
You can now run another test by placing a test strip in the test
strip port and following the testing instructions (page 8).
21
To Cancel an Alarm:
When the meter is off, press
M to turn on the meter. The
date and time will appear
.
along with the
Press ▲ or ▼ two times and
the alarm icon will disappear.
Press M to cancel the alarm.
After performing a test:
Additional
Features
Using Advanced Mode
22
TO MARK RESULTS
YOU WILL SEE
Pre-Meal
Press ▲ or ▼
(Flashing)
Alarm
Press ▲ or ▼
(Flashing)
Post-Meal
Press ▲ or ▼
(Flashing)
Logbook
Press ▲ or ▼
(Flashing)
TO SET
Press M
Press M
Press M
Press M
Need Help? Call toll free: 1-800-348-8100
Result is marked as a pre-meal test.
You can now set an alarm.
Alarm is set to go off in the amount
of time you have set (1.0–2.5 hours)
to remind you to run a post-meal
test.
Result is marked as a post-meal
test.
Result is marked in memory as
unique. You should note this in your
Clinilog® logbook.
www.bayerdiabetes.com/us
Additional
Features
WHAT IT MEANS
Using Advanced Mode
YOU WILL SEE
23
Viewing Basic Mode Results:
Press M to turn your meter on. Press M again to view
the memory.
The 14 day average will
appear in the center of the
display with the number of
results shown at the top of
the display. Any control
results are not included in
this 14 day average.
Press ▲ to view the 7 day
high and low summary.
Additional
Features
Viewing Stored Results
24
At the top of the display you
will see the number of HI results (above 180 mg/dL) and
LO results (below 72 mg/dL)
during the preceding 7 day
period and the total number
of results during that period.
Press ▼ two times to
review previous results.
Results will be shown starting
with the most recent. Each
result will show the date and
time the test was taken.
You can press ▲ or ▼ to
scroll forward or backward
through the results.
Need Help? Call toll free: 1-800-348-8100
When
appears on the
display, you have viewed all of
the results in the memory.
NOTES:
• The meter will hold 480 results in the memory. When the
maximum is reached, the oldest test result will be removed
as a new test is completed and saved to the memory.
• Press M to turn the meter off, or it will automatically turn
off after 3 minutes.
represents the number of test results.
Viewing Stored Results
•
Additional
Features
• Averages include the specified time period plus the
current day.
www.bayerdiabetes.com/us
25
Viewing Advanced Mode Results:
In Advanced Mode (L-2), you have all of the options
described in Basic Mode plus additional items available.
Press M to turn your meter
on. Briefly press M again to
view the 14 day average including the number of results
used to obtain the average.
Press ▼ to review previous results.
Additional
Features
Results will be shown starting
with the most recent. Each
result will show the date and
time the test was taken.
You can press ▲ or ▼ to
scroll forward or backward
through the results.
When
appears on the display, you have viewed all of
the results in the memory.
Viewing Stored Results
26
Viewing Advanced Mode Averages:
Press M to turn your meter on. Press M again to view the
14 day average including the number of results used to
obtain the average.
Press ▲ to view the 7 day
high and low summary.
At the top of the display you
will see the number of HI and
LO results. In the center of
the display is the total number
of results.
Need Help? Call toll free: 1-800-348-8100
Press ▲ to view the 7 day
average.
You will see the average in
the center of the display and
the number of results along
the top.
Press ▲ to view the 30
day average.
Press ▲ again to view the 30
day average of results marked
with a post-meal marker.
Press ▲ again and you will
see
.
Press M to turn the meter off,
or it will automatically turn off
after 3 minutes.
www.bayerdiabetes.com/us
Viewing Stored Results
Press ▲ again to view the 30
day average of results marked
with a pre-meal marker.
Additional
Features
This will display the average
in the center and the number
of readings along the top.
27
Alternative Site Testing (AST):
Use AST only when it has been Use the
more than two hours after any Clear
one of the following:
endcap
a meal, diabetes medication,
or exercise.
Alternative Site Testing
IMPORTANT: Do not use Alternative Site Testing under
the following conditions. Use fingertip testing in any of
these cases:
• If you think your blood glucose is low (hypoglycemia).
• When blood glucose is changing rapidly (after a meal,
insulin dose or exercise).
• If you have hypoglycemic unawareness (lack of symptoms).
• If you get alternative site blood glucose results that do not
agree with how you feel.
• During illness or times of stress.
• If you will be driving a car or operating machinery.
Consult your healthcare professional to determine if
alternative site testing is right for you.
Options
Attach the clear AST
endcap to the MICROLET2
lancing device.
Select a puncture
site from a fleshy
area on forearm or
palm. Avoid veins,
hair, moles, bones,
and tendons.
28
Need Help? Call toll free: 1-800-348-8100
Press the clear
endcap firmly against
the puncture site and
then press the blue
release button.
For forearm
testing only,
rub the testing
area vigorously
until it feels warm
to increase blood
flow. Press the
clear endcap
firmly against the
puncture site
and then press
the blue release
button. Keep the
device in constant contact with the
skin and pump (apply and release
pressure) up and down 2–3 times
without lifting the device away
from the skin.
Alternative Site Testing
For palm testing,
it is not necessary to
rub the skin or pump
the device.
Suggested drop size
Lift the device away
from the skin without smearing the
blood.
Options
Maintain steady pressure until
the blood drop reaches the
suggested size (0.6 μL).
Do not test the blood sample if you get: Smeared blood •
Clotted blood • Runny blood • Clear fluid mixed with the blood.
www.bayerdiabetes.com/us
29
Control Solution Testing:
Use only Bayer’s CONTOUR control solutions (Normal,
Low, or High) to practice on the system or to run a
check to make sure the meter and the test strips are
working properly. Using anything other than CONTOUR
control solution could present incorrect results.
Control Solution Testing
Options
30
Remove a test strip from the bottle. Tightly close the
bottle lid immediately after you have removed the
test strip.
NOTE: Check the expiration and discard dates. Make sure
the test strip does not appear torn or damaged.
Hold the test strip with the
gray end facing up.
Insert the gray end into the
test strip port on the meter.
The meter will turn on. An
image of a test strip with
a flashing blood drop will
appear letting you know the
meter is ready to test.
Need Help? Call toll free: 1-800-348-8100
Immediately touch the tip of the test strip to the drop of
control solution. The solution is pulled into the test strip
through the tip. Hold it in the drop until the meter beeps.
After a beep, you will see the
meter count down 5 seconds
until the test is complete and
your control test result is
displayed.
The meter will automatically
recognize and mark the
control result for you.
NOTE: The does not
indicate the control test
result is within the specified range. It only marks it
as a control solution test.
It will not be included in
your averages.
www.bayerdiabetes.com/us
Options
Squeeze a small drop of
control solution on a clean
nonabsorbent surface (such
as a piece of wax paper). Do
not apply control solution
to the test strip directly
from the bottle.
Control Solution Testing
NOTE: Gently rock the control bottle before opening to
ensure it is mixed well.
31
Compare your control test
result with the Normal Control
Range printed on the test
strip bottle label or on the
bottom of the test strip box.
Control Solution Testing
NOTE: Low and High
control range values can
be found on the bottom of
the test strip box.
If your control test result is out-of-range, see the
“What You Should Do” recommendations on page 36.
Options
To turn your meter off, simply
remove the test strip. The
result will be automatically
marked and stored in the
meter memory. Control results
will not be included in your
blood glucose averages or in
the 7 day HI-LO summary.
Carefully dispose of the used
test strip.
IMPORTANT: To ensure accuracy of your blood glucose
test results and accuracy of your control test results,
use only CONTOUR control solution.
32
Need Help? Call toll free: 1-800-348-8100
You can transfer test results
from the CONTOUR meter to a
computer, where they can be
summarized in a report with
graphs and tables. To make
use of this feature, you need
Bayer’s diabetes management
software and a data cable
from Bayer.
For a free download of the software go to
www.bayerdiabetes.com/us
IMPORTANT: The CONTOUR meter has not been tested
or certified by Bayer for use with any software other
than Bayer’s diabetes management software. Bayer is
not responsible for any erroneous results from the use
of other software.
Options
For more information, call our Customer Service
Department (1-800-348-8100), or visit our website at
www.bayerdiabetes.com/us
Transferring Results to a Computer
Transferring Results to a Computer:
www.bayerdiabetes.com/us
33
Error Codes and Symbols:
If you do not resolve the problem, contact Bayer
Error Codes and Symbols
Technical
Information
WHAT YOU SEE
WHAT IT MEANS
(will flash
for 10 seconds and
then the meter
will turn off)
Dead batteries.
(will remain on
the display)
Low batteries.
Replace the batteries as soon as
possible.
E1
Temperature out
of range.
Move to an area that is within the
operating range for the meter:
41°F – 113°F. Let the meter adjust
to this temperature for 20 minutes
before performing a test.
E2
The test strip has
not filled enough
for an accurate
test. Insufficient
blood drop.
Remove the test strip and retest
using a new test strip. Wait until
you see the flashing blood drop
on the display before testing.
E3
The meter is sensing
a used test strip.
Remove the test strip and retest
using a new test strip. Wait until
you see the flashing blood drop
on the display before testing.
E4
Test strip not
inserted correctly.
Remove and reinsert the test strip
properly (see page 9).
Potential software or
hardware issue.
Remove the test strip and retest
using a new test strip. If you
continue to have problems,
contact Bayer Diabetes Care
Customer Service.
E5
E6
E8
34
E9
E12
E13
WHAT YOU SHOULD DO
Replace the batteries.
Call Bayer Diabetes Care Customer Service at 1-800-348-8100
for the Free Batteries for Life
program.
Need Help? Call toll free: 1-800-348-8100
Diabetes Care Customer Service at 1-800-348-8100.
Remove the test strip and retest
using a new test strip. Make certain that you are using a CONTOUR
test strip from Bayer.
WHAT YOU SHOULD DO
E10
Invalid date or time.
This error occurs only in
Communication mode. See page
15 to reset the date or time.
If you continue to see this error,
please contact Bayer Diabetes
Care Customer Service.
E11
Abnormal result.
Remove the test strip and
retest using a new test strip. Be
sure you wash your hands and
carefully follow instructions in this
user guide.
HI
Test result is
above 600 mg/dL.
• Wash your hands and the test
site. Repeat the test using a new
test strip.
• If your result still flashes “HI”,
contact your physician or healthcare professional immediately.
CAUTION: Glucose levels above 250 mg/dL may indicate
a potentially serious medical condition.
LO
Test result is
below 10 mg/dL.
• Repeat the test using a new test
strip.
• If your result still flashes “LO”,
contact your physician or healthcare professional immediately.
CAUTION: Glucose levels below 50 mg/dL may indicate
a potentially serious medical condition.
www.bayerdiabetes.com/us
35
Error Codes and Symbols
WHAT IT MEANS
Incorrect sensor
type.
Technical
Information
WHAT YOU SEE
E7
If you do not resolve the problem, contact Bayer
Diabetes Care Customer Service at 1-800-348-8100.
Error Codes and Symbols
WHAT YOU SEE
WHAT IT MEANS
Control test result
is out of range
(too high or too
low).
• Test strip or control
solution is past the
expiration date or
is past the discard
date.
• Check all expiration dates and
discard dates. Do not use
expired testing materials.
• Test strip is
deteriorated due to
heat or exposure to
moisture.
• Run another control test with
a new test strip and control
solution.
• Control solution
is not at room
temperature or may
not be mixed well.
• Gently rock the control bottle
to ensure the control solution is
mixed well.
• Incorrect control
solution was used.
• Make sure you are using Bayer’s
CONTOUR control solution.
• Meter could be
damaged.
• If result is still out of range,
contact Bayer Diabetes Care
Customer Service.
Some display
segments do not
appear when the
meter initially
turns on.
Possible meter
electronics failure.
Compare meter display with the
illustration on page 3.
If the display is not correct,
contact Bayer Diabetes Care
Customer Service.
Results are not
displayed in
expected units of
measure (mg/dL
or mmol/L).
This may affect
the way you see your
results.
Contact Bayer Diabetes
Care Customer Service,
1-800-348-8100.
Technical
Information
36
WHAT YOU SHOULD DO
Need Help? Call toll free: 1-800-348-8100
Changing the Batteries:
Batteries should be replaced
when the meter continually
displays
or the meter
briefly shows
and then
turns off (See Error Codes
and Symbols, page 34).
Turn off your meter before
changing your batteries.
Remove the old batteries
by pressing the top of the
battery which will raise the
bottom of the battery up.
www.bayerdiabetes.com/us
37
Technical
Information
NOTE: If you put the new batteries in the meter within
5 minutes of taking the old ones out, all your settings
and results will be saved. If you take more than 5
minutes, you will need to reset the date and time
although your other settings and results will be saved.
Changing the Batteries
Press firmly on the battery
cover and slide in the
direction of the arrow.
Place new batteries under the
prongs and into the battery
compartment with the “+”
side up.
Slide the battery cover back
into place, lining up with the
open slots, and close firmly.
Changing the Batteries
WARNING: Keep batteries away from children.
Lithium batteries are poisonous. If swallowed,
immediately contact your physician or poison
control center. Discard batteries according to
your local environmental regulations.
Bayer offers the Free Batteries For Life program. When your batteries are low, please call
1-800-348-8100 for your free batteries.
Technical
Information
38
Need Help? Call toll free: 1-800-348-8100
Caring for the System:
• Store meter in the carrying case provided whenever
possible.
• Wash hands and dry them thoroughly before handling
to keep the meter and test strips free of oils and other
contaminants.
• Handle the meter carefully to avoid damaging the
electronics or causing other malfunctions.
• Avoid exposing meter and test strips to excessive
humidity, heat, cold, dust, or dirt.
• The exterior of the meter can be cleaned using a moist
(not wet) lint-free tissue with a mild detergent or disinfectant solution, such as 1 part bleach mixed with 9 parts
water. Wipe dry with lint-free tissue after cleaning.
39
Technical
Information
www.bayerdiabetes.com/us
Caring for the System
CAUTION: Do not allow cleaning solution to run in
or around the buttons or battery cover. Doing so may
cause a malfunction.
Technical Information:
Accuracy: The accuracy of the CONTOUR blood glucose monitoring
system has been assessed in a correlation study conducted by healthcare professionals. In this study, 108 fresh capillary blood specimens
were tested with the CONTOUR blood glucose monitoring system by
108 untrained people with diabetes using three test strip lots. The
reference measurement was done on the YSI Glucose Analyzer.
CONTOUR data compare well with the results from the YSI method.
Regression Statistics (Plasma/Serum Reference):
plasma reference glucose range: 75 to 397 mg/dL
Lot
y=
Correlation
Coefficient (r)
1
1.02x – 0.12 mg/dL
0.972
2
1.03x – 4.34 mg/dL
0.963
3
0.95x – 0.41 mg/dL
0.974
Technical Information
Precision: A study was conducted with the CONTOUR blood glucose
monitoring system with five heparinized whole blood specimens with
glucose levels from 40 to 325 mg/dL. Multiple replicates (n=100)
were tested using multiple CONTOUR blood glucose meters and one
lot of CONTOUR blood glucose test strips. The following precision
results were obtained:
Plasma/Serum:
Mean
SD
Coefficient
of variation
38 mg/dL
1.9 mg/dL
4.8%
101 mg/dL
5.1 mg/dL
5.1%
118 mg/dL
4.4 mg/dL
3.7%
205 mg/dL
6.8 mg/dL
3.3%
326 mg/dL
11.7 mg/dL
3.6%
Technical
Information
Your CONTOUR blood glucose meter is specific for glucose and has
been referenced to plasma/serum values. Methods calibrated to
plasma/serum can be 9 to 15% higher than the results of whole blood
glucose assay methods.
40
Need Help? Call toll free: 1-800-348-8100
Potential Biohazard
Healthcare professionals or persons using this system on multiple patients should follow the infection
control procedure approved by their facility. All products or objects which come in contact with human
blood, even after cleaning, should be handled as if
capable of transmitting viral diseases.3
Specifications:
Test Sample: Whole blood
Test Result: Referenced to plasma/serum glucose
Sample Volume: 0.6 μL
Measuring Range: 10–600 mg/dL
Measuring Time: 5 seconds
Memory Feature: Stores most recent 480 test results
Operating Temperature Range: 41º–113ºF
Humidity: 10–93% RH
Dimensions: 77 mm (H) x 57 mm (W) x 19 mm (T)
Weight: 1.7 oz. (47.5 grams)
Alarm: A beep sounds when the meter is turned on, a test
strip is inserted, when a test strip is filled with blood,
or when a test result appears on the display. Two
beeps sound when the meter turns off or to indicate
an error. Twenty beeps will sound when a programmed alarm goes off.
www.bayerdiabetes.com/us
41
Technical
Information
Battery Life: Approximately 1000 tests (1 yr. average use)
Specifications
Battery Type: Two 3-volt lithium batteries
(DL2032 or CR2032)
Warranty:
Manufacturer’s Warranty: Bayer HealthCare warrants to the
original purchaser that this instrument will be free from defects
in materials and workmanship for 5 years from the date of original purchase (except as noted below). During the stated 5-year
period, Bayer HealthCare shall, at no charge, replace a unit found
to be defective with an equivalent or current version of the owner’s
model.
Limitations of Warranty: This warranty is subject to the following
exceptions and limitations:
1. A 90-day warranty only will be extended for consumable parts
and/or accessories.
Warranty
2. This warranty is limited to replacement due to defects in parts
or workmanship. Bayer HealthCare shall not be required to
replace any units which malfunction or are damaged due to
abuse, accidents, alteration, misuse, neglect, maintenance by
someone other than Bayer HealthCare, or failure to operate
the instrument in accordance with instructions. Further, Bayer
HealthCare assumes no liability for malfunction or damage to
Bayer HealthCare instruments caused by the use of reagents
other than reagents (i.e., CONTOUR ® test strips) manufactured
or recommended by Bayer HealthCare.
3. Bayer HealthCare reserves the right to make changes in
design of this instrument without obligation to incorporate
such changes into previously manufactured instruments.
Technical
Information
4. Bayer HealthCare has no knowledge of the performance of
the CONTOUR ® blood glucose meter when used with any test
strips other than CONTOUR test strips, and therefore makes no
warranty of the performance of the CONTOUR meter when used
with any test strips other than CONTOUR test strips or when the
CONTOUR test strip is altered or modified in any manner.
42
Need Help? Call toll free: 1-800-348-8100
5. Bayer HealthCare makes no warranty of the performance of the
CONTOUR ® meter or test results when used with any control
solution other than CONTOUR control solution.
BAYER HEALTHCARE MAKES NO OTHER EXPRESS WARRANTY FOR THIS PRODUCT. THE OPTION OF REPLACEMENT, DESCRIBED ABOVE, IS BAYER HEALTHCARE’S ONLY
OBLIGATION UNDER THIS WARRANTY.
IN NO EVENT SHALL BAYER BE LIABLE FOR INDIRECT,
SPECIAL OR CONSEQUENTIAL DAMAGES, EVEN IF BAYER
HEALTHCARE HAS BEEN ADVISED OF THE POSSIBILITY OF
SUCH DAMAGES.
Some states do not allow the exclusion or limitation of incidental or
consequential damages, so the above limitation or exclusion may
not apply to you. This warranty gives you specific legal rights and
you may also have other rights which vary from state to state.
For warranty service: Purchaser must contact the Customer
Service Department of Bayer Diabetes Care, by calling toll free
1-800-348-8100, for assistance and/or instructions for obtaining
service of this instrument.
The system described herein is covered by one or more of the following
U.S. patents: 5,120,420, 5,582,697, 5,266,179, 5,723,284, 5,954,738,
6,451,040, 6,599,406, 6,827,829, 6,911,131, and 7,232,510, as well as
pending applications and international equivalents.
www.bayerdiabetes.com/us
43
Technical
Information
Warranty
PATENTS
Service Information:
If you have a problem and none of the problem solving steps
in this user guide help, call Bayer Diabetes Care Customer
Service. In the U.S.A., call toll free: 1-800-348-8100 (7 days a
week/24 hours a day). We have trained specialists to help you.
Important:
Speak to a Bayer Diabetes Care Customer Service
Representative before returning your meter for any
reason. He/she will give you the information needed
to get your problem handled correctly and efficiently.
Have your CONTOUR blood glucose meter and
CONTOUR test strips available when you phone. It
would also be helpful to have a bottle of CONTOUR
control solution nearby.
Check List
Service Information
This check list may be helpful when speaking with Bayer
Diabetes Care Customer Service:
1. Locate the serial number
(A) and model number (B)
on the back of the meter.
_______________________
_______________________
SN
A PR00059
B
7151G
mg/dL
2. Locate the CONTOUR test
strips’ expiration date on
the bottle.
_______________________
Technical
Information
3. Check the battery icon on the display. (See page 37,
Changing the Batteries.)
44
Need Help? Call toll free: 1-800-348-8100
Supplies:
When calling or writing for supplies be sure to include the number with the name of the replacement part or accessory item.
REPLACEMENT PARTS
Part Number*
Item
40030030
Two 3-volt Lithium Batteries DL2032 or
CR2032 (Free Batteries For Life program.
Call 1-800-348-8100.)
99C71519
CONTOUR ® User Guide
40453276
Bayer’s Serial Data Cable
40453291
Bayer’s USB Data Cable
*Part numbers are subject to change without notice.
These parts are available in the United States from:
REFERENCES
1
American Diabetes Association, www.diabetes.org
2
American Diabetes Association: Standards of Medical
Care in Diabetes (Position Statement). Diabetes Care 29
(Suppl. 1):S10, 2006.
3
Protection of Laboratory Workers from Occupationally
Acquired Infections; Approved Guideline–Third Edition. Clinical
and Laboratory Standards Institute (CLSI), document M29-A3,
(ISBN 1-56238-567-4). CLSI, 940 West Valley Road, Suite
1400, Wayne, Pennsylvania 19087-1898, USA 2005.
www.bayerdiabetes.com/us
45
Technical
Information
Supplies
Bayer HealthCare LLC
Customer Service Department
Order Entry P.O. Box 2004
Mishawaka, Indiana 46546
or call 1-800-348-8100 to order
Bayer HealthCare LLC
Mishawaka, IN 46544 USA
www.bayerdiabetes.com/us
Bayer, the Bayer Cross, CONTOUR , MICROLET,
Clinilog, No Coding and the No Coding logo are
trademarks of Bayer.
99C71519
Rev. 2/08