1
ES
USER’S GUIDE (Basics)
GUÍA DEL USUARIO (Conceptos básicos)
Please keep all information for future reference.
Guarde toda información para tener como referencia futura.
● You can download a separate tutorial manual from
the CASIO website below.
http://world.casio.com/
● El manual Tutorial por separado puede descargarse
del siguiente sitio web de CASIO.
http://world.casio.com/
Safety Precautions
Before trying to use the Digital Piano, be sure to
read the separate “Safety Precautions”.
Precauciones de seguridad
Antes de intentar usar el piano digital, asegúrese de
leer las “Precauciones de seguridad” separadas.
PX5S-ES-1B
Español
English
PX - 5S
TO REDUCE THE RISK OF FIRE OR ELECTRIC SHOCK, REFER SERVICING TO QUALIFIED SERVICE PERSONNEL.
IMPORTANT SAFETY INSTRUCTIONS
1.
2.
3.
4.
5.
6.
7.
8.
9.
Read these instructions.
Keep these instructions.
Heed all warnings.
Follow all instructions.
Do not use this apparatus near water.
Clean only with dry cloth.
Do not block any ventilation openings. Install in accordance with the manufacturer’s instructions.
Do not install near any heat sources such as radiators, heat registers, stoves, or other apparatus (including amplifiers) that produce heat.
Do not defeat the safety purpose of the polarized or grounding-type plug. A polarized plug has two blades with one wider than the other.
A grounding type plug has two blades and a third grounding prong. The wide blade or the third prong are provided for your safety. If the
provided plug does not fit into your outlet, consult an electrician for replacement of the obsolete outlet.
10. Protect the power cord from being walked on or pinched particularly at plugs, convenience receptacles, and the point where they exit
from the apparatus.
11. Only use attachments/accessories specified by the manufacturer.
12. Use only with the cart, stand, tripod, bracket, or table specified by the manufacturer, or sold with the
apparatus. When a cart is used, use caution when moving the cart/apparatus combination to avoid injury
from tip-over.
13. Unplug this apparatus during lightning storms or when unused for long periods of time.
14. Refer all servicing to qualified service personnel. Servicing is required when the apparatus has been damaged in any way, such as
power-supply cord or plug is damaged, liquid has been spilled or objects have fallen into the apparatus, the apparatus has been
exposed to rain or moisture, does not operate normally, or has been dropped.
The apparatus shall not be exposed to dripping or splashing and that no objects filled with liquids, such as vases, shall be placed on the apparatus.
The P (POWER) indicator being unlit does not mean the apparatus is completely disconnected from the MAINS.
When you need to have the apparatus completely disconnected from the MAINS, you must unplug the power cord. For that purpose, locate
the apparatus in a way that secures easy access to the power cord.
Declaration of Conformity
Model Number: PX-5S
Trade Name: CASIO COMPUTER CO., LTD.
Responsible party: CASIO AMERICA, INC.
Address: 570 MT. PLEASANT AVENUE, DOVER, NEW JERSEY 07801
Telephone number: 973-361-5400
This device complies with Part 15 of the FCC Rules, Operation is subject to the following two conditions:
(1) This device may not cause harmful interference, and (2) this device must accept any interference received, including interference that
may cause undesired operation.
NOTICE
This equipment has been tested and found to comply with the limits for a Class B digital device, pursuant to Part 15 of the FCC Rules.
These limits are designed to provide reasonable protection against harmful interference in a residential installation. This equipment
generates, uses and can radiate radio frequency energy and, if not installed and used in accordance with the instructions, may cause
harmful interference to radio communications. However, there is no guarantee that interference will not occur in a particular installation. If
this equipment does cause harmful interference to radio or television reception, which can be determined by turning the equipment off and
on, the user is encouraged to try to correct the interference by one or more of the following measures:
• Reorient or relocate the receiving antenna.
• Increase the separation between the equipment and receiver.
• Connect the equipment into an outlet on a circuit different from that to which the receiver is connected.
• Consult the dealer or an experienced radio/TV technician for help.
FCC WARNING
Changes or modifications not expressly approved by the party responsible for compliance could void the user’s authority to operate the
equipment.
Important!
Please note the following important information before using this product.
• Before using the AD-A12150LW Adaptor to power the product, be sure to check the AC Adaptor for any damage first. Carefully check the
power cord for breakage, cuts, exposed wire and other serious damage. Never let children use an AC adaptor that is seriously damaged.
• The product is not intended for children under 3 years.
• Use only the CASIO AD-A12150LW adaptor.
• The AC adaptor is not a toy.
• Be sure to disconnect the AC adaptor before cleaning the product.
Declaration of Conformity According to EU Directive
This mark applies in EU countries only.
Manufacturer:
CASIO COMPUTER CO., LTD.
6-2, Hon-machi 1-chome, Shibuya-ku, Tokyo 151-8543, Japan
Responsible within the European Union:
CASIO EUROPE GmbH
Casio-Platz 1, 22848 Norderstedt, Germany
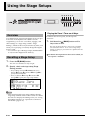
General Guide........................... E-2
Using the Stage Setups .........E-26
Saving Settings and Using Panel Lock....................... E-4
Returning the Digital Piano to Its
Factory Default Settings ............................................. E-4
Separate Tutorial Manual ........................................... E-4
Overview ................................................................... E-26
Recalling a Stage Setup............................................ E-26
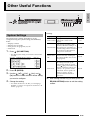
Other Useful Functions..........E-27
Power Outlet ............................. E-5
System Settings ........................................................ E-27
Deleting Data ............................................................ E-28
Using an AC Adaptor .................................................. E-5
Using Batteries ........................................................... E-5
Turning Power On or Off............................................. E-6
USB Flash Drive .....................E-29
Connections.............................. E-7
Connecting Headphones ............................................ E-7
Connecting a Pedal .................................................... E-7
Connecting Audio Equipment or an Amplifier ............. E-8
Bundled and Optional Accessories............................. E-8
Operations Common to
All Modes .................................. E-9
Changing a Number or a Value .................................. E-9
Inputting Text Characters ......................................... E-10
Saving Data .............................................................. E-11
Starting and Stopping Playback................................ E-11
Starting and Stopping Recording.............................. E-12
Using the Editing Function........................................ E-13
Meanings of Symbols Next to Numbers ................... E-13
Using Built-in Tones .............. E-14
Selecting a Tone....................................................... E-14
Editing a Tone........................................................... E-14
Using the Bender Wheel........................................... E-15
Modifying Notes with the Modulation Wheel,
Knobs and Sliders..................................................... E-15
Playing Demo Songs.............. E-16
Storing Standard Audio Data (WAV Files)
to a USB Flash Drive................................................. E-30
Connecting a USB Flash Drive to and
Detaching It from the Digital Piano............................ E-30
Formatting a USB Flash Drive .................................. E-31
Saving Digital Piano Data to a USB Flash Drive....... E-32
Loading Data from a USB Flash Drive to
Digital Piano Memory ................................................ E-32
Deleting Data from a USB Flash Drive...................... E-33
Renaming a USB Flash Drive File ............................ E-33
Playing Back Audio Data Stored on
a USB Flash Drive..................................................... E-34
Playing Back a MIDI File Stored on
a USB Flash Drive..................................................... E-34
Error Messages......................................................... E-35
Connecting to a Computer ....E-36
Minimum Computer System Requirements .............. E-36
Connecting the Digital Piano to Your Computer ....... E-36
Saving and Loading Digital Piano Data
to a Computer and Editing Digital Piano Data
on a Computer .......................................................... E-37
Reference ................................E-38
Troubleshooting ........................................................ E-38
Product Specifications............................................... E-39
Operating Precautions .............................................. E-40
Sounding Arpeggios
Automatically.......................... E-17
To use the Arpeggio Function................................... E-17
Recording and
Playing Back Phrases ............ E-18
Recording a New Phrase.......................................... E-18
Listening to a Phrase ................................................ E-20
Recording Over Another Phrase (Overdubbing)....... E-21
To save a phrase ...................................................... E-21
Creating a Song (Song Sequencer).......................... E-21
Recording Your
Keyboard Play ........................ E-23
Recording to a USB Flash Drive............................... E-23
Company and product names used in this
manual may be registered trademarks of others.
E-1
English
Contents
General Guide
1
2
3
4
bk
6
bm
bn
cm
cn
dl
dm
dn
do
dp
dq
en
dr
ds
dt
ek
el
em
ep
Back
7
bo
co
8
9
bp
bq
cp
cq
br
cr
eq
bt
ck
er
fm
fp
fo
cl
dk
ct
es
fn
fl
bs
cs
eo
fk
et
E-2
bl
5
fq
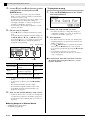
General Guide
• This manual uses the numbers and names below to refer to buttons and controllers.
2 MODULATION wheel
dk ZONE/PART/STEP/TRACK, –/+ buttons
Display
3 K1 through K4 knobs
dl BANK, INITIALIZE button
4 S1 slider
dm 0, DELETE button
5 S2 slider
dn 1, INSERT button
6 S3 slider
do 2 button
7 S4 slider
dp 3 button
8 S5 slider
dq 4 button
9 S6 slider
dr EXIT button
bk P (POWER) button
ds 5, u button
bl VOLUME controller
dt 6, w button
bm SYS SETTING button
ek 7, q button
bn ARPEGGIO button
el 8, i button
bo PIANO button
em 9, ENTER button
bp ELEC PIANO button
en NUM KEY button
bq ORGAN button
eo –/NO, +/YES buttons
br STRINGS/BRASS button
ep EDIT button
bs GUITAR/BASS button
eq WRITE button
bt SYNTH/VARIOUS button
er AUDIO RECORDER, MEDIA button
ck DRUMS button
es USB flash drive port
cl HEX LAYER button
et USB port
cm EFFECT, SONG button
fk DAMPER/PEDAL1, PEDAL2 jacks
cn DSP, REW button
fl MIDI OUT/THRU, IN terminals
co SYSTEM, FF button
fm LINE OUT R, L/MONO jacks
cp MASTER, PAUSE button
fn DC 12V terminal
cq PHRASE button
fo LINE IN R, L/MONO jacks
cr START/STOP button
fp PHONES jacks
cs RECORD button
fq AUDIO IN jack
English
1 BENDER wheel
ct TEMPO, TAP button
E-3
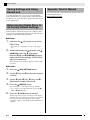
General Guide
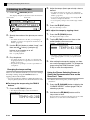
Saving Settings and Using
Panel Lock
Your Digital Piano lets you save its current settings,
and lock its buttons to protect against operation errors.
For details, see “Auto Resume” (page E-27) and “Panel
Lock” (page E-27).
Separate Tutorial Manual
You can download a separate tutorial manual from the
CASIO website below.
http://world.casio.com/
Returning the Digital Piano to
Its Factory Default Settings
Perform either of the following two procedures when
you want to return the Digital Piano’s stored data and
settings to their initial factory defaults.
■ Method 1
1.
Hold down the bk (P) button to turn off the
Digital Piano.
• For details, see “Turning Power On or Off” (page
E-6).
2.
While holding down the dq (4) button and en
(NUM KEY), press the bk (P) button.
Keep the dq (4) and en (NUM KEY) buttons
depressed until the message “INITIALIZING”
appears on the display.
After initialization is complete, display contents return
to normal.
■ Method 2
1.
2.
Press the bm (SYS SETTING) button.
Use the dt (w) and ek (q) buttons to select
“Initialize”.
3.
Use the ds (u), dt (w), ek (q), and el
(i) buttons to select “Initialize All”.
4.
Press the em (ENTER) button.
This will display a confirmation message “SURE?”.
• If you want to cancel the initialization, press the eo
(NO) or dr (EXIT) button.
5.
Press the
eo (YES) button to initialize.
The message “Please Wait” will remain on the display
while the operation is being performed. Do not perform
any operation while this message is on the display.
“Complete” appears on the display after initialization is
complete.
E-4
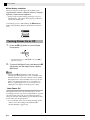
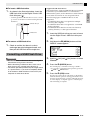
B
Power Outlet
Using an AC Adaptor
Use only the AC adaptor (JEITA Standard, with unified
polarity plug) that comes with this Digital Piano. Use
of a different type of AC adaptor can cause
malfunction of the Digital Piano.
Specified AC Adaptor: AD-A12150LW
Using Batteries
English
Your Digital Piano runs on standard household power.
Be sure to turn off power whenever you are not using
the Digital Piano.
You can use eight AA-size batteries for power.
• Use alkaline batteries.
Never use oxyride or any other nickel based
batteries.
1.
On the back of the Digital Piano on the right,
loosen the two screws that secure the battery
cover in place.
• The screws are designed so they can be loosened
only, and not come completely out.
• Use the supplied power cord to connect the AC
adaptor as shown in the illustration below.
Screws
Household power outlet
Battery cover
Power cord
DC 12V terminal
2.
Slide the battery cover away from you to
remove it.
3.
Load eight AA-size batteries into the battery
compartment.
AC adaptor
• Configuration and type depends
on your geographic location.
Note the following important precautions to avoid
damage to the power cord.
■ During Use
• Never pull on the cord with excessive force.
• Never repeatedly pull on the cord.
• Never twist the cord at the base of the plug or
connector.
• Make sure the positive + and negative - ends of the
batteries are facing as shown in the illustration.
■ During Movement
• Before moving the Digital Piano, be sure to unplug
the AC adaptor from the power outlet.
■ During Storage
• Loop and bundle the power cord, but never wind it
around the AC adaptor.
4.
IMPORTANT!
• Never connect the AC adaptor (JEITA Standard,
with unified polarity plug) that comes with this Digital
Piano to any other device besides this Digital Piano.
Doing so creates the risk of malfunction.
• Make sure the Digital Piano is turned off before
plugging in or unplugging the AC adaptor.
• The AC adaptor will become warm to the touch after
very long use. This is normal and does not indicate
malfunction.
Replace the battery cover and slide it towards
you (the reverse of what you did in step 2) to
close it.
• Make sure that the tabs of the battery cover engage
with the tabs of the Digital Piano.
Tabs
5.
Secure the battery cover by tightening the
two screws you loosened in step 1.
E-5
Power Outlet
■ Low Battery Indication
The following shows the approximate battery life.
Approximately 3 hours* (alkaline batteries, using the
optional CASIO CP-16 headphones)
* Using a high volume setting, playing in very low
temperatures, and certain other playing conditions
can shorten battery life.
Low battery power is indicated by the cm (EFFECT)
button lamp flashing. Replace the batteries with new
ones.
Turning Power On or Off
1.
Press the bk (P) button to turn on Digital
Piano power.
• Use the Digital Piano’s VOLUME controller (bl) to
adjust the volume.
2.
To turn off the Digital Piano, hold down the bk
(P) button until the Digital Piano’s display
goes blank.
NOTE
• Pressing the bk (P) button to turn off power
actually puts the Digital Piano into a standby state.
Minute amounts of current continue to flow within
the Digital Piano in the standby state. If you do not
plan to use the Digital Piano for a long time or if
there is a lightning storm in your area, be sure to
unplug the AC adaptor from the power outlet.
Auto Power Off
The Digital Piano turns off automatically to avoid
wasting power if no operation is performed for a preset
amount of time. The Auto Power Off trigger time is
about six minutes under battery power and about four
hours under AC adaptor power.
• You can disable Auto Power Off by turning off the
“Auto Power Off” setting as described under
“System Settings” (page E-27).
E-6
Connecting Headphones
IMPORTANT!
• Before connecting headphones, be sure to use the
Digital Piano’s VOLUME controller to turn the
volume down to a low level. After connecting, you
can adjust the volume to the level you want.
Back
PHONES jacks
Commercially
available headphones
Standard plug
Connect commercially available headphones to the
PHONES jacks. To protect your hearing, make sure
that you do not set the volume level too high when
using headphones.
NOTE
• Be sure to push the headphones plug into the
PHONES jacks as far as it will go. If you don’t, you
may hear sound from only one side of the
headphones.
• If the plug of the headphones you are using does not
match the PHONES jacks, use the applicable
commercially available adaptor plug.
Connecting a Pedal
Your Digital Piano has two pedal terminals.
A variety of different functions can be assigned to a
pedal.
• Under initial factory settings, the damper pedal*
function is assigned to DAMPER/PEDAL1.
* Pressing the damper pedal while playing causes
notes you play on the keyboard to be sustained
longer.
Whenever a piano tone is selected, pressing this
pedal will activate the Digital Piano’s Damper
Resonance effect, which causes notes to resonate
in the same way they do when the damper pedal
on an acoustic piano is pressed.
• For details, see the separate “Tutorial”.
To connect to the pedal jack
Depending on the type of operation you want the
pedal (SP-3) to perform, connect the pedal’s cable
either to the Digital Piano’s DAMPER/PEDAL1 jack or
PEDAL2 jack. If you want to use both operations
(jacks) at the same time, you need to purchase another
optionally available pedal.
Back
DAMPER/PEDAL1, PEDAL2 jacks
SP-3
E-7
English
Connections
Connections
Connecting Audio Equipment
or an Amplifier
This Digital Piano outputs notes from its LINE OUT R
(right channel output) and LINE OUT L/MONO (left
channel output). Connect a keyboard amplifier or other
device to direct output to speakers. You can adjust the
LINE OUT volume level with the Digital Piano’s
VOLUME controller.
IMPORTANT!
• Whenever connecting something to the Digital
Piano, first use the VOLUME controller to set the
volume to a low level. After connecting, you can
adjust the volume to the level you want.
• Whenever you connect any device to the Digital
Piano, be sure to read the user documentation that
comes with the device.
Guitar amplifier
Keyboard amplifier, etc.
INPUT 1
INPUT 2
Standard plug
Other electronic music
instrument
CD player, audio player, etc.
Stereo mini plug
Stereo mini jack
Standard jack
Audio amplifier AUX IN jack, etc.
LEFT (White)
RIGHT (Red)
Pin plug
To output to a musical instrument
amplifier (Figure 1)
Use a commercially available connecting cord to
connect the amplifier to the Digital Piano’s LINE OUT
L/MONO jack as shown in Figure 1. Connecting a
cord to LINE OUT L/MONO only will cause the left
and right channels to be mixed and output as mono.
To output to audio equipment (Figure 2)
Use commercially available connection cords to
connect as shown in Figure 2. Normally, you should
set the input selector of the audio equipment to the
terminal where the Digital Piano is connected (AUX
IN, etc.)
E-8
To input from audio equipment (Figure 3)
Connect the Digital Piano’s AUDIO IN terminal to the
audio equipment as shown in Figure 3. You can also
connect to the LINE IN R and LINE IN L/MONO
terminals. Use commercially available connection cords
that match the equipment being connected to.
Connecting a cord to LINE IN L/MONO only will
cause the left and right channels to be mixed and output
from both LINE OUT R and LINE OUT L/MONO.
Bundled and Optional
Accessories
Use only accessories that are specified for use with this
Digital Piano.
Use of unauthorized accessories creates the risk of fire,
electric shock, and personal injury.
NOTE
• You can get information about accessories that are
sold separately for this product from the CASIO
catalog available from your retailer, and from the
CASIO website at the following URL.
http://world.casio.com/
cm
cq cr
cs
The operations described in this section are common to
all modes and functions.
en
eo
dr ds dt ek el em
ep eq er
To input a number with the 10-key pad
1.
Changing a Number or a Value
Use the operations in this section to specify a number
or to change a value.
dl dm dn do dp dq
English
Operations Common to All Modes
Press the en (NUM KEY) button.
This will cause the button’s lamp to light, indicating the
number input mode.
2.
Example: To change a tone number
Use buttons dm (0) through dq (4) and buttons
ds (5) through em (9) to input the number you
want.
After using buttons bo through cl (Tone Group) to
specify a group, use one of the methods below to
change the selected tone number. (For details about
selecting tones, see “Using Built-in Tones” on page
E-14.)
To scroll a number sequentially
1.
Press the eo minus (–) or plus (+) button.
To return a number to its initial default
setting
• The initial default of a number depends on the
parameter being set.
1.
Press the eo minus (–) and plus (+) buttons at
the same time.
To fast scroll a number
1.
NOTE
Hold down the eo minus (–) or plus (+) button.
To jump in steps of 10
1.
• You can also input numbers and characters using the
Digital Piano’s knobs. For more information, see the
separate “Tutorial”.
While holding down the en (NUM KEY), press
the eo minus (–) or plus (+) button.
E-9
Operations Common to All Modes
Inputting Text Characters
Use the procedures in this section to input or edit
names.
Example: When creating a new phrase and saving data (For
details, see “Recording and Playing Back Phrases”
on page E-18.)
If you are saving a newly created phrase in Digital
Piano memory, display the Digital Piano’s save menu
(“Saving Data”, page E-11) before trying to input
characters using the procedure below.
• With this method, you select one of the characters
shown below.
2.
You can use either of the methods below to
select a character and input it.
• Method 1
Press the eo minus (–) or plus (+) button to scroll
sequentially through characters and symbols. With
this method, each time you press the eo minus (–) or
plus (+) buttons at the same time, input jumps to the
first character of a group in the following sequence:
Symbols 3 Numerals 3 Upper case 3 Lower
case.
• Method 2
Press the en (NUM KEY) button so its lamp becomes
lit.
Next, use the 12 buttons from dl to em to input letters
as shown in the illustration below. Each press of a
button cycles through the letters assigned to it at the
current cursor location.
After inputting the letters you want, press the en
(NUM KEY) button so its lamp becomes unlit.
Symbols (Part 1)
Numerals
• For information about characters that are supported
when using a USB flash drive, see “Renaming a USB
Flash Drive File” (page E-33).
MNO
(Upper/lower case toggle)
1.
E-10
Use the ds (u), dt (w), ek (q), and el
(i) buttons to move the cursor to location
where you want to input the character.
ABC
DEF
GHI
PQRS
TUV
WXYZ
JKL
Symbols (Part 2)
NOTE
• You can also input numbers and characters using the
Digital Piano’s knobs. For more information, see the
separate “Tutorial”.
Operations Common to All Modes
Use the procedure below to save edited and registered
data to Digital Piano memory.
1.
Press the eq (WRITE) button.
Starting and Stopping
Playback
Use the procedure below with functions that allow
playback of data.
1.
2.
3.
The button of each function has a lamp. When the lamp
of a function button is lit, it means the function is
standing by for playback.
• cm (SONG) button: Song sequencer playback (page
E-21)
• cq (PHRASE) button: Phrase sequencer playback
(page E-18)
• er (AUDIO RECORDER) button: Audio recorder
playback (page E-23)
If the data lets you change its number or data
name, perform the procedure under “Inputting
Text Characters” on page E-10.
• You can also input numbers with the 10-key pad. For
details, see “To input a number with the 10-key pad”
in “Operations Common to All Modes” (page E-9).
• To specify a number, move the cursor to the location
where the number is located.
• To specify a name, move the cursor to the first
character of the location where the name is located.
Press the button of the function you want to
use the required number of times until the
button lamp is lit.
2.
Press the cr (START/STOP) button to start
playback.
3.
Press the cr (START/STOP) button to stop
playback.
Press the em (ENTER) button.
This will display a confirmation message “SURE?”.
• If you want to cancel the save operation, press the eo
(NO) or dr (EXIT) button.
4.
Press the eo (YES) button.
The message “Please Wait” will remain on the display
while the operation is being performed. Do not perform
any operation while this message is on the display.
“Complete” appears on the display after data save is
complete.
• If there is already data at the location you are saving
the new data or if there is already a file with the same
name you specified, a message “Replace?” will
appear asking if you want to overwrite the existing
data with the new data. Press the eo (YES) button to
overwrite or the (NO) button to cancel the save
operation.
E-11
English
Saving Data
Operations Common to All Modes
Starting and Stopping
Recording
Perform the procedure below with functions that allow
recording of data (phrase sequencer and audio
recorder).
1.
In step 1 under “Starting and Stopping
Playback”, press the button of the function
you want to use the required number of times
until the button lamp is flashing.
This will enter the recording standby state, which is
indicated by the cs (RECORD) button also flashing.
2.
Now, any one of the following will start
recording.
• Pressing the cs (RECORD) button
• A pedal operation
• A knob operation
• A slider operation
• A wheel operation
• Playing something on the keyboard
When recording starts, the cs (RECORD) button lamp
will change from flashing to lit. The lamp of the button
of the function you selected will continue flashing.
3.
Press the cs (RECORD) button to stop
recording.
This will cause the button’s lamp to go out. The
function you are using will go into playback standby
and the lamp of the function’s button will change from
flashing to lit. This indicates the same status as that
after step 1 is performed under “Starting and Stopping
Playback” on page E-11.
E-12
NOTE
• The following describes button lamp operations that
are common to the song sequencer, phrase
sequencer, and audio recorder functions.
A) Function button lamps: cm (SONG) button, cq
(PHRASE) button, er (AUDIO RECORDER)
button
Unlit: Function disabled.
Flashing: Recording using the function in
standby or in progress.
Lit: Playback using the function in standby or in
progress.
B) cs (RECORD) button lamp
Unlit: All recording disabled.
Flashing: Recording using the function whose
button is flashing in standby.
Lit: Recording using the function whose button is
flashing in progress.
• The following describes button lamp operations that
are common to the song sequencer, phrase
sequencer, and audio recorder functions when a
button is pressed.
C) Operation when the cr (START/STOP) button is
pressed.
When playback is not in progress: Starts
playback of the function whose lamp is lit.
When playback is in progress: Stops playback.
D) Operation (functions that support recording
only) when the cs (RECORD) button is pressed.
When the cs (RECORD) button lamp is flashing
(recording standby): Starts recording with the
function whose lamp is flashing.
When the cs (RECORD) button lamp is lit
(recording in progress): Stops recording. If
more than one playback operation is in
progress, they are all stopped.
Operations Common to All Modes
Using the Editing Function
1.
English
Use the procedure below with functions that allow
editing of tones and data. Editing lets you change the
parameters of each editable item.
Press the ep (EDIT) button.
This displays the editing screen.
2.
Use the ds (u), dt (w), ek (q), and el
(i) buttons to select the item you want to
edit.
• If “>ENT” is on the display, it means that there are
more items that can be edited in the operation you are
performing. In this case, pressing the em (ENTER)
button will advance to the next editing page.
3.
Change parameters as desired.
• For details about how to change parameters, see
“Changing a Number or a Value” in “Operations
Common to All Modes” (page E-9).
4.
After you finish with your edits, use the dr
(EXIT) button to exit the editing screen.
• Press the dr (EXIT) button the required number of
times to navigate back to the screen that was
displayed when you started editing.
Meanings of Symbols Next to
Numbers
The meanings of the symbols next to numbers after you
record or edit data are explained below.
! : Unsaved data
* : Saved data
• Unsaved data (!) will be discarded if you exit the
editing or recording operation by selecting a
different number. Don’t forget to save data that you
want to retain. See “Saving Data” in “Operations
Common to All Modes” (page E-11) for more
information.
E-13
Using Built-in Tones
1 2
3
bo bp bq br bs bt ck cl
4 5 6 7 8 9
Selecting a Tone
dk
NOTE
Your Digital Piano has memory for 720 tones (370
presets and 350 user tones), divided into eight groups.
• For more information about tones (Tone List), see
the separate “Tutorial”.
• The Digital Piano has built-in demonstration tunes
that highlight the different characteristics of tones.
For more information, see “Playing Demo Songs”
(page E-16).
1.
Use the “Tone List” to look up the group and
the number of the tone you want to select.
2.
Use the bo to cl (tone groups) buttons to
select the group you want.
Example: To select the ORGAN group
Lit
Zones
• To specify a tone for each zone,* use the
dk (ZONE, –/+) buttons to select a zone number, and
then perform steps 1 through 3 above to change
select a tone.
• Press the dk (ZONE, –/+) buttons at the same time to
toggle the currently selected zone tone between
muted and unmuted.
* For details about zones, see the separate “Tutorial”.
Editing a Tone
You can use the procedure below to edit a tone to suit
your needs. You can also use the editing menu to
specify DSP and system effects.
1.
Specify the number of the tone you want to
edit.
• For details about how to do this, see “Selecting a
Tone” on page E-14.
3.
Specify the number of the tone you want to
use.
• For details about how to do this, see “Changing a
Number or a Value” in “Operations Common to All
Modes” (page E-9).
Example: To select “01 Organ3 G”
Tone name
E-14
Tone number
2.
Edit the tone as desired.
• For details about how to do this, see “Using the
Editing Function” in “Operations Common to All
Modes” (page E-13).
• The items that appear on the editing screen depend
on the tone you select.
• For details and actual parameters, see the separate
“Tutorial”.
B
Using Built-in Tones
Using the Bender Wheel
English
You can use the bender wheel to slide the pitch of notes
smoothly upwards and downwards. This capability
makes it possible to reproduce saxophone and electric
guitar choking effects.
Adding a Pitch Bend Effect
1.
While playing a note on the
keyboard, rotate the 1
(BENDER) wheel on the left of the
keyboard upwards or downwards.
The amount the note bends depends on
how much you rotate the pitch bend
wheel.
• Do not have the pitch bend wheel
rotated as you turn on the Digital Piano.
NOTE
• You also can configure pitch bend wheel operation
by specifying the amount of pitch change at
maximum rotation in either direction. For more
information, see the separate “Tutorial”.
Modifying Notes with the
Modulation Wheel, Knobs and
Sliders
You can modify notes even while you are playing. Each
tone is preset with effects that are appropriate for it.
1.
While playing on the keyboard
with your right hand, you can
operate the 2 (MODULATION)
wheel, 3 knobs (K1 through K4),
and sliders 4 (S1) through
9 (S6).
The amount effect applied depends on
how much the applicable control is
moved.
• Do not have the modulation wheel, knobs, or sliders
in a moved position as you turn on the Digital Piano.
NOTE
• You can change the effects and functions assigned to
the modulation wheel, knobs, and sliders. For more
information, see the separate “Tutorial”.
z For information about other functions related to
“Using Built-in Tones”, see the separate
“Tutorial”.
E-15
Playing Demo Songs
eo
cr
1.
ep eq
While holding down the ep (EDIT) button,
press the eq (WRITE) button.
This will start sequential playback of the demo songs,
starting from song 1.
Song number
Song name
Current
measure
Song tempo
• You can scroll through songs manually with the
eo (–, +) buttons.
2.
Press the cr (START/STOP) button.
This stops demo song playback.
Playback of the demo songs will continue in an endless
loop until you press the cr (START/STOP) button to
stop it.
NOTE
• Only the operations described above can be
performed while demo song playback is in progress.
E-16
bm
bn
With the Arpeggio Function, you can play various
arpeggios automatically by simply pressing keys on
the keyboard. You can select from a number of
different arpeggio types for playback, including
arpeggios using the notes that make up a chord you
play on the keyboard, arpeggios that also include notes
that are automatically inserted in addition to those that
make up a chord you play on the keyboard, and more.
• The Arpeggio Function has 100 arpeggio type
presets (Arpeggio number 000 to 099). An arpeggio
type preset can be edited and saved as a user
arpeggio type. There is memory for up to 100 user
arpeggio types (Arpeggio number 100 to 199).
• A HOLD function is provided to enable arpeggios to
continue to play even after keyboard keys are
released.
dl
3.
Hold down the bn (ARPEGGIO) button until
the arpeggio type selection screen shown
below appears on the display.
This will cause the button’s lamp to light.
Arpeggio number
2.
Arpeggio name
Specify the arpeggio number you want.
• For details about how to do this, see “Changing a
Number or a Value” in “Operations Common to All
Modes” (page E-9).
Turn arpeggio hold on or off.
• While holding down the bm (SYS SETTING) button,
press the bn (ARPEGGIO) button to toggle HOLD
between on and off.
OFF : The arpeggio will play while keyboard keys
are depressed.
ON : The arpeggio will continue to play even after
the keyboard keys are released.
• The bn (ARPEGGIO) button lamp flashes while
arpeggio hold (HOLD) is turned on.
4.
Press some keys and the arpeggio will start
to play automatically.
• Press the bn (ARPEGGIO) button to toggle arpeggio
between on and off.
• To stop arpeggio HOLD playback, press bn
(ARPEGGIO) button or change the HOLD function
in step 3 of the above procedure to OFF.
To use the Arpeggio Function
1.
English
Sounding Arpeggios Automatically
Using the Arpeggio Type Selection
Screen to Select the Recommended Tone
as the Zone Part Tone
• For details about zone parts, see the separate
“Tutorial”.
1.
Hold down the bn (ARPEGGIO) button until
the arpeggio type selection screen appears
on the display.
2.
Hold down the dl (BANK) button until its
lamp starts to flash.
NOTE
• In the case of a user arpeggio, the tone that was
selected as the Zone Part tone when the user data
was saved is the recommended tone.
z For information about other functions related to
“Sounding Arpeggios Automatically”, see the
separate “Tutorial”.
E-17
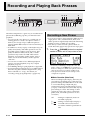
Recording and Playing Back Phrases
bm
cm
dl dm dn
cn co cp cq
cs
ct
dk
The Phrase Sequencer is a great way to record musical
phrases that suddenly pop into your mind for later
playback.
• You can record a new phrase or overdub onto an
existing phrase to create a user phrase. There is
memory for storage of up to 1,000 user phrases
(phrase number 000 to 999) for later recall when you
need them.
• In addition to what you play on the keyboard, your
pedal, wheel, knob, and slider operations are also
recorded as part of phrase. Note, however, that
pedal, modulation wheel, knob, and/or slider
operations may not be recorded when certain
functions are assigned to pedals, knobs, and/or
sliders. For more information, see the separate
“Tutorial”.
• You can choose either of two different playback
options: one-time playback (loop off) or repeat
playback (loop on).
• Overdubbing during looped playback is supported.
• A Song Sequencer function lets you combine phrase
data into song data. With this Digital Piano, song
data is referred as a “song”. For details, see
“Creating a Song (Song Sequencer)” (page E-21).
dr ds dt ek el em
eo
ep
Recording a New Phrase
• You can record up to approximately 1,600 notes for a
single phrase. Also, recorded wheel, knob, and
slider operations significantly reduce the remaining
number of notes available for recording.
• Note that you cannot record a phrase while an
Audio Recorder (page E-23) operation is in progress.
1.
Press the cq (PHRASE) button the required
number of times until its lamp starts to flash.
• If OVDB (overdubbing) is displayed as the “Rec
Mode” setting, use the eo minus (–) and plus (+)
buttons to change it to NEW (new phrase). This will
enter the new phrase recording standby mode.
• Note quantize and end measure settings can be
configured as required.
■ Note Quantize (Note Qntz)
When recording keyboard play, there may be
cases when your timing strays a bit. The note
quantize settings described below can be used
to correct the timing of keyboard play
automatically and correct the timing of notes
you play on the keyboard. (Note that only key
press timing is correct. The timing of other
operations such as key release, and wheel,
pedal, knob, and slider operations are not
corrected.)
Off
6,
7,
E-18
,
: Timing not adjusted. (Notes are
recorded as played.)
: Timing of actual keyboard play is
corrected to the nearest note in
accordance with the specified note
unit.
Recording and Playing Back Phrases
2.
• For details about how to do this, see “Starting and
Stopping Recording” in “Operations Common to All
Modes” (page E-12).
• Recording is performed as a Zone 1 stage setup
phrase. For details about zones, see the separate
“Tutorial”.
End Measure settings specify the number of
measures (up to a maximum of 16) in the
phrase. Phrase recording stops automatically
when it reaches the number of measures
specified by the End Measure setting.
Auto
1 to 16
: No number of measures is specified.
The number of measures where
phrase recording was stopped is
applied automatically.
: Phrase recording stops when it
reaches the specified number of
measures.
• Pressing the bm (SYS SETTING) button will display a
menu of the detailed settings shown below. Use the
dt down (w) and ek up (q) buttons to select a
parameter and then use the eo minus (–) and plus (+)
buttons to change its setting.
Menu
Description
Setting
Range
Guide Beat
Guide tone (Guide
Off, On
Beat). Specifies
whether or not a count
tone is sounded during
phrase recording and/
or record standby.
Precount
Precount (Precount).
Specifies the number
of measures of count.
HighReso/
Off Velo
High-resolution sound Off, On
source (High Reso
Velocity) and off
velocity (Off Velocity).
Turning on this setting
records with both a
high-resolution sound
source and Off
velocity. However, the
maximum number of
measures that can be
recorded is halved
when this option is
turned on.
Start recording.
3.
After you finish recording, save the data as
described below.
• For details about how to do this, see “Saving Data” in
“Operations Common to All Modes” (page E-11).
• The message “Memory Full” will appear on the
display when recording is not possible because there
is not enough memory capacity available. If this
happens, record a different phrase that does not take
up so much memory.
• For information about deleting data you saved, see
page E-28.
■ Saving a Phrase to an External Device
• USB flash drive (page E-32)
• Computer (page E-37)
Off
1:1 measure,
2:2 measures
• Pressing the ep (EDIT) button will display a screen
for configuring Guide Beat (click), precount, and End
Measure beat settings.
Use the dt (w) and ek (q) buttons to select “Beat”,
and then use the eo minus (–) and plus (+) buttons to
select a beat within the ranges of 2/4 to 8/4, or 2/8 to
16/8.
E-19
English
■ Configuring End Measure Settings
Recording and Playing Back Phrases
Listening to a Phrase
1.
2.
• For details about how to do this, see “Changing a
Number or a Value” in “Operations Common to All
Modes” (page E-9).
• You can also change the tempo value using the dk
minus (–) and plus (+) buttons.
• You can specify a tempo value in the range of 020 to
255.
Press the cq (PHRASE) button.
This displays the phrase selection screen shown below.
Phrase number
Adjust the tempo (beats per minute) value as
desired.
Phrase name
3.
Press the dr (EXIT) button.
This exits the tempo screen.
Loop setting
2.
Specify the number of the phrase you want to
hear.
• For details about how to do this, see “Changing a
Number or a Value” in “Operations Common to All
Modes” (page E-9).
3.
■ To adjust the tempo by tapping a beat
1.
Press the ct (TEMPO) button.
This displays the tempo screen.
2.
Tap the ct (TAP) button four times at the
speed (tempo) you want to set.
Use the dt (w) button to select “Loop”, and
then use the eo minus (–) and plus (+)
buttons to turn looping on or off.
OFF : One-time playback
ON : Looped playback
4.
• The tempo setting will change in accordance with
your tapping speed as soon as you tap the fourth
time.
Play the phrase.
• For details about how to do this, see “Starting and
Stopping Playback” in “Operations Common to All
Modes” (page E-11).
• The phrase loop setting is saved as a parameter for
each phrase.
3.
After setting the tempo by tapping, you then
can use the procedure under “To change the
tempo using the TEMPO buttons” (page
E-20) to make fine adjustments.
Changing the tempo setting
There are two different methods you can use to change
the tempo setting: using the TEMPO buttons or
tapping a beat with a button.
• You can use this procedure to adjust the tempo not
only for phrases, but also for other functions as well.
■ To change the tempo using the TEMPO
buttons
1.
Using the Phrase Selection Screen to
Select the Recommended Tone as the
Zone Part 1 Tone
• For details about zone parts, see the separate
“Tutorial”.
1.
Press the cq (PHRASE) button to display the
“PHRASE SELECT” screen (page E-20) for
selecting a phrase.
2.
Hold down the dl (BANK) button until its
lamp starts to flash.
Press the ct (TEMPO) button.
• This displays the tempo screen shown below.
The tone that was selected as the Zone Part 1 tone when
the data was saved is the recommended tone.
E-20
Recording and Playing Back Phrases
1.
2.
Select the phrase you want to overdub.
Press the cq (PHRASE) button the required
number of times until its lamp starts to flash.
• If NEW (new phrase) is displayed as the “Rec Mode”
setting, use the eo minus (–) and plus (+) buttons to
change it to OVDB (overdubbing). This will enter the
overdubbing standby mode.
3.
Start recording.
• For details about how to do this, see “Starting and
Stopping Recording” in “Operations Common to All
Modes” (page E-12).
• The original phrase will playback as a loop. Anything
you play on the keyboard and any operations you
perform during loop playback will be overdubbed
onto the original phrase.
■ To delete the last recorded data (undo)
While phrase playback is in progress or stopped, or
while overdubbing is in progress, hold down the cs
(RECORD) button until the undo screen “PHRASE :
UNDO” appears.
• You can also use the operation below to perform an
undo operation while the PHRASE SELECT screen
shown under “Listening to a Phrase” (page E-20) is
displayed.
Press the ep (EDIT) button and then use the dt (w)
and ek (q) buttons to select “Undo”. Finally, press
the em (ENTER) button.
This will display an undo screen. Perform the
procedure from step 3 under “Saving Data” on page
E-11 of the “Operations Common to All Modes”
section.
• The message “PHRASE : Can’t UNDO” will be
appear on the display if you try to perform an undo
operation again after already undoing the last
recording. Press the dr (EXIT) button to clear the
message.
To save a phrase
For details about how to save data, see “Saving Data”
in “Operations Common to All Modes” (page E-11).
• If there is not enough Digital Piano memory space
available to store the phrase data, the message “not
enough space” will appear on the above display in
place of “Press Enter”, and you will not be able to
save the phrase data. If this happens, delete some of
the data in the Digital Piano’s memory to free up
memory space.
• For information about deleting data you saved, see
page E-28.
• The Digital Piano can store up to 1,000 user phrases
of a combined data volume of 1MB.
■ Saving a Phrase to an External Device
• USB flash drive (page E-32)
• Computer (page E-37)
Creating a Song
(Song Sequencer)
The Song Sequencer lets you combine phrase data into
song data. With this Digital Piano, song data is referred
as a “song”.
To create a song
1.
Press the cm (SONG) button so the “SONG”
side lamp becomes lit.
2.
Specify the song number you want.
• For details about how to do this, see “Changing a
Number or a Value” in “Operations Common to All
Modes” (page E-9).
3.
Press the ep (EDIT) button.
E-21
English
Recording Over Another
Phrase (Overdubbing)
Recording and Playing Back Phrases
4.
Use the dt (w) and ek (q) buttons to select
a song edit item and then press the em
(ENTER) button.
• If you want to create a new song, select “TRACK
EDIT”. See step 5 of this procedure for information
about how to create a song.
• To adjust the song tempo value, select “Tempo”. For
details about how to change this setting, see
“Changing a Number or a Value” in “Operations
Common to All Modes” (page E-9).
• For information about using “Song Mixer”, see the
separate “Tutorial”.
5.
Edit the song as required.
• Use the dk minus (–) and plus (+) buttons to select a
track.
• To change the phrase number and other settings, use
the ds (u), dt (w), ek (q), and el (i) buttons to
move the underscore (_) to a setting to select it, and
then use the eo minus (–) and plus (+) buttons to
change the selected setting.
Track
Sequential number
Measure number
Repeat
Phrase number
Note shift
Menu
Description
Settings
Phrase number
Number of the phrase to
Ph000 to Ph999
be used
Repeat
Number of times play of
1 to 99
the phrase is repeated
Note shift
How much notes in the
–24 to +24
phrase should be shifted
• To delete part of a phrase, press the dm (DELETE)
button.
• To insert part of a phrase, press the dn (INSERT)
button.
• The maximum number of tracks is eight.
• The maximum sequential number value is 999.
• Song editing cannot be performed while song
playback is in progress.
6.
After you are finished editing a song, save it.
• For details about how to save data, see “Saving Data”
in “Operations Common to All Modes” (page E-11).
• For information about deleting data you saved, see
page E-28.
■ Saving Songs to an External Device
• USB flash drive (page E-32)
• Computer (page E-37)
E-22
To play back a song
1.
Press the cm (SONG) button so the “SONG”
side lamp becomes lit.
2.
Specify the song number you want.
• For details about how to change this setting, see
“Changing a Number or a Value” in “Operations
Common to All Modes” (page E-9).
3.
Start playback.
• For details about how to do this, see “Starting and
Stopping Playback” in “Operations Common to All
Modes” (page E-11).
• Use the cn (REW) button to scroll back measure-bymeasure, or the co (FF) button to scroll forward.
• You can pause playback by pressing the cp (PAUSE)
button.
• You can edit a song later, if you want. For
information about how to do this, see “To create a
song” on page E-21.
z For information about other functions related to
“Recording and Playing Back Phrases”, see the
separate “Tutorial”.
English
Recording Your Keyboard Play
eo
cm
cn co cp
cr
cs
When a commercially available USB flash drive is
inserted in the Digital Piano’s USB flash drive port,
audio data can be recorded to and played back from
the USB flash drive (Audio Recorder).
Recording to a USB Flash
Drive
em
Recording Digital Piano Play
PREPARATION
• Be sure to format the USB flash drive on the Digital
Piano before using it. See “USB Flash Drive” on page
E-29 for more information.
1.
Anything played on the Digital Piano is recorded to the
USB flash drive as audio data (WAV files*). If you play
along on the Digital Piano as you play back data stored
in the song and phrase sequencer, the memory
playback and your keyboard play are both recorded to
USB flash drive.
* Linear PCM, 16bit, 44.1 kHz, Stereo
• 100 files (No. 00 to No. 99)
• Approximately 25 minutes maximum recording per
file
■ Recorded Data
• Anything played on the Digital Piano is recorded.
• Individual part recording is not supported.
Each new recording of audio data to a USB flash drive
is automatically assigned a new file name, so existing
data is not overwritten.
Insert the USB flash drive into the Digital
Piano’s USB flash drive port.
• When you plug in a USB flash drive, the Digital Piano
initially needs to “mount” the USB flash drive and
prepare for data exchange. Note that Digital Piano
operations are momentarily disabled while a USB
flash drive mounting sequence is being performed.
While the mounting process is in progress, the
message “Mounting Media” will be displayed on the
display. It may take up to 10 or 20 seconds or even
longer for a USB flash drive to be mounted. Do not
attempt to perform any operation on the Digital
Piano while a mounting sequence is in progress. A
USB flash drive needs to be mounted each time it is
connected to the Digital Piano.
• If you turn on the Digital Piano while USB flash drive
is plugged into the Digital Piano, the mount
operation described above will need to be performed,
and Digital Piano operation will be disabled during
that time.
■ Recording Capacity
■ Recording Data Storage
er
2.
Press the er (AUDIO RECORDER) button
the required number of times until the button
lamp starts to flash.
E-23
Recording Your Keyboard Play
3.
Start recording.
• For details about how to do this, see “Starting and
Stopping Recording” in “Operations Common to All
Modes” (page E-12).
• This will start recording to the USB flash drive. The
message “Audio Recording . . .” will appear on the
display.
To play back performance data recorded
on a USB flash drive
1.
Press the er (AUDIO RECORDER) button
the required number of times until the button
lamp is lit.
NOTE
• Do not remove the USB flash drive from the USB
flash drive port while the AUDIO RECORDER
button lamp is lit or flashing. Doing so will interrupt
recording and may corrupt data.
• To exit the Audio Recorder, press the er (AUDIO
RECORDER) button the required number of times
until its lamp goes out.
This will display the audio file selection screen.
2.
in order from the newest (most recently recorded) to
the oldest.
• The eo (+) button scrolls from the old to the new.
To record keyboard play while playing
back a phrase or song
1.
Select the phrase or song you want to play
back.
• Phrase: Perform steps 1 through 3 under “Listening
to a Phrase” (page E-20).
• Song: Perform steps 1 and 2 under “To play back a
song” (page E-22).
2.
Press the er (AUDIO RECORDER) button
the required number of times until the button
lamp starts to flash.
3.
Start recording.
• For details about how to do this, see “Starting and
Stopping Recording” in “Operations Common to All
Modes” (page E-12).
• At the point where you want to start phrase or song
playback while recording, press the cr (START/
STOP) button.
• To turn off playback and continue recording, press
the cr (START/STOP) button again.
4.
To stop recording, press the cs (RECORD)
button.
• The cs (RECORD) button lamp will go out to let you
know that audio recording is stopped. Phrase/song
playback also will automatically stop at this time.
• To exit the Audio Recorder, press the er (AUDIO
RECORDER) button the required number of times
until the button lamp goes out.
NOTE
• A MIDI file (SMF) cannot be played back during
recording.
E-24
Use the eo (–, +) buttons to select a song.
• The eo (–) button scrolls through the recorded songs
3.
Start playback.
• For details about how to do this, see “Starting and
Stopping Playback” in “Operations Common to All
Modes” (page E-11).
• To scroll back, hold down the cm (SONG) button as
you press the cn (REW) button. To scroll forward,
hold down the cm (SONG) button as you press the co
(FF) button. This operation can be performed only
while an audio file is playing back.
• You can pause playback by holding down the cm
(SONG) button as you press the cp (PAUSE) button.
This operation can be performed only while an audio
file is playing back.
• A MIDI file (SMF) and audio file cannot be played
back simultaneously.
• To exit the Audio Recorder, press the er (AUDIO
RECORDER) button the required number of times
until its lamp goes out.
Recording Your Keyboard Play
Deleting an Audio File from a USB Flash
Drive
English
Files can be deleted one at a time.
IMPORTANT!
• The procedure below deletes all of the data of the
selected song. Note that the delete operation cannot
be undone. Check to make sure you really do not
need the file in USB flash drive before you perform
the following steps.
1.
Press the er (AUDIO RECORDER) button
the required number of times until the button
lamp is lit.
2.
Use the eo (–, +) buttons to select the song
you want to delete.
• The eo (–) button scrolls through the recorded songs
in order from the newest (most recently recorded) to
the oldest.
• The eo (+) button scrolls from the old to the new.
• After selecting a song, you can play it back by
pressing the cr (START/STOP) button. Press the cr
(START/STOP) button again to stop playback.
3.
Press the em (ENTER) button.
This will display a confirmation message “SURE?”.
• To cancel the delete operation, press the eo (NO)
button.
4.
To delete the file, press the eo (YES) button.
This will delete the file you selected.
NOTE
• The file number of file you delete remains unused.
Recording a new file will cause the file number that
comes after the last file recorded to the USB flash
drive.
E-25
Using the Stage Setups
dl dm dn do dp dq
ds dt ek el em
Overview
Your Digital Piano supports simultaneous play of up to
four tones on the keyboard. In addition to tone
assignments, you can also save effect, arpeggio, and
other settings as a stage setup (called a “Stage
Setting”), which can be easily recalled at any time, even
while you are playing, to instantly change the Digital
Piano’s setup.
• You can have up to 100 stage setups (numbered 0-0
to 9-9) stored in Digital Piano memory.
Recalling a Stage Setup
1.
Press the dl (BANK) button.
This will cause the button’s lamp to light.
2.
Specify a bank and stage setup (Stage
Setting) number.
• First, holding down the dl (BANK) button, use
buttons dm through dq or buttons ds through em to
specify the bank number.
• Next, use buttons dm through dq or buttons ds
through em to specify the stage setup number.
NOTE
• After specifying the stage setup number, edit the
stage setup contents and save the results. For details
about how to display the editing screen, see “Using
the Editing Function” in “Operations Common to
All Modes” (page E-13).
E-26
Playing the Zone 1 Tone on all Keys
For details about zone parts, see the separate
“Tutorial”.
1.
Hold down the dl (BANK) button until its
lamp starts to flash.
This sets up the keyboard so all keys will sound the
tone selected for Zone 1. It also causes Stage Setup
settings to change to presets that are optimized for the
selected tone.
z For details about parameters that can be edited, see
the separate “Tutorial”.
bm
English
Other Useful Functions
eo
ds dt ek el em
System Settings
The Digital Piano settings listed below can be
configured using the system setting (SYS SETTING)
menu.
• Display contrast
• Initial power on mode
• Auto power off (page E-6) on/off
• Panel lock
1.
Press bm (SYS SETTING).
• This displays the setting screen with “General>Ent”
selected.
2.
3.
4.
Settings
Display
Change the setting.
• For details about how to do this, see “Changing a
Number or a Value” in “Operations Common to All
Modes” (page E-9).
Settings
Display contrast (LCD Contrast).
LCD Contrast Adjusts the contrast of the
1 to 17
display.
Auto storage of settings (Auto
Resume). When this setting is on,
the Digital Piano remembers its
Auto Resume
Off, On
current settings when it is turned
off, and restores them the next
time power is turned on.
Auto Power
Off
Auto Power Off function on/off
(Auto Power Off). Turning off
this setting disables Auto Power
Off (page E-6).
Panel Lock
Panel Lock (Panel Lock). When
this setting is turned on, the
Digital Piano’s buttons (except
for the bk (P) power button and
buttons required for unlock) are
Off, On
locked, so no operation can be
performed. Turn on panel lock
when you want to protect
against unintentional button
operations.
Press em (ENTER).
Use the ds (u), dt (w), ek (q), and el
(i) buttons to select the item whose setting
you want to configure.
Description
5.
Off, On
After settings are the way you want, press the
bm (SYS SETTING) button to exit the setting
screen.
E-27
Other Useful Functions
Deleting Data
Use the procedure below to delete specific edited or
recorded data (tones, arpeggios, phrases, songs, stage
setups) from Digital Piano memory.
1.
Press the bm (SYS SETTING) button.
2.
Use the dt (w) and ek (q) buttons to select
“Initialize”.
3.
Use the ds (u), dt (w), ek (q), and el
(i) buttons to select the type of data you
want to delete.
•
•
•
•
•
•
4.
To delete one stage setup: Init Stage Set
To delete one user tone: Init Tone
To delete one user arpeggio: Clear Arpeggio
To delete one recorded phrase: Clear Phrase
To delete one recorded song: Clear Song Seq
To delete all data: Initialize All
Select the number of the data you want to
delete.
• For details about how to do this, see “Changing a
Number or a Value” in “Operations Common to All
Modes” (page E-9).
• If you selected “Initialize All” in step 3 of the above
procedure, you do not need to select a data number
here.
5.
Press the em (ENTER) button.
This will display a confirmation message “SURE?”.
• If you want to cancel the delete operation, press the
eo (NO) or dr (EXIT) button.
6.
Press the eo (YES) button.
The message “Please Wait” will remain on the display
while the operation is being performed. Do not perform
any operation while this message is on the display.
“Complete” appears on the display after data delete is
complete.
z For information about other setting items that
appear on the display when the bm (SYS SETTING)
button is pressed, see the separate “Tutorial”.
E-28
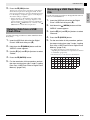
bo bp bq br bs bt ck cl
eo
cn co cp
Your Digital Piano supports the following USB flash
drive operations.
• USB flash drive formatting
• Data storage to a USB flash drive
– Stage setups, tones, arpeggio, and phrase
sequencer data edited with the Digital Piano can
be saved on a USB flash drive.
– Song data recorded with the Digital Piano’s song
sequencer is on a USB flash drive as MIDI files
(SMF format 0).
– Digital Piano play can be recorded directly to a
USB flash drive.
For details, see “Recording to a USB Flash Drive”
(page E-23).
• USB flash drive data loading to Digital Piano
memory
• Delete data from a USB flash drive
• Easy play back of song data from a USB flash drive
English
USB Flash Drive
dr
dt ek
em
er
■ Types of Data
Supported
Operations
Description
(File Name Extension)
Save to
USB
Flash
Drive
Load
from USB
Flash
Drive
O
O
The following tone data,
edited with this Digital
Piano
• Melody tone data
(ZTN)
• Hex Layer Tone data
(ZLT)
• Drum sound data
(ZDR)
O
O
Arpeggio
(page E-17)
Arpeggio data edited
with this Digital Piano
(ZAR)
O
O
Phrase
Sequencer
(page E-18)
Phrase sequencer data
edited with this Digital
Piano (ZPH)
O
O
Song
sequencer
(page E-21)
Song sequencer data
edited with this Digital
Piano (ZSQ)
O*
O
All data
All of the above data
(ZAL)
O
O
Data Type
Stage Setting Stage setup data edited
(page E-26)
with this Digital Piano
(ZPF)
Tone
(Page E-14)
* Can be saved as a MIDI file (SMF format 0).
E-29
USB Flash Drive
Storing Standard Audio Data
(WAV Files) to a USB Flash
Drive
Performing a record operation with the Digital Piano’s
audio recorder stores the data as a WAV file
(automatically assigned a name from TAKE00.WAV to
TAKE99.WAV) in the MUSICDAT folder (which is
created automatically by the format operation) on the
USB flash drive. You also can connect a USB flash drive
to a computer and change the names of audio data
(WAV) files to the format “TAKExx.WAV”*, and move
them to the MUSICDAT folder. Then you will be able
to play them back on the Digital Piano.
* xx = 00 to 99
USB Flash Drive and USB Flash Drive
Port Handling Precautions
IMPORTANT!
• Be sure to observe the precautions provided in the
documentation that comes with the USB flash drive.
• Avoid using a USB flash drive under the following
conditions. Such conditions can corrupt data stored
on the USB flash drive.
– Areas subjected to high temperature, high
humidity, or corrosive gas
– Areas subjected to strong electrostatic charge and
digital noise
• Never remove the USB flash drive while data is
being written to or loaded from it. Doing so can
corrupt the data on the USB flash drive and damage
the USB flash drive port.
• Never insert anything besides a USB flash drive into
the USB flash drive port. Doing so creates the risk of
malfunction.
• A USB flash drive can become warm after very long
use. This is normal and does not indicate
malfunction.
• Static electricity conducted to the USB flash drive
port from your hand or from a USB flash drive can
cause malfunction of the Digital Piano. If this
happens, turn the Digital Piano off and then back on
again.
E-30
Copyrights
You are allowed to use recordings for your own
personal use. Any reproduction of an audio or music
format file, without the permission of its copyright
holder, is strictly prohibited under copyright laws
and international treaties. Also, making such files
available on the Internet or distributing them to third
parties, regardless of whether such activities are
conducted with or without compensation, is strictly
prohibited under copyright laws and international
treaties. CASIO COMPUTER CO., LTD. shall not be
held in any way liable for any use of this Digital
Piano that is illegal under copyright laws.
Connecting a USB Flash Drive
to and Detaching It from the
Digital Piano
IMPORTANT!
• When you plug in a USB flash drive, the Digital
Piano initially needs to “mount” the USB flash drive
and prepare for data exchange. Note that Digital
Piano operations are momentarily disabled while a
USB flash drive mounting sequence is being
performed. While the mounting process is in
progress, the message “Mounting Media” will be
displayed on the display. It may take up to 10 or 20
seconds or even longer for a USB flash drive to be
mounted. Do not attempt to perform any operation
on the Digital Piano while a mounting sequence is in
progress. A USB flash drive needs to be mounted
each time it is connected to the Digital Piano.
• If you turn on the Digital Piano while USB flash drive
is plugged into the Digital Piano, the mount operation
described above will need to be performed, and
Digital Piano operation will be disabled during that
time.
• Never plug any other device besides a USB flash
drive into the USB flash drive port.
■ To insert a USB flash drive
1.
As shown in the illustration below, insert the
USB flash drive into the Digital Piano’s USB
flash drive port (es).
• Carefully push the USB flash drive in as far as it will
go. Do not use undue force when inserting the USB
flash drive.
USB flash drive port
USB flash drive
■ To remove a USB flash drive
1.
Supported USB Flash Drives
This Digital Piano supports USB flash drives formatted
to FAT32. If your USB flash drive is formatted to a
different file system, use the Windows format function
to reformat it to FAT32. Do not use quick format.
The following types of USB flash drives are not
supported.
• A USB flash drive that is recognized as multiple
drives by the computer
• A USB flash drive that is recognized as a CD-ROM
by the computer
• A USB flash drive that has an anti-virus function,
security function, or other special function
1.
Insert the USB flash drive you want to format
into the Digital Piano’s USB flash drive port
(es).
2.
Hold down the er (MEDIA) button until the
“MEDIA” screen appears.
3.
Use the dt (w) and ek (q) buttons to select
“Format”.
4.
Press the em (ENTER) button.
Check to confirm that there is no data
exchange operation being performed, and
then pull the USB flash drive straight out.
Formatting a USB Flash Drive
IMPORTANT!
• Be sure to format a USB flash drive on the Digital
Piano before using it for the first time.
• Before formatting a USB flash drive, make sure it
does not have any valuable data stored on it.
• The format operation performed by this Digital Piano
is a “quick format”. If you want to completely delete
all of the data in USB flash drive, format it on your
computer or some other device.
This will display a confirmation message “SURE?”.
• If you want to cancel the format operation, press the
eo (NO) or dr (EXIT) button.
5.
Press the eo (YES) button.
The message “Please Wait” will remain on the display
while the format operation is being performed. Do not
perform any Digital Piano operation while this message
is on the display. “Complete” appears on the display
after formatting is complete.
E-31
English
USB Flash Drive
USB Flash Drive
Saving Digital Piano Data to a
USB Flash Drive
Use the following procedure to save Digital Piano data
to a USB flash drive.
• The following types of data can be stored to USB
flash drive.
Stage setups, tones, arpeggios, phrases, song
sequencer data, all data
1.
Insert the USB flash drive into the Digital
Piano’s USB flash drive port (es).
2.
Hold down the er (MEDIA) button until the
“MEDIA” screen appears.
3.
Use the dt (w) and ek (q) buttons to select
“Save”.
4.
5.
Press the em (ENTER) button.
Use the dt (w) and ek (q) buttons to select
a data type of the data you want to save.
• You can select one of the data types below.
Stage setups (Stage Setting), tones (Tone), arpeggios
(Arpeggio), phrases (Phrase), song sequencer data
(Song Seq), all data (All Data)
• To save a song sequencer data as a MIDI file (SMF),
select “Song Seq” and then press the em (ENTER)
button. Next, select “SMF Save” and then press the em
(ENTER) button again.
6.
7.
Press the em (ENTER) button.
The above procedure stores Digital Piano data in a
folder named MUSICDAT on the USB flash drive.
• The above data folders are created automatically
when you format the USB flash drive on the Digital
Piano (page E-31).
• Note that a file not in one of the data folders cannot
be loaded, deleted, or renamed by the Digital Piano.
You also will not be able to recall, delete, or play any
file stored in any subfolder inside one of the data
folders.
Loading Data from a USB
Flash Drive to Digital Piano
Memory
You can use the procedure below to load data from a
USB flash drive into Digital Piano memory.
1.
Insert the USB flash drive into the Digital
Piano’s USB flash drive port (es).
2.
Hold down the er (MEDIA) button until the
“MEDIA” screen appears.
3.
Use the dt (w) and ek (q) buttons to select
“Load”.
4.
5.
Press the em (ENTER) button.
Specify the number of the data you want to
save to the USB flash drive.
• For details about how to do this, see “Changing a
Number or a Value” in “Operations Common to All
Modes” (page E-9).
• When saving a tone, you can use buttons bo through
cl (tone group) to select the type of file being saved.
8.
■ USB Flash Drive Data (File) Storage
Locations
Press the em (ENTER) button.
• You can select one of the data types below.
Stage setups (Stage Setting), tones (Tone), arpeggios
(Arpeggio), phrases (Phrase), song sequencer data
(Song Seq), all data (All Data)
6.
7.
This will display a confirmation message “SURE?”.
• If you want to cancel the save, press the eo (NO) or dr
(EXIT) button.
9.
E-32
Press the em (ENTER) button.
Specify the number of the data you want to
load from the USB flash drive.
• For details about how to do this, see “Changing a
Number or a Value” in “Operations Common to All
Modes” (page E-9).
• When loading a tone, you can use buttons bo through
cl (tone group) to select the type of file being loaded.
bo (PIANO) to bt (SYNTH/VARIOUS) buttons:
Melody tone data (ZTN)
ck (DRUMS) button: Drum sound data (ZDR)
cl (HEX LAYER) button: Hex layer tone data (ZLT)
Press the eo (YES) button.
The message “Please Wait” will remain on the display
while the save operation is being performed. Do not
perform any Digital Piano operation while this message
is on the display. “Complete” appears on the display
after data save is complete.
• If there is already a file with the same name on the
USB flash drive, a message “Replace?” will appear
asking if you want to overwrite it with the new data.
Press the eo (YES) button to overwrite or the eo (NO)
button to cancel the save operation.
Use the dt (w) and ek (q) buttons to select
a data type of the data you want to load.
8.
Press the em (ENTER) button.
This will display a confirmation message “SURE?”.
• If you want to cancel the data load, press the eo (NO)
or dr (EXIT) button.
USB Flash Drive
Press the eo (YES) button.
The message “Please Wait” will remain on the display
while the load operation is being performed. Do not
perform any Digital Piano operation while this message
is on the display. “Complete” appears on the display
after data loading is complete.
• If there already is a file with the same name in the
Digital Piano memory, a message “Replace?” will
appear asking if you want to replace it with the new
data. Press the eo (YES) button to overwrite or the eo
(NO) button to cancel the load operation.
Deleting Data from a USB
Flash Drive
Use the following procedure to delete USB flash drive
data (files).
1.
Insert the USB flash drive into the Digital
Piano’s USB flash drive port (es).
2.
Hold down the er (MEDIA) button until the
“MEDIA” screen appears.
3.
Use the dt (w) and ek (q) buttons to select
“Delete”.
4.
5.
Press the em (ENTER) button.
For the remainder of this procedure, perform
the steps starting from step 7 under “Loading
Data from a USB Flash Drive to Digital Piano
Memory” (page E-32).
Renaming a USB Flash Drive
File
Use the following procedure to change the file name of
a file on a USB flash drive.
1.
Insert the USB flash drive into the Digital
Piano’s USB flash drive port (es).
2.
Hold down the er (MEDIA) button until the
“MEDIA” screen appears.
3.
Use the dt (w) and ek (q) buttons to select
“Rename”.
4.
5.
Press the em (ENTER) button.
For the remainder of this procedure, perform
the steps starting from step 7 under “Loading
Data from a USB Flash Drive to Digital Piano
Memory” (page E-32).
• For details about how to input characters, see
“Inputting Text Characters” in “Operations Common
to All Modes” (page E-10).
• The characters you can select are shown below.
0
A
K
U
(
1 2 3
B C D
L M N
V W X
) - ^
4
E
O
Y
{
5 6
F G
P Q
Z S
} @
7
H
R
&
~
8
I
S
_
`
9
J
T
'
E-33
English
9.
USB Flash Drive
Playing Back Audio Data
Stored on a USB Flash Drive
You can use your Digital Piano to play back audio data
(WAV files*) stored on a commercially available USB
flash drive.
See “USB Flash Drive” on page E-29 for more
information.
* Linear PCM, 16bit, 44.1 kHz, Stereo
PREPARATION
Playing Back a MIDI File
Stored on a USB Flash Drive
You can use your Digital Piano to play back MIDI files
(SMF) stored on a commercially available USB flash
drive.
PREPARATION
• Use a computer to move the MIDI file (SMF) you
want to play into the MUSICDAT folder on the USB
flash drive.
• Prepare a USB flash drive that contains data
recorded to it using the Digital Piano’s Audio
Recorder. See “Recording to a USB Flash Drive” on
page E-23 for more information.
• You can also use a computer to save audio data
(WAV file) to the USB Flash Drive for playback. See
“Storing Standard Audio Data (WAV Files) to a USB
Flash Drive” on page E-30 for more information.
• Insert the USB flash drive that contains the data you
want to play back into your Digital Piano’s USB
flash drive port.
1.
Plug the USB flash drive into the Digital
Piano’s USB flash drive port (es).
2.
Hold down the er (MEDIA) button until the
message “MEDIA” appears on the Digital
Piano display.
3.
Use the dt (w) and ek (q) buttons to select
“SMF Play”.
1.
4.
5.
Press the em (ENTER) button.
Press the er (AUDIO RECORDER) button
the required number of times until the button
lamp is lit.
Specify the number of the MIDI file (SMF) you
want to play.
• For details about how to do this, see “Changing a
Number or a Value” in “Operations Common to All
Modes” (page E-9).
6.
This will display the audio file selection screen.
2.
Use the eo (–, +) buttons to select a song.
• The eo (+) button scrolls forward through the song
file names (TAKE00.WAV, TAKE01.WAV, etc.) The
eo (–) button scrolls backward through the song file
names.
3.
Start playback.
• For details about how to do this, see “Starting and
Stopping Playback” in “Operations Common to All
Modes” (page E-11).
• To exit the Audio Recorder, press the er (AUDIO
RECORDER) button the required number of times
until its lamp goes out.
E-34
Start playback.
• For details about how to do this, see the steps starting
from step 2 under “Starting and Stopping Playback”
in “Operations Common to All Modes” (page E-11).
• Use the cn (REW) button to scroll back measure-bymeasure, or the co (FF) button to scroll forward.
• You can pause playback by pressing the cp (PAUSE)
button.
USB Flash Drive
One of the error messages below appears on the display when a problem occurs.
• Press the dr (EXIT) button to clear an error message.
Display Message
No Media
No File
No Data
Read Only
Media Full
Too Many Files
Not SMF01
Size Over
Wrong Data
Memory Full
Format Error
Media Error
Filename Error
Cause
1. The USB flash drive is not connected to the
Digital Piano’s USB flash drive port.
2. The USB flash drive was removed while some
operation was in progress.
3. The USB flash drive is write-protected.
4. The USB flash drive has anti-virus software.
Action
1. Correctly plug the USB flash drive into the USB
flash drive port.
2. Do not remove the USB flash drive while any
operation is in progress.
3. Unprotect the USB flash drive.
4. Use a USB flash drive that does not have antivirus software.
There is no loadable or playable file in the
Move the file you want to load into the appropriate
“MUSICDAT” folder.
location (pages E-30, 32) in the “MUSICDAT” folder.
You are attempting to save data to a USB flash drive Record something before performing a save
when there is no data to save.
operation.
A read-only file with the same name you are trying • Change the name and then save the new data.
to use is already stored on USB flash drive.
• Remove the read-only attribute from the existing
USB flash drive file and overwrite it with the new
data.
• Use a different USB flash drive.
There is not enough space available on the USB flash Delete some of the files on the USB flash drive to
drive.
make room for new data (page E-33) or use a
different USB flash drive.
1. There are too many files on the USB flash drive. 1. Delete some of the files on the USB flash drive to
make room for new data.
2. There is a file named TAKE99.WAV in the
2. Delete the WAV file in the “MUSICDAT” folder.
“MUSICDAT” folder.
You are attempting to play back song data that is not This Digital Piano supports playback of SMF Format
SMF Format 0 or Format 1.
0 or Format 1 only.
1. The data on the USB flash drive is too big to play. 1 and 2. This Digital Piano supports playback of
song data files with a maximum size of
2. The SMF file size exceeded 320KB during SMF
320KB.
save.
3. The phrase data you are trying to load is too
3. Delete some of the data currently in Digital Piano
large to be imported into Digital Piano memory.
memory to free up available space.
• The maximum allowable size of a phrase file
for import is approximately 8KB.
• The maximum allowable total size of phrase
files that can be imported is approximately
1MB (up to 1,000 files).
1. The USB flash drive data is corrupted.
—
2. USB flash drive contains data that is not
supported by this Digital Piano.
There is not enough Digital Piano memory available Reduce the size of the song data.
to convert a song sequencer song to SMF data and
Example:
store it on the USB flash drive.
Delete any tracks that are not required.
1. The USB flash drive format is not compatible
1. Format the USB flash drive on the Digital Piano.
with this Digital Piano.
2. The USB flash drive is corrupted.
2. Use a different USB flash drive.
The USB flash drive is corrupted.
Use a different USB flash drive.
You are attempting to rename a USB flash drive file Rename to a different file name.
with a file name that is already used by another file
on the USB flash drive.
E-35
English
Error Messages
Connecting to a Computer
You can connect the Digital Piano to a computer and
exchange MIDI data between them. You can send play
data from the Digital Piano to commercially available
music software running on your computer, or you can
send MIDI data from your computer to the Digital
Piano for playback.
Minimum Computer System
Requirements
The following shows the minimum computer system
requirements for sending and receiving MIDI data.
Check to make sure that your computer complies with
these requirements before connecting the Digital Piano
to it.
z Operating System
Windows® XP (SP2 or later)*1
Windows Vista® *2
Windows® 7 *3
Windows® 8 *4
Mac OS® X (10.3.9, 10.4.11, 10.5.X, 10.6.X, 10.7.X, 10.8.X)
*1: Windows XP Home Edition
Windows XP Professional (32-bit)
*2: Windows Vista (32-bit)
*3: Windows 7 (32-bit, 64-bit)
*4: Windows 8 (32-bit, 64-bit)
z USB port
Connecting the Digital Piano
to Your Computer
IMPORTANT!
• Make sure you follow the steps of the procedure
below exactly. Connecting incorrectly can make data
send and receive impossible.
1.
• Do not start up the music software on your computer
yet!
2.
After starting up your computer, use a
commercially available USB cable to connect
it to the Digital Piano.
B connector
USB cable
(A-B type)
A connector
Digital Piano USB port
Computer USB port
3.
Turn on the Digital Piano.
• If this is the first time you are connecting the Digital
Piano to your computer, the driver software required
to send and receive data will be installed on your
computer automatically.
IMPORTANT!
• Never connect to a computer that does not conform
to the above requirements. Doing so can cause
problems with your computer.
Turn off the Digital Piano and then start up
your computer.
4.
Start up commercially available music
software on your computer.
5.
Configure the music software settings to
select one of the following as the MIDI device.
CASIO USB-MIDI : For Windows Vista, Windows 7,
Windows 8, Mac OS X
USB Audio Device: For Windows XP
• For information about how to select the MIDI device,
see the user documentation that comes with the
music software you are using.
IMPORTANT!
• Be sure to turn on the Digital Piano first before
starting up your computer’s music software.
E-36
NOTE
• Once you are able to connect successfully, there is no
problem with leaving the USB cable connected when
you turn off your computer and/or Digital Piano.
• This Digital Piano conforms to General MIDI Level 1
(GM).
• For detailed specifications and connections that
apply to MIDI data send and receive by this Digital
Piano, see the latest support information provided
by the website at the following URL.
http://world.casio.com/
Saving and Loading Digital
Piano Data to a Computer and
Editing Digital Piano Data on a
Computer
You can transfer user tones, phrases, and other data
you saved with the Digital Piano to a computer for
storage. Later, you can return the data back to the
Digital Piano when you need it.
You can also edit tone, stage setup and other Digital
Piano data on a computer, where it is easier to work
with. A special Data Editor application is required in
order to perform operations such as these.
1.
Go to the CASIO WORLDWIDE site at the
following URL.
http://world.casio.com/
2.
At the site, select a geographic area or
country.
3.
After accessing the area site, navigate to the
minimum computer system requirements for
Data Editor for this product.
• You should be able to find a link to Data Editor
information on the product introduction page of this
product. If you cannot find such a link, use the search
form of the area site where you are located to enter
the model name of this product and search for it.
• Note that site contents are subject to change without
notice.
4.
Check if your computer system complies with
the minimum requirements for Data Editor.
5.
Download Data Editor and its user’s guide to
your computer.
6.
Follow the procedure in the Data Editor user’s
guide you downloaded in step 5 to install
Data Editor.
7.
Use the procedures in the Data Editor user’s
guide to transfer and edit data.
• See the Data Editor user’s guide for information
about the types of data that can be transferred and
the data that can be edited.
E-37
English
Connecting to a Computer
Reference
Troubleshooting
Problem
Cause
No sound is produced when I 1. The VOLUME controller is set to
press a keyboard key.
“MIN”.
2. This Digital Piano does not have
built-in speakers. Nothing will
sound if an output device is not
connected.
The pitch of the Digital Piano 1. Digital Piano tuning is incorrect.
is off.
2. The Digital Piano’s key setting is
something other than “440.0 Hz”.
3. A non-standard temperament
setting is being used.
Tones and/or effects sound
strange. Turning power off
and then back on again does
not eliminate the problem.
Example: Note intensity does
not change even though I
alter key pressure.
Chorus, reverb, and/or delay
are not being applied.
I cannot transfer data after
connecting the Digital Piano
to a computer.
I cannot store data to a USB
flash drive or load data from a
USB flash drive.
A tone’s quality and volume
sounds slightly different
depending where it is played
on the keyboard.
4. Octave shift is enabled.
The “Auto Resume” feature is
turned on.
1. Lower the system effect send
and/or return level.
2. A small value is selected for the
effect setting of an effect
parameter.
—
—
Action
1. Rotate the VOLUME controller more
towards “MAX”.
2. Connect audio equipment, an amplifier,
or headphones.
See Page
) E-6
) E-7
1. Adjust Digital Piano tuning, or turn the
) Tutorial
Digital Piano off and then back on again.
2. Change the key setting to “440.0 Hz”, or
turn Digital Piano power off and then
back on again.
3. Change the temperament setting to
“00:Equal”, which is the standard
modern tuning.
4. Change the octave shift setting to 0.
Turn off “Auto Resume”. Next, turn power
) E-27
off and then back on again.
1. Change the system effect send and/or
return levels to greater values.
2. Select a larger value for the effect
setting of the effect parameter.
) Tutorial
1. Check to make sure that the USB cable ) E-36
is connected to the Digital Piano and
computer, and that the correct device is
selected with your computer’s music
software.
2. Turn off the Digital Piano and then exit
the music software on your computer.
Next, turn the Digital Piano back on and
then restart the music software on your
computer.
See “Error Messages”.
) E-35
This is an unavoidable result of the digital sampling process*, and does not indicate
malfunction.
* Multiple digital samples are taken for the low range, middle range, and high range of the
original musical instrument. Because of this, there may be a very slight difference in tonal
quality and volume between sample ranges.
When I press a button, the
Performing a button operation while playing with the recorder, or other functions can cause
note that is sounding cuts out such phenomena when the Digital Piano switches internal tone effects. It does not indicate
momentarily or there is a
malfunction.
slight change in how effects
are applied.
Even though I play on
The ranges of certain tones are limited, which means that octaves change normally up to a
different ranges of the
certain low note or high note. With such a tone, the notes of the lowest octave will be repeated
keyboard, the notes do not
to the left of the lowest possible note, and the highest octave will be repeated to the right of
change octaves.
the highest possible note. This is due do limitations in the range of the original musical
instrument for each tone, and does not indicate malfunction of the Digital Piano.
E-38
Reference
Model
PX-5SWE
Sound Source
Multi-dimensional Morphing AiR
Keyboard
88-key piano keyboard, with Touch Response (3 levels, Off), High-Resolution Velocity, Key Off Velocity,
Hammer Response
Maximum Polyphony
256 notes
Tones
370 preset, 350 user
Melody Tones: 300 preset, 180 user
Hex Layer Tones: 50 preset, 150 user
PCM Drum Tones: 20 preset, 20 user
Effects
• System Effects: Reverb, Chorus, Delay, Resonance
• Master Effects: 4 band equalizer, Compressor
• DSP: 20 types
Number of Demo Songs
4
Number of Stage Setups
100
Phrase Sequencer
•
•
•
•
•
Audio Recorder
• Real-time recording and playback to USB flash drive*
* Linear PCM, 16bit, 44.1 kHz, stereo .WAV format
• Number of Songs: 100
• Approximately 25 minutes maximum recording per song.
Mixer
16 parts + Externally input parts
Other Functions
•
•
•
•
•
•
MIDI
16 multi-timbre received, GM Level 1 standard
Main Controllers
Bender wheel, modulation wheel, knobs × 4, sliders × 6
USB Flash Drive
SMF playback, playback of audio data, user data save/load
Inputs/Outputs
•
•
•
•
•
•
•
•
•
Number of Phrases: 1000
Number of Songs (Song Sequencer): 10
Playback Mode: One time, loop
Memory Capacity: Approximately 1MB
Other: Overdubbing, Note Quantize (for recording)
Transpose: ±1 octaves (–12 to 0 to +12 semitones)
Octave Shift: ±3 octaves
Tuning: A4 = 415.5 - 440.0 - 465.9 Hz
Temperaments: 17 types (including equal temperament)
Stretch Tune: 8 types
Number of Arpeggios: Preset: 100
User: 100
Pedal Jacks: Standard jacks × 2
Power: 12V DC (Power Consumption: 12V = 5W)
PHONES jacks: Stereo standard jacks × 2
MIDI IN, OUT/THRU terminals
LINE OUT R, L/MONO jacks: Standard jacks × 2
Output impedance: 2.3kΩ
Output voltage: 1.8V (RMS) MAX
LINE IN R, L/MONO jacks: Standard jacks × 2
Input impedance: 9.0kΩ
Input voltage: 200mV
AUDIO IN jack: Stereo mini jack
Input Impedance: 9.0kΩ, Input Sensitivity: 200mV
USB flash drive port : Type A
USB port: Type B
Power Supply
2-way
Batteries: 8 AA-size alkaline batteries
Battery Life: Approximately 3 hours continuous operation on alkaline batteries
AC Adaptor: AD-A12150LW
Auto Power Off Time: Approximately 6 minutes after last key operation during battery use, approximately 4
hours after last key operation during AC adaptor use. Auto Power Off can be
disabled.
Dimensions
132.2 (W) × 28.6 (D) × 13.5 (H) cm (52 1/16 × 11 1/4 × 5 5/16 inch)
Weight
Approximately 11.1kg (24.5lbs)
* Based on 1KB = 1024bytes, 1MB = 10242 bytes
• Specifications and designs are subject to change without notice.
• Access the website below for the latest news about specifications and firmware versions.
http://world.casio.com/
B
E-39
English
Product Specifications
Reference
Operating Precautions
Be sure to read and observe the following operating
precautions.
■ Location
Avoid the following locations for this product.
• Areas exposed to direct sunlight and high humidity
• Areas subjected to temperature extremes
• Near a radio, TV, video deck, or tuner
• The above devices will not cause malfunction of the
product, but the product can cause interference in
the audio or video of a nearby device.
■ User Maintenance
• Never use benzine, alcohol, thinner, or other
chemical agents to clean the product.
• To clean the product or its keyboard, wipe with a
soft cloth moistened in a weak solution of water and
a mild neutral detergent. Wring all excess moisture
from the cloth before wiping.
■ Included and Optional Accessories
Use only accessories that are specified for use with this
product. Use of unauthorized accessories creates the
risk of fire, electric shock, and personal injury.
■ Weld Lines
Lines may be visible on the exterior of the product.
These are “weld lines” that result from the plastic
molding process. They are not cracks or scratches.
■ Musical Instrument Etiquette
Always be aware of others around you whenever using
this product. Be especially careful when playing late at
night to keep the volume at levels that do not disturb
others. Other steps you can take when playing late at
night are closing windows and using headphones.
E-40
• Any reproduction of the contents of this manual,
either in part or its entirety, is prohibited. Except for
your own, personal use, any other use of the
contents of this manual without the consent of
CASIO is prohibited under copyright laws.
• IN NO EVENT SHALL CASIO BE LIABLE FOR
ANY DAMAGES WHATSOEVER (INCLUDING,
WITHOUT LIMITATION, DAMAGES FOR LOSS
OF PROFITS, BUSINESS INTERRUPTION, LOSS
OF INFORMATION) ARISING OUT OF THE USE
OF OR INABILITY TO USE THIS MANUAL OR
PRODUCT, EVEN IF CASIO HAS BEEN ADVISED
OF THE POSSIBILITY OF SUCH DAMAGES.
• The contents of this manual are subject to change
without notice.
■ AC Adaptor Handling Precautions
• Use a power outlet that is easily accessible so you
can unplug the AC adaptor when a malfunction
occurs or whenever else you need to do so.
• The AC adaptor is intended for indoor use only. Do
not use it where it might be exposed to splashing or
moisture. Do not place any container, such as a
flower vase, that contains liquid on the AC adaptor.
• Store the AC adaptor in a dry place.
• Use the AC adaptor in an open, well-ventilated area.
• Never cover the AC adaptor with newspaper, a table
cloth, a curtain, or any other similar item.
• Unplug the AC adaptor from the power outlet if you
do not plan to use the Digital Piano for a long time.
• Never try to repair the AC adaptor or modify it in
any way.
• AC adaptor operating environment
Temperature: 0 to 40°C
Humidity: 10% to 90% RH
• Output polarity:
Reference
Model: AD-A12150LW
1. Read these instructions.
2. Keep these instructions on hand.
3. Heed all warnings.
4. Follow all instructions.
5. Do not use this product near water.
6. Clean only with a dry cloth.
7. Do not install near radiators, heat registers, stoves, or any other source of heat (including amplifiers).
8. Use only attachments and accessories specified by the manufacturer.
9. Refer all servicing to qualified service personnel. Servicing is required after any of the following occurs:
when the product is damaged, when the power supply cord or plug is damaged, when liquid is spilled into
the product, when a foreign object falls into the product, when the product is exposed to rain or moisture,
when the product does not operate normally, when the product is dropped.
10. Do not allow the product to be exposed to dripping or splashing liquid. Do not place any object containing
liquid on the product.
11. Do not allow the electrical load output to exceed the label rating.
12. Make sure the surrounding area is dry before plugging into a power source.
13. Make sure the product is oriented correctly.
14. Unplug the product during lightning storms or when you do not plan to use it for a long time.
15. Do not allow product ventilation openings to become blocked. Install the product in accordance with the
manufacturer’s instructions.
16. Take care the power cord is located where it will not be stepped upon or bent severely, particularly in
locations close to plugs and convenience receptacles, and in locations where it exits from the product.
17. The AC adaptor should be plugged into a power outlet as close to the product as possible to allow
immediate disconnection of the plug in case of emergency.
The symbol below is an alert indicating un-insulated hazardous voltage inside the product’s enclosure, which
may be sufficient to constitute the risk of electric shock to users.
’
The symbol below is an alert indicating the presence of important operating and maintenance (servicing)
instructions in the documentation that accompanies the product.
*
E-41
English
AC Adaptor Handling Precautions
This recycle mark indicates that the packaging conforms to
the environmental protection legislation in Germany.
Esta marca de reciclaje indica que el empaquetado se
ajusta a la legislación de protección ambiental en Alemania.
C
MA1303-B Printed in China