1
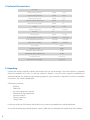
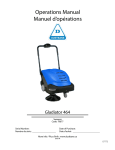
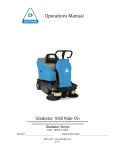
Operations Manual
Gladiator 464
Gladiator Series
Code: 19677-C-AGM
Serial #:_________________________
Date of Purchase:_________________________
More info : www.dustbane.ca
08-2011
1. Index
1. Index
2. Introduction/ General Warnings
3. Safety Precautions
4. Technical Characteristics
5. Unpacking
6. Machine Preparation
7. Machine And Control Panel Components
8. Use Of The On-Board Battery Charger
9. Starting Of The Machine
10. Operations To Make For Correct Use
11. Waste Hopper Emptying And Cleaning
12. Machine Maintenance
13. Side Brush Replacement
14. Main Brush Replacement
15. Cleaning And Servicing The Filter
16. Actuator Function
17. Adjusting The Side Brush
18. Flap Raiser
19. Control Panel Display Codes
20. Programming
1
2
2
4
4
5
6
8
8
8
9
9
10
10
11
12
12
12
13
13
2. Introduction / General Warnings
Welcome on board!
We thank you for choosing Dustbane and congratulate you for purchasing the 1050 A sweeper especially
designed to guarantee safety and concern for the environment. The innovative design, the robust and
trustworthy structure and the recyclable components make a 1050 sweeper. A truly unique machine. Before
using your machine, we advise you to carefully read this handbook. It is an invaluable guide to the characteristics
of your machine and will help you use it correctly.
In particular, it provides precious information concerning safety, integrity and concern for the environment.
3. Safety Precautions
This machine is intended for commercial use only. It is designed to pick up dirt, dry debris and dust from dry
hard floor or carpeted surfaces in an indoor environment. It is not constructed for any other use. The pick up of
any type of liquid substance or dangerous/ toxic materials is prohibited.
All operators must read, understand and practice the following safety precautions.
The following warning alert symbol and the “FOR SAFETY” heading are used throughout this manual as
indicated in their description:
WARNING: To warn of hazards or unsafe practices which could result in severe personal injury or death.
FOR SAFETY: To identify actions which must befollowed for safe operation of equipment.
Failure to follow these warnings may result in: personal injury, electrocution, electric shock, fire or explosion:
WARNING: Do Not Operate Machine In Or Near Flammable Liquids, Vapors Or Combustible Dusts.
This machine is not equipped with explosion proof motors. The electric motors will spark upon start up and
during operation which could cause a flash fire or explosion if machine is used in an area where flammable
vapors/liquids or combustible dusts are present.
WARNING: Do Not Pick Up Flammable Or Toxic Material, Burning Or Smoking Debris.
WARNING: Do Not Charge Batteries With Damaged Power Cord. Do Not Modify Plug.
If the charger supply cord is damaged or broken, it must be replaced by the manufacturer or it’s service agent
or a similarly qualified person in order to avoid a hazard.
WARNING: Disconnect Battery Cables and Unplug Charger Power Cord Before Servicing Machine.
WARNING: Do Not Use Outdoors Or On Wet Surfaces. Do Not Expose To Rain. Store Indoors.
The following information signals potentially dangerous conditions to the operator or equipment:
2
FOR SAFETY:
1. Do not operate machine:
•
•
•
•
•
2. Before starting machine:.
•
Do not pick up burning or smoking debris, such as cigarettes, matches or hot ashes.
Do not operate in standing water
Report machine damage or faulty operation immediately.
Go slow on inclines and slippery surfaces.
Do not leave unattended or on an unlevel surface.
Do not pick up cables, strings, wires or other similar material.
Make sure area is illuminated.
Never allow children to play on or around.
Do not transport riders or objects.
Wear a dust mask, protective glasses and gloves in dusty environments.
4. Before leaving or servicing machine:
•
•
Make sure all safety devices are in place and operate properly.
3. When using machine:
•
•
•
•
•
•
•
•
•
•
In flammable or explosive areas
Unless trained and authorized..
Unless operation manual is read and understood.
.If not in proper operating condition
Without hopper and/or filters in place
Stop on level surface.
Turn off machine.
5. When servicing machine
•
•
•
•
•
Avoid moving parts. Do not wear loose jackets, shirts, or sleeves.
Disconnect battery connection and charger plug before working on machine.
Use manufacturer supplied or approved replacement parts.
All repairs must be performed by a qualified service person.
Do not modify the machine from its original design.
7. This product is classified as RAEE type special waste and is covered by the requisites of the new
environmental protection regulations (2002/96/CE RAEE). It must be disposed of separately from ordinary
waste in compliance with current legislation and standards.
Special waste. Do not dispose of with ordinary waste
3
4. Technical Characteristics
Description
Width-including side brush
600mm
23,75”
Length-including side brush
730mm
28,75”
Height-including handle
950mm
37,5”
Machine height W/Handle folded
559mm
22”
Maximum sweeping width
650mm
25”
Weight
53Kg
115lbs
Hopper capacity (real)
9,3 Lt
1,25 Cu.ft
Run time
Filtering surface
2h
0,95mq
10 sq.ft
Productivity Rate-Theoretical
1800mq/h
18000 sq.ft
Productivity Rate-Estimat\Actual
900 mq/h
9000 sq.ft
Total power consumption
360W/18A
360W/18A
Type of battery
42A/5h
Sound Pressure LpA
57[dB]
MEASURED SOUND POWER LWA
62 [dB]
GUARANTEED SOUND POWER LWA,g
63 [dB]
Hand vibration HAV
1,4 [m/sec2]
(measurement uncertainty) k
0,7 [m/sec2]
5. Unpacking
Unpack the machine carefully avoiding movements that can cause damage. Once the machine is unpacked,
check the condition of its parts. In case the machine is broken in any of its parts, contact immediately our
authorized dealer. For shipping and packaging purposes, some assembly is required. For correct assembling
instructions, see machine preparation.
5. Packaging Contents
•
•
•
•
•
•
•
Machine
Side brush
Use and maintenance manual
Maintenance free type battery
4mm hex wrench
20 amp spare fuse
Charger cord
In the case anything of the above should be missing, contact immediately our authorized dealer.
Assure that all packaging material (plastics, carton, pallet, etc.) are collected and stored away from children.
4
6. Machine Preparation
Side brush assembly:
•
Raise the front part of the machine, slide the brush on to the shaft until it locks into place
Handle assembly:
•
•
•
Release the handle locks as shown
Rotate handle into working height position
Return handle lock to the locking position
Unlock
Handle lock
5
Connecting the Battery:
•
Remove the top cover to gain access to the battery using the 4 mm hex wrench provided.
•
•
•
Locate the two Red/Black connectors.
Align the colors of the connectors.
Plug the two connector together.
7. Machine and Control Panel Components:
The machine is equipped with a simple panel control that controls all the operational functions of the machine.
A) On-Off main switch of the machine
B) Led indicator for battery charge
C) Display switch
D) On-Off sweeping mode switches 1 and 2
E) Manual operating switch of the filter shaker
F) Vacuum fan switch
G) Numeric display
6
The functions located on the control panel can be explained as follows:
A) Main switch to turn on and off the machine.
B) Led indicator for battery charge. Green for when the machine is charged, red for when the machine is
discharged and yellow for when the machine charge is in reserve or when the machine is being charged.
C) Numeric display switch: pressing this switch, a part from seeing the machine voltage, the display indicates
the working hours of the machine (pressing the switch once) and minutes (pressing the switch twice).
D) On-Off sweeping mode switches 1 and 2: these two switches allow the machine to work with two
separate sweeping mode: mode 1 for light debris collection and mode 2 for heavy debris collection.
E) Manual operating switch of the filter shaker gives the possibility in shaking the filter at any time during
work. This is to be intended as an addition to the automatic filter shaking that cycles every 3 minutes.
F) Vacuum fan: the vacuum fan automatically activates when sweeping mode is on. Therefore the switch is
used when the requirements are to switch off the vacuum fan during sweeping mode.
G) Numeric display
FUSE 2,5A
A) Control Panel
B) Charger Fuse (2,5 A)
C) Handle Locks
D) Bumper
E) Side Brush)
F) Top Cover
G) Charger Cord Compartment
I) Hopper
L) Flap Raiser (664)
7
8. Use of the On-Board Battery Charger
When the battery on the machine is discharged, the red led on the control panel illuminates and all functions
of the machine will automatically stop: the operator must then turn off the machine and start the charging
procedure by connecting the machine battery charger plug into an AC electrical outlet. (during charging the
yellow led on the display will be lit): when the machine is fully charged the green led will be lit, the battery
charger plug can be disconnected and the machine is ready for operation. IMPORTANT NOTE: USING THE
MACHINE BEFORE THE BATTERY HAS FULLY CHARGED AND A GREEN LIGHT DISPLAYED WILL REDUCE
THE LIFE AND RUN TIME OF YOUR BATTERY AND VOID THE WARRANTY. The on-board charger is specifically
designed for Sealed batteries.
NOTE: If during working mode the machine battery charger plug is connected, the machine will automatically
stop all its functions. Such operation is forbidden.
9. Starting of the Machine
ATTENTION: the machine must be used only by authorized personal, DO NOT ABANDON the machine when
switched on, do not use the machine for collecting liquid, turn the machine OFF before leaving the machine.
FOR SAFETY: DO NOT OPERATE MACHINE UNLESS OPERATION MANUAL IS READ AND UNDERSTOOD
To start the machine use the following procedures:
•
•
•
Press the main ON/OFF button
Check the that the green led is lit indicating a proper battery charge level
Select the appropriate sweeping mode
• ON/OFF sweeping mode button 1 - for light debris and smooth surfaces
• ON/OFF sweeping mode button 2 - for heavy debris and concrete, asphalt and carpeted surfaces. Notes: using sweeping mode 2 will reduce the maximum machine run time.
10. Operations to Make for Correct Use
After having followed all operations for starting the machine you are now ready to work with the machine as
a sweeper. To achieve the maximum performance follow the proceedures in this manual to avoid the risk of
damaging the machine. It is important:
•
•
Not to use the machine for collecting wires, ropes, strings, water or other liquids .
In the presence of large volume debris (paper, leaves, etc.) raise the front part of the machine by
pushing down the handle bar. Shake the filter at the end of the working session.
ATTENTION: This machine is not intended for wet surface sweeping. However, if you encounter a
slightly damp environment (moisture buildup on the floor), it is required that you turn the vacuum fan
switch off to prevent filter damage. Machine damage due to wet debris pickup is not covered under
warranty.
ATTENTION: If the sweeper is lying inactive for a period longer then one month you must disconnect
the red and black battery clips. If the sweeper is lying inactive for a period longer then one week you
should leave it connected to the electrical outlet.
8
11. Waste Hopper Emptying and Cleaning
Before proceeding in removing the hopper assure that the machine is turned off. ATTENTION: WASTE DISPOSAL MUST BE DONE BY FOLLOWING THE LAWS IN FORCE.
To clean the waste hopper proceed as follows:
• Release the hopper clamp by lifting and then pushing on the back of the clamp.
• Pull out the hopper by its handle
• Empty the hopper
To put back the hopper proceed as follows:
•
•
Slide the hopper back into place
Lower and press the hopper clamp to lock into place.
NOTE: It is recommended to clean the pre-filter daily. See cleaning and servicing the filter-page 7+++
12. Machine Maintenance
All service performed should be completed by persons who understand the machine or an AUTHORIZED
SERVICE CENTER. It is recommended that only authorized repair parts be used for service.
FOR SAFETY: When servicing the machine disconnect the battery connection and battery charger plug
before working on the machine
MAINTENANCE CHECK LIST
On
delivery
Daily
Every
10
hours
Every
20
hours
Every
50
hours
The belts for slackening
x
The tightness of nuts and screws
x
The brushes for wear
x
The gaskets for wear and leakages
If all the functions are in working order
x
x
x
Empty hopper
x
Remove and shake pre-filter
x
Check main filter
Every
100
hours
x
x
x
x
x
9
13. Side Brush Replacement
Raise the front part of the machine. Press in the 2 tabs (indicated by the arrows) and pull off the brushes. Slide
the new brush until it locks into place.
14. Main Brush Replacement
•
•
•
•
10
Tilt the machine backwards until the handle is touching the ground and the main brush is easily
reached.
Manually turn the brush until a black button is seen on the right hand side of the brush core.
Press the button and push to dis-engage the brush.
- Insert the new brush following the guide
15. Cleaning and Servicing the Filters
The filters are very important components of the machine and essential for correct operation. Proper filter
maintenance will allow you to obtain the best performance from your machine.
Pre-Filter
Clean Daily
1. Remove the debris hopper to access the pre-filter
2. Release the two metal retaining clip arms that secure the pre-filter in place. Hinge the retaining clip arms
outward and remove the pre-filter.
3. Shake the pre-filter into a debris receptacle.
4. Replace the pre-filter and secure with retainer clips.
Main Filter
The Main filter can be cleaned in any of the following three ways:
1. by means of the automatic filter shaker:
During operation, the machine will automatically activate the filter shaker every 3 minutes.
2. by means of manually activating the filter shaker:
Just a simple command is needed to keep the filter in perfect working order: press the button marked ‘E’ and hold it down for a few seconds. Repeat this operation 4 or 5 times. Remember that the cleaner the filter, the better the results of your cleaning session. It is recommended to carry this operation out at the end of each work cycle.
NOTE: dusty environments If you are using the machine in a dusty environment it is a
3. by manually cleaning the filter:
Manually clean the filter when the filter shaker is not enough to keep the filter clean and/or every
20 hours of work. Before carrying out any kind of procedure on the machine, make sure it is turned off and that all functions are deactivated
1. Remove the rear hopper
2. Take the filter out
3. Blow compressed air into the side of the filter (at a pressure of 87 psi at the most). Safety glasses required
4. Reinstall the filters and the rear hopper.
11
16. Actuator Function
The system allows the brush to immediately and constantly follow all types of surfaces, self adjust to surfaces
and self adjust for main/side brush wear through out the life of the brushes.
17. Adjusting the Side Brush
To adjust the side brush, remove the top cover, and turn adjusting handle in the direction required.
:
18. Flap Raiser
To pick up bulky rubbish, raise the flap using the lever on the handlebar. You should not use the appliance with
the flap raised for longer than necessary as the cleaning efficiency is reduced.
Batteries: removal
When removing the batteries, the operator must be equipped with suitable personal protection devices
(gloves, goggles, overalls, safety shoes, etc) to reduce the risk of accidents. Make sure the switches on
the control panel are in the “0” position (off) and the machine is turned off. Keep away from naked
flames, do not short circuit the battery poles, do not cause sparks and do not smoke. Proceed as follows:
•
•
•
12
disconnect the battery wiring and bridge terminals from the battery poles.
if necessary, remove the devices fixing the battery to the base of the machine.
lift the batteries from the compartment using suitable lifting equipment.
19. Control Panel Display codes
Safety code
Cause
Actions to take
C22
Short circuit brush protection:
stops all functions
Reset by turning OFF the machine and
starting again
C14
Dissipater at high temperature. Activates if
temperature is over 194° F
The machine resets when temperature lowers
under 176° F
FS0
Worn brushes
Replace brush
BRUSHES KO
Error can only be reset by turning off the
machine. This alarm condition arises if the
brushes are put in SHUTDOWN condition
three times in a minute.
Battery in reserve
Machine continues to work. Only a warning
that the battery is near discharge.
Sweeping mode 1 button programming
activated
Machine stops all functions. Turn off machine
and charge the battery.
P1.X
Sweeping mode 1 button
programming activated
See programming
P2.X
Sweeping mode 2 button
programming activated
See programming
SF.X
Filter shaker program setting activated
See programming
SP1
Yellow led lit
Red led flashes
X = A VALUE FROM “0” TO “9”
20. Programming
Your machine is factory programmed for optimum performance. It does not require further programming.
However, if you encounter one of the following codes; P1.x, P2.x or SF.x (x= a value from 0 to 9), use the
following programming instructions to reset your display. Operating the machine in a setting other than the
factory setting may cause machine failure. Machine damage due to improper programming will void your
warranty.
PROGRAMMING INSTRUCTIONS:
If your display reads P1.0 , P2.1 or SF.3 simply turn the main power off and back on again to reset display (these
are the factory programmed settings). If your display reads a value greater than stated above (ex. P1.”5” , P2.”7” ,
SF.”9”) continue to follow the instructions as described below
To reprogram the machine to the factory settings, turn the main power ON and press and hold the display
switch button (battery/time symbols) down for at least 3 seconds. P1.x will appear on the display. The P1 value
should read “0” (ex. P1.0). If the value is greater than “0”, press the vacuum fan button until the display reads P1.0.
Press the display switch button again to advance to the next code. The P2.x value should read “1” (ex. P2.1). Press
the vacuum fan button to properly set. Press the display switch one more time to advance to the last code. This
code should read SF.3. If the value is not “3”, press the filter shaker button until the display reads SF.3. To exist the
programming mode, turn machine off.
13
14