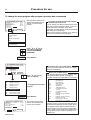
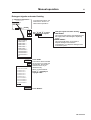
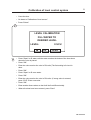
1
Operating manual Wascator FOM71 CLS Operating manual in original language 438 9200-91/EN 2010.05.03 Register now And be able to join the Wascator FOM 71 CLS web site where you can find: • • • • • • General information about Wascator FOM 71 CLS Updated installation-, operating- and service manuals and spare part lists. News about accessories and software updates. Operating and maintenance tip Possibility to personally ask specialists about the machine and its operation Hints about new standards related to the Wascator FOM 71 CLS. You can send the registration via internet or fax. Via internet: Enter www.electrolux.com/laundrysystems and select ”New user” up in the right corner. Fill in all required information marked with an *. In the field ”Comments” fill in the code word ”Wascator FOM 71 CLS” and your machines product number and serial number. (You can find the product number on the inside of the door frame or at the data sign at the rear side of the machine). Within 24 hours you shall receive a personal code word so you can enter the Wascator FOM71CLS web site. Via fax: If you prefer to register via fax please send in the information below. Send fax to: Electrolux Attention S H Almstrom Fax number +46 372 133 90 Registration for the Wascator FOM 71 CLS web site Company: ................................................................................................................................... Contact person: Surname ....................................................................................................... First name ..................................................................................................... Mr/Ms ........................................................................................................... Company adress: ....................................................................................................................... Zip code: .................................................................................................................................... City: ............................................................................................................................................ State: .......................................................................................................................................... Country: ..................................................................................................................................... Phone: ........................................................................................................................................ Fax: ............................................................................................................................................ e-mail address: .......................................................................................................................... Wascator FOM 71 CLS product number: .................................................................................. Wascator FOM 71 CLS serial number: ...................................................................................... Contents 3 Contents Procedure for use ........................................................................................ 9 General introduction ................................................................................ 9 Preparations .......................................................................................... 10 The ”Move back” key ............................................................................. 11 To start the wash program .................................................................... 11 Program description .............................................................................. 15 To start a wash program from the program library ................................ 16 To change parameters in the current program step .............................. 19 Rapid advance ...................................................................................... 20 Show weight .......................................................................................... 22 No water reduction ................................................................................ 23 Pause .................................................................................................... 24 Manual operation during a program ...................................................... 25 Text ....................................................................................................... 31 To change the wash program after program operation has commenced ........................................................................................... 32 To change temperature ......................................................................... 33 Auto restart ............................................................................................ 34 Manual operation ....................................................................................... 35 To select manual operation ................................................................... 35 Motor/door ............................................................................................. 36 Water/drain ............................................................................................ 37 Heating .................................................................................................. 38 Detergent signals and water flushing .................................................... 39 Statistics .................................................................................................... 40 To select statistics ................................................................................. 40 Resetting statistic registers ................................................................... 42 Scale .......................................................................................................... 47 Memory card .............................................................................................. 58 General indtroduction ........................................................................... 58 To select the ”Memory card” function .................................................... 59 To run a wash program straight from a memory card ........................... 62 To copy a program from a memory card to the machine’s program control unit ............................................................................................. 63 To copy a program from the program control unit to a memory card .... 66 To delete a program on a memory card ................................................ 69 To delete all programs on a memory card ............................................ 70 Maintenance .............................................................................................. 71 Calibration of level control system ............................................................. 72 Calibration of the scale (weight function) .................................................. 77 Calibration of the reference machines Wascator FOM71CLS .................. 78 Checklist for calibration of Wascator FOM71CLS ..................................... 78 Cheks to be made ...................................................................................... 79 Door opening for test sample Wascator FOM71CLS ................................ 82 Calibration protocol .................................................................................... 83 438 9163-01/05 Safety 5 Safety This machine can only be used with water. Never use dry cleaning agents. Do not allow children to operate the machine. Do not hose down or spray the machine with water. All mechanical and electrical installation must be carried out by qualified personnel. The machine’s door lock must not be bypassed and it should be checked daily to ensure it functions. Should the machine malfunction, please report the fault to the technician responsible for the machine. 4328 Emergency stop If the machine for some reason has to be stopped – press emergency stop button 4329 When necessary measures have been taken, the emergency button can be reset by pulling it out. The manufacturer reserves the right to make changes to design and component specifications. NOTE! Some of the display texts and functions may not appear on your machine version. 438 9163-01/05 7 If you are not sure of which program can be performed while a program is running This is your starting point when you wish to run a wash program Preparations Start the wash program Start a wash program from the program library Here you can see how the machine can be controlled when a wash program is not running Select manual operation Motor/door Water/drain Change parameters in the current program step There are many operations which can be performed while a program is running Heating Rapid advance Detergent signals and water flushing Pause Here you can find information on machine operating times and the latest error codes flagged Statistics Manual operation Text Change wash program after starting Change temperature scale°C/°F Select "Memory card" function Run a wash program from memory card A "Memory card" is a plastic card containing a memory chip which can store wash programs. It can be used, amongst other things, for transferring programs between washer extractors Copy a program from card to PCU Auto restart Copy a program from PCU to card Delete a program from a card Delete all programs from a card 3657 438 9163-01/05 8 Note Weight calibration (only Wascator FOM71 CLS) If the value in the display shows more than ±0.1 kg, reset scale to zero. Level calibration Check and calibrate if a longer test serie is to commence. 438 9163-01/05 Procedure for use 9 General introduction This washer extractor is controlled by a microprocessor-based program control unit. There are many advantages to this equipment, including: Fig. 1 • timing, levels and temperatures are controlled with great precision and flexibility • detailed information on wash programs, machine status and operations, wash times and temperatures can be accessed in plain language on the large display screen • it is possible for the user to create new wash programs, and to adapt programs precisely on the basis of experience and to suit various types of textile, degrees of soiling etc. • a very high level of machine safety through continuous monitoring and built-in safety interlocks • the program control unit has a reader for ”memory cards”. These are cards the size of a credit card which contain a memory chip. Memory cards allow the user to: - transfer wash programs between a PC and the washer extractor, or from one washer extractor to another - run programs straight from a card • great flexibility during program operation: - rapid advance both forwards and backwards in the program - change temperatures, program module lengths and extraction speeds directly, during program operation - start a different program at any time during program operation. 1 Display screen Numeric keyboard RUN A WASH PROGRAM OPTIONS MENU MAKE YOUR CHOICE WITH OR AND PRESS SELECT WEIGHT, KG: 000,0 TAR SELECT 1 2 3 4 5 6 7 8 9 Card reader for ”memory cards” 0 The functions of these keys change, depending on which menu or part of a menu you are using. Their current functions at any time are shown on the display immediately above each key. The ”Move back” key By pressing this key repeatedly you can move backwards through the menus you have navigated through. This will always bring you back to the menu illustrated here. 4221 3651 438 9163-01/05 Procedure for use 10 Preparations 2 • Sort the load, paying attention to the textile care labels on the items. Empty all pockets and do up zip fasteners. • Open the machine door, check that the drum is empty, load the items into the machine and close the door. • Check that the emergency stop button has not been pressed inwards (see ”Machine safety”). Measuring the detergent Fig. 2 Compartment 1 – pre wash, powder or liquid detergent Compartment 2 – main wash, powder detergent Compartment 3 – softener (Note! When using weight control softener can not be used (compartment 3 will be used for dosing water in all baths). Compartment 4 – main wash, liquid detergent 438 9163-01/05 5343 Procedure for use 11 The ”Move back” key If you find you are in the wrong place, or if you want to undo earlier key presses: 3627 The "Move back" function Each press of the ”Move back” key moves you back one menu, in reverse order. By pressing this key repeatedly you can return to this menu at any time: Press the ”Move back” key one or more times. RUN A WASH PROGRAM OPTIONS MENU MAKE YOUR CHOICE WITH OR AND PRESS SELECT WEIGHT, KG: 000,0 3651 TAR SELECT To start the wash program RUN A WASH PROGRAM OPTIONS MENU If this menu is not currently displayed: Press a repeatedly. MAKE YOUR CHOICE WITH OR AND PRESS SELECT WEIGHT, KG 000,0 SELECT 3580 RUN A WASH PROGRAM OPTIONS MENU If ”GO TO THE MENU” is highlighted: Two ways of starting a program By entering the actual program number Enter the actual program number if you know it, then press SELECT. By starting from the program library (see section "To start a wash program from the program library) If you are unsure about the programs available, you can select a program from the program library, where the programs are listed with their descriptions. Press c. RUN A WASH PROGRAM OPTIONS MENU SELECT When ”RUN A WASH PROGRAM” is highlighted: Press SELECT. 438 9163-01/05 Procedure for use 12 RUN A WASH PROGRAM ENTER A PROGRAM NUMBER: 0 SELECT FROM LIBRARY CLS SMC 993 3581 A for example: 91 SELECT Here you can select programs from the program libraries. See the section entitled ”To start a wash program from the program library”. Displayed here will be the number of the most frequently used program. S993 would indicate the number of a program on a memory card. Press this key if you want to select this program. Use the numeric keys to enter the program number Press SELECT. RUN A WASH PROGRAM ENTER A PROGRAM NUMBER: 0 FROM CLS OR SMC? CLS SMC If you have a memory card in the program control unit, and the program you selected is both on the memory card and in the PCU, you will be asked ”FROM CLS OR SMC?”. OK 4031 A CLS SMC Press CLS if you want to take the program from the PCU. Press SMC if you want to take the program from the memory card. In some of the text shown on the display, Clarus Control is referred to as CLS and the memory card is referred to as SMC. 438 9163-01/05 If you have entered the wrong number Enter the correct number to overstrike the earlier one. Note: you must always enter three digits, even when the number is really only a one or two-digit number. Examples: The program number required is 9. Enter 009 to overstrike all digits in the wrong number. The program number required is 19. Enter 019 to overstrike all digits in the wrong number. Memory cards A memory card is a plastic card, the size of a credit card, with an electronic memory chip inside it. This card is capable of storing 10 to 15 wash programs of normal size. If the programs are mostly small ones, more of them can be stored, whereas larger programs will reduce the number which can be held by the card. Memory cards of this type can be used to: • transfer wash programs from one washer extractor to another • run wash programs straight from the card • transfer wash programs from a PC to a memory card and from a memory card to a PC (these procedures, and how to write a wash program on a PC, are described elsewhere). Memory cards are described in detail in the section entitled ”The Memory card”. Procedure for use 13 RUN A WASH PROGRAM ENTER A PROGRAM NUMBER: 91 Delayed start time (hrs:mins) Program name 00:00 NORMAL 95°C STD TEXT START If you want to see the description of the program: 3582 TEXT Press TEXT . Pressing ”Text” displays more information The text displayed is a description of the wash program selected. This text description is inserted when a new wash program is created. This procedure is described fully in the programming manual. Choose 1 or 2: 1 START 1 To start the program now: Press START. 2 1 2 3 4 5 6 7 8 9 0 START 2 Delayed start Use the numeric keys to enter a time (max. 99 hrs). This parameter appears on the right of the display. Delayed start Delayed start means that the machine will not start the wash program until the time entered has elapsed. This function allows you, for example, to load the machine in the evening, but delay the start of the wash until early the next morning, to end in time for the next shift. Press START. DELAYED START ENTER A PROGRAM NUMBER: 91 14:30 Time left before the machine is to start NORMAL 95°C STD EXIT EXIT If you want to cancel the delayed start: Press EXIT During a wash program: 3627 Press a to make the machine pause during the wash program. Two ways of pausing during a wash program There are two ways of pausing during a wash program: 1 By pressing a. 2 As an additional function. This is described in section "Pause". 438 9163-01/05 Procedure for use 14 The following information is displayed during the wash program: Current program step 91 NORMAL 95°C STD PROGRAM STEP: MAIN WASH STEP TIME: SET TEMPERATURE ACTUAL TEMPERATURE: REMAINING TIME: DRUM SPEED: 1 720 85 21 70 1000 SEC C C MIN RPM SHOW WEIGHT RAPID ADVANCE SELECT Time left for this program step Set temperature To terminate a program before it has finished • Select RAPID ADVANCE and press SELECT. Advance to ”END OF PROGRAM” and press SELECT. • Wait until ”READY TO UNLOAD” appears on the display. • Now the door can be opened. Actual temperature Remaining program time Drum speed 3583 SHOW WEIGHT RAPID ADVANCE PAUSE MANUAL FUNCTIONS TEXT SELECT NEW WASH PROGRAM CHANGE °F/°C AUTO RESTARTS If required: Select a function using the cursor keys. SELECT Press SELECT. Additional functions during the program Rapid advance (see section ”To change parameters in the current program step”) Rapid advance through the program to the program step required. Rapid advance can be used to move both forwards and backwards through the program. Display weight (see section ”Show weight”) The actual load weight is shown in large digits on the display (weight display mode). (On machines with weighing equipment only.) No water level reduction (see section ”No water level reduction”) Machines with weighing equipment installed adjust the water level automatically according to the load weight. This function lets you switch off water level reduction during the current program. Pause (see section ”Pause”) The machine stops. The drain valve remains closed. Another way to pause the program: Press a. Manual functions (see section ”Manual operation during a program”) The following functions can be controlled manually during the course of the program: 438 9163-01/05 - all water valves, drain and pumps (where applicable). - limit highest extraction speed. - motor on/off after end of wash program. - flush detergent. Text (see section ”Text”) Display description of wash program (if available). Select a different wash program (see section ”To change the wash program after program operation has commenced”) You can switch to using a different wash program at any stage during the wash. Once this function has been selected, the current step (for example, rinse) of the earlier program will be allowed to finish and then the new program will start (from the beginning). Change temperature scale °C or °F (see section ”To change temperature scale °C/°F”) Auto restart (see section ”Auto restart”) Here you enter the number of times you wish the wash program to restart automatically. Program description 15 Program description The following programs are fixed programmes in memory. Prgr.no. Name Contents/Application 991 Start-up program If the machine has been idle more than two hours, this program should be run before any other program is run. 992 Level check Check with ruler insider Program fills machine with water to a reference level at 160 mm, maintains this level 20 seconds and press PAUS and it empties the machine. This process is repeated five times. After that, the program fills machine with water to the following levels one after the other: 100 mm, 130 mm, 160 mm and 200 mm. Each level is maintained 40 seconds before emptying. 993 Weight check Program fills the machine with water to 18 kg, wait 30 seconds, rotates 60 seconds and fills to 26 kg (+8) and waits 30 seconds. Then drain. 994 Temperature check Program fills machine with water to 130 mm level and warms it in five steps: 25°C for 2 minutes, 40°C for 2 minutes, 60°C for 2 minutes, 80°C for 2 minutes and 90°C for 2 minutes. The machine is emptied, filled twice with cold water to a high level 200 mm and finishes with a two minute spin cycle 1000 rpm. The buzzer sounds at the end of the program. 995 Low extraction 500 rpm 1 minute. 996 Low extraction 500 rpm 5 minutes. 997 Extraction 775 rpm 2 minutes (15s 550) 998 Extraction 950 rpm 4 minutes (15s 550 + 15s 775) 999 High extraction 1100 rpm 5 minutes (15+15+20s 950) 438 9163-01/05 Procedure for use 16 To start a wash program from the program library RUN A WASH PROGRAM OPTIONS MENU MAKE YOUR CHOICE WITH OR AND PRESS SELECT WEIGHT, KG 000,0 If this menu is not currently displayed: Press a repeatedly. SELECT 3580 RUN A WASH PROGRAM OPTIONS MENU If ”GO TO THE MENU” is highlighted: Press c. RUN A WASH PROGRAM OPTIONS MENU SELECT When ”RUN A WASH PROGRAM” is highlighted: Press SELECT. What is the program library? The program library lists all wash programs, both user and standard programs, showing their program numbers and a description, for example: 1 2 3 991 992 993 994 995 996 997 998 999 MY OWN 40 °C MY OWN 60 °C MY OWN 90 °C Start-up program Level check Weight check Temperature check Low extraction 500 rpm 1 minute Low extraction 500 rpm 5 minutes Extraction 775 rpm 2 minutes (15s 550) Extraction 950 rpm 4 minutes (15s 550 + 15s 775) High extraction 1100 rpm 5 minutes (15 + 15 + 20s 950) Each time a new program is stored in the machine program memory, its number and description will be inserted automatically into the program library. The program library may be used for starting a wash program, but is also used in programming, when a wash program needs to be modified or if a new program is to be created on the basis of an existing one. 438 9163-01/05 Procedure for use 17 RUN A WASH PROGRAM ENTER A PROGRAM NUMBER: 0 FROM CLS OR SMC? CLS SMC OK 4031 A CLS SMC To select a program from the PCU program library: Press CLS. If there is a memory card in the PCU and you wish to select a program on that: Press SMC. Select library via menu You can also select the program library via the option ”GO TO THE MENU”. Then select ”WASH PROGRAM LIBRARY”. MENU MAKE A CHOISE: WASH PROGRAM LIBRARY PROGRAMMING MODE SETTINGS 1 MEMORY CARD SERVICE MODE STATISTICS SELECT 3590 WASH PROGRAM LIBRARY PROGRAMMING MODE SETTINGS 1 MEMORY CARD SERVICE MODE STATISTICS MANUAL FUNCTIONS SETTINGS 2 EXIT 438 9163-01/05 Procedure for use 18 RUN A WASH PROGRAM ENTER A PROGRAM NUMBER: 91 Delayed start time (hrs:mins) Program name 00:00 NORMAL 95°C STD TEXT START If you want to see the description of the program: 3582 TEXT Press TEXT Pressing ”Text” displays more information The text displayed is a description of the wash program selected. This text description is inserted when a new wash program is created. This procedure is described fully in the programming manual. Choose 1 or 2: 1 START 1 To start the program now: Press START. 2 1 2 3 4 5 6 7 8 9 0 START DELAYED START ENTER A PROGRAM NUMBER: 91 Use the numeric keys to enter a time (max. 99 hrs). This parameter appears on the right of the display. Press START. Time (in hours and minutes) left before the machine is to start. 14:30 NORMAL 95°C STD EXIT EXIT 438 9163-01/05 2 Delayed start OIf you want to cancel the delayed start: Press EXIT. The functions which are available during program operation are described in sections "To change parameters in the current program step - Auto restart". Delayed start Delayed start means that the machine will not start the wash program until the time entered has elapsed. This function allows you, for example, to load the machine in the evening, but delay the start of the wash until early the next morning, to end in time for the next shift. Procedure for use 19 To change parameters in the current program step 91 NORMAL 95°C STD PROGRAM STEP: MAIN WASH STEP TIME: SET TEMPERATURE: ACTUAL TEMPERATURE: REMAINING TIME: DRUM SPEED: 1 720 85 21 70 1000 During program operation the display will look like this (see section "To start the wash program"). SEC °C °C MIN RPM SHOW WEIGHT RAPID ADVANCE SELECT 3584 You can alter the following program steps: Prewash, Main wash, Rinse, Drain, Soak Length of program step (max. 9998 seconds), heating temperature (max. 97°C). Extraction Length of program step (max. 3599seconds), extraction speed. Press c one or more times... 91 NORMAL 95°C STD PROGRAM STEP: MAIN WASH STEP TIME: SET TEMPERATURE: ACTUAL TEMPERATURE: REMAINING TIME: DRUM SPEED: 1 720 85 21 70 1000 SEC °C °C MIN RPM ...to highlight the line required. SHOW WEIGHT RAPID ADVANCE SELECT SELECT 1 2 3 4 5 6 7 8 9 Press SELECT. Use the numeric keys to enter the new parameter . If you have entered the wrong parameter Continue pressing numeric keys to overstrike the incorrect parameter. Note: always use the same number of digits as used on the display to overstrike the incorrect parameter. Example: To change the time for the program step to 30 seconds, enter 030 to overstrike the earlier parameter. 0 SELECT Press SELECT. 438 9163-01/05 Procedure for use 20 Rapid advance 91 NORMAL 95°C STD PROGRAM STEP: MAIN WASH STEP TIME: SET TEMPERATURE ACTUAL TEMPERATURE: REMAINING TIME: DRUM SPEED: 1 720 85 21 70 1000 SEC C C MIN RPM During program operation the display will look like this (see section "To start the wash program"). SHOW WEIGHT RAPID ADVANCE SELECT 3583 Check that ”RAPID ADVANCE” is highlighted. SHOW WEIGHT RAPID ADVANCE PAUSE MANUAL FUNCTIONS TEXT SELECT NEW WASH PROGRAM CHANGE °F/°C AUTO RESTARTS If it is not highlighted: Press c or b one or more times to highlight ”RAPID ADVANCE”. SELECT 438 9163-01/05 Press SELECT. To terminate a program before it has finished • Select RAPID ADVANCE and press SELECT. Advance to ”END OF PROGRAM” and press SELECT. • Wait until ”THE DOOR IS UNLOCKED” appears on the display. • Now the door can be opened. Procedure for use 21 91 NORMAL 95°C STD RAPID ADVANCE PRE WASH EXTRACT MAIN WASH EXTRACT RINSE 1 1 1 2 1 SELECT 3586 PRE WASH 1 EXTRACT 1 MAIN WASH 1 EXTRACT 2 RINSE 1 EXTRACT 3 RINSE 2 EXTRACT 4 RINSE 3 EXTRACT 5 END OF PROGRAM SELECT Press b or c one or more times to highlight the program step you wish to advance to. Rapid advance works in both directions Rapid advance works in both directions, using b and c. Using rapid advance to move forwards allows you to skip one or more program steps. Using rapid advance backwards allows you to repeat one or more program steps. Automatic return to normal display Once you have selected any of the functions below, you must make any changes required within 20 seconds. If no further keys are pressed within 20 seconds, the display will revert automatically to its normal appearance during a wash program. Press SELECT. 438 9163-01/05 Procedure for use 22 For machines with weighing equipment installed only! Show weight 91 NORMAL 95°C STD PROGRAM STEP: MAIN WASH STEP TIME: SET TEMPERATURE ACTUAL TEMPERATURE: REMAINING TIME: DRUM SPEED: SHOW WEIGHT RAPID ADVANCE 1 720 85 21 70 1000 SEC °C °C MIN RPM During program operation the display will look like this (see section ”To start the wash program”). Show weight The actual weight is shown in large digits on the display (weight display mode). If the weighing equipment is not connected, the error message “FUNCTION NOT ALLOWED” will appear. See the section “Fault-finding, weighing equipment” in the machine manual. SELECT 4774 SHOW WEIGHT RAPID ADVANCE NO WATER REDUCTION PAUSE MANUAL FUNCTIONS TEXT SELECT NEW WASH PROGRAM CHANGE °F/°C AUTO RESTART Press c or b one or more times to highlight ”SHOW WEIGHT”. SELECT CLARUS CONTROL WEIGHT, KG: 007,0 4775 Press SELECT. Weight display mode: The actual net weight is shown in large digits on the display. Return to normal display The display will return to normal at the end of the ”time for weight display” set as a parameter in Settings 1. The manufacturer’s default parameter is 20 seconds. To end weight display sooner Press a or use the numeric keys to enter a new program number. 438 9163-01/05 Procedure for use 23 For machines with weighing equipment installed only! No water reduction (not for Wascator FOM71 CLS) 91 NORMAL 95°C STD PROGRAM STEP: MAIN WASH STEP TIME: SET TEMPERATURE ACTUAL TEMPERATURE: REMAINING TIME: DRUM SPEED: 1 720 85 21 70 1000 SEC °C °C MIN RPM During program operation the display will look like this (see section ”To start the wash program”). SHOW WEIGHT RAPID ADVANCE SELECT 4776 SHOW WEIGHT RAPID ADVANCE No water reduction The wash load is weighed during the program and the water level is adjusted automatically according to its weight. If the load is not a full one, the water level will be reduced according to a water level reduction table. You can switch off water level reduction at any stage of a program. Note that if you select ”NO WATER REDUCTION”, this applies only to the program currently running. The next time a program is started, water level reduction will occur automatically again. NO WATER REDUCTION PAUSE MANUAL FUNCTIONS TEXT SELECT NEW WASH PROGRAM CHANGE °F/°C AUTO RESTART Press c or bone or more times to highlight ”NO WATER REDUCTION”. SELECT Press SELECT. 438 9163-01/05 Procedure for use 24 Pause 91 NORMAL 95°C STD PROGRAM STEP: MAIN WASH STEP TIME: SET TEMPERATURE ACTUAL TEMPERATURE: REMAINING TIME DRUM SPEED: 1 720 85 21 70 70 SEC °C °C MIN RPM During program operation the display will look like this (see section "To start the wash program"). SHOW WEIGHT RAPID ADVANCE SELECT 3587 SHOW WEIGHT Two ways of pausing during a wash program Note that you must be in normal wash mode to be able to pause in this way. If, for example, you are using ”Manual Functions”, you will have to exit that first before you can use Pause. There are two ways of pausing during a wash program: 1 As an additional function. This is described in this section. 2 By pressing a. RAPID ADVANCE PAUSE MANUAL FUNCTIONS TEXT SELECT NEW WASH PROGRAM CHANGE °F/°C AUTO RESTARTS Press c or b one or more times to highlight ”PAUSE”. SELECT Press SELECT. 91 NORMAL 95° STD PROGRAM STEP: MAIN WASH 1 PAUSE START 3588 START 438 9163-01/05 Press START to restart the wash program. • • • • • • When the machine pauses: Program operation is halted. Filling is halted (where applicable). Heating is halted (where applicable). The motor stops. The drain valve remains closed. The door cannot be opened. Procedure for use Manual operation during a program 91 NORMAL 95°C STD PROGRAM STEP: MAIN WASH STEP TIME: SET TEMPERATURE ACTUAL TEMPERATURE: REMAINING TIME: DRUM SPEED: 1 720 85 21 70 1000 SEC C C MIN RPM During program operation the display will look like this (see section "To start the wash program"). SHOW WEIGHT RAPID ADVANCE SELECT 3585 25 Two types of manual operation There are two types of manual operation, which should not be confused: • Manual operation during a program These functions are described in this section. • Manual operation when no program is running These functions are described in section "Manual operation". SHOW WEIGHT RAPID ADVANCE PAUSE MANUAL FUNCTIONS TEXT SELECT NEW WASH PROGRAM CHANGE °F/°C AUTO RESTARTS Press c or b one or more times to highlight ”MANUAL FUNCTIONS”. SELECT Press SELECT. 438 9163-01/05 Procedure for use 26 Automatic return to normal display Once you have selected any of the functions below, you must make any changes required within 20 seconds. If no further keys are pressed within 20 seconds, the display will revert automatically to its normal appearance during a wash program. MANUAL FUNCTIONS MAKE A CHOICE: WATER/DRAIN HIGH EXTRACT MOTOR DETERGENT/FLUSH EXIT SELECT 3679 WATER/DRAIN HIGH EXTRACT MOTOR DETERGENT/FLUSH EXIT Use the cursor keys to select the function. SELECT 438 9163-01/05 Press SELECT. Manual functions during a wash program Water/drain (see section "Water/drain") Allows manual operation of all water valves and the drain valve. Highest extraction speed (see section "Maximum extraction speed") Here you can limit the maximum extraction speed for the current program. Motor (see section "Motor on after wash") Motor on/off after program has ended. Detergent valves (see section "Detergent signals and water flushing") Allows you to control all valves in the detergent compartment or in external detergent supply system. Procedure for use 27 Water/drain MANUAL FUNCTIONS WATER/DRAIN COLD WATER MIXED WATER HOT WATER COLD HARD WATER WATER FROM TANK 1 WATER FROM TANK 2 LEVEL: 63 UNITS OPEN To access this function, see instructions in section "Manual operation". Water level in drum 3680 Use b and c to select the water/drain option you require. COLD WATER MIXED WATER HOT WATER COLD HARD WATER WATER FROM TANK 1 Not for Wascator FOM71 CLS WATER FROM TANK 2 DRAIN EXIT OPEN COLD WATER MIXED WATER HOT WATER Press OPEN. The function will be activated for as long as you press and hold this key. The function ceases as soon as you release the key. When you have finished: Press b repeatedly to highlight ”EXIT”. COLD HARD WATER WATER FROM TANK 1 Not for Wascator FOM71 CLS WATER FROM TANK 2 DRAIN EXIT SELECT Press SELECT. 438 9163-01/05 Procedure for use 28 Maximum extraction speed MANUAL FUNCTIONS HIGH EXTRACT CURRENT MAXIMUM EXTCACT SPEED: 1000 RPM To access this function, see instructions in section "Manual operation". SELECT NEW EXTRACT SPEED: Maximum extraction speed in current program. 1000 RPM SELECT To limit the program’s highest extraction speed This function allows you to modify the highest extraction speed allowed during the program. Example: Assume that the highest speed in the program is 1000 rpm and that you have set 700 rpm as the highest speed allowed. 3681 1 2 3 4 5 6 7 8 9 All speeds above 700 rpm will be limited to 700 rpm Enter the maximum extraction speed you require for this program. 1000 0 SELECT rpm Speeds below 700 rpm will not be affected 800 Press SELECT. 600 400 200 Time 3682 This change will affect the current program only. No change will be implemented if extraction is taking place at the time of the (attempted) change.The next time that this program is used, the original maximum speed will apply. This function does not allow you to set a higher speed than the usual maximum speed for the program. 438 9163-01/05 Procedure for use 29 Motor on after wash MANUAL FUNCTIONS MOTOR MOTOR ON AFTER WASH EXIT N To access this function, see instructions in section "Manual mode". Y/N Motor to rotate after program has ended If you answer Yes (Y): The motor will continue to rotate in alternative directions after the program has ended. This prevents creasing of the load. When the program has ended, the display will look like this: 3683 Y/N MOTOR ON AFTER WASH A toggle function: Use Y/N to toggle the function from ON (Yes) to OFF (No). When you have finished: Press b to highlight ”EXIT”. EXIT 91 NORMAL 95°C STD MOTOR ON IN MANUAL FUNCTIONS STOP 4111 Press STOP to stop the motor. SELECT Press SELECT. 438 9163-01/05 Procedure for use 30 Detergent signals and water flushing MANUAL FUNCTIONS DETERGENT/FLUSH WATER FLUSH FLUSH COLD POWDER POWDER SIGNAL 1 POWDER SIGNAL 2 POWDER SIGNAL 3 POWDER SIGNAL 4 To access this function, see instructions in section "Manual mode". OPEN 3684 Use b and c to select the function you require. WATER FLUSH FLUSH COLD WATER POWDER SIGNAL 1 POWDER SIGNAL 2 POWDER SIGNAL 3 POWDER SIGNAL 4 POWDER SIGNAL 5 LIQUID DETERGENT 1 LIQUID DETERGENT 2 LIQUID DETERGENT 3 LIQUID DETERGENT 4 EXIT OPEN WATER FLUSH FLUSH COLD POWDER POWDER SIGNAL 1 POWDER SIGNAL 2 Press OPEN. The function will be activated for as long as you press and hold this key. The function ceases as soon as you release the key. When you have finished: Press b repeatedly to highlight ”EXIT”. POWDER SIGNAL 3 POWDER SIGNAL 4 POWDER SIGNAL 5 LIQUID DETERGENT 1 LIQUID DETERGENT 2 LIQUID DETERGENT 3 LIQUID DETERGENT 4 EXIT SELECT 438 9163-01/05 Press SELECT. Detergent signals and water flushing FLUSH WATER: This function uses water to clear detergent from the supply tubes of the detergent dispensing system. POWDER SIGNAL: This function will either: a) use water to dispense detergent from machine compartments, or: b) dispense detergent from an external system. The number of valves present will vary according to the machine type. Procedure for use Text 91 NORMAL 95°C STD PROGRAM STEP: MAIN WASH STEP TIME: SET TEMPERATURE ACTUAL TEMPERATURE: REMAINING TIME: DRUM SPEED: 1 720 85 21 70 1000 SEC C C MIN RPM During program operation the display will look like this (see section "To start the wash program". 31 Pressing ”Text” displays more information The text displayed is a description of the wash program selected. This text description is inserted when a new wash program is created. This procedure is described fully in the programming manual. SHOW WEIGHT RAPID ADVANCE SELECT 3592 SHOW WEIGHT RAPID ADVANCE PAUSE MANUAL FUNCTIONS TEXT SELECT NEW WASH PROGRAM CHANGE °F/°C AUTO RESTARTS Press c or b one or more times to highlight ”TEXT”. SELECT 91 NORMAL 95°C STD PROGRAM STEP: MAIN WASH 1 NORMAL PROGRAM FOR MEDIUM SOILED CLOTHES Press SELECT. Description of wash program TEXT AUTO RESTARTS SELECT 3630 SELECT To return to the normal display: Press SELECT again. Automatic return to normal display If you do not press SELECT within 20 seconds, the display will revert automatically. 438 9163-01/05 Procedure for use 32 To change the wash program after program operation has commenced 91 NORMAL 95°C STD PROGRAM STEP: MAIN WASH STEP TIME: SET TEMPERATURE ACTUAL TEMPERATURE: REMAINING TIME DRUM SPEED: 1 720 85 21 70 1000 SEC °C °C MIN RPM During program operation the display will look like this (see section "To start the wash program". SHOW WEIGHT RAPID ADVANCE SELECT 3694 SHOW WEIGHT To change the wash program after program operation has commenced You can change to a different wash program at any time during program operation. When you do, the current function (for example, rinse) will be interrupted. The new program will start immediately after that (from the beginning). This function is useful, for example, if you discover that you have started the wrong program. RAPID ADVANCE PAUSE MANUAL FUNCTIONS TEXT SELECT NEW WASH PROGRAM CHANGE °F/°C AUTO RESTARTS Press c or b one or more times to highlight ”SELECT NEW WASH PROGRAM”. SELECT Press SELECT. 91 NORMAL 95°C STD SELECT NEW PROGRAM AND PRESS SELECT PR.NO. NAME 991 NORMAL 95°C STD 992 NORMAL 60°C STD 993 NORMAL 40°C STD 994 INTENSIVE 95°C 995 INTENSIVE 60°C 996 PERM PRESS 60°C Automatic return to normal display If no key is pressed within 20 seconds, the display will revert automatically. SELECT 3695 Press b one or more times as required... 991 NORMAL 95°C STD 992 NORMAL 60°C STD 993 NORMAL 40°C STD 994 INTENSIVE 95°C 995 INTENSIVE 60°C 996 PERM. PRESS 60°C 997 PERM. PRESS 40°C 998 LOW EXTRACT 1 MIN 999 HIGH EXTRACT 5 MIN ...to highlight the new wash program. What is the program library? The program library lists all wash programs, both user and standard programs, showing their program numbers and a description, for example: 1 2 3 991 992 993 994 995 996 997 SELECT Press SELECT. 998 999 996 PERM. PRESS 60°C PROGRAM STEP: PREWASH STEP TIME: NO HEATING ACTUAL TEMPERATURE: DRUM SPEED: 1 120 SEC 21 °C 48 RPM SHOW WEIGHT RAPID ADVANCE SELECT 438 9163-01/05 The existing wash program will now be interrupted and the new one will begin. MY OWN 40 °C MY OWN 60 °C MY OWN 90 °C Start-up program Level check Weight check Temperature check Low extraction 500 rpm 1 minute Low extraction 500 rpm 5 minutes Extraction 775 rpm 2 minutes (15s 550) Extraction 950 rpm 4 minutes (15s 550 + 15s 775) High extraction 1100 rpm 5 minutes (15 + 15 + 20s 950) Each time a new program is stored in the machine program memory, its number and description will be inserted automatically into the program library. The program library may be used for starting a wash program, but is also used in programming, when a wash program needs to be modified or if a new program is to be created on the basis of an existing one. Procedure for use To change temperature scale °C/°F 91 NORMAL 95°C STD PROGRAM STEP: MAIN WASH STEP TIME: SET TEMPERATURE ACTUAL TEMPERATURE: REMAINING TIME DRUM SPEED: 1 720 85 21 70 1000 SEC °C °C MIN RPM During program operation the display will look like this (see section "To start the wash program". SHOW WEIGHT RAPID ADVANCE SELECT 3696 SHOW WEIGHT 33 To change temperature scale °C/°F This function changes the temperature scale used for all temperatures displayed during the wash program. Please note that this scale change applies only to the current program. The default temperature scale will apply next time you run a program. To change the default temperature scale for all programs, use the function ”SETTINGS”, which is described in the Service Manual. RAPID ADVANCE PAUSE MANUAL FUNCTIONS TEXT SELECT NEW WASH PROGRAM CHANGE °F/°C AUTO RESTARTS Press c or b one or more times to highlight ”CHANGE °C/°F”. SELECT Press SELECT. 438 9163-01/05 Procedure for use 34 Auto restart What is Auto restart? Auto restart means that the same program will be repeated one or more times, according to the number set. The program will restart immediately, and the door will remain locked. If you have set auto restart, the display will show the number of restarts left. This function is used primarily for testing. 91 NORMAL 95°C STD PROGRAM STEP: MAIN WASH STEP TIME: SET TEMPERATURE ACTUAL TEMPERATURE: REMAINING TIME DRUM SPEED: 1 720 85 21 70 1000 SEC °C °C MIN RPM SHOW WEIGHT RAPID ADVANCE SELECT 3593 SHOW WEIGHT RAPID ADVANCE PAUSE MANUAL FUNCTIONS TEXT SELECT NEW WASH PROGRAM CHANGE °F/°C AUTO RESTART Press b one or more times to highlight ”AUTO RESTART”. SELECT Press SELECT. 91 NORMAL 95°STD PROGRAM STEP: MAIN WASH STEP TIME: NO HEATING ACTUAL TEMPERATURE: 1 300 SEC 19 C DRUM SPEED: Shows the number of times the program will restart. 70 RPM AUTO RESTARTS´ 0 SELECT 3594 1 2 3 4 5 6 7 8 9 If required: Use the numeric keys to change the required number of restarts. 0 SELECT 438 9163-01/05 Press SELECT. Manual operation Manual operation To select manual operation RUN A WASH PROGRAM OPTIONS MENU If this menu is not currently displayed: Press a repeatedly. MAKE YOUR CHOICE WITH OR AND PRESS SELECT WEIGHT, KG: 000,0 SELECT 35 Two types of manual operation There are two types of manual operation, which should not be confused: • Manual operation when no program is running These functions are described in this section. • Manual operation during a program These functions are described in section "Manual operation" . 3589 RUN A WASH PROGRAM OPTIONS MENU SELECT Press b to highlight ”GO TO THE MENU”. Press SELECT. Always lock the door first! You must always close and lock the door first before you can operate the machine manually. To lock the door, use the submenu MOTOR/DOOR, see section "Motor/door". All manual settings are cancelled when you exit manual operation All manual settings (such as door, motor, temperature, and drain) will be cancelled when you exit manual operation. The door is unlocked, the motor stops, the drain opens, heating is halted, and the temperature is reset to zero. MENU MAKE A CHOICE: WASH PROGRAM LIBRARY PROGRAMMING MODE SETTINGS 1 MEMORY CARD SERVICE MODE STATISTICS SELECT 3685 Press b six times... WASH PROGRAM LIBRARY PROGRAMMING MODE SETTINGS 1 MEMORY CARD SERVICE MODE STATISTICS MANUAL MODE SETTINGS 2 ....to highlight ”MANUAL MODE”. EXIT SELECT Press SELECT. 438 9163-01/05 Manual operation 36 MANUAL FUNCTIONS MAKE A CHOICE: MOTOR/DOOR WATER/DRAIN HEATING DETERGENT/FLUSH EXIT SELECT 3686 MOTOR/DOOR WATER/DRAIN HEATING DETERGENT/FLUSH EXIT Select the function required using the cursor keys. SELECT Press SELECT. Manual operation when no program is running Motor/door (see section "Motor/door") Lock/unlock door. Switch motor on/off (normal drum action). Water and drain valves (see section "Water/ drain") Operation of drain valve and all water valves. Heating (see section "Heating") Heat water to any temperature required. Detergent valves (see section "Detergent signals and water flushing") Allows manual operation of all valves in detergent compartment or external detergent supply system. Exit Returns you to the MENU display. Motor/door MANUAL FUNCTIONS MOTOR/DOOR DOOR LOCK ON MOTOR ON EXIT N N Y/N 3687 DOOR LOCK ON MOTOR ON Press b as required to select a function. EXIT Y/N A toggle function: Use Y/N to toggle the function from ON (Yes) to OFF (No). When you have finished: Press b to highlight ”EXIT”. DOOR LOCK ON MOTOR ON EXIT SELECT 438 9163-01/05 Press SELECT. Lock the door and start the motor DOOR LOCK ON If you answer Yes (Y): The door will be locked. Note that you must always lock the door before you can operate the machine manually. MOTOR ON If you answer Yes (Y): The motor will start and operate, using normal action. Manual operation 37 Water/drain MANUAL FUNCTIONS WATER/DRAIN DRAIN CLOSED COLD WATER MIXED WATER HOT WATER COLD HARD WATER WATER FROM TANK 1 WATER FROM TANK 2 N To access this function, see instructions in section "To select manual operation". LEVEL: 0 UNITS Y/N 3688 Use b or c to select Drain or one of the six Water filling alternatives. DRAIN CLOSED COLD WATER MIXED WATER HOT WATER COLD HARD WATER Not for Wascator FOM71 CLS WATER FROM TANK 1 WATER FROM TANK 2 EXIT Y/N OPEN DRAIN CLOSED Drain (a toggle function) : Press Y/N to toggle the function from Yes (Y) and No (N). Water filling: Press OPEN. The function will be activated for as long as you press and hold this key. The function ceases as soon as you release the key. When you have finished: Press b to highlight ”EXIT”. COLD WATER MIXED WATER HOT WATER COLD HARD WATER WATER FROM TANK 1 WATER FROM TANK 2 Not for Wascator FOM71 CLS EXIT SELECT Press SELECT. 438 9163-01/05 Manual operation 38 Heating To access this function, see instructions in section "To select manual operation". MANUAL FUNCTIONS HEATING SELECT SET TEMPERATURE Temperature selected Actual temperature 0° C ACTUAL TEMPERATURE 24° C START 3689 1 2 3 4 5 6 7 8 9 Use the numeric keys to enter the temperature the water is to be heated to. 0 438 9163-01/05 START Press START. Heating will now begin. STOP If you wish, you can cancel heating before the set temperature is reached: Access this function again and press STOP. Manual operation 39 Detergent signals and water flushing MANUAL FUNCTIONS DETERGENT/FLUSH WATER FLUSH FLUSH COLD POWDER POWDER SIGNAL 1 POWDER SIGNAL 2 POWDER SIGNAL 3 POWDER SIGNAL 4 To access this function, see instructions in section "To select manual operation". OPEN 3684 Use b and c to select the function you require. WATER FLUSH FLUSH COLD WATER POWDER SIGNAL 1 POWDER SIGNAL 2 POWDER SIGNAL 3 Detergent signals and water flushing FLUSH WATER: This function uses water to clear detergent from the supply tubes of the detergent dispensing system. POWDER SIGNAL: This function will either: a) use water to dispense detergent from machine compartments, or: b) dispense detergent from an external system. POWDER SIGNAL 4 POWDER SIGNAL 5 LIQUID DETERGENT 1 LIQUID DETERGENT 2 LIQUID DETERGENT 3 LIQUID DETERGENT 4 EXIT OPEN WATER FLUSH FLUSH COLD POWDER POWDER SIGNAL 1 POWDER SIGNAL 2 POWDER SIGNAL 3 Press OPEN. The function will be activated for as long as you press and hold this key. The function ceases as soon as you release the key. When you have finished: Press b repeatedly to highlight ”EXIT”. POWDER SIGNAL 4 POWDER SIGNAL 5 LIQUID DETERGENT 1 LIQUID DETERGENT 2 LIQUID DETERGENT 3 LIQUID DETERGENT 4 EXIT SELECT Press SELECT. 438 9163-01/05 Statistics 40 Statistics To select Statistics RUN A WASH PROGRAM OPTIONS MENU If this menu is not currently displayed: Press a repeatedly. MAKE YOUR CHOICE WITH OR AND PRESS SELECT WEIGHT, KG: 000,0 SELECT 3589 Press b to highlight ”GO TO THE MENU”. RUN A WASH PROGRAM OPTIONS MENU Press SELECT. SELECT MENU MAKE A CHOICE: WASH PROGRAM LIBRARY PROGRAMMING MODE SETTINGS 1 MEMORY CARD SERVICE MODE STATISTICS SELECT 3691 Press b five times... WASH PROGRAM LIBRARY PROGRAMMING MODE SETTINGS 1 MEMORY CARD SERVICE MODE STATISTICS MANUAL MODE ...to highlight ”STATISTICS”. SETTINGS 2 EXIT SELECT 438 9163-01/05 Press SELECT. Statistics STATISTICS TOTAL RUN TIME HOURS TOTAL TRIP RUN TIME HOURS HOURS SINCE LAST SERVICE LAST 5 ERROR CODES 08 NO HEATING 08 NO HEATING 08 NO HEATING 08 NO HEATING 08 NO HEATING 0 0 0 PROGRAM 991 996 993 991 991 HOURS 0 0 0 0 0 EXIT 3690 To display the next page of statistics: Press b. STATISTICS PROGRAM 2 12 78 991 993 995 997 999 WASHES 4 0 0 35 1 0 0 0 PROGRAM WASHES 10 0 52 0 123 0 992 3 994 0 996 0 998 0 EXIT 3958 To display the next page of statistics: Press b. STATISTICS PROGRAM S 1 S 5 S 80 S 99 S992 S994 S996 S998 WASHES 0 0 0 0 0 0 0 0 PROGRAM WASHES S 2 0 S 6 0 S 90 0 S991 0 S993 0 S995 0 S997 0 S999 0 If a memory card is in place in the PCU, the memory card program statistics will be displayed. An ”S” before the program number shows that it is a memory card program. 41 The Statistics function The Statistics function gives you access to the following information: TOTAL RUN TIME HOURS: Shows the total operating time for the machine since it was installed. TOTAL TRIP RUN TIME HOURS: This register records the total number of operating hours since it was last reset. It can, for example, be used to keep track of operating time since the last machine service. The procedure for resetting it is described in section "To reset "Total trip run time hours" to zero". HOURS SINCE LAST SERVICE This register shows the time elapsed since the last service. The register can also be used to generate a signal on the display to show when service is needed (see the section ”Settings 1” in the service manual). LAST 5 ERROR CODES: This displays the most recent error codes, and tells which program was operating at the time and during which hour (according to the ”total run time” record) the error code was flagged. NO. OF TIMES EACH PROGRAM USED: Displays statistics for PCU programs and for programs on any memory card currently in place in the PCU. EXIT 4040 EXIT When you want to cancel the display of statistics: Press EXIT. 438 9163-01/05 Statistics 42 Resetting statistic registers RUN A WASH PROGRAM OPTIONS MENU If this menu is not currently displayed: Press a repeatedly. MAKE YOUR CHOICE WITH OR AND PRESS SELECT WEIGHT, KG: 000,0 SELECT 3589 Press b to highlight ”GO TO THE MENU”. RUN A WASH PROGRAM OPTIONS MENU SELECT 438 9163-01/05 Press SELECT. Statistics registers which can be reset to zero The following registers in the statistics function can be cleared (reset to zero): • Total trip run time hours. • Hours since last service. • No. of times each program used (PCU programs). • No. of times each program used (programs on any memory card currently in the PCU). Statistics 43 MENU MAKE A CHOICE: WASH PROGRAM LIBRARY PROGRAMMING MODE SETTINGS 1 MEMORY CARD SERVICE MODE STATISTICS SELECT 3693 Press b..four times.... The service program may only be used by authorised personnel, because most safety interlocks are disabled. WASH PROGRAM LIBRARY PROGRAMMING MODE SETTINGS 1 MEMORY CARD SERVICE MODE STATISTICS MANUAL MODE SETTINGS 2 EXIT ... to highlight "SERVICE PROGRAM". SELECT Press SELECT SERVICE PROGRAM MAKE A CHOICE: SERVICE PROGRAM CLEAR TRIP HOUR COUNTER CLEAR SERVICE COUNTER CLEAR WASH PROGRAM COUNTER IN CLS CLEAR WASH PROGRAM COUNTER IN SMC SCALE ADJUSTMENTS CALIB. OF LEVEL SENSOR Now you can choose either to clear/reset a register or to adjust the weighing equipment. SELECT 4042 A SELECT Press b to highlight the option you want, then press SELECT. If you want to exit: Press b repeatedly until EXIT is highlighted. SERVICE PROGRAM CLEAR TRIP HOUR COUNTER CLEAR SERVICE COUNTER CLEAR WASH PROGRAM COUNTER IN CLS CLEAR WASH PROGRAM COUNTER IN SMC MEMORY CARD SCALE ADJUSTMENTS CALIB. OF LEVEL SENSOR EXIT SELECT Press SELECT. 438 9163-01/05 Statistics 44 Time counter, hours after last service SERVICE MODE MAKE A CHOICE: Both counters can be reset in the same way. SERVICE PROGRAM CLEAR TRIP HOUR COUNTER CLEAR SERVICE COUNTER CLEAR WASH PROGRAM COUNTER IN CLS CLEAR WASH PROGRAM COUNTER IN SMC SCALE ADJUSTMENTS CALIB. OF LEVEL SENSOR EXIT SELECT 4041 A SELECT CLEAR COUNTER CLS Press b so that CLEAR TRIP HOUR COUNTER OR CLEAR SERVICE COUNTER will be marked. Press SELECT. First you have a chance to change your mind. ARE YOU SURE ? PRESS SELECT ELSE PRESS ANY OTHER KEY SELECT 4043 A SELECT 438 9163-01/05 If you do not want to reset the register: Press any key other than SELECT. If you want to reset the register: Press SELECT. Statistics 45 Number of washes for program in timer or memory card You can reset program in both timer and the memory card (if inserted). SERVICE MODE MAKE A CHOICE: SERVICE PROGRAM CLEAR TRIP HOUR COUNTER CLEAR SERVICE COUNTER CLEAR WASH PROGRAM COUNTER IN CLS CLEAR WASH PROGRAM COUNTER IN SMC Press b so that CLEAR WASH PROGRAM COUNTER IN CLS or CLEAR WASH PROGRAM COUNTER IN SMC will be marked. SELECT 4044 A SELECT Press SELECT. CLEAR COUNTER CLS FROM PROGRAM NUMBER: 0 TO PROGRAM NUMBER: 0 TO END: TO PROGRAM NUMBER = 0 EXIT 4045 A 1 2 3 4 5 6 7 8 9 Write from which program number you want to clear wash programs. 0 Press b. 438 9163-01/05 Statistics 46 CLEAR COUNTER CLS FROM PROGRAM NUMBER: 1 TO PROGRAM NUMBER: 0 TO END: TO PROGRAM NUMBER = 0 EXIT 4046 A 1 2 3 4 5 6 7 8 9 Enter digits corresponding to the program number (inclusive) up to which you wish to clear the total counter. 0 ERASE CLEAR COUNTER CLS ARE YOU SURE ? PRESS SELECT ELSE PRESS ANY OTHER KEY SELECT 4043 A SELECT Press ERASE. First you have the chance to change your mind. If you do not want to reset the register: Press any key other than SELECT. If you do want to reset the register: Press SELECT. Now the totals of the program numbers you have specified will be cleared. If you wish to change any numbers you have entered: Press c if you want to change the first number entered. Enter the new number. If you change your mind: Press a. 438 9163-01/05 Scale 47 For machines with weighing equipment installed only! Scale Scale adjustments SERVICE PROGRAM MAKE A CHOICE: SERVICE PROGRAM CLEAR COUNTER CLEAR SERVICE COUNTER CLEAR WASH COUNTER IN CLS CLEAR WASH COUNTER IN MEMORY CARD SCALE ADJUSTMENTS SELECT 4777 A Press b repeatedly until SCALE ADJUSTMENTS is highlighted. SELECT Press SELECT. When you have finished: Press b repeatedly until EXIT is highlighted. SERVICE PROGRAM CLEAR COUNTER CLEAR SERVICE COUNTER CLEAR WASH COUNTER IN CLS CLEAR WASH COUNTER IN MEMORY CARD SCALE ADJUSTMENTS EXIT SELECT Press SELECT. Scale adjustments The following functions are accessed via the SCALE ADJUSTMENTS menu: Reset scale to zero (see section ”Reset scale to zero”) Used to make the weighing equipment display 0 when the machine has no load in it. Reset tare to zero (see section ”Reset tare to zero”) Used to clear a stored tare parameter. Tare scale (see section ”Tare scale”) Used to reset the weighing equipment so that a weight such as a container will not be included when calculating net weight. Set tare to a certain value (see section ”Set tare to a certain value”) Used to enter a value for the tare parameter, a weight in hectograms. Read tare value (see section ”Read tare value”) Used to check the value currently stored as the tare parameter. Calibrate the scale (see section ”Calibrate the scale”) This function is used only on installation of a new scale unit. Zero calibration (see section ”Zero calibration”) Used after installation of machine in order to put scale to 0 or when it is not possible to make scale to 0 with ”Reset scale to zero”. Read version number (see section ”Read version number”) This is where you find the version number of the weighing equipment. If the weighing equipment is not connected, the error message “WEIGHING EQUIPMENT NOT CONNECTED” will be displayed. Connect the weighing equipment and try again. If necessary, see the section “Fault-finding, weighing equipment” in the machine manual. 438 9163-01/05 Scale 48 For machines with weighing equipment installed only! Reset scale to zero Reset scale to zero ”Reset weighing equipment” is used to make the weighing equipment display 0 when the machine has no load in it. If your attempt to reset the weighing equipment fails at this point, you will see an error message equivalent to: “FAILED. PRESS SELECT” on the display. For troubleshooting, see the section “Fault-finding, weighing equipment” in the machine manual. SERVICE PROGRAM MAKE A CHOICE: RESET SCALE TO ZERO RESET TARE TO ZERO TARE SCALE SET TARE TO A CERTAIN VALUE READ TARE VALUE CALIBRATE THE SCALE SELECT 4778 RESET SCALE TO ZERO RESET TARE TO ZERO TARE SCALE Check that ”RESET SCALE TO ZERO” is highlighted. SET TARE TO A CERTAIN VALUE Please note: The machine must be unladen when you use this function, i.e. no water or wash load in the drum. Do not lean towards the machine. READ TARE VALUE CALIBRATE THE SCALE ZERO CALIBRATION READ VERSION NUMBER EXIT If it isn’t... Press c or b as required to highlight ”RESET SCALE TO ZERO”. SELECT SCALE ADJUSTMENTS RESET SCALE TO ZERO DONE! PRESS SELECT Press SELECT. This screen shows that the weighing equipment has been reset to zero. SELECT 4779 SELECT 438 9163-01/05 Press SELECT. Please note: After a power-cut, the weighing equipment will always display 0, no matter what the actual load in the drum. In this event you will have to use the “Reset scale to zero” function. Scale 49 Reset tare to zero Reset tare to zero If your attempt to clear the tare parameter fails at this point, you will see an error message equivalent to: “FAILED. PRESS SELECT” on the display. For troubleshooting, see the section “Fault-finding, weighing equipment” in the machine manual. SERVICE PROGRAM MAKE A CHOICE: RESET SCALE TO ZERO RESET TARE TO ZERO TARE SCALE SET TARE TO A CERTAIN VALUE READ TARE VALUE CALIBRATE THE SCALE SELECT 4780 Press b once to highlight ”RESET TARE TO ZERO”. RESET SCALE TO ZERO RESET TARE TO ZERO TARE SCALE SET TARE TO A CERTAIN VALUE READ TARE VALUE CALIBRATE THE SCALE ZERO CALIBRATION READ VERSION NUMBER EXIT SELECT SCALE ADJUSTMENTS RESET TARE TO ZERO Press SELECT. This screen shows that the stored tare parameter has been cleared. DONE! PRESS SELECT SELECT 4781 SELECT Press SELECT. 438 9163-01/05 Scale 50 Tare scale SERVICE PROGRAM MAKE A CHOICE: RESET SCALE TO ZERO RESET TARE TO ZERO TARE SCALE SET TARE TO A CERTAIN VALUE READ TARE VALUE CALIBRATE THE SCALE SELECT 4782 Press b twice to highlight ”TARE SCALE”. RESET SCALE TO ZERO RESET TARE TO ZERO TARE SCALE SET TARE TO A CERTAIN VALUE READ TARE VALUE CALIBRATE THE SCALE ZERO CALIBRATION READ VERSION NUMBER EXIT SELECT SCALE ADJUSTMENTS TARE SCALE Press SELECT. This screen shows that the weighing equipment has been tared successfully. DONE! PRESS SELECT SELECT 4783 SELECT 438 9163-01/05 Press SELECT. Tare scale This function involves first loading the drum with, for example, a container, then taring (resetting) the weighing equipment so that the weight of the container will not be included when calculating net weight. If your attempt to tare the weighing equipment fails at this point, you will see an error message equivalent to: “FAILED. PRESS SELECT” on the display. For troubleshooting, see the section “Faultfinding, weighing equipment” in the machine manual. Scale 51 Set tare to a certain value SERVICE PROGRAM MAKE A CHOICE: RESET SCALE TO ZERO RESET TARE TO ZERO TARE SCALE SET TARE TO A CERTAIN VALUE READ TARE VALUE CALIBRATE THE SCALE SELECT 4784 Press b three times to highlight ”SET TARE TO A CERTAIN VALUE” Set tare to a certain value This function lets you enter a value for the tare parameter, i.e. a weight value which the weighing equipment will disregard when showing a net weight on the display. The function will automatically clear any earlier tare value when you enter a new one. If your value is not entered successfully at this point, you will see an error message equivalent to: “FAILED. PRESS SELECT” on the display. For troubleshooting, see the section “Fault-finding, weighing equipment” in the machine manual. RESET SCALE TO ZERO RESET TARE TO ZERO TARE SCALE SET TARE TO A CERTAIN VALUE READ TARE VALUE CALIBRATE THE SCALE ZERO CALIBRATION READ VERSION NUMBER EXIT SELECT Press SELECT. SCALE ADJUSTMENTS SET TARE TO A CERTAIN VALUE ENTER TARE IN HG AND PRESS SELECT SELECT 4785 1 2 3 4 5 6 7 8 9 Use the numeric keys to enter the tare you require, unit: hectograms; 1 hectogram = 0.1 kg). 0 SELECT SCALE ADJUSTMENTS SET TARE TO A CERTAIN VALUE Press SELECT. This screen shows that the parameter has been entered successfully. DONE! PRESS SELECT SELECT 4786 SELECT Press SELECT. 438 9163-01/05 Scale 52 Read tare value Read tare value This function lets you check the value currently stored as the tare parameter. SERVICE PROGRAM MAKE A CHOICE: RESET SCALE TO ZERO RESET TARE TO ZERO TARE SCALE SET TARE TO A CERTAIN VALUE READ TARE VALUE CALIBRATE THE SCALE SELECT 4787 Press b four times to highlight ”READ TARE VALUE”. RESET SCALE TO ZERO RESET TARE TO ZERO TARE SCALE SET TARE TO A CERTAIN VALUE READ TARE VALUE CALIBRATE THE SCALE ZERO CALIBRATION READ VERSION NUMBER EXIT SELECT SCALE ADJUSTMENTS READ TARE VALUE 10 HG Press SELECT. This screen shows the stored tare parameter (unit: hectograms (1 hectogram = 0.1 kg). SELECT 4788 SELECT 438 9163-01/05 Press SELECT. Scale Calibrate the scale 53 Please note: This function is used only on installation of a new scale unit. SERVICE PROGRAM MAKE A CHOICE: RESET SCALE TO ZERO RESET TARE TO ZERO TARE SCALE SET TARE TO A CERTAIN VALUE READ TARE VALUE CALIBRATE THE SCALE SELECT 4789 Press b five times to highlight ”CALIBRATE THE SCALE”. RESET SCALE TO ZERO Calibrate the scale If this calibration has not succeeded you will see an error message equivalent to: “FAILED. PRESS SELECT” on the display. For troubleshooting, see the section “Fault-finding, weighing equipment” in the machine manual. RESET TARE TO ZERO TARE SCALE SET TARE TO A CERTAIN VALUE READ TARE VALUE Please note: The machine must be unladen at the start of calibration, i.e. no water or wash load in the drum. CALIBRATE THE SCALE ZERO CALIBRATION READ VERSION NUMBER EXIT SELECT Press SELECT. SCALE ADJUSTMENTS CALIBRATE THE SCALE PLEASE SET SCALE TO CALIBRATION MODE PRESS SELECT FOR ZERO CALIBRATION Set the calibration switch to calibration mode. Calibration mode/normal mode To gain access to the calibration switch in the scale unit, the top panel has to be taken off. Remove the four screws on the scale unit cover. Then the calibration switch can be switched between normal mode ”ON” and calibration mode ”CAL”. SELECT 4790 ON (normal) SELECT CAL (calibration) Press SELECT. SCALE ADJUSTMENTS CALIBRATE THE SCALE Calibration switch DONE! PRESS SELECT SELECT Scale unit 4758 A 4791 SELECT Press SELECT. 438 9163-01/05 Scale 54 For machines with weighing equipment installed only! SCALE ADJUSTMENTS CALIBRATE THE SCALE FILL DRUM WITH CALIBRATION WEIGHT ENTER WEIGHT IN HG AND PRESS SELECT Put the calibration weight in the drum. SELECT 4792 1 2 3 4 5 6 7 8 9 Use the numeric keys to enter the calibration weight in hg (1 hg = 0.1 kg). 0 SELECT Press SELECT. SCALE ADJUSTMENTS CALIBRATE THE SCALE DONE! PRESS SELECT SELECT 4791 SELECT SCALE ADJUSTMENTS Press SELECT. Remove the calibration weight. CALIBRATE THE SCALE REMOVE WEIGHT AND PRESS SELECT SELECT 4793 SELECT Press SELECT. SCALE ADJUSTMENTS CALIBRATE THE SCALE PRESS SELECT FOR ZERO CALIBRATION SELECT If you want to use the ”Calibrate zero” function now: 4794 SELECT 438 9163-01/05 Press SELECT. Calibration weight A weight of between 20 kg and 40 kg should be used as a calibration weight. The higher the weight (within these limits), the better the weighing accuracy of the machine. Scale 55 SCALE ADJUSTMENTS CALIBRATE THE SCALE DONE! PRESS SELECT SELECT 4791 SELECT Press SELECT. Calibration mode/normal mode To gain access to the calibration switch in the scale unit, the top panel has to be taken off. Remove the four screws on the scale unit cover. Then the calibration switch can be switched between normal mode ”ON” and calibration mode ”CAL”. ON (normal) SCALE ADJUSTMENTS CALIBRATE THE SCALE RESET SCALE FROM CALIBRATION MODE AND PRESS SELECT CAL (calibration) Restore the calibration switch to normal mode. SELECT 4795 SELECT Press SELECT. Calibration switch Scale unit 4758 A 438 9163-01/05 Scale 56 For machines with weighing equipment installed only! Zero calibration SERVICE PROGRAM MAKE A CHOICE: RESET SCALE TO ZERO RESET TARE TO ZERO TARE SCALE SET TARE TO A CERTAIN VALUE READ TARE VALUE CALIBRATE THE SCALE SELECT 4796 Press b six times to highlight ”ZERO CALIBRATION”. RESET SCALE TO ZERO Please note: The machine must be unladen during this calibration, i.e. no water or wash load in the drum. RESET TARE TO ZERO TARE SCALE SET TARE TO A CERTAIN VALUE READ TARE VALUE CALIBRATE THE SCALE ZERO CALIBRATION READ VERSION NUMBER EXIT SELECT Press SELECT. SCALE ADJUSTMENTS ZERO CALIBRATION PRESS SELECT FOR ZERO CALIBRATION If you wish to calibrate zero for the weighing equipment: SELECT 4797 SELECT Press SELECT. SCALE ADJUSTMENTS ZERO CALIBRATION DONE! PRESS SELECT SELECT This screen shows you have calibrated zero. 4798 SELECT 438 9163-01/05 Zero calibration Used after installation of machine in order to put scale to 0 or when it is not possible to make scale to 0 with ”Reset scale to zero”. If this calibration has not succeeded you will see an error message equivalent to: “FAILED. PRESS SELECT” on the display. For troubleshooting, see the section “Fault-finding, weighing equipment” in the machine manual. Press SELECT. Scale 57 Read version number SERVICE PROGRAM MAKE A CHOICE: RESET SCALE TO ZERO RESET TARE TO ZERO TARE SCALE SET TARE TO A CERTAIN VALUE READ TARE VALUE CALIBRATE THE SCALE SELECT 4799 Press b seven times to highlight ”READ VERSION NUMBER”. Read version number In the event of a fault in the weighing equipment (which cannot be put right with the aid of the section “Fault-finding, weighing equipment” in the machine manual), make a note of the version number accessed via this function before you contact the supplier’s service department. RESET SCALE TO ZERO RESET TARE TO ZERO TARE SCALE SET TARE TO A CERTAIN VALUE READ TARE VALUE CALIBRATE THE SCALE ZERO CALIBRATION READ VERSION NUMBER EXIT SELECT Press SELECT. SCALE ADJUSTMENTS READ VERSION NUMBER STATHMOS AB 3050 REV 00521 The screen shows the version number. SELECT 4800 SELECT Press SELECT. 438 9163-01/05 Memory card 58 Memory card General introduction A memory card is a plastic card, the size of a credit card, with an electronic memory chip inside it. This memory card is capable of storing 10 to 15 wash programs of normal size. If the programs are mostly small ones, more of them can be stored, whereas larger programs will reduce the number which can be held by the memory card. Memory card of this type, open card, can be used to: • transfer wash programs from one machine to another 3605 Memory chip • run wash programs straight from the memory card • transfer wash programs from a PC to a memory card and from a memory card to a PC (these procedures, and how to write a wash program on a PC, are described elsewhere) A program stored on a memory card may be given restricted-use status. Locked card means that: • The program cannot be deleted or copied to the program control unit of a washer extractor. • You cannot alter the program or inspect the way it is written. • To run the program you have to have the memory card and to insert it into the program control unit when the program is to be started. Open card The content of the open card can be downloaded into a machine. The content in a machine can be uploaded to a card. The content can also be downloaded to several machines. Locked card The content can not be changed and can not be downloaded to a machine. At operation, the card has to be inserted into the card reader. Program can not be uploaded to the card. Erasing the card is possible. 438 9163-01/05 Memory card 59 To select the ”Memory card” function Memory chip Turn the memory card so its memory chip is at the far end, and on the left of the card... 3606 Card reader 1 2 3 4 5 6 7 8 9 ...then insert the memory card into the program control unit. 0 4115 RUN A WASH PROGRAM OPTIONS MENU If this menu is not currently displayed: Press a repeatedly. MAKE YOUR CHOICE WITH OR AND PRESS SELECT WEIGHT, KG: 000,0 SELECT 3589 Press b to highlight ”GO TO THE MENU”. RUN A WASH PROGRAM OPTIONS MENU SELECT Press SELECT. 438 9163-01/05 Memory card 60 MENU MAKE A CHOICE: WASH PROGRAM LIBRARY PROGRAMMING MODE SETTINGS 1 MEMORY CARD SERVICE MODE STATISTICS SELECT 3596 Press b three times... WASH PROGRAM LIBRARY PROGRAMMING MODE SETTINGS 1 ...to highlight ”MEMORY CARD”. MEMORY CARD SERVICE MODE STATISTICS MANUAL MODE SETTINGS 2 EXIT SELECT 438 9163-01/05 Press SELECT. Memory card MEMORY CARD EXECUTE WASH PROGRAM FROM MEMORY CARD COPY PROGRAM FROM MEMORY CARD TO CLS COPY PROGRAM FROM PCS TO MEMORY CARD DELETE PROGRAM IN MEMORY CARD CLEAR MEMORY CARD EXIT SELECT 3597 A Select the function required using the cursor keys. EXECUTE WASH PROGRAM FROM MEMORY CARD COPY PROGRAM FROM MEMORY CARD TO CLS COPY PROGRAM FROM PCS TO MEMORY CARD DELETE PROGRAM IN MEMORY CARD CLEAR MEMORY CARD EXIT SELECT Press SELECT. 61 "The ”Memory card” functions Run wash program straight from memory card (see section "To run a wash program straight from a memory card") A wash program can be run from the memory card, without first being copied to the washer extractor. The memory card may be removed from the card reader after the program has started. Programs on memory cards may have ”restricted-use” status, which means that they can only be run straight from the memory card, not copied or modified. Copy program from memory card to CLS (see section "To copy a program from a memory card to the machine´s program control unit") One or more wash programs can be copied from the memory card to the memory chip in the machine’s program control unit. Note that programs on the memory card with ”restricteduse” status cannot be copied to the machine memory chip. Copy program from CLS to memory card (see section "To copy a program from the program control unit to a memory card") One or more wash programs can be copied from the memory chip in the machine’s program control unit to the memory card. The memory card can hold 10 to 15 wash programs of normal size. Delete program on memory card (see section "To delete a program on a memory card") Clear memory card (see section "To delete all programs on a memory card") 438 9163-01/05 Memory card 62 To run a wash program straight from a memory card MEMORY CARD EXECUTE WASHPROGRAM FROM MEMORY CARD COPY PROGRAM FROM MEMORY CARD TO CLS COPY PROGRAM FROM PCS TO MEMORY CARD DELETE PROGRAM IN MEMORY CARD CLEAR MEMORY CARD SELECT 3598 A EXECUTE WASHPROGRAM FROM MEMORY CARD COPY PROGRAM FROM MEMORY CARD TO CLS COPY PROGRAM FROM PCS TO MEMORY CARD DELETE PROGRAM IN MEMORY CARD CLEAR MEMORY CARD SELECT To access this menu, follow the instructions in section "To select the "Memory card" function". Highlight ”EXECUTE WASH PROGRAM FROM MEMORY CARD” (press c if necessary). To run a program from the memory card In broad terms, the program control unit has two different memories. One is a ”program memory” where all its wash programs are stored, the other is an ”operating memory”, which is used to hold the program currently in use. The program control unit takes the instructions it needs to run the program from the operating memory. When a wash program is started, the correct program is retrieved from the program memory and copied into the operating memory. 1 2 3 4 5 6 7 8 9 Press SELECT. 0 3617 1 2 3 991 992 993 994 995 Program memory program control unit MEMORY CARD EXECUTE WASH PROGRAM FROM MEMORY CARD PR.NO. NAME 991 NORMAL 95°C STD 992 NORMAL 60°C STD 993 NORMAL 40°C STD 994 INTENSIVE 95°C 995 INTENSIVE 60°C 996 PER. PRESS 60°C SELECT If necessary, use b to... NORMAL 95°C STD 992 NORMAL 60°C STD 993 NORMAL 40°C STD 994 INTENSIVE 95°C 995 INTENSIVE 60°C 996 PER.PRESS 60°C ... highlight the wash program required. SELECT NORMAL 95°C STD 992 NORMAL 60°C STD 993 NORMAL 40°C STD 994 INTENSIVE 95°C 995 INTENSEIVE 60°C 996 PERM. PRESS 60°C 997 PERM. PRESS 40°C 998 LOW EXTRACT 1 MIN 999 HIGH EXTRACT 5 MIN Operating memory program control unit 3607 991 991 997 PERM. PRESS 40°C 996 997 998 999 MY OWN 40 °C MY OWN 60 °C MY OWN 90 °C Start-up program Level check Weight check Temperature check Low extraction 500 rpm 1 minute Low extraction 500 rpm 5 minutes Extraction 775 rpm 2 minutes (15s 550) Extraction 950 rpm 4 minutes (15s 550 + 15s 775) High extraction 1100 rpm 5 minutes (15 + 15 + 20s 950) Program currently being used A parallel process takes place when a program is started from a memory card. In other words, the program is copied from the memory card into the operating memory, and the machine runs the program entirely from the set of instructions in the operating memory. Press SELECT. 1 2 3 4 5 6 7 8 9 0 3618 Program memory card RUN A WASH PROGRAM PROGRAM NUMBER AND START DELAY SELECTED: 994 00:00 Program name INTENSIVE 95 °C TEXT START MY OWN 40 °C 2 MY OWN 60 °C 3 MY OWN 90 °C 4 MY OWN WOOL 30 °C 5 MY OWN INTENSIVE Program memory program control unit 991 NORMAL 95°C STD 992 NORMAL 60°C STD 993 NORMAL 40°C STD 994 INTENSIVE 95° 995 INTENSIVE 60°C 996 PERM.PRESS 60°C 997 PERM.PRESS 40°C 998 LOW EXTRACT 1 MIN 999 HIGH EXTRACT 5 MIN Operating memory program control unit 3608 4 TEXT START 438 9163-01/05 1 If you want to see the description of the program (where available): Press TEXT. To start the program: Press START. Once the program has started, the memory card may be removed from the card reader. MY OWN WOOL 30 °C That is why you may remove the memory card from the card reader once the program has started. Once the program has ended it is erased from the operating memory. Memory card 63 To copy a program from a memory card to the machine’s program control unit MEMORY CARD EXECUTE WASHPROGRAM FROM MEMORY CARD COPY PROGRAM FROM MEMORY CARD TO CLS COPY PROGRAM FROM CLS TO MEMORY CARD DELETE PROGRAM IN MEMORY CARD CLEAR MEMORY CARD EXIT SELECT 3609 A EXECUTE WASHPROGRAM FROM MEMORY CARD COPY PROGRAM FROM MEMORY CARD TO CLS COPY PROGRAM FROM CLS TO MEMORY CARD DELETE PROGRAM IN MEMORY CARD CLEAR MEMORY CARD EXIT SELECT To access this menu, follow the instructions in section "To select the "Memory card" function". Note that restricted-use programs on a memory card cannot be copied. Highlight ”COPY PROGRAM FROM MEMORY CARD TO CLS” (press b or c if necessary). Press SELECT. What is a restricted-use program? A wash program which has been created on a PC can be made a ”restricted-use” program. This means that: • The program cannot be deleted or copied to the program memory of a washer extractor. • You cannot modify the program or examine its structure. • To run the program you must have access to the memory card, and insert it into the card reader when the program is to be started. What happens when a program is copied? Both the memory card and the program control unit have memory chips capable of storing wash programs. The chip on the card can hold about 10 to 15 programs of normal size, while the chip in the program control unit has a capacity of several hundred programs. MEMORY CARD COPY PROGRAM FROM MEMORY CARD TO CLS 1 2 3 PR.NO. 1 2 3 4 5 4 5 6 7 8 NAME MY OWN 40 °C MY OWN 60 °C MY OWN 90 °C MY OWN WOOL 30 °C MY OWN INTENSIVE 3614 SELECT 3610 A Program memory card If necessary, use b to... 1 MY OWN 40 °C 2 MY OWN 60 °C ... highlight the wash program required. 3 MY OWN 90 °C 4 MY OWN WOOL 30 °C 5 MY OWN INTENSIVE SELECT 9 0 Press SELECT. 1 MY OWN 40 °C 2 MY OWN 60 °C 3 MY OWN 90 °C 4 MY OWN WOOL 30 °C 5 MY OWN INTENSIVE Program memory program control unit 991 NORMAL 95°C STD 992 NORMAL 60°C STD 993 NORMAL 40°C STD 994 INTENSIVE 95° 995 INTENSIVE 60°C 996 PERM.PRESS 60°C 997 PERM.PRESS 40°C 998 LOW EXTRACT 1 MIN 999 HIGH EXTRACT 5 MIN When a program is copied from a memory card to the machine’s program control unit, it is copied, not moved (not deleted from the card). A copy is transferred from the chip on the memory card to the storage chip of the machine program control unit. Program memory card 1 MY OWN 40 °C 2 MY OWN 60 °C 3 MY OWN 90 °C 4 MY OWN WOOL 30 °C 5 MY OWN INTENSIVE Program memory program control unit 4 MY OWN WOOL 30 °C 991 NORMAL 95°C STD 992 NORMAL 60°C STD 993 NORMAL 40°C STD 994 INTENSIVE 95° 995 INTENSIVE 60°C 996 PERM.PRESS 60°C 997 PERM.PRESS 40°C 998 LOW EXTRACT 1 MIN 999 HIGH EXTRACT 5 MIN 3615 The program remains on the memory card, but another copy of it has now been stored in the program control unit. Program memory card Program memory program control unit 1 MY OWN 40 °C 4 MY OWN WOOL 30 °C 2 MY OWN 60 °C 991 NORMAL 95°C STD 3 MY OWN 90 °C 992 NORMAL 60°C STD 4 MY OWN WOOL 30 °C 993 NORMAL 40°C STD MY OWN INTENSIVE 994 INTENSIVE 95° 5 995 INTENSIVE 60°C 996 PERM.PRESS 60°C 997 PERM.PRESS 40°C 998 LOW EXTRACT 1 MIN 999 HIGH EXTRACT 5 MIN 3616 438 9163-01/05 Memory card 64 MEMORY CARD COPY PROGRAM FROM MEMORY CARD TO CLS NOW YOU CAN CHANGE NUMBER. 123 JUST PRESS SELECT IF NUMBER IS OK SELECT 3611 A 1 2 3 4 5 6 7 8 9 0 SELECT Choose 1 or 2: 1 If you want to give the program a different program number (from the one it had on the memory card): Use the numeric keys to enter the new program number, then press SELECT. 2 If the existing number is suitable: Press SELECT. MEMORY CARD COPY PROGRAM FROM MEMORY CARD TO CLS NOW YOU CAN CHANGE NUMBER 00 PROG. NUMBER EXIST! OVERWRITE? PRESS SELECT OR ANY OTHER KEY If the number you have choosen is already used: SELECT 4114 A 1 2 3 1 Select another number. 4 5 6 Enter the new number and press SELECT. 7 8 9 0 SELECT 438 9163-01/05 2 Erase the old program number. Press SELECT. Memory card MEMORY CARD COPY PROGRAM FROM MEMORY CARD TO CLS PROGRAM LOADED PRESS ANY KEY TO CONTINUE... 3612 A EXECUTE WASHPROGRAM FROM MEMORY CARD COPY PROGRAM FROM MEMORY CARD TO CLS COPY PROGRAM FROM CLS TO MEMORY CARD DELETE PROGRAM IN MEMORY CARD CLEAR MEMORY CARD EXIT 65 After the program has been copied (it takes only a few seconds) the menu will look like this: If you want to copy more programs: Press any key to continue. When you have finished: Press b repeatedly tohighlight "EXIT". 4210 A SELECT Press SELECT. 438 9163-01/05 Memory card 66 To copy a program from the program control unit to a memory card What happens when a program is copied? Both the memory card and the program control unit have memory chips capable of storing wash programs. The chip on the memory card can hold about 10 to 15 programs of normal size, while the chip in the program control unit has a capacity of several hundred programs. MEMORY CARD EXECUTE WASHPROGRAM FROM MEMORY CARD COPY PROGRAM FROM MEMORY CARD TO CLS COPY PROGRAM FROM CLS TO MEMORY CARD DELETE PROGRAM IN MEMORY CARD CLEAR MEMORY CARD EXIT SELECT 3619 A Highlight ”COPY PROGRAM FROM CLS TO MEMORY CARD” (press b or c if necessary). Press SELECT. NAME NORMAL 95 °C STD NORMAL 60 °C STD NORMAL 40 °C STD INTENSIVE 95 °C INTENSIVE 60 °C PER. PRESS 60 °C 1 MY OWN 40 °C 2 MY OWN 60 °C 3 MY OWN 90 °C 4 MY OWN WOOL 30 °C 5 MY OWN INTENSIVE SELECT Program memory card 3620 If necessary, use b to... 991 NORMAL 95 °C STD 992 NORMAL 60 °C STD 993 NORMAL 40 °C STD 994 INTENSIVE 95 °C 995 INTENSIVE 60 °C 996 PERM. PRESS 60 °C 997 LOW EXTRACT 1 MIN 998 HIGH EXTRACT 5 MIN SELECT 6 7 8 9 Program memory program control unit 991 NORMAL 95°C STD 992 NORMAL 60°C STD 993 NORMAL 40°C STD 994 INTENSIVE 95° 995 INTENSIVE 60°C 996 PERM.PRESS 60°C 997 PERM.PRESS 40°C 998 LOW EXTRACT 1 MIN 999 HIGH EXTRACT 5 MIN When a program is copied from the machine’s program control unit to a memory card, it is copied, not moved (not deleted from the machine). A copy is transferred from the storage chip of the machine program control unit to the chip on the card. COPY PROGRAM FROM PCS TO MEMORY CARD PR.NO. 991 992 993 994 995 996 3 5 3614 Program memory card MEMORY CARD 2 4 0 EXECUTE WASHPROGRAM FROM MEMORY CARD COPY PROGRAM FROM MEMORY CARD TO CLS COPY PROGRAM FROM CLS TO MEMORY CARD DELETE PROGRAM IN MEMORY CARD CLEAR MEMORY CARD EXIT SELECT 1 ... highlight the wash program required. 1 MY OWN 40 °C 2 MY OWN 60 °C 3 MY OWN 90 °C 4 MY OWN WOOL 30 °C 5 MY OWN INTENSIVE 992 NORMAL 60 °C STD Program memory program control unit 991 NORMAL 95°C STD 992 NORMAL 60°C STD 993 NORMAL 40°C STD 994 INTENSIVE 95° 995 INTENSIVE 60°C 996 PERM.PRESS 60°C 997 PERM.PRESS 40°C 998 LOW EXTRACT 1 MIN 999 LOW EXTRACT 5 MIN 3621 The program remains in the program control unit, but another copy of it has now been stored on the card. Program memory card Press SELECT. 1 MY OWN 40 °C 2 MY OWN 60 °C 3 MY OWN 90 °C 4 MY OWN WOOL 30 °C 5 MY OWN INTENSIVE 992 NORMAL 60 °C STD Program memory program control unit 991 992 NORMAL 95°C STD NORMAL 60°C STD 993 NORMAL 40°C STD 994 INTENSIVE 95° 995 INTENSIVE 60°C 996 PERM.PRESS 60°C 997 PERM.PRESS 40°C 998 LOW EXTRACT 1 MIN 999 LOW EXTRACT 5 MIN 3622 438 9163-01/05 Memory card 67 MEMORY CARD COPY PROGRAM FROM CLS TO MEMORY CARD NOW YOU CAN CHANGE NUMBER. 998 JUST PRESS SELECT IF NUMBER IS OK SELECT 3623 A 1 2 3 4 5 6 7 8 9 0 SELECT Choose 1 or 2: 1 If you want to give the program a different program number (from the one it had on the machine): Use the numeric keys to enter the new program number, then press SELECT. 2 If the existing number is suitable: Press SELECT. MEMORY CARD COPY PROGRAM FROM MEMORY CARD TO CLS NOW YOU CAN CHANGE NUMBER 00 PROG. NUMBER EXIST! OVERWRITE? PRESS SELECT OR ANY OTHER KEY If the number you have choosen is already used: SELECT 4114 A 1 2 3 1 Select another number. 4 5 6 Enter the new number and press SELECT. 7 8 9 0 2 Erase the old program number. Press SELECT. SELECT 438 9163-01/05 Memory card 68 MEMORY CARD COPY PROGRAM FROM MEMORY CARD TO CLS PROGRAM LOADED PRESS ANY KEY TO CONTINUE... 3612 A EXECUTE WASHPROGRAM FROM MEMORY CARD COPY PROGRAM FROM MEMORY CARD TO CLS COPY PROGRAM FROM CLS TO MEMORY CARD DELETE PROGRAM IN MEMORY CARD CLEAR MEMORY CARD EXIT 4210 A 438 9163-01/05 SELECT After the program has been copied (it takes only a few seconds) the menu will look like this: If you want to copy more programs: Press any key to continue. When you have finished: Press b repeatedly to highlight "EXIT". Press SELECT. Memory card To delete a program on a memory card MEMORY CARD EXECUTE WASH PROGRAM FROM MEMORY CARD COPY PROGRAM FROM MEMORY CARD TO CLS COPY PROGRAM FROM CLS TO MEMORY CARD DELETE PROGRAM IN MEMORY CARD CLEAR MEMORY CARD EXIT SELECT 3625 A To access this menu, follow the instructions in section "To select the "Memory card" function Note that restricted-use programs on a memory card cannot be deleted. Highlight ”DELETE PROGRAM IN MEMORY CARD” (press c or b if necessary). 69 What is a restricted-use program? A wash program which has been created on a PC can be made a ”restricted-use” program. This means that: • The program cannot be deleted or copied to the program memory of a washer extractor. • You cannot modify the program or examine its structure. • To run the program you must have access to the memory card, and insert it into the card reader when the program is to be started. EXECUTE WASHPROGRAM FROM MEMORY CARD COPY PROGRAM FROM MEMORY CARD TO CLS COPY PROGRAM FROM CLS TO MEMORY CARD DELETE PROGRAM IN MEMORY CARD CLEAR MEMORY CARD EXIT SELECT Press SELECT. MEMORY CARD DELETE PROGRAM IN MEMORY CARD PR.NO. 1 2 3 4 5 NAME MY OWN 40°C MY OWN 60 °C MY OWN 90 °C MY OWN WOOL 30 °C MY OWN INTENSIVE SELECT 3626 If necessary, use b to... 1 MY OWN 40 °C 2 MY OWN 60 °C 3 MY OWN 90 °C 4 MY OWN WOOL 30 °C 5 MY OWN INTENSIVE SELECT .... highlight the wash program required. Press SELECT. The program will now be deleted from the memory card. This takes between 5 and 15 seconds. If you want to delete more programs: Continue in the same way as described above. EXECUTE WASHPROGRAM FROM MEMORY CARD COPY PROGRAM FROM MEMORY CARD TO CLS COPY PROGRAM FROM CLS TO MEMORY CARD DELETE PROGRAM IN MEMORY CARD CLEAR MEMORY CARD EXIT When you have finished: Press b repeatedly to highlight "EXIT". 4210 A SELECT Press SELECT. 438 9163-01/05 Memory card 70 To delete all programs on a memory card MEMORY CARD EXECUTE WASH PROGRAM FROM MEMORY CARD COPY PROGRAM FROM MEMORY CARD TO CLS COPY PROGRAM FROM CLS TO MEMORY CARD DELETE PROGRAM IN MEMORY CARD CLEAR MEMORY CARD EXIT SELECT 4519 A Note that restricted-use programs on a memory card cannot be copied or deleted. Highlight ”CLEAR MEMORY CARD” (press b or c if necessary). EXECUTE WASHPROGRAM FROM MEMORY CARD COPY PROGRAM FROM MEMORY CARD TO CLS COPY PROGRAM FROM CLS TO MEMORY CARD DELETE PROGRAM IN MEMORY CARD CLEAR MEMORY CARD EXIT SELECT MEMORY CARD CLEAR MEMORY CARD THIS WILL CLEAR ALL PROGRAMS !! TO CONTINUE PRESS SELECT. ELSE PRESS ANY OTHER KEY. SELECT 3629 SELECT 438 9163-01/05 Press SELECT. If you change your mind and do not want to delete the entire memory card: Press any key other than SELECT. If you want to delete all programs on the memory card (with the exception of any restricted-use programs): Press SELECT. What is a restricted-use program? A wash program which has been created on a PC can be made a ”restricted-use” program. This means that: • The program cannot be deleted or copied to the program memory of a washer extractor. • You cannot modify the program or examine its structure. • To run the program you must have access to the memory card, and insert it into the card reader when the program is to be started. Maintenance 71 Maintenance Daily • Clean the door seal and remove detergent residue. • Check that the door does not leak. • Clean the detergent compartment and wipe down the machine with a damp cloth. • Check that the drain valve does not leak. • Start the machine and check that the door remains locked while the machine is operating. Fast forward the machine to the stop position and check that the door cannot be opened until the program is completed. Machine with scale • Check that panels are mounted. • Check that no foreign objects are placed on the machine. • Check that inlet and drain hoses are hanging freely. • Check 0-weight. Every month • Check that valves, hoses and connections do not leak. • Remove any textile lint from the drain opening, joints in drain pipes etc. • Check the door locking relay. – Select program 991 (”Start-up program”). When level is reached, press the emergency stop button. The door lock relay shall open when the water level has drained close to the bottom surface of the inner drum. Reset the emergency stop button and switch power off and on to reset the error message. Note, the door lock relay must not open immediately. 438 9163-01/05 Calibration of level control system 72 Calibration of level control system The level control system can be individually and manually calibrated. The calibration starts at the level at the bottom of the inner drum. The calibration can be made up to 250 mm from the bottom of the inner drum. A ruler is supplied with the machine where the water level above the inner drum can be read. 1 CLS 7.jpg • Place the ruler on the bottom of the inner drum, equally between two lifters and front and rear gables. Rotate the drum so that the ruler is totally vertical and assure that the three pins of the ruler fit in the holes of the inner drum. Fig. 1 • Push the scale to the bottom of the drum and tighten the nuts. 2 IMG 0012.jpg Fig. 2 • Close the door. 438 9163-01/05 Calibration of level control system 73 • The ruler has two different scales, one in mm and one in RU units (exactly 2 mm/RU units). The calibration shall be made in at least five level steps, and the first step when the water just enters the inner drum. More calibration steps can be made if requested. - Go down to "Options menu" - Press "Select" - Go down to "Service mode" - Press "Select". Fig. 3 3 CLS 4.jpg CLS 6.jpg 438 9163-01/05 Calibration of level control system 74 4 SERVICE PROGRAM MAKE A CHOICE: CLEAR TRIP HOUR COUNTER CLEAR SERVICE COUNTER CLEAR WASH PROGRAM COUNTER IN CLS CLEAR WASH PROGRAM COUNTER IN SMC SCALE ADJUSTMENTS CALIB. OF LEVEL SENSOR EXIT SELECT Fig. 4 • "Service Mode" menu is now shown on the display. 438 9163-01/05 Calibration of level control system 75 • Close the door. • Go down to "Calibration of level sensor" • Press "Select" 5 LEVEL CALIBRATION FILL WATER TO DESIRED LEVEL LEVEL: 0 SCU OK Fig. 5 OPEN • Press "Open" to fill water until the water reaches the botton of the inner drum where the ruler is placed. • Press "OK" • Enter the value read on the ruler in RU units (The first setting is 0=level in drum. • Press "OK" • Press "Open" to fill more water. • Press "OK" • Enter the value read on the ruler in RU units. (If wrong value is entered, press "CLR". Enter new value. • Press "OK" • Enter another three values so that it will be five different totally. • When all values have been entered, press "Save" 438 9163-01/05 Calibration of level control system 76 6 LEVEL CALIBRATION OLD CALIBRATION WILL BE OWERWRITTEN ARE YOU SURE? PRESS OK ELSE PRESS ANY OTHER KEY OK Fig. 6 • Press "OK" • Go down to "Exit" • Press "Select" 438 9163-01/05 Calibration of the scale (weight function) 77 Zero adjustment of the scale (weight function) The scale itself is calibrated from factory and no adjustment should be necessary unless some scale parts need to be changed. However a zero adjustment needs to be done as the total weight of the machine needs to be programmed into the scale. Be sure that the water and drain hoses are in place and properly mounted. Be sure that all panels are mounted and the cover over the power connection is placed on top of the machine. • Enter the "service mode" as in level calibration. • In "service mode" go to "scale adjustment" • Press "Select" • Go down to "Zero calibration" • Press "Select" • Press "Select" (Be sure that there are no extra weight on the machine. And don´t lean on the machine). • When display text "Reset scale from calibration…" appears, press "Select" • Go down to "Exit" • Press "Select" • Go back to main menu. The zero adjustment is now done and the weight of the emty machine should now be red on the display as 0.0 kg (a difference of ±0.1 kg is allowed). If an other value is shown in the display , the zero adjustment has to be done again from the start. 438 9163-01/05 Calibration of the reference machines Wascator FOM 71 CLS 78 Checklist for calibration of Wascator FOM 71 CLS Some of the checkpoints results in exposure to dangerous line voltages or rotating parts and must be carried out only by authorized personnel. This approval inspection shall be performed at least once a year. All measurement equipment shall be of laboratory type (see list below) with identification labels and checked not more than 12 months prior the testing. For calibration procedures see list below and the manual following the machine. Follow the instructions and report all values in attached xxxx enclosed to this instruction. A reference machine passing all the calibration checks will conform with the specification given in IEC 456. Measurement equipment needed: Water level Multimeter Speedo meter, digital tachometer Temperature instrument Time watch Weights 438 9163-01/05 Calibration of the reference machines Wascator FOM 71 CLS 79 Checks to be made 1. Heating element power ***WARNING*** Remove the front panel and measure the cold resistance of the heating elements. The elements shall be at ambient temperature and the machine should not have been run for at least 5 hours. Resistance at 20° shall be: Rated voltage according to data label attached on machine Resistance 400/230 volts 28.5 - 29.7 ohms 415/240 volts 30.9 - 32.2 ohms 2. Visual heating element inspection ***WARNING*** Remove one of the heating elements and visually inspect for and build up of lint, limestone, etc. which can cause reduced heater efficiency. 3. Line voltage ***WARNING*** Measure the rated voltage between L1 - L2 - L3 on the incoming mains to the machine. 4. Leveling of the machine The machine must be installed on a flat horizontal surface. Check that the top of the machine is horizontal. Measure with a water-level. Deviation from horizontal at any top panel corner must not exceed 5 mm. 5. Drain installation Check drain installation, minimum drain diameter 50 mm. A drain with a 150 mm free vertical flow is recommended but not compulsory. 6. Water supply Check of water supply pressure and supply filling rate. Supply pressure shall be between 200 - 600 kPa (2-6 bar). Measure the supply time using the ”weight check” program: FOM 71 CLS Program 993 (18 kgs) The machines shall be without load. Supply time to 18 kgs shall be 60 - 75 seconds. 438 9163-01/05 Calibration of the reference machines Wascator FOM 71 CLS 80 7. Leakage at drain and inlet valve Check for leakage at drain and inlet valves. Run weight check program (see 6). Weight 18 kgs. Pause the machine for 15 minutes. After 15 minutes the weight shall not be changed. Reading tolerances ± 1 mm. 8. Calibration of the internal level scale Calibrate the level control according to Operating manual. 9. Water level Water level adjustments and checks. Use level check programs. The machine shall be without load and not rotating. Run the level check program 992. The program fills repeatedly to 100, 130, 160 and 200 mm. Read water level at each stop on the internal ruler. Max. deviation ± 5 mm. 10. Weight check Zero calibrate the machine according to Operating manual. The machine shall be at stand still. Place a calibrated weight of 10 kgs on the top of the machine. Read the scale output. Repeat with an additional 10 kgs. Read the output. Displayed weight shall be with in ± 0.1 kg from the calibrated weights. 11. Drain time Use level check program 992. Fill to 160 mm. Drain the water. Measure the drain time until full flow is reduced. Max. allowable time 30 seconds. 438 9163-01/05 Calibration of the reference machines Wascator FOM 71 CLS 81 12. Temperature control Use temperature control program 994. Put a temperature probe through the upper door gasket into the bath or use the laboratory temperature measurement system (must be calibrated separately in advance). Read the temperatures at 25°, 40°, 60° and 80° on the machine display and on the measurement instruments. Max. deviation ± 1°C. 13. Drum speed at wash. ***WARNING*** Remove the back panel. Run program 991. The wash speed shall be measured with a speedo meter (reflector type). The reflector shall be placed on the big pulley. Wash speed shall be measured at nominal voltage and with a load of 5 kg of cotton as load. Speed variation allowable in both directions: 52 ± 1 RPM. 14. Extraction speed ***WARNING*** Proceed as in 13, but rapid advance to last drain after wetting the load and measure the extraction speed with a well balanced load of wet cotton (dry weight 5 kg) after reaching set speed 500 rpm. Extraction speed shall be within 500 ± 20 RPM. 15. Recording of complete program (not compulsory) Record using the laboratory recording equipment the complete IEC 60° cotton program. For best calibration accuracy use no load. Parameters to be recorded as a function of time: Temperature Amount of water Speed 438 9163-01/05 82 Door opening for test sample Wascator FOM71 CLS Open door during wash cycle It is possible to open the door during a wash cycle in order to take out test samples. But to be able to do so some criteria have to be fullfilled. • The water level in the machine may not exceed 38 RU when the door is opened. • The water temp may not exceed 60°C. Two different pauses are approved for door opening during wash cycle. • Programmed pause – the pause is programmed in the wash cycle. • Select ”PAUSE” by clicking down in the menu. 438 9163-01/05 CALIBRATION PROTOCOL Wascator FOM 71CLS Document number: .......................................................................................... Page: 1(3) Machine location: ............................................................................................................. Calibration made by: ....................................................................................................... Date: ................................ Previous calibration date: ....................................... Signature: .......................................................................................................................... Machine data: Measurement equipment: Wascator FOM 71CLS .... .................................................................................... Type ................................. .................................................................................... Ser. No. ............................ / .................................................................................... Hz Voltage ............................ V .................................................................................... Instructions: Instructions how to calibrate the Wascator FOM 71CLS are given in document: Calibration of reference Wascator FOM 71CLS. All instruments and measurements devices needed for the calibration shall confirm with instructions given in above document. Report summary: Document number: page 2 (3) Mandatory Measured After adjust 1. Heating element power R1 ohm 230V: 28.5-29.7, 240V: 30.9-32.2 ohm R2 ohm R3 ohm 2. Visual heating element inspection. Visual 3. Line voltage. L1-L2 OK L1-L3 L2-L3 4. Levelling of the machine. lf-lr < 5 mm rf-rr < 5 mm lf-rf < 5 mm lr-rr < 5 mm 5. Drain installation. d (mm) > 50 mm 6. Water supply. P (bar) 2-6 bar Filltime 60-75 sec 7. Leakage at drain and inlet valve. Leakage 0 ± 1 mm 8. Calibration of water level scale. Level 0-200 mm Document number: page 3 (3) Mandatory Measured After adjust 9. Water level. 130±5 mm Linearity 100, 130, 160 and 200 mm. 160±5 mm 200±5 mm 10. Weight check 1. 10 kg ± 0.1 10±0.1 kg 2. 20 kg ± 0.1 20±0.1 kg 11. Drain time. Drain time < 30 sec 12. Temperature control. Tol±1°C 25°C 40°C 60°C 80°C 13. Drum speed at wash. 5 Kg of load, set speed 52 rpm 14. Extraction speed. 5 Kg of load, set speed 500 rpm 15. Recording of complete program. (Not compulsory) CW 52±1 rpm CCW 52±1 rpm n(rpm) 480-520 rpm Washer extractors, Tumble dryers, Hydro extractors Types: W.55H., W3..., WN3..., W4.H., EXSM.X., H1..., N1130.., N1190.., N2..., N3..., N4..., N5... Product standards:EN 60335-2-4, -7, -11 EMF standards: EN 50366:2003 + A1 EMC standards: EN 61000-6-1 (2001) W.55H., W3..., W4.H., N1130, N1190, N2..., N3... EN 61000-6-3 (2001) W.55H., W3..., WN3..., W4.H., EXSM.X., N1130, N1190, N2..., N3... A11 (2003) WN3..., N5... EN 61000-3-11 (2001) EXSM.X. EN 61000-6-2 (2005) WN3..., N4..., N5... EN 61000-6-3 (2007) N4... Försäkran om överensstämmelse EF-samsvarserklæring Vi, Electrolux Laundry Systems Sweden AB SE-341 80 Ljungby, Sverige försäkrar under eget ansvar att denna produkt, med typbeteckning och enl. ovan, är tillverkad i överensstämmelse med följande direktiv: • LVD Directive 2006/95/EC • EMC Directive 2004/108/EC • GAS Directive 2009/142/EC (gäller endast N'''''' och WN3...) • CE Marking Directive 93/68/EEC • RoHS Directive 2002/95/EC • WEEE Directive 2002/96/EC • MD Directive 2006/42/EC Vi, Electrolux Laundry Systems Sweden AB SE-341 80 Ljungby, Sverige, erklærer på eget ansvar at dette produktet, med typebetegnelse og produksjonsnummer som angitt nedenfor, er produsert i samsvar med bestemmelsene i følgende direktiver: • LVD Directive 2006/95/EC • EMC Directive 2004/108/EC • GAS Directive 2009/142/EC (gjelder bare N'''''' og WN3... ) • CE Marking Directive 93/68/EEC • RoHS Directive 2002/95/EC • WEEE Directive 2002/96/EC • MD Directive 2006/42/EC CE Declaration of conformity EG-Conformiteitsverklaring We, Electrolux Laundry Systems Sweden AB SE-341 80 Ljungby, Sweden declare under our sole responsibility that the product of the type stated above is manufactured in conformity with the following EU directives: Wij, Electrolux Laundry Systems Sweden AB SE-341 80 Ljungby, Zweden verklaren hierbij op eigen verantwoordelijkheid dat het produkt van het type en met het serienummer zoals hieronder vermeld, is vervaardigd conform de volgende normen: • LVD Directive 2006/95/EC • EMC Directive 2004/108/EC • GAS Directive 2009/142/EC (alleen N'''''' en WN3...) • CE Marking Directive 93/68/EEC • RoHS Directive 2002/95/EC • WEEE Directive 2002/96/EC • MD Directive 2006/42/EC • • • • • • • LVD Directive 2006/95/EC EMC Directive 2004/108/EC GAS Directive 2009/142/EC (N''''''... and WN3... only) CE Marking Directive 93/68/EEC RoHS Directive 2002/95/EC WEEE Directive 2002/96/EC MD Directive 2006/42/EC EG-Konformitätserklärung Wir, die, Electrolux Laundry Systems Sweden AB SE-341 80 Ljungby, Schweden erklären hiermit in alleiniger Verantwortung, daß das Produkt mit der oben genannten Typenbezeichnung mit folgenden EU-Richtlinien übereinstimmt: • • • • • • • LVD Directive 2006/95/EC EMC Directive 2004/108/EC GAS Directive 2009/142/EC (Nur N'''''' und WN3...) CE Marking Directive 93/68/EEC RoHS Directive 2002/95/EC WEEE Directive 2002/96/EC MD Directive 2006/42/EC Déclaration de conformité CE Nous, Electrolux Laundry Systems Sweden AB SE-341 80 Ljungby, Suède déclarons sous notre seule et unique responsabilité que le produit des type et numéro de série indiqués ci-dessus est fabriqué conformément aux directives UE suivantes: • • • • • • • LVD Directive 2006/95/EC EMC Directive 2004/108/EC GAS Directive 2009/142/EC (N'''''' et WN3... uniquement) CE Marking Directive 93/68/EEC RoHS Directive 2002/95/EC WEEE Directive 2002/96/EC MD Directive 2006/42/EC Declaración de conformidad CE Electrolux Laundry Systems Sweden AB con sede en SE-341 80 Ljungby, Suecia declara bajo su exclusiva responsabilidad que el producto cuyo tipo se especifica en el encabezado se ha fabricado conforme a las siguientes directivas: • • • • • • • LVD Directive 2006/95/EC EMC Directive 2004/108/EC GAS Directive 2009/142/EC (vale sólo N'''''' y WN3) CE Marking Directive 93/68/EEC RoHS Directive 2002/95/EC WEEE Directive 2002/96/EC MD Directive 2006/42/EC Erklæring om EU-overensstemmelse Vi Electrolux Laundry Systems Sweden AB SE-341 80 Ljungby, Sverige erklærer på eget ansvar, at produktet med typebetegnelse som angivet er fremstillet i overens stemmelse med følgende EU-direktiver: • • • • • • • LVD Directive 2006/95/EC EMC Directive 2004/108/EC GAS Directive 2009/142/EC (gælder kun N'''''' og WN3...) CE Marking Directive 93/68/EEC RoHS Directive 2002/95/EC WEEE Directive 2002/96/EC MD Directive 2006/42/EC Dichiarazione CE di conformità Noi Electrolux Laundry Systems Sweden AB SE-341 80 Ljungby, Svezia dichiariamo sotto la nostra esclusiva responsabilità che il prodotto del tipo specificato sopra è conforme alle seguenti direttive [UE]: • LVD Directive 2006/95/EC • EMC Directive 2004/108/EC • GAS Directive 2009/142/EC (solo N'''''' e WN3...) • CE Marking Directive 93/68/EEC • RoHS Directive 2002/95/EC • WEEE Directive 2002/96/EC • MD Directive 2006/42/EC Declaração CE de conformidade Nós, Electrolux Laundry Systems Sweden AB SE-341 80 Ljungby, Suécia declaramos sob nossa inteira responsabilidade que o produto com os números de série e de tipo abaixo indicados é fabricado em conformidade com as seguintes directivas [UE]: • LVD Directive 2006/95/EC • EMC Directive 2004/108/EC • GAS Directive 2009/142/EC (apenas N'''''' e WN3...) • CE Marking Directive 93/68/EEC • RoHS Directive 2002/95/EC • WEEE Directive 2002/96/EC • MD Directive 2006/42/EC ΔΗΛΩΣΗ ΠΙΣΤΟΤΗΤΑΣ ΕΚ H Electrolux Laundry Systems Sweden AB SE-341 80 Ljungby, Σουηδία δηλώνει με αποκλειστική της ευθύνη ότι το προϊόν του ανωτέρω αναφερόμενου τύπου κατασκευάζεται σύμφωνα με τις ακόλουθες οδηγίες της Ευρωπαϊκής Ένωσης: • LVD Directive 2006/95/EC • EMC Directive 2004/108/EC • GAS Directive 2009/142/EC (N'''''' και WN3... μόνο) • CE Marking Directive 93/68/EEC • RoHS Directive 2002/95/EC • WEEE Directive 2002/96/EC • MD Directive 2006/42/EC CE megfelelöségi nyilatkozat Mi, az Electrolux Laundry Systems Sweden AB SE-341 8 Ljungby, Svédország felelöségünk teljes tudatában kijelentjük, hogy az alább megadott típusú termék gyártása a következö EU-irányelvekkel összhangban történik: • LVD Directive 2006/95/EC • EMC Directive 2004/108/EC • GAS Directive 2009/142/EC (csak az N'''''' és WN3... esetén) • CE Marking Directive 93/68/EEC • RoHS Directive 2002/95/EC • WEEE Directive 2002/96/EC • MD Directive 2006/42/EC Ljungby 2010.08.16 EY-Vaatimustenmukaisuusvakuutus Me Electrolux Laundry Systems Sweden AB SE-341 80 Ljungby, Ruotsi vakuutamme yksinomaan omalla vastuullamme, että tuote, jonka tyyppitunnus lukee yllä, on valmistettu seuraavien [EU]-direktiivien mukaisesti: • • • • • • • LVD Directive 2006/95/EC EMC Directive 2004/108/EC GAS Directive 2009/142/EC (vain N'''''' ja WN3...) CE Marking Directive 93/68/EEC RoHS Directive 2002/95/EC WEEE Directive 2002/96/EC MD Directive 2006/42/EC Franco Panno Vice President Technical Operations 471 1531-43/21 Page 1/2 Translation table for model name to type of approval Commercial name Type W455H W.55H. W465H W3... W475H W3... W4105H W3... W4130H W3... W4180H W3... W4240H W3... W4300H W3... FOM71 CLS W3... WB4130H W3... WB4180H W3... PW9 W3... W475S W3... W485S W3... W4105S W3... W4130S W3... W4180S W3... W4250S W3... W4330S W3... W475N W3... W485N W3... W4105N W3... W4130N W3... W4180N W3... W4250N W3... W4330N W3... WD4130H WN3... WD4240H WN3... W4400H W4.H. W4600H W4.H. W4850H W4.H. W41100H W4.H. W4280X EXSM.X. W4350X EXSM.X. W4600X EXSM.X. C240 H1... C260 H1... C240R H1... C260R H1... C290R H1... T4130 N1130.. T4190 N1190.. PD9 N1190.. T4250 N2... T4350 N2... T4300S N3... T4290 N4... T4530 N4... T4650 N4... T4900 N4... T41200 N4... T4900CR N4... T41200CR N4... T4300LE N5... Ljungby 2010.08.16 Franco Panno Vice President Technical Operations 471 1531-43/21 Page 2/2 Skrotning av maskin När maskinen inte längre skall användas måste den lämnas till en återvinningsstation för destruktion. Många detaljer i maskinen går att återanvända, men den innehåller även annat material som måste tas om hand på ett korrekt sätt. Lämna därför aldrig maskinen eller delar av maskinen i hushållsavfallet, eftersom det kan leda till hälsorisker eller skador på miljön. Scrapping of machine When the machine is no longer to be used, it must be submitted to a recycling facility for destruction. The majority of the components in the machine can be reused, but it also contains other material that must be taken care of in the correct way. Therefore, never mix the machine or its parts with domestic waste as this may lead to health hazards or damage to the environment. Entsorgung des Geräts Wenn das Gerät nicht länger im Gebrauch ist, muss dieses einer Recyclingstation zur Entsorgung zugeführt werden. Viele Komponenten des Geräts sind recyclingfähig, enthalten aber auch Materialien, die vorschriftsmäßig entsorgt werden müssen. Entsorgen Sie daher das Gerät oder Geräteteile niemals im Hausmüll, da dies Gefahren für die Gesundheit oder Umweltschäden nach sich ziehen kann. Mise au rebut de machine Lorsque la machine n’est plus utilisée, elle doit être déposée à une installation de recyclage pour y être détruite. La majorité des composants de la machine peuvent être réutilisés mais celle-ci contient également d’autres matériaux qui doivent être traités correctement. C’est pourquoi vous ne devez jamais mélanger la machine ou ses pièces avec les ordures ménagères, risque de polution pour l’environnement ou la santé. Desguace de la máquina Cuando la máquina no tenga que utilizarse más, ha de entregarse a una instalación de destrucción para su reciclado. La mayor parte de sus componentes pueden volver a utilizarse, pero consta también de otros materiales que han de ser tratados de la manera correcta. Por esa razón nunca mezclar la máquina ni sus partes con la basura doméstica pues esto podría constituir un peligro para la salud o dañar el medio ambiente. Bortskaffelse af maskinen Når maskinen ikke længere er i brug, skal den afleveres til destruktion på en genbrugsstation. Mange dele i maskinen kan genanvendes, men den indeholder også andre materialer, der skal håndteres korrekt. Smid derfor ikke maskinen eller dele af den ud sammen med husholdningens almindelige affald, da det kan være forbundet med sundhedsrisiko eller give miljøskader. Koneen hävittäminen Kun konetta ei enää käytetä, se pitää luovuttaa kierrätyskeskukseen tuhottavaksi. Suurinta osaa koneen osista voidaan käyttää uudelleen, mutta se sisältää myös materiaaleja, jotka pitää käsitellä asianmukaisesti. Älä sen vuoksi koskaan laita konetta tai sen osia kotitalousjätteen sekaan, sillä se saattaa aiheuttaa terveysriskejä tai vahinkoa ympäristölle. Skroting av maskin Når maskinen ikke lenger skal brukes, må den leveres til en gjenvinningsstasjon for destruksjon. Det går an å gjenbruke mange deler av maskinen, men den inneholder også annet materiale som man må ta hånd om på riktig måte. Legg derfor aldri maskinen eller deler av maskinen i husholdningsavfallet, siden det kan føre til helse- eller miljøskader. Afdanken van de machine Als de machine niet langer gebruikt gaat worden, moet deze ter vernietiging worden aangeboden bij een recyclinginrichting. De meeste componenten van de machine kunnen worden hergebruikt, maar hij bevat ook ander materiaal dat op een juiste wijze moet worden behandeld. Daarom de machine of zijn onderdelen nooit bij het huisvuil zetten, want dat kan leiden tot gezondheidsrisico’s of schade aan het milieu. Rottamazione della macchina Quando la macchina non può più essere utilizzata, deve essere affidata a un centro di riciclaggio che ne effettui la rottamazione. La maggior parte dei componenti della macchina sono riciclabili, ma ce ne sono anche alcuni che devono essere smaltiti in modo appropriato. Perciò, non mischiare mai la macchina o parti di essa con i normali rifiuti domestici, poiché ciò potrebbe comportare rischi per la salute o per l’ambiente. Złomowanie maszyny Wycofaną z użytkowania maszynę należy przekazać do zakładu utylizacji w celu złomowania. Większość podzespołów maszyny nadaje się do powtórnego wykorzystania, lecz zawiera ona także inne materiały, z którymi należy postępować w odpowiedni sposób. Z tego powodu niedozwolone jest łączenie maszyny lub jej części z odpadami domowymi, gdyż może to prowadzić do zagrożenia zdrowia lub szkody dla środowiska. Vyřazení přístroje Přístroj, který již nebude používán, by měl být odevzdán k likvidaci do ekodvora. Většina součástek přístroje může být opětovně použita, některé ale vyžadují likvidaci přesně daným způsobem. A proto nikdy nemíchejte dohromady přístoje nebo jejich části s domácím odpadem, mohlo by to vést ke zdravotním rizikům nebo k poškození životního prostředí. Οριστική απόσυρση μηχανήματος Όταν το μηχάνημα δεν προορίζεται για περαιτέρω χρήση, θα πρέπει να οδηγείται σε εγκατάσταση ανακύκλωσης για καταστροφήΤο μεγαλύτερο ποσοστό των εξαρτημάτων του μηχανήματος μπορεί να χρησιμοποιηθεί ξανά, αλλά το μηχάνημα περιλαμβάνει και άλλα υλικά η διαλογή των οποίων θα πρέπει να πραγματοποιείται με τον κατάλληλο τρόποΚατά συνέπεια, μην αναμιγνύετε ποτέ το μηχάνημα ή τα εξαρτήματά του με οικιακά απορρίμματα καθώς αυτό μπορεί να αποβεί επικίνδυνο για την υγεία ή επιβλαβές για το περιβάλλον. Art. No. 438 9041-90 / 06.21 Electrolux Laundry Systems Sweden AB 341 80 Ljungby, Sweden www.electrolux.com/laundrysystems Share more of our thinking at www.electrolux.com