1
12.0 Changing Components
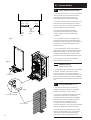
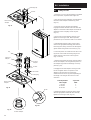
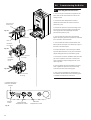
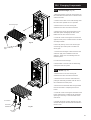
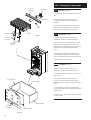
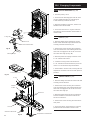
12.15 Pressure Gauge (Figs. 59 & 60)
1. Drain the primary circuit and undo the nut on
the pressure gauge capillary.
2. Remove the timer cover and ease the timer
wiring aside. Undo the screws securing the
gauge retaining bracket.
3. Remove the bracket and gauge assembly.
Depress the barbs on the side of the gauge and
remove the retaining bracket.
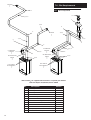
Fig. 59
Pressure Gauge
Capillary
4. Reassemble in reverse order.
Gauge Retaining
Bracket
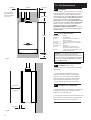
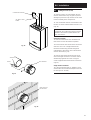
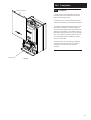
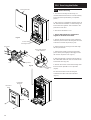
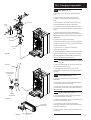
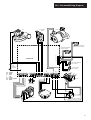
12.16 Expansion Vessel (Fig. 61)
1. To replace the expansion vessel it is
necessary to remove the boiler from the wall.
Timer Cover
NOTE: Alternatively a vessel of equivalent
capacity can be fitted on the system return
pipe as close as possible to the boiler.
Pressure Gauge
2. Drain the system and undo all gas and water
connections. Remove the flue elbow.
Fig. 60
3. Lift the boiler off the wall plate and lay it on it’s
side on a clean flat surface.
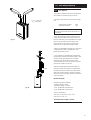
Expansion Vessel
4. Undo the nut on the vessel outlet spigot, and
remove the locknut and spring washer securing
the spigot to the boiler chassis.
Retaining Clip
5. Undo the screws and remove the appliance
upper cross member. Slide the expansion vessel
out of the retaining clips.
6. Reassemble in reverse order. Fully
recommission the appliance and system.
Vessel Outlet
Spigot
Boiler
Chassis
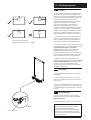
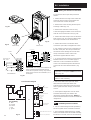
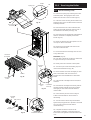
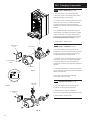
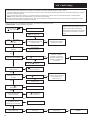
12.17 Spark Generator (Fig. 62)
NOTE: The spark generator is an integral
part of the NAC gas valve plug.
Spring
Washer
Lock Nut
1. Disconnect the ignition lead and earth wire
from the NAC plug.
Fig. 61
2. Remove the screw securing the NAC plug to
the gas valve. Carefully pull the NAC forwards
off the valve.
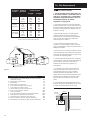
3. Remove the screws securing the control box
cover and release the cover retaining barbs from
their slots. Disengage the rear of the cover from
the control box hinge pin.
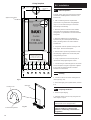
Electrode Leads
4. Undo the earth strip securing screws. Lift the
strip away from the control box.
Gas Valve
5. Trace the NAC supply cable and disconnect
the plug from the PCB.
Fig. 62
NAC
6. Reassemble in reverse order, ensuring that all
connections on the earth strip are secure.
33