1
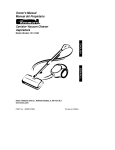
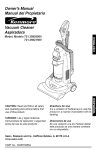
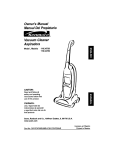
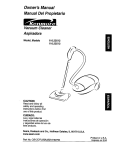
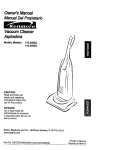
Owner's Manual
Manual del Propietario
Canister Vacuum Cleaner
A spiradora
Model,
Modelo
721.24195
Sears, Roebuck and Co., Hoffman Estates, IL 60179 U.S.A
www. sears, corn
Part No.: 3828Fi3849A
Printed in CHINA
BeforeUsingYour New Vacuum ...................2
PerformanceFeatures ......................................
8
KenmoreVacuum CleanerWarranty .............2
ChangingThe Dust Bag ....................................
9
Cleaning MotorSafety Filter ..............................9
ImportantSafety Instructions ........................3
Cleaning ExteriorandAttachments .................10
Parts and Features...........................................4
Assembly .........................................................
5
Use and Care ...................................................
6
How Your VacuumWorks .................................6
How to Start Your Vacuum ................................6
Attachments ......................................................
7
StoringYour Vacuum ......................................10
CleaningAir-Turbine Brush Nozzle..................11
Belt changingand brush cleaning....................11
Troubleshooting ............................................
13
Parts List ..................................................
14~16
AttachmentsUseChart......................................7
Master ProtectionAgreements ....................17
VacuumingTips .................................................
8
Service .............................................
Back Covet
Please read this guide. It will help you assemble and operate your new Kenmore vacuum in the
safest and most effective way.
For more information about vacuum care and operation, call your nearest Sears store.
You will need the complete model and serial numbers when requesting information.
Your vacuum's model and serial numbers are located on the Model and Serial Number Plate.
Usethe space below to recordthe model number and serial numberof your new Kenmorevacuum.
Model No.
Serial No.
Date of Purchase
Keep this book and your sales check (receipt) in a safe place for future reference.
LIMITED ONE YEAR WARRANTY ON KENMORE VACUUM CLEANER
This warranty is for one year from the date of purchase, and includes only private household
vacuum cleaner use. During the warranty year, when this vacuum cleaner is operated and
maintained according to the owner's manual instructions, Sears will repair any defects in
material or workmanship free of charge.
This warranty excludes vacuum bags, belts, light bulbs, and filters, which are expendable
parts and become worn during normal use.
For warranty service, return this vacuum cleaner to the nearest Sears Service Center in
the United States.
This warranty applies only while this product is in use in the United States.
This warranty gives you specific legal rights, and you may also have other rights which vary
from stste to state.
Sears, Roebuck and Co., D/817WA, Hoffman Estates, IL 60179
-2-
WARNING
Your safety is important to us. To reduce the risk of fire, electrical shock, injury to
oersons or damage when using your vacuum cleaner, follow basic safety precautions
including the following:
Readthis manualbefore assemblingor using
your vacuum cleaner.
Useyour cleaneronly as describedinthis
manual.Useonly withsuppliedattachments.
To reducethe risk of electricalshock- Do not
use outdoors or on wetsurfaces.
Disconnectelectricalsupply beforeservicing
or cleaningout brush area. Failureto do so
could result in electricalshock or brush
suddenly starting.
Always turn cleaneroff before connectingor
disconnectingthe hose.
Always turn cleaneroff before unplugging.
Do not unplug by pulling on cord. To unplug,
grasp the plug, not the cord.
Hold plug when rewindingonto cord reel.
Do not allow plug to whipwhen rewinding.
Do not use withdamagedcord or plug. If
cleaneris not working as it should, has been
dropped,damaged, left outdoors,or dropped
into water.
Do not pull or carry bycord, use cordas a
handle,close dooron cord, or pullcordaround
sharpedges or corners.Donot runcleanerover
cord. Keepcord awayfrom heatedsurfaces.
Do not leave cleanerwhen pluggedin. Unplug
from outletwhennot in useand beforeservicing.
Do not allowto be usedasa toy. Closeattention
isnecessarywhenusedbyor nearchildren.
Do not handle plug or cleanerwith wet hands.
Do not operate the cleanerwith a punctured
hose. Replaceif cut or worn. Avoid vacuuming
sharp objects.
Do not use with any openingblocked; keep
free of dust, lint, hair and anythingthat may
reduceair flow.
Keep hair, loose clothing,fingers, andall parts
of body away from openings and movingparts.
Do not use cleanerwithout dust bag and/or
filters in place.
Always changethe dust bag after vacuuming
carpetcleanersor freshener, powdersand fine
dust.These productsclog the bag, reduce
airflow and can causethe bagto burst. Failure
to changebag could causepermanentdamage
to the cleaner.
Do not use the cleanerto pick up sharp hard
objects,small toys, pins, paper, etc. They may
damagethe cleaneror dust bag.
Donotpickup anythingthatis burningor smoking,
suchas cigarettes,matches,or hot ashes.
Do not usevacuum cleaner
to pick upflammableor combustibleliquids
(gasoline,cleaningfluids, perfumes,etc.),or use
in areaswherethey may be present.The fumes
from these substancescan createa fire hazard
or explosion.
Use extra care when cleaningon stairs.Do not
put on chairs, tables,etc. Keep on floor.
You are responsiblefor makingsure that your
vacuum cleaneris not used by anyone unable
to operate it properly.
SAVE THESE INSTRUCTIONS
Proper assembly and safe use of your vacuum cleaner are your responsibilities. Your
cleaner is intended only for household use. Read this Owner's Manual carefully for
important use and safety information. This guide contains safety statements under warning
and caution symbols. Please pay special attention to these boxes and follow any
instructions given. WARNING statements alert you to such hazards as fire, electrical
shock, burns and serious personal injury. CAUTION statements alert you to such hazards as
moderate personal injury and/or property damage.
-3-
It is important to know your vacuum cleaner's parts and features to assure its proper and safe
use. Review these before using your cleaner.
Slide Switch
___
Hose
M
Handle Button/"
/_
Telescopic _
__
_o mance Indicato
Power Cord
(Not Shown)
/
Wand
//
//
Lid Release Latch
//
Wand
Button
FittingCord
Hook
Reel
Button
Suction Inlet
A-,/
Pile Adjustment
Air-Turbine Brush Nozzle
ATTACHMENTS
Crevice Tool
Floor Nozzle
-4-
Dusting/
Upholstery Tool
CANISTER
Before assembling your vacuum cleaner, be
sure you have all the parts shown in PARTS
AND FEATURES.
TELESCOPIC
1. Open the canister hood.
2. Check to see that the dust bag is properly
installed.See CHANGING THE DUST BAG
for instructions.
3. Check to see that the motor safety filter is
properly installed. See CLEANING
MOTOR SAFETY FILTER for instructions.
WAND
Hold spring latch
and pull out or push
in wand to
required length.
'_ Spring Latch
AIR-TURBINE
MotorSatety
BRUSH NOZZLE
1. Insert wands
into the AirTurbine Brush
Nozzle until the
wand button
snaps into place
in the hole of _
the tool.
Long Pile
1
_
Fitting Hook
#
Adjustment
_
HOSE
X
2. Slide the Pile Adjustment to the right for long
pile and to the left for short pile.
,_Pile
/_
Filter
1. Insert hose into canister until it snaps into
place.
To remove hose: Push hose fitting hook
down and pull out.
I
2. Insert wand into handle until lock button
snaps into place.
To remove handle: Press lock button in
and pull up on handle.
Short Pile
ATTACHMENTS
Open the accessory cover and pull out
accessory you want.
For proper use of accessory and best cleaning
results, see ATTACHMENT USE CHART.
Handle
Lock Button
-5-
USE AND CARE
The vacuum cleaner creates suction that
picks up dirt. Rapidly moving air carries
the dirt to the dust bag through the air
flow passages. The dust bag lets the air
pass through, while it traps the dirt. For
best cleaning results, keep the airflow
passage open. Check the starred areas
occasionally for clogs. Unplug from
outlet before checking.
NOTE: Do not stand canister body on its
end while operating or you will block the
exhaust vents.
WARNING
Personal Injury and Product Damage
Hazard!
• DO NOT plug in if switch is in ON
position. Personal injury or damage
could result,
• The cord moves rapidly when rewinding.
Keep children away and provide a clear
path when rewinding the cord to prevent
personal injury,
• DO NOT use outlets above counters.
Damage to items in surrounding area
could occur.
NOTE: To reduce the risk of electric shock,
this vacuum cleaner has a polarized plug;
one blade is wider than the other. This plug
will fit in a polarized outlet only one way. If
the plug does not fit fully in the outlet,
reverse the plug. If it still does not fit, contact
a qualified electrician to install the proper
outlet. Do not change the plug in any way.
1. Pull out the power cord to the desired
length.
2. Plug power cord into a 120 Volt outlet
located near the floor.
Note: To rewind the cord when finished
vacuuming, first unplug the cleaner. Hold
the plug while rewinding to prevent
damage or injury from the moving cord.
Press on the cord reel button to rewind the
cord.
3. To start, push slide switch down toward
MAX. To stop, raise slide up to OFF.
OFF
-6-
ATTACHMENTS
ON HANDLE
ATTACHMENTS
ON WANDS
The crevice tool and dusting/upholstery tool do
not have locking holes.
1. Press handle button on wand and remove it
from handle.
Put on attachments
as needed.
See chart below.
2. Push crevice tool onto handle.
The dusting/upholstery
tool has two options.
When the brush is removed the remaining part
can be used as an upholstery tool.
Uph,
Tool
Dusting
Brush
3. Dusting/Upholstery
tool will fit onto extension
wand only.
CLEANING
ATTACHMENT
Furniture*
Between
Cushions*
Drapes*
X
X
X
X
X
X
X
X
X
X
X
Crevice Tool
Dusting /
_
Stairs
AREA
Bare
Floors
Carpeted
Walls
Floors/Rugs
Upholstery
Tool
Nozzle
Floor
Air-Turbine
Brush Nozzle
* Always clean
X
_
attachments
X
before
using on fabrics.
-7-
X
X
X
X
Suggested sweeping pattern
For best cleaning action, the Air-Turbine
Brush Nozzle should be pushed straight
forward from you and pulled straight back.
This pattern should be continued across the
rug with slow, gliding motions.
Carpeted stairs need to be vacuumed
regularly. For best cleaning results, put the
slide switch on MAX.
NOTE: Fast, jerky strokes do not provide
complete cleaning.
section.
ONE-TOUCH
For best cleaning
results,
keep the airflow
passage open. Check occasionally
for clogs.
See HOW YOUR VACUUM WORKS
Unplug
from outlet before
checking.
CONTROL
HOSE SWIVEL
The hose swivel
prevents the hose
The length of wand can be changed by one
touch quickly and easily.
Adjust the length of wand as shown.
This is helpful for
cleaning in small
areas.
from twisting.
_
PERFORMANCE
SUCTION
When the unit is
CONTROL
The handle slide switch allows you to change
the vacuum suction for different fabric and
carpet weights.
Adjust the suction power with slide switch in
the handle.
OFF
OVERLOAD
INDICATOR
Indicator Window
running, the indicator
_::-windows will be
_,green if there are
no clogs.
When the indicator
window turns
completely red,
check if the dust bag
is full or if other areas are clogged.
See HOW YOUR VACUUM WORKS.
NOTE: Indicator window may turn red when
using attachments or when cleaning new
carpet. This is due to reduced airflow caused
by the vacuum seal between attachment and
surface, or new carpet fuzz filling the bag
quickly. Restore airflow by raising
attachment slightly from surface you are
cleaning, or replace bag if it is full.
PROTECTOR
The motor has an overload protector.
If the cleaner starts but cuts off, unplug cord
from wall outlet and wait 20-25 minutes for
motor to cool and automatically reset.
-8-
For best cleaning results, the dust bag
should be changed before it gets full. Use
dust bag no. 5231FI2390J
4. Remove used bag and throw it away.
5. To insert new dust bag:
• Press back the bag mount hook.
• Fit bottom edge of bag mount tab
onto bag mount ledge.
• Pull bag mount tab flush with suction
inlet hole.
• Secure bag mount hook over top edge of
bag mount tab.
1. Unplug cord from wall outlet.
2. Pull lid release latch out and up,
then lift canister hood.
3. Press back the bag mount hook.
_Lid
Release
Bag Mount Tab
_!_
CAUTION
Bag Mount kedge
6. Close and latch canister hood.
NEVER REUSE A DUST BAG. Very fine
materials, such as carpet freshener,
face powder, fine dust, plaster, soot,
new carpet lint, etc., can clog the bag
and cause it to burst before it is full.
Change bag more often when
vacuuming these materials.
NOTE: The vacuum is fitted with a safety
device which prevents you from closing the
canister hood if the bag is not fitted correctly.
7. Plug cord into wall outlet.
2. Pull out safety filter as shown.
_!_
WARNING
Electrical Shock Hazard
Do not operate the cleaner without the
motor safety filter. Be sure the filter is
dry and properly installed to prevent
motor failure and/or electrical shock.
Check motor safety filter occasionally
and clean when dirty.
3. Wash filter in warm soapy water, rinse,
then dry. Do not clean in dishwasher or
install while damp.
4. Insert filter back into canister.
5. Insert bag.
1. Unplug cord from wall outlet and
remove bag.
--9--
1. Unplug cord from wall outlet. DO NOT
drip water on cleaner,
_I_
2. Clean vacuum exterior using a clean, soft
cloth that has been dipped in clean water,
then wrung out. Wipe dry after cleaning.
NOTE: Regular cleaning helps to reduce
static electricity and dust buildup on outer
surfaces of cleaner and attachments.
CAUTION
DO NOT use attachments if they are
wet. Damage to dust bag and motor
may occur.
Attachments used in dirty areas, such
as under a refrigerator, should not be
used on other surfaces until they are
washed since they could leave marks.
When not in use, attach wand assembly to canister by inserting nozzle clip into either the
bottom or back storage clip holder. See Fig.1 and Fig.2. Attach hose storage clip to handle.
Store wand assembly in upright position only.
©
HoseStorage Clip
_
Nozzle Clip
C'k,_._
_
Back Storage
Clip Holder
Bottom
Storage
ClipHolder
Fig. 1
Fig. 2
-10-
1. Press the button on the rear side of the
vaccum nozzle to remove air cover.
2. Use the dusting/upholstery tool
attachment to clean the brush and fan.
Fan
Hook
Air Cover
Brush
Disconnect cleaner from electrical outlet. Check and remove hair, string and lint build-up
frequently in the air-turbine brush and brush support areas. If build-up becomes excessive,
disconnect air-turbine brush nozzle from telescopic wand.
TO REMOVE BELT:
1. Turn air-turbine brush nozzle upside
down.
2. Unscrew the four air-turbine brush nozzle
cover screws.
3. Turn air-turbine brush nozzle rear side up
and tilt cover forward from back until front
snaps free.
-11 -
4. Carefully insert and lift screwdriver at each
brush support to free brush from base.
TO REPLACE BELT:
1. Install brush supports onto brush.
Brush support
Brush
2. Install new belt in belt groove on the
brush, then over the fan shaft. Be sure belt
is between the belt guards. Refer to parts
list for replacement belt number.
Base
5. Remove worn belt.
Belt
Guard
Belt Groove
3. Insert each support
into its base slot.
6. Slide brush supports off to check and
clean brush support areas. See PARTS
LIST for picture of complete
brush
assembly.
4. Push cover and base together.
-12-
Review this chart to find do-it-yourself solutions for minor performance problems. Any other
service needed should be performed by a Sears or other qualified service representative.
Disconnect electrical supply before servicing or cleaning the unit.
Electrical Shock Hazard
so could result in electrical shock or personal injury.
WARNING
Failure to do
PROBLEM
POSSIBLE
CAUSE
Cleanerwon'tstart. 1. Unpluggedat walloutlet.
2. Trippedcircuitbreaker/blownfuse at
householdservicepanel.
3. Loosehoseelectricalconnections,
Poorjob of dirt
pick-up.
1.
2.
3.
4.
5.
Full or clogged dust bag.
Clogged airflow passages.
Dirty filter.
Slide switch is on MIN.
Hole in hose.
6. Canister hood open.
Cleaner starts
but cuts off.
1. Hose or hood electrical connections.
2. Tripped overload protector in canister
POSSIBLE
SOLUTION
1. Pluginfirmly,
pushthe handleslideswitch.
2. Resetcircuitbreakeror
replacefuse.
3. Reconnecthoseends(p. 5).
1. Change bag (p. 9).
2. Clear airflow passages (p. 6).
3. Change filter (p. 9).
4. Adjust control (p. 8).
5. Replace hose.
6. Close and latch hood.
1. Check connections, reconnect hose
ends (p. 5).
2. Change dust bag, clear airflow
blockage (p. 9, 6).
3. Unplug cord from wall outlet and wait
20~25 minutes for motor to cool and
automatically reset.
Air-Turbine Brush
Nozzle will not run
when attached
1. Worn or broken belt
1. Check brush area for excessive lint
2. Dirty brush or brush supports.
build-up or jamming.
2. Clean brush and brush supports
(p 11, 12)
Performance
indicator, some
models, is red.
1. Full or clogged dust bag.
2. Dirty filter.
3. Clogged airflow passage.
1. Change bag (p. 9).
2. Change filter (p. 9).
3. Clear blockage from airflow passage
(p. 6).
Cleaner picks up
movable rugs, or
nozzle pushes too
hard.
1. Suction too strong.
1. Adjust control (p. 8).
Power cord won't
rewind.
1. Dirty power cord.
2. Power cord jammed.
1. Clean the power cord.
2. Pull out power cord and rewind.
-13-
VACUUM
CLEANER
PARTS
For Model:721.24195400
%
7
8
11
]
3
4
5
18
o
lO
9
f
20
-_36
21
19
33
28
31
-14-
38
40
VACUUM CLEANER
PARTS
For Model : 721.241 95400
Illust.
No.
Part No.
DESCRIPTION
1
2
3
4
5
6
3550FI1759A
3550FI1758A
3550FI3868A
3123019L
4036FI4074A
1TPL0302418
Accessory Cover
Figer Cover
Indicator Cover
Indicator
Indicator Seal
Screw 3 x 8
7
8
9
5203FI2071A
5058FI3593A
4026FI3691A
Dust Brush Ass'y
Crevice Tool
Latch
10
11
12
4970FI4260A
3650FI2422A
4370FI3678A
Latch Spring
Handle
Handle Shaft
13
14
15
16
17
3550FI1757A
5020FI3806A
4170024A
4510FI2441A
1TPL0402818
Illust.
No.
Part No.
DESCRIPTION
Illust.
No.
18
5230FI3558B
Exhaust Filter
19
20
21
22
23
24
25
3040FI1525A
3920FI128gA
4661FI1008A
*5231FI2390J
4480FI3752A
4123017A
3550FI1756B
Body Base
Dust SeaI Packing
Wheel Ass'y
38
Dust Bag
39
Filter Setting Hook 40
Filter
SettingHookSpring 41
FrontCover
42
26
27
28
3123038G
Terminal PlateAss'y
3123009L
Terminal Supporter
1TPLO402818 Screw 4 x 12
29
Body Cover
30
CordWindingButton 31
CordWindingSpring 32
CordWindingLever 33
Screw 4x 12
34
4036FI3036A
5230FI3248F
4441FI3608D
4122017A
4122094A
1TPLO403318
DESCRIPTION
6871FX2130G PWBAss'y
3920FI3860A MotorMountPacking
4681FI2373G Motor
43
3940FI3646A
4980Fi3702A
3920FI3746A
4687FI1468H
5230FI3557C
Absorbing Sponge
Motor Supporter
MotorSeal Packing
Cord WindingAss'y
Exhaust Filter
3940FI3311B
ExhaustSponge
Following Parts Not Illustrated
Terminal Packing
Motor Safety Filter
CasterAss'y
Roller
Roller Shaft
Screw 4 x 20
HOSE AND ATTACHMENTS
Part No.
35
36
37
3828FI3849A Manual, Owner's
*5231FI2390J
Dust Bag
* Available At Any Sears Store.
PARTS
1
_12
2
3
4
_,_to
9"_>
_/
Illus.
No.
1
2
3
4
5
6
Part
No.
5214FI1324X
4940FI3431A
3500FI3630H
1TPL0302416
3550FI1713G
3650FI1474F
DESCRIPTION
Hose Ass'y
Slide Knob
Switch Board
Screw 3 x 8
Handle Cover
Grip Handle
LJ_
IIlue.
Part
No.
No.
7
8
9
10
11
2
Illus.
No.
Part
No.
DESCRIPTION
5201FI2475C
5249FI1260E
TelescopicWand
Floor Nozzle
DESCRIPTION
4932FI2360Z
5200FI2357M
4123028A
3123013J
3550FI2358J
TPL03024 6
-15-
Hose
Fitting Pipe
Hook Spring
Fitting Hook
F/Pipe Cover
Screw3x8
13
14
AIR-TURBINE
BRUSH
NOZZLE
PARTS
For Model:721.24195400
10
15
16
13
22
Illus.
No.
1
2
3
4
5
6
7
8
Part
No.
3040FI1502B
3550FI1637B
4940FI3736A
5200FI2497B
1KZZFI3001B
4930FI2452B
5901FI2001A
4280FI3003A
DESCRIPTION
Nozzle Base
Nozzle Cover
Pile Adjustment
Suction Pipe
Key
Suction Pipe Holder
Fan Assembly
Bearing Ball
Illus.
No.
9
10
11
12
13
Part
No.
DESCRIPTION
4581FI3001A
4370FI3669A
4581FI3002A
4370FI3670A
3550FI2540B
14 4820FI2399B
15 5882FI2001A
16 4766FI3709A
-16-
Rollerassy
Shaft
Rollerassy
Shaft
Cover Flow
Nozzle Bumper
Sweeper
Felt
Illus.
No.
17
18
19
20
21
22
Part
No.
3740FI3712A
3740FI3711A
4280FI3004A
5973FI2001A
4400FI3349A
1TPL0403116
DESCRIPTION
Protector(Mech)Belt
Protector(Mech)Belt
Bearing Ball
Brush
Belt
Screw4x16
Master Protection
Agreements
Once you purchase the Agreement, a simple phone
call is all that it takes for you to schedule service.
You can call anytime day or night, or schedule a
service appointment online.
Congratulations on making a smart purchase.
Your new Kenmore® product is designed and
manufactured for years of dependable operation.
But like all products, it may require preventive
maintenance or repair from time to time.
That's when having a Master Protection Agreement
can save you money and aggravation.
Purchase a Master Protection Agreement now and
protect yourself from unexpected hassle and
expense.
Sears has over 12,000 professional repair specialists,
who have access to over 4.5 million quality parts and
accessories. That's the kind of professionalism you
can count on to help prolong the life of your new
purchase for years to come. Purchase your Master
Protection Agreement today!
The Master Protection Agreement also helps extend
the life of your new product. Here's what's included in
the Agreement:
Some limitations and exclusions apply,
For prices and additional information call
1-800-827-6655.
[] Expert service by our 12,000 professional repair
specialists
Sears Installation Service
[] Unlimited service and no charge for parts and
labor on all covered repairs
[] "No-lemon" guarantee - replacement of your
covered product if four or more product failures
occur within twelve months
[] Product replacement if your covered product
can't be fixed
[] Annual Preventive Maintenance Check at your
request - no extra charge
[] Fast help by phone - phone support from a
Sears technician on products requiring in-home
repair, plus convenient repair scheduling
[] Power surge protection against electrical
damage due to power fluctuations
[] Rental reimbursement if repair of your covered
product takes longer than promised
-17-
For Sears professional installation of home
appliances, garage door openers, water heaters, and
other major home items, in the U.S.A. call
1-800-4-MY-HOME _
Antesde usar su aspiradora nueva ...............2
Garantiade la aspiradora Kenmore...............2
Irnportantesinstrucciones
sobreseguridad...............................................
3
Partesy Caracteristicas..................................
4
Consejospara aspirar........................................8
Caracteristicasde rendimiento..........................8
Cambio de la bolsa para el polvo.......................9
Limpieza del filtro de seguridad del motor.........9
Limpieza del exterior y de los accesorios........10
Almacenandosu aspiradora............................10
Limpieza de latobera con cepillo a turbina
de aire..............................................................
11
Ensamblaje.......................................................
5
Uso y cuidado...................................................
6
Comofuncionasu aspiradora............................6
C6moechar a andar a su aspiradora.................6
Aditamentos.......................................................
7
Cambio de la banday limpiezadel cepillo.......11
Localizacionde problemas...............................13
Acuerdos maestrosde protecci6n....................14
Tabla para utilizaci6nde los aditamentos..........7
Perfavorleaesta gufa,Leayudaraa ensamblary a operarsunuevaaspiradoraKenmorede la manerama.s
seguray efectiva.
Paramayorinformaci6nacercadel cuidadoy operacionde aspiradoras,Ilameasu almacenSearsmas cercano,
Parapedirinformacion,ustednecesitaraelnOmerodelmodeloy el nOmerodeserie.El nemerodel modeloy el
nOmerode seriede su aspiradoraestancontenidosen laPlacadelModeloy Nemerode Serie.Utiiiceel
siguienteespaciopararegistrarel nemerodel modeloy el @merede seriedesu nuevaaspiradoraKenmore.
ModeloNo.
No.de Serie
Fechadecompra
Parareferenciafutura,guardeestefolletoy su comprobantede page(recibo)en un lugarseguro.
GARANTiALIMITADADE UNANO DE LAASPIRADORAKENMORE
Estagarantfaesde un abea partirde lafechade compra,e incluyeel uso de laaspiradorasolamenteen una
casaparticular.Duranteel aSode garanfia,siesta aspiradoraes utilizaday mantenidade acuerdoalas
instruccionesdel manualdel propietario,Searsreparagratiscualesquierdefectosen materialeso de
fabricacion.
Estagarantfaexcluyelasbolsasparaaspiradora,bandas,focosy filtros,loscualesson partesdesechables
quese desgastanduranteel usonormal.
Paraobtenerunserviciodemantenimientoen garantia,enEstadosUnidos,retorneesta aspiradoraa
suCentrode ServiciodeMantenimientoSearsrn_scercano.
Estagarantfaseaplicasolomientraseste productoestaen use dentrode EstadosUnidos,
Estagarantfaleda derechoslegalesespecfficos,peroustedtambienpuedetenerotrosderechosqueva@n
de un estadoa otro.
Sears,RoebuckandCo.,D/817WA,HoffmanEstates,IL 60179
-2-
ADVERTENCIA
Nosotros consideramos
que su seguridad es muy importante.
AI usar su aspiradora,
para reducir el riesgo de fuego, de choque el_ctrico, de lesiones personales o de
da_os, observe las precauciones
b&sicas de seguridad incluyendo
las siguientes:
Lea este manualantes deensamblaro de usarsu
aspiradora.
Usesu aspiradorasolamentecome sedescribeen este
manual.Oselas61ocon los aditamentossuministrados.
Para reducirel riesgode chequeelectrico- No la utilice
en exterioresnisobresuperficiesmojadas.
Desconecte la alimentaci6nelectricaantes de hacerun
mantenimientoo de limpiarla zona delcepillo.De no
hacerloasf, esposibleque se produzcaun cheque
electricoo queel cepilloarranquest_bitamente.
Siempre apaguelaaspiradoraantesde conectaro
desconectarla manguera.
Siempre apaguelaaspiradoraantesde desconectarel
enchufe.
No deeconecte el enchufetirandodelcable.Para
desconectarel enchufeagarre el enchufe,no el cable.
Soetenga el enehufeal volvera enrollarelcable ensu
carrete.
Nohagafuncionara la aspiradorasi la mangueraha
sideagujereada.Siesta desgastadao cortada,
reempl_.cela.
Eviteaspirarobjetospuntiagudos.
No la utilice si algunade las aberturasse ha obstruido;
mantengalalibrede polvo,pelusas,cabellosy de
cualquiercosaquepueda reducirelfhjo delaire.
Mantenga elcabello, laropa holgada,los dedos y
todas las partesdelcuerpo,lejosde las aberturasy de
laspiezas m6viles.
No use la aspiradorasin que labolsa parael polvoy los
filtros estenen su lugar.
Siemprereemplacelabolsa parael polvodespuesde
aspirarlimpiadoreso refrescadoresde alfombras,
pelvesy polvillos.Estosproductosproducenbloqueos
enla bolsa,reducenel fhjo de airey puedenhacerque
labolsase reviente. Si nose la reemplazase podria
producirun daflo permanentea laaspiradora.
No utilice la aspiradorapararecogerobjetosafiladosy
duros,juguetespequeflos, alfileres,papel,etc. Ellos
puedendaflara laaspiradorao a labolsa parael polvo.
No recojaningunacosaque se estequemandoo
humeando,per ejemplocigarrillos,fdsforoso cenizas
calientes.
No permita queel enehufede latigazosalvolver a
enrollarelcable.
No la utilice si el cableo el enchufeesta.ndaflados.
No la jale nitransporteper medio delcable,no use el
cablecome agarradera,no cierreuna puertacontrael
cablenitire delcable alrededorde aristasafiladasni de
No use la aspiradorapara recogerliquidosinflamables
o combustibles(gasolina,Iiquidosde limpiar,perfumes,
etc.)nila use en _.reasen que estospuedenestar
presentes.Losvapores de estassustanciaspueden
crearun riesgode fuegoo de explosbn.
esquinas.No pasela aspiradoraper encimadelcable.
Mantengaelcable alejadode las superficiescalientes.
No abandone a laaspiradoracuandoeste conectada.
Deecon_ctela deltomacorrientecuandono este en
Preste especial cuidadocuandohagalimpiezaen los
escalones.No la coloquesobresillas,mesas,etc.
Mantengalasobreel piso.
use y antesde hacerleun mantenimiento.
No permita quese lau_lieecome si fuera un juguete.
Sedebe prestarmuchaatenci6ncuandosea utilizada
per o cerca de los niflos.
Usted tiene la responsabilidadde asegurarsede que
suaspiradoranosea utilizadaper ningunapersonaque
nosea capazde utilizarlacorrectamente.
No toque elenchufeni la aspiradoracuandotengalas
manesmojadas.
GUARDE ESTAS INSTRUCClONES
Ustedtienelaresponsabilidad
deensamblarcorrectamente
y de usarsuaspiradorade unamanerasegura.Su
aspiradoraest,.designadaparausecaserosolamente.
LeaconcuidadoesteManualdelPrepietarioparaobtener
importantes
informaciones
acercadela utilizaci6n
y de laseguridad.
Estaguiacontienedeclaraciones
de
seguridad
debajode lossimbolosde advertencia
y deprecauci6n.
Perfavorprestemuchaatenciona estos
rect&ngulos
y sigalasinstrucciones
queleproporcionan.
Lasdeclaraciones
de ADVERTENCtA
lealertana riesgos
talescomedefuego,de chequeelectrico,dequemaduras
y de graveslesionespersonales.
Lasdeclaraciones
de
PRECAUCION
lealertanariesgostalescomede lesionespersonalesmoderadas
y / o dedafloa lapropiedad.
-3-
Para asegurar un uso correcto y seguro, es importante conocer las partes y
caracteristicas de la aspiradora. Repase esto antes de utilizarla.
Interruptor deslizable
Manguera
Gancho para
conectar
Bot6n para la manija
Bot6n para el
carrete del cable
.,_.]
Indicador de
/)_
Tubo
rendimiento
/. /
telesc6pico
/
/
Cer
de
alimentaci6n
(No $e muestr_
lar
Botdn del tubo_
Ajuste para hilo de alfombra
..............
Tobera con cepillo a turbina de aire
ADITAMENTOS
Tobera para piso
Herramienta para hendiduras
-4-
Herramienta para desenpolvar/
para tapiceria
RECIPIENTE
Antes de ensamblar su aspiradora, asegurese
de tener todas las partes mostradas en
PARTES Y CARACTER/STICAS.
1. Abra la oubierta del recipiente (c_nister).
2. Verifique que la bolsa para el polvo este
instalada correctamente. Vea
CAMBIANDO LA BOLSA PARA EL
POLVO para obtener las instrucciones.
3. Verifique que el filtro de seguridad del
motor este instalado correctamente. Vea
LIMPIEZA DEL FILTRO DE SEGURIDAD
DEL MOTOR para obtener las
instrucciones.
TUBO TELESCOPICO
Sostenga el cerrojo de
resorte y tire hacia
afuera o empuje el
tubo hacia adentro
hasta obtener la
Iongitud requerida.
Cerrojo
de resorte
TOBERA
CON CEPILL0A TURBINA
DEAIRE
Filtro de
seguridad
del motor
1. Inserte el tubo
dentro de la tobera
con cepillo a turbina
de aire hasta que el
bot6n del tubo se
abroche en su
lugar, en el orificio
de la herramienta.
MANGUERA
Gancho para
conectar
2. Deslice el ajuste del hilo de la alfombra
hacia la derecha para hilo largo y hacia la
izquierda para hilo corto.
del hilo
1. Inserte la manguera dentro del recipiente
hasta que se abroche en su lugar.
Para quitar la manguera: Presione el
gancho para conectar la manguera hacia
abajo y jale hacia afuera.
_te
Hilo largo
Hilo corto
ADITAMENTOS
Abra la cubierta de los accesorios y saque el
accesorio deseado.
Para el uso correcto de los accesorios y para
obtener los mejores resultados de limpieza, yea la
TABLA PARA UTILIZAClON DE ADITAMENTOS.
2. Inserte el tubo en la manija hasta que el
boton cerrojo se abroche en su lugar.
Para quitar la manija: Presione el bot6n
cerrojo hacia adentro y tire de la manija
hacia arriba.
Boton oerrojo
-5-
USO Y CUIDADO
La aspiradoracreaunasuccionque recogea lasuciedad.
El airequese muevera.pidamente
Ilevala suciedadhacia
la bolsade polvoa travesde lospasajesdeflujo delaire.
La bolsade polvodeja pasarel aire,mientrasqueatrapaa
lasuciedad.Para obtenerlosmejoresresultadosde
limpieza,mantengadespejadoslospasajesde flujodel
aire.ChequeeocasionalmentelasAreascon asteriscos
paraver si hayobstrucciones.Desconectedel
tomacorrienteantesde hacerloschequeos.
NOTA:Mientraseste enfuncionamientono dejequeel
cuerpodel recipientese pare ensu extreme.DeIo
contrariosevan a bloquearlosrespiraderosde descarga.
ADVERTENCIA
iRiesgodelesi6ncorporal
ydeda_oalproducto!
. NOenchufar
sielinterruptor
est_enlaposici6n
de
ENCENDIDO.
Sepueden
producir
da_tos
o lesiones
corporales.
, AIvolverse
aenrollar,
elcablesemueve
r_pidamente.
Paraevitarunalesi6ncorporal,
al
enrollar
elcable,mantenga
lejosalosni6osy
proporcione
unpasolibre,
. NOusetomacorrientes
queest_nsituados
sobrelos
mostradores
delacocina,
Sepueden
producir
da_tos
alosarticulos
queest_nenel-_.rea
circundante.
NOTA: Esta aspiradora tiene un enchufe
polarizado para reducir el riesgo de choques
electricos; un contacto es m_.s ancho que los
otros. Este enchufe calzara en un tomacorriente
polarizado s61o en una direcci6n. Si el enchufe no
calza completamente en el tomacorriente, de
vuelta al enchufe. Si todavia no calza, contacte a
un electricista calificado para que instale el
tomacorriente correcto. No modifique al enchufe
de ninguna manera.
-6-
1. Saque el cable de alimentacion hasta obtener
la Iongituddeseada.
2. Enchufe el cable de alimentaci6n en un
tomacorriente de 120voltios que este cerca del
piso.
Nota: Cuando termine de hacer la limpiezacon
la aspiradora, para volver a enrollar el cable,
primero desconecte a la aspiradora. Sostenga
el enchufe al volver a enrollar el cable para
evitar dahos o lastimadurascausadospor el
movimiento del cable. Paravolver a enrollarlo,
presione el boton del carrete del cable.
3. Para hacer funcionar, mueva el interruptor
deslizable hacia abajo, hacia MAX. Para parar,
deslice el interrupterhacia arriba a la posici6n
de OFF (apagado).oF F
ADITAMENTOS
EN LA MANIJA
ADITAMENTOS
1. Presione el bot6n de la manija en el tubo y
retfrelo fuera de la manija.
EN LOS TUBO8
Laherramientapara hendidurasy la herramientapara
polvo/ paratapicerianotienenagujerosde sujeccion.
InstalelosaccesoriossegQnsea necesario.
Vealatablaquesigue.
2. Empuje la herramienta para hendiduras
en la manija.
Lapieza parapolvo/ paratapiceffatiene2 opciones.
Cuandose retiraelcepillofrontal,laparterestante
puedeser usadacomoun accesoriopara tapiceffa.
Acoesorio
tapiceria
ADITAMENTO
AREA DE LIMPIEZA
Entre
Muebles*
Cortinas* EscalonesPisoslisosAlfombras Paredes
cojines*
Accesoriopara _
hendiduras
X
X
X
X
Accesoriopara _
X
X
X
X
X
X
X
desenpolvar
/
paratapiceria
3iso
Toberapara
X
cepilloaturbina
Tobera
deaire con
X
X
_
Limpie siempre los accesorios antes de utilizarlos para limpiar telas.
-7-
X
X
X
Trayectoriade barrido sugerida
Para obtener la mejor acci6n de limpieza,la
Tobera condel cepillo a turbina de aire debe
ser empujadahacia adelantey jalada hacia atrAs.
Se debe continuar de esta forma a por toda la
alfombra,deslizAndolacon movimientoslentos.
NOTA: Los movimientosr_.pidosy bruscosno
proporcionanuna limpiezacompleta.
CONTROL
Los escalonesalfombrados debenser
aspirados regularmente.Para obtener los mejores
resultados de limpiezaponga el interruptor
deslizableen MAX.
Para obtenerlos mejores resultadosde
limpieza, mantengadespejadoel paso del flujo
de aire. Chequeede vez en cuando para ver si
hay obstrucciones.Lea la secci6n COMO
FUNCIONASU ASPIRADORA.Antes de hacer
cualquierchequeo, desench_feladel
tomacorriente.
ACOPLEGIRATORIO
DE LAMANGUERA
DE UN TOQUE
La Iongitud del tubo se puede cambiar rgtpida
y facilmente con un toque.
Ajuste la Iongitud del tubo come se muestra.
El acople giratorio de la
manguera evita que ella se _
tuerza. Esto es Qtil para
,_//(:::_-_J/Ylimpiar en gtreas
[//..__JJJestrechas.
INDICADOR
CONTROL
DE RENDIMIENTO
Cuando la unidad
Ventana
funciona, si no hay del indicador
taponamientos, el
indicador de ventana
muestra un color
verde. Cuando la
ventana indicadora se
pone completamente
roja verifique si la
bolsa para el polvo
esta Ilena o si existen taponamientos en
otras Areas. Lea COMO TRABAJA SU
ASPIRADORA.
DE 8UCCION
El interruptor deslizable de la manija permite
cambiar la succi6n de la aspiradora para
diferentes grosores de telas y alfombras.
Ajuste la potencia de succi6n deslizando
interrupter deslizable situado en la manija.
OFF
PROTECTORPARA8OBRECARGA8
El motor tiene un protector para
sobrecargas. Si la aspiradora se enciende
pero luego se apaga, desconecte el cable
del tomacorriente y espere de 20 a 25
minutos para que el motor se enfrfe y se
rearme automa.ticamente.
-8-
NOTA: La ventana indicadora se puede
poner en rojo cuando se usan aditamentos o
al limpiar alfombras nuevas. Esto se debe a
la reducci6n del flujo de aire causado por el
sello del aire que se produce entre los
aditamentos y la superficie, o porque las
pelusas de una nueva alfombra pueden
hacer que la bolsa se Ilene rapidamente.
Restaure el flujo de aire levantando un poco
al aditamento de la superficie o
reemplazando la bolsa de polvo, siesta lien&
Para obtener los mejores resultados de limpieza,
la bolsa para polvo debe ser cambiada antes de
que se Ilene. Use la bolsa no. 5231FI2390J
1. Desconecteel cable del tomacorriente.
2. Jale el cerrojode la tapa hacia afueray hacia
arriba,luego levante la tapa del recipiente.
3. Presionehacia atr_.sel ganchode montajede
la bolsa.
4. Retire la bolsa usada y desechela.
5. Para insertar una nueva bolsa:
• Presione hacia atras el gancho de montaje
de la bolsa.
• Coloque el borde inferior de la lengOeta de
montaje de la bolsa en el borde de montaje.
• Tire de la lengeeta de montaje hasta que
quede al ras del orificio de entrada.
• Asegure el gancho de montaje de la bolsa
encima del borde superior de la lengOeta.
Leng0eta de montaje de la bolsa
Borde de montaje de [a boisa
PRECAUCION
6. Cierre y asegure la tapa del recipiente.
NUNCAVUELVAA USARLA BOLSAPARA
POLVO,Losmateriales muyfinos,tales como
losrefrescantesdealfombras,el polvofacial,
yeso, holI[n,pelusasde alfombranueva,etc.,
puedenobstruirla bolsay hacerquese
revienteantesde Ilenarse.
Cuandoaspireestosmaterialescambiela
bolsaconm_s frecuencia.
NOTA: La aspiradora tiene un dispositivo de
seguridad que impide que usted cierre la
tapa del recipiente, si la bolsa no ha side
colocada correctamente.
7. Conecte el cable de alimentaci6n.
2. Saque el filtro de seguridad como se
muestra.
ADVERTENCIA
Peligro de choque el6ctrico.
No utilice la aspiradora sin el filtro de
seguridad del motor. Aseg_rese de que
el filtro est6 seco y correctamente
instalado para evitar fallas del motor o
choques el6ctricos.
De vez en cuando revise el filtro de seguridad
del motor y limpielo cuando est6 sucio.
1, Desconecte el cable de alimentaci6n del
tomacorriente y retire la bolsa.
-9-
3. Laveelfiltroconaguacalientejabonosa,enju_.guelo,
luegosequelo.Nole laveenlalavadorade vajitla
ni Ioinstalemientrasest_h,',medo.
4. Vuelvaa colocarelfiltroensulugardentrodel
recipiente.
5. Instalelabolsa.
1, Desconecte el cable de alimentacidn del
tomacorriente. NO deje gotear agua
sobre la aspiradora.
PRECAUCION
2. Limpie el exterior de la aspiradora con un
paho suave escurrido que haya sido
mojado con agua limpia. Seque luego de
limpiar.
NOTA: Una limpieza regular ayuda a reducir
la electricidad est&tica y la acumulacion de
polvo en la superficie de la aspiradora yen
los accesorios.
NO use los accesorios cuando est_n
mojados. Se pueden ocasionar da_os
a la bolsa para polvo y al motor.
Los accesorios usados en _reas
sucias, tales como debajo del
refrigerador, deben ser lavados antes
en usarlos en otras superficies ya que
podrian dejar manchas.
Cuando la aspiradora no este en uso, conecte el tubo al recipiente insertando el broche de
sujecci6n de la tobera en uno de los soportes para el broche situados en el fondo y en la
parte posterior. Vea la Fig.1 y Fig.2. Conecte el broche de almacenamiento de la manguera
en la manija. Almacene solamente en posici6n vertical.
©
Broche de almacenamiento
de la manguera
de la manguera
i
tobera
_._
_
Soporte para
broche de
almacenamiento
situado atras
Soporte
para
broche
dealmacenamiento
enelrondo
Fig. 1
Fig. 2
-10-
1. Presione el boton en el lade posterior de
la tobera de la aspiradora para retirar la
cubierta del aire.
2. Use el accesorio para desenpolvar / para
tapiceria yaspire el cepillo y el ventilador.
Ventilador
Bot6ndeltubo
Cubierta del aire
Desconecte la aspiradora del tomacorriente. Revise frecuentemente y retire la acumulacion
de pelo, hilos y pelusas de las _reas del Cepillo a turbina de aire y de sus soportes. Si la
suciedad es excesiva, desconecte la tobera del Cepillo a turbina del tubo telesc6pico.
PARA RETIRAR LA BANDA:
1. De la vuelta a la tobera con Cepillo a
turbina de aire.
2. Retire los cuatro tornillos de la cubierta al
fondo de la tobera.
3. Gire la tobera con Cepillo a turbina de aire
a su posici6n normal e incline la cubierta
levant_ndola de la parte de arras hasta
que la parte delantera quede libre.
-11 -
4, Cuidadosamente inserte y levante el
destornillador en cada uno de los soportes
del cepillo para liberarlo de la base.
PARA REEMPLAZAR LA BANDA:
1. Instale los soportes en el cepillo.
del cepillo
2. Instale la banda nueva en la ranura del
cepillo, luego sobre el eje del ventilador.
AsegL_rese de que la banda quede entre
sus resguardos.
cepillo
Base
5. Retire la banda desgastada.
Eje del ventilador
Banda
para labanda
Ranuraparala banda
3. Inserte cada soporte en su ranura de la
base.
6. Deslice los soportes del cepillo hacia
afuera para inspeccionar y limpiar las
_reas de los soportes. Vaya a la LISTA
DE PARTES para ver una figura del
ensamble completo del cepillo.
4. Presione juntos a la base y la cubierta.
-12-
Revise esta tabla para encontrar soluciones, que puede hacer usted mismo, a problemas
leves de rendimiento. Cualquier otro servicio de mantenimiento que sea necesario, debe ser
realizado per Sears o per algL_notro representante de mantenimiento calificado.
_
Desconecte la fuente de energia el_ctrica antes de hacer un mantenimiento o de
limpiar
a la unidad.
ADVERTENCIA
Peligro de choque el_ctrico
El no hacerlo puede dar como resultado choques el_ctricos o heridas personales.
PROBLEMA
POSIBLE
CAUSA
POSIBLE
SOLUCION
Laaepiradoranose
enciende.
1.Desconexi6n
deltomacorriente.
1.Conectefirmemente,
presione
elinterruptor
2.Disyuntor
abiertoofusiblequemado
deslizable
delamanija.
eneltablerodeservicio
delacasa. 2. Reinicie
eldisyuntor
o reemplace
elfusible.
3.Conexiones
electricas
de la
3. Reconecte
losextremos
delamanguera
manguera
flojas.
(p_ig.5).
fVlaltrabajoal recoger
lasuciedad,
1. Bolsapara polvoIlenau obstruida.
2. Obstruccionde los pasajesdeflujo
delaire.
3. Filtrosucio.
4. El interruptordeslizableesta en MIN.
5. Hayun agujeroen la manguera,
6. Tapa delrecipienteabierta.
La aspiradora ee
enciendepero ee
apagainmediatamente
El cepillo a turbinade
aireno funcionacuando
eeconecta
El indicador de
rendimiento, algunoe
modelos, estaen rojo
La aspiradorarecogea
laealfombraem6vileso
1. Conexioneselectricasen la
manguerao latapa.
2. Protectorparasobrecargasactivado
en el recipiente
1.Cambielabolsa(p_ig.9).
2. Destape
lospasajesdeflujodelaire(p_ig.
6).
3. Cambieel filtro (p_ig.9).
4. Ajusteel control(pag.8).
5. ReemplaceIs manguera.
6. Cierrey asegurea lataps.
1. Inspeccionelas conexiones,reconectelos
extremesde lamanguera(pag.5).
2. Cambiela bolsapara polvo,destapebloqueos
en el flujodel aire (pags.9, 6),
3. Desconectela aspiradoradeltomacorrientey
esperede20 a 25 minutospara queel motor
se enfriey se rearmeautomaticamente.
1. Banda rotao desgastada.
1.Yea si el _readel cepillotieneuna
acumulacionexcesivade pelusaso si se
atasca.
2. Cepilloo sussoportesest_insucios.
2. Limpieal cepilloy sussoportes (pags.11,12)
1. Bolsapara polvoIlenau obstruida.
2. Filtrosucio.
3. Obstrucciondelpaso delflujo de
aire.
1.Cambiela bolsa(p_ig.9).
2. Cambieel filtro (p_ig.9).
3. Despejelas obstruccionesalflujo de aire
(p_ig.6).
1. Succi6nmuyfuerte.
1.Ajusteel control(p_g.8).
1. Cable dealimentaci6nsucie.
2. Cable dealimentaci6natascado.
1. Limpieel cablede alimentaci6n
2. Jale el cablede alimentacionhaciaafueray
vuelva a enrollar.
latolva empujamuy
fuertemente.
El cablede
alimentaci6n no se
enrolla
-13-
Acuerdos Maestros de Proteccibn
Felicitaciones por haber hecho una compra
inteligente.
Su nuevo producto Kenmore® esta diseSado y
fabricado para brindarle aSos de operaci6n confiable.
Pero como todo producto, de vez en cuando puede
necesitar mantenimiento preventivo o reparaciones.
Es entonces cuando el tener un Acuerdo Maestro de
protecci6n le puede ahorrar dinero y molestias.
Adquiera hoy un Acuerdo Maestro de Protecci6n y
protejase contra molestias o gastos imprevistos.
Una vez que ha comprado el Acuerdo, una simple
Ilamada telef6nica basta para programar un
mantenimiento. Puede Ilamar a cualquier hora del dia
o de la noche o hacer una cita de atenci6n por
Internet.
Sears tiene mas de 12,000 profesionales
especialistas en reparaeiones que tienen acceso a
m_.sde 4,5 millones de partes y aecesorios de
ealidad. Esa es la clase de profesionalismo con la
que usted puede contar para ayudar a prolongar la
vida de su nueva adquisici6n por muchos aSos.
iAdquiera su Acuerdo Maestro de protecei6n hoy
mismo!
El Acuerdo Maestro de Protecci6n tambien ayuda a
prolongar la vida de su nuevo producto. Estos son
los aspeetos ineluidos en el Aeuerdo:
Se aplicanalgunaslimitacionesy exclusiones.
Paraenterarsedepreciose informaci6nadicional
Ilameal 1-800-827-6655.
[]
Servicio experto, Ilevado a cabo por
cualesquiera de nuestros 12.000 profesionales
especialistas en reparaciones.
[]
Servicio ilimitado y sin cargo alguno, por las
partes y por el trabajo en todas las reparaciones
cubiertas por el acuerdo.
[]
Garantia de "Sin Defectos" - reemplazo del
producto cubierto por el contrato si falla cuatro o
rnas veces dentro de los doce primeros meses.
[]
Reemplazo del preducte si el producto cubierto
no puede ser reparado.
[]
Control anual de mantenimiento preventivo a
pedido suyo- sin cargo extra,
[]
Ayuda r_pida por tel_fono - Soporte telef6nico
de un tecnico de Sears sobre los productos que
requieren de reparaci6n en casa, m_.sla
programaci6n conveniente del servicio de
mantenimiento.
[]
Pretecci6n centra sobrecarga el6ctrica, contra
daSos electricos causados por fluctuaciones de
voltaje.
[]
Reembolso de alquiler, si la reparacion del
producto cubierto toma m_.stiempo de Io
prometido.
-14-
Servicio de instalacibn Sears
Para una instalaei6n profesional Sears de aparatos
del hogar, dispositivos de apertura de la puerta de la
cochera, calentadores de agua y otros articulos
principales del hogar, en Estados Unidos, Ilame al 1800.4-MY-HOME ®
Your Home
For repair - in your home - of all major brand appliances,
lawn and garden equipment, or heating and cooling systems,
nomatterwhomadeit,
nomatterwhosoldit!
HHHHHHH_
For!hereplacementparts,
accessoriesand
iiiiiiiiiiiiiiiiiiiiiiiiiiiiiiii owners manualsthatyou
needtodo-it-yourself,
iiiiiiiiiiiiiiiii
ForSearsprofessional
installationofhomeappliances
and itemslikegaragedooropenersandwaterheaters,
1-800-4-MY-HOME ®
iiiiiiiiiiiiiiiii
(1-800-469-4663)
www.sears.com
iiiiiiiiiiiiiiiiiiiiiiiiiiii!iii
iiiiiiiiiiiiii
iiiiiiiiiiiiiii
iiiiiiiiiiiiii
iiiiiiiiiiiiiii
iiiiiiiiiiiiii
iiiiiiiiiiiiiii
24/7/365
iiiiiiiiiiiiiii
(U.S.A. andCanada)
www.sears.ca
iiiiiiiiiiiiiii
iiiiiiiiiiiiiii
OurHome
iiiiiiiiiiiiiii
ii!ilililililililiiii!!i!!
Forrepairofcarry-inproductslikevacuums,
lawn equipment,
and electronics, call orgoon-lineforthe
nearest
Sears Partsand RepairCenter.
iiiiiiiiiiiiiii
iiiiiiiiiiiiiii
iiiiiiiiiiiiiii
iiiiiiiiiiiiiiiiiii_iiii!iiiiii
iiiiiiiiiiiiiii
1-800-488-1222
24/7/365
(U.S.A. on,y)
www.sears.com
iiiiiiiiiiiiiii
iiiiii_ii!iii!iiiiiiill
Topurchaseaprotectionagreement(U.S.A.)
ormaintenanceagreement(Canada)
onaproductservicedbySears:
iiiiiiiiiiiiii
iiiiiiiiiiiiiii
ii!ii!ili!ii!!i!!i!!i!!i!!i!!i!!i!!i!iiii
1-800-827-6655(U.S.A.)
iiiiiiiiiiiiiii
iiiiiiiiiiiiiiii:!iiii!
Parapedirserviciode reparaci6n
iiiiiiiiiiiiiiiiiii_ill
adomicilio, yparaordenarpiezas:
1-888_U.HOGAR
i:iil;ii:ii:ii:ii:ii:ii:il;iiiii!ii!iiiiiiiiiiiiiil;i_
(1-688-784-6427)
SM
1-800-361-6665(Canada)
AuCanadapourservceenfran(_as
1.800.LE.FOYERMC
(1-800-533-6937)
www.sears.ca
© Sears, Roebuck and Co.
© Registered Trademark / TMTrademark / SMService Mark of Sears, Roebuck and Co.
© Mama Registrada / TMMama de Fabrica / SMMarca de Servicio de Sears, Roebuck and Co.
MCMarque de commerce / MDMarque d_pos_e de Sears, Roebuck and Co.
iiiiii
!ii!ii!ii!ii!ii!ii!ii
i!iiiii!i!iiiiiiiiiiiiii