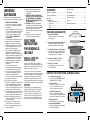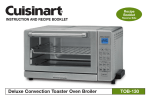
1
INSTRUCTION BOOKLET
Recipe
Booklet
Included
Cook Central™ 4-in-1 Multicooker
MSC-800C Series
For your safety and continued enjoyment of this product, always read the instruction book carefully before using.
IB-10299-CAN
IMPORTANT
SAFEGUARDS
16. Avoid sudden temperature changes,
such as adding refrigerated foods to
a heated pot.
17. C
AUTION: TO REDUCE THE RISK OF
ELECTRIC SHOCK, COOK ONLY IN THE
POT PROVIDED OR IN CONTAINERS
PLACED ON THE COOKING RACK IN
THE PROVIDED POT.
18. CAUTION: A heated pot may damage
countertops or tables. When removing
the hot pot from the multicooker, DO NOT
place it directly on any unprotected
surface. Always set the hot pot on a trivet
or a rack.
19. To disconnect, turn any control to off,
then remove plug from wall outlet.
When using an electrical appliance, basic
safety precautions should always be followed:
1. READ ALL INSTRUCTIONS.
2. Do not touch hot surfaces; use handles.
Always use oven mitts when handling
hot material.
3. To protect against risk of electrical shock,
do not immerse the multicooker housing
in water or any other liquid. If housing
falls into liquid, unplug the cord from
outlet immediately. DO NOT reach
into the liquid.
4. To avoid possible accidental injury, close
supervision is necessary when any
appliance is used by or near children.
5. Unplug from outlet when not in use and
before cleaning. Allow to cool before
putting on or taking off parts.
6. Do not operate any appliance with a
damaged cord or plug or after the
appliance has malfunctioned or has been
dropped or damaged in any way or is not
operating properly. Return the appliance
to the Customer Service Centre (see
Warranty for details) for examination,
repair or mechanical or electrical
adjustment.
7. The use of attachments not
recommended by Cuisinart may cause
fire, electrical shock, or risk of injury.
8. Do not use outdoors or anywhere the
cord or unit housing might come into
contact with water while in use.
9. Do not use the multicooker for anything
other than its intended use.
10. This unit is not a deep fryer.
11. To avoid the possibility of the multicooker
being accidentally pulled off work area,
which could result in damage to the
cooker or personal injury, do not let cord
hang over edge of table or counter.
12. To avoid damage to cord and possible fire
or electrocution hazard, do not let cord
contact hot surfaces, including a stove.
13. Extreme caution must be used when
moving the multicooker containing hot oil
or other hot liquids.
14. Do not place on or near a hot gas or
electric burner, or in a heated oven.
15. Do not operate multicooker in water or
under running water.
SAVE THESE
INSTRUCTIONS
FOR HOUSEHOLD
USE ONLY
CONTENTS
Important Safeguards . . . . . . . . . . . . . . . . 2
Tips & Hints . . . . . . . . . . . . . . . . . . . . . . . . . 6
Features and Benefits . . . . . . . . . . . . . . . .
3
Cooking Guidelines . . . . . . . . . . . . . . . . . . . 9
Operation . . . . . . . . . . . . . . . . . . . . . . . . . . .
Programming
Brown, Sauté, Sear . . . . . . . . . . . . . . .
Slow Cook . . . . . . . . . . . . . . . . . . . . . . .
Roast . . . . . . . . . . . . . . . . . . . . . . . . . . .
Steam . . . . . . . . . . . . . . . . . . . . . . . . . .
4
Troubleshooting . . . . . . . . . . . . . . . . . . . . . 10
1
2
2. Reversible Steaming/Roasting Rack
Elevates ingredients to steam or lifts
ingredients off pan bottom to roast.
3
3. Cast Aluminum Nonstick Cooking Pot
Spreads heat evenly to perfectly brown,
sear and sauté ingredients right in unit.
Extra-large 7-qt (6.6 L) capacity.
A short power supply cord is provided to
reduce the risks of becoming entangled in or
tripping over a longer cord. Extension cords
may be used if care is exercised.
5. BPA Free (not shown)
All parts that come into contact with
food are BPA free.
This appliance has a polarized plug (one
prong is wider than the other). As a safety
feature, this plug will fit into a polarized
outlet only one way. If the plug does not fit
fully in the outlet, reverse the plug. If it still
does not fit, contact a qualified electrician.
Do not attempt to defeat this safety feature.
Warranty Information . . . . . . . . . . . . . . . . 38
1. Glass Lid with Handle
Check the progress of a dish without
releasing heat.
4. Retractable Cord (not shown)
For convenient, easy storage.
NOTICE
Recipes . . . . . . . . . . . . . . . . . . . . . . . . . . . 12
4
4
5
5
FEATURES AND Benefits
SPECIAL CORD SET
INSTRUCTIONS
If an extension cord is used, the marked
electrical rating of the extension cord should
be at least as great as the electrical rating of
the appliance. The longer cord should be
arranged so that it will not drape over the
countertop or tabletop where it can be pulled
on by children or tripped over unintentionally.
Cleaning & Care . . . . . . . . . . . . . . . . . . . . . 6
GETTING TO KNOW YOUR CONTROL PANEL
a. Cooking Function Buttons
Use to select SLOW COOK, ROAST,
BROWN/SAUTÉ or STEAM.
a
b. Time Directionals
Use to set cooking time. Press and
hold to scroll quickly; press and
release to advance more slowly.
c. Temperature Directionals
Use to set cooking temperatures.
Press and hold to scroll quickly; press
and release to advance more slowly.
d. Start/Stop Button
Starts and stops cooking function.
b
d
e. Blue Backlit LCD Display
Side-by-side display shows cooking
time and temperature.
2
3
e
c
Operation
programming
BROWN, SAUTÉ, SEAR
Cooking is simple with the Cook Central
4-in-1 Multicooker. Use the slow cooker
as you would a normal slow cooker, the
roaster as you would a normal oven and
brown/sauté as you would a skillet.
™
1. P
ress BROWN/SAUTÉ. A preset
temperature of 350°F will flash, as this
is the most commonly used Brown/
Sauté temperature.
1. Select your cooking function.
2. P
ress Temperature Directionals to select
a different temperature (from 250°F to
500°F).
2. Set your desired cooking time and
temperature.
3. Press Start/Stop to begin cooking.
7. W
hen Keep Warm time elapses, one
beep will sound and heater will turn off.
8. T
o turn the heater off manually at any
time, press the START/STOP button.
NOTE: Always use pot holders during and
after cooking, and always lift the lid away
from you – the unit is hot.
4.When selected temperature is reached,
two beeps will sound. Add ingredients
to cooking pot—for best results, do not
crowd pot.
ROAST
CHANGING SETTINGS DURING
COOKING
5. O
nce cooking is complete, press
START/STOP to stop cooking, or if
you’ve browned ingredients as a first
step in your recipe, switch to the next
function in your recipe. There is no need
to press START/STOP again, as the unit
is already cooking.
Switching functions during cooking
is easy. Press the new cooking function
button and the unit will adjust to the
default settings for your selection. Set your
desired time and temperature as needed.
NOTE: Though browning is usually a
hands-on task, you can set a cooking time
if you wish with the Time Directionals.
If time is selected, countdown will start
when selected temperature is reached.
Unit will automatically shut off when
countdown is complete.
You can adjust cooking time or
temperature at any point with the Time/
Temperature Directionals.
There is no need to press Start/Stop
to select new settings.
Cooking without a timer
SLOW COOK
If you do not wish to program a time, the
unit will cook at the selected temperature
until you manually turn the heater off. The
heater will turn off after the maximum
allowable cooking time for the selected
function has been reached.
1. Fill cooking pot with ingredients and
cover with lid.
2. Press SLOW COOK. A preset
temperature setting of Low will flash, as
this is the most commonly used Slow
Cook setting.
NOTE: Do not leave the unit on 500°F for
over 1 hour – prolonged heat at this high
temperature can harm the nonstick coating
or overheat the unit.
3. Press Temperature Directionals to
select High, Low, Simmer or Warm,
displayed along the bottom of the LCD.
Sleep Mode
4. Set desired cooking time (up to 24
hours) with Time Directionals.
The multicooker is equipped with a powersaving Sleep mode that will turn off the
lights if there is no use. The unit will also
enter this mode if you manually stop
cooking. Press any button to “wake up”
the unit and operate as normal.
5. Press the START/STOP button to begin
cooking. Selected time and
temperature setting (High, Low, Simmer
or Warm) will be displayed.
4
1. P
lace about 1 quart (4 cups) of water
or other liquid in cooking pot and place
cooking rack in steam position, as
shown below; cover with lid. For best
results, do not add ingredients to pot
until steaming temperature is reached
(preheating is complete).
6. W
hen slow cooking on High, Low or
Simmer, the unit will beep five times at
the end of the cooking time and will
automatically switch to the Keep Warm
setting for 8 hours.
3.Press the START/STOP button to begin
preheating. Selected temperature will
flash during heatup.
4. To turn off the heater at any time during
cooking, press Start/Stop.
STEAM
NOTE: If you brown ingredients before
switching to slow cooking, the unit is
already on, so Step 5 is not necessary.
2. P
ress STEAM. Steaming temperature
cannot be changed.
3. Set desired cooking time (up to 1½
hours) by pressing Time Directionals.
4. P
ress the START/STOP button to start
preheating. Selected time and temperature
will flash as unit heats up.
5. When steaming temperature is reached,
the unit will beep two times and the timer
will begin counting down cooking time.
With pot holders, carefully lift lid away
from you and place food on rack, starting
in the middle and working your way out.
Be sure to cover pot with lid again.
6. When cooking time is completed, the
unit will beep five times and the heater
will turn off automatically.
7. C
arefully remove food from pot with
spoon, fork or tongs.
1. P
ut cooking rack in pot in Roast
position, as shown below. Place
ingredients on rack and cover pot with
lid for faster heatup.
2. P
ress ROAST. A preset temperature of
350°F will flash, as this the most
commonly used Roast temperature.
3. U
se Temperature Directionals to select a
different temperature (from 250°F to
450°F).
4. S
et desired cooking time (up to 6 hours)
with Time Directionals.
8. T
o turn the heater off manually at any
time, press the START/STOP button.
NOTE: The unit is equipped with a boil-dry
protection. If all water has boiled out,
the unit will shut off to avoid damaging
the heater.
5. P
ress the START/STOP button to begin
preheating. Selected time and
temperature will flash as unit heats up.
NOTE: If you brown ingredients before
switching to roasting, the unit is already
on, so Step 5 above is not necessary.
6. W
hen selected roasting temperature is
reached, the unit will beep two times
and the timer will begin counting down
cooking time.
7. W
hen cooking time has elapsed, the
unit will beep five times and the heater
will automatically turn off.
8. C
arefully remove food from pot with
spoon, fork or tongs. Do not use rack
as handles; they will be hot.
9. T
o turn the heater off manually at any
time, press the START/STOP button.
5
Cleaning & CARE
Brown/Sauté Tips
All removable parts are dishwasher safe.
• Use Brown/Sauté as you would a skillet
or sauté pan on the stove – from quickly
sautéed skillet dishes to the first step in
many braised or slow-cooked dishes.
1. U
nplug unit and allow it to cool
completely before cleaning.
2. N
ever immerse unit in water or other
liquids.
• Brown/Sauté also works well to brown
foods on all sides before roasting.
3. T
o clean the housing and control panel,
simply wipe with a clean damp cloth.
• For even browning, it is important not to
crowd the pan. Foods should be
cooked in an even layer on the bottom
of the pan, so it is good to cook foods
in batches when necessary.
4. W
ash cooking pot, lid and rack with
warm soapy water and rinse thoroughly.
Or, clean in the dishwasher.
5. Dry all parts after every use.
• Many recipes call for browning and
sautéing foods before slow cooking or
roasting. Some items produce more
grease and fat than is desirable in the
finished dish. To remove the excess
grease, using pot holders, very carefully
remove the cooking pot from the base
and pour out the grease from the corner
of the cooking pot. Return the cooking
pot to the base and finish cooking the
dish as desired.
6. A
ny servicing should be performed by
an authorized service representative.
NOTE: If food residue sticks to cooking
pot surface, fill pot with warm soapy water
and allow to soak before cleaning. If
scouring is necessary, use a nonabrasive
cleanser or liquid detergent with a nylon
pad or brush.
Tips & Hints
• When browning meats, any brown bits
that are left in the bottom of the pan
can be used to flavour the dish. Simply
add a small amount of liquid (like wine
or broth) to the pan and scrape up the
browned bits with a wooden spoon –
leave in pot. Incorporate into the dish or
sauce.
• H
eatup times may vary in different
cooking modes, based on a number of
factors. The selected temperature, the
current temperature of the cooking pot,
the contents of the pot, and other
factors can all affect heatup time.
For example, you may reach the set
temperature in the Brown/Sauté mode,
but require additional heatup time if you
switch to the Roast mode, even though
your temperature selection is the same.
• Foods can be reheated with the Brown/
Sauté function. Put precooked foods
into the cooking pot. Set on Brown/
Sauté at 350°F [176°C]. Stir ingredients
while heating so that all ingredients are
warmed through. Once food is
simmering, switch to Warm on the Slow
Cook function for serving.
For an idea of how long it takes to
reach a temperature in different modes,
see below:
• Brown/Saute (350ºF [176°C], empty pot)
- 5 min
Roasting Tips
• Roast (400ºF [204°C], with 4-lb [1.8 Kg]
roast) - 9½ min
• For roasting, foods should first be
placed on the roasting rack and then
into the multicooker pot. The pot should
then be covered during preheating and
cooking.
• Steam (1 quart [0.95 L] of water) 8½ min
• Always use nonstick utensils in your
cooking pot. Metal utensils may
damage the nonstick coating.
• There are some recipes that do not
require the use of the rack – some
dishes benefit from direct heat.
• Be careful removing foods after
roasting, as the sides of the pot can still
be very hot. Allow foods like roasted
6
Low or Simmer, but may be finished
and served much sooner. Some
included recipes have a range of
cooking times – adjust the
recommended time to suit yours.
meats to rest for about 10 minutes for
juices to distribute evenly. Remove
foods from rack and arrange on a
cutting board or platter for serving.
• Foods like meats and poultry benefit by
browning first on all sides to caramelize
the exterior and lock in flavors.
• For best cooking results, fill multicooker
at least one-quarter full but not more
than three-quarters full.
• For easy food release, spray roasting
rack with nonstick cooking spray before
roasting.
• To ensure that root vegetables such as
carrots and potatoes are cooked
through, they should be cut no larger
than 1-inch (2.5 cm) pieces. This is
most important for slow-cooked dishes
under 6 hours.
• Baked goods like cakes and breads can
also be prepared using the Roast
function. An 8-inch (20 cm) round or
square pan or a loaf pan fits well on top
of the roasting rack. For baking, the
roasting temperature should be set the
same as you would your oven.
• “Crisp-tender” vegetables should be
added during the last 30 minutes of
cooking time to prevent overcooking.
Fresh herbs should be stirred into
dishes immediately before serving.
Slow Cooking Tips
• In general, cooking for 1 hour on High is
the equivalent of cooking for 2 hours on
Low.
• Slow cooking is perfect for foods that
require long, slow simmering, such as
soups, stocks, stews, and dried beans.
• Slow cooking is ideal for tougher and
less expensive cuts of meat like
shoulder and pot roast.
• The Keep Warm function keeps foods
at perfect serving temperature after they
are finished cooking on the Slow Cook
function.
• We encourage browning foods before
slow cooking as it adds much depth
and flavor to the finished dish. However,
if time is short this step can be skipped
and all ingredients can be added to
your cooking pot to slow cook.
• We do not recommend removing the
lid when slow cooking as heat will
escape, requiring extra cooking time.
Each time the lid is removed, about
15 to 20 minutes of cooking time
should be added.
• When converting a traditional slow cook
recipe for the multicooker that
incorporates the Brown/Sauté or Roast
function first the liquid amount will need
to be increased. This is because the
cooking pot will start at a higher
temperature than it would in a
traditional slow cooker. Every recipe is
different and we’ve created our
recommended recipes accordingly, but
our approximate guideline is to double
the liquid for a long braise and increase
it by about 50% for a soup or stew.
Also, set the slow cook timer to the
lower end of the recommended time
range.
• A fat mop can be used to remove
separated fat from slow-cooked food by
brushing it over the top. Alternatively,
the food may be refrigerated and the
congealed fat can then be lifted off and
discarded before reheating and serving.
• Many slow-cooked foods such as stews
benefit from cooling and refrigerating,
then reheating – as the saying goes, stew
or chili is always better the second day.
• A great way to reheat slow-cooked
foods is to bring them to a simmer on
the Brown/Sauté function at 350°F
(176°C). Stir to ensure all ingredients are
warmed through and then switch to
Warm on the Slow Cook function for
serving.
• Ground meats should always be
browned before slow cooking.
• If using frozen foods, thaw completely
before slow cooking.
• Slow cook up to 24 hours, with an 8
hour Keep Warm. Certain foods benefit
from a long, slow cook time on either
7
• When making soups, add solid
ingredients to multicooker and then
liquid to cover. If a thinner soup is
desired, add more liquid to taste when
finished.
• Recipes can be assembled the night
before cooking. Brown ingredients if
necessary and then combine with
remaining ingredients in cooking pot.
Cover and refrigerate. When ready to
cook, place the cooking pot in the cold
multicooker and add 30 minutes to your
projected cooking time.
• If your recipe calls for precooked pasta,
UNDERCOOK it and add to the pot in
the last 30 minutes of slow cooking.
The same goes for rice. Add precooked
rice in the last 30 minutes of cooking.
• To decrease the amount of fat in
recipes, remove as much of the visible
fat as possible from meats and poultry.
Remove skin from poultry and drain any
fat from browned meats.
Steaming Tips:
• Steaming is one of the healthiest
methods of cooking, as the smallest
amount of nutrients are lost in the
cooking process.
• Dried beans should be soaked
overnight, then brought to a boil,
drained and rinsed before cooking. Do
not add salt or any acid to beans when
cooking, as it will prevent them from
softening completely. Dried beans can
be cooked ahead, drained and frozen.
Thaw to add to your favorite recipes.
• To steam, fill the multicooker pot with
1 quart (0.95 L) of water unless
otherwise indicated.
• When adding heavier foods like corn
on the cob to the steaming rack, place
them on the middle of the rack and
work your way to the edges.
Adapt your own recipes to slow cook:
• For recipes that do not require Brown/
Sauté or Roast function before slow
cooking, reduce the cooking liquid by at
least 50% (soups are the exception).
Liquids do not evaporate as they do in
traditional cooking, and most often you
will end up with much more liquid than
you began with.
• There are some instances when it is
best to add ingredients to the rack
before preheating, such as delicate food
like dumplings or tamales.
• Always use caution when removing lid.
It is best to remove the lid away from
you.
• When converting a traditional slow cook
recipe that incorporates the Brown/
Sauté or Roast function first, the liquid
amount will need to be increased. Every
recipe is different. Our approximate
guideline is to double the liquid for a
long braise and increase it by about
50% for a soup or stew. Also, set the
slow cook time to the lower end of the
recommended time range.
COOKING GUIDELINES
Slow Cooking Modes
Three cooking modes, Simmer, Low and High, give you the opportunity to prepare a wider
variety of dishes. You will usually want to use the Simmer or Low setting for recipes that cook
longer. If you’re starting a dish later in the day, select the High setting to ensure that your
food is cooked, warm, and ready when you’d like to eat.
Setting
Guidelines
Recipes
Temp
Timer
High
This is the setting to use
when you don’t have time
for a long, slow cook. It’s
also the setting to select
when “baking” in your slow
cooker.
Potatoes,
casseroles,
puddings, rolls
212˚F (100˚C)
Programmable
up to 24 hours,
then 8 hours (Warm)
Low
Low is the standard slow
cooker temperature, and is
ideal for foods that you start
in the morning before work
and enjoy at the end of your
day.
Braised foods,
roasts, stews, ribs,
casseroles, shanks,
chops, less tender
cuts of meat,
soups
200˚F (93˚C)
Programmable
up to 24 hours,
then 8 hours (Warm)
Simmer
The longer the cooking time,
the more flavours blend
together and intensify.
Soups, stews,
stocks
185˚F (85˚C)
Programmable
up to 24 hours,
then 8 hours (Warm)
----
165˚F (74˚C)
Defaults up to 8 hours.
Or programmable
up to 24 hours
Warm
Do not use this setting to
cook food or as a cooking
function. This setting is
intended only for use with
preheated foods.
Suggested Cuts of Meat for Slow Cooking
Beef/Veal
• Certain cuts of meat are more appropriate
for slow cooking. Lean cuts such as
boneless, skinless chicken breast or
pork tenderloin may seem dry if slow
cooked. See our suggestions on page 9
for more information.
• Dairy products (milk, sour cream, some
cheeses) will break down and curdle
during slow cooking. Substitute canned
evaporated milk, nonfat dry milk, or add
dairy products during the last 30
minutes of cooking.
8
Pork
Lamb
Poultry
Game
Choose cuts that
are full of flavour
and benefit from
braising to
tenderize.
Less tender cuts
work best.
Tenderloin will
become tough if
slow cooked.
Choose flavourful
cuts that benefit
from braising to
tenderize.
Best choice – dark
meat – bone-in and
skinless. Breast
meat can be cooked
in Slow Cooker, but
will become dry in
texture.
Game generally
tends to be less
tender, therefore it
is perfect for the
Slow Cooker.
Arm pot roast; beef
brisket or corned
beef brisket; beef
short ribs; bottom
round roast; chuck
or rump roast;
chuck shoulder
steak; veal shanks
Boston butt roast;
pork shoulder
pieces; sausages;
country style pork
ribs (bone-in); pork
shoulder or blade
roast
Lamb shoulder;
lamb stew meat;
lamb shanks
Chicken or turkey
legs and thighs
Venison roasts or
stew meat,
pheasant, duck
thighs and legs
9
Troubleshooting Chart
Steaming Chart
Subject
Food
Amount
Preparation
Question
Cooking Time
Why won’t my unit turn on?
Answer/Solution
Check to make sure your unit is plugged into a functional outlet.
Contact Customer Service at 1-800-472-7606.
Artichokes
6 individual
trimmed – see recipe page
26
40–50 minutes
Asparagus
1 pound (450g)
medium
trimmed
4 minutes
Broccoli
1 bunch (about 16
to 20 oz. [453-566g])
2-inch (5 cm) florets
6–7 minutes
Carrots, baby
1 pound (450g)
whole
8 minutes
Cauliflower
1 medium head
(about 20 oz. [566g])
2-inch (5 cm) florets
7–9 minutes
Corn
4 ears
husked
10–12 minutes
Green Beans
1 pound (450g)
trimmed
7 minutes
Peas, snow
1 pound (450g)
trimmed
4 minutes
Potatoes, new
1 pound (450 g)
quartered/halved
12–15 minutes
If changing functions when the unit is already cooking, you do
not need to hit the START/STOP button again to select. Doing
so will turn the unit off. Simply press your new function and
select your desired settings; the unit will switch automatically.
Potatoes, yellow/gold
16–20 ounces
(453-566g)
slices or ¾-inch
(1.9 cm) pieces
10–12 minutes
The heater will turn off automatically after the cooking time and/
or Keep Warm time have elapsed. This is normal.
Potatoes, sweet
16–20 ounces
(453-566g)
slices or ¾-inch
(1.9 cm) pieces
8–10 minutes
Squash, summer/zucchini
1 pound (450g)
½-inch (1.25 cm) slices
5 minutes
Chicken
1 pound (450g
[about 2 large
breasts])
whole
12–15 minutes
Shrimp*
1 pound (450g
[large])
peeled & deveined
2–4 minutes
Fin Fish
(salmon, swordfish, etc.)
1 pound (450g)
cut into portion sizes
8–12 minutes
If no cooking function has been started, the cooker will enter
sleep mode after 5 minutes of no use. All lights will turn off.
Press any button to “wake up” the unit and operate as normal.
It is possible the unit overheated. Wait for the unit to cool down
and try again. If it does not turn back on, contact Customer
Service at 1-800-472-7606.
If all of your water has boiled out during steaming, the unit will
shut off as a safety precaution. To continue steaming, add
water to the pot and restart the program.
Power
Why is my unit turning itself off?
If you do not set a cooking time, the unit will cook for the
maximum allowable cooking time before shutting off
automatically. This is normal.
Programming
Can I set a timer for the Brown/
Sauté function?
Yes. Setting a timer for brown/sauté is an optional step. Simply
set your timer using the Time Directionals as you would any
other function.
Can I change my cooking
function, time or temperature
when the unit is already
cooking?
Yes. Simply use the cooking function, Time and Temperature
Directionals, to change your programming. Note: The unit is
already on, so you do not need to hit the START/STOP button
again to select. Doing so will turn the unit off. Simply press your
new function or desired settings; the unit will switch
automatically and adjust accordingly.
When should I brown my meat
before slow cooking/roasting?
Browning meat before slow cooking and roasting is an optional
step. It is beneficial, as it adds flavor and color, but the step
can be omitted if time is short. Exception: ground meats.
Which position should the rack
be in for steaming/roasting?
The rack is intended for steaming in the “up” position. The rack
is intended for roasting in the “down” position (see page 5).
Can I use the cooking pot on
the stove/in the oven?
The cooking pot was designed specifically for use in this multicooker. We do not suggest using it on the stove or in the oven.
Why is there not enough liquid
in my slow cooked dish?
Recipe ingredient amounts may vary if using multiple functions.
See page 8 for details.
*3 cups (750ml) of water should be used here
TROUBLESHOOTING
Error Codes
Service at 1-800-472-7606.
- - - - - - - (flashing) indicates that the
pot has been removed from the unit or is
not seated properly. The heater will turn off
temporarily if the pot is removed to avoid
damage. Once the pot is returned, the unit
should resume cooking.
Cooking
Can I put my unit in the
dishwasher?
Note: If the pot is out of place for over
15 minutes, you will need to restart the
program.
Cleaning
Err indicates the unit has overheated. Wait
for the unit to cool down and try again. If
the problem persists contact Customer
10
If the pot is out of place for more than 15 minutes, when the
pot is replaced, the unit will not resume cooking. You will need
to restart the program.
All removable parts are top-rack dishwasher safe.
Do not immerse or put the base of the unit in the dishwasher. Clean
the base and control panel with a clean damp cloth.
The pot is nonstick – why is
food sticking?
While the pot does have a nonstick coating, it is possible for
food residue to burn onto the pot, making it difficult to remove.
Food residue is sticking to the
cooking pot surface. How do I
clean it without damaging it?
If food has burned on, fill pot with warm soapy water and allow
to soak before cleaning. If scouring is necessary, use a nonabrasive cleanser or liquid detergent with a nylon pad or brush.
11
Recipe Booklet
RECIPES
Breakfast & Starters
Sides
Spinach & Gruyère
Breakfast Strata . . . . . . . . . . . . . . . . . . 3
Buttery Dinner Rolls . . . . . . . . . . . . . . . . 23
Maple Cinnamon Oatmeal . . . . . . . . . . . . 3
Roasted Corn on the Cob . . . . . . . . . . . 25
Turkey Swedish Meatballs . . . . . . . . . . . . 5
Roasted Red Potatoes . . . . . . . . . . . . . . 26
Garlic-Rosemary Beans . . . . . . . . . . . . . 24
Steamed Artichokes . . . . . . . . . . . . . . . . 26
Stocks & Sauces
Rich Veggie Stock . . . . . . . . . . . . . . . . . . 6
Desserts
Roasted Beef Stock . . . . . . . . . . . . . . . . . 7
Applesauce . . . . . . . . . . . . . . . . . . . . . . 27
Garden Vegetable Sauce . . . . . . . . . . . . . 8
Cannoli Cheesecake . . . . . . . . . . . . . . . 28
Bolognese . . . . . . . . . . . . . . . . . . . . . . . . 8
Fall Fruit Crisp . . . . . . . . . . . . . . . . . . . . 30
Rice Pudding . . . . . . . . . . . . . . . . . . . . . 32
Soups & Stews
Steamed Mocha Pudding . . . . . . . . . . . 32
Rustic Tomato Soup . . . . . . . . . . . . . . . . .9
Mushroom Barley Soup . . . . . . . . . . . . . 10
Beef Stew . . . . . . . . . . . . . . . . . . . . . . . 10
Super Chili . . . . . . . . . . . . . . . . . . . . . . . 11
Shrimp & Chorizo Gumbo . . . . . . . . . . . 12
Entrées
Roasted Herb & Garlic Pork . . . . . . . . . . 14
Roasted Stuffed Turkey Breast . . . . . . . 16
Chicken with Three Peppers . . . . . . . . . 17
Steak and Roast Rub . . . . . . . . . . . . . . . 18
Rib-Eye Roast . . . . . . . . . . . . . . . . . . . . 19
Guinness Braised Short Ribs . . . . . . . . . 19
Primavera Shrimp Sauté . . . . . . . . . . . . 21
Asian Style Poached Salmon . . . . . . . . . 21
12
13
Maple Cinnamon
Oatmeal
Breakfast & Starters
Spinach and Gruyère
Breakfast Strata
Turkey Swedish
Meatballs
What a delightful aroma to wake up to
in the morning! Prepare your oatmeal
the night before so it will be ready
for your family to start the day right.*
This is a delicious dish to have at
a brunch for a crowd. The flavours are rich
and it only takes a few steps to complete.
Settings: B
rown/Sauté
Slow Cook
Makes twelve 1-cup (250 ml) servings
½
tablespoon (7 ml) extra virgin
olive oil
1
garlic clove, finely chopped
½
large onion, chopped
1
teaspoon (5 ml) sea or kosher
salt, divided
1loaf (1 pound [500 g]) challah
bread, cut into 1-inch (25 mm)
cubes
8
large eggs, beaten
1
cup (250 ml) heavy cream
1
cup (250 ml) whole milk
¼teaspoon (1 ml) freshly ground
black pepper
¼
teaspoon (1 ml) ground nutmeg
1
teaspoon (5 ml) ground mustard
6
ounces (170 g) Gruyère, shredded
4
ounces (115 g) baby spinach
Setting: Brown/Sauté
Makes eight 1-cup (250 ml) servings
Makes about 20 meatballs
2¼ cups (550 ml) steel cut oats
4
cups (1 L) water
4cups (1 L) milk (may use whole or
lowfat), divided
3
tablespoons (45 ml) pure maple
syrup
2
cinnamon sticks
¼
teaspoon (1 ml) kosher salt
pinch ground nutmeg
¾cup (175 ml) raisins or any other
dried fruit (for larger dried fruit
varieties, chop into small,
bite-size pieces)
1
2. S
elect Slow Cook on Low and set time
for 2½ hours.
1. P
ut the oil into the cooking pot of the
Cuisinart® Multicooker and set to
Brown/Sauté at 350°F (180°C). Once
the oil is hot, add the garlic, onion and
a pinch of the salt. Sauté until golden
and fragrant, about 3 to 5 minutes.
3. O
nce unit switches to Keep Warm, stir
the remaining 2 cups (500 ml) of milk
into oatmeal. Remove cinnamon sticks
and serve immediately.
Nutritional information per serving:
Calories 319 (16% from fat) • carb. 56g • pro. 11g
• fat 6g • sat. fat 2g • chol. 10mg • sod. 140mg
• calc. 164mg • fiber 6g
2. S
witch from Brown/Sauté to Slow Cook
set on Low for 3½ hours. Add the
remaining ingredients; toss to combine
and cover.
*If programming the oatmeal overnight,
use all water for cooking. Stir 2 cups
(500 ml) of milk into oatmeal as
instructed once cooking time is finished
and the unit has switched to Keep
Warm.
3. O
nce time has expired, the unit will
automatically switch to Keep Warm.
Nutritional information per serving:
Calories 307 (21% from fat) • carb. 21g • pro. 13g
• fat 19g • sat. fat 9g • chol. 205mg • sod. 497mg
• calc. 243mg • fiber 1g
14
What was old is new and popular again,
and that is true with this classic dish.
These are sure to please everyone,
Swedes and non-Swedes alike.
Setting: Slow Cook
1. P
ut the oats, water, 2 cups (500 ml) of
milk (substitute with water if preparing
in advance), maple syrup, cinnamon
sticks, salt, nutmeg and dried fruit into
the cooking pot of the Cuisinart®
Multicooker.
3. P
ut ½ tablespoon (7 ml) of the butter
into the cooking pot of the Cuisinart®
Multicooker set to Brown/Sauté at 375˚F
(190°C) . Once the butter melts and is
hot and foamy, add the meatballs in
about four batches so not to overcrowd
the pan (overcrowding the pan will lead
to poor browning and bring down the
heat).
4. T
urn the meatballs every minute or two
until fully browned. Remove, reserve
and repeat with remaining meatballs.
Once all are browned, remove and
reserve together.
/3cup (75 ml) milk (whole or
reduced fat)
2slices sandwich bread, torn into
1-inch (25 mm) pieces
1
medium celery stalk, finely
chopped
2
pounds (1 Kg) ground turkey
1
medium onion, finely chopped
1½ teaspoons (7 ml) sea or
kosher salt
¼
teaspoon (1 ml) ground white
pepper
1
teaspoon (5 ml) baking powder
¼
teaspoon (1 ml) ground allspice
2
pinches ground nutmeg
1
large egg, beaten
3½ tablespoons (50 ml) unsalted
butter, divided
3tablespoons (45 ml) unbleached,
all-purpose flour
4
cups (1 L) chicken broth, low
sodium
1
/3
cup (75 ml) sour cream
5. P
repare the gravy. Add the remaining
butter to the cooking pot. Once it is
melted and foamy, whisk in the flour.
Stirring constantly with a wooden
spoon, cook until the butter/flour
mixture is lightly browned. Once it is
browned, slowly whisk in the broth.
Bring to a boil and let cook until
thickened, about 10 minutes. Reduce
heat to 300°F (150°C) and stir in the
sour cream.
6. P
ut all of the reserved meatballs into
the cooking pot with the gravy. Raise
heat to 350°F (180°C) and bring to a
boil. Let boil for about 10 minutes to
coat the meatballs with the thickened
gravy.
7. R
educe heat to 250°F (120°C) and keep
on this temperature until ready to serve.
(Note: the meatballs can be served right
after boiling in Step 6. This additional
time is optional, but adds to the flavour
and cohesiveness of the dish.)
1. P
ut the milk into a liquid measuring cup
and add the bread. Let soak; reserve.
2. W
hile the bread is soaking, combine the
celery, turkey, onion, salt, pepper,
baking powder, spices and egg in a
large mixing bowl. Squeeze the milk out
of the bread and add the bread to the
turkey mixture. With gentle hands, mix
together until fully combined. You want
to mix as little as possible, because if
you over-mix, the meatballs will be
tough. Form into 1-inch (25 mm)
meatballs.
Nutritional information per meatball:
Calories 121 (53% from fat) • carb. 4g • pro. 10g
• fat 7g • sat. fat 3g • chol. 90mg • sod. 390mg
• calc. 28mg • fiber 0g
15
Roasted Beef Stock
Stocks & Sauces
There is nothing more wholesome or
economical than preparing your own
homemade stocks.
Rich Veggie Stock
This stock makes a delicious base
for all soups and sauces.
Settings: R
oast
Slow Cook
Setting: Slow Cook
Makes about 10 cups (2.5 L)
Makes about 8 cups (2 L)
4
pounds (1.8 Kg) beef bones
1
large onion, cut into eighths
1large leek, washed well with root
end trimmed, cut into 2-inch
(50 mm) pieces
4medium carrots, peeled and cut
into 2-inch (50 mm) pieces
2medium celery stalks, cut into
2-inch (50 mm) pieces
1
large handful fresh Italian parsley
1
teaspoon (5 ml) black
peppercorns
1
bay leaf
1
garlic clove, crushed
12
cups (3 L) cold water
1
large onion, cut into eighths
1large leek, root end trimmed and
washed, cut into 2-inch (50 mm)
pieces
2parsnips, peeled and cut into
2-inch (50 mm) pieces
1
plum tomato, cut into quarters
3medium-to-large carrots, peeled
and cut into 2-inch (50 mm)
pieces
3medium celery stalks, cut into
2-inch (50 mm) pieces
1
large handful fresh Italian parsley
1
small sprig fresh thyme
1
large garlic clove, crushed
½
teaspoon (2 ml) black
peppercorns
8
cups (2 L) water
1. P
reheat the Cuisinart® Multicooker to
Roast at 425°F (220°C). Put bones into
the cooking pot, cover and roast for
about 30 minutes, turning once during
cooking until well browned. Remove the
beef bones and carefully remove the pot
and pour out any residual grease.
1. P
ut all ingredients into the cooking pot
of the Cuisinart® Multicooker.
2. S
et to Slow Cook on Low for 12 to
16 hours.
2. R
eturn pot to unit. Add bones and
remaining ingredients to the pot.
Switch to Slow Cook on Simmer for
14 to 20 hours.
3. O
nce unit switches to Keep Warm,
strain stock, discarding vegetables. Use
immediately or cool to place in storage
containers for refrigerator or freezer.*
3. Once
unit switches to Keep Warm,
strain stock, discarding beef bones and
vegetables. Use immediately or cool to
place in storage containers for
refrigerator or freezer.*
*Stock will keep in refrigerator for up to
one week, or two months in a freezer.
Nutritional information per serving (½ cup [125 ml]):
Calories 24 (5% from fat) • carb. 6g • pro. 1g
• fat 0g • sat. fat 0g • chol. 0mg • sod. 17mg
• calc. 25mg • fiber 1g
*Stock will keep in refrigerator for up to
one week, or two months in a freezer.
Nutritional information per serving (½ cup [125 ml]):
Calories 42 (15% from fat) • carb. 3g • pro. 3g
• fat 2g • sat. fat 1g • chol. 7mg • sod. 28mg
• calc. 20mg • fiber 0g
16
Garden Vegetable
Sauce
with the 1 cup (250 ml) of reserved
juices, remaining salt, pepper and sugar.
Bring mixture to a boil and then switch
to Slow Cook on Low for 3 hours.
This sauce can be served chunky, or you can
use an immersion blender to make it smooth.
3. O
nce the 3 hours expire, the unit will
automatically switch to Keep Warm. If
you want to serve as a more rustic-style
sauce, you can serve as is. If you want
a smoother sauce, blend in the cooking
pot by using an immersion blender.
Settings: B
rown/Sauté
Slow Cook
Makes about 6 cups (1.5 L)
1½
tablespoons (25 ml) extra virgin
olive oil
2 medium-to-large onions, peeled
and cut into ½-inch (12.5 mm)
pieces
4 medium carrots, cut into ½-inch
(12.5 mm) pieces
2cups (500 ml) ½-inch (12.5 mm)
cubed eggplant (not peeled)
2 medium celery stalks, cut into
½-inch (12.5 mm) pieces
4
garlic cloves
1½teaspoons (7 ml) sea or kosher
salt, divided
1½ teaspoons (7 ml) dried oregano
1½ teaspoons (7 ml) dried basil
4 roasted red bell peppers, cut into
1-inch (25 mm) pieces
½
cup (125 ml) dry white wine
3
tablespoons (45 ml) tomato paste
4 cans diced tomatoes, strained,
reserving 1 cup (250 ml) of the
juices
¼teaspoon (1 ml) freshly ground
black pepper
3
tablespoons (45 ml) granulated
sugar
Nutritional information per serving (¼ cup [60 ml]):
Calories 55 (6% from fat) • carb. 11g • pro. 2g
• fat 0g • sat. fat 0g • chol. 0mg • sod. 433mg
• calc. 32mg • fiber 2g
1. P
ut the oil into the cooking pot of the
Cuisinart® Multicooker; set to Brown/
Sauté at 350°F (180C). Once the oil is
hot, add the onions, carrots, eggplant,
celery, garlic and ½ teaspoon (2 ml) of
the salt. Sauté ingredients together so
that they gently cook and turn slightly
golden.
2. A
dd the oregano, basil, red peppers and
wine to the sautéed ingredients. Cook
until the wine has reduced by at least
half. Add the tomato paste, tomatoes
17
Bolognese
3. Switch to Slow Cook on Low for
6 hours.
This Italian sauce is a classic. The longer it
can simmer in the multicooker the better
the flavours will be. It freezes beautifully,
so it can be enjoyed again.
4. O
nce unit switches to Keep Warm, use
immediately or cool to place in storage
containers for refrigerator or freezer.
Settings: B
rown/Sauté
Slow Cook
*Sauce will keep up to five days in
refrigerator or three months in the
freezer.
Makes 12 cups (3 L)
1
1
tablespoon (15 ml) olive oil
tablespoon (15 ml) unsalted
butter
2
medium onions, finely chopped
2
medium carrots, finely chopped
2medium celery stalks, finely
chopped
4
garlic cloves, finely chopped
¾
pound (375 g) ground beef
¾
pound (375 g) ground veal
¾ pound (375 g) Italian sausage,
casings removed
1½ teaspoons (7 ml) kosher salt,
divided
1
cup (250 ml) whole milk
1
cup (250 ml) dry white wine
½
teaspoon (2 ml) freshly ground
black pepper
2cans (35-ounce [1 L]) tomatoes,
roughly chopped
Nutritional information per serving (¼ cup [60ml]):
Calories 58 (36% from fat) • carb. 3g • pro. 5g
• fat 2g • sat. fat 1g • chol. 16mg • sod. 220mg
• calc. 20mg • fiber 1g
Soups & Stews
*If you do not have an immersion blender, you
can use a countertop blender. Divide the solids
from the liquid and add some of the liquid to
the blender, then follow by about 1/3 of the
solids. Blend until smooth. Repeat with
remaining ingredients.
Rustic Tomato Soup
Sautéing the vegetables gives
the soup a rich, sweet flavour.
Settings: B
rown/Sauté
Slow Cook
Nutritional information per serving (1 cup [250 ml]):
Calories 111 (43% from fat) • carb. 13g • pro. 4g
• fat 6g • sat. fat 1g • chol. 0mg • sod. 808mg
• calc. 53mg • fiber 4g
Makes about 8 cups (2 L)
3
tablespoons (45 ml) olive oil, divided
3½pounds (1.6 Kg) tomatoes, halved and
seeded, divided
3
garlic cloves, smashed
1medium to large onion,
roughly chopped
2
medium carrots, roughly chopped
2
celery stalks, roughly chopped
2
pinches sea or kosher salt
pinch freshly ground black pepper
2
teaspoons (10 ml) dried basil
1
teaspoon (5 ml) marjoram
6
sun-dried tomatoes
¼
teaspoon (1 ml) baking soda
4
cups (1 L) vegetable broth or stock
1½
teaspoons (7 ml) sea or kosher salt
¾teaspoon (3.75 ml) freshly ground
black pepper
1. P
reheat the Cuisinart® Multicooker to Brown/
Saute at 400°F (200°C). Once preheated, add
1 tablespoon (15 ml) of the olive oil and half
of the tomatoes, skin side down. Brown for
about 5 minutes. Turn and brown second
side for another 5 minutes. Remove and
reserve. Add the second tablespoon (15 ml)
of oil and remaining tomatoes. Repeat as
above, scraping the bottom as needed to
prevent burning.
1. P
ut the oil and butter into the cooking
pot of the Cuisinart® Multicooker and
set to Brown/Sauté at 400°F (200°C).
When the butter melts, stir in the
chopped vegetables. Sauté vegetables
until soft and fragrant, about 5 to 6
minutes, stirring occasionally. Stir in the
ground meats and 1 teaspoon (5 ml) of
salt. Cook until completely browned,
breaking up meat with a wooden spoon
as it cooks.
2. R
educe the heat to 350°F (180°C). Add
the reserved tomatoes, garlic, onion,
carrots, celery, salt, pepper and spices.
Sauté until soft and golden, about 8 to
10 minutes, stirring occasionally.
3. A
dd remaining ingredients and stir to
combine. Switch from Brown/Sauté to
Slow Cook on Low. Cover and set timer
for 4 hours.
2. O
nce the meat is brown, stir in the milk.
Allow the mixture to simmer until the
milk is completely evaporated. Add the
wine and also simmer until liquid has
completely evaporated. Add the
remaining salt, pepper and chopped
tomatoes to the cooking pot. Stir
ingredients together well.
4. O
nce unit switches to Keep Warm, use an
immersion blender* to blend soup in the
cooking pot to finish. Taste and adjust
seasonings as desired.
18
19
Mushroom Barley Soup
3. O
nce unit switches to Keep Warm and
right before serving, stir in fresh parsley
and lemon juice.
A bowl of this deeply satisfying soup plus
a slice of crusty French bread makes the
perfect winter meal.
4. Taste and adjust seasoning accordingly.
Beef Stew
*Note: If you have the time, you can
brown the meat prior to slow cooking.
Do this on Brown/Sauté at 400°F
(200°C) as the first step. If you do this,
use 4 cups (1 L) of beef stock. Your
yield may be slightly less.
This beef stew is one of the simplest you will
ever find. No browning is required* – just
combine the ingredients and cook slowly.
Setting: Slow Cook
Settings: B
rown/Sauté
Slow Cook
Nutritional information per serving (1 cup [250 ml]):
Calories 126 (15% from fat) • carb. 22g • pro. 4g
• fat 2g • sat. fat 1g • chol. 5mg • sod. 767mg
• calc. 32mg • fiber 4g
Makes about 12 cups (3 L)
2
tablespoons (30 ml) unsalted
butter
1medium leek, white and light
green parts only, washed and
dried well, finely chopped
1
medium onion, finely chopped
3
medium carrots, finely chopped
4
garlic cloves, finely chopped
24ounces (0.7 L) mushrooms
(a mix of button, cremini, and all
wild varieties works nicely),
sliced
2
teaspoons (10 ml) kosher salt
1
teaspoon (5 ml) fresh thyme
1
bay leaf
½
cup (125 ml) sherry
1
cup (250 ml) pearl barley
10
cups (2.5 L) vegetable broth
¾teaspoon (3.75 ml) freshly ground
black pepper
1tablespoon (15 ml) chopped fresh
Italian parsley
1
teaspoon (5 ml) fresh lemon juice
1. P
ut the butter into the cooking pot of
the Cuisinart® Multicooker and set to
Brown/Sauté at 375°F (190°C). Once
melted, stir in the chopped leek, onion
and carrots. Sauté until vegetables are
soft and fragrant, about 5 to 8 minutes.
Stir in the garlic, mushrooms, salt,
thyme and bay leaf. Cook until
mushrooms release most of their
moisture and have cooked down
considerably, up to 10 minutes. Add
sherry to the pot and cook until almost
completely reduced.
Nutritional information per serving (1 cup [250ml]):
Calories 248 (28% from fat) • carb. 15g • pro. 26g
• fat 8g • sat. fat 3g • chol. 64mg • sod. 324mg
• calc. 36mg • fiber 3g
Makes about 10 cups (2.5 L)
3pounds (1.5 Kg) beef chuck, cut
into 1- to 2-inch (25 to 50 mm)
cubes*
1
teaspoon (5 ml) kosher salt
½
teaspoon (10 ml) freshly ground
black pepper
1medium leek, white and light
green parts only, finely chopped
1
medium onion, finely chopped
2medium carrots, cut into ½-inch
(12.5 mm) rounds (halve rounds if
carrots are on the larger side)
1medium parsnip, cut into ½-inch
(12.5 mm) rounds
1
medium celery stalk, thinly sliced
1 pound new white or red
potatoes, cut into 1-inch (25 mm)
pieces
8
garlic cloves, peeled, left whole
6ounces (170 g) cremini
mushrooms, halved or quartered
½
tablespoon (7 ml) herbes de
Provence
1
bay leaf
¾
cup (175 ml) dry red wine
3
tablespoons (45 ml) tomato paste
2½ cups (625 ml) beef stock,
low sodium
1cup (250 ml) green peas (thaw
first if frozen)
¼
cup (60 ml) chopped Italian
parsley leaves
1. T
oss all ingredients together except the
peas and parsley in the cooking pot of
the Cuisinart® Multicooker.
2. Set the unit to Slow Cook on Low for
16 hours.
3. O
nce the unit switches to Keep Warm,
stir in the peas and parsley.
2. A
dd the barley, broth and pepper and
switch the unit to Slow Cook on High
for 3½ hours.
4. Taste and adjust seasoning accordingly.
20
21
Super Chili
4. T
aste and adjust seasoning accordingly.
Leave on Keep Warm until ready to
serve.
Don’t be intimidated by the amount of chili
powder in the recipe; most store bought
varieties lean on the side of mild. However
spice lovers can turn up the heat by just
increasing the cayenne or stirring in
some puréed chipotle chiles.
Nutritional information per serving (1 cup [250 ml]):
Calories 214 (53% from fat) • carb. 9g • pro. 15g
• fat 13g • sat. fat 5g • chol. 51mg • sod. 895mg
• calc. 54mg • fiber 3g
Settings: B
rown/Sauté
Slow Cook
Shrimp & Chorizo
Gumbo
2. L
ower the heat to 275°F (135°C) and
add the butter. Once butter has melted,
stir the flour into the butter with a
wooden spoon so that the mixture
comes together – this is called the roux.
The roux will at first be very thick;
continue stirring roux occasionally until
it is smooth and resembles the colour of
peanut butter, approximately 30 to 40
minutes. It is important to keep a close
eye during this step as the roux could
burn if it is not occasionally stirred and
a low heat is not maintained.
Not exactly a purist’s version of gumbo,
but a delicious one just the same!
Settings: B
rown/Sauté
Slow Cook
Makes about 14 cups (3.5 L)
¼
teaspoon (1 ml) vegetable oil
1pound (500 g) chorizo or
andouille sausage cut into
½-inch (12.5 mm) dice
½
cup (125 ml) dry white wine,
divided
½
cup (125 ml) unsalted butter
¾
cup (175 ml) unbleached,
all-purpose flour
1large onion, diced (approximately
2 cups [500 ml] dice)
4 to 5large celery stalks, diced
(approximately 2 cups [500 ml]
dice)
1large green pepper, diced
(approximately 2 cups [500 ml]
dice)
4
garlic cloves, finely chopped
2
tablespoons (30 ml) Creole
seasoning
½
teaspoon (2 ml) kosher salt
2cans (15-ounce [0.4 L]) diced
tomatoes
1
bay leaf
10
cups (2.5 L) shrimp stock
(see page 7)*
10
ounces (0.3 L) okra, sliced, fresh
or frozen
2pounds (1 Kg) large shrimp,
peeled and rinsed
Makes about 12 cups (3 L)
1
1
2
teaspoon (5 ml) vegetable oil
large onion, finely chopped
jalapeños, seeded and finely
chopped
2medium red peppers, cut into
¼-inch (6 mm) dice
6
garlic cloves, finely chopped
2
pounds (1 Kg) ground beef
½
cup (125 ml) chili powder
1
tablespoon (15 ml) dried oregano
1
tablespoon (15 ml) kosher salt
¼
teaspoon (1 ml) cayenne pepper
1
can (28-ounce [0.8 L]) crushed
tomatoes
1can (15-ounce [0.47 L]) diced
tomatoes, drained
1. P
ut the oil into the cooking pot of the
Cuisinart® Multicooker and set to
Brown/Sauté at 400°F (200°C). Once
hot, add the chopped onion, jalapeños,
peppers and garlic and stir together
until soft and fragrant, about 5 to
8 minutes.
2. A
dd the ground beef and break apart
with a wooden spoon once it is added
to the pot. Stir in the chili powder,
oregano, salt and cayenne and continue
cooking until the meat is completely
cooked through.
3. O
nce the roux has reached the
appropriate colour, raise temperature to
325°F (160°C), stir in the onion and
celery; sauté for about 5 minutes. Stir in
the pepper and garlic and continue to
cook for another 5 minutes. Stir in the
remaining ¼ cup (60 ml) of white wine,
and again scrape any brown bits that
may have accumulated on the bottom
of the cooking pot. Stir in Creole
seasoning and salt – stir over heat for
1 minute. Stir in diced tomatoes and
bay leaf. Once all ingredients are well
incorporated, slowly whisk in the shrimp
stock, using a nonstick whisk. Continue
whisking until all ingredients are
incorporated.
4. A
dd the reserved cooked sausage and
switch unit to Slow Cook on Low for 4
hours. Once unit switches to Keep
Warm, stir in the okra; switch to Brown/
Sauté at 375°F (190°C) to simmer for an
additional 30 minutes. Taste and adjust
seasoning.
5. T
he final step is to stir in the shrimp.
The shrimp will take only 5 minutes to
cook so wait until just before serving to
add. If desired, set to Keep Warm for
serving.
1. P
ut the oil into the cooking pot of the
Cuisinart® Multicooker and set to
Brown/Sauté at 400°F (200°C). Once
the oil is hot, add the diced sausage
and cook until browned all over, about
6 to 10 minutes. Stir in ¼ cup (60 ml) of
the white wine in order to scrape up all
the brown bits that may have
accumulated on the bottom of the pot.
Remove sausage and reserve. Carefully
wipe out bottom of pan with a paper
towel.
3. A
dd the crushed and diced tomatoes.
Switch the unit to Slow Cook on Low
for 6 hours. When unit switches to Keep
Warm, degrease the chili by either
skimming any excess fat with a ladle or
by gently blotting the surface with a
paper towel.
22
Tip: Gumbo is best served in shallow
bowls over rice.
* Shrimp stock is a key ingredient for this
dish, plus it is easy to make with the
shells from the shrimp used in the
recipe. However, if necessary, vegetable
broth can be substituted.
23
Entrées
Note: Should there be excessive grease
remaining in the bottom of the pot after
browning sausage in Step 1, refer to the
instructions on page 6 of the instruction
book for removal.
Roasted Herb &
Garlic Pork
Nutritional information per serving (1 cup [250 ml]):
Calories 343 (65% from fat) • carb. 9g • pro. 20g
• fat 25g • sat. fat 9g • chol. 126mg • sod. 488mg
• calc. 74mg • fiber 1g
The longer the pork is marinated,
the more flavourful the end result will be.
Setting: Roast
Makes 6 servings
1pork loin roast (approximately
2½ pounds [1.1 Kg])
3
garlic cloves, chopped
6
sage leaves
2
fresh rosemary sprigs,
leaves only
4
tablespoons (60 ml) extra virgin
olive oil
¾
teaspoon (3.75 ml) kosher salt
¼
teaspoon (1 ml) freshly ground
black pepper
1. P
ut the pork in a bowl with the garlic,
sage, rosemary and olive oil and toss
together well. Let marinate in the
refrigerator for at least 2 hours and
up to overnight.
2. R
emove pork from refrigerator about
30 minutes before roasting. Season the
roast all over with the salt and pepper.
Put the roasting rack into the cooking
pot of the Cuisinart® Multicooker and
set to Roast at 400°F (200C). Put the
marinated pork on the rack, cover, and
set time for 1 hour.
3. C
heck the roast after 45 minutes; the
internal temperature should read 140°F
(60°C) at the thickest part.
4. Allow to rest 5 to 10 minutes before
slicing.
Nutritional information per serving:
Calories 457 (66% from fat) • carb. 1g • pro. 37g
• fat 33g • sat. fat 10g • chol. 119mg • sod. 361mg
• calc. 39mg • fiber 0g
Roasted Stuffed
Turkey Breast
sugar together and add the turkey
breast. If the turkey breast is not fully
submerged, add more water. Cover and
refrigerate for 3 to 4 hours, or overnight
(no more than 24 hours). Rinse well
under cold water after brining or the
turkey will be too salty.
When you are feeling nostalgic for
Thanksgiving, get the same flavours in
a fraction of the time with this
all-encompassing dish. We took the dishes
from the holiday and stuffed them into a turkey
breast to satisfy the craving. While brining is
an optional step, it is well worth the time, for it
keeps the turkey from drying out.
2. P
ut 1 tablespoon (15 ml) of butter into
the cooking pot of the Cuisinart®
Multicooker, set to Brown/Sauté at
350°F (180°C). Once butter has melted,
add the celery, onion, yam and a pinch
each of the salt and pepper. Sauté until
softened and fragrant, about 6 to 8
minutes. Remove and reserve in a large mixing bowl. Add remaining salt and
pepper, cranberries, sage, bread cubes
and broth to the sautéed vegetables.
Toss to combine. Reserve.
Settings: B
rown/Sauté
Roast
Makes about 12 servings
Brine
8
1
¼
(optional):
cups (2 L) water
cup (250 ml) kosher salt
cup (60 ml) granulated sugar
Turkey:
1turkey breast (6 to 7 pounds
[2.7 to 3.2 Kg]), de-boned
1
tablespoon (15 ml) unsalted
butter
1
celery stalk, diced (about ¼ cup
[60 ml])
1
small onion, diced (about ¾ cup
175 ml])
1medium-to-large yam, peeled
and diced
1
teaspoon (5 ml) sea or kosher
salt, divided
¾teaspoon (3.75 ml) freshly ground
black pepper, divided
½
cup (125 ml) dried cranberries
1
tablespoon (15 ml) chopped fresh
sage
1cup (250 ml) cubed sourdough
bread (or any rustic bread, like
Italian or French)
2
/3
cup (150 ml) chicken broth, low
sodium
2tablespoons (30 ml) unsalted
butter, melted for brushing (you
may substitute olive oil if you
wish)
3. L
ay the brined turkey breast out flat.
Pound to be sure that the turkey is even
in thickness. Spread the stuffing evenly
on top of the pounded turkey breast.
Carefully roll the turkey breast, widthwise, pushing any stuffing that is falling
out back in. Tie in six places with
kitchen twine to secure tightly. Brush
with the melted butter.
4. Increase the Brown/Sauté temperature
to 450°F (230°C). Once the unit is hot,
sear the stuffed turkey breast on all
sides, about 3 minutes per side.
5. Insert the roasting rack into the cooking
pot and place the stuffed turkey breast
on top. Switch the unit to Roast at
325°F (160°C) and be sure to put the lid
on. Let roast for about 2 hours, or until
the internal temperature is 165°F (74°C).
6. C
arefully remove the stuffed turkey
breast and let rest for 10 minutes before
slicing.
Nutritional information per serving:
Calories 424 (40% from fat) • carb. 12g • pro. 50g
• fat 18g • sat. fat 6g • chol. 152mg • sod. 808mg
• calc. 53mg • fiber 4g
1. P
repare the brine (if using): Combine the
water, salt and sugar in a mixing bowl
large enough to accommodate the
turkey breast. Whisk the water, salt and
24
25
Chicken with
Three Peppers
3. A
dd sausages and sauté until brown,
about 6 to 8 minutes. Remove and
reserve.
The combination of hot and sweet peppers
with olives makes this delicious chicken
dish burst with flavour.
4. Add onion and all bell peppers to the
cooking pot. Sauté until soft, about
5 minutes.
Settings: B
rown/Sauté
Slow Cook
5. S
tir in white wine, scraping any brown
bits on bottom of pot with wooden
spoon. Let liquid come to a boil and
reduce by half.
Makes 4 to 6 servings
6chicken thighs, any excess fat
trimmed, about 3 pounds (1.5 Kg)
¾
teaspoon (3.75 ml) kosher salt
¼teaspoon (1 ml) ground black
pepper
1
teaspoon (5 ml) olive oil
3 to 4Italian chicken sausages, about
9 to 12 ounces (0.26 to 0.35 L),
cut into ½-inch (12.5 mm) slices
1
medium yellow onion, finely
diced
1small red bell pepper, about
5 ounces (145 g), cut into ½-inch
(12.5 mm) dice
1small yellow bell pepper, about
5 ounces (145 g), cut into ½-inch
(12.5 mm) dice
1small orange bell pepper, about
5 ounces (145 g), cut into ½-inch
(12.5 mm) dice
1
/3
cup (75 ml) dry white wine
1¼ cups (300 ml) chopped hot and
sweet cherry peppers, seeds
removed
¾cup (175 ml) green Italian olives
(like Cerignola)
6. P
lace chicken thighs back into cooking
pot, along with cherry peppers and
olives.
7. C
over unit and switch to Slow Cook on
Low for 6 hours.
8. O
nce time has expired, unit will
automatically switch to Keep Warm.
Nutritional information per serving (1 cup [250 ml]):
Calories 432 (38% from fat) • carb. 9g • pro. 53g
• fat 18g • sat. fat 3g • chol. 220mg • sod. 933mg
• calc. 39 mg • fiber 1g
Steak and Roast Rub
2. Insert the roasting rack into the cooking
pot of the Cuisinart® Multicooker and
put the marinated roast on top. Set to
Roast at 425°F (220°C) for 1½ hours.
Check the roast after 1 hour and 10
minutes – the internal temperature
should read 130°F (55°C) for medium
rare. Let meat rest 10 to 15 minutes
before slicing.
Steak rub can be purchased pre-made,
but it is simple to make your own.
Makes about ¼ cup (60 ml)
2
1
½
½
2
2
tablespoons (30 ml) coarse sea
salt
tablespoon (15 ml) black
peppercorns
tablespoon (7 ml) whole
coriander
tablespoon (7 ml) dill seed
teaspoons (10 ml) ancho chili
powder
teaspoons (10 ml) garlic powder
*Note: If you have the time, we
recommend browning the ribeye prior
to roasting. Do this on Brown/Sauté at
400°F (200°C) before roasting.
Nutritional information per serving
(based on 15 servings):
Calories 192 (27% from fat) • carb. 0g • pro. 33g
• fat 5g • sat. fat 2g • chol. 94mg • sod. 538mg
• calc. 10mg • fiber 0g
1. P
ut all spices into the Cuisinart® Spice
Grinder. Pulse to chop and blend, about
10 to 12 pulses.
2. U
se immediately or contain in a sealed
glass jar. Store in a dry, cool place.
Rib-Eye Roast
We love using a homemade rub, any store
bought one will do. You can even use salt,
pepper and fresh herbs.
Setting: Roast
Makes 12 to 15 servings
1boneless rib-eye roast, tied
(about 4 pounds [1.8 Kg])
2
tablespoons (30 ml) olive oil
3tablespoons (45 ml) steak and
roast rub (previous recipe)
1. S
prinkle the chicken thighs on both
sides with salt and pepper.
1. R
ub roast all over with the olive oil and
the rub. Place in a stainless steel mixing
bowl or a sealable plastic bag to
marinate in the refrigerator for at least
3 hours and up to overnight.
2. P
ut the oil into the cooking pot of the
Cuisinart® Multicooker and set to
Brown/Sauté at 400°F (200°C). Once
unit is heated, put thighs into the
cooking pot skin side down. Brown well,
about 6 to 8 minutes per side. Chicken
will release from the pot once it has
browned. Remove thighs and reserve.
26
27
Guinness Braised
Short Ribs
3. A
dd the vegetables, thyme and
remaining salt to the pot and reduce the
temperature to 375°F (190°C). Cook
until onion is translucent and vegetables
are slightly softened, about 3 to 5
minutes. Stir in the Guinness and
simmer to reduce slightly (about 3 to
5 minutes). Stir in the tomato paste.
Nestle the ribs and any accumulated
liquid into the vegetables. Be sure
liquid comes halfway up the ribs.
A perfect, comforting dish for a cold
winter evening.
Settings: B
rown/Sauté
Slow Cook
Makes 8 to 10 servings
12beef short ribs (about 3 to 4
pounds [1.5 to 1.8 Kg] total)
2
teaspoons (10 ml) kosher salt,
divided
¼teaspoon (1 ml) freshly ground
black pepper
2
teaspoons (10 ml) extra virgin
olive oil
1
medium onion, finely chopped
1 leek, white parts only, finely
chopped
2
medium carrots, finely chopped
1
celery stalk, finely chopped
4
garlic cloves, finely chopped
1
teaspoon (5 ml) dried thyme
24 ounces (0.5 L) Guinness beer
(two 12-ounce [0.35 L] bottles)
2
tablespoons (30 ml) tomato paste
4
fresh parsley sprigs, chopped
4. C
over and switch unit to Slow Cook on
Low for 10 hours.
5. W
hen unit switches to keep warm, it is
recommended to degrease the top of
the liquid before serving. Either remove
grease with a ladle or blot with a fat
mop or paper towel.
6. Once ready to serve, stir in the chopped
parsley. Taste and adjust seasoning
accordingly.
Note: Should there be excessive grease in
the bottom of the pot after browning the
short ribs in Step 2, refer to the
instructions on page 6 of the instruction
book for removal.
Nutritional information per serving
(based on 10 servings):
Calories 574 (80% from fat) • carb. 6g • pro. 4g
• fat 42g • sat. fat 22g • chol. 103mg • sod. 512mg
• calc. 32mg • fiber 1g
1. S
eason the beef well on all sides with
½ teaspoon (2 ml) of the salt, and all the
pepper.
Primavera Shrimp Sauté
4. A
dd in the remaining teaspoon (5 ml) of
oil. Sauté the onion until softened and
slightly golden. Add all of the peas and
stir until they become bright green,
about 3 minutes.
A colourful and light dish that
takes very little time to prepare.
Setting: Brown/Sauté
5. P
ut all reserved ingredients back into
the pot and toss together with the
lemon zest and basil, until warmed
through.
Makes about 6 servings
1
pound (500 g) shrimp, peeled
and deveined
½
teaspoon (2 ml) kosher salt
¼
teaspoon (1 ml) freshly ground
black pepper
3teaspoons (15 ml) extra virgin
olive oil, divided
1bunch broccolini (about 8 to 9
ounces [0.23 to 0.26 L])
3
garlic cloves, chopped
1
cup (250 ml) chicken broth, low
sodium
¼
teaspoon (1 ml) crushed red
pepper
1medium red onion, halved and
sliced lengthwise
1
cup (250 ml) snow peas, trimmed
1
cup (250 ml) sugarsnap peas,
trimmed
½
cup (125 ml) frozen peas, thawed
½
teaspoon (2 ml) lemon zest
¾
ounce (20 g) fresh basil, sliced
thinly
6. T
aste and adjust seasoning accordingly.
Serve immediately.
Nutritional information per serving (1 cup [250 ml]):
Calories 149 (24% from fat) • carb. 10g • pro. 18g
• fat 4g • sat. fat 1g • chol. 115mg • sod. 443mg
• calc. 92mg • fiber 3g
1. S
eason the shrimp on both sides with
the salt and pepper.
2. P
ut 1 teaspoon (5 ml) of the oil into the
cooking pot of the Cuisinart®
Multicooker and set to Brown/Sauté at
400°F (200°C). When the oil is hot, add
half of the shrimp. Lightly brown each
side, about 2 minutes per side. Remove
and reserve. Repeat with remaining
shrimp.
2. P
ut the oil into the cooking pot of the
Cuisinart® Multicooker and set to
Brown/Sauté at 425°F (220°C). Once
hot, add the short ribs (may need to
cook in two batches). Cook for 5 to 6
minutes on each side, until very nicely
browned. Remove and reserve (repeat
with remaining if necessary). Carefully
wipe up most fat, leaving only about
2 teaspoons (10 ml) behind.
3. P
ut another teaspoon of oil into the pot
and add the broccolini and garlic. Stir
well and sauté until garlic becomes just
slightly golden – be careful not to burn.
Add the chicken broth and crushed red
pepper and simmer until the broccolini
is crisp tender, about 10 to 15 minutes.
Remove and reserve.
28
29
Asian Style
Poached Salmon
Sides
Buttery Dinner Rolls
Poached salmon is perfect served on
its own or over a bed of mixed greens.
The recipe below instructs to use a stand
mixer, but of course the dough can be
made in the food processor or by hand.
Baking in the multicooker produces
a soft and fluffy roll, perfect for sopping
up gravy or sauces.
Setting: Brown/Sauté
Makes about 12 servings
Setting: Roast
6
garlic cloves, sliced
½cup (125 ml) sliced ginger
(about a 4- x 2-inch [100 mm x
50 mm] piece)
½cup chopped celery
(about 1½ medium stalks)
2
scallions, sliced
1
star anise pod
4
cups (1 L) chicken stock,
low sodium
2½ cups (625 ml) water
¾
cup (175 ml) rice wine
¾
cup (175 ml) soy sauce,
low sodium
2
tablespoons (30 ml) sesame oil
pinch freshly ground black
pepper
3
pounds (1.5 Kg) salmon fillet
Makes 12 dinner rolls
½ cup (125 ml) whole milk
6tablespoons (90 ml) unsalted
butter (cut in 6 pieces)
3 tablespoons (45 ml) granulated
sugar
¾ teaspoon (3.75 ml) salt
3tablespoons (45 ml) warm
(105°F to 110°F [40°C to 43°C})
water
1¾ teaspoons (9 ml) active dry
yeast
1 large egg
3 to 3½ cups (750 to 875 ml) bread flour, divided butter for greasing pan
1 tablespoon (15 ml) whole milk
1 tablespoon (15 ml) unsalted butter
1. P
ut all ingredients except the salmon
into the Cuisinart® Multicooker. Stir to
combine; cover.
1. S
cald milk (heat until just bubbling
around edges – may be done in
microwave). Stir in butter, sugar, and
salt. Let cool until just warm (105ºF to
115ºF [40°C to 46°C]).
2. S
et unit on Brown/Sauté at 400°F
(200°C). Bring to a boil and then reduce
heat to 300°F (150°C). Let heat for an
additional 30 minutes.
Garlic-Rosemary Beans
speed slightly and knead until smooth,
about 5 minutes.
These are delicious served alongside lamb
chops. You can also purée them in a food
processor to make a white bean dip to
serve with a crudités platter.*
4. T
ransfer to the cooking pot of the
Cuisinart® Multicooker and let rise until
doubled, about 45 to 60 minutes.
Settings: Brown/Sauté
Slow Cook
5. L
ightly butter an 8-inch (203 mm) round
baking pan. Punch down the dough and
then divide into 12 equal pieces. Roll
into balls and arrange in the prepared
pan. Insert roasting rack into the
cooking pot and put filled pan on top.
Let rise until about doubled, about 30 to
40 minutes.
Makes about 5 cups (1.25 L)
1pound (500 g) navy or cannelloni
beans, soaked in room-temperature
water overnight
1½ teaspoons (7 ml) olive oil
6 to 8 garlic cloves, crushed
2 rosemary sprigs
½ teaspoon (2 ml) sea or kosher salt
2½ cups (625 ml) vegetable or chicken
broth
6. W
hile dough is rising, combine
remaining tablespoon (15 ml) of milk
and butter and heat until butter is
melted. Once rolls have risen, gently
brush with melted butter and milk.
1. S
oak the beans overnight by covering
with water by about 2 inches (50 mm).
Once soaked, drain and rinse.
7. S
et unit to Roast at 375°F (190°C) for
35 minutes. Check at 30 minutes. Rolls
should be golden brown (internal
temperature of rolls will be 205°F (96°C)
when tested with an instant-read
thermometer).
2. P
ut the rinsed beans into the cooking
pot of the Cuisinart® MultiCooker and
cover with water. Cover and set to
Brown/Sauté at 500°F (260°C) to bring
to a boil. Once a boil has been
achieved, let boil for 10 minutes.
Carefully drain beans and rinse under
cold water; reserve. Dry cooking pot
well and place pot back into unit with
the oil.
8. R
emove pan and let cool for about 10
minutes before serving. For softer rolls,
brush each with melted butter just after
removing from the unit.
Nutritional information per roll:
Calories 144 (28% from fat) • carb. 7g • pro. 4g
• fat 2g • sat. fat 1g • chol. 22mg • sod. 157mg
• calc. 17mg • fiber 1g
3. S
et unit to Brown/Saute at 375°F
(190°C). Once oil is hot, add the garlic.
Sauté until the garlic is golden and
fragrant.
4. A
dd the remaining ingredients (be sure
to drain the beans). Stir to combine,
cover and switch to Slow Cook on High.
Set the timer to 3 hours.
2. M
ix the warm water and yeast with a
pinch of the flour and put into the bowl
of a stand mixer. Let stand until foamy,
about 5 minutes.
3. C
arefully put salmon into the poaching
liquid. Let cook for about 15 minutes, or
until fully cooked through – it should
easily flake away with a fork.
5. O
nce the 3 hours have expired, the unit
will automatically switch to Keep Warm.
3. A
dd the cooled milk mixture, egg and
2 cups (500 ml) of the flour. Insert the
dough hook and mix on low for
2 minutes. Continuing on low, add the
remaining flour, 1 tablespoon (15 ml) at
a time, until a loose dough ball forms
that clings to the dough hook and
cleans the sides of the bowl. Raise the
4. Serve immediately.
Nutritional information per serving
(4 ounces [115 g] of fish):
Calories 229 (40% from fat) • carb. 5g • pro. 25g
• fat 10g • sat. fat 2g • chol. 62mg • sod. 613mg
• calc. 28mg • fiber 0g
30
*If puréeing, more liquid will need to be
added.
Nutritional information per serving (½ cup [125 ml]):
Calories 166 (8% from fat) • carb. 29g • pro. 11g
• fat 1g • sat. fat 0g • chol. 0mg • sod. 252mg
• calc. 83mg • fiber 11g
31
Roasted Corn
on the Cob
The taste of corn changes throughout the year,
depending on when it is in season. Obviously,
it’s much tastier at its peak of freshness, so
you may not need any seasoning then.
Roasted Red Potatoes
Steamed Artichokes
Desserts
A quick and flavourful way to enjoy red
potatoes. Be patient with flipping the potatoes
– they brown best if they are not crowded and
are left to sit in the hot cooking pot before
turning.
Trimming the bottoms of the artichokes
ensures that they stand up straight, so do
not skip that step. Also, in addition to
adding flavour, the lemon slices prevent the
artichokes from turning brown during
cooking. Enjoy plain or dip in a nice lemon oil.
Applesauce
Settings: Roast
Setting: Roast
Makes about 8 servings
Makes 4 servings
1½
tablespoons (25 ml) extra virgin
olive oil
3 to 4garlic cloves, smashed
2 pounds (1 Kg) small red new
potatoes, halved
¼teaspoon (1 ml) sea or kosher
salt pinch freshly ground black
pepper
2teaspoons (10 ml) chopped fresh
rosemary
4
ears fresh corn on the cob,
cleaned
2
tablespoons (30 ml) unsalted
butter, melted
½ to 1teaspoon (2 to 5 ml) sea or
kosher salt (start with
½ teaspoon [2ml] and add more
if desired)
¼teaspoon (1 ml) freshly ground
black pepper
1. B
rush the corn with the butter and
sprinkle with salt and pepper. Wrap in
foil.
1. P
ut all the ingredients into a large
mixing bowl and toss to fully coat.
Preheat the Cuisinart® Multicooker to
Roast at 375ºF (190°C).
2. P
ut the wrapped corn on the roasting
rack and place in the cooking pot of the
Cuisinart® Multicooker. Cover and set to
Roast at 425°F (220°C).
2. A
dd the potatoes. Let the potatoes sit
so they form a nice crust, and then toss
after about 3 minutes.
3. R
oast corn for about 40 minutes,
flipping halfway through (it is best and
easiest to use tongs to flip the corn).
3. O
nce the potatoes are browned, add
the remaining ingredients.
4. S
witch unit to Roast at 425°F (220°C).
Cover and let potatoes cook for about
30 minutes, or until fully cooked.
4. Serve immediately. Season as desired.
Nutritional information per serving:
Calories 113 (47% from fat) • carb. 14g • pro. 2g
• fat 6g • sat. fat 4g • chol. 15mg • sod. 277mg
• calc. 2mg • fiber 2g
Nutritional information per serving (½ cup [125 ml]):
Calories 106 (23% from fat) • carb. 19g • pro. 2g
• fat 3g • sat. fat 0g • chol. 0mg • sod. 80mg
• calc. 15mg • fiber 2g
Setting: Steam
When fall comes around, nothing is better
than the aroma of applesauce being made
in the home. Our recipe is quite versatile – you
can leave it as a chunky sauce or purée it for
the more common smooth version.
Makes 6 servings
Setting: Slow Cook
1 quart (0.94 L) water
6 medium-to-large artichokes
6 to 12 garlic cloves, thinly sliced
2lemons, one juiced and the
other cut into 6 slices
pinch freshly ground black
pepper
pinch sea or kosher salt
Makes about 8 cups (2 L)
4pounds (1.8 kg) apples, cored
and cut into two-inch (50 mm)
pieces (peeled or unpeeled)
2
cinnamon sticks
2
pinches freshly ground nutmeg
pinch ground cloves
pinch sea or kosher salt
¾
cup (175 ml) water
¼cup (60 ml) fresh lemon juice
(from about 2 medium lemons)
1. P
ut the water into the cooking pot of
the Cuisinart® Multicooker fitted with
the steaming rack and cover.
1. P
ut all of the ingredients into the
cooking pot of the Cuisinart®
Multicooker.
2. C
ut the stems off the artichokes so they
are able to stand. Using a serrated
knife, cut the tops of the artichokes off,
and with kitchen shears, trim the tips of
the outer leaves. Pull leaves back to
open the artichokes.
2. Select Slow Cook on Low for 4 hours.
3. O
nce unit switches to Keep Warm,
remove the cinnamon sticks. If a chunky
sauce is desired, use a potato masher
to mash cooked apples to desired
consistency. If a smooth sauce is
preferred, transfer apples to a fine mesh
strainer and press through with the help
of a ladle. Once the apples have passed
through the strainer, discard the skins (if
necessary) and return smooth apples to
the cooking pot. Keep sauce on Keep
Warm for serving, or cool to room
temperature and store in the refrigerator.
3. E
venly stuff the garlic slices in between
the leaves of each artichoke. Season
each with lemon juice, pepper and salt.
Place one lemon slice on top of each
artichoke.
4. Set the unit to Steam for 45 minutes.
5. O
nce tone sounds, stand the artichokes
upright in the rack and cover.
Nutritional information per serving (½ cup [125 ml]):
Calories 61 (3% from fat) • carb. 16g • pro. 0g
• fat 0g • sat. fat 0g • chol. 0mg • sod. 10mg
• calc. 9mg • fiber 3g
6. A
rtichokes are done when the leaves
are able to be pulled off easily.
Nutritional information per artichoke:
Calories 73 (3% from fat) • carb. 17g • pro. 5g
• fat 0g • sat. fat 0g • chol. 25mg • sod. 122mg
• calc. 78mg • fiber 8g
32
33
Cannoli Cheesecake
2. L
ightly brush the springform pan with
the tablespoon (15 ml) of room
temperature butter. Reserve.
We make many cheesecakes in the
Test Kitchen, and still one of our favourite
methods (which happens to be the easiest and
most foolproof) is slow cooked. To offer the
palate some new, fun flavours, we made
a cheesecake that is nice and creamy
with the flavour of cannoli filling.
3. P
repare the crust. Put all of the crust
ingredients into a small mixing bowl.
Using a hand or stand mixer, beat on
low until the mixture comes together.
Pat crumb crust evenly into prepared
springform pan. Reserve.
Setting: Slow Cook
4. P
repare the filling. Mix cream cheese,
sugar, salt and cinnamon using a hand
or stand mixer on a medium speed until
very smooth (you cannot over-mix at
this stage. Be sure there are no lumps
in the batter). Scrape bowl and beaters/
paddle with a spatula. Add eggs and
whites, one at a time, making sure each
is incorporated into the batter before
adding the next. Mix in vanilla. Reduce
to low and carefully mix in the ricotta,
being sure the batter is homogenous,
but do not over-mix. Stir in the chopped
chocolate.
Makes one 7-inch (180 mm) cheesecake
(springform pan)
1tablespoon (15 ml) unsalted
butter, room temperature
(for pan)
Crust:
¼
cup (60 ml) graham cracker
crumbs
¼
cup (60 ml) toasted pine nuts,
finely ground
1
tablespoon (15 ml) granulated
sugar pinch sea or kosher salt
½tablespoon (7 ml) unsalted butter,
melted and cooled to room
temperature
5. P
our batter into the prepared pan. Put
pan onto the rack in the unit.
6. Select Slow Cook on High for 2 hours.
7. O
nce the time has elapsed, allow cake
to rest on Keep Warm in the unit for an
additional 30 minutes to an hour (you
want it to be just set).
Filling:
4ounces (115 g) (½ package)
cream cheese, quartered and at
room temperature
½
cup (125 ml) granulated sugar
¼
teaspoon (1 ml) sea or kosher
salt
¼
teaspoon (1 ml) ground cinnamon
3
large eggs, at room temperature
2large egg whites, at room
temperature
1
teaspoon (5 ml) pure vanilla
extract
12ounces (340 g) whole-milk
ricotta, at room temperature
2ounces (60 g) bitter or semisweet
chocolate, finely chopped
8. R
emove cheesecake and place on a
cooling rack. Once completely cool,
wrap well with plastic and refrigerate for
at least 6 hours before serving.
Nutritional information per serving:
Calories 235 (54% from fat) • carb. 19g • pro. 8g
• fat 14g • sat. fat 7g • chol. 91mg • sod. 191mg
• calc. 127mg • fiber 1g
Fall Fruit Crisp
3. P
ut the roasting rack into the Cuisinart®
Multicooker and put the filled baking
pan on top of that. Cover and set to
Roast at 375°F (190°C) for 45 minutes.
Let cook until top is browned and fruit
is just tender – start checking the
doneness of the fruit around 30
minutes. Add more time if necessary.
Apples and pears vary in composition,
so some might need more time to cook
than others.
Comfort is at the forefront in this simple
dessert. This is great recipe to make when you
seem to have a surplus of fall fruits that need
to be used – the rest of the ingredients are
basic pantry staples. If you prefer pears to
apples, you can change the ratios.
Setting: Roast
Makes 8 to 10 servings
cup (125 ml) unbleached,
all-purpose flour
¼cup (60 ml) rolled oats
(old-fashioned oats, not
quick-cooking)
1
/3
cup (75 ml) packed light brown
sugar
pinch table salt
pinch ground cinnamon
pinch freshly ground nutmeg
2tablespoons (30 ml) unsalted
butter, melted
1pound (500 g) apples (any baking
variety), peeled, cored and cut
into ½-inch (12.5 mm) slices
½pound (250 g) pears (any baking
variety), peeled, cored and cut
into ½-inch (12.5 mm) slices
¼
cup (60 ml) granulated sugar
2tablespoons (30 ml) unbleached,
all-purpose flour
pinch table salt
¼
teaspoon (1 ml) pure vanilla
extract
½
Nutritional information per serving
(based on 10 servings):
Calories 266 (16% from fat) • carb. 56g • pro. 2g
• fat 5g • sat. fat 3g • chol. 12mg • sod. 28mg
• calc. 10mg • fiber 4g
1. P
ut the first 7 ingredients into a small
mixing bowl. Toss to fully combine;
reserve.
2. P
ut the remaining ingredients into a
large mixing bowl. Toss to combine.
Transfer apple/pear mixture to an 8-inch
(203 mm) round baking pan. Top with
the oat mixture.
1. P
ut the steaming rack into the cooking
pot of the Cuisinart® Multicooker.
34
35
Rice Pudding
Steamed Mocha
Pudding
What better ending to a meal than a cup
(250 ml) of rice pudding? The great thing
about this dessert is that it can be served
warm out of the cooking pot or chilled. Chilled
rice pudding does set up and has a different
consistency than when served warm. If
not serving immediately, stir some extra
milk or water into the rice pudding to
make it creamier.
Setting: Slow Cook
Setting: Slow Cook
Makes about 10 servings
Serve immediately for the best results. This
recipe is more of a warm cake-like pudding
and is delicious on a cold day. Scoop out into
individual cups, if you can resist eating
it out of the baking dish!
6. O
nce unit switches to Keep Warm, turn
the unit off and serve immediately.
Nutritional information per serving:
Calories 218 (59% from fat) • carb. 22g • pro. 2g
• fat 15g • sat. fat 9g • chol. 45mg • sod. 23mg
• calc. 11mg • fiber 2g
½cup (1 stick [125 ml]) unsalted
butter, cut into 8 pieces
½
cup (125 ml) packed light brown
sugar
1
large egg, room temperature
1cup (500 ml) semi or bittersweet
chocolate chips (about 7 ounces
[0.2 L})
½
cup (125 ml) brewed coffee, hot
2
tablespoons (30 ml) cocoa
powder
½
teaspoon (2 ml) pure vanilla
extract
pinch ground cinnamon
pinch table salt
¼
cup (60 ml) unbleached,
all-purpose flour
Makes 5 cups (1.25 L)
2
cups (500 ml) Arborio rice
3cans (12-ounce [0.35 L]) fat-free
evaporated milk
1
can (14-ounce [0.41 L]) light
coconut milk
¼
cup (60 ml) water
1vanilla bean, halved and seeds
scraped
1½ cups (375 ml) granulated sugar
¼
teaspoon (1 ml) sea salt
1
tablespoon (15 ml) pure vanilla
extract
2
whole cinnamon sticks
pinch freshly ground nutmeg
1. P
ut all of the ingredients into the pot of
the Cuisinart® Multicooker. Stir to
combine.
1. U
sing a hand or stand mixer, mix the
butter and sugar until light and creamy.
Add the egg and mix until just
combined. Reserve.
2. Select Slow Cook on High for 3 hours.
3. O
nce the cooking time has elapsed, the
unit will automatically switch to Keep
Warm. Let rest on Keep Warm for 30
minutes to 1 hour, depending on desired
consistency. The longer it sits, the stiffer
the pudding gets.
2. P
ut the chocolate into a separate heatproof bowl, pour the hot coffee over it
and stir to fully melt the chocolate. Stir
in the cocoa powder, vanilla, cinnamon
and salt.
4. R
emove and discard vanilla bean and
cinnamon sticks.
3. F
old the chocolate mixture into the
butter/sugar/egg mixture. Stir in the
flour.
5. If not serving immediately, stir in more
liquid (any type of milk or water) before
reheating.
4. P
ut the steaming rack into the
Cuisinart® Multicooker. Pour the batter
into a 2-quart (1.89 L) baking dish and
put on the rack.
Nutritional information per serving (½ cup [125 ml]):
Calories 367 (7% from fat) • carb. 73g • pro. 11g
• fat 3g • sat. fat 2g • chol. 5mg • sod. 198mg
• calc. 343mg • fiber 1g
5. Select Slow Cook on High for 2 hours.
36
37
WARRANTY
3-YEAR LIMITED
WARRANTY
If the appliance should become defective
within the warranty period, do not return
the appliance to the store. Please
contact our Customer Service Centre:
Toll-free phone number:
1-800-472-7606
We warrant that this Cuisinart product will
be free of defects in material or workmanship under normal home use for 3 years
from the date of original purchase.
Address:
Cuisinart Canada
100 Conair Parkway
Woodbridge, Ont. L4H 0L2
This warranty covers manufacturer’s
defects including mechanical and
electrical defects. It does not cover
damage from consumer abuse,
unauthorized repairs or modifications,
theft, misuse, or damage due to
transportation or environmental
conditions. Products with removed or
altered identification numbers will not be
covered.
Email:
[email protected]
Model:
MSC-800C
To facilitate the speed and accuracy of
your return, please enclose:
• $10.00 for shipping and handling of the
product (cheque or money order)
This warranty is not available to retailers
or other commercial purchasers or owners.
• Return address and phone number
• Description of the product defect
• Product date code*/copy of original
proof of purchase
If your Cuisinart product should prove to
be defective within the warranty period,
we will repair it or replace it if necessary.
• Any other information pertinent to the
product’s return
For warranty purposes, please register
your product online at www.cuisinart.ca to
facilitate verification of the date of original
purchase or keep your original receipt for
the duration of the limited warranty.
* Product date code can be found on the
underside of the base of the product.
The product date code is a 4 or 5 digit
number. Example, 90630 would designate
year, month & day (2009, June 30th).
This warranty excludes damage caused
by accident, misuse or abuse, including
damage caused by overheating, and it
does not apply to scratches, stains,
discolouration or other damage to
external or internal surfaces that does not
impair the functional utility of the
tool/gadget. This warranty also expressly
excludes all incidental or consequential
damages.
Note: We recommend you use a
traceable, insured delivery service for
added protection. Cuisinart will not be
held responsible for in-transit damage or
for packages that are not delivered to us.
Coffeemakers
Cafetières
Food Processors
Robots de
cuisine
Toasters
Grille-pain
Blenders
Mélangeurs
Ice Cream
Makers
Sorbetières
Cuisinart® offers an extensive assortment of top quality products to make life in the kitchen easier
than ever. Try some of our other countertop appliances and cookware, and Savor the Good Life®.
CuisinartMD offre une vaste gamme de produits de grande qualité qui facilitent la vie dans la
cuisine comme jamais auparavant. Essayez nos autres appareils de comptoir et ustensiles
de cuisson et Savor the Good Life®.
www.cuisinart.ca
To order replacement parts or
accessories, call our Customer Service
Centre at 1-800-472-7606.
For more information, please visit our
website at www.cuisinart.ca
©2011 Cuisinart Canada
100 Conair Parkway
Woodbridge, ON L4H 0L2
Consumer Call Centre E-mail:/
Centre d’appel des consommateurs
[email protected]
1-800-472-7606
Printed in China/ Imprimé en Chine
11CC120972
Any trademarks or service marks of third
parties used herein are the trademarks or
service marks of their respective owners.
Toutes les autres marques de commerce ou
de service utilisées dans le présent document
appartiennent à leurs propriétaires respectifs.
38
39