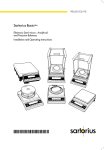
1
SBA/SBC
Aufstellungs- und Betriebsanleitung
Installation and Operating Instructions
Präzisionswaagen
Precision Balances
Pos. Bezeichnung
No. Designation
1
15
13
4
5
12
16
1
Waagschale
Weighing pan
10 CAL/CF-Taste1)
CAL/CF key (calibration/clear function)1)
2
entfällt
not assigned
11 Gewichtsanzeige
Weight display
3
Angabe der metrologischen Daten
bei geeichter Ausführung
Metrological ID label for verified
balances approved for use as legal
measuring instruments
12 Betriebsspannungsanschluß
AC jack
4
Verriegelungsschalter
Menu access switch
5
Stellfuß
Leveling foot
6
Funktions-Taste (FUNCTION)
Function key (FUNCTION)
14
17
7
9
11
3
10
6
7
9
8
Pos. Bezeichnung
No. Designation
PRINT-Taste (Datenausgabe)
PRINT key (data transfer)
Ein-/Aus-Taste
ON/OFF key
1)
bei Funktion CF, Taste länger
als zwei Sekunden gedrückt halten
1)
To activate the CF function,
press it for more than two seconds
13 Kennzeichnungsschild mit Angabe
der eichtechnisch relevanten Daten
Verification ID label with metrological data
for verified balances approved
for use as legal measuring instruments
14 Typenschild mit C-Zeichen
Manufacturer’s ID label with the C mark
of conformity
15 Datenschnittstelle
Data interface port
16 Libelle
Level indicator
17 Befestigungsöse für Diebstahlsicherung
Lug for fastening an antitheft locking device
Analysenwaage
Analytical Balances
Pos. Bezeichnung
No. Designation
Modell/Model: SBC22
1
Waagschale
Weighing pan
10 CAL/CF-Taste1)
CAL/CF key (calibration/clear function)1)
2
Schirmring
Shield disk
11 Gewichtsanzeige
Weight display
3
Angabe der metrologischen Daten
bei geeichter Ausführung
Metrological ID label for verified
balances approved for use as legal
measuring instruments
12 Betriebsspannungsanschluß
AC jack
16
15
14
1
4
Verriegelungsschalter
Menu access switch
2
5
Stellfuß
Leveling foot
6
Funktions-Taste (FUNCTION)
Function key (FUNCTION)
13
12
3
4
7
5
11
3
10
9
PRINT-Taste (Datenausgabe)
PRINT key (data transfer)
8
Tariertaste (TARE)
Tare key (TARE)
9
Ein-/Aus-Taste
ON/OFF key
1)
bei Funktion CF, Taste länger
als zwei Sekunden gedrückt halten
1)
To activate the CF function,
press it for more than two seconds
6
7
8
Pos. Bezeichnung
No. Designation
13 Kennzeichnungsschild mit Angabe
der eichtechnisch relevanten Daten
Verification ID label with metrological data
for verified balances approved
for use as legal measuring instruments
14 Typenschild mit C-Zeichen
Manufacturer’s ID label with the C mark
of conformity
15 Datenschnittstelle
Data interface port
16 Libelle
Level indicator
Bitte klappen Sie vor dem Lesen die erste Seite
mit der Übersichtsdarstellung auf.
Before reading these instructions, fold out the first page
showing a general view of the balance.
Inhalt
Contents
Seite
Page
Garantie
4
Warranty
5
Aufstellhinweise
6
Installation Instructions
6
Inbetriebnahme
9
Getting Started
9
Betreiben der Waage
13
Operating the Balance
13
Justieren
17
Calibration
17
Datenschnittstelle
21
Data Interface Port
21
Unterflurwägung
22
Below-Balance Weighing
22
Diebstahlsicherung
24
Fastening an Antitheft Locking Device
24
Was ist, wenn...
25
Troubleshooting Guide
26
Pflege und Wartung
27
Care and Maintenance
27
Waagenbetriebsmenü
28
Balance Operating Menu
28
Wägebetrieb
31
Balance Operating Parameters
31
Anwendungsprogramme
38
Application Programs
38
GLP/GMP konforme Protokollierung
55
GLP/GMP-compliant Printout or Record
55
Technische Daten
60
Technical Specifications
61
Konformitätserklärungen
70
Declarations of Conformity
71
Zubehör (Optionen)
73
Accessories (Options)
73
Anhang: Garantiekarte
Supplement: Warranty Card
3
Bitte lesen Sie die Aufstellungs- und Betriebsanleitung aufmerksam durch, bevor Sie mit Ihrer neuen
Waage arbeiten.
Das von Ihnen erworbene SCALTEC-Produkt
entspricht hohen Qualitätsanforderungen und garantiert
jahrelang zufriedenstellende Funktion.
Garantie
Verschenken Sie nicht Ihren erweiterten Garantieanspruch. Schicken Sie uns bitte die vollständig ausgefüllte
Garantieanmeldung (siehe Anlage) zurück.
Sollte dennoch Ihr Gerät innerhalb der Garantiezeit von
3 Jahren einmal technische Unterstützung benötigen,
so verständigen Sie bitte unter Angabe des Gerätetypes, der
Serien-Nummer und den Grund Ihrer Beanstandung in der
Bundesrepublik Deutschland:
SCALTEC INSTRUMENTS GmbH
Robert-Bosch-Breite 10
37079 Göttingen
Telefon (0551) 209773-0
Telefax (0551) 209773-9
Internet: http://www.scaltec.com
E-Mail: [email protected]
4
Lager- und Transportbedingungen
Zulässige Lagertemperatur: +5°C…+40°C
Überprüfen Sie bitte das Gerät sofort nach dem Auspacken
auf eventuell sichtbare äußere Beschädigungen.
Bitte richten Sie sich im Fall einer Beschädigung nach
den unter Punkt »Sicherheitsüberprüfung« beschriebenen
Anweisungen.
Please read these installation and operating instructions
carefully before you begin to operate your new balance.
The SCALTEC product you have purchased meets
high-quality standards and is designed to assure long years
of trouble-free service.
Warranty
Do not miss out on the benefits of our extended
warranty. Please complete the warranty registration card
and return it to the address listed below (see supplement).
Storage and Shipping Conditions
Allowable storage temperature: +5°C …+40°C
+41°F…+104°F
After unpacking the balance, please check it immediately
for any visible damage as a result of rough handling during
shipment. If this is the case, proceed as directed in the
section entitled “Safety Inspection.”
In the unlikely event that your balance should require
servicing within the 3-year warranty period, please contact
the office listed below for your country, and state the
model number, serial number and the problem:
Federal Republic of Germany:
SCALTEC INSTRUMENTS GmbH
Robert-Bosch-Breite 10
37079 Goettingen, Germany
Phone (+49/551) 209773-0
Telefax (+49/551) 209773-9
Internet: http://www.scaltec.com
E-mail: [email protected]
5
6
Aufstellhinweise
Installation Instructions
Umgebungsbedingungen
Ambient Conditions
Die SCALTEC SBA/SBC ist so konstruiert, daß unter
den in Labor und Betrieb üblichen Einsatzbedingungen
zuverlässige Wägeergebnisse erzielt werden.
The SCALTEC SBA/SBC Balance is designed to provide
reliable weighing results under normal ambient conditions
in the laboratory and in industry.
Beachten Sie deshalb am Aufstellort folgendes:
Therefore, please observe the following when choosing
a suitable place of installation:
– Waage auf eine stabile gerade Fläche stellen
– Set up the balance on a stable, even surface
– Waage vor aggressiven chemischen Dämpfen schützen
– Protect the balance from aggressive chemical vapors
– Waage vor Luftzug durch geöffnete Fenster und
Türen schützen
– Protect the balance from drafts that come from open
windows and doors
– extreme Erschütterungen vermeiden
– Avoid exposing the balance to extreme vibrations
– extreme Wärme durch Heizung
oder Sonne vermeiden
– Avoid exposing the balance to extreme heat
or to direct sunlight
Informationen über die aktuellen in Ihrem Land
gültigen gesetzlichen Vorschriften erfragen Sie bitte bei
Ihrem SCALTEC-Kundendienst.
For information on the current legal requirements of your
country, please contact your local SCALTEC customer
service office.
Information on Radio Frequency Interference
Warning!
This equipment generates, uses and can radiate radio
frequency energy and, if not installed and used in
accordance with the instruction manual, may cause
interference to radio communications. It has been tested
and found to comply with the limits for a Class A computing
device pursuant to Subpart J of Part 15 of FCC rules,
which are designed to provide reasonable protection against
such interference, when operated in a commercial
environment. Operation of this equipment in a residential
area is likely to cause interference, in which case the user,
at his own expense, will be required to take whatever
measures may be required to correct the interference.
7
8
Einsetzen der geeichten Waage
im eichpflichtigen Verkehr
Vor dem Einsatz im eichpflichtigen Verkehr
ist die Waage am Aufstellort zu justieren
(s. Kapitel »Justieren« ab Seite 17).
Using Verified Balances
as Legal Measuring Instruments
You must calibrate the balance at the place
of installation before using it as a legal measuring
instrument (see “Calibration,” page 17).
Die Waage darf nicht in offenen Verkaufstellen benutzt
werden. Die Bauartzulassung zur Eichung gilt nur für nichtselbständige Waagen; für selbständigen Betrieb mit oder
ohne zusätzlich angebaute Einrichtungen sind die für den
Aufstellort geltenden nationalen Vorschriften zu beachten.
Zur Überwachung der Umgebungsbedingungen ist die
Verwendung eines geeigneten Thermo- und Barometers
zu empfehlen.
Für Waagen der Genauigkeitsklasse k sind Thermo- und
Barometer zur Überwachung der Umgebungsbedingungen
zu empfehlen.
Der auf dem Kennzeichnungsschild angegebene Temperaturbereich darf beim Betrieb nicht überschritten werden.
Eine Anwärmzeit von mindestens 24 Stunden ist nach erstmaligem Anschluß (bzw. nach längerem Neztausfall) an das
Stromnetz einzuhalten.
Rechtliche Grundlage für den Hersteller, die EG-Eichung
durchzuführen, ist die EG-Richtlinie Nr. 90/384/ EWG für
nicht selbstständige Waagen, die ab dem 01.01.1993 im
harmonisierten Binnenmarkt gilt, sowie die erteilte Anerkennung des diesbezüglichen Qualitätsmanagement Systems
des Herstellers durch das Niedersächsische Landesverwaltungsamt -Eichwesen vom 15.02.1993.
Diese erlaubt dem Hersteller unter der Nr. 0111 die
Ersteichung am Fabrikationsort.
This balance is not allowed to be used for weighing goods
intended for direct sale to the public. The type-approval
certificate for verification applies only to non-automatic
weighing instruments; for automatic operation with or without auxiliary measuring devices, you must comply with
the regulations of your country applicable to the place
of installation of your balance. A suitable thermometer and
barometer are recommended for monitoring the ambient
conditions.
For balances of accuracy class k, a thermometer and
barometer are recommended for monitoring the ambient
conditions. The temperature range indicated on the
verification ID label must not be exceeded during operation.
The balance must warm up for at least 24 hours after initial
connection to AC power or after a relatively long power
outage.
The manufacturer complies with EC Directive No. 90/384/
EEC for non-automatic weighing instruments, which has
been in effect since January 1, 1993, within the Single
European Market as well as the accreditation of the quality
management system of the manufacturer by Lower Saxony’s
Regional Administrative Department of Legal Metrology
(Niedersächsische Landesverwaltungsamt-Eichwesen) from
February 15, 1993.
Inbetriebnahme
Getting Started
Hinweis zu allen geeichten Waagen
Important Note Concerning All Verified Balances
Approved for Use as Legal Measuring Instruments:
Sofern eine gesetzliche Plombierung der geeichten Waage
erforderlich ist, erfolgt diese mittels einer Versiegelungsmarke. Beim Versuch, sie zu entfernen, zerstört sie sich
selbst. In diesem Fall erlischt die Eichgültigkeit und die
Waage muß nachgeeicht werden.
Provided that an official lead seal is required for the
verified balance, a control seal is affixed to the balance.
Unauthorized attempts to remove this seal will irreversibly
damage it. If you break the seal, the validity of the verification
will become void, and you must have your balance re-verified.
Verbindung Waage – Elektronik-Box herstellen bei
SBC 22
Connecting the SBC 22 Balance
to the Electronic Box:
– Stecker des Verbindungskabels in die Anschlußbuchse der
Elektronik-Box stecken
– Plug the cable into the socket of the electronics box.
Wägeraum einrichten bei den Waagen
SBA 31/32/33 und SBC 22/31/32/33 mit Windschutz
Teile nacheinander einsetzen:
– Schirmring
– Waagschale
Preparing the SBA 31/32/33 and
the SBC 22/31/32/33 with a Draft Shield Chamber
Place the following components inside the chamber in the
order given:
– Shield disk
– Weighing pan
9
10
Teile aufsetzen bei den Waagen SBA 41/42
und SBC 41/42 mit Glasring-Windschutz
Preparing the SBA 41/42 and the SBC 41/42
with a Round Glass Draft Shield
– Schirmring auf die Waage setzen und linksherum drehen,
bis er fest sitzt.
– Place the shield disk on the balance. Turn the disk
counterclockwise until it is securely fastened.
Setzen Sie folgende Teile nacheinander auf die Waage auf:
– Schalenaufnehmer
– Waagschale
– Glasaufsatz
– Windschutzdeckel
Place components listed below on the balance in the order
given:
– Pan support
– Weighing pan
– Glass draft shield cylinder
– Draft shield cover
Teile aufsetzen bei den Waagen SBA 53 und SBC 53
mit runder Waagschale
Preparing the SBA 53 and the SBC 53
with a Round Weighing Pan
– Schirmring auf die Waage setzen und linksherum drehen,
bis er fest sitzt.
– Place the shield disk on the balance. Turn the disk
counterclockwise until it is securely fastened.
Setzen Sie folgende Teile nacheinander auf die Waage auf:
– Schalenaufnehmer
– Waagschale
Place components listed below on the balance in the
order given:
– Pan support
– Weighing pan
Teile aufsetzen bei den Waagen SBA 51/52/61/62
und SBC 51/52 mit eckiger Waagschale
Preparing the SBA 51/52/61/62
with a Rectangular Weighing Pan
– Waagschale aufsetzen (1)
– Place the weighing pan (1) on the balance
Netzanschluß
Connecting the Balance to AC Power
Die Stromversorgung erfolgt über das Steckernetzgerät.
Der aufgedruckte Spannungswert muß mit der örtlichen
Spannung übereinstimmen.
The balance is powered by an AC adapter. Make sure
that the voltage rating printed on this unit is identical to your
local line voltage.
Schließen Sie das Steckernetzgerät an die
Betriebsspannung (12) an.
Plug the cord of the AC adapter into the DC jack (12);
then plug the AC adapter into a wall outlet (mains).
11
12
Ausrichten der Waage nach Libelle
Leveling the Balance Using the Level Indicator
Richten Sie die Waage am Aufstellort mit den
Stellfüßen (5) so aus, daß die Luftblase der Libelle (16)
in der Kreismitte steht.
At the place of installation, level the balance using the
leveling feet (5) so that the air bubble is centered within the
circle of the level indicator (16).
Die beiden Hilfsfüße hinten an der Waage eindrehen.
Retract the two auxiliary feet located at the back
of the balance.
Alle Waagen nach der Libelle einstellen:
Anheben der Waage: Stellfüße rechtsherum drehen.
Senken der Waage: Stellfüße linksherum drehen.
Use the level indicator as a guide to level the balance:
To lift the balance, extend the leveling feet (turn clockwise).
To lower the balance, retract the leveling feet
(turn counterclockwise).
Danach die hinteren Hilfsfüße bis zum Kontakt mit der
Aufstellfläche wieder herausdrehen.
After retracting the rear auxiliary feet, extend them until they
touch the surface on which the balance rests.
Betreiben der Waage
Operating the Balance
Anwärmzeit
Warmup Time
Um genaue Resultate zu liefern, benötigt die Waage
eine Anwärmzeit von mindestens 30 Minuten
nach erstmaligem Anschluß an das Stromnetz oder nach
längerem Netzausfall. Erst dann hat die Waage die
notwendige Betriebstemperatur erreicht.
To deliver exact results, the balance must warm up for at
least 30 minutes after initial connection to AC power or after
a relatively long power outage. Only after this time will the
balance have reached the required operating temperature.
13
▼
14
Ein- und Ausschalten (Stand-by-Betrieb)
Turning the Display On or Off (Standby Mode)
Betätigen Sie zum Ein- und Ausschalten der Anzeige
die On/Off-Taste (9).
Press the ON/OFF key (9) to turn the display on or off.
Selbsttest
Self-Test
Nach dem Einschalten erfolgt ein
automatischer Funktionstest der Waagenelektronik.
Der Selbsttest endet mit der Nullanzeige.
Die Waage ist jetzt betriebsbereit.
After the balance has been turned on, an automatic
self-test of the balance’s electronic circuitry is performed.
At the end of the self-test, a zero readout is displayed.
This means that the balance is ready to operate.
Hinweis zu geeichten Modellen!
Bei geeichten Waagen mit einem Eichwert »e« größer
als der Ziffernschritt »d« ist die letzte Anzeigestelle durch
einen Rahmen gekennzeichnet.
Important Note Concerning Verified Balances
Approved for Use as Legal Measuring Instruments:
For verified balances that have a verification scale interval
“e” which is greater than the scale interval “d,” the last digit
on the display is bordered.
o
Zu Ihrer Information erscheinen folgende Symbole
im Anzeigefeld der Waage:
O rechts oben für OFF
The display shows the following special codes for
your information:
O displayed in the upper right corner stands for OFF
O links unten für Stand-by
O displayed in the lower left corner means standby
b für Busy
b means busy
o
b
15
16
Tarieren
Taring
Eine genaue Gewichtsbestimmung erfolgt nur von
einem definierten Nullpunkt aus. Betätigen Sie die TARETaste (8), um die Gewichtsanzeige auf Null zu setzen.
Das Tarieren kann innerhalb des gesamten Wägebereichs
der Waage erfolgen.
A weight can be determined accurately only from a defined
zero point. Press TARE (8) to zero the weight display.
You can tare within the entire weighing range of the balance.
Hinweis zu geeichten Modellen!
Der kleine Kreis in der Gewichtsanzeige (links) zeigt,
daß die Waage genau auf »0« (±0.25 Ziffernschritt)
gestellt ist.
Important Note Concerning Verified Balances
Approved for Use as Legal Measuring Instruments:
The small circle in the weight display (on the left) shows
that the balance is exactly tared to “0” (±0.25 of a scale
interval).
Einfaches Wägen
Simple Weighing
Bringen Sie jetzt Ihr Wägegut auf die Waagschale (1).
Lesen Sie den Gewichtswert erst ab, wenn die
Gewichtseinheit »g« oder eine andere gewählte Einheit als
Stillstandssymbol in der Anzeige erscheint.
Place your sample on the weighing pan (1) to determine the
weight. Read off the weight indicated on the display only
after the weight unit “g” or a different unit selected appears
as the stability symbol.
Justieren
Calibration
Beim Justieren wird die Empfindlichkeit der Waage den
Umgebungsbedingungen angepaßt.
Justieren Sie Ihre neue Waage am Aufstellort nach
der Anwärmzeit und vor der ersten Messung. Bei geeichten
Modellen soll die Justierung mindestens einmal täglich
durchgeführt werden.
During calibration, the sensitivity of the balance is adjusted
to changes in the ambient conditions.
Calibrate your new balance at the place of installation after
each warmup period and before the first weight
measurement. In verified models the balance should be
calibrated at least once a day.
Die Waage bietet Ihnen verschiedene
Justierfunktionen, abhängig von dem eingestellten
Menücode.
The balance offers you various calibration
functions. You can select these functions
by setting the appropriate menu code.
Alle SBC-Modelle sind mit interner
Gewichtsschaltung ausgerüstet.
All SBC models have a built-in calibration weight.
Einsetzen der geeichten Waagen
im eichpflichtigen Verkehr!
Vor dem Einsatz im eichpflichtigen Verkehr ist die Funktion
»Internes Justieren« nach der Anwärmzeit am Aufstellort
durchzuführen.
Menüanwahl: 1 9 3*
Das Justiergewicht wird motorisch aufgelegt und nach
abgeschlossener Justierung wieder abgehoben.
* = werkseitige Einstellung bei SBC-Modellen
Using Verified SBC Balances
as Legal Measuring Instruments
Before using your balance as a legal measuring instrument,
you must carry out an “Internal Calibration” operation at the
place of installation after the warmup period.
Menu code selection: 1 9 3 *
The calibration weight is internally applied by servomotor
and removed at the end of calibration.
* = factory setting on SBC balances
17
▼
Bei Nullanzeige die Justierfunktion mit der CAL-Taste (10)
aufrufen.
When the display shows a zero readout, press the
CAL key (10) to activate calibration.
Bei Störungen während des Justiervorgangs kann kurz die
Meldung »Err 02« in der Anzeige erscheinen.
Ist dies der Fall, tarieren Sie bitte nochmals und drücken
Sie erneut die CAL-Taste.
If any interference affects calibration, you may obtain a brief
display of the error message “Err 02.”
In this case, tare and press the CAL key again.
Hinweis!
Während eines Justiervorgangs muß die Waagschale
unbelastet sein.
Important Note
During calibration, the weighing pan must be unloaded.
▼
18
Externes Justieren**
External Calibration**
Menüanwahl: 1 9 1*
Menu code selection: 1 9 1*
Verwenden Sie nur Justiergewichte, deren Genauigkeit
gleich oder besser ist als die Ablesbarkeit der jeweiligen
Waage. Einen Überblick über die Justiergewichtssätze
finden Sie auf Seite 73 unter »Zubehör«.
Use only calibration weights with an accuracy equal to
or better than the readability of your balance. Refer to the list
of calibration weights under “Accessories” on page 73.
Bei Nullanzeige die CAL-Taste (10) betätigen:
Die Justierroutine wird gestartet und ein Justiergewichtswert
in Gramm erscheint in der Anzeige.
When a zero readout is displayed, press the CAL key (10).
This starts calibration. The calibration weight value in grams
is then displayed.
Fehler oder Störungen beim Start der Justierroutine
werden durch »Err 02« angezeigt. In diesem Fall tarieren
und bei Nullanzeige erneut die CAL-Taste betätigen.
Errors or interference at the start of the calibration routine
are indicated by the error message “Err 02.” If this
is the case, tare and press the CAL key again when a zero
readout appears.
Stellen Sie das Justiergewicht mittig auf die Waagschale.
Die Waage justiert sich automatisch. Der Justiervorgang ist
abgeschlossen, wenn der Wert des Justiergewichts mit
dem Stillstandssymbol »g« in der Anzeige erscheint.
Center the calibration weight on the weighing pan.
The balance then calibrates automatically. When calibration
is completed, the value of the calibration weight and the
stability symbol “g” are displayed.
** = werkseitige Einstellung bei SBC-Modellen
mit einer Ablesbarkeit ≤0,1 mg
** = nicht bei geeichten SBC-Modellen
der Genauigkeitsklasse K
** = factory setting for SBC balances
with a readability of ≤0.1 mg
** = not applicable to verified balances
of accuracy class K
19
20
Kalibrieren bei SBC-Modellen
mit interner Gewichtsschaltung
Calibration Test for SBC Models with a Built-in
Calibration Weight
Menüanwahl: 1 9 4
Menu code selection: 1 9 4
Größere Luftdruck- und Temperaturveränderungen können
das Anzeigeverhalten der Waagen beeinflussen. Um auch
beim Ausnutzen des gesamten Wägebereichs die volle
Anzeigegenauigkeit zu gewährleisten, kann diese mit dem
Kalibrieren überprüft werden. Diese Funktion erleichtert
Ihnen die Entscheidung, ob ein erneutes Justieren nötig ist
(z.B. Meßreihen über einen längeren Zeitraum).
Rather substantial changes in barometric pressure and
temperature may affect the display response of the balance.
To ensure that you obtain the full accuracy of the balance,
even when you use the entire weighing range, we have
implemented a calibration test function. It will help you
quickly to decide whether or not you need to recalibrate your
balance (for example, to maintain the same accuracy
during long-term weighing series).
Entlasten Sie die Waage und tarieren Sie.
Unload the balance and tare.
Bei Nullanzeige die CAL-Taste (10) betätigen. Das interne
Gewicht wird motorisch aufgelegt. Dabei erscheint in der
Anzeige CAL. Nach Stillstand erscheint die Abweichung des
aktuellen Wägewertes vom Sollgewicht (nur in Gramm) in
der Anzeige.
When a zero readout is displayed, press the CAL (10) key.
The built-in calibration weight is now internally applied
by servomotor. At the same time, CAL is displayed. After the
display has stabilized, the deviation of the momentary
readout from the target weight (in grams only) is indicated.
Bei einer externen Störung kann kurz »Err 02«
erscheinen. In diesem Fall bitte erneut tarieren und die
CAL-Taste betätigen.
If external interference affects the calibration test, you may
obtain a brief display of the error message “Err 02.” In this
case, tare and then press the CAL key again.
Hinweis!
Important Note
Die Waage sollte justiert werden, wenn die Abweichung
von Null mehr als die Reproduzierbarkeit bei den StandardWaagen und mehr als der Eichwert bei den geeichten
Waagen beträgt. Reproduzierbarkeit und Eichwert siehe
Abschnitt »Technische Daten« ab Seite 60.
The balance should be calibrated if the deviation of the
readout from zero is more than the reproducibility specified
for your balance in the “Technical Specifications” starting
on page 61.
Die Waage mit dem internen Gewicht automatisch justieren:
CAL-Taste kurz drücken
To calibrate the balance with the built-in weight:
press the CAL key briefly
oder
or
Kalibrieren verlassen:
CAL-Taste länger als 2 Sekunden gedrückt halten.
to quit the calibration test:
hold down the CAL key for more than 2 seconds
Justierfunktion sperren
Blocking the Calibration Functions
Die Justierfunktion kann mit Code 1 9 7 gesperrt werden
(bei geschlossenem Verriegelungsschalter (4)).
You can block the calibration functions by setting code 1 9 7
(when the menu access switch (4) is locked).
Datenschnittstelle
Data Interface Port
Wenn Sie Ihre Meßwerte mit dem SCALTEC-Printer
dokumentieren wollen, schließen Sie den Stecker des
Printers an die Datenschnittstelle (15) an.
If you wish to record weighing data using a SCALTEC
printer, plug the printer connector into the interface port (15)
of the balance.
Einsatz der geeichten Waage im eichpflichtigen
Verkehr:
Für eichpflichtige Abnwendungen dürfen nur die gesetzlich
zugelassenen Zusatzeinrichtungen angeschlossen werden.
Für nicht eichpflichtige Anwendungen dürfen beliebige,
besonders zu kennzeichnende Zusatzeinrichtungen
angeschlossen werden: z.B. Zusatzanzeigen, PC, usw.
Important Note Concerning Verified Balances
Approved for Use as Legal Measuring Instruments:
When using the balance as a legal measuring instrument,
you may connect it only to auxiliary measuring devices that
are legally permitted. However, if you are not using the balance
as a legal measuring instrument, you may connect it to any
peripheral devices that you wish, e.g., additional remote
displays, personal computer, etc. Such peripheral devices must
be marked to indicate that they may not be connected when
the balance is being used as a legal measuring instrument.
21
Hinweis!
Important Note
Vor Anschluß oder Trennen von Zusatzgeräten
(Drucker, PC) an die Datenschnittstelle muß die Waage
unbedingt vom Netz getrennt werden.
Make sure to unplug the balance from AC power before
you connect or disconnect a peripheral device (printer or
PC) to or from the interface port.
Zur Datenausgabe betätigen Sie die PRINT-Taste (7).
To print data on hard copy or output them on a computer
screen, press the PRINT key (7).
Hinweise zur Datenausgabebedingung und
Datenkennzeichnung siehe Seite 36.
Nähere Informationen zur Datenschnittstelle fordern
Sie bitte direkt bei SCALTEC an (z.B. Datenausgabe-,
Dateneingangsformate, Pinbelegung, usw.).
22
For information about the data output parameters and data
ID codes, see page 36. For details on the data interface (such
as the data output or input formats, pin assignment, etc.),
contact SCALTEC.
Unterflurwägung
Below-Balance Weighing
Für Wägungen unterhalb der Waage steht eine
Unterfluröffnung zur Verfügung.
A port for a below-balance weighing hanger is located
on the bottom of the balance.
Bei Waagen mit Analysen-Windschutz:
Die Unterflurwägung durch Drehen der Verschlußplatte
am Waagenboden öffnen.
For Balances with an Analytical Draft Shield
Chamber:
To open the below-balance port, turn the cover plate.
Bei den anderen Waagen der Modellreihen
SBA/SBC (außer SBA 61/62):
Zum Öffnen die Verschlußplatte am Waagenboden
herausheben.
For Balances of the SBA/SBC Series
(Except for SBA 61/62):
To open the below-balance port, remove the cover plate from
the bottom of the balance.
An den Haken kann nun eine Probe, z.B. mit einem Draht,
eingehängt werden. Häufige Anwendungen sind
Dichtebestimmungen oder Eintauchen einer Probe in eine
spezielle Atmosphäre (Reaktionsmedium).
Now you can attach a sample using a suspension wire, for
example. Common applications for below-balance weighing
include density determination and immersing a sample
in a special atmosphere (medium for reaction).
Hinweis zu geeichten Modellen!
Important Note Concerning Verified Balances
Approved for Use as Legal Measuring Instruments:
Bei geeichten Waagen darf im eichpflichtigen Verkehr die
Unterfluröffnung am Waagenboden weder geöffnet noch
verwendet werden.
The below-balance weighing port may not be opened or
used when an approved balance is being operated as a
legal measuring instrument.
Hinweis!
Important Note
Bei Verwendung solcher Zusatzeinrichtungen sollte eine
Abschirmung gegen Luftzug installiert werden.
When you use a below-balance weighing hanger, you must
install a shield to protect against drafts.
23
24
Diebstahlsicherung*
Fastening an
Antitheft Locking Device*
Zur Diebstahlsicherung verwenden Sie die Befestigungsöse
(17) an der Rückseite der Waage.
To fasten an antitheft locking device, use the lug (17)
on the rear panel of the balance.
* = nicht bei SBC 22, SBA/SBC 31, 32, 33
* = Not applicable for SBC 22, SBA/SBC 31, 32, 33
Was ist, wenn…
Was ist, wenn…
Dann ist…
Abhilfe
in der Gewichtsanzeige (11) keine
Anzeigesegmente erscheinen?
– keine Betriebsspannung vorhanden
– das Netzgerät nicht eingesteckt
– Stromversorgung überprüfen
– Netzgerät an die Stromversorgung anschließen
nach dem Justieren keine
Anzeigesegmente erscheinen?
– die Aufstellung der Waage nicht ruhig
– kein interner Stillstand erreicht
– für ruhige Umgebungsbedingungen sorgen
– Untergrunderschütterungen vermeiden, Windschutz schließen
die Gewichtsanzeige »H« zeigt?
– der Wägebereich überschritten
– Waage entlasten
die Gewichtsanzeige »L«
oder »Err 54« zeigt?
– die Waagschale (1) und/oder die Unterschale
– nicht aufgelegt
– Waagschale, Unterschale (je nach Modelltyp)
– auflegen
die Gewichtsanzeige kurz
»Err 02« zeigt?
– die CAL-Taste (10) beim Justieren nicht bei
– Nullanzeige betätigt worden
– die Waage belastet
– die TARE-Taste (8) betätigen und erneut
– die CAL-Taste drücken
– Waage entlasten
in der Gewichtsanzeige die Sonderinformation »b« nicht erlischt?
– nach dem Einschalten noch keine Taste
– betätigt worden
– eine Taste betätigen
sich das Wägeresultat
laufend ändert?
– der Aufstellort instabil
– zuviel Vibration oder Luftzug vorhanden
– Aufstellort wechseln
– eine Anpassung über das »Waagenbetriebsmenü« vornehmen
das Wägeergebnis offensichtlich
falsch ist?
– die Waage nicht justiert
– vor dem Wägen nicht tariert worden
– die Luftblase der Libelle (16) nicht in Kreismitte
– Justieren (siehe Seite 17)
– vor dem Wägen tarieren
– Libelle einstellen (siehe Seite 12)
25
Troubleshooting Guide
Problem
Causes
Solution
No segments appear on the
weight display (11)
– No AC power is available
– The AC adapter is not plugged in
– Check the AC power supply
– Plug in the AC adapter
No segments appear on the weight
display after adjustment/calibration?
– The surface on which the balance rests is not stable – Make sure that the ambient conditions are stable
– Internal stability has not been reached
– Prevent vibrations from affecting the surface on which
– the scale rests
– Close the draft shield
The weight display shows “H”
– The load exceeds the capacity of the balance
– Unload the balance
The weight display shows “L”
or “Err 54”
– The weighing pan (1) and/or the pan
– support disk is not in place
– Position the pan and/or the pan support disk
– (depending on the balance model)
The weight display briefly shows
“Err 02”
– The display did not show a zero readout when
– the CAL key (10) was pressed to calibrate
– The balance is loaded
– Press the TARE key (8); then press the CAL key again
– Unload the balance
The special code “b” does not
go out on the weight display
– None of the keys has been pressed since the
– balance was turned on
– Press a key
The weight readout changes constantly
– Unstable ambient conditions
– Too much vibration or the balance is exposed
– to a draft
– Set up the balance in another area
– Access the menu to select the correct code
– for the weighing environment
The weight readout is obviously wrong
– The balance is not calibrated
– The balance was not tared before weighing
– The air bubble of the level indicator (16)
– is not centered within the circle
– Calibrate the balance (see page 17)
– Tare before weighing
– Level the balance (see page 12)
26
Pflege und Wartung
Care and Maintenance
Service
Servicing
Eine regelmäßige Wartung Ihrer Waage durch einen
Mitarbeiter des SCALTEC-Kundendienstes verlängert
die Lebensdauer des Geräts und erhöht die Meßsicherheit.
SCALTEC kann Ihnen Wartungsverträge mit Zyklen von
1 Monat bis zu 2 Jahren anbieten.
Regular servicing by a SCALTEC service technician
will extend the service life of your balance and increase
the measuring accuracy. SCALTEC can offer you service
contracts, with your choice of regular maintenance intervals
ranging from 1 month to 2 years.
Sicherheitsüberprüfung
Safety Inspection
Erscheint Ihnen ein gefahrloser Betrieb nicht mehr
gewährleistet, so setzen Sie das Gerät durch Trennen von
der Netzspannung außer Betrieb und sichern Sie es gegen
weitere Benutzung.
If there is any indication that safe operation of the balance
with the AC adapter is no longer warranted, turn off the power
and disconnect the equipment from AC power immediately.
Lock the equipment in a secure place to ensure that it cannot
be used for the time being.
Benachrichtigen Sie in diesem Fall den SCALTECKundendienst.
In this case, notify your SCALTEC customer service office.
27
Waagenbetriebsmenü
Balance Operating Menu
Die werkseitigen Einstellungen des Waagenbetriebsmenüs sind mit einem »*« gekennzeichnet. Die
nicht mit einem »*« gekennzeichneten Funktionen können
durch Eingabe des entsprechenden Codes eingestellt
werden. Die Codes finden Sie im Kapitel »Wägebetrieb«
ab Seite 31.
The factory settings of the menu codes are identified
by an “*” in this instruction manual. You can select the
functions not identified by an “*” by setting the respective
menu codes. You will find these codes in the section entitled
“Balance Operating Parameters,” which starts on page 31.
Hinweis zu geeichten Waagen!
Das Waagenbetriebsmenü kann auch im eichpflichtigen
Verkehr geändert werden. Im eichpflichtigen Verkehr
nicht zugelassene Codes sind gesperrt und können nicht
angewählt werden. Bei geeichten Waagen kann das
Waagenbetriebsmenü nicht gesperrt werden
(keine Anzeige »–«).
Important Note Concerning Verified Balances
Approved for Use as Legal Measuring Instruments:
The balance operating menu can also be changed when the
balance is being used as a legal measuring instrument.
Codes that are not permitted for operation of the balance as a
legal measuring instrument are blocked and cannot be selected.
The balance operating menu on verified balances cannot
be locked with the menu access switch (“–” not displayed).
Einstellungsänderungen durchführen
Changing Menu Code Settings
Das Ändern eines Codes erfolgt in drei Schritten:
There are three steps to changing a code:
– Aufrufen des Menüs
– Einstellen des Codes
– Bestätigen und Abspeichern
– Accessing the menu
– Setting a code
– Confirming and storing this code
Für das Einstellen des Codes haben die Tasten besondere
Funktionen:
The keys have special functions for setting menu codes:
CAL (10) = Anwahl schrittweise aufwärts
(zyklisch umlaufend)
TARE (8) = Einstellungen bestätigen, abspeichern und
Menü verlassen
PRINT (7) = schrittweise springen nach rechts und nach
links von der dritten zur ersten Ziffer
28
CAL (10) = Increases a number by one with each press
(the numbers change in cycles)
TARE (8) = Confirms a code setting; stores a code setting;
and exits the menu
PRINT (7) = Moves to the right stepwise, and to the left from
the third number to the first one
Aufrufen des Menüs
Accessing the Menu
– Waage ausschalten mit ON/OFF
Waage einschalten. Während der Anzeige aller Segmente
die TARE-Taste (8) kurz drücken.
– TARE-Taste loslassen, wenn »1« in der Anzeige erscheint
– Press ON/OFF to turn off the balance.
Turn the balance back on. While all segments are
displayed, briefly press the TARE key (8).
– Release the TARE key when “1” is displayed.
– bei Anzeige »-« vor der linken Zahl die Schutzkappe
an der Rückseite der Waage entfernen und den
Verriegelungsschalter (4) in Pfeilrichtung betätigen
– If “-” is displayed in front of the left-hand number,
remove the protective cap from the rear panel of the
balance, and move the menu access switch (4)
in the direction of the arrow.
– CAL-Taste betätigen, bis die »8« erscheint
– Press CAL until “8” appears
– PRINT-Taste betätigen, bis die 2. Ziffer des
Codes erscheint
– Press PRINT until the 2nd number of the code appears
– CAL-Taste betätigen bis die »5« erscheint
– Press CAL until “5” appears
– PRINT-Taste betätigen bis die 3. Ziffer erscheint
(angesprungen wird immer der eingestellte Code)
– Press PRINT until the 3rd number appears
(when you move to this number, the previously set menu
code will appear)
– CAL-Taste betätigen, bis die »4« erscheint
– Press CAL to select “4”
– Einstellung bestätigen
Zum Bestätigen der Einstellung muß die TARE-Taste
gedrückt werden (Kennzeichnung »o« hinter dem Code).
– Confirming a Menu Code Setting
Press TARE to confirm the code you have just set
(this is indicated by the “o” after the code).
– zum Abspeichern der Einstellung die TARE-Taste länger
als 2 Sekunden gedrückt halten
– To store the new menu code setting, press TARE for more
than 2 seconds.
29
Hinweis!
Important Note
Der jeweils eingestellte Code wird im Waagenbetriebsmenü
durch ein kleines hochgestelltes »o« hinter der letzten
Ziffer gekennzeichnet. Bei Aufruf des Waagenbetriebsmenüs
wird nach Anwahl der rechten Zahl der eingestellte Code
angezeigt.
The current code setting in the balance operating menu
is identified by a small, superscript “o” after the last number.
When you access the operating menu, the previously
set code will be displayed after you have selected the righthand number.
Wenn Sie mehrere Einstellungsänderungen
vornehmen wollen, müssen Sie das Waagenbetriebsmenü
nicht jedesmal über die TARE-Taste verlassen.
If you would like to change several menu code settings,
you do not have to press the TARE key after each change to
exit the balance operating menu.
Vergessen Sie bitte nicht, das Waagenbetriebsmenü
wieder zu verriegeln. Der verriegelte Zustand wird durch
»-« angezeigt.
Please do not forget to relock the balance operating menu.
The symbol “-” indicates that the menu is locked.
Reset – Einstellungsänderungen
rückgängig machen
Undoing All Menu Code Changes - Reset Function
Die Reset-Funktion ermöglicht ein Rücksetzen aller
Einstellungsänderungen auf die werkseitige mit
»*« gekennzeichnete Einstellung. Diese Sonderfunktion
wird durch Einstellen des Codes 9 – – 1° aufgerufen.
Reset-Funktion
Code
Reset Function
aktiv
9 – – 1
On
9 – – 1
aus
9 – – 2*
Off
9 – – 2*
* werkseitige Einstellung
30
The reset function lets you undo all menu code changes,
which means that you will obtain the original
factory-set menu codes identified by an “*.” To use this
function, select code 9 – – 1°.
* factory setting
Code
Wägebetrieb
Balance Operating Parameters
Anpassung an den Aufstellort
Code
Adapting the Balance to Ambient Conditions
Code
sehr ruhige Umgebung
1 1 1*
Very stable conditions
1 1 1*
ruhige Umgebung
1 1 2*
Stable conditions
1 1 2*
unruhige Umgebung
1 1 3
Unstable conditions
1 1 3
sehr unruhige Umgebung
1 1 4
Very unstable conditions
1 1 4
Normales Wägen – manuelles Dosieren
Code
Standard Weighing Mode – Manual Filling Mode
Code
normales Wägen
1 2 1*
Standard weighing mode
1 2 1*
manuelles Dosieren
1 2 2
Manual filling mode
1 2 2
Stillstandsbreite
Code
Stability Range
Code
0,25 Ziffernschritt
1 3 1
0.25 digit
1 3 1
0,5 Ziffernschritt
1 3 2*
0.5 digit
1 3 2*
1
Ziffernschritt
1 3 3
1
digits
1 3 3
2
Ziffernschritte
1 3 4*
2
digits
1 3 4*
4
Ziffernschritte
1 3 5
4
digits
1 3 5
8
Ziffernschritte1)
1 3 6
8
digits1)
1 3 6
Code**
Tare Parameter
Code**
jederzeit
1 5 1*/**
At any time
1 5 1*/**
erst nach Stillstand
1 5 2*
Not until the readout is stable
1 5 2*
Tarierbedingung
** = werkseitige Einstellung, teilweise abhängig vom Waagentyp
** = Einstellungsänderung entfällt bei geeichten Waagen
der Genauigkeitsklasse K
1) = entfällt bei geeichten Waagen
** = factory setting; depends on the balance model in some cases
** = setting not applicable to verified balances of accuracy class K
1) = not applicable to the verified balances approved for use as legal
measuring instruments
31
Auto-Zero-Funktion
Code
Auto Zero Function
Code
Auto-Zero ein
1 6 1*
Auto Zero on
1 6 1*
Auto-Zero aus
1 6 2
Auto Zero off
1 6 2
Justier-/Kalibrier- und Linearisierfunktionen mit CAL
Code
Calibration and Linearization Functions Using CAL
Code
Externes Justieren
1 9 1*/**
External calibration
1 9 1*/**
Internes Justieren für SBC-Modelle
1 9 3*
Internal calibration for SBC models
1 9 3*
Kalibrieren für SBC-Modelle
1 9 4
Calibration test for SBC models
1 9 4
Internes Linearisieren bei SBC22
1 9 6
Internal linearization for SBC22
1 9 6
Justierfunktion gesperrt
1 9 7
Calibration functions blocked
1 9 7
** = werkseitige Einstellung, teilweise abhängig vom Waagentyp
** = Einstellungsänderung entfällt bei geeichten Waagen
der Genauigkeitsklasse K
32
** = factory setting; depends on the balance model in some cases
** = setting not applicable to verified balances of accuracy class K
Wägen in zwei Bereichen
Zeichen
Über die FUNCTION-Taste (6) läßt sich zwischen zwei Gewichtseinheiten
umschalten. Die 2. Einheit wird gekennzeichnet durch das Anzeigesymbol »R1«.
Umrechnungsfaktor
1g=
1. Bereich
Code
2. Bereich R1
Code
Milligramm2)
1000.
1 7 13
3 1 13 *
FUNCTION-Taste gesperrt
2 1 1*
Parts pro Pound**o
1.1287667712
1 7 14
3 1 14
Einheitenumschaltung
2 1 2*
Tael China**
tl
0.02645547175
1 7 15
3 1 15
Momme**
m
0.2667
1 7 16
3 1 16
Karat**
k
5.
1 7 17
3 1 17
Gewichtseinheiten
Die Basis-Gewichtseinheit ist die Einheit, in der die Waage nach dem Einschalten
wiegt. Diese Einheit wird im 1. Bereich eingestellt. Die Einheiten der zwei Bereiche
können durch Einstellen des jeweiligen Codes individuell gewählt werden.
mg
Tola**
t
0.0857333381
1 7 18
3 1 18
Baht**
b
0.06578947436
1 7 19
3 1 19
Mesghal**
m
0.217
1 7 20
3 1 20
1. Bereich
Code
2. Bereich R1
Zeichen
Umrechnungsfaktor
1g=
Code
1. Bereich
2. Bereich R1
Gramm (o)
o
1.
1 7 1
3 1 1
Gramm
g
1.
1 7 2*
3 1 2*
größtmögliche Genauigkeit
1 8 1*
3 2 1*
Kilogramm1)
kg
0.001
1 7 3
3 1 3
letzte Stelle »dunkel« bei Laständerung3)
1 8 2
3 2 2
Anzeigegenauigkeit
Carat**
ct
5.
1 7 4
3 1 4
Rundungsfaktor 2**
1 8 3
3 2 3
Pound**
lb
0.0022046226
1 7 5
3 1 5
Rundungsfaktor 5**
1 8 4
3 2 4
Rundungsfaktor 10**
1 8 5
3 2 5
Unze**
oz
0.035273962
1 7 6
3 1 6
Troy Unze**
ozt
0.032150747
1 7 7
3 1 7
Tael Hongkong** tl
0.02671725
1 7 8
3 1 8
Tael Singapur** tl
0.02646063
1 7 9
3 1 9
Tael Taiwan**
tl
0.02666666
1 7 10
3 1 10
Grain**
GN
15.43235835
1 7 11
3 1 11
Pennyweight**
dwt
0.643014931
1 7 12
3 1 12
**
**
1)
2)
3)
= werkseitige Einstellung, teilweise abhängig vom Waagentyp
= entfällt bei geeichten Waagen
= entfällt bei geeichten Waagen der Genauigkeitsklasse k
= entfällt bei geeichten Waagen der Genauigkeitsklasse K
= nur bei geeichten Waagen
33
Weighing in Two Ranges
Symbol
The FUNCTION key (6) lets you switch back and forth (toggle) between two weight
units. The 2nd unit is identified by the display symbol “R1.”
Conversion Factor
1g=
1st Range
Code
2nd Range R1
1000.
1 7 13
3 1 13 *
1.1287667712
1 7 14
3 1 14
Code
Milligrams2)
FUNCTION key blocked
2 1 1*
Parts per pound**o
Mass unit conversion by toggling
2 1 2*
Chinese taels** tl
0.02645547175
1 7 15
3 1 15
Mommes**
0.2667
1 7 16
3 1 16
5.
1 7 17
3 1 17
Weight Units
mg
m
Austrian carats** k
The “basic weight unit” is the unit in which your balance will weigh the moment
you turn it on. This unit is selected for the first range. You can select a different unit
for each of the two ranges by setting the appropriate menu codes.
Tola**
t
0.0857333381
1 7 18
3 1 18
Baht**
b
0.06578947436
1 7 19
3 1 19
Mesghal**
m
0.217
1 7 20
3 1 20
1st Range
Code
2nd Range R1
Symbol
Conversion Factor
1g=
Code
2nd Range R1
1st Range
Grams (o)
o
1.
1 7 1
3 1 1
Grams
g
1.
1 7 2*
3 1 2*
Highest possible accuracy3)
1 8 1*
3 2 1*
Kilograms1)
kg
0.001
1 7 3
3 1 3
Rounding factor 2**
1 8 3
3 2 3
Carats**
ct
5.
1 7 4
3 1 4
Rounding factor 5**
1 8 4
3 2 4
Pounds**
lb
0.0022046226
1 7 5
3 1 5
Rounding factor 10**
1 8 5
3 2 5
Ounces**
oz
0.035273962
1 7 6
3 1 6
Troy ounces**
ozt
0.032150747
1 7 7
3 1 7
Hong Kong taels**tl
0.02671725
1 7 8
3 1 8
Singapore taels** tl
0.02646063
1 7 9
3 1 9
Taiwanese taels** tl
0.02666666
1 7 10
3 1 10
Grains**
GN
15.43235835
1 7 11
3 1 11
Pennyweights** dwt
0.643014931
1 7 12
3 1 12
34
Display Mode
** = factory setting; depends on the balance model in some cases
** = not applicable to verified balances approved for use as legal
measuring instruments
1) = not applicable to verified balances of accuracy class k
2) = not applicable to verified balances of accuracy class K
3) = applicable only to verified balances approved for use as legal
measuring instruments
Einstellungen der Schnittstellenparameter
Baudrate
Code
Interface Parameter Settings
Baud Rate
Code
150 Baud
5 1 1
,150 baud
5 1 1
300 Baud
5 1 2
,300 baud
5 1 2
600 Baud
5 1 3
,600 baud
5 1 3
1200 Baud
5 1 4*
1,200 baud
5 1 4*
2400 Baud
5 1 5
2,400 baud
5 1 5
4800 Baud
5 1 6
4,800 baud
5 1 6
9600 Baud
5 1 7
9,600 baud
5 1 7
19200 Baud
5 1 8
19,200 baud
5 1 8
Parität
Code
Parity
Code
Mark Parity
5 2 1
Mark parity
5 2 1
Space Parity
5 2 2
Space parity
5 2 2
Odd Parity
5 2 3*
Odd parity
5 2 3*
Even Parity
5 2 4
Even parity
5 2 4
Anzahl der Stopbits
Code
Number of Stop Bits
Code
1 Stopbit
5 3 1*
1 stop bit
5 3 1*
2 Stopbits
5 3 2
2 stop bits
5 3 2
Handshake-Art
Code
Handshake Mode
Code
Software-Handshake
5 4 1
Software handshake
5 4 1
Hardware-Handshake mit 2 Zeichen nach CTS
5 4 2*
Hardware handshake with 2 characters after CTS
5 4 2*
Hardware-Handshake mit 1 Zeichen nach CTS
5 4 3
Hardware handshake with 1 character after CTS
5 4 3
** = werkseitige Einstellung
n
** = factory setting
35
Dienstleistungen für die Dokumentation
Utilities for Printouts or Data Transfer
Datenausgabebedingung
Code
Data Output Parameter
Code
Einzelprint ohne Stillstand
6 1 1
Print on request regardless of stability
6 1 1
Einzelprint nach Stillstand mit Funktionsspeicherung
6 1 2*
Print on request after stability, with storage of the function
6 1 2*
Einzelprint bei Stillstand ohne Funktionsspeicherung
6 1 3
Print on request at stability, without storage of the function
6 1 3
Autoprint ohne Stillstand
6 1 4
Auto print regardless of stability
6 1 4
Autoprint bei Stillstand
6 1 5
Auto print at stability
6 1 5
Autoprint
Code
Auto Print
Code
Autoprint über die PRINT-Taste abschaltbar
6 2 1
Start/stop auto print using the PRINT key
6 2 1
Autoprint nicht abschaltbar
6 2 2*
Auto print not stoppable
6 2 2*
Datenausgabe in Intervallen
Code
Data Output at Defined Intervals
Code
1 Anzeigewechsel
6 3 1*
1 display update
6 3 1*
2 Anzeigewechsel
6 3 2
2 display updates
6 3 2
Automatisches Tarieren nach einer Datenausgabe
Code
Automatic Taring after Data Output
Code
Datenausgabe ohne automatisches Tarieren
6 4 1*
Data output without automatic taring
6 4 1*
Datenausgabe mit automatischem Tarieren
6 4 2
Data output with automatic taring
6 4 2
Automatische Ausgabe der Anwendungsparameter
Code
Automatic Output of the Application Parameters
Code
aus
7 1 1*
Off
7 1 1*
ein
7 1 2
On
7 1 2
* = werkseitige Einstellung
36
* = factory setting
Kennzeichnung der Datenausgabe
Code
Data ID Codes
Code
ohne
7 2 1*
Without
7 2 1*
mit
7 2 2
With
7 2 2
Automatische Datenausgabe Tara
Code
Automatic Output of the Tare Memory Data
Code
Letzter Nettowert (Einzelwert N1)
7 3 1*
Last net value (individual value N1)
7 3 1*
Speicherinhalt (Summenwert T1)
7 3 2
Tare memory data (total T1)
7 3 2
Zusatzfunktionen
Additional Functions
Zugang zum Menü
Menu Access Function
Die Funktion des Verriegelungsschalters kann mit der Einstellung »Waagenbetriebsmenü – frei –« aufgehoben werden. Das Waagenmenü ist dann immer
zugängig. Unabhängig von der Schalterstellung können so jederzeit Änderungen
vorgenommen werden.
You can define the function of the menu access switch by setting the code for the
balance operating menu to “accessible.” The balance operating menu will then be
accessible at all times, which means that you can change the menu codes at any
time regardless of the setting of the menu access switch.
Zugang zum Menü
Code
Access to Balance Operating Menu
Code
frei
8 1 1
Accessible (codes can be changed)
8 1 1
abhängig vom Verriegelungsschalter
8 1 2*
Locked (codes can be read only)
8 1 2*
Tastenfunktionen
Code
Key Functions
Code
frei
8 3 1*
Accessible
8 3 1*
gesperrt (außer ON/OFF)
8 3 2
Blocked (except for ON/OFF)
8 3 2
* = werkseitige Einstellung
* = factory setting
37
Funktion des Verriegelungsschalters bei geeichten Waagen der
Genauigkeitsklasse K
Menu Access Switch Function on Verified Balances of Accuracy Class K
Das Waagenbetriebsmenü kann auch im eichpflichtigen Verkehr geändert
werden. Im eichpflichtigen Verkehr nicht zugelassene Codes sind allerdings
nicht anwählbar. Das Waagenbetriebsmenü kann mit dem Verriegelungsschalter
nicht gesperrt werden (keine Anzeige -»–«). Nach der Eichung der Waagen der
Genauigkeitsklasse K wird mit dem Verriegelungsschalter »Externes
Justieren« gesperrt. Hierzu muß der Schalter nach links umgelegt werden.
Die Zugänglichkeit des Schalters wird gesperrt durch eine Siegelmarke,
die sich bei unerlaubtem Entfernen selbst zuerstört. Bei Zerstörung dieser
Sicherungsmarke erlischt die Eichfähigkeit.
The balance operating menu can also be changed when the balance is being used as a
legal measuring instrument. Codes that are not permitted for operation of the balance
as a legal measuring instrument are blocked and cannot be selected. The balance
operating menu on verified balances approved for use as legal measuring instruments
cannot be locked with the menu access switch (“–” not displayed). For balances of
accuracy class K, the menu access switch is adjusted to lock the “External
Calibration” function after verification. To do this, the switch must be moved to the left.
A control seal is affixed to the balance to lock the menu access switch. Unauthorized
attempts to remove this seal will irreversibly damage it. If you break the seal, the
validity of the verification will become void, and you must have your balance re-verified.
Einschaltmodus
Code
Power-on Mode
Code
(Power) off –> on <–> standby
8 5 1*
(Power) off –> on <–> standby
8 5 1*
on <–> standby
8 5 3
on <–> standby
8 5 3
Automatisches Einschalten
8 5 4
Automatic power-on
8 5 4
Anwendungsprogramme
Application Programs
Zusätzlich zur Wägefunktion bietet Ihnen unsere Waage weitere nützliche
Anwendungsprogramme.
In addition to the functions implemented for weighing, SCALTEC balances offer
you a variety of application programs.
Die Anwahl bestimmter Funktionen oder eines
Anwendungsprogramms erfolgt durch Einstellen des entsprechenden
Codes im Menü.
To select an application program or a specific function,
set the appropriate code in the menu.
Vor einem Arbeitsbeispiel werden zusätzliche Einstellungen für den
Programmablauf und die Dokumentation in einer Code-Tabelle aufgeführt.
* = werkseitige Einstellung
38
Additional settings for running a particular program and displaying or printing the
data on hard copy are listed in a table of codes.
* = factory setting
Tara-Speicher
Tara-Speicher
Code 2 1 6
Anwendung: Dokumentation von Tara-, Netto-, Bruttowerten
Das Tara-Gewicht wird mit Betätigen der FUNCTION-Taste (6) abgespeichert.
Die Waage wird automatisch tariert. Die Einwaage erfolgt anschließend wieder von
»Null« aus.
Schritt/Taste
Bei Verwendung der Taraspeicherfunktion wird die Taraspeicherbelegung bei der
Datenausgabe mit einer der Kennzeichnung nachgestellten »1« angezeigt.
Behälter aufstellen
FUNCTION
Arbeitsbeispiel »Tara – Netto – Brutto«
Einstellungen im Beispiel
Code
Tara-Speicher
Automatische Datenausgabe aller Parameter
mit Kennzeichnung
Print Tara-Speicher
2
7
7
7
1
1
2
3
6
2
2
2
Alternativ kann für die Dokumentation gewählt werden:
automatische Datenausgabe
Print Nettowert
* = werkseitige Einstellung
Anzeige
CF1), TARE
Datenausgabe
0.00 g
22.65 g
0.00 g NET T1
+
22.65 g
Wägegut einfüllen
PRINT
+ 250.24 g NET N1
+
250.24 g
CF1), PRINT
+ 272.89 g
+
272.89 g
Die Kennzeichnung
T1
N1
N
+
+
+
+
N
bezeichnet
22.65 g Tara-Speicher-Gewicht (Gewichtswert)
250.24 g Nettogewicht bei belegtem Tara-Speicher
272.89 g Bruttogewicht = Tara + Netto
7 3 1*
1)
= CF länger als zwei Sekunden gedrückt halten
39
Tare Memory
Tare Memory
Code 2 1 6
Press the FUNCTION key (6) to store the tare weight. The balance is now
automatically tared so you can weigh starting with a zero readout.
If you have stored a value in the tare memory, a “1” will be printed or output
after the ID code of this value to identify it as such on the printout or on
the computer screen.
Step/Key
Code
Tare memory
Automatic output of all parameters
With data ID code
Print tare memory
2
7
7
7
1
1
2
3
6
2
2
2
7 3 1*
+
22.65 g
0.00 g NET T1
+
22.65 g
Fill container
with sample;
press PRINT
+ 250.24 g NET N1
+
250.24 g
CF1), PRINT
+ 272.89 g
+
272.89 g
The data ID codes
T1
+
N1
N
+
+
N
mean:
22.65 g tare weight stored in the memory
(weight value)
250.24 g net weight when tare weight is stored
272.89 g gross weight = tare + net
* = factory setting
1) = press CF for more than two seconds
40
Data Output/Printout
0.00 g
Place container
on pan;
press FUNCTION
As an alternative, you can select this output parameter:
Print net value
Readout
CF1), TARE
“Tare – Net – Gross” Weights
Menu codes used in the example:
Application: Obtaining printouts of tare, net and gross weights
Arbeitsbeispiel »Netto-Total«
Einstellungen im Beispiel
Code
Tara-Speicher
Automatische Datenausgabe
mit Kennzeichnung
Ausdruck der einzelnen Komponenten/Tarawerte
2
7
7
7
1
1
2
3
6
2
2
1*
Alternativ kann für die Dokumentation gewählt werden:
Ausdruck der Netto-Total-Einwaage/des Tara-Summenwertes
7 3 2
Anwendung: Einwaage mehrerer Komponenten mit additivem Abspeichern,
automatischem Tarieren und Ausgabe des Komponentenwertes
Schritt/Taste
Anzeige
Behälter aufstellen
+
CF1), TARE
22.65 g
0.00 g
1. Komponente
einwiegen,
speichern:
FUNCTION
2. Komponente
einwiegen,
speichern:
FUNCTION
weitere Komponenten einwiegen,
speichern:
FUNCTION
* = werkseitige Einstellung
Datenausgabe
+
4.61 g
0.00 g NET N1
+
+
4.61 g
0.00 g NET N1
+
60.33 g
xxx.xx g NET N1
+
xxx.xx g
+
272.89 g
60.33 g
Einwaage beenden,
Gesamtgewicht
dokumentieren
CF1), PRINT
+ 272.89 g
N
Die Kennzeichnung
bezeichnet
N1
+
N
+
1)
60.33 g Komponentengewicht
(Netto-Einzelgewicht)
272.89 g Gesamteinwaage (Netto-Gesamtgewicht)
= CF länger als zwei Sekunden gedrückt halten
41
Practical Example: Net Total
Menu codes used in the example:
Code
Tare memory
Automatic data output
With data ID code
Printout of individual components/tare weights
2
7
7
7
1
1
2
3
6
2
2
1*
As an alternative, you can select this output parameter:
Printout of the net total weight/total tare weight
7 3 2
Application: Simple compounding and formulating of several components
with additive storage, automatic taring and outputting
of component weight
Step/Key
Readout
Place container
on pan
+
CF1), TARE
42
22.65 g
0.00 g
Weigh in
1st component;
store: FUNCTION
+
Weigh in
2nd component;
store: FUNCTION
+
Weigh in and
store additional
components:
FUNCTION
4.61 g
0.00 g NET N1
+
4.61 g
60.33 g
0.00 g NET N1
+
60.33 g
xxx.xx g NET N1
+
xxx.xx g
+
272.89 g
Finish weighing
in components;
output total weight:
CF1), PRINT
+ 272.89 g
N
The data ID codes
mean:
N1
N
* = factory setting
Data Output/Printout
+
+
60.33 g component weight (net individual weight)
272.89 g total components weighed-in
(net total weight)
1) = press CF for more than two seconds
Prozentwägen
Prozentwägen
Weighing in Percent
Code 2 1 5
Weighing in Percent
Code 2 1 5
Das Prozentwägen ermöglicht die Gewichtsanzeige in Prozent, bezogen auf
ein Referenzgewicht. Der angezeigte Gewichtswert wird als fest vorgegebener
Prozentwert übernommen (Werkseinstellung: 100%).
This application program enables you to obtain weight readouts in percent
which are in proportion to a reference weight. The reference weight readout is
stored as a menu-defined percentage (factory setting: 100%).
Referenzprozentwert ändern
Changing the Reference Percentage
You can change the reference percentage in cycles. Choose from the following
settings: 5,10, 20, 50 and 100.
Der Referenzprozentwert kann umlaufend verändert werden.
Mögliche Referenzprozentwerte sind 5,10, 20, 50 und 100.
Aufruf der Funktion:
FUNCTION (6) länger als 2 Sekunden gedrückt halten,
bis in der Anzeige »rEF 100%« erscheint
Einstellen:
FUNCTION kurz drücken
Übernahme des Wertes: fest nach Ausschalten (netzausfallsicher):
FUNCTION länger als 2 Sekunden gedrückt halten
Diese Einstellung wird durch Reset: 9 – – 1° nicht gelöscht!
Referenzübernahme
Code
meßwertgenau nach interner Auflösung
3 5 1*
anzeigegenau
3 5 2
Prozentwertanzeige
Code
ohne Nachkommastelle
3 6 1
mit einer Nachkommastelle
3 6 2*
mit zwei Nachkommastellen
3 6 3*
mit drei Nachkommastellen
3 6 4
Die Anzahl der Nachkommastellen werden bei der Übernahme automatisch
verringert, wenn das Wägegut für die Darstellung zu leicht ist.
* = werkseitige Einstellung, teilweise abhängig vom Waagentyp
To activate the
change function:
To change the setting:
To store the percentage:
Hold down FUNCTION (6) for more than 2 seconds until
“rEF 100%” appears on the display
Briefly press FUNCTION
Hold down FUNCTION for more than 2 seconds to
store it permanently (in the non-volatile memory) after
you turn off the power
This setting is not canceled by the reset code 9 – – 1°!
Storage Parameter for the Reference Weight/Value
Code
With full accuracy according to the internal resolution
3 5 1*
According to the display accuracy
3 5 2
Display Parameter for Readouts in Percent
Code
Without a decimal place
3 6 1
With one decimal place
3 6 2*
With two decimal places
3 6 3*
With three decimal places
3 6 4
If the weight stored is too light to be displayed, the number of decimal places is
automatically decreased.
* = factory setting; depends on the balance model in some cases
43
Arbeitsbeispiel »Restgewichtsbestimmung in Prozent«
Schritt/Taste
Einstellungen im Beispiel
Code
Prozentwägen
Referenz-Wert und -Gewicht
mit Kennzeichnung
2 1 5
7 1 2
7 2 2
Anzeige
Restgewichtsanzeige
und Referenzwert
löschen mit CF
+
3.34 g
PRINT
3.34 g
+
Anwendung: Schnelle Trockengewichtsbestimmung einer Probe
Die Kennzeichnung
Schritt/Taste
Anzeige
Behälter aufstellen
+
CF1), TARE
0.00 g
pRef
Wxx%
Prc
N
vorbereitete Probe
einfüllen
FUNCTION
+
4.61 g
+ 100.0 %
22.65 g
bei
Feuchtigkeitsbestimmung
hier TARE
0.0%
Behälter abnehmen,
Probe trocken
xx.x %
Behälter mit Probe
wieder aufstellen
+
72.5 %
PRINT
+
72.5 %
1)
44
Datenausgabe
pRef
Wxx%
+
+
100 %
4.61 g
Prc
+
72.5 %
= CF länger als zwei Sekunden gedrückt halten
+
+
+
+
Datenausgabe
N
+
3.34 g
bezeichnet
100
4.61
72.5
3.34
%
g
%
g
Referenzprozentzahl
Referenzgewicht netto xx%
errechnete Prozentzahl
Netto-Restgewicht
Practical Example: Determination of the Residual Weight in Percent
Step/Key
Readout
Menu codes used in the example:
Code
Weighing in percent
Reference % and weight
With data ID code
2 1 5
7 1 2
7 2 2
Press CF to clear
residual weight
readout and
reference value
+
3.34 g
PRINT
+
3.34 g
Application: Quick determination of the dry weight of a sample
Step/Key
Readout
Place container
on pan
+
CF1), TARE
pRef
Wxx%
Prc
N
0.00 g
For moisture
analysis,
press TARE
at this point
N
The data ID codes
Data Output/Printout
22.65 g
Add prepared sample
to container;
+
4.61 g
FUNCTION
+ 100.0 %
Data Output/Printout
pRef
Wxx%
+
+
100 %
4.61 g
Prc
+
72.5 %
+
+
+
+
+
3.34 g
mean:
100
4.61
72.5
3.34
%
g
%
g
reference percentage
net reference weight xx%
calculated percentage
net residual weight
0.0 %
Remove container;
dry sample
xx.x %
Reweigh sample
in container
+
72.5 %
PRINT
+
72.5 %
1) = press CF for more than two seconds
45
Zählen
Zählen
Counting
Code 2 1 4
Counting
Code 2 1 4
Das Zählprogramm ermöglicht die Gewichtswertumrechnung in Stückzahlen,
bezogen auf ein Referenzgewicht. Der angezeigte Gewichtswert wird für eine fest
vorgegebene Stückzahl übernommen (Werkseinstellung: 10 pcs).
The counting program allows automatic conversion of weights into piece
counts based on a reference sample weight. A weight readout is stored as
a reference sample quantity (factory setting: 10 pcs = pieces).
Referenzstückzahl ändern
Changing the Reference Sample Quantity
Die Referenzstückzahl kann umlaufend verändert werden.
Mögliche Referenzstückzahlen sind 5,10, 20, 50 und 100.
You can change the reference sample quantity in cycles. Choose from the
following settings for the reference sample quantity: 5,10, 20, 50 and 100.
Aufruf der Funktion:
To activate the
change function:
To change the setting:
To store the quantity:
FUNCTION (6) länger als 2 Sekunden gedrückt halten,
bis in der Anzeige »rEF ... pcs« erscheint
Einstellen:
FUNCTION kurz wiederholt drücken
Übernahme des Wertes: fest nach Ausschalten (netzausfallsicher):
FUNCTION länger als 2 Sekunden gedrückt halten
Diese Einstellung wird durch Reset: 9 – – 1° nicht gelöscht!
Hold down FUNCTION (6) for more than 2 seconds until
“rEF ... pcs” appears on the display
Briefly press FUNCTION again
Hold down FUNCTION for more than 2 seconds to store
it permanently (in the non-volatile memory) after you turn
off the power
This setting is not canceled by the reset code 9 – – 1°!
Referenzübernahme
Code
meßwertgenau nach interner Auflösung
3 5 1*
Storage Parameter for the Reference Sample Weight
Code
3 5 2
With full accuracy according to the internal resolution
3 5 1*
According to the display accuracy
3 5 2
anzeigegenau
* = werkseitige Einstellung
46
* = factory setting
Arbeitsbeispiel »Zählen von Teilen«
Schritt/Taste
Einstellugen im Beispiel
Code
Zählen
Referenz-Wert und -Gewicht
mit Kennzeichnung
2 1 4
7 1 2
7 2 2
FUNCTION
drücken
Anzeige
Behälter aufstellen
+
CF1), TARE
Datenausgabe
22.65 g
0.00 g
Datenausgabe
rEF 20 pcs
übernehmen:
FUNCTION
länger als
2 Sekunden
gedrückt halten
Anwendung: Zählen von gleichgewichtigen Massenteilen
Schritt/Taste
Anzeige
Referenzstückzahl
mit FUNCTION
bestätigen
+
10 pcs
Gewünschte Teilemenge einfüllen
+
500 pcs
PRINT
+
500 pcs
Gewichtsanzeige
und Referenzwert
löschen mit CF
PRINT
+ 2827.35 g
+ 2827.35 g
10 Stück einzählen
evtl. Referenzstückzahl
ändern:
z.B. 20 Stück
einzählen
Referenz-Stückzahl 20 einstellen,
FUNCTION
länger als
2 Sekunden
gedrückt
halten
rEF 10 pcs
1)
Die Kennzeichnung
nRef
wRef
Qnt
N
+
10
+ 5.6546
+
500
+ 2827.35
nRef
wRef
+
+
10 pcs
5.6546 g
Qnt
+
500 pcs
N
+
2827.35 g
bezeichnet
pcsReferenzstückzahl
g Referenzgewicht
pcserrechnete Stückzahl
g Netto-Gewichtswert
= CF länger als zwei Sekunden gedrückt halten
47
Practical Example: Parts Counting
Menu codes used in the example:
Code
Counting
Reference quantity and ref. weight
With data ID code
2 1 4
7 1 2
7 2 2
Press
FUNCTION
To store:
hold down
FUNCTION
for more than
2 seconds
Application: Counting bulk quantities of items with the same weight
Step/Key
Readout
Place container
on pan
+
CF1), TARE
Data Output/Printout
Press FUNCTION
to confirm reference
piece count
+
10 pcs
22.65 g
0.00 g
Add 10 counted parts rEF 10 pcs
Change the reference sample
qty., if desired:
To use 20 as
the reference
qty., add
10 more parts
to container.
To change the
ref. qty. to 20,
hold down
FUNCTION for
> 2 seconds rEF 10 pcs
1) = press CF for more than two seconds
48
rEF 20 pcs
Fill container with
desired quantity
of parts (without
counting them)
+
500 pcs
PRINT
+
500 pcs
Press CF to clear
the weight readout
and the
reference value
PRINT
+ 2827.35 g
+ 2827.35 g
The data ID codes
nRef
wRef
Qnt
N
+
10
+ 5.6546
+
500
+ 2827.35
nRef
wRef
+
+
10 pcs
5.6546 g
Qnt
+
500 pcs
mean:
pcsreference piece count
g reference weight
pcscalculated piece count
g net weight
Tierwägen
Tierwägen / Mittelwertbildung
Animal Weighing
Code: 2 1 7
Mit diesem Programm werden Gewichte lebender Tiere bzw. Gewichtswerte
in unruhiger Umgebung ermittelt.
Das Gewicht wird dabei als Mittelwert aus einer wählbaren Anzahl von
Einzelwägungen ermittelt.
Während der Mittelwertbildung wird in der Gewichtsanzeige die noch
verbleibende Zahl von durchzuführenden Einzelmessungen durchlaufend
angezeigt.
Nach Abschluß der Messungen erscheint der errechnete Mittelwert als stabiler
Wert in der Gewichtsanzeige.
Animal Weighing/Averaging
Code: 2 1 7
Use this program to determine the weights of live animals or weights under
unstable ambient conditions.
In this program, the balance calculates the weight as the average of
a selectable number of individual weighing operations by the balance. These
weighing operations are also known as “subweighing operations.”
During averaging, the number of individual subweighing operations left
is shown in the application display in a “countdown” mode.
Once all subweighing operations have been performed, the calculated mean
value is indicated as a stable readout on the weight display.
Start manuell oder automatisch
Manual or Automatic Start Mode
Der Start der Tierwägung erfolgt entsprechend der Menü-Einstellung manuell
oder automatisch.
Bei Anwahl »automatisch« muß der Programmstart zur ersten Mittelwertbildung
über die FUNCTION-Taste gestartet werden. Sie haben jederzeit die
Möglichkeit, die gestartete Messung mit der CF-Taste zu unterbrechen. Bei automatischem Start erscheint als Symbol »AUTO« während der Messung.
Das Ergebnis wird fest in der Anzeige verriegelt. Das Symbol »Maus« bzw.
»AUTO« blinkt während dieser Zeit. Das Blinken wird nach Entlasten der Waage
beendet und die Anzeige folgt wieder dem aufgelegten Gewichtswert.
Depending on the menu code you select, animal weighing will be started
automatically or manually by pressing a key.
If you select the “automatic mode,” you will have to press FUNCTION
to start the program for averaging the first weight. You can press CF to interrupt
a weight measurement in progress at any time. In the “automatic mode,” the
symbol “AUTO” will be displayed during weight measurement.
The result is locked into the display. The “mouse” symbol or “AUTO”
flashes during this time. The readout will stop flashing after you have unloaded the
balance, and the next weight will be displayed.
Start der Tierwägung erfolgt:
Code
Animal weighing/averaging will start by:
Code
manuell
3 8 1
Manual mode
3 8 1
automatisch
3 8 2*
Automatic mode
3 8 2*
* = werkseitige Einstellung
* = factory setting
49
Startverzögerung
Delayed Start Mode
Je unruhiger das Tier ist, desto größer muß die Abweichung zweier aufeinander
folgender Meßpunkte gewählt werden.
Entsprechend den individuellen Anforderungen kann der Start sowohl bei
manuellem als auch bei automatischem Start so lange verzögert werden, bis sich
das Tier etwas beruhigt hat.
Startkriterium ist hier die Größe der Abweichung von zwei aufeinander folgenden
Gewichtswerten.
Bewegt sich das Tier nach dem Start zu heftig, wird das Startkriterium
überschritten und die Messung läuft nicht an. Bleiben nach der Beruhigung des
Tieres zwei gemessene Werte innerhalb des vorher gewählten Bereiches,
wird der Meßvorgang gestartet.
A rule of thumb to go by for selecting the right setting to weigh animals is:
the more active an animal is, the greater the difference must be between two
successive subweights measured.
Depending on individual requirements, starting the averaging operation can be
delayed either in the automatic or manual mode until the animal you are weighing
has calmed down to a certain degree.
klein
3 7 1
In this case, the start criterion is defined by the difference between two successive
subweights measured.
If the animal moves, the start criterion is not met; therefore, averaging will
not start.
Once the animal has calmed down, the program checks whether two measured
subweights are within the previously selected range. If so, the actual averaging
operation will be started.
mittel
3 7 2*
Delay start
groß
3 7 3
Slight
3 7 1
Average
3 7 2*
Considerable
3 7 3
Startverzögerung
Code
Während der Mittelwertbildung wird der abwärts laufende Zähler für die Anzahl
der verbleibenden Messungen in der Gewichtsanzeige angezeigt.
Code
During averaging, the number of subweighing operations left to perform is shown
on the weight display (countdown mode).
* = werkseitige Einstellung
50
* = factory setting
Anzahl der Untermessungen ändern
Changing the Number of Subweighing Operations
Die Anzahl der für die Mittelwertbildung herangezogenen Messungen kann
umlaufend verändert werden. Mögliche Werte sind 5,10, 20, 50 und 100.
You can change the number of subweighing operations used to average
a weight. Change this number in cycles. You can choose from the following
settings: 5,10, 20, 50 and 100.
Aufruf der Funktion:
FUNCTION (6) länger als 2 Sekunden gedrückt halten,
bis in der Anzeige »rEF 10« erscheint
Einstellen:
FUNCTION kurz drücken
Ein evtl. nötiges Rücksetzen erfolgt über CF
Übernahme des Wertes: fest nach Ausschalten (netzausfallsicher):
FUNCTION länger als 2 Sekunden gedrückt halten
Diese Einstellung wird durch Reset: 9 – – 1° nicht gelöscht!
Übernahmeschwelle bei automatischem Start
Um bei automatischem Start eine gewisse Sicherheit zu haben, daß kein
»Fehlstart« erfolgt, ist die Übernahme eines Wägewertes fest gekoppelt an die
Übernahmeschwelle von 100 Anzeigeschritten.
Nach erfolgter Mittelwertbildung bleibt das Programm gesperrt, bis eine
Entlastung der Waage auf die Hälfte der Übernahmeschwelle (50 Anzeigeschritte)
erfolgt ist.
To activate the change function: Hold down FUNCTION (6) for more than
2 seconds until “rEF 10” appears on the display
If you enter a wrong number, press CF to clear it.
To change the setting:
Briefly press FUNCTION
To store the number:
Hold down FUNCTION for more than 2 seconds
to store this number permanently (in the
non-volatile memory) after you turn off the power
This setting is not canceled by the reset code 9 – – 1°!
Storage Threshold for the Automatic Start Mode
To obtain an added measure of reliability in the automatic mode in order
to avoid an “incorrect start,” a weight value must correspond to a minimum load
of 100 display increments.
Once averaging has been completed, the program will stop until the balance is
unloaded to half the value (50 display increments) of the storage threshold.
51
Arbeitsbeispiel: »Tierwaage mit automatischen Start«
Schritt/Taste
Einstellungen im Beispiel
Code
Tierwaage
mittlere Startverzögerung
Automatischer Start
Automatische Datenausgabe aller Parameter
mit Kennzeichnung
2
3
3
7
7
1
7
8
1
2
7
2*
2*
2
2
alternativ kann gewählt werden:
Code
andere Startverzögerung
Manueller Start
3 7 x
3 8 1
Die Anzahl der Untermessungen ist veränderbar.
Erfolgt keine Eingabe, wird die Mittelwertbildung mit der eingestellten Anzahl
von Untermessungen durchgeführt (werkseitig 10 Untermessungen).
Nach der ersten Betätigung von FUNCTION erfolgen alle weiteren Wägungen
automatisch nach Erfüllung der Startkriterien.
Anwendung: Automatisches Wägen von Tieren mit 20 Untermessungen
Anzeige
Datenausgabe
Tierwaagschale
aufstellen
CF1), TARE
0.00 g
Anzahl der
Untermessungen
ändern, z.B.
20 Untermessungen
einstellen:
FUNCTION länger
als 2 Sekunden
gedrückt halten
ref 10
FUNCTION drücken
ref 20
übernehmen:
FUNCTION länger
als 2 Sekunden
gedrückt halten
ref 20
1.Tier in die
Tierwaagschale setzen
FUNCTION
20
465.20 g
mdef +
x-Net +
1. Tier entnehmen
* = werkseitige Einstellung
52
1) = CF länger als zwei Sekunden gedrückt halten
20
465.20 g
Practical Example: Animal Weighing with Automatic Start Mode
Step/Key
Menu codes used in the example:
Code
Animal weighing
Delay start until dif. is average
Automatic start mode
Automatic output of all parameters
With data ID code
2
3
3
7
7
As an alternative you can select this code:
Code
Other delay start
Manual start mode
3 7 x
3 8 1
1
7
8
1
2
7
2*
2*
2
2
You can change the number of subweighing operations.
If you do not enter a number, averaging will be done based on the number
shown on the display (factory setting: 10 subweighing operations).
Once you press FUNCTION the first time, all further weighing operations
will be performed automatically after they have met the start criteria.
Application: Automatic weighing of animals based on 20 subweighing operations
Readout
Data Output/Printout
Place animal
weighing bowl
on balance
CF1), TARE
0.00 g
Change number
of subweighing
operations; e.g.,
set number to 20:
Hold down
FUNCTION for more
than 2 seconds
ref 10
Press FUNCTION
ref 20
To store: hold down
FUNCTION
for more than
2 seconds
ref 20
Place 1st animal
in bowl
FUNCTION
20
465.20 g
mdef +
x-Net +
20
465.20 g
Remove 1st animal
* = factory setting
1) = press CF for more than two seconds
53
Schritt/Taste
2. Tier in die Tierwaagschale setzen
2. Tier entnehmen
3. Tier in die Tierwaagschale setzen
usw.
Die Kennzeichnung
mdef
x-Net
54
Anzeige
20
388.53 g
20
401.18 g
Datenausgabe
Step/Key
Place 2nd animal
in bowl
mdef +
x-Net +
20
388.53 g
Remove 2nd animal
Place 3rd animal
in bowl
mdef +
x-Net +
20
401.18 g
bezeichnet
20
definierte Anzahl von Messungen
401.18 g errechneter Mittelwert
Repeat above steps
The data ID codes
mdef
x-Net
Readout
20
388.53 g
20
401.18 g
Data Output/Printout
mdef +
x-Net +
20
388.53 g
mdef +
x-Net +
20
401.18 g
mean:
defined number of subweighing operations
20
401.18 g calculated average
GLP/GMP-konforme Protokollierung
GLP/GMP-compliant Record or Printout
Anwendung:
Application:
Einsatz der Waage in Qualitätssicherungssystemen gemäß
ISO/GLP/GMP/EN, usw.
Use of the balance in quality assurance systems in compliance
with ISO, GLP, GMP, EN, etc.
Die Waage kann sowohl alle vollzogenen Justiervorgänge als auch alle Meßwerte
in Übereinstimmung mit den Forderungen der Guten Laborpraxis (GLP)
protokollieren. Im Zusammenwirken mit einem speziellen Meßwertdrucker oder
Rechner wird ein Dokument erstellt, das über die Angabe von Datum, Uhrzeit,
Serien-Nr. und Typenbezeichnung eine eindeutige Zuordnung des Meßwertes zur
benutzten Waage und zum Zeitpunkt der Meßwertermittlung zuläßt.
The balance can record all completed calibration and adjustment operations
and print out data in compliance with the requirements of Good Laboratory
Practice (GLP). The balance, interfaced with a data printer or a computer, creates
a document that records the date, time, serial number and model number,
making it possible to clearly trace data to the balance that generated it and the time
at which it was generated.
Die Anwahl der GLP/GMP-konformen Protokollierung erfolgt durch
Einstellen des entsprechenden Codes im Waagenbetriebsmenü:
Select the GLP/GMP-compliant printout or record mode by setting the
respective code in the balance operating menu:
GLP/GMP-konforme Protokollierung
Code
GLP/GMP-compliant printout/record mode
Code
aus
8 10 1 *
Off
8 10 1 *
nur bei Justier- u. Linearisierfunktion
8 10 2
Only for the calibration and linearization functions
8 10 2
immer ein
8 10 3
Always on
8 10 3
Vorzunehmende Einstellungsänderung für die GLP/GMP-konforme
Protokollierung:
mit Kennzeichnung der Datenausgabe
!
The following menu code setting must be selected in order to obtain
a GLP/GMP-compliant printout/record:
7 2 2
Hinweis!
Bei werkseitiger Einstellung Code 7 2 1 werden keine GLP-/GMP
konforme Protokolle ausgegeben. Außerdem darf die
Datenausgabebedingung »Autoprint« (Code 6 1 4 oder 6 1 5) nicht
angewählt werden.
* = werkseitige Einstellung
With data ID code
!
7 2 2
Important Note
GLP/GMP printouts/records will not be generated if the factory
setting, code 7 2 1, is selected. In addition, do not select the “Auto
print” data output parameter (code 6 1 4 or 6 1 5).
* = factory setting
55
Waage mit GLP/GMP protokollfähigem Gerät betreiben
An die SCALTEC-Waagen kann ein spezieller SCALTEC Printer (Best. Nr: SPR 01)
angeschlossen werden, der für die GLP/GMP-komforme Protokollierung sorgt.
Ein GLP/GMP-gerechter Printer stellt folgende Funktionen zur Verfügung:
– GLP/GMP-Funktion ein- und ausschalten
– Datum/Uhrzeit
– Ident-Nr. zur Kennzeichnung des Arbeitsplatzes/Bedieners
– Protokollierung mit waagenspezifischen Daten
Operating the Balance with a Device that Has a GLP/GMP
Printing or Recording Capability:
You can connect a special SCALTEC printer (order no. SPR 01) to SCALTEC
balances for generating GLP/GMP-compliant printouts.
The GLP/GMP-compliant SCALTEC printer provides you with
the following functions:
– Turns the GLP/GMP function on or off
– Date/time
– ID no. for identifying a workstation/operator
– Printouts with balance-specific data
Protokoll bei Justier- und Linearisierfunktionen
Printout/Record for Calibration and Linearization Functions
Ein Protokoll wird nach Ende folgender Funktionen ausgegeben:
A printout or record is generated at the end of the following functions:
– aller Justier-/Kalibrier- und Lineariersiervorgänge
– All calibration and linearization functions
56
Das Protokoll kann aus folgenden Zeilen bestehen:
-------------------SCALTEC
: Waagenfamilie und Hersteller
Model
SBC22
: Waagentyp
S/N
70500146
: Seriennummer der Waage
Id
: Feld für Eintragung des
Arbeitsplatzes/Bedieners
-------------------Date : 21-Jun-97
: Aktuelles Datum
Start:
10:05
: Startzeit der Anwendung
Cal. :
Extern
: Art der Justierfunktion
(hier »Externes Justieren«)
Set. : 200.00000 g
: Justiergewichtswert
(nur bei »Externes Justieren«)
End :
10:05
: Ende der Anwendung
Name :
: Feld für Unterschrift des
verantwortlichen Bedieners
-------------------Zusätzliche Informationen bei weiteren Justierfunktionen:
Cal. :
Intern
: Internes Justieren
Lin. :
Intern
: Internes Linearisieren
Lin. :
Extern
: Externes Linearisieren
Stat.: Complete
: Statushinweis für Justier- und
Linearisierfunktionen
Cal. :
Test
: Kalibrieren
Diff.:- 0.00004 g
: Meßdaten beim Kalibrieren
The printout can have the following lines:
-------------------SCALTEC
: Balance family and manufacturer
Model
SBC22
: Balance model
S/N
70500146
: Serial number of the balance
Id
: Space for entering a workstation
or operator ID
-------------------Date : 21-Jun-97
: Current date
Start:
10:05
: Time at which the application started
Cal. :
Extern
: Calibration mode (in this case,
“external calibration”)
Set. : 200.00000 g
: Calibration weight value
(only for “external calibration”)
End :
10:05
: End of application
Name :
: Space for signature of the operator
responsible
-------------------Additional information for other calibration modes:
Cal. :
Intern
: Internal calibration
Lin. :
Intern
: Internal linearization
Lin. :
Extern
: External linearization
Stat.: Complete
: Status comment for calibration
or linearization functions
Cal. :
Test
: Calibration test
Diff.:- 0.00004 g
: Data measured during
the calibration test
57
Meßwertprotokoll
Data Printout/Record
Die Ausgabe dieses Protokolls erfolgt durch folgende Bedienung:
To have a data record printed out, perform the following:
– Protokollkopf und ersten Meßwert ausgeben mit der PRINT-Taste (nach dem
Einschalten der Waage oder nach CF)
– Press PRINT (after you have turned on the balance or cleared a function
by pressing CF) to output the printout heading
– weitere Meßwerte ausgeben mit der PRINT Taste
– Press PRINT to output additional data
– Protokollabschluß und Erfassen der Meßwerte beenden mit der CF-Taste
– To end printout generation and recording of data, press CF
Eine GLP/GMP-konforme Protokollierung endet ebenfalls, wenn ein
Justiervorgang eingeleitet wird.
Generation of a GLP/GMP-compliant printout or record is also ended when
a calibration operation is started.
Bei den Anwendungsprogrammen können die Referenzdaten (Parameter) in das
Protokoll aufgenommen werden.
For application programs, the reference data (parameters) can be included
in the printout/record.
Autom. Ausgabe der Referenzdaten (Parameter)
Code
Automatic Output of the Reference Data (Parameters)
aus
7 1 1*
Off
7 1 1*
Referenzwert und Referenzgewicht
7 1 2
Reference %/qty. and reference weight
7 1 2
Code
Die Ausgabe eines Protokolls erfolgt durch folgende Bedienung:
To have a data record printed out, perform the following:
– Protokollkopf und Referenzdaten ausgeben mit der FUNCTION-Taste
(gleichzeitige Übernahme der Referenzdaten)
– Press FUNCTION to output the printout heading and reference data
(the reference data will be stored at the same time)
Während einer aktiven GLP/GMP-konformen Protokollierung werden bei der
Übernahme von Referenzen die entsprechenden Referenzdaten ausgegeben.
If you input and store new reference values while a GLP/GMP-compliant record
is being printed out, the new reference data will be output.
– Meßwerte ausgeben mit der PRINT-Taste
– Press PRINT to output weighing data
– Protokoll beenden mit der CF-Taste (ein Meßwertprotokoll endet ebenfalls,
wenn ein Justiervorgang eingeleitet wird)
– Press CF to end printout generation (this also ends once a calibration or
linearization operation has been started)
– danach die Referenzdaten der Anwendungsprogramme löschen mit der CF-Taste
– Then press CF to clear the reference data for the application programs
58
Das Protokoll kann aus folgenden Zeilen bestehen:
-------------------SCALTEC
: Waagenfamilie und Hersteller
Model
SBC22
: Waagentyp
S/N
70500146
: Seriennummer der Waage
Id
: Feld für Eintragung des
Arbeitsplatzes/Bedieners
-------------------Date : 10-Jun-97
: Aktuelles Datum
Start:
11:15
: Startzeit der Anwendung
Ser. :
: Feld für Eintragung der
Projekt-Nummer
nRef +
10 pcs
: Referenzdaten
(hier »Zählen« – siehe auch Seite 46)
wRef + 0.13400 g
Qnt
+
500 pcs : Meßwerte (hier »errechnete
Stückzahl«)
:
:
End :
12:15
: Ende der Anwendung
Name :
: Feld für Unterschrift des
verantwortlichen Bedieners
--------------------
The printout of the data record can have the following lines:
-------------------SCALTEC
: Balance family and manufacturer
Model
SBC22
: Balance model
S/N
70500146
: Serial number of the balance
Id
: Space for entering a workstation
or operator ID
-------------------Date : 10-Jun-97
: Current date
Start:
11:15
: Time at which the application started
Ser. :
: Space for entering
a project number
nRef +
10 pcs : Reference data (in this case,
“counting” – see also page 46)
wRef + 0.13400 g
Qnt
+
500 pcs : Measured values (in this case,
“calculated piece count”)
:
:
End :
12:15
: End of application
Name :
: Space for signature of the
operator responsible
--------------------
* = werkseitige Einstellung
* = factory setting
59
Technische Daten
Modell
Wägebereich
Ablesbarkeit
Tarierbereich (subtraktiv)
Reproduzierbarkeit (Standardabweichung)*
Linearitätsabweichung
Meßzeit (typisch)
Anpassung an Einsatz- und Aufstellbedingungen
Anzeigefolge (je nach eingestellter Filterstufe)
Zulässige Betriebs-Umgebungstemperatur
Einsatz-Temperaturbereich
Empfindlichkeitsdrift innerhalb +10… +30 °C
Waagschalenabmessung
Wägeraumhöhe
Nettogewicht, ca.
Wählbare Gewichtseinheiten
Wählbare Anwendungsprogramme
Abschaltbare automatische Nullstelleinrichtung
Justiergewichtswert für externes Prüfgewicht (mind. Genauigkeitsklasse)
Netzanschluß, Netzspannung
Netzfrequenz
Leistungsaufnahme (typ.)
Betriebsdauer mit externem Akku SBP 01 bei voller Aufladung, ca.:
Eingebaute Schnittstelle
Serienmäßige Ausstattung/Lieferumfang:
Analysen-Windschutz / Staubschutzhaube
Glasringwindschutz
Steckernetzgerät, länderspezifisch
Libelle
Unterflurwägeeinrichtung
* = Standardabweichung der Reproduzierbarkeit nach DIN 8120, Teil 3
60
g
g
g
g
g
s
s
°C
°C
/°C
mm
mm
kg
g
V~
Hz
VA
h
SBA 31
SBA 32
SBA 33
SBA 41
SBA 42
220
150
65
410
120
0,0001
0,0001
0,0001
0,001
0,001
–220
–150
–65
–410
–120
≤±0,0001
≤±0,0001
≤±0,0001
≤±0,003
≤±0,003
≤±0,0002
≤±0,0002
≤±0,0002
≤±0,002
≤±0,002
≤2
≤2
≤2
≤1,5
≤1,5
4 optimierte Filterstufen
0,1–0,4
+5…+40
+5…+40
+5…+40
0…+40
0…+40
+10… +30
≤±2 · 10–6
Ø 80
Ø 80
Ø 80
Ø 115
Ø 115
225
225
225
–
–
5,4
5,4
5,4
2,8
2,8
g, kg, ct, lb, oz, ozt, tlh, tls, tlt, GN, dwt, mg, /lb, tlc, mom, K, tol, bat, MS
Einheitenumschaltung, Tara-Speicher, Netto-Total, Prozentwägen, Zählen, Tierwägen
serienmäßig
200 (E2)
100 (E2)
50 (E2)
200 (F1)
100 (F1)
über Steckernetzgerät 230 VAC oder 115 VAC, –20%…+15%
48–63
maximal 16; typisch 8
32
RS 232 C-S/V24-V28; 7-bit; -even, -mark, -odd, -space; Übertragungsgeschwindigkeit 150…19200 Baud, 1 oder 2 Stopbits,
Software/Hardware handshake
x
–
x
x
x
x
–
x
x
x
x
–
x
x
x
–
x
x
x
x
–
x
x
x
x
Technical Specifications
Model
Weighing capacity
Readability
Tare range (subtractive)
Repeatability (standard deviation)*
Linearity
Response time (average)
Adaptation to ambient conditions and application requirements
Display update (depends on the filter level selected)
Allowable ambient operating temperature
Operating temperature range
Sensitivity drift within +10…+30 °C
Pan size
Weighing chamber height
Net weight, approx.
Selectable weight units
Selectable application programs
Automatic zero tracking function (can be turned off by menu code)
External calibration weight value (of at least accuracy class…)
Power requirements
Frequency
Power consumption (average)
Hours of operation with fully charged SBP 01 external battery pack, approx.:
Built-in interface port
Standard features/equipment supplied:
Analytical draft shield chamber / Dust cover
Round glass draft shield
AC adapter, varies acc. to country
Level indicator
Hanger for below-balance weighing
g
g
g
g
g
s
s
°C
°C
/°C
mm
mm
kg
g
V~
Hz
VA
h
SBA 31
SBA 32
SBA 33
SBA 41
SBA 42
220
150
65
410
120
0.0001
0.0001
0.0001
0.001
0.001
– 220
–150
–65
–410
–120
≤±0.0001
≤±0.0001
≤±0.0001
≤±0.003
≤±0.003
≤±0.0002
≤±0.0002
≤±0.0002
≤±0.002
≤±0.002
≤2
≤2
≤2
≤1.5
≤1.5
By selection of 1 of 4 optimized filter levels
0.1 - 0.4
+5…+40
+5…+40
+5…+40
0…+40
0…+40
+10…+30
≤±2 · 10–6
Ø 80
Ø 80
Ø 80
Ø 115
Ø 115
225
225
225
–
–
5.4
5.4
5.4
2.8
2.8
g, kg, ct, lb, oz, ozt, tlh, tls, tlt, GN, dwt, mg, /lb, tlc, mom, K, tol, bat, MS
Mass unit conversion by toggling; tare memory; net total; weighing in percent; animal weighing
Standard feature
200 (E2)
100 (E2)
50 (E2)
200 (F1)
100 (F1)
Via AC adapter 230 VAC or 115 VAC, –20%…+15%
48–63
16: maximum; 8: average
32
RS-232 C-S/V24-V28; 7-bit; -even, -mark, -odd, -space; Transmission rates: 150…19,200 baud; 1 or 2 stop bits;
software/hardware handshake
x
–
x
x
x
x
–
x
x
x
x
–
x
x
x
–
x
x
x
x
–
x
x
x
x
* = standard deviation of the reproducibility acc. to DIN 8120, Part 3
61
Technische Daten
Modell
Wägebereich
Ablesbarkeit
Tarierbereich (subtraktiv)
Reproduzierbarkeit (Standardabweichung)*
Linearitätsabweichung
Meßzeit (typisch)
Anpassung an Einsatz- und Aufstellbedingungen
Anzeigefolge (je nach eingestellter Filterstufe)
Zulässige Betriebs-Umgebungstemperatur
Einsatz-Temperaturbereich
Empfindlichkeitsdrift innerhalb +10… +30 °C
Waagschalenabmessung
Nettogewicht, ca.
Wählbare Gewichtseinheiten
Wählbare Anwendungsprogramme
Abschaltbare automatische Nullstelleinrichtung
Justiergewichtswert für externes Prüfgewicht (mind. Genauigkeitsklasse)
Netzanschluß, Netzspannung
Netzfrequenz
Leistungsaufnahme (typ.)
Betriebsdauer mit externem Akku SBP 01 bei voller Aufladung, ca.:
Eingebaute Schnittstelle
Serienmäßige Ausstattung/Lieferumfang:
Steckernetzgerät, länderspezifisch
Libelle
Unterflurwägeeinrichtung
* = Standardabweichung der Reproduzierbarkeit nach DIN 8120, Teil 3
62
g
g
g
g
g
s
s
°C
°C
/°C
mm
kg
g
V~
Hz
VA
h
SBA 51
SBA 52
SBA 53
SBA 61
SBA 62
4100
2220
620
7200
4200
0,01
0,01
0,01
0,1
0,1
–4100
–2220
–620
–7200
–4200
≤±0,03
≤±0,03
≤±0,03
≤±0,2
≤±0,2
≤±0,02
≤±0,02
≤±0,01
≤±0,2
≤±0,1
≤1,5
≤1,5
≤1,5
≤1
≤1
4 optimierte Filterstufen
0,1–0,4
0…+40
+10… +30
≤±2 · 10–6
≤±2 · 10–6
≤±2 · 10–6
≤±5 · 10–6
≤±5 · 10–6
180 x180
180 x180
Ø 115
180 x180
180 x180
3,5
3,5
1,9
2,8
2,8
g, kg, ct, lb, oz, ozt, tlh, tls, tlt, GN, dwt, mg, /lb, tlc, mom, K, tol, bat, MS
Einheitenumschaltung, Tara-Speicher, Netto-Total, Prozentwägen, Zählen, Tierwägen
serienmäßig
2000 (F1)
2000 (F1)
500 (F2)
5000 (F2)
2000 (F2)
über Steckernetzgerät 230 VAC oder 115 VAC, –20%…+15%
48–63
maximal 16; typisch 8
25
25
25
45
45
RS 232 C-S/V24-V28; 7-bit; -even, -mark, -odd, -space; Übertragungsgeschwindigkeit 150…19200 Baud, 1 oder 2 Stopbits,
Software/Hardware handshake
x
x
x
x
x
x
x
x
x
x
x
–
x
x
–
Technical Specifications
Model
Weighing capacity
Readability
Tare range (subtractive)
Repeatability (standard deviation)*
Linearity
Response time (average)
Adaptation to ambient conditions and application requirements
Display update (depends on the filter level selected)
Allowable ambient operating temperature
Operating temperature range
Sensitivity drift within +10…+30 °C
Pan size
Net weight, approx.
Selectable weight units
Selectable application programs
Automatic zero tracking function (can be turned off by menu code)
External calibration weight value (of at least accuracy class…)
Power requirements
Frequency
Power consumption (average)
Hours of operation with fully charged SBP 01 external battery pack, approx.:
Built-in interface port
Standard features/equipment supplied:
AC adapter, varies acc. to country
Level indicator
Hanger for below-balance weighing
g
g
g
g
g
s
s
°C
°C
/°C
mm
kg
g
V~
Hz
VA
h
SBA 51
SBA 52
SBA 53
SBA 61
SBA 62
4100
2220
620
7200
4200
0.01
0.01
0.01
0.1
0.1
–4100
–2220
–620
–7200
–4200
≤±0.03
≤±0.03
≤±0.03
≤±0.2
≤±0.2
≤±0.02
≤±0.02
≤±0.01
≤±0.2
≤±0.1
≤1.5
≤1.5
≤1.5
≤1
≤1
By selection of 1 of 4 optimized filter levels
0.1–0.4
0…+40
+10…+30
≤±2 · 10–6
≤±2 · 10–6
≤±2 · 10–6
≤±5 · 10–6
≤±5 · 10–6
180 x180
180 x180
Ø 115
180 x180
180 x180
3.5
3.5
1.9
2.8
2.8
g, kg, ct, lb, oz, ozt, tlh, tls, tlt, GN, dwt, mg, /lb, tlc, mom, K, tol, bat, MS
Mass unit conversion by toggling; tare memory; net total; weighing in percent; animal weighing
Standard feature
2000 (F1)
2000 (F1)
500 (F2)
5000 (F2)
2000 (F2)
Via AC adapter 230 VAC or 115 VAC; –20%…+15%
48–63
16: maximum; 8: average
25
25
25
45
45
RS-232 C-S/V24-V28; 7-bit; -even, -mark, -odd, -space; Transmission rates: 150…19,200 baud; 1 or 2 stop bits;
software/hardware handshake
x
x
x
x
x
x
x
x
x
x
x
–
x
x
–
* = standard deviation of the reproducibility acc. to DIN 8120, Part 3
63
Technische Daten
Geeichte Modelle mit EG-Bauartzulassung
Modell
Genauigkeitsklasse
Wägebereich Max.*
Ziffernschritt d*
Eichwert e*
Mindestlast Min.*
Tarierbereich (subtraktiv)
Verwendungsbereich nach RL*
Meßzeit (typisch)
Anpassung an Einsatz- und Aufstellbedingungen
Anzeigefolge (je nach eingestellter Filterstufe)
Zulässige Betriebs-Umgebungstemperatur
Einsatz-Temperaturbereich
Waagschalenabmessung
Wägeraumhöhe (Nutzmaße)
Nettogewicht, ca.
Wählbare Gewichtseinheiten
Wählbare Anwendungsprogramme
Abschaltbare automatische Nullstelleinrichtung
Netzanschluß, Netzspannung
Netzfrequenz
Leistungsaufnahme (typ.)
Betriebsdauer mit externem Akku SBP 01 bei voller Aufladung, ca.:
Eingebaute Schnittstelle
Serienmäßige Ausstattung/Lieferumfang:
Staubschutzhaube
Steckernetzgerät, länderspezifisch
Integrierte Justiergewichtsschaltung
Libelle
g
mg
g
g
g
g
s
s
°C
°C
mm
mm
kg
V~
Hz
VA
h
SBC 22
k
60/210
0,01/0,1
0,001
0,001
–210
0,001–210
≤12/3
4 optimierte Filterstufen
0,2–0,4
+5…+40
+15…+25
Ø 80
225
6,6
g, mg
Einheitenumschaltung, Tara-Speicher, Netto-Total, Prozentwägen, Zählen,Tierwägen
serienmäßig
über Steckernetzgerät 230 VAC oder 115 VAC, –20%…+15%
48–63
maximal 16; typisch 8
25
RS 232 C-S/V24-V28; 7-bit; -even, -odd; Übertragungsgeschwindigkeit 150…19200 Baud, 1 oder 2 Stopbits,
Software/Hardware handshake
x
x
x
x
* = Richtlinie 90/384/EWG für nichtselbsttätige Waagen für den Bereich des Europäischen Wirtschaftsraumes
64
Technical Specifications
Verified Balances with EC Type Approval
Model
Accuracy class
Weighing capacity Max.*
Scale interval d*
Verification scale interval e*
Minimum capacity Min.*
Tare range (subtractive)
Range of use according to Directive No. 90/384/EEC*
Response time (average)
Adaptation to ambient conditions and application requirements
Display update (depends on the filter level selected)
Allowable ambient operating temperature
Operating temperature range
Pan size
Weighing chamber height (effect. dimens.)
Net weight approx.
Selectable weight units
Selectable application programs
Automatic zero tracking function (can be turned off by menu code)
Power requirements
Frequency
Power consumption (average)
Hours of operation with fully charged SBP 01 external battery pack, approx.:
Built-in interface port
Standard features/equipment supplied:
Dust cover
AC adapter, varies acc. to country
Built-in calibration weight
Level indicator
g
mg
g
g
g
g
s
s
°C
°C
mm
mm
kg
V~
Hz
VA
h
SBC 22
k
60/210
0.01/0.1
0.001
0.001
–210
0.001–210
≤12/3
By selection of 1 of 4 optimized filters
0.2–0.4
+5…+40
+15…+25
Ø 80
225
6,6
g, mg
Mass unit conversion by toggling; tare memory; net total; weighing in percent; animal weighing
Standard feature
Via AC adapter 230 VAC or 115 VAC, –20%…+15%
48–63
16: maximum; 8: average
25
RS-232 C-S/V24-V28; 7-bit; -even, -odd; Transmission rates: 150…19200 baud; 1 or 2 stop bits;
software/hardware handshake
x
x
x
x
* = EC Directive No. 90/384/EEC non-automatic weighing instruments applicable in the E.U. and within the European Economic Area
65
Technische Daten
Modell
Genauigkeitsklasse
Wägebereich Max.*
Ziffernschritt d*
Eichwert e*
Mindestlast Min.*
Tarierbereich (subtraktiv)
Verwendungsbereich nach RL*
Meßzeit (typisch)
Anpassung an Einsatz- und Aufstellbedingungen
Anzeigefolge (je nach eingestellter Filterstufe)
Zulässige Betriebs-Umgebungstemperatur
Einsatz-Temperaturbereich
Waagschalenabmessung
Wägeraumhöhe
Nettogewicht, ca.
Wählbare Gewichtseinheiten
anwählbare Anwendungsprogramme
Abschaltbare automatische Nullstelleinrichtung
Netzanschluß, Netzspannung
Netzfrequenz
Leistungsaufnahme (typ.)
Betriebsdauer mit externem Akku SBP 01 bei voller Aufladung, ca.:
Eingebaute Schnittstelle
g
mg
g
g
g
g
s
s
°C
°C
mm
mm
kg
V~
Hz
VA
h
SBC 31
SBC 32
SBC 33
SBC 41
SBC 42
k
k
k
K
K
220
150
65
410
120
0,1
0,1
0,1
1
1
0,001
0,001
0,001
0,01
0,01
0,01
0,01
0,01
0,02
0,02
–220
–150
–65
–410
–120
0,01–220
0,01–150
0,01–65
0,02–320
0,02–120
≤2
≤2
≤2
≤1.5
≤1.5
4 optimierte Filterstufen
0,1–0,4
+5…+40
+5…+40
+5…+40
0…+40
0…+40
+15…+25
+15…+25
+15…+25
+10…+30
+10…+30
Ø 80
Ø 80
Ø 80
Ø 115
Ø 115
225
225
225
–
–
5,3
5,3
5,3
4,7
4,7
g, mg
g, mg
g, mg
g, kg
g, kg
Einheitenumschaltung, Tara-Speicher, Netto-Total, Prozentwägen, Zählen,Tierwägen
serienmäßig
über Steckernetzgerät 230 VAC oder 115 VAC, –20%…+15%
48–63
maximal 16; typisch 8
32
RS 232 C-S/V24-V28; 7-bit; -even, -odd; Übertragungsgeschwindigkeit 150…19200 Baud, 1 oder 2 Stopbits,
Software/Hardware handshake
Serienmäßige Ausstattung/Lieferumfang:
Analysen-Windschutz
x
x
Staubschutzhaube
x
x
Glasringwindschutz
–
–
Integrierte Justiergewichtsschaltung
x
x
Steckernetzgerät, länderspezifisch
x
x
Libelle
x
x
* = Richtlinie 90/384/EWG für nichtselbsttätige Waagen für den Bereich des Europäischen Wirtschaftsraumes
66
x
x
–
x
x
x
–
–
x
x
x
x
–
–
x
x
x
x
Technical Specifications
Model
Accuracy class
Weighing capacity Max.*
Scale interval d*
Verification scale interval e*
Minimum capacity Min.*
Tare range (subtractive)
Range of use according to Directive No. 90/384/EEC*
Response time (average)
Adaptation to ambient conditions and application requirements
Display update (depends on the filter level selected)
Allowable ambient operating temperature
Operating temperature range
Pan size
Weighing chamber height
Net weight approx.
Selectable weight units
Selectable application programs
Automatic zero tracking function (can be turned off by menu code)
Power requirements
Frequency
Power consumption (average)
Hours of operation with fully charged SBP 01 external battery pack, approx.:
Built-in interface port
g
mg
g
g
g
g
s
s
°C
°C
mm
mm
kg
V~
Hz
VA
h
SBC 31
SBC 32
SBC 33
SBC 41
k
k
k
K
220
150
65
410
0.1
0.1
0.1
1
0.001
0.001
0.001
0.01
0.01
0.01
0.01
0.02
–220
–150
–65
–410
0.01–220
0.01–150
0.01–65
0.02–320
≤2
≤2
≤2
≤1.5
By selection of 1 of 4 optimized filters
0.1–0.4
+5…+40
+5…+40
+5…+40
0…+40
+15…+25
+15…+25
+15…+25
+10…+30
Ø 80
Ø 80
Ø 80
Ø 115
225
225
225
–
5.3
5.3
5.3
4.7
g, mg
g, mg
g, mg
g, kg
Mass unit conversion by toggling; tare memory; net total; weighing in percent; animal weighing
Standard feature
Via AC adapter 230 VAC or 115 VAC, –20%…+15%
48–63
16: maximum; 8: average
32
RS-232 C-S/V24-V28; 7-bit; -even, -odd; Transmission rates: 150…19200 baud; 1 or 2 stop bits;
software/hardware handshake
Standard features/equipment supplied:
Analytical draft shield
x
x
Dust cover
x
x
Round glass draft shield
–
–
Built-in calibration weight
x
x
AC adapter, varies acc. to country
x
x
Level indicator
x
x
* = EC Directive No. 90/384/EEC for Non-Automatic Weighing Instruments applicable in the E.U. and within the European Economic Area
x
x
–
x
x
x
–
–
x
x
x
x
SBC 42
K
120
1
0.01
0.02
–120
0.02–120
≤1.5
0…+40
+10…+30
Ø 115
–
4.7
g, kg
–
–
x
x
x
x
67
Technische Daten
Modell
Genauigkeitsklasse
Wägebereich Max.*
Ziffernschritt d*
Eichwert e*
Mindestlast Min.*
Tarierbereich (subtraktiv)
Verwendungsbereich nach RL*
Meßzeit (typisch)
Anpassung an Einsatz- und Aufstellbedingungen
Anzeigefolge (je nach eingestellter Filterstufe)
Zulässige Betriebs-Umgebungstemperatur
Einsatz-Temperaturbereich
Waagschalenabmessung
Nettogewicht, ca.
Wählbare Gewichtseinheiten
Wählbare Anwendungsprogramme
Abschaltbare automatische Nullstelleinrichtung
Netzanschluß, Netzspannung
Netzfrequenz
Leistungsaufnahme (typ.)
Betriebsdauer mit externem Akku SBP 01 bei voller Aufladung, ca.:
Eingebaute Schnittstelle
Serienmäßige Ausstattung/Lieferumfang:
Steckernetzgerät, länderspezifisch
Integrierte Justiergewichtsschaltung
Libelle
g
g
g
g
g
g
s
s
°C
°C
mm
kg
V~
Hz
VA
h
SBC 51
SBC 52
SBC 53
SBC 61
K
K
K
K
4100
2200
620
6200
0,01
0,01
0,01
0,1
0,1
0,1
0,1
1
0,5
0,5
0,5
5
–4100
–2200
–620
–6200
0,5–4100
0,5–2200
0,5–620
5–6200
≤1.5
≤1.5
≤1.5
≤1
4 optimierte Filterstufen
0,1–0,4
0…+40
+10…+30
180 x180
180 x180
Ø 115
180 x180
4,4
4,2
4,7
4,4
g, kg
Einheitenumschaltung, Tara-Speicher, Netto-Total, Prozentwägen, Zählen,Tierwägen
serienmäßig
über Steckernetzgerät 230 VAC oder 115 VAC, –20%…+15%
48–63
maximal 16; typisch 8
25
RS 232 C-S/V24-V28; 7-bit; -even, -odd; Übertragungsgeschwindigkeit 150…19200 Baud, 1 oder 2 Stopbits,
Software/Hardware handshake
x
x
x
* = Richtlinie 90/384/EWG für nichtselbsttätige Waagen für den Bereich des Europäischen Wirtschaftsraumes
68
x
x
x
x
x
x
x
x
x
Technical Specifications
Model
Accuracy class
Weighing capacity Max.*
Scale interval d*
Verification scale interval e*
Minimum capacity Min.*
Tare range (subtractive)
Range of use according to Directive No. 90/384/EEC*
Response time (average)
Adaptation to ambient conditions and application requirements
Display update (depends on the filter level selected)
Allowable ambient operating temperature
Operating temperature range
Pan size
Net weight approx.
Selectable weight units
Selectable application programs
Automatic zero tracking function (can be turned off by menu code)
Power requirements
Frequency
Power consumption (average)
Hours of operation with fully charged SBP 01 external battery pack, approx.:
Built-in interface port
Standard features/equipment supplied:
AC adapter, varies acc. to country
Built-in calibration weight
Level indicator
g
g
g
g
g
g
s
s
°C
°C
mm
kg
V~
Hz
VA
h
SBC 51
SBC 52
SBC 53
SBC 61
K
K
K
K
4100
2200
620
6200
0.01
0.01
0.01
0.1
0.1
0.1
0.1
1
0.5
0.5
0.5
5
–4100
–2200
–620
–6200
0.5–4100
0.5–2200
0.5–620
5–6200
≤1.5
≤1.5
≤1.5
≤1
By selection of 1 of 4 optimized filters
0.1–0.4
0…+40
+10…+30
180 x 180
180 x 180
Ø 115
180 x 180
4.4
4.2
4.7
4.4
g, kg
Mass unit conversion by toggling; tare memory; net total; weighing in percent; animal weighing
Standard feature
Via AC adapter 230 VAC or 115 VAC, –20%…+15%
48–63
16: maximum; 8: average
25
RS-232 C-S/V24-V28; 7-bit; -even, -odd; Transmission rates: 150…19200 baud; 1 or 2 stop bits;
software/hardware handshake
x
x
x
x
x
x
x
x
x
x
x
x
* = EC Directive No. 90/384/EEC for Non-Automatic Weighing Instruments applicable in the E.U. and within the European Economic Area
69
Konformitätserklärungen
EU-Richtlinien und Europäische Normen:
Diese SCALTEC Waage erfüllt die Anforderungen der Richtlinien des Rates der EU:
89/336/EWG »Elektromagnetische Verträglichkeit (EMV)«
Hinweis:
Modifikationen der Geräte sowie der Anschluß von nicht von SCALTEC
gelieferten Kabeln oder Geräten unterliegen der Verantwortung des Betreibers
und sind von diesem entsprechend zu prüfen und falls erforderlich zu
korrigieren. SCALTEC stellt auf Anfrage Angaben zur Betriebsqualität zur
Verfügung (gemäß den o.g. Normen zur Störfestigkeit).
73/23/EWG »Elektrische Betriebsmittel zur Verwendung
innerhalb bestimmter Spannungsgrenzen«
Bei Verwendung elektrischer Betriebsmittel in Anlagen und
Umgebungsbedingungen mit erhöhten Sicherheitsanforderungen sind die
Auflagen gemäß den zutreffenden Errichtungsbestimmungen zu beachten.
Informationen über die aktuellen in Ihrem Land gültigen gesetzlichen
Vorschriften erfragen Sie bitte bei Ihrem SCALTEC-Kundendienst.
Zusätzlich für Waagen zur Verwendung im gesetzlichen Meßwesen:
Richtlinie 90/384/EWG »Nichtselbsttätige Waagen«
Diese Richtlinie regelt die Durchführung der EG-Eichung durch den Hersteller,
sofern eine EG-Bauartzulassung vorliegt (siehe Seite 72) und der Hersteller für
diese Tätigkeiten von einer von der Kommission der Europäischen
Gemeinschaften benannten Stelle akkreditiert ist.
Der Hersteller wurde hierzu am 15. Februar 1993 akkreditiert.
Nacheichungen in Deutschland
Die Gültigkeit der Eichung endet mit Ablauf des übernächsten Kalenderjahres.
Bei einem Einsatz der Waage in der Füllmengenkontrolle, gemäß Verordnung
über Fertigpackungen, endet die Gültigkeit mit Ablauf des folgenden
Kalenderjahres. Nacheichungen müssen z. Zt. von einem Eichbeamten
durchgeführt werden. Eine rechtzeitige Nacheichung ist beim örtlichen Eichamt
anzumelden. Bitte beachten Sie ggf. die Änderungen des Gesetzgebers.
Der Betreiber ist für die Nacheichung verantwortlich.
Nacheichungen im Europäischen Ausland
Die Eichgültigkeitsdauer richtet sich nach nationalen Vorschriften des Landes,
in dem die Waage verwendet wird. Es liegt in der Verantwortung des Betreibers,
die entsprechenden Stellen rechtzeitig zu informieren.
70
Declarations of Conformity
Council Directives of the EU and European Standards:
This SCALTEC balance meets the requirements of the following
Directives issued by the Council of the European Union.
Council Directive 89/336/EU “Electomagnetic compatibility (EMC)”
Important Note:
The operator shall be responsible for any modifications to SCALTEC equipment
and for any connections of cables or equipment not supplied by SCALTEC
and must check and, if necessary, correct these modifications and connections.
On request, SCALTEC will provide information on the minimum
operating specifications (in accordance with the Standards listed above
for defined immunity to interference).
73/23/EEC “Electrical equipment designed for use within certain
voltage limits”
Additional Directive for Weighing Instruments Used in Legal Metrology:
Directive 90/384/EEC “Non-automatic weighing instruments”
This Directive also regulates the performance of the EC verification by the
manufacturer, provided that an EC Type-Approval Certificate has been issued
(see page 72) and the manufacturer has been accredited by an officer of a
Notified Body registered at the Commission of the European Community for
performing such verification. On February 15, 1993, the manufacturers
received accreditation for performing verification.
Subsequent Verifications within the European Countries
The validity of the verification will become void in accordance with the national
regulations of the country in which the balance is used. For information on
verification and legal regulations currently applicable in your country, and to
obtain the names of the persons to contact, please contact your local SCALTEC
office, dealer or service center.
If you use electrical equipment in installations and under ambient conditions
requiring higher safety standards, you must comply with the provisions
as specified in the applicable regulations for installations in your country.
For information on the current legal requirements of your country,
please contact your local SCALTEC customer service office.
71
Konformitätserklärungen
72
Zubehör (Optionen)
Accessories (Options)
Artikel
Best.Nr:
Product
Order No.:
Printer
mit GLP/GMP Funktion und Ausdruck
von Wägeergebis, Datum/Uhr und Statistik
SPR 01
Printer
with GLP/GMP function; prints the weighing results
along with the date/time; statistics functions
Print speed approx. lines/sec. 1.5
Printer housing (W x D x H) in mm 150 x 138 x 43
in inches 5.9 x 5.4 x 1.7
Rechargeable battery pack
with a battery-level indicator (LED); can be recharged using
the AC adapter (time it takes to charge the discharged battery pack:
15 hours); see “Technical Specifications” for hours of operation
Density determination kit
for determining the density and the specific weight of solids;
for SBC 21, SBA/SBC 31 and SBA/SBC 32
External calibration weights:
For Balance Model
Accuracy Class (OIML) Weight in g
SPR 01
Druckgeschwindigkeit ca. Zeilen/sec. 1,5
Druckergehäuse (B x T x H) in mm 150 x 138 x 43
Externer Akku
wiederaufladbar über Netzgerät mit optischer Ladezustandsanzeige
(Aufladedauer nach Entladung 15 Stunden); Betriebsdauer siehe
Abschnitt »Technische Daten«
SBP 01
Dichte-Kit
zur Bestimmung der Dichte und des spezifischen Gewichtes
von Festkörpern für SBC 21, SBA/SBC 31, SBA/SBC 32
SDK 01
Externe Justiergewichte:
für Waagenmodell Genauigkeitsklasse (OIML)
Gewicht in g
SBA 31
SBA 32
SBA 33
SBA 41
SBA 42
SBA 51
SBA 52
SBA 53
SBA 61
SBA 62
200
100
50
200
100
2000
2000
500
5000
2000
E2
E2
E2
F1
E2
F1
F1
F2
F1
F1
SWE 21
SWE 22
SWE 23
SWE 43
SWE 22
SWE 42
SWE 42
SWE 62
SWE 41
SWE 42
SBA 31
SBA 32
SBA 33
SBA 41
SBA 42
SBA 51
SBA 52
SBA 53
SBA 61
SBA 62
E2
E2
E2
F1
E2
F1
F1
F2
F1
F1
200
100
50
200
100
2000
2000
500
5000
2000
SBP 01
SDK 01
SWE 21
SWE 22
SWE 23
SWE 43
SWE 22
SWE 42
SWE 42
SWE 62
SWE 41
SWE 42
73
SCALTEC
Instruments GmbH
Robert-Bosch-Breite 10
37079 Goettingen, Germany
Phone (+49/551) 209773-0
Telefax (+49/551) 209773-9
Internet: http://www.scaltec.com
E-mail: [email protected]
98648-007-63
Printed in Germany
on paper that has been bleached
without any use of chlorine · W198.02 · KT
Publication No. WXX6032-a01035
Copyright by Scaltec Instruments GmbH, Goettingen, Germany.
All rights reserved.
No part of this publication may be reprinted or translated in
any form or by any means without the prior written permission
of Scaltec Instruments GmbH.
The status of the information, specifications and illustrations
in this manual is indicated by the date given below.
Scaltec Instruments GmbH reserves the right to make changes to the technology,
features, specifications, and design of the equipment without notice.
Status: March 2001, Scaltec Instruments GmbH, Goettingen, Germany.