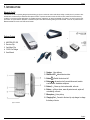
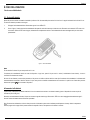
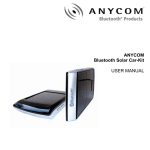
Download Anycom HCC-250 User manual

Transcript
ANYCOM
Bluetooth “Car-Kit”
HCC-250
USER MANUAL
Multilingual USER MANUAL
•
Deutsch
•
English
•
Français
•
Español
•
Nederlands
•
Português
•
Italiano
BEDIENUNGSANLEITUNG
Bluetooth Car-Kit HCC-250
INHALT
1.
2.
3.
4.
5.
6.
7.
8.
9.
10.
11.
Einführung
Lieferumfang
Benutzung des ANYCOM HCC-250 Car-Kits
2.1. Laden des Akku
2.2. Installation Ihres HCC-250 Car-Kits
2.3. Ein- und Ausschalten des ANYCOM HCC-250 Car-Kit
2.4. Koppeln und Verbinden des Car-Kit’s mit einem anderen Bluetooth Gerät
2.4.1 Koppeln (Pairen) Ihres ANYCOM HCC-250 mit einem Bluetooth Mobiltelefon
(oder anderes Gerät)
2.4.2 Löschen aller Kopplungsinformationen
2.4.3 Verbinden des ANYCOM HCC-250 Car-Kit mit dem Bluetooth Gerät
2.5. Anruf-Funktionen
2.5.1. Standard Anruf Funktionen
2.5.2. Stummschaltung (Mute)
2.5.3. Übertragen eines Gesprächs zwischen Car-Kit und Mobiltelefon
2.5.4. Sprachwahl
2.5.5. Erweiterte Anruffunktionen
2.6
Audiowiedergabe (A2DP Profil)
2.6.1 Verbinden eines Mobiltelefons mit A2DP Profil
2.6.2 Fernbedienungs-Funktionen (AVRCP Profil)
2.7
Einstellen der Lautstärke
2.8
Koppeln und Verbinden des Car-Kits mit anderen Bluetooth Geräten
Kurzanleitung
3.1
LED Statusanzeige
3.2
Kurzanleitung
Wartung
Wichtige Information und häufig gestellte Fragen (FAQs)
Sicherheitshinweise
Zulassungen
Fcc Statement
CE-Declaration
Copyright
Gewährleistungsinformationen
2
2
3
3
4
4
5
5
5
5
5
6
6
6
6
6
6
6
7
7
7
7
7
7
8
11
12
13
13
13
14
14
14
Seite 2
1. EINFÜHRUNG
Bluetooth Car-Kit
Dieses ANYCOM Bluetooth Car-Kit wurde entwickelt, um Telefonate mit Ihrem Handy führen zu können, ohne das Mobiltelefon am Ohr zu halten. Durch die
Verwendung der Bluetooth Technologie verbindet sich das Car-Kit drahtlos mit Ihrem Mobiltelefon oder PDA. Das Car-Kit kann auch außerhalb des
Fahrzeugs, z.B. in einer Büroumgebung als mobile Freisprecheinrichtung eingesetzt werden und lässt sich auch für Voice over IP Anwendungen (VoIP) wie
beispielsweise Skype in Verbindung mit einem PC verwenden.
Lieferumfang
2.
5.
1.
2.
3.
4.
5.
ANYCOM HCC-250 Car-Kit
Klipp zur Befestigung an der Sonnenblende
1.
Klipp zur Befestigung am Lüftungsschlitz
12/24V KFZ Ladeadapter
Bedienungsanleitung
3.
4.
1. Lautsprecher:Audio-Wiedergabe
2. Rote/blaue LED:Statusanzeige
3. Taste
:Car-Kit ein-/ausschalten
4. Taste
: Gespräch annehmen/beenden, verbinden/trennen,
Gespräch zwischen Telefon und Car-Kit
5. Taste ╋:Lautstärke, Wahlwiederholung, Stummschaltung
6. Taste ━:Lautstärke, löschen aller Kopplungen, Anruf ablehnen,
Sprachwahl, Stummschaltung
7. Mikrofone:Nimmt Sprache auf
8. Ladebuchse:Eingang für USB-Ladekabel / KFZ-Adapter
Abbildung 1: Übersicht
Deutsch
Seite 3
2. BENUTZUNG DES ANYCOM HCC-250 CAR-KITS
Laden und Verwendung des Akku
2.1 Laden des Akku
Dieses Car-Kit wird über einen fest eingebauten, leistungsfähigen Lithium-Polymer Akku versorgt. Wenn Sie das Car-Kit zum ersten Mal laden, beträgt die
Ladezeit etwa vier Stunden; danach dauert der Ladevorgang etwa 2-3 Stunden. Der Akku wird wie folgt geladen:
1.
Verbinden Sie das USB Ladekabel mit dem KFZ Ladeadapter oder mit der USB Buchse eines PCs (der PC muss eingeschaltet sein, um die
Ladespannung liefern zu können).
2.
Verbinden Sie das Ladekabel gemäß Abbildung 2 mit der Ladebuchse des Car-Kits, um den Ladevorgang zu starten. Die rote und die blaue Status LED
leuchten während des Ladevorgangs. Wenn die rote Status-LED erlischt ist der Akku vollständig geladen. Trennen Sie dann das Car-Kit vom Ladekabel.
Abbildung 2: Laden des Akkus
Hinweis:
Wir empfehlen, das Car-Kit während des Ladevorgangs nicht zu benutzen.
Bitte beachten Sie, dass das Einstecken des Ladekabels ein “Reset” des Car-Kits auslöst und ein laufendes Gespräch in diesem Fall unterbrochen wird. Das
gedrückt
Gespräch wird dann automatisch zurück auf das Mobiltelefon übertragen. Um sich wieder mit dem Car-Kit zu verbinden, muss kurz die Taste
werden.
Akku Information
Mit dem voll geladenen Akku bietet das Car-Kit eine Sprechzeit von bis zu 14 Stunden oder eine Standby Zeit (Car-Kit eingeschaltet ohne Bluetooth Verbindung)
von bis zu 25 Tagen.
Wenn das Car-Kit alle 20 Sekunden einen Signalton sendet und die blaue und rote Status LED abwechselnd alle 3 Sekunden aufleuchten, muss der Akku wie
oben beschrieben wieder neu aufgeladen werden.
Hinweis:
Übermäßiges Laden des Akkus reduziert dessen Kapazität und Lebensdauer. Wenn ein vollgeladener Akku nicht benutzt wird, reduziert sich die Ladung im
Laufe der Zeit. Extreme Temperaturen und Temperaturschwankungen können dem Akku schaden und reduzieren ebenfalls Kapazität und Lebensdauer.
Deutsch
Seite 4
2.2 Installation Ihres HCC-250 Car-Kits
Das ANYCOM HCC-250 Car-Kit lässt sich einfach und schnell an der Sonnenblende oder an den Lüftungsschlitzen Ihres Fahrzeugs befestigen. Wie die
Abbildungen 3 und 4 zeigen, befinden sich zwei Magnethalterungen auf der Rückseite des Car-Kits. An diese Halterungen werden die Klips zur Befestigung an der
Sonneblende oder den Lüftungsschlitzen befestigt.
Wir empfehlen Ihnen, zunächst den Klipp an der Sonneblende oder den Lüftungsschlitz zu befestigen und dann das Car-Kit aufzusetzen.
Den Klipp zur Befestigung an den Lüftungsschlitzen können Sie, wie in Abbildung 5 gezeigt, anpassen.
Hinweis:
Das Mikrofon des Car-Kits sollte auf Ihren Kopf hin ausgerichtet sein, um eine optimale Kommunikationsqualität zu gewährleisten.
Magnethalter
Klip für Lüftungsschlitz
Klip für Sonnenblende
Abbildung 3: Befestigung des Magnethalters für die Sonnenblende
Halter für Lüftungsschlitz
(vertikal anpassen)
Abbildung 4: Befestigung des Magnethalters für den Lüftungsschlitz
Halter für Lüftungsschlitz
(horizontal anpassen)
Metallschiene
Abbildung 5: Anpassung des Halters für den Lüftungsschlitz (Vertikal oder horizontal)
Etwas nach vorne ziehen
und dann herunter drücken
Abbildung 6: Halter von der Metallschiene abnehmen
Das Car-Kit kann auch außerhalb des Fahrzeugs als portable Freisprecheinrichtung eingesetzt werden, zum Beispiel im Büro oder zuhause.
2.3 Ein- und Ausschalten des ANYCOM HCC-250 Car-Kit
Einschalten des Car-Kit’s: Drücken Sie die Taste
und halten Sie diese für drei Sekunden gedrückt. Zwei Signaltöne erklingen und die blaue LED blinkt
dreimal kurz und danach alle drei Sekunden einmal. Das Car-Kit ist jetzt eingeschaltet.
Ausschalten des Car-Kit’s: Drücken Sie die Taste
dreimal und danach ist das Car-Kit ausgeschaltet.
und halten Sie diese für drei Sekunden gedrückt. Sie hören dann zwei Signaltöne, die rote LED blinkt
Deutsch
Seite 5
2.4 Koppeln und Verbinden des Car-Kit’s mit einem anderen Bluetooth Gerät
2.4.1 Koppeln (Pairen) Ihres ANYCOM HCC-250 mit einem Bluetooth Mobiltelefon (oder anderes Gerät)
Bevor Sie das Car-Kit zum Telefonieren nutzen können, muss es mit dem Mobiltelefon gekoppelt (Pairing) werden. Dies ist ein einmaliger Vorgang, der
die Verbindung zwischen Telefon und Car-Kit autorisiert. Dabei speichert das Telefon die Kennung des HCC-250 und ermöglicht so eine gesicherte und
verschlüsselte Verbindung zwischen dem Car-Kit und Ihrem Telefon.
Die Kopplung wird wie folgt vorgenommen:
1.
Bringen Sie das ANYCOM HCC-250 in die Nähe des Mobiltelefons und stellen Sie sicher, dass das Car-Kits ausgeschaltet und das Mobiltelefon
eingeschaltet ist.
2.
Drücken Sie die Taste
und halten Sie diese für mindestens sechs Sekunden gedrückt, bis die blaue und die rote LED abwechselnd aufleuchten. Das
Car-Kit befindet sich jetzt im Kopplungsmodus.
3.
Folgen Sie jetzt den Anweisungen Ihres Mobiltelefons, um nach Bluetooth Geräten zu suchen. Nach einer Weile wird das Telefon eine Liste von Bluetooth
Geräten anzeigen, die es gefunden hat.
4.
Wählen Sie ANYCOM HCC-250 aus dieser Liste aus und folgen Sie den weiteren Anweisungen Ihres Telefons.
5.
Im Laufe der Installation werden Sie aufgefordert einen PIN oder Passkey einzugeben. Geben Sie “0000” (Vier Nullen) ein und folgen Sie den weiteren
Anweisungen Ihres Telefons. Danach sollte der Kopplungsvorgang abgeschlossen sein und die blaue LED blinkt dreimal kurz innerhalb von zwei
Sekunden. Dies zeigt an, dass die Kopplung erfolgreich abgeschlossen wurde und die beiden Geräte miteinander verbunden sind.
Hinweis:
Wenn die Kopplung erfolgreich war, erlischt die rote LED. Die blaue LED blinkt dreimal kurz innerhalb von zwei Sekunden. Wenn Ihr Mobiltelefon anzeigt, dass die
Kopplung (Pairing) fehlgeschlagen ist und sich das Car-Kit noch im Kopplungsmodus befindet, dann wiederholen Sie die Schritte 3 bis 5.
Das Car-Kit verbleibt etwa zwei Minuten im Kopplungsmodus. Wenn die Kopplung nicht innerhalb von zwei Minuten abgeschlossen ist, wechselt das HCC-250 in
den Standby-Modus (ohne Bluetooth Verbindung). Um das Car-Kit wieder in den Kopplungsmodus zu versetzen, müssen Sie es zunächst ausschalten und dann
die Schritte 2-5 wiederholen.
2.4.2 Löschen aller Kopplungsinformationen
Dieses Car-Kit kann mit bis zu 8 Bluetooth Geräten gekoppelt werden. Um alle Kopplungsinformationen zu löschen, drücken Sie die – Taste für mindestens drei
Sekunden, während sich das Car-Kit im Kopplungsmodus befindet. Der Kopplungsmodus wird dann beendet und die blaue LED blinkt einmal alle drei Sekunden.
2.4.3 Verbinden des ANYCOM HCC-250 Car-Kit mit dem Bluetooth Gerät
Wenn das Car-Kit mit einem Bluetooth Gerät benutzt werden soll, dass über das Handsfree Profil gekoppelt wurde, müssen diese nach der Kopplung auch
miteinander verbunden werden.
Verbinden des ANYCOM HCC-250 mit einem Bluetooth Mobiltelefon
Die Verbindung kann entweder vom Car-Kit oder vom Mobiltelefon aus aufgebaut werden:
.
1.
Aufbau der Verbindung vom Car-Kit: Bringen Sie das Car-Kit in die Nähe des Mobiltelefons und drücken Sie kurz die Taste
2.
Aufbau der Verbindung vom Mobiltelefon: Bringen Sie das Car-Kit in die Nähe des Mobiltelefons und folgen Sie den Anweisungen im Handbuch des
Mobiltelefons, um eine Bluetooth Verbindung aufzubauen.
Nach dem Verbindungsaufbau hören Sie einen Signalton und die blaue LED blinkt dreimal kurz innerhalb von zwei Sekunden.
Trennen der Verbindung zwischen ANYCOM HCC-250 und dem Mobiltelefon
Wenn das Car-Kit mit dem Telefon verbunden ist, lässt sich diese Verbindung wie folgt trennen:
1.
Vom Car-Kit: Drücken Sie die Taste
2.
Vom Mobiltelefon: Folgen Sie den Anweisungen im Handbuch des Mobiltelefons.
und halten Sie diese für mindestens drei Sekunden gedrückt.
Das Trennen der Verbindung wird durch einen Signalton bestätigt und die blaue LED blinkt einmal in drei Sekunden.
Deutsch
Seite 6
2.5 Anruf-Funktionen
2.5.1 Standard Anruf Funktionen
Überprüfen Sie, dass Ihr Mobiltelefon und das ANYCOM HCC-250 Car-Kit eingeschaltet sind, bevor Sie es zum Telefonieren verwenden. Beide Geräte müssen
über Bluetooth miteinander verbunden sein (siehe 2.4.3).
Rufannahme: Drücken Sie kurz die Taste
.
Anruf abweisen: Drücken Sie die Taste – und halten Sie diese für mindestens drei Sekunden gedrückt.
Anruf beenden: Drücken Sie kurz die Taste
.
Wahlwiederholung: Drücken Sie die Taste + und halten Sie diese für mindestens drei Sekunden gedrückt.
Während der oben beschriebenen Funktionen leuchtet die blaue LED dreimal kurz innerhalb von zwei Sekunden und die rote LED bleibt aus.
2.5.2 Stummschaltung (Mute)
Sie können während eines Gespräch durch kurzes gleichzeitiges Drücken der + und – Taste die Stummschaltung aktivieren. Drücken Sie die beiden Tasten
nochmals, um die Stummschaltung wieder auszuheben.
2.5.3 Übertragen eines Gesprächs zwischen Car-Kit und Mobiltelefon
Um ein laufendes Gespräch vom Car-Kit auf das Telefon zu übertragen, drücken Sie die Taste
Die blaue LED blinkt einmal alle drei Sekunden und die rote LED bleibt dunkel.
Um ein laufendes Gespräch vom Mobiltelefon auf das Car-Kit zu übertragen, drücken Sie die Taste
Sekunden.
und halten Sie diese für mindestens drei Sekunden gedrückt.
. Die blaue LED leuchtet dreimal kurz innerhalb von zwei
2.5.4 Sprachwahl
Wenn das verbundene Mobiltelefon die Funktion Sprachwahl unterstützt, dann können Sie diese durch Drücken der Taste – für mindestens drei Sekunden
aktivieren. Die blaue LED leuchtet dann dreimal kurz innerhalb von zwei Sekunden. Bevor Sie die Sprachwahl verwenden können, müssen Sie zunächst die
Sprachbefehle in Ihrem Mobiltelefon aktiviert haben. Folgen Sie dazu den Anweisungen im Handbuch Ihres Mobiltelefons.
Wenn Sie die Sprachwahl unterbrechen wollen, dann drücken Sie kurz die Taste – .
2.5.5 Erweiterte Anruffunktionen
Wenn Ihr Mobiltelefon und Ihr Provider/Carrier die Konferenz-Schaltung (3-way call) unterstützen, dann können Sie diese ebenfalls mit Ihrem ANYCOM HCC-250
Car-Kit nutzen:
1.
Wenn während eines Gesprächs ein weiterer Anruf hereinkommt:
1)
Drücken Sie die Taste + für mindestens drei Sekunden, um das erste Gespräch zu halten und das zweite Gespräch anzunehmen.
, um den ersten Anruf zu beenden und das zweite Gespräch anzunehmen.
2)
Drücken Sie die Taste
2.
Wenn zwei Anrufe gleichzeitig geführt werden und eines aktiv und das andere wartend/stumm geschaltet (hold/Mute) ist, dann können Sie die folgenden
Funktionen nutzen:
und halten Sie diese für mindestens drei Sekunden gedrückt, um zwischen den beiden Gesprächen zu wechseln.
1)
Drücken Sie die Taste
, um das aktive Gespräch zu beenden und auf das wartende Gespräch zu wechseln.
2)
Drücken Sie Taste
3)
Drücken Sie die Taste – für mindestens drei Sekunden, um eine Konferenz zu beginnen.
2.6 Audiowiedergabe (A2DP Profil)
Dieses Car-Kit unterstützt das Bluetooth A2DP Profil und kann dadurch Audio-Dateien in hoher Qualität von Quellen wie Mobiltelefonen, PDAs oder MP3-Playern
wiedergeben. Da das Car-Kit nur über einen Lautsprecher verfügt, erfolgt die Wiedergabe in mono. Die Audio Quelle muss ebenfalls über das A2DP Profil
(Source) verfügen.
Deutsch
Seite 7
2.6.1 Verbinden eines Mobiltelefons mit A2DP Profil
Wenn Ihr Mobiltelefon das A2DP Profil unterstützt, dann können Sie über das Car-Kit Musik wiedergeben, die auf Ihrem Telefon gespeichert ist. Bei einem
eingehenden Anruf wird die Wiedergabe unterbrochen und Sie können das Telefonat über das Car-Kit führen. Üblicherweise wird die A2DP Verbindung vom
Telefon selbstständig im Rahmen der Kopplung (siehe 2.4) erstellt. Sollte dies nicht der Fall sein, dann schlagen Sie bitte in der Anleitung Ihres Mobiltelefons
nach, wie Sie eine A2DP Audio Verbindung erstellen können.
2.6.2 Fernbedienungs-Funktionen (AVRCP Profil)
Mit den folgenden Tasten können Sie während der Wiedergabe den Musik-Player Ihres Mobiltelefons (oder einer anderen A2DP Audio Quelle) fernsteuern:
Play:
Pause:
Drücken Sie die Taste
.
.
Stopp:
Halten Sie die Taste
Vorlauf:
Rücklauf:
Halten Sie die Taste + für mindestens drei Sekunden gedrückt.
Halten Sie die Taste – für mindestens drei Sekunden gedrückt.
für mindestens drei Sekunden gedrückt.
2.7 Einstellen der Lautstärke
Wenn das Car-Kit mit dem Telefon verbunden ist und zum Telefonieren bzw. Audiowiedergabe genutzt wird, dann können Sie die Lautstärke mit den
Tasten + und – . Wenn die maximale Lautstärke erreicht wird, ertönt ein zusätzlicher Signalton.
Hinweis:
In den meisten Fällen ist die Einstellung der Lautstärke über Bluetooth zwischen dem Car-Kit und Ihrem Mobiltelefon synchronisiert. Sie können dann vom
Telefon aus die Lautstärke des Car-Kits einstellen und umgekehrt. Wegen unterschiedlicher Umsetzungen des Bluetooth Standards durch die Telefon-Hersteller
ist diese Funktion jedoch nicht immer gegeben.
2.8 Koppeln und Verbinden des Car-Kits mit anderen Bluetooth Geräten
Ihr Car-Kit kann über Ihr Mobiltelefon hinaus auch mit anderen Bluetooth Geräten verbunden werden. Das Car-Kit wird dazu wie in Kapitel 2.4 beschrieben
gekoppelt und verbunden. Folgen Sie den Anweisungen in der Bedienungsanleitung des zu verbindenden Bluetooth Gerätes, um dieses zu koppeln und zu
verbinden.
Das HCC-250 kann mit bis zu 8 Bluetooth Geräten (einschließlich Mobiltelefonen) gekoppelt werden. Diese Kopplungs-Informationen werden im Car-Kit
gespeichert. Jedes der gekoppelten Bluetooth Geräte kann mit dem Car-Kit verbunden werden. Bitte folgen Sie den Anweisungen in Kapitel 2.4.3, um eine
Bluetooth Verbindung aufzubauen.
3. KURZANLEITUNG
3.1 LED Statusanzeige
z
LED Blinkfolge 1: Blaue LED blinkt einmal in drei Sekunden, rote LED ist aus.
z
LED Blinkfolge 2: Blaue LED blinkt dreimal kurz innerhalb von zwei Sekunden, rote LED ist aus.
z
LED Blinkfolge 3: Blaue und rote LED blinken abwechselnd.
z
LED Blinkfolge 4: Blaue und rote LEDs blinken abwechselnd alle drei Sekunden.
z
LED Blinkfolge 5: Alle LEDs sind aus.
Deutsch
Seite 8
3.2 Kurzanleitung
Die folgenden Tabellen 1 bis 7 zeigen in Kurzform, wie Ihr ANYCOM HCC-250 Car-Kit bedient wird. Die Lage der Tasten entnehmen Sie bitte Kapitel 1.
Hinweis:
Das Car-Kit kann nur mit Bluetooth Geräten arbeiten, die vorher gekoppelt worden sind. Bluetooth Geräte und Mobiltelefone, die nur das Handsfree Profil (HFP)
unterstützen, müssen vorher mit dem Car-Kit ausdrücklich verbunden werden.
Tabelle 1: Ein- und Ausschalten
BETRIEBSZUSTAND
HCC-250 STATUS MELDUNGEN
FUNKTION
BEDIENUNG
TELEFON
HCC-250
SIGNALTON
LED STATUS
Einschalten
Ausgeschaltet
Drücken Sie die Taste
für
mindestens 3 Sekunden.
2 Signaltöne (Power Up)
LED Blinkfolge 1
Ausschalten
Standby
für
Drücken Sie die Taste
mindestens 3 Sekunden.
2 Signaltöne (Power
Down)
LED Blinkfolge 5
Tabelle 2: Koppeln/Verbinden
FUNKTION
BETRIEBSZUSTAND
TELEFON
Kopplung
aktivieren
Löschen aller
Kopplungen
BEDIENUNG
HCC-250
Ausgeschaltet
Kopplungsmode
Car-Kit mit
Telefon koppeln
Eingeschaltet
Kopplungsmode
Verbinden (CarKit mit Telefon)
Standby
(nicht verbunden)
Standby
(nicht
verbunden)
Trennen
Standby
(verbunden)
Standby
(verbunden)
für
Drücken Sie die Taste
mindestens 6 Sekunden.
Drücken Sie die Taste – für
mindestens 3 Sekunden
Folgen Sie dem Handbuch
Ihres Telefons. PIN Code
lautet “0000”
Drücken Sie
oder bauen
Sie die Verbindung vom
Telefon aus auf.
Drücken Sie die Taste
für
mindestens 3 Sekunden oder
trennen Sie die Verbindung
vom Telefon aus.
HCC-250 STATUS MELDUNGEN
SIGNALTON
LED STATUS
2 Signaltöne (Power Up)
und 1 Kopplungssignal
LED Blinkfolge 3
LED Blinkfolge 1
1 Kopplungssignal
LED Blinkfolge 2
1 Verbindungssignal
LED Blinkfolge 2
LED Blinkfolge 1
Deutsch
Seite 9
Tabelle 3: Anruf-Funktionen
BETRIEBSZUSTAND
HCC-250 STATUS MELDUNGEN
FUNKTION
BEDIENUNG
TELEFON
HCC-250
Ruf annehmen
Eingehendes
Telefonat
Eingehendes
Telefonat
Drücken Sie die Taste
SIGNALTON
LED STATUS
LED Blinkfolge 2
Ruf abweisen
Eingehendes
Telefonat
Eingehendes
Telefonat
Drücken Sie die Taste ━ für
mindestens 3 Sekunden
LED Blinkfolge 2
Telefonat
beenden
Laufendes
Telefonat
Laufendes
Telefonat
Drücken Sie die Taste
Wahlwiederholung
Standby
Standby
Drücken Sie die Taste + für
mindestens 3 Sekunden
Tasten / Wahlton
LED Blinkfolge 2
Sprachwahl
Standby
Standby
Drücken Sie die Taste ━ für
mindestens 3 Sekunden
Tasten / Wahlton
LED Blinkfolge 2
Sprachwahl
abbrechen
Wählen
Wählen
Drücken Sie die Taste ━
Tasten / Wahlton
LED Blinkfolge 2
Lautstärke
erhöhen
Laufendes
Telefonat
Laufendes
Telefonat
Drücken Sie die Taste +
LED Blinkfolge 2
Lautstärke
reduzieren
Laufendes
Telefonat
Laufendes
Telefonat
Drücken Sie die Taste ━
LED Blinkfolge 2
Stummschaltung
(Mute)
Laufendes
Telefonat
Laufendes
Telefonat
Drücken Sie die Tasten ━
und + gleichzeitig
Tasten / Wahlton
LED Blinkfolge 2
Stummschaltung
beenden
Laufendes
Telefonat
Stumm
geschaltet
Drücken Sie die Tasten ━
und + gleichzeitig
Tasten / Wahlton
LED Blinkfolge 2
LED Blinkfolge 2
Tabelle 4: Gespräche übergeben
BETRIEBSZUSTAND
FUNKTION
Gespräch übergeben
(Car-Kit an Telefon)
Gespräch übergeben
(Telefon an Car-Kit)
HCC-250 STATUS MELDUNGEN
BEDIENUNG
TELEFON
HCC-250
Laufendes
Telefonat
Laufendes
Telefonat
Laufendes
Telefonat
Laufendes
Telefonat
Drücken Sie die Taste
mindestens 3 Sekunden
Drücken Sie die Taste
für
SIGNALTON
LED STATUS
Tasten / Wahlton
LED Blinkfolge 1
Tasten / Wahlton
LED Blinkfolge 2
Tabelle 5: Akku-Anzeige
BETRIEBSZUSTAND
FUNKTION
TELEFON
Warnung: Niedriger
Akku-Stand
HCC-250 STATUS MELDUNGEN
BEDIENUNG
HCC-250
SIGNALTON
LED STATUS
Eingeschaltet
oder Standby
Signalton alle 20
Sekunden
LED Blinkfolge 4
Deutsch
Seite 10
Tabelle 6: Erweiterte Anruffunktionen
BETRIEBSZUSTAND
FUNKTION
Laufendes Gespräch
halten, eingehendes
Gespräch annehmen
Laufendes Gespräch
beenden, eingehendes
Gespräch annehmen
Wechseln zwischen den
beiden Gesprächen
Laufendes Gespräch
beenden und wartendes
Gespräch annehmen
Konferenzschaltung
HCC-250 STATUS MELDUNGEN
BEDIENUNG
TELEFON
TELEFON
SIGNALTON
LED STATUS
Laufendes
Telefonat
Eingehendes
Gespräch
wartet
Eingehendes
Gespräch
wartet
Ein Gespräch
wartet (Hold)
Laufendes
Telefonat
Ein Gespräch
wartet (Hold)
Drücken Sie die Taste
LED Blinkfolge 2
Laufendes
Telefonat
Ein Gespräch
wartet (Hold)
Drücken Sie die Taste – für
mindestens 3 Sekunden
LED Blinkfolge 2
Laufendes
Telefonat
Laufendes
Telefonat
Drücken Sie die Taste + für
mindestens 3 Sekunden
LED Blinkfolge 2
Drücken Sie die Taste
LED Blinkfolge 2
Drücken Sie die Taste + für
mindestens 3 Sekunden
LED Blinkfolge 2
Tabelle 7: Fernbedienung für Audio Player
BETRIEBSZUSTAND
HCC-250 STATUS MELDUNGEN
FUNKTION
BEDIENUNG
AUDIOPLAYER
Play
Keine Wiedergabe
HCC-250
SIGNALTON
LED STATUS
Drücken Sie die Taste
Pause
Wiedergabe
Drücken Sie die Taste
Stopp
Wiedergabe
Drücken Sie die Taste
mindestens 3 Sekunden
Lautstärke erhöhen
Wiedergabe
Drücken Sie die Taste +
Lautstärke reduzieren
Wiedergabe
Drücken Sie die Taste –
Vorlauf
Wiedergabe
Rücklauf
Wiedergabe
für
Drücken Sie die Taste +
für 3 Sekunden
Drücken Sie die Taste –
für 3 Sekunden
Deutsch
Seite 11
4. WARTUNG
Das ANYCOM HCC-250 ist ein Car-Kit, das mit großer Sorgfalt entwickelt wurde und Sie bei sachgerechter Nutzung durch eine lange Funktionsdauer und hohe
Kommunikationsqualität überzeugen wird. Beachten Sie daher die nachfolgenden Hinweise:
z
Schalten Sie das Car-Kit aus, wenn Sie es nicht benutzen und lagern Sie es an einem sicheren Ort.
z
Halten Sie das Car-Kit fern von Feuchtigkeit, Nässe oder Flüssigkeiten. Sollte das Car-Kit versehentlich mit Flüssigkeit oder Nässe in Berührung kommen,
z
Halten Sie das Car-Kit fern von Rauch und Staubpartikel, damit diese nicht in das Gehäuse eindringen und die Elektronik beschädigen können.
schalten Sie es unverzüglich aus und benutzen Sie es erst wieder, wenn es vollständig getrocknet ist.
z
Betreiben oder lagern Sie das Car-Kit nicht bei sehr hohen Temperaturen oder in direktem Sonnenlicht. Sehr hohe Temperaturen können die Leistung des
Car-Kits – insbesondere des Akkus – reduzieren und mechanische oder elektrische Komponenten schmelzen.
z
Setzen Sie das Car-Kit keinen extremen Temperaturschwankungen aus: Dadurch kann sich Feuchtigkeit im Inneren des Car-Kits bilden, die die Elektronik
zerstören kann.
z
Vermeiden Sie zu starke mechanische Belastungen, die zum Beispiel durch den Fall aus größerer Höhe oder heftiges Schütteln verursacht werden
können.
z
Verwenden Sie keine aggressiven Putzmittel, um das Car-Kit zu reinigen, da diese die Oberfläche beschädigen könnten. Reinigen Sie das Car-Kit mit
einem feuchten Staubtuch.
z
Öffnen Sie niemals selbst das Car-Kit. Wenn eine Reparatur notwendig ist, dann lassen Sie diese nur durch den Fachhandel oder von ANYCOM direkt
durchführen. Die Garantie erlischt, wenn das Car-Kit unautorisiert geöffnet wird.
Deutsch
Seite 12
5. WICHTIGE INFORMATION UND HÄUFIG GESTELLTE FRAGEN (FAQS)
Q1.
Rote LED leuchtet:
Niedriger Akkustand, bitte laden Sie das Car-Kit schnellstmöglich.
Q2.
Car-Kit lässt sich nicht einschalten, obwohl es 20 Minuten geladen wurde:
Bei der ersten Inbetriebnahme muss das Car-Kit für mindestens 40 Minuten geladen werden, wir empfehlen jedoch ausdrücklich, das Car-Kit vollständig
zu laden.
Q3.
Keine LED Anzeige:
Wenn der Akku vollständig entleert ist oder das Car-Kit für einen längeren Zeitraum nicht benutzt wurde, kann es einige Minuten dauern, bevor die rote
LED aufleuchtet und den Ladevorgang anzeigt.
Q4.
Q5.
Der Lautsprecher des Car-Kit ist nicht zu hören. Prüfen Sie folgende Punkte:
z
HCC-250 ist eingeschaltet
z
HCC-250 ist mit einem Mobiltelefon gekoppelt
z
HCC-250 ist mit dem Mobiltelefon verbunden
z
HCC-250 und Mobiltelefon befinden sich innerhalb der Reichweite von ca. 10 Metern
z
Lautstärke ist nicht minimal eingestellt
Car-Kit wird beim Kopplungsvorgang nicht gefunden:
Überprüfen Sie, ob sich Ihr HCC-250 im Kopplungsmodus befindet (siehe Kapitel 2.4.1)
Q6.
Müssen das Car-Kit oder Telefon nach dem Ausschalten wieder gekoppelt werden?
Nein: Bei Telefonen mit dem Handsfree Profil (HFP) muss lediglich die Verbindung neu hergestellt werden (siehe Kapitel 2.4.4.)
Q7.
Sprachwahl funktioniert nicht:
Überprüfen Sie zunächst, ob Ihr Telefon Sprachwahl unterstützt. Die Befehle zur Sprachwahl müssen vorher aufgezeichnet worden sein. Beachten Sie
auch, dass die Sprachwahl von lauten Umgebungsgeräuschen gestört werden kann.
Deutsch
Seite 13
6. SICHERHEITSHINWEISE
•
Verwenden Sie ausschließlich das Ladekabel, das mit dem Car-Kit geliefert wurde.
•
Wechseln Sie niemals den Akku – es droht Explosionsgefahr.
•
Beachten Sie immer die aktuellen gesetzlichen Vorschriften für das Telefonieren im Fahrzeug und während der Fahrt.
•
Halten Sie das HCC-250 Car-Kit fern von kleinen Kindern. Sie könnten möglicherweise Kleinteile verschlucken, die sich vom Car-Kit lösen oder
auch andere Weise verletzt werden.
•
Dieses Car-Kit ich mit einem Lithium-Polymer Akku ausgestattet. Setzen Sie den Akku nicht hohen Temperaturen oder Feuer aus, weil dieser
möglicherweise explodieren könnte.
•
Beachten Sie die geltenden Vorschriften für die Entsorgung von elektronischen Geräten.
7. ZULASSUNGEN
Dieses Car-Kit erfüllt alle relevanten Zulassungsvorschriften einschließlich BQB (Bluetooth), FCC (USA, part 15), R&TTE Directive(99/5/EC)
und CE.
8. FCC STATEMENT
This device complies with part 15 of the FCC Rules. Operation is subject to the following two
conditions:
(1) This device may not cause harmful interference, and
(2) This device must accept any interference received , including interference that may cause undesired operation.
Note:
The manufacturer is not responsible for ANY interference, for example RADIO or TV interference, caused by unauthorized modifications to this equipment.
Such modifications could void the user’s authority to operate the equipment.
Federal Communication Commission Interference Statement
This equipment has been tested and found to comply with the limits for a Class B digital device, pursuant to Part 15 of the FCC Rules. These limits are
designed to provide reasonable protection against harmful interference in a residential installation. This equipment generates, uses and can radiate radio
frequency energy and, if not installed and used in accordance with the instructions, may cause harmful interference to radio communications. However, there
is no guarantee that interference will not occur in a particular installation. If this equipment does cause harmful interference to radio or television reception,
which can be determined by turning the equipment off and on, the user is encouraged to try to correct the interference by one of the following measures:
1.
Reorient or relocate the receiving antenna.
2.
Increase the separation between the equipment and receiver.
Connect the equipment into an outlet on a circuit different from that to which the receiver is connected. Consult the dealer or an experienced radio/TV
3.
technician for help.
FCC Caution: Any changes or modifications not expressly approved by the party responsible for compliance could void the user's authority to operate this equipment.
IMPORTANT NOTE:
FCC Radiation Exposure Statement:
This equipment complies with FCC radiation exposure limits set forth for an uncontrolled environment. This equipment should be installed and operated with minimum distance
20cm between the radiator & your body. This transmitter must not be co-located or operating in conjunction with any other antenna or transmitter.
Deutsch
Seite 14
9. CE-DECLARATION
10. COPYRIGHT:
Ohne vorherige schriftliche Zustimmung durch ANYCOM darf diese Bedienungsanleitung weder ganz noch in Teilen reproduziert, gespeichert oder in anderer
Form Dritten zugänglich gemacht werden.
ANYCOM behält sich das Recht vor, das HCC-250 Car-Kit und/oder diese Anleitung jederzeit ohne vorherige Ankündigung zu ändern.
11. GEWÄHRLEISTUNGSINFORMATIONEN
ANYCOM Technologies AG oder ANYCOM Technologies Inc. übernimmt gegenüber dem ursprünglichen Käufer dieses Hardwareproduktes die
Gewährleistung für Mängel im Material und der Ausführung für einen Zeitraum von ZWEI (2) JAHREN ab dem Datum des ursprünglichen Kaufs im
Einzelhandel. Falls ein Mangel entdeckt wird, so wird ANYCOM nach seiner Wahl das Produkt kostenlos reparieren oder ersetzen, wenn es innerhalb der
Gewährleistungsdauer vollständig mit der gesamten Hardware, Kabeln und Software an ANYCOM zurückgegeben wird. Für jedes Produkt, das im Rahmen
dieser Gewährleistungsbedingungen zurückgegeben wird, wird eine ANYCOM RMA Nummer (Warenrückgabeerlaubnis) verlangt, sowie Ihr Name, Anschrift,
Telefonnummer und eine Kopie des ursprünglichen Kaufbelegs als Beweis für das Kaufdatum. Eine ANYCOM RMA Nummer kann telefonisch bei der
Gesellschaft angefordert werden. Für die USA, Kanada und Asien: (001) (949) 553-9426 oder für Europa und EMEA: (049) (2161) 57630. Diese
Gewährleistung bezieht sich nur auf von ANYCOM hergestellte Hardware, die durch das ANYCOM Warenzeichen oder Logo gekennzeichnet ist. Diese
Gewährleistung bezieht sich nicht auf Produkte, die durch Unfälle, Fehlgebrauch, Mißbrauch, unerlaubte Wartung oder unzulässige Verwendung beschädigt
wurden. ANYCOM übernimmt keine Gewährleistung für Produkte, die nicht von ANYCOM stammen. Dies gilt auch für solche Software, die mit ANYCOMProdukten verkauft wurde und von anderen Herstellern stammt. Für Softwareanwendungen, die von anderen Herstellern als ANYCOM stammen und die mit
ANYCOM-Produkten zusammen verkauft werden, bestehen separate schriftliche Gewährleistungserklärungen des jeweiligen Herstellers für dessen
Softwareprodukte. Die oben aufgeführte Gewährleistung ist nicht übertragbar, ausschließlich und gilt anstelle aller anderen mündlichen oder schriftlichen,
ausdrücklichen oder konkludenten Gewährleistungen EINSCHLIESSLICH - SOWEIT DIES GESETZLICH ZULÄSSIG IST - DER KONKLUDENTEN
ZUSICHERUNG VON HANDELSÜBLICHER QUALITÄT. ANYCOM haftet nicht für zufällige Schäden oder für Folgeschäden einschließlich u.a. entgangenen
Gewinn, Ausfallzeit, Schaden oder Ersatz an Geräten oder Eigentum, die sich aus der Verletzung der Gewährleistung ergeben.
ANYCOM Technologies AG • Broichmühlenweg 42 • D-41066 Mönchengladbach • Germany
E-Mail: [email protected] • Phone: +49 2161 57630 • Support : +49 900 1100821
ANYCOM Technologies Inc. • PO Box 10127200 Newport Beach, A 92658 • USA
E-Mail: [email protected] • Phone: 866-553-9426
Deutsch
Seite 15
Hinweis:
Die Angaben in diesem Dokument dienen lediglich zu Informationszwecken und können jederzeit ohne Vorankündigung geändert werden. Alle Informationen sind
ohne Gewähr. Ihre Verwendung und Verwertung erfolgt auf alleiniges Risiko des Lesers. ANYCOM ist in keinem Fall haftbar für Schäden oder Ansprüche
mittelbarer oder unmittelbarer Art (einschließlich jedoch nicht beschränkt auf Minderung von Geschäftsgewinnen, Störungen im Betriebsablauf oder Verlust von
Unternehmensinformationen, die sich direkt oder im Zusammenhang mit dem Einsatz, der Verfügbarkeit oder der Nutzung der hier vorliegenden Informationen
ergeben, selbst wenn ANYCOM auf die Möglichkeiten solcher Schäden aufmerksam gemacht wurde.
Marken:
ANYCOM, das ANYCOM-Logo und die erwähnten ANYCOM-Produkte sind entweder Marken oder eingetragene Marken von ANYCOM. Das Fehlen eines
Produktnamens oder Logos, auf dieser Website/Publikation stellt keinen Verzicht auf eine ANYCOM-Marke oder andere geistige Eigentumsrechte bezüglich des
betreffenden Namens oder Logos dar. Alle übrigen Marken sind das Eigentum ihrer rechtmäßigen Inhaber.
www.anycom.com
Technischer Support: 866-553-94 26
DE 45273917
PT 00068
Die folgenden Informationen gelten nur für die Mitgliedstaaten der EU:
Dieses Symbol zeigt an, dass dieses Produkt nicht als normaler Hausmüll behandelt werden darf. Indem Sie dafür sorgen, dass dieses Produkt korrekt
entsorgt wird, tragen Sie dazu bei, negative Folgen für die Umwelt und Gesundheitsrisiken zu vermeiden, welche durch die falsche Entsorgung des Produkts
verursacht werden könnten. Wenn Sie ausführliche Informationen zum Recycling dieses Produkts wünschen, wenden Sie sich bitte an die zuständigen
örtlichen Behörden oder an den Händler, bei dem Sie dieses Produkt erworben haben.
Deutsch
USER MANUAL
Bluetooth Car-Kit HCC-250
CONTENT
1.
2.
3.
4.
5.
6.
7.
8.
9.
10.
11.
Introduction
Package Content
Using your Handsfree
2.1. Battery Charging
2.2. Mounting your Handsfree
2.3. Turn On/Off Handsfree
2.4. Pairing/Connecting your Handsfree with Bluetooth Device
2.4.1. Pairing your Handsfree with Bluetooth handset
2.4.2. Erase all Paired Records
2.4.3. Connecting/Disconnecting your Handsfree with Bluetooth Device
2.5 Call Functions
2.5.1 Basic Call Operations
2.5.2 Call Mute
2.5.3 Transferring Calls to/from your Handset
2.5.4 Voice Dialing
2.5.5 Advanced Call Functions
2.6 AV-Functions
2.6.1 Using Handset AV Function
2.6.2 AV Operations
2.7 Volume Adjustment
2.8 Pairing/Connecting your Handsfree with Other Bluetooth Device
Quick User Guide
3.1. LED Indicator Patterns
3.2. Quick User Guide
Maintenance
Important Messages and Frequently Asked Questions
Safety
Certification and Safety Approvals
Fcc Statement
CE-Declaration
Copyright
Warranty Information
2
2
3
3
4
4
5
5
5
5
6
6
6
6
6
6
6
6
7
7
7
7
7
7
10
11
12
12
12
13
13
14
Page 2
1. INTRODUCTION
Bluetooth Car-Kit
This Bluetooth Car-Kit is a specially designed product allowing car drivers to make and receive calls without holding a mobile phone. It provides a clean
wireless audio connection with your Bluetooth mobile phone and PDA. The product can also be used in the office or home, besides of vehicle environment.
In addition to vehicle environment applications, this portable equipment, supported by an internal rechargeable Li-ion battery, can also be used in office
environment as normal handsfree equipment to make/receive phone calls without bothering holding the mobile handset. It can also be placed beside a
Bluetooth-enabled PC to make voice calls over the Internet.
Package Content
2.
5.
1.
2.
3.
4.
5.
ANYCOM HCC-250
Sun-visor Clip
Vent Mount Clip
12/24V Car Charger Set
User Manual
1.
3.
4.
1. Speaker:Voice delivery.
2. Red/Blue LED:Indicate device status.
3. Button
:Switch the device on/off.
4. Button
:Answer/end call, connect/disconnect, transfer
a call between handsfree and phone.
5. Button ╋:Volume up, last number redial, call mute.
6. Button ━:Volume down, erase all paired records, reject call,
voice dialing, call mute
7. Microphone:Voice pick-up
8. Charging Port:Connect to the travel (or car) charger to charge
the battery of device
Figure: 1 Overview
English
Page 3
2. USING YOUR HANDSFREE
Battery Charging and Usage
2.1 Battery Charging
This Car-Kit contains a rechargeable Li-Polymer battery. First-time charging time is about 4 hours. Later-on recharging time is around 2-3 hours. Detailed
charging procedures as follows:
1.
Connect the car charger to the cigarette lighter, or plug the USB cable in PC.
2.
Referring to Figure 2, plug the connector of the charger to Car-Kit´s charging port to start charging. Both the Red and Blue LEDs will be on during
charging. Once the Red LED turns off, the battery is fully charged and you should disconnect the charger from the Car-Kit and the power outlet.
Figure: 2 Battery Charging
Note:
It is recommended to charge your Car-Kit when it is not in use.
Please note that “inserting” charger will cause a device reset. However, when the Car-Kit is in charging (the charger has been inserted), the Car-Kit is in normal
operation.
During a call, the existing connection between the Car-Kit and the mobile phone will be reset after “inserting” the charger.
The call will be transferred back to the mobile phone momentary. The Car-Kit will try to re-establish the connection automatically. Sometimes, the user needs to
to reconnect the device.
short-push button
Battery Information
Once fully charged, the battery supports continuous talk time up to 14 hours and standby (i.e. the device is power on but without connection) time about 25 days.
When the battery is low, the Car-Kit beeps once every 20 seconds and the Blue and Red LEDs alternate every 3 seconds, charge the battery as described
above.
Note: Over-charging will reduce battery life. If a fully charged battery is left unused, it will lose power over If a fully charged battery is left unused, it will lose power
over time. Extreme temperature (either too hot or too cold) will also affect its ability to charge, capacity, and lifetime.
English
Page 4
2.2 Mounting your Handsfree
The ANYCOM HCC-250 Car-Kit can be easily mounted inside the car by either using the companion Sun-Visor Clip to fix the product on the sun-visor over the
driver’s seat, or inserting the Vent Mount Clip into the vent in front of the driver’s seat.
As shown in Figures 3 and 4, there are two magnetic tips on the backside of the device. You can attach the Sun-Visor Clip or the Vent Mounting Clip to them.
For better mounting the device, please clip the Sun-Visor Clip to the sun visor first, and then properly attach the Car-Kit to the Sun-Visor Clip.
To use the Vent Mounting Clip, you may adjust the clip direction according to your car vent, as shown in Figure 5.
Note: The microphone of the ANYCOM HCC-250 Car-Kit must aim at the sound bearing.
Magnetic Tip
Vent Mount Clip
Sun-Visor Clip
Figure 3: Attach Sun-visor Clip to Magnetic Tips
Vent Mounting Clip
(Vertical Direction)
Figure 4: Attach Vent Mount Clip to Magnetic Tips
Vent Mounting Clip
(Horizontal Direction)
Metal Base
Figure 5: Adjust Vent Mounting Clip Direction (Vertical or Horizontal)
Pull out a little and push
down from here
Figure 6: Detach Clip from metal base
With great portability and flexibility, this Car-Kit can also be used outside of such car environment such as in office and/or at home.
2.3 Turn On/Off the ANYCOM HCC-250 Car-Kit
Turn on the Handsfree: Press and hold button
for at least 3 seconds, you will hear 2 power-up tones, the Blue LED gives 3 quick blinks following by 1 blink per
3 seconds; the Red LED is off. This indicates the handsfree is power on.
Turn off the HCC-250: Press and hold button
for at least 3 seconds, you will hear 2 power-down tones, the Red LED will blink 3 times then all LEDs are off.
This indicates the Car-Kit is power off.
English
Page 5
2.4 Pairing/Connecting your Handsfree with Bluetooth Device
2.4.1 Pairing your ANYCOM HCC-250 with Bluetooth mobile phone (or other device)
Before making and answering calls, you must pair your ANYCOM HCC-250 and phone. Paring sets up a unique relationship between your Car-Kit and
your mobile phone. The mobile phone will memorize the HCC-250`s unique ID (or passkey). This ensures that a unique and encrypted wireless link
between your Car-Kit and mobile phone will be used during calls.
Detailed operation procedures are as follows:
1.
Place your ANYCOM HCC-250 close to your Bluetooth enabled mobile phone, and ensure your Car-Kit is power off, your mobile phone is power on
2.
Press and hold button
for at least 6 seconds until the Blue and Red LEDs alternate continuously. You will hear 2 power-up tones and a pairing tone to
indicate that the Car-Kit has successfully entered the paring mode
3.
Following your phone user guide to active Bluetooth device search on the phone side, on your phone screen you will see a list of Bluetooth equipment
found by the phone at the end of the searching process.
4.
Select this Bluetooth Car-Kit ANYCOM HCC-250 from the list and initiate pairing following handset’s on-screen prompts.
5.
Continue to follow on-screen prompts to enter passkey “0000”and confirm to pair the ANYCOM HCC-250 with your mobile phone. Once the pairing
procedure is completed, you will hear a connecting tone, and then Blue LED gives 3 quick blinks per 2 seconds. It indicates that the Car-Kit device and the
mobile phone are paired and connected.
Note:
If pairing is successful, Car-Kit`s Red LED is off. The Blue LED gives 3 quick blinks per 2 seconds. If your mobile phone shows that paring is failed and the Car-Kit
is still in the paring mode, you need to go back to above steps 3-5 to repeat the paring process.
Your Car-Kit will remain in the pairing mode for about 2 minutes. If paring cannot be finished within 2 minutes, the ANYCOM HCC-250 will enter into the standby
mode (without Bluetooth connection in this case). You need to turn the Car-Kit off and then repeat the above steps 2-5 to restart the pairing process.
2.4.2 Erase all Paired Records
This Car-Kit can be paired with up to 8 Bluetooth devices. When in the paring mode, press and hold – button for at least 3 seconds will allow you to erase all
paired bluetooth device profiles stored in the Car-Kit. The Car-Kit will then quit from the pairing mode. The Blue LED will give 1 blink per 3 seconds.
2.4.3 Connecting/Disconnecting your ANYCOM HCC-250 Car-Kit with a Bluetooth Device
When the Car-Kit communicates with a Bluetooth equipment thru Handsfree Profile, the Bluetooth connection between two equipments shall be established in
advance. If two Bluetooth equipments have been paired once, you can simply reconnect them.
Connecting your ANYCOM HCC-250 with a Bluetooth mobile phone
Initiating a request from either the Car-Kit or the mobile phone can set up Bluetooth connection. The detailed operations are as follows:
1.
Initiating connection request from the Car-Kit: Place the Car-Kit close to the Bluetooth mobile phone and then press button
2.
Initiating connection request from the Bluetooth mobile phone: Place the Car-Kit close to the Bluetooth mobile phone and then follow the phone`s user
guide to find the Car-Kit and send connection request.
.
After connecting, you will hear a connecting tone, and then Blue LED gives 3 quick blinks per 2 seconds
Disconnecting your ANYCOM HCC-250 from your Bluetooth mobile phone:
When the Car-Kit is connected with Bluetooth mobile phone (or in the connected mode), you can disconnect them as follows:
for at least 3 seconds.
1.
Pressing and holding button
2.
Following the mobile phone`s user guide and initiating disconnection from the phone side.
After disconnecting, you will hear a disconnecting tone, and then Blue LED gives 1 blink per 3 seconds.
English
Page 6
2.5 Call Functions
2.5.1 Basic Call Operations
Before dialing, both your ANYCOM HCC-250 Car-Kit and mobile phone must be power on. And you also need to ensure your Car-Kit and phone has been linked
with Bluetooth connection.
Answer Call:
Press button
Reject Call:
Press and hold button – for at least 3 seconds.
.
.
End Call:
Press button
Redial:
Press and hold button + for at least 3 seconds
For the above operations, the Blue LED gives 3 quick blinks per 2 seconds and the Red LED is off.
2.5.2 Call Mute
You can mute or un-mute an ongoing call by simultaneously quick pressing button + and button –. The Blue LED gives 3 quick blinks per 2 seconds and the Red
LED is off.
2.5.3 Transferring Calls to/from your mobile phone
Transferring calls to your mobile phone: Press and hold button
Transferring calls from your mobile phone: Press button
for at least 3 seconds, the Blue LED gives 1 blink per 3 seconds; Red LED is off.
, and the Blue LED gives 3 quick blinks per 2 seconds.
2.5.4 Voice Dialing
If the connected phone supports voice dialing, you can press and hold button – for at least 3 seconds to activate voice dialing. The Blue LED gives 3 quick blinks
per 2 seconds. Before using voice dialing, you must record voice tags in your mobile phone. Please refer to your mobile phone manual for detailed descriptions
on how to set up voice dialing and recording voice tags.
When voice dialing is progress, you can quick press button – to cancel voice dialing. The Blue LED gives 3 quick blinks per 2 seconds and the Red
LED is off.
2.5.5 Advanced Call Functions
If your mobile phone has call waiting/conference functions, your ANYCOM HCC-250 Car-Kit can support the function by following operations:
1.
2.
When a new call comes in while you are in talk:
1)
Press and hold button + for at least 3 seconds to hold active call and accept incoming call.
2)
Press button
to end active call and answer new call.
When two calls in progress, one is active and the other is on hold:
1)
Press and hold button + for at least 3 seconds to toggle hold call and active call.
2)
Press button
to end active call and accept hold call.
3)
Press and hold button – for at least 3 seconds to make conference.
For the above operations, the Blue LED gives 3 quick blinks per 2 seconds and the Red LED is off.
2.6 A2DP Functions
This Car-Kit supports the Bluetooth A2DP Profile to play back music in high quality. When connecting with a Bluetooth-enabled multimedia/music player or a
mobile phone with A2DP compatibility, the product allows users to enjoy and remotely play stereo music from the player.
2.6.1 Using mobile phone`s A2DP Function
For mobile phones supporting Bluetooth A2DP profiles, you can establish an audio connection between the mobile phone and the Car-Kit to enjoy music played by
the phone. Depending on the phone`s capability, the audio connection could be established automatically when you start playing music.
If your mobile phone does support Bluetooth A2DP profiles but you fail to get an audio connection when you start playing music, you must follow your phone user
guide to establish an Aaudio connection before playing music.
English
Page 7
2.6.2 AVRCP Operations
The following operations can be used for remotely control your Bluetooth capable phone or media player to play music:
Play:
Pause:
Press button
Press button
.
.
Stop:
Press and hold button
Forward:
Backward :
Press and hold button + for at least 3 seconds.
Press and hold button – for at least 3 seconds.
for at least 3 seconds.
2.7 Volume Adjustment
When in the connected or talk/play mode, you can adjust sound volume up or down by pressing buttons + or – , respectively. You can repeat the above operation
until the speaker volume reaches at a desirable level.
Note:
For most Bluetooth volume control of the Car-Kit will synchronize with the phone. That is, the sound volume of your ANYCOM HCC-250 can be controlled by your
phone and vice versa. However, this may not be always true due to variations on implementations chosen by different phone manufactures.
2.8 Pairing/Connecting your Handsfree with Other Bluetooth Device
In addition to Bluetooth phone, your Car-Kit can also pair with other Bluetooth devices for realizing short distance wireless communications. Similar pairing
procedures described in the previous Section 2.4 can be used. You can also follow the user guide of the Bluetooth device to complete paring operations on the
device side.
This Car-Kit can be paired with up to 8 Bluetooth devices (including mobile phones). The corresponding 8 sets of pairing information are recorded by the Car-Kit.
Each paired device can wireless communicated with the Car-Kit after setting up a Bluetooth connection. Please check Section 2.4.3 on procedures to set up a
Bluetooth connection.
3. QUICK USER GUIDE
3.1 LED Indicator Patterns
LED Pattern 1: Blue LED gives 1 blink per 3 seconds; Red LED is off.
LED Pattern 2: Blue LED gives 3 quick blinks per 2 seconds; Red LED is off.
LED Pattern 3: Blue and Red LEDs alternate continuously.
LED Pattern 4: Blue and Red LEDs alternate every 3 seconds.
LED Pattern 5: All LEDs are off.
3.2 Quick User Guide
You can follow the instructions listed in Table 1-7 below to operate your ANYCOM HCC-250 Car-Kit devices. (Please refer to section 1 for details of key and key
press duration definitions.)
Note: Your Car-Kit devices can only talk to paired Bluetooth devices. For devices supporting only the Handsfree Profile (HFP), you also need to establish
Bluetooth connection between your Car-Kit and your phone before making and answering calls.
English
Page 8
Table 1: Power on/off
CURRENT STATUS
HCC-250 INDICATOR
FUNCTION
OPERATION
PHONE
HCC-250
AUDIO TONE
LED INDICATOR
Turn On
Power Off
Press and hold button
least 3 seconds
for at
2 power-up tones
LED Pattern 1
Turn Off
Standby
Press and hold button
least 3 seconds
for at
2 power-down tones
LED Pattern 5
Table 2: Pairing/Connections
FUNCTION
CURRENT STATUS
PHONE
Enter pairing
mode
Erase all paired
profiles
OPERATION
HCC-250
Power Off
Paring Mode
Pair Car-Kit with
phone
Power on
Paring mode
Connect (CarKit
with phone)
Standby
(disconnected)
Standby
(disconnected)
Disconnect
Standby (connect)
Standby
(connect)
for at
Press and hold button
least 6 seconds
Press and hold button – for at
least 3 seconds
Follows your phone`s user
guide to complete pairing
procedure.
Passkey is “0000”
Press button
or set up
connection from the phone
Press and hold button
for
at least 3 seconds or refer to
phone manual to initiate the
connection from the phone
side.
HCC-250 INDICATOR
AUDIO TONE
LED INDICATOR
2 power-up tones, and
then 1 pairing tone
LED Pattern 3
LED Pattern 1
1 connecting tone
LED Pattern 2
1 connecting tone
LED Pattern 2
LED Pattern 1
Table 3: Call Functions
CURRENT STATUS
HCC-250 INDICATOR
FUNCTION
OPERATION
PHONE
HCC-250
AUDIO TONE
LED INDICATOR
Answer Call
Incoming call
Incoming call
Press button
LED Pattern 2
Reject Call
Incoming call
Incoming call
Press and hold button ━ for
at least 3 seconds
LED Pattern 2
End Call
Talk
Talk
Press button
Redial
Standby
Standby
Press and hold button + for at
least 3 seconds
Key Tone
LED Pattern 2
Key Tone
LED Pattern 2
Voice Dialing
Standby
Standby
Press and hold button ━ for
at least 3 seconds
Cancel Voice
Dialing
Voice Dialing
Voice Dialing
Press button ━
LED Pattern 2
Key Tone
LED Pattern 2
English
Page 9
CURRENT STATUS
HCC-250 INDICATOR
FUNCTION
OPERATION
PHONE
HCC-250
AUDIO TONE
LED INDICATOR
Volume up
Talk
Talk
Press button +
LED Pattern 2
Volume down
Talk
Talk
Press button ━
LED Pattern 2
Mute
Talk
Talk
Press button ━ and button +
Together
Key Tone
LED Pattern 2
Unmute
Talk
Mute
Press button ━ and button +
Together
Key Tone
LED Pattern 2
Table 4: Transfer Functions
CURRENT STATUS
HCC-250 INDICATOR
FUNCTION
Call Transfer
(Car-Kit to phone)
Call Transfer
(Phone to Car-Kit)
OPERATION
PHONE
HCC-250
Talk
Talk
Press and hold button
at least 3 seconds
Talk
Talk
Press button
for
AUDIO TONE
LED INDICATOR
Key Tone
LED Pattern 1
Key Tone
LED Pattern 2
Table 5: Low Power Indication
CURRENT STATUS
HCC-250 INDICATOR
FUNCTION
OPERATION
PHONE
Low Power Warning
HCC-250
AUDIO TONE
LED INDICATOR
Except power off
Beep every 20 seconds
LED Pattern 4
Table 6: Advanced Call Functions
CURRENT STATUS
FUNCTION
Held Active Call and
Accept Incoming Call
End Active Call and
Answer New Call
Toggle Held Call and
Active Call
End Active Call and Accept
Hold Call
Conference Calls
HCC-250 INDICATOR
OPERATION
PHONE
PHONE
Talk
Call Waiting
AUDIO TONE
Press and hold button + for at
least 3 seconds
LED INDICATOR
LED Pattern 2
Talk
Call Waiting
Press button
LED Pattern 2
Talk
Call On Hold
Press and hold button + for at
least 3 seconds
LED Pattern 2
Talk
Call On Hold
Press button
LED Pattern 2
Talk
Call On Hold
Press and hold button – for at
least 3 seconds
LED Pattern 2
English
Page 10
Table 7: Work in with Media Player
CURRENT STATUS
HCC-250 INDICATOR
FUNCTION
OPERATION
PHONE/PLAYER
Play
HCC-250
AUDIO TONE
LED INDICATOR
Press button
Pause
Press button
Stop
Press and hold button
at least 3 seconds
Volume up
Press button +
Volume down
Press button –
Forward
Backward
for
Press and hold button +
for 3 seconds
Press and hold button – for
3 seconds
4. MAINTENANCE
ANYCOM HCC-250 is a well-designed communications device, careful maintenance and proper use will extend the product life and keep their elite performance in
delivering voice. Following maintenance procedures may be helpful to you:
z
Always turn off power and keep your device in a safe place when it is not in use
z
Keep the device dry, away from water, precipitation, humidity, moisture, and various liquids that may corrode electronic circuits. If your device gets wet,
turn it off immediately and wait until the device gets dry completely before using it
z
Keep the Car-Kit away from dusty and dirty places. Otherwise, the mechanic and electronic parts could be damaged
z
Do not store the Car-Kit in high temperatures or in direct sunlight. Extreme high temperature could degrade performance, reduce battery lifetime, and wrap
or melt the certain plastics.
z
Do not store the in too cold place Moisture could form inside the device when you take it to a warm place. This could damage the internal electronic
circuits.
z
Avoid dropping, knocking, and shaking the Car-Kit. The mechanical parts and the internal electronic circuits could be broken.
z
Avoid using hash chemicals, cleaning solvents, and any other strong detergent to clean the Car-Kit. You may use a clean and slightly damp cloth to clean
the HCC-250.
z
Always take the Car-Kit to the nearest authorized service facility for repairing if it is malfunctioning. Disassembling, modifying, and replacing components
yourself could degrade product performance, cause damages, and terminate warranty
English
Page 11
5. IMPORTANT MESSAGES AND FREQUENTLY ASKED QUESTIONS
Q1.
Red LED blinking:
Low battery indicator; please recharge your battery as soon as possible.
Q2.
Can't power up the Car-Kit after charging more than 20 minutes:
For the first time, the Car-Kit should be charged at least 40 minute prior tuning on, It is recommended that the battery should be fully charged before using
the Car-Kit.
Q3.
Without charging indicator:
When the battery runs off or the Car-Kit has not been used for a while, the Red LED may take a while to light up after the charger connected.
Q4.
Q5.
Can't hear anything on the Car-Kit: you should check the followings
z
HCC-250 is power on
z
HCC-250 has paired with a mobile phone
z
HCC-250 should connected with a mobile phone (except the handset only supports phone Profile)
z
HCC-250 and mobile phone are within 10m / 30 feet
z
HCC-250 and mobile phone should have good signal strength
Car-Kit can not be found when a mobile phone tries to pair with it:
Your HCC-250 Car Kit may not be in the pairing mode, please refer section 2.4.1 for details.
Q6.
Do the paired Car-Kit or the paired mobile phone need to be repaired power off?
No. Please note that for the mobile phone supporting handsfree profile, the Car-Kit and the phone must be connected first. Refer section 2.4.4 for details.
Q7.
Voice dialing does not work:
First check if the phone supports voice dialing function; make sure you have recorded the voice tag. Please note that noisy environment will affect voice
dialing.
English
Page 12
6. SAFETY
•
Use only the charger that comes with package.
•
Caution, risk of explosion if battery is replaced by an incorrect type.
•
Check the laws and regulations on the use of mobile phones and handsfree equipment in the areas where you drive. Always give full attention to
driving and pull off the road and park before making or answering a call if driving conditions require.
•
Do not allow children to play with your HCC-250 Car-Kit since it contains small parts that could become detached and create a choking hazard.
•
This device contains a Li-polymer battery. Please keep it away from fire anytime (including discarding the Car-Kit) or the battery may explode.
•
The Car-Kit, especially the embedded battery must be properly disposed or may be recycled, contacts your local recycling centers for disposal
methods.
7. CERTIFICATION AND SAFETY APPROVALS
This product has been tested and found to comply with Bluetooth BQB requirements, part 15 of FCC rules, R&TTE Directive(99/5/EC) or CE
marked requirements.
8. FCC STATEMENT
This device complies with part 15 of the FCC Rules. Operation is subject to the following two
conditions:
(1) This device may not cause harmful interference, and
(2) This device must accept any interference received , including interference that may cause undesired operation.
Note:
The manufacturer is not responsible for ANY interference, for example RADIO or TV interference, caused by unauthorized modifications to this equipment.
Such modifications could void the user’s authority to operate the equipment.
Federal Communication Commission Interference Statement
This equipment has been tested and found to comply with the limits for a Class B digital device, pursuant to Part 15 of the FCC Rules. These limits are
designed to provide reasonable protection against harmful interference in a residential installation. This equipment generates, uses and can radiate radio
frequency energy and, if not installed and used in accordance with the instructions, may cause harmful interference to radio communications. However, there
is no guarantee that interference will not occur in a particular installation. If this equipment does cause harmful interference to radio or television reception,
which can be determined by turning the equipment off and on, the user is encouraged to try to correct the interference by one of the following measures:
1.
Reorient or relocate the receiving antenna.
2.
Increase the separation between the equipment and receiver.
Connect the equipment into an outlet on a circuit different from that to which the receiver is connected. Consult the dealer or an experienced radio/TV
3.
technician for help.
FCC Caution: Any changes or modifications not expressly approved by the party responsible for compliance could void the user's authority to operate this equipment.
IMPORTANT NOTE:
FCC Radiation Exposure Statement:
This equipment complies with FCC radiation exposure limits set forth for an uncontrolled environment. This equipment should be installed and operated with minimum distance
20cm between the radiator & your body. This transmitter must not be co-located or operating in conjunction with any other antenna or transmitter.
English
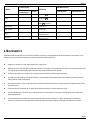
Page 13
9. CE-DECLARATION
10. COPYRIGHT:
Without written permission from original manufacturer, reproduction, transfer, distribution or storage of part or all of the contents in this document in any form is prohibited.
The company reserves rights to make any changes and improvements to the product described in this document without prior notice.
Notice:
Please make sure your mobile phone supports Bluetooth profiles and network operator supports the functions described in this manual, otherwise the relative functions cannot be
realized on this Car-Kit.
English
Page 14
11. WARRANTY INFORMATION
ANYCOM Technologies AG or ANYCOM Technologies Inc. warrants to the original purchaser, this hardware product against defects in material and workmanship for a period
of TWO (2) YEARS from the date of original retail purchase. If defect is discovered, ANYCOM, will, at its option, repair or replace this product at no charge, provided it is
returned within the warranty period, complete with all hardware, cables and software to ANYCOM. For each product returned according to the terms of this warranty, an
ANYCOM RMA number (Return Merchandise Authorization) is required along with your name, address, telephone number, and a copy of the original purchase receipt as proof
of the original date of purchase. An ANYCOM RMA number can be obtained by calling the company direct for USA, Canada and Far East (001) (949) 553-9426 or for Europe
and EMEA (049) (2161) 57630. This warranty applies only to hardware products manufactured by ANYCOM, identified by the ANYCOM trademark or logo affixed to them. This
warranty does not apply if the product has been damaged by accident, abuse, misuse, unauthorized service or misapplication. ANYCOM does not warrant any products that
are not ANYCOM products, including software bundled with ANYCOM products and produced by other manufacturers. Software applications produced by manufacturers other
than ANYCOM and bundled with ANYCOM products are warranted by separate written statements provided by each manufacturer with their software products. The warranties
set forth above are non-transferable, exclusive and in lieu of all other warranties, whether oral or written, expressed or implied, INCLUDING, WHERE ALLOWED BY LAW, ANY
IMPLIED WARRANTY OF MERCHANTABILITY. ANYCOM is not responsible for incidental or consequential damages resulting from any breach of warranty, including but not
limited to lost profits, downtime, damage to or replacement of equipment or property.
ANYCOM Technologies AG • Broichmühlenweg 42 • D-41066 Mönchengladbach • Germany
E-Mail: [email protected] • Phone: +49 2161 57630 • Support : +49 900 1100821
ANYCOM Technologies Inc. • PO Box 10127 • Newport Beach, CA 92658 • USA
E-Mail: [email protected] • Phone: 866-553-9426
Disclaimer:
The information on this document is provided for informational purposes only and is subject to change without notice. It is provided "AS IS" and without any
warranty. Any risk arising out of the use of the information shall remain with the reader. In no event shall ANYCOM be liable for any indirect, consequential,
incidental, special, punitive or other damages whatsoever (including, without limitation, damages for loss of business profits, business interruption or loss of
business information), arising out of or in connection with the availability, performance or use of the information contained, even if ANYCOM has been advised
of the possibilities of such damages.
Trademarks:
ANYCOM, the ANYCOM logo, and the ANYCOM products referred to herein are either the trademarks or the registered trademarks of ANYCOM. The absence
of a product name or logo on this website does not constitute a waiver of ANYCOM's trademark or other intellectual property rights concerning that name or
logo. All other trademarks are property of their respective owners.
www.anycom.com
Technical support: 866-553-94 26
DE 45273917
PT 00068
Following information is only for EU-member states:
The use of the symbol indicates that this product may not be treated as household waste. By ensuring this product is disposed of correctly, you will help prevent potential
negative consequences for the environment and human health, which could otherwise be caused by inappropriate waste handling of this product. For more detailed information
about recycling of this product, please contact your local city office, your household waste disposal service or the shop where you purchased the product.
English
MANUEL DE L'UTILISATEUR
Kit auto Bluetooth HCC-250
SOMMAIRE
1.
2.
3.
4.
5.
6.
7.
8.
9.
10.
11.
Introduction
Contenu de l'emballage
Utiliser votre kit mains-libres
2.1. Batterie Recharge
2.2. Monter votre kit mains-libres
2.3. Mettre en marche/arrêt votre kit mains-libres
2.4. Connecter votre kit mains-libres à un appareil Bluetooth
2.4.1. Connecter votre kit mains-libres à un appareil Bluetooth
2.4.2. Effacer tous les enregistrements synchronisés
2.4.3. Etablir/couper la connexion de votre kit mains-libres avec l'appareil Bluetooth
2.5 Fonctions d'appel
2.5.1 Opérations basiques de communication
2.5.2 Sourdine
2.5.3 Transférer des appels vers/depuis votre téléphone
2.5.4 Numérotation vocale
2.5.5 Fonctions d'appel avancées
2.6 Fonctions AV
2.6.1 Fonction AV de votre téléphone
2.6.2 Opérations AV
2.7 Réglage du volume
2.8 Connecter votre kit mains-libres à d'autres appareils Bluetooth
Guide de l'utilisateur abrégé
3.1. Signaux lumineux à DEL
3.2. Guide de l'utilisateur abrégé
Maintenance
Messages importants et foire aux questions
Sécurité
Certification et autorisations relatives à la sécurité
FCC Statement
Déclaration CE
Déclaration
Informations relatives à la garantie
2
2
3
3
4
4
5
5
5
5
6
6
6
6
6
6
6
6
7
7
7
7
7
7
10
11
12
12
12
13
13
14
Page 2
1. INTRODUCTION
Kit auto Bluetooth
Ce kit auto Bluetooth est un produit spécialement conçu pour permettre aux conducteurs automobiles de passer et recevoir des appels sans avoir à tenir en main
un téléphone portable. Il offre un connexion audio sans fil de bonne qualité avec votre téléphone portable Bluetooth ou votre PDA. Outre l'utilisation dans un
véhicule, ce produit peut également servir au bureau ou à domicile.
Outre les applications relatives à l'environnement d'un véhicule, cet appareil portable supporté par une batterie Li-Ion interne rechargeable peut également être
utilisé dans un bureau, comme un appareil mains-libres normal pour passer/recevoir des appels sans devoir tenir le combiné portable. Il peut aussi être placé à
proximité d'un PC compatible Bluetooth pour passer des appels par le biais d'Internet.
Contenu de l'emballage
1.
2.
3.
4.
5.
ANYCOM HCC-250
Clip pare-soleil
Clip ventilation
Chargeur véhicule 12/24 V
Manuel de l'utilisateur
2.
5.
1.
3.
4.
1. Haut-parleur : sortie vocale.
2. DEL rouge/bleue : indique l'état de l'appareil.
3. Bouton
: met l'appareil en marche/à l'arrêt.
4. Bouton
: décroche/raccroche, connecte/déconnecte, transfère
les appels entre le kit mains-libres et le téléphone.
5. Bouton + : augmente le volume, répète le dernier numéro composé,
met en sourdine.
6. Bouton - : diminue le volume, efface tous les enregistrements
synchronisés, rejette les appels, effectue la numérotation vocale,
met en sourdine
Illustration : 1 Vue d'ensemble
7. Microphone : entrée vocale
8. Port de charge : se branche sur le chargeur de voyage (ou du
véhicule) afin de recharger la batterie de l'appareil
Français
Page 3
2. UTILISER VOTRE KIT MAINS-LIBRES
Recharge de la batterie et utilisation
2.1 Recharger la batterie
Ce kit mains-libres contient une batterie rechargeable Li-Po. La première recharge dure environ 4 heures. La durée de recharge ultérieure est d'environ 2 à 3
heures. Pour recharger la batterie, veuillez suivre les instructions ci-dessous :
1.
Branchez le chargeur véhicule sur l'allume-cigare ou le câble USB sur votre PC.
2.
Conformément à l'illustration 2, branchez le connecteur du chargeur au port d'alimentation du kit mains-libres pour commencer à recharger. Les deux
DEL rouge et bleue sont allumées pendant la recharge. Quand le témoin rouge s'éteint, la batterie est complètement rechargée, débranchez alors le
chargeur du kit mains-libres et de la source d'alimentation.
Illustration : 2 Recharge de la batterie
Note :
Il est recommandé de recharger le kit mains-libres quand il n'est pas en cours d'utilisation.
Veuillez noter que l'introduction du chargeur entraîne une réinitialisation de l'appareil. Cependant, le kit mains-libres fonctionne normalement pendant la recharge
(une fois que le chargeur a été introduit).
Pendant un appel, la connexion existant entre le mains-libres et le téléphone portable est rétablie après l'introduction du chargeur. L'appel est alors transféré
momentanément vers le téléphone portable. Le kit mains-libres essaye ensuite automatiquement d'établir à nouveau la connexion. Il peut arriver que l'utilisateur
pour reconnecter l'appareil.
doive presser brièvement le bouton
Informations sur la batterie
Une fois rechargée, la batterie permet une durée de communication continue de 14 heures et une durée de veille (l'appareil étant en marche mais sans
communication) d'environ 25 jours.
Quand la batterie est faible, le kit mains-libres émet un signal sonore toutes les 20 secondes et les DEL bleue et rouge alternent toutes les 3 secondes. Veuillez
recharger la batterie comme indiqué ci-dessus.
Note : une surchage réduit la durée de vie de la batterie. Une batterie entièrement rechargée qui demeure non utilisée perd du courant au fil du temps. Les
températures extrêmes (trop chaud ou trop froid) affectent également sa capacité à se recharger, sa puissance et sa durée de vie.
Français
Page 4
2.2 Monter votre kit mains-libres
Le car-kit ANYCOM HCC-250 se monte facilement à l'intérieur de la voiture, soit à l'aide du clip pare-soleil permettant de fixer le produit sur le pare-soleil situé audessus de la place du conducteur soit en introduisant le clip ventilation dans la ventilation située devant le siège de l'utilisateur.
Deux pastilles magnétiques se trouvent au dos de l'appareil, comme indiqué sur les illustrations 3 et 4. Vous pouvez fixer le clip pare-soleil ou le clip ventilation sur
ces pastilles.
Pour un meilleur montage de l'appareil, veuillez fixer le clip pare-soleil sur le pare-soleil dans un premier temps, puis fixer correctement le kit mains-libres sur le
clip pare-soleil.
Pour utiliser le clip ventilation, vous pouvez orienter la direction du clip en fonction de la ventilation de votre véhicule, comme indiqué sur l'illustration 5.
Note : le microphone du kit mains-libres ANYCOM HCC-250 doit être dirigé vers la source sonore.
Pastille magnétique
Clip ventilation
Clip pare-soleil
Illustration 3 : Fixation du clip pare-soleil aux pastilles magnétiques
Clip ventilation
(sens vertical)
Illustration 4 : Fixation du clip ventilation aux pastilles magnétiques
Clip ventilation
(sens horizontal)
Socle métallique
Illustration 5 : Réglage de la direction du clip ventilation (verticale ou horizontale)
Tirez légèrement le clip puis
pousser vers le bas à partir
de là.
Illustration 6 : Dépose du clip du socle métallique
Grâce à sa grande mobilité et flexibilité, ce kit mains-libres peut également être utilisé hors d'un véhicule, comme par exemple dans un bureau et/ou à domicile.
2.3 Mise en marche/arrêt du kit auto ANYCOM HCC-250
Pour mettre en marche le kit mains-libres : appuyez sur le bouton
pendant au moins 3 secondes. Vous entendez 2 signaux de mise en marche, la DEL bleue
émet 3 brefs clignotements puis 1 clignotement toutes les 3 secondes; la DEL rouge est éteinte. Ceci indique que le kit mains-libres est en marche.
Pour éteindre le HCC-250 : appuyez sur le bouton
toutes les DEL s'éteignent.
pendant environ 3 secondes. Vous entendez 2 signaux d'arrêt, la DEL rouge émet 3 clignotements puis
Français
Page 5
Ceci indique que le kit mains-libres est éteint.
2.4 Synchroniser/connecter le kit mains-libres à un appareil Bluetooth
2.4.1 Connecter un ANYCOM HCC-250 à votre téléphone portable Bluetooth (ou autre appareil)
Avant de passer ou prendre des appels, vous devez connecter votre ANYCOM HCC-250 au téléphone. Cette connexion établit une relation unique entre
votre kit auto et votre téléphone portable. Le téléphone portable mémorise l'ID unique du HCC-250 (ou la clé). Ceci permet d'assurer qu'une connexion
sans fil unique et cryptée entre votre kit auto et votre téléphone portable est utilisée pendant les communications.
Veuillez suivre les instructions ci-dessous :
1.
Placez votre ANYCOM HCC-250 à proximité du téléphone portable Bluetooth, veillez à ce que le kit auto soit hors tension et à ce que votre téléphone
portable soit allumé.
2.
Appuyez sur le bouton
et maintenez le pendant au moins 6 secondes jusqu'à ce que les DEL bleue et rouge alternent en continu. Vous entendez les 2
signaux de mise en marche et le signal de connexion indiquant que le kit auto a réussi à passer en mode de synchronisation.
3.
Suivez les instructions du guide de l'utilisateur de votre portable pour activer la recherche de Bluetooth sur le téléphone puis vous verrez une liste
d'appareils Bluetooth détectés par le téléphone au terme de la recherche.
4.
Sélectionnez ce kit auto ANYCOM HCC-250 Bluetooth dans la liste et lancez la synchronisation en suivant les instructions figurant sur l'écran du combiné.
5.
Suivez les instructions apparaissant sur l'écran pour entrer la clé “0000” et confirmez pour synchroniser le ANYCOM HCC-250 avec votre téléphone
portable. Une fois la procédure de synchronisation terminée, vous entendez un signal de connexion et la DEL bleue émet 3 clignotements rapides toutes
les 2 secondes. Ce indique que le kit mains-libres et le téléphone portable sont synchronisés et connectés.
Note :
Si la synchronisation a réussi, la DEL rouge du kit mains-libres est éteinte. La DEL bleue émet 3 clignotements rapides toutes les 2 secondes. Si votre téléphone
portable indique que la synchronisation a échoué et si le car-kit est encore en mode de synchronisation, revenez aux étapes 3 à 5 ci-dessus et recommencer le
processus de synchronisation.
Votre kit auto reste en mode de synchronisation pendant environ 2 minutes. Si la synchronisation n'est pas encore terminée au bout de 2 minutes, le ANYCOM
HCC-250 se met en mode de veille (sans connexion Bluetooth dans ce cas). Eteignez alors le kit auto et répétez les étapes 2 à 5 ci-dessus pour recommencer le
processus de synchronisation.
2.4.2 Effacer tous les enregistrements synchronisés
Ce kit auto peut être synchronisé avec 8 appareils Bluetooth. Quand il est en mode de synchronisation, appuyez sur le bouton et maintenez le pendant au moins 3
secondes pour effacer tous les profils d'appareils Bluetooth synchronisés enregistrés dans kit. Le kit auto quitte alors le mode de synchronisation. La DEL bleue
émet un clignotement toutes les 3 secondes.
2.4.3 Connecter/déconnecter le kit auto ANYCOM HCC-250 à un/d'un appareil Bluetooth
Pour que le kit auto communique avec un équipement Bluetooth par le biais du profil mains-libres, la connexion Bluetooth entre les deux équipements doit être
établie à l'avance. Si les équipements Bluetooth ont été déjà été synchronisés une fois, vous pouvez les reconnecter simplement.
Connecter votre ANYCOM HCC-250 à un téléphone portable Bluetooth
Le fait d'initier une demande depuis le car-kit ou le téléphone portable permet d'établir la connexion Bluetooth. Veuillez suivre les instructions ci-après :
.
1.
Pour initier une demande de connexion à partir du kit auto : placez le kit auto à proximité du téléphone portable Bluetooth et appuyez sur
2.
Pour initier une demande de connexion à partir du téléphone portable Bluetooth: placez le kit auto à proximité du téléphone portable Bluetooth puis suivez
les instructions du guide de l'utilisateur pour trouver le kit auto et envoyer une demande de connexion.
Une fois la connexion établie, vous entendrez un signal de connexion et la DEL bleue émet 3 clignotements toutes les 2 secondes.
Déconnecter votre ANYCOM HCC-250 de votre téléphone portable Bluetooth :
Quand le kit auto est connecté à un téléphone portable Bluetooth (ou en mode connecté), vous pouvez les déconnecter comme suit :
1.
Appuyez sur le bouton
2.
Suivez les instructions du guide de l'utilisateur du téléphone portable et initiez la déconnexion à partir du téléphone.
pendant au moins 3 secondes.
Français
Page 6
Après la déconnexion, vous entendez un signal de déconnexion et la DEL bleue émet un clignotement toutes les 3 secondes.
2.5 Fonctions d'appel
2.5.1 Opérations basiques de communication
Avant de numéroter, votre kit auto ANYCOM HCC-250 ainsi que votre téléphone portable doivent être en marche. Et vous devez également vous assurer que le
kit auto et le téléphone sont reliés par une connexion Bluetooth.
.
Répondre à un appel :
Appuyez sur le bouton
Rejeter un appel :
Appuyez sur le bouton - pendant au moins 3 secondes.
Terminer un appel :
Appuyez sur le bouton
Renuméroter :
Appuyez sur le bouton + pendant au moins 3 secondes
.
Lors des opérations ci-dessus, la DEL bleue émet 3 clignotements toutes les 2 secondes et la DEL rouge est éteinte.
2.5.2 Sourdine
Vous pouvez mettre en sourdine puis rétablir le son d'un appel en cours en appuyant brièvement et simultanément sur les boutons + et -. Le témoin bleu émet 3
clignotements toutes les 2 secondes et le témoin rouge est éteint.
2.5.3 Transférer des appels vers/depuis votre téléphone portable
Pour transférer des appels sur votre téléphone portable : appuyez sur le bouton
secondes ; la DEL rouge est éteinte.
Pour transférer des appels depuis votre téléphone portable : appuyez sur
pendant au moins 3 secondes, la DEL bleue émet 1 clignotement toutes les 3
, la DEL bleue émet 3 clignotements rapides toutes les 2 secondes.
2.5.4 Numérotation vocale
Si le téléphone connecté supporte la numérotation vocale, appuyez sur - pendant environ 3 secondes pour activer la numérotation vocale. La DEL bleue émet 3
clignotements rapides toutes les 2 secondes. Avant d'utiliser la numérotation vocale, enregistrez des codes de reconnaissance vocale dans votre téléphone
portable. Veuillez vous reporter au manuel de votre téléphone portable pour savoir comment régler la numérotation vocale et enregistrer des codes vocaux.
Quand la numérotation vocale est en cours, vous pouvez l'annuler en appuyant brièvement sur le bouton - . La DEL bleue émet 3 clignotements toutes
les 2 secondes et la DEL rouge est éteinte.
2.5.5 Fonctions d'appel avancées
Si votre téléphone portable possède des fonctions d'attente/de conférence, votre kit auto ANYCOM HCC-250 peut supporter ces fonctions en suivant les
instructions ci-après :
1.
2.
Quand un nouvel appel entre pendant une conversation :
1)
Appuyez sur + et maintenez pendant environ 3 secondes pour maintenir l'appel en cours et accepter l'appel entrant.
2)
Appuyez sur
pour terminer l'appel en cours et répondre à un nouvel appel.
Quand deux appels sont en cours, l'un est actif et l'autre est en attente :
1)
Appuyez sur le bouton + pendant au moins 3 secondes pour basculer entre l'appel actif et l'appel en attente.
2)
Appuyez sur le bouton
pour terminer l'appel actif et prendre l'appel en attente.
3)
Appuyez sur le bouton - pendant au moins 3 secondes pour passer en mode conférence.
Lors des opérations indiquées ci-dessus, la DEL bleue émet 3 clignotements toutes les 2 secondes et la DEL rouge est éteinte.
2.6 Fonctions A2DP
Ce kit auto supporte le profil A2DP Bluetooth permettant de passer de la musique avec une excellente qualité. S'il est connecté à un lecteur multimédia Bluetooth
ou à un téléphone portable compatible A2DP, le produit permet aux utilisateurs de passer de la musique en stéréo à partir du lecteur.
2.6.1 Utilisation de la fonction A2DP du téléphone portable
Pour les téléphones portables supportant les profils A2DP Bluetooth, vous pouvez établir une connexion audio entre le téléphone portable et le kit auto pour
profiter de la musique émise par le téléphone. Selon la puissance de votre téléphone, la connexion audio peut être établie automatiquement quand vous lancez la
lecture musicale.
Français
Page 7
Si votre téléphone portable supporte les profils Bluetooth A2DP et si vous ne parvenez pas à établir une connexion audio au démarrage de la lecture musicale,
suivez les instructions du guide de l'utilisateur pour établir une connexion audio avant la lecture musicale.
2.6.2 Opérations AVRCP
Les opérations suivantes permettent de télécommander votre téléphone à Bluetooth ou votre lecteur média pour la lecture musicale :
Lecture :
Appuyez sur
.
Pause :
Stop :
Appuyez sur
Appuyez sur
.
pendant au moins 3 secondes.
Avance :
Retour :
Appuyez sur le bouton + pendant au moins 3 secondes.
Appuyez sur le bouton - pendant au moins 3 secondes.
2.7 Réglage du volume
En mode connecté ou communication/lecture, vous pouvez régler le volume sonore en appuyant sur + ou -. Vous pouvez répéter l'opération ci-dessus jusqu'à ce
que le volume du haut-parleur atteigne le niveau souhaité.
Note :
Avec la plupart des Bluetooth, le réglage de volume du kit auto se synchronise avec celui du téléphone. Cela signifie que le volume sonore de votre ANYCOM
HCC-250 peut être réglé à partir de votre téléphone et inversement. Cependant, ceci n'est pas toujours le cas en raison de variantes d'installation choisies par
les différents fabricants de téléphone.
2.8 Synchroniser/connecter votre kit mains-libres avec un autre appareil Bluetooth
Outre votre téléphone Bluetooth, votre kit auto peut également être synchronisé avec d'autres appareils Bluetooth pour réaliser des communications sans fil à
courte distance. Des procédures de synchronisations similaires à celles décrites dans la section 2.4 précédente s'appliquent. Vous pouvez également suivre les
instructions de l'appareil Bluetooth pour terminer les opérations de synchronisation sur l'appareil.
Ce kit auto peut être synchronisé avec jusqu'à 8 appareils Bluetooth (y compris téléphones portables). Les 8 sets d'informations synchronisées correspondants
sont enregistrés par le kit auto. Chaque appareil synchronisé peut communiquer sans fil avec le kit auto après l'établissement d'une connexion Bluetooth. Veuillez
vous reporter à la section 2.4.3 relative aux procédures permettant d'établir une connexion Bluetooth.
3. GUIDE DE L'UTILISATEUR ABREGE
3.1 Signaux lumineux à DEL
Signal DEL 1 : La DEL bleue émet un clignotement toutes les 3 secondes, la DEL rouge est éteinte.
Signal DEL 2 : La DEL bleue émet 3 brefs clignotements toutes les 2 secondes, la DEL rouge est éteinte.
Signal DEL 3 : Les DEL bleue et rouge alternent en continu.
Signal DEL 4 : Les DEL bleue et rouge alternent toutes les 3 secondes.
Signal DEL 5 : Les DEL sont éteintes.
3.2 Guide de l'utilisateur abrégé
Vous pouvez suivre les instructions figurant dans le tableau 1-7 ci-dessous pour faire fonctionner votre car-kit ANYCOM HCC-250. (Veuillez vous référer à la
section 1 pour les détails concernant les touches et les définitions de durée de pression des touches.)
Note : votre kit auto peut communiquer uniquement avec des appareils Bluetooth synchronisés. Pour les appareils supportant uniquement le profil main-libre
(HFP), vous devez également établir la connexion Bluetooth entre votre kit auto et votre téléphone avant de passer ou prendre des appels.
Français
Page 8
Tableau 1 : Marche/Arrêt
ETAT ACTUEL
TEMOIN HCC-250
FONCTION
FONCTIONNEMENT
TELEPHONE
HCC-250
SIGNAL AUDIO
DEL
Mise en marche
Mise à l'arrêt
Appuyez sur le bouton
pendant au moins 3 secondes
2 signaux sonores de
mise en marche
Signal DEL 1
Mise à l'arrêt
Veille
Appuyer sur le bouton
pendant au moins 3 secondes
2 signaux d'extinction
Signal DEL 5
Tableau 2 : Synchronisation/Connexions
FONCTION
ETAT ACTUEL
TELEPHONE
Activation du
mode de
synchronisation
Effacer tous les
profils
synchronisés
FONCTIONNEMENT
HCC-250
Mise à l'arrêt
Appuyer sur le bouton
pendant au moins 6 secondes
Mode de
synchronisation
Appuyer sur le bouton pendant au moins 3 secondes.
Kit auto
synchrornisé
avec un
téléphone
Marche
Mode de
synchronisation
Connexion (entre
kit auto et
téléphone)
Veille
(déconnecté)
Veille
(déconnecté)
Déconnexion
Veille (connexion)
Veille
(connexion)
Suivez les instructions du
manuel de votre téléphone
pour effectuer la procédure de
synchronisation.
La clé est "0000”
Appuyez sur le bouton
ou
établissez une connexion à
partir du téléphone
Appuyez sur le bouton
pendant au moins 3 secondes
ou reportez-vous au manuel
du téléphone pour initier la
connexion à partir du
téléphone.
TEMOIN HCC-250
SIGNAL AUDIO
TEMOIN LUMINEUX
2 signaux sonores de
mise en marche puis 1
signal de synchronisation
Signal DEL 3
Signal DEL 1
1 signal sonore de
connexion
Signal DEL 2
1 signal sonore de
connexion
Signal DEL 2
Signal DEL 1
Tableau 3 : Fonctions d'appel
ETAT ACTUEL
TEMOIN HCC-250
FONCTION
Prendre un
appel
Rejeter un appel
FONCTIONNEMENT
TELEPHONE
HCC-250
Appel entrant
Appel entrant
Appuyer sur le bouton
Signal DEL 2
Appel entrant
Appuyer sur le bouton - et le
maintenir pendant au moins 3
secondes
Signal DEL 2
Appel entrant
SIGNAL AUDIO
TEMOIN DEL
Terminer un
appel
Conversation
Conversation
Appuyer sur le bouton
Renuméroter
Veille
Veille
Appuyer sur le bouton +
pendant au moins 3 secondes
Signal de touche
Signal DEL 2
Veille
Veille
Appuyer sur le bouton pendant au moins 3 secondes
Signal de touche
Signal DEL 2
Numérotation
vocale
Numérotation
vocale
Appuyer sur le bouton -
Signal de touche
Signal DEL 2
Numérotation
vocale
Annuler la
numérotation
vocale
Signal DEL 2
Français
Page 9
ETAT ACTUEL
TEMOIN HCC-250
FONCTION
FONCTIONNEMENT
TELEPHONE
HCC-250
SIGNAL AUDIO
Augmentation du
volume
Conversation
Conversation
Appuyer sur le bouton +
Signal DEL 2
Baisse du
volume
Conversation
Conversation
Appuyer sur le bouton -
Signal DEL 2
Signal de touche
Signal DEL 2
Signal de touche
Signal DEL 2
Sourdine
Conversation
Conversation
Appuyez simultanément sur le
bouton - et sur le bouton +
Couper la
sourdine
Conversation
Sourdine
Appuyer simultanément sur le
bouton - et le bouton +
TEMOIN DEL
Tableau 4 : Fonctions de transfert
ETAT ACTUEL
TEMOIN HCC-250
FONCTION
FONCTIONNEMENT
TELEPHONE
Transfert d'appel
(du kit auto au
téléphone)
Transfert d'appel
(du téléphone au carkit)
HCC-250
Conversatio
n
Conversation
Appuyer sur le bouton
pendant au moins 3 secondes
Conversatio
n
Conversation
Appuyer sur le bouton
SIGNAL AUDIO
TEMOIN DEL
Signal de la touche
Signal DEL 1
Signal de la touche
Signal DEL 2
Tableau 5: Indication de faible courant
ETAT ACTUEL
TEMOIN HCC-250
FONCTION
FONCTIONNEMENT
TELEPHONE
Avertissement de
faible courant
HCC-250
SIGNAL AUDIO
TEMOIN DEL
Sauf courant
coupé
Bip toutes les 20
secondes
Signal DEL 4
Tableau 6 : Fonctions d'appel avancées
ETAT ACTUEL
TEMOIN HCC-250
FONCTION
Maintenir un appel actif et
accepter un appel entrant
Eteindre l'appel actif et
répondre au nouvel appel
Basculer entre l'appel en
attente et l'appel actif
Terminer l'appel actif et
prendre l'appel en attente
Appels conférence
FONCTIONNEMENT
TELEPHONE
TELEPHONE
Conversatio
n
Conversatio
n
Conversatio
n
Conversatio
n
Conversatio
n
Attente
d'appel
Attente
d'appel
Appel en
attente
Appel en
attente
Appel en
attente
SIGNAL AUDIO
Appuyer sur le bouton +
pendant au moins 3 secondes
TEMOIN DEL
Signal DEL 2
Appuyer sur le bouton
Signal DEL 2
Appuyer sur le bouton +
pendant au moins 3 secondes
Signal DEL 2
Appuyer sur le bouton
Signal DEL 2
Appuyer sur le bouton pendant au moins 3 secondes.
Signal DEL 2
Français
Page 10
Tableau 7 : Fonctionnement avec lecteur multi-média
ETAT ACTUEL
FONCTION
TELEPHONE/
LECTEUR
Lecture
TEMOIN HCC-250
FONCTIONNEMENT
HCC-250
SIGNAL AUDIO
Pause
Appuyer sur le bouton
Stop
Appuyer sur le bouton
pendant au moins 3 secondes
Augmentation du
volume
Appuyer sur le bouton +
Baisse du volume
Avance
Retour
TEMOIN DEL
Appuyer sur le bouton
Appuyer sur le bouton Appuyer sur le bouton +
pendant 3 secondes
Appuyer sur le bouton pendant 3 secondes
4. MAINTENANCE
ANYCOM HCC-250 est un appareil de communication conçu avec ingéniosité. Une maintenance soignée et une utilisation adéquate permettront de prolonger la
vie du produit et de conserver l'excellence des ses performances de transmission vocale. Il est recommandé de suivre les instructions de maintenance :
z
Coupez toujours le courant et conservez l'appareil dans un endroit sûr quand il n'est pas utilisé.
z
Conservez l'appareil au sec, éloigné de l'eau, des précipitations, de l'humidité et tout autre liquide susceptible de causer la corrosion des circuits
électroniques. Si votre appareil est mouillé, éteignez-le immédiatement et attendez qu'il soit complètement sec avant de l'utiliser à nouveau.
z
Eloignez le kit auto des lieux sales ou poussiéreux. La mécanique et les pièces électroniques pourraient être endommagées dans le cas contraire.
z
Ne conservez pas le kit auto à une température élevée ni exposé directement à la lumière du soleil. Une température extrêmement élevée peut dégrader
les performances de l'appareil, réduire la durée de vie de la batterie ou tordre ou faire fondre certains plastiques.
z
Ne conservez pas l'appareil dans un endroit trop froid. De l'humidité pourrait se former à l'intérieur de l'appareil au moment où vous le transportez dans un
endroit chaud. Ceci pourrait endommager les circuits électroniques internes.
z
Evitez de laisser choir l'appareil, de le cogner ou de le secouer. Ceci pourrait endommager les pièces mécaniques internes et les circuits électroniques.
z
Evitez l'usage de produits chimiques corrosifs, de solvants d'entretien ou de tout fort détergent pour nettoyer le kit auto. Vous pouvez utiliser un chiffon
propre et légèrement humide pour nettoyer le HCC-250.
z
Apportez le kit auto au centre de réparation agréé le plus proche pour le faire réparer en cas de dysfonctionnement. Vous pourriez diminuer les
performances du produit, l'endommager et perdre votre droit à la garantie si vous démontez, modifiez ou remplacez vous-même des composants.
Français
Page 12
5. MESSAGES IMPORTANTS ET FOIRE AUX QUESTIONS
Q1.
DEL rouge clignotante :
Indicateur de batterie faible : rechargez la batterie dès que possible.
Q2.
Je ne peux pas mettre en marche le kit auto après l'avoir rechargé plus de 20 minutes :
La première fois, le kit auto doit être rechargé pendant au moins 40 minutes avant la mise en marche. Il est recommandé de recharger pleinement la
batterie avant d'utiliser le kit auto.
Q3.
Pas de témoin de recharge :
Quand la batterie est vide ou si le kit auto n'a pas été utilisé pendant un certain temps, le témoin rouge peut prendre plus de temps pour s'allumer après la
connexion du chargeur.
Q4.
Q5.
Je n'entends rien sur le kit auto : vérifiez les points suivants
z
Le HCC-250 est en marche
z
Le HCC-250 est synchronisé avec un téléphone portable
z
Le HCC-250 devrait être connecté à un téléphone portable (sauf si le combiné ne supporte que les profils téléphone)
z
Le HCC-250 et le téléphone portable sont éloignés de 10 m/30 pieds au plus
z
Le HCC-250 et le téléphone portable doivent avoir une force de signal suffisante
Le kit auto reste introuvable quand un téléphone portable essaye de se relier à lui :
Votre kit auto HCC-250 n'est peut-être pas en mode de synchronisation. Veuillez vous référer à la section 2.4.1 pour de plus amples détails.
Q6.
Le kit audio ou le téléphone potable relié a-t-il besoin d'être à nouveau synchronisé hors tension?
Non. Veuillez noter que le kit auto et le téléphone doivent être d'abord connectés dans le cas d'un téléphone portable supportant le profil mains-libres.
Veuillez vous reporter à la section 2.4.4 pour de plus amples détails.
Q7.
La numérotation vocale ne fonctionne pas :
Veuillez vérifier si le téléphone supporte la fonction de numérotation vocale, assurez-vous que vous avez enregistré le code vocal. Veuillez noter qu'un
environnement bruyant affecte la numérotation vocale.
Français
Page 13
6. SECURITE
•
N'utilisez que le chargeur fourni dans l'emballage.
•
Attention, risque d'explosion si la batterie est remplacée par une batterie de type incorrect.
•
Veuillez vérifier les lois et règlements en vigueur relatifs à l'usage des téléphones portables et l'équipement mains-libres dans la zone où vous
conduisez. Consacrez toujours votre pleine attention à la conduite et garez-vous avant de passer ou recevoir des appels si les conditions de
•
Ne permettez pas aux enfants de jouer avec votre kit auto HCC-250 car il contient de petites pièces susceptibles de se détacher et ils pourraient
s'étrangler en les avalant.
•
Cet appareil contient une batterie Li-Po. Veuillez toujours le conserver éloigné du feu (y compris quand vous jetez le kit auto) car la batterie
risquerait d'exploser.
•
Ce kit auto, et en particulier la batterie intégrée, doit être jeté conformément aux normes ou recyclé. Veuillez contacter le centre de recyclage
compétent pour en savoir plus sur les méthodes d'élimination.
conduite l'exigent.
7. CERTIFICATION AND AUTORISATIONS CONCERNANT LA SECURITE
Ce produit a été testé et il satisfait aux normes Bluetooth BQB, section 15 des règles FCC, directive R&TTE (99/5/CE) ou aux normes CE.
8. FCC STATEMENT
This device complies with part 15 of the FCC Rules. Operation is subject to the following two
conditions:
(1) This device may not cause harmful interference, and
(2) This device must accept any interference received , including interference that may cause undesired operation.
Note:
The manufacturer is not responsible for ANY interference, for example RADIO or TV interference, caused by unauthorized modifications to this equipment.
Such modifications could void the user’s authority to operate the equipment.
Federal Communication Commission Interference Statement
This equipment has been tested and found to comply with the limits for a Class B digital device, pursuant to Part 15 of the FCC Rules. These limits are
designed to provide reasonable protection against harmful interference in a residential installation. This equipment generates, uses and can radiate radio
frequency energy and, if not installed and used in accordance with the instructions, may cause harmful interference to radio communications. However, there
is no guarantee that interference will not occur in a particular installation. If this equipment does cause harmful interference to radio or television reception,
which can be determined by turning the equipment off and on, the user is encouraged to try to correct the interference by one of the following measures:
1.
Reorient or relocate the receiving antenna.
2.
Increase the separation between the equipment and receiver.
3.
Connect the equipment into an outlet on a circuit different from that to which the receiver is connected. Consult the dealer or an experienced radio/TV
technician for help.
FCC Caution: Any changes or modifications not expressly approved by the party responsible for compliance could void the user's authority to operate this equipment.
IMPORTANT NOTE:
FCC Radiation Exposure Statement:
This equipment complies with FCC radiation exposure limits set forth for an uncontrolled environment. This equipment should be installed and operated with minimum distance
20cm between the radiator & your body. This transmitter must not be co-located or operating in conjunction with any other antenna or transmitter.
Français
Page 14
9. DECLARATION CE
10. DECLARATION :
Toute reproduction, cession, distribution ou stockage du contenu de ce document, que ce soit en totalité ou en partie, est interdite sans autorisation écrite du fabricant.
La société se réserve le droit d'apporter sans préavis des modifications et améliorations au produit décrit dans le présent document.
Remarque :
Veuillez vous assurer que votre téléphone portable supporte les profils Bluetooth et que votre opérateur réseau supporte les fonctions décrites dans le présent manuel. Dans le cas
contraire, les fonctions correspondantes ne sont pas disponibles sur le kit auto.
Français
Page 15
11. INFORMATIONS RELATIVES A LA GARANTIE
ANYCOM Technologies AG ou ANYCOM Technologies Inc. garantit à l'acheteur d'origine ce matériel contre tous défauts de matière ou de fabrication pour une période de DEUX (2)
ANS à compter de la date d'achat d'origine. En présence d'un défaut, ANYCOM réparera ou remplacera gratuitement ce produit, selon son choix, à condition qu'il soit renvoyé à
ANYCOM pendant la période de garantie et accompagné de tous les matériels, câbles et logiciels. Chaque produit renvoyé conformément aux dispositions de la présente garantie
doit comporter un numéro RMA ANYCOM (Autorisation de retour produit), ainsi que votre nom, adresse, numéro de téléphone, et une copie de la preuve d'achat originale justifiant
la date d'achat. Pour obtenir le numéro RMA ANYCOM, appelez directement la société au 001 949 553-9426 (USA, Canada, Asie) ou au ++49 2161 57630 (Europe, EMEA). La
présente garantie s'applique uniquement aux matériels fabriqués par ANYCOM, sur lesquels figure la marque ou le logo ANYCOM. La présente garantie ne couvre pas les
dommages causés au produit par un accident, une utilisation abusive ou impropre, des opérations de maintenance non autorisées, ou une application incorrecte. ANYCOM n'émet
aucune garantie sur un quelconque produit non fabriqué par ANYCOM, comme les logiciels intégrés dans les produits ANYCOM et édités par des fabricants tiers. Les applications
logicielles produites par des fabricants autres qu'ANYCOM et intégrées dans les produits ANYCOM font l'objet d'attestations écrites de garantie fournies séparément avec les
produits logiciels par leurs fabricants respectifs. Les garanties mentionnées ci-dessus ne sont pas transférables ; elles remplacent et excluent toutes autres garanties, orales ou
écrites, explicites ou implicites, Y COMPRIS, DANS LES CAS PERMIS PAR LES LOIS ET RÈGLEMENTS, TOUTE GARANTIE QUANT A L'ADÉQUATION MARCHANDE DU
PRODUIT. ANYCOM ne pourra être tenu responsable de tout dommage accessoire ou consécutif engendré par le non respect de la garantie, y compris, sans s'y limiter, des pertes
de bénéfices, temps d'immobilisation, dommages aux équipements ou biens appartenant à l'acheteur, ou du remplacement de ces équipements ou biens.
ANYCOM Technologies AG • Broichmühlenweg 42 • D-41066 Mönchengladbach • Allemagne
E-mail: [email protected] • Téléphone: +49 2161 57630 • Support technique : +49 900 1100821
ANYCOM Technologies Inc. • PO Box 10127 • Newport Beach, CA 92658 • USA
E-mail: [email protected] • Téléphone: 866-553-9426
Clause de non-responsabilité:
Les informations contenues dans ce document sont fournies à titre de d'information uniquement et peuvent être modifiées sans avis préalable. It is provided
"AS IS" and without any warranty. Tout risque découlant de l'utilisation de ces informations est de la responsabilité du lecteur. En aucun cas, ANYCOM ne
pourra être tenu responsable de tout dommage indirect, consécutif, accessoire, spécial, punitif de quelque nature que ce soit ( y compris, mais ne s'y limitant
pas, les pertes de profits, les interruptions d'affaires commerciales ou la perte d'informations commerciales) dus à ou en connexion avec la disponibilité, les
performances ou l'utilisation des informations contenues, même si ANYCOM a été avisés de l'éventualité de tels dommages.
Marques commerciales:
ANYCOM, le logo ANYCOM et les produits ANYCOM mentionnés ci-après sont soit des marques commerciales, soit des marques déposées de la société
ANYCOM. L'absence d'un nom de produit ou d'un logo sur ce site Web ne constitue pas une renonciation de la marque commerciale ANYCOM ou d'autres
droits de propriété intellectuelle concernant ce nom ou ce logo. All other trademarks are property of their respective owners.
www.anycom.com
Support technique: 866-553-94 26
DE 45273917
PT 00068
Les informations suivantes sont destinées uniquement aux pays membres de l'Union Européenne :
Ce symbole signifie que ce produit ne doit en aucun cas être éliminé au titre des ordures ménagères. En vous assurant que ce produit est éliminé de manière conforme, vous
participez à la réduction des conséquences éventuellement dommageables pour l'environnement et la santé des personnes d'une élimination inappropriée de ce produit.
Renseignez-vous de manière détaillée sur les procédures de recyclage de ce type de produit auprès des services municipaux compétents, de la société de ramassage des
ordures ou du magasin dans lequel vous l'avez acheté.
Français
MANUAL DEL USUARIO
Kit Bluetooth HCC-250 para automóvil
CONTENIDO
1.
2.
3.
4.
5.
6.
7.
8.
9.
10.
11.
Introducción
Contenido del paquete
Utilización del kit manos libres
2.1. Carga de la batería
2.2. Montaje del kit manos libres
2.3. Encendido y apagado del kit manos libres
2.4. Acople (pairing) y conexión del kit manos libres al dispositivo Bluetooth
2.4.1. Acople del kit manos libres a auriculares Bluetooth
2.4.2. Borrado de todos los registros de acople
2.4.3. Conexión y desconexión del kit manos libres al dispositivo Bluetooth
2.5 Funciones de llamada
2.5.1 Operaciones de llamada básicas
2.5.2 Silenciamiento de llamada
2.5.3 Transferencia de llamadas al/del auricular
2.5.4 Marcado por voz
2.5.5 Funciones de llamada avanzadas
2.6 Funciones AV
2.6.1 Utilización de la función AV del auricular
2.6.2 Operaciones AV
2.7 Ajuste del volumen
2.8 Acople y conexión del kit manos libres a otro dispositivo Bluetooth
Guía rápida de usuario
3.1. Pautas de indicación por LEDs
3.2. Guía rápida de usuario
Mantenimiento
Mensajes importantes y preguntas más frecuentes
Seguridad
Homologaciones de seguridad y certificados
FCC Statement
Declaración CEE
Declaración
Términos de la garantía
2
2
3
3
4
4
5
5
5
5
6
6
6
6
6
6
6
6
7
7
7
7
7
7
10
11
12
12
12
13
13
14
Página 2
1. INTRODUCCIÓN
Kit Bluetooth para automóvil
El kit Bluetooth para automóvil es un producto especialmente diseñado para que los conductores puedan hacer y recibir llamadas con su teléfono móvil sin tener
que sostener éste con la mano. Le ofrecerá una clara conexión de audio inalámbrica a su móvil Bluetooth y PDA. Además de en el coche, podrá usarlo asimismo
en su casa o en la oficina.
Este equipo portátil, alimentado por una batería recargable de ion-litio, puede usarse tanto en el automóvil como en la oficina, donde podrá aplicarlo como un kit
manos libres que le permitirá hacer/recibir llamadas sin tener que ocupar su mano en sostener el teléfono. También podrá colocarlo junto a un PC con capacidad
Bluetooth para hacer llamadas telefónicas vía Internet.
Contenido del paquete
1.
2.
3.
4.
5.
ANYCOM HCC-250
Presilla para parasol
Presilla para rejilla
Cargador 12/24 V para automóvil
Manual del usuario
2.
5.
1.
3.
4.
1. Altavoz: salida de voz.
2. LED rojo/azul: indicador de estado.
3. Botón
: encender/apagar el dispositivo.
4. Botón
: responder/finalizar llamadas, conectar/desconectar,
transferir llamadas entre manos libres y teléfono.
5. Botón +: subir volumen, rellamada, silenciación.
6. Botón -: bajar volumen, borrar todos los registros de acople,
rechazar llamadas, marcado por voz, silenciación
7. Micrófono: entrada de voz
Figura 1: Vista general
8. Puerto de carga: para conectar al cargador portátil (o al automóvil)
y cargar la batería del dispositivo
Español
Página 3
2. UTILIZACIÓN DEL KIT MANOS LIBRES
Batería: Carga y Utilización
2.1 Carga de la batería
Este kit para automóvil tiene una batería recargable de polímero-litio. La primera vez deberá cargarse unas 4 horas. En adelante necesitará 2-3 horas para
cargarse. Para la carga, proceda del siguiente modo:
1.
Conecte el cargador a la toma del encendedor de cigarrillos, o enchufe el cable USB a su PC.
2.
Tal y como se ve en la fig. 2, enchufe el conector del cargador al puerto de carga de su kit manos libres para comenzar a cargar. Durante la carga, los
LEDs rojo y azul estarán encendidos. Cuando el LED rojo se apague, la batería estará totalmente cargada y debería desconectarse el cargador tanto del
kit mismo como de la toma de corriente.
Figura 2: Carga de la batería
Nota:
Es recomendable cargar el kit cuando no se tiene en uso.
Observe que al enchufar el cargador se producirá un reset. No obstante, el kit estará en modo normal durante el proceso de carga (con el cargador enchufado).
Durante una llamada, la conexión existente entre el kit y el teléfono móvil se reseteará tras enchufar el cargador. La llamada se transferirá momentáneamente
para
de vuelta al teléfono móvil. El kit intentará reestablecer la conexión automáticamente. Algunas veces, el usuario tendrá que pulsar brevemente el botón
reconectar el dispositivo.
Información de la batería
Cuando está totalmente cargada, la batería permite tiempos de conversación continua hasta 14 horas y tiempos de stand-by (kit encendido, pero sin establecer
conexión) de unos 25 días.
Cuando la batería tiene poca carga, el kit pita una vez cada 20 segundos y los LEDs rojo y azul se encienden alternativamente cada 3 segundos. Cargue
entonces la batería tal y como se ha descrito más arriba.
Nota: Las sobrecargas acortan la vida útil de la batería. Una batería plenamente cargada se va descargando con el tiempo, aun cuando no se use. Las
temperaturas extremas (mucho calor o frío) afectan asimismo a su aptitud de recarga, capacidad y vida útil.
Español
Página 4
2.2 Montaje del kit manos libres
El kit para automóvil ANYCOM HCC-250 puede montarse fácilmente dentro del vehículo con ayuda de la presilla para fijar al parasol sobre el asiento del
conductor, o insertando la presilla para rejilla de ventilación delante del asiento del conductor.
Como se ve en las figuras 3 y 4, hay dos imanes en la cara trasera del kit. Podrá pegar ahí la presilla para parasol o la presilla para rejilla de ventilación.
Para montar mejor el dispositivo, enganche primero la presilla al parasol y luego fije bien el kit a la presilla ya enganchada al parasol.
Si usa la presilla para rejilla, podrá ajustar la dirección de la presilla para adaptarse a la rejilla de ventilación de su coche, tal y como se muestra en la figura 5.
Nota: El micrófono del kit ANYCOM HCC-250 debe apuntar hacia la fuente de sonido.
Imán
Presilla para rejilla
Presilla para parasol
Figura 3: Fijación de presilla de parasol a imanes
Presilla para rejilla
(dirección vertical)
Figura 4: Fijación de presilla de rejilla a imanes
Presilla para rejilla
(dirección horizontal)
Base de metal
Figura 5: Ajuste de dirección (horizontal o vertical) de presilla de rejilla
Tirar un poco y empujar
luego aquí hacia abajo
Figura 6: Separación de presilla y base de metal
Por ser portátil y de uso flexible, este kit para automóvil puede usarse también en otros lugares, p.ej. en el hogar o en la oficina.
2.3 Encendido y apagado del kit ANYCOM HCC-250
Encendido del kit manos libres: pulse y mantenga pulsado el botón
al menos durante 3 segundos y escuchará 2 pitidos de encendido, el LED azul parpadeará
rápidamente 3 veces y luego 1 vez por 3 segundos; el LED rojo está apagado. Esto indica que el kit manos libres está encendido.
Apagado del HCC-250: pulse y mantenga pulsado el botón
rápidamente 3 veces y luego se apagarán todos los LEDs.
al menos durante 3 segundos y escuchará 2 pitidos de apagado, el LED rojo parpadeará
Esto indica que el kit manos libres está apagado.
Español
Página 5
2.4 Acople (pairing) y conexión del kit manos libres al dispositivo Bluetooth
2.4.1 Acople del ANYCOM HCC-250 a un teléfono móvil (u otro dispositivo) Bluetooth
Para hacer/recibir llamadas, primero deberá acoplar (pairing) el ANYCOM HCC-250 y el teléfono. Con el acople se establece una correspondencia
unívoca entre el kit y el teléfono móvil. El teléfono móvil memorizará el ID único (o clave de acceso) del HCC-250. Esto garantiza que durante las
llamadas se usará un enlace inalámbrico único y cifrado entre el kit y el teléfono móvil.
Para esta operación, proceda del siguiente modo:
1.
Coloque su ANYCOM HCC-250 cerca de su teléfono móvil con capacidad Bluetooth y asegúrese de que su kit esté apagado y su teléfono encendido.
2.
Pulse y mantenga pulsado el botón
al menos durante 6 segundos hasta que los LEDs rojo y azul alternen continuamente. Escuchará 2 pitidos de
encendido y un tono de acople (pairing) que le indicarán que el kit está en modo para acople.
3.
Siguiendo la guía de usuario de su teléfono para activar la búsqueda de dispositivos Bluetooth en el teléfono, en la pantalla del mismo podrá ver una lista
de los equipos Bluetooth encontrados por el teléfono una vez concluido el proceso de búsqueda.
4.
Seleccione este kit Bluetooth ANYCOM HCC-250 en la lista e inicie el acople siguiendo las instrucciones que aparecerán en la pantalla del teléfono.
5.
Prosiga según las instrucciones en pantalla escribiendo la clave "0000" y confirme ésta para acoplar el ANYCOM HCC-250 a su teléfono móvil. Una vez
se haya completado el proceso de acople, escuchara un pitido de conexión y el LED azul parpadeará rápidamente 3 veces durante 2 segundos. Esto
indica que el kit y el teléfono móvil están acoplados y conectados.
Nota:
Si el acople es correcto, el LED rojo del kit estará apagado. El LED azul parpadeará rápidamente 3 veces durante 2 segundos. Si su teléfono móvil indica que el
acople ha resultado fallido y el kit sigue en el modo para acople (pairing), deberá repetir los pasos del 3 al 5 para realizar el acople.
Su kit permanecerá en modo para acople durante unos 2 minutos. Si el acople no se ha realizado antes de que pasen 2 minutos, el ANYCOM HCC-250 adoptará
el modo stand-by (es decir, sin conexión Bluetooth en tal caso). Tendrá que apagar el kit y repetir los pasos del 2 al 5 para reiniciar el proceso de acople.
2.4.2 Borrado de todos los registros de acople
Este kit puede acoplarse hasta a 8 dispositivos Bluetooth. Una vez en el modo para acople, pulse y mantenga pulsado el botón "-" al menos durante 3 segundos
para poder borrar todos los perfiles de dispositivos Bluetooth registrados en el kit. El kit saldrá entonces del modo para acople. El LED azul parpadeará
rápidamente 1 vez durante 3 segundos.
2.4.3 Conexión y desconexión del kit ANYCOM HCC-250 al dispositivo Bluetooth
Para que el kit de automóvil comunique con un equipo Bluetooth mediante perfil manos libres, deberá haberse establecido antes la conexión Bluetooth entre
ambos equipos. Si dos equipos Bluetooth ya han sido acoplados ("paired") antes, podrá reconectarlos sencillamente.
Conexión del ANYCOM HCC-250 a un teléfono móvil Bluetooth
El inicio de una solicitud desde el kit o el teléfono móvil puede restablecer la conexión Bluetooth. Proceda como se indica a continuación:
1.
Inicio de solicitud de conexión desde el kit: coloque el kit cerca de su teléfono móvil Bluetooth y pulse el botón
2.
Inicio de solicitud de conexión desde el teléfono móvil Bluetooth: coloque el kit cerca de su teléfono móvil Bluetooth y siga las instrucciones de la guía del
usuario del teléfono para hallar el kit y envíe una solicitud de conexión.
.
Cuando se establezca la conexión, escuchará un pitido de conexión y el LED azul parpadeará rápidamente 3 veces durante 2 segundos.
Desconexión del ANYCOM HCC-250 de su teléfono móvil Bluetooth:
Cuando el kit está conectado al teléfono móvil Bluetooth (o está en modo conectado), podrá desconectarlo como se indica a continuación:
al menos 3 segundos.
1.
Pulsando y manteniendo pulsado el botón
2.
Siguiendo las instrucciones de la guía del usuario del teléfono móvil y desconectando desde el teléfono.
Cuando se desconecte, escuchará un pitido de conexión y el LED azul parpadeará rápidamente 1 vez durante 3 segundos.
Español
Página 6
2.5 Funciones de llamada
2.5.1 Operaciones de llamada básicas
Antes de marcar, el kit ANYCOM HCC-250 y el teléfono móvil deberán estar encendidos. Y no debe olvidarse haber enlazado el kit y el teléfono mediante
Bluetooth.
Responder llamadas:
pulse el botón
Rechazar llamadas:
pulse el botón - y téngalo pulsado al menos 3 segundos.
Finalizar llamadas:
pulse el botón
Rellamada:
pulse el botón + y téngalo pulsado al menos 3 segundos
.
.
En las operaciones arriba citadas, el LED azul parpadeará rápidamente 3 veces durante 2 segundos y el LED rojo estará apagado.
2.5.2 Silenciación de llamadas
Podrá silenciar (o "desilenciar") una llamada entrante pulsando simultáneamente los botones "+" y "-". El LED azul parpadeará rápidamente 3 veces durante 2
segundos y el LED rojo estará apagado.
2.5.3 Transferencia de llamadas al/del teléfono móvil
Transferencia de llamadas al teléfono móvil: pulse y mantenga pulsado el botón
3 segundos; el LED rojo estará apagado.
Transferencia de llamadas del teléfono móvil: pulse el botón
al menos durante 3 segundos; el LED azul parpadeará rápidamente 1 vez en
, y el LED azul parpadeará rápidamente 3 veces durante 2 segundos.
2.5.4 Marcado por voz
Si el teléfono conectado dispone de marcado por voz, podrá pulsar y mantener pulsado el botón "-" (al menos 3 segundos) para activar la función de marcado
por voz. El LED azul parpadeará rápidamente 3 veces durante 2 segundos. Para poder usar el marcado por voz, primeramente deberá haber guardado archivos
de voz en su teléfono móvil. En el manual de su teléfono móvil hallará instrucciones más detalladas sobre cómo configurar el marcado por voz y guardar
archivos de voz.
Cuando el marcado por voz está en curso, podrá cancelarse la llamada pulsando brevemente el botón "-". El LED azul parpadeará rápidamente 3
veces durante 2 segundos y el LED rojo estará apagado.
2.5.5 Funciones de llamada avanzadas
Si su teléfono móvil tiene funciones de llamada en espera y multiconferencia, podrá hacer uso de éstas en el kit ANYCOM HCC-250 de la siguiente manera:
1.
2.
Cuando entra una nueva llamada mientras Vd. está hablando:
1)
Pulse el botón + y téngalo pulsado al menos 3 segundos para retener la llamada activa y aceptar la llamada entrante.
2)
Pulse el botón
para finalizar la llamada activa y responder la llamada entrante.
Cuando hay dos llamadas en curso, una estará activa y la otra retenida:
1)
Pulse el botón + y téngalo pulsado al menos 3 segundos para cambiar entre la llamada activa y la retenida.
2)
Pulse el botón
para finalizar la llamada activa y aceptar la retenida.
3)
Pulse el botón "-" y téngalo pulsado al menos 3 segundos para hacer una multiconferencia.
En las operaciones arriba citadas, el LED azul parpadeará rápidamente 3 veces durante 2 segundos y el LED rojo estará apagado.
2.6 Funciones A2DP
Este kit es compatible con el perfil Bluetooth A2DP de reproducción musical de alta calidad. Cuando se conecta a un reproductor musical/multimedia Bluetooth o
a un teléfono móvil con compatibilidad A2DP, este producto permite el disfrute y reproducción remota en estéreo desde un reproductor.
2.6.1 Utilización de la función A2DP del teléfono móvil
En los teléfonos móviles compatibles con perfiles Bluetooth A2DP, podrá establecerse una conexión de audio entre el teléfono móvil y el kit para automóvil y
disfrutar así de la música que reproduce el teléfono. Según las prestaciones del teléfono, la conexión de audio podrá establecerse automáticamente cada vez que
empiece a reproducirse música.
Si, a pesar de ser su teléfono móvil compatible con perfiles Bluetooth A2DP, no consigue establecer una conexión de audio al reproducir música, deberá consultar
la guía del usuario de su teléfono para establecer una conexión de audio antes de reproducir música.
Español
Página 7
2.6.2 Operaciones AVRCP
Las siguientes operaciones sirven para controlar remotamente su teléfono Bluetooth o su reproductor a la hora de reproducir música:
Reproducir: pulse el botón
Pausa:
pulse el botón
.
.
Stop:
pulse el botón
Avance:
Retroceso:
pulse el botón + durante al menos 3 segundos.
pulse el botón - durante al menos 3 segundos.
y téngalo pulsado al menos 3 segundos.
2.7 Ajuste del volumen
En los modos conectado o de llamada/reproducción, podrá subir o bajar el volumen del sonido pulsando respectivamente los botones "+" o "-". Podrá repetir esta
operación hasta que en el altavoz tenga el volumen deseado.
Nota:
En la mayoría de los Bluetooth, el control de volumen del kit para automóvil se sincroniza con el teléfono. Es decir, el volumen de sonido de su ANYCOM HCC250 puede controlarse desde su teléfono y viceversa. Sin embargo, es posible que no siempre sea así, debido a las diversas implementaciones de los distintos
fabricantes de teléfonos.
2.8 Acople y conexión del kit manos libres a otro dispositivo Bluetooth
Además de a un teléfono Bluetooth, este kit para automóvil puede acoplarse asimismo a otros dispositivos Bluetooth para obtener una comunicación inalámbrica
de corta distancia. Pueden usarse procedimientos de acople similares a los descritos en la sección 2.4. También podrá consultar en la guía del usuario del
dispositivo Bluetooth cómo realizar el acople (pairing) desde el dispositivo.
Este kit puede acoplarse hasta a 8 dispositivos Bluetooth (incluidos teléfonos móviles). Los correspondientes 8 registros de acople se guardan en la memoria del
kit. Cada dispositivo acoplado puede comunicar inalámbricamente con el kit estableciendo una conexión Bluetooth. Sírvase consultar la sección 2.4.3 que trata de
cómo se establece una conexión Bluetooth.
3. GUÍA RÁPIDA DE USUARIO
3.1 Pautas de indicación por LEDs
Pauta de LED 1: LED azul parpadea 1 vez durante 3 segundos, LED rojo apagado.
Pauta de LED 2: LED azul parpadea rápidamente 3 veces 2 segundos, LED rojo apagado.
Pauta de LED 3: LEDs rojo y azul alternan continuamente.
Pauta de LED 4: LEDs rojo y azul alternan cada 3 segundos.
Pauta de LED 5: Todos los LEDs apagados.
3.2 Guía rápida de usuario
Podrá consultar las instrucciones de la tabla 1-7 a la hora de usar su kit ANYCOM HCC-250 para automóvil. Sírvase consultar en la sección 1 las funciones
pormenorizadas de las teclas y sus tiempos de pulsación.
Nota: Su kit para automóvil sólo podrá comunicarse con dispositivos Bluetooth a los que se haya acoplado ("paired"). En aquellos dispositivos que admitan
meramente el perfil manos libres (HFP), también necesitará establecer una conexión Bluetooth entre su kit y su teléfono antes de poder hacer y recibir llamadas.
Español
Página 8
Tabla 1: Encendido y apagado
ESTADO ACTUAL
INDICADOR HCC-250
FUNCIÓN
OPERACIÓN
TELÉFONO
HCC-250
Encendido
Apagado
Apagado
Stand-by
Pulsar y mantener pulsado el
botón
al menos 3 s.
Pulsar y mantener pulsado el
botón
al menos 3 s.
PITIDO DE AUDIO
INDICADOR POR LED
2 pitidos de encendido
Pauta de LED 1
2 pitidos de apagado
Pauta de LED 5
Tabla 2: Acople y conexiones
FUNCIÓN
ESTADO ACTUAL
TELÉFONO
Entrada a modo
para acople
Borrar todos los
perfiles
acoplados
OPERACIÓN
HCC-250
Apagado
Modo para
acople
Acople del kit a
un teléfono
Encendido
Modo para
acople
Conectar (kit a
un teléfono)
Stand-by
(desconectado)
Stand-by
(desconectado)
Desconectar
Stand-by
(conectar)
Stand-by
(conectar)
Pulsar y mantener pulsado el
botón
al menos 6 s.
INDICADOR HCC-250
PITIDO DE AUDIO
INDICADOR POR LED
2 pitidos de encendido y
1 de acople
Pauta de LED 3
Pulsar y mantener pulsado el
botón - al menos 3 s.
Para completar el acople siga
la guía de usuario de su
teléfono.
La clave de acceso es "0000”
Pulsar botón
o establecer
conexión desde el teléfono
Pulsar y mantener pulsado el
al menos 3 s. o
botón
consultar el manual para
iniciar la conexión desde el
teléfono.
Pauta de LED 1
1 pitido de conexión
Pauta de LED 2
1 pitido de conexión
Pauta de LED 2
Pauta de LED 1
Tabla 3: Funciones de llamada
ESTADO ACTUAL
INDICADOR HCC-250
FUNCIÓN
OPERACIÓN
TELÉFONO
HCC-250
PITIDO DE AUDIO
Responder
llamada
Llamada entrante
Llamada
entrante
INDICADOR POR LED
Pulsar botón
Pauta de LED 2
Rechazar
llamada
Llamada entrante
Llamada
entrante
Pulsar y mantener pulsado el
botón - al menos 3 s.
Pauta de LED 2
Finalizar llamada
Conversación
Conversación
Pulsar botón
Rellamada
Stand-by
Stand-by
Pulsar y mantener pulsado el
botón + al menos 3 s.
Sonido de tecla
Pauta de LED 2
Pauta de LED 2
Marcado por voz
Stand-by
Stand-by
Pulsar y mantener pulsado el
botón - al menos 3 s.
Sonido de tecla
Pauta de LED 2
Cancelar
marcado por voz
Marcado por voz
Marcado por voz
Pulsar botón -
Sonido de tecla
Pauta de LED 2
FUNCIÓN
ESTADO ACTUAL
OPERACIÓN
INDICADOR HCC-250
Español
Página 9
Subir volumen
TELÉFONO
HCC-250
Conversación
Conversación
Pulsar botón +
PITIDO DE AUDIO
INDICADOR POR LED
Pauta de LED 2
Bajar volumen
Conversación
Conversación
Pulsar botón -
Silenciación
Conversación
Conversación
Pulsar botón - y botón +
simultáneamente
Sonido de tecla
Pauta de LED 2
Silenciación
Pulsar botón - y botón +
simultáneamente
Sonido de tecla
Pauta de LED 2
De-silenciación
Conversación
Pauta de LED 2
Tabla 4: Funciones de transferencia
ESTADO ACTUAL
INDICADOR HCC-250
FUNCIÓN
OPERACIÓN
TELÉFONO
Transferir llamada
(del kit al teléfono)
Transferir llamada
(del teléfono al kit)
Conversaci
ón
Conversaci
ón
HCC-250
PITIDO DE AUDIO
INDICADOR POR LED
Conversación
Pulsar y mantener pulsado el
al menos 3 s.
botón
Sonido de tecla
Pauta de LED 1
Conversación
Pulsar botón
Sonido de tecla
Pauta de LED 2
Tabla 5: Indicador de batería baja
ESTADO ACTUAL
INDICADOR HCC-250
FUNCIÓN
OPERACIÓN
TELÉFONO
Aviso de batería baja
HCC-250
PITIDO DE AUDIO
INDICADOR POR LED
Excepto apagado
Pitido cada 20 segundos
Pauta de LED 4
Tabla 6: Funciones de llamada avanzadas
ESTADO ACTUAL
FUNCIÓN
Retener llamada activa y
aceptar llamada entrante
Finalizar llamada activa y
responder nueva llamada
Cambiar entre llamada
activa y retenida
Finalizar llamada activa y
aceptar llamada retenida
Llamadas en
multiconferencia
INDICADOR HCC-250
OPERACIÓN
TELÉFONO
TELÉFONO
Conversaci
ón
Conversaci
ón
Conversaci
ón
Conversaci
ón
Conversaci
ón
Llamada en
espera
Llamada en
espera
Llamada
retenida
Llamada
retenida
Llamada
retenida
PITIDO DE AUDIO
INDICADOR POR LED
Pulsar y mantener pulsado el
botón + al menos 3 s.
Pauta de LED 2
Pulsar botón
Pauta de LED 2
Pulsar y mantener pulsado el
botón + al menos 3 s.
Pauta de LED 2
Pulsar botón
Pauta de LED 2
Pulsar y mantener pulsado el
botón - al menos 3 s.
Pauta de LED 2
Tabla 7: Utilización junto con reproductor multimedia
Español
Página 10
ESTADO ACTUAL
FUNCIÓN
TELÉFONO /
REPRODUCTOR
Reproducir
INDICADOR HCC-250
OPERACIÓN
HCC-250
PITIDO DE AUDIO
Pausa
Pulsar botón
Stop
Pulsar y mantener pulsado el
al menos 3 s.
botón
Subir volumen
Pulsar botón +
Bajar volumen
Pulsar botón -
Avance
Retroceso
INDICADOR POR LED
Pulsar botón
Pulsar y mantener pulsado 3
segundos el botón +
Pulsar y mantener pulsado 3
segundos el botón -
4. MANTENIMIENTO
ANYCOM HCC-250 es un dispositivo de comunicación bien diseñado, cuya vida útil y sus altas prestaciones se conservarán durante mucho tiempo si se usa
debidamente y recibe el mantenimiento adecuado. Son útiles las siguientes pautas de mantenimiento:
z
Apague su kit y guárdelo en un lugar seguro siempre que no lo tenga en uso.
z
Mantenga el kit seco y a salvo del agua, precipitaciones, humedad, rocío y líquidos, los cuales podrían causar corrosión en los circuitos electrónicos. Si su
kit se moja, apáguelo inmediatamente y espere hasta que se haya secado completamente antes de usarlo.
z
No deje el kit en lugares sucios o con polvo. De lo contrario, las piezas mecánicas y electrónicas podrían deteriorarse.
z
No guarde el kit a altas temperaturas ni bajo luz solar directa. Las temperaturas extremas pueden empeorar las prestaciones, acortar la vida útil de la
batería y deformar o fundir ciertos plásticos.
z
No lo guarde en lugares muy fríos, ya que podrían darse condensaciones dentro del kit al llevarlo a un lugar más caliente. Ello podría dañar los circuitos
electrónicos internos.
z
Evite caídas, golpes y sacudidas del kit. Ello podría romper las piezas mecánicas y los circuitos electrónicos internos.
z
Evite usar agentes químicos, disolventes y otros limpiadores fuertes a la hora de limpiar el kit. Para limpiar el HCC-250 puede usarse un paño limpio
ligeramente humedecido.
z
En caso de darse disfunciones, lleve el kit al punto de servicio autorizado más cercano para que se lo reparen. El desarmado o la modificación y
sustitución de componentes por cuenta propia hace que se anule la garantía y puede causar daños o menoscabo de prestaciones en el producto.
Español
Página 11
5. MENSAJES IMPORTANTES Y PREGUNTAS MÁS FRECUENTES
Q1.
Parpadeo del LED rojo:
Indicador de descarga de la batería. Recargue su batería lo antes posible.
Q2.
No puedo encender el kit tras haberlo cargado más de 20 minutos:
La primera vez el kit debe cargarse al menos durante 40 minutos antes de encenderlo. Es recomendable cargar la batería por completo antes de usar el
kit.
Q3.
Sin indicador de carga:
Cuando la batería se agota o el kit no se ha usado durante un tiempo, es posible que el LED rojo tarde un poco en encenderse al conectar el cargador.
Q4.
Q5.
No puedo escuchar nada en el kit. => Debería comprobarse lo siguiente
z
HCC-250 encendido
z
HCC-250 acoplado a un teléfono móvil
z
HCC-250 debería conectarse a un teléfono móvil (salvo que el auricular sólo admita perfiles de teléfono)
z
HCC-250 y teléfono móvil a no más de 10 m (30 pies) el uno del otro
z
HCC-250 y teléfono móvil deberían tener buena intensidad de señal
No llega a encontrarse el kit cuando un teléfono móvil intenta acoplarse a él:
Es posible que su kit HCC-250 no esté en modo para acople; consulte la sección 2.4.1 si precisa más detalles.
Q6.
¿El kit o el teléfono móvil acoplados deben ser reacoplados tras un apagado?
No. Observe que para el perfil de manos libres compatible para el teléfono móvil, primeramente deberán haberse conectado el teléfono y el kit. Consulte
la sección 2.4.4 si precisa más detalles.
Q7.
La función de marcado por voz no funciona:
Compruebe primero si el teléfono de hecho dispone de la función de marcado por voz; asegúrese que haber grabado el archivo de voz. Tenga en cuenta
que un entorno ruidoso afectará al marcado por voz.
Español
Página 12
6. SEGURIDAD
•
Use únicamente el cargador incluido en el paquete.
•
¡Atención! Riesgo de explosión si la batería se sustituye por otra de tipo incorrecto.
•
Tenga en cuenta las leyes y reglamentos de uso de teléfonos móviles y kits de manos libres en las zonas en que circule con su vehículo.
Concéntrese siempre en la conducción y salga de la carretera y estacione antes de hacer o responder una llamada si es que las condiciones de
conducción así lo requieren.
•
No permita que los niños jueguen con el kit HCC-250, ya que éste contiene pequeñas piezas que podrían soltarse y causarles asfixia.
•
Este kit tiene una batería de polímero-litio. Manténgala alejada del fuego en todo momento (también cuando se deseche el kit) porque de lo
contrario la batería podría explotar.
•
Este kit, en especial su batería, deberá desecharse debidamente o reciclarse. Consulte en los centros de reciclaje de su localidad a este
respecto.
7. HOMOLOGACIONES DE SEGURIDAD Y CERTIFICADOS
Este producto ha sido probado y se ha demostrado que cumple los requisitos Bluetooth BQB, parte 15 de la normativa FCC, directiva R&TTE
(99/5/CEE) o los requisitos exigidos para obtener el distintivo CE.
8. FCC STATEMENT
This device complies with part 15 of the FCC Rules. Operation is subject to the following two
conditions:
(1) This device may not cause harmful interference, and
(2) This device must accept any interference received , including interference that may cause undesired operation.
Note:
The manufacturer is not responsible for ANY interference, for example RADIO or TV interference, caused by unauthorized modifications to this equipment.
Such modifications could void the user’s authority to operate the equipment.
Federal Communication Commission Interference Statement
This equipment has been tested and found to comply with the limits for a Class B digital device, pursuant to Part 15 of the FCC Rules. These limits are
designed to provide reasonable protection against harmful interference in a residential installation. This equipment generates, uses and can radiate radio
frequency energy and, if not installed and used in accordance with the instructions, may cause harmful interference to radio communications. However, there
is no guarantee that interference will not occur in a particular installation. If this equipment does cause harmful interference to radio or television reception,
which can be determined by turning the equipment off and on, the user is encouraged to try to correct the interference by one of the following measures:
1.
Reorient or relocate the receiving antenna.
2.
Increase the separation between the equipment and receiver.
Connect the equipment into an outlet on a circuit different from that to which the receiver is connected. Consult the dealer or an experienced radio/TV
3.
technician for help.
FCC Caution: Any changes or modifications not expressly approved by the party responsible for compliance could void the user's authority to operate this equipment.
IMPORTANT NOTE:
FCC Radiation Exposure Statement:
This equipment complies with FCC radiation exposure limits set forth for an uncontrolled environment. This equipment should be installed and operated with minimum distance
20cm between the radiator & your body. This transmitter must not be co-located or operating in conjunction with any other antenna or transmitter.
Español
Página 13
9. DECLARACIÓN PARA LA CEE
10. DECLARACIÓN:
A menos que se tenga la autorización por escrito del fabricante original, está prohibido copiar, divulgar o grabar en forma alguna este documento o partes del mismo.
La compañía se reserva el derecho introducir cambios y mejoras en el producto descrito en este documento sin necesidad de previo aviso.
Nota:
Cerciórese de que su teléfono móvil admita perfiles Bluetooth y que el operador de red admita las funciones descritas en este manual, ya que de lo contrario no podrá hacer uso de
las respectivas funciones de este kit para automóvil.
Español
Página 14
11. TÉRMINOS DE LA GARANTÍA
ANYCOM Technologies AG o ANYCOM Technologies Inc. responde ante el comprador original de este producto de hardware por defectos de material y fabricación durante un
período de DOS (2) AÑOS a partir de la fecha que figura en el comprobante de compra. Si se descubren defectos, ANYCOM reparará o sustituirá este producto (según lo que
juzgue más oportuno) sin cargo alguno, siempre que sea devuelto a ANYCOM dentro del período de garantía y junto con todo el hardware, los cables y el software. Para cada
producto devuelto de acuerdo a los términos de esta garantía, se le requerirá un número RMA ANYCOM (autorización de devolución) junto con su nombre, dirección, número
de teléfono y una copia del comprobante original de compra como prueba de la fecha de venta. Un número RMA ANYCOM puede obtenerse llamando directamente a la
empresa desde los EE.UU., Canadá y Lejano Oriente al número (001) (949) 553-9426. Desde Europa, Medio Oriente y África: (049) (2161) 57630. Esta garantía es válida sólo
para los productos de hardware fabricados por ANYCOM, identificados por la marca ANYCOM o su logotipo anexo. Esta garantía perderá su validez si el producto ha recibido
daños a causa de accidente, mal uso, abuso, servicio no autorizado o aplicaciones no indicadas. ANYCOM no garantiza productos que no sean de ANYCOM, incluido el
software que acompaña a los productos ANYCOM producido por otros fabricantes. Los programas de software de fabricantes distintos a ANYCOM que incorporan los
productos ANYCOM vienen con su garantía por separado, la cual consta en los documentos entregados por cada fabricante junto con sus productos de software. Estas
garantías son no-transferibles y exclusivas y se aplican en lugar de toda otra garantía, ya sea oral o escrita, explícita o implícita, INCLUYENDO, DONDE LA LEY LO PERMITA,
CUALQUIER GARANTÍA IMPLÍCITA DE IDONEIDAD MERCANTIL. ANYCOM declina toda responsabilidad por daños incidentales o derivados que resulten de
incumplimientos de garantía, lo que incluye (aunque no sólo) pérdidas de beneficios, tiempo, daños o restitución de bienes y equipos.
ANYCOM Technologies AG • Broichmühlenweg 42 • D-41066 Mönchengladbach • Germany
E-Mail: [email protected] • Teléfono: +49 2161 57630 • Asistencia técnica : +49 900 1100821
ANYCOM Technologies Inc. • PO Box 10127 • Newport Beach, CA 92658 • USA
E-Mail: [email protected] • Teléfono: 866-553-9426
Exención de responsabilidad:
La información dada en este documento se facilita a título meramente informativo y podrá ser modificada sin previo aviso. Se facilita "COMO ES" y sin
ninguna garantía. Todo riesgo derivado del uso de esta información será responsabilidad exclusiva del lector. En ningún caso se podrá responsabilizar a
ANYCOM por daños indirectos, derivados, incidentales, especiales, delictivos o de otro tipo (incluyendo, sin limitación, perjuicios por beneficios comerciales
no obtenidos o interrumpidos o pérdida de información comercial) que se originen del uso (o estén en conexión con el uso, disponibilidad y prestaciones) de
la presente información, aun en el caso de que ANYCOM hubiera podido ser advertida de la posibilidad de que se produjeran tales perjuicios.
Marcas comerciales:
ANYCOM, el logotipo ANYCOM y los productos ANYCOM aquí relacionados son marcas comerciales o marcas registradas de ANYCOM. La ausencia de un
logotipo o nombre de producto en este sitio Web no constituye una renuncia a los derechos de marca o propiedad intelectual de ANYCOM concernientes a tal
nombre o logotipo. Todas las demás marcas comerciales son propiedad de sus respectivos titulares.
www.anycom.com
Asistencia técnica: 866-553-94 26
DE 45273917
PT 00068
La siguiente información es sólo para los países de la UE:
El uso de este distintivo denota que este producto no ha de desecharse como basura doméstica. Asegurándose de que este producto sea desechado del modo debido,
contribuirá a evitar posibles consecuencias perniciosas para el medio-ambiente y la salud humana, lo que podría ser el caso si este producto se llega a desechar de forma
inadecuada. Si precisa más información acerca del reciclaje de este producto, póngase en contacto con su municipalidad, su servicio de recogida de basura doméstica o el
comercio en el que haya comprado el producto.
Español
GEBRUIKSHANDLEIDING
Bluetooth carkit HCC-250
INHOUD
1.
2.
3.
4.
5.
6.
7.
8.
9.
10.
11.
Introductie
Leveromvang
Uw handsfree gebruiken
2.1. Batterij Opladen
2.2. Uw handsfree bevestigen
2.3. Handsfree in-/uitschakelen
2.4. Uw handsfree pairen/verbinden met Bluetooth-apparaat
2.4.1. Uw handsfree pairen met Bluetooth-handset
2.4.2. Alle gepairde records wissen
2.4.3. Uw handsfree verbinden/ontkoppelen via Bluetooth
2.5 Oproepfuncties
2.5.1 Algemene bediening
2.5.2 Mute
2.5.3 Oproepen overzenden naar/van uw handset
2.5.4 Voicedialing
2.5.5 Geavanceerde oproepfuncties
2.6 AV-functies
2.6.1 Handset AV-functie gebruiken
2.6.2 AV-bediening
2.7 Volume-instelling
2.8 Uw handsfree pairen/verbinden met ander Bluetooth-apparaat
Quick User Guide
3.1. LED-indicatiepatronen
3.2. Quick User Guide
Onderhoud
Belangrijke mededelingen en FAQ's
Veiligheid
Certificatie en veiligheidstoelatingen
Fcc Statement
CE-verklaring
Verklaring
Garantie
2
2
3
3
4
4
5
5
5
5
6
6
6
6
6
6
6
6
7
7
7
7
7
7
10
11
12
12
12
13
13
14
Pagina 2
1. INTRODUCTIE
Bluetooth carkit
Deze Bluetooth carkit is een speciaal ontworpen product waarmee autobestuurders mobiel kunnen telefoneren zonder de mobiele telefoon te moeten vasthouden.
Het verschaft een zuivere, snoerloze audioverbinding met uw Bluetooth mobiele telefoon en PDA. Het product kan behalve in de auto ook op kantoor of thuis
worden gebruikt.
Naast gebruik in de auto kan deze draagbare uitrusting, die wordt ondersteund door een interne oplaadbare lithium-ionbatterij, ook op kantoor als normale
handsfree-uitrusting om te telefoneren zonder de telefoon te moeten vasthouden worden gebruikt. De uitrusting kan ook naast een PC met Bluetooth worden
gepositioneerd om te telefoneren via internet.
Leveromvang
1.
2.
3.
4.
5.
ANYCOM HCC-250
Zonneklepclip
Ventilatorclip
12/24 V auto-oplaadset
Gebruikshandleiding
2.
5.
1.
1.
3.
4.
1. Luidspreker: Voicedelivery.
2. Rode/blauwe LED: Tonen apparaatstatus.
3. Toets
: Apparaat in-/uitschakelen.
4. Toets
: Oproep beantwoorden/beëindigen,
aansluiten/ontkoppelen, oproep overzenden tussen handsfree en
telefoon.
5. Toets +: Volume omhoog, laatste nummer herhalen, mute bellen.
6. Toets -: Volume omlaag, alle gepairde records wissen, oproep
afwijzen, voicedialing, mute bellen
7. Microfoon: Voicepick-up
Afbeelding: 1 Overzicht
8. Laadpoort: Aansluiten op mobiele (of auto-) lader om de
apparaatbatterij op te laden
Nederlands
Pagina 3
2. UW HANDSFREE GEBRUIKEN
Batterij opladen en gebruiken
2.1 Batterij opladen
Deze carkit bevat een oplaadbare li-polymeerbatterij. De eerste keer opladen duurt ongeveer 4 uur. Later duurt dit ongeveer 2-3 uur. Gedetailleerde
oplaadprocedure:
1.
Sluit de auto-oplader aan op de sigarettenaansteker, of steek de USB-kabel in de PC.
2.
Zie afbeelding 2, steek de connector van de oplader in de handsfree-oplaadpoort om met opladen te beginnen. Zowel de rode als de blauwe LED brandt
tijdens opladen. Als de rode LED uitgaat, is de batterij helemaal opgeladen en kunt u de oplader van de carkit en de stroomuitgang scheiden.
Afbeelding: 2 Batterij Opladen
Opmerking:
Het is raadzaam om uw carkit op te laden als deze niet wordt gebruikt.
“Insteken” van de oplader leidt tot een apparaatreset. Maar als de carkit bezig is met opladen (oplader is ingestoken) werkt de carkit normaal.
Tijdens een oproep wordt de bestaande verbinding tussen de carkit en de mobiele telefoon gereset na “insteken” van de oplader. De oproep wordt tijdelijk
drukken
"teruggezet" naar de mobiele telefoon. De verbinding probeert de verbinding automatisch weer te maken. Eventueel moet de gebruiker kort op toets
om het apparaat weer te verbinden.
Batterij Informatie
Een volledig geladen batterij ondersteunt ononderbroken spreektijd tot 14 uur en stand-by (bijvoorbeeld als het apparaat zonder verbinding is ingeschakeld)
gedurende ongeveer 25 dagen.
Als de batterij bijna ontladen is, piept de carkit ongeveer elke 20 seconden en gaan de blauwe en rode LED's om de 3 seconden afwisselend branden; laad dan
de batterij op zoals hierboven beschreven.
Opmerking: Overladen verkort de levensduur van de batterij. Als een geheel opgeladen batterij niet wordt gebruikt, verliest deze na verloop van tijd vermogen.
Extreme temperatuur (te heet of te koud) beïnvloedt eveneens de laadprestaties en de levensduur.
Nederlands
Pagina 4
2.2 Uw handsfree bevestigen
De ANYCOM HCC-250 Car-Kit kan eenvoudig in een auto worden bevestigd met de zonneklepclip om het product op de zonneklep boven de bestuurdersstoel of
met de ventilatorbevestigingsclip te bevestigen.
Zoals te zien in afbeeldingen 3 en 4 beschikt het apparaat aan de achterkant over twee magnetische clips. Hieraan kan de zonneklepclip of de ventilatorclip
worden bevestigd. Voor goede montage is het verstandig om eerst de zonneklepclip aan de zonneklep te bevestigen, en dan de carkit aan de zonneklepclip.
Om de ventilatorclip te gebruiken kunt u de cliprichting aan uw autoventilator aanpassen, zoals te zien in afbeelding 5.
Opmerking: De microfoon van de ANYCOM HCC-250 Car-Kit moet naar de geluidsbron gericht zijn.
Magneetpunt
Ventilator Bevestiging Clip
Zonneklepclip
Afbeelding 3: Zonneklepclip op magneetpunten bevestigen
Ventilatorclip
(verticale richting)
Afbeelding 4: Ventilator bevestigen Bevestiging Clip aan magneetpunten
Ventilatorclip
(horizontale richting)
Metalen Basis
Afbeelding 5: Richting van ventilatorclip instellen (verticaal of horizontaal)
Iets uittrekken en dan
omlaag duwen
Afbeelding 6: Clip van metalen basis losmaken
Door zijn grote mobiliteit en flexibiliteit kan deze carkit ook in andere omgevingen dan in een auto worden gebruikt.
2.3 ANYCOM HCC-250 Car-Kit in-/uitschakelen
Handsfree inschakelen: Houd toets
minstens 3 seconden ingedrukt tot 2 inschakeltonen klinken, de blauwe LED 3 keer kort knippert en dan 1 keer per 3
seconden; de rode LED is uit. Dit duidt erop dat de handsfree is ingeschakeld.
De HCC-250 uitschakelen: Houd toets
zijn.
minstens 3 seconden ingedrukt tot 2 uitschakeltonen klinken, de rode LED 3 keer knippert en vervolgens alle LED's uit
Dit duidt erop dat de carkit is uitgeschakeld.
Nederlands
Pagina 5
2.4 Uw handsfree pairen/verbinden met Bluetooth-apparaat
2.4.1 Uw ANYCOM HCC-250 pairen via Bluetooth mobiele telefoon (of ander apparaat)
Alvorens te telefoneren moet u uw ANYCOM HCC-250 en telefoon eerst pairen. Door ze pairen worden uw carkit en uw mobiele telefoon exclusief met
elkaar verbonden. De mobiele telefoon onthoudt de unieke ID (of sleutel) van de HCC-250. Dit garandeert een unieke en gecodeerde snoerloze
verbinding tussen uw carkit en uw mobiele telefoon tijdens oproepen.
Gedetailleerde bedieningsprocedure:
1.
Positioneer uw ANYCOM HCC-250 dicht bij uw Bluetooth-mobiele telefoon en controleer of uw carkit is uitgeschakeld en de uw mobiele telefoon is
ingeschakeld
2.
Houd toets
minstens 6 seconden ingedrukt tot de blauwe en rode LED's onderbroken afwisselend knipperen. U hoort 2 inschakeltonen en een
pairingtoon die aangeven dat de carkit in pairingmodus is
3.
Lees in de gebruiksaanwijzing van uw telefoon hoe u het zoeken naar een Bluetooth-apparaat vanuit uw telefoon kunt starten; op het scherm verschijnt
dan een lijst met Bluetooth-apparaten die door de telefoon zijn gevonden.
4.
Selecteer deze Bluetooth-carkit ANYCOM HCC-250 uit de lijst en start het pairen volgens de aanwijzingen op het scherm.
5.
Voer de sleutel “0000” in, en bevestig het pairen van de ANYCOM HCC-250 met uw mobiele telefoon. Zodra het pairen is voltooid, klinkt een
verbindingstoon en knippert de blauwe LED 3 keer per 2 seconden. Dit geeft aan dat het carkitapparaat en de mobiele telefoon zijn gepaired.
Opmerking:
Na succesvol pairen is de rode LED van de carkit uit. De blauwe LED knippert 3 keer per 2 seconden. Als uw mobiele telefoon aangeeft dat het pairen is mislukt
en de carkit nog in pairingmodus is, moet u teruggaan naar bovenstaande stappen 3-5 en het pairen herhalen.
Uw carkit blijft ongeveer 2 minuten in pairingmodus. Als pairen niet binnen 2 minuten kan worden voltooid, schakelt de ANYCOM HCC-250 in stand-bymodus
(zonder Bluetooth-verbinding in dit geval). U kunt de carkit nu uitschakelen en bovenstaande stappen 2-5 herhalen.
2.4.2 Alle gepairde records wissen
Deze carkit kan worden gepaired met tot 8 Bluetooth-apparaten. Als de carkit in pairingmodus is, kunnen door minstens 3 seconden ingedrukt houden van de toets alle in de carkit opgeslagen gepairde Bluetooth-apparaatprofielen worden gewist. De carkit verlaat dan de pairingmodus. De blauwe LED knippert 1 keer per
3 seconden.
2.4.3 Uw ANYCOM HCC-250 Car-Kit aansluiten op/ontkoppelen van een Bluetooth-apparaat
Als de carkit communiceert met een Bluetooth-uitrusting via Handsfree Profile, wordt de Bluetooth-verbinding tussen de twee apparaten eerst gemaakt. Als twee
Bluetooth-uitrustingen eenmaal zijn gepaired, kunnen deze eenvoudigweg opnieuw worden aangesloten.
Uw ANYCOM HCC-250 verbinden met een Bluetooth mobiele telefoon
Voor het maken van een Bluetooth-verbinding is het initiatief van een ofwel de carkit of de mobiele telefoon nodig. Gedetailleerde beschrijving:
.
1.
Verbinding maken vanuit de carkit: Positioneer de carkit in de buurt van de Bluetooth mobiele telefoon en druk dan op toets
2.
Verbinding maken vanuit de Bluetooth mobiele telefoon: Positioneer de carkit in de buurt van de Bluetooth mobiele telefoon en ga dan volgens de
gebruiksaanwijzing van de telefoon te werk om de carkit te vinden en de verbinding te maken.
Zodra de verbinding is gemaakt, klinkt een verbindingstoon en knippert de blauwe LED 3 keer per 2 seconden
Uw ANYCOM HCC-250 ontkoppelen van uw Bluetooth mobiele telefoon:
Als de carkit is verbonden met de Bluetooth mobiele telefoon (of in verbonden modus), kunt u deze als volgt ontkoppelen:
1.
Houd toets
2.
De gebruiksaanwijzing van de mobiele telefoon volgen en de ontkoppelen vanuit de telefoon.
minstens 3 seconden ingedrukt.
Zodra ontkoppelen is voltooid, klinkt een verbindingstoon en knippert de blauwe LED 1 keer per 3 seconden.
Nederlands
Pagina 6
2.5 Oproepfuncties
2.5.1 Algemene oproepbediening
Voordat u een nummer kunt kiezen moeten zowel uw ANYCOM HCC-250 Car-Kit als uw mobiele telefoon zijn ingeschakeld. En uw carkit en telefoon moeten zijn
verbonden via Bluetooth.
Oproep beantwoorden:
Druk op toets
Oproep afwijzen:
Houd toets - minstens 3 seconden ingedrukt.
Oproep beëindigen:
Druk op toets
Nummer herhalen:
Houd toets + minstens 3 seconden ingedrukt
.
.
Voor bovenstaande bediening knippert de blauwe LED 3 keer kort per 2 seconden en is de rode LED uit.
2.5.2 Oproep mute
Tijdens een gesprek kunt u "mute" in- of uitschakelen door gelijktijdig indrukken van toets + en toets -. De blauwe LED knippert 3 keer kort per 2 seconden en de
rode LED is uit.
2.5.3 Oproepen overzenden naar/van uw mobiele telefoon
Oproepen overzenden naar/van uw mobiele telefoon: Houd toets
LED is uit.
Oproepen overzenden van uw mobiele telefoon: Druk op toets
minstens 3 seconden ingedrukt, de blauwe LED knippert 1 keer per 3 seconden; de rode
, en de blauwe LED knippert 3 keer kort per 2 seconden.
2.5.4 Voicedialing
Als de verbonden telefoon voicedialing ondersteunt, kunt u toets - minstens 3 seconden ingedrukt houden om voicedialing te activeren. De blauwe LED knippert
3 keer per 2 seconden. Voordat u voicedialing kunt gebruiken, moet u de voicetags in uw mobiele telefoon hebben opgenomen. Zie de handleiding van uw
mobiele telefoon voor een nauwkeurig beschrijving over het activeren van voicedialing en het opnemen van voicetags.
Als voicedialing is geactiveerd, kunt u kort op toets - drukken om voicedialing af te breken. De blauwe LED knippert 3 keer kort per 2 seconden en de
rode LED is uit.
2.5.5 Geavanceerde oproepfuncties
Als uw mobiele telefoon beschikt over wachten/conferentie functies, kan uw ANYCOM HCC-250 Car-Kit de functie als volgt ondersteunen:
1.
2.
Als een nieuwe oproep binnenkomt terwijl u in gesprek bent:
1)
Houd toets + minstens 3 seconden ingedrukt om de actieve oproep te houden en de binnenkomende oproep te accepteren.
2)
Druk op toets
om de actieve oproep te beëindigen de nieuwe oproep te beantwoorden.
Bij twee oproepen is de ene actief en wordt de andere gehouden:
1)
Houd toets + minstens 3 seconden ingedrukt of wissel tussen actieve oproep en houdoproep.
2)
Druk op toets
om de actieve oproep te beëindigen en de houdoproep te accepteren.
3)
Houd toets - minstens 3 seconden ingedrukt voor een conferentie.
Voor bovenstaande bediening knippert de blauwe LED 3 keer kort per 2 seconden en is de rode LED uit.
2.6 A2DP Functies
Deze carkit ondersteunt het Bluetooth A2DP profiel om muziek in hoge kwaliteit af te spelen. Als een Bluetooth-geactiveerd multimedia-/muziekapparaat of
mobiele telefoon met A2DP-ondersteuning wordt verbonden, kan stereomuziek worden beluisterd en met de afstandsbediening worden geregeld.
2.6.1 A2DP-functie van de mobiele telefoon gebruiken
Voor mobiele telefoon die Bluetooth A2DP profielen ondersteunen, kunt u een audioverbinding tussen de mobiele telefoon en de carkit worden gemaakt om naar
muziek van de telefoon te luisteren. Afhankelijk van de telefooneigenschappen kan de audioverbinding automatisch worden gemaakt als de muziek wordt gestart.
Als uw mobiele telefoon Bluetooth A2DP profielen ondersteunt, maar geen audioverbinding kan worden opgebouwd als de muziekweergave wordt gestart, kunt u
de gebruiksaanwijzing van uw telefoon raadplegen over het maken van een audioverbinding.
Nederlands
Pagina 7
2.6.2 AVRCP bediening
De volgende bedieningsaanwijzingen kunnen worden toegepast om uw Bluetooth telefoon of mediaplayer te regelen voor het luisteren naar muziek:
Play:
Pauze:
Druk op toets
Druk op toets
.
.
Stop:
Houd toets
Vooruit:
Achteruit :
Houd toets + minstens 3 seconden ingedrukt.
Houd toets - minstens 3 seconden ingedrukt.
minstens 3 seconden ingedrukt.
2.7 Volume-instelling
Indien verbonden of in spreek-/afspeelmodus kunt u het geluidsvolume verhogen of verlagen door indrukken van toetsen + respectievelijk - . U kunt bovenstaande
handeling herhalen tot de luidspreker het gewenste volume heeft bereikt.
Opmerking:
Meestal wordt de Bluetooth-volumeregeling van de carkit gesynchroniseerd met de telefoon. Dit betekent dat het volume van uw ANYCOM HCC-250 kan worden
geregeld met uw telefoon en omgekeerd. Dit is echter niet bij alle fabrikanten altijd het geval.
2.8 Uw handsfree pairen/verbinden met een ander Bluetooth-apparaat
Naast de Bluetooth telefoon kan uw carkit ook worden gepaired met andere Bluetooth-apparaten voor het maken van snoerloze verbindingen in de directe
omgeving. De procedures die worden beschreven in bovenstaand gedeelte 2.4 kunnen hiervoor worden gebruikt. U kunt ook de gebruiksaanwijzing van het
Bluetooth-apparaat opvolgen om pairen vanuit de apparaatzijde te starten.
Deze carkit kan worden gepaired met tot 8 Bluetooth-apparaten (inclusief mobiele telefoons). De bijbehorende 8 sets met pairinginformatie worden geregistreerd
door de carkit. Elk gepaird apparaat kan na het opbouwen van een Bluetooth verbinding snoerloos worden verbonden met de carkit. Lees gedeelte 2.4.3 over
procedures om een Bluetooth-verbinding te maken.
3. QUICK USER GUIDE
3.1 LED indicatiepatronen
LED patroon 1: Blauwe LED knippert 1 keer per 3 seconden; rode LED is uit.
LED patroon 2: Blauwe LED knippert 3 keer kort per 2 seconden; rode LED is uit.
LED patroon 3: Blauwe en rode LED's knipperen afwisselend.
LED patroon 4: Blauwe en rode LED's afwisselend elke 3 seconden.
LED patroon 5: Alle LED's zijn uit.
3.2 Quick User Guide
U kunt de instructies opvolgen uit onderstaande tabel 1-7 voor de bediening van uw ANYCOM HCC-250 Car-Kit apparaten. (zie gedeelte 1 voor details over de
toets en indrukduur van de toets.)
Opmerking: Uw carkit-apparaten kunnen alleen communiceren met gepairde Bluetooth-apparaten. Voor apparaten die alleen het Handsfree Profile (HFP)
ondersteunen, moet u ook de Bluetooth-verbinding maken tussen uw carkit en uw telefoon alvorens te telefoneren.
Nederlands
Pagina 8
Tabel 1: Aan/uit
HUIDIGE STATUS
HCC-250 INDICATOR
FUNCTIE
BEDIENING
TELEFOON
Inschakelen
Uitschakelen
HCC-250
AUDIOTOON
LED-INDICATOR
Uitschakelen
minstens 3
Houd toets
seconden ingedrukt
2 inschakeltonen
LED patroon 1
Stand-by
minstens 3
Houd toets
seconden ingedrukt
2 uitschakeltonen
LED patroon 5
Tabel 2: Pairing/aansluitingen
FUNCTIE
HUIDIGE STATUS
TELEFOON
Pairingmodus
selecteren
Wis alle gepairde
profielen
BEDIENING
HCC-250
Uitschakelen
Paringmodus
Carkit met
telefoon pairen
Aan
Paringmodus
Aansluiten (carkit
met telefoon)
Stand-by
(ontkoppeld)
Stand-by
(ontkoppeld)
Ontkoppelen
Stand-by
(verbinden)
Stand-by
(verbinden)
minstens 6
Houd toets
seconden ingedrukt
Houd toets - minstens 3
seconden ingedrukt
Neem voor de
pairingprocedure de
gebruiksaanwijzing van uw
telefoon in acht.
Sleutel is “0000”
Druk op toets
of maak de
verbinding vanuit de telefoon
minstens 3
Houd toets
seconden ingedrukt, of zie
anders de gebruiksaanwijzing
van de telefoon om de
verbinding vanuit de telefoon
op te bouwen.
HCC-250 INDICATOR
AUDIOTOON
LED-INDICATOR
2 inschakeltonen, en dan
1 pairingtoon
LED patroon 3
LED patroon 1
1 verbindingstoon
LED patroon 2
1 verbindingstoon
LED patroon 2
LED patroon 1
Tabel 3: Oproepfuncties
HUIDIGE STATUS
HCC-250 INDICATOR
FUNCTIE
BEDIENING
TELEFOON
HCC-250
Oproep
beantwoorden
Binnenkomende
oproep
Binnenkomende
oproep
Druk op toets
LED patroon 2
Oproep afwijzen
Binnenkomende
oproep
Binnenkomende
oproep
Houd toets - minstens 3
seconden ingedrukt
LED patroon 2
Oproep
beëindigen
Spreken
Spreken
Druk op toets
Nummer
herhalen
Stand-by
Stand-by
Houd toets + minstens 3
seconden ingedrukt
Toetstoon
LED patroon 2
Stand-by
Houd toets - minstens 3
seconden ingedrukt
Toetstoon
LED patroon 2
Voicedialing
Stand-by
AUDIOTOON
LED-INDICATOR
LED patroon 2
Nederlands
Pagina 9
Voicedialing
afbreken
Voicedialing
Voicedialing
Druk op toets -
HUIDIGE STATUS
LED patroon 2
HCC-250 INDICATOR
FUNCTIE
Volume omhoog
Toetstoon
BEDIENING
TELEFOON
HCC-250
Spreken
Spreken
Druk op toets +
AUDIOTOON
LED-INDICATOR
LED patroon 2
Volume omlaag
Spreken
Spreken
Druk op toets -
Mute
Spreken
Spreken
Druk tegelijkertijd op toets en toets +
Toetstoon
LED patroon 2
Mute
Druk tegelijkertijd op toets en toets +
Toetstoon
LED patroon 2
Unmute
Spreken
LED patroon 2
Tabel 4: Overzendfuncties
HUIDIGE STATUS
HCC-250 INDICATOR
FUNCTIE
Oproep overzenden
(carkit naar telefoon)
Oproep overzenden
(telefoon naar carkit)
BEDIENING
TELEFOON
HCC-250
Spreken
Spreken
Spreken
Spreken
AUDIOTOON
LED-INDICATOR
Houd toets
minstens 3
seconden ingedrukt
Toetstoon
LED patroon 1
Druk op toets
Toetstoon
LED patroon 2
Tabel 5: Aanduiding weinig voeding
HUIDIGE STATUS
HCC-250 INDICATOR
FUNCTIE
BEDIENING
TELEFOON
Waarschuwing weinig
voeding
HCC-250
AUDIOTOON
LED-INDICATOR
Behalve
uitgeschakeld
Elke 20 seconden piepen
LED patroon 4
Tabel 6: Geavanceerde oproepfuncties
HUIDIGE STATUS
FUNCTIE
Actieve oproep gehouden
en binnenkomende oproep
accepteren
Actieve oproep beëindigen
en nieuwe oproep
beantwoorden
Wisselen tussen oproep
houden en actieve oproep
Actieve oproep beëindigen
en oproep in de wacht
accepteren
Conferentie oproepen
HCC-250 INDICATOR
BEDIENING
TELEFOON
TELEFOON
AUDIOTOON
LED-INDICATOR
Spreken
Oproep wacht
Houd toets + minstens 3
seconden ingedrukt
Spreken
Oproep wacht
Druk op toets
LED patroon 2
Spreken
Oproep in de
wacht
Houd toets + minstens 3
seconden ingedrukt
LED patroon 2
Spreken
Oproep in de
wacht
Druk op toets
LED patroon 2
Spreken
Oproep in de
wacht
Houd toets - minstens 3
seconden ingedrukt
LED patroon 2
LED patroon 2
Nederlands
Pagina 10
Tabel 7: Inwerken met mediaplayer
HUIDIGE STATUS
FUNCTIE
TELEFOON/PLAY
ER
Play
HCC-250 INDICATOR
BEDIENING
HCC-250
AUDIOTOON
LED-INDICATOR
Druk op toets
Pauze
Druk op toets
Stop
minstens 3
Houd toets
seconden ingedrukt
Volume omhoog
Druk op toets +
Volume omlaag
Druk op toets -
Vooruit
Houd toets + 3 seconden
Achteruit
Houd toets - 3 seconden
4. ONDERHOUD
ANYCOM HCC-250 is een zorgvuldig ontworpen communicatieapparaat. Zorgvuldig onderhoud en juist gebruik verlengen de gebruiksduur en bevorderen
optimale prestaties. De volgende onderhoudsprocedures kunnen hierbij van hulp zijn:
z
Schakel het apparaat uit en houd uw apparaat op een veilige plek als het niet wordt gebruikt
z
Houd het apparaat droog, uit de buurt van water, neerslag, vochten andere vloeistoffen die elektrische kringen kunnen aantasten. Als het apparaat nat
wordt, schakel het dan onmiddellijk uit en wacht tot het apparaat volledig droog is alvorens het opnieuw in te schakelen
z
Houd de carkit uit de buurt van stof en vuil. Anders kunnen mechanische en elektronische onderdelen worden beschadigd
z
Houd de carkit uit de buurt van hoge temperaturen en direct zonlicht. Extreem hoge temperaturen kunnen de prestaties negatief beïnvloeden, de
z
Houd het apparaat uit de buurt van extreme kou. Als u het naar een warmere plek meeneemt, kan binnenin vocht ontstaan. Dit kan leiden tot beschadiging
van de elektrische kringen.
z
Voorkom laten vallen, slaan op en schudden van de carkit. Anders kunnen de mechanische onderdelen en de interne elektronische kringen worden
beschadigd.
z
Voorkom bijtende chemicaliën, oplosmiddelen en andere agressieve middelen voor het reinigen van de carkit. Gebruik voor de reiniging een enigszins
z
Raadpleeg altijd de dichtstbijzijnde geautoriseerde service voor reparatie van de carkit als deze defect is. Zelf uit elkaar nemen, wijzigen en vervangen van
levensduur van de batterij verkorten en kunststof vouwen of vervormen.
vochtige doek HCC-250.
componenten kan slechte prestaties en beschadigingen veroorzaken en leidt tot verval van de garantie
Nederlands
Pagina 11
5. BELANGRIJKE MEDEDELINGEN EN FAQ'S
Q1.
Rode LED knippert:
Batterij bijna leeg; zo snel mogelijk weer opladen.
Q2.
Kan carkit niet inschakelen na meer dan 20 minuten opladen:
De eerste keer moet de carkit voor inschakelen minstens 40 minuten worden opgeladen. Het is raadzaam om de batterij helemaal op te laden alvorens de
carkit in te schakelen.
Q3.
Zonder laadindicator:
Als de batterij leeg is of nadat de carkit lang niet meer werd gebruikt, kan zet even duren voordat de rode LED gaat branden nadat de oplader is
aangesloten.
Q4.
Q5.
Ik hoor niets op de carkit: controleer het volgende
z
HCC-250 is ingeschakeld
z
HCC-250 is gepaired met een mobiele telefoon
z
HCC-250 moet worden verbonden met een mobiele telefoon (behalve als de handset alleen telefoonprofiel ondersteunt)
z
HCC-250 en mobiele telefoon bevinden zich binnen 10 m/30 feet
z
HCC-250 en mobiele telefoon moeten een sterk signaal hebben
Carkit wordt niet gevonden bij het pairen met een telefoon:
Uw HCC-250 Car Kit is niet in pairingmodus, zie gedeelte 2.4.1 voor details.
Q6.
Moeten de gepairde carkit of de gepairde mobiele telefoon opnieuw worden gepaired terwijl ze zijn uitgeschakeld?
Nee. Bij mobiele telefoons die handsfreeprofiel ondersteunen moeten de carkit en de telefoon eerst worden verbonden. Zie gedeelte 2.4.4 voor details.
Q7.
Voicedialing werkt niet:
Controleer eerst of de telefoon voicedialing ondersteunt, neem eerst de voicetag op. Doe dit niet in een lawaaierige omgeving.
Nederlands
Pagina 12
6. VEILIGHEID
•
Gebruik alleen de bijgeleverde oplader.
•
Waarschuwing; explosierisico als de batterij wordt vervangen door een verkeerd type.
•
Controleer de wetten en bepalingen over het gebruik van mobiele telefoons en handsfreeuitrusting in het gebied waar u zich bevindt. Houd uw
aandacht steeds volledig bij het rijden en parkeer de auto alvorens te telefoneren indien de omstandigheden dit vereisen.
•
Laat kinderen niet met uw HCC-250 Car-Kit spelen; deze bevat kleine delen die los kunnen raken en kunnen leiden tot stikken.
•
Dit apparaat bevat een li-polymeerbatterij. Houd deze uit de buurt van vuur (ook als u de carkit weggooit), anders kan de batterij exploderen.
•
De carkit, in het bijzonder de batterij ervan, moet volgens de voorschriften worden afgevoerd; raadpleeg hiervoor uw plaatselijke
recyclinginstituut.
7. CERTIFICATIE EN VEILIGHEIDSTOELATINGEN
Dit product is gekeurd en voldoet aan Bluetooth BQB (Bluetooth Qualification Body) voorschriften, deel 15 van FCC-regelingen, R&TTE richtlijn
(99/5/EC) of CE-markeringsvereisten.
8. FCC STATEMENT
This device complies with part 15 of the FCC Rules. Operation is subject to the following two
conditions:
(1) This device may not cause harmful interference, and
(2) This device must accept any interference received , including interference that may cause undesired operation.
Note:
The manufacturer is not responsible for ANY interference, for example RADIO or TV interference, caused by unauthorized modifications to this equipment.
Such modifications could void the user’s authority to operate the equipment.
Federal Communication Commission Interference Statement
This equipment has been tested and found to comply with the limits for a Class B digital device, pursuant to Part 15 of the FCC Rules. These limits are
designed to provide reasonable protection against harmful interference in a residential installation. This equipment generates, uses and can radiate radio
frequency energy and, if not installed and used in accordance with the instructions, may cause harmful interference to radio communications. However, there
is no guarantee that interference will not occur in a particular installation. If this equipment does cause harmful interference to radio or television reception,
which can be determined by turning the equipment off and on, the user is encouraged to try to correct the interference by one of the following measures:
1.
Reorient or relocate the receiving antenna.
2.
Increase the separation between the equipment and receiver.
3.
Connect the equipment into an outlet on a circuit different from that to which the receiver is connected. Consult the dealer or an experienced radio/TV
technician for help.
FCC Caution: Any changes or modifications not expressly approved by the party responsible for compliance could void the user's authority to operate this equipment.
IMPORTANT NOTE:
FCC Radiation Exposure Statement:
This equipment complies with FCC radiation exposure limits set forth for an uncontrolled environment. This equipment should be installed and operated with minimum distance
20cm between the radiator & your body. This transmitter must not be co-located or operating in conjunction with any other antenna or transmitter.
Nederlands
Pagina 13
9. CE-VERKLARING
10. VERKLARING:
Zonder schriftelijke toestemming van de originele fabrikant is reproductie, openbaarmaking, distributie van dit document of delen ervan in welke vorm dan ook verboden.
Wijzigen en verbeteren van het product dat in dit document wordt beschreven door de onderneming zonder bekendmaking vooraf voorbehouden.
Opmerking:
Uw mobiele telefoon moet Bluetooth-profielen ondersteunen, de netwerkoperator moet de in deze handleiding beschreven functies ondersteunen, anders kunnen de desbetreffende
functies van deze carkit niet worden gerealiseerd.
Nederlands
Pagina 14
11. GARANTIE
ANYCOM Technologies AG of ANYCOM Technologies Inc. verleent gedurende TWEE (2) JAAR na aankoop in de handel aan de eigenaar van dit garantie op materiaal- en
vervaardigingsfouten.hardwareproduct Bij fouten repareert of vervangt ANYCOM dit apparaat kosteloos, onder de voorwaarde dat het compleet met hardware, kabels en
software naar ANYCOM is teruggezonden. Voor elk product dat volgens deze voorwaarden terug wordt gezonden is een ANYCOM RMA-nummer (Return Merchandise
Authorization), uw naam, adres, telefoonnummer en als bewijs van de datum een kopie van de originele bon van aankoop vereist. Een ANYCOM RMA nummer ontvangt u als u
de onderneming direct belt in de USA, Canada en Azië (001) (949) 553-9426, of in Europa, het Midden-Oosten en Afrika (049) (2161) 57630. Deze garantie is uitsluitend van
toepassing op hardwareproducten die zijn vervaardigd door ANYCOM hetgeen zichtbaar is aan ANYCOM-merkteken of logo. Deze garantie is niet van toepassing als het
product is beschadigd door een ongeluk, misbruik, verkeerd gebruik, niet-geautoriseerd gebruik of een verkeerde toepassing. ANYCOM stelt zich niet aansprakelijk voor
producten die geen ANYCOM-producten zijn, inclusief software die wordt gebruikt voor ANYCOM-producten en is geproduceerd door andere fabrikanten. Voor
softwaretoepassingen die zijn gemaakt door andere fabrikanten dan ANYCOM en samen met ANYCOM-producten worden verkocht gelden andere garantiebepalingen die zijn
vastgelegd door de desbetreffende fabrikant. Bovenstaande garantie is niet overdraagbaar, exclusief en vervangt alle andere garantiebepalingen, in welke vorm dan ook,
INCLUSIEF, VOOR ZOVER WETTELIJK TOEGESTAAN, ELKE GARANTIE OVER GEBRUIKSGESCHIKTHEID. ANYCOM is niet verantwoordelijk voor incidentele of
gevolgschade door overtreding van de garantiebepalingen; dit betreft onder andere maar niet uitsluitend winstderving, uitvaltijden, beschadiging of vervanging van uitrusting of
eigendom.
ANYCOM Technologies AG • Broichmühlenweg 42 • D-41066 Mönchengladbach • Germany
E-mail: [email protected] • Telefoon: +49 2161 57630 • Support : +49 900 1100821
ANYCOM Technologies Inc. • PO Box 10127 • Newport Beach, CA 92658 • USA
E-mail: [email protected] • Telefoon: 866-553-9426
Disclaimer:
De informatie in dit document is utsluitend bedoeld om informatie te verstrekken. Wijzigingen onder voorbehoud. Het geldt als zodanig en onder voorbehoud.
Risico dat ontstaat door toepassing van de informatie draagt de lezer. In geen geval stelt ANYCOM zich aansprakelijk voor indirecte, incidentele, speciale
schade, gevolgschade of schade die ontstaat door schadevergoeding of welke schade dan ook (inclusief en zonder beperking; winstderving,
bedrijfsonderbreking of verlies van zakelijke gegevens) die voortvloeit uit of in combinatie met de beschikbaarheid , inhoud of gebruik van de verschafte
informatie, zelfs als ANYCOM op de hoogte is gesteld van de mogelijkheid van dergelijke beschadiging.
Handelsmerken:
ANYCOM, het ANYCOM logo en de ANYCOM producten zijn handelsmerken of gedeponeerde handelsmerken van ANYCOM. Afwezigheid van een
productnaam of logo op deze website leidt niet tot een vrijgave van het handelsmerk van ANYCOM of andere intellectuele eigendomsrechten betreffende de
naam of het logo. Alle andere handelsmerken zijn eigendom van de desbetreffende eigenaars.
www.anycom.com
Technische support: 866-553-94 26
DE 45273917
PT 00068
De volgende informatie geldt alleen voor EU-landen:
Dit symbool betekent dat dit product geen huishoudelijk afval is. Door ervoor te zorgen dat dit product juist wordt afgevoerd, voorkomt u dat eventuele negatieve gevolgen voor
de omgeving en gezondheid. Raadpleeg voor meer gedetailleerde informatie over recycling van dit product uw plaatselijke overheid, uw reinigingsdienst of de winkel waar u het
product heeft gekocht.
Nederlands
MANUAL
Kit para Carros Bluetooth HCC-250
CONTEÚDO
1.
2.
3.
4.
5.
6.
7.
8.
9.
10.
11.
Introdução
Conteúdo da embalagem
Usar o seu equipamento
2.1. Carregar bateria
2.2. Montar o seu equipamento
2.3. Ligar/desligar o equipamento
2.4. Emparelhar/conectar o seu equipamento com dispositivo Bluetooth
2.4.1. Emparelhar o seu equipamento com telefone handset Bluetooth
2.4.2. Excluir todos os registos emparelhados
2.4.3. Conectar/desconectar o seu equipamento com dispositivo Bluetooth
2.5 Funções de chamada
2.5.1 Operações básicas de chamada
2.5.2 Silenciar chamada
2.5.3 Transferir chamada de/para o seu telefone handset
2.5.4 Marcação por voz
2.5.5 Funções avançadas de chamada
2.6 Funções AV
2.6.1 Usar função AV do telefone handset
2.6.2 Operações AV
2.7 Ajuste de volume
2.8 Emparelhar/conectar o seu equipamento com outro dispositivo Bluetooth
Guia prático do utilizador
3.1. Padrões de indicação dos LEDs
3.2. Guia prático do utilizador
Manutenção
Mensagens importantes e dúvidas mais frequentes
Segurança
Aprovações de segurança e certificação
FCC Statement
Declaração CE
Declaração
Informações sobre garantia
2
2
3
3
4
4
5
5
5
5
6
6
6
6
6
6
6
6
7
7
7
7
7
7
10
11
12
12
12
13
13
14
Página 2
1. INTRODUÇÃO
Kit para Carros Bluetooth
Este Kit para Carros Bluetooth é um produto especialmente concebido para permitir aos motoristas efectuar e receber chamadas sem manusear o telemóvel. O
kit proporciona uma conexão clara de áudio sem fio com seu telemóvel Bluetooth e PDA. O produto pode ser utilizado no veículo, no escritório ou em casa.
Além das aplicações dentro do veículo, este equipamento portátil, que funciona com bateria interna de iões de lítio recarregável, também pode ser utilizado no
ambiente de escritório como equipamento "mãos livres" normal para efectuar/receber chamadas telefónicas sem o incómodo do contacto com as mãos. Ele
também pode ser disposto junto a um PC habilitado para Bluetooth a fim de efectuar chamadas por voz via internet.
Conteúdo da embalagem
1.
2.
3.
4.
5.
ANYCOM HCC-250
Grampo p/ quebra-sol
Grampo da base p/ saída de ar
Carregador p/ carros 12/24 V
Manual
2.
5.
3.
1.
4.
1. Altifalante: saída do som.
2. LED azul/vermelho: Indica a situação do equipamento.
3. Botão
: Ligar/desligar o equipamento.
4. Botão
: Responder/encerrar chamada, conectar/desconectar,
transferir uma chamada entre o equipamento e o telefone.
5. Botão +: Aumentar o volume, remarcar último número, silenciar
chamada.
6. Botão -: Diminuir o volume, excluir todos os registos emparelhados,
rejeitar chamada, marcação por voz, silenciar chamada
7. Microfone: entrada do som
Figura: 1 Aspectos gerais
8. Entrada para o carregador: conexão ao carregador móvel (ou do
carro) para carregar a bateria do equipamento
Português
Página 3
2. USAR O SEU EQUIPAMENTO
Carregar bateria e usar
2.1 Carregar a bateria
Este Kit para Carros contém uma bateria de polímero de lítio recarregável. Na primeira vez, a bateria carrega por cerca de 4 horas. Posteriormente, o tempo de
recarga é de 2-3 horas. Os procedimentos detalhados para carregar são os seguintes:
1.
Conecte o carregador veicular ao isqueiro, ou conecte o cabo USB no PC.
2.
De acordo com a figura 2 , conecte o conector na entrada para carregador do equipamento para iniciar a carga. Os LEDs azul e vermelho ficarão
acesos durante a carga. Assim que o LED vermelho apagar-se, a bateria estará com plena carga e já será possível desconectar o carregador do Kit
para Carros e da saída de energia.
Figura: 2 Carregar a bateria
Nota:
Recomenda-se carregar seu Kit para Carros quando estiver fora de uso.
Favor observar que introduzir o carregador causará o reinício ("reset") do equipamento. Porém, quando o Kit para Carros estiver a carregar (o carregador foi
introduzido), estará em operação normal.
Durante uma chamada, a conexão existente entre o Kit para Carros e o telemóvel será reiniciada ("reset") após a introdução do carregador. A chamada será
momentaneamente transferida de volta ao telemóvel. O Kit para Carros tentará restabelecer a conexão automaticamente. Às vezes, o utilizador precisa premir
para reconectar o equipamento.
rapidamente o botão
Informações sobre a bateria
Quando estiver com plena carga, a bateria suportará até 14 horas de conversação contínua e cerca de 25 dias em modo de espera (ou seja, o equipamento
está energizado mas sem conexão).
Quando a bateria estiver com pouca carga, haverá um sinal sonoro do Kit para Carros a cada 20 segundos e os LEDs azul e vermelho alternar-se-ão a cada 3
segundos; carregue então a bateria conforme a descrição acima.
Nota: A sobrecarga diminui a vida útil da bateria. Se uma bateria com plena carga não for usada, perderá energia com o tempo. Temperaturas extremas
(demasiado quente ou fria) também afectarão a capacidade de carga, a funcionalidade e a vida útil.
Português
Página 4
2.2 Montar o seu equipamento
O Kit para Carros ANYCOM HCC-250 pode ser facilmente montado dentro do carro com o grampo p/ quebra-sol ou com o grampo da base p/ saída de ar, ambos
à frente do condutor.
Conforme as figuras 3 e 4, há duas pontas imantadas na parte de trás do equipamento. Nestas pontas, é possível prender o grampo p/ quebra-sol ou o grampo
da base p/ saída de ar. Para facilitar a montagem do dispositivo, favor prender primeiro o grampo p/ quebra-sol no quebra-sol, depois conectar devidamente o Kit
para Carros no grampo p/ quebra-sol.
Para usar o grampo da base p/ saída de ar, é possível ajustar a direcção do grampo de acordo com a saída de ar do seu carro, conforme mostra a figura 5.
Nota: O microfone do Kit para Carros ANYCOM HCC-250 deve estar direccionado ao emissor do som.
Ponta imantada
Grampo p/ quebra-sol
Grampo da base p/ saída
de ar
Figura 3: Conectar grampo p/ quebra-sol nas pontas imantadas Figura 4: Conectar grampo da base p/ saída de ar nas pontas imantadas
Grampo da base p/ saída de ar
(direcção vertical)
Grampo da base p/ saída de ar
(direcção horizontal)
Base metálica
Figura 5: Ajustar direcção do grampo da base p/saída de ar (vertical ou horizontal)
Puxar um pouco e
pressionar para baixo a
partir daqui
Figura 6: Separar o grampo da base metálica
Com excelentes portabilidade e flexibilidade, este Kit para Carros também pode ser usado fora do espaço do carro, como em escritórios e/ou em casa.
2.3 Ligar/desligar o Kit para Carros ANYCOM HCC-250
Ligar o equipamento: Premir e assim manter o botão
por pelo menos 3 segundos, soarão 2 tons de aviso, o LED azul pisca rapidamente 3 vezes e a seguir 1
vez por 3 segundos, o LED vermelho fica desligado. Isto indica que o equipamento foi activado.
Desligar o HCC-250: Premir e assim manter o botão
o LED azul fica desligado.
por pelo menos 3 segundos, 2 tons de aviso de desligamento soarão, o LED vermelho piscará 3 vezes e
Isto indica que o Kit para Carros foi desactivado.
Português
Página 5
2.4 Emparelhar/conectar o seu equipamento com dispositivo Bluetooth
2.4.1 Emparelhar o seu ANYCOM HCC-250 com telemóvel Bluetooth (ou outro dispositivo)
Antes de efectuar e responder chamadas, é necessário emparelhar seu ANYCOM HCC-250 com o telefone. O emparelhamento estabelece uma relação
exclusiva entre seu Kitr para Carros e o seu telemóvel. O telemóvel irá memorizar o ID exclusivo (ou a chave) do HCC-250. Isto assegura um elo de
comunicação sem fio encriptado e exclusivo entre o seu Kit para Carros e o telemóvel durante as chamadas.
Os procedimentos detalhados de operação são os seguintes:
1.
Coloque seu ANYCOM HCC-250 perto de seu telemóvel habilitado para Bluetooth, com o seu Kit para Carros desligado e o seu telemóvel ligado
2.
por pelo menos 6 segundos, até os LEDS azul e vermelho alternarem-se continuamente. Soarão 2 tons de activação
Prima e assim mantenha o botão
e um tom de emparelhamento para indicar que o Kit para Carros entrou com êxito no modo de emparelhamento
3.
Siga o guia do utilizador do seu telefone para activar o dispositivo Bluetooth no lado do telefone; no ecrã de seu telefone surgirá uma lista dos
equipamentos Bluetooth encontrados pelo telefone ao final do processo de pesquisa.
4.
Seleccione este Kit para Carros Bluetooth ANYCOM HCC-250 da lista e inicie o emparelhamento conforme as instruções no ecrã do telefone handset.
5.
Continue a seguir as instruções no ecrã para entrar com a chave “0000” e confirmar o emparelhamento do ANYCOM HCC-250 com seu telemóvel.
Quando o processo de emparelhamento for concluído, soará um tom de conexão e o LED azul piscará rapidamente 3 vezes por 2 segundos. Isto indica
que o Kit para Carros e o telemóvel estão emparelhados e conectados.
Nota:
Se o emparelhamento for bem sucedido, o LED vermelho do Kit para Carros fica desligado. O LED azul pisca rapidamente 3 vezes por 2 segundos. Se o
telemóvel acusar falha no emparelhamento e o Kit para Carros ainda estiver no modo de emparelhamento, será necessário voltar aos passos 3-5 acima e repetir
o processo.
Seu Kit para Carros permanece no modo de emparelhamento por 2 segundos. Se o emparelhamento não puder ser concluído em 2 minutos, o ANYCOM HCC250 entrará no modo de espera (neste caso, sem a conexão Bluetooth). Será necessário desligar o Kit para Carros e depois repetir os passos 2-5 para reiniciar o
processo de emparelhamento.
2.4.2 Excluir todos os registos emparelhados
Este Kit para Carros pode ser emparelhado com até 8 dispositivos Bluetooth. No modo de emparelhamento, premir e assim manter o botão por pelo menos 3
segundos permitirá excluir todos os perfis de dispositivo Bluetooth emparelhados armazenados no Kit para Carros. A seguir, o Kit para Carros sairá do modo de
emparelhamento. O LED azul piscará 1 vez por 3 segundos.
2.4.3 Conectar/desconectar o seu Kit para Carros ANYCOM HCC-250 com um dispositivo Bluetooth
Quando o Kit para Carros comunica-se com um equipamento Bluetooth via perfil "mãos livres", a conexão Bluetooth entre dois equipamentos deverá ser
antecipadamente estabelecida. Se dois equipamentos Bluetooth já foram emparelhados uma vez, é possível simplesmente reconectá-los.
Conectar o seu ANYCOM HCC-250 com telemóvel Bluetooth
Solicitar a conexão a partir tanto do Kit para Carros como do telemóvel pode estabelecer a conexão Bluetooth. As operações detalhadas são as seguintes:
.
1.
Solicitar conexão a partir do Kit para Carros: coloque o Kit para Carros perto do telemóvel Bluetooth e prima o botão
2.
Solicitar conexão a partir do telemóvel Bluetooth: coloque o Kit para Carros perto do telemóvel Bluetooth e a seguir oriente-se pelo guia do utilizador do
telefone para encontrar o Kit para Carros e enviar a solicitação de conexão.
Após a conexão, soará um tom de conexão e o LED azul piscará rapidamente 3 vezes por 2 segundos
Descontectar o seu ANYCOM HCC-250 do seu telemóvel Bluetooth:
Quando o Kit para Carros está conectado ao telemóvel Bluetooth (ou no modo de conexão), é possível desconectá-los da seguinte maneira:
1.
Prima e assim mantenha o botão
2.
Siga o guia do utilizador do telemóvel e inicie a desconexão a partir do telefone.
por pelo menos 3 segundos.
Após a desconexão, soará um tom de desconexão e o LED azul pisca 1 vez por 3 segundos.
Português
Página 6
2.5 Funções de chamada
2.5.1 Operações básicas de chamada
Antes de marcar, o Kit para Carros ANYCOM HCC-250 e o telemóvel devem ser activados. E também será necessário que o seu Kit para Carros e o telefone
estejam ligados pela conexão Bluetooth.
Responder chamada: Prima o botão
Rejeitar chamada:
.
Prima e assim mantenha o botão - por pelo menos 3 segundos.
.
Finalizar chamada:
Prima o botão
Remarcar:
Prima e assim mantenha o botão + por pelo menos 3 segundos
Para as operações acima, o LED azul pisca rapidamente 3 vezes por 2 segundos e o LED vermelho fica desligado.
2.5.2 Silenciar chamada
É possível silenciar ou reverter o silêncio de uma chamada activa ao premir rápida e simultaneamente os botões + e -. O LED azul pisca rapidamente 3 vezes por
2 segundos e o LED vermelho fica desligado.
2.5.3 Transferir chamada de/para o seu telemóvel
Transferir chamada para o seu telemóvel: prima e assim mantenha o botão
segundos, o LED vermelho fica desligado.
Transferir chamada do seu telemóvel: prima o botão
por pelo menos 3 segundos, o LED azul pisca rapidamente 1 vez por 3
, o LED azul pisca rapidamente 3 vezes por 2 segundos.
2.5.4 Marcação por voz
Se o telefone conectado suportar marcação por voz, basta premir e assim manter o botão - por pelo menos 3 segundos para activar a marcação por voz. O LED
azul pisca rapidamente 3 vezes por 2 segundos. Antes de usar a marcação por voz, é necessário gravar identificações de voz em seu telemóvel. Favor
consultar o manual do seu telemóvel para descrições detalhadas do processo de marcação por voz e de gravação de identificações de voz.
Quando a marcação por voz estiver em andamento, premir rapidamente o botão - cancelará a marcação por voz. O LED azul pisca rapidamente 3
vezes por 2 segundos e o LED vermelho fica desligado.
2.5.5 Funções avançadas de chamada
Se o seu telemóvel tiver as funções de conferência/chamada em espera, seu Kit para Carros ANYCOM HCC-250 pode suportar a função para as seguintes
operações:
1.
2.
Quando chega uma nova chamada enquanto você está em uma chamada activa:
1)
Prima e assim mantenha o botão + por pelo menos 3 segundos para manter a chamada activa e aceitar a nova chamada.
para finalizar a chamada activa e responder à nova chamada.
2)
Prima o botão
Com duas chamadas em andamento, uma está activa e a outra em espera:
1)
Prima e assim mantenha o botão + por pelo menos 3 segundos alternar entre a chamada em espera e a activa.
2)
Prima o botão
para finalizar a chamada activa e aceitar a chamada em espera.
3)
Prima e assim mantenha o botão - por pelo menos 3 segundos para efectuar a conferência.
Para as operações acima, o LED azul pisca rapidamente 3 vezes por 2 segundos e o LED vermelho fica desligado.
2.6 Funções A2DP
O Kit para Carros suporta o perfil Bluetooth A2DP para reproduzir música em alta qualidade. Em conexão com um reprodutor de música/multimídia habilitado
para Bluetooth ou um telemóvel compatível com A2DP, o produto permite que os utilizadores ouçam música executada remotamente a partir do reprodutor.
2.6.1 Usar a função A2DP do telemóvel
Para telemóveis que suportam os perfis Bluetooth A2DP, é possível estabelecer uma conexão de áudio entre o telemóvel e o Kit para Carros para ouvir música
reproduzida pelo telefone. Conforme a capacidade do telefone, a conexão de áudio pode ser automaticamente estabelecida quando você começa a reproduzir
música.
Se o seu telemóvel suporta os perfis Bluetooth A2DP, mas não é possível obter uma conexão de áudio no início da reprodução da música, é necessário seguir o
guia de utilizador do seu telefone para conseguir uma conexão de áudio antes de executar a música.
Português
Página 7
2.6.2 Operações AVRCP
As seguintes operações podem ser usadas para o controlo remoto de seu telefone compatível com Bluetooth ou reprodutor para executar música:
.
Executar: Prima o botão
Pausa:
Prima o botão
Parar:
Avançar:
Prima e assim mantenha o botão
por pelo menos 3 segundos.
Prima e assim mantenha o botão + por pelo menos 3 segundos.
Recuar :
Prima e assim mantenha o botão - por pelo menos 3 segundos.
.
2.7 Ajuste de volume
No modo conectado ou em conversar/executar, é possível aumentar ou diminuir o volume de som premindo respectivamente os botões + ou -. É possível repetir
a operação acima até o altifalante atingir o volume desejável.
Nota:
Para a maioria dos dispositivos Bluetooth, o controlo de volume do Kit para Carros irá sincronizar com o telefone. Isto significa que o volume do seu ANYCOM
HCC-250 pode ser controlado pelo seu telefone e vice-versa. Porém, esta possibilidade varia conforme as implementações escolhidas por diferentes fabricantes
de telefones.
2.8 Emparelhar/conectar o seu equipamento com outro dispositivo Bluetooth
Além do telefone Bluetooth, seu Kit para Carros também pode emparelhar-se com outros dispositivos Bluetooth para comunicações sem fio de curta distância.
Podem ser usados os procedimentos de emparelhamento similares descritos na Secção 2.4. É possível também seguir o guia do utilizador do dispositivo
Bluetooth para efectuar as operações de emparelhamento a partir do dispositivo.
Este Kit para Carros pode ser emparelhado com até 8 dispositivos Bluetooth (inclusivé telemóveis). Os 8 grupos correspondentes de informações de
emparelhamento são registados pelo Kit para Carros. Cada dispositivo emparelhado pode comunicar-se sem fio com o Kit para Carros após a configuração de
uma conexão Bluetooth. Favor verificar a Secção 2.4.3 de procedimentos para configurar uma conexão Bluetooth.
3. GUIA PRÁTICO DO UTILIZADOR
3.1 Padrões de indicação dos LEDs
Padrão 1 do LED: LED azul pisca 1 vez por 3 segundos, LED vermelho desligado.
Padrão 2 do LED: LED azul pisca rapidamente 3 vezes por 2 segundos, LED vermelho desligado.
Padrão 3 do LED: LEDS azul e vermelho alternam-se continuamente.
Padrão 4 do LED: LEDS azul e vermelho alternam-se a cada 3 segundos.
Padrão 5 do LED: Todos os LEDs desligados.
3.2 Guia prático do utilizador
É possível seguir as instruções na Tabela 17 abaixo para operar seus dispositivos do Kit para Carros ANYCOM HCC-250. (Favor consultar a seção 1 para
detalhes sobre definições de teclas e por quanto tempo premi-las.)
Nota: Seus dispositivos do Kit para Carros só podem se comunicar com dispositivos Bluetooth emparelhados. Para dispositivos que suportam apenas o perfil
"mãos livres" (HFP), também é necessário estabelecer uma conexão Bluetooth entre seu Kit para Carros e seu telefone antes de efectuar e receber chamadas.
Português
Página 8
Tabela 1: Ligar/desligar energia
SITUAÇÃO ACTUAL
INDICADOR HCC-250
FUNÇÃO
OPERAÇÃO
TELEFONE
HCC-250
TOM DE ÁUDIO
INDICADOR DE LED
Prima e assim mantenha o
Ligar
Desligar
botão
por pelo menos 3
segundos
Prima e assim mantenha o
2 tons de activação
Padrão 1 do LED
Desligar
Espera
botão
por pelo menos 3
segundos
2 tons de desactivação
Padrão 5 do LED
Tabela 2: Emparelhamento/conexões
FUNÇÃO
SITUAÇÃO ACTUAL
TELEFONE
OPERAÇÃO
HCC-250
Prima e assim mantenha o
Entrar no modo
de
emparelhamento
Excluir todos os
perfis
emparelhados
Desligar
Modo de
emparelhamento
Emparelhar Kit
para Carros com
telefone
Energia ligada
Modo de
emparelhamento
Conectar (Kit
para Carros com
telefone)
Espera
(desconectado)
Espera
(desconectado)
Desconectar
Espera (conectar)
Espera
(conectar)
botão
por pelo menos 6
segundos
Prima e assim mantenha o
botão - por pelo menos 3
segundos
Consulte o guia de utilizador
do seu telefone para
emparelhar.
A chave é "0000”
Prima o botão
ou
estabeleça a conexão a partir
do telefone
Prima e assim mantenha o
por pelo menos 3
botão
segundos ou consulte o
manual do telefone para
iniciar a conexão a partir do
telefone.
INDICADOR HCC-250
TOM DE ÁUDIO
INDICADOR DE LED
2 tons de activação,
depois 1 tom de
emparelhamento
Padrão 3 do LED
Padrão 1 do LED
1 tom de conexão
Padrão 2 do LED
1 tom de conexão
Padrão 2 do LED
Padrão 1 do LED
Tabela 3: Funções de chamada
SITUAÇÃO ACTUAL
INDICADOR HCC-250
FUNÇÃO
Responder
chamada
OPERAÇÃO
TELEFONE
HCC-250
TOM DE ÁUDIO
Nova chamada
Nova chamada
Prima o botão
Padrão 2 do LED
Padrão 2 do LED
Padrão 2 do LED
Rejeitar
chamada
Nova chamada
Nova chamada
Prima e assim mantenha o
botão - por pelo menos 3
segundos
Finalizar
chamada
Conversar
Conversar
Prima o botão
Remarcar
Espera
Espera
Marcação por
voz
Espera
Espera
Marcação por voz
Marcação por
voz
Cancelar
marcação por voz
Prima e assim mantenha o
botão - por pelo menos 3
segundos
Prima e assim mantenha o
botão - por pelo menos 3
segundos
Prima o botão -
INDICADOR DE LED
Tom de tecla
Padrão 2 do LED
Tom de tecla
Padrão 2 do LED
Tom de tecla
Padrão 2 do LED
Português
Página 9
SITUAÇÃO ACTUAL
INDICADOR HCC-250
FUNÇÃO
OPERAÇÃO
TELEFONE
HCC-250
TOM DE ÁUDIO
INDICADOR DE LED
Aumentar
volume
Conversar
Conversar
Prima o botão +
Padrão 2 do LED
Diminuir volume
Conversar
Conversar
Prima o botão -
Padrão 2 do LED
Tom de tecla
Padrão 2 do LED
Tom de tecla
Padrão 2 do LED
Silencioso
Conversar
Conversar
Prima o botão - e o botão +
juntos
Não silencioso
Conversar
Silencioso
Prima o botão - e o botão +
juntos
Tabela 4: Funções de transferência
SITUAÇÃO ACTUAL
FUNÇÃO
Transferir chamada
(Kit para Carros ao
telefone)
Transferir chamada
(Telefone ao Kit para
Carros)
INDICADOR HCC-250
OPERAÇÃO
TELEFONE
HCC-250
Conversar
Conversar
Conversar
Conversar
TOM DE ÁUDIO
INDICADOR DE LED
Prima e assim mantenha o
por pelo menos 3
botão
segundos
Tom de tecla
Padrão 1 do LED
Prima o botão
Tom de tecla
Padrão 2 do LED
Tabela 5: Indicação de bateria fraca
SITUAÇÃO ACTUAL
INDICADOR HCC-250
FUNÇÃO
OPERAÇÃO
TELEFONE
Aviso de bateria fraca
HCC-250
TOM DE ÁUDIO
INDICADOR DE LED
Excepto desligado
Bipe a cada 20 segundos
Padrão 4 do LED
Tabela 6: Funções de chamada avançadas
SITUAÇÃO ACTUAL
FUNÇÃO
Manter chamada activa e
aceitar nova chamada
Finalizar chamada activa e
responder nova chamada
INDICADOR HCC-250
OPERAÇÃO
TELEFONE
TELEFONE
TOM DE ÁUDIO
Conversar
Chamada em
espera
Prima e assim mantenha o
botão + por pelo menos 3
segundos
INDICADOR DE LED
Padrão 2 do LED
Conversar
Chamada em
espera
Prima o botão
Padrão 2 do LED
Alternar entre chamada em
espera e chamada activa
Conversar
Aceder à
espera
Prima e assim mantenha o
botão + por pelo menos 3
segundos
Padrão 2 do LED
Finalizar chamada activa e
aceitar chamada em
espera
Conversar
Aceder à
espera
Prima o botão
Padrão 2 do LED
Conversar
Aceder à
espera
Prima e assim mantenha o botão
- por pelo menos 3 segundos
Padrão 2 do LED
Chamadas em conferência
Português
Página 10
Tabela 7: Funcionar com reprodutor de mídia
SITUAÇÃO ACTUAL
FUNÇÃO
TELEFONE/REPR
ODUTOR
INDICADOR HCC-250
OPERAÇÃO
HCC-250
TOM DE ÁUDIO
Executar
Prima o botão
Pausa
Prima o botão
Parar
Prima e assim mantenha o
por pelo menos 3
botão
segundos
Aumentar volume
Prima o botão +
Diminuir volume
Prima o botão -
Avançar
Recuar
INDICADOR DE LED
Prima e assim mantenha o
botão + por 3 segundos
Prima e assim mantenha o
botão - por 3 segundos
4. MANUTENÇÃO
O ANYCOM HCC-250 é um dispositivo de comunicação bem projectado; a manutenção cuidadosa e o uso adequado prolongarão a vida útil e manterão o alto
desempenho do equipamento. Os seguintes procedimentos de manutenção serão úteis:
z
z
Sempre desligue a energia e o mantenha em um lugar seguro quando não estiver em uso
Mantenha o equipamento seco, longe de água, chuva, humidade, vapor e qualquer fluido que possa corroer circuitos electrónicos. Se o seu equipamento
molhar-se, desligue imediatamente e espere até que esteja totalmente seco para reutilizá-lo
z
z
Mantenha o Kit para Carros longe de poeira e sujidade. Assim, evitará danos às peças mecânicas e electrónicas
Não armazene o Kit para Carros em altas temperaturas ou sob a incidência de luz solar. Temperaturas demasiado altas podem prejudicar o desempenho,
reduzir a vida útil da bateria e deformar ou derreter componentes plásticos.
z
Não armazene em lugares demasiado frios. Pode haver formação de humidade quando o equipamento for levado para um lugar quente. Isto pode
danificar os circuitos electrónicos internos.
z
Evite quedas, batidas e movimentos bruscos do Kit para Carros. As peças mecânicas e os circuitos electrónicos internos podem quebrar-se.
z
Evite químicos corrosivos, solventes de limpeza e qualquer detergente forte para limpar o Kit para Carros. O HCC-250 pode ser limpo com um pano limpo
z
Sempre leve o Kit para Carros ao serviço autorizado mais próximo para o reparo de qualquer defeito. Desmontar, modificar e substituir componentes por
conta própria pode degradar o desempenho do produto, causar danos e invalidar a garantia
e levemente húmido.
Português
Página 11
5. MENSAGENS IMPORTANTES E DÚVIDAS MAIS FREQUENTES
Q1. LED vermelho a piscar:
Indicação de bateria fraca; favor recarregar sua bateria o quanto antes.
Q2. Não é possível activar o Kit para Carros após carregar por mais de 20 minutos:
Na primeira vez, o Kit para Carros deve ser carregado por pelo menos 40 minutos antes da activação. Recomenda-se dar plena carga à bateria antes de
usar o Kit para Carros.
Q3. Não há indicação de carregar:
Quando a bateria fica totalmente sem carga ou o Kit para Carros não é usado por um tempo, o LED vermelho pode demorar um pouco a acender quando
o carregador é conectado.
Q4. Kit para Carros totalmente sem som: é necessário verificar se
z O HCC-250 está ligado
z O HCC-250 está emparelhado com um telemóvel
z O HCC-250 está conectado a um telemóvel (excepto se o telefone handset suporta apenas o perfil telefone)
z O HCC-250 está a até 10 m/30 pés do telemóvel
z O HCC-250 e o telemóvel estão com uma força de sinal suficiente
Q5. O Kit para Carros não pode ser encontrado quando um telemóvel tenta emparelhar com ele:
Seu Kit para Carros HCC-250 pode não estar no modo de emparelhamento, consulte a secção 2.4.1 para detalhes.
Q6. O Kit para Carros emparelhado ou o telemóvel emparelhado precisam ser reemparelhados desligados?
Não. Observe que, para o telemóvel que suporta perfil de mãos livres, o Kit para Carros e o telefone devem ser conectados primeiro. Consulte a seção
2.4.4 para detalhes.
Q7. Marcação por voz não funciona:
Verifique primeiro se o telefone suporta a função de marcação por voz e certifique-se de que gravou a identificação de voz. Observe que um ambiente
barulhento afectará a marcação por voz.
Português
Página 12
6. SEGURANÇA
•
Use somente o carregador que acompanha o conjunto.
•
Cuidado, risco de explosão se a bateria for substituída por um tipo incorrecto.
•
Verifique as leis e normas para o uso de telemóveis e equipamentos "mãos livres" nas áreas por onde dirige. Sempre preste a máxima atenção
ao conduzir o veículo, saia da via e estacione antes de efectuar ou responder a uma chamada caso as condições exijam.
•
Não permita que crianças brinquem com seu Kit para Carros HCC-250, uma vez que contém peças pequenas que podem ser destacadas e
causar asfixia.
•
Este dispositivo contém uma bateria de polímero de lítio. Favor mantê-la sempre longe do fogo (inclusivé ao descartar o Kit para Carros) ou a
bateria poderá explodir.
•
O Kit para Carros, especialmente a bateria embutida, deve ser descartado adequadamente ou pode ser reciclado; entre em contacto com os
centros de reciclagem locais para conhecer os métodos de descarte.
7. APROVAÇÕES DE SEGURANÇA E CERTIFICAÇÃO
Este produto foi testado e considerado de acordo com as exigências Bluetooth BQB, parte 15 das normas FCC, Directiva R&TTE (99/5/EC) ou
exigências CE marked .
8. FCC STATEMENT
This device complies with part 15 of the FCC Rules. Operation is subject to the following two
conditions:
(1) This device may not cause harmful interference, and
(2) This device must accept any interference received , including interference that may cause undesired operation.
Note:
The manufacturer is not responsible for ANY interference, for example RADIO or TV interference, caused by unauthorized modifications to this equipment.
Such modifications could void the user’s authority to operate the equipment.
Federal Communication Commission Interference Statement
This equipment has been tested and found to comply with the limits for a Class B digital device, pursuant to Part 15 of the FCC Rules. These limits are
designed to provide reasonable protection against harmful interference in a residential installation. This equipment generates, uses and can radiate radio
frequency energy and, if not installed and used in accordance with the instructions, may cause harmful interference to radio communications. However, there
is no guarantee that interference will not occur in a particular installation. If this equipment does cause harmful interference to radio or television reception,
which can be determined by turning the equipment off and on, the user is encouraged to try to correct the interference by one of the following measures:
1.
Reorient or relocate the receiving antenna.
2.
Increase the separation between the equipment and receiver.
Connect the equipment into an outlet on a circuit different from that to which the receiver is connected. Consult the dealer or an experienced radio/TV
3.
technician for help.
FCC Caution: Any changes or modifications not expressly approved by the party responsible for compliance could void the user's authority to operate this equipment.
IMPORTANT NOTE:
FCC Radiation Exposure Statement:
This equipment complies with FCC radiation exposure limits set forth for an uncontrolled environment. This equipment should be installed and operated with minimum distance
20cm between the radiator & your body. This transmitter must not be co-located or operating in conjunction with any other antenna or transmitter.
Português
Página 13
9. DECLARAÇÃO CE
10. DECLARAÇÃO:
Sem a permissão por escrito do fabricante original, a reprodução, transferência, distribuição ou armazenamento de parte ou de todo o conteúdo deste documento em qualquer
forma é proibido.
A companhia reserva-se o direito de efectuar quaisquer alterações e aprimoramentos ao produto descrito neste documento sem prévio aviso.
Aviso:
Favor assegurar que seu telemóvel suporta perfis Bluetooth e o operador da rede suporta as funções descritas neste manual, caso contrário as respectivas funções não serão
efectivas neste Kit para Carros.
Português
Página 14
11. INFORMAÇÕES SOBRE GARANTIA
A ANYCOM Technologies AG ou a ANYCOM Technologies Inc garantem, ao comprador original, o produto livre de defeitos de material ou de fabricação por um período de
DOIS (2) ANOS a partir da data da compra no revendedor. Constatado o defeito, a ANYCOM deverá, a seu critério, consertar ou substituir este produto sem custos, desde que
efectuada sua devolução à ANYCOM dentro do período de garantia, com todos os componentes, cabos e software. Para cada produto devolvido de acordo com os termos
desta garantia, será necessário um número de RMA (Autorização de Devolução de Mercadoria) ANYCOM, junto com nome, endereço, telefone e uma cópia da factura de
compra como prova da data original da aquisição. O número de RMA ANYCOM pode ser obtido directamente da empresa, através de (001) (949) 553-9426 para EUA, Canadá
e Ásia ou (049) (2161) 57630 para Europa e EMEA. Esta garantia aplica-se unicamente a equipamentos fabricados pela ANYCOM, identificados pela marca registada
ANYCOM ou logotipo afixados. Esta garantia não será válida se o produto sofrer danos por acidente, abuso, mau uso, aplicação indevida ou manutenção não autorizada. A
ANYCOM não garante quaisquer produtos que não sejam ANYCOM, incluídos softwares produzidos por outros fabricantes que acompanham produtos ANYCOM. Os
aplicativos de software não produzidos pela ANYCOM que acompanham produtos ANYCOM são garantidos por termos escritos em separado, fornecidos pelos respectivos
fabricantes de software. As garantias estipuladas acima são intransferíveis, exclusivas e prevalecem sobre todas as outras garantias, verbais ou por escrito, expressas ou
implícitas, INCLUSIVE, ONDE PERMITIDO POR LEI, QUALQUER GARANTIA IMPLÍCITA DE COMERCIALIZAÇÃO. A ANYCOM não se responsabiliza por danos decorrentes
ou incidentais resultantes de qualquer infracção da garantia, inclusive mas não limitada a lucro cessante, tempo em desuso, danos a ou reposição de equipamento ou
propriedade.
ANYCOM Technologies AG • Broichmühlenweg 42 • D-41066 Mönchengladbach • Alemanha
E-Mail: [email protected] • Fone: +49 2161 57630 • Apoio : +49 900 1100821
ANYCOM Technologies Inc. • PO Box 10127 • Newport Beach, CA 92658 • USA
E-Mail: [email protected] • Fone: 866-553-9426
Isenção de responsabilidade:
As informações contidas neste documento destinam-se somente a fins de informação e estão sujeitas a alteração sem prévio aviso. Elas são fornecidas
"como estão" e sem qualquer garantia. O leitor assume todos os riscos pelo uso das informações. A ANYCOM não assume qualquer responsabilidade por
quaisquer danos indirectos, consequenciais, incidentais, especiais, punitivos ou de qualquer espécie (inclusivé, mas não limitado a, danos por lucros
cessantes, por perdas comerciais ou por perdas de informações comerciais) decorrentes de ou associados à disponibilidade, desempenho ou utilização da
informação aqui contida, ainda que a ANYCOM possa estar ciente de tais possibilidades.
Marcas comerciais:
ANYCOM, o logo da ANYCOM e os produtos ANYCOM aqui mencionados são marcas comerciais ou marcas registadas da ANYCOM. A ausência de um
logo ou nome de produto neste website não implica a renúncia, pela ANYCOM, à marca comercial ANYCOM ou a quaisquer direitos de propriedade
intelectual referentes a este nome ou logo. Todas as outras marcas comerciais pertencem aos seus respectivos proprietários.
www.anycom.com
Suporte técnico: 866-553-94 26
DE 45273917
PT 00068
As informações a seguir são válidas somente para países da UE:
O uso do símbolo indica que este produto não pode ser descartado como resíduo domiciliar. O descarte correcto deste material auxilia na prevenção de impacto negativo para
o meio ambiente e a saúde humana, que pode decorrer de procedimento inadequado de eliminação deste produto. Para informações mais detalhadas sobre reciclagem deste
produto, favor entrar em contacto com a prefeitura de sua cidade, com o serviço de colecta de resíduos domiciliares ou com a loja onde o produto foi adquirido .
Português
MANUALE UTENTE
Kit per auto bluetooth HCC-250
SOMMARIO
1.
2.
3.
4.
5.
6.
7.
8.
9.
10.
11.
Introduzione
Contenuto della confezione
Uso del vivavoce
2.1. Carica della batteria
2.2. Montaggio del vivavoce
2.3. Accensione / spegnimento del vivavoce
2.4. Pairing / connessione del vivavoce con un dispositivo bluetooth
2.4.1. Pairing del vivavoce con un telefono bluetooth
2.4.2. Cancellazione dei profili di pairing
2.4.3. Connessione / disconnessione del vivavoce a un dispositivo bluetooth
2.5 Funzioni di chiamata
2.5.1 Funzioni di chiamata di base
2.5.2 Mute chiamata
2.5.3 Trasferimento di chiamata al / dal telefono
2.5.4 Composizione vocale
2.5.5 Funzioni di chiamata avanzate
2.6 Funzioni AV
2.6.1 Uso delle funzioni AV del telefono
2.6.2 Funzioni AV
2.7 Regolazione del volume
2.8 Pairing / connessione del vivavoce a un altro dispositivo bluetooth
Guida rapida per l'utente
3.1. Configurazioni dell'indicatore LED
3.2. Guida rapida per l'utente
Manutenzione
Informazioni importanti e domande più frequenti
Sicurezza
Certificazione e collaudi di sicurezza
FCC Statement
Dichiazione CE
Dichiazione
Condizioni di garanzia
2
2
3
3
4
4
5
5
5
5
6
6
6
6
6
6
6
6
7
7
7
7
7
7
10
11
12
12
12
13
13
14
Pagina 2
1. INTRODUZIONE
Kit per auto bluetooth
Questo kit per auto bluetooth è un prodotto progettato appositamente per permettere ai guidatori di effettuare e ricevere chiamate senza tenere in mano un
telefono cellulare. Esso fornisce un buon collegamento audio cordless con il proprio telefono cellulare bluetooth o PDA. L'apparecchio può essere utilizzato anche
in ufficio o a casa, oltre che all'interno di un veicolo.
Oltre alle applicazioni per l'uso all'interno di veicoli, questo apparecchio portatile, grazie a una batteria interna ricaricabile Li-ion, può essere utilizzato come
normale apparecchio vivavoce anche all'interno di uffici per effettuare o ricevere chiamate telefoniche senza dover tenere in mano il telefono cellulare. Può anche
essere affiancato a un PC dotato di tecnologia bluetooth per effettuare chiamate via Internet.
Contenuto della confezione
1.
2.
3.
4.
5.
ANYCOM HCC-250
Clip per parasole
Clip di montaggio su bocchetta
Set caricabatteria per auto 12 / 24 V
Manuale utente
2.
5.
1.
3.
4.
1. Altoparlante: uscita voce.
2. LED rosso / blu: indicazione di stato del dispositivo.
3. Pulsante
: accensione / spegnimento del dispositivo.
4. Pulsante
: risposta / fine chiamata, connessione
disconnessione, trasferimento chiamata tra vivavoce e telefono.
5. Pulsante +: volume +, ricomposizione ultima chiamata, esclusione
di chiamata.
6. Pulsante -: volume -, cancellazione dei profili di pairing, respinta
chiamata, composizione vocale, mute chiamata
7. Microfono: ingresso voce
Figura: 1 Panoramica
8. Presa di carica: collegamento al caricabatteria portatile (o dell'auto)
per il caricamento della batteria del dispositivo
Italiano
Pagina 3
2. USO DEL VIVAVOCE
Carica e uso della batteria
2.1 Carica della batteria
Questo kit per auto contiene una batteria ricaricabile al polimero di litio. La durata della prima carica è di circa 4 ore. In seguito la durata di carica è circa 2-3 ore.
Per caricare la batteria procedere come segue.
1.
Collegare il caricabatteria dell'auto all'accendino oppure il cavo USB al PC.
2.
Come in figura 2, inserire la spina del caricabatteria nella presa di carica del vivavoce per iniziare la carica. Durante la carica entrambi i LED rosso e blu
sono accesi. Quando il LED rosso si spegne, la batteria sarà completamente carica e il caricabatteria dovrà essere scollegato dal kit per auto e dalla
presa elettrica.
Figura: 2 Carica della batteria
Nota:
Si raccomanda di caricare il kit per auto quando non è in uso.
L'inserimento del caricabatteria causerà un reset del dispositivo. In ogni caso, quando il kit per auto è in carica (il caricabatteria è stato inserito), si trova in
condizioni di funzionamento normale.
Nel corso di una chiamata, la connessione presente tra il kit per auto e il telefono cellulare subirà un reset dopo l'inserimento del caricabatteria. La chiamata sarà
momentaneamente ritrasferita al telefono cellulare. Il kit per auto proverà a ristabilire automaticamente la connessione. In qualche caso l'utente deve premere
per riconnettere il dispositivo.
brevemente il pulsante
Informazioni sulla batteria
A piena carica, la batteria ha una durata massima di 14 ore in conversazione continua e una durata in stand-by (ovvero il dispositivo è acceso ma privo di
connessione) di circa 25 giorni.
Quando la carica della batteria è bassa, il kit per auto emette un segnale acustico ogni 20 secondi e i LED blu e rosso lampeggiano alternativamente ogni 3
secondi. Caricare la batteria secondo le istruzioni precedenti.
Nota: Sovraccaricare la batteria ne riduce la durata in esercizio. Una batteria a piena carica inutilizzata perderà potenza col tempo. Anche le temperature
estreme (troppo caldo o troppo freddo) avranno effetti sulla capacità di carica, sulla potenza e sulla durata in esercizio.
Italiano
Pagina 4
2.2 Montaggio del vivavoce
Il kit per auto ANYCOM HCC-250 può essere montato facilmente all'interno dell'auto utilizzando sia la clip di aggancio per parasole per fissare il prodotto sul
parasole sopra il sedile del guidatore oppure inserendo la clip di montaggio su bocchetta dell'aria nella bocchetta posta di fronte al sedile del guidatore.
Come illustrato nelle figure 3 e 4, ci sono due piastrine magnetiche sul retro del dispositivo. Su di esse è possibile agganciare la clip per parasole o la clip di
montaggio su bocchetta.
Per il miglior montaggio del dispositivo, si raccomanda di fissare prima la clip per parasole sul parasole e quindi agganciare il kit per auto sulla clip.
Per utilizzare la clip di montaggio su bocchetta, questa deve essere direzionata secondo la bocchetta, come illustrato in figura 5.
Nota: Il microfono del kit per auto ANYCOM HCC-250 deve essere orientato verso la sorgente sonora.
Piastrina magnetica
Clip di
bocchetta
Clip per parasole
Figura 3: Aggancio della clip per parasole alle piastrine magnetiche
Clip di montaggio su bocchetta
(direzione verticale)
montaggio
su
Figura 4: Aggancio della clip di montaggio su bocchetta alle piastrine
magnetiche
Clip di montaggio su bocchetta
(direzione orizzontale)
Base metallica
Figura 5: Regolazione della direzione della clip di montaggio su bocchetta (verticale od orizzontale)
Tirare leggermente
all'esterno e premere verso
il basso da questo punto
Figura 6: Distacco della clip dalla base metallica
Grazie all'ottima trasportabilità e flessibilità, questo kit per auto può essere utilizzato anche all'esterno di un veicolo, come in ufficio e/o a casa.
2.3 Accensione / spegnimento del kit per auto ANYCOM HCC-250
Accensione del vivavoce: premere il pulsante
per almeno 3 secondi. Si sentiranno 2 segnali acustici di accensione; il LED blu lampeggia rapidamente per 3
volte e poi una volta per 3 secondi. Il LED rosso è spento. Ciò significa che il vivavoce è acceso.
Spegnimento del dispositivo HCC-250: Premere il pulsante
per 3 volte e quindi tutti i LED si spegneranno.
per almeno 3 secondi. Si sentiranno 2 segnali acustici di spegnimento; il LED rosso lampeggerà
Ciò significa che il kit per auto è spento.
Italiano
Pagina 5
2.4 Pairing / connessione del vivavoce con un dispositivo bluetooth
2.4.1 Pairing dell'ANYCOM HCC-250 con un telefono cellulare bluetooth (o un altro dispositivo)
Prima di effettuare o rispondere a chiamate, è necessario effettuare il pairing del dispositivo ANYCOM HCC-250 e del telefono. Il pairing definisce un
rapporto unico tra il kit per auto e il telefono cellulare. Il telefono cellulare memorizzerà il singolo ID del dispositivo HCC-250 (o chiave di accesso). Ciò
assicura che durante le chiamate sarà utilizzato un unico collegamento criptato tra il kit per auto e il telefono cellulare.
Per eseguire il pairing, procedere come segue.
1.
Mettere il dispositivo ANYCOM HCC-250 vicino al telefono cellulare bluetooth e assicurarsi che il kit per auto sia spento e il cellulare acceso
2.
Premere il pulsante
per almeno 6 secondi fino a quando i LED blu e rosso lampeggiano in modo intermittente. Si sentiranno 2 segnali acustici di
accensione e un segnale di pairing per indicare che il kit per auto è entrato correttamente in modalità pairing
3.
Seguire la guida per l'utente del telefono per attivare la ricerca dei dispositivi bluetooth da parte del cellulare, sul cui schermo comparirà un elenco degli
apparecchi bluetooth trovati dal telefono al termine del processo di ricerca.
4.
Selezionare il kit per auto bluetooth ANYCOM HCC-250 dall'elenco e avviare il pairing seguendo le indicazioni visualizzate sullo schermo.
5.
Seguire le istruzioni successive visualizzate sullo schermo per inserire la chiave di accesso "0000" e confermare il pairing del dispositivo ANYCOM HCC250 con il telefono cellulare. Quando la procedura di pairing è completata, si sentirà un segnale acustico di connessione e il LED blu lampeggerà
rapidamente 3 volte ogni 2 secondi. Ciò significa che il kit per auto e il telefono cellulare sono in pairing e connessi.
Nota:
Se il pairing è avvenuto, il LED rosso del kit per auto è spento. Il LED blu lampeggia rapidamente 3 volte ogni 2 secondi. Se il telefono cellulare indica che il pairing
è fallito e il kit per auto è ancora nella modalità pairing, è necessario ritornare ai precedenti passaggi 3-5 e ripetere la procedura.
Il kit per auto rimane in modalità pairing per circa 2 minuti. Se il pairing non può essere completato entro 2 minuti, il dispositivo ANYCOM HCC-250 entrerà in
modalità di stand-by (in questo caso senza connessione bluetooth). Per riavviare il processo di pairing è necessario spegnere il kit per auto e ripetere i precedenti
passaggi 2-5.
2.4.2 Cancellazione dei profili di pairing
Questo kit per auto è predisposto per il pairing di 8 dispositivi bluetooth al massimo. In modalità pairing, tenendo premuto il pulsante - per almeno 3 secondi è
possibile cancellare tutti i profili di pairing dei dispositivi bluetooth memorizzati nel kit per auto. A quel punto il kit per auto uscirà dalla modalità pairing. Il LED blu
lampeggerà 1 volta ogni 3 secondi.
2.4.3 Connessione / disconnessione del kit per auto ANYCOM HCC-250 a un dispositivo bluetooth
Quando il kit per auto comunica con un apparecchio bluetooth tramite il profilo vivavoce, la connessione bluetooth tra i due apparecchi dovrà già essere stata
effettuata. Se due apparecchi bluetooth sono già stati posti in pairing una volta, è possibile semplicemente riconnetterli.
Connessione dell'ANYCOM HCC-250 con un telefono cellulare bluetooth
Una connessione bluetooth può essere impostata richiedendola sia partendo dal kit per auto che dal telefono cellulare. Procedere come segue.
1.
Se la richiesta di connessione parte dal kit per auto, avvicinare il kit al telefono cellulare bluetooth e premere il pulsante
2.
Se la richiesta di connessione parte dal telefono cellulare bluetooth, avvicinare il kit al telefono cellulare bluetooth e seguire le indicazioni della guida per
l'utente del telefono per individuare il kit per auto e inviare la richiesta di connessione.
.
Eseguita la procedura di connessione, si sentirà un segnale acustico di connessione e il LED blu lampeggerà rapidamente 3 volte ogni 2 secondi.
Disconnessione dell'ANYCOM HCC-250 da un telefono cellulare bluetooth
Quando il kit per auto è connesso con un telefono cellulare bluetooth (o si trova in modalità connessione), per effettuare la disconnessione procedere come segue.
1.
Premere il pulsante
2.
Seguire la guida per l'utente del telefono cellulare e iniziare la disconnessione partendo dal telefono.
per almeno 3 secondi.
Eseguita la procedura di disconnessione, si sentirà un segnale acustico di disconnessione e il LED blu lampeggerà rapidamente 1 volta ogni 3 secondi.
Italiano
Pagina 6
2.5 Funzioni di chiamata
2.5.1 Funzioni di chiamata di base
Prima di comporre un numero, sia il kit per auto ANYCOM HCC-250 che il telefono cellulare devono essere accesi. Assicurarsi inoltre che entrambi siano stati
collegati con una connessione bluetooth.
Per rispondere a una chiamata: premere il pulsante
.
Per respingere una chiamata:
premere il pulsante - per almeno 3 secondi.
Per finire una chiamata:
premere il pulsante
Per ricomporre una chiamata:
premere il pulsante + per almeno 3 secondi.
.
Per le operazioni sopra descritte, il LED blu lampeggia rapidamente 3 volte ogni 2 secondi e il LED rosso è spento.
2.5.2 Mute chiamata
È possibile mettere o togliere il mute a una chiamata in corso premendo simultaneamente i pulsanti + e -. Il LED blu lampeggia rapidamente 3 volte ogni 2 secondi
e il LED rosso è spento.
2.5.3 Trasferimento chiamate al / dal telefono cellulare
Per trasferire le chiamate al telefono cellulare, premere il pulsante
per almeno 3 secondi. Il LED blu lampeggia 1 volta ogni 3 secondi, il LED rosso è spento.
Per trasferire le chiamate dal telefono cellulare, premere il pulsante
. Il LED blu lampeggia rapidamente 3 volte ogni 2 secondi.
2.5.4 Composizione vocale
Se il telefono connesso supporta la composizione vocale, per attivarla premere il pulsante - per almeno 3 secondi. Il LED blu lampeggia rapidamente 3 volte ogni
2 secondi. Prima di utilizzare la composizione vocale è necessario memorizzare il riconoscimento vocale nel telefono cellulare. Fare riferimento al manuale del
telefono cellulare per le descrizioni dettagliate di impostazione della composizione vocale e registrazione del riconoscimento vocale.
Quando si sta effettuando una composizione vocale, è possibile annullarla premendo brevemente il pulsante -. Il LED blu lampeggia rapidamente 3
volte ogni 2 secondi e il LED rosso è spento.
2.5.5 Funzioni di chiamata avanzate
Se il telefono cellulare ha le funzioni di chiamata in attesa / conversazione multipla, il kit per auto ANYCOM HCC-250 può supportare queste funzioni. Procedere
come segue.
1.
2.
Se una nuova chiamata si verifica durante una conversazione in corso, ci sono due opzioni.
1)
Premere il pulsante + per almeno 3 secondi per sospendere la chiamata attiva e ricevere alla chiamata in arrivo.
2)
Premere il pulsante
per finire la chiamata attiva e rispondere alla nuova chiamata.
Se due chiamate avvengono contemporaneamente, una è attiva e l'altra rimane sospesa.
1)
Premere il pulsante + per almeno 3 secondi per alternare la chiamata sospesa e quella attiva.
2)
Premere il pulsante
per finire la chiamata attiva e ricevere quella sospesa.
3)
Premere il pulsante - per almeno 3 secondi per attivare la conversazione multipla.
Per le operazioni sopra descritte, il LED blu lampeggia rapidamente 3 volte ogni 2 secondi e il LED rosso è spento.
2.6 Funzioni A2DP
Questo kit per auto supporta il profilo bluetooth A2DP per la riproduzione di musica ad alta qualità. Se connesso con un riproduttore musicale / multimediale dotato
di tecnologia bluetooth o con un telefono cellulare compatibile con A2DP, il dispositivo consente di riprodurre musica stereofonica proveniente dal riproduttore.
2.6.1 Uso della funzione A2DP del telefono cellulare
Per telefoni cellulari che supportano profili bluetooth A2DP, è possibile stabilire una connessione audio tra il telefono cellulare e il kit per auto per ascoltare musica
riprodotta dal telefono. A seconda delle caratteristiche del telefono, la connessione audio può essere stabilita automaticamente avviando la riproduzione della
musica.
Se il telefono cellulare supporta i profili bluetooth A2DP ma non si stabilisce una connessione audio avviando la riproduzione musicale, è necessario seguire la
guida per l'utente del telefono per stabilire la connessione prima di riprodurre la musica.
Italiano
Pagina 7
2.6.2 Funzioni AVRCP
Le funzioni seguenti possono essere utilizzate per comandare a distanza il telefono o il riproduttore multimediale bluetooth per la riproduzione di musica.
Riproduzione: premere il pulsante
Pausa:
premere il pulsante
.
.
Stop:
premere il pulsante
per almeno 3 secondi.
Avanti:
Indietro:
premere il pulsante + per almeno 3 secondi.
premere il pulsante - per almeno 3 secondi.
2.7 Regolazione del volume
In modalità connessione o conversazione / riproduzione, è possibile regolare il volume del suono aumentandolo o abbassandolo premendo rispettivamente i
pulsanti + o -. È possibile ripetere la regolazione fino a raggiungere il livello desiderato di volume dell'altoparlante.
Nota:
Per la maggior parte dei bluetooth, la regolazione volume del kit per auto si sincronizzerà a quello del telefono. Ciò significa che il volume del suono
dell'ANYCOM HCC-250 può essere regolato dal telefono e viceversa. Questo non è però sempre vero, a causa delle variazioni nelle caratteristiche scelte dai
differenti produttori di apparecchi telefonici.
2.8 Pairing / connessione del vivavoce a un altro dispositivo bluetooth
Oltre che con un telefono bluetooth, il kit per auto può essere messo in pairing con un altro dispositivo bluetooth per effettuare comunicazioni cordless a breve
distanza. È possibile utilizzare le stesse procedure per il pairing descritte nella precedente sezione 2.4. È possibile anche seguire la guida per l'utente del
dispositivo bluetooth per completare il pairing partendo dal dispositivo.
Questo kit per auto è predisposto per il pairing con 8 dispositivi bluetooth al massimo (telefoni cellulari inclusi). Le 8 impostazioni corrispondenti delle informazioni
di pairing vengono memorizzate dal kit per auto. Ogni dispositivo in pairing può comunicare via radio con il kit per auto dopo l'impostazione di una connessione
bluetooth. Consultare la sezione 2.4.3 per le procedure di impostazione di una connessione bluetooth.
3. GUIDA RAPIDA PER L'UTENTE
3.1 Configurazioni dell'indicatore LED
Configurazione LED 1: il LED blu lampeggia 1 volta ogni 3 secondi; il LED rosso è spento.
Configurazione LED 2: il LED blu lampeggia rapidamente 3 volte ogni 2 secondi; il LED rosso è spento.
Configurazione LED 3: i LED blu e rosso si alternano in modo intermittente.
Configurazione LED 4: i LED blu e rosso si alternano ogni 3 secondi.
Configurazione LED 5: tutti i LED sono spenti.
3.2 Guida rapida per l'utente
Seguire le istruzioni contenute nelle seguenti tabelle 1-7 per azionare i dispositivi del kit per auto ANYCOM HCC-250. (Fare riferimento alla sezione 1 per
informazioni dettagliate sui tasti e sulla durata di azionamento degli stessi.)
Nota: Il kit per auto può effettuare conversazioni solo con dispositivi bluetooth in pairing. Per dispositivi che supportano solo il profilo vivavoce (HFP), è necessario
stabilire una connessione bluetooth tra il kit per auto e il telefono prima di effettuare o rispondere a chiamate.
Italiano
Pagina 8
Tabella 1: Spegnimento / accensione
STATO CORRENTE
INDICATORE HCC-250
FUNZIONE
OPERAZIONE
TELEFONO
HCC-250
SEGNALE ACUSTICO
INDICATORE LED
Accensione
Spento
Premere il pulsante
almeno 3 secondi
per
2 segnali di accensione
Configurazione LED 1
Spegnimento
Stand-by
Premere il pulsante
almeno 3 secondi
per
2 segnali di spegnimento
Configurazione LED 5
Tabella 2: Pairing / connessione
FUNZIONE
STATO CORRENTE
TELEFONO
Ingresso
modalità pairing
Cancellazione
dei profili di
pairing
INDICATORE HCC-250
OPERAZIONE
HCC-250
Spento
Premere il pulsante
almeno 6 secondi
Modalità pairing
Premere il pulsante - per
almeno 3 secondi
Pairing kit per
auto / telefono
Acceso
Modalità pairing
Connessione (kit
per auto /
telefono)
Stand-by
(disconnesso)
Stand-by
(disconnesso)
Disconnessione
Stand-by
(connesso)
Stand-by
(connesso)
per
Seguire la guida per l'utente
del telefono per completare la
procedura di pairing.
La chiave di accesso è "0000”
Premere il pulsante
o
impostare la connessione dal
telefono
Premere il pulsante
per
almeno 3 secondi o consultare
il manuale del telefono per
iniziare la connessione dal
telefono.
SEGNALE ACUSTICO
INDICATORE LED
2 segnali di accensione e
1 segnale di pairing
Configurazione LED 3
Configurazione LED 1
1 segnale di connessione
Configurazione LED 2
1 segnale di connessione
Configurazione LED 2
Configurazione LED 1
Tabella 3: Funzioni di chiamata
STATO CORRENTE
INDICATORE HCC-250
FUNZIONE
OPERAZIONE
TELEFONO
HCC-250
Risposta
chiamata
Chiamata in arrivo
Chiamata in
arrivo
Premere il pulsante
Configurazione LED 2
Respinta
chiamata
Chiamata in arrivo
Chiamata in
arrivo
Premere il pulsante - per
almeno 3 secondi
Configurazione LED 2
Fine chiamata
Conversazione
Conversazione
Premere il pulsante
Configurazione LED 2
Stand-by
Stand-by
Premere il pulsante + per
almeno 3 secondi
Segnale tasto
Configurazione LED 2
Stand-by
Stand-by
Premere il pulsante - per
almeno 3 secondi
Segnale tasto
Configurazione LED 2
Composizione
vocale
Composizione
vocale
Premere il pulsante -
Segnale tasto
Configurazione LED 2
Ricomposizione
Composizione
vocale
Annullamento
composizione
vocale
SEGNALE ACUSTICO
INDICATORE LED
Italiano
Pagina 9
STATO CORRENTE
INDICATORE HCC-250
FUNZIONE
OPERAZIONE
TELEFONO
HCC-250
SEGNALE ACUSTICO
INDICATORE LED
Volume +
Conversazione
Conversazione
Premere il pulsante +
Configurazione LED 2
Volume -
Conversazione
Conversazione
Premere il pulsante -
Configurazione LED 2
Segnale tasto
Configurazione LED 2
Segnale tasto
Configurazione LED 2
Mute
Conversazione
Conversazione
Premere i pulsanti - e +
contemporaneamente
Unmute
Conversazione
Mute
Premere i pulsanti - e +
contemporaneamente
Tabella 4: Funzioni di trasferimento
STATO CORRENTE
INDICATORE HCC-250
FUNZIONE
OPERAZIONE
TELEFONO
Trasferimento
chiamata
(da kit per auto a
telefono)
Trasferimento
chiamata
(da telefono a kit per
auto)
HCC-250
Conversazi
one
Conversazione
Premere il pulsante
almeno 3 secondi
Conversazi
one
Conversazione
Premere il pulsante
per
SEGNALE ACUSTICO
INDICATORE LED
Segnale tasto
Configurazione LED 1
Segnale tasto
Configurazione LED 2
Tabella 5: Indicazione di batteria scarica
STATO CORRENTE
INDICATORE HCC-250
FUNZIONE
OPERAZIONE
TELEFONO
Avviso di batteria
scarica
HCC-250
SEGNALE ACUSTICO
INDICATORE LED
Non spento
Segnale bip ogni 20
secondi
Configurazione LED 4
Tabella 6: Funzioni di chiamata avanzate
STATO CORRENTE
FUNZIONE
Sospensione chiamata
attiva e ricevimento
chiamata in arrivo
Fine chiamata attiva e
risposta a nuova chiamata
Commutazione chiamata
sospesa e chiamata attiva
Fine chiamata attiva e
ricevimento chiamata
sospesa
Conversazione multipla
INDICATORE HCC-250
OPERAZIONE
TELEFONO
TELEFONO
Conversazi
one
Chiamata in
attesa
Conversazi
one
Conversazi
one
Chiamata in
attesa
Chiamata
sospesa
Conversazi
one
Conversazi
one
SEGNALE ACUSTICO
Premere il pulsante + per
almeno 3 secondi
INDICATORE LED
Configurazione LED 2
Premere il pulsante
Configurazione LED 2
Premere il pulsante + per
almeno 3 secondi
Configurazione LED 2
Chiamata
sospesa
Premere il pulsante
Configurazione LED 2
Chiamata
sospesa
Premere il pulsante - per
almeno 3 secondi
Configurazione LED 2
Italiano
Pagina 10
Tabella 7: Operazioni con riproduttore multimediale
STATO CORRENTE
FUNZIONE
TELEFONO /
RIPRODUTTORE
INDICATORE HCC-250
OPERAZIONE
HCC-250
SEGNALE ACUSTICO
Riproduzione
Premere il pulsante
Pausa
Premere il pulsante
Stop
Premere il pulsante
almeno 3 secondi
Volume +
Premere il pulsante +
Volume -
Premere il pulsante -
Avanti
Indietro
INDICATORE LED
per
Premere il pulsante + per 3
secondi
Premere il pulsante - per 3
secondi
4. MANUTENZIONE
ANYCOM HCC-250 è un dispositivo per telecomunicazioni di design avanzato. Un'accurata manutenzione e un utilizzo appropriato aumenteranno la vita del
prodotto e consentiranno di mantenere prestazioni elevate di trasmissione della voce. Si consiglia di seguire le seguenti procedure di manutenzione.
z
Spegnere sempre il dispositivo quando non è in uso e tenerlo in un luogo sicuro.
z
Tenere il dispositivo asciutto e lontano da acqua, pioggia, umidità, condensa e altri liquidi che possono corrodere circuiti elettronici. Se il dispositivo si
bagna, spegnerlo immediatamente e aspettare che si asciughi completamente prima di utilizzarlo.
z
Tenere il kit per auto al riparo da polvere e sporcizia. In caso contrario, le parti meccaniche ed elettroniche potrebbero danneggiarsi.
z
Non conservare il kit per auto in luoghi a temperatura elevata o sotto la luce diretta del sole. Le alte temperature possono deteriorare le prestazioni, ridurre
la vita della batteria e sciogliere o mescolare alcune materie plastiche.
z
Non tenere l’apparecchio in un luogo troppo freddo. Nel passare in un luogo caldo si potrebbe formare condensa all’interno dell’apparecchio. I circuiti
elettronici interni potrebbero essere danneggiati.
z
Evitare di far cadere, colpire o agitare il kit per auto. Le parti meccaniche e i circuiti elettronici interni potrebbero rompersi.
z
Non utilizzare prodotti chimici, solventi per la pulizia o altri detergenti aggressivi per pulire il kit per auto. Utilizzare un panno pulito e leggermente umido
per pulire il dispositivo HCC-250.
z
Se l’apparecchio non funziona correttamente, rivolgersi sempre al servizio tecnico autorizzato più vicino per la riparazione. Lo smontaggio, la modifica o il
cambiamento dei componenti da parte dell’utente, potrebbero peggiorare il funzionamento dell'apparecchio, provocando danni ed annullando la garanzia.
Italiano
Pagina 11
5. INFORMAZIONI IMPORTANTI E DOMANDE PIÙ FREQUENTI
Q1.
Il LED rosso lampeggia.
Indicatore di batteria scarica. Ricaricare la batteria il più presto possibile.
Q2.
Il kit per auto non si accende dopo averlo caricato per oltre 20 minuti.
La prima volta, il kit per auto dovrà essere caricato per almeno 40 minuti prima di accenderlo. Si consiglia di caricare interamente la batteria prima di
utilizzare il kit per auto.
Q3.
Non è acceso l'indicatore di carica.
Quando la batteria è esaurita o il kit per auto non è stato utilizzato per un certo tempo, il LED rosso può tardare ad accendersi dopo aver collegato il
caricabatteria.
Q4.
Q5.
Dal kit per auto non esce alcun suono. Verificare i seguenti punti.
z
L'HCC-250 è acceso
z
L'HCC-250 è in pairing con un telefono cellulare
z
L'HCC-250 deve essere connesso con un telefono cellulare (eccetto se il vivavoce supporta solo il profilo telefonico)
z
L'HCC-250 e il telefono cellulare si trovano entro una distanza di 10 m / 30 piedi
z
L'HCC-250 e il telefono cellulare devono avere una buona intensità di segnale
Non si riesce a individuare il kit per auto quando un telefono cellulare cerca di fare il pairing.
È possibile che il kit per auto HCC-250 non sia in modalità pairing. Consultare la sezione 2.4.1 per ulteriori informazioni.
Q6.
È necessario effettuare nuovamente il pairing del kit per auto o del telefono cellulare già in pairing, dopo uno spegnimento?
No. Tenere presente che in caso di telefono cellulare che supporta il profilo vivavoce, il kit per auto e il telefono devono prima essere connessi. Consultare
la sezione 2.4.4 per ulteriori informazioni.
Q7.
La composizione vocale non funziona.
Verificare innanzitutto che il telefono supporti la funzione di composizione vocale. Assicurarsi di aver memorizzato il riconoscimento vocale. Tenere
presente che un ambiente rumoroso interferirà con la composizione vocale.
Italiano
Pagina 12
6. SICUREZZA
•
Utilizzare esclusivamente il caricabatteria fornito con l'apparecchio.
•
Attenzione. Sussiste il rischio di esplosione in caso di sostituzione della batteria con un tipo non corretto.
•
È necessario conoscere le leggi e i regolamenti sull'utilizzo dei telefoni cellulari e degli apparecchi vivavoce nelle zone in cui si guida. Prestare
sempre la massima attenzione alla guida. Accostare l'auto al bordo della strada e sostare prima di effettuare o rispondere a una chiamata se le
•
Non permettere a bambini di giocare con il kit per auto HCC-250, poiché contiene piccoli pezzi che potrebbero staccarsi e costituire un pericolo
di soffocamento.
•
Questo dispositivo contiene una batteria a polimero di litio. Tenerla sempre lontano dal fuoco (anche in caso di dismissione del kit per auto) per
evitarne lo scoppio.
•
Il kit per auto e in particolare la batteria incorporata devono essere smaltiti o riciclati correttamente. Contattare i centri di riciclaggio locali per le
modalità di smaltimento.
condizioni del traffico lo consigliano.
7. CERTIFICAZIONE E COLLAUDI DI SICUREZZA
Questo prodotto è stato collaudato e certificato come rispondente ai requisiti dell'organismo di qualificazione bluetooth (BQB), della parte 15
delle norme FCC, della direttiva R&TTE (99/5/EC) ovvero dei requisiti del marchio CE.
8. FCC STATEMENT
This device complies with part 15 of the FCC Rules. Operation is subject to the following two
conditions:
(1) This device may not cause harmful interference, and
(2) This device must accept any interference received , including interference that may cause undesired operation.
Note:
The manufacturer is not responsible for ANY interference, for example RADIO or TV interference, caused by unauthorized modifications to this equipment.
Such modifications could void the user’s authority to operate the equipment.
Federal Communication Commission Interference Statement
This equipment has been tested and found to comply with the limits for a Class B digital device, pursuant to Part 15 of the FCC Rules. These limits are
designed to provide reasonable protection against harmful interference in a residential installation. This equipment generates, uses and can radiate radio
frequency energy and, if not installed and used in accordance with the instructions, may cause harmful interference to radio communications. However, there
is no guarantee that interference will not occur in a particular installation. If this equipment does cause harmful interference to radio or television reception,
which can be determined by turning the equipment off and on, the user is encouraged to try to correct the interference by one of the following measures:
1.
Reorient or relocate the receiving antenna.
2.
Increase the separation between the equipment and receiver.
3.
Connect the equipment into an outlet on a circuit different from that to which the receiver is connected. Consult the dealer or an experienced radio/TV
technician for help.
FCC Caution: Any changes or modifications not expressly approved by the party responsible for compliance could void the user's authority to operate this equipment.
IMPORTANT NOTE:
FCC Radiation Exposure Statement:
This equipment complies with FCC radiation exposure limits set forth for an uncontrolled environment. This equipment should be installed and operated with minimum distance
20cm between the radiator & your body. This transmitter must not be co-located or operating in conjunction with any other antenna or transmitter.
Italiano
Pagina 13
9. DICHIARAZIONE CE
10. DICHIARAZIONE
Sono vietati la riproduzione, il trasferimento, la distribuzione o l'archiviazione in tutto o in parte dei contenuti del presente documento senza l'autorizzazione scritta del produttore
originale.
Il produttore si riserva il diritto di effettuare modifiche e miglioramenti al prodotto descritto nel presente documento senza obbligo di notifica.
Avvertenza:
Assicurarsi che il proprio telefono cellulare supporti i profili bluetooth e che il proprio operatore telefonico sia in grado di supportare le funzioni descritte nel presente manuale. In
caso contrario tali funzioni potrebbero non rendersi disponibili sul kit per auto.
Italiano
Pagina 14
11. CONDIZIONI DI GARANZIA
ANYCOM Technologies AG o ANYCOM Technologies Inc. garantisce l'acquirente originale di questo prodotto hardware contro eventuali difetti dei materiali o di fabbricazione
per un periodo di DUE (2) ANNI a partire dalla data di acquisto originale. Se viene riscontrato un difetto, ANYCOM si impegna a riparare o, a sua discrezione, sostituire
gratuitamente questo prodotto, purché esso le venga restituito entro il periodo di garanzia completo di tutto l'hardware, i cavi e il software. Per ogni prodotto restituito in
conformità con le presenti condizioni di garanzia è richiesto un numero ANYCOM RMA (Return Merchandise Authorization, autorizzazione alla restituzione della merce),
accompagnato da nome, indirizzo e numero telefonico e da una copia della ricevuta originale di acquisto come prova della data di acquisto originale. Il numero ANYCOM RMA
si ottiene telefonando direttamente alla compagnia per Stati Uniti, Canada ed Estremo Oriente (001) (949) 553-9426 o, per Europa, Medio Oriente e Africa, (049) (2161) 57630.
Questa garanzia è valida solamente per prodotti hardware fabbricati da ANYCOM, identificati dal marchio o logo ANYCOM applicatovi. La garanzia non vale se il prodotto
risulta danneggiato in seguito ad incidente, uso scorretto o non conforme alla destinazione, manutenzione non autorizzata o applicazione impropria. ANYCOM non fornisce
alcuna garanzia per i prodotti non fabbricati da ANYCOM, incluso il software associato ai prodotti ANYCOM realizzato da altri fabbricanti. Le applicazioni software prodotte da
fabbricanti diversi da ANYCOM e associate ai prodotti ANYCOM sono soggette a garanzia a parte concessa dal corrispondente fabbricante sui suoi prodotti software. Le
garanzie sopra esposte non sono trasferibili, sono esclusive e sostitutive di ogni altra garanzia, verbale o scritta, espressa o implicita, INCLUSA, DOVE CONSENTITO DALLA
LEGGE, QUALUNQUE GARANZIA IMPLICITA DI COMMERCIABILITÀ. ANYCOM declina qualsiasi responsabilità per danni accidentali o conseguenti risultanti da qualsiasi
violazione della garanzia, inclusi ma non limitatamente a mancato profitto, periodi di inattività, danneggiamento o sostituzione di equipaggiamenti o di proprietà.
ANYCOM Technologies AG • Broichmühlenweg 42 • D-41066 Mönchengladbach • Germany
E-Mail: [email protected] • Telefono: +49 2161 57630 • Assistenza : +49 900 1100821
ANYCOM Technologies Inc. • PO Box 10127 • Newport Beach, CA 92658 • USA
E-Mail: [email protected] • Telefono: 866-553-9426
Esclusione di responsabilità
Le informazioni fornite in questo documento sono da intendersi a scopo puramente informativo e possono essere modificate senza obbligo di notifica.
Vengono fornite "allo stato attuale" e senza alcuna garanzia. Ogni rischio derivante dall'uso delle informazioni è a carico del lettore. In nessun caso ANYCOM
potrà essere ritenuta responsabile per qualunque danno indiretto, conseguente, accidentale, speciale, a titolo di indennità punitiva o altro (inclusi, tra gli altri,
danni conseguenti a mancati profitti, interruzione dell'attività produttiva o perdita di informazioni aziendali), derivati da o collegati alla disponibilità, sfruttamento
o uso delle informazioni qui contenute, anche nel caso in cui ANYCOM sia stata informata sull'eventualità di tali danni.
Marchi commerciali:
ANYCOM, il logo ANYCOM e i prodotti ANYCOM a cui si fa riferimento in questa sede sono marchi commerciali o marchi registrati di proprietà di ANYCOM.
L'assenza di un nome di prodotto o di un logo su questa pagina web non costituisce una rinuncia al marchio ANYCOM o ad altri diritti di proprietà intellettuale
riguardanti tale nome o logo. Tutti gli altri marchi commerciali sono di proprietà dei rispettivi titolari.
www.anycom.com
Assistenza tecnica: 866-553-94 26
DE 45273917
PT 00068
Le seguenti informazioni valgono solo per gli stati membri dell'UE:
L'uso di questo simbolo indica che questo prodotto non deve essere trattato come rifiuto domestico. Assicurandosi che il prodotto venga smaltito correttamente si aiuterà a
prevenire potenziali conseguenze negative per l'ambiente e la salute delle persone, che potrebbero altrimenti essere causate da modalità di smaltimento scorrette. Per
informazioni più dettagliate sul riciclaggio di questo prodotto si prega di contattare l'autorità locale competente in materia, il servizio di smaltimento dei rifiuti domestici o il
rivenditore da cui il prodotto è stato acquistato.
Italiano