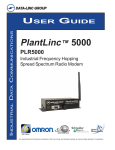
1
Industrial Data Communications
User Guide
DD1000 / DDAA1000
PLR580D / PLR580DA
Wireless I/O Extenders
It is essential that all instructions contained in the User Guide are followed precisely to ensure proper operation of equipment.
Notes:
Wireless I/O Extender User’s Guide
Table of Contents
Introduction........................................................................................................... 3
Requirements........................................................................................................ 4
Features................................................................................................................. 4
Applications.......................................................................................................... 5
Installation............................................................................................................. 5
Hardware Overview.....................................................................................................................6
Setup...................................................................................................................... 7
Operation Requirements.............................................................................................................7
Discrete Operation.................................................................................................................................. 7
Analog Operation (Analog models only)................................................................................................. 8
RF Operation........................................................................................................................................... 9
Field Configuration......................................................................................................................9
Testing.......................................................................................................................................10
Troubleshooting................................................................................................. 11
Technical Specifications.................................................................................... 12
Appendix A : Dimensions, Drawining Accessories................................. 13
Enclosure Dimensions...............................................................................................................13
Configuration Cable...................................................................................................................14
Optional Antenna.......................................................................................................................14
Appendix B – System Configuration (Using Configuration Software). ........ 15
Change I/O Configuration..........................................................................................................15
Change Radio Configuration.....................................................................................................17
Appendix C – System Configuration (Using a Terminal Program)............... 19
Change I/O Configuration..........................................................................................................19
Change Radio Configuration.....................................................................................................20
Appendix D – Radio Settings.................................................................... 27
Menu (0): Set Operation Mode..................................................................................................27
Menu (1): Set Baud Rate...........................................................................................................29
Menu (2): Edit Call Book............................................................................................................31
Menu (3): Edit Radio Transmission Characteristics
. ......................................................32
Menu (4): Show Radio Statistics...............................................................................................39
Menu (5): Edit Multipoint Parameters........................................................................................40
Menu (8): Chg Password...........................................................................................................44
Product Warranty............................................................................................... 45
Return Material Authorization........................................................................... 45
Contact Information........................................................................................... 45
PN 161-09981-007A
January 2010
Wireless I/O Extender User’s Guide
PN 161-09981-007A
January 2010
Wireless I/O Extender User’s Guide
Introduction
Data-Linc Group (DLG) has prepared this user guide for use by customers as a guide to the proper installation, operation,
and maintenance of a Wireless I/O Extender system. This includes the following DLG products:
DDAA1000 - Discrete and Analog Wireless I/O Extender (1 Watt, 900 MHz FHSS)
DD1000 - Discrete Wireless I/O Extender (1 Watt, 900 MHz FHSS)
DDAA1000/2.4 - Discrete and Analog Wireless I/O Extender (500mW, 2.4 GHz FHSS)
DD1000/2.4 - Discrete Wireless I/O Extender (500mW, 2.4 GHz FHSS)
PLR580DA - Discrete and Analog Wireless I/O Extender (200mW, 900 MHz FHSS)
PLR580D - Discrete Wireless I/O Extender (200mW, 900 MHz FHSS)
The Discrete Wireless I/O Extender is a discrete signal multiplexer and the Discrete and Analog Wireless I/O Extender is
a discrete and analog signal multiplexer. They are designed to provide wireless communication where wire lengths are
too long, too costly or not possible. In general, these units behave as if they replace a set of wires between the two or
more locations. These units are normally factory configured and eliminate the necessity of having to configure the units
in the field. The units are ready for installation into the system upon receipt. If the system changes, these units do have
the capability to be field reconfigured and to have access to the radio setup parameters using dipswitch settings and a 9
pin din serial cable to a PC. The units are configured using windows software or a terminal emulation program such as
Hyperterminal©.
The analog models have both analog and discrete inputs and outputs. The unit has 8 analog input channels, 8 analog
output channels, 8 discrete inputs, and 8 discrete outputs. The analog channels are 4-20 mA inputs and outputs with 8 bit
resolution, and the discrete inputs are a contact closure with relay drive outputs.
The discrete models have only discrete inputs and outputs. The unit has 8 discrete contact closure inputs and 8 relay
drive outputs. When designing a system that uses these units, keep in mind that if using more than one remote (8 possible) that the master unit can never have more that 8 digital-in, 8 digital-out, 8 analog-in, and 8 analog-out.
The Wireless I/O Extender takes an input at one end and reproduces it at the other end as an output. The units with I/O
Configure V2.0 are Master or Remote selectable. Older versions are master and remote specific. Each system must have
one master and at least one remote, but can have up to 8 Remotes.
Communication is accomplished using radio transceivers. A six-inch unity gain whip antenna is supplied with each unit for
test purposes.
Note: These transceivers are “line of sight” transceivers, so line of sight is required for communications. In some
instances, depending on distance and obstruction, line of sight may not be necessary, but high latency or poor
communications could result. If line of sight does not exist or the units are to be mounted into grounded metal
enclosures, an external antenna may be needed. If external antennas were not purchased with this equipment,
contact Data-Linc Group for information.
PN 161-09981-007A
January 2010
Wireless I/O Extender User’s Guide
Requirements
Power
PLR580D/PLR580DA
DD1000/DDAA1000
8-14 VDC
8-18 VDC
24V Optional (14 - 28 VDC)
24V Optional (14 - 28 VDC)
Current Draw Max 550 mA @ 12VDC
Current Draw Max 660 mA @ 12VDC
Discrete Operation
The outputs of the units cannot directly drive a relay. The digital outputs are open collector current sinking
common ground. An external power supply must be used to provide DC power to any relays.
The maximum voltage on the relay driver outputs is 24 VDC.
Each digital output can sink up to 100 mA for the purpose of controlling the relay coil.
If driving inductive loads, place a voltage suppression diode across the relay coil.
Analog Operation
The outputs are 4-20mA output transmitters.
The outputs can operate on loops with a maximum total resistance of 300 ohms.
All inputs use a common ground connection labeled “G”.
The input signal must be a 4-20 mA signal.
RF Operation
SMA antenna or coax connection.
RS-232 Configuration
6-Pin data cable to DB9 for RF & Processor configuration.
Terminal emulation program or Windows© operating system running PLR programming software.
Features
Wireless extension of discrete inputs to outputs.
•Failure condition of outputs settable to “off” or “hold last value”.
Wireless extension of analog inputs to outputs (PLR580DA model only).
•Failure condition of outputs settable to “low (4mA)” or “hold last value”.
LEDs for power, data transmit, data receive, RF Carrier Detect, and connection status indication.
•Status LED for alarm conditions, Discrete #1 can be set to follow status LED.
Operating temperature 32 °F to 140 °F (0 °C to 60 °C).
An RS-232 data port using a 6-Pin connector for configuration.
PN 161-09981-007A
January 2010
Wireless I/O Extender User’s Guide
Applications
The Wireless I/O Extenders are designed for point-to-point or point-to-multipoint wireless extension of wired sensors or
input and output controls. The system consists of one master unit and at least one remote unit, but can have up to 8
remotes. The master unit has 8 discrete inputs that are shared with the remote(s) and the discrete outputs are merged
togeather (OR’d) from the remote(s). The Discrete and Analog Wireless I/O Extenders have 8 analog inputs and outputs;
these channels are assigned to a specific remote.
Point to Point
Point to Multipoint
Installation
Unpacking the Hardware (System)
•Discrete (and Analog) Wireless I/O Extender (At least 2 are needed for a system)
•120 VAC Wall Transformer (US Power Connector)
•6-Pin Min-Din to DB9 Cable for programming (1 per system)
•CD with Configuration Software and Manual
•Quick Start Guide
•Test Antenna
The equipment was carefully packaged to prevent shipping damage. It should be free from any defect, electrical
or mechanical, and in good operating condition. If your package contents are damaged or missing, please
contact your place of purchase immediately.
PN 161-09981-007A
January 2010
Wireless I/O Extender User’s Guide
Hardware Overview
Side Panel
•Power Connector with 2 pin terminal connector, positive on the right
•Antenna Connector with standard thread SMA connector
Top Panel
-LED Indicators
LED
Indication
Power
RF CD
Modem Power
Radio Carrier Detect
RF Out
RF In
Status
Radio Transmitting Data
Radio Receiving Data
Communication Status
Note
Should be on (red) at all times
In all configurations this LED should be on (orange) except
for Multi-Point Master where it will be off unless a Repeater
or Remote is sending data to the Master.
Should flash (yellow) when modem is transmitting data
Should flash (green) when modem is receiving data
A Solid or Blinking (red) LED indicates Limited or No Communication.
-Discrete and Analog Ports
•9 pin Contact Closure Input and Output
•9 pin Analog Input and Output
PN 161-09981-007A
January 2010
Wireless I/O Extender User’s Guide
Setup
Factory Configuration Process
At the factory, each remote unit is given an address, which is zero (0) to seven (7). Each unit is then programmed for a
specific number of analog inputs and outputs, which if not specified is an equal number (or as close to) per each remote to
use all 8 available channels.
The channel fail states are default as: Analog -> 4 mA, Discrete -> Off, Alarm -> LED Only
Note: A system will have one Master and 1-8 Remotes.
Operation Requirements
•DC Voltage Connected with 2-pin terminal plug.
•SMA antenna or coax for RF transmission.
•Discrete or Analog input and output devices.
•Terminal block wire (size 12-26 AWG).
Discrete Operation
Requirements
•The outputs of the units cannot directly drive a relay. The digital outputs are open collector current sinking to the
common ground. An external power supply must be used to provide DC power to any relays. If driving inductive
loads, place a voltage suppression diode across the relay coil.
•The maximum voltage on the relay driver outputs is 24 VDC.
•Each digital output can sink up to 100 mA for the purpose of controlling the relay coil.
•The digital input expects a dry contact, such as a switch or even just a jumper wire.
•There is one common ground for all input and output connections.
•Ensure that the pull up voltage is sufficient for your relay. i.e. a 12 VDC relay needs 12 VDC, a 24 VDC relay
needs 24 VDC.
These units are bi-directional, they send and receive discrete information both directions. The discrete connection to the
device is made via the terminals labeled “Contact Closure Input” and “Contact Closure Output”. The fail state or alarm
condition on loss of communications can be set to “off” (default) or “hold last value” for these channels independent of any
other units in the system. The following diagrams illustrate the output drive circuit connection for a discrete unit and an
example test circuit.
DC Supply
+ -
Dry Contact Closure
8
7
6
5
4
3
2 1 G
Contact Closure Input
Master
Simplified Open Collector
PN 161-09981-007A
January 2010
8
7
6
5
4
3
2 1 G
Contact Closure Output
8
7
6
5
4
3
2 1 G
Contact Closure Input
8
7
6
5
4
3
2 1 G
Contact Closure Output
Remote
Point to Point Discrete Operation Example
Wireless I/O Extender User’s Guide
Analog Operation (Analog models only)
Requirements
•The outputs can drive 4-20 mA.
•The outputs can operate on loops with a maximum total resistance of 300 ohms.
•The input signal must be a 4-20 mA signal.
•All inputs use a common ground connection labeled “G”.
These units are bi-directional, they send and receive analog information both directions. The analog connection to the
device is made via the terminals labeled “4-20mA Input” and “4-20mA Output.” The fail state or alarm condition on loss of
communications can be set to “low (4mA)” (default) or “hold last value” for these channels independent of any other units
in the system.
In a Point-to-Point system the inputs correspond to the same numbered output on the other unit. The following diagram
illustrates the point-to-point analog example.
Remote
Master
Pwr
Pwr
4-20mA Output
4-20mA Input
G 1
2 3 4
5
6
7
8
G 1
2 3 4
5
6
7
4-20mA Output
4-20mA Input
8
G 1
2 3 4
5
6
7
8
G 1
2 3 4
5
6
7
8
13.7
Sensor
with 4 -20 mA
Output
Note:
Loop power supply
may be needed.
The DDAA1000 units do
not supply loop power
mA
mA
In a Multipoint system the analogs are assigned to a remote and incremented on the master. The following diagram illustrates the point-to-multipoint analog example.
PN 161-09981-007A
January 2010
Wireless I/O Extender User’s Guide
RF Operation
Requirements
•Per FCC Rules, the maximum power allowed at the antenna is 4 Watts E.I.R.P.
•Maximum RF transmit power is:
DD(AA)1000
DD(AA)1000/2.4
PLR580D(A) 955mW
500mW
200mW
•Standard thread SMA connection for coax and external antenna connections.
Field Configuration
(See Appendix B and C for complete system configuration)
To access the I/O or Radio Configuration the user must remove all connectors from the Wireless I/O Extender, then
remove the cover and change the switches, and connect the programming cable, supplied by Data-Linc Group, to
connector P3. The switch settings must be returned to the Run Mode settings after reconfiguring the system or the unit will
not operate. Refer to Appendix B and C for more configuration information.
There are 3 configurations of the switches.
Switch Location
1.
2.
3.
Run Mode Normal Wireless I/O Extender Operating Mode
PIC Config
Access to the I/O Configuration
Radio Config Access to Radio Configuration
If changing the I/O Configuration go to Appendix B.
If changing the Radio Configuration go to Appendix C.
PN 161-09981-007A
January 2010
Wireless I/O Extender User’s Guide
Testing
I/O Loop Back Test
•Configure the system as needed.
•At the master unit connect the outputs to the inputs with jumper wires on the master unit as shown below.
•At the remote change the input (analog or discrete) and the outputs follow the inputs.
10
PN 161-09981-007A
January 2010
Wireless I/O Extender User’s Guide
Troubleshooting
I have the units setup on a bench for testing, but the Master’s status LED keeps flashing or is solid and I do not
have a carrier.
When shipped, the units are setup for a maximum transmit power. If there are only a couple feet of separation
between them, the supplied whip antenna may need to be removed. Note that this will not damage the unit.
The units are installed in the field, but I have a flashing or solid LED on the status and no carrier.
The Master’s status LED only comes on when a response from a remote is not obtained after 3 tries, then the
Master moves on to the next Remote. A solid light indicates that the Master cannot connect to any remotes. A
blinking light indicates that the Master has lost communication with at least one remote. Most likely the issule is a
radio line-of-sight problem. If external antennas are being used, verify that they are grounded and that line of sight
exists. Also verify that the input power is OK. A UPS is recommended in areas where clean power may not exist.
If units are bench tested, and there is no communications, then you may have a mis-configured system. If the
system has been working and then fails, check for cable and antenna connections, and DC power levels.
The power LED on one or both of my units is out and I have no communication.
Try cycling power on either of the units, the resettable fuse may have tripped. If communications do not come
up again, verify that there is power to the device. The supplied wall transformer output is nominally around 16
VDC when the radio is not transmitting, and drops to 12 VDC when the transmitter is on. If the supply is okay and
cycling power does not fix the problem, contact Data-Linc Group.
My analog output reads 4 mA all the time.
Verify that the connection of the transducer at the transmitter is okay. Put a milliamp meter in the loop, and verify
that the connected transducer is supplying more than 4 mA into the unit. Verify that the correct current polarity is
used.
Note: Data-Linc Group unit does not supply loop power on the inputs.
My analog output is 0 or below 4 mA.
Contact Data-Linc Group. The analog output has been damaged or failed. This is a hardware problem.
The discrete output will not activate my relay.
The discrete output of the PLR580D or PLR580DA does not supply power for a relay coil. Refer to the open
collector diagram for connections.
My relay switches on and off constantly.
Verify that the Master’s status LED does not light. The status LED refers to loss of RF communication data
stream. Make sure the relay coil does not require more than 100 mA. The discrete outputs can only sink 100 mA.
The relay never switches.
Verify that the switch on the input side is wired properly to the Wireless I/O Extender. Check the discrete output
with a multimeter. Set the meter for continuity and place the “+” lead on the “G” or common terminal and “-” on the
correct discrete output.
PN 161-09981-007A
January 2010
11
Wireless I/O Extender User’s Guide
Technical Specifications
DD1000
DDAA1000
Imput Voltage Range
Input Voltage Range (24V Version)
Power Connector
Max Current Draw
Programming Interface
Discrete Channels
Analog Channels (Analog Version)
Analog Reolution (Analog Version)
RF Rated* Range
RF Frequency Range
RF Modulation
RF Data Rate
RF Error Detection
RF Receiver Sensitivity
RF Transmitter Power
DD1000/2.4
DDAA1000/2.4
8-18 VDC
PLR580D
PLR580DA
8-14 VDC
14-28 VDC
2 Position Pluggable Terminal Block
660mA @ 12 VDC
550mA @ 12VDC
19200 Baud, RS-232 Serial Port 6-Pin Mini-Din
8 Inputs (Dry Contact)
8 Outputs (Open Collector 100 mA Max Sink Current)
8 Inputs
8 Outputs
(2% Accuracy or Better with a Max Output Load of 300 Ohm)
8 Bit
20 Miles (32km)
15 Miles (24 km)
4 Miles (6.5 km)
902-928 MHz
2.400-2.483 GHz
902-928 MHz
Spread Spectrum Frequency Hopping, GFSK
144 Kbps
38.4 Kbps
32 Bit CRC
-110 dBm
-105 dBm
-106 dBm
-6
-6
@ 1x10 BER
@ 1x10 BER
@ 1x10⁻⁶ BER
1 Watt Max
(10 Steps)
RF Tuning Method
RF Operating Mode
RF Antenna Connector
Operating Temperature
Enclosure Material
Enclosure Dimensions
(Without Connectors)
Weight
500 mW Max
200 mW Max
(10 Steps)
(10 Steps)
Digital Synthesizer
Class A
Standard Thread Female SMA
32 °F to 140 °F (0 °C to 60 °C)
18 Gauge Steel
6.90” x 4.04” x 1.75”
175 x 103 x 45mm
X.xx lbs. (0.xx kg.)
*Line-of-sight distance using omni directional antennas
12
PN 161-09981-007A
January 2010
Wireless I/O Extender User’s Guide
Appendix A : Dimensions, Drawining Accessories
Enclosure Dimensions
3.94
Note: Enclosure Size, Mounting Holes and Locations may change without notice, contact Data-Linc Group (425)
882-2206 for the latest Enclosure Dimensions.
PN 161-09981-007A
January 2010
13
Wireless I/O Extender User’s Guide
Configuration Cable
Optional Antenna
Model
A-O6/ADJ
A-OB
A-O7B
A-Y8B
A-Y11B
Description
900MHz Omnidirectional Antenna 6”L, 0db Gain, SMA Female Connector
900MHz Omnidirectional Antenna, 12”L, 5.14dBi (3dBd) Gain, Mounting Brkt.
900MHz Omnidirectional Antenna, 22”L, 7.14dBi (5dBd) Gain, Mounting Brkt.
900MHz Yagi Directional Antenna, 17.5”L, 8dBi Gain, 4 Element, Mounting Brkt.
900MHz Yagi Directional Antenna, 29.3”L, 11dBi Gain, 7 Element, Mounting Brkt.
A-2.4-O4/ADJ 2.4GHz Omnidirectional Antenna 5”L, 0db Gain, SMA Female Connector
2.4GHz Omnidirectional Antenna, 5dBi Gain, Mounting Brkt.
A-2.4-O5B
2.4GHz Omnidirectional Antenna (fiberglass), 6dBi Gain, Mounting Brkt.
A-2.4-O6B
A-2.4-Y10B
14
2.4GHz Yagi Directional Antenna, 4.4”L, 10dBi Gain, 18” Coax w/ Female “N”, Mounting Brkt.
PN 161-09981-007A
January 2010
Wireless I/O Extender User’s Guide
Appendix B – System Configuration (Using Configuration Software)
The Wireless I/O Extender is made up of two components: the microprocessor and the RF transceiver (radio) each one
configurable. The microprocessor configuration parameters are stored in local memory and the radio configuration is
stored in memory local to the radio. The configuration can be changed using serial commands via port P3. The easiest
method is to use the Data-Linc Group program provided with the master unit, to be run on a PC. If the program
(io_config.exe) is missing it can be downloaded from the Data-Linc Group web site ftp://ftp.data-linc.com or it is possible
to change the settings using a PC with a terminal program (See Appendix C). The settings need to match in all the units in
the system, mis-configured units will not answer and the status LED will be lit or blink to indicate a system problem.
Change I/O Configuration
Remove all the connectors from the Wireless I/O Extender.
Remove the 4 screws on the top to remove the cover.
Connect the programming serial data cable from PC to Mini-Din connector (P3).
Note: This cable should be supplied one per system, available from Data-Linc Group.
Set the switches to “PIC Config” (3&4 ON, 1,2,5&6 OFF).
Execute the program io_config.exe on a Windows© PC
PN 161-09981-007A
January 2010
15
Wireless I/O Extender User’s Guide
Select the product model “PLR580DA or DDAA1000”(Analog Channels) or “PLR580D or DD1000” (Discrete Only).
Select the operation mode “Master” or “Remote”.
Select the baud rate (default is 19200, the radio baud rate must match this).
Select the fail states for the channels and the alarm function.
Programming a Master
•Select the number of remotes in the system.
•Select the number of analog channels for each remote in the system.
Programming a Remote
•Select the address number of the remote in the system.
•Select the number of analog channels for that remote (this should be done if the master was already
programmed and the software wasn’t closed).
Select the Comm Port number used on the PC.
Press the “Program Eeprom” button.
Follow the prompt and apply power to the unit.
The microprocessor is now programmed.
Note: To program the radio, skip to “Radio Configuration” section
Remove the power and programming cable.
Set the switches to the “Run Mode” (1&2 ON, 3,4,5&6 OFF).
Replace the cover.
Reconnect the connectors.
16
PN 161-09981-007A
January 2010
Wireless I/O Extender User’s Guide
Change Radio Configuration
Remove all the connectors from the Wireless I/O Extender.
Remove the 4 screws on the top to remove the cover.
Connect the programming serial data cable from PC to Mini-Din connector (P3).
Note: This cable should be supplied one per system, available from Data-Linc Group.
Set the switches to “Radio Config” (5&6 ON, 1,2,3&4 OFF).
Execute the program io_config.exe on a Windows© PC.
Select the “Radio Configuration” Tab.
Note: Change the Frequency if another system will be in the area to help reduce noise to the other system.
Choose the “Network type”:
•Point to Point – For a Master and one Remote. – See Point-to-point Network below.
•Point to Multipoint - For a Master and 1-8 Remotes.
•Select Network ID or Call Book – see Point-to-Multipoint Network below.
PN 161-09981-007A
January 2010
17
Wireless I/O Extender User’s Guide
Point-to-Point Network (Using Call Book)
Enter the Call Book number of the Master and Remote into the fields under “Using Call Book”.
Program the Master
•Make sure “Master” is selected from “Modem Type To Configure”.
•Press the “Program Radio” Button.
•Press the SW1 on the Wireless I/O Extender PCB to put the radio into Configuration mode and program the unit.
•When completed remove power, programming cable, and return the switches to the Run Mode.
Program the Remote
•Make sure “Remote calls Master” is selected from “Modem Type To Configure”.
•Press the “Program Radio” Button.
•Press the SW1 on the Wireless I/O Extender PCB to put the radio into Configuration mode and program the unit.
•When completed remove power, programming cable, and return the switches to the Run Mode.
Point-to-Multipoint Network (Using Network ID)
Enter a Network ID number into the field “Using Network ID”.
Program the Master
•Make sure “Master” is selected from “Modem Type To Configure”.
•Press the “Program Radio” Button.
•Press the SW1 on the Wireless I/O Extender PCB to put the radio into Configuration mode and program the unit.
•When completed remove power, programming cable, and return the switches to the Run Mode.
Program the Remote
•Make sure “Remote calls Master” is selected from “Modem Type To Configure”.
•Press the “Program Radio” Button.
•Press the SW1 on the Wireless I/O Extender PCB to put the radio into Configuration mode and program the unit.
•When completed remove power, programming cable, and return the switches to the Run Mode.
Point-to-Multipoint Network (Using Call Book)
Enter the Call Book number of the Master (and Repeater) into the fields under “Using Call Book”.
Program the Master
•Make sure “Master” is selected from “Modem Type To Configure”.
•Press the “Program Radio” Button.
•Press the SW1 on the Wireless I/O Extender PCB to put the radio into configuration mode and program the unit.
•When completed remove power, programming cable, and return the switches to the Run Mode.
Program the Remote
•Make sure “Remote calls Master” is selected from “Modem Type To Configure”.
•Press the “Program Radio” Button.
•Press the SW1 on the Wireless I/O Extender PCB to put the radio into configuration mode
and program the unit.
•When completed remove power, programming cable, and return the switches to the Run Mode.
18
PN 161-09981-007A
January 2010
Wireless I/O Extender User’s Guide
Appendix C – System Configuration (Using a Terminal Program)
Wireless I/O Extender Configuration using a terminal program such as Hyperterminal©.
Terminal Program Port Settings:
•19200 Baud Rate
•8 Data Bits
•No Parity
•1 Stop Bit
•No Flow Control
Change I/O Configuration
Remove all the connectors from the Wireless I/O Extender.
Remove the 4 screws on the top to remove the cover.
Connect the programming serial data cable from PC to Mini-Din connector (P3).
Note: This cable should be supplied one per system, available from Data-Linc Group.
Set the switches to “PIC Config” (3&4 ON, 1,2,5&6 OFF).
Execute the terminal program at 19200 Baud, 8/N/1 and no
flow control.
Apply DC power to the unit. A line of characters will appear
on the terminal screen. It must say:
Turn On the “Caps Lock”, only capitals are used for
configuration.
Programming a Master
•Press “M” for master.
•Select the baud rate (default is “5” for 19200) (1-5).
Note: This must be the same as the radio baud rate.
•Select the number of Remotes in the system (1-8).
•Select the number of analog channels,
•For discrete only systems use 0.
•For analog systems the value must
be 8 or less (0-8).
•Select failure modes
•Analog fail (0-Low 1-Hold) (Analog models only).
•Discrete fail (0-Off 1-Hold).
•Alarm Mode (0-LED only 1-LED&CC#8 On).
•Remove the programming cable and cycle power.
PN 161-09981-007A
January 2010
I/O Configure V2.0
SET CAPLOCK
(M)aster or (R)emote
Baud: 1=1200 2=2400 3=4800 4=9600 5=19200 5
(1-8)Number of Remotes:2
(0-8)Number of Analogs Remote0 4
(0-8)Number of Analogs Remote1 4
Number of Master Analogs:8
(0-Low 1-HOLD)Analog Fail Mode:1
(0-OFF 1-HOLD)Discrete Fail Mode:1
(0-LED 1-LED&Output#8)Alarm Mode:1
EEPROM CHECK:
B# #An Mode DF AF AL #Remote
5
8
0
1
1
1
2
R0 R1 R2 R3 R4 R5 R6 R7 Analog
4
4
0
0
0
0
0
0
Check
Remove Cable and Cycle Power when finished
19
Wireless I/O Extender User’s Guide
Programming a Remote
•Press “R” for remote.
•Select the baud rate (default is “5” for 19200) (1-5).
Note: This must be the same as the radio baud rate.
•Select the remote address (0-7).
Note: Value must be sequential and start low to high
without any duplicates.
•Select the number of analog channels,
•For discrete only systems use 0.
•For analog systems the value must be 8
or less (0-8).
•Select failure modes
•Analog fail (0-Low 1-Hold) (Analog models only).
•Discrete fail (0-Off 1-Hold).
•Alarm Mode (0-LED only 1-LED&CC#8 On).
•Remove the programming cable and cycle power.
Baud: 1=1200 2=2400 3=4800 4=9600 5=19200 5
(0-7)Remote Address:0
(0-8)Number of Analogs Remote4
(0-Low 1-HOLD)Analog Fail Mode:1
(0-OFF 1-HOLD)Discrete Fail Mode:1
(0-LED 1-LED&Output#8)Alarm Mode:1
EEPROM CHECK:
B# #An Mode DF AF AL #Remote
5
4
1
1
1
1
0
Check
Remove Cable and Cycle Power when finished
Change Radio Configuration
Remove all the connectors from the Wireless I/O Extender.
Remove the 4 screws on the top to remove the cover.
Connect the programming serial data cable from PC to Mini-Din connector (P3).
Note: This cable should be supplied one per system, available from Data-Linc Group.
Set the switches to “Radio Config” (5&6 ON, 1,2,3&4 OFF).
Execute the terminal program at 19200 Baud, 8/N/1 and no flow control.
Depending on the model of the radio the menus may vary in appearance and options.
Press the SW1 switch on the Wireless I/O Extender PCB and the menu should appear.
MAIN MENU
Version 2.65
06-11-2008
902 - 928 MHz
Modem Serial Number 921-8921
(0)
(1)
(2)
(3)
(4)
(5)
(6)
(8)
(Esc)
Set Operation Mode
Set Baud Rate
Edit Call Book
Edit Radio Transmission Characteristics
Show Radio Statistics
Edit MultiPoint Parameters
TDMA Menu
Chg Password
Exit Setup
Enter Choice
20
PN 161-09981-007A
January 2010
Wireless I/O Extender User’s Guide
Select option “0”
The Set Operation Menu the menu should appear:
SET MODEM MODE
Modem Mode is
3
(0)
(1)
(2)
(3)
(4)
(5)
(6)
(7)
(A)
(B)
(F)
(Esc)
Point to Point Master
Point to Point Slave
Point to MultiPoint Master
Point to MultiPoint Slave
Point to Point Slave/Repeater
Point to Point Repeater
Point to Point Slave/Master Switchable
Point to MultiPoint Repeater
Mirrorbit Master
Mirrorbit Slave
Ethernet Options
Exit to Main Menu
Enter Choice
The Operation Mode option is used to designate the method in which the particular Wireless I/O Extender will be used.
The radio operates in a master, remote, or repeater mode. The radio modems that are intended to operate together must
be set up as such.
Note:The other settings are discussed further in Appendix D.
(0) Point to Point Master
•Call Book Based System, with one master and one remote.
•The remote must be set to mode (1) and have the master call book number entered in the call book section from
the main menu.
(1) Point to Point Slave
•Call Book Based System, with one master and one remote.
•The master must be set to mode (0) and have the remote call book number entered in the call book section from
the main menu.
(2) Point to MultiPoint Master
•Used in a system with one or more remotes, the master broadcasts and the packets are received at all the
remotes.
•The system can be setup as call book or Network ID.
•The remotes must be set to mode (3) or (7).
(3) Point to MultiPoint Slave
•Used in a system with a Multipoint Master.
•The call book number or Network ID of the master must be set in the remotes.
•The master must be set to mode (2).
PN 161-09981-007A
January 2010
21
Wireless I/O Extender User’s Guide
(7) Point to Multipoint Repeater
•The Wireless I/O Extenders can be used as a repeater and remote in a multipoint network.
•A SRM6000 unit can be used in this mode as a pass through link for the DD(AA)1000 system.
•A SRM6100 unit can be used in this mode as a pass through link for the DD(AA)1000/2.4GHz system.
•A PLR5000 unit can be used in this mode as a pass through link for a PLR580D(A) system.
•The call book number or Network ID of the master must be set in the repeater.
•The Slave/Repeater mode must be set to operate as a Remote and a repeater.
Note: Number of repeaters must be set to 1 in the “Edit MultiPoint Parameters” page when a repeater is used.
•The master must be set to MultiPoint Master.
Press “ESC” to return to the Main Menu.
Select option “1”
The Set Baud Rate menu should appear:
SET BAUD RATE
Modem Baud is 019200
(0)
(1)
(2)
(3)
(4)
(5)
(6)
(7)
(8)
(9)
(A)
(B)
(C)
(D)
(E)
(F)
(G)
(Esc)
230,400
115,200
76,800
57,600
38,400
19,200
9,600
4,800
2,400
1,200
Data, Parity 0
MODBus RTU
0
RS232/485
0
Setup Port
3
TurnOffDelay 0
TurnOnDelay
FlowControl
0
Use break to access setup
Exit to Main Menu
0
0
Enter Choice
The Wireless I/O Extender can operate at different baud rates. Default is 19200 Baud.
Note: This must match the baud rate set in the microprocessor.
Do not change the other parameters from default as seen above. Changing these parameters may cause the system to
be mis-configured and the status LED will be lit or blink to indicate a system problem.
Press “ESC” to return to the main menu.
22
PN 161-09981-007A
January 2010
Wireless I/O Extender User’s Guide
If the system is using network ID, Skip to option “3”.
If the system is using Call Book, Select option “2”.
The Edit Call Book menu should appear:
MODEM CALL BOOK
Entry to Call is (ALL)
Entry
Number
Repeater1
Repeater2
(0)
000-0000
(1)
000-0000
(2)
000-0000
(3)
000-0000
(4)
000-0000
(5)
000-0000
(6)
000-0000
(7)
000-0000
(8)
000-0000
(9)
000-0000
(C)
Change Entry to Use (0-9) or A(ALL)
(Esc)
Exit to Main Menu
Enter all zeros (000-0000) as your last number in list
In a point-to-multipoint system, the master broadcasts and the packets are filtered at the remote units based off the
master call number. The master call book number must be in each remote and repeater call book that is communicating
directly with the master. The repeater call book number must be in each remote and repeater call book that is
communicating with the repeater.
In point-to-multipoint the master can be left blank (000-0000).
In a point-to-point system, the master call book number must be in the remote and the remote call book number in the
master.
Entering or modifying call book numbers in the call book.
•Select the entry number (0 – 9) you wish to change.
•When prompted “Enter New Number”, enter the 7 digit call number of the unit to call (the dash is automatically
inserted).
•Enter the Repeater1 in a Point to Point Network.
If no repeater is to be used or this is a Point to Multipoint Network,
press “ESC” to return to the modified call book menu screen.
•Enter the Repeater2 in a Point to Point Network.
If no Repeater2 is to be used, press “ESC” to return to the modified call book menu screen.
Press “ESC” to return to the Main Menu.
PN 161-09981-007A
January 2010
23
Wireless I/O Extender User’s Guide
Select option “3”
The Edit Radio Transmission Characteristics menu should appear:
RADIO PARAMETERS
WARNING: Do not change parameters without reading manual
(0)
(1)
(2)
(3)
(4)
(5)
(6)
(7)
(8)
(9)
(A)
(B)
(C)
(Esc)
FreqKey
5
Max Packet Size 9
Min Packet Size 2
Xmit Rate
1
RF Data Rate
3
RF Xmit Power
10
Slave Security
0
RTS to CTS
0
Retry Time Out 255
Lowpower Mode
0
High Noise
0
MCU Speed
0
RemoteLED
0
Exit to Main Menu
Enter Choice
The Radio Parameters are adjusted for the Wireless I/O Extender units and shouldn’t need adjusting unless other
Wireless I/O Extender systems are to be in RF range, then the frequency key should be changed for the different systems.
Also the output power can be lowered if the system is in close proximity.
Note: The other settings are discussed further in Appendix D.
(0) FreqKey
•The frequency key is the hopping pattern used for the Wireless I/O Extender system.
•To minimize the interference with other Data-Linc Group radios operating in the area, use a different frequency
key for each system and repeaters.
•There are 15 different hopping patterns are available, options (0-9 and A-E). It is recommended that a list be
maintained of the settings for each master to ensure that each is system is set to a different hopping pattern.
•The FreqKey must match on all the units in the system.
(5) RF Xmit Power
•The RF Xmit Power is the output power for the radio.
•This setting can be adjusted; the default is 10, which is the full rated output power for the model used.
•Available options are (0-10).
Press “ESC” to return to the Main Menu.
24
PN 161-09981-007A
January 2010
Wireless I/O Extender User’s Guide
Select option “4”
The Show Radio Statistics menu should appear:
MODEM STATISTICS
Master-Slave Distance(m) 0001779
Number of Disconnects
1
Radio Temperature
23
Antenna Reflected Power 81
Transmit Current (mA) 0430
Local Remote1 Remote2 Remote3
J dBm
dBm
dBm
dBm
Noise
68 90
Signal
94 66
Rate %
98
000000
Press <Ret> for Freq Table, <Esc> to return to main menu
Shows the radio statistics.
The different between the Signal and Noise in J units should be a minimum separation of 20 for a reliable
RF communications.
Note: The modem statistics are discussed further in Appendix D.
Press “ESC” to return to the Main Menu.
Select option “5”
The Edit Multipoint Parameters menu should appear as seen below:
MULTIPOINT PARAMETERS
(0)
(1)
(2)
(3)
(4)
(5)
(6)
(7)
(8)
(9)
(A)
(B)
(C)
(D)
(E)
(F)
(G)
(Esc)
Number Repeaters
0
Master Packet Repeat 3
Max Slave Retry
3
Retry Odds
3
DTR Connect
0
Repeater Frequency
0
NetWork ID
0255
Reserved
MultiMasterSync
0
1 PPS Enable/Delay 255
Slave/Repeater
0
Diagosics
0
SubNet ID
Disabled
Radio ID
Not Set
Local Access
0
Radio Name
Exit to Main Menu
Enter Choice
PN 161-09981-007A
January 2010
25
Wireless I/O Extender User’s Guide
The Multipoint Parameters can be adjusted for a multipoint Wireless I/O Extender system. Only the commonly used settings are discussed is this section.
Note:The other settings are discussed further in Appendix D.
(0) Number Repeaters
•Set the “Number of Repeaters” to “1” if there are repeaters in the system, this should be set in all of the units in
the system.
(1) Master Packet Repeat
•The number of times that a master will re-broadcast a packet.
•Available options (0-9), the larger the number the more likely a packet is to be received, but the latency is increased.
(2) Max Slave Retry
•The number of times a slave will attempt to send a packet to the master unit, before the remote/slave unit will
wait for a time based on the retry odds setting.
(3) Retry Odds
•The probability of retransmitting, a higher value will have the remote unit more likely to establish a connection
with the master over a remote unit with a lower value.
(5) Repeater Frequency
•Set the “Repeater Frequency” to “1” to use the frequency key set in the repeater.
(6) NetWork ID
•Set the “NetWork ID” for a system. A setting of 255 uses the call book addressing for the system.
•The Network ID must match in all the units and can have only one master and the other units are Remotes or
Repeaters.
(A) Slave/Repeater
•Set the “Slave/Repeater” to “1” for a multipoint repeater that will also at as a remote unit.
•The number of repeaters must be set to “1” or higher in the units in the system.
(C) SubNet ID
•The “SubNet ID” is the receive and transmit sub channels of the unit.
•Set this if it is a NetWork ID system with repeaters, to direct the RF communications path through repeaters or to
the master unit.
Press “ESC” to return to the Main Menu.
Press “ESC” to Exit Setup. (or cycle power to make sure the unit is not in setup mode).
26
PN 161-09981-007A
January 2010
Wireless I/O Extender User’s Guide
Appendix D – Radio Settings
The Radio settings menu with most of the details of the settings discussed.
Menu (0): Set Operation Mode
(0) Point-to-Point Master
Sets the radio as a Master in Point-to-Point mode. The unit must use call book and can connect to a remote unit
designated in the call book.
The Master determines the setting used for most of the radio transmission characteristics, regardless of the settings in the
remotes and/or repeaters.
The settings in the remote not determined by the Master are: RF Xmit Power, Slave Security, Retry Time Out,
and the Hop Table settings
(1) Point-to-Point Slave
Sets the radio as a remote in Point-to-Point mode. The unit must use call book and can connect with any point-to-point
master designated in the call book, but only able one connection with a master at a time.
(2) Point–to-MultiPoint Master
Sets the radio as a Master in MultiPoint mode. The unit communicates simultaneously with numerous remotes and
repeaters.
(3) Point-to-MultiPoint Slave
Sets the radio as a remote in MultiPoint mode. The unit communicates with a MultiPoint Master. The remote may communicate with its Master through one or more Repeaters.
(4) Point-to-Point Slave/Repeater
Sets the radio as a remote or repeater depending on the instructions from the Master. The unit cannot act as both a remote and a repeater at the same time. True Slave/Repeater functionality is only available in a MultiPoint mode.
Note: Configured as a point-to-point repeater, the radio has no security features, it will allow any point-to-point
master to use it as a repeater.
(5) Point-to-Point Repeater
Sets the radio as a repeater in Point-to-Point mode. The unit will allow any point-to-point master to use it as a repeater
(the repeater must still be set up in the master’s call book). The use of up to two repeaters in a communications link,
significantly extending the operation range or reliability. All settings for the call book, baud rates, and radio transmission
characteristics are disabled.
(6) Point-to-Point Slave/Master Switchable
Sets the radio into mode 6. The unit is controlled entirely through software commands. A number of key parameters may
be changed either directly with a terminal emulation or through the use of script files. When the in mode 6 is not calling a
remote, it will function as a remote and accept any appropriate calls from other radios.
When using mode 6, the following items must be followed:
•Mode 6 only works with the RS232 interface. (The DTR line is not available in RS485/422, Ethernet,
DD(AA)1000, or PLR580D(A) models.)
•The radio remains in remote mode waiting for a connection until called by another radio in mode 6 in its call book
or instructed to call another radio through an AT command. All script file or AT commands issued to the radio in
mode 6 must be in ALL CAPS.
PN 161-09981-007A
January 2010
27
Wireless I/O Extender User’s Guide
•The radio will not call until the DTR line goes high, if the DTR line is high when the command is given, it will call
out immediately.
•The master will disconnect when DTR goes low.
AT Commands
Function
ATXFx
ATXTx
ATXDx
ATXXx
ATXRx
ATXPx
ATDTx
Changes Frequency Key
ATDxxxxxxx
Call a specified call number
ATXC
Calls a repeater path
ATXS
Goes into setup mode
Changes Max Packet Size
Changes Min Packet Size
Changes Transmit Rate
Changes RF Data Rate
Changes RF Transmit Power
Position to call from the call book
(7) Point-to- MultiPoint Repeater
Sets the radio as a Repeater in MultiPoint mode. The unit will receive and re-transmit packets to significantly extend the
operating range and network reliability where needed.
The unit can be used as a remote and a repeater if the Slave/Repeater mode is set. When Slave/Repeater is set, packets
are sent across the network as well as the local RS232 port. Reducing the need for a separate repeater and a remote.
Note: To operate a radio as a MultiPoint Repeater and remote, Slave/Repeater must be set to 1 in the MultiPoint
Parameters menu.
Note: Options in Blue are SRM models only
(A) Mirrorbit Master
Sets the radio as a master radio compatible with the SEL Mirrorbit Protocol.
(For more information call the factory).
(B) Mirrorbit Slave
Sets the radio as a remote radio compatible with the SEL Mirrorbit Protocol.
(For more information call the factory).
(F) Ethernet Options – Sets the Ethernet options for Ethernet modems.
(0) Ethernet Mode
•0 for non-Ethernet Mode
•1 for Ethernet Mode
(1) Half/Full Duple
•0 for Full Duplex
•1 for Half Duplex
28
PN 161-09981-007A
January 2010
Wireless I/O Extender User’s Guide
(2) Slave IP Stack
•0 to disable
•1 to enable
(3) Slave UDP Mode
•0 to disable
•1 to use IP UDP mode
•2 to use IP UDP BroadCast
(4) IP Address
•Sets the local IP Address to use for diagnostics or UDP Mode.
(5) Port Address
•Sets the UDP port number for diagnostics to use.
(6) IP Address 2 (use this mode only in UDP Slave Mode)
•Sets the IP Address to connect to if no incoming UDP packet has been received.
(7) Port Address 2 (use this mode only in UDP Slave Mode)
•Sets the port number to connect to with IP Address 2
(8) MAC Filter
•0 to disable
•1 to use
Menu (1): Set Baud Rate
Note: For the Ethernet models this should not be changed unless the Ethernet I/O baud rate is also changed.
(0) -> (9) for the SRM radio – (230,400 to 1,200 baud)
(0) -> (5) for the PLR radio – (38,400 to 1,200 baud)
This is the baud rate between the radio and the equipment to which it will be connected. It is important to note that this is
independent of the baud rate for the other radio modem(s) in the communication loop.
(A) Data, Parity for the SRM radio / (6) Data, Parity for the PLR radio
Selection
Data Bits
Parity
Stop Bits
0
1
2
3
4
8
7
7
8
8
None
Even
Odd
None
Even
1
1
1
2
1
5
8
Odd
1
PN 161-09981-007A
January 2010
29
Wireless I/O Extender User’s Guide
(B) MODBus RTU for the SRM radio
(7) MODBus RTU for the PLR radio
0 to disable MODBus RTU mode (Default)
1 - 9 to use MODBus RTU mode, the larger the number the longer the delay for collection full packets.
Note: When using the SRM6000’s in ModBus RTU mode the Master Packet Repeat must be set to “3” regardless
of whether the modems are being used in point-to-point or multi-point mode. If a setting that is higher than “3” is
required, it can be done, but the throughput speed will be decreased. (A higher Master Packet Repeat setting may
need to be used when the radios are in a high noise environment or at long ranges).
Note: Options in Blue are SRM models only
(C) RS232/485
These settings are not used. Default is 0.
(D) Setup Port
This setting determines which port, Main or Diagnostics, is used to enter the setup Main Menu.
•1 to only use the main data port for setup.
•2 to only use the secondary diagnostics port for setup.
•3 to use both the main and secondary diagnostics port for setup.
Note: DO NOT change this setting unless the correct port is available. Without the diagnostics port the unit will
no longer be configurable in the field, if set to 2.
(E) TurnOn/OffDelay
These settings are not used. Default is 0.
(F) FlowControl
This setting specifies the hardware flow control for the main data port, for connected equipment and for the setup menu.
Most applications do not require handshaking.
XON/XOFF data will be passed through the data port, but will not be utilized in any way.
• 0 to disable flow control (none). (Default)
• 1 to use RTS/CTS flow control.
• 2 to use DTR flow control.
• 3 to use DOT half duplex flow control.
(G) Use break to access setup
This setting specifies the break character access mode to put the radio into setup mode over the data port.
To send a break character the end device must hold the Tx data line in the space voltage level for longer than 1 character
time. If a character is defined as having 1 start bit, 8 data bits, and 1 stop bit, the character time is 10 bits, thus the Tx data
line must be held in the space voltage level for a period of time longer than 10 bits
•0 to disable break command. (Default)
•1 to use the break command and access the setup menu at the default 19200 baud rate.
•2 to use the break command and access the setup menu at the configured port baud rate.
30
PN 161-09981-007A
January 2010
Wireless I/O Extender User’s Guide
Menu (2): Edit Call Book
The call book is required to be used in point-to-point networks.
The call book is an option in point-to-multipoint networks, but the Network ID feature is strongly recommended in most
applications.
The call book is an innovative feature that offers both security and flexibility in use. The call book accomplishes this by
allowing the user to determine with which radio it will communicate based on the call book numbers for both the master
and remote. The radio modem’s call book number is unique. It is identified on the radio setup menu and a label on the
outside of the unit.
Using call book for a point-to-point system.
•The master call number must be listed in the remote call book or slave security is disabled in the remote.
•The remote call number must be listed in the master call book.
•The master entry to call must be set to the remote to call or call all.
To call a remote through one or two repeaters, you must call that remote directly (as opposed to using the call all option).
When call all is selected the master is not able to connect with any remotes through repeaters. This is because the master
calls every remote in the list when instructed to call all and will connect with the first remote to respond. When establishing
a RF link through a repeater, the master must first establish a RF link with the repeater, and then establish a RF link with it
prior to making contact with the remote.
Using call book for a point-to-multipoint system.
•The master call number or repeater call number must be listed in the remote or repeater call book.
•The master call book is not used in a point-to-multipoint system.
•At times it may be desirable to force a remote to go through a specific multiPoint repeater. In this scenario, the
remote call book should contain only the call number for the repeater to call on line 0 of the call book.
Entering or modifying call book numbers in the call book.
•Select the entry number (0 – 9) you wish to change.
•When prompted “Enter New Number”, enter the 7 digit call number of the unit to call (the dash is automatically
inserted).
•Enter the Repeater1 in a Point-to-Point Network. If no repeater is to be used or this is a Point to Multipoint
Network, press “ESC” to return to the modified call book menu screen.
•Enter the Repeater2 in a Point-to-Point Network. If no Repeater2 is to be used, press “ESC” to return to
the modified call book menu screen.
PN 161-09981-007A
January 2010
31
Wireless I/O Extender User’s Guide
Menu (3): Edit Radio Transmission Characteristics
Sets the options for the radio data transmission, most of these parameters should match throughout the system.
These parameters are for the experienced user who has a good understanding of the principles of radio transmission
characteristic options.
(0) FreqKey
Sets the hopping patterns of the radio to 1 of 15 different hop patterns.
Sets each network and repeaters to use different frequency key to minimize the interference with other Data-Linc
Group radio networks operating in the area.
•0 thru 9 and A thru E
•F - More Setting
Sets the hop table parameters. Some applications may require changes in the hop table parameters.
Note: most applications do not require any modification to the frequency tables.
(0) Hop Table Version
Sets the portion of the band in which the radio will operate.
900 MHz Radio Hop Table Selections
Selection
0
1
2
Name
902-928 MHz
910-928 MHz
902-928 MHz,
16 Fewer Freqs
916-920 MHz
921-928 MHz
902–911 &
919–928 MHz
902-915 MHz
3
4
5
6
Reference
Standard
Austrialia
International (16 fewer frequencies than full Standard
set)
Taiwan
New Zeland
Notch (center frequencies of 911-919 notched out)
Brazil
Note: Do not use FreqKey 14 (E) with the Australia (915-928 MHz), Taiwan (916-920 MHz), or New Zealand
(921-928) hop table versions.
2.4 GHz Radio Hop Table Selections
Selection
0
1
2
3
4
5
6
32
Name
Table 0
Table 1
Table 2
Table 3
Table 4
Table 5
South Africa
Reference
Full 2.400 - 2.4835 GHz
Full 2.400(46) To 2.483(54) GHz - Offset
2.400(46) To 2.427(49) GHz - Lower 1/3 of the Band
2.428(49) - 2.455(51) GHz - Middle 1/3 of the Band
2.456(51) - 2.455(54) GHz - Upper 1/3 of the Band
902-928 MHz, center frequencies of 911-919 notched out
902-915 MHz
PN 161-09981-007A
January 2010
Wireless I/O Extender User’s Guide
(1) Hop Table Size
•Sets the number of hop channels to use within the specified band:
•Set between (50 to 112) for the 900 MHz. Default is 112.
•Set between (50 to 80) for the 2.4 GHz radio. Default is 80.
(2) Hop Freq Offset
The feature is not used in the 900 MHz radio.
In the 2.4 GHz radio, sets the frequency offset for the hop channel.
•0 to disable. Default is disabled.
•1 to select an offset of 115.2 KHz
•2 to select an offset of 230.4 KHz
(3) Frequency Zone
Sets the frequency bands for the radio transmission.
Divides the frequency band into 16 smaller bands of 5, 7, or 8 channels depending on the zone.
The zones are represented by 16 “0” or “1” entries.
•0 to disable the zone
•1 to use the zone
900 MHz Radio Frequency Zone
Zone
Number
1
2
3
4
5
6
7
8
9
10
11
12
13
14
15
16
Beginning
Freq. MHz
902.2464
904.0896
905.7024
907.3152
908.9280
910.5408
912.1536
913.7664
915.3792
916.9920
918.8352
920.4480
922.0608
923.6736
925.2864
926.8992
Ending
Freq. MHz
903.8592
905.4720
907.0848
908.6976
910.3104
911.9232
913.5360
915.1488
916.7616
918.6048
920.2176
921.8304
923.4432
925.0560
926.6688
927.8208
# of
Channels
8
7
7
7
7
7
7
7
7
8
7
7
7
7
7
5
Warning: In order to stay within
FCC regulations it is required
that a minimum of 50 separate
frequency channels be used within
a hop pattern. This means that a
minimum of 7 frequency zones is
required for legal communications.
Note: The Hop Table Version must be set to 0 (Entire Band) when using Frequency Zones. If another Hop Table
Version were to be selected, the limitations of that selection would be applied to the hopping pattern as well.
PN 161-09981-007A
January 2010
33
Wireless I/O Extender User’s Guide
2.4 GHz Radio Hop Table Versions
Zone
Number
1
2
3
4
5
6
7
8
9
10
11
12
13
14
15
16
Beginning
Freq. MHz
Ending
Freq. MHz
2400.3072
2405.4912
2405.8368
2410.6752
2411.0208
2415.8592
2416.2048
2421.0432
2421.3888
2426.2272
2426.5728
2431.4112
2431.7568
2436.5952
2436.9408
2441.7792
2442.1248
2446.9632
2447.3088
2452.1472
2452.4928
2457.3312
2457.6768
2462.5152
2462.8608
2467.6992
2468.0448
2472.8832
2473.2288
2478.0672
2478.4128
2483.2512
# of
Channels
5
5
5
5
5
5
5
5
5
5
5
5
5
5
5
5
Warning: To adhere to the EU
specifications, it is necessary
to use the proper frequency
zone combination based on the
frequency offset. While using a
frequency offset of zero, the first
zone (0) needs to be removed.
Using frequency offsets of one or
two, the last zone (15) needs to be
removed.
Warning: In order to stay within
FCC regulations it is required
that a minimum of 50 separate
frequency channels be used within
a hop pattern.
(4) Goverment Rules (2.4 GHz Models Only)
Sets the radio to comply with different government standards.
Set the mode to comply with the correct regulations for the area in which the radio will be operated.
•0 to comply with FCC rules.
•1 to comply with EU 328 rules.
•2 to comply with EU 440 rules.
(1) Max Packet Size &
(2) Min Packet Size
Sets the size of the packets (in bytes) used by the radio for the RF communications. The packet size is determined by a
combination of the size settings and the RF Data Rate.
This may be of particular value when using the radio with different communications protocols; you may find that
throughput is optimized when packet sizes are restricted by the radio.
Note: Using Diagnostics mode uses the extra space in the packets for diagnostics data, using small max and min
packet sizes may reduce or stop the diagnostics data available.
34
PN 161-09981-007A
January 2010
Wireless I/O Extender User’s Guide
Maximum Packet Size Settings where RF Data Rate=2
Max Setting
Min Setting
0
0
1
2
3
4
5
6
7
8
9
1
2
3
4
5
6
7
8
9
15
36
58
79
100
121
142
164
185
206
20
42
63
84
105
127
148
169
190
212
26
47
68
90
111
132
153
175
196
217
31
52
74
95
116
137
159
180
201
222
36
58
79
100
121
143
164
185
206
228
42
63
84
105
127
148
169
190
212
233
47
68
90
111
132
153
175
196
217
238
52
74
95
116
137
159
180
201
222
244
58
79
100
121
143
164
185
206
228
249
63
84
95
127
148
169
190
212
233
254
6
7
8
9
Maximum Packet Size Settings where RF Data Rate=3
Max Setting
Min Setting
0
0
1
2
3
4
5
6
7
8
9
1
2
3
4
5
8
24
40
56
72
88
104
120
136
152
12
28
44
60
76
92
108
124
140
156
16
32
48
64
80
96
112
128
144
160
20
36
52
68
84
100
116
132
148
164
24
40
56
72
88
104
120
136
152
168
28
44
60
76
92
108
124
140
156
172
32
48
64
80
96
112
128
144
160
176
36
52
68
84
100
116
132
148
164
180
40
56
72
88
104
140
136
152
168
184
44
60
76
92
108
124
140
156
172
188
(3) Xmit Rate
Sets the operation mode for the transmitter.
•0 for normal operation.
•1 for continuous transmit.
Continuous transmit mode is useful to qualitatively gauge signal strength viewed in the menu Show Radio Statistics
option or it may be gauged by the Clear to Send LED. A solid red CTS LED indicates a strong signal; a blinking CTS LED
indicates a weaker signal.
Due to the fact that the radio transmits continuously when Xmit Rate is set to 0, this mode should be used only as a
diagnostic tool and not for normal operation.
PN 161-09981-007A
January 2010
35
Wireless I/O Extender User’s Guide
(4) RF Data Rate
•2 when the radios are closer together and data throughput is to be optimized.
•3 when the radios are farther away and a solid RF data link is preferred over data throughput.
Note: The RF Data Rate setting must be identical for all units in the system. Any radio modem with a different
RF Data Rate than the master will not establish a communication link.Sets the RF Data Rate for the over-the-air
communications rate.
(5) RF Xmit Power
Sets the radio output transmit power. The table below shows the typical power breakdown.
Value
0
1
2
3
4
5
6
7
8
9
10
SRM 900MHz (1W Power)
SRM 2.4GHz (500mW Max)
PLR 900 MHz (200mW Max)
mW
mW
mW
5
75
115
325
450
550
675
750
825
925
1000
dBm
+6
+18.7
+23.5
+25
+26.5
+27.4
+28
+28.7
+29
+29.6
+30
0.5
20
60
125
200
300
350
400
430
450
500
dBm
-3
+13
+18
+21
+23
+24.8
+25.4
+26
+26.3
+26.5
+27
5
10
25
60
95
125
140
155
165
185
200
dBm
+6
+10
+14
+17.7
+19.7
+21
+21.5
+21.9
+22.1
+22.6
+23
Note: The output power in the table may slightly very from transceiver to transceiver, but the output power will
never exceed the RF Xmit Power settings of 10 dBm specifications from the table below.
(6) Slave Security
Sets the security mode of a remote in a call book based system to only accept connections from radios in the remote units
call book.
•0 to enable security.
•1 to disable security.
This may need to be disabled if the radio is operating in a point-to-point system where calls from more than 10 different
radios may be needed.
Note: With Slave security disabled the radio will accept calls from any unit calling this remote and additional system
security measures should be taken to prevent unauthorized access.
(7) RTS to CTS
Sets the RTS line on the master radio to control the CTS line on the remote.
•0 to disable RTS pass-through.
•1 to use RTS to CTS pass-through.
This pass-through control can be enabled in point-to-point mode as well as point-to-multi-point. In the latter, the master
36
PN 161-09981-007A
January 2010
Wireless I/O Extender User’s Guide
RTS line will control all remotes’ CTS lines.
When this mode is enabled the CTS line ceases to function as flow control. Therefore it is not recommended to enable
this feature when operating at high RS232 speeds.
Note: The RTS to CTS feature does not function in point-to-point systems that contain a repeater. If this feature is
needed in with a repeater, the system should be changed to a point-to-multiPoint system.
Note: If the DTRConnect feature is set to 2, the RTS to CTS feature will not work.
Note: If the DTRConnect feature is set to 1 and RTS to CTS function in enabled on the radio, the RTS to CTS
mode takes precedence over the functionality of the CTS line on the remote relating to the DTRConnect feature.
(8) Retry Time Out
Sets the retry time out of the radio before it will drop a connection and attempt to reconnect.
•8 – 255 in multipoint mode.
•151 – 255 in point-to-point mode.
The number of packets that fail in a row before dropping the connection and re-establishing a connection from a calling
master or repeater. Default is 255.
A lower setting will allow a remote to drop the connection after fewer failed packets and re-establish a connection with
other units in the remotes call book or in the same Network ID.
Note: Options in Blue are SRM models only
(9) Lowpower Mode
Lowpower Mode is used only in MultiPoint remote using serial protocol. The power savings occur only when a remote is
in receive mode. When the remote is transmitting data no power savings occur so it is of little value when a remote has a
constant, high throughput.
•0 to disable low power mode. Default is 0.
•1-31 to enable low power mode. See table for description.
Note: MCUSpeed must be set to ‘0’ and RF Data Rate must be set to ‘3’ for Lowpower Mode to operate properly
and additional power savings may result when the Number Repeaters is set to 1.
Note: To communicate to the RS232 port of the radio transceiver that is in Lowpower Mode, the RTS line must be
held high to wake it up. Because the Lowpower mode puts the radio to sleep, latency will be introduced before it
becomes fully linked to the master. This latency can range from 20 ms to 2.5 seconds
Master
Repeater
0
1
Low Power Mode Disabled
2
The radio LED’s are dimmed and the radio sleeps every other slot.
The radio’s data port is shut down if the RTS line is held low.
3
The radio LED’s are dimmed and the radio sleeps 2 of 3 slots.
The radio’s data port is shut down if the RTS line is held low.
4 thru 31
The radio LED’s are dimmed and the radio sleeps (n-1) of (n) slots.
The radio’s data port is shut down if the RTS line is held low.
PN 161-09981-007A
January 2010
The radio LED’s are dimmed and the radio remains awake.
The radio’s data port is shut down if the RTS line is held low.
37
Wireless I/O Extender User’s Guide
(A) High Noise
Sets the radio High Noise feature.
This feature is useful in determining if out of band interference is affecting a radio link.
•0 to disable high noise.
•1 to use the high noise feature
When enabled it reduces the gain in the front-end circuitry, which decreases the affects from out-of-band noise. The
results will be seen as a lower signal value and a much lower noise value (as found in Radio Statistics or Diagnostics).
Note: When enabling the High Noise feature reduces a noise problem, chances are that the noise may be reduced further with the use of a band pass filter.
Note: If the noise is not reduced by a greater amount than the signal, the interference is most likely an in-band
issue.
(B) MCU speed
Sets the MCU speed of the radio processor.
•0 for normal speed and lower power consumption.
•1 for high speed, which is required for a 230,400 port baud rate or Ethernet mode.
Note: Only needs to be enabled for Ethernet and UDP operation, a baud rate set to 115.2Kbaud or 230.4Kbaud,
or if LincView Diagnostics software is being used.
(C) Remote LED
This settings is not used.
•Default is 0.
38
PN 161-09981-007A
January 2010
Wireless I/O Extender User’s Guide
Menu (4): Show Radio Statistics
Number of Disconnects
The value records the number of times the radio has lost the RF link and re-establishes a link. The value indicates the
total number of disconnects that have occurred from the time the transceiver is powered on until the radio is put into Setup
mode. Under ideal operating conditions, the number of disconnects should be 0. One or more disconnects may indicate a
weak link, the presence of severe interference problems or loss of power to any of the radios in the link.
Radio Temperature
The Radio Temperature value is the current operating temperature of the transceiver in degrees Celsius. For proper
operation, a radio must be in the temperature range of -40° to +75° C.
Antenna Reflected Power
This is a measurement of the transmitted power that is reflected back into the transceiver from mismatched antennas or
cables, or loose connections between the transceiver and antenna. A reading of 0-5 is good and 5-30 is acceptable, but a
30+ number would indicate that the connections from the radio to the antenna should be inspected for a loose connection
and the cable quality checked.
Transmit Current (mA)
This measures the current draw of the transmitter in milliamps. Refer to the radio model specs for typical values.
Average Noise Level
The average noise level indicates the level of background noise and interference at this radio and at each of the radios
used as repeaters in the link.
The average noise levels will typically fall in the range of 15 to 35 “J”, and the noise levels should be below 70 “J”. Higher
noise levels are an indication of a high level of interference that may degrade the performance of the link. High noise
levels can often be improved with:
•The addition of a bandpass filter for out-of-band noise
•Relocation of the antenna or antenna polarization.
•Proper antenna and equipment grounding
Average Signal Level
The average signal level indicates the level of received signal strength at this radio and each repeater in the link. For each
of these, the signal source is the radio that transmits to it.
Low Average Signal Levels can often improved with:
•Using higher gain antennas or directional instead of omni
•The relocation of the antenna to improve the line of site
•The use of repeaters
The signal and noise number is an average of the received levels measured at each frequency in the radio’s frequency
hop table. The individual measurement values at each frequency hop channel are shown in the frequency table. The
frequency table is accessed by pressing the ENTER key on the computer when in the Show Radio Statistics menu.
For a reliable link, the margin or delta between the signal and noise should be at least 26 “J” units.
Overall Rcv Rate (%)
The Overall Rcv Rate measures the percentage of data packets that were successfully transmitted from the master to the
remote on the first attempt without requiring retransmission.
A number of 75 or higher indicates a robust link that will provide very good performance even at high data transmission
rates. A number of 25 or lower indicates a weak or marginal link that will provide lower data throughput. An Overall
PN 161-09981-007A
January 2010
39
Wireless I/O Extender User’s Guide
Rcv Rate of 100% will provide approximately 100 Kbaud of bandwidth with an RF data rate of 3 (Radio Transmission
Parameters Menu) and approximately 150 Kbaud of bandwidth with an RF Data Rate of 2.
These numbers are reduced approximately 50% if there are one or more repeaters in the network.
Menu (5): Edit Multipoint Parameters
When installing a Point-to-MultiPoint system, for the system it requires that several parameters be set consistently on
all the radios. This includes RF data rate, Min and Max Packet Size, and FreqKey (Unless it is a repeater using repeater
frequency).
(0) Number Repeaters
Sets the number of repeaters in the system, this setting is critical for transmission timing for the system.
•0 when not using repeaters or diagnostics at the master.
•1 if repeaters are in the system or if running diagnostics at the master.
Note: This should be the same for all the radios in the system.
Note: This should be enabled when running diagnostics from the master.
(1) Master Packet Repeat
Sets the number of times the packet is re-broadcast to the system by the master or repeaters in the system. The remotes
do not acknowledge the packets in a multipoint system, so the higher the value the high the probability of receiving a
successful packet at the remote, but the higher the latency for the repeated data packets.
•0 or 1 if the software protocol being used controls the retries.
This could improve throughput if the system has strong RF links and high data rates.
For lower data rates this is not an optimal setting.
•2 or 3 for most well designed networks.
•4 thru 9 for a robust system where high data throughput is not an issue.
Note: This setting is only used in the master and repeaters in a multipoint system.
(2) Max Remote Retry
Sets the number of times the remote will attempt to retransmit a packet to the master. If the packet is not received
successfully within the number of set retries the remote waits a specified a time from the Retry Odds setting.
Set to a higher value for a better probability of a successful packet to the master with one transmission time, but this could
cause a higher latency for the other remotes in the system.
Note: The remote will stop the retries when an acknowledgement is received from the Master.
(3) Retry Odds
Sets the fallback time algorithm to wait to retry for the remote, to resolve contention to the master.
•A lower setting to assign a lower priority to the remote re-transmitting the data buffer.
his could be used with a remote with a strong RF link to have a lower priority to a remote with a
weaker RF link.
•A higher setting to assign a higher priority to the remote re-transmitting the data buffer.
This could be used with a remote with a weak RF link to have a higher priority than a remote with a
strong RF link.
Note: If Retry Odds is set to 0, the remote’s data buffer will be purged if all the max remote retry were
unsuccessful.
40
PN 161-09981-007A
January 2010
Wireless I/O Extender User’s Guide
(4) DTR Connect
Sets the operation of the radio based of the DTR line.
•0 to ignore the DTR line, data is transmitted when it is received.
•1 to form a point-to-point link with the Master when the DTR line is high.
•2 to transmit data in bursts when the DTR line is high.
Use this mode when a system is comprised of many low data rate devices and it is desirable to increase
overall system capacity.
Note: If the DTRConnect feature is set to 1 and RTS to CTS function in enabled on the radio, the RTS to CTS
mode takes precedence over the functionality of the CTS line on the remote relating to the DTRConnect feature.
Note: If the DTRConnect feature is set to 2, then the RTS to CTS feature will not work.
(5) Repeater Frequency
Sets the hopping pattern to use for the re-transmitted data from a repeater.
•0 to use the master or repeater hopping pattern.
•1 to use the set FreqKey for the repeater.
Note: When the repeater frequency is set to 0 the FreqKey setting must match the master or the repeater that this
radio is connected to.
(6) NetWork ID
Sets the Network ID of the network or sets the use of the call book.
The use of network ID allows units to connect to different master radios without using call book entries, to direct the RF
link path subnet ID is used.
The masters and repeaters may be replaced without changing the remotes that link to the unit.
•0 thru 254 NetWork ID values (below 255 may be needed for backward compatibility with older units).
•255 to disable Network ID and use the call book entries in multipoint mode.
•256 – 4095 NetWork ID values (extended range).
Note: A remote will link with the first master or repeater with a matching Network ID.
Note: Options in Blue are SRM models only
(8) MultiMaster Synch
Sets in point-to-point and multipoint systems to reduce interference between the masters where concentrations of master
radios exist.
•0 to disable synch mode.
•1 to enable synch mode.
PN 161-09981-007A
January 2010
41
Wireless I/O Extender User’s Guide
(9) 1 PPS Enable/Delay
This mode allows the master to propagate a 1PPS signal to all the remotes in a multipoint network. The properly
generated pulse applied on the DTR line of the master will provide a 1 PPS pulse on the CD line of any remote in the
system. The output on the Slave will occur within 20 microseconds of the input to the Master.
•0 in the master to enable 1 PPS pulse mode.
The master must have a 1 PPS pulse on the DTR line.
•0 – 254 Set to adjust the timing out the CD line of the remote unit.
When properly calibrated the CD line of a Slave radio will output a pulse that goes high for about
2mS in synch with the 1 PPS pulse on the Master radio.
•255 to disable 1 PPS pulse mode.
Note: If 1 PPS is set to 1, the Master must have a 1 PPS pulse on its DTR pin, otherwise the RF network will not
function.
(A) Slave/Repeater for the SRM model
(8) Slave/Repeater for the PLR model
Set this mode to allow a repeater to act as a remote and a repeater. In this mode data will be re-transmitted over the RF
as well as sent out the local data port.
•0 to disable the data port on a repeater.
•1 to enable the data port on a repeater.
Note: This option is only used if the radio is in mode (7) MultiPoint Repeater.
Note: Options in Blue are SRM models only
(B) Diagnostics – (Not Available on the Wireless I/O Extender)
This option is to view diagnostics data at the master radio in parallel with application data.
•0 to disable diagnostics.
•1 thru 128 Set to enable serial diagnostics.
•129 for UDP diagnostics.
Note: The diagnostic program must be connected to the master radio using the secondary optional diagnostics
port.
Note: A Windows© computer with a serial port or UDP connection (Ethernet models only) running the diagnostics
software is needed.
(C) SubNet ID for the SRM model
(9) SubNet ID for the PLR model
This option is to to direct the RF path of a system. These are the sub-channels that repeaters use to differentiate the RF
links. The Subnet ID option is particularly helpful to force two repeaters in the same system to operate in series rather
than in parallel, or if desired, to force the remote to communicate to a specific repeater for load balancing purposes.
The Subnet ID option consists of the receive (Rcv) channel and the transmit (Xmit) channel.
•The receive (Rcv) Subnet ID identifies which channel a repeater or remote will listen to.
•The transmite (Xmit) Subnet ID identifies which channel a repeater will transmits, and in turn which devices will listen to
it.
42
PN 161-09981-007A
January 2010
Wireless I/O Extender User’s Guide
•Rcv Options (0 – 9, A - F) / (0 – 15)
The channel to listen to.
•Xmit Options (0 – 9, A - F) / (0 – 15)
The channel to use for transmitting.
The default is disable, which is a setting for both Rcv and Xmit of F.
The master using this mode should have a setting for both Rcv and Xmit of 0.
Note: The Subnet ID only works in a multipoint system using Network ID addressing.
Note: The transmit (Xmit) Subnet ID parameter is only used for multipoint repeaters.
Note: A Master will always transmit and receive on 0 and should be set to Rcv 0 and Xmit 0, which is roaming
mode.
Sample picture of using network ID:
Repeater /
Remote 0
Master
Network ID: 100
SubNet ID TX: 0 RX: 0 (Roaming)
Network ID: 100
SubNet ID TX: 1 RX: 0
Remote 1
Network ID: 100
SubNet ID TX: F RX: 1
Note “TX:” is ignored on
Remote only
Note: Options in Blue are SRM models only
(D) Radio ID
Sets an arbitrary, user selectable, 4-digit number, which identifies the transceiver in diagnostics mode.
•Set to the arbitrary number to use as reference in diagnostics mode.
Note: Once this option is changed it cannot be changed back to “not set”; this does not affect the operation of the
unit in any way.
(E) Local Access
These settings are typically not used. Contact Data-Linc Group for further information.
Note: This feature is only available with firmware versions 2.54 and 3.54 or higher.
(G) Radio Name
Sets a unique radio name up to 20 characters in length.
PN 161-09981-007A
January 2010
43
Wireless I/O Extender User’s Guide
Menu (8): Chg Password
Sets a password, which will prevent unauthorized users from making or viewing the configuration of the radio
Note: If the password feature is enabled and you cannot remember the password, the radio modem will have to
be returned to Data-Linc Group to have the password disabled. Use with caution.
Setting a Password
Note: All ASCII characters are valid except the “ESC” character (Backspace, Enter, etc..) and the password is
case sensitive.
•Choose option 8 from the Main Menu.
•The prompt “New PW? (<esc> to exit)” will appear.
•Press “ESC” to cancel and return to the main menu or enter 4 characters to set the password.
At any point in the process you can cancel by hitting the escape key. Once the 4 characters have been entered, you will
be prompted with “<enter> to accept, <esc> to quit”.
•Press enter to set the password or “ESC” to cancel and to the main menu.
Changing or Disabling a Password
Note: it is possible to change or remove the password.
•Choose option 8 from the Main Menu.
•The prompt “Enter Security Code” will appear.
•Enter the current password.
•Refer to Setting a password at this point to change the password. See below to remove a known password.
•Disabling Password, enter the following password:
•Hold the “Alt” key down and using the number key pad (not the numbers across the top of the key board)
type “0255”
•Release the “Alt” key
•Repeat steps 1 and 2 three more times (this will enter 0255 a total of four times).
•At the prompt “<Enter> to accept, <esc> to quit.” Hit the “Enter” key to disable the password or hit the escape key
to keep the password.
44
PN 161-09981-007A
January 2010
Wireless I/O Extender User’s Guide
Technical Support
Data-Linc Group maintains a fully trained staff of service personnel who are capable of providing complete product
assistance. They can provide you with technical, application and troubleshooting, spare parts and warranty assistance.
Our technical staff are based in Bellevue, Washington USA and may be reached at (425) 882-2206 or e-mail
[email protected]
Product Warranty
Data-Linc Group warrants equipment of its own manufacture to be free from defects in material and workmanship for
one year from date of shipment to original user. Data-Linc Group will replace or repair, at our option, any part found to be
defective. Buyer must return any part claimed defective to Data-Linc Group, transportation prepaid.
Return Material Authorization
If a part needs to be sent to the factory for repair, contact Data-Linc Group’s corporate office and request a Return
Material Authorization (RMA) number. The RMA number identifies the part and the owner and must be included with the
part when shipped to the factory.
Contact Information
Corporate Office
Data-Linc Group
3535 Factoria Blvd. SE
Suite 100
Bellevue, Washington 98006 USA
Telephone: (425) 882-2206
Fax: (425) 867-0865
E-mail: [email protected]
Web site: www.data-linc.com
PN 161-09981-007A
January 2010
45