1
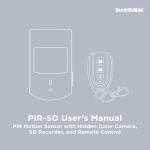
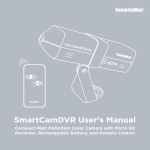
PIR-SD User’s Manual
PIR Motion Sensor with Hidden Color Camera,
SD Recorder, and Remote Control
© Copyright 2012
This manual is furnished under license and may be used or copied only in
accordance with the terms of such license.
Except as permitted by such license, no part of this publication may be
reproduced, stored in a retrieval system, or transmitted, in any form or any means,
electronic, mechanical, recording, or otherwise, including translation to another
language or format, without the prior written permission of SecurityMan.
The content of this manual is furnished for informational use only, is subject
to change without notice, and should not be construed as a commitment by
SecurityMan. SecurityMan Inc assumes no responsibility or liability for any errors or
inaccuracies that may appear in this book.
FCC Information
Notes on FCC’s “Consistent Statement of Information” This product meet the
requirements specified in Part 15 of FCC Regulation. Operation rests with the
following two conditions:
(1) The equipment should not cause any harmful interference.
(2) The equipment must receive and process any interference, including any
possible interference caused by operation mistakes.
After testing the product, we confirm that the camera complies with the provision
for class C digital equipment in the 15th part in FCC regulations; and the receiver
complies with the limitations for class B digital equipment in Part 15 of FCC
regulation. The product generates, applies and emits radio waves. It might cause
harmful interferences to wireless communication if not be installed and used
following the description of the manual.
The product may cause interference in residential area, and the customer should
take remedies to eliminate the interference on their own costs. If the product
causes any harmful interference to wireless equipment or disturbs the receiving of
TV signals (it can be identified by turning on and off the product), you can solve
the trouble by following methods:
• Readjust the product or put it in another place.
• Extend the distance between the equipment interfered and the product.
• Refer to dealers or experienced radio electrician for help.
Warranty
SecurityMan warrants that this product will be free from defects in title, materials
and manufacturing workmanship for one year from the date of the purchase or
otherwise specified on the package. If the product is found to be defective then,
as your sole remedy and as the manufacturer’s only obligation, SecurityMan will
repair or replace the product.
This warranty is exclusive and is limited to this product. This warranty shall not
apply to products that have been subjected to abuse, misuse, abnormal electrical
or environmental conditions, or any condition other than what can be considered
normal use.
Warranty Disclaimers
SecurityMan Inc, makes no other warranties, express, implied or otherwise,
regarding this product, and specifically disclaims any warranty for merchantability
or fitness for a particular purpose.
The exclusion of implied warranties is not permitted in some states and the exclusions
specified herein may not apply to you. This warranty provides you with specific
legal rights. There may be other rights that you have which vary from state to state.
Limitation of Liability
The liability of SecurityMan Inc, arising from this warranty and sale shall be limited
to a refund of the purchase price. In no event shall SecurityMan be liable for costs
of procurement of substitute products or services, or for any lost profits, or for any
consequential, incidental, direct or indirect damages, however caused and on any
theory of liability, arising from this warranty and sale. These limitations shall apply
not withstanding any failure of essential purpose of any limited remedy.
For Tech Support Call: 888-977-3777
SecurityMan
4601 E. Airport Drive, Ontario, CA, 91761, USA
Tel: 909-230-6668
Fax: 909-230-6889
Email: [email protected]
Website: www.securitymaninc.com
Copyright 2012 by SecurityMan v1.0
Table of Contents
Introduction
Features
Important
Operating Restrictions
Conditions
Safety Instructions
Package Contents
Product Basics
PIR-SD
Remote Control
Set Up
Set the Date and Time
Adding and Cancelling Remote Control
Adding Remote Control
Cancelling Remote Control
Operation
Using PIR-SD
Motion Detection Recording
Emergency Recording
Stop Recording
New File Alert
SD Full Alert (Memory Full)
Playback Recorded Video
Integrating with Air-Alarm Series
Adding PIR-SD Remote to the Alarm Host
Cancelling PIR-SD Remote from the Alarm Host
Adding PIR-SD Motion Detection to Alarm Host
Cancelling PIR-SD Motion Detection from Alarm Host
Enabling Video Recording
Disabling Video Recording
Specifications
1
1
2
2
5
5
6
7
7
7
8
8
12
12
12
13
13
13
13
13
14
14
14
15
15
16
16
16
16
17
18
Introduction
Thank you for purchasing SecurityMan PIR-SD. The PIR-SD is a color
camera with SD recorder hidden inside a PIR motion detector. This covert
motion detector camera blends perfectly into almost any home or business
environment where an alarm system might be present and can also be
intergraded with any of our SecurityMan DIY Wireless Home Alarm Systems,
providing you with both security and discreet monitoring capabilities. So
whether you’re looking to expand your wireless security system or just
looking for a covert hidden camera, the PIR-SD will fit your needs.
Features
• PIR motion sensor with color camera and SD recorder
(SD card not included)
• Works independently or can be integrated with any SecurityMan
Air-Alarm series wireless alarm systems
• Up to 300ft (clear line of sight) wireless transmitting distance
between the PIR-SD and alarm host (100ft indoors)
• 1-minute video clip per motion detection event
• Records up to 12 hours of video footage on a 32 GB SD card
• SD card full notification
• Audible and visual new file alert notification
• Can easily be armed/disarmed via remote control, alarm host keypad,
or phone call (when integrated with a SecurityMan Air-Alarm system)
• One touch (remote control) manual record for emergency situations
• Easy PC playback using a PC card reader or direct connect via mini USB port
1
Important
This guide provides important information on the use and operation of
your PIR-SD. Please read all the information carefully prior to using the
product for the best performance and to prevent any damage/injuries
or misuse of the device(s). Customers are entitled to have read through
this complete user’s manual before using the PIR-SD. Any unapproved
changes or modifications will void your warranty. Please ensure to have
a complete understanding of the following restrictions.
Operating Restrictions
When using this product, the safety precautions below must be taken
to avoid possible legal liabilities and damages. Retain and follow all
product safety and operating instructions. Observe all warnings in
the product operating instructions. To reduce the risk of bodily injury,
electric shock, fire and damage to the equipment, observe the following
precautions.
PLEASE NOTE that under certain circumstances, audio/video recording
may be PROHIBITED by law. This device should be used only in
compliance with all applicable federal, state and local statutes.
• DO NOT place this product near any medical equipments. Radio
waves might potentially cause breakdown of electrical medical
equipment. This product should be placed at least one foot away from
any heart pacemaker. Radio waves might potentially influence heart
pacemaker and lead to respiratory disturbance.
• DO NOT use this product to violate one’s privacy. Monitoring one’s
private activities without consent is illegal and this product is not
designed and manufactured for these purposes.
2
• DO NOT use this product for any illegal activities. SecurityMan shall
not be responsible for any consequences of illegal conducts made
by users.
• DO NOT put the plastic package bags in reach of children or babies.
Young children can choke on these items if they put them into their mouths.
• DO NOT plug the AC adapter into the outlet in improper situations.
• Plugging in an AC adapter with wet hands might cause electric shock.
• Plugging in the AC adapter unsteadily might cause fire or electric shock.
• DO NOT cover the AC adapter when it is connected to an outlet, place
the adapter near heaters, or put it on the floor which is equipped with
a heater. The above mentioned operation might cause fire or incidents.
• DO NOT use it aboard; please abide by the airway’s provision. It might
influence communication aboard and the flying apparatus if departing
from the airway’s regulation. This will result in accident, possible death
and severe physical hurt.
• DO NOT disassemble or repair the camera or other relevant
peripheral equipments by yourself. Improper disassembly might cause
damage to the product or the peripheral equipment.
• DO NOT put the camera in quaky paces. The camera may be unstable
or out of operation if installed improperly. Such installation may also
cause breakdown.
• DO NOT use the camera in complex environment, the obstruction of
stumbling block will affect the electromagnetic wave and influence
the receiving range. Wall, tree and other stumbling block might absorb,
reflect the electromagnetic wave, and influence the receiving range.
• DO NOT use the camera in the places which are covered with
metal.The around metal, such as elevator and cabin, might shield the
3
electromagnetic wave, and result in inability to receive signals.
• DO NOT use the camera near aggressive chemicals.
• DO NOT place the product near any strong magnetic objects
• DO NOT disassemble the product.
• DO NOT shake or strike the product.
• DO NOT attempt to service the product yourself as opening or
removing covers may expose you to dangerous voltage or other
hazards. Refer all servicing to qualified service personnel.
The PIR-SD is designed to be, and acts as, a theft deterrent. This
device cannot offer complete protection for your home or business.
Like all practical systems, it has limitations and it could be disable by
a skilled intruder. We suggest that you avoid relying solely on PIR-SD
to protect your property, but used it as part of a comprehensive
security solution.
Please keep in mind the PIR-SD has a 2-sec delay time to record after
an event occurred. To compensate for the 2-sec delay time to record
and proper use, we recommend to install this product about 15ft away
from the intended monitoring object. As part of our disclaimers it is the
customers responsibilities to be aware of the 2-sec delay time to record
before use.
4
Conditions
Please read the following messages to make sure your working
environment is suitable.
• The temperature should be kept between –10˚C and 50˚C (14˚F to
122˚F). The relative humidity should be kept between 20% and 80%.
• Avoid putting the product in places where temperature or humidity
may change rapidly.
• Keep it dry, dustless and avoid exposure directly in sunlight.
• Keep product away from heat sources such as electric heater.
• It might influence the normal operation of the product if used at the
fringe range of normal temperature. Please turn off the power when
not in use.
• Please obey the local government’s environment protection policy.
Safety Instructions
• Please read these instructions before using the product. This product
is neither waterproof nor dust proof; therefore it cannot be used
outdoors or in adverse environment.
• Please adopt original DC power supply, to avoid causing device
damage or electric shock or fire.
• Unauthorized dismantlement of the device or replacement of device
parts is forbidden. The manufacturer will not be responsible for any
loss arising from such actions.
• Do not put the device into fire, oven or microwave oven, in order to
avoid explosion.
• As a result of version changes, the user manual may be different from
the actual product. Please take the actual product as the standard.
5
Package Contents
**SD card not included.
1 x PIR-SD w/Bracket
1 x USB Cable
1 x Remote Control
1 x USB AC Adapters
Screws
Plectrum (for Pairing)
2x Warning Stickers
User’s Manual
6
Product Basics
PIR-SD
Front
Back
Sensor
Window
Study
Power/USB
SD Slot
Mini USB
Power Socket
Mounting Base
Detecting LED
Camera
Remote Control
Stop Record
Stop Record button
Stop/Deactivate Motion Detection
and Emergency Recording
Study Button
Motion Record
Emergency Record
Motion Record button
Start/Activate Motion Detection Recording
Emergency Record button
Start Emergency Record (1 minute clip)
7
Set Up
Set the Date and Time
Insert an SD card (note included) “face up” into the SD slot located on
the right hand side of the PIR-SD as illustrated below.
SD
IMPORTANT NOTICE: The PIR-SD required an SD card to be inserted
into the SD slot in order for the PIR-SD to function as a motion
detector/recorder.
Connect the PIR-SD to your PC or Laptop using the USB cable provided
as illustrated below.
8
Once connected, an “Auto Play” pop up window will appear (as shown
below) providing various programs for you to use to access and view the
stored files. Click on the “Open Folder to View Files” option to open a
folder view as illustrated.
Double-click on the “GetSysTime” folder, double-click on the
“GetSysTime.exe” file located on the SD card, and then click on the “Get
System Time” pop up to synchronize your computers time to the PIR-SD.
Make sure the computer you are using has the current time and date. If
it is a newly formatted SD card, please copy and paste the “GetSysTime.
exe” time/date setup file from other SD source or download it from our
web site, http://www.securitymaninc.com/?page_id=575 .
9
After clicking on the “Get System Time” pop up, a confirmation pop up will
appear letting you know that the time and date were set successfully. Click
OK to close the window and disconnect the PIR-SD from your computer.
NOTE: A “SysTime.bin” file will be created indicating that the date
and time was set correctly.
Finally, connect the PIR-SD to the USB power adapter and a solid red light
will appear in the motion detection window for 30-sec. After the red light
disappeared, the PIR-SD is ready for commands.
IMPORTANT NOTICE: Please avoid unplugging the USB power from the
PIR-SD as doing so will cause the system Date and Time to reset. To
playback recorded files, please remove the SD card from the PIR-SD to
playback on a media reader.
Mount the PIR-SD’s mouting bracket in the desired location and secure it
to the wall using the screws provided (use the green dry wall inserts when
applicable) as shown below.
Wall
10
IMPORTANT NOTICE: Due to a 2~3-sec delay time to record, we
recommend to mount the PIR-SD about 15ft from the intended
monitoring object for proper recording.
Slide the PIR-SD over the mounting bracket and push it downwards to
secure. Adjust the PIR-SD as necessary till you reach a desired viewing
angle as shown below.
Wall
Insert an SD card (note included) “face up” into the SD slot located on
the right hand side of the PIR-SD as illustrated below.
IMPORTANT NOTICE: The PIR-SD required an SD card to be inserted
into the SD slot in order for the PIR-SD to function as a motion
detector/recorder.
Using the supplied USB power adapter, connect the USB mini-B
(smaller end) receptacle end of the USB cable into the power port
of the PIR-SD and the other end into an electrical power outlet as
illustrated below.
NOTE: After connected to the power outlet, the red LED light on the
PIR-SD will stay solid for 30 seconds and then enter standby mode
(ready to use) after the red LED turns off. Since the camera does
not have any infrared to monitor in the dark, we recommend to use
night light or lamp stand in dark area.
11
Adding and Cancelling Remote Control
Adding Remote Control:
1) While plugged into the power outlet, press and release the
“Study” button located on the back of the PIR-SD. The PIR-SD will
beep once after being pressed indicating that it is in study mode.
2) Press any one of the four buttons on the remote control 2
consecutive times and the PIR-SD will beep 5 times to indicate
the remote control has been successfully added to the PIR-SD.
Note: The PIR-SD will beep twice to indicate failure during the adding
process and exit the study mode if the signal is not received from the
remote control within 20 seconds. Please repeat steps 1-2 above if this
should happen.
Cancelling Remote Control:
Press and hold down the “Study” button for 5 seconds and then
release, the PIR-SD will beep for 3 seconds to indicate the remote
control is sucessfully cancelled from the PIR-SD.
12
Operation
Using PIR-SD
Motion Detection Recording
To Activate Motion Detection recording, simply
press any of the “Motion Record” buttons on
the remote control and the PIR-SD will beep
once to indicate that motion detection has been
activated in stand-by mode. Once activated and
motion has been detected after the 8 seconds
delay time to exit, the red LED will flash continuously
to indicate recording. The PIR-SD will record a
1 minute video clip per motion detection event.
Motion
Record
Note: The PIR-SD has a built in 8 second exit delay that allows the
user to exit the detecting area (after activating motion detection)
without triggering the PIR to record.
Emergency Recording
Press the “Emergency Record” button on the
remote control (at any time) to start an
immediate Emergency recording event. Once
activated, the red LED will become solid
(while recording) and the PIR-SD will record a
1 minute video clip per emergency recording event.
Stop Recording
To stop emergency recording or Deactivate
Motion Detection recording, simply press
the “Stop Record” button on the remote
control at any time (the PIR-SD will beep twice
to indicate that recording has been stopped).
13
Emergency
Record
Stop
Record
New File Alert
After deactivating motion detection or emergency recording, by
default the “New File Alert” featured:
• Blue LED will stay solid for 5 seconds.
• PIR-SD will beep 5 times.
To disable the PIR-SD from beeping 5 times, simply press both the
“DISARM + ARM” buttons once simultaneously before enabling motion
detection or emergency recording and the PIR-SD will beep 3 times to
disable the PIR-SD from beeping 5 times on “New File Alert” notification.
Press both the “DISARM + ARM” buttons once simultaneously again
before enabling motion detection or emergency recording and the PIRSD will beep 4 times to enable the PIR-SD to beep 5 times on “New File
Alert” notification.
NOTE: You can manually mute the new file alerts by pressing the Stop
Record button 3 times rapidly within 5 seconds or simply activate
motion or manual recording. “New File Alert” notification always
display solid blue LED for 5 seconds regardless of the beeping “New
File Alert” notification.
SD Full Alert (Memory Full)
The Blue LED will start to flash continuously whenever the SD card
becomes full. Please remove the SD card from the PIR-SD and back up
all recorded events to you PC or Laptop to free up space.
NOTE: The Blue LED will also start to flash continuously whenever the
SD card is not present.
Playback Recorded Video
You can playback recorded files directly from the PIR-SD (when
connected to a PC) or directly from the SD card by inserting the card
into your computers card reader. To playback recorded video on a PC:
14
1. Remove the SD card from the PIR-SD by gently pushing on the SD
card allowing it to pop out from the SD card slot.
2. Insert the SD card into an SD card reader (not included) connected
to your PC (your PC should load the SD card as a new Removable Drive).
3. When prompted, select the “Open folder to view files” option to
view its contents, you should see two folders labeled SYSTEM
and VIDEO.
Open the VIDEO folder to view a list of all the recorded events. Once
inside the video folder you can double-click any of the recorded AVI files
and the video will begin playing in your default AVI media player.
NOTE: To playback video footages, we recommend to remove the
SD card from the PIR-SD to playback. Using method 1 to connect the
PIR-SD via USB cable for playback is strongly NOT recommended.
Once the PIR-SD is powered on, if for any reasons the power were to
be unplugged from the PIR-SD, the Date and Time will auto reset to
default date/time. When this occurs, please remember to setup the
Date and Time before the next operation.
Integrating with Air-Alarm Series
To fully integrate the PIR-SD system with the Air-Alarm Host series,
there are three components that needs to be added. Adding the PIR-SD
remote control (Not a must), the PIR-SD motion detection sensor, and the
video recording (on/off) as shown below. To avoid using multiple remote
controls when integrating the PIR-SD to the Air-Alarm host series, please
add the PIR-SD remote control to the Air-Alarm host series or vice versa.
Adding PIR-SD Remote to the Alarm Host
Step 1: Press PRGM/SET + Password (system default 888)+ENT+70+
ENT+00+ENT [the “
/Learn” light will appear solid blue/red].
Step2: Press any 1 of the 4 buttons on the PIR-SD remote twice
consecutively to add.
15
Cancelling PIR-SD Remote from the Alarm Host
Step1: Press PRGM/SET + Password (system default 888)+ENT+71
+ENT+00+ENT to cancel.
NOTE: Please reference the Air-Alarm series user’s manual as needed.
Adding PIR-SD Motion Detection to Alarm Host
Make sure the host is “DIS-ARMED” and press:
Step 1: PRGM/SET + Password (default is 888) + ENT+ 70 + ENT + XX
+ ENT [Input zones 11~15 for XX indicating the 2nd defense line
dedicated for PIR sensors]
(The “
/Learn” light will appear solid blue/red)
Step 2: Provoke the motion sensor on the PIR-SD 2 consecutive times
to add.
Cancelling PIR-SD Motion Detection from Alarm Host
Make sure the host is “DIS-ARMED” and press:
PRGM/SET + Password (default is 888) + ENT+ 71 + ENT + XX + ENT
[Input zones 11~15 for XX indicating the zone number that the PIR-SD
is paired to and using code 71 to remove the PIR-SD will remove any
sensor that was paired to that zone.]
(The “
/Learn” light will appear solid blue/red)
The alarm host will beep twice, and the “
/Learn” light will flash once
to indicate the PIR-SD is successfully cancelled from the Alarm Host.
Enabling Video Recording
Please follow steps 1-2 to enable the PIR-SD to start recording when ever
your alarm system is triggered.
Step 1: Press the “Study” button on the back of the PIR-SD
(PIR-SD will beep once).
Step 2: On the Alarm Host Press: ESC + Password (default is 888) +
ENT + ESC + Password (default is 888) + ENT. At this time
16
the PIR-SD will beep 5 times to indicate video recording has
been successfully enabled. PIR-SD will beep 2 times to
indicate failure; please repeat steps 1-2 above.
IMPORTANT NOTICE: Enabling video recording when integrating
with SM-8808T or SM-8808E Air-Alarm Hosts will have a 2-sec or
3-sec delay time to record respectively due to processing speed.
Please note that it is normal for the PIR-SD to have a 2~3-sec delay
time to record, so it is important and a recommendation to mount
the PIR-SD 15ft from the intended target for proper monitoring view
and proper recording file.
Note: Study mode will automatically turned off if inactive for more
than 20 seconds.
Disabling Video Recording
Make sure the host is “DIS-ARMED” and press:
Press and hold down the “Study Button” on the back of the PIR-SD for
5 seconds, and the PIR-SD will beep for 3 seconds to indicate video
recording is successfully disabled.
NOTE: Since the same command are use to remove the remote
control from the PIR-SD and the same command use to disable video
recording from the Alarm Host, it is important to remember to Study/
pair the remote control back to the PIR-SD whenever disabling video
recording from the Alarm Host.
After the PIR-SD has been successfully added to the Alarm Host series,
the PIR-SD should function similar to that of the standard motion
detection sensor. If the PIR-SD is triggered by motion in Armed mode, it
will alert the Alarm Host to alarm and at the same time the Alarm Host
will send a signal to the PIR-SD recorder to start the video recording
process. Moreover, if any of the input sensing device(s) that are preprogrammed to the Alarm Host triggered at anytime to alert the Alarm
17
Host to start alarming and at the same time sends a signal to the PIRSD to start the video recording.
Note: To review the recorded video footages, please follow
“Playback Recorded Video” section above.
Specifications
Image Sensor
Resolution
Recording Speed
Camera Lens
Camera Viewing Angle
Recording Video Format
Recording Time and Size
LED Indicator
PIR sensor/
camera
Remote
Control
Wireless
(General)
USB Port
Video Storage (SD slot)
PIR Detecting Area
Pet Immunity
Power Consumption
Power Supply
Dimensions
Gross Weight
Operating Power
Remote Control Distance
Battery Life Time
Buttons
Frequency
Transmission Distance
Operating Temperature
Operating Humidity
1/6.5”CMOS color
640x480
30fps
8mm
H: 60 degree, V: 35 degree
AVI
One minute per motion detection event.
40MB/minute. 32GB = 12hrs of video
2 LED lights (Red: power, record, alarm/
Blue: SD full or new REC file)
2.0 (data transfer to PC or USB power adapter)
SD card (up to 32GB, SD Class 4 or higher)
110 degree * 26ft (8M)
22lbs(10kgs) or less
≤ 60mA (standby); 110mA (active)
110-240VAC, 5VDC 1.0A(USB)
4.3”x2.4”x1.7”
0.5 lbs
27A 12V battery (alkaline)
30ft
Up to 2 years
Stop, Motion Detection, and Manual Record
433Mhz
Up to 300ft (in open area);
Up to 100ft (indoors)
-10°C to 50°C(14°F to 122°f)
≤ 85% RH
18