1
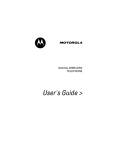
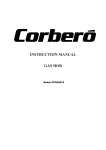
USE AND CARE GUIDE P E R F O R M A N C E S E R I E S™ GAS COOKTOPS THE POWER OF PERFORMANCE™ capital cooking is your friend hello and welcome to Capital... We thank you for choosing our Performance Series™ cooking equipment. Because of the unique features found in our products, we recommend spending some time to familiarize yourself with this booklet before using your product. In it you will find valuable information on how to safely operate and maintain your appliance for years of enjoyable cooking. We understand that questions arise from time to time on use and care about our products, so we want to make it easy for you to find the answers. That’s why we pride ourselves on superior customer service and work harder to respond to your needs quickly and effectively. Our Customer Service representatives are here to assist you and are just a phone call away. You can reach us toll free: 1-866-402-4600; by e-mail: [email protected]; or by standard mail: 13211 Florence Ave. Santa Fe Springs, CA, 90670. When you contact us, please make sure you have the model # and your serial # ready. This allows us to better serve your needs. We realize you have a choice in your appliance needs so we feel honored to welcome you to our family, where passion for improving the quality of your culinary life is our number one priority. your friends at Capital Cooking Equipment. warnings ii IMPORTANT: Save these instructions for the Local Gas Inspector’s use. INSTALLER: Please leave these Installation Instructions with the unit for the owner. OWNER: Please retain these instructions for future reference. This appliance was designed for ease of installation and operation. However, we recommend that you read all sections of this manual before beginning installation and that your range is installed by an approved gas installation technician, OR IN THE COMMONWEALTH OF MASSACHUSSETTS A LICENSED PLUMBER OR LICENSED GAS FITTER, capable of reviewing and performing the manufacturers installation checklist included in your information packet. The installation of appliances assigned for manufactured (mobile) home installation must conform with the Manufactured Home Construction and Safety and Safety Standard, Title 24 CFR, Part 3280 or, when such standard is not applicable, the Standard for Manufactured Home Installations, ANSI/NCSBCS A225.1, or with local codes as applicable. The installation of appliances designed for Recreation Park Trailers must conform with state or other codes or, in the absence of such codes, with the standard for Recreational Park Trailers, ANSI A119.5. The appliance, when installed, must be electrically grounded in accordance with local codes or, in the absence of local codes, with the National Electrical Code, ANSI/NFPA 70 The appliance and its individual shutoff valve must be disconnected from the gas supply piping system during any pressure testing of that system at test pressures in excess of 1/2 psi (35 kPa). The appliance must be isolated from the gas supply piping system by closing its individual manual shutoff valve during any pressure testing of the gas supply piping system at test pressures equal to or less than 1/2 psi (35 kpa). DO NOT store or use gasoline or other flammable liquids or vaporous products in the vicinity of this appliance. • Smother flames with a close fitting lid, or any metal tray. • Turn OFF the burner. Be careful to prevent burns. If the flames do not extinguish, immediately evacuate and call the fire department. • NEVER pick up a flaming pan. By doing so, you may be burned. • DO NOT use water or a wet dishcloth on fire. A violent steam explosion will result. WARNING! If the information in this manual is not followed EXACTLY, a fire or explosion may resuly, causing property damage, personal injury or death. * DO NOT store or use gasoline or other flammable vapors and liquids in the vicinity of this or any other appliance. **WHAT TO DO IF YOU SMELL GAS** DO NOT try to light any appliance. DO NOT touch any electrical switch. DO NOT use any phone in your building. IMMEDIATELY call your gas supplier from a neighbor's phone. Follow the gas supplier's instructions. If you cannot reach a gas supplier, call the fire department. INSTALLATION AND SERVICE must be performed by a qualified installer, service agency or the gas supplier. NOTE: USE FIRE EXTINGUISHER ONLY IF: • You have CLASS ABC extinguisher and you know how to operate it. • The fire is small and contained in the area where it started. • The fire department has been called. • You can fight the fire with your back to the exit. WARNING! Disconnect Power before installing. Before turning power ON, be sure that all controls are in the OFF position. IMPORTANT! Installation must conform with local codes or, in the absence of local codes, with the National fuel Gas Code, ANSI Z223.1/NFPA 54. warnings iii IMPORTANT! All cooktops must be installed with a back-guard. One of three available back-guards must be ordered separately and installed at the back of the cooktop. The three back-guard choices include 12" Low Back, 22" High-Back, or 22" High-Shelf. Before using the range insure that it is equipped with a proper back-guard. Refer to the Installation Instructions accompanying this appliance. CAUTION! When connecting the unit to propane gas, make certain the propane tank is equipped with its own high-pressure regulator in addition to the pressure regulator supplied with the range. The pressure of the gas supplied to the appliance must not exceed 14” (34.57 mB) water column from the propane gas tank to the pressure regulator. ! IMPORTANT! Installation must conform with local codes or, in the absence of local codes, with the National fuel Gas Code, ANSI Z223.1/NFPA 54. PLEASE NOTE: In the Commonwealth of Massachusetts, gas connection must be performed by a licensed plumber or licensed gas fitter. important technical information: TESTED IN ACCORDANCE WITH ANSI Z21.1b-2003, 27th Edition, supplemented by CGA Interim Requirement 58b (IR58) STANDARD FOR HOUSEHOLD COOKING GAS APPLIANCES. IN CANADA TESTED IN ACCORDANCE WITH CUL 1.1 GAS RANGES, CURRENT ISSUE. Check your local building codes for the proper method of installation. In the absence of local codes, this unit should be installed in accordance with the National Fuel Gas Code No. Z223.1 Current issue and the National Electrical Code ANSI/NFPPA No. 70 Current issue or the Can B149 Installation Codes for Gas Burning Appliances and C22.1 Canadian Electrical Code Part 1. please retain this manual for future reference! TABLE OF CONTENTS MESSAGE .................................................................................................................................................. I WARNINGS ................................................................................................................................................II MODELS AND GAS TYPE VERIFICATION ..............................................................................................2 BE SAFE ......................................................................................................................................................3 USING YOUR NEW COOKTOP: BURNERS..............................................................................................6 USING YOUR NEW COOKTOP: BURNERS, COOKWARE ......................................................................7 USING YOUR NEW COOKTOP: BBQ SECTION ......................................................................................8 USING YOUR NEW COOKTOP: GRIDDLE SECTION ..............................................................................9 CARE AND MAINTENANCE ....................................................................................................................10 DO-IT-YOURSELF MAINTENANCE ........................................................................................................12 BEFORE CALLING FOR SERVICE ..........................................................................................................13 WE’RE HERE FOR YOU ..........................................................................................................................14 WARRANTY ..............................................................................................................................................15 models and gas type verification 2 INTRODUCTION: Capital’s Performance Series™ gas cooktops are tested and approved in accordance with ANSI Z21.1b-2003/CGA IR 58, 1995, Household Cooking Appliances. It is STRONGLY RECOMMENDED that this appliance be installed in conjunction with a suitable overhead VENT HOOD. Due to the high heat output of this unit, particular attention should be paid to the hood and ductwork installation to assure it meets local building codes. All Performance Series™ gas cooktops feature a Gas Cooking Surface w/ multiple burners and griddle or grill configurations. MODEL # FEATURES: PSCT366 36” gas cooktop w/ 6 sealed burners PSCT364G 36” gas cooktop w/ 4 sealed burners and griddle PSCT364B 36” gas cooktop w/ 4 sealed burners and BBQ PSCT488 48” gas cooktop w/ 8 sealed burners PSCT486B 48” gas cooktop w/ 6 sealed burners and BBQ PSCT486G 48” gas cooktop w/ 6 sealed burners and griddle PSCT484BG 48” gas cooktop w/ 4 sealed burners + BBQ + griddle IMPORTANT: A back guard must be utilized when there is less than 12” horizontal clearance between combustible materials and the back edge of the range. The Capital PERFORMANCE SERIES Low Back, High-Back, or High-Shelf must be ordered separately and installed at the rear of the cooktop. The cooktop is supplied with its own island trim facilitating island installations and other installations with greater than 12" clearance. GAS SUPPLY: Natural Gas: 6-inch water column. (14.9mb) Min., 8 inch (20mb) nominal Propane Gas: 11-inch water column. (27.4mb), 14 inch (37mb) maximum ELECTRIC POWER SUPPLY: PSCT36 models – 120 VAC, 60Hz., 1 Ph., 10 Amp Circuit PSCT48 models – 120 VAC, 60 Hz., 1 Ph., 10 Amp Circuit GAS TYPE VERIFICATION: Your gas cooktop is shipped from the factory to operate on either natural gas or LP depending on the model ordered. Verify that the gas being used at the installation site matches the type of gas being used by the appliance. If the location/job site requires a conversion from one type of gas to another, contact the dealer where the unit was purchased or contact CAPITAL Customer Service at 866-402-4600. The field conversion kit for all PERFORMANCE SERIES™ cooktops is Capital model # PSCTCKN-L (Natural to LP) or PSCTCKL-N (LP to Natural). Only a factory-authorized service technician may perform the field conversion. Unauthorized conversion VOIDS the warranty. Please order correct gas type for the site prior to installing the cooktop or range. special instructions for Massachusetts: In the COMMONWEALTH OF MASSACHUSETTS, GAS CONNECTION MUST BE PERFORMED BY A LICENSED PLUMBER OR GAS FITTER. be safe Your new Capital PERFORMANCE SERIES™ cooktop has been designed to be a safe, reliable appliance when properly used and maintained. If not properly used, it could be dangerous. Read ALL the instructions in this Use and Care Guide carefully before using this appliance. WARNING! These precautions will reduce the risk of burns, electric shock, fire, and injury to persons. Use extreme care when using this restaurant caliber cooktop as this appliance provides intense heat and can increase accident potential. Safety precautions must be followed when using any kitchen appliance. INSTALLATION SAFETY: Insure proper installation and servicing. Follow the installation instructions provided with this product. Have the cooktop installed and grounded by a qualified technician. Have the installer show you where the gas supply shut off valve is located so that you know how and where to turn off the gas to the range. If you smell gas, your installer has not done a proper job of checking for leaks. If the connections are not perfectly tight, you can have a small leak and therefore a smell a faint gas odor. Finding a gas leak is not a “do-it-yourself” procedure. Some leaks can only be found with the burner control in the “ON” position and a qualified service technician must do this. BURNER SAFETY: In the event a burner goes out and gas escapes, open a window or door immediately. DO NOT attempt to use the range until the gas has had time to dissipate. Wait at least 5 minutes before using the range. DO NOT repair or replace any part of the appliance unless specifically recommended in this manual. All other servicing should be referred to a factory-authorized service technician. If the cooktop is near a window, be certain the curtains do not blow over or near the range burners, griddle or broiler section; they could catch fire and cause serious injury. 3 CHILD SAFETY: Children SHOULD NOT be left alone or unattended in an area where appliances are in use. They should never be allowed to sit or stand on any part of the appliance. CAUTION! Do not store items of interest to children above the cooktop or behind it. If children should climb onto the appliance to reach these items, they could be seriously injured. STORAGE SAFETY: NEVER use any part of the range for storage. Flammable materials can catch fire and plastic items may melt or ignite. GREASE FIRE SAFETY: DO NOT USE WATER ON GREASE FIRES! Turn appliance off and smother fire with baking soda or use a dry chemical or foam-type extinguisher. FLAMMABLE MATERIALS SAFETY: NEVER let clothing, pot holders, or other flammable materials come into contact with or too close to any element, burner, or burner grate until it has cooled. Fabric may ignite and result in personal injury. USE ONLY DRY POT HOLDERS. Moist or damp potholders on hot surfaces may cause burns from the steam. Do not use a towel or other bulky cloth in place of potholders. Do not let potholders touch hot elements, hot burners, or burner grates. ALWAYS use utensils that have flat bottoms, large enough to cover the burner. The use of undersized utensils could expose a portion of the flame and may result in ignition of clothing. CLOTHING SAFETY: FOR PERSONAL SAFETY, wear proper apparel. Loose fitting garments or hanging sleeves should never be worn while using this appliance. Some synthetic fabrics are highly flammable and should not be worn while cooking. DO NOT lift the range by the oven door handles! DO NOT remove the griddle and grill sections! be safe WARNING! This appliance is for cooking! Based on safety considerations, never use the cooktop to warm or heat a room. Such use can damage the cooktop and may result in personal injury. COOKING SAFETY: DO NOT use aluminum foil as a shield against food spills or drippings around the burners or control panel area. This could obstruct the flow of combustion and ventilated air. This can damage the finish of the range. DO NOT TOUCH THE BURNER GRATES OR THE IMMEDIATE SURROUNDING AREAS adjacent to the burners. When in use these areas may become hot enough to cause burns. NEVER leave the range unattended when using high flame settings. Boil-overs cause smoking and greasy spills that may ignite. More importantly, if the burner flames are smothered, unburned gas will escape into the room. See inside front cover regarding gas leaks. UTENSIL SAFETY: ONLY certain types of glass, heatproof glassceramic, ceramic, earthenware or other glazed utensils are suitable for range use. This type of utensil may break with sudden temperature changes. Use only on low or medium heat settings according to the utensil manufacturer’s directions. DO NOT HEAT UNOPENED FOOD CONTAINERS. A buildup of pressure may cause the container to burst. DURING COOKING, set the burner control so that the flame heats only the bottom of the pan and does not extend beyond the bottom of the pan. USE CAUTION to ensure that drafts like those from forced air vents or fans do not blow flammable materials toward the flames or push the flames so that they extend beyond the edges of the pot. TO MINIMIZE BURNS, ignition of flammable materials and unintentional spills, position handles of utensil inward so that it does not extend over adjacent work areas, cooking areas or the edge of the cooktop. 4 HOLD THE HANDLE of the pan to prevent movement of the utensil when stirring food. BBQ SAFETY: DO NOT USE the BBQ top section for cooking excessively fatty meats or products that promote flare- ups. GREASE IS FLAMMABLE. Let hot grease to cool before attempting to handle it. Avoid letting grease deposits to collect. Clean after each use. KEEP BURNER PORTS CLEAN. This is essential for proper lighting and maintenance of the burners. It is necessary to clean the burner ports when there is a boil over or when the burner does not light though the electronic igniters click. CLEANING SAFETY: CLEAN THE COOKTOP WITH CAUTION. Avoid steam burns; do not use a wet sponge or cloth to clean the range while it is hot. Some cleaners produce noxious fumes if applied to a hot surface. Follow directions provided by the cleaner manufacturer. BE SURE ALL COOKTOP CONTROLS ARE TURNED OFF and the cooktop is cool before using any type of aerosol cleaner on or around the top section. The chemical that produces the spraying action could, in the presence of heat, ignite or cause metal parts to corrode. Only a factoryauthorized service technician should perform Service. Technicians must disconnect the power supply before servicing this unit. VENTILATION SAFETY: CLEAN THE VENTILATOR HOOD and filters above the range frequently so grease deposits from cooking vapors do not accumulate on them. IN CASE OF FIRE or when intentionally “flaming” liquor or other spirits on the range, follow hood manufacturer’s instructions. INSTALL A SMOKE DETECTOR in or near the kitchen. DO NOT lift the range by the oven door handles! DO NOT remove the griddle and grill sections! 5 be safe ELECTRICAL SAFETY: If for any reason a gas control knob is turned ON and there is no electric power to operate the electronic igniters on the burners, turn OFF the gas control knob and wait 5 minutes for the gas to dissipate before lighting the range burner manually. WARNING: Do not, under any circumstances cut or remove the separate ground wire or the third (ground) prong from the power cord plug. NOTE: Service should only be performed by a qualified, Factory Authorized Service Technician. Technicians must disconnect the power supply before servicing this unit. Please Read Carefully: All cooktop models require an electrical circuit rated at 120 volts, 60 Hz., and 20 Amps. ALL MODELS: In case of an Electrical failure To light the sealed burners, carefully hold a lighted match to the burner ports and turn the gas control knob to HI. During a power failure, you can manually light the standard sealed burners only and BBQ, but each must be lit with a match. NOTE: The griddle CANNOT be lit manually. GROUNDING SAFETY: For personal safety, this appliance must be connected to a properly grounded and polarized electrical power supply. Always disconnect the electrical plug from the wall receptacle before servicing this unit. See Installation Instructions for electrical requirements and grounding instructions. It is the personal responsibility and obligation of you, the user, to have this appliance connected to the electrical power supply in accordance with the National Electrical Code and/or applicable local codes and ordinances by a qualified electrician. *It is recommended that a dedicated circuit servicing this appliance be provided. grounded outlet grounded outlet box grounding pin grounding plug important warning from the government! CALIFORNIA PROPOSITION 65 WARNING: The burning of gas cooking fuel generates some byproducts which are on the list of substances which are known by the State of California to cause Cancer or reproductive harm. California law requires business to warn customers of potential exposure to these substances. To minimize exposure to these substances, always operate this unit according to the instructions contained in this booklet and provide good ventilation to the room when cooking with gas. using your new cooktop: burners before using your cooktop for the first time: Record the Model and Serial number of your appliance on the Service Page of this use and care guide. This may be used for any future contact with your service technician or the factory. Also, enter this information on the Product Registration Card included with this product, and mail it to the indicated address. 6 SEALED BURNERS: The range features four, six, or eight gas surface burners; each rated at 15,000 BTUS/HR. The burners are sealed to the stainless steel top frame to prevent liquid spills from accumulating below the top surface, making it easier to clean. Each burner has its own control knob. burner operation: 1) Depress the knob and turn it counterclockwise to the High position. 2) The igniter for the selected burner clicks and sparks. WARNING! Power Failure: In the event of a power failure, only the sealed burners and grill can be manually lit. It is necessary to light each one individually. If the range is being used when the power failure occurs, turn ALL knobs to the OFF position. Holding a match at the ports and turning the control knob to the HI position can light the standard burners. Wait until the flame is burning all around the burner cap before adjusting the flame to the desired height. Neither the grill nor the griddle burner can be used during a power failure. If you smell gas, refer to safety instructions listed inside the front cover. IMPORTANT: For proper combustion, do not use the cooktop without the burner grates in place. 3) After flame ignition, the igniters stop clicking. 4) Rotate the knob to any flame setting between “HI” and “Sim” (note: for pre-2006 models LO and SIM are the same) ELECTRONIC IGNITERS: Each burner has its own electronic igniter that sparks when the burner is turned on. Each burner should light within 4 seconds or less. If a burner does not light, check to see that the cap is positioned correctly on the base. DO NOT touch the burners when the igniters are sparking. If a burner fails to ignite, refer to the section “Before Calling For Service.” automatic re-ignition: If any one or more burners or grill blow out, the electronic igniter automatically sparks to relight the flame. Again, DO NOT touch the burners when the igniters are sparking. NOTE: There is a slight sound associated with gas combustion and ignition. This is a normal condition. On ranges using propane gas (LP), a slight “pop” sound may be heard at the burner ports a few seconds after the burner has been turned off. Fig. 1 FLAME HEIGHT (see fig. 1) : 1) The correct flame height depends upon a) size and material of pan being used; b) food being cooked; and c) amount of liquid in the pan. 2) Never extend the flame beyond the base of the pan. 3) Use a low or medium flame for pan materials that conduct the heat slowly, such as porcelain-coated steel or glass ceramic. 4) The burner flame color should be blue with no yellow tips. It is uncommon to see orange in the flame color; this indicates the burning of airborne impurities in the gas and will disappear with use. 5) With propane (LP) gas, slight yellow tips on the primary cone are normal. 6) The flame should burn completely around the burner cap. If it doesn’t, check that the cap is positioned correctly on the base and that the ports are not blocked. 7) The flame should be stable with no excessive noise or fluttering. using your new cooktop: burners, cookware 7 SIMMER POSITION: a) The type and quantity of food affects which settings to use. SAFETY PRECAUTIONS: Food packaged in aluminum foil should not be placed directly on the burner grate. Aluminum foil can melt during cooking. b) The pan selected affects the setting, its size, type, material, and whether a lid is used, all affect the consistency of the cooking temperature. Do not let plastic, paper or cloth come in contact with a hot burner grate. They may melt or catch fire. c) To maintain a low/simmer heat, bring food to a rolling boil. Stir well, then cover the pan and lower the heat to a setting to the Simmer d) Periodically check your food to see if the control knob should be turned to another setting. e) If an over-sized pan is used, the simmer action may occur mainly in the center of the pan. To equalize the temperature throughout the food, stir the food around the outer edges of the pan into the food in the center. f) It is normal to stir food occasionally while simmering. This is especially important when simmering for several hours, such as for homemade spaghetti sauce or beans. g) When lowering the flame setting, adjust it in small steps. If the setting is too low to hold a simmer, bring the food back to a boil before resetting to a higher heat. h) It is normal not to see simmer bubbles immediately after the food has been stirred. Never let a pan boil dry. This can damage your pan and the cooking surface. COOKWARE: For best cooking results, use professional quality pans with metal handles. (If the flames extend up the side of the pan, plastic handles can melt or blister.) Professional quality pans are found at restaurant supply stores and gourmet specialty stores. All cookware should have these characteristics: good heat conductivity, good balance, correctly sized base diameter, a heavy, flat base, and a proper fitting lid. Aluminum and copper are pan materials that conduct heat quickly and evenly. These metals are sometimes attached to the base or in the core between stainless steel. Balance is important for stability and even cooking. The handle must not be heavier than the pan and tilt it unevenly. A pan must sit level on the grate without rocking or wobbling. Base Diameter: Select the base diameter to match the diameter of the flame. The diameter of the flame should not be the same size as the pan base or slightly smaller. Oversize or undersize pans sacrifice cooking performance. A 5 1/2” (140 mm) base size is generally the smallest recommended. Flat Base Pan: A heavy, flat base is more apt to remain flat when heated. Pan bases that are warped, dented, ridged, or too lightweight will heat unevenly. Heat and cool pans gradually to avoid sudden temperature changes which tend to distort cookware. Do not add cold water to a hot pan. Covered Pan: A properly fitting lid will shorten cooking time and make it possible to use lower heat settings. using your new cooktop: BBQ section NOTE: The BBQ is only available on model # PSCT364B, PSCT486B, and PSCT484BG. CAUTION! Use extreme care when placing the grill components into the grill compartment. Avoid contacting the ceramic igniter that could break, preventing operation of the grill. DO NOT leave the grill unattended while in use. DO NOT use charcoal briquettes, ceramic plates, or coals of any kind. 8 GRILLING SUGGESTIONS: a) Trim any excess fat from the meat before cooking. FATTY MEATS increase the likelihood of flare-ups. Cut slits in the remaining fat around the edges at 2” (51 mm) intervals. b) Brush on basting sauces towards the end of cooking. c) Add seasoning or salt after grilling. Early salting dries out meat. d) Use a spatula or tongs instead of a fork to turn the meat. A fork punctures the meat and lets the juices flow out. After removing all packaging materials, check to be certain that the grill components are correctly assembled in the grill box. The grill grates, stainless steel radiant tray and the burner are assembled in the grill box from the factory. e) After the juices begin to bubble to the surface, turn the meat only once. This helps keep the juices in the meat. NOTE: f) Some pieces of meat and poultry cook faster than others. Move those pieces to the cooler area of the grill until the rest have finished. Your grill racks are constructed from stainless steel and have been electro-polished to achieve a brilliant finish. After the first use, discoloration will occur. This is natural and unavoidable COOKING ON THE BBQ: The burner should light within approximately 5 seconds. Preheat the grill for approximately 10 minutes minimum. The hot grill sears the food, sealing in the juices. The longer the preheat time, the faster the meat browns and the darker the brand marks. g) The doneness of meat is affected by the thickness of the cut. Chefs say it is impossible to have a rare doneness with a thin cut. THE GRILL RACK: The grill rack is a double sided, two position grate. Use the concave side (channels up) for meats of higher fat content (Steaks, hamburgers, sausage patties, etc.); use the convex side (channels down) for foods of lesser fat content (fish, vegetables, fruits, etc.) Grilling requires high heat for optimum results. High heat is necessary for searing and proper browning. Most foods are cooked at higher heat settings for most of the cooking time. However, when grilling large pieces of meat or poultry, it may be necessary to turn the heat to a lower setting after the initial browning. This cooks the food thoroughly without burning the outside. HANDLING EXCESSIVE FLARE- UPS: The intense heat needed for grilling may also cause flare-ups, due to grease and basting sauces dripping on the stainless steel radiant plate. Foods cooked for a long period of time or basted with a sugary marinade may need a lower heat setting near the end of the cooking time. Should flare-ups become excessive, remove the food from the grill and turn off the burner. After grilling and the food has been removed, turn the knob to HI and burn off any excess grease that may have accumulated on the stainless steel radiant. Use a brass wire brush, dipped in hot water, to loosen food particles from the grate. If flare-ups occur, use a long handled spatula to move the food to another area of the grill. Excessive flames occur when cooking meat with high fat concentration, i.e. 30% ground beef, untrimmed steaks, lamb chops, etc. Be cautious when turning meat over. 9 using your new cooktop: griddle section griddle section NOTE: The griddle section is only available on model # PSCT364G, PSCT486G, PSCT484BG DESCRIPTION: The built in griddle is made of restaurant quality 3/8” thick stainless steel. This produces a surface with even heat that is easy to clean. The griddle has a stainless steel straight tube burner that is lit by a spark igniter. The griddle should light with 5 clicks of the igniter. This eliminates the need for a continuous burning pilot lighter. The burner is rated at 18,000 BTU/HR. Control Knob: The griddle is electronically controlled with temperatures marked on the knob from 150 deg. F to 500 deg. F. There are no fixed settings on the knob. Press and turn the knob counter-clockwise to the temperature setting. PRIOR TO USE: Preparing the Griddle: The griddle must be level or tilted slightly forward for optimum performance. The griddle should have been leveled during installation It is NECESSARY to wash the griddle plate with warm soapy water then rinsed with clear water. The griddle may be used without butter, margarine, or oil. However, a very small amount may be used to flavor foods. Cooking on the Griddle • Check that the grease tray is tucked under the griddle plate overhang. • Turn the knob to the cooking temperature to preheat the griddle. • Preheat 5-10 Minutes. • Add butter, margarine, shortening or oil for more flavor: Add food and cook! 10 care and maintenence sealed burners For proper lighting and performance of the burners, keep the igniters, burner caps, and ports clean and free of soil. It is necessary to clean these only when the flame does not burn blue completely around and within the burner, when there is a severe boil-over, when the burner does not light, or when the electronic igniter clicks continuously even after the flame has been lit. When the burner and burner grate are cool, remove the grate. Grasp the burner cap and remove it. burner caps: Clean the burner cap with a cleanser suitable for enamel. Use a wire, a straightened paper clip or needle to clear the ports. Do not use a toothpick; it could break off in the port. If necessary, wash, rinse and dry burner according to the Cleaning Chart on following pages. Be sure to dry the burner base and cap thoroughly before reinstalling the burner cap. Replace the burner cap, being sure to properly line up the locater tab with the notch in the burner base. Thoroughly dry the igniters to prevent nuisance or continuous sparking. grill racks Two grill RACKS forms a continuous surface. The burner racks are constructed of stainless steel that has been electro-polished to achieve a bright shimmering lustre. Due to the extreme temperatures and rapid temperature change that the racks are exposed to, in addition to spillage of acidic and sugar laden foods onto the racks, some deterioration may include extreme discoloration. The extent of deterioration will be directly related to the severity and amount of usage The bright lustre of the grill racks WILL fade after the first use and is a normal condition of stainless steel exposed to heat. To clean, the grill rack may be wiped while on the range with hot soapy water, rinsed and wiped dry. If cleaning necessitates removal of racks, care should be taken in lifting them. Be sure to place the grill rack on a protected surface. The grill racks may be washed in a dishwasher. CAUTION! Avoid cleaning any part of the cooktop while it is hot. Do not clean any removable part of the cooktop in a self-cleaning oven. NOTE—Before cleaning the cooktop, be certain that the burners are turned off and the grates and exterior surfaces are cool. Clean the griddle and grill carefully while still warm. Always clean the cooktop with caution. A wet sponge or cloth used to wipe spills off a hot area can result in steam burns. grill racks (cont.) The easiest way to clean the grill is while it is warm (not hot) after cooking is completed and after turning off the flame. Wear a BBQ mitt to protect your hand from the heat and steam. Use a brass grill brush and water on the grill grate in most instances. For stubborn stains, use a soap filled steel wool pad. Steam created as the water contacts the hot grill assists the cleaning process by softening any food particles, which will fall off and burn. If the grill is allowed to cool before cleaning, it will be more difficult. grill parts After the grill has cooled, remove the racks, stainless steel radiant and U-shaped burner, heat deflector, removable heat shield, and drip pan. Lift the U-shaped burner where it hooks to the brackets at the rear of the grill box. Pull burner from the burner hole and remove it from the gas connection. The burner may be cleaned, if desired, with a wire brush. All gas ports must be free of blockage for safe operation. Use a straightened metal paper clip, needle or wire to remove debris from portholes. Lift out and wash the stainless steel removable heat shield, and grease drip pan tray. Use hot, sudsy water, rinse and dry. 11 care and maintenence cooktop BURNER BASE AND CAP: Use hot, sudsy water and dry thoroughly. Acidic and sugar laden spills deteriorate the stainless steel. Remove soil immediately! CONTROL KNOBS/ BEZELS: use hot sudsy water, rinse and dry immediately. DO NOT soak knobs DO NOT force knobs into wrong valve shaft. EXTERIOR FINISH/Stainless Steel: Use non-abrasive cleaners: Hot water and detergent, amonia, sudsy water. Rinse and dry immediately. For HARD WATER SPOTS, try household vinegar . Note: Stainless steel resists most food stains and pit marks providing the surface is kept clean and protected. NEVER allow food stains to remain on stainless steel for any length of time. ALWAYS RUB LIGHTLY IN THE DIRECTION OF THE GRAIN AND NEVER CLEAN STAINLESS STEEL SURFACES IN A CIRCULAR MOTION. Note: Chlorine or chlorine compounds in some cleaners are corrosive to stainless steel. ALWAYS check ingredients on label. griddle plate NEVER flood a hot griddle with cold water. This will cause steam and may result in steam burns. DO NOT clean any part of the griddle in a self-cleaning oven. If food particles stick to the griddle plate, remove with a mild abrasive cleaner such as Soft Scrub. Clean griddle plate with a hot sudsy water. drip pans Use hot sudsy water; rinse and dry thoroughly. DO NOT clean the drip pan in a self cleaning oven! After grease removal, drip pan may be put into a dishwasher. igniters/ ceramic Use a cotton swab dampened with water, Formula 409, or Fantastic. DO NOT use sharp tools to scrape the igniter; it is fragile and if damaged the burner cannot be lit. 12 do it yourself maintenance WARNING! POWER FAILURE In the event of a power failure, only the standard burners and grill can be lit manually. It is necessary to light each standard burner individually. If the cooktop is being used when the power failure occurs, turn all of the burner control knobs to the OFF position. Holding a match at the ports, then by turning the control knob to the HI position, can light the standard burners and grill. Wait until the flame is burning all the way around the burner cap before adjusting the flame to the desired height. INTERMITTENT OR CONSTANT IGNITER SPARKING Intermittent or constant sparking of the sealed gas surface burners can result from a number of preventable conditions. Eliminate these conditions as indicated in the following chart. SYMPTOM CAUSE REMEDY Intermittent Sparking Improper fit of burner cap into burner base Seat cap in place. Ceramic igniter is wet or dirty Knob is left in the LITE position Carefully dry or clean igniter. Clean ports in burner cap with a wire, a needle, or straightened paper clip. Turn the knob to a setting between HI and SIM (LO on earlier models) Constant Sparking Range is not properly grounded Have a qualified electrician ground the range properly. Electrical power supply is incorrectly polarized Refer to installation instructions for correct installation before calling for service Before calling for service, check the following to avoid unnecessary service charges. Be sure to check these items first: • Is there a power surge in the area? • Is the household fuse blown or the circuit breaker tripped? • Is the Range disconnected from the electrical supply? IF THE BURNERS DO NOT IGNITE: • Are the burner caps properly aligned on the burner bases (sealed burners)? • Are the burner ports clogged? • Is a fuse blown or is the circuit breaker tripped? • Is the manual shut-off valve closed, preventing the flow of gas? • Are the burner ports clogged? • Is the spark igniter sparking (surface burners)? NOTE: The DATA RATING PLATE containing model #, serial #, and gas type, is located on on the underside of the chassis, near the gas inlet connection and electric power cord. In most cases after installation, technicians are unable to access this information. Therefore it is necessary to capture this information in this guide prior to installation. 13 we're here for you: 14 HOW TO OBTAIN SERVICE: For service, contact one of our PERFORMANCE SERIES SPECIALISTS at 1-866-402-4600. Before you call, please have the following information ready: • Model Number • Serial Number • Date of purchase and Installation • A brief description of the problem • Dealer name Your satisfaction is of the utmost importance to us. If a problem cannot be resolved to your satisfaction, please write or fax us at: Capital Cooking Equipment Attn: Customer Service 13211 Florence Ave Santa Fe Springs, CA 90670 USA Fax us at 562-903-1167 Email us at [email protected] FOR: ________________________________________________________________________ MODEL #: ___________________________________________________________________ SERIAL #: ____________________________________________________________________ GAS TYPE: __________________________________________________________________ NOTES: _____________________________________________________________________ ____________________________________________________________________________ ____________________________________________________________________________ ____________________________________________________________________________ 15 THE POWER OF PERFORMANCE™ PERFORMANCE SERIES™ COOKTOPS WARRANTY Two (2) years parts and One (1) year labor, covers the entire unit. Five (5) years parts and Two (2) years labor, covers All Burners (does not include ignition systems). Five (5) years parts and One (1) year labor covers the porcelain enameling on the Burner Grates Limited Lifetime against rust on all stainless steel parts covers entire product. For the life of the product, Capital will repair or replace any stainless steel panel, stainless steel cover or BBQ grate which rusts through due to defective material or workmanship. Labor to remove and replace defective parts is covered for One (1) year only. Only a qualified Factory Authorized Service Technician must perform such service during normal business hours. WILL PAY FOR: Parts and labor on product found to be defective due to materials and workmanship as defined above from the date of installation. This does not apply if the unit has been subjected to other than normal household use, has been tampered with, or has been equipped with non factory-authorized parts. Service MUST BE performed by a Factory Authorized Service Agent/Technician during normal business hours. Replacement parts will be shipped freight prepaid by Capital and shipped standard ground shipping. Capital will not be liable for any air freight or expedited transportation costs, labor costs, or export duties. Such costs are the customer’s responsibility. This warranty shall not apply, nor can we assume responsibility for damage that might result from a failure to follow manufacturer’s instructions in the installation and use and care manuals, or for installer’s failure to follow local codes, or where the appliance has been tampered with or altered in any way or which, in our judgment, has been subjected to misuse, negligence or accident. Implied warranty shall not extend beyond the duration of this written warranty. This warranty is in lieu of all warranties expressed or implied and all other obligations or liability in connection with the sale of this appliance. WILL NOT PAY FOR: Cleaning Installation or start up Shipping damage, except due to negligence in packaging on our part Concealed shipping damage Service by unauthorized agency Damage or repairs due to service performed by unauthorized agency or the use of unauthorized parts Service during other than normal business hours Improper installation or hook-up Service visits to teach consumers and/or customers how to use the appliance, correct the installation, reset circuit breakers or replace home fuses Repairs due to other than normal household use Damage caused from accident, abuse, misuse, incorrect installation or installation not in accordance with local codes, acts of God. Units installed in non-residential and/or commercial applications such as day care centers, public parks, hotels, motels, bed and breakfast centers, recreation areas, common areas of apartment and condominium complexes, churches, temples, synagogues, nursing homes, restaurants, schools, and the like. Isolated geographic locations of 50 miles of travel distance or two hours of travel time both ways, for example such places that require planes, trains, boats, ferry trips, and the like. This Warranty applies to appliances used in residential application only. It does not cover their use in commercial situations where the units may be subjected to multiple users, such as public outdoor and/or indoor cooking areas (see above under “Will Not Pay For”). This Warranty is for products purchased and retained in the 50 States of the USA, the District of Columbia and Canada. This Warranty applies even if you should move during the warranty period. Should the original purchaser sell the appliance during the warranty period, the new owner continues to be protected until the expiration date of the original purchaser’s warranty period. This warranty gives you specific legal rights. You may also have other rights, which vary from state to state. NOTES: NOTES: All illustrations and specifications contained in this use and care guide are based on the latest product information available at the time of this printing. Because product improvement is an ongoing process, Capital reserves the right to make changes at any time, without notice, in colors, materials, equipment, specifications, features and models. Some product pictures may be shown with optional equipment. Further information can be obtained from your authorized Capital Cooking Equipment dealer or visit us online at www.capital-cooking.com. © 2006 Capital Cooking Equipment, Inc. Not to be reproduced wholly or in part without written permission from Capital Cooking Equipment, Inc. Capital Cooking Equipment, Inc. 13211 Florence Ave. Santa Fe Springs, Ca 90670 USA 866.402.4600 Toll Free 562-903-1167 Fax MADE IN USA UL and CUL certified for USA and Canada PART #: 87022 THE POWER OF PERFORMANCE TM