1
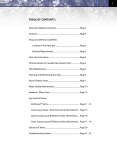
1
CONTENTS:
Important safety instructions........................................................ Page 2
Cautions................................................................................................. Page 3
Setup and delivery guidelines
Location of your new spa........................................................... Page 3
Electrical requirements............................................................... Page 3
Start-up instructions......................................................................... Page 3
Fill instructions for Cascade Series owners only..................... Page 4
Filter maintenance............................................................................. Page 5
Draining and winterizing your spa.............................................. Page 6
Home Theater Series......................................................................... Page 6-9
Water quality maintenance............................................................ Page 9 - 10
Product/pillow care........................................................................... Page 10 - 11
Spa control panels............................................................................. Page 12 - 19
Glossary of terms............................................................................... Page 21
Troubleshooting guide.................................................................... Page 22-24
2
IMPORTANT SAFETY INSTRUCTIONS
READ AND FOLLOW ALL INSTRUCTIONS CAREFULLY
1) DANGER: Risk of Injury. The suction fittings in this hot tub
are sized to match the specific water flow created by the
pump. Should the need arise to replace the suction fittings or
the pump, be sure that the flow rates are compatible. Never
operate the hot tub if the suction fittings are broken or missing. Never replace a suction fitting with one rated less than
the flow rate marked on the original suction fitting.
2) ELECTRICAL SUPPLY: The electrical supply for this product must include a suitably rated switch or circuit breaker to
open all ungrounded supply conductors to comply with section 422-20 of the National Electrical Code, ANSI/NFPA 70.
The disconnect must be readily accessible and visible to the
hot tub occupant but installed at least 5 feet (1.5 m) from the
hot tub water.
3) WARNING: To Reduce the Risk of Injury:
a) The water in a hot tub should never exceed 104 °F (40
°C). Water temperatures between 100 °F (38 °C) and 104
°F (40 °C) are considered safe for a healthy adult. Lower
water temperatures are recommended for young children and when hot tub use exceeds 10 minutes.
b) Since excessive water temperatures have a high potential for causing fetal damage during the early months
of pregnancy, pregnant or possibly pregnant women
should limit hot tub water temperatures to 100 °F (38
°C). If pregnant, please consult your physician before
using a hot tub.
c) Before entering the hot tub, the user should measure
the water temperature with an accurate thermometer
since the tolerance of water temperature-regulating devices may vary as much as +/- 5 °F (2 °C).
d) Persons suffering from obesity or a medical history of
heart disease, low or high blood pressure, circulatory
system problems or diabetes should consult a physician
before using a hot tub.
SAFETY INFORMATION
When using this electrical equipment, basic safety precautions should always be followed, including the following:
WARNING: Children should not use hot tubs without adult
supervision.
WARNING: Do not use hot tubs unless all suction guards are
installed to prevent body and hair entrapment.
WARNING: People with infectious diseases should not use a
hot tub.
WARNING: To avoid injury, exercise care when entering or
exiting the hot tub.
WARNING: Do not use drugs or alcohol before or during
the use of a hot tub to avoid unconsciousness and possible
drowning.
WARNING: Pregnant or possibly pregnant women should
consult a physician before using a hot tub.
WARNING: Water temperature in excess of 38 °C (100 °F) may
be injurious to your health.
WARNING: Before entering the hot tub, measure the water
temperature with an accurate thermometer.
WARNING: Do not use a hot tub immediately following
strenuous exercise.
WARNING: Prolonged immersion in a hot tub may be injurious to your health.
WARNING: Do not permit electric appliances (such as lights,
telephone, radio, television, etc.) within 5 feet (1.5 m) of this
hot tub unless such appliances are built-in by the manufacturer.
CAUTION: Maintain water chemistry in accordance with
manufacturer’s instructions.
WARNING: The use of alcohol or drugs can greatly increase
the risk of fatal hyperthermia in hot tubs.
WARNING: People using medication and/or having an adverse medical history should consult a physician before using
a spa or hot tub.
READ, FOLLOW AND SAVE THESE INSTRUCTIONS
a) A green colored terminal or a terminal marked G, Gr,
Ground, Grounding or the symbol* is located inside the
supply terminal box or compartment. To reduce the risk
of electric shock, this terminal must be connected to
the grounding means provided in the electric supply
service panel with a continuous copper wire equivalent
in size to the circuit conductors that supply this equipment.
b) At least two lugs marked “Bonding Lugs” are provided
on the external surface or on the inside of the supply
terminal box/compartment. To reduce the risk of electric shock, connect the local common bonding grid in
the area of the hot tub to these terminals with an insulated or bare copper conductor not smaller than No. 6
AWG.
c) All field-installed metal components such as rails, ladders,
drains or other similar hardware within 5 feet (1.5 m) of the
hot tub shall be bonded to the equipment grounding buss
with copper conductors not smaller than No. 6 AWG.
3
HYPERTHERMIA
• Can neighbors or passersby see the spa?
Prolonged immersion in hot water may induce hyperthermia.
A description of the causes, symptoms, and effects of hyperthermia are as follows:
• If your spa is to be placed near where sprinklers may hit
the wood skirt, shell or equipment, please adjust or cap
them to prevent prolonged water exposure.
Hyperthermia occurs when the internal temperature of the
body reaches a level several degrees above the normal body
temperature of 98.6 °F (37 °C). The symptoms of hyperthermia include drowsiness, lethargy, and an increase in the internal temperature of the body.
The effects of hyperthermia include:
a) Unawareness of impending hazard;
b) Failure to perceive heat;
c) Failure to recognize the need to exit hot tub;
d) Physical inability to exit hot tub;
e) Fetal damage in pregnant women; and
f ) Unconsciousness and danger of drowning.
CAUTIONS
1. Observe a reasonable time limit when using the hot
tub. Long exposures at higher temperatures can cause
high body temperature. Symptoms may include dizziness, nausea, fainting, drowsiness, and reduced awareness. These effects could possibly result in drowning.
2. Always test the hot tub water temperature before entering the hot tub. Enter and exit the hot tub slowly. Wet
surfaces can be very slippery.
3. Proper chemical maintenance of hot tub water is necessary to maintain safe water and prevent possible damage
to hot tub components.
4. Use the straps and clip tie downs to secure the cover
when not in use. This will help to discourage unsupervised children from entering the hot tub and keep the
hot tub cover secure in high-wind conditions. There is no
representation that the cover, clip tie-downs, or actual
locks will prevent access to the hot tub.
5. For exercise, the water should not exceed 90 °F (32 °C).
SET-UP AND DELIVERY GUIDELINES
ELECTRICAL REQUIREMENTS: ALL SELF-CONTAINED SPAS
USE 120 OR 240 VOLT ELECTRIC SPA PACKS.
All installations should be done by a certified electrician.
• Your 120-volt spa pack requires an isolated (no other appliances or lights on this circuit at any time)  120-volt, 20amp circuit breaker.
• Extension cords are not to be used in conjunction with
the operation of the spa. Low voltage damage could result, which is not covered by warranty.
• Depending on the model, your 240-volt spa will require a
40- or 50-amp dedicated circuit breaker, GFCI, with proper wire size for length of run.
• If you have any doubts, have your electrical system
checked by a certified electrician.
* See Diagram 02 on Page 20
SURFACE AND PAD REQUIREMENTS
• Your new portable spa must be placed on a firm, flat and
level surface, so the spa weight is supported uniformly.
We recommend no less than a 3-1/2 in. (93 mm) thick
concrete slab. Alternate decking methods may void warranty of spa shell.
• Contact your Coast Spas dealer if you have any questions
regarding spa location or placement.
REQUIREMENTS FOR WOOD DECKING, GATES AND
BALCONIES
• Wood decking or balconies must be constructed to support
150 pounds per square foot (730 kg/m²). Refer to local and
current building codes in your area.
• Consult an engineer for live loads in your area.
Should your new spa need to go through a gate, the opening should be a minimum of 48 inches and up to 8.5’ overhead
clearance depending on the size of the unit.
Getting ready for delivery and setup of your new spa
START-UP INSTRUCTIONS
LOCATION OF YOUR NEW SPA: Some points to consider
FILLING YOUR COAST SPA
• How close is the spa from the exit or entrance to your
house? (Consider the cold weather)
• Is the path to the spa clean of debris, sand, grass
clippings? (so as not to track into spa)
• Is there protection from wind, inclement weather?
• Your new spa has left the factory cleaned and polished.
You may have to clean out any dirt that has accumulated
during shipping. Use warm water and sponge or cloth.
• Be sure all fittings are connected, secure and hand tightened in the equipment enclosure. Your Coast Spa is
4
shipped with fittings disconnected to ensure no damage or freezing occurs during the spa’s route from our
factory to your home.
•Before filling, remove filter from filter housing and remove its plastic bag. Replace filter in housing. Also replace filter cap and lock ring.
•Fill your Coast Spa with your garden hose. Place the
hose inside the spa or in the filter canister and secure
the hose in place. Filling through the filter helps to allow most of the trapped air in the pumps and heater to
be eliminated. Loosen the bleeder valve in the skimmer
while filling.
•Note: Coast Spas recommends you do not fill your spa
with hot water. Excessively hot water (over 107 ºF) may
cause damage to components in the spa pack as well as
all plastic and acrylic components.
up your spa to prevent any damage to the unit.
INITIAL START-UP OF PUMPS (FOR SPAS WITH
WIDE-MOUTH SKIMMER)
• Turn power off at the breaker.
• Make sure all union fittings are tightened and valves
(Gate or Knife) are fully opened.
• Turn power on at the main breaker. Turn on pump #1. If
circulation is not visible, turn off pump #1, open bleeder
valve in skimmer cavity and allow air to escape. Re-tighten bleeder valve (finger tight only).
Note: Air bleeder valve only needs to be loosened and
not completely removed.
Turn on pump #1. Depending on
the amount of air trapped in the
pump, this step might need to
be repeated a few times. If this
fails to release air, gently loosen
the pump union until water (and
not air) comes out.
•Also: Do not fill your spa with water from a water softener. If your water is extremely hard your Coast Spas dealer
can help you to remedy this problem.
•Continue filling the spa to half (1/2) way up the skimmer
opening. Remove the hose and close the filter canister
(see page 5 filter maintenance).
FILL INSTRUCTIONS FOR CASCADE SERIES SPA
OWNERS ONLY
•The Cascade spa series has a specific fill line. Located in
the equipment enclosure, on the right-hand side, is a
clear sight tube with a pre-marked (red) fill to line
(8” up from floor of equipment enclosure).
•Fill the spa in the regular manner (see above) by placing
your garden hose into the spa.
•Allow the water to spill over into the displacement tank,
until the correct level is reached in the sight tube.
•Do not under fill or over fill as this could cause a spillover problem when the spa is in use.
•Pump #1 must be programmed to circulate for 24 hours.
Failure to do so could result in freezing during colder
weather.
•The Cascade series has a pressurized top load filter.
Loosen bleed screw on filter lid before removing lock
ring.
•When draining your Cascade series, ensure that you
have drained all water. Use the sight glass as a guide.
CONTROL PANEL
Please read the CONTROL
PANELS Card (see pages 12
-19) pertaining to the spa
side control and control box
supplied with your unit.  This
must be done before starting
• Once there is water flow from
the jets, repeat the process for
pump #2 until water flow is present when pump #2 is activated.
BLEEDER VALVE
• Allow both pumps to circulate for 2-3 minutes before activating heater.
• Set the desired temperature using the heater control
button on your keypad and the spa will begin to heat.
Depending on initial water temperature, reaching the
desired temperature may take 6-10 hours.
Note: If the water is freshly filled and below the set temperature, the heater will automatically come on.
• Refer to page 12 - 19 for setting filter cycle and programming.
INITIAL START-UP OF PUMPS (FOR SPAS WITH FRONT
ACCESS SKIMMER/FILTER)
• Turn power off at the breaker.
• Ensure all union fittings are tightened and valves (Gate
or Knife) are fully opened.
• Turn power on at the main breaker. Turn on pump #1. If
circulation is not visible, turn off pump #1, open bleeder
valve on top of pump #1 and allow air to escape until water comes out steadily. Re-tighten bleeder valve (finger
tight only). Note: Bleeder valve only needs to be loosened and not completely removed. If there is still no circulation, gently loosen the union until only water is present and no air.
• Allow both pumps to circulate for 2-3 minutes before activating heater.
• Set the desired temperature using the heater control
5
Diagram 03
TYPICAL INSTALLATION - Pump Bleeder (front view)
CRYSTAL CLEAR
TUBE
OZONATOR
PUMP
PUMP PACK
CONTROL
LED POWER MODULE
FILTER ACCESS LID
RETAINING RING
AIR RELIEF VALVE
DOME LID
UNION
FILTER CARTRIDGE
VALVE
VENT FAN
WATER HEATER
VALVE PUMP BLEEDER
(CLEAR TUBING)
UNION
button on your keypad and the spa will begin to heat.
Depending on initial water temperature, reaching the
desired temperature may take 6-10 hours.
WARNING: DO NOT RUN SPA WITH GATE VALVES
CLOSED OR RUN PUMP WITH NO WATER CIRCULATING
IN SPA. THIS COULD DAMAGE THE PUMPS AND PUMP
SEALS.
• Refer to page 12 -19 for setting filter cycle and programming.
and a high-pressure nozzle. Periodically you may need to
soak your filter in a “cartridge filter cleaner” to remove excess minerals and/or oils. You can purchase this cleaner
at your Coast Spas dealer.
• Rinse filter thoroughly before installing. Clean
o-ring on dome lid and apply a light film of silicone lubricant to o-ring. Do not use a petroleum-based lubricant
as it could damage the o-ring. Consult your Coast Spas
dealer.
• Place clean Cartridge in filter canister.
FILTER MAINTENANCE
Filtration starts as soon as flow is steady through the filter. As
the filter cartridge removes the dirt from the spa water, the
accumulated dirt causes flow resistance.
CLEANING AND REPLACING FILTER CARTRIDGE
Your spa filter has been designed for quick and easy maintenance. The filter cartridge should be rinsed by hose once
a week and cleaned with a cartridge cleaner once a month.
A second filter cartridge is recommended and will speed
up the process. This can be purchased from your Coast Spas
dealer.
TOP LOAD FILTERS
• Turn power OFF at the breaker.
• Replace dome lid and re-tighten retaining ring (finger
tight only).
• NOTE: MAKE SURE THE O-RING IS ON THE AIR RELIEF
VALVE, AND IS FINGER TIGHT WHEN READY TO START
PUMP. This O-ring should periodically be lubricated with
a silicone lubricant.
• 3/8’ line comes from filter
and goes to the corner of
the spa. This drains all the
water around the filter.
• This is a good time to check
the skimmer basket. Bring skimmer door (weir)
forward and unscrew basket. Clean out debris
and reinstall.
FRONT ACCESS SKIMMER/FILTER
• Loosen air relief valve, then remove retainer ring.
• Turn power OFF at the breaker.
• Pull dome lid straight up to remove.
• Pull open skimmer weir door.
• DO NOT TWIST OR PULL DOME LID UP AT AN ANGLE.  THIS COULD CAUSE DAMAGE TO THE FILTER CANISTER,
ESPECIALLY IN FREEZING WEATHER.  DO NOT REMOVE
DOME LID IN ICY CONDITIONS!  • Reach in and turn skimmer basket counterclockwise to line up flat section on basket.
• Remove filter cartridge and clean with a garden hose
• Pull straight up and out to remove basket. Clean out debris and reinstall.
6
• Remove diverter plate.
• Pull up on first of 2 filter cartridges.
• Grasp tab that is attached to second cartridge and pull
up and out.
• Clean with a garden hose and high-pressure nozzle. Periodically you may need to soak your filter in a cartridge
filter cleaner to remove excess minerals and/or oils. You
can purchase this cleaner at your Coast Spas dealer.
• Rinse filter thoroughly before installing.  • Reverse this procedure to re-install the filter cartridges.
• Put pump #1 on low speed. This will help pull the cartridges into place.
DRAINING & WINTERIZING
YOUR SPA
DRAINING YOUR COAST SPA
After a period of 3-4 months, detergent residues from bathing suits and soap film will build up in your spa water. Once
this happens, your spa water will appear cloudy and should
probably be replaced.
• Turn power OFF at the breaker.
• Follow start-up instructions.
WINTERIZING:
If it is necessary to leave your spa unattended for long periods of time during cold weather conditions, you should drain
your spa to avoid accidental freezing caused by power outages. Your Coast Spas dealer can perform the following winterizing procedures, if you are not completely comfortable
with them.
• Refer to the DRAINING YOUR COAST SPA section.
• After draining, your Coast Spa may still have water remaining in the equipment and plumbing fittings. Disconnect the hand-tightened union fittings going to and
from the jet pumps. Be careful not to lose the o-rings between the unions and pump housing.
• Leave drain valve in the open position and safety cap off.
• To completely drain the plumbing lines, a wet/dry shop
vac can be used to draw out any remaining water. Place
the vac hose over the jet fittings in the spa as well as
the plumbing lines in the equipment area. You should
also disconnect the union on the crystal clear inspection
tube.
• Remove the filter cartridge and store in a warm, dry area.
• Clean the spa shell and place spa cover on spa. Be sure to
lock the cover in place in case of high winds or rain.
EMERGENCY SITUATIONS: To eliminate freezing in the
event of equipment failure, use a 100-watt light bulb or small
heater via extension cord and place it in the equipment area,
keeping it away from plumbing lines. This will help for a short
period of time until proper service can be rendered.
• Locate the drain valve (usually at the front left-hand corner of the skirt).
HOME THEATER SERIES
• Remove the safety cap and attach garden hose. Pull outward on the garden hose. This will open the drain valve
fully.
Before you start using Coast Spas’ Home Theater system, locate your floating remote control or B.O.S.S. (Buoyant Operating Spa System) control.
• Drain water to a convenient area. (Spa water may harm
grass or plants if sanitizer levels are high.)
Your Coast Home Theater series spa comes with a 12-volt DC
17-inch LCD monitor, DVD player and Sony Radio/CD player.
These items and other electronics carry a separate manufacturer’s warranty. Please contact your dealer for details.
• When water begins to flow out of the hose, open the air
relief valve located on filter lid.
• Your Coast Spa will drain except for a small portion left
in the foot well. This can be removed with a sponge and
pail.
• Once empty, clean as required.
• To finish, push garden hose forward and, remove garden
hose and attach safety cap.
REFILLING YOUR COAST SPA
• Please follow the instructions on page 4, filling your spa.
The Coast Spas B.O.S.S. and floating remote control operate
the DVD player, Sony Radio/CD player and LCD Monitor with
basic commands; i.e., On/Off, Play, Stop, Channel-Up, Channel-Down, Skip and Switch between DVD/CABLE Modes.
Other settings are available with the manufacturer remote
controls which are not waterproof! Included electronic components have been programmed and tested by Coast Spas
technicians. If you decide to modify settings (not recommended), make sure you read all the instructions found in
the device’s User’s Manual carefully. We strongly recommend
using only Coast Spas’ universal waterproof floating remote
7
• Floatable
control! B.O.S.S. HANDHELD REMOTE CONTROL
The B.O.S.S. (Buoyant Operating Spa System) is the industry’s
best remote control — waterproof and designed to provide
hours of trouble-free usage.
For best results, please remove the control from the water
when the spa is not in use. Prolonged exposure to the hot
water in your spa may create humidity built-up inside your
control. This will not affect the operation of the remote but it
may alter its appearance.
Please read the instructions provided in this manual carefully to
ensure optimal use of your B.O.S.S. remote control.
THE B.O.S.S. HANDHELD REMOTE CAN CONTROL THE
FOLLOWING DEVICES:
• Spa
• Totally sealed
• 3 “AAA” batteries in watertight compartment (remote
control retains values even after having replaced the
batteries)
• Speed keys for quick and easy access to main spa functions.
THE B.O.S.S. RF BOX FEATURES THE FOLLOWING:
• Built-in RF receiver and RF transmitter.
• For programming instructions, please see B.O.S.S. instruction manual provided with your spa.
• When not in use, the remote should be put into sleep
mode to prolong battery life.
PROGRAMMING YOUR FLOATING REMOTE CONTROL
For Sony Radio/CD, LCD Monitor and DVD
• Audio equipment (CD, Tuner)
• Video equipment (TV, VCR and DVD)
THE B.O.S.S. HANDHELD REMOTE FEATURES THE
FOLLOWING:
Before you start, it is important to note that a more than 10sec delay between key presses automatically cancels Programming Mode. Use the codes required for your devices
listed below.
LCD MONITOR
• Multifunction device keys
• Spa status monitoring from inside your home
-To start using LCD monitor press TV button.
• Data reception up to 150 feet (distance may vary depending on obstacles such as walls, etc. Should this happen, try a different and more favorable location)
-ON/OFF button powers on or off LCD Monitor.
• Ergonomic design
-Volume UP button increases volume of the Sony® Radio/CD player.
-Play button switches between CABLE/DVD/COMPUTER
modes.
THE B.O.S.S. HANDHELD REMOTE CONTROL
REMOTE KEYS
PUMP 1 KEY
PUMP 2 KEY
LIGHT KEY
QUIET/ECONOMY KEY
(see Economy section)
Multifunction keys
Each of these four keys helps
you to select and/or execute
the indicated function
(pointed by the arrows)
displayed on the screen in
any given window. In this
way, the task performed by a
given multifunction key will
vary depending on the menu
or window.
Esc/Next key
Home key
The Esc/Next key
allows surfing through
the various windows
and options of any
given menu. Also it
allows you to exit any
programming window
without saving any
changes and go back
to the previous screen.
The Home key
allows surfing through
the different menus
and submenus from
all features and modes
available with this
remote. Also it allows
you to exit any
programming window
without saving any
changes and go back
to the main Device
Selection screen.
UPPER LEFT
MULTIFUNCTION KEY
LOWER LEFT
MULTIFUNCTION KEY
LOWER RIGHT
MULTIFUNCTION KEY
UPPER RIGHT
MULTIFUNCTION KEY
8
PROGRAMMING YOUR FLOATING REMOTE
CONTROL CONTINUED...
- Volume Down button will decrease volume of the Sony®
Radio/CD player.
On/Off
- Channel Up skips to next channel in CABLE mode.
T V ( LC D M o n i t o r )
- Channel Down skips to previous channel in CABLE
mode.
Vo l u m e U p
- Stop button displays the activated mode.
Vo l u m e D ow n
- In order to set the audio for DVD/CABLE, turn on the Radio/CD player by pressing ON/OFF button on floating
remote control. Press the button again to switch to AUX
(auxiliary input).
Play
Channel Up
Channel Down
Rewind
Stop
For ward
Radio CD
DVD
- The CABLE/TV connection is located in the lower right
hand corner of the stereo enclosure. Simply plug in a
standard cable line to this connection for start-up.
SONY® RADIO/CD PLAYER
- Stop button stops playing DVD.
- To start using Sony Radio/CD player, press RADIO CD
button.
- Forward button skips forward to next chapter.
- ON/OFF button activates the Sony® Radio/CD player.
When the power is on, this button allows you to switch
between sources Radio AM/FM TUNER and AUX. The
Monitor is connected to auxiliary in order to get the
sound from DVD or Cable/TV.
- In order to set the audio for DVD/CABLE, turn on the
Radio/CD player by pressing ON/OFF button on floating remote control. Press the button again to switch to
AUX (auxiliary input).
- Volume UP button increases volume of the Sony® Radio/
CD player.
- Volume Down button decreases volume of the Sony®
Radio/CD player.
- Channel Up seeks the next radio station or skips to next
CD track.
- Channel Down seeks the previous radio station or skips
to previous CD track.
- Play button switches between AM/FM modes.
- Stop button turns off the Sony® Radio/CD player.
Note this universal floating remote can also operate your
home entertainment equipment. For programming instructions, refer to remote manual included separately with remote.
DVD PLAYER
- To start using DVD player you must first turn on the LCD
Monitor and set it to Video mode (DVD).
- Rewind button skips backwards to previous chapter.
SONY STEREO SPAS (SOUND WAVES™ SERIES)
For spa units made with the stereo/CD option:
• For Coast series, the stereo can be controlled by the stereo’s remote, floating remote control or B.O.S.S. (which is
an option), or topside control panel. The floating remote
and B.O.S.S. also control the functions of the spa.
• If your Spa is equipped with manually activated popup
speakers, simply push down on the speaker surface for
speaker to rise up. To lower, push speaker housing surface down until it locks in place. For smooth operation,
use gentle hand pressure to slow speaker’s rise until it is
fully extended.
SONY® STEREO (EXTREME SOUND™) OPTION
If your spa is equipped with the sub amp combo, the amplifier will turn on after you activate the stereo (whether by remote controls or manually).
- Press VCR button on your floating remote control.
BALBOA DOLPHIN REMOTE
- ON/OFF button will power on or off DVD player.
Please refer to the instruction
manual provided with this product.
- Volume UP button increases volume of the Sony® Radio/
CD player.
- Volume Down button decreases volume of the Sony®
Radio/CD player.
- Play button starts playing DVD.
9
WATER QUALITY MAINTENANCE
Maintaining the quality of the water within specified limits will serve to enhance your enjoyment and prolong the
life of the hot tub’s equipment. It is a fairly simple task, but
it requires regular attention because the water chemistry
involved is a balance of several factors. There is no simple
formula, and there is no avoiding it. A careless attitude in regard to water maintenance will result in poor and potentially
harmful conditions for soaking and even damage to your hot
tub investment. For specific guidance on maintaining water
quality, consult your Authorized Coast Spas Dealer who can
recommend appropriate chemical products for sanitizing
and maintaining your hot tub.
CAUTION: Never store hot tub chemicals inside the hot
tub’s equipment enclosure.
MAINTAIN HEALTHY SPA WATER
Always maintain your hot tub’s water chemistry within the
following parameters:
MP3/IPOD-COMPATIBLE SOUND OPTION
Your spa may include the MP3-compatible sound option, which allows
you to connect your personal music
device to your Coast spa. This option is available on certain series as
a standalone MP3 connection, in
which case volume and other adjustments can only be set through
the MP3 player’s controls. You may
also have the MP3 connection as
an additional option to your Sony
AM/FM CD stereo system. On this
option, volume may be controlled
through your Sony stereo controls
and/or remote control.
pH
7.2-7.8
Chlorine
1.0-3.0ppm
Bromine
2.0-3.0ppm
Total Alkalinity
100-120ppm
Calcium Hardness
150-250ppm
Always maintain your spa filter as outlines below to ensure
healthy spa water.
REQUIRED FILTER MAINTENANCE
Your new hot tub is equipped with a Microban filter cartridge. To ensure maximum water quality at all times, you
should replace the filter cartridge every six months, or earlier as necessary. The filter cartridge is designed to be thrown
away! Attempts to reuse the filter cartridge may result in the
re-release of unwanted particles back into the hot tub.
REQUIRED WATER REPLACEMENT
MP3 PLUG-IN WINDOW
(WITH SLIDING DOOR)
You should replace the hot tub’s water every 3 to 6 months.
The frequency depends on a number of variables including
frequency of use, number of users and attention paid to water quality maintenance. You will know it is time for a change
when you cannot control sudsing and/or you can no longer
get the normal feel or sparkle to the water, even though the
key water balance measurements are all within the proper
10
PH CONTROL
HEADREST / PILLOW CARE
pH is a measure of relative acidity or alkalinity of water and
is measured on a scale of 0 to 14. The midpoint of 7 is said
to be neutral, above which is alkaline and below which is
acidic. In hot tub water, IT IS VERY IMPORTANT TO MAINTAIN
A SLIGHTLY ALKALINE CONDITION OF 7.2 to 7.8. Problems
become proportionately severe the further outside of this
range the water gets. A low pH will be corrosive to metals in
the hot tub equipment. A high pH will cause minerals to deposit on the interior surface (scaling). In addition, the ability
of the sanitation agents to keep the hot tub clean is severely
affected as the pH moves beyond the ideal range. That is
why almost all hot tub water test kits contain a measure for
pH as well as sanitizer.
1. Do not sit on pillows
SANITIZING
HOT TUB INTERIOR
To destroy bacteria and organic compounds in the hot tub
water, a sanitizer must be used regularly, either chlorine or
bromine. Bromine residual of 2 to 3ppm is generally considered desirable. A two-part bromine system or granular chlorine (Dichlor) can also be acceptable sanitizers. Chlorine residual should be 1 to 3ppm.
Your Coast spa has a fiberglass reinforced acrylic shell. Generally dirt and stains will not adhere to the surface. To properly
clean the surface, we recommend wiping it with a soft damp
cloth (or sponge) using household soap or liquid detergent
and rinsing thoroughly with fresh water. Stubborn dirt or stains
may be removed by using Spic & Span adequately dissolved in
water.
IMPORTANT: Do not use Hydrogen Peroxide based sanitizers in your spa. When using Trichlor chlorine or Bromine tablets you must use a floating dispenser. These chemicals can
have an extremely corrosive effect on certain materials in the
spa. Damage caused by use of these chemicals, or improper
use of any chemicals, is not covered under the spa’s warranty.
OTHER ADDITIVES
Many other additives are available for your spa. Some are
necessary to compensate for out-of-balance water, some aid
in cosmetic water treatment and others simply alter the feel
or smell of the water. Your Authorized Coast Spas Dealer can
advise you on the use of these additives.
PRODUCT CARE GUIDE
Your Authorized Coast Spas Dealer carries a wide variety
of care and maintenance products. For more information
please contact your Dealer.
2. Do not pull on pillows
3. Proper water chemistry must be maintained. Excessive levels of chlorine, bromine or ozone may damage your pillows.
4. Pillows should be cleaned using a soft cloth and mild soap, then wiped with a conditioner. We recommend that pillows be washed each time you drain your hot tub.
5. When you shock your spa, prop up your cover for a minimum of thirty minutes so excess gases may escape out of spa.
DO NOT use any cleaning products containing abrasives or
solvents, since these could damage the surface. Harsh chemicals should never be used on acrylic surfaces. Damage to the
shell due to the use of harsh chemicals is not covered under
the warranty.
DO NOT leave your hot tub drained and in direct sunlight for
extended periods of time. Extreme heat could cause damage
to the acrylic surface.
STAINLESS STEEL CONTROLS AND COMPONENTS
ABOVE THE WATER LINE
To preserve the stainless steel finish of the controls and components above the water line, we recommend they be wiped with
a dry soft cloth after each use of your hot tub.
CABINET CARE
CAUTION: Never spray cabinets with a high-pressure garden
hose or pressure washer for any reason. This action may induce
an electrical short in the hot tub’s electrical equipment.
11
CEDAR CABINET: Our cedar cabinets are made from topquality Western Cedar and manufactured and stained at our
factory. With proper care and maintenance, your cedar cabinet
should maintain its beauty for many years. Coast Spas recommends touch-up or re-staining of the cabinet every three to
four years depending on your environment. Contact your Dealer for re-staining procedures
VINYL CABINET: Coast Spas’ optional Vinyl cabinets are made
of a rigid polymer that combines the durability of plastic with
the beauty of real wood. This cabinet is manufactured so that
it won’t crack, peel, blister or delaminate even after prolonged
exposure to the elements. We recommend wiping the cabinet
with a soft damp cloth (or sponge) using household soap or
liquid detergent and rinsing with fresh water thoroughly. DO
NOT use abrasive cleansers or material as this may damage the
surface.
SLATE FINISH/RIVERSTONE CABINETS: Coast Spas’
optional Slate and Riverstone cabinets are custom-built and
painted in our factory. We recommend lightly brushing the
cabinet with a SOFT bristle brush to remove and dirt or stains.
For more information on the care of your Slate cabinet, please
contact your Coast Spas Dealer
STAINLESS STEEL CABINET & CARBON FIBER
COMPONENTS: Coast Spas’ exclusive stainless steel cabinets
and carbon fiber components are made with the finest materials available. We recommend wiping the cabinet with a soft
damp cloth (or sponge) using household soap or liquid detergent and rinsing with fresh water thoroughly. There are also
many stainless steel appliance cleaners on the market today
that will help in the care and maintenance of the stainless steel
cabinet. DO NOT use abrasive cleansers or material as this may
damage the surface.
COAST SPAS COVER CARE
A well cared for spa cover is a thing of beauty in its own right.
Be sure to clean and condition your cover at least once a
month – more often if needed.
Your cover needs to be clean and conditioned because vinyl
can be dry and become brittle, spoiling your spa’s appearance.
Dry, brittle vinyl can also tear at the seams and stress points.
Quality materials, internal sewn reinforcing and careful workmanship can only go so far against the ravages of Mother Nature.
Luckily, proper care is easy.
VERY IMPORTANT: We recommend a vinyl conditioner.
Your Coast Spas Dealer carries a wide variety of care and
maintenance products.
Choose a pleasant day each month to remove your cover
from the spa and lie it on a flat surface accessible by garden
hose. Douse the cover with a healthy amount of water from
the hose or a bucket to rinse away loose dirt or debris.
Using a soft bristle brush and a mild solution of dishwashing
liquid (about one teaspoon of detergent to two gallons of water), and with a gentle circular motion, scrub the cover clean.
Be careful not to let any areas of the cover dry before they’re
thoroughly rinsed.
Now apply the vinyl conditioner as directed on the container.
Massage the conditioner into the cover in a gentle but firm
manner.
Before replacing the cover on your spa, wipe and rinse any
dirt from the bottom of the cover. When you are ready, put
the cover on the spa.
NOTE: To remove tree sap, use lighter fluid (not charcoal
lighter but the fluid used in cigarette lighters).
USE SPARINGLY, then immediately apply conditioner to
that area.
12
CONTROL PANELS
CONTROL PANELS
13
14
CONTROL PANELS
CONTROL PANELS
15
16
CONTROL PANELS
The Quick Reference Card provides a quick overview of your spa's main
functions and the operations accessible with your digital control pad.
Starting Pump 1:
Press Pump 1 key to turn Pump 1 on
at low speed. Press a second time
to turn Pump 1 to high speed. A
third time turns Pump 1 off. A
built-in timer automatically turns
Pump 1 off after 20 minutes, unless
it has been manually deactivated.
Programming the filter cycle duration:
The system automatically performs two filter cycles per day, at 12-hour intervals. During a filter cycle,
Pump 2 runs for one minute, then Pump 1 runs for the programmed number of hours and the
ozonator is activated.
To set the filter cycle duration:
The "Pump 1" indicator lights
up when Pump 1 is on.
Starting Pump 2:
Press Pump 2 key to turn Pump 2
on. Press a second time to turn
Pump 2 off. A built-in timer
auto-matically turns Pump 2 off
after 20 minutes, unless it has
been manually deactivated.
Press and hold Spa Light key
for 5 seconds. The display
will show the currently set
filter cycle duration in hours.
The "Pump 2" indicator lights
up when Pump 2 is on.
Turning the light on:
Press Spa Light key to turn light on.
Press a second time to turn light
off. A built-in timer automatically
turns light off after 2 hours, unless
it has been manually deactivated.
The "Light" indicator is displayed when light is on.
Setting water temperature:
Press and hold Warm/Cool key
once to increase temperature.
To decrease, press and hold Warm/
Cool key again. The temperature
setting will be displayed for 5
seconds to confirm your new
selection.
The "Set Point" indicator
displays the desired
temperature, NOT the
current water temperature!
Water temperature can be
adjusted by 1˚ increments from 59
to 104˚F (15 to 40˚C).
Use Warm/Cool key to change
setting.
0 = no filtration
12 = continuous filtration
An irregularly flashing "Filter Cycle" indicator means that the system has stopped filtering after 3
hours because water temperature exceeds the Set Point by more than 2˚F (1˚C). If the temperature
cools down to 1˚F (0.5˚C) above Set Point before the scheduled end of the cycle, filtering will resume
for the remainder of the programmed duration.
After a power failure, the filter cycle duration will return to its default value (6 hours). In this case, the
first filter cycle will start 12 hours after power has been restored.
Troubleshooting:
The "Heater" indicator is flashing Pumps have started up for one
when pumps are running at high minute on several occasions and
speed.
"Filter Cycle" indicator is flashing.
Not a bug but a feature!
Not a bug but a feature!
The heater is automatically turned off when pumps are running
at high speed to limit the electrical current draw.
Our Smart Winter Mode
protects your spa from the cold
by automatically turning pumps
on for one minute several times
a day to prevent water from
freezing in pipes.
Automatic water heater start:
When water temperature is 1˚F (0.5˚C)
lower than the Set Point, the heater will
automatically turn on until water temperature reaches the Set Point plus 1˚F (0.5˚C).
The "Heater" indicator lights up
when the heater is on.
Note: If your system is configured in Low Current
Mode, the heater will not start if a pump is running
at high speed.
When the desired setting is
displayed, press Spa Light key
to confirm. A filter cycle will
start.
The "Filter Cycle" indicator lights up when
the filter cycle is on.
3 flashing dots are displayed.
The display is flashing.
A problem has been detected.
A power failure has occurred.
Press any key to reset the
system, then reprogram all
desired parameters.
Do not enter the water! Check
and open water valves. Clean
filter if necessary. Check water
level. Add water if needed.
Shut power off and power your
spa up again to reset the system.
Call your dealer or service supplier if problem persists.
Water temperature is flashing.
Water temperature in the spa
has reached 112˚F (44˚C).
Do not enter the water! Allow
the water to cool down. The
system will reset automatically
when water reaches 109˚F
(43˚C).
Call your dealer or service
supplier if problem persists.
17
CONTROL PANELS
Temperature
unit
Enter
key
Programming Mode
key
Keypad lockout
Service
icon
This function allows you to prevent unauthorized
parameter setting of the unit. The basic functions of
the spa will remain accessible (pump and light
outputs) but it will be impossible to change the
temperature Set Point, to override the Economy
mode or to enter the Programming mode.
Service message
Economy mode start time & duration
Every 8,000 hours of use, the spa will display a "SER"
message that will indicate that it is time for your spa
check-up.
The Economy mode allows you to lower the
temperature Set Point of the spa by 20˚F (11˚C)
during a certain period of the day. When in Economy
mode, the "Economy Mode" icon is displayed.
When the keypad is locked, the "Lock" icon will be
displayed.
Filter Cycle
icon
Economy Mode
icon
To program the Economy mode, you must enter two
parameters: the start time and the duration. If the
Economy mode is not required, the duration must
be set to "OFF".
Time of day
Setting the time:
CL
2:20 pm
4:30 pm
1- Enter Programming mode by
holding Prog. key pressed down
for 2 seconds. The "CL" message
is displayed.
2- Press Enter key to display the
current setting.
3- Use Warm or Cool arrow key to
change setting.
You can manually override the current Economy
status (on or off ) for the rest of the day by pressing
Econo. key.
Setting Economy mode start time:
ECon
10:00 pm
+
Filter cycle start time & duration
11:00 pm
Setting Economy mode duration:
ECdu
4:00
+
To program a filter cycle, you must enter two
parameters: the start time of the cycle and its
duration. If no filtering is required, the duration must
be set to "OFF". If continuous filtering is required, the
duration must then be set to "12:00".
+
The system automatically performs two filter cycles
per day, at 12-hour intervals. During a filter cycle,
Pump 2 and blower run for one minute then Pump 1
(or circulation pump if installed) runs at low speed
for the programmed number of hours. "Filter Cycle"
icon is on during a filter cycle.
8:00
Setting filter cycle start time:
FIon
10:15
11:30
1- Press Prog. key a second time.
2- The display will show "FIon", with
"xx" representing the starting
hour.
3- Press Enter key to display the
current setting.
4- Use Warm or Cool arrow key to
change setting.
+
Temperature unit
Tu
F
2:00
C
Loc
OFF
ON
1- Press Prog. key a seventh time.
2- The display will show "Loc" or
"Uloc".
3- Press Enter key to display the
current setting.
4- Use Warm or Cool arrow key to
change setting.
To unlock the keypad, press and hold Pump 1 key for
5 seconds.
Inverting the display
A simple key press sequence inverts the display to
make it readable from inside or outside the spa. To
invert the display:
1- Press and hold Prog. key for 2 seconds. The "CL"
message will be displayed.
2- Press Light key. The "CL" message will disappear
and the display will be inverted. The "˚F" or "˚C"
icon will not be displayed.
Changing modes
The system can be configured in 3 different modes:
SPA, VCR and CD. Simply press Mode key to change
modes. The appropriate icon will light up to indicate
which mode you are in. If keypad remains
untouched for more than 5 minutes, the system will
automatically revert to SPA mode.
In SPA mode:
In CD/DVD mode:
Pump 1 key............... Rewind key
Pump 2 key............... Forward key
Light key....................Play key
Stop/Enter key.........Stop key
Selecting the temperature display unit:
+
1:00
1- Press Prog. key a third time.
2- The display will show "FIdu", with
"xx" representing the duration in
hours.
3- Press Enter key to display the
current setting.
4- Use Warm or Cool arrow key to
change setting.
1- Press Prog. key a fifth time.
2- The display will show "ECdu",
with "xx" representing the
duration in hours.
3- Press Enter key to display the
current setting.
4- Use Warm or Cool arrow key to
change setting.
Water temperature can be displayed in ˚F or ˚C.
Setting filter cycle duration:
FIdu
1- Press Prog. key a fourth time.
2- The display will show "ECon",
with "xx" representing the
starting hour.
3- Press Enter key to display the
current setting.
4- Use Warm or Cool arrow key to
change setting.
Locking the keypad:
+
Programming Mode
icon
1- Press Prog. key a sixth time.
2- The display will show "Tu", with
"x" for either ˚F or ˚C.
3- Press Enter key to display the
current setting.
4- Use Warm or Cool arrow key to
change setting.
In SPA mode:
In Radio mode:
Pump 1 key............... Seek - key
Pump 2 key............... Seek + key
Light key....................Mode key (FM1, FM2 & AM)
Stop/Enter key.........Sources key (On or toggles
between CD and Radio mode)
Summary of control panel parameters
CL
Flon
FIdu
ECon
ECdu
Tu
Loc
Time of day
Filter cycle start time
Filter cycle duration
Economy mode start time
Economy mode duration
Temperature unit (˚F or ˚C)
Keypad lockout
+
CONTROL PANELS
18
The Quick Reference Card provides a quick overview of your spa's main
functions and the operations accessible with your digital control pad.
Starting Pump 1:
Turning the light on:
Dual-speed pump system:
Press Pump 1 to turn Pump 1 on at low speed. Press a second time to turn pump to
high speed. A third time turns pump off.
Two-intensity spa light:
Press Light key to turn light on at high intensity. Press a second time to turn light to low
intensity. A third time turns light off.
Single-speed pump system:
Press Pump 1 to turn Pump 1 on. Press a second time to turn Pump 1 off.
One-intensity spa light:
Press Light key to turn light on. Press a second time to turn light off.
In both cases, a built-in timer turns Pump 1 off after 20 minutes, unless pump has been
manually deactivated first.
In both cases, a built-in timer turns light off after 2 hours, unless manually deactivated first.
The "Pump 1" indicator lights up when Pump 1 is on. With a dual-speed pump,
it will flash when Pump 1 is on at low speed.
Starting Pump 2:
Dual-speed pump system:
Press Pump 2 to turn Pump 2 on at low speed. Press a second time to turn pump to
high speed. A third time turns pump off.
The "Light" indicator is displayed when light is on at high intensity. It flashes
when light is on at low intensity.
Setting water temperature:
Use Warm or Cool arrow key to regulate water temperature. The temperature setting will
be displayed for 5 seconds to confirm your new selection.
The "Set Point" symbol indicates the desired temperature, NOT the current
water temperature!
Single-speed pump system:
Press Pump 2 to turn Pump 2 on. Press a second time to turn Pump 2 off.
Water temperature can be adjusted by 1˚ increments from 15 to 40˚C (59 to 104˚F).
In both cases, a built-in timer turns Pump 2 off after 20 minutes, unless pump has
been manually deactivated first.
Troubleshooting
The "Pump 2" indicator lights up when Pump 2 is on. With a dual-speed
pump, it will flash when Pump 2 is on at low speed.
Turning fiber light on:
Press Fiber Light key to turn motor and light on. Press a second time to turn both
motor and light off.
Fiber box option:
Press Fiber Light key to turn fiber box (motor & light) on. Press a second time to turn
fiber box motor off and leave light on. A third time turns both motor and light off.
In both cases, a built-in timer automatically turns fiber light off after 2 hours, unless
fiber light has been manually deactivated first.
Automatic water heater start:
Water temperature is flashing.
Water temperature in the spa has
reached 44˚C (112˚F).
Do not enter the water! Allow water to
cool down. The system will reset
automatically when water temperature
reaches 43˚C (109˚F).
A power failure has occurred. Press any key to
reset the system, then reprogram all desired
parameters.
Note: If your system is configured in Low Current mode, the heater will not start if two
pumps or more are on at high speed.
3 flashing dots are displayed.
A problem has been detected.
The "Blower" indicator lights up when blower is on at high speed. It flashes
when blower is on at low speed.
Our Smart Winter Mode protects your system
from the cold by automatically turning
pumps on for one minute several times a day
to prevent water from freezing in pipes.
The display is flashing.
The "Heater" indicator lights up when the heater is on. It flashes when there is
a request for more heat but the heater has not yet started.
Press Blower to turn blower on at high speed. Press a second time to turn blower to
low speed. A third time turns blower off. A built-in timer automatically turns blower
off after 20 minutes, unless manually deactivated first.
Not a bug but a feature!
Call your dealer or service supplier if
problem persists.
When water temperature is 0.5˚C (1˚F) lower than the Set Point, the heater will
automatically turn on until water temperature reaches Set Point plus 0.5˚C (1˚F).
Starting the blower:
Pumps have started up for one minute on several
occasions and "Filter Cycle" indicator is flashing.
Do not enter the water! Check and open
water valves. Clean filter if necessary.
Check water level. Add water if needed.
Shut power off and power the spa up
again to reset the system.
Call your dealer or service supplier if
problem persists.
19
CONTROL PANELS
Off mode
Press and hold Fiber Light key for 5 seconds to turn the system down (i.e. to set it to Off
mode) for 30 minutes. The "OFF" message is displayed. All keys are then disabled, unless you
press Fiber Light key to reactivate the system before the expiration of the 30-minute delay.
Temperature unit
Press and hold Light key for 5 seconds to toggle between ˚C and ˚F.
Inverted display
Press and hold Filter key for 5 seconds to invert the display. If a power-up occurs, the
display always returns to default mode.
Filter cycles
The system automatically performs 2 filter cycles per day, at 12-hour intervals. During a
filter cycle, Pumps 2 & 3 and blower run for one minute. Pump 1 then runs at low speed
for the remaining of the cycle and "Filter Cycle" icon lights up. (If system is equipped with
a circulation pump, all pumps and blower run for one minute. Circulation pump then
runs for the remaining of the cycle and "Filter Cycle" icon lights up.)
Setting filter cycles:
Fd10
FS 6
1- Press Filter key.
2- The display will show Fdxx, with "xx" representing the duration in hours.
3- Use Warm and Cool arrows to change setting.
4- Press Filter key again.
5- The display will show FSxx, with "xx" representing the delay before cycle
starts.
6- Use Warm and Cool arrows to change setting.
7- Press Filter key to store settings.
40-minute filter cycle time-out: If you turn a pump, blower or light on during a filter cycle, the
cycle will be interrupted and will only resume 40 minutes after the system has turned the
last active output off.
Purge cycles
Digital control pad lockout
This function allows you to prevent unauthorized parameter settings. This feature is
especially helpful when young children have access to the keypad.
There are two modes you can choose from: Full lock or Partial lock. Full lock means that all
keypad functions are locked. Partial lock means that the basic functions of the spa will
remain accessible (pumps, blower and light), but it will be impossible to change the
temperature Set Point, to override the Economy mode or to enter the Programming mode.
When control pad is locked, the "Lock" icon will be displayed.
Locking your digital control pad:
1- Press and hold Econo key for 5 seconds.
LocP
2- The display will show LocP, with "P" representing Partial lock.
LocF
3- Release key and keypad will be in Partial lock mode. Keep key pressed down
for 5 more seconds if you want to be in Full lock mode. The "LocF" message
will then be displayed.
When control pad is locked, all automatic functions of the system run as usual. If a key is
pressed down, a "LocP" or "LocF" message will be displayed for 1 second. To unlock the
keypad, simply press and hold Econo key again for 5 seconds.
Economy mode
To save energy, the Economy mode Set Point is 11˚C (20˚F) below the Normal mode
Set Point.
The "Economy Mode" icon lights up when Economy mode is on.
Setting Economy mode:
1- Press Econo key.
2- The display will show Edxx, with "xx" representing the Economy mode duration.
Ed12
3- Use Warm or Cool key to change setting.
4- Press Econo key again.
5- The display will show ESxx, with "xx" representing the delay before mode starts.
ES20
6- Use Warm and Cool arrows to change setting.
During a purge cycle, pumps and blower run for two minutes and "Filter Cycle" icon lights up.
Setting purge cycles:
1- Press Filter key.
P 24
2- The display will show P xx, with "xx" representing the currently set number
of daily purge cycles.
3- Use Warm and Cool arrows to change setting.
4- Press Filter key to store settings.
Note: The system may be installed to support 24-hour filtering with a circulation pump. In this
case, pressing Filter key will allow you to set the number of purge cycles per day.
Boost filtration mode
This function allows you to speed up filtration after intensive use of your spa or to mix
chemicals. Simply keep Pump 1 key pressed down for 5 seconds. Pump 1 will run at high
speed for 45 minutes and "BOO" message will be displayed. Ozonator is also activated.
Water level sensor
If the system is equipped with an optional water level sensor and the sensor detects an
insufficient level of water in the tub, the system will prevent pumps from starting and
will display the "H20" message. Pumps will be allowed to turn back on when water level
returns above sensor.
7- Press Econo key a third time to store settings.
40-minute Economy mode time-out: If you turn a pump, blower or light on while Economy
mode is on, the Economy mode will be interrupted and will only resume 40 minutes after
the system has turned the last active output off. The "Econ" message or "Economy Mode"
icon will flash, depending on your system configuration.
"CLE" message
Every two weeks, the "CLE" message will be displayed indicating to clean the filter
(depending on your spa configuration). Press any key to reset the message.
Real-time clock
Use Clock key to set real-time clock. The display toggles every 5 seconds
alternately showing the hourly time and the current water temperature.
Summary of control panel parameters
Fdxx
FSxx
LocX
Edxx
ESxx
P xx
Filter cycle duration
Filter cycle delay
Control pad lockout
Economy mode duration
Economy mode delay
Purge cycles
20
Electrical Wiring - Diagram 02
(North American customers only)
Correct wiring of the electrical service box, GFCI box and pack
terminal block is essential. All installations should be carried out
by a certified electrician.
INTERNATIONAL CUSTOMERS should see their local authorized
Coast Spas Dealer for electrical wiring requirements.
LINE 1
WHITE (NEUTRAL)
GREEN (GROUND)
LINE 2
GFCI
TSPA-MP
21
GLOSSARY OF TERMS
AIR CONTROL: Mounted generally on the lip of the spa, it
induces warm air from the equipment enclosure into the jet
stream through venturi action.
from the spa lip. May be backlit by Fiber Optic or LED.
MASTER MASSAGE JET: A large-aperture jet with multiple
nozzles to massage many muscle groups simultaneously.
NECK JET: Direction-controllable jet for soothing
neck massage.
AIR RELIEF VALVE: Located on top of dome filter lid. Used to
release air on a pressure filter (Cascade model only).
TRILLIUM ADJUSTABLE CLUSTER JET: Our adjustable,
high-intensity hydrotherapy jet.
BLEEDER VALVE: Located on the wet end of pump #1 and
pump #2. Used for releasing air from the pumping system.
TRILLIUM ORBITAL JET: Provides a uni-directional circular
therapeutic massage.
COAST ZONE OZONATOR: Available as an option. The ozonator produces natural ozone through Corona Discharge. Continuous use of an ozonator can dramatically reduce sanitizer
consumption.
CHECK VALVE: To prevent water back flow into ozonator.
CONTROL BOX: Basically the “heart” of the spa. Power is distributed to any/all functions of the spa: pumps, ozonators,
LED lighting, heater element, etc.
CONTROL PANEL: Mounted on the top lip of the spa and
controls the functions of the spa.
TRILLIUM GATLIN POLY JET: Delivers massage in stac-cato
bursts over a wide area, like a professional masseuse.
TRILLIUM POLY ORBITAL JET: Provides a uni-directional
circular therapeutic massage.
TRILLIUM POLY DIRECTIONAL JET: Provides a straight
flow for a therapeutic massage.
TRILLIUM DIRECTIONAL JET: Provides a straight flow for a
therapeutic massage.
TRILLIUM FIBER OPTIC JET: Exclusive to Coast, it adds a
splash of color to hydrotherapy sessions.
TRILLIUM VOLCANO/WHIRLPOOL JET: high-output jet on
spa floor designed for foot and leg massage.
DRAIN VALVE: Used in draining of the spa. Normally located
in the lower left hand corner of the spa skirt.
TRILLIUM GATLIN JET: Delivers massage in staccato
bursts over a narrow, focused area.
EQUIPMENT ENCLOSURE: An enclosure that houses the control box, pump(s) and other electrical components.
TRILLIUM PULSATING JET: Provides a uni-directional circular therapeutic massage.
FILTER: The filter cleans the spa by passing water through a
filter cartridge where debris and impurities are removed. Top
load filter means the filter cartridge is accessible through the
top of the spa. Front access skimmer means cartridge is accessed through door of skimmer.
KNIFE VALVES: A white “T”-handled valve, same functions as
Gate valve (see above), except to open pull up on handle.
LEDs: LEDs and their special lenses can be used to achieve the
desired mood lighting in the spa and spa jets.
FLOATING REMOTE: A remote control that controls spa functions as well as the DVD player and the Sony radio/CD. The
unique design allows it to float on the water surface.
SKIMMER: This is the rectangular outlet at the water level.
The skimmer removes surface debris to the filter. The water
level in the spa should be kept at the center of the skimmer
for optimum operation.
FLOOR DRAIN: The floor drain is covered by a grate-type
cover and is utilised when draining the spa. It also acts as the
return for the ozonator. You will see bubbles emitted from
this drain, which is the result of water mixing with the ozone
output.
SUCTION FITTING: During operation of the equipment, the
suction works in conjunction with the skimmer to draw water from the bottom of the spa through the filter, keeping the
spa sparkling clean.
GATE VALVES: Red with a grey handle is located at the inlet and outlet of the pumping system. Used while servicing
the spa equipment, the valves open or close the water flow
to the equipment. To remain open for normal use, turn fully
counterclockwise.
HEATER: The thermostatically controlled heater raises the
temperature of the spa to the desired setting.
JETS:
LAMINAR FLOW JET: A thin stream of water that arcs
WATER DIVERTER VALVE (2 sizes): The large diverter is used
to divert water to various seats in the spa. The smaller diverter is
used to divert water to the neck jets and/or waterfalls. Turn handle only when pump is on low speed.
22
TROUBLESHOOTING GUIDE
NO HEAT OR HEAT TOO LOW
Probable Cause
Recommended action
Breaker at house
OFF.
Reset breaker at house.  Breaker can
appear to be on and one pole can be
off. Turn breaker OFF then ON twice.
Inadequate water
flow due to dirty
filter.
Clean filter cartridge(s).
Pump not primed.
Refer to the section of this manual
on pump priming. O-ring may be
missing or damaged on air bleeds.
Improper line
voltage.
Have a licensed electrician check
the line voltage.
 SPA LIGHT WON’T COME ON
Probable Cause
Recommended action
Light bulb burnt out.
Replace bulb. (non-warranty)
 Dirty connection
Check to see if there is anything
covering the connection on the
housing that holds the light bulb.
PUMP WILL NOT PRIME
Probable Cause
Recommended action
top bleeder valve on
Pump(s) on but no water Loosen
pump(s)
until water comes out
flow
steadily.
No water in pump
Make sure water level in spa is
midway in skimmer wall fitting/
bleed top air on face of pump
till water flows out.
Air lock
Bleed off air at bleeder valve.
Closed gate valves or
blocked lines
Open gate valves/check
skimmer, suction for blockage.
Pump surges (jets lose
power then come back,
then lose power again)
Check filter air relief valve to
insure o-ring is in place and is
tightly closed.
Check union on front of pump
to ensure tightness.
Check bleeder valve on front of
pump to ensure tightness.
JETS WON’T COME ON
Probable Cause
Recommended action
Jets turned off
Turn jet face to open jets.
Pump not primed
Refer to the section in this manual
on pump priming.
Gate valves closed
Check that both gate valves are in
the up positions or turned open.
LOW WATER FLOW
Probable Cause
Recommended action
Dirty filter
Remove filter cartridge and clean.
Closed gate valves or
blocked lines
Open all gate valves.
Low voltage or
incorrect voltage
Have a licensed electrician check
the line voltage.
SPA IS LEAKING
Probable Cause
Recommended action
Loose connection
Hand tighten all quick disconnects
and fittings, check gaskets and
o-rings.
If water appears near,
below filter area
Splashing water into the filter
canister area will drain slowly to
the base.
PUMP MOTOR DOESN’T RUN
Probable Cause
Recommended action
No power to motor
Check power switches and
circuit breakers.  Check motor
plug into control panel.
Blown fuse
Replace pump fuse.
Thermal overload has
tripped
Wait until motor cools off.
Pump jammed from
foreign matter in
impeller
Call dealer for recommended
action.
Motor overheats during
hot days while filtering
Reprogram your controls to
cycle during the coolest parts of
day or shorter cycles.
PUMP MOTOR RUNS HOT
Probable Cause
Recommended action
Pump ran dry
Call dealer for recommended
action.
Motor vent is blocked
Clear debris or obstruction to the
motor vent.
sure all valves are open and
Restricted suction lines Make
clear suction of debris.
NOTE:  These motors will feel hot to the touch.  This is
normal.  The internal overload protector will turn the motor
off if there is an overload or high temperature problem.
23
FLOATING REMOTE DOESN’T WORK
Probable Cause
Recommended action
Low battery power
Replace with new batteries.
Programming of
remote is incorrect
Refer to remote control user’s
instructions included with your
spa.
LCD Monitor doesn’t
respond to floating
remote control or
B.O.S.S.
• Reprogram the floating remote
control. Follow instructions on
how to program floating remote
control or B.O.S.S.
No sound
• Increase volume on your stereo
with either floating remote
control or manually.
• With original LCD Monitor
remote control, press Volume
Up button, being sure to hold
the controller very close to
the screen (within four inches)
until you see volume bar on
the screen filed to Maximum.
Repeat with original DVD remote
control.
• Turn on the Radio/CD player
by pressing ON/OFF button on
floating remote control; press the
button again to switch to AUX
(auxiliary input).
No picture
• Check if DVD is powered ON.
• Check if Monitor is powered ON.
• On your floating remote, press
TV then PLAY button until
display message on your monitor
shows VIDEO mode.
• Try another channel or input
source.
• Apply Factory setup with the
original Monitor’s remote; refer
to page 13 of LCD Monitor’s
owner’s manual. Be sure to hold
the controller very close to the
screen (within four inches).
RADIO/CD PLAYER
Problem
Recommended action
If CD player doesn’t
read CDs:
• Try other CDs.
• Clean the CD Player heads (by
using special cleaning CD).
• Read the Sony instruction book
provided to you.
DVD/CABLE
Problem
Recommended action
• Increase CD player volume.
• In order to set the audio for
DVD/CABLE, turn on the Radio/
CD player by pressing ON/OFF
button on floating remote
control. Press the button again to
switch to AUX (auxiliary input).
• Check for the blown LCD Monitor
FUSE 5A (fuse #1).
No sound or video
• V
erify that Monitor mode is at
when playing DVD or
Video
(DVD).
watching CABLE
• Or verify that Monitor mode is at
TV (Cable).
• Make sure the DVD video disc
works with sound/video in other
DVD players.
• Make sure the monitor is ON.
• Verify that the Stereo is NOT on
ATT.
• Check Cable/TV connection; refer
to the stereo enclosure image
shown in this manual.
Only snow appears on
• W
ith original Monitor’s remote,
the screen
press Auto Scan button. Be sure
to hold the controller very close
to the screen (within four inches).
AMPLIFIER
LCD MONITOR
Problem
Recommended action
No power
• Check for blown 5A fuse. Fuse #1
in the fuse box.
• Using Monitor’s original remote
control, press ON/Off button,
being sure to hold the controller
very close to the screen (within
four inches).
Problem
Recommended action
Subwoofer
doesn’t work
• Check for blown 20A amplifier
fuse (in the amplifier).
• Adjust Bass setting. Refer to CD
player user’s manual.
Notes
24
B.O.S.S.
Problem
If B.O.S.S. loses
communication:
If B.O.S.S. remote
does not respond:
There’s no sound
when watching
Cable/TV
• With Monitor’s original remote
control, press Volume UP button
until you see the volume bar
filled up to maximum.
• Repeat with DVD remote control.
• Turn ON the Modulator Switch
found on the right side of the
DVD Player and set the Radio to
89.1 FM.
• Check the Modulator Fuse 5A (#4
in the fuse box).
DVD will not play
• There’s no disc inside (NO DISC
message appears on the front of
the DVD Player).
• Verify that Monitor mode is at
Video (DVD).
• Make sure the DVD video disc
works with sound/video in other
DVD players.
• Make sure the monitor is ON.
• Check for the blown LCD Monitor
FUSE 5A (fuse #1).
• Disc is upside down in DVD
Player. Insert disc correctly, with
label side up on disc tray.
• The disc has been damaged.
Change the disc.
• Moisture has condensed inside
the player. Remove disc and
leave the player turned on for
one hour.
The remote doesn’t
function
• Remove all the obstacles from
the path of the IR remote sensor.
• Point the remote at the IR sensor
on the DVD Player.
• Replace the batteries in the
remote.
Recommended action
You have to force the remote to
synchronize as follows:
• Hold the two bottom keys
for 10 seconds (when the
communication error message is
displayed)
• Press on the sync menu
• Align remote to cradle for
synchronization
• Put the remote in the cradle
and leave it there for
24 hours to charge
• Press on HOME - NEXT - OPTIONS
- SLEEP - answer ‘yes’
• Insert the remote inside
the cradle
• Spa should then function
INTERNATIONAL CUSTOMERS
AUDIO/VISUAL TROUBLESHOOTING
Problem
Recommended action
There’s no picture
• Refer to LCD Monitor
troubleshooting presented in
this guide.
• Using Monitor’s original remote,
press SOURCE button, being sure
to hold the controller very close
to the screen (within four inches)
until display message on your
monitor shows VIDEO.