1
McAfee® Endpoint Encryption for Files
and Folders
Administration Guide Version 3.1.3
McAfee, Inc.
McAfee, Inc. 3965 Freedom Circle, Santa Clara, CA 95054, USA
Tel: (+1) 888.847.8766
For more information regarding local McAfee representatives please contact your local
McAfee office, or visit:
www.mcafee.com
Document: Endpoint Encryption for Files and Folders Administration Guide
Last updated: Monday, 16 March 2009
Product Version: 3.1.3
Copyright (c) 1992-2008 McAfee, Inc., and/or its affiliates. All rights reserved.
McAfee and/or other noted McAfee related products contained herein are registered
trademarks or trademarks of McAfee, Inc., and/or its affiliates in the US and/or other
countries. McAfee Red in connection with security is distinctive of McAfee brand products.
Any other non-McAfee related products, registered and/or unregistered trademarks
contained herein is only by reference and are the sole property of their respective owners. Contents
Preface ........................................................................................... 6 About This Guide .....................................................................................
Audience .................................................................................................
Conventions ............................................................................................
Related Documentation.............................................................................
Acknowledgements ..................................................................................
Contacting Technical Support ....................................................................
6 6 7 7 7 7 Introduction ...................................................................................8 Why Endpoint Encryption for Files and Folders? ........................................... 8 Design Philosophy .................................................................................... 8 The Endpoint Encryption Server Side Components ...................................... 12 Install and Deployment ............................................................................ 14 Endpoint Encryption for Files and Folders Client Software ............16 Endpoint Encryption for Files and Folders client........................................... 16 General information about the client.......................................................... 16 Limitations in Endpoint Encryption for Files and Folders ............................... 18 Deploying Endpoint Encryption for Files and Folders ....................20 Endpoint Encryption for Files and Folders Policy Settings .............21 About Endpoint Encryption for Files and Folders Policies ............................... 21 Policy administration functions.................................................................. 21 Policy configuration settings ..................................................................... 23 Encryption keys ............................................................................ 50 About Encryption keys ............................................................................. 50 Encryption key administration functions ..................................................... 50 Create an Encryption Key ......................................................................... 50 Encryption key configuration settings ........................................................ 52 Properties for an Encryption Key ............................................................... 55 Assigning and Updating Policies ................................................... 57 Assigning policies .................................................................................... 57 Updating policies..................................................................................... 58 Creating an Install Package .......................................................... 59 About Install Packages............................................................................. 59 Creating an Install Set ............................................................................. 59 Creating the Install set ............................................................................ 61 Installing Endpoint Encryption for Files and Folders client ............................. 62 Upgrading Endpoint Encryption for Files and Folders .................................... 63 Updating Endpoint Encryption for Files and Folders policies .......................... 65 Uninstalling Endpoint Encryption for Files and Folders .................................. 66 Installing Endpoint Encryption Manager ..................................................... 67 Uninstalling Endpoint Encryption Manager .................................................. 67 Endpoint Encryption for Files and Folders client ...........................68 System tray icon ..................................................................................... 68 Local user key management options .......................................................... 72 Context menu options (right-click options) ................................................. 74 Identifying encrypted files and folders ....................................................... 82 Accessing encrypted files ......................................................................... 83 The .cekey file ........................................................................................ 84 Some client characteristics ....................................................................... 84 Preface
Client Registry controls ............................................................................ 85 Controlling the authentication result dialog................................................. 85 Utilities for Endpoint Encryption for Files and Folders ..................88 Troubleshooting utilities ........................................................................... 88 User mode process debugging utilities ....................................................... 92 Command line file operation utilities .......................................................... 94 The Endpoint Encryption for Files and Folders Logon ....................96 The Forced Logon ................................................................................... 96 Authentication desktop view switching ....................................................... 96 Large-scale deployment considerations ........................................ 99 First-time logon ...................................................................................... 99 Enable database name indexing ................................................................ 99 Key caching ......................................................................................... 100 Avoid other “9 a.m.” database payloads................................................... 100 Exclude from antivirus real-time scanning ................................................ 100 Tune encryption intensity for network ...................................................... 101 Explicitly encrypt large shares in advance ................................................ 101 Dedicated machine ................................................................................ 101 Exclude Endpoint Encryption for Files and Folders client program directory ... 102 Tokens ........................................................................................ 103 Passwords ............................................................................................ 103 USB tokens .......................................................................................... 103 Smart cards ......................................................................................... 104 Generic PKI token ................................................................................. 105 PIN caching .......................................................................................... 108 Endpoint Encryption for Files and Folders Configuration Files ....109 SbErrors.ini .......................................................................................... 109 SbFeatur.ini ......................................................................................... 109 SDMCFG.ini .......................................................................................... 109 SbC4.ini ............................................................................................... 109 SBM.ini ................................................................................................ 110 Endpoint Encryption for Files and Folders Program and Driver Files111 EXE files .............................................................................................. 111 DLL files .............................................................................................. 111 SYS files .............................................................................................. 114 DAT files .............................................................................................. 114 Other files ............................................................................................ 115 Error Messages ........................................................................... 116 Module codes ....................................................................................... 116 5C02: Communications, Crypto .............................................................. 116 5C00: Communications, Protocol ............................................................ 116 DB00: Directory .................................................................................... 118 DB01: Database, Objects ....................................................................... 120 DB02: Database, Attributes .................................................................... 121 A100 Algorithm..................................................................................... 121 Installer program errors......................................................................... 122 Technical Specifications and Options .......................................... 123 Language Support ................................................................................. 123 System Requirements............................................................................ 123 Encryption Algorithms ........................................................................... 124 Data wiping standard ............................................................................ 124 Appendix .................................................................................... 126 Making Endpoint Encryption for Files and Folders FIPS Compliant ................ 126 4|
Preface
Index .......................................................................................... 134 |5
Preface
Preface
McAfee is dedicated to providing you with the best in security for protecting data on
personal computers. Applying the latest technology, deployment and management of
users is accomplished using simple and structured administration controls.
Endpoint Encryption for Files and Folders represents a technology where we are
pleased to address the security requirements for files and folders, data in transit on
removable devices, and stored on NAS, SAN and network servers. Endpoint Encryption
for Files and Folders is the next generation of the McAfee file and folder encryption
product.
Through the continued investment in technology and the inclusions of industry
standards we are confident that our goal of keeping Endpoint Encryption at the
forefront of data security will be achieved.
About This Guide
This Guide is designed to aid corporate security administrators in the correct
implementation, configuration and deployment of Endpoint Encryption for Files and
Folders. Although this guide is complete in terms of setting up and managing Endpoint
Encryption for Files and Folders, it does not attempt to teach the topic of "Enterprise
Security" as a whole. Readers unfamiliar with Endpoint Encryption should follow the
appropriate sections of the Endpoint Encryption for Files and Folders Quick Start Guide
which walks through setting up an Endpoint Encryption enterprise before tackling any
of the topics in this guide.
This guide should be read as a companion to the Endpoint Encryption Manager
Administration Guide, which details more general topics regarding managing Endpoint
Encryption products.
Audience
This guide was designed to be used by qualified system administrators and security
managers. Knowledge of basic encryption technology, networking and routing
concepts, and a general understanding of the aims of centrally managed security is
required.
For information about cryptography topics, readers are advised to consult the following
publications:
Applied Cryptography: Protocols, Algorithms, and Source Code in C, 2nd Edition, Bruce
Schneier, Pub. John Wiley & Sons; ISBN: 0471128457
Computer Security, Deiter Gollman, Pub. John Wiley and Sons; ISBN: 0471978442
6|
Preface
Conventions
This guide uses the following conventions:
Bold Condensed
All words from the interface, including options, menus, buttons, and dialog
box names.
Courier
The path of a folder or program; text that represents code or something the
user types exactly (for example, a command at the system prompt).
Italic
Emphasis or introduction of a new term; names of product manuals.
Blue
A web address (URL); a live link.
NOTE
Supplemental information; for example, an alternate method of executing
the same command.
CAUTION
Important advice to protect your computer system, enterprise, software
installation, or data.
Related Documentation
The following materials are available from your Endpoint Encryption representative:
•
Endpoint Encryption for Files and Folders Administration Guide (this document)
•
Endpoint Encryption Manager Administration Guide
•
Endpoint Encryption for Files and Folders Quick Start Guide
•
Endpoint Encryption for Files and Folders Users Guide
•
Endpoint Encryption for Files and Folders Technical Description
•
Endpoint Encryption Enterprise Technical Overview
•
Endpoint Encryption for Files and Folders Generic PKI Token Technical White
Paper
Acknowledgements
McAfee’s Novell NDS Connector and LDAP Connectors make use of OpenLDAP
(www.openldap.org) and OpenSSL (www.openssl.org). Due credit is given to these
T
T
T
T
organizations for their free API’s.
Contacting Technical Support
Please refer to www.mcafee.com for further information
|7
Introduction
Introduction
Why Endpoint Encryption for Files and Folders?
All organizations have their own rules about what data is available to whom. Some
information is available to all – other information is restricted and confidential. At the
most basic level, most IT users are trusted to access their PC’s and use their
documents; however, at a higher level – for example, at the board of directors, or
within Finance, certain information (e.g. reports and shareholder information) should
remain restricted, even to system administrators.
Endpoint Encryption for Files and Folders allows you to define and protect information
in a way that only certain users can access it. This data is stored, managed, archived,
and distributed as any other file is, however, they can be viewed only by those who
have been given access.
Endpoint Encryption for Files and Folders is a “Persistent Encryption” engine. When a
file has been encrypted and has been moved or copied to another place, it remains
encrypted. If a file is moved out of an encrypted directory, it will also remain
encrypted. Likewise, if an encrypted file is moved to a FAT32 device - such as a
memory stick – the encryption will remain in place.
Endpoint Encryption for Files and Folders follows the Endpoint Encryption Policy control
methods; Administrators can set individual, department, group, or company-wide
policies such as All .doc files will be encrypted, My Documents will be
encrypted, and Users cannot explicitly decrypt encrypted data. This policy
engine is managed from the Endpoint Encryption Manager.
Design Philosophy
McAfee’s product range enhances the security of data by providing data encryption
and a token-based logon procedure using, for example, a Smart Card or a USB based
token. You can use any login method, including passwords and national ID cards to
access protected data. You can also use the same credentials for Endpoint Encryption
for Files and Folders that you may, for example, use with McAfee’s Endpoint
Encryption for PC module. The same administration system, user IDs, and ancillary
software can be used for both systems.
The Endpoint Encryption for Files and Folders client supports the following platforms:
8|
•
Microsoft Windows 2000 with SP4 + Rollup package 1
•
Microsoft Windows XP SP2
•
Microsoft Windows Vista
Introduction
Users can work without interruption. With the exception of the initial logon to access
protected data, Endpoint Encryption for Files and Folders provides complete
transparent security.
How Endpoint Encryption for Files and Folders Works
The Endpoint Encryption for Files and Folders client encrypts folders and files
according to policies determined by Endpoint Encryption Administrators. These policies
are delivered by the Endpoint Encryption Server. The Endpoint Encryption for Files and
Folders client acts like a filter between the application creating or editing the files and
the storage media, e.g. the hard disk.
Whenever a file is written to the storage media the Endpoint Encryption for Files and
Folders filter executes the assigned encryption policies and encrypts the data, if
applicable. Later, when an application reads the file, the encryption filter automatically
decrypts the file reading it into the computer memory. Remember, the source file is
always encrypted on disk.
The encryption/decryption process happens automatically and is fully transparent to
the user. The user does not notice any difference between working with encrypted and
plaintext files; the user’s working procedures are not (and must not be) disturbed.
When a file is encrypted, it is encrypted at its original location on the disk. Hence, no
copies or other special files are created when encrypting a file. The original file
remains encrypted at all times, only the parts read into the memory are decrypted
when an application reads the file.
When the application closes the file, the memory is wiped and the original file is still
encrypted on disk. No decrypted traces of the file remain in the RAM.
Endpoint Encryption for Files and Folders can encrypt files and folders on all formatted
local drives, e.g. FAT and NTFS and network drives - e.g. NTFS and SAN with Unix
servers. Also, Endpoint Encryption for Files and Folders supports encryption of files
and folders within terminal server environments such as Microsoft® Terminal
Server™.
Encrypted folders and files are always visible to the user. The user can search and
recognize files and folders as before encryption. A small padlock icon can be optionally
attached to the file or folder icon, marking it as encrypted.
With Endpoint Encryption for Files and Folders, it is easy to encrypt files and folders.
Encryption can be enforced either by an organizational policy or by the user rightclicking folders and files.
|9
Introduction
A key feature of Endpoint Encryption for Files and Folders is the principle of
containment, or persistent encryption, as it is also known. This means that the
encrypted folder or file always will retain its encryption, irrespective of how it is edited,
moved or copied.
The file remains encrypted and secure regardless of where or how it is moved. This
applies to files moved to other folders, or, USB memory sticks, floppy disks or a
network share.
Files and folders are decrypted manually by the user. The user right-clicks on the
encrypted file or folder and selects the appropriate menu option. It is worth noting
that policies can restrict this option. Likewise, policies can enforce decryption if
necessary.
NOTE: Files moved to PDAs will lose their encryption. The user is presented a warning if moving encrypted files to media not supported by Endpoint Encryption for Files and Folders. Files moved from the PDA to an encrypted directory at the PC will certainly be encrypted A user’s access to various encryption keys is defined by Endpoint Encryption
Administrators, and delivered to the Endpoint Encryption for Files and Folders client
via the Endpoint Encryption Server. The user must authenticate to Endpoint Encryption
for Files and Folders before getting access to the key and eventually, the file. The
authentication is performed with the Endpoint Encryption logon dialog. If
authentication fails the user will be unable to read the encrypted files.
Once a user has accessed an encryption key, it can optionally be stored securely
(encrypted) on the user’s PC for future use (this is called the local key cache). Other
keys may only be available direct from the Endpoint Encryption Server - this can
prevent encrypted data from being used outside the corporate environment.
Endpoint Encryption for Files and Folders encrypts folders and files transparently at the
original location of the file or folder. User interaction is minimal and the user perceives
the working environment as normal.
Policy entries define folders where all files will automatically be encrypted. This allows
directories, e.g. those containing Temp files to be encrypted also. This assures that all
temporary files created will be encrypted.
Files can also be encrypted based on a policy of their file type, e.g. a policy may state
that all Microsoft Word® document files (*.doc, *.rtf, etc) should be encrypted. The
user is never involved in applying policies. All policy enforcement is automatic and
beyond user control.
Finally, the user’s ability to do any operations with the Endpoint Encryption for Files
and Folders client can be policy controlled, for example, the ability to encrypt
additional folders by right-clicking, or create decrypted copies of files.
10 |
Introduction
Endpoint Encryption for Files and Folders supports three standard algorithms with
various key lengths, including the Endpoint Encryption FIPS 140-2 certified AES 256
algorithm.
Endpoint Encryption for Files and Folders encrypts the Windows' pagefile. This feature
is automatic and cannot be configured or disabled. The pagefile is overwritten when
the computer is restarted. Again, any new data being written to the pagefile is
automatically encrypted. This option prevents hackers from finding fragments of
sensitive data stored in the paging areas on the hard disk.
With central management using the Endpoint Encryption Manager, and distribution of
encryption keys using the secure Endpoint Encryption Server, it is easy to allow
sharing of encrypted files within an organization. By assigning groups of users to
encryption keys, the users in the group can exchange and read encrypted files like any
other file, without noticing any difference. Users not assigned to the key will not be
able to read files encrypted with that key.
Using this mechanism it is possible to protect files and folders on shared units, e.g. a
network drive, from unauthorized access by encrypting it with a proper key and
allocating selected users to this key only. This approach provides for encryption key
hierarchies to be created, with an organization common key at the bottom (which
every user has), to specific department or group keys at the top (assigned only to
selected users within that department or group).
The Endpoint Encryption Manager also provides for a separation between security
administration and system administration. Only dedicated security administrators can
be authorized to deal with encryption management, thereby excluding system
administrators from access to encrypted data. Moreover, various security levels can be
created among the security administrators, preventing some (most) administrators
from critical functions while allowing only a few administrators to access all the
functions in the system.
Management
Endpoint Encryption for Files and Folders communicates with an Endpoint Encryption
Management Centre Server to update its policy whenever the user authenticates to
Endpoint Encryption for Files and Folders, i.e. tries to access encrypted data or logs on
to Endpoint Encryption for Files and Folders. NOTE: the user must be online. Endpoint
Encryption for Files and Folders will work also when offline, provided that the
encryption key(s) used are made available offline (this is a policy setting per
encryption key or encryption key group).
You can create a policy from the Endpoint Encryption Manager, and then create an
install set from it. When the Endpoint Encryption for Files and Folders client is
| 11
Introduction
installed, the user that logs on will be forced to retrieve the proper policy assigned to
him/her in the central database.
If Administrators change the device policy in the Endpoint Encryption Manger, all
machines using that policy will apply it when they next check for updates, i.e.
authentication performed when online.
The Endpoint Encryption for Files and Folders software queries the directory for any
updates to its policy, and if needed downloads and applies them. Typical updates could
be new rules about what should be encrypted, new passwords or policy information for
users, and also updates and rule changes to the way data can be accessed. In this
way, transparent synchronization of the enterprise becomes possible.
Permission to access or manage policies is controlled through the Endpoint Encryption
Manger administration rights.
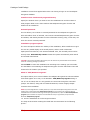
The Endpoint Encryption Server Side Components
Endpoint Encryption Manager
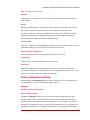
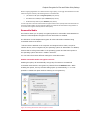
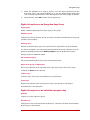
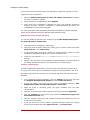
Figure 1: Endpoint Encryption Manager interface The most important component of the Endpoint Encryption solutions is Endpoint
Encryption Manger, the administration interface. This utility allows privileged users to
manage the enterprise from any workstation that can establish a TCP/IP link or file link
to the Object Directory. Typical procedures that the Endpoint Encryption Manger
handles are:
•
12 |
Defining Administrators and Users
Introduction
•
Configuring Endpoint Encryption for Files and Folders Policies
•
Creating and assigning Endpoint Encryption for Files and Folders keys
Database Server
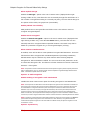
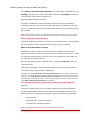
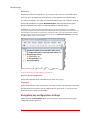
Figure 2: Endpoint Encryption Server The Endpoint Encryption Database Server facilitates connections between Endpoint
Encryption entities such as the Endpoint Encryption for Files and Folders Client and
Endpoint Encryption Manger, and the central Object Directory over an IP connection
(rather than the file based "local" connection). The server performs authentication of
the entity using DSA signatures, and link encryption using Diffie-Hellman key
exchange and bulk algorithm line encryption. This ensures that "snooping" the
connection cannot result in any secure key information being disclosed.
The server exposes the Object Directory via fully routed TCP/IP, meaning that access
to the Object Directory can be safely exposed to the Internet / Intranet, allowing
clients to connect wherever they are. As all communications between the Server and
client are encrypted and authenticated there is no security risk in exposing it in this
way.
Object Directory
The Object Directory is the central configuration store for the Endpoint Encryption for
Files and Folders policies and is used as a repository of information for all the Endpoint
Encryption entities. The default directory uses the operating systems file system driver
to provide a high performance scalable system which mirrors an X500 design. The
standard store has a capacity of over 4 billion users and machines.
| 13
Introduction
Typical information stored in the Object Directory includes:
•
User Configuration and Policy Configuration information
•
Client and administration file lists
•
Encryption key and recovery information
•
Audit trails
•
Secure Server Key information
Connector Manager
Endpoint Encryption’s directory used to keep track of security information is designed
so that synchronization of details between Endpoint Encryption and other systems is
possible. The Connector Manager is a customizable module which enables data from
systems such as X500 directories (commonly used in PKI infrastructures) to propagate
to the Endpoint Encryption Object Directory. Using this mechanism, it is possible to
replicate details such as a user’s account status between Endpoint Encryption for Files
and Folders and other directories. Current connector options include LDAP, Active
Directory, Novell, and NT Domains. For information on these components, see the
Endpoint Encryption Manager Administration Guide or contact your Endpoint
Encryption representative.
Endpoint Encryption for Files and Folders client files
All the files that encompass the entire Endpoint Encryption product framework reside
within the database.
At first, they are written from the installation CD to the disk of the system where the
central system shall reside. Once the database is created, the files on disk are
imported to the database and assigned proper attributes and indexing. The files are
imported into File Groups, where each group has a dedicated purpose, e.g. EEFF31:
Endpoint Encryption for Files and Folders for PC client files.
By opening the System tab in the Endpoint Encryption Manager and then expanding
the Endpoint Encryption File Groups, the existing file groups are listed. By doubleclicking any group, the files within the group are listed in a separate window. Actions
such as Update may then be performed at any of the files by right-clicking it and
select the desired action.
Install and Deployment
Endpoint Encryption for Files and Folders is installed on users’ computers by running
small deploy sets (also known as install sets) created by the Endpoint Encryption
14 |
Introduction
Manager. This executable file contains the core components and drivers needed to
enable Endpoint Encryption on a user’s machine.
The install set can be used on any number of PCs and contains all the data and links to
install Endpoint Encryption for Files and Folders on any supported Windows platform.
The executable may be deployed using any standard software distribution tool, like
Microsoft System Management Server (SMS) or Novell ZenWorks.
CAUTION: It is critical that the client operating system is fully updated using Windows update. Client machines that do not have the latest Windows updates may not be able to support Endpoint Encryption for Files and Folders. The Endpoint Encryption for Files and Folders installer makes a check to see if the minimum OS update patches are installed. If not, the installation will stop. After a re-start of the client system after installation, the user may be forced to logon
to EEFF in order to retrieve the correct encryption policy. This first logon can be made
mandatory, i.e. such that it cannot be bypassed until proper authentication credentials
are entered. This authentication enforcement is enabled/disabled in the Endpoint
Encryption Manager.
There is also an option in the Endpoint Encryption Manager providing an automatic
logon feature if both Endpoint Encryption Manager (hard disk encryption with pre-boot
authentication) and Endpoint Encryption for Files and Folders are installed. If enabled,
the logon to Endpoint Encryption for Files and Folders is done automatically, since the
user has already entered Endpoint Encryption logon credentials in pre-boot. The
authentication to Endpoint Encryption for Files and Folders is then based on the
authentication from Endpoint Encryption for PC. See Endpoint Encryption for Files and
Folders Policy Settings of this document for more detail.
| 15
Endpoint Encryption for Files and Folders Client Software
Endpoint Encryption for Files and
Folders Client Software
Endpoint Encryption for Files and Folders client
Once the Endpoint Encryption for Files and Folders client is installed, the machine
needs to restart. After re-start, the user may be forced to do a logon to retrieve the
correct policy from the central database through the Endpoint Encryption Server. If
there is no connection to the central database, the user will work with the default
policy as defined by the policy from which the install set was created (i.e. a blank
policy if not created from a dedicated policy). This forced logon is subject to a policy
setting in Endpoint Encryption Manager and its value is included in the installation set
that is deployed.
If the forced logon is enabled, the initial logon cannot be by-passed. The
authentication dialog will remain until proper authentication details are presented.
General information about the client
When users try and access encrypted data, the Endpoint Encryption for Files and
Folders client automatically recognizes this and prompts the user to authenticate. If
successful, the data is transparently decrypted and the appropriate application started.
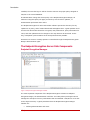
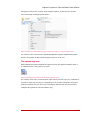
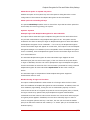
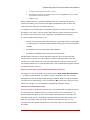
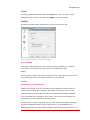
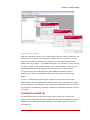
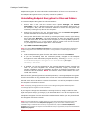
Figure 3: Endpoint Encryption for Files and Folders authentication dialog The Endpoint Encryption for Files and Folders client software is largely transparent to
the end user. The visible parts are an entry in the users tool tray (the Endpoint
16 |
Endpoint Encryption for Files and Folders Client Software
Encryption product icon), and the shell extension options, visible from the context
menu when right-clicking files and folders.
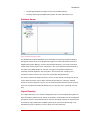
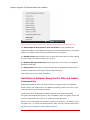
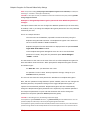
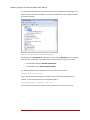
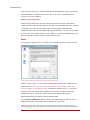
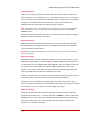
Figure 4: Context menu with Endpoint Encryption Endpoint Encryption for Files and Folders entries The content of the context menu regarding Endpoint Encryption Endpoint Encryption
for Files and Folders is determined through a policy for each user.
The system tray icon
With Endpoint Encryption Endpoint Encryption for Files and Folders installed, there is
an additional icon in the system tray menu.
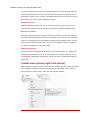
Figure 5: The Endpoint Encryption for Files and Folders system tray icon The content of the menu (accessed when right-clicking the tool tray icon) is defined by
a policy for each user that logs on. Depending on the number of Endpoint Encryption
products installed, the tray menu may look slightly different than the picture below
(Endpoint Encryption for Files and Folders only).
| 17
Endpoint Encryption for Files and Folders Client Software
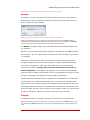
Figure 6: Endpoint Encryption system tray icon menu (Endpoint Encryption for Files and Folders only) The About Endpoint Encryption for Files and Folders… option displays the
configuration data for the Endpoint Encryption for Files and Folders client in a separate
window. The details of this window are presented later in this guide.
The Unload all keys option enables users to close all the keys that have been opened
to access data, thus securing (locking) the system.
The Endpoint Encryption Recovery option allows the user to recover lost Endpoint
Encryption passwords.
The Synchronize option opens a communication with the Endpoint Encryption Server
in order to retrieve the latest policy from the Object Directory.
Click System tray icon for more information.
Limitations in Endpoint Encryption for Files and Folders
Compressed files
Endpoint Encryption for Files and Folders cannot encrypt files that are compressed
with the built-in file compression in the Windows operating system. This is due to the
format and design of this Windows function.
Consequently, files compressed by Windows will first be decompressed before
encryption with Endpoint Encryption for Files and Folders. After encryption, the file will
not be re-compressed. Nor will it be re-compressed after decryption.
However, files compressed with third party compression software, e.g. WinZip, can be
encrypted as is, i.e. without any decompression. Note, however, that the compressed
file needs to be encrypted in order protect its content.
18 |
Endpoint Encryption for Files and Folders Client Software
Removable media
Endpoint Encryption for Files and Folders can enforce encryption on removable media.
However, the removable media affected must follow the following definition:
“Any device that is attached to the computer and is assigned a drive letter, except for
network drives, and that report itself to the operating system as ‘Removable’ . The
media shall also set a flag ‘Removable’ in the operating system and also report to the
operating system whenever a media is inserted. “
For certain devices, where a media is inserted into a reading device attached to the
computer, removable media encryption policies will only be applied when there is a
write operation initiated to the media. Examples of such devices are:
•
Floppy Disk drives (FDD), and
•
Magneto-Optical (MO) storage drives.
Self-Extractors: Minimizing window issue
When attaching a Self-Extractor to an e-mail (with context menu option Attach as
Self-Extractor to E-mail), the window with the e-mail that opens up cannot be
minimized. This is due to a design issue in MAPI, not an error within Endpoint
Encryption for Files and Folders.
Self-Extractors: Creating e-mail draft
When attaching a Self-Extractor to an e-mail (with context menu option Attach as
Self-Extractor to E-mail), and closing the e-mail without sending it (create Draft)
the draft is not saved to the Drafts, but to the Inbox folder instead (MS Outlook). This
is due to a design issue in MAPI, not an error within Endpoint Encryption for Files and
Folders.
Encryption on Novell file servers
In this version of Endpoint Encryption for Files and Folders, due to missing Unicode
support in the NWFS file system, files cannot be encrypted on Novell file servers
(NWFS files shares).
| 19
Deploying Endpoint Encryption for Files and Folders
Deploying Endpoint Encryption for
Files and Folders
There are 7 steps you need to follow to install Endpoint Encryption for Files and
Folders on your users’ computers:
1. Install the Endpoint Encryption Management Centre
Follow the Installing Endpoint Encryption Manager section of the Endpoint Encryption
Manager Administrator’s Guide.
2. Create your Endpoint Encryption for Files and Folders Administrators
Follow the ‘Creating and Configuring Users’ section of the Endpoint Encryption
Manager Administration Guide.
3. Create your Endpoint Encryption Server(s)
Follow the ‘Endpoint Encryption Database Server section of the Endpoint Encryption
Manager Administrator’s Guide.
4. Create encryption keys and policies relevant to your user population
Follow the Endpoint Encryption for Files and Folders Policy Settings section of this
guide.
5. Create Install Sets from the policies
Follow the Creating an Install Set section of this guide.
6. Install on the target computers
Follow the Installing, Upgrading, and Removing Endpoint Encryption for Files and
Folders section of this guide.
7. Manage Encryption Policies
Use the information in the Endpoint Encryption for Files and Folders Policy Settings
section of this guide to change policies as you wish.
20 |
Endpoint Encryption for Files and Folders Policy Settings
Endpoint Encryption for Files and
Folders Policy Settings
About Endpoint Encryption for Files and Folders Policies
Endpoint Encryption for Files and Folders policies control the encryption settings,
encrypted areas and the available context menu options for users when using Endpoint
Encryption for Files and Folders.
Each installation of Endpoint Encryption for Files and Folders is linked back to a policy
object in the Endpoint Encryption Manager. Any updates and changes to this policy will
be reflected to all users assigned that policy.
To manage policies, navigate to the Policies tree in the Endpoint Encryption Manager
and mark the Endpoint Encryption for Files and Folders Policy Groups node.
Policy administration functions
Create a Policy Group
You can create any number of Endpoint Encryption for Files and Folders Policy Groups.
Simply right-click the Endpoint Encryption for Files and Folders Policy Groups
node and select Create policy group. When selected, you will be asked to give a
name for the group. You may also select if all the member policies in this group shall
have the same settings as the group itself (i.e. a controlled group, as compared with a
non-controlled group).
Typically, this is not the case. Each individual policy created is separate from the
others, even if in the same group. Otherwise it would not make sense to have several
polices (i.e. if all were the same).
Create a Policy
Once you have created a Policy Group, you may create and configure individual
polices.
You should create policies to fulfill an organizational or functional need – for example,
a policy for a department within your organization, such as Management Policy, HR
Policy and Sales & Marketing Policy.
To create a new Endpoint Encryption for Files and Folders policy:
1.
Navigate to the Policies tab of the Endpoint Encryption Manager.
2.
Find the Endpoint Encryption for Files and Folders Policy Groups.
| 21
Endpoint Encryption for Files and Folders Policy Settings
3.
Double-click it to expand its groups.
4.
Either open an existing group, or create a new group by right-clicking the top
node and selecting Create policy group.
5.
From the open group window, right-click and select Add.
6.
Enter the name for the new policy, type in an optional description if you like
and select OK.
Right-click options on a Policy Group
Open group
This option opens a window displaying the content (policies) of the group.
Rename group
This option changes the name of the Policy Group. This does not affect the association
of the group content to other objects.
Delete group
This option deletes the selected group. The group must be empty before it can be
deleted. You will be prompted if you want to permanently delete the group, otherwise
it will be placed into Endpoint Encryption Deleted objects. See the Endpoint Encryption
Manager guide for additional details.
Create install set
This option creates an install set for the Endpoint Encryption for Files and Folders
client. For more information please see Creating an Install Package– in this guide.
Set as default group
Set the selected Policy Group to the default group.
Reset all to group configuration
Resets the properties of the individual policies within the group to those of its group.
Create copy
Creates a copy of the Policy Group based on the selected one.
Properties
Opens the properties of the selected Policy Group. The content of this dialog is
described later in this document.
Right-click options on an individual Policy
Add
22 |
Endpoint Encryption for Files and Folders Policy Settings
Adds a new policy to the group.
Rename
Changes the name of the policy. This does not affect the association of the policy to
other objects.
Delete
Deletes the selected policy. If you delete a policy, all users connected to that policy
will have all restrictions removed as they were defined in the deleted policy.
You will be asked if you want to permanently delete the group, otherwise it will be
placed in the Endpoint Encryption Deleted objects. See the Endpoint Encryption
Manager guide for additional details on deleting objects.
Create install
Creates an install set for the Endpoint Encryption for Files and Folders client. For more
information please see Creating an Install Package in this guide.
Reset to group configuration
Resets the properties of the individual policy to those of its group.
Create copy
Creates a copy of the policy based on the selected one.
Properties
Opens the properties of the selected policy. If the policy is within a group that is
controlled, the properties of the member policy are defined at the group level; i.e. the
policies in the group cannot be configured individually.
Policy configuration settings
When selecting the Properties option for either a Policy Group or an individual noncontrolled policy, the policy configuration dialog opens up.
General
Options - Explorer Integration
Allow explicit encrypt
Enables the Encrypt… option in the user’s context menu (displayed when rightclicking a folder or file). This allows the user to manually encrypt files and folders
beyond what has been defined in the central policies. If a file or folder is encrypted
according to a centrally set policy, the user cannot change this by “re-encrypting” the
file/folder with another key. The option will be visible, but grayed out (inaccessible).
| 23
Endpoint Encryption for Files and Folders Policy Settings
Allow explicit decrypt
Enables the Decrypt… option in the user’s context menu (displayed when rightclicking a folder or file). This allows the user to manually decrypt files and folders. If a
file or folder is encrypted according to a centrally set policy, the user cannot decrypt it.
The option will be visible, but grayed out (inaccessible).
Enable padlock icon visibility
Adds padlock icons to encrypted files and folders icons. This makes it easier to
recognize encrypted objects.
Enable search encrypted
Enables the Search encrypted… option in the user’s context menu (displayed when
right-clicking a folder only, or the Windows Start button), such that the user can
manually search for encrypted data on specified locations. The search may also be
based on a particular encryption key, or all encrypted objects (all keys).
Allow creation of Self-Extractor
If enabled, users will be able to create password encrypted Self-Extractors. These are
files that have been encrypted with a dedicated password (according to PKCS#5).
Self-Extractors may be read from any other machine without having Endpoint
Encryption for Files and Folders installed. The user must know the password in order
to extract and decrypt the file. This feature is further described in section Create SelfExtractor– of this guide.
NOTE: The password rules for Self‐Extractors follow the Endpoint Encryption password quality restrictions that are applied to the user, e.g. minimum length. See the Endpoint Encryption Manager Administration Guide ‐> Password template section for details. Options - E-mail Integration
Enable sending of encrypted e-mail attachments
Enables the client context menu option for sending encrypted e-mail attachments.
NOTE: The recipient of the attachment must have Endpoint Encryption for Files and Folders installed and also access to the encryption key used to encrypt the attachment. If you use an encryption key from the central database to encrypt the attachment, then the recipient must also be able to access the same database. If you use a user local key to encrypt the attachment, then that key must be exported to the recipient using the local user key management functions. See section Local user key management for details. In both cases, the recipient must have Endpoint Encryption for Files and Folders installed. If this is not the case, consider using the Self‐Extractor function instead. See section Create Self‐Extractor for details. NOTE: Encrypted e‐mail attachments created with Endpoint Encryption for Files and Folders 2.x cannot be opened with a Endpoint Encryption for Files and Folders 3.x client. However, encrypted attachments created with Endpoint Encryption for Files and Folders 3.x can be read by a Endpoint Encryption for Files and Folders 2.x client. Options - System Tray
24 |
Endpoint Encryption for Files and Folders Policy Settings
Show About option on system tray menu
Enables the option in the system tray menu that opens a dialog about the current
configuration of this instance of Endpoint Encryption for Files and Folders.
Show option for unloading all keys
The option Unload keys enables users to close all the keys that have been opened to
access data, thus securing (locking) the system.
Options - System
Attempt logon with Endpoint Encryption for PC credentials
This option allows automatic logon to Endpoint Encryption for Files and Folders from
the pre-boot authentication using Endpoint Encryption for PC. This option must be
enabled for the client to attempt to logon to Endpoint Encryption for Files and Folders
with Endpoint Encryption for PC credentials – if it is not set, the Endpoint Encryption
for Files and Folders logon will appear as normal. Also, if this option is set but Endpoint
Encryption Manager is not installed (or an incompatible version of Endpoint Encryption
for PC is installed), then the Endpoint Encryption for Files and Folders logon will revert
to its normal behavior.
The automatic Endpoint Encryption for Files and Folders logon happens at each
Windows logon (but not screen saver logon). If the user closes the keys and doesn't
re-logon to Windows, then the user will be prompted to logon to Endpoint Encryption
for Files and Folders as normal as if the user accesses a protected file. Doing a manual
Endpoint Encryption for Files and Folders Synchronize will also work exactly as
before.
The automatic logon is independent of what Endpoint Encryption supported
authentication token is used.
Disable forcing of logon on first boot
This option enables/disables the enforcement of a first logon after the first re-boot
after the installation of Endpoint Encryption for Files and Folders. If enabled, there will
be a mandatory logon dialog, forcing the user to authenticate properly in order to
retrieve the correct set of encryption keys and the correct encryption policy. If forced,
the logon cannot be by-passed until proper Endpoint Encryption authentication
credentials have been entered. This ensures that the user cannot work without proper
encryption policies applied. If disabled, the user has to manually logon in order to
retrieve encryption policies and keys. Until then, the user will work with the default
policy from which the install set was created (i.e. a “blank” policy if not created from a
dedicated policy).
| 25
Endpoint Encryption for Files and Folders Policy Settings
NOTE: if the previous setting (Attempt logon with Endpoint Encryption for PC credentials) is enabled, the forced logon – if enabled – will happen automatically. CAUTION: For this option to work, the installation set must be created from the policy containing Disable forcing of logon on first boot. Attempt to change Endpoint Encryption password when Windows password
changes
This option detects when the user changes the Windows password (on the client side).
If enabled, it will try to change the Endpoint Encryption password to the new password
selected by the user.
This is an example scenario:
The users exist in the database, imported from Active Directory using the
Endpoint Encryption AD Connector. The Endpoint Encryption user names are
set to be the AD standard “sAMAccountName”.
Endpoint Encryption for Files and Folders is deployed with the option Forced
logon after first reboot enabled.
In the Endpoint Encryption Managerthe users are set to use the default
password of ‘12345’, along with the password option Force change if
‘12345’ enabled.
The instructions to the users at the time of the roll-out of the Endpoint Encryption for
Files and Folders client have been: When prompted for Endpoint Encryption for Files
and Folders logon:
For User ID: enter your Windows user name.
For password: enter ‘12345’. When prompted to change, change to your
current Windows password.
The user will now have the same password in Windows as in Endpoint Encryption.
Now, with the ‘password change detection’ option enabled, when the user changes the
Windows password, the password change event triggers Endpoint Encryption to
capture the new Windows password. Endpoint Encryption will then automatically
change the Endpoint Encryption password to the captured (new) Windows password.
This keeps the passwords in synch and also eliminates the need to change the
password in two places (Windows and Endpoint Encryption).
CAUTION: For this setting to work, the following requirements apply: The Endpoint Encryption Password restrictions, e.g. Password History must be disabled for the user. The password quality will instead rely on the corresponding settings within Windows. The Endpoint Encryption password and the Windows password must be the same, prior to the automatic password change. Please see the example above for how to accomplish this in a user convenient manner. 26 |
Endpoint Encryption for Files and Folders Policy Settings
The Endpoint Encryption user name and the Windows user name must be identical. It
is recommended to use the Endpoint Encryption ActiveDirectory Connector to
accomplish this. See Step 1 in the example scenario above.
Admin Level
The Endpoint Encryption Management Centre administration level applied to this
policy. Only Administrators with an equal or higher level will be able to change the
settings.
Description
Here you may type some descriptive information about the policy, e.g. what the
purpose of the policy is, or to who it shall be applied.
File Extensions
File extension encryption allows you to define what kind of files shall be encrypted
based on their file extensions assigned by the application (not the user). You may add
any extension and select what key shall be used to encrypt these files. Also, you need
to specify what applications will be creating the files, for example, to encrypt *doc
files, you need to stipulate the application that creates these files, i.e. Microsoft®
Word™ in this example.
Process Specific File Extension encryption
Process specific file encryption provides the possibility to encrypt particular file
extensions created by named applications (processes). Both the file extension and the
process name must be listed in order for the file extension encryption to work. For
example, assume you want to encrypt files with the extension *.txt. However, you
only want *.txt files created by Notepad to be encrypted, not *.txt files encrypted by
any other application, e.g. MS Word®.
You would then enter the process specific name notepad.exe, the extension .txt and
the encryption key in your list of process specific file extensions to be encrypted. How
this is done is described below. The result would then be that only *.txt files created
by Notepad will be encrypted, not those by any other application. This feature is
particularly useful for temporary files (*.tmp).
Only newly created files can be encrypted with file extension encryption. For
encryption of existing files, folder encryption needs to be used.
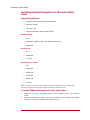
Creating (editing/removing) a process specific file extension encryption
policy
1.
Start the Endpoint Encryption Manager and open the policy for which you would
like to enable process specific file extension encryption.
| 27
Endpoint Encryption for Files and Folders Policy Settings
2.
Click the icon for File Extensions encryption.
3.
Assure the category Process Specific is selected.
4.
Click the Add button to add a process name.
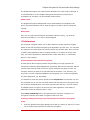
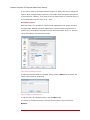
Figure 7: Process specific file extension encryption – Adding a process name 5.
Enter the process name you want to enable the file extension encryption for.
NOTE: Observe that you need to enter process name and the [exe] extension; i.e. notepad.exe. Process names may easily be identified by starting the corresponding application and then locate the process name in the Windows Task Manager. 6.
After you have entered the process name, select the encryption key to be used to
encrypt the file types created by the given process. Select the key by clicking the
corresponding button. A list of available encryption keys will be presented. The
option Use default local key refers to the user local encryption key that may be
generated automatically as per the policy for user local keys. See section User
Local Keys for additional details.
7.
Click OK and observe your process being added to the list. If you want to remove
or edit a process, mark the process and click the Remove and Edit buttons
respectively.
Figure 8: Process specific extension encryption – Process listing 28 |
Endpoint Encryption for Files and Folders Policy Settings
8.
Next you must add file extensions to be encrypted by the listed processes. Mark
the process name and click Add. A window appears asking you to enter file
extensions for the process.
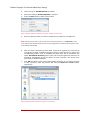
Figure 9: Process specific extension encryption – Adding extensions to a process 9.
Enter the extension. NOTE: the encryption key is selected in the previous steps.
It is not possible to change the key in this window (Select is disabled). Also, only
the extension should be entered - any wildcards or dots (“doc” and not “*.doc”,
or “.doc”) should be omitted.
10. Click OK and observe the extension being listed below the process name. Repeat
this step if you want to add multiple extensions to one process. If you would like
to have all files created by a particular process, simply enter a wildcard only, i.e.
“*” as file extension.
11. Repeat the above steps for adding additional processes and/or extensions.
Remember to mark the appropriate headline before you click Add, i.e. mark
Process Specific and then Add to add a new process; mark a particular process
name and then Add to add an extension to the marked process.
The following pictures show an example setup where all temporary files (*.tmp)
created by Microsoft® PowerPoint™ and Microsoft® Excel™ are encrypted with the
Management Key. Also, PowerPoint™ PPT files, Excel™ XLS files, Word™ DOC files
and TXT files created through the Windows Explorer (i.e. created by using the
Windows’ right-click option New…) will be encrypted with the Management Key.
NOTE: For Microsoft® Office™ 2007, the file extensions are different compared with previous versions of Office. Office 2007 uses a four letter extension by default, e.g. the default extension for Word™ 2007 is *.docx. | 29
Endpoint Encryption for Files and Folders Policy Settings
Figure 10: Process specific extension encryption – Adding additional processes Figure 11: Process specific extension encryption – Adding additional extensions 30 |
Endpoint Encryption for Files and Folders Policy Settings
Figure 12: Process specific extension encryption – Example setup To remove or edit a listed process or an extension, highlight the object and then click
the Remove or Edit buttons accordingly.
About Process Specific file extension encryption
Mix of keys and extensions
It is possible to add as many processes and extensions as you like. It is also possible
to mix encryption keys for different extensions in one and the same process, as long
as it is done in a rational manner.
Save vs. Save As… when editing existing files
Consider an existing file with an extension that is listed to be encrypted by a file
extension encryption policy. Opening this file, and editing it and then saving it, does
not necessarily mean it will be encrypted, even if the policy states files with that
extension to be encrypted.
For some applications, it is required to do a Save As… operation (i.e. create a new
file) for the encryption to happen on that particular file. Whereas for other
applications, the regular Save operation is enough on the existing file for the
encryption to happen. Typically, Microsoft® Office™ applications belong to the latter,
i.e. such files will be encrypted by just opening them and do a Save operation.
Notepad is an example of the former, where it is necessary to do “Save As…” in order
for the file extension encryption policy to apply on that existing file.
| 31
Endpoint Encryption for Files and Folders Policy Settings
Deleting extensions
It is important to notice that deleting a file extension does not initiate any decryption
of files with the particular extension. To decrypt files encrypted with a file extension
encryption policy, you need to do a manual search-and-decrypt action using the
corresponding context menu options from a client with Endpoint Encryption for Files
and Folders installed. More about searching-and-decrypting encrypted files is
presented in the Search encrypted… section
of this guide.
Folders
This section lets you specify what folders shall be encrypted for users that are
assigned this policy. You may either specify folders on local drives or network drives
using direct addressing or UNC paths. It is also possible to fetch a path from the user’s
environment variables by typing, e.g. C:\%user%.
Add
Let’s you specify a new folder to encrypt.
Figure 13: Endpoint Encryption for Files and Folders Policy – Folder selection You may choose from the drop-down menu a list of predefined folders for local drives.
These will be resolved properly, independent of what language the client operating
system is using. Note the following folders:
[DESKTOPDIRECTORY] = The working desktop of the user, i.e.
[SYSDRIVE:\Documents and Settings\{USER}\Desktop]
[TEMP] = The user’s directory for Temporary files being created,
i.e.
[SYSDRIVE:\Documents and Settings\{USER}\Local Settings\Temp]
[MYDOCUMENTS] = The “My Documents” folder for the user, i.e.
[SYSDRIVE:\Documents and Settings\{USER}\My Documents]
[APPDATA] = The Application Data directory for the user, i.e.
[SYSDRIVE:\Documents and Settings\{USER}\Application Data]
[LOCAL_APPDATA] = The user’s local Application Data directory,
i.e.
[SYSDRIVE:\Documents and Settings\{USER}\Local
Settings\Application Data]
32 |
Endpoint Encryption for Files and Folders Policy Settings
[PROFILE] = The user’s local user root directory, i.e.
[SYSDRIVE:\Documents and Settings\{USER}]
You may also type the UNC path for any folder residing on a network share, as well as
using a mapped drive letter to identify the folder to encrypt.
You may also browse the network for folders, as it is mapped and viewed from the
machine hosting your instance of the Endpoint Encryption Manager. By clicking the
Browse button a standard folder browser opens up that lets you select folders to
encrypt.
Select the folder you want to encrypt and then select what encryption key shall be
used for that folder (Select). Note that you may assign several folders with different
keys in one and the same folder encryption policy.
Environment variables in folder paths
It is also possible to type in environment variables in the folder encryption path, these
will then be resolved in the client to fetch the proper folder to encrypt, e.g. if you
write: c:\%user% as a folder path, then on the client side, the environment variable
%user% is fetched and included when resolving the entire path to the folder to be
encrypted.
Folder should be decrypted
Selecting this option for a folder will remove the indicator that specifies what key
should be used to encrypt files stored in that folder, i.e. new files added to the folder
will not be encrypted. Also, existing files will be decrypted. You will see the key
selection change to <No Key> when selecting this option.
Once you have made your selections for the folder, click OK to see your selection
being added to the folder encryption policy you are creating.
Use default local key
This refers to the user local encryption key that may be generated automatically as
per the policy for user local keys. See the User Local Keys section for additional
details.
Remove
Lets you remove a selected folder encryption item from the list.
NOTE: Removing a folder entry from the list of folders to encrypt does not imply that the content of that folder will be automatically decrypted. In order to decrypt a folder listed as encrypted, you need to use the option Folder should be decrypted as described above. | 33
Endpoint Encryption for Files and Folders Policy Settings
Edit
Lets you edit a selected folder encryption item from the list, e.g. change encryption
key.
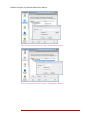
The image below depicts an example configuration for folder encryption, containing
both a local folder as well as network folders with various notations.
Figure 14: Folder encryption ‐ Example configuration Considerations on folder encryption
McAfee recommends that you...
•
Do not encrypt entire volumes and in particular the system volume. Doing
this may cause deadlocks in the client systems.
•
Do not encrypt the [Program Files] directory as it may cause deadlocks in the
client systems.
•
Do not assign folder encryption onto removable devices (e.g. a USB-Hard
disk) drive based on the drive letter. As the drive letter assigned to the
removable device very well may change each time the device is attached, and
other drives may be assigned the letter previously assigned to the removable
device, it could lead to unintentional encryption of other devices.
NOTE: It is possible to have a subfolder set as decrypted even if (any) parent folder is set to be encrypted, i.e. it is possible to encrypt the My Documents folder through a folder encryption policy and then have the subfolder My Video decrypted also through a policy. For large (>1 GB) network folders that shall be encrypted, rather than having the folders encrypted through a folder encryption policy, consider a manual (explicit) encrypt of the network folder(s) in advance, from one machine with Endpoint Encryption for Files and Folders deployed. See the chapter on Large‐scale deployment considerations for additional details 34 |
Endpoint Encryption for Files and Folders Policy Settings
When encrypting large folders on a network share through a policy, it is strongly recommended to tune the network encryption intensity. The following values are recommended: •
I/O Utilization: 20% (Set in Encryption options policy section) •
Bandwidth limit: 100 KB/sec. (Set in Network policy section) •
Network latency: 600 ms. (Set in Network policy section) You also may want to tune the network folder encryption based on the capacity of the client machines and the overall network traffic. Use the parameter “Maximum number of clients allowed to encrypt folder” to an increase the encryption intensity if there is idle capacity. Removable Media
This feature allows you to specify encryption policies for removable media attached to
machines where Endpoint Encryption for Files and Folders is installed.
The definition of what Endpoint Encryption for Files and Folders considers being
removable media is as follows:
“A device that is attached to the computer and assigned a drive letter, except for
network drives, and is recognized by the operating system as ‘Removable’. In addition,
devices that set a flag ‘Removable’ in the operating system and that also reports to
the operating system whenever a media is inserted”.
You can select from three different settings for removable media.
Enable removable media encryption controls
Enabling this policy will automatically encrypt any file written to an attached
removable media with the encryption key selected from the Select button. When
enabling this option, the key selection dialog opens up automatically, i.e. it is not
possible to enable this option without selecting an encryption key.
Figure 15: Enabling "Removable media encryption controls” | 35
Endpoint Encryption for Files and Folders Policy Settings
If the Make all removable media plaintext (see below) option is enabled, then any
existing encrypted file on inserted removable media will be decrypted, provided the
user has access to the proper encryption key.
Ignore existing content on media
This option is disabled by default and dictates that all existing files on attached
removable media will be encrypted also. When this setting is enabled, only new files
will be encrypted when placed on removable media attached to a system that has this
policy applied.
NOTE: When this option is disabled, all existing files become encrypted. Therefore, they can no longer be read from systems without Endpoint Encryption for Files and Folders. Be mindful when using this option. Make all removable media plaintext
This option disables the persistent encryption for removable media, i.e. encrypted files
that are transferred to the removable media will end up there in plaintext.
Make all removable media read-only
This option is mutually exclusive to the previous one. Instead of encrypting files
written to removable media, you may prevent files from being written at all, i.e. make
the removable media attached, read-only. Users may read files from the media, but
any writing to the media is blocked.
Note that the previous option is disabled when you select the Read-only option for
removable media.
Changing this parameter requires the client machines to be restarted (after having
received the policy change) before it takes effect.
CAUTION: Disabling the Automatically encrypt all removable media option does not mean that new files created on a removable media that have been subject to the removable media encryption policy will be in plaintext – new files will still be encrypted when written to the media (the encryption policy is still applied to the removable media itself). In order to remove an applied encryption policy on removable media, the option Make all removable media plaintext must be enabled. Auto-create Self-Extractors of files put on media through the (Windows)
Explorer
This option renders all files put on removable media to be converted to password
encrypted Self-Extractors when they are placed on the removable media using the
Windows Explorer file management operations. These operations are the following:
•
Drag-and-drop
•
Copy-Paste (incl. keyboard shortcuts)
•
Cut-Paste (incl. keyboard shortcuts)
NOTE: the following file management operations are not covered by this policy: 36 |
Endpoint Encryption for Files and Folders Policy Settings
•
Command prompt file operations (copy *, move *) •
Files being created directly on removable media, e.g. when doing Save on a file from within the application, directly to the media •
CD/DVD burning When enabled, the user is asked what password to use. Unless the sub-option is
enabled (see below), the conversion will happen automatically with no other user
intervention than asking for the password to use.
The creation to the Self-Extractor will happen irrespective of if the file is already
encrypted or not. Also, it will only be the Self-Extractor copy of the file that is put on
the media, not any other copy of the original file, not plaintext nor encrypted.
The main purpose of this feature is to:
•
Provide a way to protect files when placed on removable media, yet being able
to read the files on machines without Endpoint Encryption for Files and Folders
installed
•
No limitation to special removable media hardware
•
No software installation when reading the Self-Extractors
Self-Extractors can only be read on Windows machines. As is the case with SelfExtractor files in general, it is not possible to unpack the Self-Extractor, alter the
content and re-pack it back into a protected Self-Extractor that may be put back on
the media protected. To re-create Self-Extractors, the full Endpoint Encryption for Files
and Folders client is required.
Ask user if files put on media shall become Self-Extractors
This option can only be enabled once its parent option Auto-create Self-Extractors
… is enabled. When enabled, this option presents a question to the user if the file
being placed on the removable media through a Windows Explorer function should be
converted into a Self-Extractor. If the user answers No, the file will not be put on the
media in any shape, i.e. the intended file management operation will fail.
Additional exempted Device IDs
This list provides for additional exclusions from removable media encryption by listing
the Device ID of the media to exclude. The main cause for this exclusion list is to
prevent double encryption of files on removable media with built-in encryption. By
excluding certain devices, the Endpoint Encryption for Files and Folders client won’t
apply any removable media encryption policies to these devices. Still, any nonexcluded removable devices attached to the PC will be subject to removable media
encryption.
| 37
Endpoint Encryption for Files and Folders Policy Settings
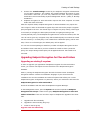
You will find the DeviceID of a device by looking in the Windows Device Manager on a
machine where the device is attached. The picture below shows an example of where
to find the DeviceID.
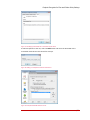
Figure 16: Finding the DeviceID for a removable media device By looking at the Properties of a particular device and the Details tab, the DeviceID
may be found. First assure the correct item is selected from the drop-down menu.
•
For Windows 2000/XP: Device Instance Id
•
For Windows Vista: Device Instance Path
The data presented in the information box is normally on the format:
STORAGETYPE\DeviceID\UnitID
As it is the DeviceID that shall be exempted, only the DeviceID information is of
interest. In the example below, the sought DeviceID is:
DISK&VEN_MXI&PROD_CLIPDRIVE_2.0&REV_2.00
This is the data that shall be entered in the exemptions list in the user’s policy.
38 |
Endpoint Encryption for Files and Folders Policy Settings
Figure 17: Identifying the DeviceID for a removable media device To add exemptions to the list, click the Add button and enter the DeviceID of the
removable media device that should be exempt.
Figure 18: Adding an exempted removable media device Figure 19: Exempted DeviceID added to the list | 39
Endpoint Encryption for Files and Folders Policy Settings
Changes to the list of exempted DeviceIDs are done by using the Edit and Remove
buttons accordingly.
About Removable Media encryption
Definition reminder
Note again the definition of removable media defined above. In addition to this
definition, floppy disk drives (FDD) and Magneto-Optical (MO) drives are supported.
Free space on media
When applying encryption to FDD, the floppy must contain enough free disk space to
encrypt the files. If a file is larger than 50% of the floppy, the encryption will fail and
the file will be left in plaintext. There is no warning message informing the user about
this.
I/O utilization value for FDD encryption
For removable media encryption enforcement to work better on floppy disk drives, it is
recommended to increase the I/O Utilization value to 80%. This will have no impact
on the rest of the system and can be safely done.
CD / DVD Encryption
This option enforces encryption on CD and DVD write operations. The encryption is
applied on a sector level to the entire CD/DVD, meaning that all content being written
to the CD/DVD will be encrypted. Thus, it is not possible to encrypt only selected files
out of several in a burning session; all files being burnt will be encrypted.
In order to read an encrypted CD/DVD, the Endpoint Encryption for Files and Folders
client needs to be installed, i.e. it is not possible to read the encrypted disk without
the client.
The encryption is independent of the application used to burn the CD or DVD (with one
exception, see note below); the encryption will be applied whether or not the files
being burnt are already encrypted. This is an all-or-nothing encryption feature.
When trying to read an encrypted CD/DVD from a client without Endpoint Encryption
for Files and Folders installed, the user will see no content, i.e. it will appear as a blank
disk. If the user tries to burn data onto an encrypted disk from a system without
Endpoint Encryption for Files and Folders installed, there will be error messages saying
that the data structure and file tables of the disk are invalid; the burning will therefore
fail.
40 |
Endpoint Encryption for Files and Folders Policy Settings
About Multi-Session CDs/DVDs
The CD/DVD encryption feature supports burning of encrypted data to plain
CDs/DVDs. Disks that have plaintext data already burnt to them cannot have
encrypted files added, however, if the first burning was done with enforced encryption,
files can be added in later burning sessions upon which they will also be encrypted
with the same key used to originally encrypt the disk. Thus, it is not possible to have
mixed plaintext and encrypted data on a CD/DVD.
Enforce encryption on CD/DVD write operations
This option enables the CD/DVD encryption. When enabled, an encryption key must
first be selected. This encryption key will be used to encrypt data written to CD/DVD
for the users assigned to this policy. In order to read the encrypted CD/DVD, the user
must be able to access this encryption key; they must also have the Endpoint
Encryption for Files and Folders client installed.
Make all CDs and DVDs plaintext
This option prevents users from manually encrypting CDs and DVDs via the context
menu (right-click) option Encrypt.... Even if the above policy (Enforce encryption on
CD/DVD write operations) is disabled, it's possible for a user with the context menu
option Encrypt... enabled, to right-click the CD/DVD drive and encrypt a CD/DVD by
selecting the Encrypt... option and an encryption key. If the user performs this
manual operation, the next burning session will burn the CD/DVD encrypted. To
disable this, the user may do a manual Decrypt... from the context menu, provided
this option is enabled.
With the Make all CDs and DVDs plaintext option enabled, users cannot burn
encrypted CDs/DVDs on their own using the context menu.
Do not allow writing to CDs and DVDs (make CDs and DVDs read-only)
This option is mutually exclusive to the above option. When enabled, it prevents users
from writing to CD/DVD.
NOTE: The burning application Alcohol 120% is not affected by the CD/DVD encryption policy due to the behaviour of this burning application. Self‐Extractors will also be encrypted when burnt to CD/DVD with this policy enabled, i.e. these Self‐
Extractors cannot be read on systems without Endpoint Encryption for Files and Folders installed. With this policy disabled, it is still possible to burn Self‐Extractors to CD/DVD which can be read on systems without Endpoint Encryption for Files and Folders installed. This requires the user to first manually create the Self‐
Extractors and then include them in the burning session data set. Key Manager
This property page contains settings for key loading and unloading and timeouts.
| 41
Endpoint Encryption for Files and Folders Policy Settings
Automatic key loading/unloading
Enable inactivity timeout
If a user has successfully authenticated to a Endpoint Encryption for Files and Folders
key, there is no need to again authenticate when the key is needed next. As long as
the key is active (performing encryption/decryption), it will be available to the
Endpoint Encryption for Files and Folders Driver. However, when a key is inactive it
will be closed after the amount of time specified by this parameter. The user will then
need to authenticate again when the key is needed. The default value is enabled at 60
minutes; this can be disabled and the time can be changed. If disabled, it will render
an indefinite timeout, i.e. once authenticated the keys will remain loaded throughout
that entire Windows session.
Unload keys when screen saver is started or screen is locked - Marking this option will
result in all keys being closed when the screen saver starts or when the workstation is
locked (e.g. with Ctrl-Alt-Del). When the user returns from the inactivation, an
authentication is required to access the Endpoint Encryption for Files and Folders keys.
The default value is disabled.
Load ALL keys available to a user at logon
Marking this option will result in that all keys that the user can access are loaded
simultaneously once the user has done a first successful Endpoint Encryption for Files
and Folders logon. Thus, subsequent authentications to other keys are not required.
Leaving this option unmarked will require the user to authenticate once to every key
assigned to the user (when requested).
NOTE: When doing a Windows logoff, all the encryption keys are automatically closed. Thus, for each new Windows logon, a Endpoint Encryption for Files and Folders authentication is required in order to access encryption keys. User Local Keys
With the options in this section, it is possible to allow the user to create their own
encryption keys and manage them locally. As a safety mechanism, the Endpoint
Encryption Recovery schema applies also to user locally generated keys. No local
encryption key can ever be generated without being recoverable with the Endpoint
Encryption Recovery system.
The user local keys are protected with a separate password or a user digital certificate.
NOTE: The password for local user keys is subject to the Endpoint Encryption password quality restrictions that are applied to the user, e.g. minimum length. See the “Endpoint Encryption Manager Administration Guide ‐> Password template” for details. 42 |
Endpoint Encryption for Files and Folders Policy Settings
Allow user local keys
Marking this box prepares the Endpoint Encryption for Files and Folders client to work
with user local keys. As soon as this option is enabled, a recovery key must be
selected. It is not possible to enable this option without selecting a proper recovery
key. This mandatory selection of a key from the Endpoint Encryption central database
provides for using the Endpoint Encryption Recovery mechanisms when recovering
user local keys. The Recovery key may be changed at a later stage.
Enabling this option will present a new section in the Endpoint Encryption client tray
icon menu. If none of the sub-options presented below are selected, this section will
have no meaning to the users (no menu entries).
Recovery key
This field presents what key from the Endpoint Encryption central database that is
used for recovery of encryption keys created locally by the users. By clicking the
Select button, the Recovery key may be changed.
Local key management options
The following options each corresponds to an entry in the Endpoint Encryption tray
icon menu for the Endpoint Encryption for Files and Folders client, i.e. when enabled,
the users with User Local Keys enabled will have access to each of the wizards that
corresponds to the menu entry.
Allow user local key generation
Enabling this option allows users to start the local key generation wizard. The wizard
guides the user in the creation of a secure storage location and the actual key
generation. The key generation wizard is described in the Endpoint Encryption for Files
and Folders User Guide.
NOTE: User local encryption keys are all generated for the Endpoint Encryption FIPS 140‐2 certified implementation of the AES algorithm with a 256 bits key length. The algorithm and the key length cannot be changed for user local keys. Allow export of user local keys
This option allows users to export keys that they have generated locally, i.e. sharing
their keys with other users that have Endpoint Encryption for Files and Folders
installed (and local key management enabled). There are no restrictions to export, i.e.
the users may very well share encryption keys with external users that also are using
Endpoint Encryption for Files and Folders with local user key management. Only user
local keys can be exported, i.e. not encryption keys from the Endpoint Encryption
central object directory. The key export wizard is described in the document Endpoint
Encryption for Files and Folders User Guide.
| 43
Endpoint Encryption for Files and Folders Policy Settings
Allow import of user local keys
This option allows users to import keys that have been created with Endpoint
Encryption for Files and Folders by other users, i.e. sharing keys with other users that
have local key management enabled. There are no restrictions to import, i.e. the users
may very well import encryption keys from external users that also are using Endpoint
Encryption for Files and Folders with local user key management. Only user local keys
can be imported, i.e. not encryption keys from external Endpoint Encryption
databases. The key import wizard is described in the document Endpoint Encryption
for Files and Folders User Guide.
Allow deletion of user local keys
This option allows users to delete local user keys, both locally generated keys and
imported keys. Encryption keys from the Endpoint Encryption central database cannot
be deleted with this option. The key deletion wizard is described in the document
Endpoint Encryption for Files and Folders User Guide.
NOTE: Be very careful with allowing users to delete local user encryption keys. If deleted, there is no way to restore that key. For a description of the Endpoint Encryption client tray icon menu entries, please see
the System tray icon section of this document, as well as the Endpoint Encryption for
Files and Folders User Guide.
Automatically create user local key
With this option enabled in the user’s policy, the wizard to create a local key will
automatically start on the user’s machine. The encryption key being generated is the
one that is referred to as Default Local Key in the key selection dialogs for e.g. a
folder encryption policy.
Encryption options
This dialog contains various settings for encryption restrictions and encryption priority.
Changes to most of the parameters in this dialog require the client machine to be
restarted (after having received the policy change) before they take effect (machine
policies).
Preserve file times
This setting resets the file time attributes after encryption and decryption. When a file
is encrypted with Endpoint Encryption for Files and Folders, the Last Modified time is
changed. Also, some other time values are changed when a file is encrypted or
decrypted.
44 |
Endpoint Encryption for Files and Folders Policy Settings
With this option, it is possible to have the original time values restored (preserved)
after encryption and decryption, e.g. the Last Modified time will be reset to when the
file was truly last modified, i.e. by a user. The default setting is enabled.
Require authentication for listing of encrypted folders
This setting prevents a user from listing (view) the contents of an encrypted folder
unless the user has access to the encryption key used to encrypt that folder.
The Endpoint Encryption for Files and Folders client must be installed for this viewing
restriction to occur. The default value is disabled.
Use wiping when encrypting and deleting files
When a file is encrypted with Endpoint Encryption for Files and Folders there is a risk
that plaintext traces may remain on the disk. With the wiping functionality that is
enabled with this option, any plaintext traces are securely deleted (wiped) whenever a
file is encrypted. When using wiping, the encryption of files will take about 5% longer
than without wiping.
The wiping mechanism follows the data shredding specification of US Department of
Defense (DoD). The specification detail may be found in:
DoD 5220.22-M National Industrial Security Program Operating Manual (NISPOM)
January 1995, Department of Defense & Central Intelligence Agency, U.S. Government
Printing Office. ISBN 0-16-045560-X.
Enable limiting of file size that will be encrypted
Marking this option allows you to exclude files larger that a certain size from
encryption when encrypted by a folder policy enforcement, i.e. when existing files are
encrypted in accordance with the folder policy (including Removable Media existing
content enforcement). Files encrypted with explicit (right-click) Encrypt… are not
subject to this limitation, nor are files encrypted by a file extension encryption policy;
Other files not subject to this limitation are files that are drag-dropped to encrypted
folders and files saved to encrypted folders. Specify the file size restriction in the field.
You can use this option to prevent (very) large files from being encrypted by the policy
enforcement; particularly for network shares where encryption of large files may cause
heavy network traffic.
I/O Utilization
This value defines the frequency at which Endpoint Encryption for Files and Folders will
encrypt files when enforcing encryption policies. A value of 50% means it will take a
file, encrypt it and then wait the same amount of time it took to encrypt the previous
file before starting to encrypt the next file.
| 45
Endpoint Encryption for Files and Folders Policy Settings
If you want to enforce removable media encryption on floppy disk drives, setting this
value to 80% will significantly improve the removable media encryption enforcement
on these devices. However, if you want to encrypt large folders on a network share, it
is recommended to set this value to 20 – 30%.
Blocked Processes
With this feature, it is possible to exclude certain applications from proper access to
encrypted data. Blocked processes (applications) will then always be given files in
cipher text by the Endpoint Encryption for Files and Folders filter driver, i.e. files will
not be decrypted for the blocked processes.
Figure 20: List of exempted processes To add a process that shall be exempted, simply click the Add button and enter the
name of the process to be blocked.
Figure 21: Adding an exempted process To edit the name of a blocked process, click the Edit button.
To remove an exempted process, select the process name in the list and click
Remove.
46 |
Endpoint Encryption for Files and Folders Policy Settings
The main purpose of process blocking is to prevent encrypted data from being
unintentionally exposed in plaintext; this is done by circumventing the Endpoint
Encryption for Files and Folders encryption engine. One example of this is to prevent
encrypted data from being uploaded to external FTP sites. By blocking the FTP
process, it is not possible for the user to upload data in plaintext to an FTP server.
The aim of this feature is not to share encrypted data via web-mail or the Internet, for
example. The Blocked Processes feature is not designed for such usage, due to the file
name change for encrypted files. The CE 3 design does not allow for any user mode
application interaction with blocked processes.
Consider the process exemption feature as a prevention feature, a part of the concept
of digital rights management, rather than a way for users to share encrypted data. For
sharing encrypted files beside regular file shares or removable media, consider using
the Endpoint Encryption for Files and Folders features of e-mail attachment encryption
or Self-Extractors.
With the blocked processes feature, it is also possible to prevent encrypted data from
being burnt to CD/DVD. By blocking the CD/DVD burning applications, encrypted files
cannot be written to CD/DVD.
Other processes that may be worth blocking are Internet browser applications (e.g.
iexplore.exe) and FTP applications.
CAUTION: Data compression applications like WinZip® must not be set as blocked processes. If blocked, they will continuously fail to perform compression operations on encrypted data. Likewise, do not set explorer.exe as a blocked process; also, do not set it as a Key Request Exclusion. See the next section. Key Request Exclusions
Assume a user is working with encrypted data on the PC. All keys are loaded such that
encrypted data can be accessed transparently. The user then takes a lunch break at
11.30 a.m. and closes the keys manually (or the keys may unload due to work station
locking, for example). Now, at 11.50 a.m. the user’s antivirus software is set to start a
system scan each day. When the antivirus reaches the first encrypted file, it cannot
access the file since the encryption key is not loaded. Hence, an authentication dialog
will be presented to the user, who cannot do anything as he/she is at lunch.
Consequently, the entire virus scanning process will stop until the user is back at the
desk and can authenticate properly.
The Key Request Exclusion option exists to avoid scenarios like the one described
above. By listing processes that automatically shall get an Access Denied message if
keys are not available, the example situation above will be avoided and the user will
return from lunch finding the daily virus scanning process properly finished. Of course,
the encrypted files have not been scanned, but at least the virus scanning process
| 47
Endpoint Encryption for Files and Folders Policy Settings
didn’t halt. In addition, encrypted files will be scanned later whenever they are
accessed by the user and the encryption keys are there to decrypt the data.
Figure 22: List of Key Request Exclusions To add a Key Request Exclusion, click the Add button and enter the process name of
the exclusion.
Figure 23: Adding a Key Request Exclusion To edit the name of a Key Request Exclusion, click the Edit button.
To remove a Key Request Exclusion, select the process name in the list and click
Remove.
Network
This dialog lets you set some parameters controlling encryption on network shares (file
server storage). Changes to any of the parameters in this dialog require the client
machine to be restarted (after having received the policy change) before they take
effect (machine policies).
48 |
Endpoint Encryption for Files and Folders Policy Settings
Enable network encryption
This tick box switches network encryption on/off. If unchecked, then no encryption will
be done on network shares, no matter what other encryption settings are made for the
network. Also, content copied, moved or created directly on network drives will not be
encrypted.
The default setting is enabled. Changes to this setting require the client machine to
reboot after the policy update in order for the change to take effect.
Enable network bandwidth limit
Marking this option limits the participation when encrypting folders on network drives.
All Endpoint Encryption for Files and Folders clients connecting to a network cooperate
to encrypt files found in shared encrypted directories. This setting allows users with a
poor network capacity to be excluded from this cooperation as long as the bandwidth
is lower than the specified limit. Specify the limit in the field. The default limit is 50
kB/sec, which signifies a quite busy network.
Disable encryption on slow network connections
This option defines a limit (network latency) beyond which this Endpoint Encryption for
Files and Folders client will not participate in encryption of existing network files.
Specify the limit in the field.
Maximum clients to encrypt folder
This option imposes a limit on the number of client machines that will encrypt a
particular network folder. This option makes network encryption more cost-efficient in
that not all the clients will run to each and every network folder to encrypt it if
specified by a policy. Such a “rush” could potentially cause network congestion and
jam encryption. Hence, this option introduces a control to enforce network encryption
more efficiently. If the maximum number of clients is already working on a folder,
then the other clients will ignore these folders and proceed to the other folders set to
be encrypted by the policy. If the network bandwidth permits, setting a higher value
than the default “5” will speed up the pace at which existing folders are being
encrypted on the network.
| 49
Encryption keys
Encryption keys
About Encryption keys
Encryption keys are generic purpose objects which Endpoint Encryption applications
can use to encrypt information – for example, Endpoint Encryption for Files and
Folders uses Key objects to protect files and folders on network, removable media and
user hard disks.
Encryption key administration functions
You create and manage the Endpoint Encryption for Files and Folders keys from the
Endpoint Encryption Manager. Navigate to the Policies tab and find the entry
Encryption Keys Groups.
You can create any number of Endpoint Encryption for Files and Folders Encryption
Key Groups. Each group created should have a clear purpose reflecting the use of the
keys within that group, e.g. Company keys or Test keys.
Simply right-click the Encryption Keys Groups node and select Create keys
groups. When selected, you will be asked to give a name for the group. You may also
specify if all the member keys in this group should have the same settings as the
group itself. Typically, this is not the case. Each individual key created is separate
from the others, even if in the same group. Otherwise it would not make sense to
have several encryption keys (i.e. if all had identical settings).
Create an Encryption Key
Once you have created an Encryption Keys Group, you may create and configure
individual encryption keys.
You should create encryption keys to fulfill an organizational or functional need, e.g.
Management Key, Project X Key and Company common key.
To create a new Endpoint Encryption for Files and Folders key:
1.
Navigate to the Policies tab of the Endpoint Encryption Manager.
2.
Find the Encryption Keys Groups.
3.
Double-click it to expand the groups.
4.
Either open an existing group, or create a new group by right-clicking the top
node and selecting Create keys groups.
5.
From the open group window, right-click and select Create new key.
6.
Enter the name for the new key, type in an optional description if needed.
50 |
Encryption keys
7.
Select the algorithm to be used by the key. You may select algorithm from the
drop-down menu. The recommendation is to use the Endpoint Encryption FIPS
140-2 certified implementation of the AES algorithm with a key length of 256 bits.
8.
When finished, select OK to create the encryption key.
Right-click options on an Encryption Keys Group
Open group
Opens a window displaying the content (keys) of the group.
Rename group
Changes the name of the Keys Group. This does not affect the association of the group
content to other objects.
Delete group
Deletes the selected Keys group. The group must be empty before it can be deleted.
You will be prompted if you want to permanently delete the group, otherwise it will be
placed in the Endpoint Encryption Deleted objects. See the Endpoint Encryption
Manager guide for additional details.
Set as default group
Set the selected Encryption Keys Group to the default group.
Reset all to group configuration
Resets the properties of the individual keys within the group to those of its group,
including the Users list for each key.
Create copy
Creates a copy of the Keys Group based on the selected one.
Properties
Opens the properties of the selected Keys Group. The content of this dialog is
described later in this document.
Right-click options on an individual encryption key
Add key
Creates a new key within the group.
Rename key
Changes the name of the selected encryption key. This does not affect the association
of the policy to other objects.
| 51
Encryption keys
Delete key
Deletes the selected encryption key. If you delete a key, all users connected to that
policy will have all restrictions removed as they were defined in the deleted policy.
You will be prompted if you want to permanently delete the group, otherwise it will be
placed within Endpoint Encryption Deleted objects. See the Endpoint Encryption
Manager Administration Guide for additional details on deleting objects.
CAUTION: Be very careful when deleting encryption keys! If permanently deleted, there is no way to recover the encryption keys. Data encrypted with a deleted key will be permanently inaccessible. Thus, it is recommended to never delete an encryption key. Instead, consider an archiving function where obsolete encryption keys are moved to a special encryption keys group, e.g. Obsolete Encryption Keys. Simply drag‐
drop keys between groups in order to do this. Figure 24: Archiving old Encryption Keys to a special group Reset to group configuration
Resets the properties of the individual key to those of its group.
Properties
Opens the properties of the selected key. If the key is within a group that is controlled,
the properties of the member key are defined at the group level; i.e. the keys in the
group cannot be configured individually.
Encryption key configuration settings
When selecting the Properties option for an Encryption Keys Group the key group
configuration dialog opens up.
52 |
Encryption keys
Group
This dialog presents information about the Keys group. You may type in some
description for the group in the field. Click Apply to save any changes.
Validity
This dialog sets the validity parameters for the keys within the group.
Figure 25: Validity settings for an Encryption Keys group Key is enabled
This option enables/disables the keys within the group. Disabled keys cannot be
retrieved by users and cannot thus be used to encrypt/decrypt data.
Expiry
You can specify a date where the key will be valid until. After this date access to the
key (and therefore access to data protected by it) will be denied.
Caching
Allow keys to be cached locally
Enables local caching of the key. Normally keys are obtained on access from the
network Endpoint Encryption database. This means that the only way to access
protected data is to have a good connection to the Endpoint Encryption database.
If you need data to be available to users’ offline, you can allow local caching of a
particular key or on keys within a controlled group.
For the first time a key is requested, the user must authenticate against a Endpoint
Encryption Database to obtain a fresh copy of the key. If the Database is not
accessible then the user authenticates against a local key cache and queries it for a
| 53
Encryption keys
copy of the key. If the key could be obtained from the Database, then the local copy
may be installed, or updated at the same time. If the user’s credentials are not
correct, no keys are released.
Remove from cache after...
Causes a local cached copy of a key to be wiped from the local key cache after a
certain number of days of disconnection. This prevents users obtaining keys, and then
continuing to use them for extended periods of time without validating their
credentials against the central Endpoint Encryption Database. You can use this option
to ensure that if you make changes to the validity or user list of cacheable keys, that
these changes are enforced within a certain period of time.
Users
You can restrict access to keys to certain users by adding them to the keys user list.
Figure 26: User settings for an Encryption Keys group/Encryption Key When the list is empty, any user who has valid Endpoint Encryption credentials can
obtain the key. Once one or more users are added to the list though, ONLY those
users can obtain, or administer the key, irrespective of admin level, i.e. if the list is
defined without any administrators added to the list, then no administrator can
manage the keys in the group. This prevents general Endpoint Encryption
Administrators from being able to access sensitive data.
Use the Add and Remove buttons to edit the list. Both individual users as well as
Endpoint Encryption user groups may be assigned to a key group.
CAUTION: The assignment of users to keys is an irreversible process. Once the users are assigned, only those on the list can change any property of the keys in the group. Likewise, if you delete a user group or a 54 |
Encryption keys
user that is assigned to the key, then that group or user can no longer manage the key. Be extra cautious if this is the only object assigned to the key; otherwise the key may become impossible to manage. Such a situation cannot be resolved. Also be very cautious when permanently deleting users. Make sure that users that are permanently deleted are not the only persons assigned to any encryption key. If permanently deleted and no other user is assigned to manage the key, then the key will forever be impossible to manage. Such a situation cannot be recovered. Such keys will forever remain in the system as zombie”keys. Under no circumstances must zombie keys be selected to encrypt data! NOTE: You can restrict what administration functions regarding keys (add key, delete key, properties etc) by setting a users administration rights – see Endpoint Encryption Manager Administration Guide for details. Admin level
Admin level must be greater than…
You can specify the minimum admin level required to access a key. This parameter is
enforced in addition to the restricted user lists. If you add a user to the user list, and
also set an admin level, then if the user does not match or exceed the level they will
not be able to access the key. For more information on admin levels see the Endpoint
Encryption Manager Administrators’ Guide.
Allowed to use on client
This option offers a way to prevent certain Endpoint Encryption administrator levels
from being able to access encryption keys from clients, e.g. for reading encrypted
data. Even if the Administrators of a restricted level are listed in the Users list, when
they try to authenticate on a Endpoint Encryption for Files and Folders client, no
encryption key with the corresponding Admin level restriction set will be loaded. By
un-checking the relevant tick-boxes 1 through 32, you restrict the access right based
on the Endpoint Encryption Admin level.
Algorithm
Select algorithm to be associated with the keys in the group. The available algorithms
are presented in the drop-down menu. The recommendation is to use the Endpoint
Encryption FIPS 140-2 certified implementation of the AES algorithm with a key length
of 256 bits.
Properties for an Encryption Key
Information
This dialog presents information about the particular encryption key. If the key is in a
non-controlled group, you may edit the description information about the selected key.
Select Apply to save any changes.
Validity
Please see the Validity section of this Guide for details on this dialog.
| 55
Encryption keys
Users
Please see Users section of this Guide for details on this dialog.
56 |
Assigning and Updating Policies
Assigning and Updating Policies
Assigning policies
Once you have created encryption policies, these must be assigned to the users and
user groups in order to take any effect.
Encryption policies are assigned to users and user groups (typically the latter) through
the Endpoint Encryption Manager.
If you have created your Endpoint Encryption for Files and Folders policies wisely, i.e.
with a specific aim and purpose for each policy, assigning them to users and user
groups will be a very simple task.
1.
Once you have started the Endpoint Encryption Manager and have verified that
your Endpoint Encryption for Files and Folders policies are ready for
deployment, navigate to the Users tab and then select to what user object
you want to assign a particular policy, e.g. the Management user group.
2.
Open the Properties of the object and scroll down the left-hand pane of the
object configuration window to find the Policies icon.
3.
Click Add to select what encryption policy shall be assigned to the object. To
remove a policy from the list, select the policy and click Remove. Select
Apply to save any changes in the policy assignment.
Figure 27: Users – Selecting encryption policy | 57
Assigning and Updating Policies
NOTE: You can only assign one type of policy to a user group or user. I.e. a user cannot have two different Endpoint Encryption for Files and Folders policies applied. Once the policy has been assigned to the user object, users may retrieve the policy.
When the Endpoint Encryption for Files and Folders client is installed, after the
mandatory reboot, the user logging on can be forced to authenticate to Endpoint
Encryption for Files and Folders in order to retrieve the correct encryption policy
assigned. This mandatory authentication is subject to a policy setting; see the General
section of this guide for details. If enforced, there is no way to cancel the
authentication dialog but to enter correct Endpoint Encryption credentials.
If there is no connection to the Endpoint Encryption database hosting the policy the
user will work with the default policy from which the install set was created (i.e. a
“blank” policy if not created from a dedicated policy).
Updating policies
The policy for a user is automatically updated whenever the user performs a Endpoint
Encryption for Files and Folders authentication. Provided there is a connection to the
Endpoint Encryption database holding the corresponding policy, any changes to the
user’s policy will immediately be applied. Likewise, any updates regarding encryption
keys will also take immediate effect after a successful Endpoint Encryption for Files
and Folders authentication.
If there is no connection to the Endpoint Encryption database, the policy will not be
updated, nor will the encryption keys.
The update is thus fully transparent and automated, provided there is a connection to
the correct Endpoint Encryption database. The user cannot avoid having updates
applied, nor can the updates be altered by the user.
Policy changes requiring reboot
Unlike Endpoint Encryption for Files and Folders versions 2.x, there is no need to
restart the client machine for any policy updates to take effect. All policy changes take
immediate effect once updated on the client.
However, some policy changes might require other events before they are enforced.
One example is the setting for Key Manager, Default Key Inactivity Timeout;
changes to this setting will only happen when keys are reloaded.
58 |
Creating an Install Package
Creating an Install Package
About Install Packages
Endpoint Encryption for Files and Folders is installed by running a special archive file
created from the Endpoint Encryption Manager. This archive file contains all the
components necessary to install the Endpoint Encryption for Files and Folders client.
The Endpoint Encryption Manager compresses the files needed into a single selfcontained executable for ease of management.
Install sets can be created for policy groups, or an individual policy. This chapter deals
with creating the install package, for information on how to apply it, see the Creating
an Install Set chapter for more information.
Creating an Install Set
You create the Install Set from the Endpoint Encryption Manager.
1.
Select the policy you want to create set for.
2.
From the Policies tab, select the Endpoint Encryption for Files and Folders
Policies Groups node.
3.
Open the group, and select the policy object containing the settings you wish to
deploy.
4.
Select either an individual Policy or a Policy group. There is no difference in the
resulting install set.
5.
Right-click it and choose Create install set.
6.
Select which file sets you want to include. This should include at least the core
Endpoint Encryption for Files and Folders files, and also any token, reader and
language file sets you want to use.
7.
Select the Endpoint Encryption Server that the new client will communicate with
to synchronize policy information and to retrieve encryption keys. The default is
the Endpoint Encryption Server that the administrator is currently using, but
could be any the administrator has access to. You can specify multiple connection
points if you have more than one server defined.
NOTE: For information on setting up a Endpoint Encryption Server, see the Endpoint Encryption Manager Administration Guide. 8.
Select creation and install locations and set install parameters.
9.
Set the location you wish the completed install file to be saved to and the
directory on the client you wish Endpoint Encryption for Files and Folders to be
installed into.
Configuration base
This contains the policy group (or individual policy) that will form the configuration
base for this install set. It is possible to create an installation set based on an
individual policy such that the specific settings in that policy are included in the
| 59
Creating an Install Package
installation set and thus applied without the user having to logon on to the Endpoint
Encryption database.
Install set save location and program directory
Specify the location where you want to save the installation set and then select to
what program folder on the client machine that Endpoint Encryption for Files and
Folders will be installed to.
Uninstall password
This line allows you to select an uninstall password for the Endpoint Encryption for
Files and Folders client. If selected, users cannot uninstall Endpoint Encryption for Files
and Folders, and thereby deviate from the information security policy, unless they can
enter the correct uninstall password.
Installation progress options
The next two options defines the visibility of the installation; Silent installs do not give
the user any visible display of the install process, and are used in automatic
deployment environments, such as Microsoft SMS. Also, the uninstall process will be
entirely silent. Automatically restart reboots the system automatically when install
and uninstall has finished.
CAUTION: If you use the automatic restart option, the user will lose any unsaved data at the automatic restart as no warning message is presented. Select Finish to create the installation set according to the settings you have made.
The installation set containing the Endpoint Encryption for Files and Folders client will
be stored in the location you specified.
Show in “Add/Remove Programs”
This option allows you to control whether the Endpoint Encryption for Files and Folders
client shall appear as an entry in the Windows’ Add/Remove programs listing or
not. If it is not listed, then it is only possible to remove CE through the command
prompt. This feature, along with an Uninstall Password, creates a highly tamperresistant client installation.
NOTE: If you have forgotten the uninstall password, or if you want the Endpoint Encryption for Files and Folders entry to show in Windows’ Add/remove programs, you just need to over‐install the existing installation with an Install set containing a known (or no) password set, and/or the Show in Add/Remove programs option enabled. You may then uninstall with the new (or no) password, and/or from the Windows’ Add/Remove programs. 10. Run the installation file on the target machines.
The steps involved when creating the Install Set are summarized in the following
picture:
60 |
Creating an Install Package
Figure 28: Creating an Install Set After the install file has been run on a client machine and the machine restarted, it will
immediately connect back to the Endpoint Encryption Server(s). When the user has
logged into Windows, the Endpoint Encryption for Files and Folders authentication
dialog can be set to appear – a so-called forced logon. This mandatory logon is subject
to a policy setting; see the General section of this guide for details. If enforced, this
first authentication cannot be bypassed as it forces the user to retrieve correct
encryption policy from the Endpoint Encryption database. Without the forced
authentication, there is no guarantee that the user really gets the correct policy
applied.
If there is no Endpoint Encryption Server available at the time of the forced first
authentication, the user will be working with the default policy from which the install
set was created (i.e. a blank policy if not created from a dedicated policy) and without
any encryption keysInstalling, Upgrading, and Removing Endpoint Encryption for Files
and Folders
Creating the Install set
The Endpoint Encryption for Files and Folders client is created by extracting the
necessary client files along with some configuration files from the Endpoint Encryption
database, via the Endpoint Encryption Manager, and packaging these files into an
executable file.
| 61
Creating an Install Package
Installing Endpoint Encryption for Files and Folders
client
Supported platforms
•
Windows 2000 Workstation SP4 with RollUp1
•
Windows XP SP2
•
Windows Vista
•
Minimum Windows Update Requirements
Windows 2000:
•
SP4
•
KB891861 (Update Rollup 1 for Windows 2000 SP4)
•
KB922582
Windows XP:
•
SP 2
•
KB922582
•
(or SP3)
Windows Server 2003:
•
SP1
•
KB922582
•
KB930184
•
KB922529
•
KB910048
•
(or SP2)
NOTE: The Endpoint Encryption for Files and Folders installation will check for these updates before executing the installation. Without these updates installed, the installation will fail. To install Endpoint Encryption for Files and Folders:
1.
Make sure you have local admin rights on the computer where you intend to
install.
2.
Ensure the Endpoint Encryption Server you defined in your Endpoint Encryption
Manager is running (preferably as a system service).
62 |
Creating an Install Package
3.
Execute the Install Package created by the Endpoint Encryption administrator
on the target computer. This enables and installs Endpoint Encryption for Files
and Folders. Note that you well may distribute the client using any software
distribution tool like Microsoft® System Management Server™ (SMS) or Novell®
ZenWorks™.
4.
Endpoint Encryption for Files and Folders requires the client computer to restart
before the client will launch.
After the required restart, Endpoint Encryption for Files and Folders may require the
user to logon in order to download encryption keys and execute the proper encryption
policy assigned to the user. This forced logon is subject to a policy setting. If the logon
is successful, it will apply the latest policy and start encrypting according to the
centrally defined policy. If the Endpoint Encryption Server cannot be reached, then the
user will not be given any encryption keys and the default policy from which the install
set was created (i.e. a blank policy if not created from a dedicated policy) will be used.
Also, if there is no forced logon, the default policy will be applied.
You can use the same package to install any number of Endpoint Encryption for Files
and Folders clients. Note that if you have created the install set from a particular
policy, the unique settings of that policy will be applied wherever that install set is
executed.
Upgrading Endpoint Encryption for Files and Folders
Upgrading an existing 3.x system
In order to upgrade your population of Endpoint Encryption for Files and Folders
clients, you need to first import the new client files to the Endpoint Encryption
database.
Start by running the Endpoint Encryption CD with the latest version of Endpoint
Encryption software. Choose the installation language of your choice from the
installation CD. Run the installation and select all options that reflect your current
Endpoint Encryption configuration. In particular, assure you mark all the tick boxes for
Endpoint Encryption for Files and Folders.
Finish the installation and then start the Endpoint Encryption Manager.
In the Management Centre, open the System tab and then expand the Endpoint
Encryption File Groups. Locate the file group Endpoint Encryption for Files and
Folders client files. There are now three ways to complete the upgrade of the client
files.
1.
Upgrade each file individually
2.
Upgrade the entire existing file group
3.
Create a new file group
Upgrade each file individually
| 63
Creating an Install Package
If you know precisely the file(s) that have changed for a particular upgrade, you may
upgrade the file(s) individually.
1.
Open the Endpoint Encryption for Files and Folders client files and identify
the file(s) you want to upgrade.
2.
Right-click the file to upgrade and select Upgrade.
3.
Then locate the corresponding upgraded file from your Endpoint Encryption
Manager Program directory, subdirectory [McAfee\Endpoint Encryption for
Files&Folders]. Then finish the upgrade.
For more information about upgrading files within the Endpoint Encryption database,
please see the Endpoint Encryption Manager Administration Guide.
Upgrade the entire existing file group
You can also update all the files in the existing file group CE3: Endpoint Encryption
for Files and Folders 3 Client Files.
1.
First delete all the existing files in the group.
2.
Then right-click anywhere within the (empty) group content window and select
Import file set… (not Import files).
3.
In the search dialog that opens, browse the system directory where you have
installed the Endpoint Encryption files from the Installation CD.
4.
Locate the file called SbCeFiles.ini in the SYSDRIVE:\Program Files\McAfee
directory.
5.
Open the file and assert in the Endpoint Encryption Manager log at the bottom of
the Admin interface that the files are imported to your new file group.
Create a new file group
Instead of upgrading individual files, you may create a new file group for each and
every file in the newer version of Endpoint Encryption for Files and Folders. This is an
alternative approach to the previous one, leaving the old client files untouched in the
database.
1.
In the Endpoint Encryption Manager, open the System tab and then right-click
the Endpoint Encryption File Groups and select Create File Group.
2.
In the next dialog, name the new file group to something similar to CE3:
Endpoint Encryption for Files and Folders 3.x Client Files.
3.
Make the group a controlled group (all group members have the same
configuration).
4.
Once the group has been created, right-click the group and select Properties.
5.
Click the Contents icon and set the group content to Endpoint Encryption for
Files and Folders files only.
6.
Save the settings, close the group properties window and double-click the new
group to open its content.
7.
To fill the group with correct content, right-click anywhere within the (empty)
group content window and select Import file set… (not Import files).
64 |
Creating an Install Package
8.
In the search dialog that opens, browse the system directory where you have
installed the Endpoint Encryption files from the Installation CD.
9.
Locate the file called SbCeFiles.ini in the SYSDRIVE:\Program Files\SBAdmin
directory.
10. Open the file and assert in the Endpoint Encryption Manager log at the bottom of
the Admin interface that the files are imported to your new file group.
11. Based on your new file group, create a new Endpoint Encryption for Files and
Folders client and ensure that only the new file group is included, containing the
upgraded files.
CAUTION: Under no circumstances should two file groups containing Endpoint Encryption for Files and Folders client files be selected for an installation set. For any of the three above described file upgrade scenarios, a new Endpoint
Encryption for Files and Folders client installation set must be created and then
deployed. This is described next.
Upgrading the client installation
To upgrade a Endpoint Encryption for Files and Folders client, the following schema
applies.
Upgrade
from version
2.x
To
version
3.0
Actions
To upgrade any previous version of Endpoint
Encryption for Files and Folders to Endpoint
Encryption for Files and Folders 3.1.0, simply overinstall any existing installation using an Install Set
for 3.1.0. The Installer will automatically remove
any previous version of Endpoint Encryption for
Files and Folders before completing the installation
of version 3.1.0. Also, since version 3.1.0 is
backward compatible, there is no need to decrypt
any data even if encrypted with version 2.x.
Endpoint Encryption for Files and Folders 3.1.0 can
read also data encrypted by versions 2.x.
NOTE: A reboot is always required to activate the latest version. Also, when upgrading runtime environments (RTEs) for the Aladdin eTokens, be aware that there is incompatibility between the eToken RTE versions available in Endpoint Encryption. If you have an installed eToken RTE of 3.00 and want to upgrade Endpoint Encryption for Files and Folders and the eToken RTE to 3.60, then you must first uninstall the existing Endpoint Encryption for Files and Folders client, restart the machine and then install the new version with the correct RTE, irrespective of what version of Endpoint Encryption for Files and Folders is installed. Updating Endpoint Encryption for Files and Folders
policies
In order to update a policy on a client, change the policy and then ask the users with
that policy to do a manual Endpoint Encryption for Files and Folders logon (described
in the Synchronize section of this guide). This will immediately update the policy. If no
manual logon is done, the policy will be updated the next time the user does a
| 65
Creating an Install Package
Endpoint Encryption for Files and Folders authentication. If there is no connection to
the Endpoint Encryption Server, the policy cannot be updated.
Uninstalling Endpoint Encryption for Files and Folders
To remove Endpoint Encryption for Files and Folders:
1.
Ensure that a user with the context menu options Decrypt, and Search
encrypted… logs on (Endpoint Encryption for Files and Folders Synchronize) to
the computer. Also, this user should be allowed to access the encryption keys
necessary to decrypt any data on the computer.
2.
Search the local drives for any encrypted data. Use the Search encrypted…
function described in the Search encrypted…section.
3.
Decrypt the data found in the search by selecting all search results, right-clicking
them and select Decrypt…. For large amounts of data, the decryption process
may take some time. If a file fails to be decrypted, it is most probably opened by
another application, e.g. a virus scanner doing a system scan for the moment.
Try to decrypt the failed files again after a few seconds.
4.
Open Add or Remove Programs.
NOTE: If the option Show in Add/Remove Programs was not selected for the Install Set that installed the Endpoint Encryption for Files and Folders client, then it is only possible to uninstall using the command prompt. 5.
Find the Endpoint Encryption for Files and Folders item and click Remove.
6.
If you are uninstalling from the command prompt, navigate to the Endpoint
Encryption for Files and Folders program directory, normally [SYSDRIVE:\Program
Files\McAfee\Endpoint Encryption for Files&Folders] and type:
sbcesetup –uninstall 7.
If enabled, you will be prompted for the uninstall password before uninstall can
start. If you have forgotten the uninstall password, simply over-install the
existing installation with an installation set where no password protection is set
and then redo the Uninstall. NOTE: the machine must restart between the overinstall and removal.
Other than the (optional) password uninstall protection, removing Endpoint Encryption
for Files and Folders is only possible if the current user has local administration rights.
General users will not be able to remove the software. You will be prompted to restart
the computer to finish the removal.
NOTE: The steps (1) through (3) above are crucial since no data gets decrypted automatically when uninstalling Endpoint Encryption for Files and Folders! If you forget to decrypt the data before removing the client, simply install the client
again and pursue steps (1) through (3) as described above. You will be required to do
a Endpoint Encryption for Files and Folders authentication before you can proceed with
the decryption and client removal.
NOTE: If you have forgotten the uninstall password, or if you want the Endpoint Encryption for Files and Folders entry to show in Windows Add/remove programs, you just need to over‐install the existing installation using an Install set with a known (or no) password set, and/or the Show in Add/Remove programs option enabled. You may then uninstall with the new (or no) password, and/or from the Windows Add/Remove programs. 66 |
Creating an Install Package
Also, when uninstalling from a Windows Vista system, there will be a (hidden)
directory left behind on the client: [SYSDRIVE:\Program Data\McAfee]. Though not
causing any system disturbances, this folder has to be deleted manually.
Installing Endpoint Encryption Manager
To install Endpoint Encryption Manager:
1.
Run Setup.exe from your Installation CD or install media. More information on
setting up Endpoint Encryption for Files and Folders can be found in the Endpoint
Encryption for Files and Folders Quick Start Guide and the Endpoint Encryption
Manager Administration Guide.
Supported platforms
•
Windows 2000 Workstation (evaluation use only!)
•
Windows 2000 Server
•
Windows XP (evaluation use only!)
•
Windows Server 2003
•
Windows Vista
Uninstalling Endpoint Encryption Manager
To uninstall Endpoint Encryption Manager:
1.
Open the control panel on the target machine
2.
Open Add or Remove Programs.
3.
Find the Endpoint Encryption Manager item and click Remove.
NOTE: Removing Endpoint Encryption Manager does not remove any Endpoint Encryption for Files and Folders clients. After removal, no encryption keys can be retrieved from the database as it is deleted. Thus, make sure that all Endpoint Encryption for Files and Folders clients are removed and all data decrypted before removing Endpoint Encryption Manager. If you back up your Endpoint Encryption database directory before uninstalling the
product, you can be sure of the ability to retrieve encrypted data and policies in the
future. The default location of this is:
Windows 2000/2003/XP:
[SYSDRIVE:\Program Files\SBAdmin\SBDATA]
Windows Vista (hidden directory):
[SYSDRIVE:\Program Data\SBAdmin\SBDATA]
NOTE: When uninstalling from a Windows Vista system, there will be a (hidden) directory left behind on the machine: [SYSDRIVE:\Program Data\SBAdmin]. Though not causing any system disturbances, this folder has to be deleted manually. It is also wise to leave this directory, should there be a need to later access encrypted data that was not decrypted before the Management Centre was uninstalled. Hence, leaving this folder untouched is good for a future backup purpose.
| 67
Endpoint Encryption for Files and Folders client
Endpoint Encryption for Files and
Folders client
This chapter describes the client side of Endpoint Encryption for Files and Folders and
the available options.
System tray icon
When Endpoint Encryption for Files and Folders is installed, you will notice a new icon
in the system tray – the Endpoint Encryption for Files and Folders application icon:
Figure 29: Endpoint Encryption product icon This icon is the same for all Endpoint Encryption products. Thus, all Endpoint
Encryption product tray icon menus will be available from this common product icon. If
you right-click this icon, a menu appears with a number of options. A few options are
subject to policy control and may be made invisible to the end user.
Depending on the number of Endpoint Encryption products installed on the client, the
tray icon menu will have different sections. The picture below shows a client where
only Endpoint Encryption for Files and Folders is installed.
Figure 30: Endpoint Encryption tray icon menu ‐ Endpoint Encryption for Files and Folders only 68 |
Endpoint Encryption for Files and Folders client
About Endpoint Encryption for Files and Folders
This option opens up a dialog with information about this installation of Endpoint
Encryption for Files and Folders.
Unload all keys
This option clears all the currently open keys from memory. The next time encrypted
data is accessed the user will be prompted to authenticate.
Local user key management options
Please see the Local user key management options section for details regarding these
options.
Endpoint Encryption Recovery
Selecting this option allows a user to recover a lost Endpoint Encryption for Files and
Folders password when offline. Doing an offline recovery requires an interaction with
the IT HelpDesk over telephone or the Endpoint Encryption User Web Recovery
system.
The recovery process starts with the following dialog:
Figure 31: Endpoint Encryption for Files and Folders Recovery – Recovery challenge code The client challenge code should be read out to the HelpDesk operator, or entered into
the Endpoint Encryption User Web Recovery interface.
Based on this challenge, the HelpDesk operator can see what user is trying to do the
recovery and ask authentication questions based on the information stored in the
Endpoint Encryption database or any other external system. If the Endpoint Encryption
| 69
Endpoint Encryption for Files and Folders client
User Web Recovery is used, then the questions entered by the user at the time of Web
Recovery registration will be presented.
Identification information such as department, cell phone number, nearest boss etc.
may be imported to the Endpoint Encryption database from external LDAP systems,
e.g. Microsoft ActiveDirectory. For more information about how to accomplish this,
please see the Endpoint Encryption Manager Administration Guide, chapters about
various connectors.
If the identification of the user is approved, then a response code will be presented to
the HelpDesk operator, or, in the User Web Recovery interface. This response code
should be entered into the client dialog appearing once the user has clicked Next>
after having presented the client challenge.
Figure 32: Endpoint Encryption for Files and Folders Recovery – Enter recovery response code Once the response is entered into the dialog, select Enter. Based on the recovery key
size specified for the user in Endpoint Encryption Manager, additional response codes
may have to be entered. Please consult the Endpoint Encryption Manager
Administration Guide, chapter about User management for more information about
Recovery key sizes.
Once the response code(s) is entered, the user should click Next> in order to have
the response code verified. If successful, the user password will be reset to Endpoint
Encryption default ‘12345’. If the user has the password policy Force change if
‘12345’ enabled, then the user must change the password before proceeding with
the Endpoint Encryption for Files and Folders authentication. Please consult the
Endpoint Encryption Manager Administration Guide, chapter about password policies
for more information about password restrictions.
70 |
Endpoint Encryption for Files and Folders client
For more information about setting up and configuring Endpoint Encryption Web
Recovery, please see the Endpoint Encryption Manager Administration Guide, chapter
about Web Recovery.
Show status
This entry opens a dialog presenting the ongoing activities in the Endpoint Encryption
for Files and Folders client. For example, if the client is active in encrypting the content
of a network folder, it will be displayed in the dialog along with an approximation for
how long it will last.
There are also two buttons available:
Diagnostics
This buttons automatically creates an e-mail with an XML attachment using the system
default e-mail application. The attachment contains (non-sensitive) system data for
support purposes. The better description of the machine needing support, the better
understanding the Endpoint Encryption support staff will get and thus the chance of a
quick resolution of the support issue is dramatically improved.
The e-mail with the XML attachment shall be sent to the Endpoint Encryption support
representative along with a description of the support issue.
Again, it is important to stress that no secret or sensitive system data is gathered, but
only system configuration data. Under no circumstances is sensitive information about
encryption keys included, nor are any encryption keys, or pieces of these, ever sent to
Endpoint Encryption. As you may verify by reviewing the XML file in a standard Web
browser, there is no data disclosure of files stored on the machine, again only system
configuration data is extracted.
Endpoint Encryption makes no further use of the data sent to us other than trying to
understand and reproduce the support issue. As soon as it can be done safely, the
information sent to us is destroyed.
Also, if there is information included in the text file that you find inappropriate, then
edit the file before sending it to your Endpoint Encryption support representative.
The default e-mail address may be changed by altering a registry value on the
machine where the Diagnostics operation is executed. See the Client Registry controls
section for details.
Synchronize
Triggers a client synchronization with the Endpoint Encryption database. See the
following section for details.
| 71
Endpoint Encryption for Files and Folders client
Synchronize
Synchronizing Endpoint Encryption for Files and Folders triggers an authentication to
the Endpoint Encryption database. Upon synchronization, the user’s policy is updated
to reflect any changes in the Endpoint Encryption database. Also, all encryption key
assignments and settings are updated. For example, the user may have been revoked
access to a certain encryption key. After synchronization the revoked encryption key
will no longer be available to the user.
Also, any successful Endpoint Encryption for Files and Folders authentication when the
central database can be reached automatically updates the user’s policy and the
encryption key settings. Hence, it is not necessary to do a manual Synchronization to
get the policy updated; yet the option exists for immediate synchronizations.
For information on what settings are available in a Endpoint Encryption for Files and
Folders policy see the Endpoint Encryption for Files and Folders Policies chapter in this
guide.
Local user key management options
There are entries on the Endpoint Encryption for Files and Folders tray icon menu that
relate to the management of local user generated keys; each entry is subject to policy
control. When selected, each entry starts a wizard that assists the user in
accomplishing that operation in an easy and intuitive manner.
Figure 33: Local user key management menu options 72 |
Endpoint Encryption for Files and Folders client
Create Local Key…
Starts the encryption key creation wizard. Keys may be stored either on the user’s
local hard disk or on a removable unit, e.g. a USB flash memory stick. The encryption
keys are stored in key stores that are protected either by a password or a user digital
certificate. The creation wizard allows the user to select storage location and
protection method; these selections cannot be policy controlled.
NOTE: The password rules for local user keys follow the Endpoint Encryption password quality restrictions that are applied to the user, e.g. minimum length. (See the Administration Guide, section Password templates for details. All locally generated encryption keys can be recovered using the Endpoint Encryption
standard recovery procedure for lost tokens.
Delete Local Key…
Starts the key deletion wizard to delete local user keys, both locally generated keys
and imported keys. Encryption keys from the Endpoint Encryption central database
cannot be deleted with this option.
CAUTION: Be very careful with allowing users to delete local user encryption keys. If deleted, there is no way to restore that key. Export Local Key…
Selecting this option starts the wizard for exporting a user local key so that it can be
imported by other clients, i.e. shared. NOTE: it is not possible to export a user local
key and import it into an Endpoint Encryption database. Nor is it possible to export an
encryption key from the Endpoint Encryption database and import it by a client.
However, user local keys can always be shared with other users through export and
import, provided these operations are allowed by the policy.
In order to export a key, there must be one key available for export. If there is no key
available for export, this menu option will be visible, but not accessible.
Exported keys are protected by a transport password that the user selects. Also, in
order to complete the export the user must again authenticate to the key store holding
the encryption key, even if the key is already loaded in the client.
Import Local Key…
Selecting this option starts the wizard for importing a user local key that has been
exported from another client, i.e. shared. Like with the Export… function, note that it
is not possible to import a key from a Endpoint Encryption database. Only user local
keys can be shared with other users through export and import, provided these
operations are allowed by the policy.
| 73
Endpoint Encryption for Files and Folders client
In order to complete the import, the transport password must be entered. Also, the
user must authenticate to the key store to which the imported key shall be saved,
alternatively create a new key store. This authentication has to be done even if keys
from the key store are currently loaded in the client.
Rename Local Key…
Start the wizard that allows the user to rename a local key. Only local user keys
(generated or imported) can be changed; not centrally managed encryption keys.
Recover Local Keys…
This option starts the recovery wizard such that a user may recover user local keys,
should the authentication token have been forgotten or lost. The recovery operation
involves an interaction with the Endpoint Encryption administration system, just like
recovery for centrally generated keys. The user is prompted to select a new token,
e.g. set a new password, during the wizard.
Change Local Token…
This option starts the wizard that allows the user to change token, e.g. change the
protection mechanism for a key store from password to a digital certificate, or vice
versa. NOTE: changing the password for a local Key Store is managed through this
option also.
Context menu options (right-click options)
When Endpoint Encryption for Files and Folders is installed, the policy settings created
for the Desktop Integration and Email Integration will take effect. These settings
mainly affect the context menu (right-click menu below) options.
74 |
Endpoint Encryption for Files and Folders client
Figure 34: Endpoint Encryption for Files and Folders– Context menu options Encrypt…
If enabled for the user, this option encrypts the folder or file that is right-clicked. A
dialog opens up when selecting this operation, where the user may select what key
shall be used to encrypt the object.
Figure 35: Endpoint Encryption for Files and Folders– Encryption key selection NOTE: If the folder/file already is encrypted (e.g. according to a policy), the user cannot change the encryption key by selecting another key from the drop‐down menu. This is also reflected in the Encrypt context menu option being unavailable (greyed out), even if allowed in the policy. The Details >> button reveals more information about the selected encryption key,
e.g. algorithm.
When the user has selected encryption settings for the folder/file, click OK to execute
the encryption. The user may be asked to authenticate if the encryption key selected
is not loaded.
Depending on the amount of data to encrypt, there may be a progress bar of the
encryption displayed. At the end of the encryption, a dialog is presented telling the
result of the encryption. In some cases, the product may fail to encrypt some
documents in a folder. Typically, this is because the document is opened by
another application. For example, if encrypting a text document while having the
document open for editing, the encryption will fail. The application must first be closed
and then re-encrypting the document using the right-click operation.
Also be aware that a document may be "opened" by an application, even without the
user knowing it. For example the automatic anti-virus scanning process also opens
documents for virus scanning and then automatically closes the documents when the
scanning has finished. If there is a coincidence that a document is scanned for viruses
at the time when the user tries to encrypt it, the encryption will fail. The user then has
to redo the encryption. Typically, this may be done within a few seconds.
Decrypt…
If enabled for the user, this option decrypts the folder/file the user right-clicks.
NOTE: If the folder/file already is encrypted (e.g. according to a policy), the user cannot decrypt it. This is also reflected in the Decrypt context menu option being unavailable (greyed out), even if allowed in the policy. | 75
Endpoint Encryption for Files and Folders client
If the folder/file is encrypted (e.g. according to a policy), the user cannot decrypt it.
This is also reflected in the Decrypt context menu option being unavailable (grayed
out), even if allowed in the policy. Depending on the amount of data to decrypt, there
may be a bar stating the progress of the decryption. At the end of the decryption, a
dialog is presented telling the result of the decryption. In some cases, the product may
fail to decrypt some documents in a folder. Typically, this is because the
document is opened by another application. For example, if encrypting a text
document while having the document open for editing, the decryption will fail. The
application must first be closed and then re-decrypting the document using the rightclick operation.
Also be aware that a document may be "opened" by an application, even without the
user knowing it. For example the automatic anti-virus scanning process also opens
documents for virus scanning and then automatically closes the documents when the
scanning has finished. If there is a coincidence that a document is scanned for viruses
at the time when the user tries to decrypt it, the decryption will fail. The user then has
to redo the decryption. Typically, this may be done within a few seconds.
Search encrypted…
This option is only available when right-clicking a folder, or the Windows Start button.
When selected, a search dialog opens up that allows the user to specify the search.
Figure 36: Endpoint Encryption for Files and Folders– Search dialog Specify the parameters for the search, e.g. search for all files and folders encrypted
with a particular key (or <any key>) on this location. When ready, select Search to
launch the search. As the search progresses, matching objects found will be displayed
in a list.
Once the search is complete, the objects found may be marked with Ctrl-A and then
any action can be performed on them, e.g. right-click and select Decrypt.
76 |
Endpoint Encryption for Files and Folders client
This operation is very helpful before uninstalling Endpoint Encryption for Files and
Folders from a computer. As no data is decrypted when uninstalling the client, any
encrypted data must first be decrypted. To find this data, the Search encrypted…
function is the tool to use.
Create Self-Extractor
This option allows the user to create a special package of a file or folder, namely a
self-extracting package that is encrypted with a password (as specified in PKCS#5).
This package may be stored on portable media and then opened on other systems by
simply providing the password used to encrypt the file/folder. Or, it may be attached
to an e-mail (in a *.cab format) and sent to a recipient that does not have Endpoint
Encryption for Files and Folders installed. For both cases, there is a corresponding
option in the Endpoint Encryption for Files and Folders context menu.
Figure 37: Create Self‐extractor context menu option Create Self-Extractor ({filename}.exe…)
This option creates an encrypted self-extracting file (*.exe) of whatever file or folder
is selected. Note the source file/folder will remain intact on disk, only a copy of the
file/folder is transformed into a self-extractor, irrespective of if it is encrypted or not.
Once selected, the user is asked to provide details to the self-extracting file:
| 77
Endpoint Encryption for Files and Folders client
Figure 38: Entering encryption password for self‐extracting file In essence, only the password used to encrypt the self-extracting file needs to be
entered. As an option, the user may specify where to save the self-extracting file. The
default location is the same as the location of the source file/folder. Also, the user may
change the name of the self-extracting file. By default, the self-extracting file is named
as its source file/folder with the *.exe extension.
Figure 39: Selecting storage location for the self‐extracting file The user may browse for a suitable storage location, e.g. a USB memory stick
attached to the computer, by clicking Browse.
When finished, the user clicks OK, whereby the self-extracting file is created. The selfextracting file has the following icon:
Figure 40: Example of self‐extracting file The extra options may be hidden/displayed by clicking the Advanced button.
Attach as Self-Extractor to E-mail…
When selecting this option, the self-extractor is automatically packaged into a *.cab
(cabinet) file and attached to a new e-mail. By simply calling Windows to create a new
e-mail with the self-extractor *.cab attachment, using whatever default e-mail client
is installed, there is automatic support for all e-mail clients.
78 |
Endpoint Encryption for Files and Folders client
The self-extractor is packaged into a *.cab file as these are widely recognized in most
computer environments and the likelihood to pass e-mail virus scanners increases.
Otherwise, the plain *.exe is most likely to be blocked. However, proactive e-mail
virus scanners may very well block also the *.cab file as they detect an *.exe hidden
in the cabinet file. Thus, it may happen that e-mails sent with *.cab self-extractor
attachments are blocked.
Before creating the self-extractor *.cab package and attaching it to a new e-mail, the
user is asked to provide a password to be used to encrypt the self-extractor.
By clicking OK, the self-extractor is packed into a *.cab file and then attached to a
new e-mail ready to be sent.
Opening a Self-Extractor
For any of the two creation scenarios described above, opening and viewing the selfextractor is done in the same manner. For e-mail attachments, however, the selfextractor file must first be unpacked from the *.cab file. The user then just doubleclicks the Self-Extractor file. The user will then be prompted for the password used to
create and encrypt the self-extracting file. Thus, the creator of this file must submit
the password to the recipient of the file in a secure manner.
By default, after typing the correct password the content of the Self-Extractor will
open up automatically in the associated application However, the content won’t be
automatically saved to disk. When the user closes the application that opened up
the unpacked Self-Extractor content, the unpacked content will be wiped from the
disk. If the user instead wants to save the Self-Extractor content to disk, the
Advanced >> button must be selected.
This opens up an extra dialog where the user may select what to do with the unpacked
and decrypted Self-Extractor.
Figure 41: Selecting what to do with the content of the Self‐Extractor | 79
Endpoint Encryption for Files and Folders client
By default, the open-close-wipe option is selected. If the Extract option is selected
instead, the user may select where to permanently save the unpacked and decrypted
Self-Extractor. The user may browse for a suitable location with the Browse button.
Figure 42: Selecting storage location for the unpacked Self‐Extractor Self-Extractors may be read on any computer running Windows 2000 and later. There
is no need to have the Endpoint Encryption for Files and Folders client installed. Nor is
there any need to have local administrator rights in order to open a Self-Extractor.
NOTE: If a file is encrypted with Endpoint Encryption for Files and Folders ‐ when creating a self‐extracting file, the copy of the file being placed in the self‐extractor will be decrypted. However, the self‐extractor is itself encrypted (by the password selected by the user). Also, only the copy of the source file used for the self‐extractor is decrypted, not the source file/folder. CAUTION: When opening the files in the self‐extractor, i.e. the “regular” files, with the default applications, e.g. MS Word™, temporary files and working copies may be created from the “regular” files. These file copies contain traces of the content of the file in the self‐extractor. Thus, deleting the self‐extracting file and any extracted file may not be sufficient from a security perspective, should the self‐extractor contain sensitive information. In addition, traces of any file opened on the computer may be found in the system’s pagefile. Thus, make sure to advise your users to be careful on what computers the self‐extracting files are “opened”; sensitive data may be left behind even though the self‐extracting file and any extracted are “safely” deleted. Attach encrypted to e-mail…
This option only appears when right-clicking files, not folders. It allows the user to
send a particular document (plaintext or encrypted) in a protected way to a recipient
that also has Endpoint Encryption for Files and Folders installed. The option creates a
special encrypted format of the document and attaches it automatically to an e-mail
that you can send. The recipient must have Endpoint Encryption for Files and Folders
installed and also have access to the encryption key used when creating the encrypted
attachment, i.e. either having a connection to the Endpoint Encryption database
hosting the key or having shared a user local encryption key.
NOTE: If you attach an encrypted document to an e‐mail without using the Encrypt and E‐mail... function, the document will be attached in plaintext even if the document is encrypted on disk. The source document will still be encrypted, but the copy created as an attachment will be in plaintext and the recipient will receive it in plaintext. If you want the “standard” encryption to remain in the attached file, you need to set the e‐mail application as an Exempted Processes. 80 |
Endpoint Encryption for Files and Folders client
CAUTION: Please observe the following regarding this option: First, in order to have Encrypt and E‐mail… available in the context menu, it must first be enabled in the user’s policy. Second, this option will only be visible when right‐clicking a file, i.e. unlike the Self‐Extractors, not on folders. The following is a step-by-step instruction to the user how to send a document as an
encrypted e-mail attachment.
Creating and sending the attachment
Select document
Select the document that shall be sent as an encrypted attachment by right-clicking it
and select Attach encrypted to E-Mail... from the menu that appears.
CAUTION: The decision to send a particular document as an encrypted attachment is done outside the e‐
mail application. The Attach encrypted to E‐mail... operation is selected directly on the document and not from within the e‐mail application. The encrypted attachment will then automatically be attached to whatever e‐mail application is used in a new e‐mail. Select encryption key
The dialog that opens up will ask for a selection of encryption key for the attachment.
If the document is already encrypted, it is possible to proceed by clicking OK.
However, in that case the recipient must also have the key the document is already
encrypted with.
If the document was not already encrypted, the user cannot click OK until an
encryption key is selected from the list of available keys.
Select the encryption key to use for the attachment and then click OK to continue.
Authenticate and Send
Depending on whether the selected key is loaded or not, the user may be prompted to
authenticate before proceeding. Once the attachment is created and encrypted, it will
automatically be attached to a new e-mail that is created. The user then fills in the
rest of the e-mail and sends it.
Reading the attachment
For the recipient to read the attachment, first assure that Endpoint Encryption for Files
and Folders is installed and that the user can access the encryption key used to
encrypt the attachment.
Then the recipient simply double-clicks the attachment and it will open in its correct
application. If the key used to encrypt the attachment is not available, the recipient
must first authenticate.
The user may read the attachment and save it in an encrypted state.
| 81
Endpoint Encryption for Files and Folders client
Identifying encrypted files and folders
Figure 43: Endpoint Encryption for Files and Folders – Identify Encrypted Files Endpoint Encryption for Files and Folders can add a padlock icon to the file icon of
encrypted files and folders. This is an optional policy setting, Enable padlock icon
visibility. You can find out more about Endpoint Encryption for Files and Folders
policies in Endpoint Encryption for Files and Folders Policies of this guide.
Users may right-click files to find more information about their encryption by viewing
the Properties of the file. An extra tab Encryption is also visible.
It is also possible to enable an Encryption column to the Windows Explorer detailed
file listing view. This column is enabled as other detail columns are enabled in
Windows Explorer.
82 |
Endpoint Encryption for Files and Folders client
Accessing encrypted files
Figure 44: Endpoint Encryption for Files and Folders authentication To access encrypted information, users simply open the files as they would normally.
If the files are encrypted, users will be presented with a Endpoint Encryption for Files
and Folders authentication screen as above.
If the user has a correct personal ID and password, and the users account has been
assigned to the key used to protect the files then they will be able to access them.
The first time encrypted data is accessed Endpoint Encryption for Files and Folders
communicates over TCP/IP with a Endpoint Encryption Server, and downloads a copy
of the encryption key used to protect the data. Encryption keys may be cached locally,
so a connection to the Endpoint Encryption Server is not required when the key is
needed again. Other keys can only be used online, and a connection to the Endpoint
Encryption Server is needed each time a key is required.
You can find out more about Keys in the About Encryption keys chapter of this guide.
To summarize the access restrictions for encrypted data:
1.
The user must have valid Endpoint Encryption for Files and Folders credentials.
2.
The user’s Endpoint Encryption account must be allocated to the key used to
encrypt the data.
3.
The key must be cached locally, or a connection must be possible to the Endpoint
Encryption Server.
NOTE: With Endpoint Encryption for Files and Folders it is important to remember that the files are not encrypted with a user id and password, they are encrypted with a centrally controlled key, or a user locally generated key. Access to the data is only possible if the user can successfully authenticate to access the key. | 83
Endpoint Encryption for Files and Folders client
The .cekey file
When encrypting folders, either manually using the Encrypt option or when encrypted
automatically following a centrally defined folder encryption policy, a small file named
.cekey is written to the folder.
This file basically only contains information about what key shall be used to encrypt
the files stored in that particular folder. It contains the KeyID, not the key itself.
The file is protected by the system with the System and Hidden file attributes.
Moreover, the Endpoint Encryption for Files and Folders driver locks the file such that
it cannot be manipulated or deleted. This makes it highly tamper resistant.
If the .cekey file were to be deleted or manipulated, the encryption policy for the
folder hosting the file would be disabled, thus posing a security threat.
As long as Endpoint Encryption for Files and Folders is installed on the client computer,
the .cekey file cannot be manipulated in anyway.
Figure 45: Endpoint Encryption for Files and Folders– the .cekey file in encrypted folders Some client characteristics
This section outlines characteristics of the Endpoint Encryption for Files and Folders
client that are important for an administrator of the system.
Inaccessible folders
If the user is not assigned to the key used to encrypt a folder, then the user cannot
list (view) the content of that folder as long as Endpoint Encryption for Files and
Folders is installed. If the user is assigned to the key, then it is possible to list the
content of folders encrypted with that key.
This behavior is subject to a policy setting (Require authentication for listing of
encrypted folders) – see the Endpoint Encryption for Files and Folders Policies chapter
for policy details.
84 |
Endpoint Encryption for Files and Folders client
Follow target
When a file that is encrypted with key A, for example, and is moved to a folder where
files are encrypted with key B, then the file encrypted with key A will immediately be
re-encrypted with key B. This behavior, known as follow-target-encryption requires
that the user (process) transferring the file has access to both key A and key B, since
the file is first decrypted (with key A) and then instantly re-encrypted (with key B).
This operation takes place instantly when the file is placed in the folder encrypted with
key B.
Process sbceCore.exe automatically restarts
The process SbCeCore.EXE is the main process that manages the Endpoint Encryption
for Files and Folders client. If the user manages to kill this process, thereby attempting
to deviate from the assigned encryption policy, the user will automatically restart.
In previous versions of Endpoint Encryption for Files and Folders, this process was
protected from being killed. However, such protection is not allowed on the Microsoft®
Vista™ operating system. Hence, alterations have been done such that if killed, it will
instantaneously restart. The automatic restart cannot be disabled.
Client Registry controls
This section outlines some of the changes that may be made in the Registry of the
client machine in order to change the behavior of the Endpoint Encryption for Files and
Folders client.
NOTE: As for all client Registry changes, it is recommended that they are carried out by an authorized system administrator and not by the end‐user themselves Controlling the authentication result dialog
If the authentication to the central database fails, a message can be displayed to the
end user. This will notify the user that there was no connection to the central
database, but the authentication instead happened towards the user’s local database.
The message dialog is disabled by default but can be enabled by configuring the
SbC4.INI file, located in the Endpoint Encryption for Files and Folders program
directory, a subfolder called Data:
•
Windows 2000/XP: [SYSDRIVE:\Program Files\McAfee\Endpoint
Encryption for Files&Folders\Data]
•
Windows Vista: [SYSDRIVE:\Program Data\Endpoint Encryption for
Files&Folders\Data]
Add the following entries to the SbC4.INI file to enable the messages:
| 85
Endpoint Encryption for Files and Folders client
[Options.Logon]
Manual.ShowFailedRemoteConnect=Yes
RequestKey.ShowFailedRemoteConnect=Yes
The first entry Manual.ShowFailedRemoteConnect controls the result message display
when the authentication was initiated through a manual Synchronize by the user. A
parameter of “No” will display no message.
The second entry RequestKey.ShowFailedRemoteConnect controls the result message
display when the authentication was triggered by a key request (user trying to access
encrypted file). A parameter of “No” will display no message.
Once the file has been edited, a copy of the edited sbc4.ini file with the entries must
be made to the parent folder in order for the changes to take effect:
•
Windows 2000/XP: [SYSDRIVE:\Program Data\Endpoint Encryption for
Files&Folders\Data]
•
Windows Vista: [SYSDRIVE:\Program Data\Endpoint Encryption for
Files&Folders\Data]
Pre/Post-install authentication message alterations
By default, the authentication result is disabled and the options controlling the
message display in the sbc4.INI file are blank. The INI file is created automatically
after the installation and first successful Endpoint Encryption for Files and Folders
authentication. Hence, the additions have to be added manually after the client install.
However, there is a way to include the additions into an installation set, i.e. prior to
any deployment:
1.
Create a new TXT file named SbC4.TXT
2.
Open the text file and add the following text:
[Options.Logon]
Manual.ShowFailedRemoteConnect=Yes
RequestKey.ShowFailedRemoteConnect=Yes
3.
Save the changes and close the text editor.
4.
Change the TXT extension to INI, ignore any system warning. The file created in
step (1) shall now have a name of SbC4.INI
5.
Open the Endpoint Encryption Manager and locate the Endpoint Encryption File
Groups (System tab).
6.
Expand the file group containing the Endpoint Encryption for Files and Folders
client files.
7.
Right-click the content of this file group and select Import files...
86 |
Endpoint Encryption for Files and Folders client
8.
Browse for the SbC4.INI file from step (4) and finish the import.
9.
Create and deploy a new Endpoint Encryption for Files and Folders Installation
Set. This Install Set will now contain a SbC4.INI file with the settings needed to
show the authentication result dialog.
Likewise, any file/software distribution tool may be used to deploy this individual
SbC4.INI file containing the above entries only to the correct directory:
Windows 2000/XP: [SYSDRIVE:\Program Files\McAfee\Endpoint
Encryption for Files&Folders]
Windows Vista: [SYSDRIVE:\Program Data\McAfee\Endpoint Encryption
for Files&Folders]
| 87
Utilities for Endpoint Encryption for Files and Folders
Utilities for Endpoint Encryption for
Files and Folders
This chapter describes the various utilities that may be used together with Endpoint
Encryption for Files and Folders.
Troubleshooting utilities
There are two tracing utilities that may be used for troubleshooting Endpoint
Encryption for Files and Folders:
•
SbCE.log
•
sbceCoreTrace
The SbCE.log utility
Description
This log reveals what the key provider and the authentication dialogs are doing, not
the low-level transactions traced by the utility described next.
Where to find it
The SbCE.log is enabled by editing the sbc4.ini file in the Endpoint Encryption for
Files and Folders program directory.
•
On Windows 2000/XP: [SYSDRIVE:\Program Files\McAfee\Endpoint
Encryption for Files&Folders]
•
On Windows Vista: [SYSDRIVE:\Program Data\McAfee\Endpoint
Encryption for Files&Folders]
You will need to create this file by making a copy of it from the sbc4.ini file stored in
the subdirectory \Data.
How to use “SbCE.log”
Add:
[Debug]
Trace=1
to the sbc4.ini file in the \Data directory. Then copy the file to the parent directory.
The log will be output to the SbCE.log file in the same directory.
When to use SbCE.log
Authentication problems
88 |
Utilities for Endpoint Encryption for Files and Folders
•
Communication between the Endpoint Encryption for Files and Folders client
and the database
•
Tokens problems
•
Key retrieval from database and key loading
•
Send the log file to your McAfee representative for further analysis.
Kernel and User traces
Description
This utility contains two logging functions, tracing what happens in the User Mode and
the Driver component of Endpoint Encryption for Files and Folders respectively. The
utility logs all the activities in each component such that it detect what happens at a
certain occasions, e.g. if a module malfunctions.
As the Endpoint Encryption for Files and Folders driver is extensively involved in all file
I/O transactions of the client system, the Kernel trace log grows large very quickly.
Thus, before using the Kernel Tracing mode, the problem being traced must be as
close as possible to 100% reproducible. Then activate the Kernel Tracing, as per the
instructions below; try to reproduce the problem immediately and then disable Kernel
Tracing as soon as the problem has been reproduced.
The User Mode trace file does not grow as fast as the Kernel tracing, yet the same
procedure as for Kernel tracing should be followed in order to keep all logs as small as
possible, therefore reducing the amount of trace information not related to the issue
being reproduced.
The utility creates one log for Kernel tracing and one for User Mode tracing, depending
on what tracing is enabled (see steps below). Any trace file being generated should be
sent to your McAfee representative for further analysis.
Where to find it
This utility is built into the Endpoint Encryption for Files and Folders client. Hence, it
comes as a part of any deployed client.
Instructions
To create a coreTrace log, you should use the SbCeShell.com (command line version)
or SbCeShell.exe (Windows version) utility in the CE 3 [Program Files] directory.
To enable tracing, run the following commands from a command prompt when in the
CE 3 [Program Files] directory on the client:
1.
SbCeShell -enable_user_mode_trace
| 89
Utilities for Endpoint Encryption for Files and Folders
2.
SbCeShell -use_full_driver_trace
3.
SbCeShell -enable_driver_trace <{complete path}\trace file name>
4.
Perform the operation you want to log
5.
SbCeShell -disable_driver_trace
6.
SbCeShell -disable_user_mode_trace
Zip the two output files and send them to your McAfee representative for analysis. The
output files are:
•
the driver trace file specified in step 3, and
•
the user mode trace file called TraceFile.sb that is located in the users temp
folder (complete path is displayed in step 1).
The Windows built-in dump file
Description
This utility is actually not part of Endpoint Encryption for Files and Folders, but a builtin function in Windows (XP and Vista). Thus, it is only available on these platforms,
not any earlier versions of Windows. The utility is activated from within Windows.
When enabled, it generates a dump file that contains important data about the system
status, as it was when the error occurred. It also may give important clues about the
error itself.
Where to find it
This utility comes as a part of the Windows XP and Vista operating systems.
Instructions
The utility is activated as follows:
•
Start the Windows Control Panel
•
Select the System option
•
90 |
o
On XP: Click the Advanced tab
o
On Vista: Select Advanced system settings
Select Settings in the Startup and Recovery section
Utilities for Endpoint Encryption for Files and Folders
Figure 46: Windows dialog for mini‐dump file •
In the section named Write debugging information, enable the dump file
utility by selecting the appropriate dump file to be generated from the dropdown menu.
There are three types of dump files that Windows can generate:
•
Small memory dump
•
Kernel memory dump
•
Complete memory dump
Small memory dump
The Small memory dump often provides clues on what program module generated the
error. Also, it is quite small and thus handy to send as an e-mail attachment.
However, it only provides an indication of why and where the problem occurred. The
really interesting details are not included. Nevertheless, the “Small” dump will reveal if
the error is because of Endpoint Encryption for Files and Folders.
Kernel memory dump
The Kernel memory dump option generates a dump file that is actually best suited for
Endpoint Encryption for Files and Folders investigations. Thus, try using this option
when creating a dump file that may be because of Endpoint Encryption for Files and
Folders.
| 91
Utilities for Endpoint Encryption for Files and Folders
Complete memory dump
The Complete memory dump is the ideal dump from an error investigation perspective
as it provides a complete dump of the system RAM. Thus, it will be equal to the size of
the RAM of the machine, i.e. very large on modern computers.
All dump files may be considerably compressed. Please do this before sending them to
your McAfee representative for further analysis.
Also, this utility works the best if a debug version of the Endpoint Encryption for Files
and Folders client is installed. Please contact your McAfee representative for details
how this version may be obtained.
Used for problems related to
System failures, system stop errors
User mode process debugging utilities
The Windows Debug Diagnostics tool (Vista and XP only)
The Windows Debug Diagnostics tool is a tool designed to help troubleshoot
performance issues in any Win32 user-mode process. For example, the Debug
Diagnostics 1.1 tool can help you troubleshoot an application that stops responding
(hangs) or crashes, performs slowly or exhibits any other abnormal behavior, e.g.
explorer.exe or SbCeCore.exe. The tool, once executed, generates an application
dump that contains valuable information for analyzing the cause of the abnormal
behavior. The tool is only available for Windows XP and Windows Vista. For process
debugging under Windows 2000, please see The NTSD User Mode Process debugger
(Windows 2000 only) section later in this chapter.
Where to find it
The tool is built into Windows Vista and is available as a stand-alone tool for Windows
XP.
For Windows XP, the tool and the associated instructions are available at:
http://www.microsoft.com/downloadS/details.aspx?FamilyID=28bd5941-c458-46f1b24d-f60151d875a3&displaylang=en
Instructions/syntax - Windows Vista
Crashing applications
Whenever an application crashes on Vista, a process minidump is automatically
created in [%SystemRoot%\Minidump]. Retrieve the correct Process Minidump and
submit to Support for further processing.
92 |
Utilities for Endpoint Encryption for Files and Folders
Hanging applications
Open the Task Manager and identify the frozen process that needs to be monitored.
Right-click the process and select Create dump from the context menu. This will
generate a full memory dump file, in the directory stated above.
Instructions/syntax - Windows XP
Crashing applications
Follow the Process crash instructions provided on the download site:
http://www.microsoft.com/downloadS/details.aspx?FamilyID=28bd5941-c458-46f1b24d-f60151d875a3&displaylang=en
Hanging applications
Follow the Process Hangs instructions provided on the download site:
http://www.microsoft.com/downloadS/details.aspx?FamilyID=28bd5941-c458-46f1b24d-f60151d875a3&displaylang=en
In all of the above cases, send the generated dump reports to Support for further
processing.
The NTSD User Mode Process debugger (Windows 2000 only)
The NTSD user mode process debugger is not a utility that comes with Endpoint
Encryption for Files and Folders. Instead, it is a built-in debugger utility in the
Windows Vista, XP, Windows 2000 and Windows Server 2003 platforms.
The awareness of this utility is quite low, but it is a very useful utility for debugging
issues that occur in user mode processes. Endpoint Encryption for Files and Folders
has one key user mode process: SBCECore.EXE. If this process terminates
unexpectedly, the NTSD debugger may provide important clues.
Where to find it
It comes as a part of all modern Microsoft® Windows® operating systems.
Instructions/syntax
1.
Log on to the computer where SBCECore.exe crashes.
2.
Click on the Windows Start menu and select Run…
3.
Type: ntsd -g -G "C:\Program Files\ McAfee\Endpoint Encryption for
Files&Folders\SBCECore.exe
4.
(Change the path to the one that corresponds to your Endpoint Encryption for
Files and Folders program directory)
5.
Press enter and a command prompt window will appear.
| 93
Utilities for Endpoint Encryption for Files and Folders
6.
Wait until SBCECore.exe crashes. To know when this happens, you should look
into the command prompt window. When it has crashed you should see a
prompt looking like: 0:006>
7.
Type the following five commands in the command prompt window and hit
enter
between them (observe the dot in the beginning of logopen and
logclose):
1).logopen sbcedbgtrace.txt 2) g 3) kb 4) .logclose 5) q 8.
The window should now have been closed by the last command
9.
Click on the Start menu and select Run…
10. Type: cmd
11. Press enter and a new command prompt window will appear
12. In the new command prompt window, type: dir
You should now see a file called sbcedbgtrace.txt
13. Send that file to your McAfee support representative for further analysis.
Command line file operation utilities
File copy with retained encryption SbCeShell.com/.exe
The
SbCeShell utility contains a function to make a blind (raw) copy of an
encrypted file from a command prompt, to a target location without decrypting the
file. This copy function may be useful for scripted back-up operations.
Where to find it
The utility comes as a part of the Endpoint Encryption for Files and Folders client. Once
the client has been installed, the utility is ready to use.
Instructions/syntax
1.
Open a command prompt and step to the Program Files directory for Endpoint
Encryption for Files and Folders, normally: [SYSDRIVE:\Program
Files\Endpoint Encryption for Files&Folders]
2.
Run the command >SbCeShell -blind_copy <source> <destination>
94 |
Utilities for Endpoint Encryption for Files and Folders
Where source must be a path to a file, either complete or relative, and destination
must be either a path to an existing folder, either complete or relative, or, a complete
path to a non existing destination file.
When to use it
This "blind copy" feature of
SbCeShell is well suited for scripted back-up operations
where the back-up shall stay encrypted and the back-up runs when the user is not
present at the machine.
| 95
The Endpoint Encryption for Files and Folders Logon
The Endpoint Encryption for Files and
Folders Logon
The Forced Logon
When Endpoint Encryption for Files and Folders is installed on the client computer and
the computer has restarted, the user logging on to Windows may be forced to perform
a Endpoint Encryption for Files and Folders logon (authentication), depending on the
corresponding policy setting. If forced, it means that the user cannot cancel or bypass
it. The authentication dialog will persist.
The forced logon is enabled in all policies by default and must be disabled prior to
creating the corresponding install set for the disabling to have effect; the reason
being that the client won’t synchronize until after the first logon. Thus, if you want to
disable this setting, it has to accompany the install set, i.e. the install set must be
created based on the particular policy containing this setting (disabled forced
logon).
NOTE: If you are running Endpoint Encryption for Files and Folders together with Endpoint Encryption for PC it is possible to configure the system such that the logon to Endpoint Encryption for Files and Folders is automatically based on the authentication done in Endpoint Encryption for PC. With this configuration, the user will not see the Endpoint Encryption for Files and Folders logon once authenticated to Endpoint Encryption for PC. Please see the General section of this document for more information. Also, be aware that if any protected file is accessed, a logon will always appear but it
will be possible to cancel this logon.
Authentication desktop view switching
By default, the Endpoint Encryption for Files and Folders logon dialog appears on a
separate desktop view. It is possible to configure if the desktop view switching shall
occur or not by making changes to an INI file.
The configuration file controlling the desktop view switching is the
sbc4.ini file,
located in the Endpoint Encryption for Files and Folders program directory, a subfolder
called
•
Data:
Windows 2000/XP: [SYSDRIVE:\Program Files\ McAfee\Endpoint
Encryption for Files&Folders\Data]
•
Windows Vista: [SYSDRIVE:\Program Data\ McAfee\Endpoint Encryption
for Files&Folders\Data]
Using the user’s standard desktop view instead is accomplished by adding the
following entries to the
96 |
sbc4.ini file:
The Endpoint Encryption for Files and Folders Logon
[Options.Logon]
Manual.Force.UsePrivateDesktop=No
Manual.UsePrivateDesktop=No
RequestKey.UsePrivateDesktop=No
The first entry Manual.Force.UsePrivateDesktop controls the desktop switching
when there is a forced logon after the first installation of Endpoint Encryption for Files
and Folders. If the option is set to No – the logon dialog box will sit over your current
desktop view. If the option is set to Yes a private desktop (your current desktop
image excluding the icons and taskbar) will appear with the dialog box.
The second entry Manual.UsePrivateDesktop controls the switching when the user
manually triggers a Synchronize from the tray icon menu. If the option is set to No –
the logon dialog box will sit over your current desktop view. If the option is set to Yes
a private desktop(your current desktop image excluding the icons and taskbar) will
appear with the dialog box.
The last entry RequestKey.UsePrivateDesktop controls the desktop switching when
there is an authentication dialog triggered based on accessing encrypted data and the
encryption key is not loaded, i.e. a regular user authentication when accessing
encrypted data. If the option is set to No – the logon dialog box will sit over your
current desktop view. If the option is set to “Yes” a private desktop (your current
desktop image excluding the icons and taskbar) will appear with the dialog box.
Once the file has been edited, a copy of the edited
sbc4.ini file with the entries
must be made to the parent folder in order for the changes to take effect:
•
Windows 2000/XP: [SYSDRIVE:\Program Files\McAfee\Endpoint
Encryption for Files&Folders]
•
Windows Vista: [SYSDRIVE:\Program Data\McAfee\Endpoint Encryption
for Files&Folders\]
Post-install Desktop view switching alterations
By default, the desktop view switching is enabled and the options controlling the
switching in the sbc4.INI file are blank. The INI file is created automatically after the
installation and first successful Endpoint Encryption for Files and Folders
authentication. Hence, the additions have to be added manually after the client install.
However, there is a way to include the additions into an installation set:
1.
Create a new TXT file named SbC4
2.
Open the text file and add the following text:
| 97
The Endpoint Encryption for Files and Folders Logon
[Options.Logon]
Manual.UsePrivateDesktop=No
RequestKey.UsePrivateDesktop=No
Manual.Force.UsePrivateDesktop=No
3.
Save the changes and close the text editor.
4.
Change the TXT extension to INI, ignore any system warning. The file created in
step (1) shall now have a name of SbC4.INI
5.
Open the Endpoint Encryption Manager and locate the Endpoint Encryption File
Groups (System tab).
6.
Expand the file group containing the Endpoint Encryption for Files and Folders
client files.
7.
Right-click the content of this file group and select Import files...
8.
Browse for the SbC4.INI file from step (4) and finish the import.
9.
Create and deploy a new Endpoint Encryption for Files and Folders Installation
Set. This Set will now contain an SbC4.INI file with the settings needed to disable
the desktop switching.
Likewise, any file/software distribution tool may be used to deploy this individual
SbC4.INI file containing the above entries only to the correct directory:
•
Windows 2000/XP: [SYSDRIVE:\Program Files\McAfee\Endpoint
Encryption for Files&Folders]
•
Windows Vista: [SYSDRIVE:\Program Data\McAfee\Endpoint Encryption
for Files&Folders]
98 |
Large-scale deployment considerations
Large-scale deployment
considerations
This chapter briefly outlines some recommendations for large scale deployments of
Endpoint Encryption for Files and Folders. These are just general recommendations.
For your particular environment additional recommendations may apply. Please
consult your Endpoint Encryption representative if you have special considerations for
your environment.
The definition of a large-scale installation is any deployment with 1000 users and
above.
First-time logon
If many clients are deployed simultaneously and the systems are re-started such that
the clients all try to contact the database at the same time (e.g. due to the forced
logon) the response times may be quite long.
The reason for this is that for each user authenticating to the central database (i.e.
doing a logon), the directory infrastructure performs a name-to-id lookup. This
involves trawling the object directory to find the user object with a name attribute
which matches the one requested. Also, when a new object is created, a trawl of the
entire database is initiated to check that the new (e.g.) user is unique.
To remedy this situation, it is strongly recommended that name indexing is enabled in
the central object directory, see the next section for details.
Enable database name indexing
This operation significantly improves the response time when the clients communicate
with the Endpoint Encryption object directory. The name index creates a shortcut to
the name-to-ID lookup by periodically creating indexes of the name/id attributes of all
objects in the directory.
For further details about name indexing, please consult the Endpoint Encryption
Manager Administration Guide.
The following configuration values (in the file dbcfg.ini) are recommended:
[NameIndex]
Enabled=Yes
LockTimeout=3000
LockSleep=10
HashCount=32
MinEntrySize=16
LifeTime=0
| 99
Large-scale deployment considerations
Make sure you have performed the name indexing before you start deploying your
clients. The recommendation is to first deploy one single client and then perform a
logon to the database. This single logon will initiate the name indexing to start and
after that the remaining clients can be deployed.
NOTE: Name indexing is not the same as database compression. Compression of the object directory is not recognized to render any performance improvements for Endpoint Encryption for Files and Folders and, thus, not recommended. Consequently, the parameters for [Attribs] and [Tracking] of the dbcfg.ini file shall be disabled. Also, there is no need to set any values for the [idassignments] in the dbcfg.ini file. Key caching
If possible, try to make use of the encryption key caching feature. This may be
impossible due to security reasons. However, considering this option for any
encryption key created will help reduce the communication payload on the Endpoint
Encryption Server.
Avoid other “9 a.m.” database payloads
If possible, try to avoid other payloads on the machine hosting the Endpoint
Encryption object directory and the Endpoint Encryption Servers.
Examples of such extra payloads are object directory backups and Endpoint Encryption
for PC synchronizations.
For directory backups, please consider a scheduling later during the day.
For Endpoint Encryption for PC synchronizations, please consider using the
synchronization delay options. See the Endpoint Encryption for PC – Administrators’
Guide for details.
Exclude from antivirus real-time scanning
If you happen to have anti-virus software on the computer hosting the central object
directory and the Endpoint Encryption communication servers, consider excluding the
following process and directory from real-time scanning (if possible and allowed by
your anti-virus policy):
•
Process: SbDbServer.exe
•
Directory: [SYSDRIVE:\Program Files\SBAdmin]
This will dramatically improve the response times in the communication between the
client and the server.
100 |
Large-scale deployment considerations
Tune encryption intensity for network
When encrypting large folders on a network share through a policy, it is strongly
recommended to tune the network encryption intensity. The following values are
advised:
•
I/O Utilization: 30% (Set in Encryption options policy section)
•
Bandwidth limit: 100 KB/sec. (Set in Network policy section)
•
Network latency: 600 ms. (Set in Network policy section)
•
Maximum number of clients to encrypt folders: 10
You also may want to consider limiting the size of the files to be encrypted (Set in the
Encryption options). This is not critical, however.
Explicitly encrypt large shares in advance
For large network folders that shall be encrypted, rather than having the folders
encrypted through a folder encryption policy, consider a manual (explicit) encrypt of
the network folder(s) in advance, from one machine with Endpoint Encryption for Files
and Folders deployed.
Initiate the encryption from this single machine, after logging on with an appropriate
Endpoint Encryption for Files and Folders user, and then let the encryption run, say,
maybe overnight.
The reason is to avoid extreme payload on the file server(s) from many clients seeking
to 1. Enumerate, 2. Fetch 3. Encrypt and 4. Upload files to/from the server(s). By
doing this, the risk of network failure and file server payload overflow is minimized.
Dedicated machine
If possible, consider using a dedicated machine for hosting of your central object
directory and the Endpoint Encryption communication servers. This will help eliminate
disturbances from other applications consuming RAM, CPU and HDD I/O.
When considering using a dedicated machine, the following three hardware
parameters are of foremost importance:
•
Fast hard disk drive
•
Plenty of RAM (preferably 1 GB or more)
•
High-speed network cards / 100 Mbps+ network connection
| 101
Large-scale deployment considerations
Exclude Endpoint Encryption for Files and Folders client
program directory
Irrespective of what antivirus solution is used on the clients, it is recommended to
exclude the Endpoint Encryption for Files and Folders program directory from real-time
antivirus scanning.
By default, the Endpoint Encryption for Files and Folders program directory is:
•
[SYSDRIVE]\Program Files\McAfee\Endpoint Encryption for
Files&Folders
Typically, most antivirus solutions can be policy controlled to exclude certain
directories from real-time scanning. Please consult the operating manuals for your
antivirus solution for further details.
102 |
Tokens
Tokens
This chapter addresses the different authentication tokens that are supported in
Endpoint Encryption for Files and Folders.
Passwords
The most common authentication token is the user password. There are a number of
password quality restrictions that can be imposed on the Endpoint Encryption user
from the Endpoint Encryption Manager, e.g. minimum length, content, change
intervals etc. Please consult the Endpoint Encryption Manager Administrator’s Guide
for details about user password quality restrictions.
For user local keys and Self-Extractors the same password rules apply as specified in
the user’s Endpoint Encryption password policy, i.e. the restrictions imposed on the
user, in the Endpoint Encryption Manager, also apply for user local keys and SelfExtractor passwords.
USB tokens
The following USB authentication tokens are directly supported by Endpoint Encryption
for Files and Folders, i.e. without using the Generic PKI token (see below).
•
Aladdin eToken 32 MB and 64 MB
•
SafeNet iKey
•
RSA SID800
The USB tokens can be used either with or without digital certificates for
authentication.
The list of supported USB tokens is continuously updated. Please consult your Endpoint
Encryption representative for the latest list of supported tokens.
With certificates (PKI)
If user digital certificates are used for authentication, it requires the use of a Endpoint
Encryption Connector that imports the user certificates to the Endpoint Encryption
database from an external certificate repository; it then associates them with each
Endpoint Encryption user accordingly. Observe, as a side note, that the user group
containing the users must be a non-controlled group and with the password token
selected in order for the Connector to successfully set the user certificate as the token
to use. For more information about setting up Connectors and importing user digital
certificates, please consult the Endpoint Encryption Manager Administration Guide.
| 103
Tokens
When properly configured, the users can use the certificates on the supported USB
authentication tokens to authenticate to Endpoint Encryption for Files and Folders.
However, you may want to consider using the Generic PKI token instead when working
with certificate based authentication in Endpoint Encryption for Files and Folders, see
more below.
Without certificates
The USB authentication tokens can also be used without digital certificates. If so, each
token must pass a Endpoint Encryption Manager Console for proper configuration.
Also, each user must be set to use the corresponding token for authentication.
NOTE: When upgrading runtime environments (RTEs) for the Aladdin eTokens, be aware that there is incompatibility between the eToken RTE versions available in Endpoint Encryption. If you have an installed eToken RTE of 3.00 and want to upgrade Endpoint Encryption for Files and Folders and the eToken RTE to 3.60, then you must first uninstall the existing Endpoint Encryption for Files and Folders client, restart the machine and then install the new version with the correct RTE. USB token for user local keys
A special case related to USB tokens is the user local keys – these may be stored on
any USB stick with memory capacity and are protected either with a password or a
user imported certificate.
To begin with, unlike the previously mentioned USB tokens, the encryption key store
for local user keys may be stored directly on the USB token. However, this requires
the USB token to have a storage memory area that can be mapped by the PC.
Typically, this is not the case with plain USB authentication tokens. Thus, for user local
key stores on a USB drive involves the usage of a USB flash memory. These drives
typically have a FAT formatted storage area that is mapped by the PC. Thus, the
encryption key store for user local keys is not itself protected by any internal token
structures or on-board cryptographic processor. However, they may be protected by a
private key that corresponds to the user’s digital certificate and that is protected by
built-in security mechanisms on the card. This holds both for USB authentication
tokens and smart cards.
Smart cards
Like with USB authentication tokens, smart cards can be used with or without digital
certificates for authentication to Endpoint Encryption for Files and Folders.
A number of smart cards are supported by Endpoint Encryption for Files and Folders,
both for PKI and non-PKI usage. For a list of directly supported cards, please consult
your McAfee representative.
104 |
Tokens
Also, for smart cards with certificates, you may want to try the Generic PKI token
module available. Please see information below.
With certificates (PKI)
If user digital certificates are used for authentication, it requires the use of a Endpoint
Encryption Connector that imports the user certificates to the Endpoint Encryption
database from an external certificate repository and associates them with each
Endpoint Encryption user accordingly. Observe, as a side note, that the user group
containing the users must be a non-controlled group and with the password token
selected in order for the Connector to successfully set the user certificate as the token
to use. For more information about setting up Connectors and importing user digital
certificates, please consult the Endpoint Encryption Manager Administration Guide.
When properly configured, the users can use the certificates on the supported smart
card to authenticate to Endpoint Encryption for Files and Folders.
Without certificates
The smart card authentication tokens can also be used without digital certificates. If
so, each card must pass a Endpoint Encryption Manager for proper configuration. Also,
each user must be set to use the corresponding smart card for authentication.
Generic PKI token
The last added token support to Endpoint Encryption for Files and Folders is the
Generic PKI token module. The aim of this is to make the Endpoint Encryption for Files
and Folders (and Management Centre) logon independent of whatever smart card is
used, i.e. any smart card with a valid certificate can be used without any dedicated
scripts or driver files.
However, the following criteria must all be met in order to have the Generic PKI token
working:
Microsoft compliance
The certificates used together with the Generic PKI token need to be Microsoft
compliant. Microsoft compliant certificates can be used for e.g. Windows smart card
logon. If the certificate is not Microsoft compliant it will not work with the Generic PKI
token.
Certificates in Endpoint Encryption database
The certificates must also be imported into the Endpoint Encryption database and
assigned to each Endpoint Encryption user that will use the Generic PKI token as the
authentication token to use. For certificate import from MS Active Directory, the
| 105
Tokens
Endpoint Encryption Connector Manager G2 for Active Directory is necessary. For
documentation about the Endpoint Encryption Connector Manager, please contact your
McAfee representative.
Also, be mindful that the Generic PKI token only works with Endpoint Encryption for
Files and Folders and not any other Endpoint Encryption product, e.g. Endpoint
Encryption for PC. Please see the documentation for other Endpoint Encryption
products regarding token support for each.
In order to get the Generic PKI token to work, the CSP from the corresponding smart
card manufacturer must be properly installed on the client side. Also, the exact name
of the CSP must be known and entered into a configuration file in the Generic PKI
token file group.
There is a separate White Paper that describes the Generic PKI token more in detail,
e.g. what INI file to edit. Please contact your Endpoint Encryption representative to
obtain this document.
Installation
This feature is installed by selecting the corresponding entry in the Tokens section
when first installing the Endpoint Encryption central systems. If selected, there will be
a file group in the subsequently created Endpoint Encryption database containing the
Generic PKI token files. This file group will be available as an option when creating the
Endpoint Encryption for Files and Folders installation set. If you want your Endpoint
Encryption for Files and Folders clients to support the Generic PKI token, this file group
must be included in the installation set.
The Generic PKI token requires the exact name of the CSP used on the client side to
be known and entered into an INI file. It may make sense to create copies of the
“Generic PKI token files” file group in the Endpoint Encryption database and edit the
appropriate file in each group to correspond to the CSP it will support, e.g. you may
have one Generic PKI token files – RSA file group and another file group called
Generic PKI token files – Siemens for those deployments where a Siemens PKI
token will be used.
As mentioned, for the Generic PKI token to work, the exact name of the third-party
CSP must be entered into the SbTokCSP.INI file in the Generic PKI token file group,
i.e. manually edit the
INI file outside the database and then import (replace) the
same file into the corresponding file group. Thus, if you have a Generic PKI token file
group aimed at RSA tokens, edit the
SbTokCSP.INI with the name of the RSA CSP
and then import it to the file group Generic PKI token files – RSA. The edit of the
106 |
Tokens
SbTokCSP.INI file must be done before creating any installation sets for Endpoint
Encryption for Files and Folders clients that shall use the Generic PKI token.
Installation steps
•
When first installing the Endpoint Encryption central components, ensure that
you select the TOKEN: Generic PKI (CSP) Token files file group when
selecting the tokens to be supported in the Endpoint Encryption database. Also
make sure you select the Endpoint Encryption for Files and Folders files.
•
Finish the installation of the Endpoint Encryption database as you find
appropriate. For details regarding installation of the Endpoint Encryption
database, please consult the Endpoint Encryption Manager Administration
Guide, available from your Endpoint Encryption representative upon request.
•
Configure the Endpoint Encryption Connectors and import user data and user
certificates from the repository holding the certificates to be used with
Endpoint Encryption for Files and Folders. Make sure that the pre-requisites
(stated above) are met. For configuration of Connectors, please consult the
Endpoint Encryption Manager Administrator’s Guide, available from your
McAfee representative upon request.
•
Now, if you are not using the RSA SID800 token and the associated CSP, you
need to edit the file called SbTokCSP.INI. First, create a text file called
SbTokCSP.TXT outside the Endpoint Encryption Manager. Open the file and
make the following entry:
[CSP]
Name=”Exact name of the CSP”
•
You need to replace the string within the quotation marks above with the
name of the deployed CSP. For example, support for the RSA SID800 token
and its CSP require the entry to look as follows:
[CSP]
Name=RSA Sign-on Manager CSP
•
Then rename the file extension from SbTokCSP.TXT to SbTokCSP.INI, accept
any warning presented.
•
Now, in Endpoint Encryption Manager, open the file group named TOKEN:
Generic PKI (CSP) Token files and delete the existing file SbTokCSP.INI.
Then import the file you created outside the database containing the name of
your CSP. Alternatively, create a copy of the file group with all files in it, name
| 107
Tokens
it in accordance with what CSP is supported, e.g. Generic PKI token files –
Siemens and import/replace the SbTokCSP.INI file For a complete description
of file group management within the Endpoint Encryption database, please
consult the Endpoint Encryption Manager Administration Guide, available from
your McAfee representative upon request.
•
Then configure the Endpoint Encryption database for Endpoint Encryption for
Files and Folders to match your security policy, i.e. create and assign
encryption keys and encryption policies. For guidance on configuration of
Endpoint Encryption for Files and Folders, please see the Endpoint Encryption
for Files and Folders Policies section of this guide.
•
When creating the Endpoint Encryption for Files and Folders installation set,
make sure that you also include the correct file group for TOKEN: Generic
PKI (CSP) Token files, corresponding to the CSP you want to support with
the Generic PKI token. Once the installation set has been created, it can be
deployed to the machines and the Generic PKI token functionality will be
automatically available.
If you have made all configurations correct, users may now use their PKI tokens with
certificates to authenticate to Endpoint Encryption for Files and Folders.
PIN caching
PIN caching is a concept that applies to plain USB authentication tokens such as smart
cards. This is a mechanism that is implemented in some CSPs for (secure) storage of
the user PIN. The user doesn’t have to enter the PIN repeatedly in each operation that
involves access to the authentication token.
If the PIN caching principle is implemented in the CSP being used, then Endpoint
Encryption for Files and Folders can benefit from that feature, making it less stressful
for the user to authenticate with the PIN as soon as there is a request to access the
token.
108 |
Endpoint Encryption for Files and Folders Configuration Files
Endpoint Encryption for Files and
Folders Configuration Files
Endpoint Encryption for Files and Folders uses several .INI files to maintain
information about the configuration of various components. Some of the more
important files are listed here.
SbErrors.ini
This file is used to increase the detail available in on-screen error messages. You can
add further descriptions to errors by amending this file.
SbFeatur.ini
This file controls the feature set available to Endpoint Encryption. This file is digitally
signed by the McAfee team and must not be modified.
SDMCFG.ini
This file is used by the Endpoint Encryption Client to control the connection to the
Object Directory. There may be many connections listed in the file, the multiconnection behavior is controlled through scm.ini.
[Databases]
Database1=192.168.20.57
The IP address for the remote server. This can be a DNS name. [Database1]
Description=SB-HP-Vista
IsLocal=No
Authenticate=Yes
Port=5555
ServerKey=…
ExtraInfo=…
The public key for the remote Server. This is used to stop a hacker putting a rogue server in place and intercepting the traffic. Padding for the server key. SbC4.ini
This file contains the configuration settings for the Endpoint Encryption for Files and
Folders client.
| 109
Endpoint Encryption for Files and Folders Configuration Files
SBM.ini
This is the configuration file for Endpoint Encryption authentication tokens, readers
and algorithms. Typically, this file is automatically generated and populated when
selecting tokens and reader file during the creation of the Endpoint Encryption for Files
and Folders installation set.
110 |
Endpoint Encryption for Files and Folders Program and Driver Files
Endpoint Encryption for Files and
Folders Program and Driver Files
EXE files
SBCESETUP
SBCESetup.exe is the core executable in Endpoint Encryption’s packaging mechanism.
It is used as an exe stub for the install package, and also handles the uninstall
process. Setup takes one parameter -Uninstall which prompts it to walk through
sbfiles.lst, deleting files (or marking them for deletion if they are in use) and
reversing registry settings. Setup also re-runs any installation executables with the Uninstall flag to remove programs. The order of removal is reverse to the install, i.e.
Installation executables, registry settings, then lastly files.
SbCeCore
This is the client core service running in User mode. It starts all the managers and acts
as the coordinator for Endpoint Encryption for Files and Folders activities in User
mode. In order to prevent users from working without encryption, this process cannot
be killed in the Windows Task Manager.
SBCECoreService
This is the client core service running in System mode. It acts as the coordinator for
Endpoint Encryption for Files and Folders activities in System mode.
DLL files
SbAlg, SbAlg00, SbAlg01, SbAlg12
These are the cryptographic support for communications with the Endpoint Encryption
Manager and the implementation of the client encryption algorithms.
SbC4
Utilities for configuration of Endpoint Encryption for Files and Folders.
Etpro
Utilities for the eToken Pro USB token.
SbCePolicy
Utilities for receiving and loading policies.
| 111
Endpoint Encryption for Files and Folders Program and Driver Files
SbCeProvider
Utilities for receiving and providing encryption keys to the other parts of the client.
SbDbMgr
Directory communication and access control support.
SbFile
Endpoint Encryption File Encryptor Support.
SbFileDB
Directory driver for the standard Endpoint Encryption X500 type Object Directory.
SbGroup
Utilities for group management and support.
SbHashes
Utilities for application control (hash sum control)
SbKeys
Libraries for controlling encryption keys.
SBM
Libraries for Endpoint Encryption tokens, readers and algorithm settings.
SbUser
Utilities for user management and support.
SbUtils
Libraries for various Endpoint Encryption utilities.
SbXferDb
Transport directory driver for offline installs.
SbCeNp
The libraries providing for the automatic change of the Endpoint Encryption password
when the Windows password is changed.
SCom
Communication service control for the Endpoint Encryption Manager.
112 |
Endpoint Encryption for Files and Folders Program and Driver Files
SbCeDriverCom
Utilities for controlling and running the kernel driver.
DesktopIntegration
Libraries for integration between Endpoint Encryption for Files and Folders and the
Windows Explorer, e.g. drag-and-drop operations on encrypted files.
SbCePolicyEnforcer
Libraries for the enforcement of encryption policies.
Install
Libraries used when installing the client.
KeyGenerator
Libraries for generation of user local encryption keys.
KeyManager
Utilities for management of encryption keys.
KeyMenuProvider, KeyMenuProvider_04XX
Utilities for the functions available to the user for management of user local keys. The
variants of this module containing a _04XX extension represent different language
versions of this module.
KeyStore, KeyStore_04XX
Libraries for the interaction and management of user local key stores. The variants of
this module containing a _04XX extension represent different language versions of this
module.
LogManager
Libraries for managing the logging operations. Currently not fully implemented.
MachinePolicyProcessor
Utilities for enforcement of machine policies.
MenuProvider, MenuProvider_04XX
Libraries for managing the system tray menu. The variants of this module containing a
_04XX extension represent different language versions of this module.
| 113
Endpoint Encryption for Files and Folders Program and Driver Files
NotificationManager
Manages and responds to notification events. This library is located in the
WINDOWS\System32 folder.
PolicyUpdateManager
Utilities for receiving and interpretation of policy updates.
PostInstall
Utilities for post-installation operations.
RemovableMediaEnforcer
Libraries for the enforcement of removable media policies.
SbCeSelfExtractorStub
The libraries for the Self-Extractor functions. The variants of this module containing a
_04XX extension represent different language versions of this module.
StandAloneKeyProvider, StandAloneKeyProvider_04XX
The libraries for the interaction with the user local keys. The variants of this module
containing a _04XX extension represent different language versions of this module.
SbTrayManager
Libraries for the system tray icon management.
SYS files
sbce
The Endpoint Encryption for Files and Folders kernel filter driver.
SbAlg00, SBAlg01, SbAlg12
Encryption algorithm drivers.
DAT files
SbCe-{Endpoint Encryption DB ID}
The local Endpoint Encryption database containing duplicate data from the central
database. This database is encrypted.
SbCe-DEFAULTS
The default settings for an installation of Endpoint Encryption for Files and Folders
before any policy has been retrieved and applied.
114 |
Endpoint Encryption for Files and Folders Program and Driver Files
SbCe-POLICIES
The default policy for an installation of Endpoint Encryption for Files and Folders before
any policy has been retrieved and applied. If the client fails to connect to the Endpoint
Encryption Server after the first restart after installation, then the content of this file
will be applied (no privileges).
Other files
SRG files
Endpoint Encryption registry files – these are standard Regedit files which are
processed into the registry by Endpoint Encryption, without using the Windows
Regedit utility.
PostInstall.XML
An XML file with information about actions after the installation of Endpoint Encryption
for Files and Folders has been done. Incorrect changes to this file may result in severe
malfunctions on the machine.
SBFILES.LST
A list of the files to process by the sbc4Setup.exe un/installer executable.
Setup.log
A log file with log data about the setup of the Endpoint Encryption for Files and Folders
client.
LNG files
Language resource files for different working languages of Endpoint Encryption for
Files and Folders.
| 115
Error Messages
Error Messages
Please see the file sberrors.ini for more details of these error messages. You can
also find more information on error messages on our web site, www.mcafee.com.
Module codes
The following codes can be used to identify from which Endpoint Encryption module
the error message was generated.
5c00=SCOM, network comms;Protocol
5c02=SCOM, network comms;Cryptographic
db00=Database, database;Miscellaneous
db01=Database, database;Objects
db02=Database, database;Attributes
a100=ALG, encryption algorithms; Miscellaneous
1500 = Installer program errors
5C02: Communications, Crypto
[5c020000] The Diffie-Hellmen data is invalid or corrupt
[5c020001] An unsupported encryption algorithm has been requested
[5c020002] An unsupported authentication algorithm has been requested
[5c020003] Unable to sign data
[5c020004] Authentication signature is not valid
[5c020005] Authentication parameters are invalid or corrupt
[5c020006] Failed while generating DSA parameters
[5c020007] No session key has been generated
[5c020008] Unable to authenticate user
[5c020009] Session key too big
5C00: Communications, Protocol
[5c000000] Unsupported version
The server and client are not talking the same communications protocol version
[5c000005] Out of memory
116 |
Error Messages
[5c000008] A corrupt or unexpected message was received
[5c000009] Unable to load the Windows TCP/IP library (WSOCK32.DLL)
Check that the TCP/IP protocol is installed
[5c00000a] Communications library not initialized
This is an internal programmatic error
[5c00000c] Unable to create TCP/IP socket
[5c00000d] Failed while listening on a TCP/IP socket
[5c00000e] Unable to convert a host name to an IP address
Check the host file or the DNS settings
[5c00000f] Failed to connect to the remote computer
The computer may not be listening or it is too busy to accept connections
[5c000010] Failed while accepting a new TCP/IP connection
[5c000011] Failed while receiving communications data
The remote computer may have reset the connection
[5c000012] Failed while sending communications data
[5c000013] Invalid communications configuration
[5c000014] Invalid context handle
[5c000015] A connection has already been established
[5c000016] No connection has been established
[5c000017] Request for an unknown function has been received
[5c000018] Unsupported or corrupt compressed data received
[5c000019] Data block is too big
[5c00001a] Data of an unexpected length has been received
[5c00001b] Message too big to be sent
This may occur if an attempt is made to import large amounts of data into the
database (e.g. a file)
[5c00001c] Unable to create thread mutex
[5c00001d] Message too big to be sent
| 117
Error Messages
This may occur if an attempt is made to import large amounts of data into the
database (e.g. a file)
[5c00001c] Unable to create thread mutex
[5c020000] The Diffie-Hellmen data is invalid or corrupt
[5c020001] An unsupported encryption algorithm has been requested
[5c020002] An unsupported authentication algorithm has been requested
[5c020003] Unable to sign data
[5c020004] Authentication signature is not valid
[5c020005] Authentication parameters are invalid or corrupt
[5c020006] Failed while generating DSA parameters
[5c020007] No session key has been generated
[5c020008] Unable to authenticate user
[5c020009] Session key too big
DB00: Directory
[db000000] Out of memory
[db000001] More data is available
[db000002] The database has not been created or initialized yet
Check the database path or create a new database.
To force the new database wizard to be run, delete the SDMCFG.INI file and restart the
administration program.
[db000003] Invalid context handle
[db000004] The name was not found in the database
[db000005] Authentication was not successful
Check that you have the correct token for this database
[db000006] Unknown database
[db000007] Invalid database type
[db000008] The database could not be found
Check the database path settings
[db000009] Database already exists
118 |
Error Messages
Choose a different database path
[db00000a] Unable to create the database
Check the path settings and make sure you have write access to the directory
[db00000b] Invalid database handle
[db00000c] The database is currently in use by another entity
You cannot delete a database while someone is using it
[db00000d] Unable to initialize the database
[db00000e] User aborted
[db00000f] Memory access violation
[db000010] Invalid string
[db000011] No default group has been defined
[db000012] The group could not be found
[db000013] File not found
[db000014] Unable to read file
[db000015] Unable to create file
[db000016] Unable to write to file
[db000017] File corrupt
[db000018] Invalid function
[db000019] Unable to create mutex
[db00001a] Invalid license
The license has been modified so that the signature is now invalid
[db00001b] License has expired
[db00001c] The license is not for this database
Check the database ID and ensure it is the same as the one specified in the license.
Each time you create a new database, a different ID is generated.
There is no way to change the ID of a database.
[db00001d] You do not have permission to access the object
[db00001e] Endpoint Encryption is currently busy with another task. Please wait for it
to complete and try again.
| 119
Error Messages
This usually means that your hard disks are in the process of being encrypted or
decrypted.
You can check the current Endpoint Encryption status from the right-click menu of the
Endpoint Encryption task bar icon.
[db00001f] Endpoint Encryption is still installed on this machine
[db000020] Buffer too small
[db000021] The requested function is not supported
[db000022] Unable to update the boot sector
The disk may be in use by another application or Explorer itself.
The disk may be protected by an anti-virus program.
DB01: Database, Objects
[db010000] The object is locked
Someone else is currently updating the same object
[db010001] Unable to get the object ID
[db010002] Unable to change the object's access mode
Someone else may by accessing the object at the same time.
If you are trying to write to the object while someone else has the object open for
reading, you will not be able to change to write mode.
[db010003] Object is in wrong access mode
[db010004] Unable to create the object in the database
The disk may be full or write protected
[db010005] Operation not allowed on the object type
[db010006] Insufficient privilege level
You do not have the access rights required to access the object.
[db010007] The object status is disabled
This is usually associated with User objects. Disabling the user's object prevents them
logging on until their account is re-enabled.
[db010008] The object already exists
[db01000f] The object is in use
[db010010] Object not found
120 |
Error Messages
The object has been deleted from the database
[db010011] License has been exceeded for this object type
Check that your licenses are still valid and if not obtain further licenses if necessary
[db010012] No more object id's are available for this type of object.
You have run out of object ID's
[db010013] Remove Error - Can't Remove Object
The object is locked, or no longer exists.
[db010014] Object Not Removed
You are trying to restore an object which has not been deleted.
[db010015] Restore Error
Could not restore the object.
DB02: Database, Attributes
[db020000]
Attribute not found
[db020001]
Unable to update attribute
[db020002]
Unable to get attribute data
[db020003]
Invalid offset into attribute data
[db020004]
Unable to delete attribute
[db020005]
Incorrect attribute length
[db020006]
Attribute data required
A100 Algorithm
[a1000000] Not enough memory
[a1000001] Unknown or unsupported function
[a1000002] Invalid handle
[a1000003] Encryption key is too big
[a1000004] Encryption key is too small
[a1000005] Unsupported encryption mode
[a1000006] Invalid memory address
[a1000007] Invalid key data
| 121
Error Messages
Installer program errors
[15000001]
Memory Error
[15000002]
No EXE Stub
[15000003]
Error reading EXE Stub
[15000004]
Error Creating File
[15000005]
Error Writing File
[15000006]
Error Opening File
[15000007]
Error Reading File
[15000008]
Invalid File
[15000009]
No More Files
[1500000a]
Block Data Too Large
[1500000b]
Decompress Failed
[1500000c]
Unsupported Computation
[1500000d]
Install Error
[1500000e]
Error Creating Temp Directory
122 |
Technical Specifications and Options
Technical Specifications and Options
Language Support
Endpoint Encryption Manager
American English, International English, Dutch, German, Italian, Japanese, Korean,
Swedish
Endpoint Encryption for Files and Folders Client
American English, International English, Dutch, German, Japanese, Swedish, Czech,
French
System Requirements
Documentation that discusses appropriate hardware for typical installations of
Endpoint Encryption is available from your McAfee representative upon request.
Endpoint Encryption Manager Server
•
Windows NT4.0 sp6a, 2000 all service packs (Workstation for evaluation only),
XP all service packs (for evaluation only), 2003 Server (all service packs),
Vista (both 32 and 64 bits editions)
•
256MB RAM, 512MB recommended.
•
200MB Free hard disk space
•
Pentium compatible processor
•
TCP/IP network connection with a static DNS name / IP address
Windows NT, 2000, XP, 2003 Server and Vista are soft limited to 200 connections, but
may be increased to up to 1000.
For high-loaded systems, please contact your McAfee representative for information on
setting up multiple-server implementations.
Endpoint Encryption Manager Application
•
Windows NT4.0, 2000, XP, 2003 Server, Vista
•
256MB RAM
•
20MB free hard disk space
•
Pentium compatible processor
•
TCP/IP network connection
| 123
Technical Specifications and Options
Endpoint Encryption for Files and Folders Client
•
Windows 2000 SP4 with RollUp1, XP SP2, Vista SP1. Please see section
Installing Endpoint Encryption for Files and Folders client for additional client
OS requirements.
•
256MB RAM
•
5MB Free hard disk space
•
Pentium compatible processor
•
TCP/IP network connection
Encryption Algorithms
Endpoint Encryption supports many custom algorithms. Each encryption key generated
for Endpoint Encryption for Files and Folders may be associated with a separate
algorithm.
Algorithm performance is based on the “PassMark” rating which gives an overall
indication of system performance. All tests were performed on a K6-II-300 machine
running Windows XP SP2. This test platform has a PassMark of 20.7. The closer to this
figure an algorithm gets, the less the impact of Endpoint Encryption on the user.
Faster machines will achieve correspondingly faster passmark ratings, but the
percentage difference between them will be comparable.
RC5-12
CBC Mode, 1024 bit key, 12 rounds, 64 bit blocks. PassMark 20.7 (100%). The RC5-12
algorithm is compatible with the Endpoint Encryption 3.x algorithm.
RC5-18
CBC Mode, 1024 bit key, 18 rounds, 64 bit blocks, PassMark 20.7 (100%). The 18
round RC5 variant is designed to prevent the theoretical “Known Plaintext” attack.
AES 256 (FIPS 140-2 Approved) - recommended
CBC Mode, 256 bit key, 128 bit blocks, PassMark 19.3 (93%)
This algorithm is approved for FIPS 140-2 use.
Data wiping standard
The wiping mechanism follows the data shredding specification of US Department of
Defense (DoD). The specification detail may be found in:
124 |
Technical Specifications and Options
DoD 5220.22-M National Industrial Security Program Operating Manual (NISPOM)
January 1995, Department of Defense & Central Intelligence Agency, U.S. Government
Printing Office. ISBN 0-16-045560-X.
| 125
Appendix
Appendix
Making Endpoint Encryption for Files and Folders FIPS
Compliant
The following procedures must be followed to operate McAfee Endpoint Encryption for
Files and Folders cryptographic module in a FIPS Approved mode:
1.
McAfee Endpoint Encryption for Files and Folders must be installed using a
FIPS approved algorithm. The validated version of McAfee Endpoint Encryption
for Files and Folders presents AES-256 as the only option for the encryption
algorithm. The AES-256 encryption algorithm is certified for use in FIPS 140-2
implementations.
2.
The module software must be operating in “FIPS” mode. This is done by
setting the FIPS registry key value from 0 (disabled) to 1 (enabled). The first
step is to create a FIPS registry script (see Appendix A for details). Once the
file is created right click on the newly created .reg file and select merge from
the drop down menu.
3.
To verify that the registry has been updated properly the user must install a
registry editor and navigate to the following paths and verify that “FipMode is
set to 1”:
•
Windows 2000 and XP - HKEY_LOCAL_MACHINE\SOFTWARE\SafeBoot
International\SafeBoot Content Encryption\Verifier
•
HKEY_LOCAL_MACHINE\SOFTWARE\SafeBoot
International\SafeBoot Content Encryption\Verifier
The PC used to run McAfee Endpoint Encryption for Files and Folders must be built
using production grade components and configured in a single operator mode. To do
this, the following operating system services must be disabled:
126 |
•
Fast user switching
•
Terminal services
•
Remote registry service
•
Secondary logon service
•
Telnet service
•
Remote desktop and Remote assistance services
Appendix
FIPS mode registry script
The following needs to be saved to a text file with the extension “.reg” and then
merged into the registry as a requirement for installing the module in a FIPScompliant mode of operation:
Windows 2000/XP
REGEDIT4
[HKEY_LOCAL_MACHINE\SOFTWARE\SafeBoot International\SafeBoot Content
Encryption\Verifier]
"FipsMode"=dword:00000001
[HKEY_LOCAL_MACHINE\SOFTWARE\SafeBoot International\SafeBoot Content
Encryption\Verifier\1]
"Path"="c:\\program files\\safeboot content encryption\\SbCeProvider.dll"
[HKEY_LOCAL_MACHINE\SOFTWARE\SafeBoot International\SafeBoot Content
Encryption\Verifier\2]
"Path"="c:\\program files\\safeboot content encryption\\SbCeNp.dll"
[HKEY_LOCAL_MACHINE\SOFTWARE\SafeBoot International\SafeBoot Content
Encryption\Verifier\3]
"Path"="c:\\program files\\safeboot content encryption\\SbCeDe5Auth.dll"
[HKEY_LOCAL_MACHINE\SOFTWARE\SafeBoot International\SafeBoot Content
Encryption\Verifier\4]
"Path"="c:\\program files\\safeboot content encryption\\SbCeSetup.exe
[HKEY_LOCAL_MACHINE\SOFTWARE\SafeBoot International\SafeBoot Content
Encryption\Verifier\5]
"Path"="c:\\program files\\safeboot content encryption\\SbCeObj.dll"
[HKEY_LOCAL_MACHINE\SOFTWARE\SafeBoot International\SafeBoot Content
Encryption\Verifier\6]
"Path"="c:\\program files\\safeboot content encryption\\SbKeysObj.dll"
[HKEY_LOCAL_MACHINE\SOFTWARE\SafeBoot International\SafeBoot Content
Encryption\Verifier\7]
"Path"="c:\\program files\\safeboot content encryption\\SbCeMarshal.dll"
[HKEY_LOCAL_MACHINE\SOFTWARE\SafeBoot International\SafeBoot Content
Encryption\Verifier\8]
"Path"="c:\\program files\\safeboot content encryption\\SbCmaCe.dll"
[HKEY_LOCAL_MACHINE\SOFTWARE\SafeBoot International\SafeBoot Content
Encryption\Verifier\9]
| 127
Appendix
"Path"="c:\\program files\\safeboot content encryption\\SbAlgs\\SbAlg00.dll"
[HKEY_LOCAL_MACHINE\SOFTWARE\SafeBoot International\SafeBoot Content
Encryption\Verifier\10]
"Path"="c:\\program files\\safeboot content encryption\\SbAlgs\\SbAlg01.dll"
[HKEY_LOCAL_MACHINE\SOFTWARE\SafeBoot International\SafeBoot Content
Encryption\Verifier\11]
"Path"="c:\\program files\\safeboot content encryption\\SbAlgs\\SbAlg11.dll"
[HKEY_LOCAL_MACHINE\SOFTWARE\SafeBoot International\SafeBoot Content
Encryption\Verifier\12]
"Path"="c:\\program files\\safeboot content encryption\\SbAlgs\\SbAlg12.dll"
[HKEY_LOCAL_MACHINE\SOFTWARE\SafeBoot International\SafeBoot Content
Encryption\Verifier\13]
"Path"="c:\\windows\\system32\\drivers\\Sbalg00.sys"
[HKEY_LOCAL_MACHINE\SOFTWARE\SafeBoot International\SafeBoot Content
Encryption\Verifier\14]
"Path"="c:\\windows\\system32\\drivers\\Sbalg01.sys"
[HKEY_LOCAL_MACHINE\SOFTWARE\SafeBoot International\SafeBoot Content
Encryption\Verifier\15]
"Path"="c:\\windows\\system32\\drivers\\Sbalg11.sys"
[HKEY_LOCAL_MACHINE\SOFTWARE\SafeBoot International\SafeBoot Content
Encryption\Verifier\16]
"Path"="c:\\windows\\system32\\drivers\\Sbalg12.sys"
[HKEY_LOCAL_MACHINE\SOFTWARE\SafeBoot International\SafeBoot Content
Encryption\Verifier\17]
"Path"="c:\\program files\\safeboot content encryption\\SbComms.dll"
[HKEY_LOCAL_MACHINE\SOFTWARE\SafeBoot International\SafeBoot Content
Encryption\Verifier\18]
"Path"="c:\\program files\\safeboot content encryption\\SbTokens\\SbTokenPwd.dll"
[HKEY_LOCAL_MACHINE\SOFTWARE\SafeBoot International\SafeBoot Content
Encryption\Verifier\19]
"Path"="c:\\program files\\safeboot content encryption\\SbCeCore.exe"
[HKEY_LOCAL_MACHINE\SOFTWARE\SafeBoot International\SafeBoot Content
Encryption\Verifier\20]
"Path"="c:\\program files\\safeboot content encryption\\SbCeCoreService.exe"
[HKEY_LOCAL_MACHINE\SOFTWARE\SafeBoot International\SafeBoot Content
128 |
Appendix
Encryption\Verifier\21]
"Path"="c:\\program files\\safeboot content
encryption\\SbCeDesktopIntegration.dll"
[HKEY_LOCAL_MACHINE\SOFTWARE\SafeBoot International\SafeBoot Content
Encryption\Verifier\22]
"Path"="c:\\windows\\system32\\drivers\\SbCe.sys"
[HKEY_LOCAL_MACHINE\SOFTWARE\SafeBoot International\SafeBoot Content
Encryption\Verifier\23]
"Path"="c:\\windows\\system32\\drivers\\SbCeCd.sys"
[HKEY_LOCAL_MACHINE\SOFTWARE\SafeBoot International\SafeBoot Content
Encryption\Verifier\24]
"Path"="c:\\program files\\safeboot content encryption\\SbCeDriverCom.dll
[HKEY_LOCAL_MACHINE\SOFTWARE\SafeBoot International\SafeBoot Content
Encryption\Verifier\25]
"Path"="c:\\program files\\safeboot content encryption\\SbCeLocalProvider.dll"
[HKEY_LOCAL_MACHINE\SOFTWARE\SafeBoot International\SafeBoot Content
Encryption\Verifier\26]
"Path"="c:\\program files\\safeboot content encryption\\SbCePolicyEnforcer.dll"
[HKEY_LOCAL_MACHINE\SOFTWARE\SafeBoot International\SafeBoot Content
Encryption\Verifier\27]
"Path"="c:\\program files\\safeboot content encryption\\SbCeProviderManager.dll"
[HKEY_LOCAL_MACHINE\SOFTWARE\SafeBoot International\SafeBoot Content
Encryption\Verifier\28]
"Path"="c:\\program files\\safeboot content encryption\\SbCeTray.dll"
[HKEY_LOCAL_MACHINE\SOFTWARE\SafeBoot International\SafeBoot Content
Encryption\Verifier\29]
"Path"="c:\\program files\\safeboot content encryption\\resource.dll"
[HKEY_LOCAL_MACHINE\SOFTWARE\SafeBoot International\SafeBoot Content
Encryption\Verifier\30]
"Path"="c:\\program files\\safeboot content encryption\\SbCeSelfExtractorStub.exe"
[HKEY_LOCAL_MACHINE\SOFTWARE\SafeBoot International\SafeBoot Content
Encryption\Verifier\31]
"Path"="c:\\program files\\safeboot content encryption\\SbCeShell.exe"
[HKEY_LOCAL_MACHINE\SOFTWARE\SafeBoot International\SafeBoot Content
Encryption\Verifier\32]
"Path"="c:\\program files\\safeboot content encryption\\SbCeShell.com"
| 129
Appendix
[HKEY_LOCAL_MACHINE\SOFTWARE\SafeBoot International\SafeBoot Content
Encryption\Verifier\33]
"Path"="c:\\program files\\safeboot content encryption\\SbCeProxy.exe"
[HKEY_LOCAL_MACHINE\SOFTWARE\SafeBoot International\SafeBoot Content
Encryption\Verifier\34]
"Path"="c:\\program files\\safeboot content encryption\\SbCePostInstall.dll"
Windows Vista
REGEDIT4
[HKEY_LOCAL_MACHINE\SOFTWARE\SafeBoot International\SafeBoot Content
Encryption\Verifier]
"FipsMode"=dword:00000001
[HKEY_LOCAL_MACHINE\SOFTWARE\SafeBoot International\SafeBoot Content
Encryption\Verifier\1]
“Path”=“c:\\program files\\safeboot content encryption\\SbCeProvider.dll”
[HKEY_LOCAL_MACHINE\SOFTWARE\SafeBoot International\SafeBoot Content
Encryption\Verifier\2]
“Path”=“c:\\program files\\safeboot content encryption\\SbCeNp.dll”
[HKEY_LOCAL_MACHINE\SOFTWARE\SafeBoot International\SafeBoot Content
Encryption\Verifier\3]
“Path”=“c:\\program files\\safeboot content encryption\\SbCeDe5Auth.dll”
[HKEY_LOCAL_MACHINE\SOFTWARE\SafeBoot International\SafeBoot Content
Encryption\Verifier\4]
“Path”=“c:\\program files\\safeboot content encryption\\SbCeSetup.exe
[HKEY_LOCAL_MACHINE\SOFTWARE\SafeBoot International\SafeBoot Content
Encryption\Verifier\5]
“Path”=“c:\\program files\\safeboot content encryption\\SbCeObj.dll”
[HKEY_LOCAL_MACHINE\SOFTWARE\SafeBoot International\SafeBoot Content
Encryption\Verifier\6]
“Path”=“c:\\program files\\safeboot content encryption\\SbKeysObj.dll”
[HKEY_LOCAL_MACHINE\SOFTWARE\SafeBoot International\SafeBoot Content
Encryption\Verifier\7]
“Path”=“c:\\program files\\safeboot content encryption\\SbCeMarshal.dll”
[HKEY_LOCAL_MACHINE\SOFTWARE\SafeBoot International\SafeBoot Content
Encryption\Verifier\8]
130 |
Appendix
“Path”=“c:\\program files\\safeboot content encryption\\SbCmaCe.dll”
[HKEY_LOCAL_MACHINE\SOFTWARE\SafeBoot International\SafeBoot Content
Encryption\Verifier\9]
“Path”=“c:\\program files\\safeboot content encryption\\SbAlgs\\SbAlg00.dll”
[HKEY_LOCAL_MACHINE\SOFTWARE\SafeBoot International\SafeBoot Content
Encryption\Verifier\10]
“Path”=“c:\\program files\\safeboot content encryption\\SbAlgs\\SbAlg01.dll”
[HKEY_LOCAL_MACHINE\SOFTWARE\SafeBoot International\SafeBoot Content
Encryption\Verifier\11]
“Path”=“c:\\program files\\safeboot content encryption\\SbAlgs\\SbAlg11.dll”
[HKEY_LOCAL_MACHINE\SOFTWARE\SafeBoot International\SafeBoot Content
Encryption\Verifier\12]
“Path”=“c:\\program files\\safeboot content encryption\\SbAlgs\\SbAlg12.dll”
[HKEY_LOCAL_MACHINE\SOFTWARE\SafeBoot International\SafeBoot Content
Encryption\Verifier\13]
“Path”=“c:\\windows\\system32\\drivers\\Sbalg00.sys”
[HKEY_LOCAL_MACHINE\SOFTWARE\SafeBoot International\SafeBoot Content
Encryption\Verifier\14]
“Path”=“c:\\windows\\system32\\drivers\\Sbalg01.sys”
[HKEY_LOCAL_MACHINE\SOFTWARE\SafeBoot International\SafeBoot Content
Encryption\Verifier\15]
“Path”=“c:\\windows\\system32\\drivers\\Sbalg11.sys”
[HKEY_LOCAL_MACHINE\SOFTWARE\SafeBoot International\SafeBoot Content
Encryption\Verifier\16]
“Path”=“c:\\windows\\system32\\drivers\\Sbalg12.sys”
[HKEY_LOCAL_MACHINE\SOFTWARE\SafeBoot International\SafeBoot Content
Encryption\Verifier\17]
“Path”=“c:\\program files\\safeboot content encryption\\SbComms.dll”
[HKEY_LOCAL_MACHINE\SOFTWARE\SafeBoot International\SafeBoot Content
Encryption\Verifier\18]
“Path”=“c:\\program files\\safeboot content encryption\\SbTokens\\SbTokenPwd.dll”
[HKEY_LOCAL_MACHINE\SOFTWARE\SafeBoot International\SafeBoot Content
Encryption\Verifier\19]
“Path”=“c:\\program files\\safeboot content encryption\\SbCeCore.exe”
[HKEY_LOCAL_MACHINE\SOFTWARE\SafeBoot International\SafeBoot Content
| 131
Appendix
Encryption\Verifier\20]
“Path”=“c:\\program files\\safeboot content encryption\\SbCeCoreService.exe”
[HKEY_LOCAL_MACHINE\SOFTWARE\SafeBoot International\SafeBoot Content
Encryption\Verifier\21]
“Path”=“c:\\program files\\safeboot content
encryption\\SbCeDesktopIntegration.dll”
[HKEY_LOCAL_MACHINE\SOFTWARE\SafeBoot International\SafeBoot Content
Encryption\Verifier\22]
“Path”=“c:\\windows\\system32\\drivers\\SbCe.sys”
[HKEY_LOCAL_MACHINE\SOFTWARE\SafeBoot International\SafeBoot Content
Encryption\Verifier\23]
“Path”=“c:\\windows\\system32\\drivers\\SbCeCd.sys”
[HKEY_LOCAL_MACHINE\SOFTWARE\SafeBoot International\SafeBoot Content
Encryption\Verifier\24]
“Path”=“c:\\program files\\safeboot content encryption\\SbCeDriverCom.dll
[HKEY_LOCAL_MACHINE\SOFTWARE\SafeBoot International\SafeBoot Content
Encryption\Verifier\25]
“Path”=“c:\\program files\\safeboot content encryption\\SbCeLocalProvider.dll”
[HKEY_LOCAL_MACHINE\SOFTWARE\SafeBoot International\SafeBoot Content
Encryption\Verifier\26]
“Path”=“c:\\program files\\safeboot content encryption\\SbCePolicyEnforcer.dll”
[HKEY_LOCAL_MACHINE\SOFTWARE\SafeBoot International\SafeBoot Content
Encryption\Verifier\27]
“Path”=“c:\\program files\\safeboot content encryption\\SbCeProviderManager.dll”
[HKEY_LOCAL_MACHINE\SOFTWARE\SafeBoot International\SafeBoot Content
Encryption\Verifier\28]
“Path”=“c:\\program files\\safeboot content encryption\\SbCeTray.dll”
[HKEY_LOCAL_MACHINE\SOFTWARE\SafeBoot International\SafeBoot Content
Encryption\Verifier\29]
“Path”=“c:\\program files\\safeboot content encryption\\resource.dll”
[HKEY_LOCAL_MACHINE\SOFTWARE\SafeBoot International\SafeBoot Content
Encryption\Verifier\30]
“Path”=“c:\\program files\\safeboot content encryption\\SbCeSelfExtractorStub.exe”
[HKEY_LOCAL_MACHINE\SOFTWARE\SafeBoot International\SafeBoot Content
Encryption\Verifier\31]
“Path”=“c:\\program files\\safeboot content encryption\\SbCeShell.exe”
132 |
Appendix
[HKEY_LOCAL_MACHINE\SOFTWARE\SafeBoot International\SafeBoot Content
Encryption\Verifier\32]
“Path”=“c:\\program files\\safeboot content encryption\\SbCeShell.com”
[HKEY_LOCAL_MACHINE\SOFTWARE\SafeBoot International\SafeBoot Content
Encryption\Verifier\33]
“Path”=“c:\\program files\\safeboot content encryption\\SbCeProxy.exe”
[HKEY_LOCAL_MACHINE\SOFTWARE\SafeBoot International\SafeBoot Content
Encryption\Verifier\34]
“Path”=“c:\\program files\\safeboot content encryption\\SbCePostInstall.dll”
| 133
Index
Index
A Active Directory, 14 algorithm, 13, 118, 120, 123, 126, 127 authentication, 13 C Client cekey file, 86 configuration files, 111 creating an install set, 59 Deployment, 20 Explorer Integration, 23 forced logon, 98 installation of, 61 Installation Set, 22 keyhole icon, 84 limitations, 18 overview of, 16 Program files, 113 system tray icon, 17, 69 uninstall, 66 upgrading, 63 Connector Manager overview of, 14 Context menu, 17 options in, 75 cryptography, 6 file properties tab, 84 Encryption Algorithm, 13, 118, 120, 126, 127 Encryption Algorithms RC5, 126 Encryption keys About, 50 Administration of, 50 Create, 50 Settings, 52 Endpoint Encryption. See Client Endpoint Encryption for Files and Folders persistent encryption, 10 Working principle, 9 Endpoint Encryption Manger, 12 Endpoint Encryption Server, 13 overview of, 13 error codes, 111, 118 error messages, 118 Error messages, 118 F File decryption, 77 File encryption, 76 File extensions Encryption, 27 Files ini files, 111 Folder decryption, 77 Folder encryption, 32, 76 D deploy, 14 Design Philosophy, 8 DNS, 111, 119, 125 DSA, 13 groups, 59 I E E‐mail attachment encryption, 82 Settings, 24 Encryption algorithms, 126 134 |
G IP Address, 12, 13, 119, 125, 126 L language support, 125 LDAP, 14 Index
M Microsoft, 60 N recovery, 14 Recovery, 70 registry, 113, 117 Removable Media, 35 RSA, 13 Network encryption, 48 NT Domain, 14 S O object directory, 12, 13, 14, 111, 114 SbCE.log, 90 Search encrypted data, 77 system requirements, 125 System tray icon Settings, 24 P T Pagefile encryption, 11 Pentium, 125, 126 performance, 13, 126 Policies About, 21 Policy Administration, 21 Settings, 23 updating of, 65 TCP/IP, 12, 13, 125, 126 Technical Specifications, 125 Troubleshooting Utilities for, 90 X X500, 13, 14 R RC5, 126 | 135