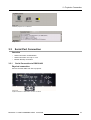
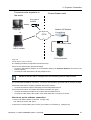
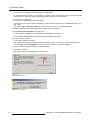
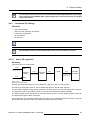
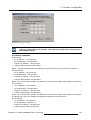
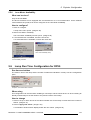
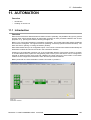
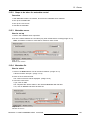
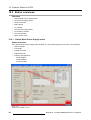
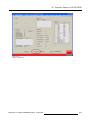
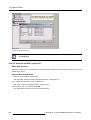
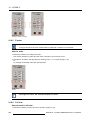
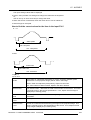
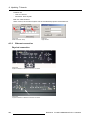
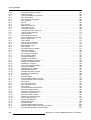
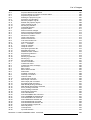
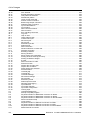
1
D-Cine Communicator
User Guide
Engineering Edition
R5976510/07
11/04/2006
Barco Inc. - USA
3240 Town Point Drive, Kennesaw, GA 30144
Phone: (770) 218-3200
Fax: (770) 218-3250
E-mail: [email protected]
Visit us at the web: www.barco.com
Barco nv Digital Cinema
Noordlaan 5, B-8520 Kuurne
Phone: +32 56.36.84.93
Fax: +32 56.36.88.62
E-mail: [email protected]
Visit us at the web: www.barco.com
Printed in Belgium
Changes
Barco provides this manual ’as is’ without warranty of any kind, either expressed or implied, including but not
limited to the implied warranties or merchantability and fitness for a particular purpose. Barco may make improvements and/or changes to the product(s) and/or the program(s) described in this publication at any time
without notice.
This publication could contain technical inaccuracies or typographical errors. Changes are periodically made
to the information in this publication; these changes are incorporated in new editions of this publication.
Copyright ©
All rights reserved. No part of this document may be copied, reproduced or translated. It shall not otherwise
be recorded, transmitted or stored in a retrieval system without the prior written consent of Barco.
Guarantee and Compensation
Barco provides a guarantee relating to perfect manufacturing as part of the legally stipulated terms of guarantee.
On receipt, the purchaser must immediately inspect all delivered goods for damage incurred during transport, as
well as for material and manufacturing faults Barco must be informed immediately in writing of any complaints.
The period of guarantee begins on the date of transfer of risks, in the case of special systems and software
on the date of commissioning, at latest 30 days after the transfer of risks. In the event of justified notice of
complaint, Barco can repair the fault or provide a replacement at its own discretion within an appropriate period.
If this measure proves to be impossible or unsuccessful, the purchaser can demand a reduction in the purchase
price or cancellation of the contract. All other claims, in particular those relating to compensation for direct or
indirect damage, and also damage attributed to the operation of software as well as to other services provided
by Barco, being a component of the system or independent service, will be deemed invalid provided the damage
is not proven to be attributed to the absence of properties guaranteed in writing or due to the intent or gross
negligence or part of Barco.
If the purchaser or a third party carries out modifications or repairs on goods delivered by Barco, or if the goods
are handled incorrectly, in particular if the systems are commissioned operated incorrectly or if, after the transfer of risks, the goods are subject to influences not agreed upon in the contract, all guarantee claims of the
purchaser will be rendered invalid. Not included in the guarantee coverage are system failures which are attributed to programs or special electronic circuitry provided by the purchaser, e.g. interfaces. Normal wear as
well as normal maintenance are not subject to the guarantee provided by Barco either.
The environmental conditions as well as the servicing and maintenance regulations specified in the this manual
must be complied with by the customer.
Trademarks
Brand and product names mentioned in this manual may be trademarks, registered trademarks or copyrights
of their respective holders. All brand and product names mentioned in this manual serve as comments or
examples and are not to be understood as advertising for the products or their manufactures.
Software License Agreement
You should carefully read the following terms and conditions before using this software. Your use of this software indicates your acceptance of this license agreement and warranty.
Terms and Conditions
1. 1. No redistribution of the D-Cine Communicator is allowed.
2. 2. Reverse-Engineering. You may not reverse engineer, decompile, disassemble or alter anyhow this software product.
Disclaimer of Warranty
THIS SOFTWARE AND THE ACCOMPANYING FILES ARE SOLD "AS IS" AND WITHOUT WARRANTIES AS
TO PERFORMANCE OR MERCHANTABILITY OR ANY OTHER WARRANTIES WHETHER EXPRESSED
OR IMPLIED. IN NO EVENT SHALL BARCO BE LIABLE FOR DAMAGE OF ANY KIND, LOSS OF DATA,
LOSS OF PROFITS, BUSINESS INTERRUPTION OR OTHER PECUNIARY LOSS ARISING DIRECTLY OR
INDIRECTLY. ANY LIABILITY OF THE SELLER WILL BE EXCLUSIVELY LIMITED TO REPLACEMENT OF
THE PRODUCT OR REFUND OF PURCHASE PRICE.
GNU-GPL code
If you would like a copy of the GPL source code contained in this product shipped to you on CD, please contact
[email protected] . The cost of preparing and mailing a CD will be charged.
Table of contents
TABLE OF CONTENTS
1. Introduction .........................................................................................7
1.1
General Introduction . . . . . . . . . . . . . . . . . . . . . . . . . . . . . . . . . . . . . . . . . . . . . . . . . . . . . . . . . . . . . . . . . . . . . . . . . . . . . . . . . . . . . . . . . . . 7
2. Software Installation and Start up .............................................................9
2.1
2.2
2.3
2.4
2.5
2.6
2.7
Required Configuration . . . . . . . . . . . . . . . . . . . . . . . . . . . . . . . . . . . . . . . . . . . . . . . . . . . . . . . . . . . . . . . . . . . . . . . . . . . . . . . . . . . . . . . . 9
Installing the Software . . . . . . . . . . . . . . . . . . . . . . . . . . . . . . . . . . . . . . . . . . . . . . . . . . . . . . . . . . . . . . . . . . . . . . . . . . . . . . . . . . . . . . . . . 9
Upgrading the Software . . . . . . . . . . . . . . . . . . . . . . . . . . . . . . . . . . . . . . . . . . . . . . . . . . . . . . . . . . . . . . . . . . . . . . . . . . . . . . . . . . . . . . 10
Getting access . . . . . . . . . . . . . . . . . . . . . . . . . . . . . . . . . . . . . . . . . . . . . . . . . . . . . . . . . . . . . . . . . . . . . . . . . . . . . . . . . . . . . . . . . . . . . . . . 11
Registration procedure . . . . . . . . . . . . . . . . . . . . . . . . . . . . . . . . . . . . . . . . . . . . . . . . . . . . . . . . . . . . . . . . . . . . . . . . . . . . . . . . . . . . . . . 12
Removing the D-Cine Communicator software . . . . . . . . . . . . . . . . . . . . . . . . . . . . . . . . . . . . . . . . . . . . . . . . . . . . . . . . . . . . 13
Start up of the D-Cine Communicator via a batch file . . . . . . . . . . . . . . . . . . . . . . . . . . . . . . . . . . . . . . . . . . . . . . . . . . . . . 13
3. Projector Connection ........................................................................... 15
3.1
3.2
Introduction . . . . . . . . . . . . . . . . . . . . . . . . . . . . . . . . . . . . . . . . . . . . . . . . . . . . . . . . . . . . . . . . . . . . . . . . . . . . . . . . . . . . . . . . . . . . . . . . . . . . 15
Ethernet Connection . . . . . . . . . . . . . . . . . . . . . . . . . . . . . . . . . . . . . . . . . . . . . . . . . . . . . . . . . . . . . . . . . . . . . . . . . . . . . . . . . . . . . . . . . . 15
3.2.1 Hardware connection . . . . . . . . . . . . . . . . . . . . . . . . . . . . . . . . . . . . . . . . . . . . . . . . . . . . . . . . . . . . . . . . . . . . . . . . . . . . . . . . . . . 15
3.2.2 Ethernet Connection via entering an IP address . . . . . . . . . . . . . . . . . . . . . . . . . . . . . . . . . . . . . . . . . . . . . . . . . . . . . 16
3.2.3 Ethernet connection via short cuts . . . . . . . . . . . . . . . . . . . . . . . . . . . . . . . . . . . . . . . . . . . . . . . . . . . . . . . . . . . . . . . . . . . . 18
3.3 Serial Port Connection. . . . . . . . . . . . . . . . . . . . . . . . . . . . . . . . . . . . . . . . . . . . . . . . . . . . . . . . . . . . . . . . . . . . . . . . . . . . . . . . . . . . . . . . 19
3.3.1 Serial Connection to RS232/422. . . . . . . . . . . . . . . . . . . . . . . . . . . . . . . . . . . . . . . . . . . . . . . . . . . . . . . . . . . . . . . . . . . . . . . 19
3.3.2 Serial Connection to Loop In / Out . . . . . . . . . . . . . . . . . . . . . . . . . . . . . . . . . . . . . . . . . . . . . . . . . . . . . . . . . . . . . . . . . . . . 21
3.3.3 Modem Dial Up connection. . . . . . . . . . . . . . . . . . . . . . . . . . . . . . . . . . . . . . . . . . . . . . . . . . . . . . . . . . . . . . . . . . . . . . . . . . . . . 24
3.4 Disconnection from the D-Cine Premiere . . . . . . . . . . . . . . . . . . . . . . . . . . . . . . . . . . . . . . . . . . . . . . . . . . . . . . . . . . . . . . . . . . 28
3.5 Changing the password . . . . . . . . . . . . . . . . . . . . . . . . . . . . . . . . . . . . . . . . . . . . . . . . . . . . . . . . . . . . . . . . . . . . . . . . . . . . . . . . . . . . . . 28
3.6 Reset Projector Head. . . . . . . . . . . . . . . . . . . . . . . . . . . . . . . . . . . . . . . . . . . . . . . . . . . . . . . . . . . . . . . . . . . . . . . . . . . . . . . . . . . . . . . . . 29
4. Projector Setup ................................................................................... 31
4.1
4.2
4.3
4.4
4.5
4.6
4.7
Control Interface set up . . . . . . . . . . . . . . . . . . . . . . . . . . . . . . . . . . . . . . . . . . . . . . . . . . . . . . . . . . . . . . . . . . . . . . . . . . . . . . . . . . . . . . 31
Pattern Shortcuts. . . . . . . . . . . . . . . . . . . . . . . . . . . . . . . . . . . . . . . . . . . . . . . . . . . . . . . . . . . . . . . . . . . . . . . . . . . . . . . . . . . . . . . . . . . . . . 32
Execute Quickly a MacroSet up . . . . . . . . . . . . . . . . . . . . . . . . . . . . . . . . . . . . . . . . . . . . . . . . . . . . . . . . . . . . . . . . . . . . . . . . . . . . . 32
Activate Projector Configuration . . . . . . . . . . . . . . . . . . . . . . . . . . . . . . . . . . . . . . . . . . . . . . . . . . . . . . . . . . . . . . . . . . . . . . . . . . . . . 34
Activate Projector Screen Set up . . . . . . . . . . . . . . . . . . . . . . . . . . . . . . . . . . . . . . . . . . . . . . . . . . . . . . . . . . . . . . . . . . . . . . . . . . . . 35
Macro Shortcuts for DP30 and DP50 . . . . . . . . . . . . . . . . . . . . . . . . . . . . . . . . . . . . . . . . . . . . . . . . . . . . . . . . . . . . . . . . . . . . . . . 36
Input and Source set up . . . . . . . . . . . . . . . . . . . . . . . . . . . . . . . . . . . . . . . . . . . . . . . . . . . . . . . . . . . . . . . . . . . . . . . . . . . . . . . . . . . . . . 36
4.7.1 Source Selection for DP30 and DP50. . . . . . . . . . . . . . . . . . . . . . . . . . . . . . . . . . . . . . . . . . . . . . . . . . . . . . . . . . . . . . . . . 37
4.7.2 Source Selection for DP100 and DP90 . . . . . . . . . . . . . . . . . . . . . . . . . . . . . . . . . . . . . . . . . . . . . . . . . . . . . . . . . . . . . . . 39
4.7.2.1 Cine Input. . . . . . . . . . . . . . . . . . . . . . . . . . . . . . . . . . . . . . . . . . . . . . . . . . . . . . . . . . . . . . . . . . . . . . . . . . . . . . . . . . . . . . . . . . . 39
4.7.2.2 ACSAR 2 source selection start up . . . . . . . . . . . . . . . . . . . . . . . . . . . . . . . . . . . . . . . . . . . . . . . . . . . . . . . . . . . . . . 42
4.7.3 About DVI standards . . . . . . . . . . . . . . . . . . . . . . . . . . . . . . . . . . . . . . . . . . . . . . . . . . . . . . . . . . . . . . . . . . . . . . . . . . . . . . . . . . . . 43
4.7.4 Active Area Selection & Aspect Ratio . . . . . . . . . . . . . . . . . . . . . . . . . . . . . . . . . . . . . . . . . . . . . . . . . . . . . . . . . . . . . . . . . 44
4.8 Output and Screen set up . . . . . . . . . . . . . . . . . . . . . . . . . . . . . . . . . . . . . . . . . . . . . . . . . . . . . . . . . . . . . . . . . . . . . . . . . . . . . . . . . . . . 47
4.8.1 Lamp ON/OFF . . . . . . . . . . . . . . . . . . . . . . . . . . . . . . . . . . . . . . . . . . . . . . . . . . . . . . . . . . . . . . . . . . . . . . . . . . . . . . . . . . . . . . . . . . . 47
4.8.2 Image Orientation . . . . . . . . . . . . . . . . . . . . . . . . . . . . . . . . . . . . . . . . . . . . . . . . . . . . . . . . . . . . . . . . . . . . . . . . . . . . . . . . . . . . . . . 48
4.8.3 Lens Type selection . . . . . . . . . . . . . . . . . . . . . . . . . . . . . . . . . . . . . . . . . . . . . . . . . . . . . . . . . . . . . . . . . . . . . . . . . . . . . . . . . . . . . 49
4.8.4 Anamorphic Lens holder calibration for DP100 and DP90. . . . . . . . . . . . . . . . . . . . . . . . . . . . . . . . . . . . . . . . . . 51
4.8.5 Resizing the image . . . . . . . . . . . . . . . . . . . . . . . . . . . . . . . . . . . . . . . . . . . . . . . . . . . . . . . . . . . . . . . . . . . . . . . . . . . . . . . . . . . . . . 53
4.8.5.1 What is Resizing?. . . . . . . . . . . . . . . . . . . . . . . . . . . . . . . . . . . . . . . . . . . . . . . . . . . . . . . . . . . . . . . . . . . . . . . . . . . . . . . . . . 54
4.8.5.2 Resizing with the arrow keys . . . . . . . . . . . . . . . . . . . . . . . . . . . . . . . . . . . . . . . . . . . . . . . . . . . . . . . . . . . . . . . . . . . . . 54
4.8.5.3 Resizing with direct user input. . . . . . . . . . . . . . . . . . . . . . . . . . . . . . . . . . . . . . . . . . . . . . . . . . . . . . . . . . . . . . . . . . . . 56
4.8.5.4 Letterbox function. . . . . . . . . . . . . . . . . . . . . . . . . . . . . . . . . . . . . . . . . . . . . . . . . . . . . . . . . . . . . . . . . . . . . . . . . . . . . . . . . . 58
4.8.6 Masking the image . . . . . . . . . . . . . . . . . . . . . . . . . . . . . . . . . . . . . . . . . . . . . . . . . . . . . . . . . . . . . . . . . . . . . . . . . . . . . . . . . . . . . . 62
4.8.6.1 What is masking . . . . . . . . . . . . . . . . . . . . . . . . . . . . . . . . . . . . . . . . . . . . . . . . . . . . . . . . . . . . . . . . . . . . . . . . . . . . . . . . . . . 62
4.8.6.2 Masking via the arrow keys . . . . . . . . . . . . . . . . . . . . . . . . . . . . . . . . . . . . . . . . . . . . . . . . . . . . . . . . . . . . . . . . . . . . . . . 63
4.8.6.3 Masking with direct user input . . . . . . . . . . . . . . . . . . . . . . . . . . . . . . . . . . . . . . . . . . . . . . . . . . . . . . . . . . . . . . . . . . . . 66
4.8.7 Saving Screen Settings while Resizing or Masking. . . . . . . . . . . . . . . . . . . . . . . . . . . . . . . . . . . . . . . . . . . . . . . . . . 68
4.8.8 Dowser Open or Close. . . . . . . . . . . . . . . . . . . . . . . . . . . . . . . . . . . . . . . . . . . . . . . . . . . . . . . . . . . . . . . . . . . . . . . . . . . . . . . . . . 69
4.8.9 Constant Light Output for DP50 . . . . . . . . . . . . . . . . . . . . . . . . . . . . . . . . . . . . . . . . . . . . . . . . . . . . . . . . . . . . . . . . . . . . . . . 69
R5976510 D-CINE COMMUNICATOR 11/04/2006
1
Table of contents
4.8.9.1 Start up of the CLO functions. . . . . . . . . . . . . . . . . . . . . . . . . . . . . . . . . . . . . . . . . . . . . . . . . . . . . . . . . . . . . . . . . . . . . 70
4.8.9.2 Read out the light output . . . . . . . . . . . . . . . . . . . . . . . . . . . . . . . . . . . . . . . . . . . . . . . . . . . . . . . . . . . . . . . . . . . . . . . . . . 70
4.8.9.3 Calibrating CLO . . . . . . . . . . . . . . . . . . . . . . . . . . . . . . . . . . . . . . . . . . . . . . . . . . . . . . . . . . . . . . . . . . . . . . . . . . . . . . . . . . . . 71
4.8.10 Light Output and Calibration for DP30 . . . . . . . . . . . . . . . . . . . . . . . . . . . . . . . . . . . . . . . . . . . . . . . . . . . . . . . . . . . . . . . . 74
4.8.10.1 Start up of the CLO functions. . . . . . . . . . . . . . . . . . . . . . . . . . . . . . . . . . . . . . . . . . . . . . . . . . . . . . . . . . . . . . . . . . . . . 74
4.8.10.2 Target set up for Normal Mode . . . . . . . . . . . . . . . . . . . . . . . . . . . . . . . . . . . . . . . . . . . . . . . . . . . . . . . . . . . . . . . . . . . 75
4.8.10.3 Target set up for CLO Mode . . . . . . . . . . . . . . . . . . . . . . . . . . . . . . . . . . . . . . . . . . . . . . . . . . . . . . . . . . . . . . . . . . . . . . 76
4.8.10.4 Light output Calibration . . . . . . . . . . . . . . . . . . . . . . . . . . . . . . . . . . . . . . . . . . . . . . . . . . . . . . . . . . . . . . . . . . . . . . . . . . . 77
4.8.11 Light Output and Calibration for DP100-DP90 . . . . . . . . . . . . . . . . . . . . . . . . . . . . . . . . . . . . . . . . . . . . . . . . . . . . . . . 78
4.8.11.1 Start up of the CLO functions. . . . . . . . . . . . . . . . . . . . . . . . . . . . . . . . . . . . . . . . . . . . . . . . . . . . . . . . . . . . . . . . . . . . . 78
4.8.11.2 Target set up for Normal Mode . . . . . . . . . . . . . . . . . . . . . . . . . . . . . . . . . . . . . . . . . . . . . . . . . . . . . . . . . . . . . . . . . . . 79
4.8.11.3 Target set up for CLO Mode . . . . . . . . . . . . . . . . . . . . . . . . . . . . . . . . . . . . . . . . . . . . . . . . . . . . . . . . . . . . . . . . . . . . . . 80
4.8.11.4 Light output Calibration . . . . . . . . . . . . . . . . . . . . . . . . . . . . . . . . . . . . . . . . . . . . . . . . . . . . . . . . . . . . . . . . . . . . . . . . . . . 81
4.9 Advanced Settings . . . . . . . . . . . . . . . . . . . . . . . . . . . . . . . . . . . . . . . . . . . . . . . . . . . . . . . . . . . . . . . . . . . . . . . . . . . . . . . . . . . . . . . . . . . . 81
4.9.1 Advanced Source settings. . . . . . . . . . . . . . . . . . . . . . . . . . . . . . . . . . . . . . . . . . . . . . . . . . . . . . . . . . . . . . . . . . . . . . . . . . . . . . 82
4.9.1.1 Start up of the advanced source settings . . . . . . . . . . . . . . . . . . . . . . . . . . . . . . . . . . . . . . . . . . . . . . . . . . . . . . . 82
4.9.1.2 SMPTE Field bit. . . . . . . . . . . . . . . . . . . . . . . . . . . . . . . . . . . . . . . . . . . . . . . . . . . . . . . . . . . . . . . . . . . . . . . . . . . . . . . . . . . . 82
4.9.1.3 SMPTE 291 . . . . . . . . . . . . . . . . . . . . . . . . . . . . . . . . . . . . . . . . . . . . . . . . . . . . . . . . . . . . . . . . . . . . . . . . . . . . . . . . . . . . . . . . 83
4.9.1.4 3 - 2 pull down . . . . . . . . . . . . . . . . . . . . . . . . . . . . . . . . . . . . . . . . . . . . . . . . . . . . . . . . . . . . . . . . . . . . . . . . . . . . . . . . . . . . . 83
4.9.1.5 Re-synchronisation . . . . . . . . . . . . . . . . . . . . . . . . . . . . . . . . . . . . . . . . . . . . . . . . . . . . . . . . . . . . . . . . . . . . . . . . . . . . . . . 84
4.9.1.6 Offset. . . . . . . . . . . . . . . . . . . . . . . . . . . . . . . . . . . . . . . . . . . . . . . . . . . . . . . . . . . . . . . . . . . . . . . . . . . . . . . . . . . . . . . . . . . . . . . . 84
4.9.2 Advanced Image settings. . . . . . . . . . . . . . . . . . . . . . . . . . . . . . . . . . . . . . . . . . . . . . . . . . . . . . . . . . . . . . . . . . . . . . . . . . . . . . . 85
4.9.2.1 Start up of the advanced image settings . . . . . . . . . . . . . . . . . . . . . . . . . . . . . . . . . . . . . . . . . . . . . . . . . . . . . . . . 85
4.9.2.2 Anti log Lut . . . . . . . . . . . . . . . . . . . . . . . . . . . . . . . . . . . . . . . . . . . . . . . . . . . . . . . . . . . . . . . . . . . . . . . . . . . . . . . . . . . . . . . . . 86
4.9.2.3 De-Gamma Lut. . . . . . . . . . . . . . . . . . . . . . . . . . . . . . . . . . . . . . . . . . . . . . . . . . . . . . . . . . . . . . . . . . . . . . . . . . . . . . . . . . . . . 87
4.9.2.4 3D lookup table (complex Lut). . . . . . . . . . . . . . . . . . . . . . . . . . . . . . . . . . . . . . . . . . . . . . . . . . . . . . . . . . . . . . . . . . . . 87
4.9.2.5 Image Scaling . . . . . . . . . . . . . . . . . . . . . . . . . . . . . . . . . . . . . . . . . . . . . . . . . . . . . . . . . . . . . . . . . . . . . . . . . . . . . . . . . . . . . . 88
4.9.3 Advanced 3D Settings . . . . . . . . . . . . . . . . . . . . . . . . . . . . . . . . . . . . . . . . . . . . . . . . . . . . . . . . . . . . . . . . . . . . . . . . . . . . . . . . . . 89
4.9.3.1 About 3D projection . . . . . . . . . . . . . . . . . . . . . . . . . . . . . . . . . . . . . . . . . . . . . . . . . . . . . . . . . . . . . . . . . . . . . . . . . . . . . . . 89
4.9.3.2 Start up of the advanced 3D settings . . . . . . . . . . . . . . . . . . . . . . . . . . . . . . . . . . . . . . . . . . . . . . . . . . . . . . . . . . . . 90
4.9.3.3 Frame rate multiplication. . . . . . . . . . . . . . . . . . . . . . . . . . . . . . . . . . . . . . . . . . . . . . . . . . . . . . . . . . . . . . . . . . . . . . . . . . 91
4.9.3.4 3D Test pattern. . . . . . . . . . . . . . . . . . . . . . . . . . . . . . . . . . . . . . . . . . . . . . . . . . . . . . . . . . . . . . . . . . . . . . . . . . . . . . . . . . . . . 91
4.9.3.5 3D Controls. . . . . . . . . . . . . . . . . . . . . . . . . . . . . . . . . . . . . . . . . . . . . . . . . . . . . . . . . . . . . . . . . . . . . . . . . . . . . . . . . . . . . . . . . 92
4.9.4 Image Freeze . . . . . . . . . . . . . . . . . . . . . . . . . . . . . . . . . . . . . . . . . . . . . . . . . . . . . . . . . . . . . . . . . . . . . . . . . . . . . . . . . . . . . . . . . . . . 95
4.10 Function keys. . . . . . . . . . . . . . . . . . . . . . . . . . . . . . . . . . . . . . . . . . . . . . . . . . . . . . . . . . . . . . . . . . . . . . . . . . . . . . . . . . . . . . . . . . . . . . . . . . 96
5. Projector Configuration ........................................................................ 97
5.1
5.2
5.3
Set up of the Internal Clock . . . . . . . . . . . . . . . . . . . . . . . . . . . . . . . . . . . . . . . . . . . . . . . . . . . . . . . . . . . . . . . . . . . . . . . . . . . . . . . . . . 97
Set up of the Serial Bus Address . . . . . . . . . . . . . . . . . . . . . . . . . . . . . . . . . . . . . . . . . . . . . . . . . . . . . . . . . . . . . . . . . . . . . . . . . . . . 98
Set up of the Network Properties . . . . . . . . . . . . . . . . . . . . . . . . . . . . . . . . . . . . . . . . . . . . . . . . . . . . . . . . . . . . . . . . . . . . . . . . . . . . 98
5.3.1 Ethernet Connections . . . . . . . . . . . . . . . . . . . . . . . . . . . . . . . . . . . . . . . . . . . . . . . . . . . . . . . . . . . . . . . . . . . . . . . . . . . . . . . . . . . 98
5.3.2 Assign a hostname to the projector . . . . . . . . . . . . . . . . . . . . . . . . . . . . . . . . . . . . . . . . . . . . . . . . . . . . . . . . . . . . . . . . . 100
5.3.3 Assign an Ethernet address via DHCP for the TI boards . . . . . . . . . . . . . . . . . . . . . . . . . . . . . . . . . . . . . . . . . 101
5.3.4 Manually assign an Ethernet address for the TI boards. . . . . . . . . . . . . . . . . . . . . . . . . . . . . . . . . . . . . . . . . . . 103
5.3.5 Assign an Ethernet address via DHCP for the Barco controller (only for DP100-DP90). . . . . . . 105
5.3.6 Manually assign an Ethernet address for the Barco controller . . . . . . . . . . . . . . . . . . . . . . . . . . . . . . . . . . . 106
5.4 OPTO-Isolated GPI Configuration. . . . . . . . . . . . . . . . . . . . . . . . . . . . . . . . . . . . . . . . . . . . . . . . . . . . . . . . . . . . . . . . . . . . . . . . . 108
5.5 Controller Configuration . . . . . . . . . . . . . . . . . . . . . . . . . . . . . . . . . . . . . . . . . . . . . . . . . . . . . . . . . . . . . . . . . . . . . . . . . . . . . . . . . . . . .110
5.5.1 Configuring Serial Ports . . . . . . . . . . . . . . . . . . . . . . . . . . . . . . . . . . . . . . . . . . . . . . . . . . . . . . . . . . . . . . . . . . . . . . . . . . . . . . .110
5.5.2 Read out of the serial number . . . . . . . . . . . . . . . . . . . . . . . . . . . . . . . . . . . . . . . . . . . . . . . . . . . . . . . . . . . . . . . . . . . . . . . .111
5.5.3 Entering a SNMP key . . . . . . . . . . . . . . . . . . . . . . . . . . . . . . . . . . . . . . . . . . . . . . . . . . . . . . . . . . . . . . . . . . . . . . . . . . . . . . . . . .111
5.5.4 SNMP settings . . . . . . . . . . . . . . . . . . . . . . . . . . . . . . . . . . . . . . . . . . . . . . . . . . . . . . . . . . . . . . . . . . . . . . . . . . . . . . . . . . . . . . . . . .112
5.5.5 Entering a CLO key . . . . . . . . . . . . . . . . . . . . . . . . . . . . . . . . . . . . . . . . . . . . . . . . . . . . . . . . . . . . . . . . . . . . . . . . . . . . . . . . . . . .113
5.5.6 Lens Motor Availability . . . . . . . . . . . . . . . . . . . . . . . . . . . . . . . . . . . . . . . . . . . . . . . . . . . . . . . . . . . . . . . . . . . . . . . . . . . . . . . .115
5.6 Lamp Run Time Configuration for DP50. . . . . . . . . . . . . . . . . . . . . . . . . . . . . . . . . . . . . . . . . . . . . . . . . . . . . . . . . . . . . . . . . . .115
5.7 Lamp Settings for DP30 . . . . . . . . . . . . . . . . . . . . . . . . . . . . . . . . . . . . . . . . . . . . . . . . . . . . . . . . . . . . . . . . . . . . . . . . . . . . . . . . . . . . .116
5.8 Lamp Settings for DP100-DP90 . . . . . . . . . . . . . . . . . . . . . . . . . . . . . . . . . . . . . . . . . . . . . . . . . . . . . . . . . . . . . . . . . . . . . . . . . . . .117
6. Projector Tests ................................................................................... 119
6.1
2
General Purpose Outputs . . . . . . . . . . . . . . . . . . . . . . . . . . . . . . . . . . . . . . . . . . . . . . . . . . . . . . . . . . . . . . . . . . . . . . . . . . . . . . . . . . .119
R5976510 D-CINE COMMUNICATOR 11/04/2006
Table of contents
6.2
6.3
Ethernet test . . . . . . . . . . . . . . . . . . . . . . . . . . . . . . . . . . . . . . . . . . . . . . . . . . . . . . . . . . . . . . . . . . . . . . . . . . . . . . . . . . . . . . . . . . . . . . . . . .119
Test Patterns. . . . . . . . . . . . . . . . . . . . . . . . . . . . . . . . . . . . . . . . . . . . . . . . . . . . . . . . . . . . . . . . . . . . . . . . . . . . . . . . . . . . . . . . . . . . . . . . . 120
6.3.1 Changing a test pattern . . . . . . . . . . . . . . . . . . . . . . . . . . . . . . . . . . . . . . . . . . . . . . . . . . . . . . . . . . . . . . . . . . . . . . . . . . . . . . . 120
6.3.2 Clear the projected test pattern . . . . . . . . . . . . . . . . . . . . . . . . . . . . . . . . . . . . . . . . . . . . . . . . . . . . . . . . . . . . . . . . . . . . . . 122
6.4 Port 292 error counts . . . . . . . . . . . . . . . . . . . . . . . . . . . . . . . . . . . . . . . . . . . . . . . . . . . . . . . . . . . . . . . . . . . . . . . . . . . . . . . . . . . . . . . 123
6.5 Self Test . . . . . . . . . . . . . . . . . . . . . . . . . . . . . . . . . . . . . . . . . . . . . . . . . . . . . . . . . . . . . . . . . . . . . . . . . . . . . . . . . . . . . . . . . . . . . . . . . . . . . . 123
6.5.1 Start up of the self tests setup . . . . . . . . . . . . . . . . . . . . . . . . . . . . . . . . . . . . . . . . . . . . . . . . . . . . . . . . . . . . . . . . . . . . . . . 123
6.5.2 Self tests choices . . . . . . . . . . . . . . . . . . . . . . . . . . . . . . . . . . . . . . . . . . . . . . . . . . . . . . . . . . . . . . . . . . . . . . . . . . . . . . . . . . . . . . 125
7. Color Calibration ................................................................................127
7.1
7.2
Introduction to Color Calibration . . . . . . . . . . . . . . . . . . . . . . . . . . . . . . . . . . . . . . . . . . . . . . . . . . . . . . . . . . . . . . . . . . . . . . . . . . .
Color Correction. . . . . . . . . . . . . . . . . . . . . . . . . . . . . . . . . . . . . . . . . . . . . . . . . . . . . . . . . . . . . . . . . . . . . . . . . . . . . . . . . . . . . . . . . . . . .
7.2.1 Color Correction Process . . . . . . . . . . . . . . . . . . . . . . . . . . . . . . . . . . . . . . . . . . . . . . . . . . . . . . . . . . . . . . . . . . . . . . . . . . . . .
7.2.2 Color Measuring . . . . . . . . . . . . . . . . . . . . . . . . . . . . . . . . . . . . . . . . . . . . . . . . . . . . . . . . . . . . . . . . . . . . . . . . . . . . . . . . . . . . . . .
7.2.3 Installing a Target Color Gamut file . . . . . . . . . . . . . . . . . . . . . . . . . . . . . . . . . . . . . . . . . . . . . . . . . . . . . . . . . . . . . . . . . .
7.2.4 Verifying the colors after correction. . . . . . . . . . . . . . . . . . . . . . . . . . . . . . . . . . . . . . . . . . . . . . . . . . . . . . . . . . . . . . . . . .
127
127
127
128
129
131
8. File Manager ......................................................................................133
8.1
8.2
Introduction . . . . . . . . . . . . . . . . . . . . . . . . . . . . . . . . . . . . . . . . . . . . . . . . . . . . . . . . . . . . . . . . . . . . . . . . . . . . . . . . . . . . . . . . . . . . . . . . . .
Internal file system . . . . . . . . . . . . . . . . . . . . . . . . . . . . . . . . . . . . . . . . . . . . . . . . . . . . . . . . . . . . . . . . . . . . . . . . . . . . . . . . . . . . . . . . . .
8.2.1 Changing the view. . . . . . . . . . . . . . . . . . . . . . . . . . . . . . . . . . . . . . . . . . . . . . . . . . . . . . . . . . . . . . . . . . . . . . . . . . . . . . . . . . . . .
8.2.2 Renaming files and folders . . . . . . . . . . . . . . . . . . . . . . . . . . . . . . . . . . . . . . . . . . . . . . . . . . . . . . . . . . . . . . . . . . . . . . . . . . .
8.2.3 Deleting files and directory . . . . . . . . . . . . . . . . . . . . . . . . . . . . . . . . . . . . . . . . . . . . . . . . . . . . . . . . . . . . . . . . . . . . . . . . . . .
8.2.4 Creating a new folder . . . . . . . . . . . . . . . . . . . . . . . . . . . . . . . . . . . . . . . . . . . . . . . . . . . . . . . . . . . . . . . . . . . . . . . . . . . . . . . . .
8.2.5 Navigation through folders . . . . . . . . . . . . . . . . . . . . . . . . . . . . . . . . . . . . . . . . . . . . . . . . . . . . . . . . . . . . . . . . . . . . . . . . . . .
8.2.6 Changing the attribute setting . . . . . . . . . . . . . . . . . . . . . . . . . . . . . . . . . . . . . . . . . . . . . . . . . . . . . . . . . . . . . . . . . . . . . . . .
8.3 File Upload. . . . . . . . . . . . . . . . . . . . . . . . . . . . . . . . . . . . . . . . . . . . . . . . . . . . . . . . . . . . . . . . . . . . . . . . . . . . . . . . . . . . . . . . . . . . . . . . . . .
8.4 File Download . . . . . . . . . . . . . . . . . . . . . . . . . . . . . . . . . . . . . . . . . . . . . . . . . . . . . . . . . . . . . . . . . . . . . . . . . . . . . . . . . . . . . . . . . . . . . . .
8.5 Actions on Projector files . . . . . . . . . . . . . . . . . . . . . . . . . . . . . . . . . . . . . . . . . . . . . . . . . . . . . . . . . . . . . . . . . . . . . . . . . . . . . . . . . . .
8.5.1 Save from ACTIVE . . . . . . . . . . . . . . . . . . . . . . . . . . . . . . . . . . . . . . . . . . . . . . . . . . . . . . . . . . . . . . . . . . . . . . . . . . . . . . . . . . . .
8.5.2 Select ACTIVE. . . . . . . . . . . . . . . . . . . . . . . . . . . . . . . . . . . . . . . . . . . . . . . . . . . . . . . . . . . . . . . . . . . . . . . . . . . . . . . . . . . . . . . . .
8.5.3 Write ACTIVE Direct . . . . . . . . . . . . . . . . . . . . . . . . . . . . . . . . . . . . . . . . . . . . . . . . . . . . . . . . . . . . . . . . . . . . . . . . . . . . . . . . . .
8.5.4 Read from ACTIVE. . . . . . . . . . . . . . . . . . . . . . . . . . . . . . . . . . . . . . . . . . . . . . . . . . . . . . . . . . . . . . . . . . . . . . . . . . . . . . . . . . . .
8.5.5 Read Files Active . . . . . . . . . . . . . . . . . . . . . . . . . . . . . . . . . . . . . . . . . . . . . . . . . . . . . . . . . . . . . . . . . . . . . . . . . . . . . . . . . . . . . .
8.5.6 Executing a Macro file . . . . . . . . . . . . . . . . . . . . . . . . . . . . . . . . . . . . . . . . . . . . . . . . . . . . . . . . . . . . . . . . . . . . . . . . . . . . . . . .
8.6 Backup the file system. . . . . . . . . . . . . . . . . . . . . . . . . . . . . . . . . . . . . . . . . . . . . . . . . . . . . . . . . . . . . . . . . . . . . . . . . . . . . . . . . . . . . .
8.7 Restore the file system . . . . . . . . . . . . . . . . . . . . . . . . . . . . . . . . . . . . . . . . . . . . . . . . . . . . . . . . . . . . . . . . . . . . . . . . . . . . . . . . . . . . .
133
133
134
137
137
138
138
138
139
140
141
141
142
144
145
146
148
149
151
9. Updates ............................................................................................155
9.1
9.2
9.3
General overview . . . . . . . . . . . . . . . . . . . . . . . . . . . . . . . . . . . . . . . . . . . . . . . . . . . . . . . . . . . . . . . . . . . . . . . . . . . . . . . . . . . . . . . . . . . 155
General Updates . . . . . . . . . . . . . . . . . . . . . . . . . . . . . . . . . . . . . . . . . . . . . . . . . . . . . . . . . . . . . . . . . . . . . . . . . . . . . . . . . . . . . . . . . . . . 156
Other individual upgrades . . . . . . . . . . . . . . . . . . . . . . . . . . . . . . . . . . . . . . . . . . . . . . . . . . . . . . . . . . . . . . . . . . . . . . . . . . . . . . . . . . 161
9.3.1 Loading setting in the Button module . . . . . . . . . . . . . . . . . . . . . . . . . . . . . . . . . . . . . . . . . . . . . . . . . . . . . . . . . . . . . . . 161
9.3.2 Upgrading the Touch panel menu structure . . . . . . . . . . . . . . . . . . . . . . . . . . . . . . . . . . . . . . . . . . . . . . . . . . . . . . . . 161
9.3.3 Controller Software update . . . . . . . . . . . . . . . . . . . . . . . . . . . . . . . . . . . . . . . . . . . . . . . . . . . . . . . . . . . . . . . . . . . . . . . . . . . 162
9.4 Upgrade Troubleshooting . . . . . . . . . . . . . . . . . . . . . . . . . . . . . . . . . . . . . . . . . . . . . . . . . . . . . . . . . . . . . . . . . . . . . . . . . . . . . . . . . . 163
9.4.1 Connection broken, projector reset. . . . . . . . . . . . . . . . . . . . . . . . . . . . . . . . . . . . . . . . . . . . . . . . . . . . . . . . . . . . . . . . . . 163
9.4.2 Connection broken while updating Button control or touch panel software. . . . . . . . . . . . . . . . . . . . . 164
10.Security Management .........................................................................165
10.1
10.2
10.3
10.4
10.5
Security management overview . . . . . . . . . . . . . . . . . . . . . . . . . . . . . . . . . . . . . . . . . . . . . . . . . . . . . . . . . . . . . . . . . . . . . . . . . . .
Starting up the Security management with valid key . . . . . . . . . . . . . . . . . . . . . . . . . . . . . . . . . . . . . . . . . . . . . . . . . . . .
Adding an extra key to the list . . . . . . . . . . . . . . . . . . . . . . . . . . . . . . . . . . . . . . . . . . . . . . . . . . . . . . . . . . . . . . . . . . . . . . . . . . . . .
Changing the pin code of an existing key . . . . . . . . . . . . . . . . . . . . . . . . . . . . . . . . . . . . . . . . . . . . . . . . . . . . . . . . . . . . . . . .
Get an overview of the Card Cage access . . . . . . . . . . . . . . . . . . . . . . . . . . . . . . . . . . . . . . . . . . . . . . . . . . . . . . . . . . . . . . .
165
165
167
167
168
11.Automation .......................................................................................169
11.1 Introduction . . . . . . . . . . . . . . . . . . . . . . . . . . . . . . . . . . . . . . . . . . . . . . . . . . . . . . . . . . . . . . . . . . . . . . . . . . . . . . . . . . . . . . . . . . . . . . . . . . 169
11.2 Creating an Action List . . . . . . . . . . . . . . . . . . . . . . . . . . . . . . . . . . . . . . . . . . . . . . . . . . . . . . . . . . . . . . . . . . . . . . . . . . . . . . . . . . . . . 170
R5976510 D-CINE COMMUNICATOR 11/04/2006
3
Table of contents
12.Automation for DP100 and DP90 ...........................................................173
12.1
12.2
12.3
12.4
Introduction . . . . . . . . . . . . . . . . . . . . . . . . . . . . . . . . . . . . . . . . . . . . . . . . . . . . . . . . . . . . . . . . . . . . . . . . . . . . . . . . . . . . . . . . . . . . . . . . . .
Activating a macro . . . . . . . . . . . . . . . . . . . . . . . . . . . . . . . . . . . . . . . . . . . . . . . . . . . . . . . . . . . . . . . . . . . . . . . . . . . . . . . . . . . . . . . . . .
Macro association. . . . . . . . . . . . . . . . . . . . . . . . . . . . . . . . . . . . . . . . . . . . . . . . . . . . . . . . . . . . . . . . . . . . . . . . . . . . . . . . . . . . . . . . . . .
Edit a macro . . . . . . . . . . . . . . . . . . . . . . . . . . . . . . . . . . . . . . . . . . . . . . . . . . . . . . . . . . . . . . . . . . . . . . . . . . . . . . . . . . . . . . . . . . . . . . . . .
173
174
174
175
13.Server .............................................................................................179
13.1 Introduction . . . . . . . . . . . . . . . . . . . . . . . . . . . . . . . . . . . . . . . . . . . . . . . . . . . . . . . . . . . . . . . . . . . . . . . . . . . . . . . . . . . . . . . . . . . . . . . . . .
13.2 Server overview interface . . . . . . . . . . . . . . . . . . . . . . . . . . . . . . . . . . . . . . . . . . . . . . . . . . . . . . . . . . . . . . . . . . . . . . . . . . . . . . . . . .
13.3 Time Control . . . . . . . . . . . . . . . . . . . . . . . . . . . . . . . . . . . . . . . . . . . . . . . . . . . . . . . . . . . . . . . . . . . . . . . . . . . . . . . . . . . . . . . . . . . . . . . . .
13.3.1 Time source . . . . . . . . . . . . . . . . . . . . . . . . . . . . . . . . . . . . . . . . . . . . . . . . . . . . . . . . . . . . . . . . . . . . . . . . . . . . . . . . . . . . . . . . . . . .
13.3.2 Input frequency . . . . . . . . . . . . . . . . . . . . . . . . . . . . . . . . . . . . . . . . . . . . . . . . . . . . . . . . . . . . . . . . . . . . . . . . . . . . . . . . . . . . . . . .
13.3.3 Timeline stamp . . . . . . . . . . . . . . . . . . . . . . . . . . . . . . . . . . . . . . . . . . . . . . . . . . . . . . . . . . . . . . . . . . . . . . . . . . . . . . . . . . . . . . . .
13.3.4 Timeline adjustment . . . . . . . . . . . . . . . . . . . . . . . . . . . . . . . . . . . . . . . . . . . . . . . . . . . . . . . . . . . . . . . . . . . . . . . . . . . . . . . . . . .
13.3.5 Control . . . . . . . . . . . . . . . . . . . . . . . . . . . . . . . . . . . . . . . . . . . . . . . . . . . . . . . . . . . . . . . . . . . . . . . . . . . . . . . . . . . . . . . . . . . . . . . . . .
13.4 Subtitle Control . . . . . . . . . . . . . . . . . . . . . . . . . . . . . . . . . . . . . . . . . . . . . . . . . . . . . . . . . . . . . . . . . . . . . . . . . . . . . . . . . . . . . . . . . . . . . .
13.4.1 Steps to be taken for subtitle control . . . . . . . . . . . . . . . . . . . . . . . . . . . . . . . . . . . . . . . . . . . . . . . . . . . . . . . . . . . . . . . .
13.4.2 Subtitle server . . . . . . . . . . . . . . . . . . . . . . . . . . . . . . . . . . . . . . . . . . . . . . . . . . . . . . . . . . . . . . . . . . . . . . . . . . . . . . . . . . . . . . . . .
13.4.3 Subtitle file . . . . . . . . . . . . . . . . . . . . . . . . . . . . . . . . . . . . . . . . . . . . . . . . . . . . . . . . . . . . . . . . . . . . . . . . . . . . . . . . . . . . . . . . . . . . .
13.4.4 Time to live (TTL). . . . . . . . . . . . . . . . . . . . . . . . . . . . . . . . . . . . . . . . . . . . . . . . . . . . . . . . . . . . . . . . . . . . . . . . . . . . . . . . . . . . . .
13.4.5 Subtitle Control activation . . . . . . . . . . . . . . . . . . . . . . . . . . . . . . . . . . . . . . . . . . . . . . . . . . . . . . . . . . . . . . . . . . . . . . . . . . . .
13.5 Metadata Control. . . . . . . . . . . . . . . . . . . . . . . . . . . . . . . . . . . . . . . . . . . . . . . . . . . . . . . . . . . . . . . . . . . . . . . . . . . . . . . . . . . . . . . . . . . .
13.5.1 Introduction. . . . . . . . . . . . . . . . . . . . . . . . . . . . . . . . . . . . . . . . . . . . . . . . . . . . . . . . . . . . . . . . . . . . . . . . . . . . . . . . . . . . . . . . . . . . .
13.5.2 Steps to be taken for metadata control . . . . . . . . . . . . . . . . . . . . . . . . . . . . . . . . . . . . . . . . . . . . . . . . . . . . . . . . . . . . .
13.5.3 Metadata server . . . . . . . . . . . . . . . . . . . . . . . . . . . . . . . . . . . . . . . . . . . . . . . . . . . . . . . . . . . . . . . . . . . . . . . . . . . . . . . . . . . . . . .
13.5.4 Metadata file . . . . . . . . . . . . . . . . . . . . . . . . . . . . . . . . . . . . . . . . . . . . . . . . . . . . . . . . . . . . . . . . . . . . . . . . . . . . . . . . . . . . . . . . . . .
13.5.5 Time to live (TTL). . . . . . . . . . . . . . . . . . . . . . . . . . . . . . . . . . . . . . . . . . . . . . . . . . . . . . . . . . . . . . . . . . . . . . . . . . . . . . . . . . . . . .
13.5.6 Metadata Control activation . . . . . . . . . . . . . . . . . . . . . . . . . . . . . . . . . . . . . . . . . . . . . . . . . . . . . . . . . . . . . . . . . . . . . . . . . .
179
180
180
180
181
181
182
182
183
183
183
183
185
186
186
186
187
187
187
189
189
14.Projector Status for DP50 ....................................................................191
14.1 General overview . . . . . . . . . . . . . . . . . . . . . . . . . . . . . . . . . . . . . . . . . . . . . . . . . . . . . . . . . . . . . . . . . . . . . . . . . . . . . . . . . . . . . . . . . . .
14.2 Status overviews . . . . . . . . . . . . . . . . . . . . . . . . . . . . . . . . . . . . . . . . . . . . . . . . . . . . . . . . . . . . . . . . . . . . . . . . . . . . . . . . . . . . . . . . . . . .
14.2.1 Switch Mode Power Supply status . . . . . . . . . . . . . . . . . . . . . . . . . . . . . . . . . . . . . . . . . . . . . . . . . . . . . . . . . . . . . . . . . .
14.2.2 Fan/Tec Controller status . . . . . . . . . . . . . . . . . . . . . . . . . . . . . . . . . . . . . . . . . . . . . . . . . . . . . . . . . . . . . . . . . . . . . . . . . . . . .
14.2.3 Boards Status. . . . . . . . . . . . . . . . . . . . . . . . . . . . . . . . . . . . . . . . . . . . . . . . . . . . . . . . . . . . . . . . . . . . . . . . . . . . . . . . . . . . . . . . . .
14.2.4 External Cooler Unit Status . . . . . . . . . . . . . . . . . . . . . . . . . . . . . . . . . . . . . . . . . . . . . . . . . . . . . . . . . . . . . . . . . . . . . . . . . .
14.2.5 CLO status . . . . . . . . . . . . . . . . . . . . . . . . . . . . . . . . . . . . . . . . . . . . . . . . . . . . . . . . . . . . . . . . . . . . . . . . . . . . . . . . . . . . . . . . . . . . .
14.2.6 Security Card Cage Status . . . . . . . . . . . . . . . . . . . . . . . . . . . . . . . . . . . . . . . . . . . . . . . . . . . . . . . . . . . . . . . . . . . . . . . . . . .
14.2.7 Barco access level . . . . . . . . . . . . . . . . . . . . . . . . . . . . . . . . . . . . . . . . . . . . . . . . . . . . . . . . . . . . . . . . . . . . . . . . . . . . . . . . . . . .
14.3 Projector Log Information . . . . . . . . . . . . . . . . . . . . . . . . . . . . . . . . . . . . . . . . . . . . . . . . . . . . . . . . . . . . . . . . . . . . . . . . . . . . . . . . . .
14.3.1 Displaying Projector Log Information. . . . . . . . . . . . . . . . . . . . . . . . . . . . . . . . . . . . . . . . . . . . . . . . . . . . . . . . . . . . . . . .
14.3.2 Saving the Projector Log File . . . . . . . . . . . . . . . . . . . . . . . . . . . . . . . . . . . . . . . . . . . . . . . . . . . . . . . . . . . . . . . . . . . . . . . .
14.3.3 Refreshing the Projector log information. . . . . . . . . . . . . . . . . . . . . . . . . . . . . . . . . . . . . . . . . . . . . . . . . . . . . . . . . . . .
14.3.4 Clearing the Projector log file . . . . . . . . . . . . . . . . . . . . . . . . . . . . . . . . . . . . . . . . . . . . . . . . . . . . . . . . . . . . . . . . . . . . . . . .
14.3.5 Active Cooling on DMD’s . . . . . . . . . . . . . . . . . . . . . . . . . . . . . . . . . . . . . . . . . . . . . . . . . . . . . . . . . . . . . . . . . . . . . . . . . . . . .
14.4 Security log file . . . . . . . . . . . . . . . . . . . . . . . . . . . . . . . . . . . . . . . . . . . . . . . . . . . . . . . . . . . . . . . . . . . . . . . . . . . . . . . . . . . . . . . . . . . . . .
14.5 Certificates . . . . . . . . . . . . . . . . . . . . . . . . . . . . . . . . . . . . . . . . . . . . . . . . . . . . . . . . . . . . . . . . . . . . . . . . . . . . . . . . . . . . . . . . . . . . . . . . . . .
191
192
192
193
195
195
195
195
196
196
196
197
197
197
197
198
198
15.Projector Status for DP30 ....................................................................201
15.1 General overview . . . . . . . . . . . . . . . . . . . . . . . . . . . . . . . . . . . . . . . . . . . . . . . . . . . . . . . . . . . . . . . . . . . . . . . . . . . . . . . . . . . . . . . . . . .
15.2 Status overviews . . . . . . . . . . . . . . . . . . . . . . . . . . . . . . . . . . . . . . . . . . . . . . . . . . . . . . . . . . . . . . . . . . . . . . . . . . . . . . . . . . . . . . . . . . . .
15.2.1 Switch Mode Power Supply status . . . . . . . . . . . . . . . . . . . . . . . . . . . . . . . . . . . . . . . . . . . . . . . . . . . . . . . . . . . . . . . . . .
15.2.2 Lamp Power Supply status . . . . . . . . . . . . . . . . . . . . . . . . . . . . . . . . . . . . . . . . . . . . . . . . . . . . . . . . . . . . . . . . . . . . . . . . . . .
15.2.3 DCDC Controller . . . . . . . . . . . . . . . . . . . . . . . . . . . . . . . . . . . . . . . . . . . . . . . . . . . . . . . . . . . . . . . . . . . . . . . . . . . . . . . . . . . . . .
15.2.4 Board status . . . . . . . . . . . . . . . . . . . . . . . . . . . . . . . . . . . . . . . . . . . . . . . . . . . . . . . . . . . . . . . . . . . . . . . . . . . . . . . . . . . . . . . . . . .
15.2.5 CLO status . . . . . . . . . . . . . . . . . . . . . . . . . . . . . . . . . . . . . . . . . . . . . . . . . . . . . . . . . . . . . . . . . . . . . . . . . . . . . . . . . . . . . . . . . . . . .
15.2.6 Security Card Cage Status . . . . . . . . . . . . . . . . . . . . . . . . . . . . . . . . . . . . . . . . . . . . . . . . . . . . . . . . . . . . . . . . . . . . . . . . . . .
15.2.7 Lens Motor Controller . . . . . . . . . . . . . . . . . . . . . . . . . . . . . . . . . . . . . . . . . . . . . . . . . . . . . . . . . . . . . . . . . . . . . . . . . . . . . . . . .
15.2.8 Lens Info Module . . . . . . . . . . . . . . . . . . . . . . . . . . . . . . . . . . . . . . . . . . . . . . . . . . . . . . . . . . . . . . . . . . . . . . . . . . . . . . . . . . . . . .
15.2.9 Barco access level . . . . . . . . . . . . . . . . . . . . . . . . . . . . . . . . . . . . . . . . . . . . . . . . . . . . . . . . . . . . . . . . . . . . . . . . . . . . . . . . . . . .
4
201
202
202
203
203
204
205
205
205
206
206
R5976510 D-CINE COMMUNICATOR 11/04/2006
Table of contents
15.3 Projector Log Information . . . . . . . . . . . . . . . . . . . . . . . . . . . . . . . . . . . . . . . . . . . . . . . . . . . . . . . . . . . . . . . . . . . . . . . . . . . . . . . . . .
15.3.1 Displaying Projector Log Information. . . . . . . . . . . . . . . . . . . . . . . . . . . . . . . . . . . . . . . . . . . . . . . . . . . . . . . . . . . . . . . .
15.3.2 Saving the Projector Log File . . . . . . . . . . . . . . . . . . . . . . . . . . . . . . . . . . . . . . . . . . . . . . . . . . . . . . . . . . . . . . . . . . . . . . . .
15.3.3 Refreshing the Projector log information. . . . . . . . . . . . . . . . . . . . . . . . . . . . . . . . . . . . . . . . . . . . . . . . . . . . . . . . . . . .
15.3.4 Clearing the Projector log file . . . . . . . . . . . . . . . . . . . . . . . . . . . . . . . . . . . . . . . . . . . . . . . . . . . . . . . . . . . . . . . . . . . . . . . .
15.4 Security log file . . . . . . . . . . . . . . . . . . . . . . . . . . . . . . . . . . . . . . . . . . . . . . . . . . . . . . . . . . . . . . . . . . . . . . . . . . . . . . . . . . . . . . . . . . . . . .
15.5 Certificates . . . . . . . . . . . . . . . . . . . . . . . . . . . . . . . . . . . . . . . . . . . . . . . . . . . . . . . . . . . . . . . . . . . . . . . . . . . . . . . . . . . . . . . . . . . . . . . . . . .
206
207
207
207
208
208
209
16.Projector Status for DP100-DP90 ........................................................... 211
16.1 General Overview . . . . . . . . . . . . . . . . . . . . . . . . . . . . . . . . . . . . . . . . . . . . . . . . . . . . . . . . . . . . . . . . . . . . . . . . . . . . . . . . . . . . . . . . . . . .211
16.2 Status overviews . . . . . . . . . . . . . . . . . . . . . . . . . . . . . . . . . . . . . . . . . . . . . . . . . . . . . . . . . . . . . . . . . . . . . . . . . . . . . . . . . . . . . . . . . . . . 212
16.2.1 Voltage statuses . . . . . . . . . . . . . . . . . . . . . . . . . . . . . . . . . . . . . . . . . . . . . . . . . . . . . . . . . . . . . . . . . . . . . . . . . . . . . . . . . . . . . . . 212
16.2.2 Temperature statuses . . . . . . . . . . . . . . . . . . . . . . . . . . . . . . . . . . . . . . . . . . . . . . . . . . . . . . . . . . . . . . . . . . . . . . . . . . . . . . . . . 212
16.2.3 Fan statuses . . . . . . . . . . . . . . . . . . . . . . . . . . . . . . . . . . . . . . . . . . . . . . . . . . . . . . . . . . . . . . . . . . . . . . . . . . . . . . . . . . . . . . . . . . . 214
16.2.4 Other projector properties . . . . . . . . . . . . . . . . . . . . . . . . . . . . . . . . . . . . . . . . . . . . . . . . . . . . . . . . . . . . . . . . . . . . . . . . . . . . 216
16.2.5 Projector Log file . . . . . . . . . . . . . . . . . . . . . . . . . . . . . . . . . . . . . . . . . . . . . . . . . . . . . . . . . . . . . . . . . . . . . . . . . . . . . . . . . . . . . . 217
16.2.6 Security log file . . . . . . . . . . . . . . . . . . . . . . . . . . . . . . . . . . . . . . . . . . . . . . . . . . . . . . . . . . . . . . . . . . . . . . . . . . . . . . . . . . . . . . . . 218
16.3 Certificates . . . . . . . . . . . . . . . . . . . . . . . . . . . . . . . . . . . . . . . . . . . . . . . . . . . . . . . . . . . . . . . . . . . . . . . . . . . . . . . . . . . . . . . . . . . . . . . . . . . 220
17.Version Info ......................................................................................223
17.1 Version Information . . . . . . . . . . . . . . . . . . . . . . . . . . . . . . . . . . . . . . . . . . . . . . . . . . . . . . . . . . . . . . . . . . . . . . . . . . . . . . . . . . . . . . . . . 223
18.Macro Editor .....................................................................................225
18.1 Create a new Macro . . . . . . . . . . . . . . . . . . . . . . . . . . . . . . . . . . . . . . . . . . . . . . . . . . . . . . . . . . . . . . . . . . . . . . . . . . . . . . . . . . . . . . . .
18.2 Save a Macro. . . . . . . . . . . . . . . . . . . . . . . . . . . . . . . . . . . . . . . . . . . . . . . . . . . . . . . . . . . . . . . . . . . . . . . . . . . . . . . . . . . . . . . . . . . . . . . .
18.3 Edit a Macro file . . . . . . . . . . . . . . . . . . . . . . . . . . . . . . . . . . . . . . . . . . . . . . . . . . . . . . . . . . . . . . . . . . . . . . . . . . . . . . . . . . . . . . . . . . . . .
18.3.1 Selecting a Macro file . . . . . . . . . . . . . . . . . . . . . . . . . . . . . . . . . . . . . . . . . . . . . . . . . . . . . . . . . . . . . . . . . . . . . . . . . . . . . . . . .
18.3.2 Delete a command out of a macro file . . . . . . . . . . . . . . . . . . . . . . . . . . . . . . . . . . . . . . . . . . . . . . . . . . . . . . . . . . . . . .
18.3.3 Add commands to a macro file. . . . . . . . . . . . . . . . . . . . . . . . . . . . . . . . . . . . . . . . . . . . . . . . . . . . . . . . . . . . . . . . . . . . . . .
18.3.4 Change the order of the Macro commands. . . . . . . . . . . . . . . . . . . . . . . . . . . . . . . . . . . . . . . . . . . . . . . . . . . . . . . . .
18.4 Edit the attributes (values) of the items . . . . . . . . . . . . . . . . . . . . . . . . . . . . . . . . . . . . . . . . . . . . . . . . . . . . . . . . . . . . . . . . . . .
18.4.1 Input Control . . . . . . . . . . . . . . . . . . . . . . . . . . . . . . . . . . . . . . . . . . . . . . . . . . . . . . . . . . . . . . . . . . . . . . . . . . . . . . . . . . . . . . . . . . .
18.4.1.1 Select input . . . . . . . . . . . . . . . . . . . . . . . . . . . . . . . . . . . . . . . . . . . . . . . . . . . . . . . . . . . . . . . . . . . . . . . . . . . . . . . . . . . . . . .
18.4.1.2 Select input path (only for DP100-DP90) . . . . . . . . . . . . . . . . . . . . . . . . . . . . . . . . . . . . . . . . . . . . . . . . . . . . .
18.4.1.3 Processing path. . . . . . . . . . . . . . . . . . . . . . . . . . . . . . . . . . . . . . . . . . . . . . . . . . . . . . . . . . . . . . . . . . . . . . . . . . . . . . . . . .
18.4.1.4 SMPTE292 packing . . . . . . . . . . . . . . . . . . . . . . . . . . . . . . . . . . . . . . . . . . . . . . . . . . . . . . . . . . . . . . . . . . . . . . . . . . . . .
18.4.1.5 SMPTE 292 dual packing . . . . . . . . . . . . . . . . . . . . . . . . . . . . . . . . . . . . . . . . . . . . . . . . . . . . . . . . . . . . . . . . . . . . . . .
18.4.1.6 DVI packing . . . . . . . . . . . . . . . . . . . . . . . . . . . . . . . . . . . . . . . . . . . . . . . . . . . . . . . . . . . . . . . . . . . . . . . . . . . . . . . . . . . . . .
18.4.1.7 DVI Dual packing . . . . . . . . . . . . . . . . . . . . . . . . . . . . . . . . . . . . . . . . . . . . . . . . . . . . . . . . . . . . . . . . . . . . . . . . . . . . . . . .
18.4.2 Preset files . . . . . . . . . . . . . . . . . . . . . . . . . . . . . . . . . . . . . . . . . . . . . . . . . . . . . . . . . . . . . . . . . . . . . . . . . . . . . . . . . . . . . . . . . . . . .
18.4.2.1 Activate PCF file . . . . . . . . . . . . . . . . . . . . . . . . . . . . . . . . . . . . . . . . . . . . . . . . . . . . . . . . . . . . . . . . . . . . . . . . . . . . . . . . .
18.4.2.2 Activate SCREEN file . . . . . . . . . . . . . . . . . . . . . . . . . . . . . . . . . . . . . . . . . . . . . . . . . . . . . . . . . . . . . . . . . . . . . . . . . . .
18.4.2.3 Activate EXTRA file. . . . . . . . . . . . . . . . . . . . . . . . . . . . . . . . . . . . . . . . . . . . . . . . . . . . . . . . . . . . . . . . . . . . . . . . . . . . . .
18.4.2.4 Activate MCGD file . . . . . . . . . . . . . . . . . . . . . . . . . . . . . . . . . . . . . . . . . . . . . . . . . . . . . . . . . . . . . . . . . . . . . . . . . . . . . .
18.4.2.5 Activate ACSAR 2 layout file . . . . . . . . . . . . . . . . . . . . . . . . . . . . . . . . . . . . . . . . . . . . . . . . . . . . . . . . . . . . . . . . . . .
18.4.2.6 Activate ACSAR 2 Input file . . . . . . . . . . . . . . . . . . . . . . . . . . . . . . . . . . . . . . . . . . . . . . . . . . . . . . . . . . . . . . . . . . . .
18.4.2.7 Auto load ACSAR2 input file. . . . . . . . . . . . . . . . . . . . . . . . . . . . . . . . . . . . . . . . . . . . . . . . . . . . . . . . . . . . . . . . . . . .
18.4.3 Test pattern. . . . . . . . . . . . . . . . . . . . . . . . . . . . . . . . . . . . . . . . . . . . . . . . . . . . . . . . . . . . . . . . . . . . . . . . . . . . . . . . . . . . . . . . . . . . .
18.4.3.1 Enable test pattern . . . . . . . . . . . . . . . . . . . . . . . . . . . . . . . . . . . . . . . . . . . . . . . . . . . . . . . . . . . . . . . . . . . . . . . . . . . . . .
18.4.3.2 Disable test pattern . . . . . . . . . . . . . . . . . . . . . . . . . . . . . . . . . . . . . . . . . . . . . . . . . . . . . . . . . . . . . . . . . . . . . . . . . . . . . .
18.4.4 Output . . . . . . . . . . . . . . . . . . . . . . . . . . . . . . . . . . . . . . . . . . . . . . . . . . . . . . . . . . . . . . . . . . . . . . . . . . . . . . . . . . . . . . . . . . . . . . . . . .
18.4.4.1 Lamp control . . . . . . . . . . . . . . . . . . . . . . . . . . . . . . . . . . . . . . . . . . . . . . . . . . . . . . . . . . . . . . . . . . . . . . . . . . . . . . . . . . . . .
18.4.4.2 Dowser control . . . . . . . . . . . . . . . . . . . . . . . . . . . . . . . . . . . . . . . . . . . . . . . . . . . . . . . . . . . . . . . . . . . . . . . . . . . . . . . . . . .
18.4.4.3 Set the execution delay for a ’blank image’ . . . . . . . . . . . . . . . . . . . . . . . . . . . . . . . . . . . . . . . . . . . . . . . . . . .
18.4.4.4 Set the execution delay for a ’deblank image output’ . . . . . . . . . . . . . . . . . . . . . . . . . . . . . . . . . . . . . . . .
18.4.5 ACSAR2. . . . . . . . . . . . . . . . . . . . . . . . . . . . . . . . . . . . . . . . . . . . . . . . . . . . . . . . . . . . . . . . . . . . . . . . . . . . . . . . . . . . . . . . . . . . . . . .
18.4.5.1 Input mode . . . . . . . . . . . . . . . . . . . . . . . . . . . . . . . . . . . . . . . . . . . . . . . . . . . . . . . . . . . . . . . . . . . . . . . . . . . . . . . . . . . . . . .
18.4.5.2 Input Locking . . . . . . . . . . . . . . . . . . . . . . . . . . . . . . . . . . . . . . . . . . . . . . . . . . . . . . . . . . . . . . . . . . . . . . . . . . . . . . . . . . . . .
18.4.6 Automation . . . . . . . . . . . . . . . . . . . . . . . . . . . . . . . . . . . . . . . . . . . . . . . . . . . . . . . . . . . . . . . . . . . . . . . . . . . . . . . . . . . . . . . . . . . . .
18.4.6.1 GPO control . . . . . . . . . . . . . . . . . . . . . . . . . . . . . . . . . . . . . . . . . . . . . . . . . . . . . . . . . . . . . . . . . . . . . . . . . . . . . . . . . . . . . .
R5976510 D-CINE COMMUNICATOR 11/04/2006
225
225
226
226
227
227
228
229
229
229
230
231
231
232
233
234
235
235
236
237
239
240
241
242
243
243
244
244
244
245
246
246
247
247
248
249
249
5
Table of contents
18.4.7 Error handling. . . . . . . . . . . . . . . . . . . . . . . . . . . . . . . . . . . . . . . . . . . . . . . . . . . . . . . . . . . . . . . . . . . . . . . . . . . . . . . . . . . . . . . . . . 250
18.4.7.1 Error handling . . . . . . . . . . . . . . . . . . . . . . . . . . . . . . . . . . . . . . . . . . . . . . . . . . . . . . . . . . . . . . . . . . . . . . . . . . . . . . . . . . . . 250
19.D-Cine Communicator Log information ...................................................253
19.1 Log information window . . . . . . . . . . . . . . . . . . . . . . . . . . . . . . . . . . . . . . . . . . . . . . . . . . . . . . . . . . . . . . . . . . . . . . . . . . . . . . . . . . . . 253
20.Help Function ...................................................................................255
20.1 Introduction . . . . . . . . . . . . . . . . . . . . . . . . . . . . . . . . . . . . . . . . . . . . . . . . . . . . . . . . . . . . . . . . . . . . . . . . . . . . . . . . . . . . . . . . . . . . . . . . . . 255
20.2 Using help . . . . . . . . . . . . . . . . . . . . . . . . . . . . . . . . . . . . . . . . . . . . . . . . . . . . . . . . . . . . . . . . . . . . . . . . . . . . . . . . . . . . . . . . . . . . . . . . . . . 255
21.ACSAR 2 ..........................................................................................257
21.1 General introduction . . . . . . . . . . . . . . . . . . . . . . . . . . . . . . . . . . . . . . . . . . . . . . . . . . . . . . . . . . . . . . . . . . . . . . . . . . . . . . . . . . . . . . . .
21.2 Create a new layout . . . . . . . . . . . . . . . . . . . . . . . . . . . . . . . . . . . . . . . . . . . . . . . . . . . . . . . . . . . . . . . . . . . . . . . . . . . . . . . . . . . . . . . .
21.3 Edit an existing layout . . . . . . . . . . . . . . . . . . . . . . . . . . . . . . . . . . . . . . . . . . . . . . . . . . . . . . . . . . . . . . . . . . . . . . . . . . . . . . . . . . . . . .
21.4 Renaming a layout . . . . . . . . . . . . . . . . . . . . . . . . . . . . . . . . . . . . . . . . . . . . . . . . . . . . . . . . . . . . . . . . . . . . . . . . . . . . . . . . . . . . . . . . . .
21.5 Deleting a layout . . . . . . . . . . . . . . . . . . . . . . . . . . . . . . . . . . . . . . . . . . . . . . . . . . . . . . . . . . . . . . . . . . . . . . . . . . . . . . . . . . . . . . . . . . . .
21.6 Windowing . . . . . . . . . . . . . . . . . . . . . . . . . . . . . . . . . . . . . . . . . . . . . . . . . . . . . . . . . . . . . . . . . . . . . . . . . . . . . . . . . . . . . . . . . . . . . . . . . . .
21.6.1 Window selection . . . . . . . . . . . . . . . . . . . . . . . . . . . . . . . . . . . . . . . . . . . . . . . . . . . . . . . . . . . . . . . . . . . . . . . . . . . . . . . . . . . . . .
21.6.2 Enabling or disabling a Window . . . . . . . . . . . . . . . . . . . . . . . . . . . . . . . . . . . . . . . . . . . . . . . . . . . . . . . . . . . . . . . . . . . . .
21.6.3 Moving Windows . . . . . . . . . . . . . . . . . . . . . . . . . . . . . . . . . . . . . . . . . . . . . . . . . . . . . . . . . . . . . . . . . . . . . . . . . . . . . . . . . . . . . .
21.6.4 Scaling Windows . . . . . . . . . . . . . . . . . . . . . . . . . . . . . . . . . . . . . . . . . . . . . . . . . . . . . . . . . . . . . . . . . . . . . . . . . . . . . . . . . . . . . .
21.6.5 Z-order. . . . . . . . . . . . . . . . . . . . . . . . . . . . . . . . . . . . . . . . . . . . . . . . . . . . . . . . . . . . . . . . . . . . . . . . . . . . . . . . . . . . . . . . . . . . . . . . . .
21.6.6 Full size. . . . . . . . . . . . . . . . . . . . . . . . . . . . . . . . . . . . . . . . . . . . . . . . . . . . . . . . . . . . . . . . . . . . . . . . . . . . . . . . . . . . . . . . . . . . . . . . .
21.6.7 Aspect Ratio . . . . . . . . . . . . . . . . . . . . . . . . . . . . . . . . . . . . . . . . . . . . . . . . . . . . . . . . . . . . . . . . . . . . . . . . . . . . . . . . . . . . . . . . . . .
21.7 Settings . . . . . . . . . . . . . . . . . . . . . . . . . . . . . . . . . . . . . . . . . . . . . . . . . . . . . . . . . . . . . . . . . . . . . . . . . . . . . . . . . . . . . . . . . . . . . . . . . . . . . .
21.7.1 Introduction. . . . . . . . . . . . . . . . . . . . . . . . . . . . . . . . . . . . . . . . . . . . . . . . . . . . . . . . . . . . . . . . . . . . . . . . . . . . . . . . . . . . . . . . . . . . .
21.7.2 Load a file . . . . . . . . . . . . . . . . . . . . . . . . . . . . . . . . . . . . . . . . . . . . . . . . . . . . . . . . . . . . . . . . . . . . . . . . . . . . . . . . . . . . . . . . . . . . . .
21.7.3 Save a file . . . . . . . . . . . . . . . . . . . . . . . . . . . . . . . . . . . . . . . . . . . . . . . . . . . . . . . . . . . . . . . . . . . . . . . . . . . . . . . . . . . . . . . . . . . . . .
21.7.4 Save all file . . . . . . . . . . . . . . . . . . . . . . . . . . . . . . . . . . . . . . . . . . . . . . . . . . . . . . . . . . . . . . . . . . . . . . . . . . . . . . . . . . . . . . . . . . . . .
21.7.5 Rename a file . . . . . . . . . . . . . . . . . . . . . . . . . . . . . . . . . . . . . . . . . . . . . . . . . . . . . . . . . . . . . . . . . . . . . . . . . . . . . . . . . . . . . . . . . .
21.7.6 Delete a file . . . . . . . . . . . . . . . . . . . . . . . . . . . . . . . . . . . . . . . . . . . . . . . . . . . . . . . . . . . . . . . . . . . . . . . . . . . . . . . . . . . . . . . . . . . .
21.7.7 Auto Load Enabled . . . . . . . . . . . . . . . . . . . . . . . . . . . . . . . . . . . . . . . . . . . . . . . . . . . . . . . . . . . . . . . . . . . . . . . . . . . . . . . . . . . .
21.7.8 Image Settings. . . . . . . . . . . . . . . . . . . . . . . . . . . . . . . . . . . . . . . . . . . . . . . . . . . . . . . . . . . . . . . . . . . . . . . . . . . . . . . . . . . . . . . . .
21.7.9 Input Settings . . . . . . . . . . . . . . . . . . . . . . . . . . . . . . . . . . . . . . . . . . . . . . . . . . . . . . . . . . . . . . . . . . . . . . . . . . . . . . . . . . . . . . . . . .
21.8 Input slot configuration . . . . . . . . . . . . . . . . . . . . . . . . . . . . . . . . . . . . . . . . . . . . . . . . . . . . . . . . . . . . . . . . . . . . . . . . . . . . . . . . . . . . .
21.9 Input locking . . . . . . . . . . . . . . . . . . . . . . . . . . . . . . . . . . . . . . . . . . . . . . . . . . . . . . . . . . . . . . . . . . . . . . . . . . . . . . . . . . . . . . . . . . . . . . . . .
257
257
258
259
260
261
261
263
264
265
266
266
267
268
269
269
272
272
272
273
274
274
274
276
276
A. Updating TI boards..............................................................................279
A.1 Installation of the Update Package. . . . . . . . . . . . . . . . . . . . . . . . . . . . . . . . . . . . . . . . . . . . . . . . . . . . . . . . . . . . . . . . . . . . . . . .
A.2 Start up the update program . . . . . . . . . . . . . . . . . . . . . . . . . . . . . . . . . . . . . . . . . . . . . . . . . . . . . . . . . . . . . . . . . . . . . . . . . . . . . . .
A.3 Make a connection . . . . . . . . . . . . . . . . . . . . . . . . . . . . . . . . . . . . . . . . . . . . . . . . . . . . . . . . . . . . . . . . . . . . . . . . . . . . . . . . . . . . . . . . . .
A.3.1 Type of connections . . . . . . . . . . . . . . . . . . . . . . . . . . . . . . . . . . . . . . . . . . . . . . . . . . . . . . . . . . . . . . . . . . . . . . . . . . . . . . . . . . .
A.3.2 Serial connection . . . . . . . . . . . . . . . . . . . . . . . . . . . . . . . . . . . . . . . . . . . . . . . . . . . . . . . . . . . . . . . . . . . . . . . . . . . . . . . . . . . . . .
A.3.3 Ethernet connection . . . . . . . . . . . . . . . . . . . . . . . . . . . . . . . . . . . . . . . . . . . . . . . . . . . . . . . . . . . . . . . . . . . . . . . . . . . . . . . . . . .
A.4 Installation of the new software release . . . . . . . . . . . . . . . . . . . . . . . . . . . . . . . . . . . . . . . . . . . . . . . . . . . . . . . . . . . . . . . . . .
A.5 Logging of the operation . . . . . . . . . . . . . . . . . . . . . . . . . . . . . . . . . . . . . . . . . . . . . . . . . . . . . . . . . . . . . . . . . . . . . . . . . . . . . . . . . . .
A.6 Special functions . . . . . . . . . . . . . . . . . . . . . . . . . . . . . . . . . . . . . . . . . . . . . . . . . . . . . . . . . . . . . . . . . . . . . . . . . . . . . . . . . . . . . . . . . . . .
A.7 Factory Install Options. . . . . . . . . . . . . . . . . . . . . . . . . . . . . . . . . . . . . . . . . . . . . . . . . . . . . . . . . . . . . . . . . . . . . . . . . . . . . . . . . . . . . .
A.8 Recovery option - Stay in Boot option . . . . . . . . . . . . . . . . . . . . . . . . . . . . . . . . . . . . . . . . . . . . . . . . . . . . . . . . . . . . . . . . . . . .
279
279
280
280
280
282
285
287
289
290
290
Glossary...............................................................................................293
Index ...................................................................................................297
List of images ........................................................................................303
6
R5976510 D-CINE COMMUNICATOR 11/04/2006
1. Introduction
1. INTRODUCTION
1.1
General Introduction
D-Cine Premiere configuration tool
A uniquely powerful and easy to use configuration program for the Barco D-Cine Premiere projector,
D-Cine Communicator provides all of the tools necessary for the total projector set-up and control. A comprehensive array of easy to access menu pages provide control of the D-Cine Premiere’s digital input,
output and screen display via a combination of simple buttons and WYSIWYG displays.
Quick and Easy configuration
Via clearly indicated tab pages for control of Projector Connection, Configuration, Test, Color Calibration,
File Management, and configuration with your existing Automation system.
Total Control
Of the Projector Input selection, alignment and switching; Screen Display output, including Lens type selection, Sizing , Masking and Barco’s unique CLO (Constant Light Output) calibration
… And Total Security
With extensive projector Status indication, Lamp run-time register, Factory or User Definable projector
back-up settings, Security Key settings control … plus a comprehensive Help File.
About this manual
This User Guide provides detailed information about the D-Cine Communicator features. This guide is
designed to be a reference tool in your everyday work with the D-Cine Communicator.
The following icons are used in the manual :
Caution
Warning
Info, term definition. General info about the term.
Note, gives extra information about the described subject.
Tip, gives extra advice about the described subject.
Typography:
• Clickable menu items or buttons are indicated in bold, e.g. Open
• A menu window is indicated in italic, e.g. Measure CLO.
• Step related notes, tips, warnings or cautions are printed in italic.
• Procedure related notes, tips, warnings or cautions are printed in bold between 2 lines preceding by
the corresponding icon.
R5976510 D-CINE COMMUNICATOR 11/04/2006
7
1. Introduction
8
R5976510 D-CINE COMMUNICATOR 11/04/2006
2. Software Installation and Start up
2. SOFTWARE INSTALLATION AND START
UP
2.1
Required Configuration
PC requirements
•
•
•
•
2.2
Windows 2000, Windows XP and WinME
266 MHz, 64 MB Ram
Minimum disk space : 50 MB
Minimum Screen resolution: 1024 x 768
Installing the Software
How to install
1. Insert the CD-ROM in the CD-ROM drive.
2. Is the AutoPlay active on your PC.
If yes, go to step 6
If no, from within the Windows environment go to the Start Menu. Choose Run... from the menu and
proceed with the next steps.
3. Open windows explorer.
4. Select the CD-ROM drive.
5. Double click ’setup.exe’ file.
6. Press OK to run the installation.
Follow the instruction of the Installation shield.
7. The setup program will ask you for to specify an install directory. You can accept the default location or
browse to a specific directory. Click NEXT.
Theatre Edition
C:\Program Files\BARCO\D-CineCommunicatorTheatre
Engineering Edition
C:\Program Files\BARCO\D-CineCommunicatorEngineering
Post Production Edition
C:\Program Files\BARCO\D-CineCommunicatorPostProd
8. Read the Licence agreement and click Yes to continue the installation. (image 2-1)
The program will be installed on the PC system and the user will be prompted to ask a icon will be
placed on the desktop
.
R5976510 D-CINE COMMUNICATOR 11/04/2006
9
2. Software Installation and Start up
Image 2-1
Licence agreement
2.3
Upgrading the Software
How to update
1. Download or copy the update zip file locally.
2. Unzip the update file in the communicator install directory..
3. Run Setup.exe.
The windows install shield opens.
4. Click on Next to continue.
The install shield check the PC for an old version of the D-Cine Communicator software.
A selection window will be displayed. (image 2-2)
5. Select the radio button in front of Upgrade Software to version xxxx.
6. Click no Next.
The actual version on the PC will be replaced by the new one.
10
R5976510 D-CINE COMMUNICATOR 11/04/2006
2. Software Installation and Start up
Image 2-2
Install selection window
If you were previously issued licensing key, this key will be valid for this version.
If upgrading the D-Cine Communicator software from versions lower than 1.2.0 to 1.2.0
or higher, the default folder where the software is installed has been changed. Any existing license files (communicator.lc) need to be copied manually to the new communicator
folder. The D-Cine Communicator, Theatre version is free of license.
See D-Cine Communicator release notes to find out the differences with previous versions.
2.4
Getting access
To start up
1. Click on the D-Cine Communicator icon.
The program starts up. (image 2-3)
2. Enter your password.
The default password is premiere.
3. Click OK to enter the software.
Only for Post Production and Engineering version, when it is the first start up, the D-Cine Communicator
will run in a non registered mode for 30 days. The user will be warned by several messages. (image 2-4)
The software starts up with the Projector Connection window.
R5976510 D-CINE COMMUNICATOR 11/04/2006
11
2. Software Installation and Start up
Image 2-3
Logon screen
Image 2-4
Register warning
It is strongly recommended to change your password after the first logon.
2.5
Registration procedure
Registration
At the first start up of the D-Cine Communicator software a register.dat file is created in the directory where
the software is installed.
How to register
1. Send the register.dat file to your local supplier.
Or,
Open the register.dat file in your favorite editor and write down the serial number which has to be sent
to your local supplier.
2. Your local supplier will sent a communicator.lc file back.
12
R5976510 D-CINE COMMUNICATOR 11/04/2006
2. Software Installation and Start up
3. Copy this communicator.lc file into the directory where the software is installed.
4. Restart the D-Cine Communicator software.
Your version is registered.
2.6
Removing the D-Cine Communicator software
How to remove
1. Run Setup.exe.
The windows install shield opens.
2. Click on Next to continue.
A selection window will be displayed (image 2-2).
3. Select the radio button in front of Delete the current installed software.
4. Click on Next.
The software will be removed from the PC.
2.7
Start up of the D-Cine Communicator via a batch file
How to start up
1. Create a batch file to start up the D-Cine Communicator by entering the exe file in the batch file.
drive letter:\installation path\D-Cine Communicator_exe_file -arguments
The communicator can be started with arguments
Argument
Description
-ac
IPaddress
autoconnect to given IP address
-gt tabname
goto the given tab page
-np
connect without password
Example : to view immediately the status pages with the Post production version of the D-Cine Communicator (for the other versions, fill out the appropriate exe file.):
Installation path\DCineCommunicatorPP.exe -gt Status
R5976510 D-CINE COMMUNICATOR 11/04/2006
13
2. Software Installation and Start up
14
R5976510 D-CINE COMMUNICATOR 11/04/2006
3. Projector Connection
3. PROJECTOR CONNECTION
3.1
Introduction
Overview
The D-Cine Communicator can be connected to the D-Cine Premiere in one of following ways:
• Via an Ethernet connection
• Via a serial connection
Note when connecting to the D-Cine Premiere
When metadata control is enabled on this projector, the following message will be displayed while connecting.
Image 3-1
Metadata enabled message
During this session, executing macros and activating PCF files will not work as expected. To switch off
metadata control automatically, click Yes. If not, click no, cancel this action.
3.2
Ethernet Connection
Overview
•
•
•
3.2.1
Hardware connection
Ethernet Connection via entering an IP address
Ethernet connection via short cuts
Hardware connection
Possibilities
Two Ethernet connection are possible at the same time:
• Primary
• Secondary
Use the primary connection as default to connect the D-Cine Communicator to the D-Cine Premiere.
If another device or another D-Cine Communicator is already connected to the D-Cine Premiere, use the
secondary connection to connect.
R5976510 D-CINE COMMUNICATOR 11/04/2006
15
3. Projector Connection
Image 3-2
Physical indication of Ethernet connector on DP50
Image 3-3
Physical indication of Ethernet connector on DP30
Image 3-4
Physical indication of Ethernet connectors on DP100 and DP90
For DP100 and DP90, connect the Ethernet to port 1 or port2.
For DP30 and DP50, a crossed Ethernet cable is necessary.
For DP100 and DP90, a crossed or non crossed cable can be used. the projector
switched automatically for the correct cable.
3.2.2
Ethernet Connection via entering an IP address
This way of connecting to the D-Cine Premiere is not valid when Obtaining an IP address
automatically (DHCP) is enabled.
16
R5976510 D-CINE COMMUNICATOR 11/04/2006
3. Projector Connection
Possible Ethernet connections
Two Ethernet connection are possible at the same time:
• Primary
• Secondary
Use the primary connection as default to connect the D-Cine Communicator to the D-Cine Premiere.
If another device or another D-Cine Communicator is already connected to the D-Cine Premiere, use the
secondary connection to connect.
Connection
1. Click on the tab button Network Connection. (image 3-5)
The tab page opens.
2. Fill out the Ethernet address of the D-Cine Premiere.
Note: An address contains 4 octets with a maximum value of 255.
3. Select a Port by clicking Primary (default selected when starting up) or Secondary. (image 3-6)
4. Click on Connect. (image 3-7)
When a connection is possible, a Logon Successful will be indicated in the connection status pane.
(image 3-8)
All other tabs will become enabled and accessible.
Image 3-5
Selecting Ethernet
R5976510 D-CINE COMMUNICATOR 11/04/2006
17
3. Projector Connection
Image 3-6
Primary port selected within an Ethernet connection
Image 3-7
Selecting Connect
Image 3-8
Logon connection status
3.2.3
Ethernet connection via short cuts
Broadcast query
The broadcast query for projectors scans the complete LAN network to detect available projectors on the
network.
These projectors will be indicated in the Available projectors on the Ethernet pane as short cuts. The short
cut will be referenced by the IP address and the host name of the projector.
Broadcast Query for projectors is based on UDP.
Connection
1. Double click on the short cut of the projector you want to make a connect with. (image 3-9)
Tip: The IP address and host name of the projector is displayed below the short cut.
When a connection is possible, a Logon Successful will be indicated in the connection status pane.
(image 3-10)
All other tabs will become enabled and accessible.
The projector IP address will be filled out in the Host Address field.
18
R5976510 D-CINE COMMUNICATOR 11/04/2006
3. Projector Connection
Image 3-9
Available projectors on the Ethernet
Image 3-10
3.3
Serial Port Connection
Overview
•
•
•
3.3.1
Serial Connection to RS232/422
Serial Connection to Loop In / Out
Modem Dial Up connection
Serial Connection to RS232/422
Physical connection
Connect a serial cable from PC to projector
Image 3-11
Physical indication of RS232/422 connector on DP50
R5976510 D-CINE COMMUNICATOR 11/04/2006
19
3. Projector Connection
Image 3-12
Physical indication of RS232/422 connector on DP30
Image 3-13
Physical indication of RS232/422 connector on DP100 and DP90
Necessary parts
Straight serial cable from PC to projector.
Software connection
1. Click on the tab button Serial Connection. (image 3-14)
The tab page opens.
2. Set up the communication port by clicking on the drop down menu (1) and selecting the correct port.
(image 3-15)
3. Click on the bits per second drop down menu (2) to setup the desired baud rate.
4. Click on Connect. (image 3-16)
When a connection is possible, a Logon Successful will be indicated in the connection status pane.
All other tabs will become enabled and accessible.
20
R5976510 D-CINE COMMUNICATOR 11/04/2006
3. Projector Connection
Image 3-14
Selecting Serial Port
Image 3-15
Selecting the communication port
Image 3-16
Selecting Connect
3.3.2
Serial Connection to Loop In / Out
Physical connection
Connect a serial cable from PC to projector
R5976510 D-CINE COMMUNICATOR 11/04/2006
21
3. Projector Connection
Image 3-17
Physical indication of the Serial Loop in connector on DP50
Image 3-18
Physical indication of the Serial Loop in connector on DP30
Image 3-19
Physical indication of the Serial Loop in connector on DP100 and DP90
Necessary parts
Straight serial cable from PC to projector.
Software connection
1. Click on the tab button Serial Connection. (image 3-20)
The Serial Connection tab opens.
2. Set up the communication port (1) by clicking on the drop down menu and selecting the correct port.
(image 3-21)
The bits per second (2) has no importants.
3. Check the box in front of Serial Network mode. (image 3-22)
22
R5976510 D-CINE COMMUNICATOR 11/04/2006
3. Projector Connection
The Bits per second box grays out. The communication speed is only 115200 bps.
The default projector address is set to 1.
4. To change the projector address, click on the up or down arrow until the desired address in shown in
the box.
5. Click on Connect. (image 3-23)
When a connection is possible, a Logon Successful will be indicated in the connection status pane.
All other tabs will become enabled and accessible.
Image 3-20
Selecting Serial Port
Image 3-21
Selecting the communication port
R5976510 D-CINE COMMUNICATOR 11/04/2006
23
3. Projector Connection
Image 3-22
Serial bus mode selection
Image 3-23
Selecting Connect
3.3.3
Modem Dial Up connection
What is possible
To take full control of the projector via a telephone line from anywhere in the world.
PSTN
PSTN (public switched telephone network) is the world’s collection of interconnected voiceoriented public telephone networks, both commercial and government-owned.
Null modem cable
An adapter cable or adapter piece to switch the receive and transmit line within a RS232 cable.
Principle hardware set up
Principle diagram :
24
R5976510 D-CINE COMMUNICATOR 11/04/2006
3. Projector Connection
Technican side anywhere in
the world
Cinema theatre side
Any type of
modem
Desk top
Modem US Robotics
V.everything
or
PSTN
Null modem cable
Laptop with
built in modem
D-Cine projector
Image 3-24
Principle diagram modem connection
The following hardware configuration should be set up:
At the Cinema theatre side (optional package) :
• Connect a US Robotics modem via a null modem cable to the IN Serial Network connector on the
D-Cine projector.
• Connect the other side with the analog telephone line.
Modem on theatre side is configured for auto answering and for different users.
For more detailed installation instructions, consult the documentation delivered with the modem package.
At the technician side for a laptop computer with built-in modem :
• Connect the modem output of the laptop to the analog telephone line.
At the technician side for a computer with external modem (any type) :
• Connect the telephone output of the modem with the telephone line.
• Connect the other side of the modem via a serial cable with a com port on the PC.
How to set up the software connection
1. Click on tab button Dialup Connection. (image 3-25)
The dialup connection tab opens.
2. Select the communication port to which your modem is connected (1). (image 3-26)
R5976510 D-CINE COMMUNICATOR 11/04/2006
25
3. Projector Connection
If it is an external modem, you can physically see to which port it is physically connected.
If it is in internal modem, click Start on your desk top page and select Control Panel. Go to Network
and Dial-up connections. The modem Com port is indicated in that window.
3. Fill out the telephone number (2) of the remote projector’s modem.
4. Click on Connect. (image 3-27)
The Modem Terminal Window appears. (image 3-28)
This shows the AT commands send to the modem. ATDT number (1) means that the modem is currently
dialing the specified number. CONNECT speeds ... (2) means the other modem is answering.
You will be prompted to enter the password of remote projector’s modem (3). (image 3-29)
5. Fill out your password and click OK.
6. When the message ’Security Access granted’ is displayed, click on Take Control. (image 3-30)
Full control of the projector is now possible via the telephone line.
Image 3-25
Dialup connection selection
Image 3-26
Dialup connection
26
R5976510 D-CINE COMMUNICATOR 11/04/2006
3. Projector Connection
Image 3-27
Dial-up connection
Image 3-28
Modem Terminal Window
Image 3-29
Modem Terminal Window : password
Image 3-30
Take Control via dial-up
The connection is only guaranteed for the following modem type at the theatre side :
3Com USRobotics Courier V.Everything.
R5976510 D-CINE COMMUNICATOR 11/04/2006
27
3. Projector Connection
3.4
Disconnection from the D-Cine Premiere
Software disconnection
1. Click on Disconnect. (image 3-31)
A logout will happen. (image 3-32)
Image 3-31
Disconnect from D-Cine Premiere
Image 3-32
Disconnect status
3.5
Changing the password
To change
1. Click on Change Passwords.
The change password menu will be displayed. (image 3-33)
2. Click in the Old password input field and enter your current password.
Note: Your password is case sensitive.
3. Click in the New password input field and enter your new password.
4. Click in the Confirm password input field and re-enter your new password.
5. Click on OK to change your password.
The following messages can be displayed.
- Case sensitivity of the old password (image 3-34)
- Confirm password and new password are not the same. (image 3-35)
Image 3-34
Case sensitivity old password
Image 3-33
Password menu
28
R5976510 D-CINE COMMUNICATOR 11/04/2006
3. Projector Connection
Image 3-35
Confirm password error
3.6
Reset Projector Head
How to reset
1. Click on Reset Projection Head.
A warning message will be displayed. (image 3-36)
2. Do you really want to reset the head?
If yes, Click on Yes.
The projector head will be reset. The connection will be lost.
If no, Click on No, Cancel this action.
The software returns to the Projector Connection window.
Image 3-36
Reset Projector Head message
Reset projector head, does not mean a complete power down of the head. Only some
boards will be reset.
R5976510 D-CINE COMMUNICATOR 11/04/2006
29
3. Projector Connection
30
R5976510 D-CINE COMMUNICATOR 11/04/2006
4. Projector Setup
4. PROJECTOR SETUP
Overview
•
•
•
•
•
•
•
•
•
•
4.1
Control Interface set up
Pattern Shortcuts
Execute Quickly a MacroSet up
Activate Projector Configuration
Activate Projector Screen Set up
Macro Shortcuts for DP30 and DP50
Input and Source set up
Output and Screen set up
Advanced Settings
Function keys
Control Interface set up
Overview of the layout
Image 4-1
Set up interface
All the settings and setups are visualised in this control interface.
The following is visualised from left to right:
• The projector type and host name of the projector
• Input source : name of the input source.
• Source Input Frequency
• Processing path : cinema or standard
• Active area in pixels and the aspect ratio
• Lens factor
• Lamp status
• Light output indication
• Dowser open or closed (mechanical dowser), Dowser (E-Dowser) open or closed for electronic dowser.
• Projector logo
• Resizing dimensions
• Letterboxing on or off
• Image projection, a light beam indicates that the projector projects an image, black indicates that no
image is produced.
• Test pattern on/off + the name of the test pattern or preview
R5976510 D-CINE COMMUNICATOR 11/04/2006
31
4. Projector Setup
4.2
Pattern Shortcuts
What can be done?
A predefined pattern can be set immediately on the projection screen.
To set a pattern
1. Click on one of the predefined icons. (image 4-2)
The selected pattern will be displayed by the projector when the lamp is on and the dowser is open.
The following patterns are available:
- RGB-12bit-Full Screen White.tga
- RGB-12bit-Full Screen Black.tga
- RGB-12bit-ANSI-CheckerBoard Normal.tga
- RGB-12bit-Full Screen Red.tga
- RGB-12bit-Full Screen Blue.tga
- RGB-12bit-Alignment.tga
- RGB-12bit-Color Bars.tga
- Alternating Checkerboard.tga
- RGB-12bit-Full Screen Green.tga
- BDCLogo.tga
Image 4-2
Pattern shortcuts
These patterns can also be selected via Test tab page item Change test pattern.
4.3
Execute Quickly a MacroSet up
Macro
Macro files contains a sequence of commands. These commands are typically select Input
Source, Activate PCF, Activate SCREEN.
32
R5976510 D-CINE COMMUNICATOR 11/04/2006
4. Projector Setup
When metadata control is enabled on this projector, the execution of macros will not
work as expected. The following message will be displayed:
Image 4-3
Metadata enabled message
Click Yes to turn off metadata control automatically.
How to quickly execute a Macro.
1. Click on Macro. (image 4-4)
A file list of possible Macro files will be retrieve. (image 4-5)
2. Select the desired file out of the list.
3. Click on Execute to execute the macro.
For DP30 and DP50, the macro will be executed.
For DP100 and DP90, the macro will be executed and the macro name will be added just below the
MACRO button. The active PCF and active SCREEN file name will also be added below the corresponding button. (image 4-6)
Image 4-4
Macro selected
Image 4-5
Retrieve Macro files
R5976510 D-CINE COMMUNICATOR 11/04/2006
33
4. Projector Setup
Image 4-6
Selected macro indicated for DP100 and DP90
Contents of macro files can be edited in the Macro Editor.
4.4
Activate Projector Configuration
PCF File
Projector Configuration File. This file is a file that will be delivered with each movie. It contains
all data needed to display a certain movie as it is defined by the movie distributor.
When metadata control is enabled on this projector, the following message will be displayed when clicking on PCF:
Image 4-7
Metadata enabled message
Click Yes to turn off metadata control automatically.
How to quickly activate a PCF file.
1. Click on PCF. (image 4-8)
A file list of possible PCF files will be retrieve. (image 4-9)
2. Select the desired file out of the list.
3. Click on Activate to load the file in Active.
The configuration will be loaded from the internal file system to ACTIVE. The indication on the Control
interface will change accordingly.
34
R5976510 D-CINE COMMUNICATOR 11/04/2006
4. Projector Setup
Image 4-8
PCF selected
Image 4-9
Retrieve PCF files
4.5
Activate Projector Screen Set up
Screen File
Screen presentation configuration file. This file contains information about resizing, letterboxing, masking and lens factor.
How to quickly activate a Screen file.
1. Click on Screen. (image 4-10)
A file list of possible Screen files will be retrieve. (image 4-11)
2. Select the desired file out of the list.
3. Click on Activate to load the file in Active.
The screen presentation configuration will be loaded from the internal file system to ACTIVE. The different indications on the Control interface will change accordingly.
Image 4-10
Screen selected
R5976510 D-CINE COMMUNICATOR 11/04/2006
35
4. Projector Setup
Image 4-11
Retrieve Screen files
4.6
Macro Shortcuts for DP30 and DP50
What can be done?
The content of the macro file associated with the shortcut will be executed.
MACRO01 is associated with button 1, MACRO02 is associated with button 2, etc. .
To create or to change a macro file, see Macro Editor.
To activate a macro
1. Press on one of the 6 macro shortcuts. (image 4-12)
The macro associated with this button will be executed.
Image 4-12
Macro shortcuts
4.7
Input and Source set up
DVI-EDID
Digital Visual Interface – Extended Display Identification Data
DVI sources that are reported to the projector via the VESA E-EDID standard. These will be
autodetected and displayed at the source format size, using standard processing.
292–DUAL
Input A and input B are combined to 1 input. From a complete signal, part is send to input A
and the other part to input B to reach bigger way through.
36
R5976510 D-CINE COMMUNICATOR 11/04/2006
4. Projector Setup
SMPTE
Society of Motion Picture and Television Engineers - A global organization, based in the United
States, that sets standards for baseband visual communications. This includes film as well
video standards.
4:2:2
A commonly used term for a component digital video format. A ratio of sampling frequencies
used to digitize the luminance and color difference components (Y, R-Y, B-Y) of a video signal.
It is generally used as shorthand for ITU-R 601. The term 4:2:2 describes that for every four
samples of Y, there are two samples each of R-Y and B-Y, giving more chrominance bandwidth
in relation to luminance compared to 4:1:1 sampling.
4:4:4
Similar to 4:2:2, except that for every four luminance samples, the color channels are also
sampled four times.
Overview
•
•
•
•
4.7.1
Source Selection for DP30 and DP50
Source Selection for DP100 and DP90
About DVI standards
Active Area Selection & Aspect Ratio
Source Selection for DP30 and DP50
How to select a source
1. Click on Source Selection. (image 4-13)
The source selection window opens. (image 4-14)
2. Click on a radio button in front of source type.
The following choices are possible:
- 292 – A
- 292 – B
- 292 – Dual
- DVI – A
- Auto-Select : auto select will monitor the three ports (292-A, 292-B, DVI-A) and select a port that has
an active input signal. If more ports are active simultaneously, the selection is based on priorities
1) DVI – A as first priority
2) 292-A as second priority
3) 292-B as third priority
3. Select the source mode for each input by clicking on the drop down box next to the source type.
R5976510 D-CINE COMMUNICATOR 11/04/2006
37
4. Projector Setup
The following modes are possible
Source
Source Modes
292-A
•
•
•
•
Standard 4:2:2
Non Standard 4:2:2, 12 bits/color
Non Standard 4:4:4, 10 bits/color
Non Standard 4:4:4, 12 bits/color
292-B
•
•
•
•
Standard 4:2:2
Non Standard 4:2:2, 12 bits/color
Non Standard 4:4:4, 10 bits/color
Non Standard 4:4:4, 12 bits/color
292-DUAL
•
•
•
•
•
•
•
•
Default - 4:2:2 Packed, 10 bits/color, O/E pixels
4:2:2 Packed, 10 bits/color, O/E lines
4:2:2 Packed, 12 bits/color, O/E pixels
4:2:2 Packed, 12 bits/color, O/E lines
4:4:4 Unpacked, 10 bits
4:4:4 Packed, 10 bits, Mixed
4:4:4 Packed, 10 bits, O/E pixels
4:4:4 Packed, 12 bits
DVI-A
•
•
•
Standard 8 bits/color
10 bits/color, packed
12 bits/color, packed
For more explanation about the supported DVI standards, see "About DVI standards", page 43.
4. Select Processing path for the selected source by clicking on the drop down box. (image 4-15)
Note: Cinema processing contains the following functionality : image scaling, 3:2 pull down functionality, SMPTE291 embedded data, LUT’s for analog, de-gamma and color correction. However,
contrast and brightness settings are only applicable for standard processing (non-cinema processing).
Standard processing has no scaling, no resizing, and no anamorphic lens factor.
When Automatic is selected, the projector itself makes a choice between standard processing or cinema
processing. The choice depends on the input frequency of the selected source.
5. Press Exit to close the Source Selection window.
38
R5976510 D-CINE COMMUNICATOR 11/04/2006
4. Projector Setup
Image 4-13
Source Selection
Image 4-14
Source Selection window
Image 4-15
Processing path selection
4.7.2
Source Selection for DP100 and DP90
Overview
•
•
Cine Input
ACSAR 2 source selection start up
4.7.2.1
Cine Input
How to select a source
1. Click on the check box next to Cine Input. (image 4-16)
The Cine Input buttons becomes active. The path line jumps to the cine input.
2. Click on Cine Input.
The source selection window opens. (image 4-17)
3. Click on a radio button in front of source type.
R5976510 D-CINE COMMUNICATOR 11/04/2006
39
4. Projector Setup
The following choices are possible:
- 292 – A
- 292 – B
- 292 – Dual
- DVI – A
- DVI – B
- DVI – DUAL/TWIN
- Auto-Select : auto select will monitor the six ports (292-A, 292-B, DVI-A, DVI-B and DVI-Dual) and
select a port that has an active input signal. If more ports are active simultaneously, the selection is
based on priorities
1) DVI – A as first priority
2) 292-A as second priority
3) 292-B as third priority
4. Select the source mode for each input by clicking on the drop down box next to the source type.
40
R5976510 D-CINE COMMUNICATOR 11/04/2006
4. Projector Setup
The following modes are possible
Source
Source Modes
292-A
•
•
•
•
Standard 4:2:2
Non Standard 4:2:2, 12 bits/color
Non Standard 4:4:4, 10 bits/color
Non Standard 4:4:4, 12 bits/color
292-B
•
•
•
•
Standard 4:2:2
Non Standard 4:2:2, 12 bits/color
Non Standard 4:4:4, 10 bits/color
Non Standard 4:4:4, 12 bits/color
292-DUAL
•
•
•
•
•
•
•
•
•
Default - 4:2:2 Packed, 10 bits/color, O/E pixels
4:2:2 Packed, 10 bits/color, O/E lines
4:2:2 Packed, 12 bits/color, O/E pixels
4:2:2 Packed, 12 bits/color, O/E lines
4:2:2 Packed, 10 bits, O/E Frames
4:4:4 Unpacked, 10 bits
4:4:4 Packed, 10 bits, Mixed
4:4:4 Packed, 10 bits, O/E pixels
4:4:4 Packed, 12 bits
DVI-A
•
•
•
Standard 8 bits/color
10 bits/color, packed
12 bits/color, packed
DVI-B
•
•
•
Standard 8 bits/color
10 bits/color, packed
12 bits/color, packed
DVI-DUAL/TWIN
•
•
Dual 10 bits/color, Packed
Twin 10 bits/color, Packed
For more explanation about the supported DVI standards, see "About DVI standards", page 43.
Note: 292-DUAL with packing 4:2:2 Packed, 10 bits, O/E Frames is used for 3D projection.
5. Select Processing path for the selected source by clicking on the drop down box. (image 4-18)
Note: Cinema processing contains the following functionality : image scaling, 3:2 pull down functionality, SMPTE291 embedded data, LUT’s for analog, de-gamma and color correction. However,
contrast and brightness settings are only applicable for standard processing (non-cinema processing).
Standard processing has no scaling, no resizing, and no anamorphic lens factor.
When Automatic is selected, the projector itself makes a choice between standard processing or cinema
processing. The choice depends on the input frequency of the selected source.
6. Press Exit to close the Source Selection window.
R5976510 D-CINE COMMUNICATOR 11/04/2006
41
4. Projector Setup
Image 4-16
Cine input selected
Image 4-17
Source selection window
Image 4-18
Processing path selection
4.7.2.2
ACSAR 2 source selection start up
How to select
1. Click on the check box next to ACSAR 2. (image 4-19)
The ACSAR 2 buttons becomes active. The path line jumps to the ACSAR 2 input.
2. Click on the ACSAR 2 button.
42
R5976510 D-CINE COMMUNICATOR 11/04/2006
4. Projector Setup
The Alternative Content setup window appears. (image 4-20)
Image 4-19
ACSAR 2 selected
Image 4-20
Alternative Content setup window
For detailed description of the ACSAR 2 functionality via the D-Cine Communicator, see
chapter "ACSAR 2", page 257.
4.7.3
About DVI standards
Supported VESA E-EDID standards
The DVI inputs supports a limited number of sources that will be reported to the host via the VESA E-EDID
data structure standard. These sources are listed in the next table.
These sources will be auto-detected and displayed.
R5976510 D-CINE COMMUNICATOR 11/04/2006
43
4. Projector Setup
These source bypass the Cinema processing, using standard processing, and will be displayed at the
source format size. Images smaller than the array size will be centered on the array.
Port Protocol
Source
Format1
Vertical Rate
Clock Rate
Scan Type
Color Space
DDWG DVI
640x480
60 Hz
25.175 MHz
Progressive
RGB
DDWG DVI
640x480
72 Hz
31.500 MHz
Progressive
RGB
DDWG DVI
800x600
60 Hz
40 MHz
Progressive
RGB
DDWG DVI
800x600
72 Hz
50 MHz
Progressive
RGB
DDWG DVI
1024x768
60 Hz
65 MHz
Progressive
RGB
DDWG DVI
1024x768
70 Hz
75 MHz
Progressive
RGB
DDWG DVI
1280x10242
50 Hz
89.970 MHz
Progressive
RGB
DDWG DVI
1280x1024
60 Hz
108 MHz
Progressive
RGB
For the processing path, select Standard processing path.
When for the processing path, Automatic is selected, the projector will select Standard
Processing path automatically.
Other supported sources
In addition to the sources mentioned in Supported VESA E-EDID standards, the DVI port(s) will support
any input that is presented to the port as described in the next table.
Port
Protocol
Source
Format
DDWG
DVI
DDWG
DVI
Vertical
Rate
Clock
Rate
Scan
Type
Color
Space
Processing Path
Display
Format
1280x1024 23-61 Hz
82.5 MHz
Progressive
RGB
Cinema
1280x1024
1280x1024 23-96 Hz
165 MHz
Progressive
RGB
Standard
1280x1024
When for the processing path, Automatic is selected, the projector will select itself the
correct processing path by looking to the Vertical Rate.
For a Vertical Rate between 23 and 61 Hz it will select the Cinema processing path.
For a Vertical Rate higher than 61 Hz it will select the Standard processing path.
4.7.4
Active Area Selection & Aspect Ratio
Aspect ratio
Relation between the horizontal & vertical dimension in which the window will be displayed,
e.g. 4 by 3 or 16 by 9.
1. VESA standard compliant
2. Timing is extrapolated from VESA standard timing
44
R5976510 D-CINE COMMUNICATOR 11/04/2006
4. Projector Setup
Active Area
The active area within a source frame equals the relevant movie information within the movie stream. E.g.
: 1280 x 1024 movie can be mastered in a 1920 x 1080 stream.
Only the 1280 x 1024 frame contains the relevant movie information. In this case, the active area is 1280
x 1024.
How to start up
1. Click on Active Area Selection. (image 4-21, image 4-22)
The Active Area window opens. (image 4-23)
2. Do you want to set the active area manually?
If yes, go to step 3
If no, check Entire Active Input.
When entire active input is checked, the projector will search itself for the active area. If the image is
not correct, uncheck entire active input and continue with step 3, otherwise continue with step 4.
3. Click on the up or down arrows of the Width and Height field to set up the active area size.
Or,
click in the input fields of the Width and Height and enter the values with the keyboard.
The width and the height referring to the size of the image (active area) is set. (image 4-24)
4. Click on the up or down arrows of the Horizontal Center Offset and Vertical Center Offset field to set up
the center offset.
Or,
click in the input fields of Horizontal and Vertical and enter the values with the keyboard.
The offset is referring to the center of the active area and to the center of the source frame. (image 4-25)
5. Select the image aspect ratio by clicking in the drop down box and selecting an aspect ratio.
When automatic is selected, the system assumes square pixels and calculates the aspect ratio based
on the Active Area Size.
When the image pixels are not squared, select one of the following aspect ratios:
- 1.25 [5:4]
- 1.33 [4:3]
- 1.77 [16:9 HDTV]
- 1.85 [Flat]
- 2.39 [Scope]
6. Click Close to return to the Projector configuration window.
Image 4-21
Selecting active area for DP30
and DP50
Image 4-22
Selecting active area for DP100 and DP90
R5976510 D-CINE COMMUNICATOR 11/04/2006
45
4. Projector Setup
Image 4-23
Active Area window
Image 4-24
Width & height indication
46
R5976510 D-CINE COMMUNICATOR 11/04/2006
4. Projector Setup
Image 4-25
Center offset indication
1
2
A
B
source frame
Active area on source frame
Horizontal offset
Vertical offset
Output and Screen set up
4.8
Overview
•
•
•
•
•
•
•
•
•
•
•
4.8.1
Lamp ON/OFF
Image Orientation
Lens Type selection
Anamorphic Lens holder calibration for DP100 and DP90
Resizing the image
Masking the image
Saving Screen Settings while Resizing or Masking
Dowser Open or Close
Constant Light Output for DP50
Light Output and Calibration for DP30
Light Output and Calibration for DP100-DP90
Lamp ON/OFF
What can be done?
The projection lamp can be switched ON or OFF using the buttons in the software.
Toggling the lamp status
1. Press lamp on icon (
) in the Output / Screen box. (image 4-26)
The lamp will be switched ON. The interface will indicate lamp ON.
2. Press lamp off icon (
) to switch off the lamp.
R5976510 D-CINE COMMUNICATOR 11/04/2006
47
4. Projector Setup
Image 4-26
Toggling the lamp ON/OFF.
Only for DP30:
When the lamp could not be ignited, messages will be displayed with the reason for the
failure.
Typical message are : Lamp runtime exceeded: Issued If 1.5 times maximum runtime
is exceeded, in that case lamp will not be powered. Wrong article number, Wrong lamp
parameter, Communication to LPS failed, Communication to fan controller failed, Lamp
Ignition Failure, Lamp Communication Error.
4.8.2
Image Orientation
Possible orientations
The projector can be configured as:
• Normal front projector
• Normal rear projector
• Upside down front projector
• Upside down rear projection
How to switch
1. Click on Image Orientation. (image 4-27)
The image orientation window pops up. (image 4-28)
2. Click on one of the four possible orientations.
The logo in the middle of the window will change according the projector position.
3. Press Exit to return to the Projector Configuration window.
Image 4-27
Select Image Orientation
Image 4-28
Image orientation set up window
48
R5976510 D-CINE COMMUNICATOR 11/04/2006
4. Projector Setup
For DP30 : when table mounted (normal cases), set the image orientation on Upside
Down Front projection.
This reverse setting is due to the hardware configuration inside the projector.
4.8.3
Lens Type selection
The anamorphic factor will only be taken into account when the processing path for the
source is Cinema processing.
What will be done?
With this interface, it is possible to select the anamorphic factor for the lens that is attached to the head.
Depending on the lens, the projector will squeeze the image. This is to compensate the effect of the lens.
How to select?
1. Click on Lens Type. (image 4-29)
The Lens anamorphic factor selection window opens.
image 4-33)
(image 4-30, image 4-31, image 4-32,
2. Click on the drop down box and select the correct factor.
Projector type
Anamorphic factor
DP30
1.00 - 1.50 - 1.90
DP50
1.00 - 1.50 - 1.90
DP100
1.00 - 1.26
DP90
1.00 - 1.26
Custom lens types can be inserted manually.
3. Press Exit to return to the Projector configuration window.
Image 4-29
Lens type selection
Image 4-30
Lens Anamorphic factor set up for DP50
R5976510 D-CINE COMMUNICATOR 11/04/2006
49
4. Projector Setup
Image 4-31
Lens Anamorphic factor set up for DP30
Image 4-32
Lens Anamorphic factor set up for DP100 and DP90 with motorized lens
Image 4-33
Lens Anamorphic factor set up for DP100 and
DP90 with non-motorized lens
50
R5976510 D-CINE COMMUNICATOR 11/04/2006
4. Projector Setup
Lens Adjustment for DP30
As a DP30 is equipped with motorized lens adjustments, it is possible to adjust the standard lens via the
D-Cine Communicator software.
Adjusting the standard lens of DP30
1. To shift the image, click on red arrows under Lens shift.(image 4-32)
The image can be moved left-rigth and top-bottom
2. To zoom, click on the red arrow under Lens Zoom.
3. To focus the image, click on the red arrows under Lens Focus.
Lens Adjustment for DP100 and DP90 with motorized lens
As a DP100 or DP 90 is equipped with motorized lens adjustments, it is possible to adjust the standard
lens via the D-Cine Communicator software.
Lens Adjustment for DP100 and DP 90 with motorized lens
1. To shift the image, click on red arrows under Lens shift.(image 4-31)
The image can be moved left-rigth and top-bottom
2. To focus the image, click on the red arrows under Lens Focus.
Lens Adjustment for DP100 and DP90 with non-motorized lens
As the lens adjustment is not motorized, this should be done be hand. For more information on how to
adjust the lens, consult the Installation manual of the projector.
4.8.4
Anamorphic Lens holder calibration for DP100 and DP90
What can be done ?
The shift range of the anamorphic lens holder can be adapted according the used prime lens and anamorphic lens.
Pin in - pin out function
The pin in - pin out function is only used for maintenance functions. Consult the service and maintenance
manual of the projector. Never use this function during the calibration procedure.
How to calibrate the shift range?
1. Remove first the anamorphic lens before starting the calibration procedure.
2. Click on the arrow down just below the lens holder buttons (1) to expand the lens calibration window
(2). (image 4-34, image 4-35)
3. Click on Lens Holder On.
The anamorphic lens holder will pivot till the anamorphic lens in on the same axis as the prime lens.
4. Click on the Shift out button to shift the anamorphic lens holder to its maximum position.
5. Turn in the anamorphic lens.
6. Click now on the Shift in button until the anamorphic lens is close to the prime lens (± 5 mm between
prime lens and anamorphic lens..
7. Loosen both screws of the end of range block and slide the block forward until it hits the end of range
switch of the anamorphic lens holder. (image 4-36)
8. Fixate both screws of the end of range block.
R5976510 D-CINE COMMUNICATOR 11/04/2006
51
4. Projector Setup
Image 4-34
Anamorphic Lens calibration for DP100/DP90 with motorized lens
52
R5976510 D-CINE COMMUNICATOR 11/04/2006
4. Projector Setup
Image 4-35
Anamorphic Lens calibration for DP100/DP90 with non-motorized lens
Image 4-36
End of range blocks
4.8.5
Resizing the image
CAUTION: Set lens anamorphic factor to 1.0 before starting resizing.
R5976510 D-CINE COMMUNICATOR 11/04/2006
53
4. Projector Setup
For standard processing paths, no resizing is not taken into account.
Overview
•
•
•
•
What is Resizing?
Resizing with the arrow keys
Resizing with direct user input
Letterbox function
Displaying test patterns to check resizing: make sure the anamorphic lens factor is set
correctly.
Resizing images are only give as an illustration to explain the principle. There is a difference between the DP30-DP50 and DP100-DP90.
4.8.5.1
What is Resizing?
Definition
With the resizing tool it is possible to adapt the projected image on the screen size (defining the area
available for image display). So, look always to the screen when resizing the image.
The projector will always attempt to keep the image centered within this defined area, and the correct
aspect ratio of the image will always be preserved.
The key function that determines how the image will be displayed is the Letterbox function. For a more
detailed explanation, see "Letterbox function", page 58.
As the D-Cine Premiere project an image under an angle, the original image will be shown
as trapezium.
The image will be squared with the masking function by masking the shaded areas.
4.8.5.2
Resizing with the arrow keys
Click on
to return to the initial values for the selected dots while resizing the image.
Before starting the resizing, it is preferable to select a test pattern.
How to resize?
1. Click on Resizing. (image 4-37)
The Resizing window opens. (image 4-38)
54
R5976510 D-CINE COMMUNICATOR 11/04/2006
4. Projector Setup
2. As it is preferable to resize on a test pattern rather then on the normal image, select a pattern by clicking
on one of the pattern short cuts.
The following patterns can be selected:
- full white
- hatch pattern (image 4-39)
When a button is pressed (in state on the interface), the pattern is selected.
3. Select a red button (indicated by an arrow in the image 4-38) by clicking on it. To select both buttons
together, select first one button, hold the shift key down and select the second button.
A selected button becomes clear red.
4. Move the selected button by pressing on the arrow keys on your keyboard.
Or,
by pressing the arrows of the keypad interface.
Note: The representation on the interface is not an exact representation of the resizing on the screen.
Therefor, always look to the screen to see the exact resizing.
The image will move in the direction of the clicked arrow. Yellow arrows on the interface image will
indicate the direction. The values in the corner will change accordingly. (image 4-40)
5. When finished, press Exit to return to the Projector Configuration menu.
Note: Before pressing Exit, it is possible to save the screen setting. see "Saving Screen Settings while
Resizing or Masking", page 68 for more explanation.
Image 4-37
Start up Resizing
Image 4-39
Short cuts to patterns
A Full white pattern
B Hatch pattern
Image 4-38
Resizing window
R5976510 D-CINE COMMUNICATOR 11/04/2006
55
4. Projector Setup
Image 4-40
Resizing indication
When leaving the Resize window without switching off the test pattern, this pattern will
still be available for masking.
As the resizing is best done on a test pattern, when finished, switch back to the normal
image to check the resizing settings.
After resizing set the anamorphic lens factor back to its original value.
4.8.5.3
Resizing with direct user input
What can be done
With direct user input it is possible to enter the resizing values with your keyboard.
How to resize
1. Click on Resizing. (image 4-41)
The Resizing window opens. (image 4-42)
2. As it is preferable to resize on a test pattern rather then on the normal image, select a pattern by clicking
on one of the pattern short cuts.
The following patterns can be selected:
- full white
- hatch pattern (image 4-43)
When a button is pressed (in state on the interface), the pattern is selected.
56
R5976510 D-CINE COMMUNICATOR 11/04/2006
4. Projector Setup
3. Select a red button by clicking on it. To select both buttons together, select first one button, hold the
shift key down and select the second button.
A selected button becomes clear red.
4. Right click on a selected button.
The coordinate window pops up on the resize window. (image 4-44)
5. Click in the input fields for X and Y and fill out the desired value.
6. Click on Apply to activate the resizing.
7. When finished, press Exit to return to the Projector Configuration menu.
Note: Before pressing Exit, it is possible to save the screen setting. see "Saving Screen Settings while
Resizing or Masking", page 68 for more explanation.
Image 4-41
Start up Resizing
Image 4-43
Short cuts to patterns
A Full white pattern
B Hatch pattern
Image 4-42
Resizing window
R5976510 D-CINE COMMUNICATOR 11/04/2006
57
4. Projector Setup
Image 4-44
When leaving the Resize window without switching off the test pattern, this pattern will
still be available for masking.
As the resizing is best done on a test pattern, when finished, switch back to the normal
image to check the resizing settings.
After resizing set the anamorphic lens factor back to its original value.
4.8.5.4
Letterbox function
Function
The letterbox function determines how the image will be displayed.
If Letterbox enabled is checked, the system will show all of the original image data on the screen. This
may require that the system letterbox the image, either on the top and bottom, or left and right side.
If Letterbox enabled is not checked, the system will fill all the screen with image data. This may require
that the system discard image data, either from the top and bottom, or the left and right side.
The following two examples show what will be displayed based on the state of the letterbox function.
Letterbox enabled.
58
R5976510 D-CINE COMMUNICATOR 11/04/2006
4. Projector Setup
Image 4-45
Example letterboxing enabled
W and H are width and height of the resized area.
R5976510 D-CINE COMMUNICATOR 11/04/2006
59
4. Projector Setup
•
•
•
•
•
A : input source
B:
- Resized area equals the maximum DMD size
- The input image has a different aspect ratio from the resized area.
- Full image is letterboxed (top and bottom) and centered within the resized area.
C:
- The screen height is narrowed, bottom is moved upwards.
- The input image has a different aspect ratio from the resized area.
- Full image is letterboxed (top and bottom) and centered within the resized area.
D:
- Bottom of resized area is moved upward to where image fills this area.
- The input image has now the same aspect ratio from the resized area.
- Full input image centered within the resized area and letterboxing is not required.
E:
- Bottom of resized area has moved upward to where image at previous size cannot be fully displayed.
- Resized area reduced in both directions (maintaining aspect ratio) so full scaled image can be displayed.
- Image is letterboxed ( right side and left side).
Letterbox disabled
60
R5976510 D-CINE COMMUNICATOR 11/04/2006
4. Projector Setup
Image 4-46
Example letterboxing disabled
W and H are width and height of the resized area.
R5976510 D-CINE COMMUNICATOR 11/04/2006
61
4. Projector Setup
•
•
•
•
4.8.6
A
B
-
: input source
:
Resized area equals the maximum DMD size
The input image has a different aspect ratio from the resized area.
Image is scaled up to fill resized area, requiring that some input data be discarded because it falls
outside the resized area (dark transparent areas left and right).
C:
- Bottom of resized area has moved upward.
- The input image has a different aspect ratio from the resized area.
- Image is scaled up to fill resized area, requiring that some input data be discarded because it falls
outside the resized area (dark transparent areas left and right).
D:
- Bottom of resized area has moved upward so that the height is smaller than the image height.
- The input image has a different aspect ratio from the resized area.
- Input image is not scaled, however, data at the top of the image must be discarded because it falls
outside of the resized area, and data at the bottom of the image must be discarded because it falls
outside the resized area.
Masking the image
CAUTION: Set lens anamorphic factor to 1.0 before starting masking the image
Overview
•
•
•
What is masking
Masking via the arrow keys
Masking with direct user input
Displaying test patterns to check masking: make sure the anamorphic lens factor is set
correctly.
Masking images are only give as an illustration to explain the principle. There is a difference between the DP30-DP50 and DP100-DP90.
4.8.6.1
What is masking
Definition
After resizing the image, it may be still need to mask away pixels on the screen due to keystone and/or
bow distortion of the projected image. So look always at the screen while masking pixels.
62
R5976510 D-CINE COMMUNICATOR 11/04/2006
4. Projector Setup
shaded areas will be masked.
Image 4-47
Masking indication
4.8.6.2
Masking via the arrow keys
Click on
to reset the masking for the selected button.
Before starting masking, it is preferable to select a test pattern.
How to mask?
1. Click on Masking. (image 4-48)
The masking window pops up. (image 4-49)
In most cases, test pattern will be on. If not continue with step 2, otherwise with step 3.
2. As it is preferable to resize on a test pattern rather then on the normal image, select a pattern by clicking
on one of the pattern short cuts.
The following patterns can be selected:
- full white
- hatch pattern (image 4-50)
When a button is pressed (in state on the interface), the pattern is selected.
3. Click on a red button in one of the corners. To select extra corner buttons together, select first one
button, hold the shift key down and select another button.
A selected button becomes clear red.
4. Move the selected button by pressing on the arrow keys on your keyboard.
Or,
by pressing the arrows of the keypad interface.
The image will move in the direction of the clicked arrow. Yellow arrows on the interface image will
indicate the direction. The values in the corner will change accordingly. (image 4-51)
R5976510 D-CINE COMMUNICATOR 11/04/2006
63
4. Projector Setup
5. Click on a red square in the middle of a side.
Note: Only one square button can be selected at a time.
6. Move the selected square by pressing on the arrow keys on your keyboard
Or,
by pressing the arrows of the keypad interface.
The moving will blind the side-curves. A yellow arrow with a curved yellow line will show the direction
of the correction. The value will change accordingly. (image 4-52)
7. Press Exit to return to the Projector Configuration.
Note: Before pressing Exit, it is possible to save the screen setting. see "Saving Screen Settings while
Resizing or Masking", page 68 for more explanation.
Image 4-48
Start up Masking
Image 4-50
Short cuts to patterns
A Full white pattern
B Hatch pattern
Image 4-49
Masking window
64
R5976510 D-CINE COMMUNICATOR 11/04/2006
4. Projector Setup
Image 4-51
Masking the corners
Image 4-52
Curve masking
Press the Reset All button to reset the complete masking.
As the masking is best done on a test pattern, when finished, switch back to the normal
image to check the masking settings
R5976510 D-CINE COMMUNICATOR 11/04/2006
65
4. Projector Setup
After masking set the anamorphic lens factor back to its original value.
Do not forget to switch off the test patterns.
4.8.6.3
Masking with direct user input
What can be done
With direct user input it is possible to enter the masking values with your keyboard.
Before starting masking, it is preferable to select a test pattern.
How to mask
1. Click on Masking. (image 4-53)
The masking window pops up. (image 4-54)
In most cases, test pattern will be on. If not continue with step 2, otherwise with step 3.
2. As it is preferable to resize on a test pattern rather then on the normal image, select a pattern by clicking
on one of the pattern short cuts.
The following patterns can be selected:
- full white
- hatch pattern (image 4-55)
When a button is pressed (in state on the interface), the pattern is selected.
3. Click on a red button in one of the corners. To select extra corner buttons together, select first one
button, hold the shift key down and select another button.
A selected button becomes clear red.
4. Right click on a selected corner button.
The coordinate window pops up on the masking window. (image 4-56)
5. Click in the input fields for X and Y and fill out the desired value.
6. Click on Apply.
The corner masking will be applied to the image on the screen.
7. Right click on a selected square button in the middle of a side.
The curve factor window pops up on the masking window. (image 4-57)
8. Click on the input field and enter the curve factor.
9. Click on OK.
The curve masking will be applied to the image on the screen.
10.Press Exit to return to the Projector Configuration menu.
Note: Before pressing Exit, it is possible to save the screen setting. see "Saving Screen Settings while
Resizing or Masking", page 68 for more explanation.
66
R5976510 D-CINE COMMUNICATOR 11/04/2006
4. Projector Setup
Image 4-53
Start up Masking
Image 4-55
Short cuts to patterns
A Full white pattern
B Hatch pattern
Image 4-54
Masking window
Image 4-56
Direct masking input corners
R5976510 D-CINE COMMUNICATOR 11/04/2006
67
4. Projector Setup
Image 4-57
Curve factor window for masking
Press the Reset All button to reset the complete masking.
As the masking is best done on a test pattern, when finished, switch back to the normal
image to check the masking settings
After masking set the anamorphic lens factor back to its original value.
Do not forget to switch off the test patterns.
4.8.7
Saving Screen Settings while Resizing or Masking
CAUTION: Before saving SCREEN settings, set first the anamorphic lens factor back
the value used before.
How to overwrite an existing file.
1. While in Resizing or Masking, click on Overwrite. (image 4-58)
The file selection window pops up. (image 4-59)
2. Select a file you want to overwrite and click Overwrite.
68
R5976510 D-CINE COMMUNICATOR 11/04/2006
4. Projector Setup
Image 4-58
Save Screen File
Image 4-59
File Selection window
How to save in a new file
1. While in Resizing or Masking, click on Save (image 4-58).
The file name enter window opens. (image 4-60)
2. Fill out a file name and click on OK.
The ACTIVE settings for resizing, masking and lens factor will be stored in the entered file.
Image 4-60
Input File name window
4.8.8
Dowser Open or Close
What can be done?
With this function you have full control over the dowser setting. With a single click it is possible to open
or close the dowser.
How toggling the dowser
1. Click on one of the dowser icons to open or close the dowser. (image 4-61)
The status of the dowser is indicated on the interface window.
To open the dowser, click on the open icon (
).
To close the dowser, click on the close icon (
).
Image 4-61
Open or close the dowser
4.8.9
Constant Light Output for DP50
The constant light output functions are options for which a key must be installed.
R5976510 D-CINE COMMUNICATOR 11/04/2006
69
4. Projector Setup
Overview
•
•
•
Start up of the CLO functions
Read out the light output
Calibrating CLO
What is CLO?
The CLO function will regulate the lamp power within its minimum and maximum limits, to ensure a constant light output.
4.8.9.1
Start up of the CLO functions
How to start up
1. Click on CLO. (image 4-62)
The CLO read out / calibration window will be displayed. (image 4-63)
Image 4-62
Start up of the CLO functions
Image 4-63
4.8.9.2
Read out the light output
How to read out
1. Click on Read CLO now. (image 4-64)
70
R5976510 D-CINE COMMUNICATOR 11/04/2006
4. Projector Setup
A Read CLO message will appear on the screen. (image 4-65)
To read out the light output value, it is necessary to set the screen out to black. All light must be redirected to the CLO measuring device inside the projector to measure the correct value.
2. Do you want to continue?
If yes, Click on Yes.
The screen becomes black and the measuring starts. The interface window becomes black too and
after a few seconds the value will be filled out in footLambert.
The Read CLO now button changes into Stop reading. When the value is filled out, click on stop
Reading to return the screen output to normal. (image 4-66)
If no, click on No, cancel this action.
The screen returns to the CLO read out / calibration window.
Image 4-64
CLO window, read selected
Image 4-65
CLO read message
Image 4-66
Stop reading light output
4.8.9.3
Calibrating CLO
How to calibrate
1. Press Measure now. (image 4-67)
R5976510 D-CINE COMMUNICATOR 11/04/2006
71
4. Projector Setup
A measure CLO message will be displayed. (image 4-68)
To measure the CLO output, it is necessary to set the screen output to fully white. All light must be
projected on the screen to measure the light output correctly with a colorimeter.
2. Do you want to continue?
If yes, Click on Yes and continue with step 3.
A measuring busy screen will be displayed and the screen output will go automatically white. (image 4-69)
If no, click on No, cancel this action to return to the CLO read out ./ calibration window.
3. Measure the amount of footLambert with a colorimeter on the screen.
4. Press Insert measured values. (image 4-70)
An Insert value / calibrating CLO message will be displayed. (image 4-71)
To insert the measured value, the screen output must set to fully black.
5. Do you want to continue?
If yes, Click on Yes to continue.
The screen goes fully back and the insert value window opens. Continue with step 6. (image 4-72)
If no, Click No, cancel this action to return to the CLO read out / calibration window.
6. Click in the fill out field and insert the measured value.
7. Click OK to continue.
The projector CLO is now calibrated. (image 4-73)
Image 4-67
Selecting measure now
Image 4-68
Measure CLO message
72
R5976510 D-CINE COMMUNICATOR 11/04/2006
4. Projector Setup
Image 4-69
Measuring CLO on Screen
Image 4-70
Select insert measured values
Image 4-71
Insert value / calibrating message
R5976510 D-CINE COMMUNICATOR 11/04/2006
73
4. Projector Setup
Image 4-73
Calibration successful message
Image 4-72
Insert value window for measured CLO
4.8.10 Light Output and Calibration for DP30
The constant light output functions are options for which a key must be installed.
Overview
•
•
•
•
Start up of the CLO functions
Target set up for Normal Mode
Target set up for CLO Mode
Light output Calibration
What is CLO?
The CLO function will regulate the lamp power within its minimum and maximum limits, to ensure a constant light output.
4.8.10.1 Start up of the CLO functions
How to start up
1. Click on CLO. (image 4-74)
The Light Output / calibration window will be displayed. Depending on the mode selection, the window
can be a little bit different. (image 4-75)
74
R5976510 D-CINE COMMUNICATOR 11/04/2006
4. Projector Setup
Image 4-74
Start up of the CLO functions
Image 4-75
Light output / calibration window
4.8.10.2 Target set up for Normal Mode
How to set up
1. Check the radio button next to Normal Mode. (image 4-76)
The mode selection pane changes to the Normal mode parameters.
2. Adjust with the slide bar until the desired lamp power is obtained.
Or,
click on the up or down arrow until the desired power is obtained.
The Current Light Output and Lamp power pane will change accordingly. A histogram will indicate the
lamp power. The color of that histogram changes from green when lamp power is minimum to red when
the lamp power is maximum. The value indication can have a tolerance of 50W. So the value can be
50W higher or lower than the entered target value. The corresponding footLambert value will change
accordingly. (image 4-77)
R5976510 D-CINE COMMUNICATOR 11/04/2006
75
4. Projector Setup
Image 4-76
Normal mode selection
Image 4-77
Lamp indications
4.8.10.3 Target set up for CLO Mode
Target set up for CLO mode is lens dependent.
Before starting the calibration procedure, set the lamp power to its minimum power in
normal mode. Start calibration with a 1.0 lens.
CLO mode is only available when a valid CLO key is installed.
How to set up
1. Check the radio button next to CLO Mode. (image 4-78)
The mode selection pane changes to the CLO mode parameters.
2. Enter the target foodLambert by clicking on the up or down arrows.
3. Click on Set target now.
The lamp power will change accordingly between maximum and minimum until the entered light output
is reached each time the lamp is switched off and is ignited again.
When the entered value is to high, the lamp power goes to its maximum. When the value is to low, the
lamp power goes to its minimum.
76
R5976510 D-CINE COMMUNICATOR 11/04/2006
4. Projector Setup
Image 4-78
CLO mode selection
4.8.10.4 Light output Calibration
Light output calibration is lens specific. This procedure has to be redone for each other
lens used with the projection system.
How to calibrate
1. Select first the lens anamorphic factor via Lens Configuration.
2. Physically install the corresponding lens onto the projection system.
3. Switch on a white test pattern via the pattern short cuts.
4. Measure the light output in the middle of the screen with a light meter.
5. Enter the measured value into the input box next to corresponding lens indication.
6. Click on Calibrate to start the calibration procedure. (image 4-79)
The calibration message window will be displayed. (image 4-80)
7. Click Yes to start the calibration.
Image 4-79
Start calibration
Image 4-80
Calibration message
R5976510 D-CINE COMMUNICATOR 11/04/2006
77
4. Projector Setup
4.8.11
Light Output and Calibration for DP100-DP90
Overview
•
•
•
•
Start up of the CLO functions
Target set up for Normal Mode
Target set up for CLO Mode
Light output Calibration
The constant light output functions are options for which a key must be installed.
4.8.11.1 Start up of the CLO functions
How to start up
1. Click on CLO. (image 4-81)
The Light Output / Calibration window will be displayed. Depending on the lamp type, the values in left
pane will be different. (image 4-82)
Image 4-81
Start up of the CLO functions
78
R5976510 D-CINE COMMUNICATOR 11/04/2006
4. Projector Setup
Image 4-82
Light output / calibration window
4.8.11.2 Target set up for Normal Mode
How to set up
1. Check the radio button next to Normal Mode. (image 4-83)
The mode selection pane changes to the Normal mode parameters.
2. Adjust with the slide bar until the desired lamp power is obtained.
Or,
click on the up or down arrow until the desired power is obtained.
The Current Light Output and Lamp power pane will change accordingly. A histogram will indicate
the lamp power. The color of that histogram changes from green when lamp power is minimum to
red when the lamp power is maximum. The corresponding footLambert value will change accordingly.
(image 4-84)
Image 4-83
Normal mode selection
R5976510 D-CINE COMMUNICATOR 11/04/2006
79
4. Projector Setup
Image 4-84
Lamp indication
4.8.11.3 Target set up for CLO Mode
Target set up for CLO mode is lens dependent.
Before starting the calibration procedure, set the lamp power to its minimum power in
normal mode. Start calibration with a 1.0 lens.
CLO mode is only available when a valid CLO key is installed.
How to set up
1. Check the radio button next to CLO Mode. (image 4-85)
The mode selection pane changes to the CLO mode parameters.
2. Enter the target foodLambert by clicking on the up or down arrows.
3. Click on Set target now.
The lamp power will change accordingly between maximum and minimum until the entered light output
is reached each time the lamp is switched off and is ignited again.
When the entered value is to high, the lamp power goes to its maximum. When the value is to low, the
lamp power goes to its minimum.
Image 4-85
For DP100-DP90, CLO mode selected
80
R5976510 D-CINE COMMUNICATOR 11/04/2006
4. Projector Setup
4.8.11.4 Light output Calibration
Light output calibration is lens specific. This procedure has to be redone for each other
lens used with the projection system.
How to calibrate
1. Select first the lens anamorphic factor via Lens Configuration.
2. Physically install the corresponding lens onto the projection system.
3. Switch on a white test pattern via the pattern short cuts.
4. Measure the light output in the middle of the screen with a light meter.
5. Enter the measured value into the input box next to corresponding lens indication.
6. Click on Calibrate to start the calibration procedure. (image 4-86)
The calibration message window will be displayed. (image 4-87)
7. Click Yes to start the calibration.
Image 4-86
Start calibration
Image 4-87
Calibration message
4.9
Advanced Settings
Overview
•
•
•
•
Advanced Source settings
Advanced Image settings
Advanced 3D Settings
Image Freeze
R5976510 D-CINE COMMUNICATOR 11/04/2006
81
4. Projector Setup
4.9.1
Advanced Source settings
Overview
•
•
•
•
•
•
Start up of the advanced source settings
SMPTE Field bit
SMPTE 291
3 - 2 pull down
Re-synchronisation
Offset
4.9.1.1
Start up of the advanced source settings
How to start up
1. Click on Source Settings within Advanced settings. (image 4-88)
The Advanced settings window opens. (image 4-89)
Image 4-88
Source settings selected
Image 4-89
Advanced Settings window
4.9.1.2
SMPTE Field bit
When used
The SMPTE field bit function is used for segmented frames. Both rasters of the image could be shifted in
a wrong way. This can be corrected by forcing the SMPTE field bit from normal to inverse or vice versa.
How to invert
1. Click on Source Settings.
The Advanced Source settings window opens.
2. Click on the drop down box next to SMPTE field bit and select the desired value. (image 4-90)
Default value : normal
82
R5976510 D-CINE COMMUNICATOR 11/04/2006
4. Projector Setup
Image 4-90
Advanced settings window : SMPTE field bit
4.9.1.3
SMPTE 291
How to toggle
1. Click on Source Settings.
The Advanced Source settings window opens.
2. Click on the drop down box next to SMPTE 291 and select the desired value. (image 4-91)
Enabled
Decoding of SMPTE291 auxillary data, embedded in the SMPTE292 data stream, is
enabled. This data could be decryption data, meta data, etc.
Disabled
Decoding of SMPTE291 auxillary data is disabled.
Image 4-91
Advanced settings window : SMPTE 291
4.9.1.4
3 - 2 pull down
When used
Activate 3-2 pull down when 24 fps of film must be mapped onto 30 fps (60 fields) or 25 fps (50 fields) to
be shown as normal video.
How to toggle
1. Click on Source Settings.
The Advanced Source settings window opens.
2. Click on the drop down box next to 3-2 pull down and select the desired value. (image 4-92)
R5976510 D-CINE COMMUNICATOR 11/04/2006
83
4. Projector Setup
disabled
Pull down process not active (default)
enabled
Pull down process active.
Image 4-92
Advanced settings window : 3-2 pull down
4.9.1.5
Re-synchronisation
When used
The re-synchronisation command is used to enable or disable the re-synchronisation function associated
with the Pull-Down Sequence. It is sometimes useful to disable the re-synchronisation function when the
time code is not running at the proper rate, such as when a jog control is being used with a tape machine.
How to toggle
1. Click on Source Settings.
The Advanced Source settings window opens.
2. Click on the drop down box next to Re-synchronisation and select the desired value. (image 4-93)
enabled
Re-synchronisation function enabled
disabled
Re-synchronisation function disabled
Image 4-93
Advanced settings window : Re-Synchronisation
4.9.1.6
Offset
Why offset
The offset command is used to select the offset or dominant field associated with the Pull-Down Sequence.
The offset can be changed between field 0, field 1, field 2, field 3, field 4 or field 5.
84
R5976510 D-CINE COMMUNICATOR 11/04/2006
4. Projector Setup
How to change
1. Click on Source Settings.
The Advanced Source settings window opens.
2. Click on the drop down box next to Offset and select the desired offset. (image 4-94)
Image 4-94
Advanced settings window : Offset
4.9.2
Advanced Image settings
Overview
•
•
•
•
•
Start up of the advanced image settings
Anti log Lut
De-Gamma Lut
3D lookup table (complex Lut)
Image Scaling
4.9.2.1
Start up of the advanced image settings
How to start up
1. Click on Image Settings within Advanced settings. (image 4-95)
The Advanced settings window opens. (image 4-96)
Image 4-95
Image settings selected
R5976510 D-CINE COMMUNICATOR 11/04/2006
85
4. Projector Setup
Image 4-96
Advanced Image settings window
4.9.2.2
Anti log Lut
Lut
Look up table
How to toggle
1. Click on Image settings.
The Advanced Image settings window opens.
2. Click on the drop down box next to Antilog Look up table and select the desired value. (image 4-97)
activated
Anti-Logarithmic data correction is activated.
by
passed
Anti-Logarithmic data correction is by passed.
default value : activated (image 4-98)
Image 4-97
Advanced image settings : anti log Lut
86
R5976510 D-CINE COMMUNICATOR 11/04/2006
4. Projector Setup
Image 4-98
Anti lut exemple
A Original source with logaritmical input signal
B Image when by passing the logarithmic data correction
4.9.2.3
De-Gamma Lut
How to toggle
1. Click on Image settings.
The Advanced Image settings window opens.
2. Click on the drop down box next to DeGamma Look up table and select the desired value. (image 4-99)
activated
De-gamma correction is activated.
by
passed
De-gamma correction is by passed
Default value : Activated
Image 4-99
Advanced image settings : De-Gamma Lut
4.9.2.4
3D lookup table (complex Lut)
What are Complex Luts
These complex lut tables are used to color correct the output signals.
How to toggle
1. Click on Image settings.
The Advanced Image settings window opens.
2. Click on the drop down box next to 3D lookup table and select the desired value. (image 4-100)
R5976510 D-CINE COMMUNICATOR 11/04/2006
87
4. Projector Setup
activated
Color correction is activated.
by
passed
Color correction is by passed.
Default value : Activated
Image 4-100
Advanced Image settings : complex Lut
4.9.2.5
Image Scaling
When used
Image scaling is only available in the Cinema processing path.
Image scaling is available in both directions, horizontal and vertical.
The image scaling filter coefficients are optimized for bandwidth-limited image contents, and as such, they
may not suitable for high bandwidth image contents. Therefore when graphics data is being processed in
the Cinema processing path, it is desirable to disable the filter.
How to enable/disable
1. Click on Image settings.
The Advanced Image settings window opens.
2. Click on the drop down box next to Image scaling and select the desired value. (image 4-101)
enable
With image scaling enabled, the incoming data is scaled according to the screen
presentation file.
disable
If the image filter is disabled, and if resizing of the image is occurring, the output will be
a nearest neighbor resample of the input.
If the image filter is disabled, and if no resizing of the image is occurring, the output will
be a pixel for pixel representation of the input.
Image 4-101
Advanced Image settings : image scaling
88
R5976510 D-CINE COMMUNICATOR 11/04/2006
4. Projector Setup
In no resizing is desired, the user should set the Active Area (SOURCE) data (input image
size) and Resizing (SCREEN) data (output image size) such that the input and output
image sizes match.
4.9.3
Advanced 3D Settings
Overview
•
•
•
•
•
About 3D projection
Start up of the advanced 3D settings
Frame rate multiplication
3D Test pattern
3D Controls
3D projection can only be performed on a D-Cine Premiere DP100 and DP90.
3D information can be stored to EXTRA files which can be recalled via a macro.
4.9.3.1
About 3D projection
Summary
Typical scenario for 3D projection:
24 Hz
L1, L2, L3, L4,...
292A
48 Hz
48 Hz
Processor
Interface
Board L1, R1, L2, R2... Board L1, R1, L2, R2...
24 Hz
R1, R2, R3, R4,...
EFIB
Modular
Formatter
L1, R1, L1, R1,
96 Hz
L2, R2, L2, R2,...
292B
Image 4-102
Signal flow processing path
The left eye image data comes in over a HDSDI 24 p signal on port A on the projector.
The right eye image data comes in over a HDSDI 24p signal on port B of the projector.
On the interface board both signals are combined to a 48 Hz signal. Left and right frames are combined.
The signals are further up scaled to 96 Hz at the level of the Modular Formatter and DMD
The 48 Hz signals can be outputted to an external polarizer system, or active polarity glasses. They can
be outputted through the GPO connection.
For 3D projection, with Dual link HDSDI input where the input A represents the left eye stream, and input
B represents the right eye stream, the following settings should be enabled.
R5976510 D-CINE COMMUNICATOR 11/04/2006
89
4. Projector Setup
Input selection
Cine input
Source selection
292 Dual
Mode selection
4:2:2 Unpacked, 10 bits, O/E
Frames
Frame rate Multiplication
4:2
L/R Input Reference
Use active data port: Port A =
Left; Port B = Right
3D settings
Set 3D Dark Time adjustment, 3D L/R Output Reference Delay and 3D L/R Output Polarity as needed.
4.9.3.2
Start up of the advanced 3D settings
How to start up
1. Click on 3D Settings within Advanced settings. (image 4-103)
The Advanced 3D settings window opens. (image 4-104)
Image 4-103
3D settings selected
Image 4-104
Advanced 3D settings window
90
R5976510 D-CINE COMMUNICATOR 11/04/2006
4. Projector Setup
4.9.3.3
Frame rate multiplication
Introduction
The system provides the capability to do frame rate multiplication based on an N/M system.
For this system, M and N are defined as follows:
• M is defined as the number of input frames of data (defined by input vertical sync) that are required to
constitute a full frame of image data. This parameter is used to determine the “base” or “full” image
frame rate for the input data, in the form: Base rate (Hz) = Input frame rate (Hz) / M.
• N is defined as the number of frames of data to be displayed during a base rate time. This parameter
is used to determine the output vertical rate, in the form: Output rate (Hz) = Base rate (Hz) * N
The following are a few examples:
Example 1:
•
•
Full frame of picture data input each vsync, therefore M = 1
One frame of picture data output each base rate, therefore N = 1
E.g. 24 Hz input, 24 Hz output (Normal projector use)
Example 2:
•
•
½ frame of picture data input each vsync, therefore M = 2
frames of picture data output each base rate, therefore N = 4
E.g. LR data input at 48Hz, LRLR output at 96Hz (LRLR 3D)
4:2 is generally used for 3D.
Frame rate Setup
Click on the combo box next to Multiplication and select the desired multiplication.
1:1 is normal projector use.
4:2 is generally used for 3D
others are used for experimental purposes.
4.9.3.4
3D Test pattern
What can be done?
With the 3D test pattern, it is possible to test the complete setup in combination with an external polarizer
system, or active polarity glasses. The output frequency of the test pattern can be entered so that the
simulation of the input signal is completely.
Entering the output frequency
1. Click in the input field next to the test pattern icon. (image 4-105)
2. Enter the new frequency with the keyboard.
Image 4-105
3D test pattern
R5976510 D-CINE COMMUNICATOR 11/04/2006
91
4. Projector Setup
How to check the complete setup
1. Click on the test pattern icon to run the test pattern.
A 3D test pattern generated on the interface board will be displayed.
Alternating, the left and the right pattern will be displayed.
For the best test pattern and to display the pattern for the left or the right eye:
- set the frequency on 48 Hz
- set frame rate multiplication on 4:2
- set 3D control, 3D L/R Input Reference on White Line Code True or Blue Line Code True.
- set 3D L/R Display Reference GPI on one of the GPIs.
- set 3D L/R Display Reference on Use assigned GPI (polarity = true)
- set 3D Dark Time Adjustment, 3D L/R Output Reference Delay and 3D L/R Output Reference Polarity
as needed.
Either the left or the right eye pattern will be displayed.
When e.g. the left pattern (indicated with L) is displayed, only the left eye may see this image. When it
is not so, the setup is wrong and should be corrected.
2. Change the 3D setting L/R Display Reference to Use assigned GPI (polarity = false).
When the left patterns was displayed, now the right pattern will be displayed. Only the right eye may
see this pattern. When it is not so, the setup is wrong and should be corrected.
4.9.3.5
3D Controls
Overview
Image 4-106
3D controls
L/R Input Reference
The Input Reference indicates which frame is Right and which frame is Left.
92
R5976510 D-CINE COMMUNICATOR 11/04/2006
4. Projector Setup
The following choices are possible:
Setting
Description
3D disabled
no 3D images possible
None Provided
no 3D L/R input reference provided
Use assigned GPI (polarity = true)
Can be used for single stream inputs
High : Left is Active
Low : Right is Active
Use assigned GPI (polarity = false)
Can be used for single stream inputs
High : Right is Active
Low : Left is Active
Use active data port : Port A = Left, Port B = Right
Use Active data port assignment (for dual port
sources) to determine 3D L/R input reference.
Use active data port : Port A = Right, Port B = Left
Use Active data port assignment (for dual port
sources) to determine 3D L/R input reference
Use <White Line Code> (polarity = true)
Use “White Line Code” embedded in data stream
as 3D L/R input reference.
Use <White Line Code> (polarity = inverted)
Use “White Line Code” embedded in data stream
as 3D L/R input reference.
Use <Blue Line Code> (polarity = true)
Use “Blue Line Code” embedded in data stream
as 3D L/R input reference.
Use <Blue Line Code> (polarity = inverted)
Use “Blue Line Code” embedded in data stream
as 3D L/R input reference.
About <White Line Code> or <Blue Line Code>
The White/Blue Line Code is an embedded methodology for specifying whether a specific frame of input
data has left or right eye data.
•
•
The bottom pixel-row of the left-eye subfield should be pure white (blue) for the left-most 25% of the
pixel-row, and pure black for the remainder of the row.
The bottom pixel-row of the right-eye subfield should be pure white(blue) for the left most 75% of the
pixel-row, and pure black for the remainder of the row.
A
B
Image 4-107
White (Blue) line code
A Green field with white L and last lines 25 % white, 75 % black
B Magenta field with last lines 75 % white, 25% black
R5976510 D-CINE COMMUNICATOR 11/04/2006
93
4. Projector Setup
The system will only sample the blue channel, allowing the external user to use either White or Blue Line
Code. The system will blank out the encoded line so that it is not displayed.
This mechanism is only relevant when using a single stream input. The input reference is encoded in the
content. (Information is on R, G and B channels).
This information can also be on blue channel only (Blue line bottom) Blue Line Code.
Input frame dominance
Only relevant for dual stream input.
The frames are arriving at the same time, but they will be inserted sequentially.
Insert order selection:
• Left (L1, R1, L2, R2 ...)
• Right (R1, L1, R2, L2 ...)
L/R Input Reference GPI
Only relevant if L/R Input Reference is set to Use assigned GPI.
Select the GPI which is used to set retrieve the L/R Input Reference.
L/R Display Reference
The optional 3D L/R Display Reference signal is used to specify which frame of eye data is to be displayed
during a specific display frame. This signal is referenced to the display frame rate which is specified by the
Frame Rate Multiplication command. The system will sample this reference in the middle of each display
frame, inverting the sample for use during the following display frame.
Vsync (Display)
3D L/R Display
Reference
Data (Displayed)
Right
Left
Right
Left
Image 4-108
Relationship of 3D L/R Display Reference and displayed data
L/R Display Reference GPI
Only relevant if L/R Display Reference is set to Use assigned GPI.
Select the GPI which is used to set retrieve the L/R Display Reference.
L/R Output Reference Polarity
Indicates the polarity of the outgoing reference signal.
L/R Output Reference GPO
The L/R Output Reference signal provides an external reference to the start of dark time for each displayed
frame, as well as specifying which frame of eye date (left or right) is being displayed.
It is used to synchronize external polarizer systems, or active polarity glasses.
Defines which GPO is used to output the reference signal.
94
R5976510 D-CINE COMMUNICATOR 11/04/2006
4. Projector Setup
Delay
3D L/R Output
Reference
Data (displayed)
Right
Left
Right
Left
Dark time
Image 4-109
Output reference - displayed data
Dark Time Adjustment
Between switching the frames the image needs to be black the same time the external devices need to
switch (external devices can be 3D Glasses, or polarizing filter).
For 3D applications, systems typically need a period of time where the image projected on the screen is
black. This black or “dark time” is used to switch the mechanism that controls what a viewers left eye and
right eye sees. This software command is used to adjust the projector dark time to meet the requirements
of whatever switching mechanism is being used.
3D dark time adjustment will be disabled (set to 0) whenever 3D is disabled. With 3D enabled and 3D
dark time adjustment disabled, the projector will be set to its default dark time of approximately 388 µs.
There is no dark time when 3D is disabled.
The system will have a minimum and maximum dark time that can be achieved. If the specified value is
smaller than the system can provide, the dark time will be set to the systems minimum value, which will
be reported as the actual dark time value. If the specified value is larger than the system can provide, the
dark time will be set to the systems maximum value, which will be reported as the actual dark time value.
For 3D applications, systems typically need a period of time where the image projected on the screen is
black. This black or “dark time” is used to switch the mechanism that controls what a viewers left eye and
right eye sees. For most 3D applications, the system will provide an output reference signal that indicates
whether left or right eye data is being displayed, as well as the start of dark time. This signal is the 3D L/R
Output Reference.
Output Reference Delay
Delay values from Delay – Time and Delay – Phase are added to the nominal timing between the displayed
dark time and the 3D L/R Output Reference.
Dark time
Data (Displayed)
Right
Left
Right
Left
3D L/R output reference
Nominal
3D L/R output reference
Positive delay
3D L/R output reference
Negative delay
Image 4-110
Delay example for 3D L/R Output Reference
4.9.4
Image Freeze
How to freeze
1. Check the image freeze check box to freeze the image. (image 4-111)
The word freeze becomes red. (image 4-112)
R5976510 D-CINE COMMUNICATOR 11/04/2006
95
4. Projector Setup
Image 4-111
Advanced Image settings : freeze
Image 4-112
Advanced Image settings : freeze activated
4.10 Function keys
Overview
96
F1
Macro 1
F2
Macro 2
F3
Macro 3
F4
Macro 4
F5
Macro 5
F6
Macro 6
F7
Freeze image
F8
De-freeze image
F9
Dowser open
F10
Dowser close
R5976510 D-CINE COMMUNICATOR 11/04/2006
5. Projector Configuration
5. PROJECTOR CONFIGURATION
Overview
•
•
•
•
•
•
•
•
5.1
Set up of the Internal Clock
Set up of the Serial Bus Address
Set up of the Network Properties
OPTO-Isolated GPI Configuration
Controller Configuration
Lamp Run Time Configuration for DP50
Lamp Settings for DP30
Lamp Settings for DP100-DP90
Set up of the Internal Clock
Set up of the internal clock
1. Set up the date by clicking on the up or down arrow next to the month, day and year input. (image 5-1)
Or,
click in the digit field and enter the correct month, day and year.
2. Set up of the time by clicking on the up or down arrow next to the hour, minute and second input (image 5-1).
Or,
click in the digit field and enter the correct hour, minute and seconds.
3. Click on the graphic icon to set the internal clock. (image 5-2)
A message will be displayed. (image 5-3)
Image 5-1
Internal clock set up
Image 5-2
Setting the internal clock
Image 5-3
Internal clock set message
Set the internal clock with the current PC time
1. Check the box Use PC time. (image 5-4)
2. Click on the graphic icon to set the internal clock (image 5-2).
A message will be displayed (image 5-3).
R5976510 D-CINE COMMUNICATOR 11/04/2006
97
5. Projector Configuration
Image 5-4
Set current PC time as internal clock
5.2
Set up of the Serial Bus Address
Do not change the serial bus address when connected over a serial loop.
How to set up
1. Click on the + or – button next to the address indication. (image 5-5)
2. Click on Apply now.
The serial bus address will be set, the Apply now button will gray out.
Image 5-5
Serial Bus Address Setting
5.3
Set up of the Network Properties
For DP100-DP90, it is highly recommended to set the IP addresses in the same range as
that of the PC running the D-Cine Communicator.
Overview
•
•
•
•
•
•
5.3.1
Ethernet Connections
Assign a hostname to the projector
Assign an Ethernet address via DHCP for the TI boards
Manually assign an Ethernet address for the TI boards
Assign an Ethernet address via DHCP for the Barco controller (only for DP100-DP90)
Manually assign an Ethernet address for the Barco controller
Ethernet Connections
IP
Internet Protocol. The network layer of TCP/IP. Required for communication with the internet.
98
R5976510 D-CINE COMMUNICATOR 11/04/2006
5. Projector Configuration
For a DP100-DP90
In the user interface of the D-Cine Communicator two IP addresses can be changed:
• TI IP address – Cinema IP Address: this IP address is used as the primary access point. This is the
IP address used by the D-Cine Communicator and servers. The servers need to connect to the TI
interface board to send over Metadata and Subtitle data.
• Barco IP address – Projector IP Address: This IP address is used as the secondary access point.
This IP address is used to update the Barco controller DIM PC. It will also be used for third parties
that would like to integrate the projector into a custom system. E.g. Post houses that want to control
a projector through a Creston Controller.
When the projector is set up in a network configuration, those 2 different Ethernet address should be
applied to the projector.
Both Ethernet interfaces, from TI boards and from the Barco controller, are internally connected to a built-in
Ethernet Hub. Both Ethernet ports on the connection panel are also connected to that built-in Ethernet
hub. This hub detects automatically if a straight or crossover cable is used and adjusts this internally. Both
straight and crossed cable can be used.
For a DP50 or DP30
When the projector is set up in a network configuration, only one Ethernet address should be applied to
the projector. Only the TI boards are addressable via Ethernet. A crossed cable must be use to connect
a PC to the Ethernet port.
After changing any Ethernet configuration setting, it is NECESSARY to reset/restart the
projector’s electronics
Subnet mask
A number that is used to identify a subnetwork so that IP addresses can be shared on a local
area network.
Default Gateway
A router that serves as an entry point into and exit point out of a network. For example, a
local network (LAN) may need a gateway to connect it to a wide area network (WAN) or to the
Internet.
DNS server
Computers, Projectors connected to a network are referenced by their IP address. The only
problem is that remembering IP addresses is not easy. If you need to use hundreds of addresses then it will become impossible to remember them. This is why domain names are created. Internet names (domain and host names) are just aliases to these IP addresses. When
you use an Internet address it is automatically translated to an IP address. In fact a program
or device that translates those Internet names to IP addresses is called a DNS Server.
Host name
This is the name that will be returned, along with the IP address in response to the UDP broadcast query for projectors.
R5976510 D-CINE COMMUNICATOR 11/04/2006
99
5. Projector Configuration
DHCP
Dynamic host configuration protocol. DHCP is a communications protocol that lets network
administrators manage centrally and automate the assignment of IP addresses in an organization’s network. Using the Internet Protocol, each machine that can connect to the Internet
needs a unique IP address. When an organization sets up its computer users with a connection
to the Internet, an IP address must be assigned to each machine. Without DHCP, the IP address must be entered manually at each computer and, if computers move to another location
in another part of the network, a new IP address must be entered. DHCP lets a network administrator supervise and distribute IP addresses from a central point and automatically sends
a new IP address when a computer is plugged into a different place in the network.
UDP
User Datagram Protocol
What should be set up for each Ethernet address
2 ways can be used to assign addresses:
•
•
5.3.2
use the DHCP setting so that a automatic address will be assigned.
Assign manually an IP address, Subnet-mask, default gateway and DNS server address.
- Set the IP-Address field to the desired value. This must NOT be 0.0.0.0 for static IP-Address assignment. The IP address identifies a projector’s location on the network in the same way a street
address identifies a house on a city block. Just as a street address must identify a unique residence,
an IP address must be globally unique and have a uniform format.
- Set the Subnet-Mask as appropriate for the local subnet.
- Set the Default-Gateway to the IP-Address of the local router (MUST be on the local subnet!) on
the same network as this projector that is used to forward traffic to destinations beyond the local
network. This must not be 0.0.0.0. If there is no router on the projector’s local subnet then just set
this field to any IP-Address on the subnet.
- Set the DNS server address to the IP address if the DNS server obtained from your network administrator or Internet Service Provider. That address can be any address. The DNS Server might
be used in future releases to support the projector subtitling mechanism.
Assign a hostname to the projector
When using the type of projector as part of the hostname, the correct pictographic will
be displayed in the connection window. Otherwise a standard pictographic will be used.
How to set up
1. Click on the TI button. (image 5-6)
Note: For DP30 and DP50, the second part of the window (Barco settings) will be grayed out.
The Network settings window will open.
2. Click in the input field next to Hostname.
3. Enter a hostname for your projector. (image 5-7)
As example : e.g. DP100_Theatre1, DP30_Theatre3
100
R5976510 D-CINE COMMUNICATOR 11/04/2006
5. Projector Configuration
Image 5-6
Image 5-7
Hostname set up
5.3.3
Assign an Ethernet address via DHCP for the TI boards
How to set up
1. Click on the TI button. (image 5-8)
Note: For DP30 and DP50, the second part of the window (Barco settings) will be grayed out.
The Network settings window will open. (image 5-9)
2. Check the check box next to Obtain an IP address automatically (DHCP).
This selection will become active. Other selections are grayed out.
3. Click on OK to activate.
R5976510 D-CINE COMMUNICATOR 11/04/2006
101
5. Projector Configuration
Image 5-8
Network properties, TI button selected.
Image 5-9
Network settings window, DHCP selected
When DHCP is enabled and the projector does not find a DHCP server on the network,
or the projector is not connected to a network, than the projector will be in a fail state.
The hardware Fail LED on the interface board will be on. The status (Status tab) will
indicate ’Ethernet Not OK’
Image 5-10
Ethernet state
102
R5976510 D-CINE COMMUNICATOR 11/04/2006
5. Projector Configuration
5.3.4
Manually assign an Ethernet address for the TI boards
How to set up
1. Click on the TI button. (image 5-11)
Note: For DP30 and DP50, the second part of the window (Barco settings) will be grayed out.
The Network settings window will open. (image 5-12)
2. Check the check box next to Use the following IP address
3. Click in the input field of the IP address and fill out the 4 fields.
Note: An address contains 4 octets with a maximum value of 255.
This must NOT be 0.0.0.0 for static IP-Address assignment
4. Click in the Subnet mask input fields and fill out the 4 fields as appropriate for the local subnet.
5. Click in the Default Gateway input fields and fill out the 4 fields. Set the Default-Gateway to the IP-Address of the router (MUST be on the local subnet!).
Note: This must NOT be 0.0.0.0.
If there is no router on the projector’s local subnet then just set this field to any IP-Address on
the subnet.
6. Click in the DNS server input fields and fill out the 4 fields.
Note: Address will be provided by your network administrator or Internet Service Provider.
7. Click OK to activate.
Image 5-11
R5976510 D-CINE COMMUNICATOR 11/04/2006
103
5. Projector Configuration
Image 5-12
Network settings window, manual set up selected
The PC’s IP Address MUST be within the same subnet as the projector’s IP Address in
order for communication to be possible. This requires checking the PC’s and projector’s
Subnet-Mask settings.
IP address examples
First example
• PC IP Address : 192.168.100.5
• PC Subnet Mask : 255.255.255.0
• Projector IP Address : 192.168.100.2
• Projector Subnet Mask: 255.255.255.0
Result : Communication possible. PC address is in the subnet range of the projector’s IP address.
Second example
• PC IP Address : 10.16.236.100
• PC Subnet Mask : 255.255.255.0
• Projector IP Address : 192.168.100.2
• Projector Subnet Mask: 255.255.255.0
Result : No communication possible. PC address is not in the subnet range of the projector’s IP address.
Third example
• PC IP Address : 192.168.200.1
• PC Subnet Mask : 255.255.255.0
• Projector IP Address : 192.168.100.2
• Projector Subnet Mask: 255.255.255.0
Result : No communication possible. PC address is not in the subnet range of the projector’s IP address.
The third group in the PC IP address and Projector IP address must be the same.
104
R5976510 D-CINE COMMUNICATOR 11/04/2006
5. Projector Configuration
Fourth example
• PC IP Address : 192.168.200.1
• PC Subnet Mask : 255.255.0.0
• Projector IP Address : 192.168.100.2
• Projector Subnet Mask: 255.255.0.0
Remark : Communication possible. PC address is in the subnet range of the projector’s IP address. The
third group in the IP¨ addresses can be any value as the third group in the subnet mask is 0.
5.3.5
Assign an Ethernet address via DHCP for the Barco controller (only for
DP100-DP90)
How to set up
1. Click on the BARCO button. (image 5-13)
The Network settings window will open. (image 5-14)
2. Check the check box next to Obtain an IP address automatically (DHCP).
This selection will become active. Other selections are grayed out.
3. Click on OK to activate.
Image 5-13
Network properties, Barco controller
Image 5-14
Network settings window, Barco controller
R5976510 D-CINE COMMUNICATOR 11/04/2006
105
5. Projector Configuration
When DHCP is enabled and the projector does not find a DHCP server on the network,
or the projector is not connected to a network, than the projector will be in a fail state.
The hardware Fail LED on the interface board will be on. The status (Status tab) will
indicate ’Ethernet Not OK’
Image 5-15
Ethernet state
5.3.6
Manually assign an Ethernet address for the Barco controller
How to set up
1. Click on the BARCO button. (image 5-16)
The Network settings window will open. (image 5-17)
2. Check the check box next to Use the following IP address
3. Click in the input field of the IP address and fill out the 4 fields.
Note: An address contains 4 octets with a maximum value of 255.
This must NOT be 0.0.0.0 for static IP-Address assignment
4. Click in the Subnet mask input fields and fill out the 4 fields as appropriate for the local subnet.
5. Click in the Default Gateway input fields and fill out the 4 fields. Set the Default-Gateway to the IP-Address of the router (MUST be on the local subnet!).
Note: This must NOT be 0.0.0.0.
If there is no router on the projector’s local subnet then just set this field to any IP-Address on
the subnet.
6. Click OK to activate.
Image 5-16
106
R5976510 D-CINE COMMUNICATOR 11/04/2006
5. Projector Configuration
Image 5-17
Network settings, Barco controller
The PC’s IP Address MUST be within the same subnet as the projector’s IP Address in
order for communication to be possible. This requires checking the PC’s and projector’s
Subnet-Mask settings.
IP address examples
First example
• PC IP Address : 192.168.100.5
• PC Subnet Mask : 255.255.255.0
• Projector IP Address : 192.168.100.2
• Projector Subnet Mask: 255.255.255.0
Result : Communication possible. PC address is in the subnet range of the projector’s IP address.
Second example
• PC IP Address : 10.16.236.100
• PC Subnet Mask : 255.255.255.0
• Projector IP Address : 192.168.100.2
• Projector Subnet Mask: 255.255.255.0
Result : No communication possible. PC address is not in the subnet range of the projector’s IP address.
Third example
• PC IP Address : 192.168.200.1
• PC Subnet Mask : 255.255.255.0
• Projector IP Address : 192.168.100.2
• Projector Subnet Mask: 255.255.255.0
Result : No communication possible. PC address is not in the subnet range of the projector’s IP address.
The third group in the PC IP address and Projector IP address must be the same.
Fourth example
• PC IP Address : 192.168.200.1
• PC Subnet Mask : 255.255.0.0
• Projector IP Address : 192.168.100.2
• Projector Subnet Mask: 255.255.0.0
R5976510 D-CINE COMMUNICATOR 11/04/2006
107
5. Projector Configuration
Remark : Communication possible. PC address is in the subnet range of the projector’s IP address. The
third group in the IP¨ addresses can be any value as the third group in the subnet mask is 0.
5.4
OPTO-Isolated GPI Configuration
GPI
General purpose Input/Output
MACRO
A macro is file that contains a sequence of commands, internally to the projector, that must be
executed.
What is possible
This interface enables the user to configure the automation system that is present inside the projection
head (standard GPI configuration). The D-Cine Communicator enables the user to couple a macro file to
a rising edge or falling edge on one of the inputs of the GPI connector (DB37).
Next to this standard GPI connector, there are also GPIOs on the button module and
eventually on the optional automation modules.
Physical position of the connector.
Image 5-18
Physical position of BD37 connector on DP50
108
R5976510 D-CINE COMMUNICATOR 11/04/2006
5. Projector Configuration
Image 5-19
Physical position of BD37 connector on DP30
Image 5-20
Physical position of DB37 connector on DP100-DP90
How to associate a macro
1. Select a General purpose input by clicking on the drop down box next to GPI selection. (image 5-21)
2. Click on Change next to Falling edge or Rising edge.
The macro selection menu will be displayed. (image 5-22)
3. Select a Macro file and click on Select. (image 5-23)
The selected macro file will be filled out next to falling edge or rising edge. (image 5-24)
4. If one edge is filled out, repeat from step 2 for the other edge if necessary.
5. If a Macro file has to be associated to another GP Input, repeat this procedure.
Image 5-21
General purpose input selection
Image 5-22
Macro selection menu
R5976510 D-CINE COMMUNICATOR 11/04/2006
109
5. Projector Configuration
Image 5-24
Macro file filled out
Image 5-23
Macro selected
How to clear a macro file
1. Click on Clear next to the macro file your want to remove.
To edit or to create a Macro, see "Macro Editor", page 225.
5.5
Controller Configuration
Overview
•
•
•
•
•
•
5.5.1
Configuring Serial Ports
Read out of the serial number
Entering a SNMP key
SNMP settings
Entering a CLO key
Lens Motor Availability
Configuring Serial Ports
What can be done?
A serial port can be configured as RS232 or RS422.
By default all values are set to RS232.
How to configure
1. Click on Configure.
A drop down menu opens. (image 5-25)
2. Select Configure serial ports.
The serial port overview menu will be displayed. (image 5-26)
3. Do you want to configure for RS232?
If yes, Click on RS232 button next to the port input you want to configure.
If no, Click on RS422 button next to the port input you want to configure and click on Terminate if you
want to terminate the line.
4. Repeat from step 3 for the other ports.
5. Click on Set to really configure the ports.
110
R5976510 D-CINE COMMUNICATOR 11/04/2006
5. Projector Configuration
Image 5-25
Select Configure serial ports
Image 5-26
Serial Port overview window
5.5.2
Read out of the serial number
How to read out
1. Click on Configure.
A drop down menu opens.
The second line indicates the serial number of the D-Cine Premiere. This serial number can also be
found on the external label on the projection head. (image 5-27)
Image 5-27
Serial number indication
5.5.3
Entering a SNMP key
SNMP
Simple Network Management Protocol is the protocol governing network management and the
monitoring of network devices and their functions.
What can be done?
Depending whether this option has been ordered, it is necessary to enter the key that has been delivered
with the projector. When the key is correctly entered, the SNMP mechanism will be enabled. From that
moment on a agent will send alarms to a specific person when something goes wrong with the projector.
How to enter a key?
1. Click on Configure. (image 5-28)
A drop down menu opens.
2. Click on SNMP key.
R5976510 D-CINE COMMUNICATOR 11/04/2006
111
5. Projector Configuration
The SNMP key window pops up. (image 5-29)
3. Enter the key exactly as indicated.
4. Click on Proceed.
A check window appears to confirm your key entry. (image 5-30)
5. When OK, click Yes.
The SNMP mechanism will be started.
Image 5-28
SNMP key selected
Image 5-29
SNMP key input
Image 5-30
SNMP key check
Deleting a SNMP key
1. Go to Configure and select SNMP key.
The SNMP key window will appears.
2. Press Delete Key(image 5-29).
The key will be removed.
5.5.4
SNMP settings
SNMP Settings start up
1. Click on Configure. (image 5-31)
A drop down menu opens.
2. Click on SNMP Settings.
The SNMP settings window opens. (image 5-32)
112
R5976510 D-CINE COMMUNICATOR 11/04/2006
5. Projector Configuration
Image 5-31
SNMP settings selected
Image 5-32
SNMP configuration
Management System address setup
1. Click on Edit to set up the management server address.
The IP address window opens. (image 5-33)
2. Enter the IP address of the management server.
3. Click OK to activate.
Image 5-33
Management system server IP address
Trap type
SNMP exists in different versions. You have SNMP V1 and SNMP V2. The difference is basically the
format of the SNMP messages. Some management systems will support V1, others will support V2.
Depending on the management system used one should select V1 or V2 traps to be sent out to the management system.
To change the trap type, click on the combo box next to Trap type and select the corresponding type.
Log size settings
The following settings are sizes of log files that relate to the operation of the SNMP agent.
Basically they should never be changed. These settings can be used for debugging.
Agent ++ log file size: Size of log file that contains logging of the SNMP Agent core engine.
BARCO SNMP log file size: Size of log file that contains logging of software modules build around the
SNMP core engine.
5.5.5
Entering a CLO key
CLO
Constant light output
R5976510 D-CINE COMMUNICATOR 11/04/2006
113
5. Projector Configuration
What can be done?
Depending whether this option has been ordered, it is necessary to enter the key that has been delivered
with the projector. When the key is correctly entered, the CLO mechanism will be enabled. To read out or
to calibrate the CLO for DP50, see "Constant Light Output for DP50", page 69, for DP30, see "Light Output
and Calibration for DP30", page 74, for DP100-DP90, see "Light Output and Calibration for DP100-DP90",
page 78.
What is CLO?
A lamp powered with a constant power will produce less light when ageing. The CLO function boosts the
lamp power so that the light output stays constant.
How to enter
1. Click on Configure.
A drop down menu opens.
2. Click on CLO key. (image 5-34)
The CLO key window pops up. (image 5-35, image 5-36)
3. Enter the key exactly as indicated.
4. Click on Proceed.
A check window appears to confirm your key entry. (image 5-37)
5. When ok, click on Yes.
The CLO mechanism will be enabled.
Image 5-34
Selecting CLO key
Image 5-35
CLO key window for DP50
Image 5-37
CLO key entry check window
Image 5-36
CLO key window for DP30, DP100 and DP90
Deleting a CLO key in the DP30, DP100 and DP90
1. Go to Configure and select CLO key.
The CLO key window will appears (image 5-36).
2. Press Delete Key.
The key will be removed.
114
R5976510 D-CINE COMMUNICATOR 11/04/2006
5. Projector Configuration
5.5.6
Lens Motor Availability
What can be done?
Only for DP100-DP90.
The D-Cine Premiere can be equipped with a motorized lens or a non-motorized lens. As the software
cannot detect that by itself, that can be configured in the Lens Motor availability.
How to configure?
1. Click on Configure.
A drop down menu opens. (image 5-38)
2. Select Lens Motor Availability.
The Lens Motor Availability window opens. (image 5-39)
3. If a motorized lens is available, check the check box.
If no motorized lens is available, uncheck the check box.
Image 5-39
Lens motor availability setup
Image 5-38
Lens availability selected
5.6
Lamp Run Time Configuration for DP50
Run time and strikes
The total run time of the lamp and the number of strikes are indicated in he lamp run time configuration
pane.
Image 5-40
Lamp Run Time and Strikes indication
When using
This configuration can be used when installing a new lamp to set the values to zero or when inserting an
already inserted lamp to set the values to the previous values of this lamp.
How to change
1. Click on the up or down arrows of the value indication box for the lamp run time and/or the number of
strikes. (image 5-41)
2. Click on Apply new values. (image 5-42)
A confirmation window will be displayed with the new values. (image 5-43)
R5976510 D-CINE COMMUNICATOR 11/04/2006
115
5. Projector Configuration
3. If you want to continue, click on Yes.
If you want to cancel, click on No, cancel the action.
Image 5-41
Changing the values
Image 5-42
Applying new values Lamp
Image 5-43
New lamp values confirmation window
5.7
Lamp Settings for DP30
Overview of the settings
Image 5-44
Settings overview
The values are given as read only.
The following values can be consulted:
Run time in hours
Run time since first start up of the lamp or since the last reset.
Remaining Run time in
hours
Remaining run time that the lamp can be used with risk of damaging the
projector.
Strikes
Number of strikes since the first start up of the lamp or since the last reset.
Article number
Article number of spare lamp which must be used in this projector.
Serial number
Serial number of actual installed lamp inside the projector.
When using the Reset button
This reset button has to be used when installing a new lamp to set the value for run time and the number
of strikes to zero and reset the remaining run time.
116
R5976510 D-CINE COMMUNICATOR 11/04/2006
5. Projector Configuration
How to reset the values?
1. Click on Reset.
A reset message will be displayed.
2. Fill out the Article number and the Serial number of the new lamp. (image 5-45)
3. Click on Reset.
The software will check if the entered article number and serial number are valid numbers. If so, the
lamp parameters will be reset. If the entered numbers are not valid, everything remain as it was.
Image 5-45
Lamp reset message
5.8
Lamp Settings for DP100-DP90
Overview of the settings
The values are given as read only.
The following values can be consulted:
Run time in hours
Run time since first start up of the lamp or since the last reset.
Remaining Run time in
hours
Remaining run time that the lamp can be used without risk of damaging
the projector.
Strikes
Number of strikes since the first start up of the lamp or since the last reset.
Article number
Article number of spare lamp which must be used in this projector.
When using the Reset button
This reset button has to be used when installing a new lamp to set the value for run time and the number
of strikes to zero and reset the remaining run time.
How to reset the values?
1. Click on Reset. (image 5-46)
A reset message will be displayed. (image 5-47)
2. Fill out the article number of the new lamp.
Or,
click on Select to display a list of possible article numbers. Select an article number and click Open.
(image 5-48)
The software will check if the entered article number is a valid number.
3. Fill out the serial number of the lamp. (image 5-49)
R5976510 D-CINE COMMUNICATOR 11/04/2006
117
5. Projector Configuration
4. Click on Reset to activate the procedure.
The lamp parameters for this new lamp will be loaded and the number of strikes, run time and remaining
run time will be reset.
Image 5-46
Select lamp reset
Image 5-47
Lamp reset message
Image 5-49
Lamp article number filled out
Image 5-48
Lamp article number selection
118
R5976510 D-CINE COMMUNICATOR 11/04/2006
6. Projector Tests
6. PROJECTOR TESTS
Overview
•
•
•
•
•
6.1
General Purpose Outputs
Ethernet test
Test Patterns
Port 292 error counts
Self Test
General Purpose Outputs
What can be done?
The general purpose outputs (GPO) for DB37 are the standard GPOs.
The general purpose outputs (GPO) can be high, low or toggle.
How to set up
1. Click on the icons to set the status of the GPO. When the icon is on a white field, it is clickable and
becomes active.
set low (make output low)
set high (make output high)
toggle (toggle the output from high to low or from low to high
continues toggle (toggles the output continuously between high and low or vice versa
The result of the selection is indicated in the status column.
6.2
Ethernet test
How to realize
1. Fill out the Ethernet address of the device you want to ping to. A ping goes from the projector to the
other device. (image 6-1)
Note: An address contains 4 octets with a maximum value of 255.
2. Click on the graphic icon to start the ping test. (image 6-2)
When the ping test is successful, a message will be displayed. (image 6-3)
when the ping test is not successful, the message ping failed will be displayed. (image 6-4)
Image 6-1
Ethernet test : fill out the address
R5976510 D-CINE COMMUNICATOR 11/04/2006
119
6. Projector Tests
Image 6-2
Starting the Ethernet test
Image 6-3
Ping successfully
Image 6-4
Ping fail message
6.3
Test Patterns
Overview
•
•
Changing a test pattern
Clear the projected test pattern
6.3.1
Changing a test pattern
The default test patterns are in the RGB color space. The color space option is by default
RGB. If a test pattern with YCbCr color space is uploaded, select first YCbCr otherwise
the pattern will be displayed in wrong way.
How to change
1. Click on Change test pattern. (image 6-5)
A retrieving window appears for a while until a file manager with the list of patterns is displayed. (image 6-6, image 6-7)
2. Select a test pattern out of the list.
3. Click on Select.
A loading window appears and the test pattern will be displayed. The name of the pattern will be fill out
in the field Test pattern currently displayed. (image 6-8, image 6-9)
Image 6-6
Retrieving test pattern
Image 6-5
Change test pattern selected
120
R5976510 D-CINE COMMUNICATOR 11/04/2006
6. Projector Tests
Image 6-8
Loading test patterns
Image 6-7
List of test patterns
Image 6-9
Test pattern displayed.
When the actual color space is different from the color space of the test pattern due to
external settings or due to loading a typical PFC file or CSC-0 or CSC-1 file, the color
space will be switched to the color space of the test pattern .
When clearing a test pattern everything will be set back to the original settings except
masking, resizing and anamorphic lens factor.
Pattern shortcuts
10 predefined test patterns can be quickly selected via the shortcuts.
1. Click on one of the 10 predefined test pattern shortcuts. (image 6-10)
The selected test pattern will be displayed. The button will be in the pressed state.
2. To clear the test pattern, click a second time on the pressed button
Or,
click on the Clear test pattern button.
The test pattern will be removed.
R5976510 D-CINE COMMUNICATOR 11/04/2006
121
6. Projector Tests
Image 6-10
Test pattern shortcuts
6.3.2
Clear the projected test pattern
How to clear
1. Click on Clear test pattern. (image 6-11)
A warning message will be displayed to indicate that any projector configuration changes made while a
test pattern was enabled are not saved into the ACTIVE configuration, and will be lost when clearing the
test pattern (except resizing and masking). Settings will be set back to the original settings as before
the test pattern was selected. Settings on resizing and masking will remain active. If you want to save
these configuration settings save them first in a file via the file manager. (image 6-12)
The test pattern will be removed from the screen.
2. Do you want to save the settings ?
If yes, Click No, cancel this action and continue with saving procedure in File manager.
If no, click Yes.
A remove test pattern message will be displayed. (image 6-13)
Image 6-11
Clear test pattern
Image 6-13
Removing test pattern
Image 6-12
Clear test pattern warning
122
R5976510 D-CINE COMMUNICATOR 11/04/2006
6. Projector Tests
6.4
Port 292 error counts
Overview
Total Error Count includes all reported errors on the source input ports A and B since the system was last
reset or power-cycled.
Recent Error Count includes all reported errors in the last 60 seconds on the source input ports A and B.
Image 6-14
Error count on port 292 A & B
If you check Continuous update, the error count will be update every 300 milliseconds.
6.5
Self Test
6.5.1
Start up of the self tests setup
How to start up?
1. Click on Self Tests. (image 6-15)
The self tests selection window pops up. (image 6-16)
Image 6-15
Start up Self tests setup
R5976510 D-CINE COMMUNICATOR 11/04/2006
123
6. Projector Tests
Image 6-16
Self test setup
124
R5976510 D-CINE COMMUNICATOR 11/04/2006
6. Projector Tests
6.5.2
Self tests choices
Overview tests
All self tests
All Interface Board Tests
Interface FPGA register test
Interface Frame Store test
Interface ANC-FIFO test
Interface RTC test
Interface Trusted Platform Module
Interface Processor / Connection
test
All processor tests
Processor Datapath test
Processor LUT-CLUT test
Processor LUT-DG test
Formatter test
When selecting a test from the first column, all underlaying test from column 2 and 3 are executed. When
selecting a test from column 2, the underlaying tests from column 3 are executed.
Additional information on the results of the self test can be found in the status tab.
R5976510 D-CINE COMMUNICATOR 11/04/2006
125
6. Projector Tests
126
R5976510 D-CINE COMMUNICATOR 11/04/2006
7. Color Calibration
7. COLOR CALIBRATION
Overview
•
•
7.1
Introduction to Color Calibration
Color Correction
Introduction to Color Calibration
Overview
The color coordinates for the projected primary colors must be measured on the screen. The values can
be different than those originally inside the projector due to reflection on the screen or due to the influence
of the glass between the projection booth and the theatre and even the projected colors are different from
setup to setup.
These measured color coordinates are references for the projector and will be entered so that the projector
knows how its colors are projected on the screen.
This reference measuring, together with the delivered gamut file of the film will introduce a color correction
so that the film will be projected with the correct color settings.
7.2
Color Correction
Overview
•
•
•
•
7.2.1
Color Correction Process
Color Measuring
Installing a Target Color Gamut file
Verifying the colors after correction
Color Correction Process
Step to be taken
1. Measuring of the color gamut of the projector.
2. Select a target color gamut file or upload a target color gamut file.
3. Verify the colors on screen after correction (optional step).
While executing step 2, the previous color corrections on the projector will be removed.
3D tables are bypassed.
When standard processing is selected the cinema color correction is not valid. The
active TCGD data is not taken into account.
R5976510 D-CINE COMMUNICATOR 11/04/2006
127
7. Color Calibration
7.2.2
Color Measuring
CAUTION: Set anamorphic lens factor to 1.0 before starting the color measuring.
How to measure
1. Click on Measure Color Gamut. (image 7-1)
The Color Gamut Measurement window will be displayed showing the actual color values. (image 7-2)
2. Select a color by clicking on the color name. (image 7-3)
A loading color test pattern message will be displayed. After a while, the selected color will be projected
without any color correction on the screen. (image 7-4)
The selected input fields of that specific color becomes white.
3. Measure the color coordinates for that specific color.
4. Enter the measured coordinates in the white input fields. Enter just the digits of the decimal value.
5. Repeat this procedure for the other colors and for white by starting at step 2.
6. Do you want to use the color calibration values in a macro file?
If yes, press Save to file (image 7-3).
Tip: This is handy when using the same projector for normal cinema projection and for 3D cinema
projection. The color calibration can then be done via a macro file but first, both color calibration
files must be saved.
The Save measured colors to file window opens.
If no, continue with step 8.
7. Enter a name in the Filename input field and press Save.
The color values will be stored for later use.
8. To use the measured values immediately, press now Apply and Exit (image 7-3).
Note: It is still possible to return to the previous coordinates by clicking Cancel.
The measured values are written to file and become active. (image 7-5)
9. Set the anamorphic lens factor back to its original value.
Image 7-1
Selecting Measure Color Gamut
128
R5976510 D-CINE COMMUNICATOR 11/04/2006
7. Color Calibration
Image 7-2
Color Gamut Measurement window
Image 7-3
Color Gamut Measurement Red selected
Image 7-4
Loading test pattern message
Image 7-5
Values successfully applied
7.2.3
Installing a Target Color Gamut file
TCGD
Target Color Gamut Data. These files defines the Target Color Gamut. For each movie, it is
possible to select a ’Target’ Color Gamut File, which defines the color gamut values for that
specific movie. The TCGD file is part of the PCF file delivered with the movie.
Selecting a target file inside the projector
1. Click on Select Target Color Gamut file. (image 7-6)
A retrieve list message will be displayed and after a while the file list comes up. (image 7-7, image 7-8)
2. Select a file out of the list.
3. Click Select.
R5976510 D-CINE COMMUNICATOR 11/04/2006
129
7. Color Calibration
An adjust gamut message will be displayed. (image 7-9)
4. Click Proceed to continue.
Click Cancel to return to the selection window.
The selected file will be made active. (image 7-10)
Image 7-6
Selecting Target Color Gamut file
Image 7-7
Retrieving color gamut files
Image 7-8
Overview color gamut files
Image 7-10
File active message
Image 7-9
Adjust color gamut message
Uploading a target file from a PC.
1. Click on Upload Target Color Gamut file. (image 7-11)
A browser window opens. (image 7-12)
2. Select the desired TCGD file on your file system and click Open.
The file will be loaded to the projector and will be made active.
130
R5976510 D-CINE COMMUNICATOR 11/04/2006
7. Color Calibration
Image 7-11
Selecting Target Color Gamut file
Image 7-12
Browser window to TCGD files
7.2.4
Verifying the colors after correction
CAUTION: Set anamorphic factor to 1.0 before verifying the colors after correction.
Overview
The color coordinates of the projected image after correction can be verified by measuring the coordinates
on the screen again. The measured values should be the values as indicated on the interface.
This part of the color correction procedure is optional.
How to verify
1. Click on Verify Color Gamut. (image 7-13)
The verify color gamut window opens. (image 7-14)
2. Select a color button.
R5976510 D-CINE COMMUNICATOR 11/04/2006
131
7. Color Calibration
A loading message will be displayed.
The selected color will be displayed on the screen with color correction.
3. Measure the coordinates with a colorimeter on the screen and check with the values below the color
bottom.
4. Repeat this procedure for other colors, starting by step 2.
5. When finished, click on Remove Color.
A remove color pattern message will be displayed. (image 7-15)
The color pattern will be removed.
6. Set the anamorphic lens factor back to its original value.
Image 7-13
Select Verify Color Gamut
Image 7-14
Verify color window
Image 7-15
Remove test pattern
132
R5976510 D-CINE COMMUNICATOR 11/04/2006
8. File Manager
8. FILE MANAGER
Overview
•
•
•
•
•
•
•
8.1
Introduction
Internal file system
File Upload
File Download
Actions on Projector files
Backup the file system
Restore the file system
Introduction
Overview
The D-Cine Premiere makes use of an internal “disk chip”. This chip contains a file system that can handled in a similar way as a file system on PC. That allows the D-Cine Premiere to make use of files and
directory structures similar to those found on a PC.
The D-Cine Premiere stores the state of the projector in something called ACTIVE. ACTIVE can be compared with a file. Changes made to the projector are immediately reflected in ACTIVE. So ACTIVE always
represents the current state of the system. When powering up the latest state will be restored.
Within the interface it is possible to manage the internal file system and the ACTIVE configuration.
ACTIVE
Stores the current state of the projector.
8.2
Internal file system
CSC
Color Space Converter
Overview
•
•
•
•
•
•
Changing the view
Renaming files and folders
Deleting files and directory
Creating a new folder
Navigation through folders
Changing the attribute setting
Overview
The default view is the “Directory Structure” view.
R5976510 D-CINE COMMUNICATOR 11/04/2006
133
8. File Manager
Image 8-1
Default projector file system view
The same manipulation can be done as on a normal file system of a PC.
The files are shown with extensions in the Directory Structure view.
8.2.1
Changing the view
How to change
1. Click on Change View ==>.
The file or structure show window pops up. (image 8-2)
The radio button in front of Show Directory Structure will be selected.
With Show Directory Structure selected, the file extension will be displayed too. For all others, the file
extensions are hidden.
2. Select a mode and click on OK.
The following mode are possible:
Mode
Explanation
CSC
Color Space Converter
Defines the Color Space to be used. It can be RGB or YcbCr.
TCGD
Target Color Gamut Data
These files defines the Target Color Gamut. For each movie, it is possible to
select a ’Target’ Color Gamut File, which defines the color gamut values for that
specific movie.
Together with the measured color coordinates of the projector, the corrections for
the projector are calculated so that the color gamut of the movie is reached.
134
LUT-AL
Anti logarithmic lookup table.
LUT-DG
De-Gamma Lookup table.
LUT-CLUT
Complex LUT lookup table.
R5976510 D-CINE COMMUNICATOR 11/04/2006
8. File Manager
Mode
Explanation
SOURCE
Source information.
Source file defines the capture configuration of the data presented to the input
port.
Number of Columns/Rows that refer to the sub-image (or active area) that is to
be captured from the active data input stream.
Offset information: shifts the offset of the active area. Image aspect ratio of the
active area.
Everything that can be configured with the Projector configuration tab in the
D-Cine Communicator package, can be saved in a Source File.
PCF
Projector Configuration File. This file is a file that will be delivered with each
movie. It contains all data needed to display a certain movie as it is defined by
the movie distributor.
This file includes :
• LUT-CLUT data
• LUT-AL data
• LUT-DG data
• Color Space Convertor data
• Target Color Gamut data
• Source data
MCGD
Measured color Gamut Data
This file contains the measured color gamut data (color reference values) for a
specific projector installation. This type of file can be created with the ’measure
color gamut’ function in the color gamut tab.
CSC-P7
Color Space Convertor – P7
Normal projector use has the CSC-P7 values calculated based on MCGD and
TCGD parameters. Therefore, downloading CSC-P7 values is typically done for
debug purposes, rather than normal operation.
R5976510 D-CINE COMMUNICATOR 11/04/2006
135
8. File Manager
Mode
Explanation
EXTRA
Extra files can contain the following information:
Source selection
• Port 292-A Source Type and Packing
• Port 292-B Source Type and Packing
• Port 292-Dual Source Type and Packing
• Port DVI-A Source Type and Packing
• Port DVI-B Source Type and Packing
• Port DVI-Dual/Twin Source Type and Packing
Processing Path Select
Advanced source settings
• SMPTE Field Bit
• 3:2 Pull-Down Enable
• Pull-Down Offset
• Pull-Down Re-Synchronization
• SMPTE 291 Disable
Image Orientation Select
Settings not accessible through the D-Cine Communicator:
• Vertical Frequency Offset
• Vertical Frequency (lsb)
• Vertical Frequency (msb)
Image Filter/Scaler Disable
GPI Configuration
3D setting
• Frame Rate Multiplication
• 3D Control commands (All)
SCREEN
Screen presentation configuration
These type of files include:
• Resizing information
• Letterboxing information
• Masking information
• Anamorphic factor of projector lens information
All information in the SCREEN file can be set with the Resizing, Masking and
Lens Type interface on the projector configuration tab.
MACRO
Macro files
Macro files contain a sequence of commands that need to be executed when
executing the macro file.
TGA
Targa Bitmap files
These files are typically used as test patterns.
The D-Cine Premiere supports the TGA™ format as specified by TrueVision
TGA™, File Format Specification, V2.0 with some restrictions. See next table
for these restrictions.
136
R5976510 D-CINE COMMUNICATOR 11/04/2006
8. File Manager
Restriction to the TGA format:
Color Space
Bits/Color
Total Bits
Sampling
w/ alpha3 w/o alpha
RGB
8
4:4:4
32
24
RGB
12
4:4:4
48
36
YC bC r
8
4:4:4
32
24
YC bC r
12
4:4:4
48
36
YC bC r
8
4:2:2
-
16
YC bC r
12
4:2:2
-
24
Image 8-2
File or structure selection window
8.2.2
Renaming files and folders
How to rename
1. Right click on a file or folder.
A pop up menu pops up. (image 8-3)
2. Select Rename.
The Rename dialog box pops up. (image 8-4)
3. Fill out the new name in the input field.
Note: File attributes must allow this action.
4. Click OK to rename the file or folder.
Image 8-4
Rename dialog box
Image 8-3
Renaming files and folders
8.2.3
Deleting files and directory
How to delete
1. Right click on a file or directory.
A pop up menu pops up. (image 8-5)
3. Alpa data is ignored for test patterns.
R5976510 D-CINE COMMUNICATOR 11/04/2006
137
8. File Manager
2. Select Delete.
Note: File attributes must allow this action.
Note: To delete a directory, the directory should be empty.
A confirmation window pops up. (image 8-6)
3. Click OK to confirm.
Image 8-6
Delete confirmation
Image 8-5
Deleting a file or directory
8.2.4
Creating a new folder
How to create
1. Right click over an empty space.
A pop up menu pops up. (image 8-7)
2. Select New folder.
The new folder creation menu pops up. (image 8-8)
3. Fill out the name of the new folder and click OK.
The new folder is created.
Image 8-8
New folder pop up
Image 8-7
Creation of new folder
8.2.5
Navigation through folders
Navigation
The same functionality is possible as in a PC environment.
Double click on a folder to open this folder.
8.2.6
Changing the attribute setting
Changing the attribute setting is only possible in Directory Structure View.
138
R5976510 D-CINE COMMUNICATOR 11/04/2006
8. File Manager
How to change
1. Right click on a file.
A pop menu pops up. (image 8-9)
2. Select Changing Attributes.
The attribute window opens. (image 8-10)
3. Check the attributes you want to set and click OK.
Image 8-9
Selecting Changing Attributes
Image 8-10
Attribute window
8.3
File Upload
File upload are best done in the typical view. Checks on type and size will be executed.
How to upload
1. Change first the view to the specific view of the file you want to upload. see "Changing the view", page
134.
2. Select a file or select multiple files by holding down the Ctrl button on the PC file system.
3. Click on ==Upload==>. (image 8-11)
The file or files will be copied to the internal file system on the selected location. Checks on file type
and size will be executed.
R5976510 D-CINE COMMUNICATOR 11/04/2006
139
8. File Manager
Image 8-11
Uploading file or files
8.4
File Download
How to download
1. Select a folder on the PC file system to which the file must be downloaded.
2. Select a file or select multiple files by holding down the Ctrl button on the internal file system.
3. Click on <==DownLoad==. (image 8-12)
The file or files will be copied to the PC file system on the selected location.
Image 8-12
Download file or files
140
R5976510 D-CINE COMMUNICATOR 11/04/2006
8. File Manager
8.5
Actions on Projector files
Overview
•
•
•
•
•
•
8.5.1
Save from ACTIVE
Select ACTIVE
Write ACTIVE Direct
Read from ACTIVE
Read Files Active
Executing a Macro file
Save from ACTIVE
What can be done?
The ACTIVE configuration or parts of the configuration can be saved on the internal file system. E.g. the
screen configuration (masking, resizing and letterboxing) can be saved in Screen File. This example will
be used to show the procedure. All other types can be saved in the same way.
How to save
1. Click first on Change View. (image 8-13)
2. Select first the typical directory, e.g. SCREEN, to save these typical settings and click OK. (image 8-14)
Note: TGA and MACRO are not allowed.
3. Click on Save from Active. (image 8-15)
Note: When in directory structure view while clicking on Save From Active, a message will be displayed.
(image 8-16)
The Save input window opens. (image 8-17)
4. Fill out a name for the file and click OK.
The Active will be saved.
Image 8-13
Change view internal file system
R5976510 D-CINE COMMUNICATOR 11/04/2006
141
8. File Manager
Image 8-14
View selection internal file system
Image 8-15
Save from active selected
Image 8-16
Message Directory structure view
8.5.2
Image 8-17
Save from Active input
Select ACTIVE
What can be done?
A saved configuration on the internal file system can be loaded as ACTIVE. This configuration will be the
new configuration of the D-Cine Premiere.
How to select
1. Click first on Change View. (image 8-18)
2. Select first the typical directory, e.g. SCREEN, to select these typical settings and click OK. (image 8-19)
3. Select a file out of the list.
4. Click on Select Active. (image 8-20)
Note: When in directory structure view while clicking on Select Active, a message will be displayed.
(image 8-21)
A confirmation screen will be displayed. (image 8-22)
5. Do you want to continue?
If yes, Click Yes
The configuration will be loaded for the internal file system to ACTIVE. A successful message will be
displayed. (image 8-23)
If no, Click No, cancel the operation.
The operation is canceled, the selected file will not become active.
142
R5976510 D-CINE COMMUNICATOR 11/04/2006
8. File Manager
Image 8-18
Change view selected
Image 8-19
Select SCREEN
Image 8-20
“Select Active” selected
Image 8-21
Message Directory structure view
Image 8-22
Select active confirmation window
R5976510 D-CINE COMMUNICATOR 11/04/2006
Image 8-23
Select active successfully
143
8. File Manager
8.5.3
Write ACTIVE Direct
What can be done?
A stored file on the PC file system can be written to ACTIVE. The type of file that can be written to ACTIVE
is determined by the View selection in the internal file system.
How to write
1. Click first on Change View.(image 8-13, image 8-24)
2. Select first the typical directory, e.g. SCREEN, corresponding to the file you want to write directly to
ACTIVE and click OK. (image 8-25)
3. Select a file on the PC file system.
4. Click on Write Active Direct. (image 8-26)
- If the corresponding file extension does not match the selected internal directory type and the file is
a valid file for Write Active Direct, the message “Only files with the extension SCREEN e.g. can be
used”. (image 8-27)
- While clicking on Write Active Direct and the internal file system is still in the directory structure, a
message as followed will be displayed : “You cannot perform a write active direct action this type of
configuration” (image 8-28)
- When the extension corresponds with the internal file structure view, a confirmation message will be
displayed. (image 8-29)
5. Do you want to continue?
If yes, Click Yes.
The file will be written to ACTIVE. A success message will be displayed. (image 8-30)
If no, click No, cancel operation.
Image 8-24
Select Change View
Image 8-25
Select SCREEN
144
R5976510 D-CINE COMMUNICATOR 11/04/2006
8. File Manager
Image 8-26
Write Active Direct selected
Image 8-27
Type message
Image 8-29
Confirmation of Write Active Direct
8.5.4
Image 8-28
Directory structure error
Image 8-30
Success message while writing to ACTIVE
Read from ACTIVE
What can be done?
A specific configuration will be saved to a PC file. The type of file that can be written to a PC is determined
by the View selection in the internal file system.
How to save
1. Click first on Change View. (image 8-31)
2. Select first the typical directory, e.g. SCREEN, corresponding to the configuration file you want to write
to the PC from ACTIVE and click OK. (image 8-32)
3. Select a directory on the PC file system.
4. Click on Read From Active. (image 8-33)
- If the internal file system is still on the ’directory structure’ view, the message that you cannot read
from active while in the directory structure will be displayed. (image 8-34)
- If the internal view is correct, an input box will be displayed to enter a file name. (image 8-35)
5. Enter a file name without extension and click OK.
The configuration will be written to the PC file system.
R5976510 D-CINE COMMUNICATOR 11/04/2006
145
8. File Manager
Image 8-31
Select Change View
Image 8-32
Select SCREEN
Image 8-33
Select Read from Active
Image 8-34
Directory structure message
8.5.5
Image 8-35
Input box for file name
Read Files Active
What can be done ?
The actual active files are indicated. When some modifications are done to one of these files, this will be
indicated in the list.
146
R5976510 D-CINE COMMUNICATOR 11/04/2006
8. File Manager
The following information is given:
• PCF file with all its sub information files.
• SCREEN
• MCGD
• CSC-P7
• EXTRA
Normally a file name is returned next to the items, but in certain cases the following non-filenames will be
returned:
<DEFAULT>
Default data was used
<DIRECT>
Write Active Direct command was used, from PC data
<CALCULATED>
Typical return for CSC-P7 data, since this data is calculated each time new
MCGD or TCGD data is entered.
<COLORS-MIXED>
Used for LUT-AL and LUT-DG when ACTIVE updated with a file for only
one color.
<TESTPATTERN>
Used for SOURCE and CSC data when set to test pattern values. SOURCE
data can not be changed when a test pattern is displayed. CSC data can
be temporarily changed when a test pattern is displayed, but will revert to
previous user settings when test pattern is turned off.
<METADATA>
Data set by Metadata function
How to get an overview of the active files ?
1. Click on Read Files Active. (image 8-36)
The active file window opens. (image 8-37)
Image 8-36
Select Files Active
Image 8-37
Files Active window
R5976510 D-CINE COMMUNICATOR 11/04/2006
147
8. File Manager
8.5.6
Executing a Macro file
What can be done?
A macro file stored on the internal file system of the D-Cine Premiere can be execute when in the macro
view.
How to execute
1. Click first on Change View. (image 8-38)
2. Select MACRO and click OK. (image 8-39)
3. Select a macro file you want to execute.
4. Click on Execute Macro. (image 8-40)
- If the macro view is not selected, a message to warn that you cannot execute a macro in this view
will be displayed. (image 8-41)
- If the view is correct and a macro file is selected, a confirmation window will be displayed. (image 8-42)
5. Do you want to continue.
If yes, Click on Yes
The macro will be execute and a message successful executed will be displayed.
If not successful, see logging information for more details. (image 8-43)
If no, Click on No, cancel the action.
No macro will be executed.
Image 8-38
Select Change View
Image 8-39
148
R5976510 D-CINE COMMUNICATOR 11/04/2006
8. File Manager
Image 8-40
Execute macro selected
Image 8-41
Wrong View message
Image 8-42
Execute Macro Confirmation window
Image 8-43
Successfully executed message
To edit a macro, see "Macro Editor", page 225.
8.6
Backup the file system
What can be done?
Backup takes a complete backup of the internal file system of the D-Cine Premiere, including ACTIVE.
It is preferable to use in the first place an Ethernet connection or in the second place a
direct RS232 connection to backup.
How to backup
1. Press Backup/Restore. (image 8-44)
The Backup/Restore selection window opens. (image 8-45)
2. Click on Backup.
A message to indicate that backup can take some time appears. (image 8-46)
3. Do you want to continue?
If yes, go to step 4
If no, Click No, cancel this action.
The software returns to the file manager screen.
4. Click Yes.
R5976510 D-CINE COMMUNICATOR 11/04/2006
149
8. File Manager
A browser window on the file system of your PC opens. (image 8-47)
5. Browse to the location where you want to store the backup files and click OK.
A retrieve file message appears first for a few seconds followed by a message to indicate the number
of files and amount of data. (image 8-48, image 8-49)
6. Do you want to proceed with this backup action?
If yes, go to step 7
If no, click on No, cancel this action.
The software returns to the File manager window.
7. Click Yes.
The files will be transferred to the indicated directory. A status window indicates which file is transferred.
(image 8-50)
When finished, a ready status message will be displayed. (image 8-51)
Image 8-44
Backup/Restore selected
Image 8-45
Backup/Restore choice window
Image 8-46
Backup message
Image 8-47
Browser on PC file system
150
R5976510 D-CINE COMMUNICATOR 11/04/2006
8. File Manager
Image 8-48
Backup status, retrieve files
Image 8-50
Retrieve status of backup
Image 8-49
Backup amount indication
Image 8-51
Backup status ready
This mechanism backs up the complete file system, including Test patterns, configurations, etc.
A partial back up can be made by downloading specific files with the File Manager.
It is recommended that for each installation the SCREEN files, PCF files and MACRO
files are copied to local PC as partial back up.
8.7
Restore the file system
What can be done?
The file system of the D-Cine Premiere can be restored from a original backup directory on the PC. Before
the restore will take place, certain checks will be performed to make sure that the backup files are valid.
It is preferable to use in the first place an Ethernet connection or in the second place a
direct RS232 connection to restore the file system.
CAUTION: Do not switch off the power !
Never give a reset command !
Never disconnect the Ethernet connection !
Never cancel the restore operation !
How to restore
1. Press Backup/Restore. (image 8-52)
The Backup/Restore selection window opens. (image 8-53)
2. Click on Restore.
A message to indicate that restore can take some time appears. (image 8-54)
3. Do you want to continue?
R5976510 D-CINE COMMUNICATOR 11/04/2006
151
8. File Manager
If yes, go to step 4
If no, click on No, cancel this action.
4. Click on Yes.
A browser window on your file system appears. (image 8-55)
5. Select an original backup directory and click on OK.
A message with the amount of files will be displayed.
When the selected directory is not an original directory, the restore fails. (image 8-56)
6. Do you want to continue?
If yes, Click on Yes.
The files will be restored. A status message will be displayed during the restore. (image 8-57)
When finished, a ready message will be displayed followed by a restore successful message. Click OK
to terminate. (image 8-58, image 8-59)
If no, click on No, cancel this action.
7. Reset the projector head, in order to make the restored settings active.
Note: The projector can be reset remotely,see "Reset Projector Head", page 29
Image 8-52
Backup/Restore selected
Image 8-53
Backup/Restore choice window
Image 8-54
Restore message
Image 8-55
Browser window on file system
152
R5976510 D-CINE COMMUNICATOR 11/04/2006
8. File Manager
Image 8-57
Restore message, busy
Image 8-56
Restore message, amount of files
Image 8-58
Restore ready message
Image 8-59
Restore successful message
R5976510 D-CINE COMMUNICATOR 11/04/2006
153
8. File Manager
154
R5976510 D-CINE COMMUNICATOR 11/04/2006
9. Updates
9. UPDATES
CAUTION: Do not perform any other hardware updates while updating the software.
Never reset the power off the projector while performing software updates.
Never break the connection between your projector and your PC while performing software updates.
see "Upgrade Troubleshooting", page 163 if such an event would occur.
Overview
•
•
•
•
9.1
General overview
General Updates
Other individual upgrades
Upgrade Troubleshooting
General overview
Updating
The D-Cine package contains only Barco updates. TI updates are done via a separate software package
(see "Updating TI boards", page 279).
The D-Cine Communicator enables the user to update Barco software and relevant settings to the D-Cine
Premiere module.
Way of updating for DP30 and DP50
There are three ways to update from a D-Cine package file:
• once a serial connection to RS232/RS422 and once a Serial connection to LoopIN/Out (Serial Bus
mode) to update the controller software.
• once a Ethernet connection and once a Serial connection to LoopIN/Out (Serial Bus mode) to update
the controller software. These method goes fast.
• the complete update via a Serial connection to Loop IN/Out but that can take 2 hours.
Way of updating for DP100-DP90
Updating should always be done via an Ethernet connection. Two connections are possible:
• Connect via the projector’s Barco IP address (preferred way).
• connect via the TI/Cinema IP address. This address must be within the same range as the Barco IP
address.
Upgrade recommendations
•
•
When using Windows® XP with service pack 2, disable the internal firewall.
For DP100-DP90, put the Barco IP address in the same range as the TI IP address (restore the IP
address after update to prevent problems with communication to other devices).
R5976510 D-CINE COMMUNICATOR 11/04/2006
155
9. Updates
9.2
General Updates
D-Cine Software updates
All Barco update files are combined in one package file (zip file). This D-Cine software package file contains software, configuration files and file for the file system of the projector.
CAUTION: Do not power down the projector while upgrading.
Do not break the connection between the PC and the projector.
How to update
Updating via an Ethernet connection :
1. Click on D-Cine Update Manager. (image 9-1)
The update manager opens. (image 9-2)
2. Click on Open Package File.
A Browser window opens.
3. Select the package file and click on Open. (image 9-3)
A version check of the hardware is executed at the same time. That means that the update software
version must be compatible with the actual installed hardware version. If there is a difference, a message request to replace the hardware component will be displayed. (image 9-4)
After the hardware version check, the software scans the projector to look up the version and the time
stamp of the files actually loaded on the projector. It compares this information with the information in
the package file and builds up a table. The checked items are those which are recommended to be
updated, the background will be light yellow. (image 9-5)
For DP30 and DP50, when updating via the Ethernet connection, the Control Software will not be check
and the background will be dark yellow as this item can only be updated via a serial connection.
When clicking on a file, a short description will be shown in the Description pane.
4. Click on Update now. (image 9-6)
The updating will be started but first a message will be displayed. (image 9-7)
5. Click on Ok, start update now.
When the update is finished, a message will be displayed to indicate how many updates are successful.
(image 9-8)
6. After update, immediately reset the projector.
The connection will be lost.
Image 9-1
Starting the update procedure
156
R5976510 D-CINE COMMUNICATOR 11/04/2006
9. Updates
Image 9-2
Update manager
Image 9-3
Selecting the update file
R5976510 D-CINE COMMUNICATOR 11/04/2006
157
9. Updates
Image 9-4
Hardware version check
158
R5976510 D-CINE COMMUNICATOR 11/04/2006
9. Updates
Image 9-5
Update list
Image 9-6
Update busy
R5976510 D-CINE COMMUNICATOR 11/04/2006
159
9. Updates
Image 9-7
Update caution
Image 9-8
Update message
For DP30 and DP50, perform the same procedure via a Serial Connection Loop IN/Out
(Serial Bus Mode) to update the controller software if needed.
Ethernet will not work if default “default Gateway IP address” is not in the range of the
configured IP address.
When the ARM Main Application software is updated from 4.x to 5.x continue with the
procedure below.
Set default gateway after update via Ethernet connection
1. Make a serial connection.
A message will be displayed. (image 9-9)
2. Click on Projector Configuration tab.
3. Set within the Ethernet address pane the Default Gateway to the IP-Address of the router (MUST be
on the local subnet!)
Tip: If the router address is not known, set the Default Gateway IP Address the same IP address of
the projector.
If the address is not correct, a warning will be displayed.
4. Go back to the Updates tab and continue with the update of the Controller software. Follow the same
procedure as described above for a standard update.
Image 9-9
Message after reset
Update timings
A Major Update to D-Cine Premiere Package file 2.00 typically takes for DP30-DP50:
• Ethernet: 7.5 minutes + 2 minutes for controller update over Serial Connection to Loop In / Out
• Serial Connection to RS232/422: 18 minutes + 2 minutes for controller update over Serial Connection
to Loop In / Out
• Serial Connection to Loop In / Out: 120 minutes
160
R5976510 D-CINE COMMUNICATOR 11/04/2006
9. Updates
For DP100-DP90:
• Updating will take about 30 minutes.
Updates from 2.00 to higher versions, will take significant less time.
9.3
Other individual upgrades
Overview
•
•
•
9.3.1
Loading setting in the Button module
Upgrading the Touch panel menu structure
Controller Software update
Loading setting in the Button module
Button Module Settings
Button module settings contains info on which actions are coupled to each button/input. For
manual configuration, see Automation tab.
Only for DP30 and DP50.
How to load
1. Check the radio button in front of the Button Module Settings and click on Load. (image 9-10)
A browser window opens.
2. Select the settings file for the button module. Click on Open.
The new settings will be loaded in the button module.
Image 9-10
Button module upgrade
9.3.2
Upgrading the Touch panel menu structure
How to upgrade
1. Check the radio button in front of the Touch Panel Menu Structure and click Load. (image 9-11)
A browser window opens.
2. Select the touch panel menu structure file for the Touch Panel. Click on Open.
R5976510 D-CINE COMMUNICATOR 11/04/2006
161
9. Updates
The new settings will be loaded in the Touch Panel.
Files to upload are typically called depending of the projector configuration. E.g. :
Menu M7 Chinese V2.0 bin
Uses Chinese fonts for projector without an ACSAR
Menu M7 Chinese with ACSAR
V2.0 bin
Uses Chinese fonts for projector with an ACSAR
Menu M7 English V2.0 bin
Uses English fonts for projector without an ACSAR
Menu M7 English with ASCAR
V2.0 bin
Uses English fonts for projector with an ACSAR
Image 9-11
Touch panel upgrade
If the connection to the projector was broken during this upload, you can restart the procedure. It is recommended to physically power OFF/ON the touch panel before retrying
a new Touch panel menus structure upload.
Typical update timings
9.3.3
Ethernet
14 to 16 minutes
Serial Connection to
RS232/422:22
22 to 24 minutes
Serial Connection to Loop In /
Out
18 to 20 minutes
Controller Software update
Only for DP30 and DP50.
Why a separate upload procedure.
The separate upload procedure can be seen as an emergency procedure. When something goes wrong
during the normal update procedure, e.g. power failure or connection failure, it is possible that the controller software is damaged. The projector cannot start up anymore. Via this procedure it is possible to
reinstall the controller software and then run the complete upgrade.
How to re-install the controller software.
1. Make a serial connection between the PC and the projector.
162
R5976510 D-CINE COMMUNICATOR 11/04/2006
9. Updates
2. Go to the Updates tab and select the radio button in front of Controller Software. Click on Load.
A browser window opens.
3. Browse to the directory where the D-Cine Communicator software is installed. Click on Updates and
select controller.bin.
The Controller software will be loaded again.
9.4
Upgrade Troubleshooting
Overview
•
•
9.4.1
Connection broken, projector reset
Connection broken while updating Button control or touch panel software.
Connection broken, projector reset
For DP30 and DP50
Problem
Connection has been broken while updating the controller software or the projector has been reset while
the controller software was being upgraded.
When connected over Ethernet, no temperatures, voltage levels, and main controller software can be read
out. Status LED 6 on the Barco Controller board is not blinking.
When connecting over Serial Connection to Loop IN/Out you get the following message:
Image 9-12
Controller software message
Solution
1. Press OK on popup window.
2. Go to the Updates tab.
3. Select Controler software.
4. Load the controller.bin file.
Note: The controller.bin file is always present in the D-Cine Software Package file. It can be extracted
from this zip file.
R5976510 D-CINE COMMUNICATOR 11/04/2006
163
9. Updates
9.4.2
Connection broken while updating Button control or touch panel software.
Problem
The connection was broken while updating the button control software or the touch panel software. The
touch panel does not work as expected and or the button control does not work as expected.
Solution
1. Click on D-Cine Update Manager.
2. Click on Open Package File
3. Reopen the D-Cine Software package file with the D-Cine Update Manager (image 9-13)
The Touch Panel and/or button control software will be indicated as not available, because their main
application software might not be running.
4. Explicitly select the button Module software and Touch panel software on the check box.
5. Restart the update.
Note: Make sure the touch panel and/or button control are physically well connected.
Image 9-13
Update manager
164
R5976510 D-CINE COMMUNICATOR 11/04/2006
10. Security Management
10. SECURITY MANAGEMENT
Overview
•
•
•
•
•
Security management overview
Starting up the Security management with valid key
Adding an extra key to the list
Changing the pin code of an existing key
Get an overview of the Card Cage access
Security management is located within the Update tab of the software.
10.1 Security management overview
Overview
The physical access to the internal card cage of the projector is protected by a dallas iButton® and an
associated pin code. Each projector is delivered with its own physical Dallas key which is also entered in
the security management system.
For DP50 and DP30, to gain access to the card cage, place your dallas iButton® in the key slot and enter
the correct pin code on the keyboard next to the key slot.
For DP100 and DP90, to authorize after accessing the card cage and removing the light processor (engine), place your dallas iButton® in the key slot and enter the correct pin code on the keyboard next to
the key slot.
Image 10-1
Card cage Dallas key protection
With the D-Cine Communicator software it is possible to add key/pin code combinations to the existing
ones. This can only be done when entering the original key with its corresponding pin code.
10.2 Starting up the Security management with valid key
How to start up
1. Click on Retrieve Key List. (image 10-2)
The Key Code window appears. (image 10-3)
2. Fill out the key code of the original dallas iButton® . (image 10-4)
Note: The given key combination is only as an example and is not valid for your projector.
3. Enter the corresponding pin code and click on Continue..
R5976510 D-CINE COMMUNICATOR 11/04/2006
165
10. Security Management
The key will first be validated. (image 10-5)
When the key is a valid one, the key list will be displayed. (image 10-6)
Image 10-3
Key code window
Image 10-2
Image 10-5
Key validation
Image 10-4
Key code window example
166
R5976510 D-CINE COMMUNICATOR 11/04/2006
10. Security Management
Image 10-6
Key list
A Key list when entered with original key
B Key list when entered with another valid key
10.3 Adding an extra key to the list
How to add
1. Start up first the Security management. see "Starting up the Security management with valid key", page
165.
2. Double click on
to add a new key to the list.
The Key Code window opens.
3. Fill out the key code of the new dallas iButton® (image 10-4).
4. Enter a new pin code and press Continue.
The new key will be added to the key list (image 10-6).
5. Click on Save Key List to make the changes active.
10.4 Changing the pin code of an existing key
How to change
1. Start up first the Security management. see "Starting up the Security management with valid key", page
165.
2. Double click on an existing key. (image 10-7)
The key code window opens.
3. Enter a new pin code and press Continue.
The key list returns active.
4. Click on Save Key List to make the changes active.
R5976510 D-CINE COMMUNICATOR 11/04/2006
167
10. Security Management
Image 10-7
Key code list
10.5 Get an overview of the Card Cage access
How to get an overview
1. Start up first the Security management. see "Starting up the Security management with valid key", page
165.
2. Click on Read Log File. (image 10-8)
The Card Cage log file opens. (image 10-9)
This log file gives an overview of who accessed the card cage at which time.
Image 10-9
Card Cage log file
Image 10-8
Read log security file
168
R5976510 D-CINE COMMUNICATOR 11/04/2006
11. Automation
11. AUTOMATION
Overview
•
•
Introduction
Creating an Action List
11.1 Introduction
Overview
Each D-Cine Premiere is delivered with one button module. Optionally, it is possible to buy up to 4 general
purpose input output boards (GPIO) for automation purposes of other processes related to the cinema
projection. E.g. opening the curtains, dimming the lights, etc.
Button 1 to 4 of the button module are completely configurable. The 4 lower buttons are always predefined
and cannot be configured. The upper two are for powering on/off the projection head and the lamp. The
lower two are for opening or closing the dowser (shutter).
Each GPIO board has up to 8 configurable inputs. The D-Cine Communicator detects automatically the
automation modules and shows the result in the automation interface.
Pressing on the automation interface one of the configurable buttons of the button module or a button
on an extra GPIO board, opens the configuration panel. Each input of the GPIOs can be configured to
execute an action list when going high and a different one when going low. Each button on the button
module can be configured to execute an action list when pressed or released.
Button panel with one extra automation module connected on position 2.
Image 11-1
Automation interface
R5976510 D-CINE COMMUNICATOR 11/04/2006
169
11. Automation
11.2 Creating an Action List
What is an Action List?
An action list is an list of actions that can be executed when a certain input becomes high or low (button
pressed or released).
The following actions can take place:
• Put a certain output of a module (this module or another module) to high or low.
• Execute a Macro File
• Switch the lamp on or off
• Open or close the dowser/shutter
An action list can contain maximum 8 actions.
How to create
1. Push first on a button in the automation interface for which input you want to create an action list.
The Configuration Panel opens. (image 11-2)
2. Click on a radio button in the action pane to create an action.
The following items can be selected:
- Output: see selecting an output.
- Macro
- Lamp: lamp on or off
- Dowser: open dowser of close dowser
3. Click on <== to add the action to the action list for ’input goes high’ or ’input goes low’.
4. Repeat step 2 to add other actions (maximum 8 actions are allowed).
5. Click on Proceed to save the current action list.
Image 11-2
Configuration panel action list
Selecting an output
1. Click on the module selection drop down menu.
170
R5976510 D-CINE COMMUNICATOR 11/04/2006
11. Automation
The drop down menu opens. (image 11-3)
2. Select a module.
3. Click on the output drop down list.
The output drop down list will be adapted according the module selection. (image 11-4)
4. Select an output.
5. Click on the status list for the selected output. (image 11-5)
The choices are:
- off
- on
- pulse
Image 11-3
Output module selection
Image 11-4
Output selection
Image 11-5
Status selection output
Selecting a macro
1. When macro is selected, a list of macro files will be displayed.
Select a macro out of the list. (image 11-6)
Some macro file will be grayed out when the name of the file is not conform. In this automation system
only macro files in the form of MACROxx can be coupled with the system. Macro files with another
name can also be used as they can be renamed to the standard macro name format. To rename a file,
see "Renaming files and folders", page 137.
MACROxx as name is MACRO followed with 2 digits (between 01 and 99).
Image 11-6
Macro selection for action list
When changing the commands associated with a button of the button control, it is necessary to reset the touch panel (if any available) after pressing the proceed button. See
installation manual of the projector.
R5976510 D-CINE COMMUNICATOR 11/04/2006
171
11. Automation
172
R5976510 D-CINE COMMUNICATOR 11/04/2006
12. Automation for DP100 and DP90
12. AUTOMATION FOR DP100 AND DP90
Overview
•
•
•
•
Introduction
Activating a macro
Macro association
Edit a macro
12.1 Introduction
Overview
The user interface represents 14 preset buttons which are the same as those on the button panel of the
projector. With each button a macro can be activated by pressing the corresponding button.
To each button, a macro can be associated. The associated macro can also be edited via the Macro Editor
by selecting the Edit macro button.
Image 12-1
Button configuration
R5976510 D-CINE COMMUNICATOR 11/04/2006
173
12. Automation for DP100 and DP90
Default associations
Button4
Macro name
1
292A_P7_Flat_1280
2
292A_P7_Scope_1280
3
292A_P7_Flat_1920
4
292A_P7_Scope_1920
5
292A_P7_Flat_2048
6
292A_P7_Scope_2048
7
292A_P3_Flat_1280
8
292A_P3_Scope_1280
9
292A_P3_Flat_1920
10
292A_P3_Scope_1920
11
ACSAR_Input1
12
ACSAR_Input2
13
ACSAR_Input3
14
ACSAR_Input4
12.2 Activating a macro
How to activate
1. Click on the button next to the desired macro description.
The selected macro will be executed. As an indication that the macro is activated, a green led will be
displayed in the corner of the button. (image 12-2)
Image 12-2
Active button
12.3 Macro association
How to associate
1. Move you mouse over a button.
Next to the button, two selection buttons appear. (image 12-3)
2. Click on Change macro.
The Macro selection window opens. (image 12-4)
3. Select a macro out of the list and click on Select.
4. Buttons are numbered from left to right and from top to bottom
174
R5976510 D-CINE COMMUNICATOR 11/04/2006
12. Automation for DP100 and DP90
The selected macro will be associated with button and the name of the macro will be filled out next to
the button.
Image 12-3
Change macro selected
Image 12-4
Macro selection window
12.4 Edit a macro
How to edit
1. Mouse you mouse over a button.
Next to the button, two selection buttons appear. (image 12-5)
2. Click on Edit macro.
R5976510 D-CINE COMMUNICATOR 11/04/2006
175
12. Automation for DP100 and DP90
The Macro editor starts up. (image 12-6)
For the explanation about the Macro editor, see "Macro Editor", page 225.
Image 12-5
Edit selected macro
176
R5976510 D-CINE COMMUNICATOR 11/04/2006
12. Automation for DP100 and DP90
Image 12-6
Macro editor
R5976510 D-CINE COMMUNICATOR 11/04/2006
177
12. Automation for DP100 and DP90
178
R5976510 D-CINE COMMUNICATOR 11/04/2006
13. Server
13. SERVER
Overview
•
•
•
•
•
Introduction
Server overview interface
Time Control
Subtitle Control
Metadata Control
13.1 Introduction
Overview
The D-Cine Premiere projectors are equipped with the possibility to process Subtitle and metadata information coming from a server.
Principal diagram :
Satelitte
Satelitte dish
Image +
Audio Data
Or
Theatre side
Server
Playback
server
+
DLP Cinema
Projector
Image
Im a g
files
e
Fil e s
Subtitle
Sub t it le
files
F ile
Subtitle Files
Multiple
Languages
SMPTE292
Image Data
Image
Processing
n
Ethernet
Subtile Data
Timing
s
Subtitle
i t le
Overlay
g
Ov
e r la
Projection
y
Subtitle
Processing
g
Subtitle
Selection
Operator
Control
Image 13-1
Principal diagram subtitling
The following process happens :
Image information together with audio data enters the server. Next to it, separate subtitle files in multiple
languages are stored on the same server as well as metadata files.
The operator of the Cinema theatre selects the film and the additional subtitling on the server.
The image data will be sent over the SMPTE292 line to the projector. When the subtitling mechanism is
activated inside the projector, this projector will process subtitle data and timings which are sent over a
Ethernet network to the projector. The projector will render the subtitling in overlay to the image.
R5976510 D-CINE COMMUNICATOR 11/04/2006
179
13. Server
13.2 Server overview interface
Overview of the layout
Image 13-2
Overview interface
In order to simulate a server triggering the projector’s subtitling mechanism, or to check if a server is
configured as it should be, Barco provides an interface as shown above.
The following is visualized from left to right and from top to bottom :
• time code, internal or external
• time code itself
• Status, running or not running
• Subtitle status, enables or disabled
• Subtitle file location
• Subtitle ’time to live’ (TTL)
• Metadata status, enabled or disabled
• Metadata file location
• Metadata ’time to live’ (TTL)
13.3 Time Control
Overview
•
•
•
•
•
Time source
Input frequency
Timeline stamp
Timeline adjustment
Control
13.3.1 Time source
Why used
The selected time source will be used to synchronize the subtitling and metadata information with the
image stream.
How to select
1. Click on one of the radio buttons in the Time source field. (image 13-3)
180
292 External
The projector will take the time code that is inserted in the SMPTE292 stream for
subtitle synchronization
Internal
The projector will take the time code from its internal time code generator.
R5976510 D-CINE COMMUNICATOR 11/04/2006
13. Server
Image 13-3
Time source selection
When 292 External is selected, the Timeline stamp and Timeline adjustment are grayed
out.
13.3.2 Input frequency
Why necessary
The projector needs to know the frequency of the input signal presented to the projector so that it can
calculate internal synchronization parameters.
How to select
1. Click on one of the radio buttons in the Input frequency field. (image 13-4)
Possible choices :
- 23.98 Hz
- 24.00 Hz
Image 13-4
Input frequency selection
13.3.3 Timeline stamp
Only available for an internal time source.
What is the purpose
The internal time code will be set to the value of the timeline stamp. The image displayed will be the image
with eventually the subtitling overlay at the time of the timeline stamp. When the play button is pressed,
the time code starts running from the value in the timeline stamp.
How to enter a timeline stamp
1. Click on the hours, minutes or seconds value and enter the new value with the digit keys on your keyboard
Or,
click on the hours, minutes or seconds value and click then on the up or down arrows to change the
value to the desired one. (image 13-5)
2. Click on Apply time now to apply the new time to the time code.
R5976510 D-CINE COMMUNICATOR 11/04/2006
181
13. Server
Image 13-5
Set up timeline stamp
13.3.4 Timeline adjustment
Only available for an internal time source.
What is the purpose
While the time code is running, the timeline can be adjusted by adding time to current time or by subtracting time from the current time. With these small corrections, it is possible to adjust small misalignments
between the spoken text and the subtitling.
How to add a correction
1. Click into the minutes, seconds or milliseconds field and select the actual value. Change that value by
entering the new value with the digit keys on your keyboard
Or,
click on the up or down arrows next to the minutes, seconds or milliseconds input field to change the
value to the desired one. (image 13-6)
40 milliseconds corresponds with 1 frame for an input frequency of 24 Hz.
2. Click on + or - button to activate the correction.
+
Entered correction will be added to the current time
-
Entered correction will be subtracted from the current time
Image 13-6
Timeline adjustment
13.3.5 Control
Only available for an internal time source.
How to control
1. Click on the Start button (
2. Click on Stop button (
182
)to start the internal time code.
) to stop the internal time code.
R5976510 D-CINE COMMUNICATOR 11/04/2006
13. Server
13.4 Subtitle Control
Overview
•
•
•
•
•
Steps to be taken for subtitle control
Subtitle server
Subtitle file
Time to live (TTL)
Subtitle Control activation
When the projector is reset or power-cycled, the subtitling function will be disabled.
13.4.1 Steps to be taken for subtitle control
Overview
1. With Subtitle enable not checked, fill out first the subtitle server address.
2. Set up the subtitle file.
3. Set up the “time to live”.
4. Activate the subtitling
13.4.2 Subtitle server
How to set up
1. Click in the subtitle server input field.
2. Fill out a valid IP address or host name (only when a DNS server is used) (image 13-7)
Note: An address contains 4 octets with a maximum value of 255.
Image 13-7
Subtitle server address
13.4.3 Subtitle file
How to select
1. Click on the Select button next to the server address. (image 13-8)
A DCine Subtitle browser will open. (image 13-9)
2. Click on file to select that file.
The content of the file will be displayed. (image 13-10)
3. Is this the correct file?
R5976510 D-CINE COMMUNICATOR 11/04/2006
183
13. Server
If yes, Click on OK.
The complete URL will be written in the Selected Subtitle XML file field.
If no, click on Cancel and select another file.
Image 13-8
Subtitle file selection start up
Image 13-9
Example of subtitle browser
184
R5976510 D-CINE COMMUNICATOR 11/04/2006
13. Server
Image 13-10
Subtitle file : example
13.4.4 Time to live (TTL)
Why used
The TTL (Time to live) is a countdown time-out used to prevent subtitles from being left on the screen
through loss of communication.
The server or D-Cine Communicator will continuously ask for the subtitle status. As long as the ’time to
live’ counter has not been expired and the subtitle status command is executed, this TTL value will be
resetted to its original value set in the TTL interface.
If the TTL value reaches ’0’, the system will disable the subtitle function and the subtitling will be removed
from the screen.
How to set up
1. Click into the TTL input field and select the actual value. Change that value by entering the new value
with the digit keys on your keyboard (the value must be in seconds)
Or,
click on the up or down arrows next to the TTL input field to change the value to the desired one.
(image 13-11)
Image 13-11
Time to live setting subtitling
R5976510 D-CINE COMMUNICATOR 11/04/2006
185
13. Server
13.4.5 Subtitle Control activation
How to activate
1. Check the check box in front of Subtitle enabled. (image 13-12)
Note: This is only possible when a server address and a subtitle file are filled out.
Image 13-12
Activating Subtitling
13.5 Metadata Control
Metadata
Generally referred to as "data about data" or "data describing other data". More specifically,
information that is considered ancillary to or otherwise directly complementary to the essence.
Any information that a content provider considers useful or of value when associated with the
essence being provided.
Overview
•
•
•
•
•
•
Introduction
Steps to be taken for metadata control
Metadata server
Metadata file
Time to live (TTL)
Metadata Control activation
13.5.1 Introduction
Overview
In case of a digital Cinema projector, Metadata contains all the data the projector needs, to be able to
display a certain content as it should be. Typically the Metadata is the data that we find in PCF files.
Metadata mode means that the server has control over the projector’s active PCF Data. Accessing the
Active PCF data of a projector in Metadata mode from the D-Cine Communicator or touch panel will fail.
Metadata Control needs to be disabled first.
Content of the metadata info
Metadata Control from a server:
•
Provides projector setup instructions without operator action
•
Contains instructions provided by content creator (PostProduction)
•
Information sent from server to projector at start of the movie
• Setup parameters include:
- Target color space (7-point) (TCGD)
- Color space conversion parameters (CSC)
- Gamma (LUT-DG)
- Incoming image size (SOURCE)
- Projector Lookup tables (LUT-AL, LUT-CLUT)
186
R5976510 D-CINE COMMUNICATOR 11/04/2006
13. Server
13.5.2 Steps to be taken for metadata control
Overview
1. With Metadata enable not checked, fill out first the metadata server address.
2. Set up the metadata file.
3. Set up the “time to live”.
4. Activate the metadata
13.5.3 Metadata server
How to set up
1. Click in the metadata server input field.
2. Fill out a valid IP address or host name (only when a DNS server is used) (image 13-13)
Note: An address contains 4 octets with a maximum value of 255.
Image 13-13
Metadata server address
13.5.4 Metadata file
How to select
1. Click on the Select button next to the server address. (image 13-14)
A DCine browser will open. (image 13-15)
2. Click on file to select that file.
The content of the file will be displayed. (image 13-16)
3. Is this the correct file?
If yes, Click on OK.
The complete URL will be written in the Selected Metadata XML file field.
If no, click on Cancel and select another file.
Image 13-14
Metadata file selection
R5976510 D-CINE COMMUNICATOR 11/04/2006
187
13. Server
Image 13-15
Example of browser window
Image 13-16
Example of metadata file
188
R5976510 D-CINE COMMUNICATOR 11/04/2006
13. Server
13.5.5 Time to live (TTL)
Why used
The TTL (Time to live) is a countdown time-out used to prevent the use of metadata information through
loss of communication.
The server or D-Cine Communicator will continuously ask for the metadata status. As long as the ’time to
live’ counter has not been expired and the metadata status command is executed, this TTL value will be
resetted to its original value set in the TTL interface.
If the TTL value reaches ’0’, the system will enable the metadata function.
How to set up
1. Click into the TTL input field and select the actual value. Change that value by entering the new value
with the digit keys on your keyboard (the value must be in seconds)
Or,
click on the up or down arrows next to the TTL input field to change the value to the desired one.
(image 13-17)
Image 13-17
Time to live
13.5.6 Metadata Control activation
How to activate
1. Check the check box in front of Metadata enabled.
Note: This is only possible when a server address and a metadata file are filled out.
Note: An indication in the Setup Control interface will be added.
CAUTION: When metadata control is enabled, the following functions are not possible :
execution of macros, applying a PCF file (e.g. on Setup page, when connecting), changing the Active Area and using the PCF editor.
R5976510 D-CINE COMMUNICATOR 11/04/2006
189
13. Server
190
R5976510 D-CINE COMMUNICATOR 11/04/2006
14. Projector Status for DP50
14. PROJECTOR STATUS FOR DP50
Overview
•
•
•
•
•
General overview
Status overviews
Projector Log Information
Security log file
Certificates
14.1 General overview
Summary
This interface gives feedback on any item that can be read out in the D-Cine Premiere.
Image 14-1
Projector status
Check first the Module Status. If the status is indicated in black is everything OK. If some items are indicated in red, follow the description in the next items to find out what is wrong with your projector.
To be sure the projector is ready as Secured platform, check the Interface Board Type. When the board
is a type 3 board, then the projector can operate as a secured platform.
If the card cage inside the projector is open, an error message will be displayed: Tamper-Switch Activated.
R5976510 D-CINE COMMUNICATOR 11/04/2006
191
14. Projector Status for DP50
14.2 Status overviews
Overview
•
•
•
•
•
•
•
Switch Mode Power Supply status
Fan/Tec Controller status
Boards Status
External Cooler Unit Status
CLO status
Security Card Cage Status
Barco access level
14.2.1 Switch Mode Power Supply status
Status overview
If the Switch Mode Power Supply status is failed, one of the following items must have a red indication:
• SMPT voltages: these voltages can out of range
• Analog Channels
• Digital Channels
• Fan speed, SMPS
• Projector Temperatures
- Cooler SMPS 1
- Cooler SMPS 2
- Ambient Output
• Bottom inlet Filter
Image 14-2
Projector status SMPS overview
192
R5976510 D-CINE COMMUNICATOR 11/04/2006
14. Projector Status for DP50
14.2.2 Fan/Tec Controller status
Status overview
If the Fan/Tec Controller status is failed, one of the following items must have a red indication:
• Fan Speeds (all, except SMPS)
• Tec Voltages
• DMD temperatures (red, green, blue)
• Ambient Input
Image 14-3
Projector Status Fan/tec overview
WARNING: Servicing only allowed by a Barco authorized service technician.
R5976510 D-CINE COMMUNICATOR 11/04/2006
193
14. Projector Status for DP50
Fan locations
Image 14-5
Fan Card cage inside
1 Fan card cage inside
Image 14-4
Fan location
1
2
3
4
5
IR filter
Engine
Integrator
SMPS
Power Factor
Image 14-6
Fan Card cage cover
1 Fan card cage back side cover
Image 14-7
Fan Engine
1 Engine sealing
194
R5976510 D-CINE COMMUNICATOR 11/04/2006
14. Projector Status for DP50
14.2.3 Boards Status
Status overview
If the Boards Status is failed, check the boards status pane. If one of them is in failed status, information
of the status is given in the log table of the same pane.
Image 14-8
Projector Status Boards Status
14.2.4 External Cooler Unit Status
Status overview
The following statuses are possible:
• Not Active: Cooler unit not powered
• Check fluid:
• Check flow: no circulation of liquid in the cooler system
• OK
14.2.5 CLO status
Status overview
CLO status can be OK or failed. When failed, there is a communication error between the CLO device
and the projector controller.
14.2.6 Security Card Cage Status
Status overview
Security card cage status can be OK or failed. When failed, there is a communication error between the
Security card cage and the controller.
R5976510 D-CINE COMMUNICATOR 11/04/2006
195
14. Projector Status for DP50
14.2.7 Barco access level
Status overview
Value should be 0x04.
When not correct, communication between TI input boards and Barco controller will not work.
When this value is higher, click on the Barco Access Level item. The access level will change to the correct
value (This must be done when a spare TI board was inserted into the projector).
14.3 Projector Log Information
Overview
•
•
•
•
•
Displaying Projector Log Information
Saving the Projector Log File
Refreshing the Projector log information
Clearing the Projector log file
Active Cooling on DMD’s
14.3.1 Displaying Projector Log Information
How to display
1. Click on Projector Log File. (image 14-9)
The Projector log file will be retrieved. A reading window will indicate the status. (image 14-10)
When ready, the projector log information will be displayed.
The projector log file contains the following information:
- actions done on the projector
- status indication when projector is in the fail state. (image 14-11)
Image 14-10
Reading the projector log file
Image 14-9
Projector log file selected
Image 14-11
Projector Log information
196
R5976510 D-CINE COMMUNICATOR 11/04/2006
14. Projector Status for DP50
14.3.2 Saving the Projector Log File
How to save
1. Click on Save. (image 14-12)
Image 14-12
Save the projector log file
14.3.3 Refreshing the Projector log information
How to refresh
1. Click on Refresh. (image 14-13)
The Projector log file will be loaded again. A reading window will indicate the status. (image 14-14)
When ready, the projector log window will be updated.
Image 14-14
Image 14-13
Refresh the projector log file
14.3.4 Clearing the Projector log file
How to clear
1. Click on Clear. (image 14-15)
The projector log will be cleared.
Image 14-15
Clear projector log file
14.3.5 Active Cooling on DMD’s
Status overview
The following states are possible:
• idle : no cooling active
• cooling : cooling active
R5976510 D-CINE COMMUNICATOR 11/04/2006
197
14. Projector Status for DP50
14.4 Security log file
Get log file
To get an online security logging, click on Security Log. The software will retrieve the security log information from the projector. When somebody tries to break-in in the projector electronics by opening the card
cage, this action will be logged in the security logging. This security log file cannot be deleted.
Image 14-16
Security log selected
Image 14-17
In normal circumstances, this security log file must be empty.
Save to PC
The online security log file can be saved to PC just by clicking Save to file on PC. A save window opens.
Select a location and enter a file name for the logging. Click on Save.
14.5 Certificates
About certificates
Before some productions are authorized to be displayed with a certain projector, the film distributor must
distribute a key to the theatre owners. This key is associated with the projector certificate which will be
available for the film distributors on a web portal.
The certificate file must be uploaded on that web portal during the installation of the projector or after
servicing the Interface board.
198
R5976510 D-CINE COMMUNICATOR 11/04/2006
14. Projector Status for DP50
To get the certificate file
Image 14-18
Certificate selection
To get online a certificate file, click Certificate. A browse window opens. Browse to the desired location,
enter a file name and click on Save. The file will be saved as an .xml file.
To upload the file on the web portal, follow the procedure in the installation manual.
R5976510 D-CINE COMMUNICATOR 11/04/2006
199
14. Projector Status for DP50
200
R5976510 D-CINE COMMUNICATOR 11/04/2006
15. Projector Status for DP30
15. PROJECTOR STATUS FOR DP30
Overview
•
•
•
•
•
General overview
Status overviews
Projector Log Information
Security log file
Certificates
15.1 General overview
Summary
This interface gives feedback on any item that can be read out in the D-Cine Premiere.
Image 15-1
Projector Status
Check first the Module Status. If the status is indicated in black is everything OK. If some items are indicated in red, follow the description in the next items to find out what is wrong with your projector.
To be sure the projector is ready as Secured platform, check the Interface Board Type. When the board
is a type 3 board, then the projector can operate as a secured platform.
If the card cage inside the projector is open, an error message will be displayed: Tamper-Switch Activated.
R5976510 D-CINE COMMUNICATOR 11/04/2006
201
15. Projector Status for DP30
15.2 Status overviews
Overview
•
•
•
•
•
•
•
•
•
Switch Mode Power Supply status
Lamp Power Supply status
DCDC Controller
Board status
CLO status
Security Card Cage Status
Lens Motor Controller
Lens Info Module
Barco access level
15.2.1 Switch Mode Power Supply status
Status overview
If the Switch Mode Power Supply status is failed, one of the following items must have a red indication:
• SMPS voltages
• Fan speed
• Analog Channels
• Digital Channels
• Projector Temperatures
- Cooler SMPS1
- Cooler SMPS2
- Ambient Output
Image 15-2
Projector status SMPS overview
202
R5976510 D-CINE COMMUNICATOR 11/04/2006
15. Projector Status for DP30
15.2.2 Lamp Power Supply status
Status overview
If the Lamp Power Supply status is failed, one of the following items must have a red indication:
• SMPS voltages
• Fan speed
• Lamp house temperature
Image 15-3
Projector status Lamp power supply overview
15.2.3 DCDC Controller
Status overview
If the DCDC controller is failed. Error messages will be given in the error message pane.
R5976510 D-CINE COMMUNICATOR 11/04/2006
203
15. Projector Status for DP30
Image 15-4
Projector Status DCDC convertor Status
15.2.4 Board status
Status overview
If the Boards Status is failed, check the boards status pane. If one of them is in failed status, information
of the status is given in the log table of the same pane.
204
R5976510 D-CINE COMMUNICATOR 11/04/2006
15. Projector Status for DP30
Image 15-5
Projector Status Boards Status
15.2.5 CLO status
Status overview
CLO status can be OK or failed. When failed, there is a communication error between the CLO device
and the projector controller.
15.2.6 Security Card Cage Status
Status overview
Security card cage status can be OK or failed. When failed, there is a communication error between the
Security card cage and the controller.
15.2.7 Lens Motor Controller
Status overview
If the Lens Motor Controller Status is failed, check the ambient temperature and read the error messages.
R5976510 D-CINE COMMUNICATOR 11/04/2006
205
15. Projector Status for DP30
Image 15-6
Projector Status Lens Motor Controller Status
15.2.8 Lens Info Module
Status overview
The lens info module status can be OK or failed.
15.2.9 Barco access level
Status overview
Value should be 0x04.
When not correct, communication between TI input boards and Barco controller will not work.
When this value is higher, click on the Barco Access Level item. The access level will change to the correct
value (This must be done when a spare TI board was inserted into the projector).
15.3 Projector Log Information
Overview
•
•
•
•
206
Displaying Projector Log Information
Saving the Projector Log File
Refreshing the Projector log information
Clearing the Projector log file
R5976510 D-CINE COMMUNICATOR 11/04/2006
15. Projector Status for DP30
15.3.1 Displaying Projector Log Information
How to display
1. Click on Projector Log File. (image 15-7)
The Projector log file will be retrieved. A reading window will indicate the status. (image 15-8)
When ready, the projector log information will be displayed.
The projector log file contains the following information:
- actions done on the projector
- status indication when projector is in the fail state. (image 15-9)
Image 15-8
Reading the projector log file
Image 15-7
Projector log file selected
Image 15-9
Projector Log information
15.3.2 Saving the Projector Log File
How to save
1. Click on Save. (image 15-10)
Image 15-10
Save the projector log file
15.3.3 Refreshing the Projector log information
How to refresh
1. Click on Refresh. (image 15-11)
The Projector log file will be loaded again. A reading window will indicate the status. (image 15-12)
When ready, the projector log window will be updated.
R5976510 D-CINE COMMUNICATOR 11/04/2006
207
15. Projector Status for DP30
Image 15-12
Image 15-11
Refresh the projector log file
15.3.4 Clearing the Projector log file
How to clear
1. Click on Clear. (image 15-13)
The projector log will be cleared.
Image 15-13
Clear projector log file
15.4 Security log file
Get log file
To get an online security logging, click on Security Log. The software will retrieve the security log information from the projector. When somebody tries to break-in in the projector electronics by opening the card
cage, this action will be logged in the security logging. This security log file cannot be deleted.
208
R5976510 D-CINE COMMUNICATOR 11/04/2006
15. Projector Status for DP30
Image 15-14
Security log selected
Image 15-15
In normal circumstances, this security log file must be empty.
Save to PC
The online security log file can be saved to PC just by clicking Save to file on PC. A save window opens.
Select a location and enter a file name for the logging. Click on Save.
15.5 Certificates
About certificates
Before some productions are authorized to be displayed with a certain projector, the film distributor must
distribute a key to the theatre owners. This key is associated with the projector certificate which will be
available for the film distributors on a web portal.
The certificate file must be uploaded on that web portal during the installation of the projector or after
servicing the Interface board.
R5976510 D-CINE COMMUNICATOR 11/04/2006
209
15. Projector Status for DP30
To get the certificate file
Image 15-16
Certificate selection
To get online a certificate file, click Certificate. A browse window opens. Browse to the desired location,
enter a file name and click on Save. The file will be saved as an .xml file.
To upload the file on the web portal, follow the procedure in the installation manual.
210
R5976510 D-CINE COMMUNICATOR 11/04/2006
16. Projector Status for DP100-DP90
16. PROJECTOR STATUS FOR
DP100-DP90
Overview
•
•
•
General Overview
Status overviews
Certificates
16.1 General Overview
Summary
This interface gives feedback on any item that can be read out in the D-Cine Premiere.
Image 16-1
Projector status
Check first the Board Status. If the status is indicated in black, everything is OK. If some items are indicated in red, follow the description in the next items to find out what is wrong with your projector.
To get an overview of the active files, click on File Active. An overview window will be displayed. For
more information, see chapter "8. File Manager", "Read Files Active", page 146.
To be sure the projector is ready as Secured platform, check the Interface Board Type. When the board
is a type 3 board, then the projector can operate as a secured platform.
If the card cage inside the projector is open, an error message will be displayed: Tamper-Switch Activated.
R5976510 D-CINE COMMUNICATOR 11/04/2006
211
16. Projector Status for DP100-DP90
16.2 Status overviews
Overview
•
•
•
•
•
•
Voltage statuses
Temperature statuses
Fan statuses
Other projector properties
Projector Log file
Security log file
16.2.1 Voltage statuses
Status overview
When one of the voltages are out of specification, the voltage indication will be red.
Image 16-2
Status overview voltages
To see the minimum and maximum allowed value for each item, just click on the + before that item.
16.2.2 Temperature statuses
Status overview
When one of the temperatures are out of specification, the indication will be in red.
212
R5976510 D-CINE COMMUNICATOR 11/04/2006
16. Projector Status for DP100-DP90
Image 16-3
Status overview temperatures
To see the minimum and maximum allowed value for each item, just click on the + before that item.
WARNING: Servicing only allowed by a Barco authorized service technician.
Sensor locations
Image 16-4
Ambient temperature sensor
Image 16-5
Sensors on modules
A Sensor on PFC
B Sensor on heatsink SMPS
R5976510 D-CINE COMMUNICATOR 11/04/2006
213
16. Projector Status for DP100-DP90
Image 16-6
Lamp house sensor
16.2.3 Fan statuses
Status overview
If one of the fans fail, the corresponding indication will be displayed in red.
Image 16-7
Status overview fans
To see the minimum and maximum allowed value for each item, just click on the + before that item.
WARNING: Servicing only allowed by a Barco authorized service technician.
214
R5976510 D-CINE COMMUNICATOR 11/04/2006
16. Projector Status for DP100-DP90
Fan locations
Image 16-8
Cold mirror bottom fan
Image 16-9
Cold mirror top fan
Image 16-10
Fan 1 – 4 elcabox
Image 16-11
Lamp fan cathode
Image 16-12
Lamp fan anode
Image 16-13
Start pulse generator fan
R5976510 D-CINE COMMUNICATOR 11/04/2006
215
16. Projector Status for DP100-DP90
16.2.4 Other projector properties
Overview
Image 16-14
Miscellaneous items
•
•
•
•
•
•
•
•
Lamp run time : expressed in hours. Time lamp is running since first start up.
Lamp strikes : number of strikes since first start up of the lamp.
Barco access level : value should be 0x04. When not correct, communication between TI input boards
and Barco controller will not work. When this value is higher, click on the Barco Access Level item.
The access level will change to the correct value (This must be done when a spare TI board was
inserted into the projector).
Active cooling Red (active - not active) : when active, Peltier cooling is activated for Red DMD.
Active cooling Green (active - not active) : when active, Peltier cooling is activated for Green DMD.
Active cooling Blue (active - not active) : when active, peltier cooling is activated for Blue DMD.
Waterflow: checks if waterflow is possible. See also location waterflow switch (image 16-15).
Outlet air flow : checks if there is air coming out of the outlet.
Image 16-15
Waterflow switch location
216
R5976510 D-CINE COMMUNICATOR 11/04/2006
16. Projector Status for DP100-DP90
16.2.5 Projector Log file
Get log file
To get an online logging, click on Projector Log. The software will retrieve the log information from the
projector. This can take several minutes as the log file can be very large.
Image 16-16
Projector log selection
R5976510 D-CINE COMMUNICATOR 11/04/2006
217
16. Projector Status for DP100-DP90
Image 16-17
Projector log
Save to PC
The online log file can be saved to PC just by clicking Save to PC. A save window opens. Select a location
and enter a file name for the logging. Click on Save.
16.2.6 Security log file
Get log file
To get an online security logging, click on Security Log. The software will retrieve the security log information from the projector. When somebody tries to break-in in the projector electronics by opening the card
cage, this action will be logged in the security logging. This security log file cannot be deleted.
218
R5976510 D-CINE COMMUNICATOR 11/04/2006
16. Projector Status for DP100-DP90
Image 16-18
Security log selection
R5976510 D-CINE COMMUNICATOR 11/04/2006
219
16. Projector Status for DP100-DP90
Image 16-19
Security log
In normal circumstances, this security log file must be empty.
Save to PC
The online security log file can be saved to PC just by clicking Save to file on PC. A save window opens.
Select a location and enter a file name for the logging. Click on Save.
16.3 Certificates
About certificates
Before some productions are authorized to be displayed with a certain projector, the film distributor must
distribute a key to the theatre owners. This key is associated with the projector certificate which will be
available for the film distributors on a web portal.
The certificate file must be uploaded on that web portal during the installation of the projector or after
servicing the Interface board.
220
R5976510 D-CINE COMMUNICATOR 11/04/2006
16. Projector Status for DP100-DP90
To get the certificate file
Image 16-20
Get certificate file
To get online a certificate file, click Certificate. A browse window opens. Browse to the desired location,
enter a file name and click on Save. The file will be saved as an .xml file.
To upload the file on the web portal, follow the procedure in the installation manual.
R5976510 D-CINE COMMUNICATOR 11/04/2006
221
16. Projector Status for DP100-DP90
222
R5976510 D-CINE COMMUNICATOR 11/04/2006
17. Version Info
17. VERSION INFO
Overview
•
Version Information
17.1 Version Information
Overview
The Version Information pane gives an overview of the firmware versions used in the boards.
The following boards are listed:
• E2 Formatter Board
• Interface Board
• Modules/Devices
• Processor Board
• SMPS & Fan Ctrl settings
• Touch Panel menu structure
• Touch Panel Software
Image 17-1
Version information
R5976510 D-CINE COMMUNICATOR 11/04/2006
223
17. Version Info
224
R5976510 D-CINE COMMUNICATOR 11/04/2006
18. Macro Editor
18. MACRO EDITOR
Overview
•
•
•
•
Create a new Macro
Save a Macro
Edit a Macro file
Edit the attributes (values) of the items
18.1 Create a new Macro
How to create
1. Click on Create new macro. (image 18-1)
A message will be displayed. (image 18-2)
2. Click Yes to create a new macro.
The current settings will not be saved.
A new macro file will be created. The macro editor will be displayed without any command filled out.
3. Insert the desired commands.
4. Enter a new name for the macro.
5. Click on Save/Exit to save your new created macro.
The macro will be added to the list of macro files.
Image 18-1
Create new macro
Image 18-2
Create new macro message
18.2 Save a Macro
Save macro with same name
1. When a macro has already a name, just click on Save/Exit. (image 18-3)
The macro will be saved and the macro editor will be closed.
R5976510 D-CINE COMMUNICATOR 11/04/2006
225
18. Macro Editor
Image 18-3
Save macro
Save macro on a different name
1. Click in the Macro name input field. (image 18-3)
2. Delete the actual indicate name and enter a new name with your keyboard.
3. Click on Save/Exit.
The macro will be saved with the new name and the macro editor will be closed.
18.3 Edit a Macro file
18.3.1 Selecting a Macro file
How to select
1. Right click on a file in the macro file list (this list is visible after clicking Change in Projector Configuration
section Opto isolated GPI or after starting the configuration panel of the Automation tab or in the Internal
File system list, Macro view in File Manager) and select Edit Macro file or for DP100/DP90 click on
Edit Macro in the Automation tab after moving your mouse over a button. (image 18-4)
The macro editor window starts up with the selected macro in edit mode. (image 18-5)
Image 18-4
Edit a macro
226
R5976510 D-CINE COMMUNICATOR 11/04/2006
18. Macro Editor
Image 18-5
Macro editor window
18.3.2 Delete a command out of a macro file
How to delete
1. Select the item that has to be deleted and push delete on your keyboard.
Or,
right click on that item.
A delete pop up menu appears. Select delete. (image 18-6)
Image 18-6
Delete item
18.3.3 Add commands to a macro file
How to add
1. To insert an item, click first the a command set tab to which that item belongs.
R5976510 D-CINE COMMUNICATOR 11/04/2006
227
18. Macro Editor
The following commands tabs are available:
- Input control
- Preset files
- Test pattern
- Output
- Automation
- Error handling (image 18-7)
The selected tab opens and the commands become available.
2. Select a command and click Insert –>. (image 18-8)
The inserted command will be added as last one in the list. (image 18-9)
Image 18-7
Available commands
Image 18-8
Inserting a command
Image 18-9
Insertion result
18.3.4 Change the order of the Macro commands
How to change
1. Click on an item and hold down the mouse button. (image 18-10)
228
R5976510 D-CINE COMMUNICATOR 11/04/2006
18. Macro Editor
2. Move your mouse up or down until the desired position is reached for the selected item.
Image 18-10
Change macro file list
18.4 Edit the attributes (values) of the items
Overview
•
•
•
•
•
•
•
Input Control
Preset files
Test pattern
Output
ACSAR2
Automation
Error handling
18.4.1 Input Control
18.4.1.1 Select input
What will be done?
This command sets the active input to a certain port.
How to select
1. Click on Select input.
The right pane shows an overview of the possible inputs. (image 18-11)
This overview is different for DP30 – DP50 and DP100 – DP90.
2. Click on the radio button in front of the port you want to select.
R5976510 D-CINE COMMUNICATOR 11/04/2006
229
18. Macro Editor
Image 18-11
Select input command
18.4.1.2 Select input path (only for DP100-DP90)
What will be done?
This command sets the DVI-A path for Cine input (projector DVI-A input) or for the output of the ACSAR2.
How to select
1. Click on Select input.
The right pane shows an overview of the possible inputs. (image 18-12)
2. Click on the radio button in front of the path you want to select.
Cine input path
External DVI is routed to the projector
ACSAR input
port
ACSAR inputs are routed to the projector
Image 18-12
Select input path command
230
R5976510 D-CINE COMMUNICATOR 11/04/2006
18. Macro Editor
18.4.1.3 Processing path
What can be done?
The processing path for the incoming signals can be set to standard processing or cinema processing.
When set to automatic, the projector itself detects the correct path.
How to select
1. Click on Processing path.
The right pane shows an overview of the possible paths. (image 18-13)
2. Click on the drop down box.
The possible choices become available.
3. Click on the desired processing path.
Standard
processing
Standard processing has no scaling, no resizing, and no anamorphic lens
factor.
Cinema
processing
Cinema processing contains the following functionality : image scaling,
3:2 pull down functionality, SMPTE291 embedded data, LUT’s for analog,
de-gamma and color correction. However, contrast and brightness settings
are only applicable for standard processing (non-cinema processing).
Automatic
The projector makes the choice itself depending on the input frequency.
For a Vertical Rate between 23 and 61 Hz it will select the Cinema processing
path.
For a Vertical Rate higher than 61 Hz it will select the Standard processing
path.
Image 18-13
Processing path command
18.4.1.4 SMPTE292 packing
What can done ?
The source format can be selected for SMPTE292 A and SMPTE292 B.
How to select
1. Click on SMPTE292 A Packing or SMPTE292 B packing.
R5976510 D-CINE COMMUNICATOR 11/04/2006
231
18. Macro Editor
The right pane shows an overview of the possible packings (source formats). (image 18-14)
2. Click on the drop down box.
The possible choices become available.
3. Click on the desired packing
The following packings are supported:
- Standard 4:2:2
- Non-Standard 4:2:2 12 bits/color
- Non-Standard 4:2:2 10 bits/color
- Non-Standard 4:4:4 12 bits/color
Image 18-14
SMPTE292 packing command
18.4.1.5 SMPTE 292 dual packing
What can done ?
The source format can be selected for SMPTE292 dual.
For the moment, only a default format is available.
How to select
1. Click on SMPTE292 Dual Packing.
232
R5976510 D-CINE COMMUNICATOR 11/04/2006
18. Macro Editor
The right pane shows an overview of the possible packings (source formats). (image 18-15)
Only the following format is supported:
- Default :4:4:2 Packed 10 bits/color
Image 18-15
SMPTE292 dual packing command
18.4.1.6 DVI packing
What can done ?
The source format can be selected for DVI A (all projectors) and DVI B (only DP100-DP90).
How to select
1. Click on DVI A Packing or on DVI B Packing. (image 18-16)
The right pane shows an overview of the possible packages (source formats).
2. Click on the drop down box.
The possible choices become available.
3. Select the desired format.
The following format are supported:
- Standard 8 bits/color
- 10 bits/color, packed
- 12 bits/color, packed
R5976510 D-CINE COMMUNICATOR 11/04/2006
233
18. Macro Editor
Image 18-16
DVI A packing command
18.4.1.7 DVI Dual packing
What can done ?
The source format can be selected for DVI dual (only DP100-DP90).
How to select
1. Click on DVI Dual. (image 18-17)
The right pane shows an overview of the possible packages (source formats).
2. Click on the drop down box.
The possible choices become available.
3. Select the desired format.
The following format are supported:
- 10 bits/color Dual
- 10 bits/color, Twin
Image 18-17
DVI A packing command
234
R5976510 D-CINE COMMUNICATOR 11/04/2006
18. Macro Editor
18.4.2 Preset files
18.4.2.1 Activate PCF file
What can be done ?
The active PCF file can be installed in the projector via the Activate PCF file command.
How to select a file
1. Click on Activate PCF file. (image 18-18)
The right pane shows the actual selected file.
2. Click on Select files.
A files overview window will be displayed. (image 18-19)
3. Select the desired file out of the list and click Select.
Or,
double click on the desired file.
The selected file name appears next to Filename.
Image 18-18
Activate File command
Image 18-19
Active file selection
R5976510 D-CINE COMMUNICATOR 11/04/2006
235
18. Macro Editor
It is also possible to click in the Filename input field and enter an existing file name with
the keyboard.
18.4.2.2 Activate SCREEN file
What can be done ?
The active SCREEN file (contains information about the screen configuration) can be installed in the projector via the Activate SCREEN file command.
How to select a file
1. Click on Activate SCREEN file. (image 18-20)
The right pane shows the actual selected file.
2. Click on Select files.
A files overview window will be displayed. (image 18-21)
3. Select the desired file out of the list and click Select.
Or,
double click on the desired file.
The selected file name appears next to Filename.
Image 18-20
Activate SCREEN File command
236
R5976510 D-CINE COMMUNICATOR 11/04/2006
18. Macro Editor
Image 18-21
Active SCREEN file selection list
It is also possible to click in the Filename input field and enter an existing file name with
the keyboard.
18.4.2.3 Activate EXTRA file
What can be done ?
The active EXTRA file (can contains information about the source settings, 3D settings, etc., information
not included in other files) can be installed in the projector via the Activate EXTRA file command.
How to select a file
1. Click on Activate EXTRA file. (image 18-22)
The right pane shows the actual selected file.
2. Click on Select files.
A files overview window will be displayed. (image 18-23)
3. Select the desired file out of the list and click Select.
Or,
double click on the desired file.
The selected file name appears next to Filename.
R5976510 D-CINE COMMUNICATOR 11/04/2006
237
18. Macro Editor
Image 18-22
Activate EXTRA File command
Image 18-23
Active EXTRA file selection list
It is also possible to click in the Filename input field and enter an existing file name with
the keyboard.
238
R5976510 D-CINE COMMUNICATOR 11/04/2006
18. Macro Editor
18.4.2.4 Activate MCGD file
What can be done ?
The active MCGD file (contains color calibration information) can be installed in the projector via the Activate MCGD file command.
How to select a file
1. Click on Activate MCGD file.
The right pane shows the actual selected file. (image 18-24)
2. Click on Select files.
A files overview window will be displayed. (image 18-25)
3. Select the desired file out of the list and click Select.
Or,
double click on the desired file.
The selected file name appears next to Filename.
Image 18-24
Activate MCGD file command
R5976510 D-CINE COMMUNICATOR 11/04/2006
239
18. Macro Editor
Image 18-25
Activate MCGD file selection list
It is also possible to click in the Filename input field and enter an existing file name with
the keyboard.
18.4.2.5 Activate ACSAR 2 layout file
What can be done
When an ACSAR 2 is connected and the ACSAR 2 path is selected, the window (inputs) layout can be
loaded via a macro.
How to load a layout file
1. Click on Active ACSAR 2 layout file
The right pane shows the actual selected layout file. (image 18-26)
2. To change the actual file, click on Select file.
The Open a layout file window opens. (image 18-27)
3. Select a file out of the list and click OK.
The selected file comes in the Layout Filename field.
240
R5976510 D-CINE COMMUNICATOR 11/04/2006
18. Macro Editor
Image 18-26
Activate ACSAR 2 layout file
Image 18-27
Select layout file
18.4.2.6 Activate ACSAR 2 Input file
How to activate
1. Click on Activate A2 Input file.
The right pane shows the actual selected input and selected input file for this input. (image 18-28)
2. Select an input.
3. Click on Select file.
The file list opens. (image 18-29)
4. Select a file and click OK.
The name of the file will be filled out next to Input FileName.
R5976510 D-CINE COMMUNICATOR 11/04/2006
241
18. Macro Editor
Image 18-28
Load input file
Image 18-29
Input file selection
18.4.2.7 Auto load ACSAR2 input file
How to enable
1. Click on Auto load input.
The right pane shows the actual setting. (image 18-30)
2. Click on the desired radio button to switch between automatic file load on or off.
242
R5976510 D-CINE COMMUNICATOR 11/04/2006
18. Macro Editor
Image 18-30
Auto load file
18.4.3 Test pattern
18.4.3.1 Enable test pattern
What can be done ?
A test pattern which is stored in a file can be enabled.
How to select a test pattern
1. Click on Enable test pattern. (image 18-31)
The right pane shows the actual selected test pattern file.
2. Click on Select testpattern.
The test pattern selection window opens. (image 18-32)
3. Select a file and click Select.
The selected file will be filled out in the Testpattern Filename field.
Image 18-31
Enable test pattern selection
R5976510 D-CINE COMMUNICATOR 11/04/2006
243
18. Macro Editor
Image 18-32
Test pattern file selection
18.4.3.2 Disable test pattern
To disable
Insert the command in the macro list. All actual test patterns will be disabled.
Image 18-33
Disable test pattern
18.4.4 Output
18.4.4.1 Lamp control
What can be done ?
The lamp can be switched on or off via this macro command.
How to switch the lamp
1. Click on Lamp control. (image 18-34)
The right pane shows the selection buttons.
2. Select the radio button of your choice.
244
R5976510 D-CINE COMMUNICATOR 11/04/2006
18. Macro Editor
lamp on
lamp will be switched on
lamp off
lamp will be switched off
Image 18-34
Lamp control command
18.4.4.2 Dowser control
What can be done ?
The dowser can be closed or opened via this macro command.
How to switch the dowser
1. Click on Lamp control. (image 18-35)
The right pane shows the selection buttons.
2. Select the radio button of your choice.
Open dowser
dowser will be opened
Close dowser
dowser will be closed
Image 18-35
Dowser control command
R5976510 D-CINE COMMUNICATOR 11/04/2006
245
18. Macro Editor
18.4.4.3 Set the execution delay for a ’blank image’
What can be done ?
The image can be electronically be blanked after a certain delay time.
How to set
1. Click on Blank Image Output. (image 18-36)
The right pane shows the execution delay input field. The value is expressed in milliseconds.
2. Click on the up or down arrows to change the value. The value change in steps of 10.
Or,
click in the input field and enter the desired value with the keyboard.
Image 18-36
Black image output command
18.4.4.4 Set the execution delay for a ’deblank image output’
How to set
1. Click on Deblank Image Output. (image 18-37)
The right pane shows the execution delay input field. The value is expressed in milliseconds.
2. Click on the up or down arrows to change the value. The value change in steps of 10.
Or,
click in the input field and enter the desired value with the keyboard.
246
R5976510 D-CINE COMMUNICATOR 11/04/2006
18. Macro Editor
Image 18-37
Deblank image command
18.4.5 ACSAR2
18.4.5.1 Input mode
What can be done ?
When an input module (slot) has different working modes, these modes can be set with the Input Mode
command in a macro.
How to select ?
1. Click on Input mode. (image 18-38)
The right pane shows an overview of the possible inputs.
2. Select the desired input by clicking on the corresponding radio button.
The actual mode will be displayed in the combo box below the selection.
3. Click on the combo box and select the desired mode.
R5976510 D-CINE COMMUNICATOR 11/04/2006
247
18. Macro Editor
Image 18-38
Input mode selection
18.4.5.2 Input Locking
What can be done?
The output signal can be locked on an internal generated sync signal or on the sync signal of one of the
input sources. Locking the output signal on an input signal can be required if motion artifacts occurs in
that window or if frame delay for that input has to be set to zero.
How to select ?
1. Click on Input Locking. (image 18-39)
The right pane show the possible inputs and shows also if a lock was set or not.
2. To lock to an input, select first the radio button in front of the desired input.
3. Select the radio button in front of Locked.
The output will be locked on the selected input.
248
R5976510 D-CINE COMMUNICATOR 11/04/2006
18. Macro Editor
Image 18-39
Input locking
If no locking is desired, click on the radio button in front of unlocked.
18.4.6 Automation
18.4.6.1 GPO control
What can be done ?
A function can be associated to a general purpose output.
How to add a function
1. Click on GPO Control. (image 18-40)
The right pane shows a GPO selection box and function box.
2. Click on the drop down box next to Output.
3. Select a GPO out of the list.
4. Click on the drop down box next to Function to associate a function to the selected Output. (image 18-41)
Possible functions:
- Set low
- Set high
- Toggle
- Continuos toggle
R5976510 D-CINE COMMUNICATOR 11/04/2006
249
18. Macro Editor
Image 18-40
GPO control command
Image 18-41
GPO functions
18.4.7 Error handling
18.4.7.1 Error handling
How to handle errors
1. Click on Error handling. (image 18-42)
The right pane shows the possible error handlings.
2. Click on the radio button next to your choice.
Possible choices :
- Halt macro exception. Indicate as failed.
- Continue macro execution. Indicate as failed.
- Continue macro execution. Indicate as passed.
250
R5976510 D-CINE COMMUNICATOR 11/04/2006
18. Macro Editor
Image 18-42
Error handling command
R5976510 D-CINE COMMUNICATOR 11/04/2006
251
18. Macro Editor
252
R5976510 D-CINE COMMUNICATOR 11/04/2006
19. D-Cine Communicator Log information
19. D-CINE COMMUNICATOR LOG
INFORMATION
19.1 Log information window
Overview
The logging of the D-Cine Communicator register all information about actions, errors and statuses while
D-Cine Communicator is connected to the projector.
Image 19-1
Log view
The following information is given:
• Line number with importance icon in front of it.
• Date and time when the registration happened
• Type of logging
- W = warning
- I = info
- E = error
- F = fatal
• Message
The logging can be sorted by clicking in an item in the title area.
This D-Cine Communicator logging can also be found as file log.txt in the same directory
as those where the program is installed
R5976510 D-CINE COMMUNICATOR 11/04/2006
253
19. D-Cine Communicator Log information
254
R5976510 D-CINE COMMUNICATOR 11/04/2006
20. Help Function
20. HELP FUNCTION
Overview
•
•
Introduction
Using help
20.1 Introduction
How is the help structured
Most items on the tab pages contains online help which will pop up while dragging with the help icon on it.
For the tab pages, the help icon is situated on the right upper corner on the same level of the tab bar.
For the pop up pages, the help icon is situate next to the close icon in the window heading.
20.2 Using help
How to use help
1. Click first on the help icon (indicated with a ?).
icon on the tab pages.
A question mark will be added to the cursor.
2. Drag your cursor over the item for which you want to see help. (image 20-1)
3. Click on that item.
A yellow help pop up window will appear with a short description of the function. (image 20-2)
Image 20-1
Help on item
Image 20-2
Yellow help window
R5976510 D-CINE COMMUNICATOR 11/04/2006
255
20. Help Function
256
R5976510 D-CINE COMMUNICATOR 11/04/2006
21. ACSAR 2
21. ACSAR 2
Overview
•
•
•
•
•
•
•
•
•
General introduction
Create a new layout
Edit an existing layout
Renaming a layout
Deleting a layout
Windowing
Settings
Input slot configuration
Input locking
21.1 General introduction
Overview
With the ACSAR 2 it is possible to connect up to four sources which can be mixed to one image. Each
source is displayed in a separate window on which z-ordering is possible. The window size, timings and
other settings can be set up for each source independently.
The result image is internally connected to the projector.
Window
A window represents the active area of an input source.
Layout
A layout is a collection of windows. These windows are placed on a certain position within the
screen.
21.2 Create a new layout
How to create
1. Click on Layout file on the menu bar (1). (image 21-1)
The menu drops down.
2. Select Open(1).
An overview window with the existing layout files will be displayed (2).
3. Select a file out of the list (3) and click Open (4) .
The selected layout will be loaded (5).
4. Change this layout to the desired one.
5. Save this layout into a new file by selecting Layout file → Save as. (image 21-2)
6. Click in the Filename input field and enter a new name for the layout. (image 21-3)
7. Click on Save.
R5976510 D-CINE COMMUNICATOR 11/04/2006
257
21. ACSAR 2
The new layout will be saved.
Image 21-1
Create new layout
Image 21-2
Save as layout
Image 21-3
21.3 Edit an existing layout
How to edit
1. Click on Layout file on the menu bar.
The menu drops down.
2. Select Open.
An overview window with the existing layout files will be displayed.
258
R5976510 D-CINE COMMUNICATOR 11/04/2006
21. ACSAR 2
3. Select the file you want to edit out of the list and click Open.
The selected layout will be loaded.
4. Edit the layout.
5. Save the layout by selecting Layout file → Save. (image 21-4)
The layout will overwrite the exiting one.
Image 21-4
Save layout
21.4 Renaming a layout
How to rename
1. Click on Layout file on the menu bar. (image 21-5)
The menu drops down.
2. Select Rename(1).
The layout file selection window opens (2).
3. Select the layout file you want to rename (3).
4. Click on Rename (4).
The rename window opens (5).
5. Click in the filename input field (6) and enter a new name for the layout.
6. Click on OK to rename (7).
R5976510 D-CINE COMMUNICATOR 11/04/2006
259
21. ACSAR 2
Image 21-5
Rename layout file
21.5 Deleting a layout
How to delete
1. Click on Layout file on the menu bar. (image 21-6)
The menu drops down.
2. Select Delete (1).
The layout file selection window opens (2).
3. Select the layout file you want to delete (3).
4. Click on Delete (4).
The Delete confirmation window opens (5).
5. Click on OK to delete the file (6).
Click on No, cancel this action to interrupt the deletion process.
260
R5976510 D-CINE COMMUNICATOR 11/04/2006
21. ACSAR 2
Image 21-6
Delete layout
21.6 Windowing
Overview
•
•
•
•
•
•
•
Window selection
Enabling or disabling a Window
Moving Windows
Scaling Windows
Z-order
Full size
Aspect Ratio
21.6.1 Window selection
When a certain window is not visible in the layout pane, that means that the window is
disabled.
Each input corresponds with one window in the layout pane.
Using the mouse
1. Move your mouse over the window you want to select.
2. Click with the left mouse button on that window.
The border color changes to yellow. (image 21-7)
R5976510 D-CINE COMMUNICATOR 11/04/2006
261
21. ACSAR 2
Image 21-7
Select a window
Using the menu bar
1. Click View to pull down the selection menu. (image 21-8)
The input selection menu opens.
2. Select the window (input) your want to activate.
The border color of the selected window in the layout pane changes to yellow.
Image 21-8
Window selection via menu bar
Using the function keys
1. Click on the corresponding function key to activate the window.
262
R5976510 D-CINE COMMUNICATOR 11/04/2006
21. ACSAR 2
F1
Input 1
F2
Input 2
F3
Input 3
F4
Input 4
The border color of the selected window in the layout pane changes to yellow.
21.6.2 Enabling or disabling a Window
How to disable a window
1. Select the window. (image 21-9)
The border colors will change to yellow
2. Remove the checked symbol next to enable by clicking on it.
The window representation will be removed from the layout pane.
Image 21-9
Disabling a window
How to enable a window
1. Select the window you want to enable via the menu bar or the function keys. (image 21-10)
The window indication changes to that corresponding window and the enable box in not checked.
2. Check the enable box.
The window representation appears in the layout pane.
R5976510 D-CINE COMMUNICATOR 11/04/2006
263
21. ACSAR 2
Image 21-10
Enabling a window
21.6.3 Moving Windows
Moving via drag and drop
1. Click on the window you want to move. (image 21-11)
The border changes to yellow and the cursor changes to a four arrow cursor.
2. Hold down the mouse button to grab the selected window.
3. Move the window to the required position. The coordinates in the right pane will change accordingly.
Image 21-11
Moving windows
Moving via the coordinates
1. Select the window you want to move.
2. Change the X and Y value indicating the actual start position of the window by clicking on the + or keys (image 21-12)
Or,
by entering a new value with the keyboard.
264
R5976510 D-CINE COMMUNICATOR 11/04/2006
21. ACSAR 2
Image 21-12
Move window via coordinates
21.6.4 Scaling Windows
Scaling via drag and drop
1. Click on the window you want to scale. (image 21-13)
The border changes to yellow and the cursor changes to a four arrow cursor.
2. Move your cursor to corner.
The cursor changes in a two arrow cursor.
3. Hold down your mouse button and drag the corner to the desired position to down-scale or upscale
the selected window. The coordinates of the selected window will be automatically adjusted in the right
pane.
Image 21-13
Scaling windows via drag and drop
Scaling via the height and width
1. Select first the window you want to scale. (image 21-14)
2. Change the width and height value by pushing the + or - button
Or,
by entering the new values with the keyboard.
Note: The upper left corner is fixed during the scaling.
R5976510 D-CINE COMMUNICATOR 11/04/2006
265
21. ACSAR 2
Image 21-14
Scaling via Width of Height
21.6.5 Z-order
Z-order
The layer sequence in which windows will be displayed in relation to one another.
How to order
1. Select the window you change the order.
The border changes to yellow and the cursor changes to a four arrow cursor.
2. Change the Z-value in the right pane by clicking on the + or - button (image 21-15)
Or,
by entering the desired value with the keyboard.
Image 21-15
Z-order
The higher the value, the more the window is in front.
21.6.6 Full size
How to reset to full size
1. Select the window you want to size to full size. (image 21-16)
266
R5976510 D-CINE COMMUNICATOR 11/04/2006
21. ACSAR 2
The border changes to yellow and the cursor changes to a four arrow cursor.
2. Click on the full size button. (image 21-17)
The selected window will be reset to the full size of the DMD.
Image 21-16
Select a window to scale
Image 21-17
Reset to full size
21.6.7 Aspect Ratio
Aspect ratio
Relation between the horizontal & vertical dimension in which the window will be displayed,
e.g. 4 by 3 or 16 by 9.
How to change
1. Select the window of which you want to change the aspect ratio.
The border changes to yellow and the cursor changes to a four arrow cursor.
2. Right click on the selected window and select the desired aspect ratio. (image 21-18)
R5976510 D-CINE COMMUNICATOR 11/04/2006
267
21. ACSAR 2
Or,
click on the aspect ratio icon and select the desired aspect ratio. (image 21-19)
Possible aspect ratios
- 3/2
- 4/3
- 14/9
- 16/9
- 21/9
- 1.85 flat
- 2.35 scope
- snap to current : fix the current aspect ratio what ever it is.
- none : no fixed aspect ratio
When a fixed aspect ratio is selected, the width and height will be coupled in the value pane. (image 21-20)
Image 21-19
Aspect ratio via button
Image 21-18
Aspect ratio via right click
Image 21-20
Fixed aspect ratio
selected
21.7 Settings
Overview
•
•
•
•
•
•
•
•
•
268
Introduction
Load a file
Save a file
Save all file
Rename a file
Delete a file
Auto Load Enabled
Image Settings
Input Settings
R5976510 D-CINE COMMUNICATOR 11/04/2006
21. ACSAR 2
21.7.1 Introduction
Overview
With each input source corresponds a source file which contains the settings for this typical source. If
there is not yet a source file available, the system can search for the most fitting file or you can associate
a file yourself. This file can then be edited and saved under a new name.
Types of source files
When opening the list of source files, you will recognize 2 types of source files :
•
•
system source files
custom source files
The custom source files which have the same name of the system source files are indicated with a index
number between brackets.
21.7.2 Load a file
How to load a file
1. Select a window. (image 21-21)
The input number and the associated file name will be indicated in the settings pain.
2. Click on Input File on the menu bar and select Load [All] (1) or Load [Fit] (1). (image 21-22, image 21-23)
The Open an input file window opens (2).
When the following is selected :
Load file [All]
All available files will be displayed in the Open an input file window.
Load file [Fit]
Only the best fitting files will be displayed in the Open an input file window.
Or,
push CTRL + L for Load file [Fit] or push CTRL + S for Load file [All].
3. Select the desired file (3) and click on Open (4).
When a system file is selected, the software will ask to create a custom file with the same name, followed
with a next possible index. When OK is selected the settings of the system file will be copied into this
new file. (image 21-24)
The settings of the selected file will be loaded.
R5976510 D-CINE COMMUNICATOR 11/04/2006
269
21. ACSAR 2
Image 21-21
File association
270
R5976510 D-CINE COMMUNICATOR 11/04/2006
21. ACSAR 2
Image 21-22
Load file [All]
Image 21-23
Load file [fit]
Image 21-24
Load file message
R5976510 D-CINE COMMUNICATOR 11/04/2006
271
21. ACSAR 2
21.7.3 Save a file
How to save
1. Click on Input File on the menu bar and select Save. (image 21-25)
The settings of the actual input will be saved.
Image 21-25
Save actual settings
21.7.4 Save all file
How to save all files
1. Click on Input File on the menu bar and select Save all. (image 21-26)
The settings of the 4 active input files which are associated with the 4 inputs will be saved.
Image 21-26
Save all files
21.7.5 Rename a file
How to rename
1. Click on Input File on the menu bar and select Rename (1). (image 21-27)
The Select Input File to rename window opens (2).
2. Select a file (3) and click on Rename (4).
The rename window opens (5).
3. Click in the input field (6) and enter the new file name.
4. Click on OK (7).
272
R5976510 D-CINE COMMUNICATOR 11/04/2006
21. ACSAR 2
Image 21-27
Rename input file
21.7.6 Delete a file
How to delete
1. Click on Input File on the menu bar and select Delete (1). (image 21-28)
The Select Input File to delete window opens (2).
2. Select an input file (3) and click on Delete (4).
The delete input file confirmation window opens (5).
3. Click Yes to delete.
Image 21-28
Delete input file name
R5976510 D-CINE COMMUNICATOR 11/04/2006
273
21. ACSAR 2
21.7.7 Auto Load Enabled
What can be done ?
When this function is enabled, the ACSAR 2 will create by itself a new custom file when it detects a relevant
input signal.
How to enable ?
1. Click on Input File on the menu bar and check Auto Load Enabled (1).
A check mark will appear in the box just before the Auto Load Enabled item.
21.7.8 Image Settings
Overview
The following image settings can be adjusted depending on the source type :
• Contrast
• Brightness
• Phase
• Sharpness
• Saturation
When a setting is not adjustable, this setting will be grayed out.
Adjusting via dragging
1. Click on the slider bar of the specific adjustment. (image 21-29)
The complete slider bar will be selected within a rectangle.
2. Move the slider up or down until the desired value for that specific adjustment is reached.
The value below the adjustment will change accordingly.
Image 21-29
Adjusting via dragging
Adjusting via the up and down keys
1. Click on the up or down arrow keys until the desired value is reached.
The value next to the arrow keys will change accordingly.
Adjusting via the input box
1. Click inside the value input box.
2. Select the actual value and enter a new value with your keyboard.
21.7.9 Input Settings
How to change
1. Click on the Input settings tab.
274
R5976510 D-CINE COMMUNICATOR 11/04/2006
21. ACSAR 2
The input settings values will be displayed
2. Click in the input field of a setting and change the value with the keyboard.
Or,
click on the up or down arrow key to change the value.
3. When the source is Interlaced, check the check box in front of Interlaced.
4. Select Single or dual path.
How to find the correct values for the item in the Input File?
Hor. line
Active pixels
Hor. start pixel
Hor. Total pixels
Frame
Active lines
Vert. Start Line
Vert. Total lines
Image 21-30
Input file items
Horizontal Total
Pixels
If the value for "Horizontal Total Pixels" is wrong, sampling mistakes (small
vertical bars in the projected image) will be seen in the image.
Select "Total" and adjust the pixel quantity. Adjust for zero bars.
hint: if the number of bars increase, adjust in the other direction.
Active Pixels
The "Active Pixels" : determine the width of the window on the screen. This value
is normally given in the source specifications. If not, adjust until full image is
displayed (no missing pixels).
Horizontal Start
Pixel
number of pixels between the start of the sync signal and the start of the video
information.
Vertical Total
Lines
already filled when an active file is selected to be edited
Vertical Active
Lines
number of horizontal lines determining the height of the projected image. This
value is normally given in the specification of the source. If not, adjust until full
image height is displayed (no missing lines)
R5976510 D-CINE COMMUNICATOR 11/04/2006
275
21. ACSAR 2
Vertical Start Line
number of lines between the start of the sync signal and the start of the video
information.
Interlaced
this selection is automatically filled out when file has loaded. If the image is wrong
due to mismeasurement, check or leave the check box blank before interlace.
(for interlaced images, 1 frame contains 2 fields).
Horizontal Period
already filled in with the correct value when active file.
Horizontal period = Horizontal Total pixels / clock frequency
21.8 Input slot configuration
What can be done ?
Each of the input slots can be configured with the correct setting.
How to configure ?
1. Click on Installation and select Input slots. (image 21-31)
The Input slots configuration menu appears. (image 21-32)
2. Click on the drop down box next to the slot which must be configured.
3. Select the desired configuration.
When all configuration are finished, click on OK.
Image 21-31
Input slots selection
Image 21-32
Input slots configuration
21.9 Input locking
What can be done ?
The output signal can be locked on an internal generated sync signal or on the sync signal of one of the
input sources. Locking the output signal on an input signal can be required if motion artifacts occurs in
that window or if frame delay for that input has to be set to zero.
How to set up?
1. Click on Locking. (image 21-33)
A drop down menu opens with the possible inputs. The locked input is indicated with a check sign.
2. Click on the input on which the output must be locked.
Note: To remove a lock, click on the locked input.
276
R5976510 D-CINE COMMUNICATOR 11/04/2006
21. ACSAR 2
The lock will be set and the menu disappears.
Image 21-33
Locking input
R5976510 D-CINE COMMUNICATOR 11/04/2006
277
21. ACSAR 2
278
R5976510 D-CINE COMMUNICATOR 11/04/2006
A. Updating TI boards
A. UPDATING TI BOARDS
A.1
Installation of the Update Package
How to install?
1. Download the Update package from the Barco Partnerzone and copy this file (.zip format) into a new
directory.
2. Unzip the package file into this directory. (image A-1)
The directory contains:
- An update program file (.exe)
- Software update file (.dlpcinema)
- read me and instruction files (.txt and .doc)
- a configuration files directory containing configuration files.
- a recovery files directory containing recovery files.
- a processor board binary files directory with binary files for the processor board.
- an interface board binary files directory with binary files for the interface board.
- a formatter sub system directory.
Image A-1
Unzipped package file
A.2
Start up the update program
How to start up ?
1. Browse to the installation directory of the TI update software.
2. Double click on DLP Cinema(TM) Firmware Installation Program v2.01(12).exe to start up the update
program.
Note: The version indication in the startup file can be different for other releases.
R5976510 D-CINE COMMUNICATOR 11/04/2006
279
A. Updating TI boards
The start up window will be displayed. (image A-2)
Image A-2
Start up of update program
A.3
Make a connection
A.3.1
Type of connections
Overview
The TI software update can be done in two ways:
• Via a serial connection
• Via an Ethernet connection
A.3.2
Serial connection
Necessary parts
A fully wired straight serial cable
280
R5976510 D-CINE COMMUNICATOR 11/04/2006
A. Updating TI boards
Physical connection
Image A-3
Physical indication of RS232/422 connector on DP50
Image A-4
Physical indication of RS232/422 connector on DP30
Image A-5
Physical indication of RS232/422 connector on DP100-DP90
Software connection
1. Select first the PC com-port by clicking on the combo box just below PC com-port # (1). (image A-6)
2. Select the baud rate by clicking on the combo box just below Baud Rate (2).
3. Check the radio button in front of Serial Port (3).
The connection will be established. A login message will be displayed. Click OK to continue.
4. Enter the userid and password. (image A-7)
R5976510 D-CINE COMMUNICATOR 11/04/2006
281
A. Updating TI boards
Defaults are:
- User Id: Service
- Password: Heal Thyself
Both are case sensitive.
When correct, the Current Projector Info of the selected projector will be filled out.
Image A-6
Serial connection setup
A.3.3
Image A-7
Login window
Ethernet connection
Physical connection
Image A-8
Physical indication of Ethernet connection on DP50
Image A-9
Physical indication of Ethernet connection on DP30
282
R5976510 D-CINE COMMUNICATOR 11/04/2006
A. Updating TI boards
Image A-10
Physical indication of Ethernet connection on DP100-DP90
For DP30 and DP50, a crossed Ethernet cable is necessary.
For DP100-DP90, a crossed or non crossed cable can be used. the projector switched
automatically for the correct cable.
The PC’s IP Address MUST be within the same subnet as the projector’s IP Address in
order for communication to be possible. This requires checking the PC’s and projector’s
Subnet-Mask settings.
IP address examples
First example
• PC IP Address : 192.168.100.5
• PC Subnet Mask : 255.255.255.0
• Projector IP Address : 192.168.100.2
• Projector Subnet Mask: 255.255.255.0
Result : Communication possible. PC address is in the subnet range of the projector’s IP address.
Second example
• PC IP Address : 10.16.236.100
• PC Subnet Mask : 255.255.255.0
• Projector IP Address : 192.168.100.2
• Projector Subnet Mask: 255.255.255.0
Result : No communication possible. PC address is not in the subnet range of the projector’s IP address.
Third example
• PC IP Address : 192.168.200.1
• PC Subnet Mask : 255.255.255.0
• Projector IP Address : 192.168.100.2
• Projector Subnet Mask: 255.255.255.0
Result : No communication possible. PC address is not in the subnet range of the projector’s IP address.
The third group in the PC IP address and Projector IP address must be the same.
Fourth example
• PC IP Address : 192.168.200.1
• PC Subnet Mask : 255.255.0.0
• Projector IP Address : 192.168.100.2
• Projector Subnet Mask: 255.255.0.0
Remark : Communication possible. PC address is in the subnet range of the projector’s IP address. The
third group in the IP¨ addresses can be any value as the third group in the subnet mask is 0.
R5976510 D-CINE COMMUNICATOR 11/04/2006
283
A. Updating TI boards
Software connection
1. Click in the IP address input field and fill out directly the IP address of the projector (1a). (image A-11)
Note: For DP100-DP90, the IP address must be the TI/Cinema IP address. To read out that address,
look for the Cinema IP address via the touch panel or look for the TI IP address via the D-Cine
Communicator software, tab page Projector Configuration.
Or,
click in the host name input field just below the IP address and fill out the host name of the projector to
perform a DNS-lookup (requires the local network to be configured to support this) (1b).
Or,
click on Projector Search (1c).
The projector scans the network and build up a list of available projectors with host name and IP address
(only possible for projectors on the local subnet AND that have Release 5.1 or later installed).
2. Select the desired projector out of the list (1d) and click OK (1e).
The IP address and host name will be filled out.
3. Check the radio button in front of Ethernet Port (2).
The program will prompt the user to login to the projector.
4. Enter the userid and password.
Defaults are:
- UserId: Service
- Password: Heal Thyself
Both are case sensitive.
When correct, the Current Projector Info of the selected projector will be filled out.
Image A-11
Make Ethernet connection
284
R5976510 D-CINE COMMUNICATOR 11/04/2006
A. Updating TI boards
A.4
Installation of the new software release
How to install ?
1. Click on Select Release Installation File (1). (image A-12)
A browser window opens (2).
2. Browse to the directory that contains the Release to be installed.
Note: The release files are indicated as .dlpcinema .
3. Click on the file to select (3) and click Open (4).
Or,
double click on the file (3).
The content of the file will be displayed in Selected release (5) after a validation. A comparison with the
actual loaded software is possible. (image A-13)
4. Click on Start Auto-Install (6).
The verification and installation process will be started. It installs anything that does not exactly match
the release.
It includes also the resetting of the projector and the re-connection to verify the installation.
A success or error dialog box will be displayed when completed.
R5976510 D-CINE COMMUNICATOR 11/04/2006
285
A. Updating TI boards
Image A-12
Select Release file
286
R5976510 D-CINE COMMUNICATOR 11/04/2006
A. Updating TI boards
Image A-13
Start auto-install
CAUTION: Do not reset or switch off the projector during an installation operation. A
reset during some operations may leave the affected board in the projector in a nonfunctional state, requiring factory recovery.
In case of failures, always send a copy of this log file to your Barco representative.
CAUTION: Log files are not saved automatically. A Dump log to file has to be done.
A.5
Logging of the operation
What is possible?
The program maintains a log of all operations performed.
To show this log, click on Show Log.
R5976510 D-CINE COMMUNICATOR 11/04/2006
287
A. Updating TI boards
Image A-14
Show logging started
The log window opens.
Image A-15
Log info
288
R5976510 D-CINE COMMUNICATOR 11/04/2006
A. Updating TI boards
By clicking on one of the buttons, the following is possible with the log:
• Dump to file : the log will be dumped into a file on the hard disk. A name and location will be asked
first.
• Clear log : the log will be cleared. All information will be removed.
Log files are not saved automatically to disk. To save the file execute a Dump to file.
A.6
Special functions
Overview
To select a special installation and/or verification function, click on <<Special Operations>>. Before
clicking on Special Operations, a connection to the projector must be present and a release file must be
selected.
Image A-16
Special operations
Auto-Install Cinema Boards Only
will only verify and install components related to the Interface
and Processor boards.
Use only if cinema boards are replaced (interface board,
processor board)
Auto-Install Formatter Subsystem
Only
will only verify and install components related to the Formatter
subsystem.
Use only when the engine was replaced.
Verify Release Only
will check all components of a Release supported by this
program. No changes will be made to the projector.
R5976510 D-CINE COMMUNICATOR 11/04/2006
289
A. Updating TI boards
Force Cinema Re-Install
(see note)
Fill-System Install Only
(see note)
will reinstall all Cinema components (Disk-Chip and flash)
whether or not they are up to date. This rarely needed and is
intended for special recovery purposes only.
will format the Disk-Chip and install all files (no other flash
components are touched). This is intended for special
file-system recovery only.
Note : with these options you will loose all default MACRO, PCF and SCREEN files. These options should
not be used.
A.7
Factory Install Options
CAUTION: Never use these options in the field. Only for factory use.
Overview
These options are intended for factory use for brand new boards.
For special factory-install operations, select Factory Installation >> to open the dialog window to select
the function to perform. Before click on Factory Installation, a connection to the projector must be present
and a release file must be selected.
A.8
Recovery option - Stay in Boot option
Problem
The main software of the interface board can get corrupt when the projector was reset while a software
update was busy. In that case the projector might be in a state where it tries to load the main software
continuously, but it fails as the software is corrupt.
It is possible to force the projector to load only its boot application and not to start its main application.
This is called Stay in Boot.
The Stay in Boot option can be activated only when connected via a Serial connection (RS232/RS422).
How to activate
1. Check Stay in Boot App. (image A-17)
A message will be displayed to indicate that a recovery will take place.
2. Click OK to continue.
When the boot application is successfully started, a message will be displayed. The current projector
info will indicated that the boot application is running.
3. Click on Select Release Installation file and select the release file.
The content of the file will be displayed.
4. Click on Start Auto Install. (image A-18)
The verification and installation process will be started. It installs the ARM_main_app.
290
R5976510 D-CINE COMMUNICATOR 11/04/2006
A. Updating TI boards
Image A-17
Stay in boot mode
Image A-18
Start auto install of ARM application
R5976510 D-CINE COMMUNICATOR 11/04/2006
291
A. Updating TI boards
292
R5976510 D-CINE COMMUNICATOR 11/04/2006
Glossary
GLOSSARY
292–DUAL
Input A and input B are combined to 1 input. From a complete signal, part is send to input A and the other
part to input B to reach bigger way through.
4:2:2
A commonly used term for a component digital video format. A ratio of sampling frequencies used to
digitize the luminance and color difference components (Y, R-Y, B-Y) of a video signal. It is generally used
as shorthand for ITU-R 601. The term 4:2:2 describes that for every four samples of Y, there are two
samples each of R-Y and B-Y, giving more chrominance bandwidth in relation to luminance compared to
4:1:1 sampling.
4:4:4
Similar to 4:2:2, except that for every four luminance samples, the color channels are also sampled four
times.
ACTIVE
Stores the current state of the projector.
Aspect ratio
Relation between the horizontal & vertical dimension in which the window will be displayed, e.g. 4 by 3 or
16 by 9.
Button Module Settings
Button module settings contains info on which actions are coupled to each button/input. For manual configuration, see Automation tab.
CLO
Constant light output
CSC
Color Space Converter
Default Gateway
A router that serves as an entry point into and exit point out of a network. For example, a local network
(LAN) may need a gateway to connect it to a wide area network (WAN) or to the Internet.
DHCP
Dynamic host configuration protocol. DHCP is a communications protocol that lets network administrators
manage centrally and automate the assignment of IP addresses in an organization’s network. Using the
Internet Protocol, each machine that can connect to the Internet needs a unique IP address. When an
organization sets up its computer users with a connection to the Internet, an IP address must be assigned
to each machine. Without DHCP, the IP address must be entered manually at each computer and, if computers move to another location in another part of the network, a new IP address must be entered. DHCP
lets a network administrator supervise and distribute IP addresses from a central point and automatically
sends a new IP address when a computer is plugged into a different place in the network.
R5976510 D-CINE COMMUNICATOR 11/04/2006
293
Glossary
DNS server
Computers, Projectors connected to a network are referenced by their IP address. The only problem is
that remembering IP addresses is not easy. If you need to use hundreds of addresses then it will become
impossible to remember them. This is why domain names are created. Internet names (domain and host
names) are just aliases to these IP addresses. When you use an Internet address it is automatically translated to an IP address. In fact a program or device that translates those Internet names to IP addresses
is called a DNS Server.
DVI-EDID
Digital Visual Interface – Extended Display Identification Data
DVI sources that are reported to the projector via the VESA E-EDID standard. These will be autodetected
and displayed at the source format size, using standard processing.
GPI
General purpose Input/Output
Host name
This is the name that will be returned, along with the IP address in response to the UDP broadcast query
for projectors.
IP
Internet Protocol. The network layer of TCP/IP. Required for communication with the internet.
Layout
A layout is a collection of windows. These windows are placed on a certain position within the screen.
Lut
Look up table
LUT
Lookup table
Macro
Macro files contains a sequence of commands. These commands are typically select Input Source, Activate PCF, Activate SCREEN.
MCGD
Measured Color Gamut Data
Metadata
Generally referred to as "data about data" or "data describing other data". More specifically, information
that is considered ancillary to or otherwise directly complementary to the essence. Any information that a
content provider considers useful or of value when associated with the essence being provided.
Null modem cable
An adapter cable or adapter piece to switch the receive and transmit line within a RS232 cable.
PCF File
Projector Configuration File. This file is a file that will be delivered with each movie. It contains all data
needed to display a certain movie as it is defined by the movie distributor.
294
R5976510 D-CINE COMMUNICATOR 11/04/2006
Glossary
PSTN
PSTN (public switched telephone network) is the world’s collection of interconnected voice-oriented public
telephone networks, both commercial and government-owned.
Screen File
Screen presentation configuration file. This file contains information about resizing, letterboxing, masking
and lens factor.
SMPTE
Society of Motion Picture and Television Engineers - A global organization, based in the United States,
that sets standards for baseband visual communications. This includes film as well video standards.
SNMP
Simple Network Management Protocol is the protocol governing network management and the monitoring
of network devices and their functions.
Subnet mask
A number that is used to identify a subnetwork so that IP addresses can be shared on a local area network.
TCGD
Target Color Gamut Data. These files defines the Target Color Gamut. For each movie, it is possible
to select a ’Target’ Color Gamut File, which defines the color gamut values for that specific movie. The
TCGD file is part of the PCF file delivered with the movie.
TGA
Targa Bitmap Files
UDP
User Datagram Protocol
Window
A window represents the active area of an input source.
Z-order
The layer sequence in which windows will be displayed in relation to one another.
R5976510 D-CINE COMMUNICATOR 11/04/2006
295
Glossary
296
R5976510 D-CINE COMMUNICATOR 11/04/2006
Index
INDEX
Numerics/Symbols
3D settings 89–92
3D controls 92
Frame rate 91
Start up 90
Test pattern 91
A
About 3D projection 89
ACSAR 2 42, 257–261, 263–269, 272–274, 276
Input locking 276
Input slots 276
Configuration 276
Introduction 257
Layout 257–261
Create 257
Delete 260
Edit 258
Rename 259
Settings 268–269, 272–274
Auto load enabled 274
Delete file 273
Image settings 274
Input settings 274
Introduction 269
Load file 269
Rename file 272
Save all file 272
Save file 272
Start up 42
Windowing 261, 263–267
Aspect ratio 267
Disabling 263
Enabling 263
Full size 266
Move 264
Scale 265
Selection 261
Z-order 266
ACTIVE 141–142, 144–145
Read from 145
Save 141
Select 142
Set 142, 144
Write 144
Write to PC 145
Active actions 141
Advanced settings 82–88, 95
Image settings 85–88, 95
Anti log Lut 86
De-Gamma Lut 87
Image freeze 95
Image scaling 88
Start up 85
Source settings 82–84
R5976510 D-CINE COMMUNICATOR 11/04/2006
3 - 2 pull down 83
Offset 84
Re-synchronisation 84
SMPTE 291 83
SMPTE field bit 82
Start up 82
Automation 169–170, 249
Action List 170
Create 170
GPO control 249
Introduction 169
Automation DP100 173–175
Activate a macro 174
Associate macro 174
Edit macro 175
Introduction 173
Automation DP90 173–175
Activate a macro 174
Associate macro 174
Edit macro 175
Introduction 173
B
Backup 149
Button module 161
Loading settings 161
C
CLO 69, 74, 78–79
for DP100 78
for DP100 normal mode 79
for DP100 start up 78
for DP30 74
for DP50 69
for DP90 78
for DP90 normal mode 79
for DP90 start up 78
CLO for DP30 74
Start up 74
CLO for DP50 70–71
Calibration 71
Read out 70
Start up 70
CLO key 113–114
Delete 114
Enter key 113
Color Calibration 127–128
Color 128
Measuring 128
Color correction 127
Process steps 127
Introduction 127
Color correction 129
Target file 129
297
Index
Color Correction 129
Color 129
Install Target file 129
Color Gamut 131
Color 131
Verify 131
Color measuring 128
Configuration 9
Controller software 162
Updates 162
D
G
Getting Access 11
H
Help 255
Introduction 255
Use 255
Hostname 100
I
Image settings 85–88, 95
Anti log Lut 86
De-Gamma Lut 87
Image freeze 95
Image scaling 88
Start up 85
Input / Source 36–37, 39, 42, 44
ACSAR 2 42
Start up 42
Active Area 44
Error counts 123
Set up 44
Port 292 123
Aspect ratio 44
Ethernet 15
Set up 44
Hardware connection 15
Cine input DP100 39
Ethernet test 119
Cine input DP90 39
Selection DP100 39
Selection DP30 37
Selection DP50 37
File 139–140
Selection DP90 39
Download 140
Input control 230–234
Upload 139
DVI dual packing 234
File manager 133–134, 137–142, 144–146, 148–149, DVI packing 233
151
Processing path 231
ACTIVE 141–142, 144–145
Select input path 230
Save 141
SMPTE292 dual packing 232
Set 142, 144
SMPTE292 packing 231
Write to PC 145
Input Control 229
Active actions 141
Select input 229
Backup 149
Input locking 276
File 139–140
ACSAR 2 276
Download 140
Input slots 276
Upload 139
ACSAR 2 276
Internal file system 133–134, 137–138
Installation 9
Changing attributes 138
Software 9
Create new folder 138
Interface 31
Delete 137
Projector Setup 31
Navigation 138
Internal file system 133–134, 137–138
Rename 137
Changing attributes 138
View change 134
Create new folder 138
Introduction 133
Delete 137
Macro 148
Navigation 138
Execute 148
Rename 137
Read 146
View change 134
Files active 146
Introduction 7
Restore 151
General 7
Function keys 96
Projector setup 96
DHCP set up 101
DHCP set up Barco controller 105
Dowser 69
DVI standards 43–44
non VESA E-EDID 44
VESA E-EDID 43
E
F
298
R5976510 D-CINE COMMUNICATOR 11/04/2006
Index
L
Lamp ON/OFF 47
Lamp settings DP100 117
Configuration 117
Read out 117
Run time 117
Strikes 117
Lamp settings DP30 116
Configuration 116
Read out 116
Remaining run time 116
Run time 116
Strikes 116
Lamp settings DP90 117
Configuration 117
Read out 117
Run time 117
Strikes 117
Lens 49, 51
Adjustment (DP100 and DP90 only) 51
Adjustment (DP30 only) 51
Anamorphic factor 49
Anamorphic lens holder 51
Calibration 51
Lens motor availability 115
Light output 75–77, 80–81
Calibration 77, 81
Target set up 75–76, 80
CLO mode 76
CLO mode DP100 80
CLO mode DP90 80
Normal mode 75
Log information 253
D-Cine Communicator 253
Overview 253
DVI dual packing 234
DVI packing 233
Processing path 231
Select input 229
Select input path 230
SMPTE292 dual packing 232
SMPTE292 packing 231
Output 244–246
Blank image delay 246
DeBlank image delay 246
Dowser control 245
Lamp control 244
Preset files 235–237, 239–242
ACSAR 2 input files 241
ACSAR 2 layout files 240
Activate EXTRA files 237
Activate MCGD files 239
Activate PCF files 235
Activate SCREEN files 236
Auto load 242
Save 225
Test pattern 243–244
Disable 244
Enable 243
Macro file 32
Execute 32
Macro Shortcuts 36
For DP30 36
For DP50 36
Masking 62–63, 66
Definition 62
Direct input 66
Via arrow keys 63
Modem dial up 24
N
M
Macro 148
Execute 148
Macro editor 225–237, 239–250
ACSAR2 247–248
Input locking 248
Input mode 247
Automation 249
GPO control 249
Create new macro 225
Edit 226–229
Delete command 227
Edit attributes 229
Edit values 229
Insert command 227
Order change 228
Select file 226
Edit items 229
Edit attributes 229
Edit values 229
Error handling 250
Input control 229–234
R5976510 D-CINE COMMUNICATOR 11/04/2006
Network properties 100–101, 103, 105–106
DHCP set up 101
DHCP set up Barco controller 105
Hostname 100
Manually set up 103
Manually set up Barco controller 106
O
Output 244–246
Blank image delay 246
DeBlank image delay 246
Dowser control 245
Lamp control 244
P
Pattern shortcuts 32
PCF file 34
Activate 34
Port 292 123
Error counts 123
299
Index
CLO for DP50 69
Preset files 235–237, 239–242
CLO for DP90 78
ACSAR 2 input files 241
CLO for DP90 normal mode 79
ACSAR 2 layout files 240
CLO for DP90 start up 78
Activate EXTRA files 237
Dowser 69
Activate MCGD files 239
Lens Type 49
Activate PCF files 235
Masking 62–63, 66
Activate SCREEN files 236
Resizing 53
Auto load 242
Saving 68
Projector configuration 48
PCF file 34
Image orientation 48
Projector Configuration 34, 36–37, 39, 47, 49, 51, 53, Serial Bus Address 98
Set up 98
62–63, 66, 68–69, 74, 78–79, 97–98, 100–101, 103,
Serial Number 111
105–106, 108, 110–113, 115–117
Read out 111
CLO 113
Serial Port 110
Key 113
Configuration 110
Controller 110
SNMP 111–112
GPI configuration 108
Key 111
Input / Source 36–37, 39
Settings 112
Cine input DP100 39
Projector Connection 15–16, 18–19, 21, 24, 28–29
Cine input DP90 39
Disconnection 28
Selection DP100 39
Ethernet 15–16, 18
Selection DP30 37
Via IP address 16
Selection DP50 37
Via short cuts 18
Selection DP90 39
Introduction 15
Internal Clock 97
Password 28
Set up 97
Change 28
Lamp Run Time 115
Projector Head 29
Configuration 115
Reset 29
Lamp settings DP100 117
Serial port 19, 21, 24
Configuration 117
Loop In / Out 21
Read out 117
Modem dial Up 24
Run time 117
RS232/422 19
Strikes 117
Projector Head 29
Lamp settings DP30 116
Reset 29
Configuration 116
Projector log 196–197, 206–208
Read out 116
Clear 197, 208
Remaining run time 116
Display 196, 207
Run time 116
Refresh 197, 207
Strikes 116
Save 197, 207
Lamp settings DP90 117
Projector Screen Set up 35
Configuration 117
Screen file 35
Read out 117
Projector setup 85, 89–92
Run time 117
Advanced settings 85, 89–92
Strikes 117
3D controls 92
Lens motor availability 115
3D settings 89
Network properties 98, 100–101, 103, 105–106
3D settings frame rate 91
DHCP set up 101
3D settings start up 90
DHCP set up Barco controller 105
3D settings test pattern 91
Ethernet connections 98
About 3D projection 89
Hostname 100
Image settings 85
Manually set up 103
Projector Setup 31, 81–84, 96
Manually set up Barco controller 106
Output / Screen 47, 49, 51, 53, 62–63, 66, 68–69, Advanced settings 81–84
3 - 2 pull down 83
74, 78–79
Offset 84
Anamorphic lens holder 51
Re-synchronisation 84
CLO for DP100 78
SMPTE 291 83
CLO for DP100 normal mode 79
SMPTE field bit 82
CLO for DP100 start up 78
Source settings 82
CLO for DP30 74
300
R5976510 D-CINE COMMUNICATOR 11/04/2006
Index
Function keys 96
Interface 31
Projector status 211
DP100 211
DP90 211
Projector Status 191–193, 195–197, 205–207, 223
Active Cooling 197
Barco access level 196, 206
Boards Status 195
CLO 195, 205
DP50 191
External Cooler 195
Fan/Tec Controller 193
Overview 191
Projector log 196, 207
Display 196, 207
Security Card Cage 195, 205
Status overview 192
Switch Mode Power Supply 192
Version 223
Software 223
Projector status DP100 211–212, 214, 216–218, 220
Certificates 220
General overview 211
Projector log 217
Projector properties 216
Security log 218
Status overviews 212, 214
Fan 214
Temperature 212
Voltages 212
Projector status DP30 208
Security log 208
Projector Status DP30 201–206
Board status 204
DCDC Controller 203
Lamp power supply 203
Lens Info Module 206
Lens Motor Controller 205
Overview 201–202
Projector log 206
SMPS 202
Projector status DP50 198, 209
Certificates 198, 209
Security log 198
Projector status DP90 211–212, 214, 216–218, 220
Certificates 220
General overview 211
Projector log 217
Projector properties 216
Security log 218
Status overviews 212, 214
Fan 214
Temperature 212
Voltages 212
Projector Tests 119–120, 122–123, 125
Ethernet test 119
General Purpose Output 119
Port 292 123
Error counts 123
R5976510 D-CINE COMMUNICATOR 11/04/2006
Self test 123, 125
Choices 125
Start up 123
Test Patterns 120, 122
Change 120
Clear 122
R
Read 146
Files active 146
Registration 12
Resizing 54, 56, 58
Definition 54
Letterbox 58
Via arrow keys 54
Via direct input 56
Restore 151
S
Saving 68
Screen file 68
Screen file 35
Activate 35
Security Management 165, 167–168
Adding 167
Extra key 167
Card Cage 168
Access overview 168
Overview 165
Pin code 167
Change 167
Start up 165
Self test 123, 125
Choices 125
Start up 123
Server 179–183, 185–187, 189
Interface 180
Introduction 179
Metadata control 186–187, 189
Activation 189
Introduction 186
Metadata file 187
Metadata server 187
Steps 187
Time to live 189
Subtitle control 183, 185–186
Activation 186
Steps 183
Subtitle file 183
Subtitle server 183
Time to live 185
Time control 180–182
Control 182
Input frequency 181
Time source 180
Timeline adjustment 182
Timeline stamp 181
301
Index
SNMP 112
Settings 112
SNMP key 112
Delete 112
Software 9–10, 13
Installation 9
Removing 13
Start up 13
Via batch file 13
Updating 10
Start up 9, 13
Via a batch file 13
T
Test Patterns 120, 122
Change 120
Clear 122
TI update 280, 282, 285, 287, 289–290
Connection 280, 282
Ethernet 282
Serial 280
Factory install options 290
Installation 285
Logging 287
Special functions 289
Stay in Boot 290
Time control 180–182
Control 182
Input frequency 181
Time source 180
Timeline adjustment 182
Timeline stamp 181
Touch panel menu 161
Updates 161
302
Troubleshooting 163–164
Connection broken 163–164
Button control software 164
Touch panel software 164
Projector reset 163
Updates 163
U
Update 279
Program 279
Start up 279
TI boards 279
Install package 279
Updates 155–156, 161–163
Controller software 162
General 156
Settings 156
Software 156
Individual 161
Button module 161
Settings 155
Overview 155
Software 155
Overview 155
Touch panel menus 161
Troubleshooting 163
Updating 10
Software 10
Upgrade 9
Software 9
V
Version Info 223
R5976510 D-CINE COMMUNICATOR 11/04/2006
List of images
LIST OF IMAGES
2-1
2-2
2-3
2-4
3-1
3-2
3-3
3-4
3-5
3-6
3-7
3-8
3-9
3-11
3-12
3-13
3-14
3-15
3-16
3-17
3-18
3-19
3-20
3-21
3-22
3-23
3-24
3-25
3-26
3-27
3-28
3-29
3-30
3-31
3-32
3-33
3-34
3-35
3-36
4-1
4-2
4-3
4-4
4-5
4-6
4-7
4-8
4-9
4-10
4-11
4-12
4-13
4-14
4-15
4-16
4-17
4-18
Licence agreement . . . . . . . . . . . . . . . . . . . . . . . . . . . . . . . . . . . . . . . . . . . . . . . . . . . . . . . . . . . . . . . . . . . . . . . . . . . . . . . 10
Install selection window . . . . . . . . . . . . . . . . . . . . . . . . . . . . . . . . . . . . . . . . . . . . . . . . . . . . . . . . . . . . . . . . . . . . . . . . . . 11
Logon screen . . . . . . . . . . . . . . . . . . . . . . . . . . . . . . . . . . . . . . . . . . . . . . . . . . . . . . . . . . . . . . . . . . . . . . . . . . . . . . . . . . . . . . 12
Register warning . . . . . . . . . . . . . . . . . . . . . . . . . . . . . . . . . . . . . . . . . . . . . . . . . . . . . . . . . . . . . . . . . . . . . . . . . . . . . . . . . . 12
Metadata enabled message . . . . . . . . . . . . . . . . . . . . . . . . . . . . . . . . . . . . . . . . . . . . . . . . . . . . . . . . . . . . . . . . . . . . . 15
Physical indication of Ethernet connector on DP50 . . . . . . . . . . . . . . . . . . . . . . . . . . . . . . . . . . . . . . . . . . . 16
Physical indication of Ethernet connector on DP30 . . . . . . . . . . . . . . . . . . . . . . . . . . . . . . . . . . . . . . . . . . . 16
Physical indication of Ethernet connectors on DP100 and DP90 . . . . . . . . . . . . . . . . . . . . . . . . . . . . 16
Selecting Ethernet . . . . . . . . . . . . . . . . . . . . . . . . . . . . . . . . . . . . . . . . . . . . . . . . . . . . . . . . . . . . . . . . . . . . . . . . . . . . . . . . 17
Primary port selected within an Ethernet connection . . . . . . . . . . . . . . . . . . . . . . . . . . . . . . . . . . . . . . . . . 18
Selecting Connect . . . . . . . . . . . . . . . . . . . . . . . . . . . . . . . . . . . . . . . . . . . . . . . . . . . . . . . . . . . . . . . . . . . . . . . . . . . . . . . . 18
Logon connection status . . . . . . . . . . . . . . . . . . . . . . . . . . . . . . . . . . . . . . . . . . . . . . . . . . . . . . . . . . . . . . . . . . . . . . . . . 18
Available projectors on the Ethernet . . . . . . . . . . . . . . . . . . . . . . . . . . . . . . . . . . . . . . . . . . . . . . . . . . . . . . . . . . . . 19
Physical indication of RS232/422 connector on DP50 . . . . . . . . . . . . . . . . . . . . . . . . . . . . . . . . . . . . . . . . 19
Physical indication of RS232/422 connector on DP30 . . . . . . . . . . . . . . . . . . . . . . . . . . . . . . . . . . . . . . . . 20
Physical indication of RS232/422 connector on DP100 and DP90 . . . . . . . . . . . . . . . . . . . . . . . . . . 20
Selecting Serial Port . . . . . . . . . . . . . . . . . . . . . . . . . . . . . . . . . . . . . . . . . . . . . . . . . . . . . . . . . . . . . . . . . . . . . . . . . . . . . . 21
Selecting the communication port . . . . . . . . . . . . . . . . . . . . . . . . . . . . . . . . . . . . . . . . . . . . . . . . . . . . . . . . . . . . . . . 21
Selecting Connect . . . . . . . . . . . . . . . . . . . . . . . . . . . . . . . . . . . . . . . . . . . . . . . . . . . . . . . . . . . . . . . . . . . . . . . . . . . . . . . . 21
Physical indication of the Serial Loop in connector on DP50. . . . . . . . . . . . . . . . . . . . . . . . . . . . . . . . . 22
Physical indication of the Serial Loop in connector on DP30. . . . . . . . . . . . . . . . . . . . . . . . . . . . . . . . . 22
Physical indication of the Serial Loop in connector on DP100 and DP90. . . . . . . . . . . . . . . . . . . 22
Selecting Serial Port . . . . . . . . . . . . . . . . . . . . . . . . . . . . . . . . . . . . . . . . . . . . . . . . . . . . . . . . . . . . . . . . . . . . . . . . . . . . . . 23
Selecting the communication port . . . . . . . . . . . . . . . . . . . . . . . . . . . . . . . . . . . . . . . . . . . . . . . . . . . . . . . . . . . . . . . 23
Serial bus mode selection. . . . . . . . . . . . . . . . . . . . . . . . . . . . . . . . . . . . . . . . . . . . . . . . . . . . . . . . . . . . . . . . . . . . . . . . 24
Selecting Connect . . . . . . . . . . . . . . . . . . . . . . . . . . . . . . . . . . . . . . . . . . . . . . . . . . . . . . . . . . . . . . . . . . . . . . . . . . . . . . . . 24
Principle diagram modem connection . . . . . . . . . . . . . . . . . . . . . . . . . . . . . . . . . . . . . . . . . . . . . . . . . . . . . . . . . . 25
Dialup connection selection. . . . . . . . . . . . . . . . . . . . . . . . . . . . . . . . . . . . . . . . . . . . . . . . . . . . . . . . . . . . . . . . . . . . . . 26
Dialup connection . . . . . . . . . . . . . . . . . . . . . . . . . . . . . . . . . . . . . . . . . . . . . . . . . . . . . . . . . . . . . . . . . . . . . . . . . . . . . . . . . 26
Dial-up connection . . . . . . . . . . . . . . . . . . . . . . . . . . . . . . . . . . . . . . . . . . . . . . . . . . . . . . . . . . . . . . . . . . . . . . . . . . . . . . . . 27
Modem Terminal Window . . . . . . . . . . . . . . . . . . . . . . . . . . . . . . . . . . . . . . . . . . . . . . . . . . . . . . . . . . . . . . . . . . . . . . . . 27
Modem Terminal Window : password . . . . . . . . . . . . . . . . . . . . . . . . . . . . . . . . . . . . . . . . . . . . . . . . . . . . . . . . . . 27
Take Control via dial-up . . . . . . . . . . . . . . . . . . . . . . . . . . . . . . . . . . . . . . . . . . . . . . . . . . . . . . . . . . . . . . . . . . . . . . . . . . 27
Disconnect from D-Cine Premiere . . . . . . . . . . . . . . . . . . . . . . . . . . . . . . . . . . . . . . . . . . . . . . . . . . . . . . . . . . . . . . 28
Disconnect status . . . . . . . . . . . . . . . . . . . . . . . . . . . . . . . . . . . . . . . . . . . . . . . . . . . . . . . . . . . . . . . . . . . . . . . . . . . . . . . . . 28
Password menu . . . . . . . . . . . . . . . . . . . . . . . . . . . . . . . . . . . . . . . . . . . . . . . . . . . . . . . . . . . . . . . . . . . . . . . . . . . . . . . . . . . 28
Case sensitivity old password . . . . . . . . . . . . . . . . . . . . . . . . . . . . . . . . . . . . . . . . . . . . . . . . . . . . . . . . . . . . . . . . . . . 28
Confirm password error . . . . . . . . . . . . . . . . . . . . . . . . . . . . . . . . . . . . . . . . . . . . . . . . . . . . . . . . . . . . . . . . . . . . . . . . . . 29
Reset Projector Head message . . . . . . . . . . . . . . . . . . . . . . . . . . . . . . . . . . . . . . . . . . . . . . . . . . . . . . . . . . . . . . . . . 29
Set up interface . . . . . . . . . . . . . . . . . . . . . . . . . . . . . . . . . . . . . . . . . . . . . . . . . . . . . . . . . . . . . . . . . . . . . . . . . . . . . . . . . . . 31
Pattern shortcuts . . . . . . . . . . . . . . . . . . . . . . . . . . . . . . . . . . . . . . . . . . . . . . . . . . . . . . . . . . . . . . . . . . . . . . . . . . . . . . . . . . 32
Metadata enabled message . . . . . . . . . . . . . . . . . . . . . . . . . . . . . . . . . . . . . . . . . . . . . . . . . . . . . . . . . . . . . . . . . . . . . 33
Macro selected . . . . . . . . . . . . . . . . . . . . . . . . . . . . . . . . . . . . . . . . . . . . . . . . . . . . . . . . . . . . . . . . . . . . . . . . . . . . . . . . . . . . 33
Retrieve Macro files. . . . . . . . . . . . . . . . . . . . . . . . . . . . . . . . . . . . . . . . . . . . . . . . . . . . . . . . . . . . . . . . . . . . . . . . . . . . . . . 33
Selected macro indicated for DP100 and DP90 . . . . . . . . . . . . . . . . . . . . . . . . . . . . . . . . . . . . . . . . . . . . . . . 34
Metadata enabled message . . . . . . . . . . . . . . . . . . . . . . . . . . . . . . . . . . . . . . . . . . . . . . . . . . . . . . . . . . . . . . . . . . . . . 34
PCF selected . . . . . . . . . . . . . . . . . . . . . . . . . . . . . . . . . . . . . . . . . . . . . . . . . . . . . . . . . . . . . . . . . . . . . . . . . . . . . . . . . . . . . . 35
Retrieve PCF files. . . . . . . . . . . . . . . . . . . . . . . . . . . . . . . . . . . . . . . . . . . . . . . . . . . . . . . . . . . . . . . . . . . . . . . . . . . . . . . . . 35
Screen selected . . . . . . . . . . . . . . . . . . . . . . . . . . . . . . . . . . . . . . . . . . . . . . . . . . . . . . . . . . . . . . . . . . . . . . . . . . . . . . . . . . . 35
Retrieve Screen files. . . . . . . . . . . . . . . . . . . . . . . . . . . . . . . . . . . . . . . . . . . . . . . . . . . . . . . . . . . . . . . . . . . . . . . . . . . . . . 36
Macro shortcuts . . . . . . . . . . . . . . . . . . . . . . . . . . . . . . . . . . . . . . . . . . . . . . . . . . . . . . . . . . . . . . . . . . . . . . . . . . . . . . . . . . . 36
Source Selection . . . . . . . . . . . . . . . . . . . . . . . . . . . . . . . . . . . . . . . . . . . . . . . . . . . . . . . . . . . . . . . . . . . . . . . . . . . . . . . . . . 39
Source Selection window . . . . . . . . . . . . . . . . . . . . . . . . . . . . . . . . . . . . . . . . . . . . . . . . . . . . . . . . . . . . . . . . . . . . . . . . 39
Processing path selection . . . . . . . . . . . . . . . . . . . . . . . . . . . . . . . . . . . . . . . . . . . . . . . . . . . . . . . . . . . . . . . . . . . . . . . . 39
Cine input selected . . . . . . . . . . . . . . . . . . . . . . . . . . . . . . . . . . . . . . . . . . . . . . . . . . . . . . . . . . . . . . . . . . . . . . . . . . . . . . . 42
Source selection window . . . . . . . . . . . . . . . . . . . . . . . . . . . . . . . . . . . . . . . . . . . . . . . . . . . . . . . . . . . . . . . . . . . . . . . . . 42
Processing path selection . . . . . . . . . . . . . . . . . . . . . . . . . . . . . . . . . . . . . . . . . . . . . . . . . . . . . . . . . . . . . . . . . . . . . . . . 42
R5976510 D-CINE COMMUNICATOR 11/04/2006
303
List of images
4-19
4-20
4-21
4-22
4-23
4-24
4-25
4-26
4-27
4-28
4-29
4-30
4-31
4-32
4-33
4-34
4-35
4-36
4-37
4-38
4-39
4-40
4-41
4-42
4-43
4-45
4-46
4-47
4-48
4-49
4-50
4-51
4-52
4-53
4-54
4-55
4-56
4-57
4-58
4-59
4-60
4-61
4-62
4-64
4-65
4-66
4-67
4-68
4-69
4-70
4-71
4-72
4-73
4-74
4-75
4-76
4-77
4-78
4-79
304
ACSAR 2 selected . . . . . . . . . . . . . . . . . . . . . . . . . . . . . . . . . . . . . . . . . . . . . . . . . . . . . . . . . . . . . . . . . . . . . . . . . . . . . . . . 43
Alternative Content setup window. . . . . . . . . . . . . . . . . . . . . . . . . . . . . . . . . . . . . . . . . . . . . . . . . . . . . . . . . . . . . . . 43
Selecting active area for DP30 and DP50. . . . . . . . . . . . . . . . . . . . . . . . . . . . . . . . . . . . . . . . . . . . . . . . . . . . . . 45
Selecting active area for DP100 and DP90 . . . . . . . . . . . . . . . . . . . . . . . . . . . . . . . . . . . . . . . . . . . . . . . . . . . . 45
Active Area window . . . . . . . . . . . . . . . . . . . . . . . . . . . . . . . . . . . . . . . . . . . . . . . . . . . . . . . . . . . . . . . . . . . . . . . . . . . . . . . 46
Width & height indication . . . . . . . . . . . . . . . . . . . . . . . . . . . . . . . . . . . . . . . . . . . . . . . . . . . . . . . . . . . . . . . . . . . . . . . . . 46
Center offset indication . . . . . . . . . . . . . . . . . . . . . . . . . . . . . . . . . . . . . . . . . . . . . . . . . . . . . . . . . . . . . . . . . . . . . . . . . . . 47
Toggling the lamp ON/OFF. . . . . . . . . . . . . . . . . . . . . . . . . . . . . . . . . . . . . . . . . . . . . . . . . . . . . . . . . . . . . . . . . . . . . . . 48
Select Image Orientation . . . . . . . . . . . . . . . . . . . . . . . . . . . . . . . . . . . . . . . . . . . . . . . . . . . . . . . . . . . . . . . . . . . . . . . . . 48
Image orientation set up window . . . . . . . . . . . . . . . . . . . . . . . . . . . . . . . . . . . . . . . . . . . . . . . . . . . . . . . . . . . . . . . . 48
Lens type selection . . . . . . . . . . . . . . . . . . . . . . . . . . . . . . . . . . . . . . . . . . . . . . . . . . . . . . . . . . . . . . . . . . . . . . . . . . . . . . . 49
Lens Anamorphic factor set up for DP50 . . . . . . . . . . . . . . . . . . . . . . . . . . . . . . . . . . . . . . . . . . . . . . . . . . . . . . . 49
Lens Anamorphic factor set up for DP30 . . . . . . . . . . . . . . . . . . . . . . . . . . . . . . . . . . . . . . . . . . . . . . . . . . . . . . . 50
Lens Anamorphic factor set up for DP100 and DP90 with motorized lens. . . . . . . . . . . . . . . . . . 50
Lens Anamorphic factor set up for DP100 and DP90 with non-motorized lens . . . . . . . . . . . . 50
Anamorphic Lens calibration for DP100/DP90 with motorized lens . . . . . . . . . . . . . . . . . . . . . . . . . 52
Anamorphic Lens calibration for DP100/DP90 with non-motorized lens . . . . . . . . . . . . . . . . . . . . 53
End of range blocks. . . . . . . . . . . . . . . . . . . . . . . . . . . . . . . . . . . . . . . . . . . . . . . . . . . . . . . . . . . . . . . . . . . . . . . . . . . . . . . 53
Start up Resizing . . . . . . . . . . . . . . . . . . . . . . . . . . . . . . . . . . . . . . . . . . . . . . . . . . . . . . . . . . . . . . . . . . . . . . . . . . . . . . . . . . 55
Resizing window . . . . . . . . . . . . . . . . . . . . . . . . . . . . . . . . . . . . . . . . . . . . . . . . . . . . . . . . . . . . . . . . . . . . . . . . . . . . . . . . . . 55
Short cuts to patterns . . . . . . . . . . . . . . . . . . . . . . . . . . . . . . . . . . . . . . . . . . . . . . . . . . . . . . . . . . . . . . . . . . . . . . . . . . . . . 55
Resizing indication . . . . . . . . . . . . . . . . . . . . . . . . . . . . . . . . . . . . . . . . . . . . . . . . . . . . . . . . . . . . . . . . . . . . . . . . . . . . . . . . 56
Start up Resizing . . . . . . . . . . . . . . . . . . . . . . . . . . . . . . . . . . . . . . . . . . . . . . . . . . . . . . . . . . . . . . . . . . . . . . . . . . . . . . . . . . 57
Resizing window . . . . . . . . . . . . . . . . . . . . . . . . . . . . . . . . . . . . . . . . . . . . . . . . . . . . . . . . . . . . . . . . . . . . . . . . . . . . . . . . . . 57
Short cuts to patterns . . . . . . . . . . . . . . . . . . . . . . . . . . . . . . . . . . . . . . . . . . . . . . . . . . . . . . . . . . . . . . . . . . . . . . . . . . . . . 57
Example letterboxing enabled . . . . . . . . . . . . . . . . . . . . . . . . . . . . . . . . . . . . . . . . . . . . . . . . . . . . . . . . . . . . . . . . . . . 59
Example letterboxing disabled. . . . . . . . . . . . . . . . . . . . . . . . . . . . . . . . . . . . . . . . . . . . . . . . . . . . . . . . . . . . . . . . . . . 61
Masking indication . . . . . . . . . . . . . . . . . . . . . . . . . . . . . . . . . . . . . . . . . . . . . . . . . . . . . . . . . . . . . . . . . . . . . . . . . . . . . . . . 63
Start up Masking . . . . . . . . . . . . . . . . . . . . . . . . . . . . . . . . . . . . . . . . . . . . . . . . . . . . . . . . . . . . . . . . . . . . . . . . . . . . . . . . . . 64
Masking window. . . . . . . . . . . . . . . . . . . . . . . . . . . . . . . . . . . . . . . . . . . . . . . . . . . . . . . . . . . . . . . . . . . . . . . . . . . . . . . . . . . 64
Short cuts to patterns . . . . . . . . . . . . . . . . . . . . . . . . . . . . . . . . . . . . . . . . . . . . . . . . . . . . . . . . . . . . . . . . . . . . . . . . . . . . . 64
Masking the corners . . . . . . . . . . . . . . . . . . . . . . . . . . . . . . . . . . . . . . . . . . . . . . . . . . . . . . . . . . . . . . . . . . . . . . . . . . . . . . 65
Curve masking . . . . . . . . . . . . . . . . . . . . . . . . . . . . . . . . . . . . . . . . . . . . . . . . . . . . . . . . . . . . . . . . . . . . . . . . . . . . . . . . . . . . 65
Start up Masking . . . . . . . . . . . . . . . . . . . . . . . . . . . . . . . . . . . . . . . . . . . . . . . . . . . . . . . . . . . . . . . . . . . . . . . . . . . . . . . . . . 67
Masking window. . . . . . . . . . . . . . . . . . . . . . . . . . . . . . . . . . . . . . . . . . . . . . . . . . . . . . . . . . . . . . . . . . . . . . . . . . . . . . . . . . . 67
Short cuts to patterns . . . . . . . . . . . . . . . . . . . . . . . . . . . . . . . . . . . . . . . . . . . . . . . . . . . . . . . . . . . . . . . . . . . . . . . . . . . . . 67
Direct masking input corners . . . . . . . . . . . . . . . . . . . . . . . . . . . . . . . . . . . . . . . . . . . . . . . . . . . . . . . . . . . . . . . . . . . . 67
Curve factor window for masking. . . . . . . . . . . . . . . . . . . . . . . . . . . . . . . . . . . . . . . . . . . . . . . . . . . . . . . . . . . . . . . . 68
Save Screen File . . . . . . . . . . . . . . . . . . . . . . . . . . . . . . . . . . . . . . . . . . . . . . . . . . . . . . . . . . . . . . . . . . . . . . . . . . . . . . . . . . 69
File Selection window . . . . . . . . . . . . . . . . . . . . . . . . . . . . . . . . . . . . . . . . . . . . . . . . . . . . . . . . . . . . . . . . . . . . . . . . . . . . 69
Input File name window . . . . . . . . . . . . . . . . . . . . . . . . . . . . . . . . . . . . . . . . . . . . . . . . . . . . . . . . . . . . . . . . . . . . . . . . . . 69
Open or close the dowser . . . . . . . . . . . . . . . . . . . . . . . . . . . . . . . . . . . . . . . . . . . . . . . . . . . . . . . . . . . . . . . . . . . . . . . . 69
Start up of the CLO functions . . . . . . . . . . . . . . . . . . . . . . . . . . . . . . . . . . . . . . . . . . . . . . . . . . . . . . . . . . . . . . . . . . . . 70
CLO window, read selected. . . . . . . . . . . . . . . . . . . . . . . . . . . . . . . . . . . . . . . . . . . . . . . . . . . . . . . . . . . . . . . . . . . . . . 71
CLO read message . . . . . . . . . . . . . . . . . . . . . . . . . . . . . . . . . . . . . . . . . . . . . . . . . . . . . . . . . . . . . . . . . . . . . . . . . . . . . . . 71
Stop reading light output . . . . . . . . . . . . . . . . . . . . . . . . . . . . . . . . . . . . . . . . . . . . . . . . . . . . . . . . . . . . . . . . . . . . . . . . . 71
Selecting measure now . . . . . . . . . . . . . . . . . . . . . . . . . . . . . . . . . . . . . . . . . . . . . . . . . . . . . . . . . . . . . . . . . . . . . . . . . . 72
Measure CLO message . . . . . . . . . . . . . . . . . . . . . . . . . . . . . . . . . . . . . . . . . . . . . . . . . . . . . . . . . . . . . . . . . . . . . . . . . . 72
Measuring CLO on Screen. . . . . . . . . . . . . . . . . . . . . . . . . . . . . . . . . . . . . . . . . . . . . . . . . . . . . . . . . . . . . . . . . . . . . . . 73
Select insert measured values . . . . . . . . . . . . . . . . . . . . . . . . . . . . . . . . . . . . . . . . . . . . . . . . . . . . . . . . . . . . . . . . . . 73
Insert value / calibrating message. . . . . . . . . . . . . . . . . . . . . . . . . . . . . . . . . . . . . . . . . . . . . . . . . . . . . . . . . . . . . . . 73
Insert value window for measured CLO . . . . . . . . . . . . . . . . . . . . . . . . . . . . . . . . . . . . . . . . . . . . . . . . . . . . . . . . 74
Calibration successful message. . . . . . . . . . . . . . . . . . . . . . . . . . . . . . . . . . . . . . . . . . . . . . . . . . . . . . . . . . . . . . . . . 74
Start up of the CLO functions . . . . . . . . . . . . . . . . . . . . . . . . . . . . . . . . . . . . . . . . . . . . . . . . . . . . . . . . . . . . . . . . . . . . 75
Light output / calibration window . . . . . . . . . . . . . . . . . . . . . . . . . . . . . . . . . . . . . . . . . . . . . . . . . . . . . . . . . . . . . . . . 75
Normal mode selection . . . . . . . . . . . . . . . . . . . . . . . . . . . . . . . . . . . . . . . . . . . . . . . . . . . . . . . . . . . . . . . . . . . . . . . . . . . 76
Lamp indications . . . . . . . . . . . . . . . . . . . . . . . . . . . . . . . . . . . . . . . . . . . . . . . . . . . . . . . . . . . . . . . . . . . . . . . . . . . . . . . . . . 76
CLO mode selection . . . . . . . . . . . . . . . . . . . . . . . . . . . . . . . . . . . . . . . . . . . . . . . . . . . . . . . . . . . . . . . . . . . . . . . . . . . . . . 77
Start calibration. . . . . . . . . . . . . . . . . . . . . . . . . . . . . . . . . . . . . . . . . . . . . . . . . . . . . . . . . . . . . . . . . . . . . . . . . . . . . . . . . . . . 77
R5976510 D-CINE COMMUNICATOR 11/04/2006
List of images
4-80
4-81
4-82
4-83
4-84
4-85
4-86
4-87
4-88
4-89
4-90
4-91
4-92
4-93
4-94
4-95
4-96
4-97
4-98
4-99
4-100
4-101
4-102
4-103
4-104
4-105
4-106
4-107
4-108
4-109
4-110
4-111
4-112
5-1
5-2
5-3
5-4
5-5
5-7
5-8
5-9
5-10
5-12
5-13
5-14
5-15
5-17
5-18
5-19
5-20
5-21
5-22
5-23
5-24
5-25
5-26
5-27
5-28
5-29
5-30
Calibration message . . . . . . . . . . . . . . . . . . . . . . . . . . . . . . . . . . . . . . . . . . . . . . . . . . . . . . . . . . . . . . . . . . . . . . . . . . . . . . 77
Start up of the CLO functions . . . . . . . . . . . . . . . . . . . . . . . . . . . . . . . . . . . . . . . . . . . . . . . . . . . . . . . . . . . . . . . . . . . . 78
Light output / calibration window . . . . . . . . . . . . . . . . . . . . . . . . . . . . . . . . . . . . . . . . . . . . . . . . . . . . . . . . . . . . . . . . 79
Normal mode selection . . . . . . . . . . . . . . . . . . . . . . . . . . . . . . . . . . . . . . . . . . . . . . . . . . . . . . . . . . . . . . . . . . . . . . . . . . . 79
Lamp indication . . . . . . . . . . . . . . . . . . . . . . . . . . . . . . . . . . . . . . . . . . . . . . . . . . . . . . . . . . . . . . . . . . . . . . . . . . . . . . . . . . . 80
For DP100-DP90, CLO mode selected . . . . . . . . . . . . . . . . . . . . . . . . . . . . . . . . . . . . . . . . . . . . . . . . . . . . . . . . . 80
Start calibration. . . . . . . . . . . . . . . . . . . . . . . . . . . . . . . . . . . . . . . . . . . . . . . . . . . . . . . . . . . . . . . . . . . . . . . . . . . . . . . . . . . . 81
Calibration message . . . . . . . . . . . . . . . . . . . . . . . . . . . . . . . . . . . . . . . . . . . . . . . . . . . . . . . . . . . . . . . . . . . . . . . . . . . . . . 81
Source settings selected . . . . . . . . . . . . . . . . . . . . . . . . . . . . . . . . . . . . . . . . . . . . . . . . . . . . . . . . . . . . . . . . . . . . . . . . . 82
Advanced Settings window . . . . . . . . . . . . . . . . . . . . . . . . . . . . . . . . . . . . . . . . . . . . . . . . . . . . . . . . . . . . . . . . . . . . . . 82
Advanced settings window : SMPTE field bit . . . . . . . . . . . . . . . . . . . . . . . . . . . . . . . . . . . . . . . . . . . . . . . . . . 83
Advanced settings window : SMPTE 291 . . . . . . . . . . . . . . . . . . . . . . . . . . . . . . . . . . . . . . . . . . . . . . . . . . . . . . 83
Advanced settings window : 3-2 pull down. . . . . . . . . . . . . . . . . . . . . . . . . . . . . . . . . . . . . . . . . . . . . . . . . . . . . 84
Advanced settings window : Re-Synchronisation . . . . . . . . . . . . . . . . . . . . . . . . . . . . . . . . . . . . . . . . . . . . . 84
Advanced settings window : Offset . . . . . . . . . . . . . . . . . . . . . . . . . . . . . . . . . . . . . . . . . . . . . . . . . . . . . . . . . . . . . 85
Image settings selected . . . . . . . . . . . . . . . . . . . . . . . . . . . . . . . . . . . . . . . . . . . . . . . . . . . . . . . . . . . . . . . . . . . . . . . . . . 85
Advanced Image settings window. . . . . . . . . . . . . . . . . . . . . . . . . . . . . . . . . . . . . . . . . . . . . . . . . . . . . . . . . . . . . . . 86
Advanced image settings : anti log Lut . . . . . . . . . . . . . . . . . . . . . . . . . . . . . . . . . . . . . . . . . . . . . . . . . . . . . . . . . 86
Anti lut exemple . . . . . . . . . . . . . . . . . . . . . . . . . . . . . . . . . . . . . . . . . . . . . . . . . . . . . . . . . . . . . . . . . . . . . . . . . . . . . . . . . . . 87
Advanced image settings : De-Gamma Lut . . . . . . . . . . . . . . . . . . . . . . . . . . . . . . . . . . . . . . . . . . . . . . . . . . . . 87
Advanced Image settings : complex Lut. . . . . . . . . . . . . . . . . . . . . . . . . . . . . . . . . . . . . . . . . . . . . . . . . . . . . . . . 88
Advanced Image settings : image scaling. . . . . . . . . . . . . . . . . . . . . . . . . . . . . . . . . . . . . . . . . . . . . . . . . . . . . . 88
Signal flow processing path. . . . . . . . . . . . . . . . . . . . . . . . . . . . . . . . . . . . . . . . . . . . . . . . . . . . . . . . . . . . . . . . . . . . . . 89
3D settings selected . . . . . . . . . . . . . . . . . . . . . . . . . . . . . . . . . . . . . . . . . . . . . . . . . . . . . . . . . . . . . . . . . . . . . . . . . . . . . . 90
Advanced 3D settings window. . . . . . . . . . . . . . . . . . . . . . . . . . . . . . . . . . . . . . . . . . . . . . . . . . . . . . . . . . . . . . . . . . . 90
3D test pattern. . . . . . . . . . . . . . . . . . . . . . . . . . . . . . . . . . . . . . . . . . . . . . . . . . . . . . . . . . . . . . . . . . . . . . . . . . . . . . . . . . . . . 91
3D controls. . . . . . . . . . . . . . . . . . . . . . . . . . . . . . . . . . . . . . . . . . . . . . . . . . . . . . . . . . . . . . . . . . . . . . . . . . . . . . . . . . . . . . . . . 92
White (Blue) line code . . . . . . . . . . . . . . . . . . . . . . . . . . . . . . . . . . . . . . . . . . . . . . . . . . . . . . . . . . . . . . . . . . . . . . . . . . . . 93
Relationship of 3D L/R Display Reference and displayed data . . . . . . . . . . . . . . . . . . . . . . . . . . . . . . 94
Output reference - displayed data. . . . . . . . . . . . . . . . . . . . . . . . . . . . . . . . . . . . . . . . . . . . . . . . . . . . . . . . . . . . . . . 95
Delay example for 3D L/R Output Reference . . . . . . . . . . . . . . . . . . . . . . . . . . . . . . . . . . . . . . . . . . . . . . . . . . 95
Advanced Image settings : freeze . . . . . . . . . . . . . . . . . . . . . . . . . . . . . . . . . . . . . . . . . . . . . . . . . . . . . . . . . . . . . . 96
Advanced Image settings : freeze activated . . . . . . . . . . . . . . . . . . . . . . . . . . . . . . . . . . . . . . . . . . . . . . . . . . . 96
Internal clock set up . . . . . . . . . . . . . . . . . . . . . . . . . . . . . . . . . . . . . . . . . . . . . . . . . . . . . . . . . . . . . . . . . . . . . . . . . . . . . . 97
Setting the internal clock . . . . . . . . . . . . . . . . . . . . . . . . . . . . . . . . . . . . . . . . . . . . . . . . . . . . . . . . . . . . . . . . . . . . . . . . . 97
Internal clock set message. . . . . . . . . . . . . . . . . . . . . . . . . . . . . . . . . . . . . . . . . . . . . . . . . . . . . . . . . . . . . . . . . . . . . . . 97
Set current PC time as internal clock . . . . . . . . . . . . . . . . . . . . . . . . . . . . . . . . . . . . . . . . . . . . . . . . . . . . . . . . . . . 98
Serial Bus Address Setting . . . . . . . . . . . . . . . . . . . . . . . . . . . . . . . . . . . . . . . . . . . . . . . . . . . . . . . . . . . . . . . . . . . . . . 98
Hostname set up . . . . . . . . . . . . . . . . . . . . . . . . . . . . . . . . . . . . . . . . . . . . . . . . . . . . . . . . . . . . . . . . . . . . . . . . . . . . . . . . 101
Network properties, TI button selected. . . . . . . . . . . . . . . . . . . . . . . . . . . . . . . . . . . . . . . . . . . . . . . . . . . . . . . 102
Network settings window, DHCP selected . . . . . . . . . . . . . . . . . . . . . . . . . . . . . . . . . . . . . . . . . . . . . . . . . . . 102
Ethernet state . . . . . . . . . . . . . . . . . . . . . . . . . . . . . . . . . . . . . . . . . . . . . . . . . . . . . . . . . . . . . . . . . . . . . . . . . . . . . . . . . . . 102
Network settings window, manual set up selected . . . . . . . . . . . . . . . . . . . . . . . . . . . . . . . . . . . . . . . . . . 104
Network properties, Barco controller. . . . . . . . . . . . . . . . . . . . . . . . . . . . . . . . . . . . . . . . . . . . . . . . . . . . . . . . . . 105
Network settings window, Barco controller . . . . . . . . . . . . . . . . . . . . . . . . . . . . . . . . . . . . . . . . . . . . . . . . . . . 105
Ethernet state . . . . . . . . . . . . . . . . . . . . . . . . . . . . . . . . . . . . . . . . . . . . . . . . . . . . . . . . . . . . . . . . . . . . . . . . . . . . . . . . . . . 106
Network settings, Barco controller . . . . . . . . . . . . . . . . . . . . . . . . . . . . . . . . . . . . . . . . . . . . . . . . . . . . . . . . . . . . 107
Physical position of BD37 connector on DP50. . . . . . . . . . . . . . . . . . . . . . . . . . . . . . . . . . . . . . . . . . . . . . . 108
Physical position of BD37 connector on DP30. . . . . . . . . . . . . . . . . . . . . . . . . . . . . . . . . . . . . . . . . . . . . . . 109
Physical position of DB37 connector on DP100-DP90. . . . . . . . . . . . . . . . . . . . . . . . . . . . . . . . . . . . . . 109
General purpose input selection. . . . . . . . . . . . . . . . . . . . . . . . . . . . . . . . . . . . . . . . . . . . . . . . . . . . . . . . . . . . . . . 109
Macro selection menu . . . . . . . . . . . . . . . . . . . . . . . . . . . . . . . . . . . . . . . . . . . . . . . . . . . . . . . . . . . . . . . . . . . . . . . . . . 109
Macro selected . . . . . . . . . . . . . . . . . . . . . . . . . . . . . . . . . . . . . . . . . . . . . . . . . . . . . . . . . . . . . . . . . . . . . . . . . . . . . . . . . . .110
Macro file filled out . . . . . . . . . . . . . . . . . . . . . . . . . . . . . . . . . . . . . . . . . . . . . . . . . . . . . . . . . . . . . . . . . . . . . . . . . . . . . . .110
Select Configure serial ports. . . . . . . . . . . . . . . . . . . . . . . . . . . . . . . . . . . . . . . . . . . . . . . . . . . . . . . . . . . . . . . . . . . .111
Serial Port overview window . . . . . . . . . . . . . . . . . . . . . . . . . . . . . . . . . . . . . . . . . . . . . . . . . . . . . . . . . . . . . . . . . . . .111
Serial number indication. . . . . . . . . . . . . . . . . . . . . . . . . . . . . . . . . . . . . . . . . . . . . . . . . . . . . . . . . . . . . . . . . . . . . . . . .111
SNMP key selected . . . . . . . . . . . . . . . . . . . . . . . . . . . . . . . . . . . . . . . . . . . . . . . . . . . . . . . . . . . . . . . . . . . . . . . . . . . . . .112
SNMP key input . . . . . . . . . . . . . . . . . . . . . . . . . . . . . . . . . . . . . . . . . . . . . . . . . . . . . . . . . . . . . . . . . . . . . . . . . . . . . . . . . .112
SNMP key check . . . . . . . . . . . . . . . . . . . . . . . . . . . . . . . . . . . . . . . . . . . . . . . . . . . . . . . . . . . . . . . . . . . . . . . . . . . . . . . . .112
R5976510 D-CINE COMMUNICATOR 11/04/2006
305
List of images
5-31
5-32
5-33
5-34
5-35
5-36
5-37
5-38
5-39
5-40
5-41
5-42
5-43
5-44
5-45
5-46
5-47
5-48
5-49
6-1
6-2
6-3
6-4
6-5
6-6
6-7
6-8
6-9
6-10
6-11
6-12
6-13
6-14
6-15
6-16
7-1
7-2
7-3
7-4
7-5
7-6
7-7
7-8
7-9
7-10
7-11
7-12
7-13
7-14
7-15
8-1
8-2
8-3
8-4
8-5
8-6
8-7
8-8
8-9
306
SNMP settings selected . . . . . . . . . . . . . . . . . . . . . . . . . . . . . . . . . . . . . . . . . . . . . . . . . . . . . . . . . . . . . . . . . . . . . . . . .113
SNMP configuration . . . . . . . . . . . . . . . . . . . . . . . . . . . . . . . . . . . . . . . . . . . . . . . . . . . . . . . . . . . . . . . . . . . . . . . . . . . . .113
Management system server IP address . . . . . . . . . . . . . . . . . . . . . . . . . . . . . . . . . . . . . . . . . . . . . . . . . . . . . . .113
Selecting CLO key . . . . . . . . . . . . . . . . . . . . . . . . . . . . . . . . . . . . . . . . . . . . . . . . . . . . . . . . . . . . . . . . . . . . . . . . . . . . . . .114
CLO key window for DP50 . . . . . . . . . . . . . . . . . . . . . . . . . . . . . . . . . . . . . . . . . . . . . . . . . . . . . . . . . . . . . . . . . . . . . .114
CLO key window for DP30, DP100 and DP90 . . . . . . . . . . . . . . . . . . . . . . . . . . . . . . . . . . . . . . . . . . . . . . . .114
CLO key entry check window . . . . . . . . . . . . . . . . . . . . . . . . . . . . . . . . . . . . . . . . . . . . . . . . . . . . . . . . . . . . . . . . . . .114
Lens availability selected. . . . . . . . . . . . . . . . . . . . . . . . . . . . . . . . . . . . . . . . . . . . . . . . . . . . . . . . . . . . . . . . . . . . . . . .115
Lens motor availability setup. . . . . . . . . . . . . . . . . . . . . . . . . . . . . . . . . . . . . . . . . . . . . . . . . . . . . . . . . . . . . . . . . . . .115
Lamp Run Time and Strikes indication . . . . . . . . . . . . . . . . . . . . . . . . . . . . . . . . . . . . . . . . . . . . . . . . . . . . . . . .115
Changing the values . . . . . . . . . . . . . . . . . . . . . . . . . . . . . . . . . . . . . . . . . . . . . . . . . . . . . . . . . . . . . . . . . . . . . . . . . . . . .116
Applying new values Lamp . . . . . . . . . . . . . . . . . . . . . . . . . . . . . . . . . . . . . . . . . . . . . . . . . . . . . . . . . . . . . . . . . . . . .116
New lamp values confirmation window . . . . . . . . . . . . . . . . . . . . . . . . . . . . . . . . . . . . . . . . . . . . . . . . . . . . . . . .116
Settings overview . . . . . . . . . . . . . . . . . . . . . . . . . . . . . . . . . . . . . . . . . . . . . . . . . . . . . . . . . . . . . . . . . . . . . . . . . . . . . . . .116
Lamp reset message . . . . . . . . . . . . . . . . . . . . . . . . . . . . . . . . . . . . . . . . . . . . . . . . . . . . . . . . . . . . . . . . . . . . . . . . . . . .117
Select lamp reset . . . . . . . . . . . . . . . . . . . . . . . . . . . . . . . . . . . . . . . . . . . . . . . . . . . . . . . . . . . . . . . . . . . . . . . . . . . . . . . .118
Lamp reset message . . . . . . . . . . . . . . . . . . . . . . . . . . . . . . . . . . . . . . . . . . . . . . . . . . . . . . . . . . . . . . . . . . . . . . . . . . . .118
Lamp article number selection. . . . . . . . . . . . . . . . . . . . . . . . . . . . . . . . . . . . . . . . . . . . . . . . . . . . . . . . . . . . . . . . . .118
Lamp article number filled out . . . . . . . . . . . . . . . . . . . . . . . . . . . . . . . . . . . . . . . . . . . . . . . . . . . . . . . . . . . . . . . . . .118
Ethernet test : fill out the address . . . . . . . . . . . . . . . . . . . . . . . . . . . . . . . . . . . . . . . . . . . . . . . . . . . . . . . . . . . . . .119
Starting the Ethernet test. . . . . . . . . . . . . . . . . . . . . . . . . . . . . . . . . . . . . . . . . . . . . . . . . . . . . . . . . . . . . . . . . . . . . . . 120
Ping successfully. . . . . . . . . . . . . . . . . . . . . . . . . . . . . . . . . . . . . . . . . . . . . . . . . . . . . . . . . . . . . . . . . . . . . . . . . . . . . . . . 120
Ping fail message . . . . . . . . . . . . . . . . . . . . . . . . . . . . . . . . . . . . . . . . . . . . . . . . . . . . . . . . . . . . . . . . . . . . . . . . . . . . . . . 120
Change test pattern selected . . . . . . . . . . . . . . . . . . . . . . . . . . . . . . . . . . . . . . . . . . . . . . . . . . . . . . . . . . . . . . . . . . 120
Retrieving test pattern . . . . . . . . . . . . . . . . . . . . . . . . . . . . . . . . . . . . . . . . . . . . . . . . . . . . . . . . . . . . . . . . . . . . . . . . . . 120
List of test patterns. . . . . . . . . . . . . . . . . . . . . . . . . . . . . . . . . . . . . . . . . . . . . . . . . . . . . . . . . . . . . . . . . . . . . . . . . . . . . . 121
Loading test patterns . . . . . . . . . . . . . . . . . . . . . . . . . . . . . . . . . . . . . . . . . . . . . . . . . . . . . . . . . . . . . . . . . . . . . . . . . . . 121
Test pattern displayed. . . . . . . . . . . . . . . . . . . . . . . . . . . . . . . . . . . . . . . . . . . . . . . . . . . . . . . . . . . . . . . . . . . . . . . . . . 121
Test pattern shortcuts. . . . . . . . . . . . . . . . . . . . . . . . . . . . . . . . . . . . . . . . . . . . . . . . . . . . . . . . . . . . . . . . . . . . . . . . . . . 122
Clear test pattern. . . . . . . . . . . . . . . . . . . . . . . . . . . . . . . . . . . . . . . . . . . . . . . . . . . . . . . . . . . . . . . . . . . . . . . . . . . . . . . . 122
Clear test pattern warning. . . . . . . . . . . . . . . . . . . . . . . . . . . . . . . . . . . . . . . . . . . . . . . . . . . . . . . . . . . . . . . . . . . . . . 122
Removing test pattern . . . . . . . . . . . . . . . . . . . . . . . . . . . . . . . . . . . . . . . . . . . . . . . . . . . . . . . . . . . . . . . . . . . . . . . . . . 122
Error count on port 292 A & B . . . . . . . . . . . . . . . . . . . . . . . . . . . . . . . . . . . . . . . . . . . . . . . . . . . . . . . . . . . . . . . . . 123
Start up Self tests setup . . . . . . . . . . . . . . . . . . . . . . . . . . . . . . . . . . . . . . . . . . . . . . . . . . . . . . . . . . . . . . . . . . . . . . . . 123
Self test setup . . . . . . . . . . . . . . . . . . . . . . . . . . . . . . . . . . . . . . . . . . . . . . . . . . . . . . . . . . . . . . . . . . . . . . . . . . . . . . . . . . . 124
Selecting Measure Color Gamut . . . . . . . . . . . . . . . . . . . . . . . . . . . . . . . . . . . . . . . . . . . . . . . . . . . . . . . . . . . . . . 128
Color Gamut Measurement window . . . . . . . . . . . . . . . . . . . . . . . . . . . . . . . . . . . . . . . . . . . . . . . . . . . . . . . . . . 129
Color Gamut Measurement Red selected . . . . . . . . . . . . . . . . . . . . . . . . . . . . . . . . . . . . . . . . . . . . . . . . . . . . 129
Loading test pattern message . . . . . . . . . . . . . . . . . . . . . . . . . . . . . . . . . . . . . . . . . . . . . . . . . . . . . . . . . . . . . . . . . 129
Values successfully applied . . . . . . . . . . . . . . . . . . . . . . . . . . . . . . . . . . . . . . . . . . . . . . . . . . . . . . . . . . . . . . . . . . . . 129
Selecting Target Color Gamut file . . . . . . . . . . . . . . . . . . . . . . . . . . . . . . . . . . . . . . . . . . . . . . . . . . . . . . . . . . . . . 130
Retrieving color gamut files . . . . . . . . . . . . . . . . . . . . . . . . . . . . . . . . . . . . . . . . . . . . . . . . . . . . . . . . . . . . . . . . . . . . 130
Overview color gamut files . . . . . . . . . . . . . . . . . . . . . . . . . . . . . . . . . . . . . . . . . . . . . . . . . . . . . . . . . . . . . . . . . . . . . 130
Adjust color gamut message. . . . . . . . . . . . . . . . . . . . . . . . . . . . . . . . . . . . . . . . . . . . . . . . . . . . . . . . . . . . . . . . . . . 130
File active message. . . . . . . . . . . . . . . . . . . . . . . . . . . . . . . . . . . . . . . . . . . . . . . . . . . . . . . . . . . . . . . . . . . . . . . . . . . . . 130
Selecting Target Color Gamut file . . . . . . . . . . . . . . . . . . . . . . . . . . . . . . . . . . . . . . . . . . . . . . . . . . . . . . . . . . . . . 131
Browser window to TCGD files . . . . . . . . . . . . . . . . . . . . . . . . . . . . . . . . . . . . . . . . . . . . . . . . . . . . . . . . . . . . . . . . 131
Select Verify Color Gamut . . . . . . . . . . . . . . . . . . . . . . . . . . . . . . . . . . . . . . . . . . . . . . . . . . . . . . . . . . . . . . . . . . . . . 132
Verify color window . . . . . . . . . . . . . . . . . . . . . . . . . . . . . . . . . . . . . . . . . . . . . . . . . . . . . . . . . . . . . . . . . . . . . . . . . . . . . 132
Remove test pattern . . . . . . . . . . . . . . . . . . . . . . . . . . . . . . . . . . . . . . . . . . . . . . . . . . . . . . . . . . . . . . . . . . . . . . . . . . . . 132
Default projector file system view . . . . . . . . . . . . . . . . . . . . . . . . . . . . . . . . . . . . . . . . . . . . . . . . . . . . . . . . . . . . . 134
File or structure selection window . . . . . . . . . . . . . . . . . . . . . . . . . . . . . . . . . . . . . . . . . . . . . . . . . . . . . . . . . . . . . 137
Renaming files and folders. . . . . . . . . . . . . . . . . . . . . . . . . . . . . . . . . . . . . . . . . . . . . . . . . . . . . . . . . . . . . . . . . . . . . 137
Rename dialog box . . . . . . . . . . . . . . . . . . . . . . . . . . . . . . . . . . . . . . . . . . . . . . . . . . . . . . . . . . . . . . . . . . . . . . . . . . . . . 137
Deleting a file or directory . . . . . . . . . . . . . . . . . . . . . . . . . . . . . . . . . . . . . . . . . . . . . . . . . . . . . . . . . . . . . . . . . . . . . . 138
Delete confirmation . . . . . . . . . . . . . . . . . . . . . . . . . . . . . . . . . . . . . . . . . . . . . . . . . . . . . . . . . . . . . . . . . . . . . . . . . . . . . 138
Creation of new folder . . . . . . . . . . . . . . . . . . . . . . . . . . . . . . . . . . . . . . . . . . . . . . . . . . . . . . . . . . . . . . . . . . . . . . . . . . 138
New folder pop up . . . . . . . . . . . . . . . . . . . . . . . . . . . . . . . . . . . . . . . . . . . . . . . . . . . . . . . . . . . . . . . . . . . . . . . . . . . . . . 138
Selecting Changing Attributes . . . . . . . . . . . . . . . . . . . . . . . . . . . . . . . . . . . . . . . . . . . . . . . . . . . . . . . . . . . . . . . . . 139
R5976510 D-CINE COMMUNICATOR 11/04/2006
List of images
8-10
8-11
8-12
8-13
8-14
8-15
8-16
8-17
8-18
8-19
8-20
8-21
8-22
8-23
8-24
8-25
8-26
8-27
8-28
8-29
8-30
8-31
8-32
8-33
8-34
8-35
8-36
8-37
8-38
8-40
8-41
8-42
8-43
8-44
8-45
8-46
8-47
8-48
8-49
8-50
8-51
8-52
8-53
8-54
8-55
8-56
8-57
8-58
8-59
9-1
9-2
9-3
9-4
9-5
9-6
9-7
9-8
9-9
9-10
9-11
Attribute window. . . . . . . . . . . . . . . . . . . . . . . . . . . . . . . . . . . . . . . . . . . . . . . . . . . . . . . . . . . . . . . . . . . . . . . . . . . . . . . . .
Uploading file or files . . . . . . . . . . . . . . . . . . . . . . . . . . . . . . . . . . . . . . . . . . . . . . . . . . . . . . . . . . . . . . . . . . . . . . . . . . .
Download file or files. . . . . . . . . . . . . . . . . . . . . . . . . . . . . . . . . . . . . . . . . . . . . . . . . . . . . . . . . . . . . . . . . . . . . . . . . . . .
Change view internal file system . . . . . . . . . . . . . . . . . . . . . . . . . . . . . . . . . . . . . . . . . . . . . . . . . . . . . . . . . . . . . .
View selection internal file system . . . . . . . . . . . . . . . . . . . . . . . . . . . . . . . . . . . . . . . . . . . . . . . . . . . . . . . . . . . .
Save from active selected. . . . . . . . . . . . . . . . . . . . . . . . . . . . . . . . . . . . . . . . . . . . . . . . . . . . . . . . . . . . . . . . . . . . . .
Message Directory structure view . . . . . . . . . . . . . . . . . . . . . . . . . . . . . . . . . . . . . . . . . . . . . . . . . . . . . . . . . . . . .
Save from Active input . . . . . . . . . . . . . . . . . . . . . . . . . . . . . . . . . . . . . . . . . . . . . . . . . . . . . . . . . . . . . . . . . . . . . . . . .
Change view selected . . . . . . . . . . . . . . . . . . . . . . . . . . . . . . . . . . . . . . . . . . . . . . . . . . . . . . . . . . . . . . . . . . . . . . . . . .
Select SCREEN . . . . . . . . . . . . . . . . . . . . . . . . . . . . . . . . . . . . . . . . . . . . . . . . . . . . . . . . . . . . . . . . . . . . . . . . . . . . . . . . .
“Select Active” selected . . . . . . . . . . . . . . . . . . . . . . . . . . . . . . . . . . . . . . . . . . . . . . . . . . . . . . . . . . . . . . . . . . . . . . . .
Message Directory structure view . . . . . . . . . . . . . . . . . . . . . . . . . . . . . . . . . . . . . . . . . . . . . . . . . . . . . . . . . . . . .
Select active confirmation window . . . . . . . . . . . . . . . . . . . . . . . . . . . . . . . . . . . . . . . . . . . . . . . . . . . . . . . . . . . .
Select active successfully . . . . . . . . . . . . . . . . . . . . . . . . . . . . . . . . . . . . . . . . . . . . . . . . . . . . . . . . . . . . . . . . . . . . . .
Select Change View . . . . . . . . . . . . . . . . . . . . . . . . . . . . . . . . . . . . . . . . . . . . . . . . . . . . . . . . . . . . . . . . . . . . . . . . . . . .
Select SCREEN . . . . . . . . . . . . . . . . . . . . . . . . . . . . . . . . . . . . . . . . . . . . . . . . . . . . . . . . . . . . . . . . . . . . . . . . . . . . . . . . .
Write Active Direct selected. . . . . . . . . . . . . . . . . . . . . . . . . . . . . . . . . . . . . . . . . . . . . . . . . . . . . . . . . . . . . . . . . . . .
Type message. . . . . . . . . . . . . . . . . . . . . . . . . . . . . . . . . . . . . . . . . . . . . . . . . . . . . . . . . . . . . . . . . . . . . . . . . . . . . . . . . . .
Directory structure error . . . . . . . . . . . . . . . . . . . . . . . . . . . . . . . . . . . . . . . . . . . . . . . . . . . . . . . . . . . . . . . . . . . . . . . .
Confirmation of Write Active Direct. . . . . . . . . . . . . . . . . . . . . . . . . . . . . . . . . . . . . . . . . . . . . . . . . . . . . . . . . . . .
Success message while writing to ACTIVE . . . . . . . . . . . . . . . . . . . . . . . . . . . . . . . . . . . . . . . . . . . . . . . . . .
Select Change View . . . . . . . . . . . . . . . . . . . . . . . . . . . . . . . . . . . . . . . . . . . . . . . . . . . . . . . . . . . . . . . . . . . . . . . . . . . .
Select SCREEN . . . . . . . . . . . . . . . . . . . . . . . . . . . . . . . . . . . . . . . . . . . . . . . . . . . . . . . . . . . . . . . . . . . . . . . . . . . . . . . . .
Select Read from Active. . . . . . . . . . . . . . . . . . . . . . . . . . . . . . . . . . . . . . . . . . . . . . . . . . . . . . . . . . . . . . . . . . . . . . . .
Directory structure message . . . . . . . . . . . . . . . . . . . . . . . . . . . . . . . . . . . . . . . . . . . . . . . . . . . . . . . . . . . . . . . . . . .
Input box for file name. . . . . . . . . . . . . . . . . . . . . . . . . . . . . . . . . . . . . . . . . . . . . . . . . . . . . . . . . . . . . . . . . . . . . . . . . .
Select Files Active . . . . . . . . . . . . . . . . . . . . . . . . . . . . . . . . . . . . . . . . . . . . . . . . . . . . . . . . . . . . . . . . . . . . . . . . . . . . . .
Files Active window . . . . . . . . . . . . . . . . . . . . . . . . . . . . . . . . . . . . . . . . . . . . . . . . . . . . . . . . . . . . . . . . . . . . . . . . . . . . .
Select Change View . . . . . . . . . . . . . . . . . . . . . . . . . . . . . . . . . . . . . . . . . . . . . . . . . . . . . . . . . . . . . . . . . . . . . . . . . . . .
Execute macro selected. . . . . . . . . . . . . . . . . . . . . . . . . . . . . . . . . . . . . . . . . . . . . . . . . . . . . . . . . . . . . . . . . . . . . . . .
Wrong View message . . . . . . . . . . . . . . . . . . . . . . . . . . . . . . . . . . . . . . . . . . . . . . . . . . . . . . . . . . . . . . . . . . . . . . . . . .
Execute Macro Confirmation window . . . . . . . . . . . . . . . . . . . . . . . . . . . . . . . . . . . . . . . . . . . . . . . . . . . . . . . . .
Successfully executed message . . . . . . . . . . . . . . . . . . . . . . . . . . . . . . . . . . . . . . . . . . . . . . . . . . . . . . . . . . . . . .
Backup/Restore selected. . . . . . . . . . . . . . . . . . . . . . . . . . . . . . . . . . . . . . . . . . . . . . . . . . . . . . . . . . . . . . . . . . . . . . .
Backup/Restore choice window . . . . . . . . . . . . . . . . . . . . . . . . . . . . . . . . . . . . . . . . . . . . . . . . . . . . . . . . . . . . . . .
Backup message. . . . . . . . . . . . . . . . . . . . . . . . . . . . . . . . . . . . . . . . . . . . . . . . . . . . . . . . . . . . . . . . . . . . . . . . . . . . . . . .
Browser on PC file system . . . . . . . . . . . . . . . . . . . . . . . . . . . . . . . . . . . . . . . . . . . . . . . . . . . . . . . . . . . . . . . . . . . . .
Backup status, retrieve files. . . . . . . . . . . . . . . . . . . . . . . . . . . . . . . . . . . . . . . . . . . . . . . . . . . . . . . . . . . . . . . . . . . .
Backup amount indication. . . . . . . . . . . . . . . . . . . . . . . . . . . . . . . . . . . . . . . . . . . . . . . . . . . . . . . . . . . . . . . . . . . . . .
Retrieve status of backup . . . . . . . . . . . . . . . . . . . . . . . . . . . . . . . . . . . . . . . . . . . . . . . . . . . . . . . . . . . . . . . . . . . . . .
Backup status ready . . . . . . . . . . . . . . . . . . . . . . . . . . . . . . . . . . . . . . . . . . . . . . . . . . . . . . . . . . . . . . . . . . . . . . . . . . . .
Backup/Restore selected. . . . . . . . . . . . . . . . . . . . . . . . . . . . . . . . . . . . . . . . . . . . . . . . . . . . . . . . . . . . . . . . . . . . . . .
Backup/Restore choice window . . . . . . . . . . . . . . . . . . . . . . . . . . . . . . . . . . . . . . . . . . . . . . . . . . . . . . . . . . . . . . .
Restore message . . . . . . . . . . . . . . . . . . . . . . . . . . . . . . . . . . . . . . . . . . . . . . . . . . . . . . . . . . . . . . . . . . . . . . . . . . . . . . .
Browser window on file system . . . . . . . . . . . . . . . . . . . . . . . . . . . . . . . . . . . . . . . . . . . . . . . . . . . . . . . . . . . . . . . .
Restore message, amount of files. . . . . . . . . . . . . . . . . . . . . . . . . . . . . . . . . . . . . . . . . . . . . . . . . . . . . . . . . . . . .
Restore message, busy . . . . . . . . . . . . . . . . . . . . . . . . . . . . . . . . . . . . . . . . . . . . . . . . . . . . . . . . . . . . . . . . . . . . . . . .
Restore ready message . . . . . . . . . . . . . . . . . . . . . . . . . . . . . . . . . . . . . . . . . . . . . . . . . . . . . . . . . . . . . . . . . . . . . . . .
Restore successful message . . . . . . . . . . . . . . . . . . . . . . . . . . . . . . . . . . . . . . . . . . . . . . . . . . . . . . . . . . . . . . . . . .
Starting the update procedure . . . . . . . . . . . . . . . . . . . . . . . . . . . . . . . . . . . . . . . . . . . . . . . . . . . . . . . . . . . . . . . . .
Update manager . . . . . . . . . . . . . . . . . . . . . . . . . . . . . . . . . . . . . . . . . . . . . . . . . . . . . . . . . . . . . . . . . . . . . . . . . . . . . . . .
Selecting the update file. . . . . . . . . . . . . . . . . . . . . . . . . . . . . . . . . . . . . . . . . . . . . . . . . . . . . . . . . . . . . . . . . . . . . . . .
Hardware version check. . . . . . . . . . . . . . . . . . . . . . . . . . . . . . . . . . . . . . . . . . . . . . . . . . . . . . . . . . . . . . . . . . . . . . . .
Update list . . . . . . . . . . . . . . . . . . . . . . . . . . . . . . . . . . . . . . . . . . . . . . . . . . . . . . . . . . . . . . . . . . . . . . . . . . . . . . . . . . . . . . .
Update busy . . . . . . . . . . . . . . . . . . . . . . . . . . . . . . . . . . . . . . . . . . . . . . . . . . . . . . . . . . . . . . . . . . . . . . . . . . . . . . . . . . . . .
Update caution . . . . . . . . . . . . . . . . . . . . . . . . . . . . . . . . . . . . . . . . . . . . . . . . . . . . . . . . . . . . . . . . . . . . . . . . . . . . . . . . . .
Update message . . . . . . . . . . . . . . . . . . . . . . . . . . . . . . . . . . . . . . . . . . . . . . . . . . . . . . . . . . . . . . . . . . . . . . . . . . . . . . . .
Message after reset. . . . . . . . . . . . . . . . . . . . . . . . . . . . . . . . . . . . . . . . . . . . . . . . . . . . . . . . . . . . . . . . . . . . . . . . . . . . .
Button module upgrade . . . . . . . . . . . . . . . . . . . . . . . . . . . . . . . . . . . . . . . . . . . . . . . . . . . . . . . . . . . . . . . . . . . . . . . .
Touch panel upgrade . . . . . . . . . . . . . . . . . . . . . . . . . . . . . . . . . . . . . . . . . . . . . . . . . . . . . . . . . . . . . . . . . . . . . . . . . . .
R5976510 D-CINE COMMUNICATOR 11/04/2006
139
140
140
141
142
142
142
142
143
143
143
143
143
143
144
144
145
145
145
145
145
146
146
146
146
146
147
147
148
149
149
149
149
150
150
150
150
151
151
151
151
152
152
152
152
153
153
153
153
156
157
157
158
159
159
160
160
160
161
162
307
List of images
9-12
9-13
10-1
10-3
10-4
10-5
10-6
10-7
10-8
10-9
11-1
11-2
11-3
11-4
11-5
11-6
12-1
12-2
12-3
12-4
12-5
12-6
13-1
13-2
13-3
13-4
13-5
13-6
13-7
13-8
13-9
13-10
13-11
13-12
13-13
13-14
13-15
13-16
13-17
14-1
14-2
14-3
14-4
14-5
14-6
14-7
14-8
14-9
14-10
14-11
14-12
14-13
14-15
14-16
14-18
15-1
15-2
15-3
15-4
308
Controller software message . . . . . . . . . . . . . . . . . . . . . . . . . . . . . . . . . . . . . . . . . . . . . . . . . . . . . . . . . . . . . . . . . .
Update manager . . . . . . . . . . . . . . . . . . . . . . . . . . . . . . . . . . . . . . . . . . . . . . . . . . . . . . . . . . . . . . . . . . . . . . . . . . . . . . . .
Card cage Dallas key protection . . . . . . . . . . . . . . . . . . . . . . . . . . . . . . . . . . . . . . . . . . . . . . . . . . . . . . . . . . . . . .
Key code window . . . . . . . . . . . . . . . . . . . . . . . . . . . . . . . . . . . . . . . . . . . . . . . . . . . . . . . . . . . . . . . . . . . . . . . . . . . . . . .
Key code window example. . . . . . . . . . . . . . . . . . . . . . . . . . . . . . . . . . . . . . . . . . . . . . . . . . . . . . . . . . . . . . . . . . . . .
Key validation . . . . . . . . . . . . . . . . . . . . . . . . . . . . . . . . . . . . . . . . . . . . . . . . . . . . . . . . . . . . . . . . . . . . . . . . . . . . . . . . . . .
Key list . . . . . . . . . . . . . . . . . . . . . . . . . . . . . . . . . . . . . . . . . . . . . . . . . . . . . . . . . . . . . . . . . . . . . . . . . . . . . . . . . . . . . . . . . . .
Key code list . . . . . . . . . . . . . . . . . . . . . . . . . . . . . . . . . . . . . . . . . . . . . . . . . . . . . . . . . . . . . . . . . . . . . . . . . . . . . . . . . . . . .
Read log security file . . . . . . . . . . . . . . . . . . . . . . . . . . . . . . . . . . . . . . . . . . . . . . . . . . . . . . . . . . . . . . . . . . . . . . . . . . .
Card Cage log file. . . . . . . . . . . . . . . . . . . . . . . . . . . . . . . . . . . . . . . . . . . . . . . . . . . . . . . . . . . . . . . . . . . . . . . . . . . . . . .
Automation interface. . . . . . . . . . . . . . . . . . . . . . . . . . . . . . . . . . . . . . . . . . . . . . . . . . . . . . . . . . . . . . . . . . . . . . . . . . . .
Configuration panel action list . . . . . . . . . . . . . . . . . . . . . . . . . . . . . . . . . . . . . . . . . . . . . . . . . . . . . . . . . . . . . . . . .
Output module selection . . . . . . . . . . . . . . . . . . . . . . . . . . . . . . . . . . . . . . . . . . . . . . . . . . . . . . . . . . . . . . . . . . . . . . .
Output selection . . . . . . . . . . . . . . . . . . . . . . . . . . . . . . . . . . . . . . . . . . . . . . . . . . . . . . . . . . . . . . . . . . . . . . . . . . . . . . . . .
Status selection output . . . . . . . . . . . . . . . . . . . . . . . . . . . . . . . . . . . . . . . . . . . . . . . . . . . . . . . . . . . . . . . . . . . . . . . . .
Macro selection for action list . . . . . . . . . . . . . . . . . . . . . . . . . . . . . . . . . . . . . . . . . . . . . . . . . . . . . . . . . . . . . . . . . .
Button configuration . . . . . . . . . . . . . . . . . . . . . . . . . . . . . . . . . . . . . . . . . . . . . . . . . . . . . . . . . . . . . . . . . . . . . . . . . . . .
Active button. . . . . . . . . . . . . . . . . . . . . . . . . . . . . . . . . . . . . . . . . . . . . . . . . . . . . . . . . . . . . . . . . . . . . . . . . . . . . . . . . . . . .
Change macro selected . . . . . . . . . . . . . . . . . . . . . . . . . . . . . . . . . . . . . . . . . . . . . . . . . . . . . . . . . . . . . . . . . . . . . . . .
Macro selection window . . . . . . . . . . . . . . . . . . . . . . . . . . . . . . . . . . . . . . . . . . . . . . . . . . . . . . . . . . . . . . . . . . . . . . . .
Edit selected macro. . . . . . . . . . . . . . . . . . . . . . . . . . . . . . . . . . . . . . . . . . . . . . . . . . . . . . . . . . . . . . . . . . . . . . . . . . . . .
Macro editor . . . . . . . . . . . . . . . . . . . . . . . . . . . . . . . . . . . . . . . . . . . . . . . . . . . . . . . . . . . . . . . . . . . . . . . . . . . . . . . . . . . . .
Principal diagram subtitling . . . . . . . . . . . . . . . . . . . . . . . . . . . . . . . . . . . . . . . . . . . . . . . . . . . . . . . . . . . . . . . . . . . .
Overview interface . . . . . . . . . . . . . . . . . . . . . . . . . . . . . . . . . . . . . . . . . . . . . . . . . . . . . . . . . . . . . . . . . . . . . . . . . . . . . .
Time source selection . . . . . . . . . . . . . . . . . . . . . . . . . . . . . . . . . . . . . . . . . . . . . . . . . . . . . . . . . . . . . . . . . . . . . . . . . .
Input frequency selection. . . . . . . . . . . . . . . . . . . . . . . . . . . . . . . . . . . . . . . . . . . . . . . . . . . . . . . . . . . . . . . . . . . . . . .
Set up timeline stamp . . . . . . . . . . . . . . . . . . . . . . . . . . . . . . . . . . . . . . . . . . . . . . . . . . . . . . . . . . . . . . . . . . . . . . . . . .
Timeline adjustment . . . . . . . . . . . . . . . . . . . . . . . . . . . . . . . . . . . . . . . . . . . . . . . . . . . . . . . . . . . . . . . . . . . . . . . . . . . .
Subtitle server address . . . . . . . . . . . . . . . . . . . . . . . . . . . . . . . . . . . . . . . . . . . . . . . . . . . . . . . . . . . . . . . . . . . . . . . . .
Subtitle file selection start up . . . . . . . . . . . . . . . . . . . . . . . . . . . . . . . . . . . . . . . . . . . . . . . . . . . . . . . . . . . . . . . . . .
Example of subtitle browser . . . . . . . . . . . . . . . . . . . . . . . . . . . . . . . . . . . . . . . . . . . . . . . . . . . . . . . . . . . . . . . . . . .
Subtitle file : example. . . . . . . . . . . . . . . . . . . . . . . . . . . . . . . . . . . . . . . . . . . . . . . . . . . . . . . . . . . . . . . . . . . . . . . . . . .
Time to live setting subtitling . . . . . . . . . . . . . . . . . . . . . . . . . . . . . . . . . . . . . . . . . . . . . . . . . . . . . . . . . . . . . . . . . . .
Activating Subtitling . . . . . . . . . . . . . . . . . . . . . . . . . . . . . . . . . . . . . . . . . . . . . . . . . . . . . . . . . . . . . . . . . . . . . . . . . . . . .
Metadata server address. . . . . . . . . . . . . . . . . . . . . . . . . . . . . . . . . . . . . . . . . . . . . . . . . . . . . . . . . . . . . . . . . . . . . . .
Metadata file selection. . . . . . . . . . . . . . . . . . . . . . . . . . . . . . . . . . . . . . . . . . . . . . . . . . . . . . . . . . . . . . . . . . . . . . . . . .
Example of browser window . . . . . . . . . . . . . . . . . . . . . . . . . . . . . . . . . . . . . . . . . . . . . . . . . . . . . . . . . . . . . . . . . . .
Example of metadata file . . . . . . . . . . . . . . . . . . . . . . . . . . . . . . . . . . . . . . . . . . . . . . . . . . . . . . . . . . . . . . . . . . . . . . .
Time to live . . . . . . . . . . . . . . . . . . . . . . . . . . . . . . . . . . . . . . . . . . . . . . . . . . . . . . . . . . . . . . . . . . . . . . . . . . . . . . . . . . . . . .
Projector status. . . . . . . . . . . . . . . . . . . . . . . . . . . . . . . . . . . . . . . . . . . . . . . . . . . . . . . . . . . . . . . . . . . . . . . . . . . . . . . . . .
Projector status SMPS overview . . . . . . . . . . . . . . . . . . . . . . . . . . . . . . . . . . . . . . . . . . . . . . . . . . . . . . . . . . . . . .
Projector Status Fan/tec overview . . . . . . . . . . . . . . . . . . . . . . . . . . . . . . . . . . . . . . . . . . . . . . . . . . . . . . . . . . . .
Fan location. . . . . . . . . . . . . . . . . . . . . . . . . . . . . . . . . . . . . . . . . . . . . . . . . . . . . . . . . . . . . . . . . . . . . . . . . . . . . . . . . . . . . .
Fan Card cage inside . . . . . . . . . . . . . . . . . . . . . . . . . . . . . . . . . . . . . . . . . . . . . . . . . . . . . . . . . . . . . . . . . . . . . . . . . . .
Fan Card cage cover . . . . . . . . . . . . . . . . . . . . . . . . . . . . . . . . . . . . . . . . . . . . . . . . . . . . . . . . . . . . . . . . . . . . . . . . . . .
Fan Engine . . . . . . . . . . . . . . . . . . . . . . . . . . . . . . . . . . . . . . . . . . . . . . . . . . . . . . . . . . . . . . . . . . . . . . . . . . . . . . . . . . . . . .
Projector Status Boards Status . . . . . . . . . . . . . . . . . . . . . . . . . . . . . . . . . . . . . . . . . . . . . . . . . . . . . . . . . . . . . . . .
Projector log file selected . . . . . . . . . . . . . . . . . . . . . . . . . . . . . . . . . . . . . . . . . . . . . . . . . . . . . . . . . . . . . . . . . . . . . .
Reading the projector log file . . . . . . . . . . . . . . . . . . . . . . . . . . . . . . . . . . . . . . . . . . . . . . . . . . . . . . . . . . . . . . . . . .
Projector Log information . . . . . . . . . . . . . . . . . . . . . . . . . . . . . . . . . . . . . . . . . . . . . . . . . . . . . . . . . . . . . . . . . . . . . .
Save the projector log file . . . . . . . . . . . . . . . . . . . . . . . . . . . . . . . . . . . . . . . . . . . . . . . . . . . . . . . . . . . . . . . . . . . . . .
Refresh the projector log file . . . . . . . . . . . . . . . . . . . . . . . . . . . . . . . . . . . . . . . . . . . . . . . . . . . . . . . . . . . . . . . . . . .
Clear projector log file . . . . . . . . . . . . . . . . . . . . . . . . . . . . . . . . . . . . . . . . . . . . . . . . . . . . . . . . . . . . . . . . . . . . . . . . . .
Security log selected. . . . . . . . . . . . . . . . . . . . . . . . . . . . . . . . . . . . . . . . . . . . . . . . . . . . . . . . . . . . . . . . . . . . . . . . . . . .
Certificate selection . . . . . . . . . . . . . . . . . . . . . . . . . . . . . . . . . . . . . . . . . . . . . . . . . . . . . . . . . . . . . . . . . . . . . . . . . . . . .
Projector Status . . . . . . . . . . . . . . . . . . . . . . . . . . . . . . . . . . . . . . . . . . . . . . . . . . . . . . . . . . . . . . . . . . . . . . . . . . . . . . . . .
Projector status SMPS overview . . . . . . . . . . . . . . . . . . . . . . . . . . . . . . . . . . . . . . . . . . . . . . . . . . . . . . . . . . . . . .
Projector status Lamp power supply overview. . . . . . . . . . . . . . . . . . . . . . . . . . . . . . . . . . . . . . . . . . . . . . .
Projector Status DCDC convertor Status. . . . . . . . . . . . . . . . . . . . . . . . . . . . . . . . . . . . . . . . . . . . . . . . . . . . .
163
164
165
166
166
166
167
168
168
168
169
170
171
171
171
171
173
174
175
175
176
177
179
180
181
181
182
182
183
184
184
185
185
186
187
187
188
188
189
191
192
193
194
194
194
194
195
196
196
196
197
197
197
198
199
201
202
203
204
R5976510 D-CINE COMMUNICATOR 11/04/2006
List of images
15-5
15-6
15-7
15-8
15-9
15-10
15-11
15-13
15-14
15-16
16-1
16-2
16-3
16-4
16-5
16-6
16-7
16-8
16-9
16-10
16-11
16-12
16-13
16-14
16-15
16-16
16-17
16-18
16-19
16-20
17-1
18-1
18-2
18-3
18-4
18-5
18-6
18-7
18-8
18-9
18-10
18-11
18-12
18-13
18-14
18-15
18-16
18-17
18-18
18-19
18-20
18-21
18-22
18-23
18-24
18-25
18-26
18-27
18-28
18-29
Projector Status Boards Status . . . . . . . . . . . . . . . . . . . . . . . . . . . . . . . . . . . . . . . . . . . . . . . . . . . . . . . . . . . . . . . . 205
Projector Status Lens Motor Controller Status. . . . . . . . . . . . . . . . . . . . . . . . . . . . . . . . . . . . . . . . . . . . . . . 206
Projector log file selected . . . . . . . . . . . . . . . . . . . . . . . . . . . . . . . . . . . . . . . . . . . . . . . . . . . . . . . . . . . . . . . . . . . . . . 207
Reading the projector log file . . . . . . . . . . . . . . . . . . . . . . . . . . . . . . . . . . . . . . . . . . . . . . . . . . . . . . . . . . . . . . . . . . 207
Projector Log information . . . . . . . . . . . . . . . . . . . . . . . . . . . . . . . . . . . . . . . . . . . . . . . . . . . . . . . . . . . . . . . . . . . . . . 207
Save the projector log file . . . . . . . . . . . . . . . . . . . . . . . . . . . . . . . . . . . . . . . . . . . . . . . . . . . . . . . . . . . . . . . . . . . . . . 207
Refresh the projector log file . . . . . . . . . . . . . . . . . . . . . . . . . . . . . . . . . . . . . . . . . . . . . . . . . . . . . . . . . . . . . . . . . . . 208
Clear projector log file . . . . . . . . . . . . . . . . . . . . . . . . . . . . . . . . . . . . . . . . . . . . . . . . . . . . . . . . . . . . . . . . . . . . . . . . . . 208
Security log selected. . . . . . . . . . . . . . . . . . . . . . . . . . . . . . . . . . . . . . . . . . . . . . . . . . . . . . . . . . . . . . . . . . . . . . . . . . . . 209
Certificate selection . . . . . . . . . . . . . . . . . . . . . . . . . . . . . . . . . . . . . . . . . . . . . . . . . . . . . . . . . . . . . . . . . . . . . . . . . . . . . 210
Projector status. . . . . . . . . . . . . . . . . . . . . . . . . . . . . . . . . . . . . . . . . . . . . . . . . . . . . . . . . . . . . . . . . . . . . . . . . . . . . . . . . . .211
Status overview voltages. . . . . . . . . . . . . . . . . . . . . . . . . . . . . . . . . . . . . . . . . . . . . . . . . . . . . . . . . . . . . . . . . . . . . . . 212
Status overview temperatures . . . . . . . . . . . . . . . . . . . . . . . . . . . . . . . . . . . . . . . . . . . . . . . . . . . . . . . . . . . . . . . . . 213
Ambient temperature sensor. . . . . . . . . . . . . . . . . . . . . . . . . . . . . . . . . . . . . . . . . . . . . . . . . . . . . . . . . . . . . . . . . . . 213
Sensors on modules . . . . . . . . . . . . . . . . . . . . . . . . . . . . . . . . . . . . . . . . . . . . . . . . . . . . . . . . . . . . . . . . . . . . . . . . . . . . 213
Lamp house sensor. . . . . . . . . . . . . . . . . . . . . . . . . . . . . . . . . . . . . . . . . . . . . . . . . . . . . . . . . . . . . . . . . . . . . . . . . . . . . 214
Status overview fans. . . . . . . . . . . . . . . . . . . . . . . . . . . . . . . . . . . . . . . . . . . . . . . . . . . . . . . . . . . . . . . . . . . . . . . . . . . . 214
Cold mirror bottom fan. . . . . . . . . . . . . . . . . . . . . . . . . . . . . . . . . . . . . . . . . . . . . . . . . . . . . . . . . . . . . . . . . . . . . . . . . . 215
Cold mirror top fan . . . . . . . . . . . . . . . . . . . . . . . . . . . . . . . . . . . . . . . . . . . . . . . . . . . . . . . . . . . . . . . . . . . . . . . . . . . . . . 215
Fan 1 – 4 elcabox . . . . . . . . . . . . . . . . . . . . . . . . . . . . . . . . . . . . . . . . . . . . . . . . . . . . . . . . . . . . . . . . . . . . . . . . . . . . . . . 215
Lamp fan cathode. . . . . . . . . . . . . . . . . . . . . . . . . . . . . . . . . . . . . . . . . . . . . . . . . . . . . . . . . . . . . . . . . . . . . . . . . . . . . . . 215
Lamp fan anode . . . . . . . . . . . . . . . . . . . . . . . . . . . . . . . . . . . . . . . . . . . . . . . . . . . . . . . . . . . . . . . . . . . . . . . . . . . . . . . . . 215
Start pulse generator fan . . . . . . . . . . . . . . . . . . . . . . . . . . . . . . . . . . . . . . . . . . . . . . . . . . . . . . . . . . . . . . . . . . . . . . . 215
Miscellaneous items . . . . . . . . . . . . . . . . . . . . . . . . . . . . . . . . . . . . . . . . . . . . . . . . . . . . . . . . . . . . . . . . . . . . . . . . . . . . 216
Waterflow switch location . . . . . . . . . . . . . . . . . . . . . . . . . . . . . . . . . . . . . . . . . . . . . . . . . . . . . . . . . . . . . . . . . . . . . . 216
Projector log selection . . . . . . . . . . . . . . . . . . . . . . . . . . . . . . . . . . . . . . . . . . . . . . . . . . . . . . . . . . . . . . . . . . . . . . . . . . 217
Projector log . . . . . . . . . . . . . . . . . . . . . . . . . . . . . . . . . . . . . . . . . . . . . . . . . . . . . . . . . . . . . . . . . . . . . . . . . . . . . . . . . . . . . 218
Security log selection . . . . . . . . . . . . . . . . . . . . . . . . . . . . . . . . . . . . . . . . . . . . . . . . . . . . . . . . . . . . . . . . . . . . . . . . . . . 219
Security log . . . . . . . . . . . . . . . . . . . . . . . . . . . . . . . . . . . . . . . . . . . . . . . . . . . . . . . . . . . . . . . . . . . . . . . . . . . . . . . . . . . . . . 220
Get certificate file . . . . . . . . . . . . . . . . . . . . . . . . . . . . . . . . . . . . . . . . . . . . . . . . . . . . . . . . . . . . . . . . . . . . . . . . . . . . . . . 221
Version information . . . . . . . . . . . . . . . . . . . . . . . . . . . . . . . . . . . . . . . . . . . . . . . . . . . . . . . . . . . . . . . . . . . . . . . . . . . . . 223
Create new macro . . . . . . . . . . . . . . . . . . . . . . . . . . . . . . . . . . . . . . . . . . . . . . . . . . . . . . . . . . . . . . . . . . . . . . . . . . . . . . 225
Create new macro message . . . . . . . . . . . . . . . . . . . . . . . . . . . . . . . . . . . . . . . . . . . . . . . . . . . . . . . . . . . . . . . . . . . 225
Save macro . . . . . . . . . . . . . . . . . . . . . . . . . . . . . . . . . . . . . . . . . . . . . . . . . . . . . . . . . . . . . . . . . . . . . . . . . . . . . . . . . . . . . . 226
Edit a macro . . . . . . . . . . . . . . . . . . . . . . . . . . . . . . . . . . . . . . . . . . . . . . . . . . . . . . . . . . . . . . . . . . . . . . . . . . . . . . . . . . . . 226
Macro editor window. . . . . . . . . . . . . . . . . . . . . . . . . . . . . . . . . . . . . . . . . . . . . . . . . . . . . . . . . . . . . . . . . . . . . . . . . . . . 227
Delete item. . . . . . . . . . . . . . . . . . . . . . . . . . . . . . . . . . . . . . . . . . . . . . . . . . . . . . . . . . . . . . . . . . . . . . . . . . . . . . . . . . . . . . . 227
Available commands. . . . . . . . . . . . . . . . . . . . . . . . . . . . . . . . . . . . . . . . . . . . . . . . . . . . . . . . . . . . . . . . . . . . . . . . . . . . 228
Inserting a command . . . . . . . . . . . . . . . . . . . . . . . . . . . . . . . . . . . . . . . . . . . . . . . . . . . . . . . . . . . . . . . . . . . . . . . . . . . 228
Insertion result. . . . . . . . . . . . . . . . . . . . . . . . . . . . . . . . . . . . . . . . . . . . . . . . . . . . . . . . . . . . . . . . . . . . . . . . . . . . . . . . . . . 228
Change macro file list . . . . . . . . . . . . . . . . . . . . . . . . . . . . . . . . . . . . . . . . . . . . . . . . . . . . . . . . . . . . . . . . . . . . . . . . . . 229
Select input command. . . . . . . . . . . . . . . . . . . . . . . . . . . . . . . . . . . . . . . . . . . . . . . . . . . . . . . . . . . . . . . . . . . . . . . . . . 230
Select input path command . . . . . . . . . . . . . . . . . . . . . . . . . . . . . . . . . . . . . . . . . . . . . . . . . . . . . . . . . . . . . . . . . . . . 230
Processing path command. . . . . . . . . . . . . . . . . . . . . . . . . . . . . . . . . . . . . . . . . . . . . . . . . . . . . . . . . . . . . . . . . . . . . 231
SMPTE292 packing command . . . . . . . . . . . . . . . . . . . . . . . . . . . . . . . . . . . . . . . . . . . . . . . . . . . . . . . . . . . . . . . . 232
SMPTE292 dual packing command . . . . . . . . . . . . . . . . . . . . . . . . . . . . . . . . . . . . . . . . . . . . . . . . . . . . . . . . . . 233
DVI A packing command . . . . . . . . . . . . . . . . . . . . . . . . . . . . . . . . . . . . . . . . . . . . . . . . . . . . . . . . . . . . . . . . . . . . . . . 234
DVI A packing command . . . . . . . . . . . . . . . . . . . . . . . . . . . . . . . . . . . . . . . . . . . . . . . . . . . . . . . . . . . . . . . . . . . . . . . 234
Activate File command . . . . . . . . . . . . . . . . . . . . . . . . . . . . . . . . . . . . . . . . . . . . . . . . . . . . . . . . . . . . . . . . . . . . . . . . . 235
Active file selection . . . . . . . . . . . . . . . . . . . . . . . . . . . . . . . . . . . . . . . . . . . . . . . . . . . . . . . . . . . . . . . . . . . . . . . . . . . . . 235
Activate SCREEN File command . . . . . . . . . . . . . . . . . . . . . . . . . . . . . . . . . . . . . . . . . . . . . . . . . . . . . . . . . . . . . 236
Active SCREEN file selection list. . . . . . . . . . . . . . . . . . . . . . . . . . . . . . . . . . . . . . . . . . . . . . . . . . . . . . . . . . . . . . 237
Activate EXTRA File command. . . . . . . . . . . . . . . . . . . . . . . . . . . . . . . . . . . . . . . . . . . . . . . . . . . . . . . . . . . . . . . . 238
Active EXTRA file selection list . . . . . . . . . . . . . . . . . . . . . . . . . . . . . . . . . . . . . . . . . . . . . . . . . . . . . . . . . . . . . . . . 238
Activate MCGD file command . . . . . . . . . . . . . . . . . . . . . . . . . . . . . . . . . . . . . . . . . . . . . . . . . . . . . . . . . . . . . . . . . 239
Activate MCGD file selection list . . . . . . . . . . . . . . . . . . . . . . . . . . . . . . . . . . . . . . . . . . . . . . . . . . . . . . . . . . . . . . 240
Activate ACSAR 2 layout file. . . . . . . . . . . . . . . . . . . . . . . . . . . . . . . . . . . . . . . . . . . . . . . . . . . . . . . . . . . . . . . . . . . 241
Select layout file. . . . . . . . . . . . . . . . . . . . . . . . . . . . . . . . . . . . . . . . . . . . . . . . . . . . . . . . . . . . . . . . . . . . . . . . . . . . . . . . . 241
Load input file . . . . . . . . . . . . . . . . . . . . . . . . . . . . . . . . . . . . . . . . . . . . . . . . . . . . . . . . . . . . . . . . . . . . . . . . . . . . . . . . . . . 242
Input file selection. . . . . . . . . . . . . . . . . . . . . . . . . . . . . . . . . . . . . . . . . . . . . . . . . . . . . . . . . . . . . . . . . . . . . . . . . . . . . . . 242
R5976510 D-CINE COMMUNICATOR 11/04/2006
309
List of images
18-30
18-31
18-32
18-33
18-34
18-35
18-36
18-37
18-38
18-39
18-40
18-41
18-42
19-1
20-1
20-2
21-1
21-2
21-4
21-5
21-6
21-7
21-8
21-9
21-10
21-11
21-12
21-13
21-14
21-15
21-16
21-17
21-18
21-19
21-20
21-21
21-22
21-23
21-24
21-25
21-26
21-27
21-28
21-29
21-30
21-31
21-32
21-33
A-1
A-2
A-3
A-4
A-5
A-6
A-7
A-8
A-9
A-10
A-11
310
Auto load file. . . . . . . . . . . . . . . . . . . . . . . . . . . . . . . . . . . . . . . . . . . . . . . . . . . . . . . . . . . . . . . . . . . . . . . . . . . . . . . . . . . . .
Enable test pattern selection. . . . . . . . . . . . . . . . . . . . . . . . . . . . . . . . . . . . . . . . . . . . . . . . . . . . . . . . . . . . . . . . . . .
Test pattern file selection . . . . . . . . . . . . . . . . . . . . . . . . . . . . . . . . . . . . . . . . . . . . . . . . . . . . . . . . . . . . . . . . . . . . . . .
Disable test pattern . . . . . . . . . . . . . . . . . . . . . . . . . . . . . . . . . . . . . . . . . . . . . . . . . . . . . . . . . . . . . . . . . . . . . . . . . . . . .
Lamp control command . . . . . . . . . . . . . . . . . . . . . . . . . . . . . . . . . . . . . . . . . . . . . . . . . . . . . . . . . . . . . . . . . . . . . . . .
Dowser control command . . . . . . . . . . . . . . . . . . . . . . . . . . . . . . . . . . . . . . . . . . . . . . . . . . . . . . . . . . . . . . . . . . . . . .
Black image output command . . . . . . . . . . . . . . . . . . . . . . . . . . . . . . . . . . . . . . . . . . . . . . . . . . . . . . . . . . . . . . . . .
Deblank image command . . . . . . . . . . . . . . . . . . . . . . . . . . . . . . . . . . . . . . . . . . . . . . . . . . . . . . . . . . . . . . . . . . . . . .
Input mode selection. . . . . . . . . . . . . . . . . . . . . . . . . . . . . . . . . . . . . . . . . . . . . . . . . . . . . . . . . . . . . . . . . . . . . . . . . . . .
Input locking . . . . . . . . . . . . . . . . . . . . . . . . . . . . . . . . . . . . . . . . . . . . . . . . . . . . . . . . . . . . . . . . . . . . . . . . . . . . . . . . . . . . .
GPO control command . . . . . . . . . . . . . . . . . . . . . . . . . . . . . . . . . . . . . . . . . . . . . . . . . . . . . . . . . . . . . . . . . . . . . . . . .
GPO functions. . . . . . . . . . . . . . . . . . . . . . . . . . . . . . . . . . . . . . . . . . . . . . . . . . . . . . . . . . . . . . . . . . . . . . . . . . . . . . . . . . .
Error handling command . . . . . . . . . . . . . . . . . . . . . . . . . . . . . . . . . . . . . . . . . . . . . . . . . . . . . . . . . . . . . . . . . . . . . . .
Log view . . . . . . . . . . . . . . . . . . . . . . . . . . . . . . . . . . . . . . . . . . . . . . . . . . . . . . . . . . . . . . . . . . . . . . . . . . . . . . . . . . . . . . . . .
Help on item . . . . . . . . . . . . . . . . . . . . . . . . . . . . . . . . . . . . . . . . . . . . . . . . . . . . . . . . . . . . . . . . . . . . . . . . . . . . . . . . . . . . .
Yellow help window . . . . . . . . . . . . . . . . . . . . . . . . . . . . . . . . . . . . . . . . . . . . . . . . . . . . . . . . . . . . . . . . . . . . . . . . . . . . .
Create new layout. . . . . . . . . . . . . . . . . . . . . . . . . . . . . . . . . . . . . . . . . . . . . . . . . . . . . . . . . . . . . . . . . . . . . . . . . . . . . . .
Save as layout. . . . . . . . . . . . . . . . . . . . . . . . . . . . . . . . . . . . . . . . . . . . . . . . . . . . . . . . . . . . . . . . . . . . . . . . . . . . . . . . . . .
Save layout . . . . . . . . . . . . . . . . . . . . . . . . . . . . . . . . . . . . . . . . . . . . . . . . . . . . . . . . . . . . . . . . . . . . . . . . . . . . . . . . . . . . . .
Rename layout file . . . . . . . . . . . . . . . . . . . . . . . . . . . . . . . . . . . . . . . . . . . . . . . . . . . . . . . . . . . . . . . . . . . . . . . . . . . . . .
Delete layout . . . . . . . . . . . . . . . . . . . . . . . . . . . . . . . . . . . . . . . . . . . . . . . . . . . . . . . . . . . . . . . . . . . . . . . . . . . . . . . . . . . .
Select a window . . . . . . . . . . . . . . . . . . . . . . . . . . . . . . . . . . . . . . . . . . . . . . . . . . . . . . . . . . . . . . . . . . . . . . . . . . . . . . . . .
Window selection via menu bar . . . . . . . . . . . . . . . . . . . . . . . . . . . . . . . . . . . . . . . . . . . . . . . . . . . . . . . . . . . . . . .
Disabling a window . . . . . . . . . . . . . . . . . . . . . . . . . . . . . . . . . . . . . . . . . . . . . . . . . . . . . . . . . . . . . . . . . . . . . . . . . . . . .
Enabling a window . . . . . . . . . . . . . . . . . . . . . . . . . . . . . . . . . . . . . . . . . . . . . . . . . . . . . . . . . . . . . . . . . . . . . . . . . . . . . .
Moving windows. . . . . . . . . . . . . . . . . . . . . . . . . . . . . . . . . . . . . . . . . . . . . . . . . . . . . . . . . . . . . . . . . . . . . . . . . . . . . . . . .
Move window via coordinates . . . . . . . . . . . . . . . . . . . . . . . . . . . . . . . . . . . . . . . . . . . . . . . . . . . . . . . . . . . . . . . . .
Scaling windows via drag and drop . . . . . . . . . . . . . . . . . . . . . . . . . . . . . . . . . . . . . . . . . . . . . . . . . . . . . . . . . . .
Scaling via Width of Height . . . . . . . . . . . . . . . . . . . . . . . . . . . . . . . . . . . . . . . . . . . . . . . . . . . . . . . . . . . . . . . . . . . .
Z-order . . . . . . . . . . . . . . . . . . . . . . . . . . . . . . . . . . . . . . . . . . . . . . . . . . . . . . . . . . . . . . . . . . . . . . . . . . . . . . . . . . . . . . . . . . .
Select a window to scale . . . . . . . . . . . . . . . . . . . . . . . . . . . . . . . . . . . . . . . . . . . . . . . . . . . . . . . . . . . . . . . . . . . . . . .
Reset to full size. . . . . . . . . . . . . . . . . . . . . . . . . . . . . . . . . . . . . . . . . . . . . . . . . . . . . . . . . . . . . . . . . . . . . . . . . . . . . . . . .
Aspect ratio via right click . . . . . . . . . . . . . . . . . . . . . . . . . . . . . . . . . . . . . . . . . . . . . . . . . . . . . . . . . . . . . . . . . . . . . .
Aspect ratio via button. . . . . . . . . . . . . . . . . . . . . . . . . . . . . . . . . . . . . . . . . . . . . . . . . . . . . . . . . . . . . . . . . . . . . . . . . .
Fixed aspect ratio selected . . . . . . . . . . . . . . . . . . . . . . . . . . . . . . . . . . . . . . . . . . . . . . . . . . . . . . . . . . . . . . . . . . . .
File association. . . . . . . . . . . . . . . . . . . . . . . . . . . . . . . . . . . . . . . . . . . . . . . . . . . . . . . . . . . . . . . . . . . . . . . . . . . . . . . . . .
Load file [All] . . . . . . . . . . . . . . . . . . . . . . . . . . . . . . . . . . . . . . . . . . . . . . . . . . . . . . . . . . . . . . . . . . . . . . . . . . . . . . . . . . . . .
Load file [fit]. . . . . . . . . . . . . . . . . . . . . . . . . . . . . . . . . . . . . . . . . . . . . . . . . . . . . . . . . . . . . . . . . . . . . . . . . . . . . . . . . . . . . .
Load file message . . . . . . . . . . . . . . . . . . . . . . . . . . . . . . . . . . . . . . . . . . . . . . . . . . . . . . . . . . . . . . . . . . . . . . . . . . . . . .
Save actual settings . . . . . . . . . . . . . . . . . . . . . . . . . . . . . . . . . . . . . . . . . . . . . . . . . . . . . . . . . . . . . . . . . . . . . . . . . . . .
Save all files . . . . . . . . . . . . . . . . . . . . . . . . . . . . . . . . . . . . . . . . . . . . . . . . . . . . . . . . . . . . . . . . . . . . . . . . . . . . . . . . . . . . .
Rename input file . . . . . . . . . . . . . . . . . . . . . . . . . . . . . . . . . . . . . . . . . . . . . . . . . . . . . . . . . . . . . . . . . . . . . . . . . . . . . . .
Delete input file name . . . . . . . . . . . . . . . . . . . . . . . . . . . . . . . . . . . . . . . . . . . . . . . . . . . . . . . . . . . . . . . . . . . . . . . . . .
Adjusting via dragging . . . . . . . . . . . . . . . . . . . . . . . . . . . . . . . . . . . . . . . . . . . . . . . . . . . . . . . . . . . . . . . . . . . . . . . . . .
Input file items . . . . . . . . . . . . . . . . . . . . . . . . . . . . . . . . . . . . . . . . . . . . . . . . . . . . . . . . . . . . . . . . . . . . . . . . . . . . . . . . . . .
Input slots selection. . . . . . . . . . . . . . . . . . . . . . . . . . . . . . . . . . . . . . . . . . . . . . . . . . . . . . . . . . . . . . . . . . . . . . . . . . . . .
Input slots configuration . . . . . . . . . . . . . . . . . . . . . . . . . . . . . . . . . . . . . . . . . . . . . . . . . . . . . . . . . . . . . . . . . . . . . . . .
Locking input . . . . . . . . . . . . . . . . . . . . . . . . . . . . . . . . . . . . . . . . . . . . . . . . . . . . . . . . . . . . . . . . . . . . . . . . . . . . . . . . . . . .
Unzipped package file . . . . . . . . . . . . . . . . . . . . . . . . . . . . . . . . . . . . . . . . . . . . . . . . . . . . . . . . . . . . . . . . . . . . . . . . . .
Start up of update program . . . . . . . . . . . . . . . . . . . . . . . . . . . . . . . . . . . . . . . . . . . . . . . . . . . . . . . . . . . . . . . . . . . .
Physical indication of RS232/422 connector on DP50 . . . . . . . . . . . . . . . . . . . . . . . . . . . . . . . . . . . . . .
Physical indication of RS232/422 connector on DP30 . . . . . . . . . . . . . . . . . . . . . . . . . . . . . . . . . . . . . .
Physical indication of RS232/422 connector on DP100-DP90 . . . . . . . . . . . . . . . . . . . . . . . . . . . . .
Serial connection setup . . . . . . . . . . . . . . . . . . . . . . . . . . . . . . . . . . . . . . . . . . . . . . . . . . . . . . . . . . . . . . . . . . . . . . . .
Login window . . . . . . . . . . . . . . . . . . . . . . . . . . . . . . . . . . . . . . . . . . . . . . . . . . . . . . . . . . . . . . . . . . . . . . . . . . . . . . . . . . . .
Physical indication of Ethernet connection on DP50 . . . . . . . . . . . . . . . . . . . . . . . . . . . . . . . . . . . . . . . .
Physical indication of Ethernet connection on DP30 . . . . . . . . . . . . . . . . . . . . . . . . . . . . . . . . . . . . . . . .
Physical indication of Ethernet connection on DP100-DP90 . . . . . . . . . . . . . . . . . . . . . . . . . . . . . . .
Make Ethernet connection . . . . . . . . . . . . . . . . . . . . . . . . . . . . . . . . . . . . . . . . . . . . . . . . . . . . . . . . . . . . . . . . . . . . .
243
243
244
244
245
245
246
247
248
249
250
250
251
253
255
255
258
258
259
260
261
262
262
263
264
264
265
265
266
266
267
267
268
268
268
270
271
271
271
272
272
273
273
274
275
276
276
277
279
280
281
281
281
282
282
282
282
283
284
R5976510 D-CINE COMMUNICATOR 11/04/2006
List of images
A-12
A-13
A-14
A-15
A-16
A-17
A-18
Select Release file . . . . . . . . . . . . . . . . . . . . . . . . . . . . . . . . . . . . . . . . . . . . . . . . . . . . . . . . . . . . . . . . . . . . . . . . . . . . . .
Start auto-install . . . . . . . . . . . . . . . . . . . . . . . . . . . . . . . . . . . . . . . . . . . . . . . . . . . . . . . . . . . . . . . . . . . . . . . . . . . . . . . . .
Show logging started . . . . . . . . . . . . . . . . . . . . . . . . . . . . . . . . . . . . . . . . . . . . . . . . . . . . . . . . . . . . . . . . . . . . . . . . . . .
Log info. . . . . . . . . . . . . . . . . . . . . . . . . . . . . . . . . . . . . . . . . . . . . . . . . . . . . . . . . . . . . . . . . . . . . . . . . . . . . . . . . . . . . . . . . . .
Special operations . . . . . . . . . . . . . . . . . . . . . . . . . . . . . . . . . . . . . . . . . . . . . . . . . . . . . . . . . . . . . . . . . . . . . . . . . . . . . .
Stay in boot mode . . . . . . . . . . . . . . . . . . . . . . . . . . . . . . . . . . . . . . . . . . . . . . . . . . . . . . . . . . . . . . . . . . . . . . . . . . . . . .
Start auto install of ARM application . . . . . . . . . . . . . . . . . . . . . . . . . . . . . . . . . . . . . . . . . . . . . . . . . . . . . . . . . .
R5976510 D-CINE COMMUNICATOR 11/04/2006
286
287
288
288
289
291
291
311
List of images
312
R5976510 D-CINE COMMUNICATOR 11/04/2006
Revision Sheet
To:
Barco nv Digital Cinema/Documentation
Noordlaan 5, B-8520 Kuurne
Phone: +32 56.36.84.93, Fax: +32 56.36.88.62
E-mail: [email protected], Web: www.barco.com
From:
Date:
Please correct the following points in this documentation (R5976510/07):
page
R5976510
wrong
D-CINE COMMUNICATOR
correct
11/04/2006