1
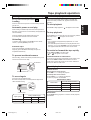
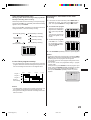
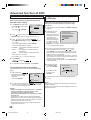
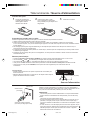
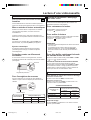
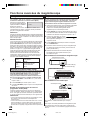
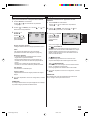
One-touch Timer Recording (OTR)
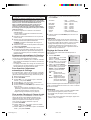
The One-touch Timer Recording feature provides a
simple and convenient way to make a timed recording.
Example: One-touch Timer Recording for 30 minutes.
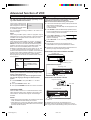
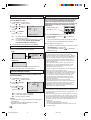
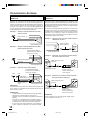
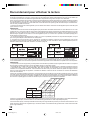
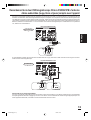
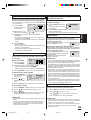
Timer recording
Timer recording can be programmed on-screen with the
remote control. The built-in timer allows automatic
unattended recording of up to 8 programs within 1 month.
1
Load a cassette tape with the erase prevention tab
intact.
The VCR will automatically turn on.
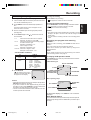
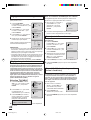
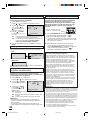
Example: Program a timer recording for the 26th day,
channel 125 (CABLE), 11:00 - 11:30 PM on timer program
number 1 (Tape speed: SLP).
2
Press SPEED to select the desired tape speed SP or
SLP.
The tape counter and SP or SLP will appear on the
screen for about 4 seconds.
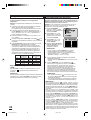
1
Press VCR MENU. Select
the “TIMER REC SET”
option, then press ENTER.
3
Set the “TV/CABLE” option to the appropriate position.
2
4
Press Number keys or CH
to be recorded.
Press SET + or – to select
one of the program line,
then press ENTER.
5
/
to select the channel
3
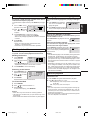
Press REC/OTR. Press the button again to stop recording after 30 minutes. Each additional press of REC/OTR
will increase recording time as shown in the chart below,
up to a maximum of 6 hours. The OTR and recording time
will appear on the screen for about 4 seconds. And, “REC”
will keep blinking in the display.
Press Recording time
NORMAL REC
once
0:30
twice
1:00
3 times
1:30
4 times
5 times
2:00
Press Recording time
3:00
6 times
4:00
7 times
5:00
8 times
6:00
9 times
10 times NORMAL REC
4
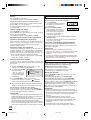
Press STOP or turn off the power.
“ ” will appear on screen for about 4 seconds.
NOTE:
If you wish to watch the DVD playback during the OTR, press
VCR/DVD to change to DVD mode and perform the DVD
playback (see page 28).
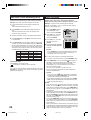
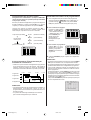
Set the start time, end time,
channel and tape speed as
in step 3.
+/-/ENTER/MENUñ
á
DATE
START
26(SU)
11:00PM 11:30PM 125 SLP
END
CH
á+/-/ENTER/CANCEL/MENUñ
NOTES:
• Press CANCEL to move cursor backward for correction.
• To record from external source set the channel to “L”. “L”
will appear next to CH 125 (or 69).
5
To enter other programs, repeat step 2 through 4.
• To return to the normal screen, press VCR MENU twice.
6
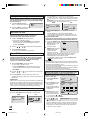
To cancel OTR
Press SET + or – to select
the date, then press
ENTER.
MENU
TIMER REC SET
AUTO REPEAT ON OFF
ON OFF
SAP
CH SETUP
SYSTEM SETUP
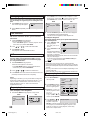
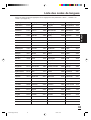
Press TIMER REC. The clock symbol( ) will appear on
the display and the VCR stands by for recording. At the
same time, VCR mode will change to DVD mode
automatically. You can use DVD even if the VCR is in
the Timer recording mode.
If you do not use the DVD, turn the power off.
The timer recording will start at 20 seconds before the
time you predetermined.
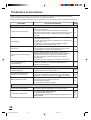
NOTES:
• If the clock symbol(
) does not appear on the display
in spite of the pressing of TIMER REC, the cassette may
not have been loaded yet (see page 21).
• If the cassette is ejected in spite of the pressing of TIMER
REC, the erase prevention tab of the cassette may have
been removed (see page 21).
NOTES:
• If the clock symbol ( ) blinks when the timer recording
ended, the TV program has not been completely recorded
because of an insufficient tape supply. Press TIMER REC to
cancel the timer program or press EJECT to remove the
cassette tape.
• During timer recording standby mode, the VCR mode cannot be selected. To use the VCR, press TIMER REC at first,
then press VCR/DVD to change to VCR mode. After you use
the VCR, press TIMER REC again to put the VCR into timer
recording standby mode.
• If you press TIMER REC during timer recording, the recording operation will be interrupted. If you press TIMER REC
again within the programmed time, the recording operation
will start again.
• After a power failure or disconnection of the power plug, all
programmed recording settings and time display will be lost
upon resumption of power. In this case, reset the clock (see
page 19) and reprogram any timer recordings.
24
2D80521A[E](22-27)
24
7/6/04, 18:51