1
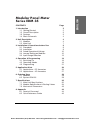
CONTENTS
Page
1. Introduction
1.1 Getting Started
1.2 Overall Description
1.3 Features
1.4 Block Schematic
2
2
3
3
4
2. Unit Description
2.1 Modules
2.2 Main Unit
4
4
7
3. Installation & Operations before Use
3.1 Procedure
3.2 Installation
3.3 Rated Operational Voltage
3.4 Jumper Setting on Modules
3.5 Input Range Selection
9
9
9
10
10
15
4. Operation & Programming
4.1 Switching On
4.2 Operating Modes
4.3 Programming
16
16
16
21
5. Application Hints
5.1 Applications - DC Ammeters
5.2 Applications - AC Ammeters
26
26
27
6. Ordering Keys
6.1 Modules
6.2 System EDM 35
28
28
29
7. Specifications
7.1 Main Unit Specifications
7.2 Module Specifications & Scaling Values
7.3 Mechanical Dimensions
32
32
34
43
8. Appendix
8.1 Reset of Password
8.2 Quick Reference Guide
44
44
45
ENGLISH
Modular Panel Meter
Series EDM 35
Gross Automation (877) 268-3700 · www.carlogavazzisales.com · [email protected]
ENGLISH
1 I n t ro d u c t i o n
1.1 Getting Started
How to prepare the EDM 35 for use
For convenience you have a check list below to be sure that all preparations of the EDM are made before the application. Page references are
mentioned so you can easily find the point in question in this manual. If
the EDM is received in modules start at point 1, otherwise start at point 6.
1. Select all modules necessary for the application.
6
Ordering Keys
Page 28
2. Set jumpers on the input module and if used
also on the excitation output module and/or
the analogue output module.
3.4
Jumper Setting
on Modules
Page 10
3. Insert all modules according to the drawing
printed on the module:
• Power supply first (then from right to left).
• Mount blind covers in non-used slots.
2.1.3 Modules and Slot
Position
Page 6
4. Fill out the label on the main unit and the
shipping box with missing information (ordering key for system, power supply, inputand output modules and ranges). Easy access to this information might help you later.
6.2
Ordering Key for
System EDM 35
Page 29
3.4
Jumper Setting on
Modules
Page 10
5. Insert engineering unit in the front cover and
mount this.
3.2
Installation
Page 9
6. The program needs information about the
actual input range. Check input range selection and change if necessary.
3.5
Input Range
Selection
Page 15
7. Program panel meter to suit the application.
4
Programming
Page 16
2
Gross Automation (877) 268-3700 · www.carlogavazzisales.com · [email protected]
ENGLISH
1.2 Overall Description
The EDM series 35 is based on a modular
concept consisting of a main unit and plug-in
modules. The concept provides the meter with
high flexibility and versatility. The offer of
input-, output- and power supply modules
makes it possible to configure the meter to
suit most applications.
Furthermore, the modular concept ensures
that the stock costs are minimized.
1.3 Features
The main features of the EDM series 35 are:
- Modularity
- Continuous measurement and monitoring of the analog signal of
the input variable
- Continuous monitoring of the measured value for exceeding the
programmed setpoint values
- Setpoints individually programmable: Value, hysteresis, high/low
alarm, time delay
- Separate programming of each output relay: energized/deenergized and status in overflow condition
- Additional software functions: scaling, data hold and peak/valley
- Input modules for measuring voltage (AC or DC), current (AC or
DC), resistance, temperature (Pt 100 or thermocouple J or K),
frequency or revolutions per minute
- Output modules with 1 or 2 relays or with analogue output (4 - 20 mA,
0 - 20 mA, 0 - 10 V)
- Power Supply modules for AC or DC supply as well as excitation
supply for sensor supply
- Interface to Carlo Gavazzi’s Dupline® Field and Installation Bus
The large variety of input signals of both electrical and industrial process
variables make the EDM an extremely versatile instrument suitable for
many applications.
The characteristics of the instrument are complemented by its easy
programming and configuration in accordance with the application.
3
Gross Automation (877) 268-3700 · www.carlogavazzisales.com · [email protected]
ENGLISH
1.4 Block Schematic
Main unit
Display and
control
Output
analog/exitation
Input
Power supply
Relay output
2 Unit Description
2.1 Modules
2.1.1 Common description
The modules are parted into 3 categories: Power supply modules, input
modules and output modules. Each module is dedicated to its own
function or input variable.
To minimize the number of modules many input modules are designed
to cover all ranges. If you want to change the input range just press the
locking tabs and pull out the module to change a jumper position, reinstall the jumper and reprogram the range selection. If you change the
range from low to high level or vice versa it might be necessary for you
to use other terminal positions as well.
The input modules are available with terminals for program lock to
protect against unauthorized admittance.
Slot position
Terminals
Motherboard
connection
Jumper
All modules are easy to plug in - for your information the slot position is
marked on the drawing on the rear of the module.
4
Gross Automation (877) 268-3700 · www.carlogavazzisales.com · [email protected]
2.1.2.1 Power Supply Modules
You will always need the power supply module. These are
available for the most common supply voltages. Due to the
size of the transformer the power supply module always
occupies 2 slots.
ENGLISH
2.1.2 Variants
2.1.2.2 Input Modules
The input modules are divided into the following categories:
Voltmeters
(AC or DC)
Ammeters
(AC, DC or 10A AC/DC)
Ohmmeters
Thermometers
(Pt 100, Thermocouple J or K)
Frequency - and Tachometers
Dupline® Analink Interface
Jumper
For voltmeters, ammeters, ohmmeters, frequency - and tachometers
a jumper in the module determines the actual range for the module.
Switching from one range to another also means that you are switching
from one input circuit to another input circuit.
For ammeters 10 A AC/DC the jumper determines whether you are
measuring AC current or DC current. The thermometers do not include
a jumper - here the range is changed only through the programming.
For the Dupline® Analink interface module only the channel number has
to be coded on two rotary switches.
All input modules occupy 1 slot and they are always placed at left (rear
view of the main unit).
5
Gross Automation (877) 268-3700 · www.carlogavazzisales.com · [email protected]
ENGLISH
2.1.2.3 Output Modules
The output modules are divided into the following categories:
Relay output
(1 or 2 relays)
Analogue output (4-20 mA, 0-20 mA and 0-10 V)
Excitation output (for sensor supply)
Depending upon the application you can choose between different output types: An output module with 1 or 2 relays and/or an output module
with analogue output where you are able to select the required type of
analogue output with the jumpers. The relay output module is always
placed at right (rear view of the main unit).
With the excitation output module inserted you are able to supply for
example sensors which are a part of the application. With a jumper you
can select 12 or 24 VDC. This module shares slot #2 with the analogue
output module.
2.1.3 Modules and Slot Position
Rear view of main unit
SLOT
#1
SLOT
#2
Input Module:
Output Module:
VAC
Excitation output
VDC
Analogue output
AAC
ADC
10A AC/DC
Ω
Pt 100
Thermo couple
Frequency
Tachometer
Dupline® Analink Interface
SLOT
#3
SLOT
#4
SLOT
#5
Power Supply module
24 VAC
48 VAC
115 VAC
230 VAC
12-48 VDC
Output Module:
1 Relay output
2 Relay outputs
6
Gross Automation (877) 268-3700 · www.carlogavazzisales.com · [email protected]
2.2.1 Description
The main unit includes a 3 1/2 digit, 7-segment display with alarm indicators, a motherboard for 1 power supply module and 3 input/output
modules, a processing unit and a keyboard.
ENGLISH
2.2 Main Unit
You can use the main unit as a 3 1/2 digit indicator when inserting only
a power supply module and an input module. If you extend the system
with a relay output module and/or an analogue output module, you
have a 3 1/2 digit controller.
The main unit is delivered with 1 front cover,1 manual, 2 mounting
brackets, 2 gaskets for sealing, 1 set of engineering unit labels and 3
blind covers for unused slots.
2.2.2 Variants
The main unit is available in 3 different variants. The 3 types are:
Standard red display
High bright red display
Green display
2.2.3 Front Panel Description
1
2
3
4
Keyboard
Display
Alarm Indicators
Engineering Unit
1 Keyboard
S
Set/Enter: Entry of variables
Selecting programming functions
▲
▼
Up/Down: Up/down keys for display control
Increasing and decreasing programming values
7
Gross Automation (877) 268-3700 · www.carlogavazzisales.com · [email protected]
ENGLISH
2 Display
3 1/2 digit (max. read-out 1999). Alphanumeric indication of:
- Measured value
- Programming parameters
3 Alarm Indicators
Indicates when an alarm condition occurs.
“1” indicates alarm condition when a 1-relay output module is
used (= 1 set point).
“1” and “2” indicate alarm condition when a 2-relay output
module is used (= 2 set points).
4 Engineering Unit
Interchangeable unit label. A set of engineering unit labels is
supplied with the EDM. The engineering unit has to be inserted
by the customer.
8
Gross Automation (877) 268-3700 · www.carlogavazzisales.com · [email protected]
3.1 Procedure
Before the instrument is ready for use, i.e. before it is ready for the application dependent programming, you have to prepare the instrument
physically (engineering unit, modules etc.) - this is described in chapter
3.2 Installation.
ENGLISH
3 Installation &
O p e r a t i o n s b e f o re U s e
Before you are connecting the instrument to the mains or the power
supply you have to be sure that the right power supply module is used.
This is discussed in chapter 3.3 Rated Operational Voltage.
You have to check the jumper settings on some of the modules. The
range selected must be in accordance with your application. The
jumper setting is shown in chapter 3.4 Jumper Setting on Modules.
After you have set the jumpers the processing unit must know which
range you have selected. This “range code” has to be entered in the
software when the instrument is turned on. Further information will be
given to you in chapter 3.5 Input Range Selection.
3.2 Installation
First, if desired, you insert the engineering unit (3). You can choose a
unit from the set of engineering unit labels.
▲
▲
3
Then you mount the front
panel (2) on the instrument remember to seal with the enclosed
gasket (the largest of the two enclosed). Place the remaining gasket
round the body of the instrument and slide instrument into the panel
aperture. To optimize the tightness be sure that the panel cut-out is
completed and deburred. Be also aware that a too thin panel may
distort and not provide sufficiant sealing.
Fasten the instrument with the two brackets (1).
9
Gross Automation (877) 268-3700 · www.carlogavazzisales.com · [email protected]
ENGLISH
If you later want to replace the engineering unit (3), you insert a screwdriver into the lateral slot in the front panel and turn (be careful!) the
screwdriver as shown until the front panel has been completely
removed. Replace the engineering unit.
You can find the panel cutout and the mechanical dimensions in chapter
7.3 Mechanical Dimensions.
3.3 Rated Operational Voltage
Before you switch on the instrument, make sure that the supply voltage
corresponds to the rated operational voltage indicated on the power
supply module.
Rated operational voltage
Caution!!
Since the input circuitry is not galvanically
isolated, the potential of the measured
variable will be present on all connections
to the unit (i.e. “HOLD” input). This is important specially when you are measuring
line voltage and current.
Power supply
3.4 Jumper Setting on Modules
As some modules are designed to cover several ranges it can be necessary for you to select the required range by moving an internal jumper.
The major part of the input modules, the excitation output module and
the analogue output module have this possibility for range selection. On
the following pages the jumper setting is shown for the modules:
3.4.1
3.4.2
3.4.3
3.4.4
3.4.5
3.4.6
Voltmeters
Ammeters
Ohmmeters
Frequency - and tachometers
Dupline® Analink Interface module
Output modules
Note! Always remember to turn off the power supply before you plug in
or pull out the modules.
10
Gross Automation (877) 268-3700 · www.carlogavazzisales.com · [email protected]
4• •1
5• •2
6• •3
ENGLISH
3.4.1 Voltmeters
Voltmeters
VDC input module 5100530/630
VAC input module 5100531/631
Input
Range
Jumper
position
200 mV
4• •1
5• •2
6• •3
2V
4• •1
5• •2
6• •3
20 V
4• •1
5• •2
6• •3
200 V
4• •1
5• •2
6• •3
600 V
4• •1
5• •2
6• •3
3.4.2 Ammeters
4• •1
5• •2
6• •3
Ammeters 0 - 5 A
ADC input module 5100532/632
AAC input module 5100533/633
Input
Range
1 2 3
Jumper
position
200 µA
4• •1
5• •2
6• •3
2 mA
4• •1
5• •2
6• •3
20 mA
4• •1
5• •2
6• •3
200 mA
4• •1
5• •2
6• •3
2A
4• •1
5• •2
6• •3
5A
4• •1
5• •2
6• •3
Ammeters 10 A
10 A AC/DC input module 5100534/634
Input
Range
Jumper
position
10 AAC
1 2 3
10 ADC
1 2 3
11
Gross Automation (877) 268-3700 · www.carlogavazzisales.com · [email protected]
ENGLISH
3.4.3 Ohmmeters
4• •1
5• •2
6• •3
Ohmmeters
Ohm input module 5100535/635
Input
Range
Jumper
position
200 Ω
4• •1
5• •2
6• •3
2 kΩ
4• •1
5• •2
6• •3
20 kΩ
4• •1
5• •2
6• •3
200 kΩ
4• •1
5• •2
6• •3
3.4.4 Frequency - and Tachometers
•
•
•
•
•
•
•
•
•
• J1
• J2
• J3
• J4
• J5
• J6
• J7
• J8
• J9
Frequency Meter
Input module 5100541/641
Range
Jumper position
199.9 Hz
• • J7
• • J8
1999 Hz
• • J7
• • J8
Frequency Meter
Input module 5100541/641
Input
Jumper position
Namur
•
•
•
•
•
•
• J1
• J2
• J3
• J4
• J5
• J6
NPN, PNP
contact
•
•
•
•
•
•
• J1
• J2
• J3
• J4
• J5
• J6
600 VAC
•
•
•
•
•
•
• J1
• J2
• J3
• J4
• J5
• J6
12
Gross Automation (877) 268-3700 · www.carlogavazzisales.com · [email protected]
• • J1
• • J2
• • J3
J4 J5 J6
• • • 1
• • • 2
• • • 3
rpm: Revolutions per minute
ppr: Pulses per revolution
ENGLISH
3.4.4 Frequency - and Tachometers (cont.)
Tachometer
Input module 5100540/640
Range
Jumper position
199.9 rpm
30 ppr
J4 J5 J6
• • • 1
• • • 2
• • • 3
199.9 rpm
60 ppr
J4 J5 J6
• • • 1
• • • 2
• • • 3
199.9 rpm
100 ppr
J4 J5 J6
• • • 1
• • • 2
• • • 3
1999 rpm
30 ppr
J4 J5 J6
• • • 1
• • • 2
• • • 3
1999 rpm
60 ppr
J4 J5 J6
• • • 1
• • • 2
• • • 3
1999 rpm
100 ppr
J4 J5 J6
• • • 1
• • • 2
• • • 3
Tachometer
Input module 5100540/640
Input
Jumper position
Namur
• • J1
• • J2
• • J3
NPN, PNP
contact
• • J1
• • J2
• • J3
3.4.5 Dupline® Analink Interface Module
Analink EDM 35 Plug-in Card
Input module G 2139 1139
S2
S1
Channel
number
Switch
position
S1: Group
A-P
S2: Channel
1-8
13
Gross Automation (877) 268-3700 · www.carlogavazzisales.com · [email protected]
ENGLISH
3.4.6 Output Modules
4• •1
5• •2
6• •3
Range determined by
jumper only. No software
programming necessary.
Excitation Power Supply
Output module 5100526
Output
Voltage
Jumper
position
12 VDC
4• •1
5• •2
6• •3
24 VDC
4• •1
5• •2
6• •3
Analogue Output Module
Output module 5100560
1 •
2 •
3 • • 1 •
2 • 2 •
3 • 3 •
Range determined by
jumper only. No software
programming necessary.
Output
Jumper
position
4 - 20 mA
1 •
2 •
3 • • 1 •
2 • 2 •
3 • 3 •
0 - 20 mA
1 •
2 •
3 • • 1 •
2 • 2 •
3 • 3 •
0 - 10 V
1 •
2 •
3 • • 1 •
2 • 2 •
3 • 3 •
14
Gross Automation (877) 268-3700 · www.carlogavazzisales.com · [email protected]
When you have selected the range on the input module (according to
3.4 Jumper Setting on Modules) you have to update or check the programming to be sure that the programmed range code corresponds to
the range selected with the jumpers on the module. This is accomplished in calibration mode. Other functions in calibration mode are discussed in chapter 8.1 Calibration Mode. To change or check the programmed range follow the description below.
1. Press
S and
display shows
for 2 s and then
▼ simultaneously and switch on the unit. The
. Release the keys. The display shows
.
▲ until ‘66’ is displayed. Press
shows
.
2. Press
3. Press
ENGLISH
3.5 Input Range Selection
S
and the display now
S to accept your entry to selection of range code. Now the
display shows the current range code (a number between 0 and 12).
4. Press ▲ or
▼ to select a range code between 0 and 12
according to the range selected on the module and the list below.
Range Temp. VDC VAC
ADC
AAC
10 A
Ohm
Freq.
Tachometer
code
AC/DC
0
All
1
0.2 V
0.2 mA
2
2V
2 mA
3
20 V
20 mA
4
200 V
0.2 A
5
2A
6
690 V
5A
10 ADC
7
0.2 V
0.2 mA
200 Ω 200 Hz
200 rpm/30 ppr
8
2V
2 mA
2 kΩ 2 kHz
200 rpm/60 ppr
9
20 V
20 mA
20 kΩ
200 rpm/100 ppr
10
200 V
0.2 A
200 kΩ
2000 rpm/30 ppr
11
2A
2000 rpm/60 ppr
12
690 V
5 A 10 AAC
2000 rpm/100 ppr
Dupline
All
5. When the desired range code is displayed press S . The display
shows
for 2 seconds and automatically returns to RUN-mode.
The range selection is now completed, and the panel meter is ready to
use. Now you can go ahead with customizing the program.
15
Gross Automation (877) 268-3700 · www.carlogavazzisales.com · [email protected]
ENGLISH
4 O p e r a t i o n & P ro g r a m m i n g
Chapter 4 describes the different operating modes for the EDM. The
calibration mode is described in details in chapter 3.5 (Range Input
Selection) and chapter 8 (Appendix).
This chapter includes
4.1
Switching On
4.2
Operating Modes
4.2.1 Measurement and Control
4.2.2 Programming Mode
4.2.2.1
4.3
Access to programming
Programming
4.3.1
4.3.2
4.3.3
4.3.4
4.3.5
New Password
Decimal Point Selection
Electrical Input Range (HiE and LoE)
Display Span (Hi and Lo)
Alarm Setpoint(s) - Controllers
4.3.5.1
4.3.5.2
4.3.5.3
4.3.5.4
4.3.5.5
4.3.5.6
4.3.5.7
Setpoint 1
Hysteresis
Time Delay
High and Low Alarm
Relay Normally energized/
de-energized
Relay Staus in Overflow Condition
Setpoint 2
4.1 Switching On
When you switch on the unit, the display shows
followed by the input signal value.
for a few seconds,
4.2 Operating Modes
The EDM can operate in 3 different modes: Measurement and control
mode, programming mode and calibration mode.
16
Gross Automation (877) 268-3700 · www.carlogavazzisales.com · [email protected]
∆
ENGLISH
Power on
∆
S and ▼
activated?
N
Y
Calibration
mode
∆
The flowchart shows
how you get access
to the different modes
of operation.
Measurement
and control
(normal mode)
S and ▲
activated?
N
Y
Programming
mode
4.2.1 Measurement and Control
In the measuring and control operating mode the instrument has the
following basic functions:
-
-
Measurement of the input variable
Display of the measured variable in the correct engineering unit
Setpoint control with activation/deactivation of the alarm LED’s and
relays
Detects when the input is out of range and indicating this with ±EE
in the display. The relay status will be as the preprogrammed fault
condition
‘Hold’ input detection
Update of peak and valley function
If analogue output module is present, repetition of the displayed
value in analogue form
The
S , ▲ and ▼ control the display. The normal function of
the display is to indicate the measured input variable.
The following lines describe how you can use these for selecting information on the display during daily operation.
17
Gross Automation (877) 268-3700 · www.carlogavazzisales.com · [email protected]
ENGLISH
4.2.1.1 Setpoint 1 Value Read-out (SP1)
Press ▲ and release.
After displaying the setpoint value for 2 seconds the instrument will return to display the input variable. Setpoint values are only shown if a
relay output module (1 or 2 relays) is installed.
4.2.1.2 Setpoint 2 Value Read-out (SP2)
Press ▼ and release.
4.2.1.3 Peak and Valley Values Read-out
Press ▲ and ▼ simultaneously and release.
4.2.1.4 Reset of Peak and Valley Values
Press ▲
, ▼ and S
simultaneously and release.
The peak and valley values are reset during power-up as well.
4.2.1.5 Programming Mode Access
Press and hold
S
the display shows
; then press ▲ . Release both immediately after
.
4.2.1.6 Calibration Mode Access
S and ▼ during power-up. Release both immediately after
the display shows
.
Press
4.2.1.7 ‘Hold’ Function
The ‘Hold’ function is standard for all versions and is located on the terminals of the power supply module. By short-circuiting the ‘Hold’ input,
the indication on the display is frozen. When the ‘Hold’ function is active, all other functions operate in normal way.
4.2.1.8 Setpoints
The setpoints can operate in four different ways depending on the programming. See the following drawing.
18
Gross Automation (877) 268-3700 · www.carlogavazzisales.com · [email protected]
ENGLISH
Setpoint Operation
Scaling Operation
19
Gross Automation (877) 268-3700 · www.carlogavazzisales.com · [email protected]
ENGLISH
4.2.2 Programming Mode
The programming mode allows the user to define the instrument parameters:
-
Password for access to programming
Decimal point position
Minimum and maximum values of the electrical input range
Display span
and for each alarm setpoint:
-
Setpoint
High or low alarm levels
Hysteresis
Time delay
Alarm relay normally energized/de-energized
State of alarm relay in overflow conditions
Stepping from the programming of one parameter to the programming
of the next happens by pressing S .
The normal measurement and control functions are not active in programming mode. The alarm outputs are OFF. The analogue output is low.
Termination of the programming mode and return to measurement and
control mode follows automatically after completion of all programming
steps or after 3 minutes without key activation.
The display will show
for 2 seconds.
4.2.2.1 Access to Programming Mode
1. Press and hold
S ; then press ▲ . Release both immediately
after the display shows
.
During this phase the instrument asks for a password between 0 and
199 - the instrument is delivered with the password “0”.
2. If the password is not set to zero, press ▲ and/or ▼ until the
value (password) is displayed. Press
S to enter.
If the entered password matches the stored password, the instrument
automatically proceeds to the next step - otherwise it returns to measurement and control mode.
20
Gross Automation (877) 268-3700 · www.carlogavazzisales.com · [email protected]
ENGLISH
4.3 Programming
4.3.1 New Password
1. After you have entered the password the display shows
.
After 2 s the stored value of the password is displayed. To retain
the present value, press
S
to pass on to the next selection.
2. To modify the password, press ▲ and/or ▼ until the desired
value is displayed; this has to be a number between 0 and 199.
Press
S
to pass on to the next parameter.
A password between 100 and 199 gives direct access to setpoint programming in the following way: Enter programming mode and press ‘S’.
Then you will automatically jump directly to setpoint programming. After
the setpoint programming the programming mode is terminated.
4.3.2 Decimal Point Selection
Decimal point selection is relative to the displayed value.
1. After selection of the password the display will show
for 2 s.
The current position of the decimal point is then indicated on the
display by a steady light as
.
2. Change the position of the decimal point using ▲ (shift to left)
and/or ▼ (shift to right). Press S
to enter and pass on to next.
4.3.3 Electrical Input Range (HiE and LoE)
This feature allows you to define an electrical input range different from
the standard range. For example, for EDM with full-scale 20 mA (±19.99
mA), it is possible to select an electrical input range from 4.00 mA to
19.99 mA by proceeding as follows:
1. After programming the decimal point the display shows
for 2
seconds signifying the maximum of the electrical input range.
The HiE value stored in the memory is shown on the display, for
example
.
To retain the value shown, press
S
to pass on to next parameter.
21
Gross Automation (877) 268-3700 · www.carlogavazzisales.com · [email protected]
ENGLISH
2. To select a new value of HiE, press ▲ and/or ▼ until the desired
value is displayed, for example
. Press
S to accept.
3. After programming the HiE the display shows
for 2 s
signifying the minimum of the electrical input range.
The LoE value stored in the memory is then shown on the display.
To modify the LoE value proceed as described for the HiE value,
but select the value 4.00 (according to the example).
Press
S
to accept the value and pass on to the next parameter.
Note! LoE and HiE values are shown in the same unit of measurement
as the input module range.
4.3.4 Display Span (Hi and Lo)
This allows you to define the display span (in engineering units) corresponding to the previously defined electrical input range.
For example EDM 20 mA
Programmed electrical input range: 4.00 to 19.99 [mA]
Programmed display span:
0.00 to 8.00 [bar]
Lo: Displayed value corresponding to minimum of the input range (LoE).
Hi:
Displayed value corresponding to maximum of the input range (HiE).
The display can be programmed within the instrument read-out range indicated in the technical data tables. Since the link between the electrical
and the displayed value is completely adjustable/variable, it is possible to
correlate a minimum electrical value to a maximum display value, and
vice versa (scale inversion).
The best resolution is achieved when
HiE - LoE
Hi - Lo
≥1
1. After selecting the electrical input range, the display shows
for
2 s, signifying the maximum of the display span. The display then
shows the Hi value stored in the memory. Press S
current value.
to retain the
22
Gross Automation (877) 268-3700 · www.carlogavazzisales.com · [email protected]
value is displayed. Press
S
and/or ▼
until the desired
to enter the value.
3. After entering the Hi value the display shows
for 2 s, signifying
the minimum of the display span. The display shows the current
value of Lo. To change or retain the Lo value proceed as described
for Hi. After the entering of the value with
S
ENGLISH
2. To select a new Hi value, press ▲
the instrument passes
on to the next parameter.
4.3.5 Alarm Setpoint(s) - Controller
The EDM automatically senses if a relay output module is installed in
the instrument, and programming mode proceeds to entry of the data
relating to the setpoints.
If no relay output module is installed, programming mode will be terminated after the display span programming.
Note! The setpoint is relative to the display span, and not to the electrical input range.
4.3.5.1 Setpoint
1. After programming the display span the display shows
for 2 s,
indicating that the current programming concerns setpoint 1.
The display will then show the stored setpoint value.
To retain the value shown, press S .
2. To select a new value for SP1, press
desired value is displayed. Press
S
▲
and/or ▼ until the
to accept and pass on to the
next parameter.
4.3.5.2 Hysteresis
The hysteresis is the difference between the programmed setpoint
value (the value at which the alarm is set ON) and the value at which the
alarm is disabled. The hysteresis is related to the display span and it is
an absolute value. See drawing on page 17.
23
Gross Automation (877) 268-3700 · www.carlogavazzisales.com · [email protected]
ENGLISH
1. The display shows
for approx. 2 s. The display then shows
the current value stored in the memory.
Accept the value by pressing
S .
2. To select a new value for the hysteresis press
▲ and/or ▼
until the desired value is displayed. Now press S
value and pass on to the next parameter.
to accept this
4.3.5.3 Time Delay
1. When entering this parameter (from 0 to 99 s) the display will show
for approx. 2 s. Then the display shows the current value
stored in the memory - the value is expressed in seconds.
To accept this value press
S .
2. If you wish to change the value, press ▲ and/or
▼
until the
required value is displayed.
Press
S
to enter the value and pass on to the next selection.
4.3.5.4 High and Low Alarm
1. When you exit from the time delay programming the display shows
if a high alarm is the current status or
if the low alarm is
the current status.
To continue with the current status, press
S
and go on with the
next parameter.
2. To change the status, press ▲ or
Press
S
▼ to switch the status.
to accept and pass on to the next parameter.
4.3.5.5 Alarm Relay Energized/De-energized
You can choose if the relay has to be energized or de-energized in the
absence of an alarm.
1. The display will show
for a normally energized relay or it will
show
for a normally de-energized relay.
Press S
to keep the current value.
24
Gross Automation (877) 268-3700 · www.carlogavazzisales.com · [email protected]
▲
to select the normally
energized status (the display will show
) or press
▼
ENGLISH
2. To select a new relay status, press
to
select the normally de-energized status (the display will
show
Press
).
S
to accept and pass on to the next selection.
4.3.5.6 Relay Status in Overflow Condition
You can choose how the relay shall react in overflow conditions as well,
namely whether the relay has to be ON or OFF.
1. The display will show
will show
Press
S
for relay ON in overflow conditions or it
for relay OFF in overflow conditions.
to keep the current value and pass on.
2. If you will change the status, press ▲ to select relay ON (the
display will show
) or press ▼ to select relay OFF (the
display will show
). Press
S
to terminate setpoint 1
programming.
All parameters are now programmed (with a 1 relay output module installed) and the programming mode is terminated automatically. This
will be shown in the display with
. The system restarts and is back
in run-mode.
4.3.5.7 Setpoint 2
If a 2 relay output module is installed the display will show
the termination of 4.3.5.6 Relay Status in Overflow Condition.
after
To select the parameters for setpoint 2, proceed as explained for setpoint 1.
After programming all parameters for setpoint 2, the programming
mode is terminated automatically and shown in the display as
.
The system restarts and is back in run-mode.
25
Gross Automation (877) 268-3700 · www.carlogavazzisales.com · [email protected]
ENGLISH
5 Application Hints
5.1 DC Ammeters with current output transducers
5.1.1
4-wire transducer
without excitation
power by EDM
If the instrument has to be connected to 4-wire transducers, connect to
screw terminals as shown in the figure.
5.1.2
3-wire transducer
with excitation
power by EDM
If the instrument has to be connected to 3-wire transducers powered by
the instrument, connect to screw terminals as indicated.
26
Gross Automation (877) 268-3700 · www.carlogavazzisales.com · [email protected]
ENGLISH
5.1.3
2-wire transducer
with excitation
power by EDM
Connect as indicated if the instrument has to be connected to 2-wire
transducers powered by the instrument.
Note:
The shown configuration is only for EDM with 20 mA input.
5.2 AC Ammeter with 5 AAC input
5.2.1
The electrical FS of this instrument is HiE = 1999; to maintain maximum
resolution, this value should not be modified (during programming).
If the instrument is connected to a current transformer (5 AAC secondary current) with a primary current of 5-250 AAC, the display span
should be programmed so that the Hi value corresponds to the input
value of the CT primary.
Example:
Electrical full-scale: 0 - 5 AAC
LoE = 0
HiE = 19.99
Display span: 0 - 250 AAC
Lo = 0
Hi = 250 (250 (Hi) = 250 A CT primary)
See also 4.1 Modes of Operation: Scaling Operation
27
Gross Automation (877) 268-3700 · www.carlogavazzisales.com · [email protected]
ENGLISH
6 O rd e r i n g K e y s
As the EDM is modular, you can assemble a unit of modules without
using tools. All ranges of the input modules are calibrated from the factory.
EDM Components
A basic EDM indicator consists of a main unit, an input module and a
power supply module. The mechanical components are included in the
main unit. To the basic system you can add: analogue output, one or
two relay outputs and excitation power supply for connected sensors
(analogue output excludes the excitation output module).
6.1 Ordering Key for Modules
Display Modules (Main Unit):
(includes mechanical parts)
Part Number
3 1/2-digit display (green)
3 1/2-digit display (standard red)
3 1/2-digit display (high-bright red)
5100710
5100711
5100712
Power Supply Modules:
Part Number
230 VAC
115 VAC
48 VAC
24 VAC
12 - 48 VDC
5100520
5100521
5100522
5100523
5100524
Input Modules:
Part Number
Part Number
(with Program Lock)
VDC
VAC
ADC
AAC
10 A AC/DC
Ohm
Pt 100
Pt 100 850°C
Thermocouple Type J (Fe-CuNi)
Thermocouple Type K (NiCr-Ni)
Frequency meter
Tachometer
Dupline® Analink Interface
5100530
5100531
5100532
5100533
5100534
5100535
5100536
5100539
5100537
5100538
5100541
5100540
5100630
5100631
5100632
5100633
5100634
5100635
5100636
5100639
5100637
5100638
5100641
5100640
G 2139 1139
28
Gross Automation (877) 268-3700 · www.carlogavazzisales.com · [email protected]
Output Modules:
Part Number
1 Relay
2 Relays
Analogue Output
12/24 VDC Excitation Output
5100561
5100562
5100560
5100526
ENGLISH
6.1 Ordering Key for Modules (continued)
6.2 Ordering Key for System EDM 35
If you want to order a custom designed system, ready for use, you can
construct a system ordering key from the following information.
EDM 35
V1D
A:
Model
number
B:
Range
(EDM)
A: Model number
4
1
C:
Power
supply
D:
Relay
output
X
E:
Output
signal
XXY
F:
Other options
and/or special
designs
EDM 35 Carlo Gavazzi digital meter 3 1/2 digit
B: Range (EDM)
DC voltmeters
V1D:
V2D:
V3D:
V4D:
V5D:
-199.9 to 199.9 mV
-1.999 to 1.999 V
-19.99 to 19.99 V
-199.9 to 199.9 V
-600 to 600 V *
* Nominal voltage according to IEC 664-1. The measuring range includes 15% tolerance equal to 690 V
AC voltmeters
V1A:
V2A:
V3A:
V4A:
V5A:
0 to 199.9 mV
0 to 1.999 V
0 to 19.99 V
0 to 199.9 V
0 to 600 V *
* Nominal voltage according to IEC 664-1. The measuring range includes 15% tolerance equal to 690 V
29
Gross Automation (877) 268-3700 · www.carlogavazzisales.com · [email protected]
ENGLISH
B: Range (EDM) (cont.)
DC ammeters
A1D:
A2D:
A3D:
A4D:
A5D:
A6D:
A7D:
-199.9 to 199.9 µA
-1.999 to 1.999 mA
-19.99 to 19.99 mA
-199.9 to 199.9 mA
-1999 to 1999 mA
-5.00 to 5.00 A
-9.99 to 9.99 A
AC ammeters
A1A:
A2A:
A3A:
A4A:
A5A:
A6A:
A7A:
0 to 199.9 µA
0 to 1.999 mA
0 to 19.99 mA
0 to 199.9 mA
0 to 1999 mA
0 to 5.00 A
0 to 9.99 A
Ohmmeters
R1D:
R2D:
R3D:
R4D:
0 to 199.9 Ω
0 to 1.999 kΩ
0 to 19.99 kΩ
0 to 199.9 kΩ
Frequency meters F1A:
F1B:
F1C:
F2A:
F2B:
F2C:
Tachometers
Dupline Interface
5.0 to 199.9 Hz, Namur
5.0 to 199.9 Hz, NPN, PNP, Contact
5.0 to 199.9 Hz, 600 VAC
10 to 1999 Hz, Namur
10 to 1999 Hz, NPN, PNP, Contact
10 to 1999 Hz, 600 VAC
Namur input:
T1A:
8.0 to 199.9 rpm, 30 pulses/revol.
T2A:
5.0 to 199.9 rpm, 60 pulses/revol.
T3A:
2.0 to 199.9 rpm, 100 pulses/revol.
T4A:
20 to 1999 rpm, 30 pulses/revol.
T5A:
10 to 1999 rpm, 60 pulses/revol.
T6A:
10 to 1999 rpm, 100 pulses/revol.
NPN, PNP & Contact input:
T1B:
8.0 to 199.9 rpm, 30 pulses/revol.
T2B:
5.0 to 199.9 rpm, 60 pulses/revol.
T3B:
2.0 to 199.9 rpm, 100 pulses/revol.
T4B:
20 to 1999 rpm, 30 pulses/revol.
T5B:
10 to 1999 rpm, 60 pulses/revol.
T6B:
10 to 1999 rpm, 100 pulses/revol.
To be ordered separately
30
Gross Automation (877) 268-3700 · www.carlogavazzisales.com · [email protected]
3:
4:
5:
6:
7:
12 to 48 VDC
230 VAC
115 VAC
48 VAC
24 VAC
D: Relay output
0:
1:
2:
None
1 relay
2 relays
E: Output signal
X:
1:
2:
4:
5:
6:
None
4 - 20 mA
0 - 20 mA
0 - 10 V
12 VDC excitation output
24 VDC excitation output
F: Options
XXY:
CXY:
DXY:
XPY:
01Y-99Y:
None
High bright red display
Green display
Program lock
Special designs (assigned by factory)
ENGLISH
C: Power supply
Ordering Key Example
EDM 35 V1D 4 1 X XXY
Carlo Gavazzi digital meter 3 1/2 digit
-199.9 to 199.9 mV DC input
230 VAC power supply
1 relay output
No output signals
No options
31
Gross Automation (877) 268-3700 · www.carlogavazzisales.com · [email protected]
ENGLISH
7 Specifications
7.1 Main Unit
7.1.1 General Specifications
Modular Panel Meter
3 1/2 digit indicator/controller.
Display
7-segment, height 14.2 mm, red LED.
2 red LED’s for indication of relay ON.
Optional:
1) High bright red display and LED’s.
2) Green display and 2 yellow LED’s.
Max. and min. indication -1999 to 1999
A/D converter
Special dual slope.
Approx. 2 display/relay updates per second.
Accuracy
See module specifications.
Warm-up to rated
accuracy
Current: 10 minutes; voltage: 2 minutes.
CMRR
100 dB
GR = 1 kΩ.
NMRR
50 dB
GR = 50 Ω.
Temperature drift
See module specifications.
Excitation output
See module specifications.
Degree of protection
IP 65 (front), IP 20 (behind panel).
Operating temperature
0 °C to 50°C (32°F to 122°F).
(R.H. < 90% non-condensing).
Storage temperature
-10°C to 60°C (14°F to 140°F).
(R.H. < 90% non-condensing).
Approvals
UL, CSA.
Weight
Approx. 350 g. (affected by configuration).
Housing dimensions
48 x 96 x 89 mm.
Housing material
ABS/Polycarbonate blend.
32
Gross Automation (877) 268-3700 · www.carlogavazzisales.com · [email protected]
Black (front red, optional green).
Module connection
Screw terminals.
7.1.2 Supply Specifications
Rated operational
voltage
230 VAC ± 10%, 50/60 Hz ± 5 Hz (5100520).
Also usable at line voltages of:
240 VAC +6/-15%, 220 VAC +15/-6%.
ENGLISH
Housing colours
115 VAC ± 10%, 50/60 Hz ± 5 Hz (5100521).
Also usable at line voltages of:
120 VAC +6/-15%, 110 VAC +15/-6%.
48 VAC ± 10%, 50/60 Hz ± 5 Hz (5100522).
24 VAC ± 10%, 50/60 Hz ± 5 Hz (5100523).
12 to 48 VDC ± 15% (5100524).
Rated operational power 6 VA (12 to 48 VDC: 6 W).
7.1.3 Programming Specifications
Scaling
Electrical input range Prog. within the whole measuring range.
Display range
Programmable within the whole scale.
Decimal point position Programmable
Alarm setpoints
Number of setpoints
Setpoint adjustment
Hysteresis adjustment
Time delay adjustment
Alarm type
Relay status
Diagnostics
Overrange
Underrange
0, 1 or 2
-1999 to 1999.
1 - 1999.
0 - 99 s.
High or low, programmable.
“Normally energized” or “Normally de-energized relay coil, programmable.
EE
-EE
33
Gross Automation (877) 268-3700 · www.carlogavazzisales.com · [email protected]
ENGLISH
7.2 Module Specifications & Scaling Values
In this chapter the specifications and the scaling values (input modules
only) are described for each module. The scaling values inform how the
decimal point, the high/low electrical inputs and the high/low display
values have to be programmed to obtain a 1:1 relationship between
input and display.
All input modules have the programming lock option. By interconnecting the two terminals marked “PROG LOCK” it is still possible to see
the programmed parameters, but access to the programmed parameters will be disabled. If attempting to change parameters, the panel
meter will lock for approx. 3 minutes and then restart.
Where the standard ordering number for an input module is 510053x
the ordering number for the module with the programming lock option
is 510063x. The modules are described as follows:
Input Modules
7.2.1
7.2.2
7.2.3
7.2.4
7.2.5
7.2.6
7.2.7
7.2.8
7.2.9
7.2.10
7.2.11
7.2.12
7.2.13
DC Voltmeter
AC Voltmeter
DC Ammeter
AC Ammeter
10 A AC/DC Ammeter
Ohmmeter
Pt 100
Pt 100 850°C
Thermocouple Type J
Thermocouple Type K
Frequency meter
Tachometer
Dupline® Analink Interface
(5100x30)
(5100x31)
(5100x32)
(5100x33)
(5100x34)
(5100x35)
(5100x36)
(5100x39)
(5100x37)
(5100x38)
(5100x41)
(5100x40)
(G 2139 1139)
Output Modules
7.2.14
7.2.15
7.2.16
Excitation output
Analog output
Relay output
(5100526)
(5100560)
(5100561 - 5100562)
Power Supply Modules
7.2.17
AC and DC
(5100520 - 5100524)
All specifications are measured at 23°C ambient temperature and rated
operational supply voltage.
Accuracy mentioned in the tables means ± X% of reading ± Y digits.
34
Gross Automation (877) 268-3700 · www.carlogavazzisales.com · [email protected]
Specifications
Code
(EDM)
Range
Resolution
V1D
±199.9 mV
0.1 mV
V2D
±1.999 V
1 mV
V3D
±19.99 V
10 mV
V4D
±199.9 V
0.1 V
V5D
±600 V *
1V
Accuracy
Temperature
drift
Input
resistance
100 kΩ
0.2% ± 2 dgt
±100 ppm/°C
±0.05 dgt/°C
1 MΩ
Max. overload
(≤ 1 min.)
50 V
ENGLISH
7.2.1 DC Voltmeter (5100530 and 5100630)
230 V
690 V
Scaling Values
Code
(EDM)
Range
DP
HiE
LoE
Hi
Lo
V5D is the default range set from
factory.
V1D
±199.9 mV
111.1
199.9
-199.9
199.9
-199.9
V2D
±1.999 V
1.111
1.999
-1.999
1.999
-1.999
V3D
±19.99 V
11.11
19.99
-19.99
19.99
-19.99
V4D
±199.9 V
111.1
199.9
-199.9
199.9
-199.9
* Nominal voltage according to
IEC 664-1. The measuring range
includes 15% tolerance equal to
± 690 VDC.
V5D
±600 V *
1111
1999
-1999
690
-690
7.2.2 AC Voltmeter (5100531 and 5100631)
Specifications (40 Hz - 1 kHz)
Code
(EDM)
Range
Resolution
V1A
199.9 mV
0.1 mV
V2A
1.999 V
1 mV
V3A
19.99 V
10 mV
V4A
199.9 V
0.1 V
V5A
600 V *
1V
Accuracy
Temperature
drift
Input
resistance
100 kΩ
±150 ppm/°C
0.3% ± 3 dgt
±0.2 dgt/°C
1 MΩ
Max. overload
(≤ 1 min.)
50 V
230 V
690 V
Scaling Values
Code
(EDM)
Range
DP
HiE
LoE
Hi
Lo
V5A is the default range set from
factory.
V1A
199.9 mV
111.1
199.9
-0.1
199.9
-0.1
V2A
1.999 V
1.111
1.999
-0.001
1.999
-0.001
V3A
19.99 V
11.11
19.99
-0.01
19.99
-0.01
V4A
199.9 V
111.1
199.9
-0.1
199.9
-0.1
* Nominal voltage according to
IEC 664-1. The measuring range
includes 15% tolerance equal to
690 VAC.
V5A
600 V *
1111
1999
-3
690
-1
35
Gross Automation (877) 268-3700 · www.carlogavazzisales.com · [email protected]
ENGLISH
7.2.3 DC Ammeter (5100532 and 5100632)
Specifications
Code
(EDM)
Range
Resolution
A1D
±199.9 µA
0.1 µA
A2D
±1.999 mA
1 µA
A3D
±19.99 mA
10 µA
A4D
±199.9 mA
0.1 mA
A5D
±1999 mA
1 mA
A6D
±5.00 A
10 mA
Accuracy
Temperature
drift
Voltage
drop
Max. overload
(≤ 10 s)
20 mA
±100 ppm/°C
±0.05 dgt/°C
0.2% ± 2 dgt
100 mA
< 200 mV
200 mA
500 mA
±200 ppm/°C
±0.1 dgt/°C
4A
8A
Scaling Values
Range
DP
HiE
LoE
Hi
Lo
A1D
±199.9 µA
111.1
199.9
-199.9
199.9
-199.9
A2D
±1.999 mA
1.111
1.999
-1.999
1.999
-1.999
A3D
±19.99 mA
11.11
19.99
-19.99
19.99
-19.99
A4D
±199.9 mA
111.1
199.9
-199.9
199.9
-199.9
A5D
±1999 mA
1111
1999
-1999
1999
-1999
A6D
±5 A
11.11
19.99
-19.99
5.00
-5.00
Code
(EDM)
A6D is the default range set from
factory.
7.2.4 AC Ammeter (5100533 and 5100633)
Specifications
Range
Resolution
A1A
199.9 µA
0.1 µA
A2A
1.999 mA
1 µA
A3A
19.99 mA
10 µA
A4A
199.9 mA
0.1 mA
A5A
1999 mA
1 mA
A6A
5.00 A
10 mA
Code
(EDM)
Accuracy
Temperature
drift
Voltage
drop
Max. overload
(≤ 10 s)
20 mA
0.3% ± 3 dgt
±150 ppm/°C
±0.5 dgt/°C
0.5% ± 3 dgt
±200 ppm/°C
±0.5 dgt/°C
100 mA
< 200 mV
200 mA
500 mA
4A
8A
Scaling Values
Code
(EDM)
Range
DP
HiE
LoE
Hi
A1A
199.9 µA
111.1
A2A
1.999 mA
1.111
A3A
19.99 mA
A4A
A5A
A6A
Lo
199.9
-0.1
199.9
-0.1
1.999
-0.001
1.999
-0.001
11.11
19.99
-0.01
19.99
-0.01
199.9 mA
111.1
199.9
-0.1
199.9
-0.1
1999 mA
1111
1999
-1
1999
-1
5A
11.11
19.99
-0.04
5.00
-0.01
A6A is the default range set from
factory.
36
Gross Automation (877) 268-3700 · www.carlogavazzisales.com · [email protected]
Specifications
Code
(EDM)
Range
A7A
10 A AC
A7D
±10 A DC
Resolution
Accuracy
Temperature
drift
0.5% ± 5 dgt
±200 ppm/°C
±0.5 dgt/°C
0.5% ± 5 dgt
±200 ppm/°C
±0.1 dgt/°C
10 mA
Voltage
drop
Max. overload
(≤ 10 s)
< 200 mV
12 A
ENGLISH
7.2.5 10 A AC/DC Ammeter (5100534 and 5100634)
Scaling Values
Code
(EDM)
Range
A7A
10 A AC
A7D
±10 A DC
DP
HiE
11.11
19.99
LoE
-0.2
Hi
Lo
A7A is the default range set from
factory.
-0.01
10
-19.99
-10.00
7.2.6 Ohmmeter (5100535 and 5100635)
Specifications
Code
(EDM)
Range
Resolution
R1D
199.9 Ω
0.1 Ω
R2D
1.999 kΩ
1Ω
R3D
19.99 kΩ
0.01 kΩ
R4D
199.9 kΩ
0.1 kΩ
Accuracy
Temperature
Open cirdrift
cuit voltage
Excitation
current
1 mA
±150 ppm/°C
±0.1 dgt/°C
0.2% ± 2 dgt
6 VDC
100 µA
10 µA
1 µA
Scaling Values
Code
(EDM)
Range
DP
HiE
LoE
Hi
Lo
R1D
199.9 Ω
111.1
199.9
-0.1
199.9
-0.1
R2D
1.999 kΩ
1.111
1.999
-0.001
1.999
-0.001
R3D
19.99 kΩ
11.11
19.99
-0.01
19.99
-0.01
R4D
199.9 kΩ
111.1
199.9
-0.1
199.9
-0.1
R1D is the default range set from
factory.
7.2.7 Pt 100 Thermometer (5100536 and 5100636)
Specifications
Code
(EDM)
Sensor
type
P1C
Range
Resolution
Accuracy
Temperature
drift
-100.0 to 199.9°C
0.1°C
0.2% of rdg
±2 dgt
±150 ppm/°C
±0.05 count/°C
-148.0 to 199.9°F
0.2°F
0.4% of rdg
±4 dgt
-148.0 to 392°F
1°F
0.2% of rdg
±4 dgt
RTD Pt 100
P1F
P2F
∝ = 0.00385
±180 ppm/°F
±0.1 count/°F
37
Gross Automation (877) 268-3700 · www.carlogavazzisales.com · [email protected]
ENGLISH
7.2.7 Pt 100 Thermometer (5100536 and 5100636) - continued
Scaling Values
Code
(EDM)
Range
P1C
-100.0 to 199.9°C
P1F
-148.0 to 199.9°F
P2F
-148.0 to 392°F
DP
111.1
1111
HiE
199.9
93.2
1999
LoE
Hi
-100.0
199.9
-100
392
Lo
P1C is the default
range set from factory.
-100.0
-148.0
-148
7.2.8 Pt 100 850°C Thermometer (5100539 and 5100639)
Specifications
Code
(EDM)
P2C
P3F
Sensor
type
RTD Pt 100
∝ = 0.00385
Range
Resolution
Accuracy
Temperature
drift
-100 to 850°C
1°C
0.2% of rdg
±3 dgt
±150 ppm/°C
±0.05 count/°C
-148 to 1562°F
2°F
0.4% of rdg
±6 dgt
±180 ppm/°F
±0.1 count/°F
Scaling Values
Code
(EDM)
Range
P2C
-100 to 850°C
P3F
-148 to 1562°F
DP
HiE
LoE
1111
1999
-235
Hi
Lo
850
-100
1562
-148
P2C is the default
range set from factory.
7.2.9 Thermocouple Type J Thermometer (5100537 and 5100637)
Specifications
Code
(EDM)
-JC
-JF
Sensor
type
Thermocouple
Type J
Range
Resolution
Accuracy
Temperature
drift
-100 to 760°C
1°C
0.1% of rdg
±4 dgt
±100 ppm/°C
±0.05 count/°C
-148 to 1400°F
2°F
0.1% of rdg
±8 dgt
±180 ppm/°F
±0.1 count/°F
Scaling Values
Code
(EDM)
Range
-JC
-100 to 760°C
-JF
-148 to 1400°F
DP
HiE
LoE
1111
1999
-264
Hi
Lo
760
-100
1400
-148
-JC is the default
range set from factory.
38
Gross Automation (877) 268-3700 · www.carlogavazzisales.com · [email protected]
Specifications
Code
(EDM)
-KC
-KF
Sensor
type
Thermocouple
Type K
Range
Resolution
Accuracy
Temperature
drift
-100 to 1250°C
1°C
3% of rdg
±3 dgt
±100 ppm/°C
±0.05 count/°C
-148 to 1999°F
2°F
4% of rdg
±5 dgt
±180 ppm/°F
±0.1 count/°F
ENGLISH
7.2.10 Thermocouple Type K Thermometer (5100538 and 5100638)
Scaling Values
Code
(EDM)
Range
DP
-KC
-100 to1250°C
-KF
-148 to 1999°F
1111
HiE
1999
1748
LoE
-160
Hi
Lo
1250
-100
1999
-148
-KC is the default
range set from factory.
Accuracy for Sub-ranges
Code
(EDM)
Sensor
type
Range
Resolution
-KF
Thermocouple
-50 to 780°C
Type K
Thermocouple
Temperature
drift
1% of rdg
+5/-1 dgt
-100 to -50°C
-KC
Accuracy
0.1% of rdg
±3 dgt
1°C
±100 ppm/°C
±0.05 count/°C
780 to 1250°C
0.25% of rdg
+1/-3 dgt
-148 to -58°F
1% of rdg
+10/-2 dgt
-58 to 1436°F
±180 ppm/°F
±0.1 count/°F
0.1% of rdg
±5 dgt
2°F
Type K
0.25% of rdg
+2/-6 dgt
1436 to 1999°F
7.2.11 Frequency Meter (5100541 and 5100 641)
Specifications
Code
(EDM)
Range
Resolution
F1x
5.0 to 199.9 Hz
0.1 Hz
F2x
10 to 1999 Hz
1 Hz
Accuracy
Temperature
drift
Input
Namur
1% of reading
± 200 ppm/ºC NPN, PNP, contact
±5 dgt
600 VAC
Input imp.
1 kΩ
5 kΩ
600 kΩ
Scaling Values
Code
(EDM)
Range
DP
HiE
LoE
Hi
Lo
F1x
5.0 to 199.9 Hz
111.1
199.9
5.0
199.9
5.0
F2x
10 to 1999 Hz
1111
1999
10
1999
10
F2B is the default
range set from factory.
Connections: Namur: Vout sensor (+), IMP INPUT (-)
NPN, PNP, Contact: IMP INPUT and IN LO
AC voltages: 600 VAC and IN LO
39
Gross Automation (877) 268-3700 · www.carlogavazzisales.com · [email protected]
ENGLISH
7.2.12 Tachometer (5100540 and 5100 640)
Specifications
Code
(EDM)
Range
Resolution
Accuracy Temperature
drift
Input/Input impedance
T1A
8.0 to 199.9 rpm, 30 ppr
Namur / 1 kΩ
T1B
8.0 to 199.9 rpm, 30 ppr
NPN, PNP, contact / 5 kΩ
T2A
5.0 to 199.9 rpm, 60 ppr
T2B
5.0 to 199.9 rpm, 60 ppr
T3A
3.0 to 199.9 rpm, 100 ppr
T3B
3.0 to 199.9 rpm, 100 ppr
T4A
20 to 1999 rpm, 30 ppr
T4B
20 to 1999 rpm, 30 ppr
T5A
10 to 1999 rpm, 60 ppr
Namur / 1 kΩ
0.1 rpm
NPN, PNP, contact / 5 kΩ
Namur / 1 kΩ
1% of rea- ± 200 ppm/ºC
ding ±5 dgt
NPN, PNP, contact / 5 kΩ
Namur / 1 kΩ
NPN, PNP, contact / 5 kΩ
Namur / 1 kΩ
1 rpm
T5B
10 to 1999 rpm, 60 ppr
T6A
10 to 1999 rpm, 100 ppr
NPN, PNP, contact / 5 kΩ
Namur / 1 kΩ
T6B
10 to 1999 rpm, 100 ppr
NPN, PNP, contact / 5 kΩ
Scaling Values
Code
(EDM)
Range
DP
HiE
LoE
Hi
Lo
T1x
8.0 to 199.9 rpm, 30 ppr
111.1
199.9
8.0
199.9
8.0
T2x
5.0 to 199.9 rpm, 60 ppr
111.1
199.9
5.0
199.9
5.0
T3x
2.0 to 199.9 rpm, 100 ppr
111.1
199.9
2.0
199.9
2.0
T4x
20 to 1999 rpm, 30 ppr
1111
1999
20
1999
20
T5x
10 to 1999 rpm, 60 ppr
1111
1999
10
1999
10
T6x
10 to 1999 rpm, 100 ppr
1111
1999
10
1999
10
T6B is the default
range set from
factory.
Connections: Namur: Vout Namur (+), IMP INPUT (-)
NPN, PNP, Contact: IMP INPUT, Vout NPN/PNP and IN LO
7.2.13 Dupline® Analink Interface Module (G 2139 1139)
Scaling Values
Code
(EDM)
DP
HiE
LoE
Hi
Lo
-
111.1
1999
0
60.0 [°C]
-30.0 [°C]
The values shown are factory settings.
The scaling values can be changed
according to the used Dupline ®
Analink transmitter
7.2.14 Excitation Output Module (5100526)
Specifications
Output
voltage
Max. allowable
output current
12 VDC ± 20%
35 mA
24 VDC ± 20%
20 mA
Short-circuit
protection
Yes
40
Gross Automation (877) 268-3700 · www.carlogavazzisales.com · [email protected]
Specifications
Output
range
Accuracy
Temperature
drift
0 - 20 mA
4 - 20 mA
±1% ±0.1 mA
0 - 10 V
±1% ±0.05 V
±200 ppm/°C
Load
resistance
Output
Short-circuit
Time
resistance protection constant
< 500 Ω
N/A
> 1000 Ω
≤3Ω
Yes
1s
ENGLISH
7.2.15 Analogue Output Module (5100560)
Outputs are source signals and linearly proportional to the displayed values.
A)
0 - 20 mADC and 4 - 20 mADC output signal
Relationship between output signal and displayed value:
0 - 20 mA
I=
I
Hi
Lo
Rdg
B)
4 - 20 mA
20 (Rdg - Lo)
Hi - Lo
=
=
=
=
I=
16 (Rdg - Lo)
+4
Hi - Lo
output current (mA)
max. programmed value of the whole measuring range
min. programmed value of the whole measuring range
displayed value
0 - 10 V output signals
Relationship between output signal and displayed value:
V=
V
Hi
Lo
Rdg
10 (Rdg - Lo)
Hi - Lo
=
=
=
=
output voltage (V)
max. programmed value of the whole measuring range
min. programmed value of the whole measuring range
displayed value
Relationship between over-/underrange and analogue output:
Input signal
to EDM
Display
indication
Analogue output Analogue Output
0 - 20 mA
4 - 20 mA
Analogue Output
0 - 10 V
> HiE (overrange)
EE
20 mA
20 mA
10 V
< LoE (underrange)
-EE
0 mA
4 mA
0V
Caution!
An insulation voltage of 125 Vrms between analogue output and all
other connections, except relay outputs and power supply, limits the
use of the system. The insulation voltage is only intended to break
ground loops and not to serve as a safety function.
41
Gross Automation (877) 268-3700 · www.carlogavazzisales.com · [email protected]
ENGLISH
7.2.16 Relay Output Modules (5100561 and 5100562)
Specifications
Module SPDT
Rated
number con- Insulation
tacts voltage
5100561
1
5100562
2
250 V
Basic
AC1
load
DC1
load
AC15
load
DC13
load
Min. Dielectric
load voltage
5A
5A
2A
3A
0.1 A
250 VAC 24 VDC 250 VAC 24 VDC 24 V
Update
frequency
2 kV AC
(RMS)
2 Hz
7.2.17 Power Supply Modules AC and DC (5100520 to 5100524)
Specifications
Module number
Input voltage
5100520
230 VAC ± 10%
5100521
115 VAC ± 10%
5100522
48 VAC ± 10%
5100523
24 VAC ± 10%
5100524
12 - 48 VDC ± 15%
Rated oper. power
“Hold” input
6 VA
Yes
6W
42
Gross Automation (877) 268-3700 · www.carlogavazzisales.com · [email protected]
Below are shown the mechanical dimensions of the panel meter, the
maximum allowable thickness of the panel and the panel cutout. All dimensions are in [mm].
Front view
ENGLISH
7.3 Mechanical Dimensions
Side view
82,2
Max. 12.0
Max. 8.2
Top view
Panel cutout
43
Gross Automation (877) 268-3700 · www.carlogavazzisales.com · [email protected]
ENGLISH
8 Appendix
8.1 Reset of Password
The programming access password is factory set to ‘0’. For returning
the password to ‘0’ you have to use the predefined password ‘99’ in the
procedure described below.
1. Press
S
shows
and
▼ simultaneously at Power ON until the display
. Release the keys. The display shows
for 2 s.
2. Press ▲ or
▼ , until the ‘99’ password is displayed - then the
instrument shows
3. Press
S
.
to reset the password or turn off the EDM to exit without
any changes.
44
Gross Automation (877) 268-3700 · www.carlogavazzisales.com · [email protected]
Programming
Mnemonic
(shown 2 s)
Programming Function
Display
(examples)
Password control. New password
ENGLISH
8.2 Quick Reference Guide
Decimal point selection
High limit for electrical input range
Low limit for electrical input range
Display span, value corresponding to HiE
Display span, value corresponding to LoE
Setpoint 1
Hysteresis (setpoint 1)
Time delay in seconds (setpoint 1)
High or low alarm level (setpoint 1)
Normally energized or de-energized relay
Relay on or off in overflow condition
Setpoint 2 parameters as setpoint 1
End of programming
Enter programming mode: Press S
Change parameters: Press ▲ and/or
Step to next parameter: Press
and ▲ simultaneously.
▼ .
S .
45
Gross Automation (877) 268-3700 · www.carlogavazzisales.com · [email protected]
ENGLISH
Commands & Passwords
Setpoint 1 value
Press ▲
.
Setpoint 2 value
Press ▼
.
Peak & Valley values
Press ▲
and ▼ simultaneously.
Reset Peak & Valley
Press ▲
,
Programming Mode
Press S
and ▲ .
Calibration Mode
Press S
and
Change Parameters
Press ▲
and/or ▼ .
Next Parameter
Press S
.
Passwords
Valid passwords
0 - 199
Setpoint access only
100 - 199
Input range selection
66
Reset password
99
Passwords
▼ and
S
simultaneously.
▼ during power-up.
46
Gross Automation (877) 268-3700 · www.carlogavazzisales.com · [email protected]
ENGLISH
Notes
47
Gross Automation (877) 268-3700 · www.carlogavazzisales.com · [email protected]
ENGLISH
Notes
Gross Automation (877) 268-3700 · www.carlogavazzisales.com · [email protected]