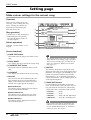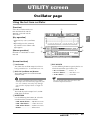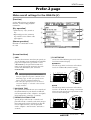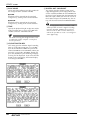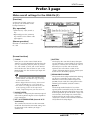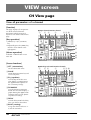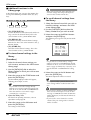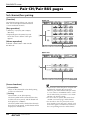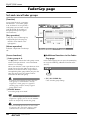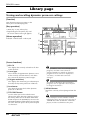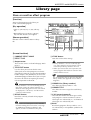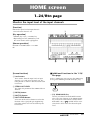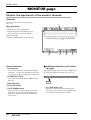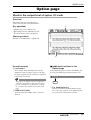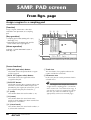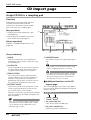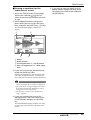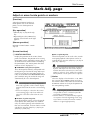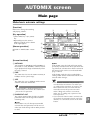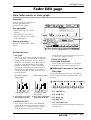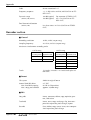
1
PROFESSIONAL AUDIO WORKSTATION
Reference Guide
E
Quick Rec page . . . . . . . . . . . . . . . . . . . . . . . . . . . . . . . . . . . . . . 8
Simultaneously recording 16 inputs/16 tracks . . . . . . . . . . . . . . . . 8
MASTERING screen . . . . . . . . . . . . . . . . . . . . . . . . . 10
Write CD page . . . . . . . . . . . . . . . . . . . . . . . . . . . . . . . . . . . . . 10
Using a CD-RW drive to create an audio CD . . . . . . . . . . . . . . . 10
CD PLAY screen . . . . . . . . . . . . . . . . . . . . . . . . . . . 12
CD Play page . . . . . . . . . . . . . . . . . . . . . . . . . . . . . . . . . . . . . . . 12
Use the CD-RW drive to play an audio CD . . . . . . . . . . . . . . . . . 12
SET UP screen . . . . . . . . . . . . . . . . . . . . . . . . . . . . . 14
Patch IN page . . . . . . . . . . . . . . . . . . . . . . . . . . . . . . . . . . . . . . 14
Patching a signal to a channel/track . . . . . . . . . . . . . . . . . . . . . . 14
Patch OUT page . . . . . . . . . . . . . . . . . . . . . . . . . . . . . . . . . . . . 16
Patch signals to output jacks . . . . . . . . . . . . . . . . . . . . . . . . . . . . 16
Patch Lib page . . . . . . . . . . . . . . . . . . . . . . . . . . . . . . . . . . . . . . 18
Store or recall patching settings . . . . . . . . . . . . . . . . . . . . . . . . . 18
D.in Setup page . . . . . . . . . . . . . . . . . . . . . . . . . . . . . . . . . . . . . 20
Make word clock/cascade settings . . . . . . . . . . . . . . . . . . . . . . . 20
Monitor page . . . . . . . . . . . . . . . . . . . . . . . . . . . . . . . . . . . . . . . 22
Monitor the digital input signals . . . . . . . . . . . . . . . . . . . . . . . . . 22
Dither Out page . . . . . . . . . . . . . . . . . . . . . . . . . . . . . . . . . . . . 24
Specify dithering and word length of the digital outputs . . . . . . . 24
Dither TRK page . . . . . . . . . . . . . . . . . . . . . . . . . . . . . . . . . . . . 25
Specify dithering and word length for tracks . . . . . . . . . . . . . . . . 25
— Reference Guide
iii
CD
PLAY
SET
UP
FILE
UTILITY
MIDI
QUICK REC screen . . . . . . . . . . . . . . . . . . . . . . . . . . 8
VIEW
Shut Down page . . . . . . . . . . . . . . . . . . . . . . . . . . . . . . . . . . . . . 7
Shut down the AW4416 . . . . . . . . . . . . . . . . . . . . . . . . . . . . . . . . 7
DYN/ EQ/ATT PAN/
DLY
/GRP ROUTE
Tempo Map page . . . . . . . . . . . . . . . . . . . . . . . . . . . . . . . . . . . . . 5
Programming the tempo map . . . . . . . . . . . . . . . . . . . . . . . . . . . . 5
SAMP.
AUX7/EFF1 AUX1–
HOME
PAD
AUX8/EFF2 AUX6
Song Edit page . . . . . . . . . . . . . . . . . . . . . . . . . . . . . . . . . . . . . . . 4
Deleting/copying/optimizing songs . . . . . . . . . . . . . . . . . . . . . . . . 4
TRACK
Setting page . . . . . . . . . . . . . . . . . . . . . . . . . . . . . . . . . . . . . . . . . 2
Make various settings for the current song . . . . . . . . . . . . . . . . . . 2
EDIT
Song List page . . . . . . . . . . . . . . . . . . . . . . . . . . . . . . . . . . . . . . . 1
Saving/loading a song . . . . . . . . . . . . . . . . . . . . . . . . . . . . . . . . . . 1
AUTO
MIX
SONG screen . . . . . . . . . . . . . . . . . . . . . . . . . . . . . . . 1
Appendix SCENE
Table of contents
MASTER- QUICK
SONG
REC
ING
Table of contents
Table of contents
Solo Setup page . . . . . . . . . . . . . . . . . . . . . . . . . . . . . . . . . . . . . 26
Make solo settings . . . . . . . . . . . . . . . . . . . . . . . . . . . . . . . . . . . 26
FILE screen . . . . . . . . . . . . . . . . . . . . . . . . . . . . . . . 28
Backup page . . . . . . . . . . . . . . . . . . . . . . . . . . . . . . . . . . . . . . . . 28
Backup a song . . . . . . . . . . . . . . . . . . . . . . . . . . . . . . . . . . . . . . 28
Restore page . . . . . . . . . . . . . . . . . . . . . . . . . . . . . . . . . . . . . . . . 30
Restore backed-up songs . . . . . . . . . . . . . . . . . . . . . . . . . . . . . . 30
Disk Util. page . . . . . . . . . . . . . . . . . . . . . . . . . . . . . . . . . . . . . . 31
Format or erase a disk . . . . . . . . . . . . . . . . . . . . . . . . . . . . . . . . 31
UTILITY screen . . . . . . . . . . . . . . . . . . . . . . . . . . . . 33
Oscillator page . . . . . . . . . . . . . . . . . . . . . . . . . . . . . . . . . . . . . . 33
Using the test tone oscillator . . . . . . . . . . . . . . . . . . . . . . . . . . . 33
Prefer.1 page . . . . . . . . . . . . . . . . . . . . . . . . . . . . . . . . . . . . . . . 34
Make overall settings for the AW4416 (1) . . . . . . . . . . . . . . . . . . 34
Prefer.2 page . . . . . . . . . . . . . . . . . . . . . . . . . . . . . . . . . . . . . . . 35
Make overall settings for the AW4416 (2) . . . . . . . . . . . . . . . . . . 35
Prefer.3 page . . . . . . . . . . . . . . . . . . . . . . . . . . . . . . . . . . . . . . . 37
Make overall settings for the AW4416 (3) . . . . . . . . . . . . . . . . . . 37
MIDI screen . . . . . . . . . . . . . . . . . . . . . . . . . . . . . . 39
MIDI Setup page . . . . . . . . . . . . . . . . . . . . . . . . . . . . . . . . . . . . 39
Make basic MIDI settings . . . . . . . . . . . . . . . . . . . . . . . . . . . . . . 39
MIDI Sync page . . . . . . . . . . . . . . . . . . . . . . . . . . . . . . . . . . . . . 41
Make settings related to MIDI synchronization . . . . . . . . . . . . . . 41
PGM Asgn. page . . . . . . . . . . . . . . . . . . . . . . . . . . . . . . . . . . . . . 43
Assign a scene number to each program change number . . . . . . 43
VIEW screen . . . . . . . . . . . . . . . . . . . . . . . . . . . . . . 44
CH View page . . . . . . . . . . . . . . . . . . . . . . . . . . . . . . . . . . . . . . 44
View all parameters of a channel . . . . . . . . . . . . . . . . . . . . . . . . 44
Library page . . . . . . . . . . . . . . . . . . . . . . . . . . . . . . . . . . . . . . . . 47
Store or recall channel settings . . . . . . . . . . . . . . . . . . . . . . . . . . 47
PAN/ROUTE screen . . . . . . . . . . . . . . . . . . . . . . . . 49
Pan 1–16/Pan17–24/Pan MONI pages . . . . . . . . . . . . . . . . . . . . 49
Set pan and routing . . . . . . . . . . . . . . . . . . . . . . . . . . . . . . . . . . 49
Pair CH/Pair BUS pages . . . . . . . . . . . . . . . . . . . . . . . . . . . . . . . 52
Set channel/bus pairing . . . . . . . . . . . . . . . . . . . . . . . . . . . . . . . 52
iv
— Reference Guide
Dly/ø1–16, Dly/ø17–24,
Dly/øMONI pages . . . . . . . . . . . . . . . . . . . . . . . . . . . . . . . . . . . 65
Set delay and phase . . . . . . . . . . . . . . . . . . . . . . . . . . . . . . . . . . 65
AUX1–AUX6 screens . . . . . . . . . . . . . . . . . . . . . . . . 67
Pre/Pst IN, Pre/Pst MONI pages . . . . . . . . . . . . . . . . . . . . . . . . 67
Make on/off and pre/post settings for the AUX sends . . . . . . . . . . 67
AUX7/EFF1 and
AUX8/EFF2 screens . . . . . . . . . . . . . . . . . . . . . . . . 69
Eff. Edit page . . . . . . . . . . . . . . . . . . . . . . . . . . . . . . . . . . . . . . . 69
Edit internal effects 1/2 . . . . . . . . . . . . . . . . . . . . . . . . . . . . . . . . 69
Library page . . . . . . . . . . . . . . . . . . . . . . . . . . . . . . . . . . . . . . . 71
Store or recall an effect program . . . . . . . . . . . . . . . . . . . . . . . . . 71
Pre/Pst IN, Pre/Pst MONI pages . . . . . . . . . . . . . . . . . . . . . . . . 73
Make on/off and pre/post settings for the effect sends . . . . . . . . . 73
HOME screen . . . . . . . . . . . . . . . . . . . . . . . . . . . . . 75
1–24/Rtn page . . . . . . . . . . . . . . . . . . . . . . . . . . . . . . . . . . . . . . 75
Monitor the input level of the input channels . . . . . . . . . . . . . . . 75
MONITOR page . . . . . . . . . . . . . . . . . . . . . . . . . . . . . . . . . . . . 76
Monitor the input levels of the monitor channels . . . . . . . . . . . . 76
Bus page . . . . . . . . . . . . . . . . . . . . . . . . . . . . . . . . . . . . . . . . . . 77
Monitor the output levels of buses 1–8/AUX buses 1–8 . . . . . . . . 77
Omni/ST page . . . . . . . . . . . . . . . . . . . . . . . . . . . . . . . . . . . . . . 78
Monitor the output levels of the OMNI OUT jacks and
stereo output . . . . . . . . . . . . . . . . . . . . . . . . . . . . . . . . . . . . . . . . 78
— Reference Guide
v
CD
PLAY
SET
UP
FILE
UTILITY
MIDI
Library page . . . . . . . . . . . . . . . . . . . . . . . . . . . . . . . . . . . . . . . 62
Storing and recalling dynamics processor settings . . . . . . . . . . . . 62
VIEW
Dyn. Edit page . . . . . . . . . . . . . . . . . . . . . . . . . . . . . . . . . . . . . . 60
Dynamics processor parameter settings . . . . . . . . . . . . . . . . . . . 60
DYN/ EQ/ATT PAN/
DLY
/GRP ROUTE
DYN/DLY screen . . . . . . . . . . . . . . . . . . . . . . . . . . 60
SAMP.
AUX7/EFF1 AUX1–
HOME
PAD
AUX8/EFF2 AUX6
Mute Grp page . . . . . . . . . . . . . . . . . . . . . . . . . . . . . . . . . . . . . 59
Set and cancel mute groups . . . . . . . . . . . . . . . . . . . . . . . . . . . . 59
TRACK
FaderGrp page . . . . . . . . . . . . . . . . . . . . . . . . . . . . . . . . . . . . . . 58
Set and cancel fader groups . . . . . . . . . . . . . . . . . . . . . . . . . . . . 58
EDIT
Library page . . . . . . . . . . . . . . . . . . . . . . . . . . . . . . . . . . . . . . . 56
Store or recall EQ settings . . . . . . . . . . . . . . . . . . . . . . . . . . . . . . 56
AUTO
MIX
EQ/Att page . . . . . . . . . . . . . . . . . . . . . . . . . . . . . . . . . . . . . . . . 54
EQ and attenuation settings . . . . . . . . . . . . . . . . . . . . . . . . . . . . 54
Appendix SCENE
EQ/ATT/GRP screen . . . . . . . . . . . . . . . . . . . . . . . . 54
MASTER- QUICK
SONG
REC
ING
Table of contents
Table of contents
Option page . . . . . . . . . . . . . . . . . . . . . . . . . . . . . . . . . . . . . . . . 79
Monitor the output level of option I/O cards . . . . . . . . . . . . . . . 79
SAMP. PAD screen . . . . . . . . . . . . . . . . . . . . . . . . . 80
From Rgn. page . . . . . . . . . . . . . . . . . . . . . . . . . . . . . . . . . . . . . 80
Assign a region to a sampling pad . . . . . . . . . . . . . . . . . . . . . . . 80
CD Import page . . . . . . . . . . . . . . . . . . . . . . . . . . . . . . . . . . . . . 82
Assign CD-DA to a sampling pad . . . . . . . . . . . . . . . . . . . . . . . . 82
WAV Import page . . . . . . . . . . . . . . . . . . . . . . . . . . . . . . . . . . . 84
Assign a WAV file to a sampling pad . . . . . . . . . . . . . . . . . . . . . 84
PAD Edit page . . . . . . . . . . . . . . . . . . . . . . . . . . . . . . . . . . . . . . 86
Editing a sample pad . . . . . . . . . . . . . . . . . . . . . . . . . . . . . . . . . 86
Trig. List page . . . . . . . . . . . . . . . . . . . . . . . . . . . . . . . . . . . . . . . 88
Recording and playing sampling pad operations . . . . . . . . . . . . 88
TRACK screen . . . . . . . . . . . . . . . . . . . . . . . . . . . . 90
TR View page . . . . . . . . . . . . . . . . . . . . . . . . . . . . . . . . . . . . . . . 90
Viewing the recorded content for each track . . . . . . . . . . . . . . . 90
V. Track page . . . . . . . . . . . . . . . . . . . . . . . . . . . . . . . . . . . . . . . 94
Switching virtual tracks . . . . . . . . . . . . . . . . . . . . . . . . . . . . . . . 94
Stereo page . . . . . . . . . . . . . . . . . . . . . . . . . . . . . . . . . . . . . . . . 95
Playing or erasing the stereo track . . . . . . . . . . . . . . . . . . . . . . . 95
Mark Adj. page . . . . . . . . . . . . . . . . . . . . . . . . . . . . . . . . . . . . . . 97
Adjust or erase locate points or markers . . . . . . . . . . . . . . . . . . . 97
EDIT screen . . . . . . . . . . . . . . . . . . . . . . . . . . . . . . 99
TR Edit page . . . . . . . . . . . . . . . . . . . . . . . . . . . . . . . . . . . . . . . . 99
Edit tracks . . . . . . . . . . . . . . . . . . . . . . . . . . . . . . . . . . . . . . . . . 99
V.TR Edit page . . . . . . . . . . . . . . . . . . . . . . . . . . . . . . . . . . . . . 107
Edit virtual tracks . . . . . . . . . . . . . . . . . . . . . . . . . . . . . . . . . . . 107
CD Import page . . . . . . . . . . . . . . . . . . . . . . . . . . . . . . . . . . . . 109
Import CD-DA to an audio track . . . . . . . . . . . . . . . . . . . . . . . 109
WavImport page . . . . . . . . . . . . . . . . . . . . . . . . . . . . . . . . . . . 111
Import a WAV file to an audio track . . . . . . . . . . . . . . . . . . . . . 111
TR Import page . . . . . . . . . . . . . . . . . . . . . . . . . . . . . . . . . . . . 113
Import a track from an existing song . . . . . . . . . . . . . . . . . . . . . 113
AUTOMIX screen . . . . . . . . . . . . . . . . . . . . . . . . . 115
Main page . . . . . . . . . . . . . . . . . . . . . . . . . . . . . . . . . . . . . . . . 115
Make basic automix settings . . . . . . . . . . . . . . . . . . . . . . . . . . . 115
Memory page . . . . . . . . . . . . . . . . . . . . . . . . . . . . . . . . . . . . . . 119
Store or recall automix . . . . . . . . . . . . . . . . . . . . . . . . . . . . . . . 119
vi
— Reference Guide
Sort page . . . . . . . . . . . . . . . . . . . . . . . . . . . . . . . . . . . . . . . . . 128
Sort scenes . . . . . . . . . . . . . . . . . . . . . . . . . . . . . . . . . . . . . . . . 128
Appendix . . . . . . . . . . . . . . . . . . . . . . . . . . . . . . . . . 1
Preset EQ Program Parameters . . . . . . . . . . . . . . . . . . . . . . . . . . 2
Preset Effects Programs . . . . . . . . . . . . . . . . . . . . . . . . . . . . . . . . 6
Effects Parameters . . . . . . . . . . . . . . . . . . . . . . . . . . . . . . . . . . . . 8
Dynamics Processors . . . . . . . . . . . . . . . . . . . . . . . . . . . . . . . . . 24
Preset Dynamics Programs . . . . . . . . . . . . . . . . . . . . . . . . . . . . . 24
Preset Dynamics Program Parameters . . . . . . . . . . . . . . . . . . . . 29
Troubleshooting . . . . . . . . . . . . . . . . . . . . . . . . . . . . . . . . . . . . 35
Display message list . . . . . . . . . . . . . . . . . . . . . . . . . . . . . . . . . . 39
Messages . . . . . . . . . . . . . . . . . . . . . . . . . . . . . . . . . . . . . . . . . . 39
Popup messages . . . . . . . . . . . . . . . . . . . . . . . . . . . . . . . . . . . . . 41
Specifications . . . . . . . . . . . . . . . . . . . . . . . . . . . . . . . . . . . . . . 43
General Specifications . . . . . . . . . . . . . . . . . . . . . . . . . . . . . . . . 43
Mixer section . . . . . . . . . . . . . . . . . . . . . . . . . . . . . . . . . . . . . . . 44
Recorder section . . . . . . . . . . . . . . . . . . . . . . . . . . . . . . . . . . . . . 46
Controls . . . . . . . . . . . . . . . . . . . . . . . . . . . . . . . . . . . . . . . . . . . 47
Control I/O . . . . . . . . . . . . . . . . . . . . . . . . . . . . . . . . . . . . . . . . . 48
Dimensions . . . . . . . . . . . . . . . . . . . . . . . . . . . . . . . . . . . . . . . . 49
CD
PLAY
SET
UP
FILE
Appendix SCENE
AUTO
MIX
EDIT
MIDI data format . . . . . . . . . . . . . . . . . . . . . . . . . . . . . . . . . . . 50
UTILITY
RCL. Safe page . . . . . . . . . . . . . . . . . . . . . . . . . . . . . . . . . . . . . 127
Make fader recall safe settings . . . . . . . . . . . . . . . . . . . . . . . . . 127
MIDI
Fade Time page . . . . . . . . . . . . . . . . . . . . . . . . . . . . . . . . . . . . 126
Specify the fade time . . . . . . . . . . . . . . . . . . . . . . . . . . . . . . . . 126
VIEW
Scene Mem page . . . . . . . . . . . . . . . . . . . . . . . . . . . . . . . . . . . 124
Store or recall a scene . . . . . . . . . . . . . . . . . . . . . . . . . . . . . . . . 124
DYN/ EQ/ATT PAN/
DLY
/GRP ROUTE
SCENE screen . . . . . . . . . . . . . . . . . . . . . . . . . . . . 124
SAMP.
AUX7/EFF1 AUX1–
HOME
PAD
AUX8/EFF2 AUX6
Event List page . . . . . . . . . . . . . . . . . . . . . . . . . . . . . . . . . . . . . 122
Edit events off-line . . . . . . . . . . . . . . . . . . . . . . . . . . . . . . . . . . 122
TRACK
Fader Edit page . . . . . . . . . . . . . . . . . . . . . . . . . . . . . . . . . . . . 121
View fader events as a bar graph . . . . . . . . . . . . . . . . . . . . . . . 121
MASTER- QUICK
SONG
REC
ING
Table of contents
— Reference Guide
vii
Reference guide
Reference guide
The reference guide explains all screens and all pages that appear in the display.
Use it like a dictionary when you wish to learn more about the functions in the
screen, or to find the page from which to execute a desired operation.
How to read the reference guide
Here’s how to read the reference guide.
A Screen name
1
EQ/ATT/GRP screen
2
EQ/Att page
B Page name/title
C [Function]
A brief summary of the
functions of this page.
EQ and attenuation settings
D [Key operation]
The procedure for using
the top panel keys to
access this page.
3
4
E [Mouse operation]
The procedure for using
the mouse to access this
page.
[Function]
1
Make four-band EQ and attenuation settings for the selected channel.
3
4
[Key operation]
• [EQ] key → [F1] key (EQ/Att) key
• Repeatedly press the [EQ] key until the
screen shown at the right appears.
5
[Mouse operation]
M button → EQ button → EQ/Att tab
5
6
F [Screen functions]
Explanations of the function of each item or
operation in this page.
2
7
6
G ■ Additional functions in the page
Explanations of the additional functions assigned
to the function keys
([F1]–[F5]) in this page.
H [Procedure]
The procedure for performing a specific operation in this page.
[Screen functions]
A EQ ON button
the EQ type to H.SHELF (shelving), and turning
it all the way in the counter-clockwise direction
will switch the EQ type to LPF (low pass filter).
Range: 10–0.10, HPF/L.SHELF (LOW band
only), LPF/H.SHELF (HIGH band only)
This switches EQ on/off. When this page is displayed, you can use the [ENTER] key to switch
this button on/off regardless of the cursor location.
7
8
EQ/ATT/GRP screen
■ Additional functions in the EQ/
Att page
● Copying the attenuation setting
to all channels
In the EQ/Att page you can press the [SHIFT] key to
assign the following additional functions to the
[F1]–[F2] and [F5] keys.
[Procedure]
1. Access the EQ/Att page for the copy
source channel, and move the cursor to
the ATT. knob.
2. Press the [SHIFT] key + [F5] key.
F1
F2
F5
• [F1] (FLAT) key
Reset all bands to a boost/cut amount of 0.0 dB
(off if HPF/LPF is selected).
• [F2] (BAND FLAT) key
Reset only the selected band to a boost/cut
amount of 0.0 dB (off if HPF/LPF is selected).
• [F5] (COPY ATT. TO ALL) key
Copy the attenuation setting of the selected
channel to all channels. (However, the stereo
output channel is excepted.)
viii
— Reference Guide
A CONFIRMATION popup window will appear,
asking you to confirm the copy.
If the cursor is at a location other than the
ATT. knob, a message of “Can’t Copy This
Parameter” will appear, and the copy will not
occur.
3. To execute the copy, move the cursor to
the OK button and press the [ENTER] key.
Only the attenuation setting will be copied. If
you wish to copy EQ settings, you must store
the settings in the library and recall them into
the copy destination channel. For the procedure refer to page 47.
SONG
SONG screen
Song List page
Saving/loading a song
[Function]
1
Load a song from hard disk, or
save the current song to hard disk.
[Key operation]
• [SONG] key → [F1] (Song List)
key
• Repeatedly press the [SONG]
key until the display shown at
right appears.
[Mouse operation]
2
M button → SONG button → Song
List tab
3
4
5
6
[Screen functions]
A Song list
This lists the songs that are saved on the internal
hard disk. The highlighted line is the current
song, and the line enclosed by a dotted line is
the song selected for loading. Use the [DATA/
JOG] dial to select the song for loading.
This list shows the following data for each song.
• SONG NAME .....First 16 characters of the
song name
• SAVED AT...........Date and time at which the
song was last saved
• SIZE ...................Size of the song
• BIT/FS ................Quantization (bit number)/
sampling frequency of the
song
• PRT ....................Song protect on/off (→ P.2)
Tip!
If song protect is on, the PRT column will
show “ ”.
B SELECTED SONG NAME
This shows the name of the song selected by the
cursor. This field is for display only, and cannot
be edited.
C COMMENT
This shows the comment of the song selected by
the cursor. This field is for display only, and cannot be edited.
Comments for other than the current song will
be displayed as “*** Other Song Comment ***”.
D LOAD button
This button loads the song enclosed by the dotted line in the list.
E SAVE button
This button saves the current song.
The location of the dotted frame in the list
does not affect the save location of the current song. It is not possible to change the
save location of the current song.
Tip!
For details on loading or saving songs, refer
to Operation Guide “Chapter 11. Song management.”
F NEW SONG button
This button creates a new song. For details on
creating a new song, refer to Operation Guide
“Chapter 5. Recording on the AW4416.”
— Reference Guide
1
SONG screen
Setting page
Make various settings for the current song
[Function]
Make various settings for the current song, such as editing the song
name, selecting the counter display method, and selecting the
time code frame rate.
1
2
[Key operation]
3
4
5
6
7
8
9
• [SONG] key → [F2] (Setting) key
• Repeatedly press the [SONG]
key until the display shown at
the right appears.
[Mouse operation]
M button → SONG button → Setting tab
[Screen functions]
A NAME EDIT button
This button edits the song name of the current
song.
B SONG NAME
This displays the song name of the current song.
C COMMENT EDIT button
This button edits the comment of the current
song.
D COMMENT
This displays the comment of the current song.
E DISPLAY
You can select one of the following three display methods for the current location that is
shown in the counter/level meter and in the
counter in the upper part of the display.
● SECOND button
The counter will be displayed as time (hours/
minutes/seconds/milliseconds).
● TIME CODE button
The counter will be displayed as time code
(hours/minutes/seconds/frames/sub-frames).
● MEASURE button
The counter will be displayed as measures
(measures/beats/ticks).
2
— Reference Guide
Tip!
The display method you select here will also
affect how the track editing range is specified
(EDIT screen TR Edit page), and how locate
points are displayed (TRACK screen Mark
Adj. page etc.).
F PROTECT
This specifies the protect setting of the song.
When you move the cursor to the button in the
PROTECT area and press the [ENTER] key, the
button will alternate between ON and OFF.
When protect is on, it will not be possible to
edit or record tracks, edit the sampling pads, or
set/change locate points.
G FRAME RATE buttons
Use the following four buttons to select the
frame rate of the time code. The frame rate setting will affect the counter time code display
and the MTC that is transmitted and received.
• 24 button ...........24 fps
• 25 button ...........25 fps
• 30 button ...........30 fps (30 non-drop frame)
• 30D button ........29.97 fps (30 drop-frame)
If you wish to use MTC to synchronize the
AW4416 and an external device, you must
use the FRAME RATE buttons to match the
frame rate of the two devices.
SONG screen
H TOP
This adjusts the time code time that corresponds
to the beginning of the song (“time code top”) in
the range of “00:00:00:00.00”–
”24:00:00:00.00”. (Negative values cannot be
set.) Move the cursor to the TOP area, and use
the [DATA/JOG] dial to adjust the hours/minutes/seconds/frames/subframes value.
Time code top= 00:00:00:00.00
Time code
display 00:00:00:00.00
00:00:05:00.00
Song
Time code top= 00:00:05:00.00
Time code
display 00:00:05
5:00.00
00:00:10:00.00
Song
• Changing the time code Top will affect the
time code indications in the display and the
MTC that the AW4416 transmits and
receives.
• When you modify the time code Top, the
start point and end point will be adjusted
automatically. For details on the start point
and end point, refer to the explanation in
“TRACK screen/Mark Adj. page.”
I RGN. FADE TIME (region fade time)
This parameter automatically fades-in/fades-out
the starting and ending point of regions. You can
select from 3, 5, 10, 20, or 45 msec as the time
over which the fade-in/out will take place
(“region fade time”). The default setting is 5
msec.
Tip!
If the level changes abruptly at the start/end
point of a region, noise or a click may be
heard during playback. For this reason, it is
not possible to set the region fade time to 0
msec. If you notice noise or clicks, set the
region fade time to a longer value.
— Reference Guide
3
SONG screen
Song Edit page
Deleting/copying/optimizing songs
[Function]
Edit songs saved on the internal hard disk,
such as by deleting, copying, or optimizing them.
[Key operation]
• [SONG] key → [F3] (Song Edit) key
• Repeatedly press the [SONG] key until
the screen shown at the right appears.
1
[Mouse operation]
2
3
M button → SONG button → Song Edit
tab
6
5
4
[Screen functions]
A Song list
C COPY button
This lists the songs saved on the internal hard
disk. The current song is highlighted in the list.
An “E” symbol displayed at the left edge of the
list indicates a song selected for editing. The following information is also displayed in the song
list.
• SONG NAME .....First 16 characters of the
song name
• SAVED AT ...........Date and time at which the
song was last saved
• SIZE ....................Size of the song
• BIT/FS.................Quantization (bit number)/
sampling frequency of the
song
• PRT.....................Song protect on/off status
Tip!
• When you use the cursor to select a song in
the list and press the [ENTER] key, the “E”
symbol that indicates the editing selection
will alternately appear and disappear.
• Depending on the operation, you may be
able to select more than one song for editing.
B DELETE button
This button deletes the song marked by the “E”
symbol from the internal hard disk.
This button copies the song marked by the “E”
symbol onto the internal hard disk.
D OPTIMIZE button
This button optimizes the song marked by the
“E” symbol. When optimize is executed, audio
files not currently used by that song (e.g., undo
files) will be deleted.
Optimize can be executed on only one song
at a time. Optimize can be executed on the
current song.
E MIXER IMP (mixer import) button
This button imports the mixer settings (scene memory/automix/tempo map/libraries) from the song
marked by the “E” symbol into the current song.
Only one song can be selected as the import
source for mixer data. The current song cannot be selected as the import source.
F Parameter area
When you move the cursor to one of the buttons 2–5, the operation (DELETE/COPY/OPTIMIZE/MIXER IMPORT) that can be executed by
that button will appear in this area.
Tip!
• The current song cannot be deleted.
• A deleted song is gone forever. Use this
operation with caution.
4
— Reference Guide
For details on using each operation, refer to
Operation Guide “Chapter 11. Song Management.”
SONG screen
Tempo Map page
Programming the tempo map
[Function]
Program tempo data and time signature data into the tempo map.
[Key operation]
• [SONG] key → [F4] (Tempo
Map) key
• Repeatedly press the [SONG]
key until the screen shown at the
right appears.
2
1
[Mouse operation]
M button → SONG button →
Tempo Map tab
3
4
5
6
[Screen functions]
A METER
In this area you can specify the time signature.
The area enclosed by the dotted frame is the
currently selected time signature data. In the
METER area you can make the following settings for the STEP/MEASURE/METER items.
● STEP
Move the cursor to this area and rotate the
[DATA/JOG] dial to select the number (step
number) of the time signature data. The step
number is assigned consecutively, starting at the
time signature data of the lowest-numbered
measure.
● MEASURE
Move the cursor to this area and rotate the
[DATA/JOG] dial to modify the measure number
of the time signature. If you move the time signature beyond the previous or next time signature data, their step numbers will be exchanged
automatically.
● METER
Move the cursor to this area and rotate the
[DATA/JOG] dial to specify the time signature
(2/1–8/8) for that measure. The numerator and
denominator of the time signature can be set
independently.
Tip!
When the AW4416 is in the default state,
time signature data of 4/4 is already input at
measure 1.
• It is not possible to move the time signature
data of measure 1.
• It is not possible to place two time signatures
at the same measure. If you move the cursor
to the MEASURE area and specify the same
measure number as an existing time signature, the previous time signature data will be
deleted.
B TEMPO
In this area you can specify tempo data. The
area enclosed by the dotted line is the currently
selected tempo data. In the TEMPO area you
can make the following settings for the STEP/
MEASURE/BEAT/TEMPO items.
● STEP
Move the cursor to this area and rotate the
[DATA/JOG] dial to select the number (step
number) of the tempo data. The step number is
assigned consecutively, starting at the tempo
data of the lowest-numbered measure.
● MEASURE/BEAT
Move the cursor to this area and rotate the
[DATA/JOG] dial to modify the location (measure/beat) of the tempo data. If you move the
tempo data beyond the previous or next tempo
data, their step numbers will be exchanged
automatically.
— Reference Guide
5
SONG screen
● TEMPO
Move the cursor to this area and rotate the
[DATA/JOG] dial to set the tempo (BPM) of that
location. The BPM value can be set in a range of
20.0–300.0, in 0.1 steps.
■ Additional functions in the
Tempo Map page
In the Tempo Map page, pressing the [SHIFT] key
will assign the following functions to the [F1]–[F3]
keys.
Tip!
When the AW4416 is in the default state,
tempo data of BPM=120 is already input at
measure 1 beat 1.
F1
• The tempo data at step number 1 cannot be
moved.
• It is not possible to place two tempo data at
the same location. If you move the cursor to
the MEASURE/BEAT area and specify the
same location as an existing tempo data, the
previous tempo data will be deleted.
C EDIT SELECT button
Use this button to specify whether you will edit
time signature data (METER) or tempo data
(TEMPO). Move the cursor to the button and
press the [ENTER] key to switch between
METER and TEMPO.
D NEW button
When you move the cursor to this button and
press the [ENTER] key, new time signature/
tempo data will be added following the last step
number that is currently input.
Tip!
• For details on inputting the tempo map, refer
to Operation Guide “Chapter 15. MIDI.”
• A maximum of 26 time signature data/tempo
data items can be input in the METER area/
TEMPO area.
E INS button
When you move the cursor to this button and
press the [ENTER] key, new time signature/
tempo data will be inserted in the step number
before the currently selected time signature/
tempo data.
F DEL button
When you move the cursor to this button and
press the [ENTER] key, the currently selected
time signature/tempo data will be deleted.
It is not possible to delete the time signature/
tempo data of step number 1.
6
— Reference Guide
F2
F3
• [F1] (NEW) key
This key inputs additional time signature data or
tempo data. This is the same function as the 4
NEW button.
• [F2] (INS) key
This key inserts time signature data or tempo
data. This is the same function as the 5 INS
button.
• [F3] (DEL) key
This key deletes time signature data or tempo
data. This is the same function as the 6 DEL
button.
SONG screen
Shut Down page
Shut down the AW4416
[Function]
Shut down the AW4416 so that the power can
be turned off.
1
[Key operation]
• [SONG] key → [F5] (Shut Down) key
• Repeatedly press the [SONG] key until the
screen shown at the right appears.
[Mouse operation]
M button → SONG button → Shut Down tab
2
[Screen functions]
A Current song status
This area displays various information on the
last-saved song.
The data for the current song (date, size,
quantization bits, protect) shown here in the
song list is the data for when the song was
last saved. When you perform the Save procedure and press the [ENTER] key, it will be
overwritten by the new data.
B EXECUTE button
In this page, the cursor is fixed at the EXECUTE
button, so you can shut-down simply by pressing the [ENTER] key. For details on the order in
which the AW4416 and peripheral devices
should be shut down, refer to Operation Guide
“Important points you must observe.”
If you turn off the power of the AW4416
without performing the shut-down operation,
audio data on the internal hard disk may be
damaged. Be sure to perform this shut-down
operation before turning off the power of the
AW4416.
— Reference Guide
7
QUICK REC screen
Quick Rec page
Simultaneously recording 16 inputs/16 tracks
[Function]
Instantly make settings (Quick Rec
function) for simultaneously
recording 16 input sources on
audio tracks 1–16.
[Key operation]
1
[QUICK REC] key
[Mouse operation]
2
M button → Quick REC button
[Screen functions]
A Input select 1–8
B Input select 9–16
Select from the following input sources to send
to audio tracks 1–8/9–16.
• ANALOG 1–8 .....INPUT jacks 1–8
• SLOT1 1–8..........INPUT 1–8 of an I/O card
(slot 1)
• SLOT2 1–8..........INPUT 1–8 of an I/O card
(slot 2)
Tip!
It is possible to select the same source for 1
and 2. In this case, the same signal will be
sent to tracks 1–8 and tracks 9–16.
C EXECUTE button
When you move the cursor to this button and
press the [ENTER] key, the settings of the
AW4416 will change as follows.
• Mix parameters such as fader, pan, and EQ for
each channel will be reset.
• [REC TRACK SELECT] keys 1–16 will blink,
and tracks 1–16 will be in record-ready mode.
• The output of all tracks 1–16 will be muted.
• Input patch and recorder input patch settings
will be switched as follows.
8
— Reference Guide
3
QUICK REC screen
• Input jacks 1–8
• I/O card SLOT1 1–8
• I/O card SLOT2 1–8
• Input jacks 1–8
• I/O card SLOT1 1–8
• I/O card SLOT2 1–8
QUICK
REC
1 Input select 1–8
Input
patch
×8
×8
Mixer section
Recorder
input
patch Recorder section
Input channels 1–8
Tracks 1–8
Input channels 9–16
Tracks 9–16
2 Input select 9–16
After you have used the EXECUTE button, you
can simply press the [REC] key + [PLAY] key to
simultaneously record 16 inputs on tracks 1–16.
Tip!
• To defeat record-ready and mute settings for
tracks 1–16, press the [ALL SAFE] key.
• For details on operation of the Quick Rec
function, refer to Operation Guide “Chapter
8. Patching.”
— Reference Guide
9
MASTERING screen
Write CD page
Using a CD-RW drive to create an audio CD
[Function]
Create an audio CD by writing the
stereo track data of songs to CD-R/
RW media as CD audio tracks.
1
[Key operation]
6
[MASTERING] key
[Mouse operation]
M button → MAST button
3
2
4
7
5
8
9 K J L
[Screen functions]
A DRIVE
Select the SCSI ID number of the internal or
external CD-RW drive.
B FINALIZE button
When you press this button, CD-R media that
was written using Track At Once will be finalized (information on track locations etc. will be
written into the data area). You must perform the
finalize operation in order for CD-R media written using Track At Once to be playable on a CD
player.
Tip!
If you used Disc At Once to write the data,
finalize will be performed automatically. For
this reason, the FINALIZE button will be displayed only if the TRACK AT ONCE button 3
is turned on.
10
— Reference Guide
C TRACK AT ONCE button
D DISC AT ONCE button
Use these buttons to select the way in which
data will be written to the CD-R/RW media
(either Track At Once or Disc At Once). Before
you execute the Write operation, you must
move the cursor to one of these buttons and
press the [ENTER] key.
CD-RW media does not support Track At
Once.
E WRITE SPEED buttons
Use the x1, x2, x4, and x6 buttons to select the
writing speed (normal speed/double speed/
quad speed/x6 speed). Normally you should
select the fastest speed supported by your CDRW drive.
MASTERING screen
Here you can select the stereo tracks that will
be written as audio tracks on the CD.
The track list shows the following information.
● TRACK
This is the track number on the CD. Move the
cursor to this area and rotate the [DATA/JOG]
dial to change the track number.
● SONG NAME/SIZE/COPY
This shows the song name, stereo track data
size, and copy protect setting of songs that contain a stereo track. Move the cursor to this area
and use the [DATA/JOG] dial to select the stereo
track that will be written to the corresponding
audio track.
• The track list will show only the stereo tracks
of songs whose sampling frequency is
44.1 kHz. Stereo tracks of 48 kHz sampling
frequency songs will not be displayed.
• If a 24 bit / 44.1 kHz stereo track is selected,
the lower 8 bits will be discarded when the
data is written, converting it into 16 bit /
44.1 kHz data.
Tip!
If CD-R media containing data written using
Track At Once is in the CD-RW drive, the
SONG NAME/SIZE/COPY area will indicate
“–EXISTING–”.
● PERMIT
Digital copying of the corresponding track will
be permitted.
Tip!
If the button is displayed as PROHIBIT, an
“ ” symbol will be displayed in the COPY
column of the track list.
L EXECUTE button
Use this button to execute writing (mastering) to
CD-R/RW media.
Tip!
• The AW4416 has a “writing test” function
that can check before mastering is performed to see whether data transmission
errors will occur. By default, this test will not
be performed. However, you can make settings so that the test will be performed
before writing, or execute the test by itself.
(→ P.37)
• For details on the procedure of the Mastering
function, refer to Operation Guide “Chapter
17. Mastering.”
■ Additional functions in the Write
CD page
In the Write CD page you can press the [SHIFT] key
to assign the following functions to the [F1]–[F5]
keys.
G Total
This shows the total of the SIZE column of the
track list. A maximum of approximately 650 MB
can be written to 74 minute CD-R/RW media.
F1
F2
F3
F4
F5
H NEW button
Add a new audio track to the track list.
I INS button
Insert a new audio track after the track number
currently selected in the track list.
J DEL
Delete the currently selected audio track from
the track list.
K COPYRIGHT button
Set the copy protect setting of the audio track
currently selected in the track list. Move the
cursor to this button and press the [ENTER] key
to switch between the following two button displays.
● PROHIBIT
Digital copying of the corresponding track will
be prohibited.
• [F1] (CD LOAD) key
Close the tray of the CD-RW drive.
• [F2] (CD UNLOAD) key
Eject the tray of the CD-RW drive.
• [F3] (NEW) key
Add a new audio track to the track list 6. This is
the same function as the NEW button 8.
• [F4] (INS) key
Insert a new audio track after the track number
currently selected in the track list 6. This is the
same function as the INS button 9.
• [F5] (DEL) key
Delete the audio track currently selected in the
track list 6. This is the same function as the DEL
button J.
— Reference Guide
11
MASTERING
F Track list
CD PLAY screen
CD Play page
Use the CD-RW drive to play an audio CD
[Function]
Use a CD-RW drive connected to
the AW4416 to play back an audio
CD (CD Play function).
[Key operation]
1
3
[CD PLAY] key
4
2
[Mouse operation]
M button → CD button
[Screen functions]
A DRIVE
C Counter
Select the SCSI ID number of the internal or
external CD-RW drive.
B CD PLAY MODE button
This button switches the CD Play function on/
off. When the CD PLAY function is on, you can
use the keys of the Transport section to operate
the CD-RW drive.
Key
Play the CD
[STOP] key
Stop the CD
[FF]/[REW] keys
Rewind/fast-forward the CD
[
Select tracks
] keys
• While the CD PLAY MODE button 2 is on,
all keys except the [CURSOR] keys, [DATA/
JOG] dial, [ENTER] key, and Transport section keys will be disabled.
• The CD audio signal is routed through the
stereo output channel and output from the
STEREO OUT jacks. (Use the STEREO fader
to adjust the volume.) During this time, the
signals of other channels will not be sent to
the stereo output channel.
• For details on the CD Play function, refer to
Operation Guide “Chapter 17. Mastering.”
12
D Track list
This list shows the audio track numbers on the
CD (TRACK area), and the times for each track
(TIME area). The currently selected audio track
will be highlighted.
CD-RW drive operation
[PLAY] key
]/[
This displays the track number (TRACK) currently selected in the track list 4, and the
elapsed time of that track (TIME).
— Reference Guide
Tip!
You can move the cursor to the track list and
switch the playback track by using the
[DATA/JOG] dial and the [ENTER] key.
CD PLAY screen
■ Additional functions in the CD
Play page
CD
PLAY
In the CD Play page you can press the [SHIFT] key
to assign the following functions to the [F1]–[F2]
keys.
F1
F2
• [F1] (CD LOAD) key
Close the tray of the CD-RW drive.
• [F2] (CD UNLOAD) key
Eject the tray of the CD-RW drive.
— Reference Guide
13
SET UP screen
Patch IN page
Patching a signal to a channel/track
[Function]
Assign signals to the inputs of input
channels 1–24, return channels 1/2,
and recorder tracks 1–16.
1
[Key operation]
• [SETUP] key → [F1] (Patch IN) key (*1)
• Repeatedly press the [SETUP] key
until the display shown at right
appears.
*1. In the SET UP screen, the tabs displayed at the bottom are divided
into two groups. If the Patch IN tab is
not assigned to the [F1] key when
you press the [SETUP] key, press the
[SETUP] key + [F1] (CHANGE TAB)
key to switch the tab.
2
3
[Mouse operation]
M button → SETU button → Patch IN tab
[Screen functions]
A MIXER CHANNEL INPUT ASSIGN
● Return channels 1/2
Select the signal that will be assigned to input
channels 1–24 and return channels 1/2. The following signals can be assigned to each channel.
EFF1 L/R
Return of internal effect 1
● Input channels 1–24
EFF2 L/R
Return of internal effect 2
AD 1/2–AD 7/8
INPUT jacks 1/2–7/8
Display
14
Signal type
Display
Signal type
AD 1–AD 8
INPUT jacks 1–8
SL1-1/2 – SL1-7/8
INPUT 1/2–7/8 of an I/O
card (slot 1)
SL1-1 – SL1-8
INPUT 1–8 of an I/O card
(slot 1)
SL2-1/2 – SL2-7/8
INPUT 1/2–7/8 of an I/O
card (slot 2)
SL2-1 – SL2-8
INPUT 1–8 of an I/O card
(slot 2)
DIN L/R
DIGITAL STEREO IN jack
(stereo)
DIN L/DIN R
L/R channels of the DIGITAL
STEREO IN jack
SMP 1–SMP 8
Sampling pads 1–8
MET
Internal metronome
— Reference Guide
B EFFECT PATCH
Select whether effects 1/2 will be used via AUX
send/return (AUX7/AUX8), or inserted into a
specified channel (INSERT). For details on operation, refer to Operation Guide “Chapter 10.
Internal effects.”
SET UP screen
C RECORDER TRACK INPUT ASSIGN
Here you can select the signals to be assigned
to the inputs of tracks 1–16. The following signals can be assigned.
● Recorder inputs 1–16
In the Patch IN page you can press the [SHIFT] key
to assign the following function to the [F1] key.
Signal type
BUS 1–BUS 8
Bus 1–8
DIR 1–DIR16
Input channel direct out 1–
16
Tip!
For detai ls on operations in the Patch IN
page, refer to Operation Guide “Chapter 8.
Patching.”
F1
SET
UP
Display
■ Additional functions in the Patch
IN page
• [F1] (CHANGE TAB) key
Switch between the following two tab displays.
— Reference Guide
15
SET UP screen
Patch OUT page
Patch signals to output jacks
[Function]
Assign output signals to the OMNI
OUT jacks, STEREO OUT jacks,
DIGITAL STEREO OUT jack, and
the output channels of I/O cards.
[Key operations]
• [SETUP] key → [F2] (Patch OUT)
key (*1)
• Repeatedly press the [SETUP]
key until the display shown at
right appears.
1
3
2
4
*1. In the SET UP screen, the tabs
displayed at the bottom of the
screen are divided into two
groups. If the Patch OUT tab is
not assigned to the [F2] key
when you press the [SETUP]
key, press [SHIFT] key + [F1]
(CHANGE TAB) key to switch
the tabs.
[Mouse operation]
M button → SETU button → Patch OUT tab
[Screen functions]
A OMNI OUT ASSIGN
B D.ST OUT ASSIGN (digital stereo out
Select the signals that will be output from the
OMNI OUT 1–4 jacks. The following signals
can be assigned.
Display
16
Signal type
AUX 1–AUX 8
AUX buses 1–8
RDR 1–RDR16
Recorder direct outputs 1–
16
ST L/ST R
L/R channels of the stereo
output channel
BUS 1–BUS8
Bus 1–8
DIR 1–DIR16
Input channel direct out 1–
16
— Reference Guide
assign)
C ST OUT ASSIGN (stereo out assign)
These respectively select the pair of signals that
will be output from the DIGITAL STEREO OUT
jack and the STEREO OUT jack. The following
signals can be assigned.
Display
Signal type
ST L/R
Stereo output channel
BUS 1/2–BUS 7/8
Bus 1/2–7/8
DIR 1/2–DIR15/16
Input channel direct out 1/
2–15/16
AUX 1/2–AUX 7/8
AUX buses 1/2–7/8
RDR 1/2–RDR15/
16
Recorder direct outs 1/2–
15/16
SET UP screen
D OPTION I/O SLOT OUT ASSIGN
This selects the signals that will be output from
I/O cards installed in OPTION I/O slots 1/2. The
following signals can be assigned.
Display
■ Additional functions in the Patch
OUT page
In the Patch OUT page you can press the [SHIFT]
key to assign the following function to the [F1] key.
Signal type
BUS 1–BUS 8
Buses 1–8
DIR 1–DIR16
Input channel direct out 1–
16
AUX 1–AUX 8
AUX buses 1–8
RDR 1–RDR16
Recorder direct outputs 1–
16
ST L/ST R
L/R channels of the stereo
output channel
F1
• [F1] (CHANGE TAB) key
Switch between the two tab displays.
Tip!
For details on operation in the Patch OUT
page, refer to Operation Guide “Chapter 8.
Patching.”
— Reference Guide
17
SET UP screen
Patch Lib page
Store or recall patching settings
[Function]
1
Store the settings of the Patch IN/Patch
OUT pages in the patch library, or recall
previously-stored settings.
2
35
[Key operation]
• [SETUP] key → [F3] (Patch Lib) key (*1)
• Repeatedly press the [SETUP] key until
the display shown at right appears.
*1. In the SET UP screen, the tabs displayed at the bottom of the screen are
divided into two groups. If the Patch
Lib tab is not assigned to the [F3] key
when you press the [SETUP] key, press
[SHIFT] key + [F1] (CHANGE TAB) key
to switch the tabs.
4
6
7
8
[Mouse operation]
M button → SETU button → Patch Lib tab
9
J
K L
[Screen functions]
A SEL CH
F TITLE EDIT button
This indicates the channel currently selected by
the [SEL] key.
B INPUT
This indicates the input signal patched to the
channel shown in 1. Refer to the explanation
of the Patch IN page for the meaning of each
abbreviation.
C BUS
This area shows the buses to which the signal of
the channel is being sent. For buses 1–8 ( – )
and the stereo bus ( ), buses to which that
channel is assigned will be displayed as white
characters on black background.
D TRACK 1-8/9-16
This area displays ■ symbols to indicate the
track inputs to which buses 1–8 ( – ) and the
direct output ( ) of the input channel currently
selected by the [SEL] key are patched.
E Input meter
This shows the input level of the odd-numbered
→ even-numbered channels adjacent to the
channel selected in 1, or the output level of the
stereo output channel.
Use this button when you wish to edit the name
(library title) of the patching settings saved in the
library. Move the cursor to the TITLE EDIT button and press the [ENTER] key to access the
TITLE EDIT screen where you can input the
name.
Library number 0 is a recall-only preset, and
therefore its name cannot be changed. Patch
library numbers in which no data has been
stored will be displayed as “No Data!,” and
their title cannot be edited.
G RECALL button
This button recalls the currently selected patching settings from the list.
If you select a number in which nothing has
been stored and attempt to recall it, an error
message of “ERROR NO DATA TO RECALL”
will be displayed, and the recall will not take
place.
H STORE button
Store the current patching settings.
18
— Reference Guide
SET UP screen
• Library number 0 is a recall-only preset; data
cannot be stored in it. Data can be stored
only in library numbers 1–20.
• When you execute the Store operation, the
patching settings that had been stored in that
number will be erased.
I LIBRARY No. (library number)
This area displays library numbers 00–20.
J LIBRARY TITLE
This area displays the names assigned to the
library settings.
K ROM
Recall-only library number 0 is indicated by a
write-prohibit symbol in this column.
L Selected patching
The patching settings enclosed by the dotted
line in the library list will be the subject of the
Store or Recall operation. In this page, you can
use the [DATA/JOG] dial to select patching settings regardless of where the cursor is located.
■ Additional functions in the Patch
Lib page
In the Patch Lib page you can press the [SHIFT] key
to assign the following functions to the [F1]–[F4]
keys.
● To store the patching settings
into a library
[Procedure]
1. Access the SET UP screen Patch Lib page.
2. Use the [DATA/JOG] dial to select the
library number 1–20 into which you wish
to store the settings.
3. Move the cursor to the STORE button and
press the [ENTER] key.
The NAME EDIT display will appear, allowing
you to input the name.
Tip!
If STORE CONFIRMATION is turned “OFF”
in the UTILITY screen Prefer.1 page ([UTILITY] key → [F2] key), this popup window will
not appear.
4. Input the library title. For details on inputting characters, refer to Operation Guide
P.60.
5. Move the cursor to the OK button and
press the [ENTER] key.
The Store operation will be executed.
● To recall patching settings from a
library
[Procedure]
1. Access the SET UP screen Patch Lib page.
F1
F2
F3
F4
• [F1] (CHANGE TAB) key
Switch between the two tab displays.
• [F2] (TITLE EDIT) key
Use this to edit the name (library title) of patching settings saved in the library. This is the same
function as the 6 TITLE EDIT button.
• [F3] (RECALL) key
Recall the currently selected patching settings
from the list. This is the same function as the 7
RECALL button.
• [F4] (STORE) key
Store the current patching settings. This is the
same function as the 8 STORE button.
2. Use the [DATA/JOG] dial to select the
library number that you wish to recall.
3. Move the cursor to the RECALL button
and press the [ENTER] key.
A confirmation message will appear.
Tip!
If RECALL CONFIRMATION is turned “OFF”
in the UTILITY screen Prefer.1 page ([UTILITY] key → [F2] key), this popup window will
not appear.
4. Move the cursor to the OK button and
press the [ENTER] key.
The Recall operation will be executed.
— Reference Guide
19
SET UP screen
D.in Setup page
Make word clock/cascade settings
[Function]
2
Select the word clock source to which the
AW4416 will synchronize. In this page
you can also make settings for stereo bus
cascade connections.
[Key operation]
• [SETUP] key → [F4] (D.in Setup) key (*1)
• Repeatedly press the [SETUP] key until
the screen shown at the right appears.
*1. In the SET UP screen, the tabs displayed at the bottom of the screen are
divided into two groups. If the D.in
Setup tab is not assigned to the [F4]
key when you press the [SETUP] key,
press the [SHIFT] key + [F1] (CHANGE
TAB) key to switch the tabs.
1
3
4
[Mouse operation]
M button → SETU button → D.in Setup
tab
5
[Screen functions]
A Slots 1/2
If an optional I/O card is installed in OPTION I/
O slots 1/2, a graphic will be displayed to show
the type of I/O card. Cards in which no card is
installed will be displayed as “No Card!”
B WORD CLOCK SOURCE
From the following choices, select one of the
following clock source to which the AW4416
will synchronize.
● SLOT 1 1/2–7/8
● SLOT 2 1/2–7/8
The input signal from a digital I/O card installed
in OPTION I/O slots 1/2 will be the clock
source. One pair of digital I/O card input channels 1/2–7/8 can be selected.
● INT
The internal clock of the AW4416 will be used
as the clock source.
● D.ST IN
The word clock data included in the input signal of the DIGITAL STEREO IN jack will be the
clock source.
20
— Reference Guide
● WCLK IN
The word clock data included in the input signal of the WORD CLOCK IN jack will be the
clock source.
• The highlighted button indicates the currently selected word clock source.
• Buttons marked with an “X” indicate that no
digital audio signal is being input from the
corresponding slot/jack.
• Buttons marked by a / indicate that a digital
audio signal is being input from the corresponding slot/jack, but is not synchronized
with the internal clock of the AW4416.
• Buttons without an X or / symbol indicate
that a digital audio signal is being input from
the corresponding slot/jack, and is synchronized with the internal clock of the
AW4416.
SET UP screen
C FS (sampling frequency)
This shows the sampling frequency of the signal
that is currently selected as the clock source.
If you select an external clock as the clock
source, you must check that the sampling frequency of the song matches the frequency of
the external clock. For example if you are
synchronized to a 48 kHz external clock and
record on a 44.1 kHz song, be aware that the
pitch will change when you return the clock
source setting to “INT” and play back.
D VARI (vari-pitch)
■ Additional functions in the D.in
Setup page
In the D.in Setup page, you can press the [SHIFT]
key to assign the following function to the [F1] key.
F1
• [F1] (CHANGE TAB) key
Switch between the two types of tab display.
If “INT” is selected as the clock source, you can
select whether the sampling frequency will be
fixed (FIX button on) or variable (VARI button
on). If “FIX” is selected, the control change frequency of the internal clock will be displayed at
the right.
If “VARI” is selected, you can move the cursor
to the knob at the right and rotate the [DATA/
JOG] dial to make fine adjustments to the sampling frequency over a range of –5.97%–
+6.00%.
E STEREO BUS CASCADE
This selects whether the digital device connected to the DIGITAL STEREO IN jack will be
cascaded with the stereo bus of the AW4416.
When you move the cursor to the “DISABLE”
button and press the [ENTER] key, the button
display will change to “ENABLE,” and the input
signal from the DIGITAL STEREO IN jack will
be sent directly to the stereo bus of the
AW4416. At this time, you can use the ATT.
knob to adjust the level (attenuation) of the
input signal.
In order for the device connected to the DIGITAL STEREO IN jack to be cascade-connected to the stereo bus, the clock source
must be set to “D.ST IN.” If another clock
source is selected, a message of “CANNOT
ASSIGN DIGITAL-ST-IN.” will be displayed,
and it will not be possible to set the button to
“ENABLE.”
— Reference Guide
21
SET UP screen
Monitor page
Monitor the digital input signals
[Function]
Monitor the state of the digital audio signals being input from the DIGITAL STEREO IN jack or from digital I/O cards
installed in the OPTION I/O slots.
1
[Key operation]
• [SETUP] key → [F5] (Monitor) key (*1)
• Repeatedly press the [SETUP] key until
the screen shown at the right appears.
*1. In the SET UP screen, the tabs displayed at the bottom of the screen are
divided into two groups. If the Monitor
tab is not assigned to the [F5] key
when you press the [SETUP] key, press
the [SHIFT] key + [F1] (CHANGE TAB)
key to switch the tabs.
2
[Mouse operation]
M button → SETU button → Monitor tab
[Screen functions]
A CHANNEL STATUS MONITOR
This area monitors the state of the digital input
signals from the DIGITAL STEREO IN jack (DIGITAL ST IN) or from a digital I/O card installed
in an OPTION I/O slot (OPTION INPUTS). The
following items are displayed.
● Fs
This shows the sampling frequency of the input
signal.
Display
22
Meaning
44.1k
44.1 kHz sampling frequency
48k
48 kHz sampling frequency
None
Unknown sampling frequency
UNLOCK
No signal being input, or
invalid signal being input
— Reference Guide
● EMPHASIS
This shows whether the input signal has been
processed by emphasis.
Display
Meaning
ON
Emphasis on
OFF
Emphasis off
???
Unknown
SET UP screen
● CATEGORY
This shows the category of the digital input signal.
Display
Meaning
GEN
General use
LASER OPTICAL
Optical laser device such as
a CD player
D/D Conv
D/D converter or signal processor
D.Broadcast
Digital broadcast
Instrument
Instrument or sound module
AD Conv
A/D converter (without
copyright data)
A/D Conv with (c)
A/D converter (with copyright data)
Solid Memory
Solid-state memory device
Experimental
Experimental device
Unknown
Unknown device
■ Additional functions in the Monitor page
In the Monitor page, you can press the [SHIFT] key
to assign the following function to the [F1] key.
F1
• [F1] (CHANGE TAB) key
Switch between the two types of tab display.
● COPY
This shows the copy permit/prohibit status of
the digital input signal.
Display
Meaning
OK
Copying permitted
Prohibit
Copying prohibited
Tip!
Digital input signals from the OPTION I/O
slots are displayed in units of two adjacent
odd-numbered → even-numbered channels
(channels 1/2, 3/4 ...). The buttons in the
MONITOR SLOT area (2) select whether slot
1 or 2 will be displayed.
B MONITOR SLOT
These buttons select the OPTION I/O slot that
will be monitored in the OPTION INPUTS area.
— Reference Guide
23
SET UP screen
Dither Out page
Specify dithering and word length of the digital outputs
[Function]
Turn dithering on/off and specify the word
length of the output signal for the various
digital outputs.
1
2
[Key operation]
• [SETUP] key → [F1] (Dither Out) key (*1)
• Repeatedly press the [SETUP] key until the
screen shown at the right appears.
*1. In the SET UP screen, the tabs displayed at
the bottom of the screen are divided into
two groups. If the Dither Out tab is not
assigned to the [F1] key when you press
the [SETUP] key, press the [SHIFT] key +
[F1] (CHANGE TAB) key to switch the
tabs.
[Mouse operation]
M button → SETU button → Dither Out tab
[Screen functions]
A ON/OFF (dithering on/off)
Turn dithering on/off for the DIGITAL STEREO
OUT jack (DIGITAL OUT) or the output channels of the OPTION I/O slots (OPTION OUT
SLOT).
■ Additional functions in the Dither
Out page
In the Dither Out page, you can press the [SHIFT]
key to assign the following function to the [F1] key.
Tip!
• Dithering is a process by which a small
amount of noise is added to the signal in
order to make the sound smoother, preventing the obtrusive sound that can occur if bits
are discarded when digital audio data is
transmitted from a high-resolution system to
a lower resolution system (for example when
copying from a 24 bit system to a 16 bit system).
• For digital I/O cards, dithering is switched
on/off by pairs of adjacent odd-numbered →
even-numbered channels (channels 1/2, 3/4,
...).
B WORD LENGTH (BIT)
Select the word length (number of bits) for the
signals that are output to the DIGITAL STEREO
OUT jack (DIGITAL OUT) or to digital I/O cards
installed in the OPTION I/O slots (OPTION
OUT SLOT). Set this to the word length of the
destination device.
24
— Reference Guide
F1
• [F1] (CHANGE TAB) key
Switch between the two types of tab display.
SET UP screen
Dither TRK page
Specify dithering and word length for tracks
[Function]
Turn dithering on/off and specify the word
length for recording on tracks 1–16 of the
recorder.
2
3
[Key operation]
• [SETUP] key → [F2] (Dither TRK) key (*1)
• Repeatedly press the [SETUP] key until
the screen shown at the right appears.
*1. In the SET UP screen, the tabs displayed at the bottom of the screen are
divided into two groups. If the Dither
TRK tab is not assigned to the [F1] key
when you press the [SETUP] key, press
the [SHIFT] key + [F1] (CHANGE TAB)
key to switch the tabs.
1
[Mouse operation]
M button → SETUP button → Dither TRK
tab
[Screen functions]
A REC TRACK
In pairs of adjacent odd-numbered → evennumbered tracks (tracks 1/2, 3/4 ...), this indicates the tracks for which you can specify dithering and word length. The settings for the
stereo track are common to tracks 1/2.
■ Additional functions in the Dither
TRK page
In the Dither TRK page, you can press the [SHIFT]
key to assign the following function to the [F1] key.
B ON/OFF (dithering on/off)
Turn dithering on/off for the data that is
recorded on adjacent odd-numbered → evennumbered tracks.
C WORD LENGTH (BIT)
Select the word length (number of bits) for the
data that is recorded on adjacent odd-numbered → even-numbered tracks. Set this to
match the quantization (number of bits) that
you selected when creating the song.
F1
• [F1] (CHANGE TAB) key
Switch between the two types of tab display.
— Reference Guide
25
SET UP screen
Solo Setup page
Make solo settings
[Function]
Make various settings related to the Solo
function.
1
2
3
4
[Key operation]
• [SETUP] key → [F3] (Solo Setup) key (*1)
• Repeatedly press the [SETUP] key until
the screen shown at the right appears.
*1. In the SET UP screen, the tabs displayed at the bottom of the screen are
divided into two groups. If the Solo
Setup tab is not assigned to the [F3]
key when you press the [SETUP] key,
press the [SHIFT] key + [F1] (CHANGE
TAB) key to switch the tabs.
5
[Mouse operation]
M button → SETU button → Solo Setup
tab
[Screen functions]
A STATUS
B LISTEN
Turn on one of the following two buttons to
select the operating mode of the Solo function.
● RECORDING SOLO
If this button is on, the solo signal will be output
via the dedicated SOLO bus to the MONITOR
OUT jacks/PHONES jack. (The output of the
stereo bus and buses 1–8 will not be affected.)
You can also monitor channels that are not
assigned to the stereo bus or to buses 1–8, or
channels whose [ON] key is off.
● MIXDOWN SOLO
If this button is on, the solo signal will be output
via the stereo bus to the MONITOR OUT jacks/
PHONES jack. When the Solo function is turned
on, only the channel(s) being soloed will be
sent to the stereo bus, and the remaining channels will be muted. It is not possible to monitor
channels that are not assigned to the stereo bus.
26
— Reference Guide
When RECORDING SOLO is selected for 1,
you can select one of the following two locations from which the signal will be sent from
each channel to the SOLO bus.
● PRE FADER
The pre-fader signal will be sent to the SOLO
bus. Since the pan setting of the channel will
have no effect, the signal being monitored from
the MONITOR OUT jacks/PHONES jack will be
monaural.
● AFTER FADER
The signal after passing through fader and pan
will be sent to the SOLO bus. The pan and fader
settings of each channel will affect the signal
that is monitored by the MONITOR OUT jacks/
PHONES jack.
C SEL MODE (select mode)
Select one of the following two ways by which
the monitored signal will be selected when the
Solo function is on.
SET UP screen
● LAST SOLO
When the Solo function is on, only the channel
last-selected by pressing its [ON] key will be
monitored.
● MIX SOLO
When the Solo function is on, all channels
selected by pressing their [ON] keys will be
monitored.
D LEVEL
This adjusts the level of the signal that is sent to
the SOLO bus when RECORDING SOLO mode
is selected for 1.
E SOLO SAFE CHANNEL
■ Additional functions in the Solo
Setup page
In the Solo Setup page, you can press the [SHIFT]
key to assign the following function to the [F1] key.
F1
• [F1] (CHANGE TAB) key
Switch between the two types of tab display.
This area selects the channels that will be
excluded from the Solo function when MIXDOWN SOLO is selected for 1. Channels that
are turned on in this area will not be affected
when you press the [SOLO] key.
— Reference Guide
27
FILE screen
Backup page
Backup a song
[Function]
Backup song data from the internal
hard disk to a SCSI device (e.g.,
internal CD-RW drive or external
MO drive).
1
[Key operation]
• [FILE] key → [F1] (Backup) key
• Repeatedly press the [FILE] key
until the screen shown at the
right appears.
[Mouse operation]
M button → FILE button → Backup
tab
3
4
2
6
5
7
[Screen functions]
A Song list
C ALL ENABLE button
This list shows the songs saved on the internal
hard disk. The current song is highlighted in the
list, and songs selected for backup are indicated
by a “●” symbol in the BACKUP column.
The following information is also shown in the
list.
• SONG NAME .. Song name
• SAVED AT ........ Date and time at which the
song was last saved
• SIZE ................. Data size of the song
• BIT/FS.............. Quantization (word length)/
sampling frequency of the
song
• PRT.................. Song protect on/off setting
B BACKUP SONG button
This button selects whether the song currently
selected in the song list 1 will be included in
the backup (ENABLE) or excluded from the
backup (DISABLE). Move the cursor to this button and press the [ENTER] key to switch
between ENABLE and DISABLE.
28
— Reference Guide
If you move the cursor to this button and press
the [ENTER] key, all songs will be selected for
backup.
D ALL DISABLE button
If you move the cursor to this button and press
the [ENTER] key, all songs will be excluded
from the backup.
E SOURCE
This shows the backup source drive (internal
hard disk). This item is for display only, and cannot be modified.
F DESTINATION
This selects the SCSI ID number of the backup
destination drive.
FILE screen
G EXECUTE button
Execute the song backup.
Tip!
FILE
• When backing up to removable media such
as an MO drive, you can select from two
types of backup: “TYPE 1” in which the
backup can extend across multiple volumes
of media, and “TYPE 2” in which data can
be backed up in units of individual songs on
one volume of media. The selection of either
TYPE 1 or TYPE 2 is made in the UTILITY
screen Prefer.3 page (→ P.37).
• For details on the song backup procedure,
refer to Operation Guide “Chapter 16. Backing up and restoring songs.”
■ Additional functions in the
Backup page
In the Backup page you can press the [SHIFT] key
to assign the following functions to the [F1]–[F2]
keys.
F1
F2
• [F1] (CD LOAD) key
Close the open tray of the CD-RW drive.
• [F2] (CD UNLOAD) key
Eject the tray of the CD-RW drive.
— Reference Guide
29
FILE screen
Restore page
Restore backed-up songs
[Function]
Restore songs from the backup destination SCSI device to the AW4416’s
internal hard disk.
1
[Key operation]
• [FILE] key → [F2] (Restore) key
• Repeatedly press the [FILE] key
until the screen shown at the right
appears.
[Mouse operation]
3
4
2
6
5
7
M button → FILE button → Restore tab
[Screen functions]
A Song list
F DESTINATION
This list shows the songs saved on the backup
destination SCSI device. Songs selected for
restore are indicated by a “●” symbol in the
RESTORE column.
The following information is also shown in the list.
• SONG NAME .. Song name
• SAVED AT ........ Date and time at which the
song was last saved on the
AW4416’s internal hard disk
• SIZE ................. Data size of the song
• BIT/FS ............... Quantization (word length)/
sampling frequency of the song
• PRT.................. Song protect on/off setting
B RESTORE SONG button
This button selects whether the song currently
selected in the song list 1 will be included in
the restore (ENABLE) or excluded from the
restore (DISABLE). Move the cursor to this button and press the [ENTER] key to switch
between ENABLE and DISABLE.
This shows the restore destination drive (internal
hard disk). This item is for display only, and cannot be modified.
G EXECUTE button
Execute the song restore.
Tip!
For details on song restore, refer to Operation Guide
“Chapter 16. Backing up and restoring songs.”
If a removable media drive (e.g., MO) is
selected, go to the UTILITY screen Prefer.3 page,
and in the REMOVABLE BACKUP area, set the
TYPE setting to the format that you used when
backing up. Do this before you execute Restore.
■ Additional functions in the
Restore page
In the Restore page you can press the [SHIFT] key to
assign the following functions to the [F1]–[F3] keys.
C ALL ENABLE button
If you move the cursor to this button and press
the [ENTER] key, all songs will be selected for
restore.
D ALL DISABLE button
If you move the cursor to this button and press
the [ENTER] key, all songs will be excluded
from the restore.
E SOURCE
This selects the ID number of the SCSI device
on which the data was backed up.
30
— Reference Guide
F1
F2
F3
• [F1] (CD LOAD) key
Close the open tray of the CD-RW drive.
• [F2] (CD UNLOAD) key
Eject the tray of the CD-RW drive.
• [F3] (RELOAD) key
Reload the removable media and update the
displayed list.
FILE screen
Disk Util. page
Format or erase a disk
[Function]
Format the internal hard disk or an external SCSI device, or erase CD-RW media.
[Key operation]
• [FILE] key → [F3] (Disk Util.) key
• Repeatedly press the [FILE] key until
the screen shown at the right appears.
1
[Mouse operation]
M button → FILE button → Disk Util. tab
[Screen functions]
Tip!
A Drive select
Select the SCSI ID number of the drive that you
wish to format (external SCSI device such as
MO) or of the CD-RW drive in which you wish
to erase CD-RW media. To format the internal
hard disk, select “INT.IDE.”
The display will change as follows, depending
on the type of drive that you select here.
■ If the internal hard disk or an
external SCSI device (MO or
external hard disk) is selected
• If a removable media drive (e.g., MO) is
selected, FORMAT column will appear
before the Format operation is executed,
allowing you to select the file system that
will be used for formatting and the formatting method.
However if REMOVABLE BACKUP is set to
“TYPE 1” in the UTILITY screen Prefer.3
page, the media will be formatted automatically, and therefore the FORMAT item for
selecting the format method will not be displayed.
• For details on this procedure, refer to Operation Guide “Chapter 16. Backing up and
restoring songs.”
When you execute the Format operation, all
the saved data will be lost forever. Please use
caution.
2
B EXECUTE button
Execute formatting of the selected drive/media.
— Reference Guide
31
FILE screen
■ If an internal or external CD-RW
drive is selected
■ Additional functions in the Disk
Util. page
In the Disk Util. page you can press the [SHIFT]
key to assign the following functions to the [F1]–
[F2] keys.
5
3
F1
F2
4
• [F1] (CD LOAD) key
Close the open tray of the CD-RW drive.
• [F2] (CD UNLOAD) key
C AUDIO READ SPEED
Use the x1, x2, x4, or x8 buttons to select the
reading speed (normal speed, double speed,
quad speed or 8x speed).
This setting is valid only for CD-IMPORT. If
errors occur during CD-IMPORT, lower the
read speed and try again.
D WRITE SPEED
Use the x1, x2, x4, or x6 buttons to select the
writing speed (normal speed, double speed,
quad speed or 6x speed).
Tip!
Normally you should set the read and write
speeds to the fastest speeds supported by
your CD-RW drive.
E CD-RW MEDIA ERASE
Use the following two buttons to specify how
the CD-RW media will be erased.
• SIMPLE ............ Only the TOC (Table Of Contents) of the CD-RW media
will be erased.
• PERFECT .......... All data on the CD-RW
media will be erased.
Tip!
For details on erasing CD-RW media, refer to
Operation Guide “Chapter 16. Backing up
and restoring songs.”
When you execute the Erase operation, all
data on the CD-RW media will be lost forever. Please use caution.
32
— Reference Guide
Eject the tray of the CD-RW drive.
UTILITY screen
Oscillator page
Using the test tone oscillator
[Function]
Select the waveform of the test
tone oscillator built into the
AW4416, and send it to the
desired bus.
UTILITY
1
[Key operation]
• [UTILITY] key → [F1] (Oscillator)
key
• Repeatedly press the [UTILITY]
key until the screen shown at the
right appears.
[Mouse operation]
M button → UTIL button → Oscillator tab
4
2
5
3
[Screen functions]
A Level meter
This shows the oscillator output level that is
being sent to buses 1–8 and AUX buses 1–8.
B OSC ON (oscillator on) button
This button switches the oscillator on/off.
(Default=OFF)
E BUS ASSIGN
Use the following buttons to specify the bus to
which the oscillator signal will be sent.
• BUS 1–8 buttons .......... Buses 1–8
• AUX 1–8 buttons.......... AUX buses 1–8
• ST BUS button ............. Stereo bus
Tip!
Sine waves and white noise have a higher
sound pressure level than they appear to your
ears. Use caution, since they may damage
your speakers if played back at a high volume.
You can specify more than one bus as the
oscillator output destination.
C LEVEL knob
This knob adjusts the output level (–96 dB–
0 dB) of the oscillator.
D WAVEFORM
Use the following four buttons to select the
waveform of the test tone oscillator.
• SINE 100 Hz button ..... 100 Hz sine wave
• SINE 1 kHz button ....... 1 kHz sine wave
• SINE 10 kHz button ..... 10 kHz sine wave
• NOISE .......................... White noise
— Reference Guide
33
UTILITY screen
Prefer.1 page
Make overall settings for the AW4416 (1)
[Function]
Enable/disable warning messages,
and specify the point from which
direct output will be taken.
[Key operation]
1
• [UTILITY] key → [F2] (Prefer.1)
key
• Repeatedly press the [UTILITY]
key until the screen shown at the
right appears.
[Mouse operation]
5
2
3
6
4
7
M button → UTIL button → Prefer.1 tab
[Screen functions]
A AUTO EQ DISPLAY
B AUTO PAN DISPLAY
If the 1 or 2 buttons are ON, operating the
[EQ] controls or [PAN] control located at the
right of the display will cause the corresponding
page to automatically appear in the display.
(Default=off)
Tip!
If buttons 1/2 are off, the current EQ/pan
settings will appear in the upper right of the
display when you operate the [EQ]/[PAN]
controls.
C STORE CONFIRMATION
D RECALL CONFIRMATION
If the 3 or 4 buttons are ON, a popup window
will ask you to confirm the operation when storing or recalling a scene or library. (Default=on)
E DIRECT OUT EXTRACT POSITION
Use the following three buttons to select the
position from which the signal will be taken for
direct output from input channels 1–24.
• PRE EQ button..............Immediately before
the EQ
• PRE FADER button........Pre-fader position
• POST FADER button.....Post-fader position
(default)
34
— Reference Guide
F DIGITAL ST IN SYNC CAUTION
G OPTION IN SYNC CAUTION
If the 6 or 7 buttons are ON, an error message
will be displayed if a digital signal that cannot
be synchronized with the word clock source is
input from the DIGITAL STEREO IN jack or from
an optional I/O card. (Default=on)
UTILITY screen
Prefer.2 page
Make overall settings for the AW4416 (2)
[Function]
Set the rollback time, pre-roll/postroll time, and the nudge playback
method etc.
[Key operation]
• [UTILITY] key → [F3] (Prefer.2)
key
• Repeatedly press the [UTILITY]
key until the screen shown at the
right appears.
[Mouse operation]
M button → UTIL button → Prefer.2 tab
1
5
6
2
7
3
8
4
[Screen functions]
A GRID
D FL METER FINE
This sets the minimum unit when you specify an
area in the EDIT screen TR Edit page or V.TR Edit
page. For example if the grid value is set to
“00:00:00.010,” the specified location will
move in 10 millisecond increments for each
click of the [DATA/JOG] dial. (Default=
00:00:00.000)
Select one of the following two scales for the
level meter/counter display.
● NORMAL
The full range of the level meter will indicate
levels of –60 dB–0 dB. (Default setting)
E
–dB 0
S
• The value you specify here will not affect
how you adjust locate points (TRACK screen
Mark Adj. page) or how you specify locate
points using the [NUM LOCATE] key.
• The value you specify here has no effect if
“measure display” is selected as the counter
display method.
F
ms
WORD CLOCK
44.1k 48k LOCK
INT EXT
VARI
MTC
MASTER
SLAVE
E
–dB 0
FINE 2
7
8
9
10
11
12
13
14
15
6
10 12
14 20
18 30
20
42
26 60
16
READY
INPUT
L
R
READY
INPUT
L
R
● FINE
The full range of the level meter will indicate
levels of –26 dB–0 dB. This setting is convenient
when you wish to make fine adjustments to the
level near the 0 dB region.
B ROLLBACK TIME
This specifies the rollback time (0–5 seconds) of
the [ROLL BACK] key. For details on rollback,
refer to Operation Guide “Chapter 6. Transport/
locate operations.” (Default= 5 seconds)
E
–dB 0
C PREROLL/POSTROLL TIME
Specify the pre-roll time (0–5 seconds) and
post-roll time (0–5 seconds) used when you perform auto punch-in/out. For details on pre-roll
time and post-roll time, refer to Operation
Guide “Chapter 7. Punch-in/out.” (Default= 5
seconds)
2
6
12
20
30
42
60
SCENE
S
F
ms
WORD CLOCK
44.1k 48k LOCK
INT EXT
VARI
MTC
FINE 2
SCENE
6
MASTER
SLAVE
E
–dB 0
FINE 2
7
8
9
10
11
12
13
14
15
16
6
10 12
14 20
18 30
20
42
26 60
READY
INPUT
L
10
14
18
20
R
26
READY
INPUT
L
— Reference Guide
R
35
UTILITY screen
E PLAY MODE
H DIGITAL OUT COPYRIGHT
Select one of the following two play modes for
the Nudge function. (Default= AFTER)
● AFTER
Playback will be repeated for the specified
nudge time 6 starting at the current location.
● BEFORE
Playback will be repeated for the specified
nudge time 6 ending at the current location.
F TIME
Specify the playback length (nudge time) of the
Nudge function over a range of 25–800 milliseconds. (Default= 100 milliseconds)
Tip!
For details on using the Nudge function, refer
to Operation Guide “Chapter 6. Transport/
locate operations.”
G CD/DAT DIGITAL REC
This setting specifies whether digital recording
from an audio CD or DAT tape via a CD-RW
drive or the DIGITAL STEREO IN jack will be
allowed (ENABLE) or not (DISABLE). When you
move the cursor to the “DISABLE” button and
press the [ENTER] key, the following two-page
warning will be displayed. If you select the YES
button in the second page, the button display
will change to ENABLE.
36
— Reference Guide
This setting specifies whether SCMS (Serial
Copy Management System) copy protect data
will be enabled (ENABLE) or not (DISABLE) for
the digital signal output from the DIGITAL STEREO OUT jack. When you move the cursor to
this button and press the [ENTER] key, the setting will alternate between ENABLE/DISABLE.
Even if copy protect data is enabled, it will
still be possible to make a digital recording
from the DIGITAL STEREO OUT jack on a
DAT recorder or MD recorder. However, it
will not be possible to create a second-generation digital copy.
UTILITY screen
Prefer.3 page
Make overall settings for the AW4416 (3)
[Function]
Set the internal clock, mouse cursor speed, and removable media
backup method etc.
[Key operation]
• [UTILITY] key → [F4] (Prefer.3)
key
• Repeatedly press the [UTILITY]
key until the screen shown at the
right appears.
1
4
2
5
3
6
[Mouse operation]
7
M button → UTIL button → Prefer.3 tab
[Screen functions]
A CLOCK
Here you can set the internal clock of the
AW4416. Use the [DATA/JOG] dial to adjust the
year (Y), month (M), date (D), hour (h), minute
(m), and second (s) fields, and use the SET button to finalize the date and time. If you use the
RESET button, the date and time you input will
be cancelled.
Tip!
• When you save a song, date and time information will be stored in the song according
to this internal clock.
• When shipped from the factory, the internal
clock of the AW4416 is set to Japan time.
• For details on setting the internal clock, refer
to the opening section of the Operation
Guide, “Important points you must observe.”
B MOUSE SPEED
Use buttons 1–4 to specify the movement speed
of the mouse pointer. Higher value will produce
faster movement.
C INT. SCSI TERMINATOR (internal SCSI
D BATTERY
This displays the state of the battery that operates the AW4416’s internal clock. If the battery
capacity is sufficient, this will indicate “OK.” If
the battery has run low and needs to be
replaced, this will indicate “LOW.” If the
“LOW” indication appears, please contact your
dealer to have the battery replaced.
E REMOVABLE BACKUP
This specifies the backup method when backing
up songs to removable media such as MO.
Move the cursor to this button and press the
[ENTER] key to switch the setting between the
following two methods. (Default= TYPE 1)
● TYPE 1
This backup method makes full use of the
capacity of the removable media, but does not
allow backup data to be added later. Even if the
data being backed up will not fit on a single volume of media, the backup can extend across
multiple volumes of media. If this method is
selected, the media will be formatted automatically before the backup begins.
terminator)
This switches the internal SCSI bus terminator
on/off. For details on the terminator setting, refer
to Operation Guide “Before you begin.”
(Default: on)
— Reference Guide
37
UTILITY screen
● TYPE 2
This backup method allows new backup data to
be added to media on which data was previously backed up. It is not possible to backup
data that extends across multiple volumes of
media. Before you can use this method to
backup on previously-unused media, you must
format the media manually.
Tip!
For details on the procedure for backing up
songs, refer to Operation Guide “Chapter 16.
Backing up and restoring songs.”
F MASTERING MODE
Use the following two buttons to select the writing mode that will be used when you execute
the Mastering function.
● TEST button
If this button is on, a test will be performed
before writing data to the CD-R/RW media to
see whether writing errors will occur. (Default=
off)
● WRITE button
This turns data writing on/off. If the TEST button
= on and the WRITE button = off, only the writing test will be executed. (Default= on)
G CD BACKUP MODE
Use the following three buttons to select the
writing mode when backing up songs to CD-R/
RW media.
● TEST/WRITE buttons
These are the same functions as the MASTERING MODE 6 TEST/WRITE buttons.
● COMPARE button
When this button is on, the backup source song
data on the internal hard disk will be compared
with the backup destination data on the CD-R/
RW media after the data has been written. If for
some reason the backup was not written correctly, an error message will be displayed when
Compare is executed.
38
— Reference Guide
MIDI screen
MIDI Setup page
Make basic MIDI settings
[Function]
Set the MIDI transmit/receive channels,
turn transmission/reception of various
messages on/off, and specify the port
used for transmission and reception.
1
2 3 45
• [MIDI] key → [F1] (MIDI Setup) key
• Repeatedly press the [MIDI] key until
the screen shown at the right appears.
6
[Mouse operation]
8
7
M button→ MIDI button → MIDI Setup
tab
9
[Screen functions]
A PROGRAM CHANGE TX (program
change transmission)
Specify whether program changes will be transmitted to external MIDI devices. If this button is
on, the program change assigned to a scene
number will be transmitted when that scene is
recalled.
B PROGRAM CHANGE RX (program
change reception)
Specify whether program changes will be
received from external MIDI devices. If this button is on, receiving a program change will
recall the scene assigned to that program number.
C PROGRAM CHANGE OMNI
If this button is on, program changes of all MIDI
channels will be received, regardless of the Rx
(receive channel) setting.
E CONTROL CHANGE ECHO
If this button is on, received control changes
will be re-transmitted without change from the
MIDI OUT connector or TO HOST connector.
F Tx CH (transmit channel)
Select the channel (1–16) on which MIDI messages will be transmitted to external MIDI
devices.
G Rx CH (receive channel)
Select the channel (1–16) on which MIDI messages will be received from external MIDI
devices.
H MIDI OUT SEL. (MIDI OUT select)
This selects whether the MIDI OUT connector
will be used as MIDI OUT or as MIDI THRU. If
“MIDI THRU” is selected, operations performed
on the AW4416 itself will not be output.
D PROGRAM CHANGE ECHO
If this button is on, received program changes
will be re-transmitted without change (“thrued”) from the MIDI OUT connector or TO
HOST connector.
If you wish to transmit MIDI Clock to an
external MIDI device, you must set this to
“MIDI OUT.” For details on synchronization,
refer to P.41.
— Reference Guide
39
MIDI
[Key operation]
MIDI screen
I PORT SELECT
Select the port and transmission speed with
which MIDI messages will be transmitted and
received.
Setting
Computer platform
MIDI
MIDI compatible
TO HOST PC2
IBM PC compatible
TO HOST MAC
Apple Macintosh series
(*1)
*1. Only usable with Macintosh computers that have
a modem/printer port. On the software that you
use, set the clock to “1 MHz.”
40
— Reference Guide
Port type
Transmission speed
MIDI IN, OUT/THRU connectors
31.25 kbps
TO HOST connector
38.4 kbps
TO HOST connector
31.25 kbps
MIDI screen
MIDI Sync page
Make settings related to MIDI synchronization
[Function]
2
1
Make various settings for synchronization operation.
3
4
[Key operation]
• [MIDI] key → [F2] (MIDI Sync)
key
• Repeatedly press the [MIDI] key
until the screen shown at the
right appears.
[Mouse operation]
M button → MIDI button → MIDI
Sync tab
5
6
[Screen functions]
A SYNC OUT
Select one of the following synchronization signals for output.
● OFF
Synchronization signals will not be output.
● MTC
MIDI Time Code will be transmitted from the
MTC OUT connector.
● MIDI CLOCK
MIDI Clock will be transmitted from the MIDI
OUT connector or TO HOST connector.
● MTC + MIDI CLK
Both MIDI Time Code (MTC OUT connector)
and MIDI Clock (MIDI OUT connector or TO
HOST connector) will be transmitted.
When using the AW4416 as the MIDI Clock
master, you must set MIDI OUT SEL. to
“MIDI OUT” in the MIDI screen MIDI Setup
page. (→ P.39)
B MTC SYNC
If master is selected, MTC messages will be
transmitted from the MTC OUT connector in
synchronization with the progress of the song. If
slave is selected, the AW4416 song will follow
the MTC messages received at the MIDI IN connector.
Tip!
The MTC frame rate is selected in the SONG
screen Setting page (→ P.2).
C MMC (MIDI Machine Control)
When using MMC for remote control between
the AW4416 and an external MIDI device, this
setting specifies whether the AW4416 will be
the MMC master (MASTER) or slave (SLAVE).
If master is selected, operating the transport of
the AW4416 will cause the corresponding
MMC command to be transmitted from the
MIDI OUT connector or TO HOST connector.
If slave is selected, MMC commands sent from a
MIDI sequencer or other external device can be
used to remotely select or de-select recording
tracks and control transport operations on the
AW4416.
Specify whether the AW4416 will be the MTC
master (MASTER) or slave (SLAVE) when MTC is
used to synchronize an AW4416 song with the
operation of an external MIDI device.
— Reference Guide
41
MIDI screen
When using MMC, you must match the
device ID of the AW4416 and the external
MIDI device. For details on setting the device
ID, refer to MMC DEV.6.
D SYNC AVE. (sync average)
When the AW4416 is used as an MTC slave,
this parameter specifies the precision with
which MTC will be received.
Normally you will use this with the “OFF” button selected. However if synchronization is
unreliable, try the 1 or 2 setting.
E SYNC OFFSET
When the AW4416 is used as an MTC slave,
this parameter specifies how the absolute time
of the AW4416 will be shifted relative to the
time code (MTC) received from the external
device. You can specify a range of “–
24:00:00:00.00”–”+24:00:00:00.00”.
Sync offset= 00:00:00:00.00
Received
time code 00:00:00:00.00
00:00:05:00.00
Song
Sync offset= +00:30:00:00.00
Received
time code 00:30
30:00:00.00
00:35:00:00.00
Song
Sync offset= –01:00:00:00.00
Received
time code 23:00:00:00.00
23:05:00:00.00
Song
Tip!
The offset value you specify here does not
affect the MTC that is transmitted from the
MTC OUT connector of the AW4416. If you
want the MTC transmitted from the MTC
OUT connector to be shifted relative to the
absolute time of the AW4416, you must
adjust the Time Code Top (SONG screen Setting page).
F MMC DEV. (MIDI Machine Control
device)
When using MMC for remote control, specify a
device ID of 1–127 to distinguish each device.
42
— Reference Guide
MIDI screen
PGM Asgn. page
Assign a scene number to each program change number
[Function]
Assign a scene number to each program
change number 1–128.
[Key operation]
• [MIDI] key → [F3] (PGM Asgn.) key
• Repeatedly press the [MIDI] key until
the screen shown at the right appears.
4
[Mouse operation]
M button → MIDI button → PGM Asgn.
tab
1 2
3
[Screen functions]
A PGM CHG. No. (program change number)
These are the program change numbers 1–128.
Move the cursor to this area, and rotate the
[DATA/JOG] dial to select the program number.
Scene numbers in which nothing has been
stored will be displayed as “No Data!”.
B SCENE MEM. No. (scene memory number)
This is the scene number assigned to each program number. Move the cursor to this area, and
rotate the [DATA/JOG] dial to select the scene
number.
C SCENE MEM. TITLE (scene memory
title)
The scene name of each scene is displayed.
D INITIALIZE
If you move the cursor to this button and press
the [ENTER] key, the scene number assignments
will be reset to the following default settings.
● Program change numbers 1–96
Scenes 1–96
● Program change numbers 97–99/101–128
No assignment
● Program change number 100
Initial data (default scene)
— Reference Guide
43
VIEW screen
CH View page
View all parameters of a channel
[Function]
This page displays all mix parameters of the selected channel.
Parameters other than EQ and
dynamics can also be edited in this
page.
● Input channel/monitor channel
1
2
6
7
89 J
[Key operation]
• [VIEW] key → [F1] (CH View)
key
• Repeatedly press the [VIEW] key
until the screen shown at the
right appears.
[Mouse operation]
M button → VIEW button → CH
View tab
K
3
L
4
M
5
N
O
[Screen functions]
● Paired input channels/monitor channels
A ATT. (attenuation)
1
Set the attenuation value.
2 6
7
89 J
B PHASE
Switch between normal (N) and
reverse (R) phase.
C EQ (equalizer)
Turn the EQ on/off. This area
also displays a graph showing
the approximate response of
the current EQ settings.
Turn the dynamics processor
on/off. This area also displays a
graph showing the approximate
response of the current dynamics processor settings.
E DELAY
Turn the delay on/off. The delay
time can also be edited here.
F ROUT (routing)
Assign the channel to buses 1–
8 and the stereo bus.
— Reference Guide
K
L
4
D DYNAMICS
44
3
5
M
N
O
VIEW screen
G PAN
● Return channel
Adjust the panning between the L/
R channels of the stereo bus or
between odd-numbered → evennumbered buses.
1
2
6
7
J
Tip!
If you move the cursor to the
PAN knob and press the
[ENTER] key, the knob will
move to the center position.
3
L
H Fader group
This area shows the fader group to
which the channel belongs. You
can also defeat or register groups
in this page.
M
5
N
O
I Mute group
This area shows the mute group to
which the channel belongs. You
can also defeat or register groups
in this page.
● Stereo output channel
7
J
VIEW
1
J Input/output meter
This shows the input level of the
input channel, monitor channel,
or return channel, and the output
level of the stereo output channel.
K Pair
This shows the pairing status. Pairing can also be set/defeated in this
page.
3
L
4
M
L ASSIGN button
Use this button to insert an external effect or internal effect into the
channel.
Move the cursor to this button and
press the [ENTER] key to access a
screen like the following.
● OFF button
When this button is on, an effect will not be
inserted.
● INT.EFF 1 button
When this button is on, internal effect 1 will be
inserted into the corresponding channel.
O
● INT.EFF 2 button
When this button is on, internal effect 2 will be
inserted into the corresponding channel.
When inserting the internal effect 1/2 into a
channel, you must set either EFF1 or EFF2 to
“INSERT” in the SETUP screen Patch IN page.
If neither of the effects is set to “INSERT,”
attempting to turn on the INT.EFF1/INT.EFF2
button in this screen will produce an error
message of “ERROR INT. EFF NOW
SELECTED AUX.”
● EXTERNAL button
When this button is on, you can select the
desired input and output jacks for use as the
insert send/return jacks for the corresponding
channel.
— Reference Guide
45
VIEW screen
● SEND
When the EXTERNAL button is on, move the
cursor to this area and rotate the [DATA/JOG]
dial to select one of the following jacks for use
as the insert send jack.
• OMNI 1–4 ..........OMNI OUT 1–4 jacks
• SL1-1–SL1-8........Output channels 1–8 of
OPTION I/O slot 1
• SL2-1–SL2-8........Output channels 1–8 of
OPTION I/O slot 2
• D STO L/R ..........L/R channels of the DIGITAL STEREO OUT jack
• STOUT L/R .........L/R channels of the STEREO
OUT jack
N AUX
This shows the send level and pre/post selection
for AUX buses 1–8. These settings can also be
edited in this page. The heart symbol indicates
AUX buses that are paired.
O ON/OFF
This switches the channel on/off.
■ Additional functions in the CH
View page
In the CH View page you can press the [SHIFT] key
to assign the following additional functions to the
[F1]–[F5] keys.
Tip!
If you select D STO or STOUT, only the L
channel can be selected for odd-numbered
channels, and only the R channel can be
selected for even-numbered channels.
● RTN.
When the EXTERNAL button is on, move the
cursor to this area and rotate the [DATA/JOG]
dial to select one of the following jacks for use
as the insert return jack.
• AD1–AD8 ...........INPUT 1–8 jacks
• SL1-1–SL1-8........Input channels 1–8 of
OPTION I/O slot 1
• SL2-1–SL2-8........Input channels 1–8 of
OPTION I/O slot 2
• D STIN L/R .........L/R channels of the DIGITAL STEREO IN jack
F1
F2
F3
F4
F5
• [F1] (EQ ON/OFF) keys
Switch EQ on/off. This is the same function as
the ON/OFF button of 3 EQ.
• [F2] (DYN ON/OFF) key
Switch the dynamics processor on/off. This is
the same function as the ON/OFF button of 4
DYNAMICS.
• [F3] (ROUT OFF) key
Turn off all signals sent from that channel to
AUX buses 1–8.
• [F4] (PAN CENTER) key
Set the pan to center.
Tip!
• When the INT.EFF 1 or INT.EFF 2 button is
on, the input and output of internal effect 1/
2 will automatically be assigned to the insert
send/return of that channel. This assignment
cannot be changed.
• For the procedure of inserting an external
effect into a channel, refer to Operation
Guide “Chapter 8. Patching.”
• For the procedure of inserting an internal
effect into a channel, refer to Operation
Guide “Chapter 10. Internal effects.”
M Fader
This shows the current fader location both
graphically and numerically. The setting can
also be edited in this page.
You can also move the cursor to the fader and
rotate the [DATA/JOG] dial to modify the fader
setting.
46
— Reference Guide
• [F5] (EFF. INS ASGN) key
This button is used to insert an external effect or
internal effect into a channel. This is the same
function as the L ASSIGN button.
VIEW screen
Library page
Store or recall channel settings
[Function]
2
Store the settings of the currently selected
channel into the channel library, or recall
stored settings.
3
[Key operation]
• [VIEW] key → [F2] (Library) key
• Repeatedly press the [VIEW] key until
the screen shown at the right appears.
[Mouse operation]
M button → VIEW button → Library tab
1
4
5
6
7
8
9
J
[Screen functions]
A Channel
This indicates the currently selected channel.
B EQ/DYN./DELAY settings
This area shows the EQ/dynamics processor/
delay settings for the channel.
C Input meter
This meter shows the input level of the channel.
D TITLE EDIT button
Use this to edit the name (library title) of the settings stored in the channel library. Move the
cursor to the TITLE EDIT button and press the
[ENTER] key to access the TITLE EDIT popup
window where you can input the name. For
details on inputting text, refer to page 60 of the
Operation Guide.
If you select a number in which nothing has
been stored and attempt to recall it, an error
message of “ERROR NO DATA TO RECALL”
will be displayed, and recall will not be possible.
F STORE button
Store the current channel settings.
Library numbers 0 and 1 are recall-only preset programs; data cannot be stored in them.
Data can be stored only in library numbers
2–64.
G LIBRARY No. (library number)
This shows the library number 1–64.
Library numbers 0 and 1 are recall-only preset programs, and their names cannot be
edited. Also, numbers in which channel settings have not been stored will be displayed
as “No Data!,” and their title cannot be
edited.
E RECALL button
Recall the currently selected settings from the
list.
H LIBRARY TITLE
This shows the name assigned to the library.
I ROM
This write-prohibit symbol is displayed for
recall-only numbers 0/1.
J SOURCE CHANNEL
This shows the original channel from which the
settings were stored. For preset numbers 0/1 this
is displayed as “GENERAL.”
— Reference Guide
47
VIEW screen
■ Additional functions in the
Library page
In the Library page you can press the [SHIFT] key
to assign the following functions to the [F1]–[F3]
keys.
F1
F2
F3
• [F1] (TITLE EDIT) key
Use this to edit the name (library title) of the settings saved in the channel library. This is the
same function as the 4 TITLE EDIT button.
• [F2] (RECALL) key
Recall the currently selected channel settings
from the list. This is the same function as the 5
RECALL button.
When you execute the Store operation, the
channel settings that had previously been
stored in that number will be lost.
● To recall channel settings from
the library
1. Select the channel into which you wish to
recall the settings, and access the VIEW
screen Library page.
2. Use the [DATA/JOG] dial to select the
library number that you wish to recall.
3. Move the cursor to the RECALL button
and press the [ENTER] key.
The following message will ask you for confirmation.
• [F3] (STORE) key
Store the current channel settings. This is the
same function as the 6 STORE button.
● To store channel settings in the
library
Tip!
[Procedure]
1. Select the channel whose settings you
wish to store, and access the VIEW screen
Library page.
2. Use the [DATA/JOG] dial to select the
library number in which you wish to store
the settings.
3. Move the cursor to the STORE button and
press the [ENTER] key.
The TITLE EDIT popup window will appear,
allowing you to input a name.
Tip!
It is possible to store the settings directly
without accessing the TITLE EDIT popup window. To do so, turn STORE CONFIRMATION
off in the UTILITY screen Prefer.1 page
([UTILITY] key → [F2] key).
4. Input the library title.
For details on inputting characters, refer to
Operation Guide page 60.
5. Move the cursor to the OK button and
press the [ENTER] key.
The settings will be stored.
48
— Reference Guide
It is possible to recall the library settings
without seeing the CONFIRMATION popup
window. To do so, access the UTILITY screen
Prefer.1 page ([UTILITY] key → [F2] key) and
turn the RECALL CONFIRMATION setting
off.
4. Move the cursor to the OK button and
press the [ENTER] key.
The Recall operation will be executed.
Tip!
When you recall to a paired channel, the
same settings will be recalled to both channels.
• If you select a number in which nothing has
been stored and attempt to recall, an error
message of “ERROR NO DATA TO RECALL”
will be displayed, and the Recall will not be
performed.
• If you recall a stereo channel to a mono
channel, the pan setting of the L channel
will be recalled.
PAN/ROUTE screen
Pan 1–16/Pan17–24/Pan MONI pages
Set pan and routing
[Function]
Set pan and routing for the input
channels, return channels and
monitor channels, and set the balance of the stereo output channel.
● Pan 1–16
[Key operation]
• [PAN] key → [F1] key (Pan 1–
16)/[F2] key (Pan 17–24)/[F3]
key (Pan MONI)
• Repeatedly press the [PAN] key
until one of the screens shown at
the right appear.
1
2
3
4
5
PAN/
ROUTE
[Mouse operation]
M button → PAN button → Pan 1–
16 tab/Pan 17–24 tab/Pan MONI
tab
● Pan 17–24
1
2
3
4
5
— Reference Guide
49
PAN/ROUTE screen
● Pan MONI
1
2
3
4
5
[Screen functions]
A Channel
● INVERTED GANG button
The pan of paired channels will be linked
inversely.
This indicates the channel for which pan/routing is being set.
B Bus assign buttons 1–8
These buttons assign the signal of each channel
to buses 1–8.
C ST (stereo bus assign) buttons
These buttons assign the signal of each channel
to the stereo bus.
D PAN knobs
These knobs pan the signal between L/R of the
stereo bus and between odd-numbered and
even-numbered buses. Use the [DATA/JOG]
dial to operate the knobs. Pressing the [ENTER]
key will set the knob to the CENTER position.
The ST OUT knobs in the Pan 17–24 page
adjust the output channel balance.
E MODE
Use the following three buttons to select how
the PAN knob will function for paired channels.
● INDIVIDUAL button
The pan of each channel will operate independently. (Default setting)
● GANG button
The pan of paired channels will be linked while
preserving the existing spatial relationship.
50
— Reference Guide
On the AW4416, the pan of a channel can be
adjusted in the following two ways.
(1).Use the [SEL] keys to select the desired
channel, and rotate the [PAN] control.
If AUTO PAN DISPLAY is turned “ON” in
the UTILITY screen Prefer.1 page ([UTILITY] key → [F2] key), operating the [PAN]
control will automatically switch the display to the PAN/ROUTE screen even if a
screen other than the PAN/ROUTE
screen had been displayed.
(2).In the PAN 1–16/PAN 17–24/PAN MONI
pages, move the cursor to the PAN knob
of the desired channel and rotate the
[DATA/JOG] dial.
In the PAN 1–16/PAN 17–24/PAN MONI
pages, the channel can be specified freely,
regardless of the state of the [SEL] keys. For
this reason, there may be cases in which the
channel whose pan is adjusted by the [PAN]
control is different than the channel whose
pan is adjusted by the [DATA/JOG] dial.
PAN/ROUTE screen
■ Additional functions in the Pan
page
● Copying pan settings to all channels
In the Pan 1–16/Pan 17–24/Pan MONI pages, you
can press the [SHIFT] key to assign the following
additional functions to the [F1]–[F5] keys.
[Procedure]
1. In the PAN screen, move the cursor to the
PAN knob of the copy source channel.
2. Press the [SHIFT] key + [F5] key.
F1
F2
F3
F4
F5
• [F1] (INDIVIDUAL) key
Independently control the pan of paired channels. This is the same function as the INDIVIDUAL button.
• [F2] (GANG) key
Link the pan of paired channels while maintaining their existing spatial relationship. This is the
same function as the GANG button.
The CONFIRMATION popup window will
appear, asking you to confirm the copy.
If the cursor is at a parameter other than the
PAN knob, a message of “Can’t Copy This
Parameter” will appear, and the copy will not
occur.
3. To execute the copy, move the cursor to
the OK button and press the [ENTER] key.
• [F3] (INVERTED GANG) key
Inversely link the pan of paired channels. This is
the same function as the INVERTED GANG button.
• [F4] (ALL ROUT OFF) key
Turn off bus assign 1–8 buttons for all channels
in the page.
• [F5] (COPY PAN TO ALL) key
Copy the pan setting of the currently selected
channel to all channels (including the channels
of other pages).
— Reference Guide
51
PAN/ROUTE screen
Pair CH/Pair BUS pages
Set channel/bus pairing
[Function]
● Pair CH
Set or defeat pairing of buses 1/2–7/8 and
AUX 1/2–5/6 for adjacent odd-numbered
→ even-numbered channels.
[Key operation]
• [PAN] key → [F4] key (Pair CH)/[F5]
(Pair BUS)
• Repeatedly press the [PAN] key until
one of the screens shown at the right
appears.
1
[Mouse operation]
M button → PAN button → Pair CH tab/
Pair BUS tab
2
● Pair BUS
1
2
[Screen functions]
A Channel/bus
These are the channels/bus for which pairing
will be set or defeated.
B Pairing
These buttons set or defeat pairing.
The heart symbol will be connected for channels/buses that are paired, and the button will
be displayed as “STEREO.”
The heart symbol will be divided for channels/
buses that are not paired, and the button will be
displayed as “MONO x2.”
52
— Reference Guide
Tip!
• All parameters other than phase and pan will
be linked for channels that are paired.
However, pan will be linked if the pan mode
is set to GANG or INVERTED GANG. It will
not be linked if the pan mode is set to INDIVIDUAL (the default setting).
• For buses that are paired, the master level
(HOME screen/Bus page) will be linked.
• For AUX buses that are paired, the master
level (HOME screen/Bus page) and the send
level of the signals sent from each channel to
the corresponding AUX bus will be linked.
PAN/ROUTE screen
● Setting or defeating pairing for
channels/buses
[Procedure]
1. To pair channels or buses, move the cursor in the Pair CH page/Pair Bus page to a
button that is displayed as “MONO x 2,”
and press the [ENTER] key.
The PAIRING popup window will appear,
allowing you to specify how the pairing will
occur.
3. To defeat pairing, move the cursor to a
button displayed as “STEREO” and press
the [ENTER] key.
A popup window will appear, asking you to
confirm that you wish to defeat pairing.
Tip!
You can also defeat channel pairing by pressing the two [SEL] keys simultaneously.
4. Move the cursor to the OK button and
press the [ENTER] key.
Tip!
Another way to pair channels is to simultaneously press adjacent odd-numbered →
even-numbered [SEL] keys. In this case, the
above window will appear when you press
the two [SEL] keys simultaneously.
2. Move the cursor to either the “INPUT 1 →
2,” “INPUT 2 → 1,” or “RESET BOTH” button, and press the [ENTER] key.
You can select one of the following three pairing methods.
● INPUT x → y (x=odd number, y=even number)
The parameters of the odd-numbered channel/
bus (except for phase and pan) will be copied to
the even-numbered channel.
● INPUT y → x (x=odd number, y=even number)
The parameters of the even-numbered channel/
bus (except for phase and pan) will be copied to
the odd-numbered channel.
● RESET BOTH
The parameters of both odd and even-numbered channels/buses will be reset to their
default values.
When you execute pairing, the button display
will change to “STEREO.” When you use the
[SEL] keys to select a paired channel, the other
[SEL] key will blink.
— Reference Guide
53
EQ/ATT/GRP screen
EQ/Att page
EQ and attenuation settings
[Function]
1
Make four-band EQ and attenuation settings for the selected channel.
2
3
4
[Key operation]
• [EQ] key → [F1] key (EQ/Att) key
• Repeatedly press the [EQ] key until the
screen shown at the right appears.
[Mouse operation]
M button → EQ button → EQ/Att tab
5
6
7
[Screen functions]
A EQ ON button
This switches EQ on/off. When this page is displayed, you can use the [ENTER] key to switch
this button on/off regardless of the cursor location.
B ATT. (attenuation) knob
Set the amount of attenuation for the signal
before it enters the EQ. This is used mainly to
prevent clipping when the EQ is boosted.
Range: –96 dB–0 dB
C EQ CURVE
This graphically displays the EQ settings.
D Output meter
This meter shows the post-EQ output level.
E Q knob
This sets the steepness at which the boost/cut
will occur at the center frequency specified by
the F knob. Higher settings will produce a
steeper curve.
For the LOW band EQ, turning the Q knob all
the way in the clockwise direction will switch
the EQ type to L.SHELF (shelving), and turning it
all the way in the counter-clockwise direction
will switch the EQ type to HPF (high pass filter).
For the HIGH band EQ, turning the Q knob all
the way in the clockwise direction will switch
54
— Reference Guide
the EQ type to H.SHELF (shelving), and turning
it all the way in the counter-clockwise direction
will switch the EQ type to LPF (low pass filter).
Range: 10–0.10, HPF/L.SHELF (LOW band
only), LPF/H.SHELF (HIGH band only)
F F (frequency) knob
Set the center frequency that will be boosted or
cut.
Range: 21 Hz–20.1 kHz
G G (gain) knob
Set the amount of boost or cut. If the LOW or
HIGH bands are set to HPF or LPF respectively,
this knob switches them on/off.
Range: –18 dB– +18 dB, ON/OFF (LOW/HIGH
bands only)
Tip!
The Q, F, and G parameters of each band can
also be controlled by the EQ [HIGH]/[HIMID]/[LO-MID]/[LOW] keys and EQ [Q]/[F]/
[G] keys located at the right of the display.
If AUTO EQ DISPLAY is turned “ON” in the
UTILITY screen Prefer.1 page ([UTILITY] key
→ [F2] key), operating these keys or controls
will automatically cause the EQ/ATT page to
automatically appear if any other page is currently selected.
EQ/ATT/GRP screen
■ Additional functions in the EQ/
Att page
● Copying the attenuation setting
to all channels
In the EQ/Att page you can press the [SHIFT] key to
assign the following additional functions to the
[F1]–[F2] and [F5] keys.
[Procedure]
1. Access the EQ/Att page for the copy
source channel, and move the cursor to
the ATT. knob.
2. Press the [SHIFT] key + [F5] key.
F2
F5
• [F1] (FLAT) key
Reset all bands to a boost/cut amount of 0.0 dB
(off if HPF/LPF is selected).
• [F2] (BAND FLAT) key
Reset only the selected band to a boost/cut
amount of 0.0 dB (off if HPF/LPF is selected).
• [F5] (COPY ATT. TO ALL) key
Copy the attenuation setting of the selected
channel to all channels. (However, the stereo
output channel is excepted.)
A CONFIRMATION popup window will appear,
asking you to confirm the copy.
If the cursor is at a location other than the
ATT. knob, a message of “Can’t Copy This
Parameter” will appear, and the copy will not
occur.
3. To execute the copy, move the cursor to
the OK button and press the [ENTER] key.
Only the attenuation setting will be copied. If
you wish to copy EQ settings, you must store
the settings in the library and recall them into
the copy destination channel. For the procedure refer to page 47.
EQ/ATT
/GRP
F1
— Reference Guide
55
EQ/ATT/GRP screen
Library page
Store or recall EQ settings
[Function]
2
3
Store EQ settings in the EQ library, or
recall a stored EQ program.
[Key operation]
• [EQ] key → [F2] (Library) key
• Repeatedly press the [EQ] key until the
screen shown at the right appears.
[Mouse operation]
1
4
M button → EQ button → Library tab
5
6
J7
8
9
K
[Screen functions]
A SEL CH
This indicates the currently selected channel.
B EQ graph
This graphically displays the EQ settings.
C Output meter
This meter shows the post-EQ output level.
D TITLE EDIT button
Use this to edit the name (library title) of the EQ
program stored in the EQ library. A library name
of up to 16 characters can be input. Move the
cursor to the TITLE EDIT button and press the
[ENTER] key to access the TITLE EDIT popup
window where you can input a name. For
details on inputting characters, refer to Operation Guide P.60.
Library numbers 1–40 are recall-only preset
memories, and their names cannot be
changed. Numbers in which no EQ program
has been stored are displayed as “No Data!,”
and their title cannot be changed.
E RECALL button
Recall the currently selected EQ program from
the list.
If you attempt to recall a number in which no
data has been stored, a message of “ERROR
NO DATA TO RECALL” will appear, and the
recall will not occur.
F STORE button
Store the current EQ settings.
• Library numbers 1–40 are recall-only preset
memories, and cannot be stored. You can
store only in library numbers 41–128.
• When you store, the EQ program that was previously stored in that number will be erased.
Tip!
For details on the EQ programs that are preset
in the EQ library, refer to the appendix “Preset EQ Program Parameters.”
G LIBRARY No. (library number)
This shows the library number 1–128.
H LIBRARY TITLE
This shows the names assigned to each library
number.
I ROM
A write-protect symbol is displayed for recallonly programs (library numbers 1–40).
56
— Reference Guide
EQ/ATT/GRP screen
J Selected program
The EQ program selected for store/recall is
enclosed by a dotted frame in the EQ library list.
In this page you can use the [DATA/JOG] dial to
select the EQ program regardless of the cursor
location.
K EQ CURVE
Of the EQ programs stored in the library, the
curve of the currently selected EQ program is
shown as a graph.
■ Additional functions in the
Library page
In the Library page you can press the [SHIFT] key
to assign the following functions to the [F1]–[F3]
keys.
5. Move the cursor to the OK button and
press the [ENTER] key.
The EQ settings will be stored.
Tip!
It is possible to store the EQ settings immediately, without displaying the TITLE EDIT
popup window. To do so, access the UTILITY
screen Prefer.1 page ([UTILITY] key → [F2]
key) and turn STORE CONFIRMATION off.
When you store, the EQ program that had
been previously stored in that number will be
erased.
● Recalling EQ settings from the EQ
library
[Procedure]
F1
F2
F3
• [F1] (TITLE EDIT) key
Use this to edit the name (library title) of an EQ
program stored in the EQ library. This is the
same function as the 4 TITLE EDIT button.
• [F2] (RECALL) key
Recall the currently selected EQ program from
the list. This is the same function as the 5
RECALL button.
• [F3] (STORE)
Store the current EQ settings. This is the same
function as the 6 STORE button.
● Storing EQ settings in the EQ
library
[Procedure]
1. Select the EQ settings that you wish to
store, and access the EQ/ATT/GRP screen
Library page.
2. Use the [DATA/JOG] dial to select the store
destination library number 41–128.
3. Move the cursor to the STORE button and
press the [ENTER] key.
The TITLE EDIT popup window will appear,
allowing you to assign a name to the EQ program.
1. Select the channel into which you wish to
recall the EQ settings, and access the EQ/
ATT/GRP screen Library page.
2. Use the [DATA/JOG] dial to select the
library number 1–128 that you wish to
recall.
3. Move the cursor to the RECALL button
and press the [ENTER] key.
A CONFIRMATION popup window will appear,
asking you to confirm the recall operation.
4. Move the cursor to the OK button and
press the [ENTER] key.
The recall will be executed.
Tip!
• It is possible to recall the EQ settings immediately, without displaying the CONFIRMATION popup window. To do so, access the
UTILITY screen Prefer.1 page ([UTILITY] key
→ [F2] key) and turn RECALL CONFIRMATION off.
• When you recall an EQ program to a paired
channel, the same settings will be recalled
into both channels.
If you attempt to recall a number in which
nothing has been stored, an error message of
“ERROR NO DATA TO RECALL” will appear,
and the recall will not occur.
4. Input the library title as desired. For details
on inputting characters, refer to Operation Guide P.60.
— Reference Guide
57
EQ/ATT/GRP screen
FaderGrp page
Set and cancel fader groups
[Function]
Assign input channels 1–24/monitor channels 1–16 to fader groups
A–D. If channels are assigned to a
fader group, you can move a single
fader to control all the faders in
that group while preserving the
current balance.
[Key operation]
• [EQ] key → [F3] (FaderGrp) key
• Repeatedly press the [EQ] key
until the screen shown at the
right appears.
1
2
[Mouse operation]
M button → EQ button → FaderGrp
tab
[Screen functions]
A Fader groups A–D
The ● symbols indicate the fader group A–D to
which each input channel 1–24 and monitor
channel 1–16 belongs.
When you move the cursor up or down to select
group A–D and use the [SEL] key to select a
channel, that channel will be assigned to the
corresponding fader group. When you press the
[SEL] key once again, the channel will be
removed from the fader group.
A channel cannot belong to more than one
fader group. If a channel that is already
assigned to a fader group is assigned to
another group, only the newly assigned
group will be valid.
B ENABLE button
Turn fader groups A–D on/off.
Tip!
If you wish to adjust the position of a fader
assigned to a group, you can use the ENABLE
button to temporarily disable that group.
Do not manually operate two or more faders
of a group at the same time. Doing so will
strain the motor and cause malfunctions.
58
— Reference Guide
■ Additional functions in the FaderGrp page
In the FaderGrp page you can press the [SHIFT] key
to assign the following additional function to the
[F1] key.
F1
• [F1] (ALL CLEAR) key
Clear all fader group settings.
EQ/ATT/GRP screen
Mute Grp page
Set and cancel mute groups
[Function]
Assign input channels 1–24/monitor channels 1–16 to mute groups
E–H. If channels are assigned to a
mute group, you can operate a single [ON] key to switch the on/off
status of all [ON] keys in that
group.
[Key operation]
• [EQ] key → [F4] (Mute Grp) key
• Repeatedly press the [EQ] key
until the screen shown at the
right appears.
1
2
[Mouse operation]
M button → EQ button → Mute
Grp tab
[Screen functions]
A Mute groups E–H
The ● symbols indicate the mute group E–H to
which each input channel 1–24 and monitor
channel 1–16 belongs.
When you move the cursor up or down to select
mute group E–H and use the [SEL] key to select
a channel, that channel will be assigned to the
corresponding mute group. When you press the
[SEL] key once again, the channel will be
removed from the mute group.
Tip!
A mute group may contain both channels
that are On and channels that are Off. If a
mute group contains channels that are On
and channels that are Off, operating the
[ON] key of one of the channels will turn off
the channels that are on, and turn on the
channels that are off.
B ENABLE button
Turn mute groups E–H on/off.
Tip!
If you wish to change the on/off status after
assigning a channel to a group, you can use
the ENABLE button of that group to temporarily disable the group.
■ Additional functions in the Mute
Grp page
In the Mute Grp page you can press the [SHIFT]
key to assign the following additional function to
the [F1] key.
F1
A channel cannot belong to more than one
mute group. If a channel that is already
assigned to a mute group is assigned to
another group, only the newly assigned
group will be valid.
• [F1] (ALL CLEAR) key
Clear all mute group settings.
— Reference Guide
59
DYN/DLY screen
Dyn. Edit page
Dynamics processor parameter settings
[Function]
Set the dynamics processor parameters for the selected channel.
2
67
[Key operation]
• [DYN] key → [F1] (Dyn. Edit) key
• Repeatedly press the [DYN] key
until the screen shown at the
right appears.
1
[Mouse operation]
3
M button → DYN button → Dyn.
Edit tab
4
8
9
5
J
[Screen functions]
A KEYIN SOURCE
Select one of the following key-in signals to
control the dynamics processor.
● SELF (POST EQ)
The post-EQ signal of the same channel
● SELF (PRE EQ)
The pre-EQ signal of the same channel
● AUX 1 OUT
The signal being output to AUX bus 1
● AUX 2 OUT
The signal being output to AUX bus 2
● LEFT (POST EQ)
The post-EQ signal of the next channel to the
left
● LEFT (PRE EQ)
The pre-EQ signal of the next channel to the left
LEFT (POST EQ) or LEFT (PRE EQ) cannot be
selected for input channel 1, monitor channel 1, or the stereo output channel.
Return channels 1/2 do not have dynamics
processors.
60
— Reference Guide
Tip!
If either one of two paired channels exceeds
the threshold level, both channels will operate simultaneously.
B Channel
If LEFT is selected as the KEYIN SOURCE (1),
the key-in signal source channel will be shown
here.
C ST LINK ON/OFF (stereo link on/off)
button
If this button is on, dynamics processor parameter settings and operation will be linked for
adjacent odd-numbered → even-numbered
channels.
For the stereo out channel and for paired
channels, this Stereo Link setting will always
be on and cannot be defeated.
When Stereo Link is turned on, the dynamics
processor settings of the odd-numbered
channel will be copied to the even-numbered channel.
DYN/DLY screen
D Channel
Select the channel(s) to which the dynamics
processor will apply when the 3 ST LINK ON/
OFF button is on; L (left/odd-numbered channel), R (right/even-numbered channel), or
BOTH (both channels).
If the ST LINK ON/OFF button is off, this will
be displayed as “----” and cannot be selected.
E ON/OFF
This button turns the dynamics processor on/off.
When the cursor is located at on/off or in the
PARAMETER area, press the [ENTER] key to turn
the dynamics processor on/off.
F GR (gain reduction)
This displays the amount of gain reduction produced by the dynamics processor in dB units.
G Level meter
This shows the output level of the dynamics
processor in dB units.
H CURVE
This graph shows the approximate response of
the current dynamics processor settings.
I TYPE
DYN/
DLY
This shows the type of the currently selected
dynamics processor.
The following types of dynamics processor are
available.
● COMP (compressor)
● EXPAND (expander)
● GATE
● COMPANDER (HARD/SOFT)
● DUCKING
The type cannot be changed in this page. If
you wish to use a specific type, you must
recall a program that uses that type from the
library. For details on recalling a program,
refer to P.47.
J PARAMETER
Set the parameters of the dynamics processor. The
type of parameters and their range will differ
depending on the currently selected type. For
details on parameters and their functions, refer to
the following appendices: “Dynamics Processors”
and “Preset Dynamics Program Parameters.”
— Reference Guide
61
DYN/DLY screen
Library page
Storing and recalling dynamics processor settings
[Function]
Store dynamics processor settings in the
library, or recall stored programs.
34
2
[Key operation]
• [DYN] key → [F2] (Library) key
• Repeatedly press the [DYN] key until
the screen shown at the right appears.
1
[Mouse operation]
M button → DYN button → Library tab
5
6
7
K 8
9
J
L
[Screen functions]
A SEL CH
This displays the currently selected recall destination channel.
B Curve/type
This indicates the approximate dynamics curve
of the currently selected channel, and shows
the name of the dynamics processor type.
C GR (gain reduction)
This displays the amount of gain reduction produced by the dynamics processor in dB units.
D Level meter
This shows the output level of the dynamics
processor in dB units.
E TITLE EDIT button
Use this when you wish to edit the name
(library title) of the dynamics program saved in
the library. Move the cursor to the TITLE EDIT
button and press the [ENTER] key to access the
TITLE EDIT popup window where you can input
the name. You can input a library name of up to
16 characters.
62
— Reference Guide
Library numbers 1–40 are recall-only preset
programs, and their name cannot be
changed. Numbers in which no dynamics
program has been stored are displayed as
“No Data!,” and their title cannot be
changed.
Tip!
For details on the library preset dynamics
programs, refer to appendix “Preset Dynamics Program Parameters”.
F RECALL button
Recall the currently selected program from the
list.
If you attempt to recall a number in which
nothing has been stored, an error message of
“ERROR NO DATA TO RECALL” will be displayed, and the recall will not take place.
DYN/DLY screen
G STORE button
Store the current dynamics settings.
• Library numbers 1–40 are recall-only; data
cannot be stored in them. You can store only
to library numbers 41–128.
• When you execute the Store operation, the
dynamics program that had been stored in
that number will be erased.
H LIBRARY No. (library number)
■ Additional functions in the
Library page
In the Library page you can press the [SHIFT] key
to assign the following functions to the [F1]–[F3]
keys.
F1
F2
F3
This displays the library number 1–128.
I LIBRARY TITLE
This displays the name assigned to the library
and the type of dynamics processor.
Tip!
Library numbers in which nothing has been
stored are displayed as “No Data!”
J ROM
This write-prohibit symbol is displayed for
recall-only library numbers 1–40.
• [F1] (TITLE EDIT) key
Use this to edit the name (library title) assigned
to settings in the library. This is the same function as the 5 TITLE EDIT button.
• [F2] (RECALL) key
Recall the currently selected dynamics settings
from the list. This is the same function as the 6
RECALL button.
• [F3] (STORE) key
Store the current dynamics settings. This is the
same function as the 7 STORE button.
K Selected program
Store/recall operations will apply to the program enclosed by a dotted line in the library list.
In this page, you can always use the [DATA/
JOG] dial to select the program, regardless of
where the cursor is located.
L CURVE/TYPE
Of the dynamics programs stored in the library,
the response and type of the currently selected
dynamics program are shown in this area.
— Reference Guide
63
DYN/DLY screen
● Storing dynamics settings in the
library
● Recalling dynamics settings from
the library
[Procedure]
[Procedure]
1. Select the channel whose settings you
wish to store, and access the DYN/DLY
screen Library page.
1. Select the recall destination channel, and
access the DYN/DLY screen Library page.
2. Use the [DATA/JOG] dial to select the
library number 41–128 in which you will
store the settings.
Library numbers in which nothing has been
stored are displayed as “No Data!”
3. Move the cursor to the STORE button and
press the [ENTER] key.
The TITLE EDIT popup window will appear,
allowing you to input a name.
Tip!
It is also possible to store the settings directly
into the library without accessing the TITLE
EDIT popup window. To do so, access the
UTILITY screen Prefer.1 page ([UTILITY] key
→ [F2] key) and turn STORE CONFIRMATION off.
4. Input the library title. For details on inputting characters, refer to Operation Guide
P.60.
The Store operation will be executed.
64
— Reference Guide
2. Use the [DATA/JOG] dial to select the
library number that you wish to recall.
3. Move the cursor to the RECALL button
and press the [ENTER] key.
A confirmation message will appear.
Tip!
It is possible to recall the library data without
seeing the CONFIRMATION popup window.
To do so, access the UTILITY screen Prefer.1
page ([UTILITY] key → [F2] key), and turn
RECALL CONFIRMATION off.
4. Move the cursor to the OK button and
press the [ENTER] key.
The recall will be executed.
Tip!
When you recall a dynamics program into a
paired channel, the same settings will be
recalled into both channels.
DYN/DLY screen
Dly/ø1–16, Dly/ø17–24,
Dly/øMONI pages
Set delay and phase
[Function]
● Dly/ø1–16
Set the delay and phase of each channel.
[Key operation]
• [DYN] key → [F3] (Dly/ø1–16) key, [F4]
(Dly/ø17–24) key/[F5] (Dly/øMONI)
key
• Repeatedly press the [DYN] key until
the desired page appears.
1
2
3
4
[Mouse operation]
M button → DYN button → Dly/ø1–16
tab, Dly/ø17–24 tab, Dly/øMONI tab
● Dly/ø17–24
[Screen functions]
A Channel
This displays the channels for which
you can make delay and phase settings.
B DELAY
Set the delay time for the signal of
each channel. The upper row shows
the delay in ms (millisecond) units,
and the lower row shows the delay in
sample units. Adjusting either one will
cause the other value to change in
tandem.
1
2
3
4
C ON/OFF
● Dly/øMONI
Switch the delay on/off.
D ø (phase)
Switch the phase of each channel.
1
Tip!
2
Phase (ø) will operate independently even for paired channels.
3
4
— Reference Guide
65
DYN/DLY screen
■ Additional functions in the Dly/
øpages
In the Dly/ø1–16, Dly/ø17–24, Dly/øMONI pages
you can press the [SHIFT] key to assign the following additional function to the [F5] key.
F5
• [F5] (COPY TO ALL) key
Copy the delay time or phase setting selected by
the cursor to all other channels.
● Copying delay time or phase settings to other channels
1. Access the DYN/DLY screen Dly/ø1–16,
Dly/ø17–24, Dly/øMONI page.
2. Move the cursor to the delay time parameter or the ø button of the copy source
channel.
3. Press the [SHIFT] key + [F5] key.
The following confirmation screen will appear.
4. Move the cursor to the OK button and
press the [ENTER] key.
66
— Reference Guide
AUX1–AUX6 screens
Pre/Pst IN, Pre/Pst MONI pages
Make on/off and pre/post settings for the AUX sends
[Function]
● Pre/Pst IN
Make on/off and pre/post settings for
the signal sent from the input channels, return channels, and monitor
channels to AUX buses 1–6.
[Key operation]
• [AUX 1]–[AUX 6] keys → [F1] (Pre/
Pst IN) key/[F2] (Pre/Pst MONI) key
• Repeatedly press an [AUX 1]–[AUX
6] key until the desired page
appears.
1
[Mouse operation]
M button → AUX 1–AUX 6 buttons →
Pre/Pst IN tab/Pre/Pst MONI tab
42 3
[Screen functions]
A Channels
AUX1–
AUX6
● Pre/Pst MONI
This area shows the channels
whose AUX send pre/post settings
are being switched.
B ON/OFF buttons
These buttons are on/off switches
for the signal that is sent from each
channel to the corresponding AUX
bus.
C PRE/POST buttons
These buttons switch the signal
sent from each channel to the corresponding AUX bus between prefader and post-fader locations.
3
2
1
4
D Send levels
These indicate the send level values of each channel.
E GBL (global)
If you move the cursor to the PRE
button or the POST button and
press the [ENTER] key, the pre/post
setting of all channels in that page
will be switched together.
— Reference Guide
67
AUX1–AUX6 screens
■ Additional functions in the Pre/
Pst IN, Pre/Pst MONI pages
In the Pre/Pst IN/Pre/Pst MONI pages, you can
press the [SHIFT] key to assign the following functions to the [F1]–[F2] keys.
F1
F2
• [F1] (GLOBAL PRE) key
Switch all channels in that page to pre-fader.
This is the same function as the PRE button in
the GBL area 5.
• [F2] (GLOBAL POST) key
Switch all channels in that page to post-fader.
This is the same function as the POST button in
the GBL area 5.
68
— Reference Guide
AUX7/EFF1 and
AUX8/EFF2 screens
Eff. Edit page
Edit internal effects 1/2
[Function]
Edit the parameters of the effect
that is selected for internal effect 1
(AUX7/EFF1 screen) or external
effect 2 (AUX8/EFF2).
[Key operation]
• [AUX 7] key/[AUX 8] → [F1] (Eff.
Edit) key
• Repeatedly press the [AUX 7]
key or [AUX 8] key until the
desired screen appears
[Mouse operation]
3
5
1
2
4
6
M button → EFF 1 button/EFF 2
button → Eff. Edit tab
7
A USED AS (effect usage method)
If the effect is patched to AUX send/return this
will indicate “AUX 7”/”AUX 8.” If the effect is
patched to a specific channel this will indicate
“INSERT.”
Tip!
The choice of AUX send/return or insertion is
made in the SET UP screen Patch IN page.
B BYPASS ON/OFF button
This button switches effect bypass on/off. This
ON/OFF button can be switched by pressing the
[ENTER] key regardless of where the cursor is
located.
C CURRENT EFFECT NAME
This shows the name of the currently used effect
program.
AUX7/EFF1
AUX8/EFF2
[Screen functions]
D EFFECT TYPE
This shows the name of the currently used effect
type. A graphic indicating the effect type is also
displayed as the right.
It is not possible to change the effect type in
this page. If you wish to use a specific effect
type, load a program using that effect type
from the effect library (→ P.71).
E Output meter
This level meter shows the effect output level.
F Effect parameters
Use the knobs displayed in this area to edit the
effect parameter values. The type of parameters
will differ depending on the currently-used
effect type.
— Reference Guide
69
AUX7/EFF1 and AUX8/EFF2 screens
G MIX BAL. (mix balance) knob
This knob adjust the mix amount of the effect
sound. A setting of 0% will output only the original sound, 50% will output equal amounts of
direct and effect sound, and 100% will output
only the effect sound. If the effect is patched via
AUX send/return, set this to 100%. If the effect
is inserted in a specific channel, adjust this to
the desired value.
■ Additional functions in the Eff
Edit page
In the Eff Edit page you can press the [SHIFT] key to
assign the following function to the [F1] key.
F1
Tip!
This knob will be located in the same place
regardless of the effect type.
• [F1] (BYPASS ON/OFF) key
Switch effect bypass on/off. This is the same
function as the 2 BYPASS ON/OFF button.
70
— Reference Guide
AUX7/EFF1 and AUX8/EFF2 screens
Library page
Store or recall an effect program
[Function]
3
Store an effect program in the library, or
recall a stored effect program.
[Key operation]
• [AUX 7]–[AUX 8] keys → [F2] (Library)
key
• Repeatedly press an [AUX 7]–[AUX 8]
key until the desired screen appears
[Mouse operation]
M button → EFF 1–EFF 2 button → Library
tab
1
2
4
5
6
K7
8
9J
L
[Screen functions]
A CURRENT EFFECT NAME
B EFFECT TYPE
F STORE button
Store the current effect settings.
C Output meter
These are the same as in the Eff. Edit page. Refer
to P.69.
D TITLE EDIT button
Use this when you wish to edit the name
(library title) of an effect program saved in the
effect library. Move the cursor to the TITLE EDIT
button and press the [ENTER] key to access the
TITLE EDIT popup window where you can input
the name. For details on inputting characters,
refer to Operation Guide P.60.
• Library numbers 1–41 are recall-only presets, and cannot be stored. Settings can be
stored only in library numbers 42–128.
• When you execute the Store operation, the
effect program that had been stored in that
number will be erased.
Tip!
For the programs that are preset in the effect
library, refer to the appendix “Preset Effects
Programs.”
G LIBRARY No. (library number)
Library numbers 1–41 are recall-only presets;
their name cannot be edited. Numbers in
which no effect program has been stored will
be displayed as “No Data!,” and their name
cannot be edited either.
E RECALL button
Recall the currently selected effect program
from the list.
If you select and attempt to recall a number
in which nothing has been stored, a message
of “ERROR NO DATA TO RECALL” will
appear, and the recall will not take place.
This shows the library number 1–128.
H LIBRARY TITLE
This shows the name assigned to each library
number.
I S/M (stereo/monaural)
This indicates whether the effect type used by
each program is stereo or monaural. Stereo
effect types are indicated by “S,” and monaural
effect types are indicated by “M.”
J ROM
Recall-only programs (library numbers 1–41)
are indicated by a write-prohibit symbol in this
column.
— Reference Guide
71
AUX7/EFF1 and AUX8/EFF2 screens
K Selected program
Store/recall operations will apply to the program enclosed by a dotted line in the library list.
In this page, you can always use the [DATA/
JOG] dial to select the program, regardless of
where the cursor is located.
L EFFECT TYPE
This displays the effect type used by the program currently selected for store or recall.
In general, the effect library is common to
both effects 1 and 2. However, effect program no.19 “HQ-Pitch” can be used only by
effect 2.
■ Additional functions in the
Library page
In the Library page, you can press the [SHIFT] key
to assign the following functions to the [F1]–[F3]
keys.
4. Input the library title as desired. For details
on inputting characters, refer to Operation Guide P.60.
A maximum of 16 characters can be input.
5. Move the cursor to the OK button and
press the [ENTER] key.
The Store operation will be executed.
Tip!
It is possible to store the settings directly in
the library without seeing the TITLE EDIT
popup window. To do so, access the UTILITY
screen Prefer.1 page ([UTILITY] key → [F2]
key) and turn STORE CONFIRMATION off.
When you store, the effect program that had
been stored in that number will be erased.
● Recalling an effect program from
the library
[Procedure]
F1
F2
F3
1. Access the Library page of the AUX7/EFF1
screen or the AUX8/EFF2 screen.
2. Use the [DATA/JOG] dial to select the
library number that you wish to recall.
• [F1] (TITLE EDIT) key
Use this to edit the name (library title) of the
effect program saved in the library. This is the
same function as the 4 TITLE EDIT button.
• [F2] (RECALL) key
Recall the currently selected effect program
from the list. This is the same function as the 5
RECALL button.
• [F3] (STORE) key
Store the current effect settings. This is the same
function as the 6 STORE button.
● Storing an effect program in the
library
3. Move the cursor to the RECALL button
and press the [ENTER] key.
The CONFIRMATION popup window will
appear, asking you to confirm the Recall operation.
4. Move the cursor to the OK button and
press the [ENTER] key.
The Recall operation will be executed.
Tip!
It is possible to execute the recall immediately without seeing the CONFIRMATION
popup window. To do so, access the UTILITY
screen Prefer.1 page ([UTILITY] key → [F2]
key) and turn RECALL CONFIRMATION off.
[Procedure]
1. Access the Library page of the AUX7/EFF1
screen or the AUX8/EFF2 screen.
2. Use the [DATA/JOG] dial to select the store
destination library number 42–128.
3. Move the cursor to the STORE button and
press the [ENTER] key.
The TITLE EDIT popup window will appear,
allowing you to assign a name to the effect program.
72
— Reference Guide
If you attempt to recall a number in which no
data has been stored, an error message of
“ERROR NO DATA TO RECALL” will appear,
and the recall will not take place.
AUX7/EFF1 and AUX8/EFF2 screens
Pre/Pst IN, Pre/Pst MONI pages
Make on/off and pre/post settings for the effect sends
[Function]
● Pre/Pst IN
Make on/off and pre/post settings
for the signal sent from the input
channels, return channels, and
monitor channels to AUX buses 7/
8 (effects 1/2).
[Key operation]
• [AUX 7] key/[AUX 8] key → [F3]
(Pre/Pst IN) key/[F4] (Pre/Pst
MONI) key
• Repeatedly press the [AUX 7]
key or [AUX 8] key until the
desired page appears.
5
1
[Mouse operation]
M button → EFF 1 button/EFF 2
button → Pre/Pst IN tab/Pre/Pst
MONI tab
42 3
[Screen functions]
● Pre/Pst MONI
A Channels
This area shows the channels
whose effect send pre/post settings are being switched.
B ON/OFF buttons
These buttons are on/off
switches for the signal that is
sent from each channel to
effect 1/2.
C PRE/POST buttons
3
2
1
5
4
These buttons select either prefader or post-fader signals to be
sent from each channel to the
effect send.
D Send levels
These indicate the send level
values of each channel.
E GBL (global)
If you move the cursor to the
PRE button or the POST button
and press the [ENTER] key, the
pre/post setting of all channels
in that page will be switched
together.
— Reference Guide
73
AUX7/EFF1 and AUX8/EFF2 screens
It is not possible to send signals from return
channel 1 to AUX7. Likewise, it is not possible to send signals from return channel 2 to
AUX8. This is to prevent the return signal of
an effect from being accidentally returned to
the same effect, creating a loop.
■ Additional functions in the Pre/
Pst IN/Pre/Pst MONI pages
In the Pre/Pst IN/Pre/Pst MONI pages, you can
press the [SHIFT] key to assign the following functions to the [F1]–[F2] keys.
F1
F2
• [F1] (GLOBAL PRE) key
Switch all channels in that page to pre-fader.
This is the same function as the PRE button in
the GBL area 5.
• [F2] (GLOBAL POST) key
Switch all channels in that page to post-fader.
This is the same function as the POST button in
the GBL area 5.
74
— Reference Guide
HOME screen
1–24/Rtn page
Monitor the input level of the input channels
[Function]
Monitor the input levels of input channels
1–24 and return channels 1/2.
1
[Key operation]
• [HOME] key → [F1] (1–24/Rtn) key
• Repeatedly press the [HOME] key until
the screen shown at the right appears
[Mouse operation]
M button → HOME button → 1–24/Rtn
tab
2
A Level meters
These meters show the input levels of input
channels 1–24 and return channels 1/2. The
fader position is shown in dB units below each
level meter.
4
5
■ Additional functions in the 1–24/
Rtn page
In the 1–24/Rtn page you can press the [SHIFT] key
to assign the following function to the [F1] key.
B STEREO OUT LEVEL
This shows the position of the STEREO fader in
dB units.
F1
C PRE EQ button
D POST EQ button
E POST FADER button
Select one of these three buttons to select the
location in the signal path (pre-EQ/post-EQ/
post-fader) whose level will be shown by the
level meters.
• [F1] (PEAK HOLD) key
This key sets/defeats the Peak Hold function.
This is the same function as the [PEAK HOLD]
key in the level meter/counter section. When
Peak Hold is on, a “ ” symbol will be maintained in the level meter to indicate the peak
level.
— Reference Guide
75
HOME
[Screen functions]
3
HOME screen
MONITOR page
Monitor the input levels of the monitor channels
[Function]
Monitor the input levels of monitor channels 1–16
1
[Key operation]
• [HOME] key → [F2] (Monitor) key
• Repeatedly press the [HOME] key until
the screen shown at the right appears
[Mouse operation]
M button → HOME button → Monitor tab
2
[Screen functions]
A Level meters
These meters show the input levels of monitor
channels 1–16. The fader position of each channel is shown in dB units below each level meter.
3
4
5
■ Additional functions in the Monitor page
In the Monitor page you can press the [SHIFT] key
to assign the following function to the [F1] key.
B STEREO OUT LEVEL
This shows the position of the STEREO fader in
dB units.
C PRE EQ button
D POST EQ button
E POST FADER button
Select one of these three buttons to select the
location in the signal path (pre-EQ/post-EQ/
post-fader) whose level will be shown by the
level meters.
76
— Reference Guide
F1
• [F1] (PEAK HOLD) key
This key sets/defeats the Peak Hold function.
This is the same function as the [PEAK HOLD]
key in the level meter/counter section.
HOME screen
Bus page
Monitor the output levels of buses 1–8/AUX buses 1–8
[Function]
Monitor the output level of buses 1–8 and
AUX buses 1–8. In this page you can also
adjust the master level of each bus.
1
[Key operation]
• [HOME] key → [F3] (Bus) key
• Repeatedly press the [HOME] key until
the screen shown at the right appears
[Mouse operation]
M button → HOME button → Bus tab
2
3
[Screen functions]
A Level meters
These meters show the output levels of buses 1–
8/AUX buses 1–8.
4
5
■ Additional functions in the Bus
page
In the Bus page you can press the [SHIFT] key to
assign the following function to the [F1] key.
B Faders
These faders adjust the master level of buses 1–
8/AUX buses 1–8. The fader location of each
bus is shown in dB units below each fader.
F1
Tip!
To adjust the value of a fader, move the cursor to the desired fader and rotate the [DATA/
JOG] dial.
C STEREO OUT LEVEL
• [F1] (PEAK HOLD) key
This key sets/defeats the Peak Hold function.
This is the same function as the [PEAK HOLD]
key in the level meter/counter section.
The location of the STEREO fader is shown in
dB units.
D PRE FADER (pre-fader) button
E POST FADER (post-fader) button
Select one of these two buttons to select the
location in the signal path (pre-fader/post-fader)
whose level will be shown by the level meters.
— Reference Guide
77
HOME screen
Omni/ST page
Monitor the output levels of the OMNI OUT jacks and
stereo output
[Function]
Monitor the output levels of OMNI OUT
jacks 1–4 and the stereo output.
[Key operation]
• [HOME] key → [F4] (Omni/ST) key
• Repeatedly press the [HOME] key until
the screen shown at the right appears
1
[Mouse operation]
M button → HOME button → Omni/St tab
2
3
4
5
[Screen functions]
A OMNI OUT level meters
These meters show the output level of OMNI
OUT jacks 1–4. The type of signal assigned to
each OMNI OUT jack is indicated below each
level meter.
Tip!
This page is for display only; assignments
cannot be changed in this page. The signals
assigned to OMNI OUT jacks 1–4 can be
selected in the SETUP screen Patch OUT
page.
The PRE FADER button/POST FADER button
setting will not affect the OMNI OUT level
meter display.
■ Additional functions in the Omni/
ST page
In the Omni/ST page you can press the [SHIFT] key
to assign the following function to the [F1] key.
B STEREO OUT level meter
This meters shows the output level of stereo output.
F1
C STEREO OUT LEVEL
This shows the position of the STEREO fader in
dB units.
D PRE FADER (pre-fader) button
E POST FADER (post-fader) button
Select one of these two buttons to select the
location in the signal path (pre-fader/post-fader)
whose level will be shown by the STEREO OUT
level meters.
78
— Reference Guide
• [F1] (PEAK HOLD) key
This key sets/defeats the Peak Hold function.
This is the same function as the [PEAK HOLD]
key in the level meter/counter section.
HOME screen
Option page
Monitor the output level of option I/O cards
[Function]
Monitor the output level of option I/O
cards inserted in slots 1/2 of the AW4416.
1
[Key operation]
• [HOME] key → [F5] (Option) key
• Repeatedly press the [HOME] key until
the screen shown at the right appears
[Mouse operation]
M button → HOME button → Option tab
2
[Screen functions]
A Level meters
These meters shows the output levels of the
option I/O cards inserted in slots 1/2. The type
of signal assigned to each OUTPUT is indicated
below each level meter.
■ Additional functions in the
Option page
In the Option page you can press the [SHIFT] key
to assign the following function to the [F1] key.
Tip!
This page is for display only; the assignments
cannot be changed here. The signals assigned
to each OUTPUT of an option I/O card can
be selected in the SETUP screen Patch OUT
page.
B STEREO OUT LEVEL
The position of the STEREO fader is shown in
dB units.
F1
• [F1] (PEAK HOLD) key
This key sets/defeats the Peak Hold function.
This is the same function as the [PEAK HOLD]
key in the level meter/counter section.
— Reference Guide
79
SAMP. PAD screen
From Rgn. page
Assign a region to a sampling pad
[Function]
Assign a region (continuous audio data
recorded in one operation) to a sampling
pad.
4 5 6
7
[Key operation]
• Sampling pad section [EDIT] pad → [F1]
(From Rgn.) key
• Repeatedly press the [EDIT] pad until the
screen shown at the right appears.
1
2
3
[Mouse operation]
M button → SAMP. PAD EDIT button →
From Rgn. tab
8
[Screen functions]
A PAD SEL (pad select) button
This button selects the pad to which a region
will be assigned.
B RGN. SEL (region select) button
This button selects the region that will be
assigned to the pad.
C EXECUTE button
This button executes the assignment. When you
move the cursor to this button and press the
[ENTER] key, the region you selected in 2 will
be assigned to the pad you selected in 1.
D T (track)
This column shows the track number (1–16).
E N (name)
This column shows the virtual track name.
Tracks in which nothing has been recorded are
displayed as “-NO REC-”.
F V (virtual track)
This column shows the virtual track number (1–
8) selected for each track.
80
— Reference Guide
G Track view
This area shows a bar graph to indicate the
regions included in each track.
H Parameter area
In this area you can set the parameters for the
selected menu.
Note
The total length of the samples that can be
assigned to the sampling pads is a maximum
of 90 seconds (for a 44.1 kHz/16 bit song). If
you wish to use part of a region that is longer
than this, you must first divide the region
appropriately (EDIT screen TR Edit page).
SAMP. PAD screen
■ Additional functions in the From
Rgn. page
In the From Rgn. page you can press the [SHIFT]
key to assign the following additional functions to
the [F1]–[F3] keys.
F1
F2
F3
• [F1] (REMAIN) key
This causes the counter/level meter and the
counter at the top of the display to show the
remaining time available for recording in the
track.
• [F2] (X-ZOOM IN) key
Each time you press the [SHIFT] key + [F2] (XZOOM IN) key, the track view 7 will zoom-in
horizontally (three stages).
• [F3] (X-ZOOM OUT) key
Each time you press the [SHIFT] key + [F3] (XZOOM OUT) key, the track view 7 will zoomout horizontally (three stages).
Tip!
SAMP.
PAD
For the procedure of assigning a region to a
pad, refer to Operation Guide “Chapter 12.
Sampling pads.”
— Reference Guide
81
SAMP. PAD screen
CD Import page
Assign CD-DA to a sampling pad
[Function]
2
Import CD-DA (CD audio) audio data from
an audio CD/mixed-mode CD-ROM
inserted in an internal or external CD-RW
drive, and assign it to a sampling pad.
[Key operation]
• Sampling pad section [EDIT] pad → [F2]
(CD Import) key
• Repeatedly press the [EDIT] key until the
screen shown at the right appears.
1
[Mouse operation]
M button → SAMP.PAD EDIT button → CD
Import tab
3
4
5
[Screen functions]
A DRIVE
E EXECUTE button
Move the cursor to this area and rotate the
[DATA/JOG] dial to select the internal or external CD-RW drive.
B ASSIGN TO
Select the pad to which you wish to assign CDDA data. Pads to which no sample has been
assigned will be displayed as “-NO ASN-”.
C TRACK/TOTAL
This is the track list of the audio CD/mixedmode CD-ROM inserted in the CD-RW drive.
Move the cursor to this list, and rotate the
[DATA/JOG] dial to select a track. The value at
the right shows the total time of that track.
D EXTRACT POINT
Select the area of the track specified in 3 that
will be assigned to the pad, in units of “minutes:seconds:frames (1/75 seconds).”
Move the cursor to this area and use the [DATA/
JOG] dial to specify the START (start point) and
END (end point).
This button executes the sample import operation.
CD-DA data can be imported only for songs
whose sampling frequency is 44.1 kHz.
Execution of this operation requires a longer
time than the actual time length of the data.
Also, processing cannot be cancelled once
the operation has been executed.
■ Additional functions in the CD
Import page
In the CD Import page you can press the [SHIFT]
key to assign the following additional functions to
the [F1]–[F2] keys.
F1
Tip!
Later, you can trim the sample assigned to the
pad to make even finer adjustments. Samples
can be trimmed in the SAMP. PAD screen
PAD Edit page (→ P.86).
F2
• [F1] (CD LOAD) key
Close the tray of the CD-RW drive.
• [F2] (CD UNLOAD) key
Eject the tray of the CD-RW drive.
82
— Reference Guide
SAMP. PAD screen
● Assigning CD-DA data to a sampling pad
[Procedure]
5. Move the cursor to the TRACK/TOTAL
area, and use the [DATA/JOG] dial to
select the track from which you wish to
import.
1. Access the SAMP. PAD screen CD Import
page, and press [SHIFT] key + [F2] (CD
UNLOAD) key.
The tray of the CD-RW drive will be ejected.
2. Place an audio CD or mixed-mode CD in
the tray, and press the [SHIFT] key + [F1]
(CD LOAD) key.
The tray of the CD-RW drive will close, and the
CD will be inserted.
3. Move the cursor to the DRIVE area, use
the [DATA/JOG] dial to select the SCSI ID
of the CD-RW drive, and press the
[ENTER] key.
The AW4416 will recognize the CD that was
inserted, and a display like the following will
appear.
6. Move the cursor to the EXTRACT POINT
area, and use the [DATA/JOG] dial to specify START (start point) and END (end
point) to select the area that will be
assigned to the pad.
7. To execute the sample import, move the
cursor to the EXECUTE button and press
the [ENTER] key.
A confirmation message like the following will
appear.
4. Move the cursor to the ASSIGN TO area,
and use the [DATA/JOG] dial to select the
bank and pad number to which the CDDA data will be assigned.
If a message of “Prohibit CD Import” appears
instead of this message, access the UTILITY
screen/Prefer.2 page ([UTILITY] key → [F3] key)
and change the CD/DAT DIGITAL REC button
display to ENABLE.
8. Move the cursor to the OK button and
press the [ENTER] key.
In this page a pair of adjacent odd-numbered →
even-numbered pads of the same bank will be
selected (e.g., A–1/A–2, B–1/B–2) and automatically specified as a pair, and the L/R channels of
the CD-DA data will be assigned to these.
The sample import will be executed.
Tip!
So that the samples assigned to the two pads
will play back in stereo, assign the pad outputs to paired channels. (SETUP screen Patch
IN page)
— Reference Guide
83
SAMP. PAD screen
WAV Import page
Assign a WAV file to a sampling pad
[Function]
2
Import a WAV format audio file from a CDROM or MO disk inserted in the internal
CD-RW drive or an external SCSI device,
and assign it to a sampling pad.
[Key operation]
• Sampling pad section [EDIT] pad → [F3]
(WavImport) key
• Repeatedly press the [EDIT] pad until the
screen shown at the right appears.
[Mouse operation]
M button → SAMP. PAD EDIT button →
WavImport tab
1
3
4
5
[Screen functions]
A DRIVE
Move the cursor to this area and rotate the
[DATA/JOG] dial to select the internal CD-RW
drive or external SCSI device.
B ASSIGN TO
Select the pad to which you wish to assign the
WAV file. Pads to which no sample is assigned
are displayed as “-NO ASN-”.
C File list
This shows a list of the WAV files on the internal
CD-RW drive or external SCSI device. This list
contains the following information.
● FILE
The file name/directory name is displayed.
icons indicate WAV files, and
files indicate
directories.
● TOTAL
The playback time of the WAV file is displayed
in hours/minutes/seconds/milliseconds.
● TYPE
The stereo ( )/monaural ( ) status of the WAV
file and its quantization (word length) is displayed.
84
— Reference Guide
The AW4416 can recognize only WAV files
that have the same sampling frequency as the
current song which have a filename extension of “.WAV” following their name. Other
files will not be displayed in the list.
D DIR (directory)
The “/” symbol and the directory name indicate
the directory in which the list shown in 3 is
located. For example this will indicate “/” if you
are in the highest level (root directory), or “/
WAV/” if you are in a directory named WAV
located one level lower.
E EXECUTE button
This button executes the WAV file import.
SAMP. PAD screen
■ Additional functions in the Wav
Import page
In the Wav Import page you can press the [SHIFT]
key to assign the following additional functions to
the [F1]–[F2] keys.
F1
F2
• [F1] (CD LOAD) key
Close the tray of the CD-RW drive.
• [F2] (CD UNLOAD) key
5. Move the cursor to the ASSIGN TO area,
and use the [DATA/JOG] dial to select the
bank and pad number to which the WAV
file will be assigned.
Tip!
If you select a stereo WAV file in step 4, a
pair of adjacent odd-numbered → even-numbered pads in the same bank will be selected
(e.g., A–1/A–2, B–1/B–2) and automatically
assigned as a pair to the L/R channels of the
WAV file.
6. To execute the sample import, move the
cursor to the EXECUTE button and press
the [ENTER] key.
A popup window will ask you for confirmation.
Eject the tray of the CD-RW drive.
● Assigning a WAV file to a sampling pad
[Procedure]
1. Insert the media containing the WAV file
into an external SCSI device (e.g., MO
drive) or the internal CD-RW drive.
2. Access the SAMP. PAD screen WavImport
page.
3. Move the cursor to the DRIVE area, use
the [DATA/JOG] dial to select the SCSI ID
of the drive, and press the [ENTER] key.
The AW4416 will recognize the WAV files on
the inserted media (CD-ROM, MO disk etc.),
and will display a list like the following.
7. Move the cursor to the OK button and
press the [ENTER] key.
The sample import will be executed.
Tip!
If you want the samples assigned to the two
pads to play back in stereo, assign the pad
outputs to paired channels. (SETUP screen
Patch IN page)
Execution of this operation requires a longer
time than the actual time length of the data.
Also, processing cannot be cancelled once
the operation has been executed.
4. Move the cursor to the file list, and use
the [DATA/JOG] dial to select the WAV file
that you wish to import.
The file enclosed by the dotted lines in the center of the list is selected for the operation.
Tip!
indicates the current directory, and
indicates the directory above. To
return to the next highest directory, move the
cursor to
and press the [ENTER] key.
— Reference Guide
85
SAMP. PAD screen
PAD Edit page
Editing a sample pad
[Function]
Assign a name to a sampling pad, erase a
pad, or trim a sample.
56
7
8
[Key operation]
• Sampling pad section [EDIT] pad → [F4]
(PAD Edit) key
• Repeatedly press the [EDIT] pad until the
screen shown at the right appears.
[Mouse operation]
1
2
3
4
M button → SAMP. PAD EDIT button →
PAD Edit tab
9
[Screen functions]
A NAME
B ERASE
This menu allows you to assign the desired
name to a pad. When you move the cursor to
this menu and press the [ENTER] key, the following buttons will appear.
This menu allows you to erase the sample and
name assigned to a pad, and return the pad to
its initial state. When you move the cursor to
this menu and press the [ENTER] key, the following buttons will appear.
These buttons have the following functions.
● PAD
Select the bank/pad number of the pad that you
wish to name.
● NAME
Access the NAME EDIT screen where you can
input a name. You can input a maximum of 8
characters.
Tip!
Immediately after a sample has been
assigned to a pad, a default name of “Smpltr”
will be assigned automatically.
Undo is not possible after the pad name has
been edited.
86
— Reference Guide
These buttons have the following functions.
● PAD
Select the bank/pad number of the pad that you
wish to erase.
● EXECUTE
Execute the pad erase operation.
Undo is not possible after a pad has been
erased.
SAMP. PAD screen
C TRIM IN
This menu allows you to adjust the playback
start location of the sample assigned to a pad.
When you move the cursor to this menu and
press the [ENTER] key, the following buttons
will appear.
F PAD
This column shows the bank and pad number
(A1–A8/B1–B8).
G NAME (pad name)
This column shows the pad name. When a sample is assigned to a pad, a name of “Smpltr” will
automatically be assigned. Pads to which nothing is assigned will be displayed as “-NO ASN”.
H SIZE
These buttons have the following functions.
● PAD
Select the bank/pad number of the pad whose
playback start location you wish to trim.
● TRIM IN
Adjust the amount of trimming in sample units.
● EXECUTE
Execute the trim operation.
D TRIM OUT
This menu allows you to adjust the playback
end location of the sample assigned to a pad.
When you move the cursor to this menu and
press the [ENTER] key, the following buttons
will appear.
This area shows a bar graph that indicates the
length of the sample assigned to each pad. MAX
(at the right edge) is the maximum RAM that
can be assigned to the sampling pad.
Tip!
The maximum total length of sound that can
be assigned to the sampling pads is 90 seconds (for a 44.1 kHz/16 bit song).
I Parameter area
In this area you can set the parameters for the
selected menu. When you select a button for
menu 1–4, the corresponding parameter values will appear here.
Tip!
For examples of editing the sampling pads,
refer to Operation Guide “Chapter 12. Sampling pads.”
These buttons have the following functions.
● PAD
Select the bank/pad number of the pad whose
playback end location you wish to trim.
● TRIM OUT
Adjust the amount of trimming in sample units.
● EXECUTE
Execute the trim operation.
• TRIM IN/TRIM OUT cannot be undone.
• Trimming a sample will not increase the
available memory area.
E Pairing
Here you can set or cancel pairing of adjacent
odd-numbered/even-numbered pads. Move the
cursor to the heart symbol and press the
[ENTER] key to connect the heart symbol, pairing the two channels. In this state, pressing
either of the pads will sound both pads simultaneously.
— Reference Guide
87
SAMP. PAD screen
Trig. List page
Recording and playing sampling pad operations
[Function]
Use a dedicated “convenience sequencer”
to record and play back pad operations,
and edit the recorded performance.
3
4 56
7
[Key operation]
• Sampling pad section [EDIT] pad → [F5]
(Trig. List) key
• Repeatedly press the [EDIT] pad until the
screen shown at the right appears.
1
2
[Mouse operation]
M button → SAMP. PAD EDIT button →
Trig. List tab
8
[Screen functions]
A COPY menu
Using this menu, events recorded in the convenience sequencer can be copied to another
location in the same pad track or to another pad
track. When you move the cursor here and
press the [ENTER] key, the following buttons
will appear.
● TO PAD
Specify the pad track to which you wish to
copy.
● TO START
Specify the location in the pad track selected for
TO PAD at which the data will be copied.
● TIMES
Specify the number of times the data will be
copied. If you specify a multiple number of copies, the pattern selected as the copy source will
be copied repeatedly.
● INTERVAL
When copying multiple times, this parameter
specifies the interval between copy destination
patterns.
These buttons have the following functions.
● FR. PAD
Select the copy source pad track.
● FR. START
● FR. END
Specify the beginning (FR. START) and end (FR.
END) of the pad track selected in FR. PAD that
will be the copy source. The specified portion of
the performance will be the copy source pattern.
88
— Reference Guide
● INSERT
Select whether the pattern will be inserted
(Insert) or overwritten (OverWrite) at the copy
destination. If you select “Insert,” the events following the insert location will be moved toward
the end of the song for the length of the copied
pattern. If you select “OverWrite,” the existing
events will be erased for the length of the copied pattern.
● EXECUTE
Execute the copy.
SAMP. PAD screen
B ERASE menu
Using this menu, a specified range of events
recorded in the convenience sequencer can be
erased. When you move the cursor here and
press the [ENTER] key, the following buttons
will appear.
G Pad track view
The timing at which trigger events are played
can be recorded separately for each pad on
these tracks. The bar graphs indicate the time
from when a pad was pressed until it was
released.
H Parameter area
The parameters required in order to execute the
editing operation can be set in this area.
Tip!
These buttons have the following functions.
● PAD
Select the pad track from which you wish to
erase events.
For the procedure of recording or playing
your pad performances, and copying or erasing a recorded performance, refer to Operation Guide “Chapter 12. Sampling pads.”
● START
■ Additional functions in the Trig.
List page
● END
Specify the beginning (START) and end (END) of
the range that you wish to erase from the pad
track specified by PAD.
In the Trig. List page you can press the [SHIFT] key
to assign the following additional functions to the
[F1]–[F3] keys.
● EXECUTE
Execute the erase command.
C PAD
This column shows the pad and pad number
(A1–A8/B1–B8).
D NAME (pad name)
This column shows the name of each pad. Pads
to which nothing has been assigned will be displayed as “-NO ASN-”.
F1
F2
F3
• [F1] (REMAIN) key
The counter will show the remaining time available for recording in the track. When you press
the [SHIFT] key + [F1] (REMAIN) key once
again, the usual counter display will reappear.
Tip!
When you assign a sample to a pad, it will
automatically be given a default name of
“Smpltr”. To edit the name, use the SAMP.
PAD screen PAD Edit page (→ P.86).
Remaining time for recording
in the track
E R (recording) buttons
These buttons enable recording for each pad.
When you move the cursor to a button and
press the [ENTER] key, the O display will
change to ●, and your performance on the pad
can be recorded as events.
F M (mute) buttons
These are mute switches for each pad. When
you move the cursor to a button and press the
[ENTER] key, the O display will change to ●,
and that pad track will no longer be played
back.
• [F2] (X-ZOOM IN) key
Each time you press the [SHIFT] key + [F2] (XZOOM IN) key, the pad track view will zoom-in
horizontally (three levels).
• [F3] (X-ZOOM OUT) key
Each time you press the [SHIFT] key + [F3] (XZOOM OUT) key, the pad track view will
zoom-out horizontally (three levels).
If bank A (B) is selected by the BANK pad,
pads 1–8 of bank B (A) will be forcibly
muted. To cancel muting, press the BANK
switch to change banks.
— Reference Guide
89
TRACK screen
TR View page
Viewing the recorded content for each track
[Function]
12 3 45 6
View a bar graph that shows the regions
recorded on each track, and switch the
input monitor mode or mute on/off for
each track.
7
[Key operation]
• [TRACK] key → [F1] (TR View) key
• Repeatedly press the [TRACK] key until
the screen shown at the right appears
[Mouse operation]
M button → TRAC button → TR View tab
8
9
J
K
[Screen functions]
A T (track)
This column shows the track number 1–16.
B B (bus)
This column indicates the type of signal that is
sent to the input (recorder input) of each track
1–16. The abbreviations have the following significance.
• B1–B8.................Buses 1–8
• D1–D16..............Direct output of input channels 1–16
Up to 16 characters can be specified as the
name of a virtual track, but only the first eight
characters will be displayed in this column.
The name can be edited in the EDIT screen
TR Edit page.
D V (virtual track)
This column shows the virtual track number (1–
8) that is selected for each track.
Tip!
C NAME
This column shows the name of the virtual track
currently selected for each track 1–16. When
you record something on a track, a default
name of “V.Tr x-y” (x=track number 1–16,
y=virtual track number 1–8) will be assigned
automatically. Tracks on which nothing has
been recorded will be displayed as “-NO REC-”.
90
Tip!
— Reference Guide
Virtual tracks are selected in the TRACK
screen V.Track page.
E M (mute)
In this column you can turn muting on/off for
each track. Move the cursor to the 5 column
and press the [ENTER] key to switch muting on
(●) or off (O) for that track.
TRACK screen
H ALL MUTE OFF button
F I (input monitor)
This column indicates the signal that can be
monitored for each track. The track input signal
is being monitored when ● is displayed, and
the track playback signal is being monitored
when O is displayed. The INPUT MONITOR 9
setting, the state of the [REC TRACK SELECT]
key, and the current transport mode will determine which signal is being monitored for each
track.
G Track view
The regions (continuous audio data recorded in
a single operation) included in each track are
displayed as bar graphs in this area. The vertical
line in this area indicates the current location.
The symbols displayed at the bottom of the
frame indicate locate points or markers that
have been set in those locations. The following
types of symbols are displayed.
• S.........................Start point
• E.........................End point
• I .........................In point
• O........................Out point
• A ........................A point
• B ........................B point
• 1–99...................Markers 1–99
This button defeats muting for all tracks.
Tracks that have been forcibly muted due to
limitations on the number of simultaneously
playable tracks cannot be un-muted.
I INPUT MONITOR
Select one of the following three buttons to
select the input mode (monitor source selection)
for each track. The following table shows how
the track monitor signal will change according
to the state of the [REC TRACK SELECT] key and
the transport mode when each mode is
selected.
● When the AUTO button is on (Auto Input
Monitor)
REC TRACK
SELECT
Stopped
Playing
Recording
Monitored signal
Off
Silence
On
Input source
Off
Playback
On
Playback
Off
Playback
On
Input source
The input mode of all tracks will change automatically depending on the on/off status of the
[REC TRACK SELECT] key. It is not possible to
change 6 input monitor manually.
● When the INDI. button is on (Individual
Input Monitor)
REC TRACK
SELECT
Monitored signal
Stopped
(irrelevant)
Input source or
silence (*1)
Playing
(irrelevant)
Input source or playback (*1)
Recording
(irrelevant)
Input source or playback (*1)
*1. Depends on the 6 input monitor setting.
You can manually change the 6 input monitor
for each track. This is unaffected by the on/off
status of the [REC TRACK SELECT] key.
Even for tracks whose 6 input monitor is set
to the input source (●), turning on a [REC
TRACK SELECT] key that had been off will
automatically cause the input source (●) to
switch to playback (O).
— Reference Guide
91
TRACK
• On the AW4416, the number of tracks that
can be played back simultaneously may be
limited according to the quantization (word
bit length) of the song and by the number of
tracks being recorded simultaneously. In this
case, a message of “PLAY TRACK MUTE
ON” will be displayed, and tracks that cannot be played back will be forcibly muted.
• If you wish to monitor a track that has been
forcibly muted, you must first turn muting on
for other tracks, and then defeat muting for
the desired track. If you simply attempt to
defeat muting without increasing the number of muted tracks, a message of “CANNOT
CHANGE MUTE” will appear, and muting
cannot be defeated.
• By pressing the [ALL SAFE] key you can cancel the record-ready and muted status of all
tracks.
• The mute on/off setting of the tracks does not
affect the [ON] keys of the monitor channels.
TRACK screen
● When the ALL button is on (All Input Monitor)
REC TRACK
SELECT
Monitored signal
Stopped
(irrelevant)
Input source
Playing
(irrelevant)
Input source
Recording
(irrelevant)
Input source
Regardless of the on/off status of the [REC
TRACK SELECT] key, the input source will be
monitored for all tracks. The 6 input monitor
cannot be switched manually.
J Current position
The vertical line in the frame shows the approximate current position. The small markers below
the frame show the approximate locations of
each locate point.
K METRO. (metronome)
Here you can turn the internal metronome on/
off (ON/OFF button) and adjust its volume
(knob). The tempo and time signature of the
metronome are set in the SONG screen Tempo
Map page.
Tip!
• When the AW4416 is in its initial state, the
internal metronome will be output from the
MONITOR OUT jacks mixed with other signals. However, it is possible to patch the
metronome output signal (MET) to any of the
input channels 1–24. For details refer to
SETUP screen Patch IN page.
• The metronome sound will not be output
while the song is stopped.
■ Additional functions in the Track
View page
In the Track View page you can press the [SHIFT]
key to assign the following additional functions to
the [F1]–[F4] keys.
F1
F2
F3
F4
• [F1] (REMAIN) key
The remaining recordable time will be displayed in the level meter/counter and in the display counter area. When you press the [SHIFT]
key + [F1] (REMAIN) key once again, the normal counter display will reappear.
Tip!
The remaining recordable time will differ
depending on the number of tracks that are
currently in record-ready mode. For example
if you increase the number of tracks in
record-ready mode from one track to two
tracks, the remaining recordable time will be
halved.
• [F2] (WAVE) key
Display the waveform for the audio of a desired
track. This is convenient when you wish to view
the waveform while searching precisely for a
locate point. For the procedure, refer to “Viewing a waveform for the audio data of a track” in
the section that follows.
• [F3] (X-ZOOM IN) key
Each time you press the [SHIFT] key + [F3] (XZOOM IN) key, the track view 7 will zoom-in
horizontally (three levels).
• [F4] (X-ZOOM OUT) key
Each time you press the [SHIFT] key + [F4] (XZOOM OUT) key, the track view 7 will zoomout horizontally (three levels).
92
— Reference Guide
TRACK screen
■ Viewing a waveform for the
audio data of a track
1. Access the TRACK screen TR View page,
and use the CURSOR [ ]/[ ] keys to
select the track whose waveform you wish
to view.
5. If you wish to close the WAVE DISPLAY
popup window without locating, move
the cursor to the EXIT button and press
the [ENTER] key.
2. While stopped, locate the song to the
place where you wish to view the waveform, and press the [SHIFT] key + [F2] key.
The WAVE DISPLAY popup window will
appear.
2
1
3
4
1 Pointer
2 Pointer location
3 Level magnification (×1–×64) adjustment
4 Time axis magnification (×1–×4096) adjustment
3. If you wish to move the pointer location,
rotate the [DATA/JOG] dial.
Rotating the [DATA/JOG] dial toward the right
will move the pointer forward, and rotating it
toward the left will move the pointer backward.
• The keys of the locate/transport section cannot be used while the waveform is displayed.
• The audio of the corresponding track cannot
be monitored while the [DATA/JOG] dial is
being used to move the pointer.
• This function can be used only while the
song is stopped.
4. If you wish to locate the song to the
pointer position, move the cursor to the
LOCATE button and press the [ENTER]
key.
The WAVE DISPLAY popup window will close,
and the song will locate to the location of the
pointer.
— Reference Guide
93
TRACK screen
V. Track page
Switching virtual tracks
[Function]
Switch the virtual track number assigned to
each track 1–16, and set/cancel pairing
between tracks.
12 3
4
[Key operation]
• [TRACK] key → [F2] (V. Track) key
• Repeatedly press the [TRACK] key until
the screen shown at the right appears.
[Mouse operation]
M button → TRAC button → V.Track tab
[Screen functions]
A Pairing
By moving the cursor to this area and pressing
the [ENTER] key, you can pair (or cancel pairing
for) two adjacent odd-numbered → even-numbered tracks. Paired tracks are indicated by a
“ ” symbol, and tracks for which pairing is
defeated are indicated by a “ ” symbol.
Tip!
• Paired tracks will be linked when you switch
virtual tracks, or when you select them for
track editing.
• Track pairing does not affect pairing of monitor channels.
Tip!
For details on operating virtual tracks, refer to
Operation Guide “Chapter 9. Track and virtual track operations.”
■ Additional functions in the V.
Track page
In the V. Track page you can press the [SHIFT]
key to assign the following additional function
to [F1].
B T (track)
These are the track numbers 1–16.
F1
C NAME
This column shows the name of the virtual track
that is currently selected for each track 1–16.
D VIRTUAL TRACK
Move the cursor to this column and press the
[ENTER] key to select the virtual track number
used by each track 1–16. The currently selected
virtual track number will be highlighted. Of the
virtual track numbers that are not currently
selected, tracks that have been recorded are displayed as
.
94
— Reference Guide
• [F1] (REMAIN) key
The remaining recordable time will appear in
the level meter/counter and in the counter area
of the display. When you press the [SHIFT] key
+ [F1] (REMAIN) key once again, the normal
display will reappear.
Tip!
The remaining recordable time will depend
on the number of tracks that is currently in
record-ready mode.
TRACK screen
Stereo page
Playing or erasing the stereo track
[Function]
Play back the stereo track, or erase the
recorded contents.
1
2
5
[Key operation]
• [TRACK] key → [F3] (Stereo) key
• Repeatedly press the [TRACK] key until
the screen shown at the right appears.
[Mouse operation]
M button → TRAC button → Stereo tab
3
4
[Screen functions]
A M (mute) button
Use this button to switch muting on (●) or off
(O) for the stereo track. When muting is off, the
output of the stereo track will be assigned to
monitor channels 1/2. (Normally muting is on.)
When you play back the song in this state, the
stereo track can be monitored via monitor channels 1/2 → stereo bus. (At this time, tracks 1–16
will be forcibly muted.) When you turn muting
on for the stereo track, tracks 1–16 will return to
their previous status.
C Current position
The vertical line in the frame indicates the
approximate current position. The small symbols beneath the frame indicates the approximate location of the locate points.
D STEREO OUT
This meter indicates the output level of the stereo output channel. The pre/post-fader position
can be selected in the HOME screen Omni/ST
page.
E ST TRACK ERASE (stereo track erase)
Tip!
For details on recording/playing the stereo
track, refer to Operation Guide “Chapter 5.
Recording on the AW4416.”
button
If you move the cursor to this button and press
the [ENTER] key, the recorded contents of the
stereo track will be erased.
B Track view
Continuous audio data in the stereo track is displayed as a bar graph. The symbols displayed
below the track view indicate locate points and
markers at those locations. The following types
of symbols are displayed.
• S.........................Start point
• E.........................End point
• I .........................In point
• O........................Out point
• A ........................A point
• B ........................B point
• 1–99...................Markers 1–99
The stereo track is an L/R pair and has only
one region. If you re-record a previous
recording on the stereo track, the previouslyrecorded content will be erased. (However,
you can use the [UNDO] key to return to the
previous state.)
— Reference Guide
95
TRACK screen
■ Additional functions in the Stereo
page
In the Stereo page you can press the [SHIFT] key to
assign the following additional functions to the
[F1]–[F3] keys.
F1
F2
F3
• [F1] (REMAIN) key
The level meter/counter and the counter area of
the display will show the remaining time available for recording. When you press the [SHIFT]
key + [F1] (REMAIN) key once again, the usual
counter display will reappear.
Tip!
The remaining time available for recording
will depend on the number of tracks that are
currently in record-ready mode.
• [F2] (X-ZOOM IN) key
Each time you press the [SHIFT] key + [F2] (XZOOM IN) key, the track view 2 will zoom-in
horizontally in three levels.
• [F3] (X-ZOOM OUT) key
Each time you press the [SHIFT] key + [F3] (XZOOM OUT) key, the track view 2 will zoomout horizontally in three levels.
96
— Reference Guide
TRACK screen
Mark Adj. page
Adjust or erase locate points or markers
[Function]
Adjust the position of markers or
locate points such as the IN/OUT
points, or erase locate points or
markers.
[Key operation]
• [TRACK] key → [F4] (Mark Adj.)
key
• Repeatedly press the [TRACK] key
until the screen shown at the right
appears.
1
2
3
[Mouse operation]
M button → TRAC button → Mark
Adj. tab
[Screen functions]
A LOCATOR POSITION
Display the positions of the various locate
points listed below. The position of an existing
locate point can be adjusted by moving the cursor to the desired numerical box and rotating
the [DATA/JOG] dial. Locate points that have
not been set are displayed as “–”.
● START/END (start point/end point)
These locate points normally correspond with
the beginning and end of the song. When you
create a new song, the Start point will be initially set to absolute time 00:00:00.000. When
you record the song, the end of the song will
automatically be set as the End point.
• The start/end points are always displayed as
time code, regardless of the counter display
method selected in the SONG screen/Setting
page.
• If measure display is selected in the SONG
screen/Setting page, only beats will be displayed for a location earlier than the start
point.
● IN/OUT (in point/out point)
These locate points can be used as the punchin/out points. The in/out points are automatically set at the beginning and end of the area
that was last-recorded, and can also be set individually by using the [SET] key + [IN] key or
[SET] key + [OUT] key.
● A/B (A point/B point)
These locate points can be used as the area for
A-B repeat playback. These points can be set
individually by using the [SET] key + [A] key or
[SET] key + [B] key.
The units used for the in/out points and the A/
B points will depend on the counter display
method (time/time code/measure). If measure
display is selected, “beat” will be the smallest
unit by which a locate point can be adjusted.
B Marker
This area displays a list of markers 1–99. Move
the cursor to the MARKER column and select
the marker number. Then move the cursor to the
POSITION column and adjust the position of
the corresponding marker.
• When adjusting the position of a marker, it is
not possible to move a marker beyond the
preceding or following marker.
• Marker numbers are automatically assigned
in sequence from the beginning of the song.
If you delete a marker, the marker numbers
will be re-assigned appropriately.
— Reference Guide
97
TRACK screen
C DELETE button (valid only when using
the mouse)
This button deletes a previously-set locate point
or marker. In this page, you can delete the
locate point or marker simply by moving the
cursor to it and pressing the [ENTER] key (or
using the mouse to click the DELETE button).
The start point and end point cannot be
deleted.
■ Additional functions in the Mark
Adj. page
In the Mark Adj. page, you can press the [SHIFT]
key to assign the following additional function to
the [F1] key.
F1
Tip!
For details on setting the various locate points
or modifying a locate point, refer to Operation Guide “Chapter 6. Transport/locate operations.”
Be aware that locate points or markers you
delete cannot be recovered.
• [F1] (REMAIN) key
The level meter/counter and the counter area of
the display will show the remaining time available for recording. When you press the [SHIFT]
key + [F1] (REMAIN) key once again, the usual
counter display will reappear.
Tip!
The remaining time available for recording
will depend on the number of tracks that are
currently in record-ready mode.
98
— Reference Guide
EDIT screen
TR Edit page
Edit tracks
[Function]
45 6 7
Assign a name to each track, and edit
audio data by tracks, parts, or regions.
9
[Key operation]
• RECORDER [EDIT] key → [F1] (TR Edit)
key
• Repeatedly press the RECORDER
[EDIT] key until the screen shown at
the right appears.
1
2
3
[Mouse operation]
M button → RECORDER EDIT button →
TR Edit tab
8
[Screen functions]
A TRACK menu
B PART menu
C REGION menu
Select one of the following three units of data
that you wish to edit.
● Track
Edit the audio data of the entire currently
selected track (1–16).
● Region
Edit a piece of continuous audio data that was
recorded in a single operation.
When you move the cursor to the desired menu
and press the [ENTER] key, a list of buttons will
appear, allowing you to select an editing command (center column in the illustration at right).
When you then move the cursor to the desired
command and press the [ENTER] key, a list of
buttons for setting the parameters of that command will appear (right column in the illustration at right).
Menus
Commands
Parameters
For details on the commands and parameters
that can be selected from the TRACK/PART/
REGION menus, refer to page 101.
EDIT
● Part
Within the currently selected track, edit the
specified area of audio data.
Tip!
If you move the cursor to the command
whose button is highlighted and press the
[ENTER] key, you will return to the command
list. If you move the cursor to the menu highlighted at the top of the list and press the
[ENTER] key, you will return to the first
menu.
— Reference Guide
99
EDIT screen
D Pairing
By moving the cursor to this column and pressing the [ENTER] key, you can set/defeat pairing
for adjacent odd-numbered → even-numbered
tracks. Paired tracks are indicated by a “ ”
symbol, and unpaired tracks by a “ ” symbol.
When editing tracks or parts, both tracks of a
pair will be selected for editing.
When selecting the edit source and edit destination tracks, as when copying or moving audio
data, the display will be as follows.
Edit source track
Edit source area
E T (track)
This column shows the track numbers 1–16.
F NAME
Edit destination track
This column shows the name of the virtual track
currently selected for each track 1–16. Tracks
that have already been recorded are assigned a
default name of “V. Tr x-y” (x=track number 1–
16, y=virtual track number 1–8). Tracks in
which nothing has been recorded will be displayed as “-NO REC-”.
A name of up to 16 characters can be
assigned to a virtual track, but this column
will show only the first eight characters.
G V (virtual track)
This shows the virtual track number (1–8) that is
currently selected for each track 1–16. Virtual
track numbers can be changed in the TRACK
screen V. Track page.
H Track view
In this area, the regions included in each track
are displayed as a bar graph. The vertical line in
the track view area indicates the location at
which the area for editing has been set. The
symbols displayed at the bottom of the track
view area indicate locate points and markers.
While editing, the track and area selected for
editing will be displayed as follows.
Track to be edited
Edited area
Edit destination area
I Parameter settings
In this area you can set the necessary parameters for executing the edit command.
Tip!
For the track editing procedure, refer to
Operation Guide “Chapter 9. Track/virtual
track operations.”
The keys of the transport section will have no
effect while the TR Edit page is displayed.
■ Additional functions in the TR
Edit page
In the TR Edit page you can press the [SHIFT] key to
assign the following additional functions to the
[F1]–[F3] keys.
F1
F2
F3
• [F1] (REMAIN) key
The level meter/counter and the counter area of
the display will show the remaining time available for recording. When you press the [SHIFT]
key + [F1] (REMAIN) key once again, the usual
counter display will reappear.
• [F2] (X-ZOOM IN) key
Each time you press the [SHIFT] key + [F2] (XZOOM IN) key, the track view 8 will zoom-in
on the time axis in three levels.
• [F3] (X-ZOOM OUT) key
Each time you press the [SHIFT] key + [F3] (XZOOM OUT) key, the track view 8 will zoomout on the time axis in three levels.
100
— Reference Guide
EDIT screen
■ TRACK menu commands and
parameters
The TRACK menu allows you to select a track (or
virtual track) and edit all of the audio data of the
track together.
In the TRACK menu, tracks containing no
audio data cannot be selected for editing.
The commands that can be selected in the TRACK
menu and their parameters are listed below.
● NAME (track name)
Edit the name of an already-recorded track.
• TRACK
Select the track whose name you wish to edit.
• NAME
Access the NAME EDIT popup window, and
input the new name. Move the cursor to the OK
button of the NAME EDIT popup window, and
press the [ENTER] key to finalize the new name.
● ERASE
Erase the audio data of a track. When you execute the Erase command, the track name will
return to the “-NO REC-” display.
• TRACK
Select the track that you wish to erase. For the
Erase command, you can specify all tracks as
the subject of the operation. To do so, rotate the
[DATA/JOG] dial all the way clockwise when
setting the TRACK parameter, to make the selection read “AL-C” (ALL-CURRENT). With this setting, all virtual tracks currently selected for
tracks 1–16 will be selected for the operation.
• ALL V.TR (all virtual tracks)
Select whether all virtual tracks included in the
corresponding track(s) will be erased (YES) or
whether only the currently selected virtual track
will be erased (NO).
• EXECUTE
Execute the command.
● COPY
Copy the audio data of a track to another track.
• FR.TRACK (from track)
Select the copy source track.
• TO TRACK
Select the copy destination track.
• ALL V.TR (all virtual tracks)
Select whether all virtual tracks included in the
corresponding track(s) will be copied (YES) or
whether only the currently selected virtual track
will be copied (NO).
• EXECUTE
Execute the command.
Tip!
If you selected one track of a pair of tracks as
the copy destination, the same content will
be copied to both of the paired tracks.
● EXCHG (exchange)
Exchange the audio data of two tracks.
• FR. TRACK (from track)
• TO TRACK
Select the two tracks that will be exchanged. For
TO TRACK, it is also possible to select an unrecorded track.
• ALL V.TR (all virtual tracks)
Select whether all virtual tracks included in the
two tracks will be exchanged (YES) or whether
only the currently selected virtual tracks will be
exchanged (NO).
• EXECUTE
Execute the command.
● SLIP
Shift the audio data of the entire track forward
or backward.
• TRACK
Select the track that you wish to shift forward or
backward. For the Slip command, you can specify all tracks as the subject of the operation. To
do so, rotate the [DATA/JOG] dial all the way
clockwise when setting the TRACK parameter,
to make the selection read “AL-C” (ALL-CURRENT). With this setting, all virtual tracks currently selected for tracks 1–16 will be selected
for the operation.
• ALL V.TR (all virtual tracks)
Select whether all virtual tracks included in the
corresponding track(s) will be moved (YES) or
whether only the currently selected virtual track
will be moved (NO).
• SLIP
Specify the time by which the data will be
shifted (range: maximum of ±5 hours).
• EXECUTE
Execute the command.
● T-COMP (time compression/expansion)
Compress or expand the length of the track in a
range of 50%–200% without affecting the pitch.
After this command is executed, all regions
included in the track will be combined into a
single region.
• TRACK
Select the track that you wish to compress or
expand.
• RATIO
Specify the compression/expansion ratio in
units of 0.01% (range: 50–200%).
• EXECUTE
Execute the command.
— Reference Guide
101
EDIT screen
● PITCH (pitch change)
Modify the pitch of the entire track without
changing the length of the audio. After this
command is executed, all regions included in
the track will be combined into a single region.
• TRACK
Select the track whose pitch you wish to modify.
• PITCH
Adjust the amount of pitch change in semitone
units (range: ±12 semitones).
• FINE
Adjust the amount of pitch change in one-cent
units (range: ±50 cents).
• ALL V.TR (all virtual tracks)
Select whether data will be erased from all virtual tracks included in the selected track(s) (YES)
or only from the currently selected virtual track
(NO).
• START
Specify the starting location of the part to be
erased.
• END
Specify the ending location of the part to be
erased.
• EXECUTE
Execute the command.
START
Executing the T-COMP or PITCH commands
will require more processing time than the
actual length of the audio. Also, it is not possible to cancel the command after it has been
executed.
• EXECUTE
Execute the command.
Tip!
Immediately after executing an editing command of the TRACK menu (except for the
NAME command), you can press the
[UNDO] key to return the data to its previous
condition.
■ PART menu commands and
parameters
The PART menu allows you to specify an area
(“part”) of the selected track, and execute an editing command.
An area that contains no audio data cannot
be specified as a part.
The commands that can be selected in the PART
menu and their parameters are listed below.
● ERASE
Erase the audio data from the selected part. If all
audio data in a track is erased, the track name
will return to the “-NO REC-” display.
• TRACK
Select the track from which you wish to erase
data. For the Erase command, you can specify
all tracks as the subject of the operation. To do
so, rotate the [DATA/JOG] dial all the way
clockwise when setting the TRACK parameter,
to make the selection read “AL-C” (ALL-CURRENT). With this setting, the START→END portion of the virtual tracks currently selected for
tracks 1–16 will be selected for the operation.
102
— Reference Guide
END
A
B
ERASE
A
A’
B
● DELETE
Delete the audio data from the selected part.
Subsequent audio data will be moved forward
by the length of the deleted part.
• TRACK
Select the track from which you wish to delete
data. For the Delete command, you can specify
all tracks as the subject of the operation. To do
so, rotate the [DATA/JOG] dial all the way
clockwise when setting the TRACK parameter,
to make the selection read “AL-C” (ALL-CURRENT). With this setting, the START→END range
of the virtual tracks currently selected for tracks
1–16 will be selected for the operation.
• ALL V.TR (all virtual tracks)
Select whether data will be deleted from all virtual tracks included in the selected track(s) (YES)
or only from the currently selected virtual track
(NO).
• START
Specify the starting location of the part to be
deleted.
• END
Specify the ending location of the part to be
deleted.
• EXECUTE
Execute the command.
START
END
A
B
DELETE
A’
B
EDIT screen
● COPY
● MOVE
Copy the audio data of the selected part to the
specified location of the specified track.
• FR. TRACK (from track)
Select the copy source track.
• FR. START (from start)
Specify the starting location of the copy source
part.
• FR. END (from end)
Specify the ending location of the copy source
part.
• ALL V.TR (all virtual tracks)
Select whether all virtual tracks included in the
corresponding track(s) will be copied (YES) or
whether only the currently selected virtual track
will be copied (NO).
• TO TRACK
Select the copy destination track.
• TO START
Specify the starting location of the copy destination.
• TIMES
Specify the number of times (1–99) that the data
will be copied.
• INTERVAL
When copying multiple times, specify the spacing of the copy destination starting locations.
• INSERT
Specify whether the copied audio data will be
inserted (Insert) or overwritten (OverWrite) in
the copy destination track.
• EXECUTE
Execute the command.
FR.START
FR.START
FR.END
Move
source
track
(FR. TRACK)
A
FR.END
Copy
source
track
(FR. TRACK)
MOVE
Move
destination
track
(TO TRACK)
A
B
C
TO START
COPY
Copy
destination
track
(TO TRACK)
B
C
MOVE
TO START
COPY
Copy
destination
track after
execution
Move the audio data of the selected part to the
specified location of the specified track. At this
time, the move source audio data will be
erased.
• FR. TRACK (from track)
Select the move source track.
• FR. START (from start)
Specify the starting location of the move source
part.
• FR. END (from end)
Specify the ending location of the move source
part.
• ALL V.TR (all virtual tracks)
Select whether all virtual tracks included in the
corresponding track(s) will be moved (YES) or
whether only the currently selected virtual track
will be moved (NO).
• TO TRACK
Select the move destination track.
• TO START
Specify the starting location of the move destination.
• INSERT
Specify whether the moved audio data will be
inserted (Insert) or overwritten (OverWrite) in
the move destination track.
• EXECUTE
Execute the command.
A’
B
B
C
INSERT= Insert
Copy
destination
track after
execution
B
Copy
destination
track after
execution
B
A’
Move
destination
track after
execution
B
Move
destination
track after
execution
B
A’
B
C
INSERT= Insert
A’
C
INSERT= OverWrite
C
INSERT= OverWrite
TIMES= 2
A’
A’
INTERVAL
— Reference Guide
103
EDIT screen
● INSERT
● T-COMP (time compression/expansion)
Insert a length of silence into the selected part.
Subsequent audio data will be moved backward
by the length of the inserted silence.
• TRACK
Select the track into which you wish to insert
silence. For the Insert command, you can specify all tracks as the subject of the operation. To
do so, rotate the [DATA/JOG] dial all the way
clockwise when setting the TRACK parameter,
to make the selection read “AL-C” (ALL-CURRENT). With this setting, the START→END portion of the virtual tracks currently selected for
tracks 1–16 will be selected for the operation.
• START
Specify the starting location of the part into
which silence will be inserted.
• END
Specify the ending location of the part into
which silence will be inserted.
• ALL V.TR (all virtual tracks)
Select whether silence will be inserted into all
virtual tracks included in the selected track(s)
(YES) or only into the currently selected virtual
track (NO).
• EXECUTE
Execute the command.
Compress or expand the length of the selected
part in a range of 50%–200% without affecting
the pitch.
• TRACK
Select the track that you wish to compress/
expand.
• START
Specify the starting location of the part that you
wish to compress/expand.
• END
Specify the ending location of the part that you
wish to compress/expand.
• RATIO
Specify the compression/expansion ratio in
units of 0.01% (range: 50–200%).
• EXECUTE
Execute the command.
START
T-COMP (time compression)
(50%)
START
START
B
T-COMP (time expansion)
(150%)
INSERT
104
END
END
A
A
END
A’
— Reference Guide
B
EDIT screen
● PITCH (pitch change)
Modify the pitch of the selected part without
changing the length of the audio.
• TRACK
Select the track whose pitch you wish to modify.
• START
Specify the starting location of the part whose
pitch you wish to modify.
• END
Specify the ending location of the part whose
pitch you wish to modify.
• PITCH
Adjust the amount of pitch change in semitone
units (range: ±12 semitones).
• FINE
Adjust the amount of pitch change in one-cent
units (range: ±50 cents).
• EXECUTE
Execute the command.
Tip!
Immediately after executing any editing command of the PART menu you can press the
[UNDO] key to return the data to its previous
condition.
Executing the T-COMP or PITCH commands
will require more processing time than the
actual length of the audio. Also, it is not possible to cancel the command after it has been
executed.
■ REGION menu commands and
parameters
In the REGION menu you can specify a region (a
continuous piece of audio data that was recorded
in a single operation) in the selected track, and execute an editing command.
Tip!
For the commands of the REGION menu, it is
not possible to select only part of the region
for editing. If you wish to do this, you must
either use the PART menu, or use the DIVIDE
command to divide the region.
The commands that can be selected in the REGION
menu and their parameters are listed below.
● NAME
Modify the name of a region.
• REGION
Select the region whose name you wish to modify.
• NAME
Access the NAME EDIT popup window, and
input the new name. Move the cursor to the OK
button of the NAME EDIT popup window, and
press the [ENTER] key to finalize the new name.
● ERASE
Erase the selected region. If all regions are
erased from a track, the track name will return
to the “-NO REC-” display.
• REGION
Select the region that will be erased.
• EXECUTE
Execute the command.
● DELETE
Delete the selected region. Subsequent audio
data will be moved forward by the length of the
deleted region.
• REGION
Select the region that will be deleted.
• EXECUTE
Execute the command.
● COPY
Copy the selected region to the specified location of the specified track.
• REGION
Select the region that you wish to copy.
• TO TRACK
Select the copy destination track.
• TO START
Specify the starting location of the copy destination.
• TIMES
Specify the number of times (1–99) that the data
will be copied.
• INTERVAL
When copying multiple times, specify the spacing of the copy destination starting locations.
• INSERT
Specify whether the copied data will be inserted
(Insert) or overwritten (OverWrite) in the copy
destination track.
• EXECUTE
Execute the command.
● MOVE
Move the selected region to the specified location of the specified track. At this time, the
move source region will be erased.
• REGION
Select the region that you wish to move.
• TO TRACK
Select the move destination track.
• TO START
Specify the starting location of the move destination.
— Reference Guide
105
EDIT screen
• INSERT
Specify whether the moved audio data will be
inserted (Insert) or overwritten (OverWrite) in
the move destination track.
• EXECUTE
Execute the command.
● DIVIDE
Divide the selected region into two regions at
the specified point.
• REGION
Select the region that you wish to divide.
• DIVIDE
Specify the location at which the region will be
divided.
• EXECUTE
Execute the command.
● TRIM IN
Trim the starting location of the selected region
toward the end of the song in units of a sample.
• REGION
Select the region that you wish to trim.
• TRIM IN
Specify the amount of trimming in units of a
sample.
• EXECUTE
Execute the command.
● TRIM OUT
Trim the ending location of the selected region
toward the beginning of the song in units of a
sample.
• REGION
Select the region that you wish to trim.
• TRIM OUT
Specify the amount of trimming in units of a
sample.
• EXECUTE
Execute the command.
● T-COMP (time compression/expansion)
Compress or expand the length of the selected
region in a range of 50%–200% without affecting the pitch.
• REGION
Select the region that you wish to compress or
expand.
• RATIO
Specify the compression/expansion ratio in
units of 0.01% (range: 50–200%).
• EXECUTE
Execute the command.
106
— Reference Guide
● PITCH (pitch change)
Modify the pitch of the selected region without
changing the length of the audio data.
• REGION
Select the region whose pitch you wish to modify.
• PITCH
Adjust the amount of pitch change in semitone
units (range: ±12 semitones).
• FINE
Adjust the amount of pitch change in one-cent
units (range: ±50 cents).
• EXECUTE
Execute the command.
Tip!
Immediately after executing an editing command of the REGION menu (except for the
NAME command), you can press the
[UNDO] key to return the data to its previous
condition.
Executing the T-COMP or PITCH commands
will require more processing time than the
actual length of the audio. Also, it is not possible to cancel the command after it has been
executed.
EDIT screen
V.TR Edit page
Edit virtual tracks
[Function]
5
Edit the virtual tracks 1–8 included in the
specified track.
4 6
8
[Key operation]
• [EDIT] key → [F2] (V. TR Edit) key
• Repeatedly press the RECORDER
[EDIT] key until the screen shown at
the right appears.
1
2
3
[Mouse operation]
M button → RECORDER EDIT button → V.
TR Edit tab
7
[Screen functions]
A TRACK menu
B PART menu
C REGION menu
These are the same as the TR Edit page TRACK
menu, PART menu, and REGION menu, with
the difference that the editing will apply to virtual tracks 1–8 of the same track. For details
refer to the explanation that begins on page 99.
For the commands that can be selected in each
menu and their parameters, refer to page 99 and
following.
In the V. TR Edit page it is not possible to
select all tracks for editing.
A name of up to 16 characters can be
assigned to a virtual track, but only the first
eight characters will be displayed in this column.
G Track view
In this area, the regions included in each virtual
track are displayed as a bar graph. With the
exception that virtual tracks 1–8 of the same
track are displayed simultaneously, this display
is the same as in the TR Edit page.
H Parameter area
In this area you can set the required parameters
for executing the edit command.
D Track number
Move the cursor to this area and use the [DATA/
JOG] dial to select the track number that contains the virtual track you wish to edit.
E V (virtual track number)
This column shows the virtual track numbers 1–
8. The virtual track currently used by the track
3 is indicated by a “C” (Current) symbol at the
left of this column.
Tip!
For the track editing procedure, refer to
Operation Guide “Chapter 9. Track/virtual
track operations.”
The keys of the transport section will have no
effect while the V. TR Edit page is displayed.
F NAME
This column shows the names of virtual tracks
1–8. Virtual tracks that have already been
recorded are assigned a default name of “V.Tr xy” (x=track number 1–16, y=virtual track number 1–8). Virtual tracks on which nothing has
been recorded are displayed as “-NO REC-”.
— Reference Guide
107
EDIT screen
■ Additional functions in the V.TR
Edit page
In the V.TR Edit page, you can press the [SHIFT]
key to assign the following additional functions
to the [F1]–[F3] keys.
F1
F2
F3
• [F1] (REMAIN) key
• [F2] (X-ZOOM IN) key
• [F3] (X-ZOOM OUT) key
These are the same as the additional functions
of the TR Edit page.
108
— Reference Guide
EDIT screen
CD Import page
Import CD-DA to an audio track
[Function]
Import CD-DA (CD audio) data
from an audio CD/mixed-mode
CD-ROM inserted in the internal
or external CD-RW drive, and
assign it to the desired audio track.
1
2
3
4
[Key operation]
• [EDIT] key → [F3] (CD Import)
key
• Repeatedly press the [EDIT] key
until the screen shown at the
right appears.
5
6
[Mouse operation]
7
M button → RECORDER EDIT button → CD Import tab
[Screen functions]
A DRIVE
Move the cursor to this area and rotate the
[DATA/JOG] dial to select the internal or external CD-RW drive.
B PASTE TO
Select the track number and virtual track number of the destination track in which the CD-DA
data will be placed.
Since the CD-DA audio data is imported in
stereo, the track number will always be
selected as an odd-numbered/even-numbered pair.
C Destination point
Specify the point in the track at which the
imported CD-DA data will be placed.
Tip!
The units used to specify this point will
change depending on the counter display
method (time/units/measures) selected in the
SONG screen Setting page. If measure display is selected, “measures” will be the
smallest settable unit.
D TYPE
Select whether the imported CD-DA data will
be inserted into the track (Insert) or overwritten
(OverWrite). If “Insert” is selected, any subsequent audio data in the import destination track
will be moved toward the end of the song by the
length of the inserted audio data.
E TRACK/TOTAL
This is the track list of the audio CD/mixedmode CD-ROM inserted in the CD-RW drive.
Move the cursor to this list and rotate the
[DATA/JOG] dial to select the import source
track.
F EXTRACT POINT
From the track selected in 5, specify the area
that will be imported in units of “minutes:seconds:frames (1/75 second).” Move the cursor to
this area, and use the [DATA/JOG] dial to set
START (start point) and END (end point).
G EXECUTE button
This button executes the CD-DA import operation.
— Reference Guide
109
EDIT screen
The AW4416 will detect the inserted CD, and a
screen like the following will appear.
• CD-DA data can be imported only into
songs whose sampling frequency is
44.1 kHz. If the current song has a sampling
frequency of 48 kHz, a message of “Current
Song is 48 (kHz) Fs Type” will appear, and
this page cannot be used.
• The keys of the transport section will have
no effect while the CD Import page is displayed.
If a “Prohibit CD Import!” message is displayed and the import cannot be executed,
access the UTILITY screen Prefer.2 page, and
after reading the warning regarding copyright, switch the CD/DAT DIGITAL REC “DISABLE” button to “ENABLE.”
■ Additional functions in the CD
Import page
In the CD Import page you can press the [SHIFT]
key to assign the following additional functions to
the [F1]–[F2] keys.
F1
4. Move the cursor to PASTE TO, and use the
[DATA/JOG] dial to specify the track number and virtual track number of the track
in which the CD-DA data will be placed.
In this page, identically-numbered virtual tracks
of adjacent odd-numbered/even-numbered
tracks will be selected (e.g., 1–1/2–1, 1–2/2–2),
and the L/R channels of the CD-DA data will be
assigned to these tracks.
5. Move the cursor to the destination point
area, and use the [DATA/JOG] dial to specify the location in the track where the CDDA audio data will be placed.
F2
• [F1] (CD LOAD) key
Close the tray of the CD-RW drive.
• [F2] (CD UNLOAD) key
Eject the tray of the CD-RW drive.
● Importing CD-DA data into a
track
6. Move the cursor to the TYPE area. Select
“Insert” if you want the CD-DA audio data
to be inserted into the track, or “OverWrite” if you want the data to be overwritten onto the track.
7. To execute the Import operation, move
the cursor to the EXECUTE button and
press the [ENTER] key.
A message will ask you to confirm.
[Procedure]
1. Access the EDIT screen CD Import page,
and press the [SHIFT] key + [F2] (CD
UNLOAD) key.
8. Move the cursor to the OK button and
press the [ENTER] key.
The CD-DA import will be executed.
The CD-RW drive tray will be ejected.
2. Place the audio CD or mixed-mode CDROM on the tray, and press the [SHIFT]
key + [F1] (CD LOAD) key.
The CD-RW drive tray will close, and the disc
will be inserted.
3. Move the cursor to the DRIVE area, use
the [DATA/JOG] dial to select the SCSI ID
of the CD-RW drive, and press the
[ENTER] key.
110
— Reference Guide
Execution of this operation will require more
time than the actual data length. Also, execution of the operation cannot be halted once it
has begun.
EDIT screen
WavImport page
Import a WAV file to an audio track
[Function]
Import a WAV format audio file
from a CD-ROM or CD-ROM/MO
disk inserted in the internal CDRW drive or an external SCSI
device, and assign it to a track.
1
2
3
4
[Key operation]
• [EDIT] key → [F4] (WavImport)
key
• Repeatedly press the RECORDER
[EDIT] key until the screen
shown at the right appears.
[Mouse operation]
5
6
7
M button → RECORDER EDIT button → WavImport tab
[Screen functions]
A DRIVE
Move the cursor to this area and rotate the
[DATA/JOG] dial to select the internal CD-RW
drive or external SCSI device.
B PASTE TO
Select the track number (1–16 and virtual track
number (1–8) of the track into which you wish
to import the WAV file. The NAME field shows
the track name of the selected track.
If a stereo WAV file is selected, two adjacent
odd-numbered → even-numbered tracks will be
displayed.
C Destination point
Specify the point in the track at which the WAV
file will be placed.
E File list
This shows a list of the WAV files on the internal
CD-RW drive or external SCSI device. This list
contains the following information.
● FILE
The file name/directory name is displayed.
icons indicate WAV files, and
files indicate
directories.
● TOTAL
The playback time of the WAV file is displayed
in hours/minutes/seconds/milliseconds.
● TYPE
The stereo ( )/monaural ( ) status of the WAV
file and its quantization (word length) is displayed.
Tip!
The units used to specify this point will
change depending on the counter display
method (time/units/measures) selected in the
SONG screen Setting page. If measure display is selected, “measures” will be the
smallest settable unit.
D TYPE
Select whether the imported WAV file will be
inserted into the track (Insert) or overwritten
(OverWrite). If “Insert” is selected, any subsequent audio data in the import destination track
will be moved toward the end of the song by the
length of the inserted WAV file.
The AW4416 can recognize only WAV files
that have the same sampling frequency as the
current song, and have a filename extension
of “.WAV” following their name. Other files
will not be displayed in the list.
F DIR (directory)
The “/” symbol and the directory name indicate
the directory in which the list shown in 5 is
located. For example this will indicate “/” if you
are in the highest level (root directory), or “/
WAV/” if you are in a directory named WAV
located one level lower.
— Reference Guide
111
EDIT screen
G EXECUTE button
This button executes the WAV file import.
The keys of the transport section will have no
effect when the WavImport page is displayed.
■ Additional functions in the Wav
Import page
In the Wav Import page you can press the [SHIFT]
key to assign the following additional functions to
the [F1]–[F2] keys.
F1
F2
4. Move the cursor to the file list, and use
the [DATA/JOG] dial to select the WAV file
that you wish to import.
The file enclosed by the dotted lines in the center of the list is selected for the operation.
Tip!
indicates the current directory, and
indicates the directory above. To
return to the next highest directory, move the
cursor to
and press the [ENTER] key.
5. Move the cursor to the PASTE TO area,
and use the [DATA/JOG] dial to select the
track number (1–16) and virtual track
number (1–8) of the track in which the
WAV file will be placed.
Tip!
• [F1] (CD LOAD) key
Close the tray of the CD-RW drive.
• [F2] (CD UNLOAD) key
Eject the tray of the CD-RW drive.
● Importing a WAV file to a track
[Procedure]
1. Insert the media containing the WAV file
into an external SCSI device (e.g., MO
drive) or the internal CD-RW drive.
If you select a stereo WAV file in step 4, identically-numbered virtual tracks for a pair of
adjacent odd-numbered → even-numbered
tracks (e.g., 1–1/2–1, 1–2/2–2) will be
selected, and the L/R channels of the WAV
file will be assigned to these tracks.
6. Move the cursor to the location point area
below PASTE TO, and use the [DATA/JOG]
dial to specify the location in the track
where the WAV file will be placed.
2. Access the EDIT screen WavImport page.
7. Set the TYPE parameter to “Insert” if you
wish to insert the WAV file into the track,
or to “OverWrite” if you wish to overwrite
the WAV file onto the track.
3. Move the cursor to the DRIVE area, use
the [DATA/JOG] dial to select the SCSI ID
of the drive, and press the [ENTER] key.
8. To execute the WAV file import, move the
cursor to the EXECUTE button and press
the [ENTER] key.
The AW4416 will recognize the WAV files on
the inserted media (CD-ROM, MO disk etc.),
and will display a list like the following.
A popup window will ask you for confirmation.
9. Move the cursor to the OK button and
press the [ENTER] key.
The WAV file import will be executed.
Execution of this operation requires a longer
time than the actual time length of the data.
Also, processing cannot be cancelled once
the operation has been executed.
112
— Reference Guide
EDIT screen
TR Import page
Import a track from an existing song
[Function]
Import a track from a song on the
hard disk into the desired track of
the current song.
[Key operation]
1
• [EDIT] key → [F5] (TR Import)
key
• Repeatedly press the RECORDER
[EDIT] key until the screen
shown at the right appears.
[Mouse operation]
2
M button → RECORDER EDIT button → TR Import tab
3
4
5
6
[Screen functions]
A Song list
This lists the songs that are saved on the internal
hard disk. The current song will be highlighted
in the list. Move the cursor to this list, and use
the [DATA/JOG] dial to select the import source
song.
The list shows the following information.
• DEST. SONG NAME.. Song name
• SAVED AT................ Date and time at which
the song was last saved
• SIZE......................... Song data size (including audio data)
• BIT/FS ..................... Song quantization and
sampling rate
• PRT ......................... Song protect on/off
Only a song with the same quantization and
sampling rate as the current song can be
selected as the import source. The current
song cannot be selected.
• This parameter will be valid only after you
have used the LOAD button 4 to load the
track information for the selected song.
• The track name is not included in the data
that is imported.
C DEST. TRACK (destination track)
Specify the track number (1–16) and virtual
track number (1–8) for the import destination
track. The name of the selected track is displayed at the right.
This display will appear only after you have
used the TRACK CLIP button 5 to register the
desired track from the import source song.
D LOAD button
When you move the cursor to this button and
press the [ENTER] key, track information for the
song selected in the track list will be loaded.
E TRACK CLIP button
The current song will be displayed with the
most recently saved content.
B SOURCE TRACK
From the song selected in the song list 1, select
the track number (1–16) and virtual track number (1–8) of the track that you wish to import.
The name of the selected track is displayed at
the right.
When you move the cursor to this button and
press the [ENTER] key, the track selected in
SOURCE TRACK 3 will be registered as the
import source.
This button will be valid only after you have
used the LOAD button 4 to load the track
information for the song.
— Reference Guide
113
EDIT screen
F EXECUTE button
This button executes the track import operation.
For the procedure of importing a track, refer to
“Importing a track from an existing song,”
below.
• This button will be valid only after you have
used the TRACK CLIP button 5 to register
the import source track.
• The keys of the transport section will have
no effect in the TR Import page.
● Importing a track from an existing song
[Procedure]
1. Access the EDIT screen TR Import page.
2. Move the cursor to the upper part of the
display, and use the [DATA/JOG] dial to
select the song from which a track will be
imported.
3. Move the cursor to the LOAD button and
press the [ENTER] key.
The track selected in the SOURCE TRACK field
will be selected as the import source, and the
display will change as follows.
When you use the TRACK CLIP button to register the import source track, it will no longer
be possible to change the track in the
SOURCE TRACK field. If you wish to change
the import source track, move the cursor to
the song list in the upper part of the display,
and rotate the [DATA/JOG] dial. In the confirmation popup window that appears, select
the OK button and you will return to the state
of step 2.
8. Move the cursor to the DEST. TRACK field,
and specify the track number (1–16) and
virtual track number (1–8) of the import
destination track.
A confirmation popup window will appear.
4. Move the cursor to the OK button and
press the [ENTER] key.
The track information will be read from the
selected song, and the display will change as
follows.
If you select an already-recorded virtual track
as the import destination, all the contents of
the corresponding track will be erased and
replaced by the contents of the imported
track.
9. Move the cursor to the EXECUTE button
and press the [ENTER] key.
A confirmation popup window will appear.
10.Move the cursor to the OK button and
press the [ENTER] key.
The track will be imported into the current song.
5. Move the cursor to the SOURCE TRACK
field, and select the track number (1–16)
and virtual track number (1–8) of the
track that you wish to import.
6. Move the cursor to the TRACK CLIP button and press the [ENTER] key.
A confirmation popup window will appear.
7. Move the cursor to the OK button and
press the [ENTER] key.
114
— Reference Guide
Tip!
By pressing the [UNDO] key immediately
after you execute the import, you can return
the data to the state before importing.
AUTOMIX screen
Main page
Make basic automix settings
[Function]
Make basic settings for recording
and playing automix.
1
2
3
[Key operation]
• [AUTO MIX] key → [F1] (Main)
key
• Repeatedly press the [AUTO
MIX] key until the screen shown
at the right appears.
[Mouse operation]
M button → AMIX button → Main
tab
4
5
6
7
9
8
J
[Screen functions]
A AUTOMIX
Turn automix on (ENABLE) or off (DISABLE). If
this button is set to “ENABLE,” automix recording or playback will begin automatically when
the song is started.
B FREE
This shows the free area of automix memory in
kilobytes and as a percentage.
● RET
If this button is on, the fader will return to the
previously-recorded value when you finish editing fader data. (The time over which it returns to
the original value can be set in the Fader Edit
page. → P.121)
If this button is off, the value at which fader
editing ended will be maintained until the next
time the fader changes.
C SIZE
Tip!
The undo buffer is dedicated memory for
automix undo, and contains the automix data
prior to the last operation.
D FADER EDIT OUT
This setting specifies how the fader and other
parameter values will change when automix
recording ends.
● END
If this button is on, all subsequent recorded
events of the same parameter will be erased
when you finish editing fader or other parameter data.
Tip!
• The AW4416 remembers the previouslyrecorded fader movements even when you
are editing fader operations. If you leave the
RET button turned on, the fader will automatically return to the previous location
when editing ends, which is convenient
when you are editing only a portion of the
fader operations.
• If you want the fader locations at which editing ended to be maintained to the end of the
automix, it is convenient to turn on the END
button.
— Reference Guide
115
AUTO
MIX
This shows the sizes in kilobytes of the current
automix and of the undo buffer.
AUTOMIX screen
When END= on
Previously-recorded
fader movement
Fader movement
after editing
RET= on
RET= off
Edited fader movement
When RET= on,
END= off
Previously-recorded
fader movement
Fader movement
after editing
Edited fader movement
When RET= off,
END= off
Previously-recorded
fader movement
Fader movement
after editing
Edited fader movement
E OVERWRITE
F FADER EDIT MODE
Switch recording on/off for each parameter.
Each button corresponds to the following
parameters.
Select one of the following two ways in which
fader movements recorded in automix will be
edited.
● FADER
Fader operations of each channel
● ABSOLUTE
This is the usual mode, in which previouslyrecorded fader events are erased and the new
events recorded.
● CH ON
[ON] key operations of each channel
● PAN
Pan operations of each channel
● EQ
EQ operations of each channel
116
— Reference Guide
● RELATIVE
In this mode, the previously-recorded fader
operation events are combined with the new
events and recorded. This is convenient when
you wish to add relative changes to the previously-recorded fader movements.
AUTOMIX screen
Fader Edit Mode= RELATIVE
RET= on
Fader movement
Fader movement
after editing
before editing
Fader movement edited
in RELATIVE mode
Fader Edit Mode= RELATIVE
RET= off
Fader movement
before editing
END= off
Fader movement
after editing
Fader movement edited
in RELATIVE mode
Fader Edit Mode= RELATIVE
RET= off
Fader movement
before editing
END= on
Fader movement
after editing
Fader movement edited
in RELATIVE mode
G NEW MIX button
When you move the cursor to this button and
press the [ENTER] key, the current automix will
be erased, and a new automix will be created.
I CLR.BUF (clear buffer) button
When you move the cursor to this button and
press the [ENTER] key, the undo buffer will be
erased.
Tip!
When a song is in its initial state, there is no
current automix. You must first create a new
automix before you can operate the automix.
H UNDO
When you move the cursor to this button and
press the [ENTER] key, the content that was lastrecorded in the automix will be erased, returning the automix to its previous state.
For example if the current automix is too
large to be stored in memory, you can try
using this button. (However, the data prior to
the most recent operation will be lost.)
J AUTOMIX TRANSPORT
These buttons control automix recording and
playback. By moving the cursor and pressing
the [ENTER] key you can perform the corresponding operation. These buttons have the following functions.
● ABORT
This button stops automix recording and discards the changes. If you turn on this button
while recording automix, a popup window will
ask whether you wish to discard the automix.
— Reference Guide
117
AUTOMIX screen
● STOP button
This button stops automix recording or playback. If you turn on this button while recording
automix, a popup window will ask whether you
wish to update the data.
● PLAY button
If the recorder is started with the ENABLE button
turned on, this button will automatically be
turned on, and automix recording/playback will
begin. While automix is playing, you can use
this button in conjunction with the REC button
to punch-in.
• Automix will not start even if you move the
cursor to the on-screen PLAY button and
press the [ENTER] key.
• When the REC button is blinking, you can
punch-in by moving the cursor to the PLAY
button and pressing the [ENTER] key.
● REC (record) button
When automix is stopped, turning this button
on will cause the button to blink and recordready mode to be selected. In this state, starting
playback on the recorder will cause automix
recording to begin, and when recording ends
the REC button will also turn off automatically.
When automix is playing, this button can be
used in conjunction with the PLAY button to
punch-in.
● AUTO REC button
If you turn this button on (lit) and play back the
recorder, automix recording will begin. However, this differs from the REC button in that this
button will not turn off automatically when
recording ends. If you wish to turn it back off,
move the cursor to this button and press the
[ENTER] key.
Tip!
For the procedure of recording and playing
automix, refer to Operation Guide “Chapter
14. Automix.”
118
— Reference Guide
■ Additional functions in the Main
page
In the Main page you can press the [SHIFT] key to
assign the following functions to the [F1]–[F5] keys.
F1
F2
F3
F4
F5
• [F1] (ABORT) key
Stop automix recording and discard the
changes. This is the same function as the
ABORT button.
• [F2] (STOP) key
Stop recording or playing automix. This is the
same function as the STOP button.
• [F3] (PLAY) key
Execute punch-in when the REC (record) button
is blinking. This is the same function as the
PLAY button.
• [F4] (REC) key
Record or punch-in automix. This is the same
function as the REC (record) button.
• [F5] (AUTO REC) key
Automatically record automix. This is the same
function as the AUTO REC (auto record) button.
AUTOMIX screen
Memory page
Store or recall automix
[Function]
Store or recall automix data to/
from memory.
45
6
[Key operation]
• [AUTO MIX] key → [F2] (Memory) key
• Repeatedly press the [AUTO
MIX] key until the screen shown
at the right appears.
1
7
2
8
9
K
3
[Mouse operation]
J
M button → AMIX button → Memory tab
L
M
N
O
[Screen functions]
A TITLE EDIT button
Use this to edit the name (memory title) of an
automix stored in memory. When you move the
cursor to the TITLE EDIT button and press the
[ENTER] key, the TITLE EDIT popup window
will appear, allowing you to input a name. A
maximum of 16 characters can be input. For
details on inputting characters, refer to Operation Guide P.60.
B RECALL button
D Selected memory
Store/recall operations will apply to the automix
data enclosed by the dotted line in the memory
list. In this page, you can use the [DATA/JOG]
dial to select automix data regardless of where
the cursor is located.
E No. (number)
This column shows the memory number 1–16.
F MEMORY TITLE
Recall the currently selected automix from the
list.
This column shows the names of the automixes
stored in memory.
If you select an automix number in which
nothing has been stored and attempt to recall
it, an error message of “CANNOT RECALL
AUTOMIX” will appear, and recall will not
be possible.
Automix numbers in which nothing has been
stored will be displayed as “No Data!”
C STORE button
This button stores the current automix data into
memory. You can select an automix number 1–
16 as the store destination.
G NEW MIX button
When you move the cursor to this button and
press the [ENTER] key, the current automix will
be erased, and a new automix will be created.
H CLEAR button
Erase the automix data that is currently selected
in the memory list.
I SIZE
When you execute the Store operation, the
automix data that had previously been stored
in that number will be erased.
This shows the free area of automix memory in
kilobytes.
— Reference Guide
119
AUTOMIX screen
■ Additional functions in the Memory page
J AUTOMIX
K OVERWRITE
In the Memory page you can press the [SHIFT] key
to assign the following functions to the [F1]–[F3]
keys.
L EDIT OUT
M UNDO button
N CLR. BUF (clear buffer) button
O AUTOMIX TRANSPORT
These are the same functions as described in the
Main page. Refer to the explanation on page
115.
F1
F2
F3
• [F1] (TITLE EDIT) key
Use this to edit the name (memory title) of automix data saved in memory. This is the same
function as the 1 TITLE EDIT button.
• [F2] (RECALL) key
Recall the automix that is currently selected by
the cursor in the list. This is the same function as
the 2 RECALL button.
• [F3] (STORE) key
Store the current automix data. This is the same
function as the 3 STORE button.
120
— Reference Guide
AUTOMIX screen
Fader Edit page
View fader events as a bar graph
[Function]
View a bar graph representation of
the fader operation events
recorded in the automix.
[Key operation]
• [AUTO MIX] key → [F3] (Fader
Edit) key
• Repeatedly press the [AUTO
MIX] key until the screen shown
at the right appears.
[Mouse operation]
M button → AMIX button → Fader
Edit tab
1
3
2
4
[Screen functions]
A Bar graph
This area shows the fader position of each channel as a bar graph. (Use the keys of the MIXING
LAYER section to select the channels that are
displayed.) For the fader being edited, both the
previously-recorded position and the edited
position are displayed, as shown in the following diagram. At this time, the arrow displayed
beside the bar graph indicates the direction in
which you can move the fader to return it to the
previous position.
Previously-recorded
fader position
Current fader position
which the faders will return to their original values after fader editing is ended.
C FADER EDIT MODE
D AUTOMIX TRANSPORT
These are the same functions as in the Main
page. Refer to the explanation on page 115.
■ Additional functions in the Fader
Edit page
In the Fader Edit page you can press the [SHIFT]
key to assign the following functions to the [F1]–
[F5] keys.
F1
Current fader position
(1) If the fader is lower than
previously recorded
Previously-recorded
fader position
F2
F3
F4
F5
• [F1] (ABORT) key
• [F2] (STOP) key
(2) If the fader is higher than
• [F3] (PLAY) key
previously recorded
B FADER EDIT OUT
These are the same functions as the END/RET
buttons of the Main page. Refer to the explanation on page 115. If the RET button is on, the
knob located at the right sets the time over
• [F4] (REC) key
• [F5] (AUTO REC) key
These are identical to the additional functions of
the Main page.
— Reference Guide
121
AUTOMIX screen
Event List page
Edit events off-line
[Function]
Perform off-line editing of the
scene/library recall, channel on/
off, pan, and fade operations
recorded in the automix.
1
[Key operation]
• [AUTO MIX] key → [F4] (Event
List) key
• Repeatedly press the [AUTO
MIX] key until the screen shown
at the right appears.
7
8
9
2
3
[Mouse operation]
M button → AMIX button → Event
List tab
This page cannot be operated
while automix is being played
or recorded. Also, if automix
playback or recording is
started when this page is displayed, the display will automatically change to the
AUTOMIX screen Main page.
4
5
6
[Screen functions]
A Event list select buttons
Of the events recorded in automix, these buttons select the type of automix events that will
be displayed in the event list. Move the cursor
to one of the four buttons, and press the
[ENTER] key to select the type of events. Each
button corresponds to the following events.
● SCENE/LIB (scene/library) button
Scene memory and library recall events will be
displayed. The following types of events will be
displayed.
• SCENE .......... Scene memory recall events.
The numeric value indicates
the scene number.
• EQ. Lib. ........ EQ library recall events. The
numeric value indicates the EQ
library number.
• DY. Lib.......... Dynamics library recall events.
The numeric value indicates
the dynamics library number.
122
— Reference Guide
• EF. Lib............Effect library recall events. The
numeric value indicates the
effect library number.
• CH. Lib..........Channel library recall events.
The numeric value indicates
the channel library number.
● CH ON (channel on) button
On/off events of each channel will be displayed.
● PAN button
Pan operation events of each channel will be
displayed.
● FADER button
Fader operation events of each channel will be
displayed.
B Event selection cursor
Move the cursor to this area and rotate the
[DATA/JOG] dial to select the data that you
wish to edit.
AUTOMIX screen
C Selected event
Editing will apply to the event that is enclosed
by a dotted line in the list. Move the cursor to
the parameter that you wish to edit, and rotate
the [DATA/JOG] dial to edit the value.
D TIME
This area shows the time at which the event is
recorded, as hours/minutes/seconds/milliseconds. (The minimum unit is 25 milliseconds.)
You can move the cursor to this area and rotate
the [DATA/JOG] dial to move the location of the
event.
Tip!
Regardless of the display method selected in
the SONG screen Setting page, the timing in
the event list is always displayed as time.
If you edit the TIME the events in the list will
be re-ordered automatically. This means that
the displayed order of the events may
change.
E EVENT
This area shows the type of each event. Move
the cursor here and rotate the [DATA/JOG] dial
to edit the event.
F CHANNEL
This area shows the channel of the event. Move
the cursor here and rotate the [DATA/JOG] dial
to change the channel.
G SELECTED CH ONLY (selected channel
only) button
If you press a [SEL] key when this button is on,
only the events of that channel will be displayed.
H DUPLICATE button
When you move the cursor to this button and
press the [ENTER] key, a duplicate of the
selected event will be created at the same location.
I DELETE button
When you move the cursor to this button and
press the [ENTER] key, the selected event will
be deleted.
Tip!
For the procedure of duplicating or deleting
an event, refer to Operation Guide “Chapter
14. Automix.”
— Reference Guide
123
SCENE screen
Scene Mem page
Store or recall a scene
[Function]
Store the current settings of the
AW4416 into scene memory, or
recall a scene that was stored in
scene memory.
4
5
67
[Key operation]
• [SCENE] key → [F1] (Scene
Mem) key
• Repeatedly press the [SCENE]
key until the screen shown at the
right appears.
1
2
8
3
9
[Mouse operation]
M button → SCEN button → Scene
Mem tab
[Screen functions]
A TITLE EDIT button
Use this to edit the name (library title) of a scene
stored in the library. When you move the cursor
to the TITLE EDIT button and press the [ENTER]
key, the TITLE EDIT popup window will appear,
allowing you to input the name. You can input a
library name of up to 16 characters. For details
on inputting characters, refer to page 60 of the
Operation Guide.
It is not possible to change the name of scene
number 0 or of a scene in which PROTECTION is turned on. Also, numbers in which
no scene has been stored will be displayed as
“No Data!,” and their title cannot be edited.
B RECALL button
Recall the currently selected scene from the
scene list. This is the same function as the
[RECALL] key of the top panel SCENE MEMORY
section.
124
— Reference Guide
If you select a number in which nothing has
been stored and attempt to recall it, an error
message of “ERROR NO DATA TO RECALL”
will be displayed, and recall will not be possible.
C STORE button
Store the current settings (current scene) of the
AW4416 into scene memory. This is the same
function as the [STORE] key of the SCENE
MEMORY section.
SCENE screen
The following parameters are saved in memory
as a scene.
Fader locations of all channels and
buses (input channels 1–24,
recorder monitor channels 1–16,
AUX send levels 1-8, effect returns
1/2, stereo)
ON key settings of all channels
Attenuation settings of all channels
Phase settings of all channels
Mix paramEQ settings of all channels
eters
H PROTECTION
Turn memory protect on/off for the scene currently selected by the cursor.
I PROTECTION ON/OFF GLOBAL
Turn memory protect on/off for all scene numbers 1–50/51–96.
■ Additional functions in the Scene
Mem page
In the Scene Mem page you can press the [SHIFT]
key to assign the following functions to the [F1]–
[F3] keys.
Pan settings of all channels
Routing settings of all channels
Fader group settings of all channels
Pairing settings of all channels
F1
F2
F3
Dynamics settings of all channels
Delay settings of all channels
Effect
Parameter settings for effects 1/2
parameters
Scene name settings
Other
Fader recall fade time settings
Patching and insert settings for
external input/output
• [F1] (TITLE EDIT) key
Use this to edit the name of a scene saved in the
library. This is the same function as the 1 TITLE
EDIT button.
• [F2] (RECALL) key
Use this to recall the scene currently selected by
the cursor from the list. This is the same function
as the 2 RECALL button.
• [F3] (STORE) key
• Scene number 0 is recall-only, and settings
cannot be stored in it.
• When you execute the Store operation, the
scene that had been stored in that number
will be erased.
Store the current scene. This is the same function as the 3 STORE button.
D LIBRARY No. (library number)
This column displays the scene number 0–96.
E LIBRARY TITLE
This column displays the name assigned to each
scene.
F PRT (protect)
A write-prohibit symbol is displayed in this column for recall-only scene number 0. In addition, a
symbol is displayed for scenes for
which the PROTECTION button is on, indicating that they cannot be stored.
G Selected scene
SCENE
Scene store/recall operations will apply to the
scene enclosed by a dotted line in the library
list. In this page, you can use the [DATA/JOG]
dial to select scenes regardless of where the cursor is located.
— Reference Guide
125
SCENE screen
Fade Time page
Specify the fade time
[Function]
1
Specify the time over which the faders will
reach their new locations when a scene is
recalled.
[Key operation]
• [SCENE] key → [F2] (Fade Time) key
• Repeatedly press the [SCENE] key until the
screen shown at the right appears.
[Mouse operation]
M button → SCEN button → Fade Time tab
[Screen functions]
A Fade time
• [F5] (COPY TO ALL) key
Specify the time (fade time) over which the faders of each channel will move their new locations when a scene is recalled, in steps of 0.1
second. (Range: 0.0 second–10 seconds). Fade
time can be set for the following channels.
Copy the fade time setting selected by the cursor to all other channels.
● Input channels 1–24
● Monitor channels 1–16
● Effect return channels 1/2
● Stereo output channel
Fade time will have no effect unless it is specified for the scene being recalled (even if it is
specified for the current scene).
The fade time is specified independently for
each scene. Be sure to save the scene after
editing the fade time.
● Copying fade time settings to all
channels
[Procedure]
1. In the SCENE screen Fade Time page,
move the cursor to the fade time setting
of the copy source channel.
■ Additional functions in the Fade
Time page
2. Press the [SHIFT] key + [F5] key.
In the Fade Time page you can press the [SHIFT]
key to assign the following additional function to
the [F5] key.
3. To execute the copy, move the cursor to
the OK button and press the [ENTER] key.
A CONFIRMATION popup window will appear,
asking you to confirm the copy.
4. Press the [STORE] key to store the scene.
F5
126
— Reference Guide
SCENE screen
RCL. Safe page
Make fader recall safe settings
[Function]
Specify the faders that will be excluded from
the recall when a scene is recalled.
1
2
[Key operation]
• [SCENE] key → [F3] (RCL. Safe) key
• Repeatedly press the [SCENE] key until the
screen shown at the right appears.
[Mouse operation]
M button → SCEN button → RCL. Safe tab
[Screen functions]
A RECALL SAFE CHANNEL
If a button in this area is turned on, the fader of
the corresponding channel will maintain its current position even when a scene is recalled. The
following channels can be set to Recall Safe status.
● Input channels 1–24
● Monitor channels 1–16
● Effect return channels 1/2
● Stereo output channel
Tip!
When a scene is recalled, Fader Recall Safe is
valid only if that scene was saved with the
ENABLE parameter 2 set to ENABLE.
Recall Safe settings are not linked for paired
channels. This means that if one channel of a
pair is set to Recall Safe, the faders of the pair
may be in different positions immediately
after a scene is recalled. However even in
this case, moving one of the faders will cause
the other fader to follow immediately.
B ENABLE
Move the cursor to this button and press the
[ENTER] key to specify whether the Fader Recall
Safe function will be enabled (ENABLE) or not
(DISABLE).
— Reference Guide
127
SCENE screen
Sort page
Sort scenes
[Function]
Sort the scenes stored in scene memory.
[Key operation]
1
2
• [SCENE] key → [F4] (Sort) key
• Repeatedly press the [SCENE] key until
the screen shown at the right appears.
[Mouse operation]
M button → SCEN button → Sort tab
3
[Screen functions]
A SOURCE
This list shows the current state of the scene
memories. Move the cursor to this list, and
rotate the [DATA/JOG] dial to select the scene
whose sorting order you wish to change. (The
currently selected scene will be highlighted.)
B DESTINATION
Specify the scene number to which the scene
selected in the SOURCE list will be moved.
Move the cursor to this area and rotate the
[DATA/JOG] dial to select the point where the
scene will be inserted. (The location currently
selected for insertion is displayed as “INSERTION POINT.”)
C EXECUTE button
Move the cursor to this button and press the
[ENTER] key to change the order of the scenes.
128
— Reference Guide
Appendix
Appendix
Preset EQ Program Parameters . . . . . . . . . . . . . . . . . . 2
Preset Effects Programs . . . . . . . . . . . . . . . . . . . . . . . . 6
Effects Parameters . . . . . . . . . . . . . . . . . . . . . . . . . . . . 8
Dynamics Processors . . . . . . . . . . . . . . . . . . . . . . . . 24
Preset Dynamics Programs . . . . . . . . . . . . . . . . . . . . . . . . . . 24
Preset Dynamics Program Parameters . . . . . . . . . . . . 29
Troubleshooting . . . . . . . . . . . . . . . . . . . . . . . . . . . . 35
Display message list . . . . . . . . . . . . . . . . . . . . . . . . . 39
Messages . . . . . . . . . . . . . . . . . . . . . . . . . . . . . . . . . . . . . . . 39
Popup messages . . . . . . . . . . . . . . . . . . . . . . . . . . . . . . . . . . 41
Specifications . . . . . . . . . . . . . . . . . . . . . . . . . . . . . . 43
General Specifications . . . . . . . . . . . . . . . . . . . . . . . . . . . . .
Mixer section . . . . . . . . . . . . . . . . . . . . . . . . . . . . . . . . . . . .
Recorder section . . . . . . . . . . . . . . . . . . . . . . . . . . . . . . . . . .
Controls . . . . . . . . . . . . . . . . . . . . . . . . . . . . . . . . . . . . . . . .
Control I/O . . . . . . . . . . . . . . . . . . . . . . . . . . . . . . . . . . . . . .
43
44
46
47
48
Dimensions . . . . . . . . . . . . . . . . . . . . . . . . . . . . . . . . 49
MIDI data format . . . . . . . . . . . . . . . . . . . . . . . . . . . 50
MIDI Implementation Chart . . . . . . . . . . . . . . . . . . . . 54
Appendix
Block diagram
— Reference Guide
Appendix– 1
Appendix
Preset EQ Program Parameters
No
001
002
003
Parameter
Name
Bass Drum 1
Bass Drum 2
Snare Drum 1
LOW
005
Snare Drum 2
Tom-tom 1
Cymbal
PEAKING
PEAKING
PEAKING
10
0.9
F
99Hz
265Hz
1.05kHz
5.33kHz
G
+3.5dB
–3.5dB
0.0dB
+4.0dB
PEAKING
PEAKING
PEAKING
LPF
Q
1.4
4.5
2.2
F
79Hz
397Hz
2.52kHz
12.6kHz
G
+8.0dB
–7.0dB
+6.0dB
ON
High Hat
H.SHELF
PEAKING
PEAKING
PEAKING
1.2
4.5
0.11
F
132Hz
1.00kHz
3.17kHz
5.04kHz
G
–0.5dB
0.0dB
+3.0dB
+4.5dB
Q
Percussion
010
E.Bass 1
E.Bass 2
Appendix–2
PEAKING
PEAKING
0.7
0.1
177Hz
334Hz
2.37kHz
4.00kHz
G
+1.5dB
–8.5dB
+2.5dB
+4.0dB
PEAKING
PEAKING
PEAKING
PEAKING
Q
1.4
10
1.2
0.28
F
210Hz
667Hz
4.49kHz
6.35kHz
G
+2.0dB
–7.5dB
+2.0dB
+1.0dB
H.SHELF
Q
PEAKING
PEAKING
8
0.9
F
105Hz
420Hz
1.05kHz
13.4kHz
G
–2.0dB
0.0dB
0.0dB
+3.0dB
H.SHELF
Q
PEAKING
PEAKING
0.5
1
F
94Hz
420Hz
2.82kHz
7.55kHz
G
–4.0dB
–2.5dB
+1.0dB
+0.5dB
H.SHELF
Q
PEAKING
PEAKING
4.5
0.56
F
99Hz
397Hz
2.82kHz
16.9kHz
G
–4.5dB
0.0dB
+2.0dB
0.0dB
H.SHELF
L.SHELF
009
PEAKING
10
F
L.SHELF
008
H.SHELF
Q
L.SHELF
007
HIGH
1.2
L.SHELF
006
H-MID
Q
L.SHELF
004
L-MID
Q
PEAKING
PEAKING
5
4.5
F
35Hz
111Hz
2.00kHz
4.00kHz
G
–7.5dB
+4.5dB
+2.5dB
0.0dB
PEAKING
PEAKING
PEAKING
H.SHELF
Q
0.1
5
6.3
F
111Hz
111Hz
2.24kHz
4.00kHz
G
+3.0dB
0.0dB
+2.5dB
+0.5dB
— Reference Guide
Description
Emphasizes the low range
of the bass drum and the
attack created by the
beater.
Creates a peak around
80Hz, producing a tight,
stiff sound.
Emphasizes snapping
and rimshot sounds.
Emphasizes the ranges of
that classic rock snare
drum sound.
Emphasizes the attack of
tom-toms, and creates a
long, “leathery” decay.
Emphasizes the attack of
crash cymbals, extending
the “sparkling” decay.
Use on a tight high-hat,
emphasizing the mid to
high range.
Emphasizes the attack
and clarifies the highrange of instruments,
such as shakers,
cabasas, and congas.
Makes a tight electric bass
sound by cutting very low
frequencies.
Unlike program 009, this
emphasizes the low range
of the electric bass.
Appendix
No
011
012
Parameter
Name
Syn.Bass 1
Syn.Bass 2
LOW
014
015
016
017
Piano 1
Piano 2
E.G.Clean
E.G.Crunch 1
E.G.Crunch 2
E.G.Distortion 1
PEAKING
PEAKING
PEAKING
8
4.5
F
83Hz
944Hz
4.00kHz
12.6kHz
G
+3.5dB
+8.5dB
0.0dB
0.0dB
020
E.G.Distortion 2
A.G.Stroke 1
H.SHELF
PEAKING
PEAKING
PEAKING
1.6
8
2.2
F
125Hz
177Hz
1.12kHz
12.6kHz
G
+2.5dB
0.0dB
+1.5dB
0.0dB
H.SHELF
Q
A.G.Stroke 2
PEAKING
PEAKING
8
0.9
F
94Hz
944Hz
3.17kHz
7.55kHz
G
–6.0dB
0.0dB
+2.0dB
+4.0dB
PEAKING
PEAKING
PEAKING
H.SHELF
Q
5.6
10
0.7
F
223Hz
595Hz
3.17kHz
5.33kHz
G
+3.5dB
–8.5dB
+1.5dB
+3.0dB
PEAKING
PEAKING
PEAKING
H.SHELF
Q
0.18
10
6.3
F
265Hz
397Hz
1.33kHz
4.49kHz
G
+2.0dB
–5.5dB
+0.5dB
+2.5dB
PEAKING
PEAKING
PEAKING
PEAKING
Q
8
4.5
0.63
9
F
140Hz
1.00kHz
1.88kHz
5.65kHz
G
+4.5dB
0.0dB
+4.0dB
+2.0dB
H.SHELF
PEAKING
PEAKING
PEAKING
Q
8
0.4
0.16
F
125Hz
445Hz
3.36kHz
19.0kHz
G
+2.5dB
+1.5dB
+2.5dB
0.0dB
H.SHELF
Q
PEAKING
PEAKING
9
10
F
354Hz
944Hz
3.36kHz
12.6kHz
G
+5.0dB
0.0dB
+3.5dB
0.0dB
H.SHELF
Q
PEAKING
PEAKING
10
4
F
315Hz
1.05kHz
4.23kHz
12.6kHz
G
+6.0dB
–8.5dB
+4.5dB
+4.0dB
PEAKING
PEAKING
PEAKING
H.SHELF
Q
0.9
4.5
3.5
F
105Hz
1.00kHz
1.88kHz
5.33kHz
G
–2.0dB
0.0dB
+1.0dB
+4.0dB
H.SHELF
L.SHELF
021
H.SHELF
Q
L.SHELF
019
HIGH
0.1
L.SHELF
018
H-MID
Q
L.SHELF
013
L-MID
Q
PEAKING
PEAKING
9
4.5
F
297Hz
749Hz
2.00kHz
3.56kHz
G
–3.5dB
–2.0dB
0.0dB
+2.0dB
Description
Use on a synth bass with
emphasized low range.
Emphasizes the attack
that is peculiar to a synth
bass.
This is used to make a
piano sound brighter.
Emphasize the attack and
low range of the piano
sound by using a
compressor.
Use for line-recording an
electric guitar or semiacoustic guitar to get a
slightly hard sound.
Adjusts the tonal quality of
a slightly distorted guitar
sound.
This is a variation on
program 016.
Makes a heavily distorted
guitar sound clearer.
This is a variation on
program 018.
Emphasizes the bright
tones of an acoustic
guitar.
This is a variation on
program 020. You can
also use it for the electric
gut guitar.
— Reference Guide
Appendix– 3
Appendix
No
Parameter
Name
LOW
L.SHELF
022
A.G.Arpeggio 1
Q
024
025
026
027
A.G.Arpeggio 2
Brass Section
Male Vocal 1
Male Vocal 2
Female Vocal 1
029
030
031
Female Vocal 2
Chorus & Harmony
Total EQ 1
Total EQ 2
Total EQ 3
Appendix–4
PEAKING
PEAKING
PEAKING
4.5
4.5
0.12
1.00kHz
4.00kHz
6.72kHz
G
–0.5dB
0.0dB
0.0dB
+2.0dB
H.SHELF
Q
PEAKING
PEAKING
7
4.5
F
177Hz
354Hz
4.00kHz
4.23kHz
G
0.0dB
–5.5dB
0.0dB
+4.0dB
PEAKING
PEAKING
PEAKING
PEAKING
Q
2.8
2
0.7
7
F
88Hz
841Hz
2.11kHz
4.49kHz
G
–2.0dB
+1.0dB
+1.5dB
+3.0dB
PEAKING
PEAKING
PEAKING
PEAKING
Q
0.11
4.5
0.56
0.11
F
187Hz
1.00kHz
2.00kHz
6.72kHz
G
–0.5dB
0.0dB
+2.0dB
+3.5dB
H.SHELF
PEAKING
PEAKING
PEAKING
Q
0.11
10
5.6
F
167Hz
236Hz
2.67kHz
6.72kHz
G
+2.0dB
–5.0dB
+2.5dB
+4.0dB
PEAKING
PEAKING
PEAKING
PEAKING
Q
0.18
0.45
0.56
0.14
F
118Hz
397Hz
2.67kHz
5.99kHz
G
–1.0dB
+1.0dB
+1.5dB
+2.0dB
H.SHELF
Q
PEAKING
PEAKING
0.16
0.2
F
111Hz
334Hz
2.00kHz
6.72kHz
G
–7.0dB
+1.5dB
+1.5dB
+2.5dB
PEAKING
PEAKING
PEAKING
PEAKING
Q
2.8
2
0.7
7
F
88Hz
841Hz
2.11kHz
4.49kHz
G
–2.0dB
+1.0dB
+1.5dB
+3.0dB
PEAKING
PEAKING
PEAKING
H.SHELF
Q
7
2.2
5.6
F
94Hz
944Hz
2.11kHz
16.0kHz
G
–0.5dB
0.0dB
+3.0dB
+6.5dB
H.SHELF
PEAKING
PEAKING
PEAKING
Q
7
2.8
5.6
F
94Hz
749Hz
1.78kHz
17.9kHz
G
+4.0dB
+1.5dB
+2.0dB
+6.0dB
H.SHELF
L.SHELF
032
HIGH
223Hz
L.SHELF
028
H-MID
F
L.SHELF
023
L-MID
Q
PEAKING
PEAKING
0.28
0.7
F
66Hz
841Hz
1.88kHz
15.1kHz
G
+1.5dB
+0.5dB
+2.0dB
+4.0dB
— Reference Guide
Description
Corrects arpeggio
technique of an acoustic
guitar.
This is a variation on
program 022.
Use with trumpets,
trombones, or sax. With
one instrument, adjust the
HIGH or H-MID
frequency.
Use as a template for
male vocal. Adjust the
HIGH or H-MID setting
according to the voice
quality.
This is a variation on
program 025.
Use as a template for
female vocal. Adjust the
HIGH or H-MID setting
according to the voice
quality.
This is a variation on
program 027.
Use as a template for a
chorus. It makes the entire
chorus much brighter.
Use on the STEREO bus
during mixdown. For more
effect, try it with a
compressor.
This is a variation on
program 030.
This is a variation on
program 030. Also use
these programs for stereo
inputs or external effect
returns.
Appendix
No
033
Parameter
Name
Bass Drum 3
LOW
Snare Drum 3
036
037
038
Tom-tom 2
Piano 3
Piano Low
Piano High
PEAKING
PEAKING
PEAKING
PEAKING
10
0.4
0.4
F
118Hz
315Hz
4.23kHz
20.1kHz
G
+3.5dB
–10.0dB
+3.5dB
0.0dB
Q
040
Fine-EQ(Cass)
Narrator
PEAKING
PEAKING
PEAKING
4.5
2.8
0.1
F
223Hz
561Hz
4.23kHz
4.00kHz
G
0.0dB
+2.0dB
+3.5dB
0.0dB
H.SHELF
Q
PEAKING
PEAKING
4.5
1.2
F
88Hz
210Hz
5.33kHz
16.9kHz
G
–9.0dB
+1.5dB
+2.0dB
0.0dB
PEAKING
PEAKING
PEAKING
H.SHELF
Q
8
10
9
F
99Hz
472Hz
2.37kHz
10.0kHz
G
+4.5dB
–13.0dB
+4.5dB
+2.5dB
H.SHELF
PEAKING
PEAKING
PEAKING
Q
10
6.3
2.2
F
187Hz
397Hz
6.72kHz
12.6kHz
G
–5.5dB
+1.5dB
+6.0dB
0.0dB
PEAKING
PEAKING
PEAKING
PEAKING
Q
10
6.3
2.2
0.1
F
187Hz
397Hz
6.72kHz
5.65kHz
G
–5.5dB
+1.5dB
+5.0dB
+3.0dB
H.SHELF
L.SHELF
039
HIGH
2
L.SHELF
035
H-MID
Q
L.SHELF
034
L-MID
Q
PEAKING
PEAKING
4.5
1.8
F
74Hz
1.00kHz
4.00kHz
12.6kHz
G
–1.5dB
0.0dB
+1.0dB
+3.0dB
PEAKING
PEAKING
PEAKING
H.SHELF
Q
4
7
0.63
F
105Hz
707Hz
2.52kHz
10.0kHz
G
–4.0dB
–1.0dB
+2.0dB
0.0dB
Description
This is a variation on
program 001. The low and
mid range is removed.
This is a variation on
program 003. It creates
rather thick sound.
This is a variation on
program 005. Emphasizes
the mid and high range.
This is a variation on
program 013.
Use for the low range of
the piano sound when it is
recorded in stereo. Use
with program 038.
Use for the high range of
the piano sound when it is
recorded in stereo. Use
with program 037.
Use for recording to or
from cassette tape to
make the sound clearer.
Use for recording a voice
reading a text.
Note
The EQ programs were programmed for recording acoustic musical instruments. If you are using them
for a sampler, synthesizer, or rhythm machine, adjust the parameters accordingly.
— Reference Guide
Appendix– 5
Appendix
Preset Effects Programs
The following table lists the preset effects programs. See “Effects Parameters” on page Appendix–8 for detailed
parameter information. Effects programs that use the HQ. PITCH effect can be used only with Effect 2.
Reverb-type Effects
#
Title
Type
Description
01
Reverb Hall
REVERB HALL
Reverb simulating a large space such as a concert hall.
02
Reverb Room
REVERB ROOM
Reverb simulating the acoustics of a smaller space (room) than REVERB
HALL.
03
Reverb Stage
REVERB STAGE
Reverb designed with vocals in mind.
04
Reverb Plate
REVERB PLATE
Simulation of a metal-plate reverb unit, producing a feeling of hardedged reverberation.
05
Early Ref.
EARLY REF.
An effect which isolates only the early reflection (ER) component from
reverberation. A flashier effect than reverb is produced.
06
Gate Reverb
GATE REVERB
A type of ER designed for use as gated reverb.
07
Reverse Gate
REVERSE GATE
A reverse-playback type ER.
Delays
#
Title
Type
Description
08
Mono Delay
MONO DELAY
Mono delay with simple operation. Use when you don't need to use
complex parameter settings.
09
Stereo Delay
STEREO DELAY
Stereo delay with independent left and right.
10
Mod.delay
MOD.DELAY
Mono delay with modulation.
11
Delay LCR
DELAY LCR
Three-tap delay (L, C, R).
ECHO
Stereo delay with additional parameters for more detailed control. The
signal can be fed back from left to right, and right to left.
12
Echo
Modulation-type Effects
#
Title
Type
Description
13
Chorus
CHORUS
Three-phase stereo chorus.
14
Flange
FLANGE
The well-known flanging effect.
15
Symphonic
SYMPHONIC
A Yamaha proprietary effect that produces a richer and more complex
modulation than chorus.
16
Phaser
PHASER
Stereo phaser with 2–16 stages of phase shift.
17
Auto Pan
AUTO PAN
An effect which cyclically moves the sound between left and right.
18
Tremolo
TREMOLO
Tremolo
19
HQ.Pitch
HQ.PITCH
(Effect 2 only)
Only one note is pitch-shifted, but a stable effect is produced.
20
Dual Pitch
DUAL PITCH
Stereo pitch shift with left and right pitches set independently.
21
Rotary
ROTARY
Simulation of a rotary speaker.
22
Ring Mod.
RING MOD.
An effect that modifies the pitch by applying amplitude modulation to
the frequency of the input. On the AW4416, even the modulation frequency can be controlled by modulation.
23
Mod.Filter
MOD.FILTER
An effect which uses an LFO to modulate the frequency of the filter.
Appendix–6
— Reference Guide
Appendix
Distortion-type Effects
#
Title
Type
Description
24
Distortion
DISTORTION
Distortion
25
Amp Simulate
AMP SIMULATE
Guitar Amp Simulator
Dynamic Effects
#
Title
Type
Description
26
Dyna.Filter
DYNA.FILTER
Dynamically controlled filter. Responds to MIDI Note On velocity
when SOURCE set to MIDI.
27
Dyna.Flange
DYNA.FLANGE
Dynamically controlled flanger. Responds to MIDI Note On velocity
when SOURCE set to MIDI.
28
Dyna.Phaser
DYNA.PHASER
Dynamically controlled phase shifter. Responds to MIDI Note On
velocity when SOURCE set to MIDI.
Combined Effects
#
Title
Type
Description
29
Rev+Chorus
REV+CHORUS
Reverb and chorus in parallel
30
Rev->Chorus
REV->CHORUS
Reverb and chorus in series
31
Rev+Flange
REV+FLANGE
Reverb and flanger in parallel
32
Rev->Flange
REV->FLANGE
Reverb and flanger in series
33
Rev+Sympho.
REV+SYMPHO.
Reverb and symphonic in parallel
34
Rev->Sympho.
REV->SYMPHO.
Reverb and symphonic in series
35
Rev->Pan
REV->PAN
Reverb and auto-pan in parallel
36
Delay+ER.
DELAY+ER.
Delay and early reflections in parallel
37
Delay->ER.
DELAY->ER.
Delay and early reflections in series
38
Delay+Rev
DELAY+REV
Delay and reverb in parallel
39
Delay->Rev
DELAY->REV
Delay and reverb in series
40
Dist->Delay
DIST->DELAY
Distortion and delay in series
Other Effects
#
Title
41
Multi.Filter
Type
MULTI.FILTER
Description
Three-band parallel filter (24 dB/octave).
— Reference Guide
Appendix– 7
Appendix
Effects Parameters
REVERB HALL, REVERB ROOM, REVERB STAGE, REVERB PLATE
Hall, room, stage, and plate simulations, all with gates.
Parameter
Range
Description
REV TIME
0.3–99.0 s
Reverb time
INI.DLY
0.0–500.0 ms
Initial delay before reverb begins
HI.RATIO
0.1–1.0
High-frequency reverb time ratio
LO.RATIO
0.1–2.4
Low-frequency reverb time ratio
DIFF.
0–10
Reverb diffusion (left–right reverb spread)
DENSITY
0–100%
Reverb density
E/R DLY
0.0–100.0 ms
Delay between early reflections and reverb
E/R BAL.
0–100%
Balance of early reflections and reverb (0% = ER, 100% = reverb)
HPF
Thru, 21 Hz–8.0 kHz
High-pass filter cutoff frequency
LPF
50 Hz–16.0 kHz, Thru
Low-pass filter cutoff frequency
GATE LVL
OFF, –60 to 0 dB
Level at which gate kicks in
ATTACK
0–120 ms
Gate opening speed
HOLD
*1
Gate open time
DECAY
*2
Gate closing speed
MIX BAL.
0–100 [%]
Mix balance of the effects and dry sounds
*1. 0.02 ms–2.13 s (fs=44.1 kHz), 0.02 ms–1.96 s (fs=48 kHz)
*2. 6.0 ms–46.0 s (fs=44.1 kHz), 5.0 ms–42.3 s (fs=48 kHz)
EARLY REF.
Early reflections.
Parameter
Range
Description
TYPE
S-Hall, L-Hall, Random,
Reverse, Plate, Spring
Type of early reflection simulation
ROOMSIZE
0.1–20.0
Reflection spacing
LIVENESS
0–10
Early reflections decay characteristics (0 = dead, 10 = live)
INI.DLY
0.0–500.0 ms
Initial delay before reverb begins
DIFF.
0–10
Reverb diffusion (left–right reverb spread)
DENSITY
0–100%
Reverb density
ER NUM.
1–19
Number of early reflections
FB.GAIN
–99 to +99%
Feedback gain
HI.RATIO
0.1–1.0
High-frequency feedback ratio
HPF
Thru, 21 Hz–8.0 kHz
High-pass filter cutoff frequency
LPF
50 Hz–16.0 kHz, Thru
Low-pass filter cutoff frequency
MIX BAL.
0–100 [%]
Mix balance of the effects and dry sounds
Appendix–8
— Reference Guide
Appendix
GATE REVERB, REVERSE GATE
Early reflections with gate, and early reflections with reverse gate.
Parameter
Range
Description
TYPE
Type-A, Type-B
Type of early reflection simulation
ROOMSIZE
0.1–20.0
Reflection spacing
LIVENESS
0–10
Early reflections decay characteristics (0 = dead, 10 = live)
INI.DLY
0.0–500.0 ms
Initial delay before reverb begins
DIFF.
0–10
Reverb diffusion (left–right reverb spread)
DENSITY
0–100%
Reverb density
ER NUM.
1–19
Number of early reflections
FB.GAIN
–99 to +99%
Feedback gain
HI.RATIO
0.1–1.0
High-frequency feedback ratio
HPF
Thru, 21 Hz–8.0 kHz
High-pass filter cutoff frequency
LPF
50 Hz–16.0 kHz, Thru
Low-pass filter cutoff frequency
MIX BAL.
0–100 [%]
Mix balance of the effects and dry sounds
MONO DELAY
Basic repeat delay.
Parameter
DELAY
Range
Description
0.0–2730.0 ms
Delay time
FB.GAIN
–99 to +99%
Feedback gain (plus values for normal-phase feedback, minus values
for reverse-phase feedback)
HI.RATIO
0.1–1.0
High-frequency feedback ratio
HPF
Thru, 21 Hz–8.0 kHz
High-pass filter cutoff frequency
LPF
50 Hz–16.0 kHz, Thru
Low-pass filter cutoff frequency
MIX BAL.
0–100 [%]
Mix balance of the effects and dry sounds
STEREO DELAY
Basic stereo delay.
Parameter
Range
Description
DELAY L
0.0–1350.0 ms
Left channel delay time
FB.G L
–99 to +99%
Left channel feedback (plus values for normal-phase feedback, minus
values for reverse-phase feedback)
DELAY R
0.0–1350.0 ms
Right channel delay time
FB.G R
–99 to +99%
Right channel feedback (plus values for normal-phase feedback,
minus values for reverse-phase feedback)
HI.RATIO
0.1–1.0
High-frequency feedback ratio
HPF
Thru, 21 Hz–8.0 kHz
High-pass filter cutoff frequency
LPF
50 Hz–16.0 kHz, Thru
Low-pass filter cutoff frequency
MIX BAL.
0–100 [%]
Mix balance of the effects and dry sounds
— Reference Guide
Appendix– 9
Appendix
MOD.DELAY
Basic repeat delay with modulation.
Parameter
DELAY
Range
Description
0.0–2725.0 ms
Delay time
FB.GAIN
–99 to +99%
Feedback gain (plus values for normal-phase feedback, minus values
for reverse-phase feedback)
HI.RATIO
0.1–1.0
High-frequency feedback ratio
FREQ.
0.05–40.00 Hz
Modulation speed
DEPTH
0–100%
Modulation depth
HPF
Thru, 21 Hz–8.0 kHz
High-pass filter cutoff frequency
LPF
50 Hz–16.0 kHz, Thru
Low-pass filter cutoff frequency
MIX BAL.
0–100 [%]
Mix balance of the effects and dry sounds
DELAY LCR
Three-tap delay (left, center, right).
Parameter
Range
Description
DELAY L
0.0–2730.0 ms
Left channel delay time
DELAY C
0.0–2730.0 ms
Center channel delay time
DELAY R
0.0–2730.0 ms
Right channel delay time
LEVEL L
–100 to +100%
Left channel delay level
LEVEL C
–100 to +100%
Center channel delay level
LEVEL R
–100 to +100%
Right channel delay level
FB.DLY
0.0–2730.0 ms
Feedback delay time
FB.GAIN
–99 to +99%
Feedback gain (plus values for normal-phase feedback, minus values
for reverse-phase feedback)
HI.RATIO
0.1–1.0
High-frequency feedback ratio
HPF
Thru, 21 Hz–8.0 kHz
High-pass filter cutoff frequency
LPF
50 Hz–16.0 kHz, Thru
Low-pass filter cutoff frequency
MIX BAL.
0–100 [%]
Mix balance of the effects and dry sounds
ECHO
Stereo delay with crossed feedback loop.
Parameter
Range
Description
DELAY L
0.0–1350.0 ms
FB.DLY L
0.0–1350.0 ms
Left channel feedback delay time
FB.G L
–99 to +99%
Left channel feedback gain (plus values for normal-phase feedback,
minus values for reverse-phase feedback)
DELAY R
0.0–1350.0 ms
Right channel delay time
FB.DLY R
0.0–1350.0 ms
Right channel feedback delay time
FB.G R
–99 to +99%
Right channel feedback gain (plus values for normal-phase feedback,
minus values for reverse-phase feedback)
L->R FBG
–99 to +99%
Left to right channel feedback gain (plus values for normal-phase
feedback, minus values for reverse-phase feedback)
R->L FBG
–99 to +99%
Right to left channel feedback gain (plus values for normal-phase
feedback, minus values for reverse-phase feedback)
HI.RATIO
0.1–1.0
High-frequency feedback ratio
HPF
Thru, 21 Hz–8.0 kHz
High-pass filter cutoff frequency
LPF
50 Hz–16.0 kHz, Thru
Low-pass filter cutoff frequency
MIX BAL.
0–100 [%]
Mix balance of the effects and dry sounds
Appendix–10
Left channel delay time
— Reference Guide
Appendix
CHORUS
Chorus effect.
Parameter
Range
Description
FREQ.
0.05–40.00 Hz
Modulation speed
PM DEP.
0–100%
Pitch modulation depth
AM DEP.
0–100%
Amp modulation depth
MOD.DLY
0.0–500.0 ms
Modulation delay time
WAVE
Sine, Tri
Modulation waveform
LSH F
21.2–8.00 k [Hz]
Low-shelving filter frequency
LSH G
–12 to +12 [dB]
Low-shelving filter gain
EQ F
100–8.00 k [Hz]
Parametric equalizer center frequency
EQ G
–12 to +12 [dB]
Parametric equalizer gain
EQ Q
10–0.10
Parametric equalizer band width
HSH F
50.0–16.0 k [Hz]
High-shelving filter frequency
HSH G
–12 to +12 [dB]
High-shelving filter gain
MIX BAL.
0–100 [%]
Mix balance of the effects and dry sounds
FLANGE
Flange effect.
Parameter
Range
Description
FREQ.
0.05–40.00 Hz
Modulation speed
DEPTH
0–100%
Modulation depth
MOD.DLY
0.0–500.0 ms
Modulation delay time
FB.GAIN
–99 to +99%
Feedback gain (plus values for normal-phase feedback, minus values
for reverse-phase feedback)
WAVE
Sine, Tri
Modulation waveform
LSH F
21.2–8.00 k [Hz]
Low-shelving filter frequency
LSH G
–12 to +12 [dB]
Low-shelving filter gain
EQ F
100–8.00 k [Hz]
Parametric equalizer center frequency
EQ G
–12 to +12 [dB]
Parametric equalizer gain
EQ Q
10–0.10
Parametric equalizer band width
HSH F
50.0–16.0 k [Hz]
High-shelving filter frequency
HSH G
–12 to +12 [dB]
High-shelving filter gain
MIX BAL.
0–100 [%]
Mix balance of the effects and dry sounds
— Reference Guide
Appendix– 11
Appendix
SYMPHONIC
Symphonic efect.
Parameter
Range
Description
FREQ.
0.05–40.00 Hz
Modulation speed
DEPTH
0–100%
Modulation depth
MOD.DLY
0.0–500.0 ms
Modulation delay time
WAVE
Sine, Tri
Modulation waveform
LSH F
21.2–8.00 k [Hz]
Low-shelving filter frequency
LSH G
–12 to +12 [dB]
Low-shelving filter gain
EQ F
100–8.00 k [Hz]
Parametric equalizer center frequency
EQ G
–12 to +12 [dB]
Parametric equalizer gain
EQ Q
10–0.10
Parametric equalizer band width
HSH F
50.0–16.0 k [Hz]
High-shelving filter frequency
HSH G
–12 to +12 [dB]
High-shelving filter gain
MIX BAL.
0–100 [%]
Mix balance of the effects and dry sounds
PHASER
16-stage phaser.
Parameter
Range
Description
FREQ.
0.05–40.00 Hz
Modulation speed
DEPTH
0–100%
Modulation depth
FB.GAIN
–99 to +99%
Feedback gain (plus values for normal-phase feedback, minus values
for reverse-phase feedback)
OFFSET
0–100
Lowest phase-shifted frequency offset
STAGE
2, 4, 8, 10, 12, 14, 16
Number of phase shift stages
LSH F
21.2–8.00 k [Hz]
Low-shelving filter frequency
LSH G
–12 to +12 [dB]
Low-shelving filter gain
HSH F
50.0–16.0 k [Hz]
High-shelving filter frequency
HSH G
–12 to +12 [dB]
High-shelving filter gain
MIX BAL.
0–100 [%]
Mix balance of the effects and dry sounds
AUTOPAN
Auto-panner.
Parameter
FREQ.
Range
Description
0.05–40.00 Hz
Modulation speed
DEPTH
0–100%
Modulation depth
DIR.
*1
Panning direction
WAVE
Sine, Tri, Square
Modulation waveform
LSH F
21.2–8.00 k [Hz]
Low-shelving filter frequency
LSH G
–12 to +12 [dB]
Low-shelving filter gain
EQ F
100–8.00 k [Hz]
Parametric equalizer center frequency
EQ G
–12 to +12 [dB]
Parametric equalizer gain
EQ Q
10–0.10
Parametric equalizer band width
HSH F
50.0–16.0 k [Hz]
High-shelving filter frequency
HSH G
–12 to +12 [dB]
High-shelving filter gain
MIX BAL.
0–100 [%]
Mix balance of the effects and dry sounds
*1. L<->R, L—>R, L<—R, Turn L, Turn R
Appendix–12
— Reference Guide
Appendix
TREMOLO
Tremolo effect.
Parameter
Range
Description
FREQ.
0.05–40.00 Hz
Modulation speed
DEPTH
0–100%
Modulation depth
WAVE
Sine, Tri, Square
Modulation waveform
LSH F
21.2–8.00 k [Hz]
Low-shelving filter frequency
LSH G
–12 to +12 [dB]
Low-shelving filter gain
EQ F
100–8.00 k [Hz]
Parametric equalizer center frequency
EQ G
–12 to +12 [dB]
Parametric equalizer gain
EQ Q
10–0.10
Parametric equalizer band width
HSH F
50.0–16.0 k [Hz]
High-shelving filter frequency
HSH G
–12 to +12 [dB]
High-shelving filter gain
MIX BAL.
0–100 [%]
Mix balance of the effects and dry sounds
HQ.PITCH (Effect 2 only)
High-quality pitch shifter.
Parameter
Range
Description
PITCH
–12 to +12 semitones
Pitch shift
FINE
–50 to +50 cents
Pitch shift fine
DELAY
0.0–1000.0 ms
Delay time
FB.GAIN
–99 to +99%
Feedback gain (plus values for normal-phase feedback, minus values
for reverse-phase feedback)
MODE
1–10
Pitch shift precision
MIX BAL.
0–100 [%]
Mix balance of the effects and dry sounds
DUAL PITCH
Twin-voice pitch shifter.
Parameter
Range
Description
PITCH 1
–24 to +24 semitones
Channel 1 pitch shift
FINE 1
–50 to +50 cents
Channel 1 pitch shift fine
PAN 1
L16–1, C, R1–16
Channel 1 panpot
DELAY 1
0.0–1000.0 ms
Channel 1 delay time
FB.G 1
–99 to +99%
Channel 1 feedback gain (plus values for normal-phase feedback,
minus values for reverse-phase feedback)
LEVEL 1
–100 to +100%
Channel 1 level (plus values for normal phase, minus values for
reverse phase)
PITCH 2
–24 to +24 semitones
Channel 2 pitch shift
FINE 2
–50 to +50 cents
Channel 2 pitch shift fine
PAN 2
L16–1, C, R1–16
Channel 2 panpot
DELAY 2
0.0–1000.0 ms
Channel 2 delay time
FB.G 2
–99 to +99%
Channel 2 feedback gain (plus values for normal-phase feedback,
minus values for reverse-phase feedback)
LEVEL 2
–100 to +100%
Channel 2 level (plus values for normal phase, minus values for
reverse phase)
MODE
1–10
Pitch shift precision
MIX BAL.
0–100 [%]
Mix balance of the effects and dry sounds
— Reference Guide
Appendix– 13
Appendix
ROTARY
Rotary speaker simulator.
Parameter
Range
Description
ROTATE
STOP, START
Rotation stop, start
SPEED
SLOW, FAST
Rotation speed (see SLOW and FAST parameters)
DRIVE
0–100
Overdrive level
ACCEL
0–10
Accelation at speed changes
LOW
0–100
Low-frequency filter
HIGH
0–100
High-frequency filter
SLOW
0.05–10.00 Hz
SLOW rotation speed
FAST
0.05–10.00 Hz
FAST rotation speed
MIX BAL.
0–100 [%]
Mix balance of the effects and dry sounds
RING MOD.
Ring modulator.
Parameter
SOURCE
Range
OSC, SELF
Description
Modulation source: oscillator or input signal
OSC FREQ
0.0–3000.0 Hz
Oscillator frequency
FM FREQ
0.05–40.00 Hz
Oscillator frequency modulation speed
FM DEPTH
0–100%
Oscillator frequency modulation depth
MIX BAL.
0–100 [%]
Mix balance of the effects and dry sounds
MOD.FILTER
LFO modulation-type filter.
Parameter
Range
Description
FREQ.
0.05–40.00 Hz
Modulation speed
DEPTH
0–100%
Modulation depth
TYPE
LPF, HPF, BPF
Filter type: low pass, high pass, band pass
OFFSET
0–100
Filter frequency offset
RESO.
0–20
Filter resonance
PHASE
0.00–354.38°
Left-channel modulation and right-channel modulation phase difference
LEVEL
0–100
Output level
MIX BAL.
0–100 [%]
Mix balance of the effects and dry sounds
DISTORTION
Distortion effect.
Parameter
Range
Description
DST TYPE
DST1, DST2, OVD1,
OVD2, CRUNCH
Distortion type (DST = distortion, OVD = overdrive)
DRIVE
0–100
Distortion drive
MASTER
0–100
Master volume
TONE
–10 to +10
Tone
N.GATE
0–20
Noise reduction
MIX BAL.
0–100 [%]
Mix balance of the effects and dry sounds
Appendix–14
— Reference Guide
Appendix
AMP SIMULATE
Guitar Amp Simulator.
Parameter
Range
Description
AMP TYPE
*1
Guitar amp simulation type
DST TYPE
DST1, DST2, OVD1,
OVD2, CRUNCH
Distortion type (DST = distortion, OVD = overdrive)
N.GATE
0–20
Noise reduction
DRIVE
0–100
Distortion drive
MASTER
0–100
Master volume
CAB DEP
0–100%
Speaker cabinet simulation depth
BASS
0–100
Bass tone control
MIDDLE
0–100
Middle tone control
TREBLE
0–100
High tone control
EQ F
99–8.0 kHz
Parametric equalizer frequency
EQ G
–12 to +12 dB
Parametric equalizer gain
EQ Q
10.0–0.10
Parametric equalizer bandwidth
MIX BAL.
0–100 [%]
Mix balance of the effects and dry sounds
*1. STK-M1, STK-M2, THRASH, MIDBST, CMB-PG, CMB-VR, CMB-DX, CMB-TW, MINI, FLAT
DYNA.FILTER
Dynamically controlled filter.
Parameter
Range
Description
SOURCE
INPUT, MIDI
Control source: input signal or MIDI note on velocity
SENSE
0–100
Sensitivity
TYPE
LPF, HPF, BPF
Filter type
OFFSET
0–100
Filter frequency offset
RESO.
0–20
Filter resonance
DIR.
UP, DOWN
Upward or downward frequency change
DECAY
*1
Filter frequency change decay speed
LEVEL
0–100
Output Level
MIX BAL.
0–100 [%]
Mix balance of the effects and dry sounds
*1. 6.0 ms–46.0 s (fs=44.1 kHz), 5.0 ms–42.3 s (fs=48 kHz)
— Reference Guide
Appendix– 15
Appendix
DYNA.FLANGE
Dynamically controlled flanger.
Parameter
Range
Description
SOURCE
INPUT, MIDI
Control source: input signal or MIDI note on velocity
SENSE
0–100
Sensitivity
FB.GAIN
–99 to +99%
Feedback gain (plus values for normal-phase feedback, minus values
for reverse-phase feedback)
OFFSET
0–100
Delay time offset
DIR.
UP, DOWN
Upward or downward frequency change
DECAY
*1
Decay speed
LSH F
21.2–8.00 k [Hz]
Low-shelving filter frequency
LSH G
–12 to +12 [dB]
Low-shelving filter gain
EQ F
100–8.00 k [Hz]
Parametric equalizer center frequency
EQ G
–12 to +12 [dB]
Parametric equalizer gain
EQ Q
10–0.10
Parametric equalizer band width
HSH F
50.0–16.0 k [Hz]
High-shelving filter frequency
HSH G
–12 to +12 [dB]
High-shelving filter gain
MIX BAL.
0–100 [%]
Mix balance of the effects and dry sounds
*1. 6.0 ms–46.0 s (fs=44.1 kHz), 5.0 ms–42.3 s (fs=48 kHz)
DYNA.PHASER
Dynamically controlled phaser.
Parameter
Range
Description
SOURCE
INPUT, MIDI
Control source: input signal or MIDI note on velocity
SENSE
0–100
Sensitivity
FB.GAIN
–99 to +99%
Feedback gain (plus values for normal-phase feedback, minus values
for reverse-phase feedback)
OFFSET
0–100
Lowest phase-shifted frequency offset
STAGE
2, 4, 8, 10, 12, 14, 16
Number of phase shift stages
DIR.
UP, DOWN
Upward or downward frequency change
DECAY
*1
Decay speed
LSH F
21.2–8.00 k [Hz]
Low-shelving filter frequency
LSH G
–12 to +12 [dB]
Low-shelving filter gain
HSH F
50.0–16.0 k [Hz]
High-shelving filter frequency
HSH G
–12 to +12 [dB]
High-shelving filter gain
MIX BAL.
0–100 [%]
Mix balance of the effects and dry sounds
*1. 6.0 ms–46.0 s (fs=44.1 kHz), 5.0 ms–42.3 s (fs=48kHz)
Appendix–16
— Reference Guide
Appendix
REV+CHORUS
Reverb and chorus effects in parallel.
Parameter
Range
Description
REV TIME
0.3–99.9 s
Reverb time
INI.DLY
0.0–500.0 ms
Initial delay before reverb begins
HI.RATIO
0.1–1.0
High-frequency reverb time ratio
DIFF.
0–10
Reverb diffusion (left-right reverb spreed)
DENSITY
0–100%
Reverb density
HPF
Thru, 21 Hz–8.0 kHz
High-pass filter cutoff frequency
LPF
50 Hz–16.0 kHz, Thru
Low-pass filter cutoff frequency
FREQ.
0.05–40.00 Hz
Modulation speed
PM DEP.
0–100%
Pitch modulation depth
AM DEP.
0–100%
Amp modulation depth
MOD.DLY
0.0–500.0 ms
Modulation delay time
WAVE
Sine, Tri
Modulation waveform
REV/CHO
0–100%
Reverb and chorus balance (0% = chorus, 100% = reverb)
MIX BAL.
0–100 [%]
Mix balance of the effects and dry sounds
REV->CHORUS
Reverb and chorus effects in series.
Parameter
Range
Description
REV TIME
0.3–99.9 s
Reverb time
INI.DLY
0.0–500.0 ms
Initial delay before reverb begins
HI.RATIO
0.1–1.0
High-frequency reverb time ratio
DIFF.
0–10
Reverb diffusion (left-right reverb spreed)
DENSITY
0–100%
Reverb density
HPF
Thru, 21 Hz–8.0 kHz
High-pass filter cutoff frequency
LPF
50 Hz–16.0 kHz, Thru
Low-pass filter cutoff frequency
FREQ.
0.05–40.00 Hz
Modulation speed
PM DEP.
0–100%
Pitch modulation depth
AM DEP.
0–100%
Amp modulation depth
MOD.DLY
0.0–500.0 ms
Modulation delay time
WAVE
Sine, Tri
Modulation waveform
REV/CHO
0–100%
Reverb and chorused reverb balance (0% = chorused reverb, 100% =
reverb)
MIX BAL.
0–100 [%]
Mix balance of the effects and dry sounds
— Reference Guide
Appendix– 17
Appendix
REV+FLANGE
Reverb and flanger effects in parallel.
Parameter
Range
Description
REV TIME
0.3–99.9 s
Reverb time
INI.DLY
0.0–500.0 ms
Initial delay before reverb begins
HI.RATIO
0.1–1.0
High-frequency reverb time ratio
DIFF.
0–10
Reverb diffusion (left-right reverb spreed)
DENSITY
0–100%
Reverb density
HPF
Thru, 21 Hz–8.0 kHz
High-pass filter cutoff frequency
LPF
50 Hz–16.0 kHz, Thru
Low-pass filter cutoff frequency
FREQ.
0.05–40.00 Hz
Modulation speed
DEPTH
0–100%
Modulation depth
MOD.DLY
0.0–500.0 ms
Modulation delay time
FB.GAIN
–99 to +99%
Feedback gain (plus values for normal-phase feedback, minus values
for reverse-phase feedback)
WAVE
Sine, Tri
Modulation waveform
REV/FLG
0–100%
Reverb and flange balance (0% = flange, 100% = reverb)
MIX BAL.
0–100 [%]
Mix balance of the effects and dry sounds
REV->FLANGE
Reverb and flanger effects in series.
Parameter
Range
Description
REV TIME
0.3–99.9 s
INI.DLY
0.0–500.0 ms
Initial delay before reverb begins
HI.RATIO
0.1–1.0
High-frequency reverb time ratio
DIFF.
0–10
Reverb diffusion (left-right reverb spreed)
DENSITY
0–100%
Reverb density
HPF
Thru, 21 Hz–8.0 kHz
High-pass filter cutoff frequency
LPF
50 Hz–16.0 kHz, Thru
Low-pass filter cutoff frequency
FREQ.
0.05–40.00 Hz
Modulation speed
DEPTH
0–100%
Modulation depth
MOD.DLY
0.0–500.0 ms
Modulation delay time
FB.GAIN
–99 to +99%
Feedback gain (plus values for normal-phase feedback, minus values
for reverse-phase feedback)
WAVE
Sine, Tri
Modulation waveform
REV/FLG.
0–100%
Reverb and flanged reverb balance (0% = flanged reverb, 100% =
reverb)
MIX BAL.
0–100 [%]
Mix balance of the effects and dry sounds
Appendix–18
Reverb time
— Reference Guide
Appendix
REV+SYMPHO.
Reverb and symphonic effects in parallel.
Parameter
Range
Description
REV TIME
0.3–99.9 s
Reverb time
INI.DLY
0.0–500.0 ms
Initial delay before reverb begins
HI.RATIO
0.1–1.0
High-frequency reverb time ratio
DIFF.
0–10
Reverb diffusion (left-right reverb spreed)
DENSITY
0–100%
Reverb density
HPF
Thru, 21 Hz–8.0 kHz
High-pass filter cutoff frequency
LPF
50 Hz–16.0 kHz, Thru
Low-pass filter cutoff frequency
FREQ.
0.05–40.00 Hz
Modulation speed
DEPTH
0–100%
Modulation depth
MOD.DLY
0.0–500.0 ms
Modulation delay time
WAVE
Sine, Tri
Modulation waveform
REV/SYM
0–100%
Reverb and symphonic balance (0% = symphonic, 100% = reverb)
MIX BAL.
0–100 [%]
Mix balance of the effects and dry sounds
REV->SYMPHO.
Reverb and symphonic effects in series.
Parameter
Range
Description
REV TIME
0.3–99.9 s
Reverb time
INI.DLY
0.0–500.0 ms
Initial delay before reverb begins
HI.RATIO
0.1–1.0
High-frequency reverb time ratio
DIFF.
0–10
Reverb diffusion (left-right reverb spreed)
DENSITY
0–100%
Reverb density
HPF
Thru, 21 Hz–8.0 kHz
High-pass filter cutoff frequency
LPF
50 Hz–16.0 kHz, Thru
Low-pass filter cutoff frequency
FREQ.
0.05–40.00 Hz
Modulation speed
DEPTH
0–100%
Modulation depth
MOD.DLY
0.0–500.0 ms
Modulation delay time
WAVE
Sine, Tri
Modulation waveform
REV/SYM
0–100%
Reverb and symphonic reverb balance (0% = symphonic reverb,
100% = reverb)
MIX BAL.
0–100 [%]
Mix balance of the effects and dry sounds
— Reference Guide
Appendix– 19
Appendix
REV->PAN
Reverb and auto-pan effects in parallel.
Parameter
Range
Description
REV TIME
0.3–99.9 s
Reverb time
INI.DLY
0.0–500.0 ms
Initial delay before reverb begins
HI.RATIO
0.1–1.0
High-frequency reverb time ratio
DIFF.
0–10
Reverb diffusion (left-right reverb spreed)
DENSITY
0–100%
Reverb density
HPF
Thru, 21 Hz–8.0 kHz
High-pass filter cutoff frequency
LPF
50 Hz–16.0 kHz, Thru
Low-pass filter cutoff frequency
FREQ.
0.05–40.00 Hz
Modulation speed
DEPTH
0–100%
Modulation depth
DIR.
*1
Panning direction
WAVE
Sine, Tri, Square
Modulation waveform
REV BAL.
0–100%
Reverb and panned reverb balance (0% = panned reverb, 100% =
reverb)
MIX BAL.
0–100 [%]
Mix balance of the effects and dry sounds
*1. L<->R, L—>R, L<—R, Turn L, Turn R
DELAY+ER.
Delay and early reflections effects in parallel.
Parameter
Range
Description
DELAY L
0.0–1000.0 ms
Left channel delay time
DELAY R
0.0–1000.0 ms
Right channel delay time
FB.DLY
0.0–1000.0 ms
Feedback delay time
–99 to +99%
Feedback gain (plus values for normal-phase feedback, minus values
for reverse-phase feedback)
HI.RATIO
0.1–1.0
High-frequency feedback ratio
TYPE
S-Hall, L-Hall, Random,
Revers, Plate, Spring
Type of early reflection simulation
ROOMSIZE
0.1–20.0
Reflection spacing
LIVENESS
0–10
Early reflections decay characteristics (0 = dead, 10 = live)
INI.DLY
0.0–500.0 ms
Initial delay before reverb begins
DIFF.
0–10
Reverb diffusion (left-right reverb spreed)
DENSITY
0–100%
Reverb density
ER NUM.
1–19
Number of early reflections
HPF
Thru, 21 Hz–8.0 kHz
High-pass filter cutoff frequency
LPF
50 Hz–16.0 kHz, Thru
Low-pass filter cutoff frequency
DLY/ER
0–100%
Delay and early reflections balance (0% = early reflections, 100% =
delay)
MIX BAL.
0–100 [%]
Mix balance of the effects and dry sounds
FB.GAIN
Appendix–20
— Reference Guide
Appendix
DELAY->ER.
Delay and early reflections effects in series.
Parameter
Range
Description
DELAY L
0.0–1000.0 ms
Left channel delay time
DELAY R
0.0–1000.0 ms
Right channel delay time
FB.DLY
0.0–1000.0 ms
Feedback delay time
FB.GAIN
–99 to +99%
Feedback gain (plus values for normal-phase feedback, minus values
for reverse-phase feedback)
HI.RATIO
0.1–1.0
High-frequency feedback ratio
TYPE
S-Hall, L-Hall, Random,
Revers, Plate, Spring
Type of early reflection simulation
ROOMSIZE
0.1–20.0
Reflection spacing
LIVENESS
0–10
Early reflections decay characteristics (0 = dead, 10 = live)
INI.DLY
0.0–500.0 ms
Initial delay before reverb begins
DIFF.
0–10
Reverb diffusion (left-right reverb spreed)
DENSITY
0–100%
Reverb density
ER NUM.
1–19
Number of early reflections
HPF
Thru, 21 Hz–8.0 kHz
High-pass filter cutoff frequency
LPF
50 Hz–16.0 kHz, Thru
Low-pass filter cutoff frequency
DLY/ER
0–100%
Delay and early reflected delay balance (0% = early reflected delay,
100% = delay)
MIX BAL.
0–100 [%]
Mix balance of the effects and dry sounds
DELAY+REV
Delay and reverb effects in parallel.
Parameter
Range
Description
DELAY L
0.0–1000.0 ms
Left channel delay time
DELAY R
0.0–1000.0 ms
Right channel delay time
FB.DLY
0.0–1000.0 ms
Feedback delay time
–99 to +99%
Feedback gain (plus values for normal-phase feedback, minus values
for reverse-phase feedback)
DELAY HI
0.1–1.0
Delay high-frequency feedback ratio
REV TIME
0.3–99.9 s
Reverb time
FB.GAIN
INI.DLY
0.0–500.0 ms
Initial delay before reverb begins
REV HI
0.1–1.0
High-frequency reverb time ratio
DIFF.
0–10
Reverb diffusion (left-right reverb spreed)
DENSITY
0–100%
Reverb density
HPF
Thru, 21 Hz–8.0 kHz
High-pass filter cutoff frequency
LPF
50 Hz–16.0 kHz, Thru
Low-pass filter cutoff frequency
DLY/REV
0–100%
Delay and reverb balance (0% = reverb, 100% = delay)
MIX BAL.
0–100 [%]
Mix balance of the effects and dry sounds
— Reference Guide
Appendix– 21
Appendix
DELAY->REV
Delay and reverb effects in series.
Parameter
Range
Description
DELAY L
0.0–1000.0 ms
Left channel delay time
DELAY R
0.0–1000.0 ms
Right channel delay time
FB.DLY
0.0–1000.0 ms
Feedback delay time
FB.GAIN
–99 to +99%
Feedback gain (plus values for normal-phase feedback, minus values
for reverse-phase feedback)
DELAY HI
0.1–1.0
Delay high-frequency feedback ratio
REV TIME
0.3–99.9 s
Reverb time
INI.DLY
0.0–500.0 ms
Initial delay before reverb begins
REV HI
0.1–1.0
High-frequency reverb time ratio
DIFF.
0–10
Reverb diffusion (left-right reverb spreed)
DENSITY
0–100%
Reverb density
HPF
Thru, 21 Hz–8.0 kHz
High-pass filter cutoff frequency
LPF
50 Hz–16.0 kHz, Thru
Low-pass filter cutoff frequency
DLY/REV
0–100%
Delay and delayed reverb balance (0% = delayed reverb, 100% =
delay)
MIX BAL.
0–100 [%]
Mix balance of the effects and dry sounds
DIST->DELAY
Distortion and delay effects in series.
Parameter
Range
Description
DST TYPE
DST1, DST2, OVD1,
OVD2, CRUNCH
Distortion type (DST = distortion, OVD = overdrive)
DRIVE
0–100
Distortion drive
MASTER
0–100
Master volume
TONE
–10 to +10
Tone control
N.GATE
0–20
Noise reduction
DELAY
0.0–2725.0 ms
Delay time
FB.GAIN
–99 to +99%
Feedback gain (plus values for normal-phase feedback, minus values
for reverse-phase feedback)
HI.RATIO
0.1–1.0
High-frequency feedback ratio
FREQ.
0.05–40.00 Hz
Modulation speed
DEPTH
0–100%
Modulation depth
DLY BAL
0–100%
Distortion and delay balance (0% = distortion, 100% = delayed distortion)
Appendix–22
— Reference Guide
Appendix
MULTI FILTER
Three-band parallel filter (24 dB/octave)
Parameter
Range
Description
TYPE 1
HPF, LPF, BPF
Filter 1 type: low pass, high pass, band pass
TYPE 2
HPF, LPF, BPF
Filter 2 type: low pass, high pass, band pass
TYPE 3
HPF, LPF, BPF
Filter 3 type: low pass, high pass, band pass
FREQ. 1
28 Hz–16.0 kHz
Filter 1 frequency
FREQ. 2
28 Hz–16.0 kHz
Filter 2 frequency
FREQ. 3
28 Hz–16.0 kHz
Filter 3 frequency
LEVEL 1
0–100
Filter 1 level
LEVEL 2
0–100
Filter 2 level
LEVEL 3
0–100
Filter 3 level
RESO. 1
0–20
Filter 1 resonance
RESO. 2
0–20
Filter 2 resonance
RESO. 3
0–20
Filter 3 resonance
MIX BAL.
0–100 [%]
Mix balance of the effects and dry sounds
— Reference Guide
Appendix– 23
Appendix
Dynamics Processors
Dynamics processors are generally used to correct or control signal levels. However, you can also use them
creatively to shape the volume envelope of a sound. The AW4416 features comprehensive dynamics processors for all the input channels, tape returns, and the bus and stereo outputs. These processors allow you to
compress, expand, compress-expand (compand), gate, or duck the signals passing through the mixer, giving
you unparalleled sonic quality and flexibility.
Preset Dynamics Programs
These are the preset dynamics programs.
No
Program Name
No
Program Name
001
A.Dr.BD
"CMP
021
BrassSection
"CMP
002
A.Dr.BD
"EXP
022
Syn.Pad
"CMP
003
A.Dr.BD
"GAT
023
SamplingPerc
"CPS
004
A.Dr.BD
"CPH
024
Sampling BD
"CMP
005
A.Dr.SN
"CMP
025
Sampling SN
"CMP
006
A.Dr.SN
"EXP
026
Hip Comp
"CPS
007
A.Dr.SN
"GAT
027
Solo Vocal1
"CMP
008
A.Dr.SN
"CPS
028
Solo Vocal2
"CMP
009
A.Dr.Tom
"EXP
029
Chorus
"CMP
010
A.Dr.OverTop
"CPS
030
Compander(H)
"CPH
011
E.B.finger
"CMP
031
Compander(S)
"CPS
012
E.B.slap
"CMP
032
Click Erase
"EXP
013
Syn.Bass
"CMP
033
Announcer
"CPH
014
Piano1
"CMP
034
Easy Gate
"GAT
015
Piano2
"CMP
035
BGM Ducking
"DUK
016
E.Guitar
"CMP
036
Limiter1
"CPS
017
A.Guitar
"CMP
037
Limiter2
"CMP
018
Strings1
"CMP
038
Total Comp1
"CMP
019
Strings2
"CMP
039
Total Comp2
"CMP
020
Strings3
"CMP
040
Total Comp3
"CMP
Appendix–24
— Reference Guide
Appendix
Compressor
A compressor provides a form of automatic level control. By attenuating
high levels, thus effectively reducing the dynamic range, the compressor
makes it much easier to control signals and set appropriate fader levels.
Reducing the dynamic range also means that recording levels can be set
higher, therefore improving the signal-to-noise performance.
dB
+20
Compression ratio = 2:1
+10
0
Output Level
-10
Threshold = -20dB
-20
Knee = hard
-30
-40
Compressor (CMP) parameters:
-50
-60
-70
dB
-70
-60
-50
-40
-30 -20 -10
Input Level
0
+10
Parameter
Value
+20
Threshold (dB)
–54 to 0
Ratio
1.0, 1.1, 1.3, 1.5, 1.7, 2.0, 2.5, 3.0, 3.5, 4.0, 5.0, 6.0, 8.0,
10, 20, ∞
(16 points)
Attack (ms)
0 to 120
(121 points)
Outgain (dB)
0 to +18
(36 points)
Knee
hard,1,2,3,4,5
Release (ms)
(55 points)
sec*1,
(6 points)
6 ms to 46.0
5 ms to 42.3
8 ms to 63.4 sec*3
sec*2,
(160 points)
*1. These values are obtained when the sampling frequency is 48 kHz.
*2. These values are obtained when the sampling frequency is 44.1 kHz.
*3. These values are obtained when the sampling frequency is 32 kHz
Threshold determines the level of input signal required to trigger the
compressor. Signals at a level below the threshold pass through unaffected.
Signals at and above the threshold level are compressed by the amount
specified using the Ratio parameter. The trigger signal is determined using
the KEY IN parameter.
Ratio controls the amount of compression—the change in output signal
level relative to change in input signal level. With a 2:1 ratio, for example, a
10 dB change in input level (above the threshold) results in a 5 dB change
in output level. For a 5:1 ratio, a 10 dB change in input level (above the
threshold) results in a 2 dB change in output level.
Attack controls how soon the signal is compressed once the compressor
has been triggered. With a fast attack time, the signal is compressed almost
immediately. With a slow attack time, the initial transient of a sound passes
through unaffected.
Out Gain sets the compressor’s output signal level. Compression tends to
reduce the average signal level. Out Gain can be used to counter this level
reduction and set an appropriate level for the next stage in the audio path.
Knee sets the transition of the signal at the threshold. With a hard knee, the
transition between uncompressed and compressed signal is immediate.
With the softest knee, knee5, the transition starts before the signal reaches
the threshold and gradually ends above the threshold.
Release determines how soon the compressor returns to its normal gain
once the trigger signal level drops below the threshold. If the release time is
too short, the gain will recover too quickly causing level pumping—noticeable gain fluctuations. If it is set too long, the compressor may not have time
to recover before the next high level signal appears, and it will be compressed incorrectly.
— Reference Guide
Appendix– 25
Appendix
Expander
An expander is another form of automatic level control. By attenuating the
signal below the threshold, the expander reduces low-level noise and effectively increases the dynamic range of the recorded material.
dB
+20
Expansion ratio = 2:1
+10
0
Knee = hard
Output Level
-10
Threshold = -10dB
-20
-30
Expander (EXP) parameters:
-40
Parameter
-50
Value
-60
-70
Threshold (dB)
–54 to 0
(55 points)
Ratio
1.0, 1.1, 1.3, 1.5, 1.7, 2.0, 2.5, 3.0, 3.5, 4.0, 5.0, 6.0, 8.0,
10, 20, ∞
(16 points)
Attack (ms)
0 to 120
(121 points)
Outgain (dB)
0 to +18
(36 points)
Knee
hard,1,2,3,4,5
dB
-70
-60
-50
-40
-30 -20 -10
Input Level
0
+10
+20
dB
+20
Expansion ratio = 2:1
+10
Release (ms)
Knee = knee5
0
Output Level
-10
Threshold = -20dB
-20
-30
-40
-50
sec*1,
6 ms to 46.0
5 ms to 42.3
8 ms to 63.4 sec*3
(6 points)
sec*2,
(160 points)
*1. These values are obtained when the sampling frequency is 48kHz.
*2. These values are obtained when the sampling frequency is 44.1 kHz.
*3. These values are obtained when the sampling frequency is 32 kHz
-60
-70
dB
-70
-60
-50
-40
-30 -20 -10
Input Level
Appendix–26
0
+10
+20
Threshold determines the level of input signal required to trigger the
expander. Signals above the threshold pass through unaffected. Signals at
and below the threshold level are attenuated by the amount specified using
the Ratio parameter. The trigger signal is determined using the KEY IN
parameter.
Ratio controls the amount of expansion—the change in output signal level
relative to change in input signal level. With a 1:2 ratio, for example, a 5 dB
change in input level (below the threshold) results in a 10 dB change in output level. For a 1:5 ratio, a 2 dB change in input level (below the threshold)
results in a 10 dB change in output level.
Attack controls how soon the signal is expanded once the expander has
been triggered. With a fast attack time, the signal is expanded almost immediately. With a slow attack time, the initial transient of a sound passes
through unaffected.
Out Gain sets the expander’s output signal level.
Knee sets the transition of the signal at the threshold. With a hard knee, the
transition between unexpanded and expanded signal is immediate. With
the softest knee, knee5, the transition starts before the signal reaches the
threshold and gradually ends above the threshold.
Release determines how soon the expander returns to its normal gain once
the trigger signal level drops below the threshold.
— Reference Guide
Appendix
Compander
A compander is a compressor-expander—a combination of signal compression and expansion. The compander attenuates the input signal above the
threshold as well as the level below the width. For very dynamic material,
this program allows you to retain the dynamic range without having to be
concerned with excessive output signal levels and clipping.
dB
+20
+10
Width
0
Output Level
-10
-20
Threshold
-30
CompanderH (CPH) and CompanderS (CPS) parameters:
-40
-50
-60
-70
dB
-70
-60
-50
-40
-30 -20 -10
Input Level
0
+10
+20
Parameter
Value
Threshold (dB)
–54 to 0
Ratio
1.0, 1.1, 1.3, 1.5, 1.7, 2.0, 2.5, 3.0, 3.5, 4.0, 5.0, 6.0, 8.0,
10, 20
(15 points)
Attack (ms)
0 to 120
(121 points)
Outgain (dB)
–18 to 0
(36 points)
Width (dB)
1 to 90
Release (ms)
(55 points)
(90 points)
sec*1,
6 ms to 46.0
5 ms to 42.3
8 ms to 63.4 sec*3
sec*2,
(160 points)
*1. These values are obtained when the sampling frequency is 48kHz.
*2. These values are obtained when the sampling frequency is 44.1 kHz.
*3. These values are obtained when the sampling frequency is 32 kHz
Threshold determines the level of input signal required to trigger the compander. Signals above the threshold pass through unaffected. Signals at and
below the threshold level are attenuated by the amount specified using the
Ratio parameter. The trigger signal is determined using the KEY IN parameter.
Ratio controls the amount of companding—the change in output signal
level relative to change in input signal level. With a 2:1 ratio, for example, a
10 dB change in input level (above the threshold) results in a 5 dB change
in output level. The hard compander (CPH) has a fixed ratio of 5:1 for
expansion and the soft compander (CPS) has a fixed ratio of 1.5:1 for
expansion.
Attack controls how soon the signal is companded once the compander has
been triggered. With a fast attack time, the signal is companded almost
immediately. With a slow attack time, the initial transient of a sound passes
through unaffected.
Out Gain sets the compander’s output signal level.
Width is used to determine the distance, in decibels, between the expander
and the compressor. With a width of 90 dB, the expander is effectively
switched off and the compander is simply a compressor-limiter. With a
smaller width (30dB) and a high threshold (0dB), the compander is an
expander-compressor-limiter.
Release determines how soon the compander returns to its normal gain
once the trigger signal level drops below the threshold.
— Reference Guide
Appendix– 27
Appendix
Gate and Ducking
A gate, or noise gate is an audio switch used to mute signals below a set
threshold level. It can be used to suppress background noise and hiss from
valve (tube) amps, effects pedals, and microphones.
Ducking is used to automatically reduce the levels of one signal when the
level of a source signal exceeds a specified threshold. It is used for voiceover applications where, for example, level of background music is automatically reduced, allowing an announcer to be heard clearly.
dB
+20
+10
0
Threshold = -10dB
Output Level
-10
-20
-30
Range = -30dB
-40
-50
-60
Range = -70dB
-70
Gate (GAT) and Ducking (DUK) parameters:
dB
-70
-60
-50
-40
-30 -20 -10
Input Level
0
+10
+20
Parameter
Value
Threshold (dB)
–54 to 0
(55 points)
Range (dB)
–70 to 0
(71 points)
Attack (ms)
0 to 120
(121 points)
Hold (ms)
0.02 ms to 1.96s*1, 0.02 ms to 2.13 sec*2, 0.03 ms to
2.94 sec*3
(216 points)
Decay (ms)
5ms to 42.3s *1., 6 ms to 46.0 sec*2.,
8 ms to 63.4 sec *3.
dB
+20
+10
0
Output Level
-10
Threshold = -20dB
-20
-30
-40
-50
(160 points)
Range = -30dB
-60
-70
dB
-70
-60
-50
-40
-30 -20 -10
Input Level
0
+10
+20
*1. These values are obtained when the sampling frequency is 48kHz.
*2. These values are obtained when the sampling frequency is 44.1 kHz.
*3. These values are obtained when the sampling frequency is 32 kHz
Threshold sets the level at which the gate closes, cutting off the signal. Signals above the threshold level pass through unaffected. Signals at or below
the threshold cause the gate to close.
For ducking, trigger signal levels at and above the threshold level activate
ducking, and the signal level is reduced to a level set by the Range parameter.
The trigger signal is determined using the KEY IN parameter.
Range controls the level to which the gate closes. It can be used to reduce
the signal level rather than cut it completely. At a setting of –70 dB, the gate
closes completely when the input signal falls below the threshold. At a setting of –30 dB, the gate only closes so far allowing an attenuated signal
through. At a setting of 0 dB, the gate has no effect. When signals are gated
abruptly, the sudden cutoff can sound odd.
For ducking, a setting of –70 dB causes the signal to be virtually cutoff. At a
setting of –30 dB the signal is ducked by 30 dB. At a setting of 0 dB, the
duck has no effect.
Attack determines how fast the gate opens when the signal exceeds the
threshold level. Slow attack times can be used to remove the initial transient
edge of percussive sounds. Too slow an attack time makes some signals
sound backwards.
For ducking, this controls how soon the signal is ducked once the duck has
been triggered. With a fast attack time, the signal is ducked almost immediately. With a slow attack time, ducking fades the signal. Too fast an attack
time may sound abrupt.
Hold sets how long the gate stays open or the ducking remains active once
the trigger signal has fallen below the threshold level.
Decay controls how fast the gate closes once the hold time has expired. A
longer decay time produces a more natural gating effect, allowing the natural decay of an instrument to pass through.
Appendix–28
— Reference Guide
Appendix
For ducking, this determines how soon the ducker returns to its normal gain after the hold time has expired.
Preset Dynamics Program Parameters
The “Release”, “Hold”, and “Decay” values shown in the following table are valid when the AW4416 is set at
a sampling frequency of 44.1 kHz.
No.
001
002
003
004
005
006
007
Name
A.Dr.BD
A.Dr.BD
A.Dr.BD
A.Dr.BD
A.Dr.SN
A.Dr.SN
A.Dr.SN
Type
"CMP
"EXP
"GAT
"CPH
"CMP
"EXP
"GAT
Compressor
Expander
Gate
CompanderH
Compressor
Expander
Gate
Parameter
Value
Threshold (dB)
–24
Ratio ( :1)
3
Attack (ms)
9
Outgain (dB)
5.5
Knee
2
Release (ms)
58
Threshold (dB)
–23
Ratio ( :1)
1.7
Attack (ms)
1
Outgain (dB)
3.5
Knee
2
Release (ms)
70
Threshold (dB)
–11
Range (dB)
–53
Attack (ms)
0
Hold (ms)
1.93
Decay (ms)
400
Threshold (dB)
–11
Ratio ( :1)
3.5
Attack (ms)
1
Outgain (dB)
–1.5
Width (dB)
7
Release (ms)
192
Threshold (dB)
–17
Ratio ( :1)
2.5
Attack (ms)
8
Outgain (dB)
3.5
Knee
2
Release (ms)
12
Threshold (dB)
–23
Ratio ( :1)
2
Attack (ms)
0
Outgain (dB)
0.5
Knee
2
Release (ms)
151
Threshold (dB)
–8
Range (dB)
–23
Attack (ms)
1
Hold (ms)
0.63
Decay (ms)
238
Description
Compressor that gives the best
results with an acoustic bass drum.
Expander for the same purpose as
program 001.
Gate for the same purpose as
program 001.
Hard compander for the same
purpose as program 001.
Compressor that gives the best
results with an acoustic snare
drum.
Expander for the same purpose as
program 005.
Gate for the same purpose as
program 005.
— Reference Guide
Appendix– 29
Appendix
No.
008
009
010
011
012
013
014
Name
A.Dr.SN
A.Dr.Tom
A.Dr.OverTop
E.B.finger
E.B.slap
Syn.Bass
Piano1
Appendix–30
Type
"CPS
"EXP
"CPS
"CMP
"CMP
"CMP
"CMP
CompanderS
Expander
CompanderS
Compressor
Compressor
Compressor
Compressor
— Reference Guide
Parameter
Value
Threshold (dB)
–8
Ratio ( :1)
1.7
Attack (ms)
11
Outgain (dB)
0.0
Width (dB)
10
Release (ms)
128
Threshold (dB)
–20
Ratio ( :1)
2
Attack (ms)
2
Outgain (dB)
5.0
Knee
2
Release (ms)
749
Threshold (dB)
–24
Ratio ( :1)
2
Attack (ms)
38
Outgain (dB)
–3.5
Width (dB)
54
Release (ms)
842
Threshold (dB)
–12
Ratio ( :1)
2
Attack (ms)
15
Outgain (dB)
4.5
Knee
2
Release (ms)
470
Threshold (dB)
–12
Ratio ( :1)
1.7
Attack (ms)
6
Outgain (dB)
4.0
Knee
hard
Release (ms)
133
Threshold (dB)
–10
Ratio ( :1)
3.5
Attack (ms)
9
Outgain (dB)
3.0
Knee
hard
Release (ms)
250
Threshold (dB)
–9
Ratio ( :1)
2.5
Attack (ms)
17
Outgain (dB)
1.0
Knee
hard
Release (ms)
238
Description
Soft compander for the same
purpose as program 005.
Expander for acoustic toms
automatically reduces the volume
when the toms are not played,
helping to differentiate the bass and
snare drums clearly.
Soft compander to emphasize the
attack and ambience of cymbals
using overhead microphones. It
automatically reduces the volume
when the cymbals are not played,
helping differentiate the bass and
snare drums clearly.
Compressor to equalize the attack
and volume level of a finger-picked
electric bass guitar.
Compressor to equalize the attack
and volume level of a slap electric
bass guitar
Compressor to adjust and/or
emphasize the level of a synth
bass.
Compressor to brighten the tonal
color of a piano.
Appendix
No.
015
016
017
018
019
020
021
Name
Piano2
E.Guitar
A.Guitar
Strings1
Strings2
Strings3
BrassSection
Type
"CMP
"CMP
"CMP
"CMP
"CMP
"CMP
"CMP
Compressor
Compressor
Compressor
Compressor
Compressor
Compressor
Compressor
Parameter
Value
Threshold (dB)
–18
Ratio ( :1)
3.5
Attack (ms)
7
Outgain (dB)
6.0
Knee
2
Release (ms)
174
Threshold (dB)
–8
Ratio ( :1)
3.5
Attack (ms)
7
Outgain (dB)
2.5
Knee
4
Release (ms)
261
Threshold (dB)
–10
Ratio ( :1)
2.5
Attack (ms)
5
Outgain (dB)
1.5
Knee
2
Release (ms)
238
Threshold (dB)
–11
Ratio ( :1)
2
Attack (ms)
33
Outgain (dB)
1.5
Knee
2
Release (ms)
749
Threshold (dB)
–12
Ratio ( :1)
1.5
Attack (ms)
93
Outgain (dB)
1.5
Knee
4
Release (ms)
1.35 S
Threshold (dB)
–17
Ratio ( :1)
1.5
Attack (ms)
76
Outgain (dB)
2.5
Knee
2
Release (ms)
186
Threshold (dB)
–18
Ratio ( :1)
1.7
Attack (ms)
18
Outgain (dB)
4.0
Knee
1
Release (ms)
226
Description
A variation on program 014,
adjusting the attack and entire level
using a deeper threshold.
Compressor for backing
performances, such as electric
rhythm guitar playing chords or
arpeggios.
A variation on program 016,
intended for acoustic guitar playing
rhythm chords or arpeggios.
Compressor for string instruments.
This program was intended for
violins.
A variation on program 018,
intended for violas or cellos.
A variation on program 018,
intended for string instruments with
a very low range, such as cellos or
contrabass.
Compressor intended for brass
sounds with fast and strong attack.
— Reference Guide
Appendix– 31
Appendix
No.
022
023
024
025
026
027
028
Name
Syn.Pad
Type
"CMP
SamplingPerc "CPS
Sampling BD
Sampling SN
Hip Comp
Solo Vocal1
Solo Vocal2
Appendix–32
"CMP
"CMP
"CPS
"CMP
"CMP
Compressor
CompanderS
Compressor
Compressor
CompanderS
Compressor
Compressor
— Reference Guide
Parameter
Value
Threshold (dB)
–13
Ratio ( :1)
2
Attack (ms)
58
Outgain (dB)
2.0
Knee
1
Release (ms)
238
Threshold (dB)
–18
Ratio ( :1)
1.7
Attack (ms)
8
Outgain (dB)
–2.5
Width (dB)
18
Release (ms)
238
Threshold (dB)
–14
Ratio ( :1)
2
Attack (ms)
2
Outgain (dB)
3.5
Knee
4
Release (ms)
35
Threshold (dB)
–18
Ratio ( :1)
4
Attack (ms)
8
Outgain (dB)
8.0
Knee
hard
Release (ms)
354
Threshold (dB)
–23
Ratio ( :1)
20
Attack (ms)
15
Outgain (dB)
0.0
Width (dB)
15
Release (ms)
163
Threshold (dB)
–20
Ratio ( :1)
2.5
Attack (ms)
31
Outgain (dB)
2.0
Knee
1
Release (ms)
342
Threshold (dB)
–8
Ratio ( :1)
2.5
Attack (ms)
26
Outgain (dB)
1.5
Knee
3
Release (ms)
331
Description
Compressor for synth pad,
intended to prevent diffusion of the
sound.
Compressor for sampled sounds to
boost them to be as powerful and
clear as the acoustic sounds. This
program is for percussion sounds.
A variation on program 023,
intended for sampled bass drum
sounds.
A variation on program 023,
intended for sampled snare drum
sounds.
A variation on program 023,
intended for sampled sounds for
loops.
Compressor suited for a solo vocal
source.
A variation on program 027.
Appendix
No.
029
030
031
032
033
034
035
036
Name
Chorus
Type
"CMP
Compander(H) "CPH
Compander(S) "CPS
Click Erase
Announcer
Easy Gate
BGM Ducking
Limiter1
"EXP
"CPH
"GAT
"DUK
"CMP
Compressor
CompanderH
CompanderS
Expander
CompanderH
Gate
Ducking
CompanderS
Parameter
Value
Threshold (dB)
–9
Ratio ( :1)
1.7
Attack (ms)
39
Outgain (dB)
2.5
Knee
2
Release (ms)
226
Threshold (dB)
–10
Ratio ( :1)
3.5
Attack (ms)
1
Outgain (dB)
0.0
Width (dB)
6
Release (ms)
250
Threshold (dB)
–8
Ratio ( :1)
4
Attack (ms)
25
Outgain (dB)
0.0
Width (dB)
24
Release (ms)
180
Threshold (dB)
–33
Ratio ( :1)
2
Attack (ms)
1
Outgain (dB)
2.0
Knee
2
Release (ms)
284
Threshold (dB)
–14
Ratio ( :1)
2.5
Attack (ms)
1
Outgain (dB)
–2.5
Width (dB)
18
Release (ms)
180
Threshold (dB)
–26
Range (dB)
–56
Attack (ms)
0
Hold (ms)
2.56
Decay (ms)
331
Threshold (dB)
–19
Range (dB)
–22
Attack (ms)
93
Hold (ms)
1.20 S
Decay (ms)
6.32 S
Threshold (dB)
–8
Ratio ( :1)
4
Attack (ms)
25
Outgain (dB)
0.0
Width (dB)
24
Release (ms)
180
Description
A variation on program 027,
intended for chorus vocals.
A template for the hard knee
compander program.
A template for the soft knee
compander program.
Expander to remove click track
sounds that may bleed out of the
monitor headphones the musicians
are using.
Hard compander reduces the level
during the interval between the
words, making the voice sound
even.
A template for the gate program.
Ducking background music for
voiceovers, typically keyed from the
announcer’s channel.
A template for a limiter using the
soft compander program. This
program has a slow release.
— Reference Guide
Appendix– 33
Appendix
No.
037
038
039
040
Name
Limiter2
Total Comp1
Total Comp2
Total Comp3
Appendix–34
Type
"CMP
"CMP
"CMP
"CMP
Compressor
Compressor
Compressor
Compressor
— Reference Guide
Parameter
Value
Threshold (dB)
0
Ratio ( :1)
∞
Attack (ms)
0
Outgain (dB)
0.0
Knee
hard
Release (ms)
319
Threshold (dB)
–8
Ratio ( :1)
2.5
Attack (ms)
60
Outgain (dB)
0.0
Knee
2
Release (ms)
1.12 S
Threshold (dB)
–18
Ratio ( :1)
3.5
Attack (ms)
94
Outgain (dB)
2.5
Knee
hard
Release (ms)
447
Threshold (dB)
–16
Ratio ( :1)
6
Attack (ms)
11
Outgain (dB)
6.0
Knee
1
Release (ms)
180
Description
A template for a limiter using the
compressor program. This program
is a PEAK STOP type.
Compressor intended to reduce the
overall volume level. Use for the
stereo out during mixdown. It is also
interesting on stereo input signals.
A variation of program 038. It has a
harder compression ratio.
A variation of program 038. It has
an extreme compression ratio,
almost a limiter in effect.
Appendix
Troubleshooting
If the AW4416 does not operate as you expect, or if you suspect a problem, please refer to the following points and take the appropriate action.
■Power does not turn on
• Is the power cable connected to an AC outlet of
the correct voltage?
• Is the POWER switch turned ON?
• If the power still does not turn on, please contact
your Yamaha dealer.
■Can’t hear the signal from the INPUT 1/2 jacks
• An external effect unit may be connected to the
INSERT jack, and turned off.
■Internal hard disk is not detected
• Is the internal hard disk connected correctly?
• The pins of the internal hard disk may have been
deformed.
• Has the internal hard disk been formatted appropriately? *
■Sound is too soft
• Are the speakers or headphones connected correctly?
• Is the volume of your amp or external equipment
raised?
• Is the [GAIN] control set correctly?
• Is the fader of the input channel or monitor channel raised?
• Is the fader of the stereo output channel raised?
• The EQ gain may be set to an extremely low
value.
• The dynamics processor may be set to an
extreme threshold or ratio.
• If you are connecting an electric guitar, is it connected to the Hi-Z jack?
• Check the level in the HOME screen. For details
refer to P.75 “HOME screen.”
• Is the attenuator of the EQ screen or VIEW screen
raised?
* If an unformatted hard disk is installed, a message
will appear when the power is turned on, asking
you whether you wish to format the hard disk.
■LCD display is dim or dark
• Use the contrast knob located at the lower right
of the screen to adjust the contrast.
■Input sound is not output
• Are speakers or headphones connected correctly?
• Is your amp and other external devices turned on?
• Is the signal from the external device being input?
• The connection cable from the external device
may be broken.
• Is the [GAIN] control set to an appropriate level?
• Is the fader of the input channel or monitor channel raised?
• Is the [ON] key of the input channel or monitor
channel lit?
• Is the fader of the stereo output channel raised?
• Is the [ON] key of the stereo output channel lit?
• Is the option card installed correctly?
• Is the input/output patching set correctly?
• Is the word clock set correctly?
• The jack being used for input may have been
assigned as an EFFECT INSERT return.
• Is the attenuator raised in the EQ screen or VIEW
screen?
■Recorded sound is not output
• Has audio data been recorded on the recorder?
• Muting may be enabled in the TRACK screen TR
View page.
• The input monitor mode may be set to INPUT.
• Is the virtual track set to the track that was
recorded?
• A region shorter than the specified region fade
time cannot be played.
■Signal from the INPUT 8 jack is too loud
• A conventional line-level signal may be connected to the Hi-Z jack.
■Sound is distorted
• Is the [GAIN] control set correctly?
• The connection cable from the external device
may be broken.
• The fader of the input channel or monitor channel may be raised excessively.
• The stereo output channel fader may be raised
excessively.
• The stereo output channel attenuator may be
raised excessively.
• The EQ gain may be excessively high.
• Did you record at an appropriate level?
• Is the word clock setting correct for both the
AW4416 and the external device(s)?
• An effect such as Distortion or Amp Simulate
may be in use.
■Can’t record
• Is the internal hard disk connected?
• Is there sufficient free space on the internal hard
disk?
• The song may be protected.
• Is the [REC TRACK SELECT] key lit?
— Reference Guide
Appendix–35
Appendix
• The stereo track may be in playback mode.
• Is the input signal routed appropriately to the
recorder? *
* If the signal is being input appropriately to the
recorder, pressing the [REC TRACK SELECT] key
will cause the meter in the FL display to react.
• When a file input/output page such as the SONG
screen Song List page is displayed, recording and
playback are not possible.
• CD/DAT DIGITAL REC in the UTILITY screen Prefer.2 page may be set to DISABLE.
• Please read and understand the copyright warning (→ P.36) before using digital input signals.
■Can’t record on the STEREO track
• It is not possible to record on the STEREO track
while recording on other tracks.
■Can’t play back the STEREO track
• Muting may be selected in the TRACK screen Stereo page.
• Are monitor channels 1 and 2 raised? *
* For STEREO track playback mode, the signal is
output from monitor channels 1 and 2.
■Not all tracks will play back
• There are limitations on the number of tracks that
can be simultaneously recorded or played. Refer
to Operation Guide P.147 “Audio tracks”.
■The volume of a particular channel increases or
decreases
• Are the dynamics processor settings appropriate?
• EQ may have been recorded in the automix.
■Faders move to the lowest position on their own
• Automix may have been recorded.
• Faders 9–14 cannot be operated when the mixing
layer is 17–24/RTN.
■Meters move even though the faders are lowered
• The direct out setting may be PRE EQ or PRE FADER.
• The meter display may be set to PRE FADER.
■Can’t store a scene
• Is the scene memory protected?
• A scene cannot be stored in scene number 00.
■Can’t reproduce a scene
• One or more channels may be set to Recall Safe.
■Can’t recall a scene during recording
• The AW4416 may be set to record the digital
input signal.
• Make sure that CD/DAT DIGITAL REC is set to
ENABLE.
■Can’t change input patches during recording
• The AW4416 may be set to record the digital
input signal.
Appendix–36
— Reference Guide
• Make sure that CD/DAT DIGITAL REC in the
UTILITY screen Prefer.2 page is set to ENABLE.
■Can’t save to a library
• It is not possible to save to the factory-preset
libraries.
■Can’t recall a channel library to the stereo output channel
• Channel libraries saved from other channels cannot be recalled to the stereo output channel.
■Can’t exchange MIDI data
• Are the MIDI cables connected correctly?
• A MIDI cable may be broken.
• Is the power turned on for the transmitting and
receiving devices?
• Do the channel settings match for the transmitted
and receiving devices?
• In the MIDI screen MIDI Setup page, is PORT
SELECT effect to MIDI?
• In the MIDI screen MIDI Setup page, are PROGRAM CHANGE TX and RX set to ON?
• Is a scene assigned to the program change number being transmitted?
■MIDI messages are looped
• In the MIDI screen MIDI Setup page, ECHO may
be turned ON.
• Also check the settings of the connected external
MIDI devices.
■MTC messages are not transmitted
• Is the MIDI cable correctly connected to the MTC
OUT connector? MTC is not transmitted from the
MIDI OUT connector.
• Is SYNC OUT set correctly?
• Is MTC SYNC set to MASTER?
■The AW4416 does not synchronize to incoming
MTC messages
• Is the MIDI cable connected to the MIDI IN connector?
• In the MIDI screen MIDI Sync page, is MTC Sync
set to SLAVE?
■MTC messages are received, but synchronization
drifts
• Is a large amount of MIDI data (notes etc.) being
received together with the MTC messages?
■MTC synchronization drifts
• Does the frame rate match between the AW4416
and the external device?
• SYNC OFFSET may have been set.
• If jumps occur in the synchronized time, change
the SYNC AVE. setting in the MIDI screen MIDI
Sync page, and try again.
Appendix
■Something happens to the sound when the
[DATA/JOG] dial, [SHUTTLE] dial, [FF] key, or
[REW] key are operated
• Differences in the number of simultaneously
played tracks will affect the way in which the
sound is heard when these controls are operated.
■MMC is not transmitted
• Is the MIDI cable connected to the MIDI OUT
connector?
• MMC messages are not transmitted from the
MTC OUT connector.
■MIDI data is not exchanged via the TO HOST
connector
• Is the cable correctly connected to the TO HOST
connector?
• PORT SELECT may be set to MIDI.
• Is the PORT SELECT setting appropriate for your
computer? *
* For details on this setting, refer to page 39 “MIDI
screen.”
• A computer application other than your
sequencer may be using the port.
■Metronome cannot be heard
• The metronome sound is normally sent only to
the MONITOR OUT and headphones. *
* Settings can also be made in the SETUP screen
Patch IN page to assign the metronome to an output channel.
■Moving a fader does not change the level
• Is the appropriate fader mode and mixing layer
selected?
• The fader may be set to PRE FADE in AUX.
■The ON key and SEL key select the wrong channel
• Is the appropriate mixing layer selected?
■Noise is present in the recorded signal
• Does the word clock setting match for the
AW4416 and the external device(s)?
• Is an unsynchronized signal being input?
• Is the dither setting appropriate?
• The oscillator may be functioning.
• If the speed of your internal hard disk is slow,
problems may occur during recording and playback. Please use only the recommended internal
hard disks.
■Sound recorded via the digital input sounds
grainy
• Is the dither setting appropriate?
■Pairing was specified, but the signal is monaural
• Is the odd-numbered channel panned far left and
the even-numbered channel panned far right?
■Pairing was specified, but the signal phase does
not match
• Even when channels are paired, the phase setting
is not linked.
■Signal is delayed
• Is the channel delay set correctly?
■Automix cannot be recorded
• Is automix set to ENABLE?
• In the AUTOMIX screen, is the REC or AUTO
REC button turned ON?
• Is the [SEL] key lit for the channel you are operating?
• Is OVERWRITE turned ON for the control (e.g.,
fader or EQ) you are operating?
■Can’t use the internal effects
• Effect BYPASS may be turned ON.
• Are the EFF.RTN 1, 2 faders raised?
• In the SETUP screen Patch IN page, EFFECT
PATCH may be set to INSERT.
• It is not possible to insert one effect into multiple
channels.
• 019. HQ. Pitch can be used only with EFFECT 2.
■Can’t use SOLO
• The channel may be set to Solo Safe.
• Is the SETUP screen Solo Setup page set appropriately? *
* For details on the settings, refer to page 14,
“SETUP screen.”
■Can’t edit a recorded track
• Have you selected the virtual track that you
recorded?
■Fader groups and mute groups don’t work
• In the EQ screen Fader Group page and Mute
Group page, check that grouping is set to
ENABLE.
■Editing results are not heard in the sound
• Have you selected the virtual track that you
recorded?
• Are you using the appropriate editing
command? *
* For details on editing commands, refer to page 99
“EDIT screen.”
■Playback pitch is wrong
• VARI may be selected.
• Is the AW4416 operating on the same sampling
frequency as the synchronized external device?
• Is the master device operating in a stable way?
• You may have executed the EDIT screen PITCH
command.
• Is an effect such as HQ.Pitch or Dual Pitch
selected for a monitor channel?
— Reference Guide
Appendix–37
Appendix
■Counter display is not 0 when you return to the
beginning of the song
• The display mode may be set to REMAIN
(remaining recording time).
• If the display mode is set to REL (relative time),
the start point may be specified.
• The SONG screen Setting page may be set to
MEASURE. *
* For details on this setting, refer to page 1 “SONG
screen.”
■No sound from the sampling pads
• In the SETUP screen Patch IN page, are the signals from the sampling pads assigned to a channel?
• The bank A/B setting may be incorrect.
■Can’t save a file
• Is there sufficient space on the internal hard disk?
• Did you perform the correct shut-down procedure when you last turned off the power? *
* If you turn off the power without performing the
shut-down, data may be lost or the hard disk may
be damaged.
■Song file size is unnaturally large
• Even after you use recorder editing to erase a
track etc., that sound file will be saved on the
disk as an unused file. Execute the optimize operation in the SONG screen Song Edit page.
■File date is not recorded correctly
• Is the internal clock set to the correct date and
time? *
* If the date and time of the internal clock has
drifted, the internal battery may have run down.
Please contact your Yamaha dealer.
■A device connected to the SCSI connector is not
recognized
• The power of the SCSI device may have been
turned on after the AW4416.
• Is the SCSI cable connected correctly?
• The pins of the SCSI cable may have been bent.
• Is the ID of the SCSI device set correctly?
• Is termination specified correctly for the SCSI
device?
■Can’t save files on a SCSI device
• Is there sufficient free space on the save destination media?
• Has the save destination media been formatted
appropriately?
■Can’t load files from a SCSI device
• Is there sufficient free space on the internal hard
disk?
■CD-RW drive is not recognized
• Is the CD-RW drive connected correctly?
Appendix–38
— Reference Guide
■Can’t create an audio CD
• Is CD-R media inserted?
• The inserted CD-R may have already been finalized.
• Is a signal recorded on the stereo track?
• The stereo track must be at least four seconds long.
• It is not possible to create an audio CD from a
song whose Fs (sampling frequency) setting is
48 kHz.
• Does the display indicate DISK FULL?
• Create sufficient space on the hard disk.
• Erase unneeded tracks and then execute Optimize to increase the available space.
■An audio CD you created does not play back on
a conventional player
• An audio CD you created you not play back on a
conventional player unless the disc has been
finalized.
■Audio recorded on CD-RW media does not play
back on some players
• In order for audio data recorded on CD-RW
media to be played back, the player must support
CD-RW. Contact the manufacturer of the player
regarding CD-RW support.
■The sound skips while playing an audio CD that
you created
• There may be differences in the quality of the
completed CD depending on the type of CD-R
media you use. If this occurs, try using single
speed (normal speed) recording rather than double-speed or faster recording.
■The screen changes on its own when you operate the PAN or EQ encoders
• In the UTILITY screen Prefer. 1 page, turn the
AUTO PAN DISPLAY and AUTO EQ DISPLAY
settings OFF. *
* For details refer to page 33 “UTILITY screen.”
■Can’t use the [DATA/JOG] dial to control onscreen parameters
• The [NUM LOCATE] key may be on.
• The [JOG ON] key may be on.
■The display indicates MEMORY FULL or DISK
FULL, and recording or editing is not possible
• Erase unneeded tracks and then execute Optimize to increase the available space.
■The display indicates DISK BUSY during playback
• It is possible that the reading speed of the internal
hard disk is not fast enough, or that the reading
speed has slowed down because the recorded
data has become fragmented. Try deleting small
regions and re-recording. Alternatively, backup
the data, and try using one of the recommended
hard disks.
Appendix
Display message list
Messages
AUTOMIX DISABLED.
Automix is not enabled, and cannot be recorded.
AUTOMIX MEMORY FULL!
Automix memory has no free area.
AUTOMIX NOT RUNNING.
Automix has been stopped, so recording is not possible. Pause the
recorder, and then playback.
AUTOMIX REC ABORTED.
Automix recording was stopped, and the data was discarded.
AUTOMIX RECORDING.
The operation cannot be executed since automix is being recorded.
AUTOMIX RUNNING.
The operation cannot be executed since automix is being
recorded or played.
BANK A SELECTED
Since sampling pad bank A is selected, muting cannot be defeated
for this pad.
BANK B SELECTED
Since sampling pad bank B is selected, muting cannot be defeated
for this pad.
CANNOT ASSIGN DIGITAL-ST-IN.
DIGITAL STEREO IN cannot be assigned to the stereo bus cascade.
CANNOT CHANGE THE MUTE
Muting cannot be defeated since this would exceed the number of
simultaneously playable tracks.
CANNOT PLAY THIS PAGE
Playback is not possible in this page.
CANNOT RECALL AUTOMIX
Recall is not possible, since automix data has not been stored.
CANNOT REDO
Redo (re-execution of an operation) is not possible.
CANNOT SELECT (MTC SLAVE)
Since the AW4416 is set to be the MTC slave, the external word
clock cannot be selected as the word clock source.
CANNOT SELECT (WC EXTERNAL)
Since the external word clock is selected as the word clock
source, the AW4416 cannot be set as the MTC slave.
CANNOT SET MARK
It is not possible to specify a mark at an already-specified position.
CANNOT UNDO
Undo (cancellation of an operation) is not possible.
CANNOT USE BOTH SLOTS!
OPTION I/O slot 1 and slot 2 cannot be used simultaneously.
CD PLAY MODE NOW.
Since the AW4416 is in CD Play mode, this operation is not possible.
DIFFERENT TC FRAME TYPE
MTC of a different frame type than the internal setting is being
received.
DIGITAL-ST-IN REC PROHIBIT.
Recording is prohibited for the signal being input from DIGITAL
STEREO IN.
DIGITAL-ST-IN SYNC ERROR!
The signal being input from DIGITAL STEREO IN is not synchronized to the word clock master.
DIN TO STEREO BUS REFUSE.
Since the signal was interrupted, cascading from DIGITAL STEREO IN to the stereo bus has been defeated.
DISK BUSY
The reading speed of the internal hard disk is not fast enough, or
the reading speed has slowed down because the recorded data
has become fragmented.
EFF1 INSERT RELEASED
Effect 1 has been released from insertion because a patch library
was recalled.
EFF2 INSERT RELEASED
Effect 2 has been released from insertion because a patch library
was recalled.
FOR EFFECT2 ONLY.
The selected effect program can be used only with effect 2.
IN/OUT POINTS TOO CLOSE
The auto punch-in/out interval is too short. It cannot be set less
than approximately 100 msec.
— Reference Guide
Appendix–39
Appendix
INT.EFF NOW SELECTED AUX.
The internal effect is connected to the AUX send, and cannot be
inserted.
LOW BATTERY!!
The internal battery is running down.
MAKE NEW MIX.
There are no events to be edited. Please create a new mix.
MARK ERASED
The mark has been erased.
MARK SET
The mark has been set.
MIDI IN: DATA FRAMING ERROR!
Invalid data may have been received at the MIDI IN connector.
MIDI IN: DATA OVERRUN!
Invalid data may have been received at the MIDI IN connector.
MIDI: RX BUFFER FULL!
The AW4416 is receiving more MIDI data than it can handle.
MIDI: TX BUFFER FULL!
The AW4416 is attempting to transmit more MIDI data than it can
handle.
NO CURRENT AUTOMIX.
There is no valid automix data. Please create a new mix.
NO DATA TO RECALL.
Since data has not been stored, it cannot be recalled.
NO MARK LEFT
The allowable number of marks has been exceeded.
PLAY TRACK MUTE IS ON
Playback tracks were muted because the allowable number of
simultaneously recorded/played tracks was exceeded.
RECORDER BUSY
The operation cannot be executed because the recorder is operating.
RECORDER RUNNING
The operation cannot be executed because the recorder is recording or playing.
REDO COMPLETE
Redo (re-execution of the previous operation) has been completed.
REPEAT POINTS TOO CLOSE
The repeat interval is too short. It cannot be set to less than one
second.
SELECTED AREA HAS NO DATA.
The selected area contains no trigger data.
SELECTED AREA HAS NO REGION.
The selected area contains no region.
SELECTED CH IS NONE.
The selected channel cannot be selected since it does not exist.
SELECTED CH ONLY MODE.
The channel cannot be changed, since the display mode is set to
SELECTED CH ONLY.
SELECTED PAD NOT ASSIGNED.
No sample is assigned to the selected sampling pad.
SELECTED SONG HAS NO REGION.
The selected song does not contain a region.
SELECTED TRACK HAS NO REGION.
The selected track does not contain a region.
SELECTED TRACK NOT RECORDED.
The selected track does not contain recorded data.
SLOT1 INPUT SYNC ERROR!
The signal being input to the input jack of a card installed in
OPTION I/O slot 1 is not synchronized to the word clock master.
SLOT1,2 INPUT SYNC ERROR!
The signal being input to the input jack of a card installed in an
OPTION I/O slot is not synchronized to the word clock master.
SLOT2 INPUT SYNC ERROR!
The signal being input to the input jack of a card installed in
OPTION I/O slot 2 is not synchronized to the word clock master.
SOLO READY.
The Solo function is ready. Use the [SEL] keys to select the solo
channel.
SOLO SLAVE.
The Solo status cannot be changed when the AW4416 is functioning as a cascade slave. Press the Solo key on the master console.
SONG NUMBER FULL.
The maximum number of songs has been reached.
SONG TOP/END OUT OF RANGE
You located outside the top/end range of the song.
STEREO PAIRED.
You are attempting to defeat ST LINK for the dynamics of paired
channels.
Appendix–40
— Reference Guide
Appendix
STEREO TRACK MUTE IS OFF
Since muting is off for the stereo track, track muting cannot be
turned off.
THIS SONG IS PROTECTED.
This song is protected, and cannot be edited or recorded.
TO HOST: DATA FRAMING ERROR!
Invalid data may have been received at the TO HOST connector.
TO HOST: DATA OVERRUN!
Invalid data may have been received at the TO HOST connector.
TO HOST: DATA PARITY ERROR!
Invalid data may have been received at the TO HOST connector.
TO HOST: RX BUFFER FULL!
Excessive amounts of data may have been received at the TO
HOST connector.
TO HOST: TX BUFFER FULL!
The AW4416 may be attempting to transmit excessive amounts of
data from the TO HOST connector.
TRIGGER LIST RECORDING
A sampling pad trigger list is being recorded.
UNDO COMPLETE
Undo (cancellation of the previous operation) has been executed.
WRONG WORD CLOCK!!
The word clock from a connected device selected by the AW4416
for synchronization is not appropriate.
Popup messages
CD Access Error!
A error occurred when accessing the CD.
CD Size Full!
Data exceeding the recordable length of the CD cannot be added.
CD Track Over!
The maximum number of tracks has been reached, and further
addition is not possible.
Can’t Copy This Parameter!
This parameter cannot be copied.
Can’t Create Image File!
Since the disk is full, a CD image file cannot be created.
Can’t Delete Current Song!
The currently loaded song cannot be deleted.
Can’t Delete Protected Song!
A protected song cannot be deleted.
Can’t Edit Multiple Songs!
This editing operation cannot be executed on multiple songs
simultaneously.
Can’t Optimize Protected Song!
Optimize cannot be executed on a protected song.
Can’t REDO
Redo is not possible.
Can’t Select Current Song!
The currently loaded song cannot be edited.
Can’t UNDO
Undo is not possible.
Can’t Write CD-RW by Track At Once! A CD-RW cannot be written using Track At Once.
Change Media, Invalid Order.
Please exchange the media. The order of media volumes is incorrect.
Change Media, Not 1st Media
Please exchange the media. This is not the first media volume.
Change Media, Not TYPE 1 Backup.
Please exchange the media. This media was not backed up as
TYPE 1.
Change Media, Not TYPE 2 Backup.
Please exchange the media. This media was not backed up as
TYPE 2.
Change Media, Please
The media is an incorrect type. Please exchange it.
Device Error!
A problem has occurred with the SCSI device.
Directory Name Too Long!
The directory name is too long and cannot be displayed.
Directory Not Found!
The specified directory cannot be found.
Disk Full!
The disk has no free capacity.
File System Error!
An error has occurred in the file system of the internal hard disk.
Finalized Media!
The media has already been finalized.
Invalid Parameter!
The parameter setting exceeds the allowable range.
— Reference Guide
Appendix–41
Appendix
Media Error!
A problem has occurred on the media.
Media Full!
The media has no free space.
Media Protected!
The media is write-protected.
Memory Full!
There is no free space in the sampling pad memory.
No Song to Backup!
There is no song to backup.
No Song to Edit!
There is no song to edit.
No Song to Load!
There is no song to load.
No Song to Restore!
There is no song to restore.
No Song to Save!
There is no song to save.
No Song to Write!
No songs to write to the CD have been selected.
No Song!
No songs can be found.
No Stereo Track!
There is no stereo track.
No Track to Open Wave Display!
There is no track data for waveform display.
Not WAV Drive!
The selected drive contains no WAV files.
Not WAV File!
The file is not a WAV file.
Partition Not Found!
The specified partition was not found.
Recall Channel Data Conflict!
The specified channel library cannot be loaded into this channel.
SCSI Error!
An error has occurred in the SCSI connection.
Selected Drive is not CD Drive!
The drive of the selected SCSI ID is not a CD drive.
Selected Drive is not Connected!
The drive of the selected SCSI ID is not connected.
Selected Preset is Effect2 Only!
The selected preset can be used only by effect 2.
Selected Song Status Conflict!
The track cannot be imported, since it is from a song with a different sampling frequency or quantization (bit length).
Selected Track is not Recorded!
The selected track is not recorded.
Too Many Regions!
There are too many regions.
Too Small Region!
Time compression/expansion cannot be executed since the region
is too small.
Appendix–42
— Reference Guide
Appendix
Specifications
General Specifications
AD converter
24-bit linear, 64-times oversampling
DA converter
24-bit linear, 128-times oversampling
Internal processing
32-bit
Sampling frequency
Internal 44.1 kHz/48kHz
External 44.1 kHz (–6%) to 48 kHz (+6%)
Audio input section
MIC/LINE
DIGITAL STEREO IN
mini YGDAI card (option)
max. 26 channels
8 channels
2 channels (stereo × 1)
max. 16 channels
Audio output section
STEREO OUT
OMNI OUT
MONITOR OUT
PHONES
DIGITAL STEREO OUT
mini YGDAI card (option)
max. 28 channels
2 channels (stereo × 1)
4 channels
2 channels (stereo × 1)
2 channels (stereo × 1)
2 channels (stereo × 1)
max. 16 channels
Mixing layer section
Input channel
Internal effect return
Playback
44 channels
24 channels
4 channels (stereo × 2)
16 channels (16 track direct out playback), or
stereo 2 channels (stereo track playback)
Internal effects section
Multi-effects × 2
Bus section
Bus
Aux
Stereo
Solo
20 channels
8 channels
8 channels
2 channels (stereo × 1)
2 channels (stereo × 1)
Sampler section
Assign to mixer section
Playback
Trigger pads
Sampling time
8 voices
8 × 2 banks
max. 90 sec. (16-bit/44.1 kHz)
Recorder section
Recording medium
Sound file format
Recording resolution
2.5" IDE hard disk drive
AW4416 original format
16-bit, 24-bit
— Reference Guide
Appendix–43
Appendix
Tracks
Maximum recording time
130 tracks (16 tracks × 8 virtual tracks plus stereo track)
Approx. 140 min (44.1 kHz, 16-bit, 16 tracks,
12 GB hard disk)
Power requirements
U.S.A. & Canada 120 V 80 W AC, 60 Hz
Europe 230 V 80 W AC, 50 Hz
Dimensions (W × H × D)
558.0 × 147.7 × 459.7 mm
(22 x 5.8 x 18.1 inches)
Weight
11.8 kg (26 lbs)
Operating temperature range
5° to 35° C
Options
Removable 2.5" hard disk adapter (ADP25H),
mini YGDAI cards (MY8-AT, MY8-TD, MY8-AE,
MY8-AT, MY4-AD, MY4-DA), Footswitch FC5
Mixer section
■ Input/output
MIC/LINE input
Channel 1, 2 (balanced, XLR-type, TRS phone
jack)
+48 V DC phantom powering
PEAK LED
–3 dB (clipping level)
Input impedance
3 kΩ
Nominal input level
–46 dB to +4 dB
Minimum input level
–52 dB
Maximum input level
+22 dB
Appendix–44
Insert I/O
Input impedance
Nominal input level
Output impedance
Nominal output level
Channel 1, 2 (unbalanced, TRS phone jack)
10 kΩ
0 dB
600Ω
0 dB
MIC/LINE input
PEAK LED
Input impedance
Nominal input level
Minimum input level
Maximum input level
channel 3–8 (balanced, TRS phone jack)
–3 dB (clipping level)
3 kΩ
–46 dB to +4 dB
–52 dB
+22 dB
MIC/LINE input (Hi-Z)
Input impedance
Nominal input level
Minimum input level
Maximum input level
channel 8 (unbalanced, phone jack)
500 kΩ
–46 dB to +4 dB
–52 dB
+20 dB
— Reference Guide
Appendix
STEREO OUT
Output impedance
Nominal load impedance
Nominal output level
Maximum output level
L, R (unbalanced, phono)
1 kΩ
10 kΩ
–10 dBV
+8 dBV
MONITOR OUT
Output impedance
Nominal load impedance
Nominal output level
Maximum output level
L, R (balanced, TRS phone jack)
150Ω
10 kΩ
+4 dB
+22 dB
OMNI OUT
Output impedance
Nominal load impedance
Nominal output level
Maximum output level
1–4 (unbalanced, phone jack)
1 kΩ
10 kΩ
0 dB
+18 dB
PHONES
Nominal load impedance
Maximum output level
(unbalanced, TRS phone jack)
8–40Ω
100 mW + 100 mW (40 Ω load)
DIGITAL STEREO I/O
Coaxial (phono)
Option card slot
Digital I/O
Slot × 2
MY-8-AT (Adat)
MY-8-TD (Tascam)
MY-8-AE (AES/EBU)
MY-8-AD (TRS phone jack × 8)
MY-4-AD (XLR-type × 4)
MY-4-DA (XLR-type × 4)
Analog input
Analog output
■ Digital mixer
Input channel (channel 1–24, playback 1–16)
Attenuator, Phase (normal, reverse), EQ (4-band
PEQ), Dynamics, Delay, On/Off, Fader (60 mm
motorized), Pan, Bus assign (stereo, bus, aux,
solo, direct out)
Internal effects return
Attenuator, Phase (normal, reverse), EQ (4-band
PEQ), Delay, On/Off, Fader (60 mm motorized),
Pan, Bus assign (stereo, bus, aux, solo)
Bus
Stereo L, R
Bus 1–8
Aux 1–8
Solo L, R
Attenuator, EQ (4-band PEQ), Dynamics, On/
Off, Fader (60 mm motorized), Balance
Attenuator
Attenuator
— Reference Guide
Appendix–45
Appendix
Fader
60 mm motorized × 17
Frequency response
+1, –3 dB, 20 Hz–20 kHz (MIC/LINE IN to STEREO OUT)
Dynamic range
109 dB (typical)
104 dB (typical)
(20 kHz, LPF, IHF-A)
DA converter (STEREO OUT)
AD + DA (LINE IN to STEREO OUT)
Total harmonic distortion
Less than 0.02% @1 kHz (LINE IN to STEREO
OUT)
(20 kHz, LPF)
Recorder section
■ General
Recording resolution
16-bit, 24-bit (set per song)
Sampling frequency
44.1 kHz, 48 kHz (set per song)
Maximum simultaneous recording tracks
• 16 bit song
• 24 bit song
Simultaneous
recording tracks
Simultaneous
playback tracks
Simultaneous
recording tracks
Simultaneous
playback tracks
0–8
16
0
16
9–16
0
1–2
14
3–4
12
5–8
8
9–16
0
130 tracks (16 tracks × 8 virtual tracks plus stereo track)
Tracks
■ Format
File system
AW4416 original format
Internal hard disk drive
Max. hard disk capacity
Max. songs per hard disk
2.5" IDE
64 GB (8 GB partition)
Approx. 30,000 songs
■ Edit
Appendix–46
Song edit
Name, comment, delete, copy, optimize, protect, fade in/out
Track edit
Name, erase, copy, exchange, slip, time compression/ expansion, pitch change, import
Part edit
Erase, delete, copy, move, insert, time compression/ expansion, pitch change
— Reference Guide
Appendix
Region edit
Erase, delete, copy, move, time compression/
expansion, pitch change, insert
■ Others
Locate
Direct locate: data entry search (time, measure)
Quick locate: start, end, RTZ, A/B, last rec in/
out, roll back
Punch I/O
Manual punch I/O, auto punch I/O
Analog section
Input (channel 1–8)
Input (channel 1, 2)
Output
Gain (variable)
+48 V (phantom switch)
Phones level, monitor out level
Controls
Mixer section
WORK NAVIGATE buttons
UNIT buttons
MIXER buttons
FADER MODE buttons
SONG, QUICK REC, MASTERING, CD PLAY
SETUP, FILE, UTILITY, MIDI
VIEW, PAN, EQ, DYN
AUX1, AUX2, AUX3, AUX4, AUX5, AUX6,
AUX7, AUX8, HOME
MIXING LAYER buttons
1–16, 17–24 RTN, MONI
ON buttons, SEL buttons, Faders
1–8
channel 1–8, channel 17–24
9–14
channel 9–14
15
channel 15/return1
16
channel 16/return 2
17
stereo master
SOLO buttons
Function buttons
SHIFT × 2, F1, F2, F3, F4, F5
EQ buttons
HIGH, HI-MID, LO-MID, LOW
Encoders
PAN, Q, F, G
Sampler section
SAMPLING PAD buttons
1, 2, 3, 4, 5, 6, 7, 8, BANK, EDIT
Recorder section
CUE button
REC TRACK SELECT buttons 1, 2, 3, 4, 5, 6, 7, 8, 9, 10, 11, 12, 13, 14, 15,
16, ST, ALL SAFE
RECORDER buttons
TRACK, EDIT
Locate buttons
NUM LOCATE,
,
, MARK, AUTO PUNCH,
IN, OUT, SET, REPEAT, A, B, ROLL BACK,
,
RTZ,
, CANCEL
Transport buttons
REW, FF, STOP, PLAY, REC
— Reference Guide
Appendix–47
Appendix
Others
ABS/REL button, PEAK HOLD button, AUTOMATION button (AUTOMIX, SCENE), SCENE
MEMORY button (STORE, RECALL, –, +), JOG
ON button, UNDO button, REDO button, CURSOR button, ( ,
, , ), DATA ENTRY button (JOG/SHUTTLE), ENTER button
320 × 240 dots graphical LCD (with contrast
control), 3-color FL display
Display
Control I/O
Appendix–48
WORD CLOCK IN
BNC
WORD CLOCK OUT
BNC
MIDI IN
5-pin DIN
MIDI OUT/THRU
5-pin DIN
MTC OUT
5-pin DIN
TO HOST
8-pin mini DIN
SCSI
50-pin half pitch D-Sub
MOUSE
9-pin D-Sub
Foot switch
Phone jack
— Reference Guide
Appendix
147.7
132.1
7.6
450
459.7
558
9.7
Dimensions
Unit: mm
Specifications and external appearance subject to change without notice.
For European Model
Purchaser/User Information specified in EN55103-1 and EN55103-2.
Inrush Current: 30A
Conformed Environment: E1, E2, E3 and E4
— Reference Guide
Appendix–49
Appendix
MIDI data format
1. Functions
1.7 MTC slave synchronization
1.1 MIDI-SETUP
There are two types of serial connector: the MIDI connectors and the TO HOST. They have the same functionality,
and you can select which type to use as appropriate for the
connection destination. Both types use the MIDI format for
communication.
In the case of the TO HOST connector, the transmission
method must be selected appropriate for the other device.
The available methods are listed below.
Regardless of which method is selected, MTC is transmitted
from the dedicated MTC OUT connector.
You can select either THRU or OUT as the function of the
MIDI THRU/OUT connector. If THRU is selected, messages
received at the MIDI IN connector will be retransmitted
without change from the MIDI OUT/THRU connector.
Name Connector Transmission speed Destination
---------+-----------+----------+------------------------------MIDI MIDI
31.25k for MIDI
PC1 ToHost 31.25k for NEC PC9800series
PC2 ToHost 38.4k for DOS/V
Mac ToHost 31.25k for Macintosh (contain CLOCK)
1.2 SCENE CHANGE
When a program change message is received, a scene will
be recalled as specified by the [MIDI Program Change
Assign Table].
Program change messages are transmitted with the program
number specified by the [MIDI Program Change Assign
Table]. If multiple program numbers are assigned to that
memory number, the lowest-numbered program change
will be transmitted.
1.3 MMC CONTROL
Basic recorder operations such as stop/play/rec/locate can
be controlled.
If you select MMC MASTER from the MIDI SETUP menu,
MMC commands will be transmitted according to operations of the transport. If you select MMC SLAVE, the internal
recorder will operate according to the MMC commands
that are received.
1.4 EFFECT CONTROL
Depending on the effect type, note on/off messages can be
received for control.
These settings are made by the parameters of the corresponding effect.
1.5 MIDI CLOCK transmission
If you select MIDI CLOCK transmission from the MIDI
SETUP menu, MIDI clock messages will be transmitted during playback and recording.
When the AW4416 is in MIDI clock transmission mode,
Start/Stop/Continue commands will be transmitted by the
corresponding operations, and MIDI Clock and Song Position Pointer messages will be transmitted according to the
MIDI Tempo Map.
1.6 MTC master
If you select MTC transmission from the MIDI SETUP menu,
MTC will be transmitted during playback and recording.
Appendix–50
— Reference Guide
If you select SLAVE operation from the MIDI SETUP menu,
the AW4416’s internal recorder will operate in synchronization with the MTC messages received from the MIDI IN or
TO HOST connector.
2. Internal settings and operations
2.1 MIDI-SETUP
2.1.1 MIDI Channel
2.1.1.1 Transmit channel
Select the MIDI channel used for transmission.
However, transmissions in response to requests are transmitted on the Receive Channel in order to specify the transmitting device.
2.1.1.2 Receive channel
Specify the MIDI channel used for reception. In general,
MIDI messages are received only if the MIDI channel
matches, but this is not the case if OMNI is turned on.
2.1.2 ON/OFF
2.1.2.1 Program change
Reception and transmission can be enabled or disabled. If
OMNI is turned on, program changes will be received
regardless of their MIDI channel. If ECHO is on, they will
be echoed regardless of the channel.
2.1.2.2 Control change
If ECHO is on, these messages will be echoed regardless of
the channel.
2.1.3 MMC Device ID
Specify the ID number used when transmitting and receiving MMC commands.
2.1.4 PORT
Select whether serial communication will use the MIDI IN/
OUT connectors or the TO HOST connector.
(MTC is always transmitted from the MTC OUT connector.)
If the TO HOST connector is selected, you must also select
one of three settings as appropriate for the other device.
2.1.5 THRU
You can select whether the MIDI OUT/THRU connector
will function as OUT or THRU.
If THRU is selected, messages received at the MIDI IN connector will be retransmitted without change from the MIDI
OUT/THRU connector.
If MIDI THRU is selected, the connector will function as
THRU regardless of the PORT setting. In order to function
as MIDI OUT, the PORT setting must be set to MIDI IN/
OUT.
2.2 MIDI program change assign table
The correspondence between program change numbers
and scene numbers can be set freely.
This conversion is applied to both transmission and reception.
Appendix
3. MIDI message formats
4. MIDI format details
3.1 CHANNEL MESSAGE
4.1 NOTE OFF (8n)
< Reception >
command
rx/tx function
-----+----------------------------+-------+------------------------------8n NOTE OFF
rx
Control internal effects
9n NOTE ON
rx
Control internal effects
Bn CONTROL CHANGE
Only echoed
Cn PROGRAM CHANGE rx/tx Select scene memories
(using the Program
Change Table)
3.2 SYSTEM COMMON MESSAGE
command
rx/tx function
-----+----------------------------+-------+------------------------------F1 MIDI TIME CODE
rx/tx MTC transmission (when
MTC master), MTC
reception (when MTC
slave)
F2 SONG POSITION
POINTER
tx
SPP transmission (when
using MIDI Clock)
3.3 SYSTEM REAL TIME MESSAGE
command
rx/tx function
-----+----------------------------+-------+------------------------------F8 TIMING CLOCK
tx
MIDI Clock reception
(when using MIDI Clock)
FA START
tx
Start command transmission (when using MIDI
Clock)
FB CONTINUE
tx
Continue command
transmission (when
using MIDI Clock)
FC STOP
tx
Stop command transmission (when using MIDI
Clock)
FE ACTIVE SENSING
rx
MIDI cable connection
checking
FF RESET
rx
Clear running status
3.4 SYSTEM EXCLUSIVE MESSAGE
3.4.1 Real Time System Exclusive
3.4.1.1 MMC
command
rx/tx function
-----+----------------------------+-------+------------------------------01 STOP
rx/tx Transport Stop
02 PLAY
rx
Transport Play
03 DEFERRED PLAY
rx/tx Transport Play
04 FAST FOWARD
rx/tx Transport Fast-forward
05 REWIND
rx/tx Transport Rewind
06 RECORD STROBE
rx
Transport Record/Punchin
07 RECORD EXIT
rx
Transport Punch-out
0F RESET
rx/tx MMC Reset
40 WRITE
rx
Write Information Field
44 LOCATE
rx/tx Transport Locate
Received if [Rx CH] matches.
Used to control effects. See below for details.
STATUS
DATA
1000nnnn 8n
0nnnnnnn nn
0vvvvvvv vv
Note Off Message
Note No.
Velocity (ignored)
4.2 NOTE ON (9n)
< Reception >
Received if [Rx CH] matches.
Used to control effects. See below for details.
If velocity is 0x00, same as note-off.
STATUS
DATA
1001nnnn 9n
0nnnnnnn nn
0vvvvvvv vv
Note On Message
Note No.
Velocity (1-127:On,
0:off)
* Notes used to control effects.
1: Dynamic Flange / Dynamic Phase / Dynamic Filter
If the SOURCE parameter is set to MIDI, velocity will control the width of frequency modulation for both note-on and
note-off.
4.3 CONTROL CHANGE (Bn)
< Reception >
Echoed if [Control Change ECHO] is on.
< Transmission >
If [Control Change ECHO] is on, this is merged with the
AW4416’s own output while taking advantage of running
status.
4.4 PROGRAM CHANGE (Cn)
< Reception >
Received if [Program Change RX] is on and [Rx CH]
matches. However if [OMNI] is on, this is received regardless of the channel.
This is echoed if [Program Change ECHO] is on.
A scene memory will be recalled according to the [Program
change table].
< Transmission >
If [Program Change TX] is on, a recall operation will cause a
program change to be transmitted on the [Tx CH] according
to the settings of the [Program change table].
If more than one program number is assigned to the memory number that was recalled, the lowest-numbered program will be transmitted.
If [Program Change ECHO] is on, program changes will be
echoed.
(If a memory number is recalled for which there is no setting
in the [MIDI Program Change Assign Table], no program
change will be transmitted.)
STATUS
DATA
1100nnnn Cn
0nnnnnnn nn
Program Change
Program No. (0-127)
4.5 MIDI TIME CODE QUARTER FRAME (F1)
< Transmission >
When MTC transmission is selected and the recorder is in
PLAY or REC status, Quarter Frame messages will be transmitted according to the time code operation of the recorder.
< Reception >
These messages are received if the AW4416 is operating as
a MTC slave. Quarter Frame messages received in realtime
are assembled internally to create time code values that
control the recorder.
— Reference Guide
Appendix–51
Appendix
STATUS
DATA
11110001 F1
0nnndddd dd
Quarter Frame Message
nnn = message type (0-7)
dddd = data
4.6 SONG POSITION POINTER (F2)
< Transmission >
If MIDI Clock is being transmitted, Song Position Pointer
messages will be transmitted when the recorder stops or
locates, in order to indicate the song position at which playback should begin for the next Start/Continue.
STATUS
DATA
11110010 F2
0ddddddd dd0
0ddddddd dd1
Song Position Pointer
data (H) high 7 bits of
14 bits data
data (L) low 7 bits of 14
bits data
4.7 TIMING CLOCK (F8)
< Transmission >
If MIDI Clock is being transmitted, Timing Clock messages
are transmitted according to the MIDI tempo map whenever
the recorder is playing or recording (until it stops).
STATUS
11111000 F8
Timing Clock
4.8 START (FA)
< Transmission >
11111010 FA
Start
4.9 CONTINUE (FB)
< Transmission >
If MIDI Clock is being transmitted, this message is transmitted when the recorder begins playback or recording from a
location other than the first measure.
STATUS
11111011 FB
Continue
4.10 STOP (FC)
< Transmission >
If MIDI Clock is being transmitted, this message is transmitted when the recorder stops.
STATUS
11111100 FC
00000110 06
EOX
00000001 01
11110111 F7
4.13.2 MMC PLAY
< Reception >
If the AW4416 is operating as the MMC SLAVE, it will begin
playback when this message is received if the device number matches or is 7F.
STATUS
ID No.
11110000 F0
01111111 7F
Device ID
0ddddddd dd
Command
00000110 06
EOX
00000010 02
11110111 F7
4.13.3 MMC DEFERRED PLAY
< Transmission >
Transmitted with device number 7F when the PLAY key is
pressed.
If the AW4416 is operating as the MMC SLAVE, it will begin
playback when this message is received if the device number matches or is 7F.
STATUS
ID No.
11110000 F0
01111111 7F
Device ID
0ddddddd dd
Command
00000110 06
EOX
00000011 03
11110111 F7
4.13.4 MMC FAST FORWARD
< Transmission >
Transmitted with device number 7F when the FF key is
pressed, or when the shuttle is rotated toward the right to
enter Cue mode.
If the AW4416 is operating as the MMC SLAVE, it will begin
fast-forward when this message is received if the device
number matches or is 7F.
STATUS
ID No.
11110000 F0
01111111 7F
Device ID
0ddddddd dd
4.12 RESET
< Reception >
Command
00000110 06
If a Reset message is received, MIDI communications will
be initialized by clearing the running status, etc.
EOX
00000110 04
11110111 F7
STATUS
11111111 FF
Active Sensing
Reset
4.13 EXCLUSIVE MESSAGES (F0-F7)
4.13.1 MMC STOP
< Transmission >
Transmitted with a device number of 7F when the STOP key
is pressed.
< Reception >
If the AW4416 is operating as the MMC SLAVE, it will stop
when this message is received if the device number
matches or is 7F.
STATUS
ID No.
11110000 F0
01111111 7F
Device ID
0ddddddd dd
Appendix–52
System Exclusive Message
Real Time System Exclusive
Destination (00-7E,
7F:all call)
Machine Control Command
(mcc) sub-id
Deferred play (MCS)
End Of Exclusive
< Reception >
Once this message has been received, an interval of 300 ms
in which no message has been received will cause MIDI
communications to be initialized by clearing the running
status, etc.
11111110 FE
System Exclusive Message
Real Time System Exclusive
Destination (00-7E,
7F:all call)
Machine Control Command
(mcc) sub-id
Play (MCS)
End Of Exclusive
Stop
4.11 ACTIVE SENSING (FE)
< Reception >
STATUS
Machine Control Command
(mcc) sub-id
Stop (MCS)
End Of Exclusive
< Reception >
If MIDI Clock is being transmitted, this message is transmitted when the recorder begins playback or recording from
the first measure.
STATUS
Command
System Exclusive Message
Real Time System Exclusive
Destination (00-7E,
7F:all call)
— Reference Guide
System Exclusive Message
Real Time System Exclusive
Destination (00-7E,
7F:all call)
Machine Control Command
(mcc) sub-id
Fast Forward (MCS)
End Of Exclusive
4.13.5 MMC REWIND
< Transmission >
Transmitted with device number 7F when the REWIND key
is pressed, or when the shuttle is rotated toward the left to
enter Review mode.
< Reception >
If the AW4416 is operating as the MMC SLAVE, it will begin
rewind when this message is received if the device number
matches or is 7F.
STATUS
ID No.
11110000 F0
01111111 7F
Device ID
0ddddddd dd
Command
00000110 06
EOX
00000101 05
11110111 F7
System Exclusive Message
Real Time System Exclusive
Destination (00-7E,
7F:all call)
Machine Control Command
(mcc) sub-id
Rewind (MCS)
End Of Exclusive
Appendix
4.13.6 MMC RECORD STROBE
< Reception >
If the AW4416 is operating as the MMC SLAVE and the
device number of the message matches or is 7F, it will begin
recording if stopped, or punch-in if playing.
STATUS
ID No.
11110000 F0
01111111 7F
Device ID
0ddddddd dd
Command
00000110 06
EOX
00000110 06
11110111 F7
System Exclusive Message
Real Time System Exclusive
Destination (00-7E,
7F:all call)
Machine Control Command
(mcc) sub-id
Record strobe
End Of Exclusive
4.13.7 MMC RECORD EXIT
< Reception >
If the AW4416 is operating as the MMC SLAVE and the
device number of the message matches or is 7F, the
AW4416 will punch-out if it had been recording.
STATUS
ID No.
11110000 F0
01111111 7F
Device ID
0ddddddd dd
Command
00000110 06
EOX
00000111 07
11110111 F7
System Exclusive Message
Real Time System Exclusive
Destination (00-7E,
7F:all call)
Machine Control Command
(mcc) sub-id
Record Exit
End Of Exclusive
4.13.8 MMC RESET
< Transmission >
Transmitted with a device number of 7F when song loading
is completed.
< Reception >
If the AW4416 is operating as the MMC SLAVE and the
device number of the message matches or is 7F, internal
MMC-related settings will be reset to the power-on state.
STATUS
ID No.
11110000 F0
01111111 7F
Device ID
0ddddddd dd
Command
00000110 06
EOX
00001101 0D
11110111 F7
System Exclusive Message
Real Time System Exclusive
Destination (00-7E,
7F:all call)
Machine Control Command
(mcc) sub-id
Reset
End Of Exclusive
4.13.9.1 MMC INFORMATION FIELD - TRACK
RECORD READY
< Reception >
If the AW4416 is operating as the MMC SLAVE and the
device number of the message matches, REC SELECT for the
recorder tracks will be switched on/off according to the data
of the standard track bitmap.
01001111 4F
0nnnnnnn nn
0aaaaaaa aa
0bbbbbbb bb
0ccccccc cc
Track Record Ready
(Information Field name)
Data Length (0:all track
off, 3:record track on)
1-2tr rec track On(Standard Track Bitmap)
3-9tr rec track On
10-16tr rec track On
4.13.10 MMC LOCATE (TARGET)
< Transmission >
This message will be transmitted with a device number of
7F when a locate-related key such as MARK SEARCH/IN/
OUT is pressed, when a FF/REW/shuttle operation is performed, when returning to the auto-punch pre-roll point, or
when repeating.
< Reception >
If the AW4416 is operating as the MMC SLAVE and the
device number of the message matches, the AW4416 will
locate to the time code location specified by the command
data of the message.
STATUS
ID No.
11110000 F0
01111111 7F
Device ID
0ddddddd dd
Command
00000110 06
EOX
01000100
00000110
00000001
0hhhhhhh
0mmmmmmm
0sssssss
0fffffff
0sssssss
11110111
44
06
01
hh
mm
ss
ff
ss
F7
System Exclusive Message
Real Time System Exclusive
Destination (00-7E,
7F:all call)
Machine Control Command
(mcc) sub-id
Locate
byte count
"target" sub command
hour(Standard Time Code)
minute
second
frame
sub-frame
End Of Exclusive
4.13.9 MMC WRITE
< Reception >
If the AW4416 is operating as the MMC SLAVE and the
device number of the message matches or is 7F, data will be
written to the specified information field.
STATUS
ID No.
11110000 F0
01111111 7F
Device ID
0ddddddd dd
Command
00000110 06
01000000 40
0ccccccc cc
0nnnnnnn nn
0ddddddd dd
:
:
0nnnnnnn nn
EOX
11110111 F7
System Exclusive Message
Real Time System Exclusive
Destination (00-7E,
7F:all call)
Machine Control Command
(mcc) sub-id
Write
Byte Count
Writeable Information
Field name
Format defined by the
Information Filed name
More nn dd... pairs as
required..
End Of Exclusive
— Reference Guide
Appendix–53
YAMAHA [PROFESSIONAL AUDIO WORKSTATION]
Model: AW4416
Function...
Date: 18 Feb. 2000
MIDI Implementation Chart
Version: 1.0
Transmitted
Recognized
Remarks
Basic
Channel
Default
Changed
1–16
1–16
1–16
1–16
Memorized
Memorized
Default
Messages
Altered
X
X
**************
OMNI off/OMNI on
X
X
Memorized
Mode
:True Voice
X
**************
0–127
X
Note
Number
Velocity
Note On
Note Off
X
X
X
X
After
Touch
Key’s
Ch’s
X
X
X
X
Pitch Bend
X
X
Control
Change
X
X
0–127
**************
0–127
0–96
X
O
*1
Prog
Change
:True#
System Exclusive
System
Common
:Song Pos
:Song Sel
:Tune
O
X
X
X
X
X
*2
System
Real Time
:Clock
:Commands
O
O
X
X
*2
*2
Aux
Messages
:Local ON/OFF
:All Notes OFF
:Active Sense
:Reset
X
X
X
X
X
X
O
O
Notes
MTC quarter frame message is transmitted.(When MTC Sync mode)
MTC quarter frame message is recognized.(When MTC Sync mode)
*1: MMC
*2: When MCLK Sync mode
Mode 1: OMNI ON, POLY
Mode 3: OMNI OFF, POLY
Mode 2: OMNI ON, MONO
Mode 4: OMNI OFF, MONO
O: Yes
X: No
PEAK
METER
METER
INPUT
1-2
METER
PREFADER LISTEN/
AFTER PAN
SOLO
AD
ON
ATT
METER
(EQ)
INPUT SELECT
AD
Hi-z
8 ch
ONLY
DYNAMICS
4 BAND EQ
PEAK
INPUT
3-8
AUX 6
AUX 7(EFF1)
AUX 8(EFF2)
STEREO
METER
INSERT
LEVEL
ATT 4BAND EQ
PAN
INPUT
DELAY
PRE/POST
METER
(Gain Reduction)
ON
AUX
METER
METER METER
(EQ) (Gain Reduction)
L
R
CD PlayBack
Mono in X 24
DIRECT OUT
(1~16 only)
RETURN 1(...2)
METER
METER
METER
PREFADER LISTEN/
AFTER PAN
SOLO
BUS1(...8)
METER
LEVEL
METER
METER
AUX1(...8)
METER
ON LEVEL
2
RECORDER INPUT 1~16
INSERT
2
ATT
DeEmp
PAN
INPUT
DELAY
4 BAND EQ
8
METER
(EQ)
METRONOME
BUS 1~8
CH DIRECT OUT1~16
AUX
RETURN1 can not be assigned to AUX7
(EFF1)
RETURN2 can not be assigned to AUX8
(EFF2)
RECORDER MONI 1(...16)
RECORDER INPUT 1-16
METER
METER
(FL Display)
ON
PRE/POST
Stereo in X 2
16
METER
PREFADER LISTEN/
AFTER PAN
SOLO
METER
INPUT
MONITOR
2
ON
ATT
DYNAMICS
4 BAND EQ
METER
(EQ)
RECORDER
DIRECT OUT
LEVEL
INPUT
DELAY
PAN
PRE/POST
METER
(Gain Reduction)
ON
AUX
Mono in X 16
ENABLE
ATT
DIGITAL STEREO L
DIGITAL STEREO R
(BUS CASCADE)
AUX7 (EFF1),
AUX8 (EFF2)
INSERT SEND
EFFECT
2
46
SELECT
16
INSERT
INPUT SELECT
(1,2 only)
RECORDER
SOLO
SOLO
METER
EFFECT
METER
METER
EFFECT1~2
ON
ATT
STEREO
STEREO
BUS1~8
AUX1~8
CH DIRECT OUT1~16
INSERT SEND
RECORDER DIRECT
OUT 1~16
STEREO
BUS1~8
AUX1~8
CH DIRECT OUT1~16
INSERT SEND
RECORDER DIRECT
OUT 1~16
STEREO
BUS1~8
AUX1~8
CH DIRECT OUT1~16
INSERT SEND
RECORDER DIRECT
OUT 1~16
STEREO
BUS1~8
AUX1~8
CH DIRECT OUT1~16
INSERT SEND
RECORDER DIRECT
OUT 1~16
SELECT
2
LEVEL
METER
(EQ)
METER
16
2
16
RECORDER
INPUT 1(...16)
DITHER
STEREO
OUT
2
8
8
16
46
SELECT
DIGITAL
STEREO IN
4 BAND EQ
DeEmp
DA
L
DA
R
10dBV
16
2
8
8
16
46
2
DIGITAL
STEREO OUT
DITHER
SELECT
SAMPLING
PAD
EFFECT 1
EFFECT 2
8
ATT
PAN
INPUT
DELAY
16
2
8
8
16
46
METER
SELECT
8
DeEmp
OPTION OUT
8
DITHER
8
DITHER
SLOT2 OUT
METER
2
8
8
16
46
X2
SLOT1 OUT
METER
16
SELECT
8
SLOT2
RECORDER
ST Trk L/R
CD PLAY mode
CD-RW
DRIVE
INSERT
SLOT1
RECORDER
REPRO1-16
METER
DYNAMICS
METER
OPTION IN
METER
ON LEVEL BAL
DYNAMICS
ATT 4BAND EQ
METER
(EQ)
INSERT
INSERT
I/O
...
AUX 1
INPUT 1(...24)
SOLO R
SELECTED INSERT RETURNS
48V
SOLO L
46
BUS1
BUS2
BUS3
BUS4
BUS5
BUS6
BUS7
BUS8
MIC/LINE
INPUT
STEREO L
STEREO R
AW4416 Block diagram
OMNI OUT
DA
X4
METER
0dB
DA
16
RECORDER
DIRECT OUT 1
PHONES
PHONES
OSC
X2
RECORDER
DIRECT OUT 16
STEREO L
MIXER SOLO
Logic
STEREO R
SOLO L
MONITOR
DA
MONITOR
OUT
L
+4dB
R
SOLO R
ON
METRONOME
RECORDER
TRACK CUE
Logic
ATT
YAMAHA CORPORATION
V566460 R1 1 IP 194
00 09 7000 AP Printed in Japan
Pro Audio & Digital Musical Instrument Division
P.O. Box 3, Hamamatsu, 430-8651, Japan