1
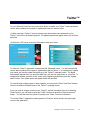
TouchConnect
Model WPF-588
User Manual
Version 1.0.2
eStarling TouchConnect User Manual
The only warranties for eStarling products and services are set forth in
the express statements accompanying such products and services.
Nothing herein should be construed as constituting an additional
warranty. PF Digital,Inc. shall not be liable for technical or editorial errors
or omissions contained herein.
PF Digital,Inc. assumes no responsibility for the use or reliability of its
software on equipment
that is not furnished by PF Digital,Inc.
This document contains proprietary information that is protected by
copyright. No
part of this document may be photocopied, reproduced, or translated to
another
language without the prior written consent of PF Digital,Inc.
PF Digital, Inc.
6819 Elm St, Suite 16
McLean, Virginia 22101, USA
© Copyright 2009 PF Digital, Inc.
Reverse engineering or disassembly is prohibited. Google, Gmail,
Picasa, Google Calendar, and their logos are trademarks or registered
trademarks of the Google group of companies in the United States
and/or other countries/regions. Yahoo!, Yahoo! Weather, Flickr, and their
logos are trademarks or registered trademarks of the Yahoo! group of
companies in the United States and/or other countries/regions. Facebook
and their logos are trademarks or registered trademarks of the Facebook
group of companies in the United States and/or other countries/regions.
Twitter and their logos are trademarks or registered trademarks of the
Twitter group of companies in the United States and/or other
countries/regions.
PF Digital,Inc. supports lawful use of technology and does not endorse or
encourage the use of our products for purposes other than those
permitted by copyright law. The information in this document is subject to
change without notice.
eStarling TouchConnect User Manual
Table of Contents
Introduction …………………………………………………………………………….................……...
Package Contents ………………………………………………………………................……....…….
Physical Setup ………………………………………………………………................…………..........
Secure Digital™ Card ………………………………………………………................…………....…..
Digital Keyboard ………………………………………………………….................…………...………
Initial Setup ………………………………………………………………..................…………...………
Over-The-Air Firmware Upgrades …………………………………….................……………...……..
Gmail™ Setup …………………………………………………………………….................…...……...
Navigating The TouchConnect ………………………………………………………...........................
Control Panel ……………………………………………………………………………….....................
About …………………………………………………………………………................…..….….
Brightness …………………………………………………………………….................….….....
Sidebar ………………………………………………………………………………................…..…….
Clock …………………………………………………………….………................……….……..
Yahoo! Weather™ ………………………………….…………………................………….…....
Media Toolbar …………………………………………………………….................……………..…….
Photos
Photo Gallery ………………………………….….………….................………………………..
Photo Controls ………………………………..….…………................………………………...
Layout ………………………………….…….…………….................…………………………..
Interval …………………………………………….………................…………………………...
Videos
Video Gallery ………………………………….….…….................……………………………...
Photo Controls ………………………………..….……................…………………………….....
Layout ………………………………….…….………….................……………………………...
Interval …………………………………………….…….................……………………………...
Application Overlay ………………………………………………..………………………………….….
My RSS …………………………………………………............………….………………….…..
Picasa™ ….....................………………………………............………………………………...
Flickr™ ………………………………..….……................…………………………............…...
Facebook™ …………………………….…….………….................………………..…………..
Twitter™ …………………………………….…….................…………………………........…...
Specifications ………………………………………………………………..................…………………
Frequently Asked Questions …............………………………………….................…………………..
Maintenance & Cleaning ………………..………………………………………….................………...
Limited Warranty …………………………….......................…………………………..........................
3
3
4
4
5
6
7
8
9
10
11
11
12
13
14
15
16
17
17
17
18
19
19
19
20
21
22
23
24
25
26
27
28
29
eStarling TouchConnect User Manual
2
Introduction
Congratulations on your purchase of the eStarling TouchConnect. Now you can show off your
digital photos directly from emails, RSS feeds, Picasa™, Flickr™, and Facebook™. Please read
this manual carefully and follow all warnings and instructions before using your TouchConnect.
Failing to follow these warnings can result in personal injury or damage to the TouchConnect.
Keep this user manual in a convenient location for future reference. Please save the original box
and all packing material for future shipping needs. The screen images in this user manual could
be different from those displayed on the frame. The functionality of the TouchConnect could also
expand with over-the-air firmware upgrades without notice.
Package Contents
Digital Frame
Power Adapter
Stand
eStarling TouchConnect User Manual
3
Physical Setup
(1) Attach the stand to the rear of the TouchConnect by screwing it into the threaded hole
clockwise in the back of the frame. Manually screw in the stand until it is tightened, but do not
over tighten. When facing the back of the frame in a horizontal position, the threaded hole is to
the left of the frame’s connections.
Wall Mount
Secure Digital™ Card Slot
Stand
Power Button
DC 12V
Ethernet Connection
(2) Connect the power cord into the DC input of the TouchConnect and then plug the AC Adapter
into an AC wall outlet. Now you can press the power button on the back of the frame.
Secure Digital™ Card
When first setting up the frame, do not insert a Secure Digital™ Card (SD card) into the
eStarling TouchConnect. Once your frame is configured, you may insert an SD card into the SD
card slot. The eStarling TouchConnect will notify you that you are now in “SD Mode”. Your
normal photo gallery will be replaced with the photos on your SD card.
Please note that your normal photo gallery will not be accessible until you remove the SD card
from the SD card slot and re-enter “Internet Mode”. Also, the eStarling TouchConnect only
supports videos played in “Internet Mode”. It does not support videos in “SD Mode”.
eStarling TouchConnect User Manual
4
Digital Keyboard
When you set up your eStarling TouchConnect, data fields will require you to use the digital
keyboard on the touchscreen. This is necessary for configuring your wireless network
requirements, setting the weather location, and accessing user accounts on the supported social
applications. The digital keyboard displays at the bottom of the screen when you need to enter
information into data fields.
(1) Select a data field (such as a username or password field) and the digital keyboard will
appear.
(2) Use the digital keyboard to select the characters you want to type into the data field.
Continue until you have spelled out the name or word that you are entering. To toggle between
the two available keyboard sets, you may press the “Toggle” button located in the bottom lefthand corner of the digital keyboard. The toggle button will show “+*#” or “123”.
(3) Once you have finished typing the word or phrase, press the “Enter” button. The “Enter”
button is located in the bottom right-hand corner of the digital keyboard when the “Toggle” button
shows “+*#”.
(4) Once you have pressed the “Enter” button, the digital keyboard will vanish.
eStarling TouchConnect User Manual
5
Initial Setup
The first time you turn on your eStarling TouchConnect, it will ask you to choose your wireless
network (note that this will not occur if you connected an Ethernet cable to the eStarling
TouchConnect and a working internet connection).
(1) Please choose your wireless network by pressing and holding it on the touchscreen. If the
frame cannot find your specific network (also known as the server set identifier or SSID), please
select “Manual Setup” to set up your Wi-Fi configuration. If you are still unable to connect the
eStarling TouchConnect to your wireless network, please connect an Ethernet cable to the
eStarling TouchConnect and a working internet connection.
(2) If your wireless connection is secured, please enter the SSID and password of your wireless
connection with the digital keyboard. The digital keyboard will appear when you touch the data
field.
(3) Press the “Connect” button to connect your eStarling TouchConnect to the Internet.
eStarling TouchConnect User Manual
6
Over-the-Air Firmware Upgrades
After successfully connecting to the Internet, your eStarling TouchConnect will now utilize the
over-the-air firmware update feature to download the latest firmware for your frame. Please do
not turn off your frame during the upgrade process. Your frame will reboot automatically
during the firmware update.
When rebooting your frame in the future, your eStarling TouchConnect will automatically update
itself on occasion. Please do not turn off your frame during the upgrade process. Your
frame will reboot automatically during the firmware update.
eStarling TouchConnect User Manual
7
Gmail™ Setup
After setting up your eStarling TouchConnect, you will be asked to enter your Gmail™ account
information. It is strongly recommended that you create a new Gmail™ account dedicated only
to your eStarling TouchConnect. The only supported email accounts for directly receiving photos
and videos are Gmail™ accounts.
(1) Please open a web browser on a computer or smartphone to visit Gmail’s website and setup
a free Gmail™ account. Please follow Google’s instructions on initiating an account.
(2) After acquiring a Gmail™ account, please enter the username and password of your Gmail™
account on the digital keyboard. The digital keyboard will appear when you touch the data field.
(3) Press the “OK” button to save the information within your frame.
If you ever wish to change or remove your Gmail™ account information from your eStarling
TouchConnect, you will need to press the “Remove Account” button when you enter the Gmail™
application. You will then have the option of inputting new Gmail™ account information.
eStarling TouchConnect User Manual
8
Navigating the TouchConnect
You can access the eStarling TouchConnect’s functions by using the touchscreen interface.
There are four major toolbars on the “Home” screen:
(1) The Control Panel
(2) The Media Taskbar
(3) The Application Overlay
(4) The Sidebar
Control Panel
Application Overlay
Media Toolbar
Sidebar
You can access the various toolbars by pressing the open space on the touchscreen where the
toolbar is located. For example, to access the Control Panel, you will want to touch the top of the
touchscreen.
eStarling TouchConnect User Manual
9
Control Panel
There are three buttons on the Control Panel
(1) Home
(2) Wireless
(3) Menu
Home
Wireless
Menu
The “Home” button allows you to return to the “Home” screen. The “Wireless” button will bring
you to the “Choose your wireless network screen”. The “Menu” button provides access to the
“Menu” that contains the “About” and “Brightness” functions.
eStarling TouchConnect User Manual
10
About
The “About” function on the eStarling TouchConnect allows you to see the firmware version, as
well as the MAC address and IP address of your frame.
Brightness
To change the brightness on your frame’s display, touch and slide the touchscreen on the
“Brightness” bar in the direction of your desired brightness. The “Brightness” indicator denotes
the current brightness setting.
eStarling TouchConnect User Manual
11
Sidebar
There are three applications on the Sidebar:
(1) The Clock
(2) Yahoo! Weather™
(3) The Slideshow Cycle
Clock
Yahoo! Weather™
Slideshow Cycle
You can access the Clock and Yahoo! Weather by touching the screen where the application is
located. The Slideshow Cycle displays the previous picture and the next picture of the
Slideshow.
eStarling TouchConnect User Manual
12
Clock
Once you have opened the “Clock”, you have the ability to change the following options:
Date
(1) Month - Touch the down-arrow to select the month from a list
(2) Day - Press the data field to enter the numeric day on the digital keyboard
(3) Year - Touch the down-arrow to select the year from a list
Time
(1) Hour - Press the data field to enter the numeric hour on the digital keyboard
(2) Minute - Press the data field to enter the numeric minute on the digital keyboard
(3) Time Zone - Touch one of the double-arrows to cycle to the proper time zone.
Note: The “Clock” expresses time in Military Time (24 hours, not 12 hours).
Once you have entered the desired date and time, please press the “Save” button.
eStarling TouchConnect User Manual
13
Yahoo! Weather™
You have the option of setting the location of the desired weather conditions on your eStarling
TouchConnect by zip code (USA only) or Where On Earth ID (WOEID). Just touch the small
circle next to “United States” to change the zip code or the small circle next to “Other Country” to
change the WOEID. Once you have completed entering the desired zip code or WOEID, please
press the “Save” button.
Note: You can find a WOEID at the website for Yahoo! Weather™ with a web browser. Just
input your city or zip code and look at the URL (Uniform Resource Identifier or web address) that
Yahoo!™ sends you to. The WOEID can be found at the end of the URL after the city name.
For example, the WOEID for Chicago is 2379574.
To change the temperature units from Celsius to Fahrenheit or vice versa on your eStarling
TouchConnect, please touch either temperature reading. It will change from "C" to "F" or "F" to
"C" .
Temperature
Reading
eStarling TouchConnect User Manual
14
Media Taskbar
There are two sets of functions on the Media Taskbar:
Photo
(1) Media Toggle
(2) Photo Gallery
(3) Photo Controls
(4) Layout
(5) Interval
Media
Toggle
Photo
Gallery
Video
(1) Media Toggle
(2) Video Gallery
(3) Video Controls
(4) Capture
(5) Volume
Photo
Controls
Layout
Interval
Media
Toggle
Video
Gallery
Video
Controls
Capture
Volume
You can access the functions on the “Media Taskbar” by touching the screen where the function
is located. Pressing the “Media Toggle” button will change the set of functions from Photo to
Video and vice versa.
eStarling TouchConnect User Manual
15
Photo Gallery
The “Photo Gallery” will display thumbnails of all the photos successfully downloaded to your
eStarling TouchConnect. Touch a thumbnail to see a preview of the photo. If you would like for
the previewed photo to be displayed, just touch the previewed photo. If you would like to return
to the “Photo Gallery”, just touch the screen away from the previewed photo. You can toggle
between pages by touching the arrows on either side of the photo page.
If you would like to delete any pictures from your eStarling TouchConnect, enter “Delete Mode”
by pressing the “Enter DELETE Mode” button. You will see red delete buttons on each photo.
To delete an individual photo, just press the red delete button. To delete an entire page of
photos, press the “Delete This Page” button which can be found at the bottom of “Delete Mode”.
If you would like to exit “Delete Mode”, please press the “Exit DELETE Mode” button.
eStarling TouchConnect User Manual
16
Photo Controls
The “Photo Controls” allow you to play and pause the slideshow as well as cycle through
pictures on your eStarling TouchConnect. To play or pause the slideshow, please press the
“Play” button. To see the previous photo, press the “Back” button. If you want to see the next
photo, press the “Next” button.
Back
Play
Next
Layout
The “Layout” button gives you the option of how you would like the Sidebar to be displayed.
Press the “Layout” button until the desired sidebar layout is showing:
(1) Sidebar displays on the right
(2) Sidebar displays on the left
(3) Sidebar does not display
Interval
To change the timing of your slideshow, please press the “Interval” button. You can change the
timing between photos to 3 seconds, 5 seconds,
10 seconds, 20 seconds, 30 seconds, 1 minute,
2 minutes, 3 minutes, 30 minutes or 60 minutes.
eStarling TouchConnect User Manual
17
Video Gallery
The “Video Gallery” will display thumbnails of all the videos successfully downloaded to your
eStarling TouchConnect. Touch a thumbnail to see a larger preview of the thumbnail. If you
would like for the previewed video to play, just touch the previewed video. If you would like to
return to the “Video Gallery”, just touch the screen away from the previewed video. You can
toggle between pages by touching the arrows on either side of the video page.
If you would like to delete any videos from your eStarling TouchConnect, enter “Delete Mode” by
pressing the “Enter DELETE Mode” button. You will see red delete buttons on each thumbnail.
To delete an individual video, just press the red delete button. To delete an entire page of
videos, press the “Delete This Page” button which can be found at the bottom of “Delete Mode”.
If you would like to exit “Delete Mode”, please press the “Exit DELETE Mode” button.
eStarling TouchConnect User Manual
18
Video Controls
The “Video Controls” allow you to play and pause the video as well as cycle through videos on
your eStarling TouchConnect. To play or pause the video, please press the “Play” button. To
see the previous video, press the “Back” button. If you want to see the next video, press the
“Next” button.
Back
Play
Next
Capture
The “Capture” button gives you the option to change the thumbnail preview of a video. Press the
“Capture” button while a video is playing. When you return to the “Video Gallery”, a screencap
will appear as the thumbnail. This screencap will
correspond to the video frame when the “Capture”
button was pressed.
Volume
To change the volume for your videos, please use the “Volume” slider. To increase the volume,
touch a point on the white line of the “Volume” slider.
To decrease the volume, touch a point on the yellow
line of the “Volume” slider.
eStarling TouchConnect User Manual
19
Application Overlay
There are currently six working applications on the “Application Overlay”:
(1) Photo & Video Via Gmail™
(2) My RSS
(3) Picasa™
(4) Flickr™
(5) Facebook™
(6) Twitter™
Photo & Video
Via Gmail™
My RSS
Picasa™
Flickr™
Facebook™
Twitter™
You can access an application by touching the screen where the application is located. Photo &
Video Via Gmail™ user information should have been completed when you initially set up your
eStarling TouchConnect. For more information about this application, please go to page 8 of this
user manual.
Please note that check marks will appear on the “Application Overlay” beside any application
that has been activated. If you touch an application that is planned for a future over-the-air
firmware update, your eStarling TouchConnect will show the message that it is “Coming soon”.
eStarling TouchConnect User Manual
20
My RSS
With your eStarling TouchConnect, you can update your photos with an RSS feed by sending an
email to the Gmail™ webmail service account of your individual frame. To accomplish this, in
the subject line, just type the symbol # and paste the RSS link address and type the symbol #
again. For example:
From: [email protected]
To: [email protected]
Subject: #http://yourfavoritewebsite.com/rss_link#
Your eStarling TouchConnect will automatically subscribe to photos every hour. You can
remove an RSS feed at any time by touching the ”Delete” button located to the right of the RSS
feed address.
To exit the My RSS application, please press the “Closeout” button found in the upper-right
corner of the application.
eStarling TouchConnect User Manual
21
Picasa™
Images on the eStarling TouchConnect can be updated through a Picasa™ photo organizing
web account. Once you add your Picasa ™ account, your photos will automatically be
downloaded onto your frame. The frame will update every time you upload an image to your
Picasa ™ account.
(1) After acquiring a Picasa™ account, please enter the username and password of your
Picasa™ account on the digital keyboard. The digital keyboard will appear when you touch the
data field.
(2) Press the “OK” button to save the information within your frame.
If you ever wish to change or remove your Picasa™ account information from your eStarling
TouchConnect, you will need to press the “Remove Account” button when you enter the
Picasa™ application. You will then have the option of inputting new Picasa™ account
information.
eStarling TouchConnect User Manual
22
Flickr™
In order to synchronize the eStarling TouchConnect with your Flickr™ account, you must first
provide your authorization by clicking a link sent to the Gmail™ address of your frame. Next, the
link will bring you to a Flickr™ login screen. Once you login to your Flickr™ account, you will see
an authorization screen. Please press the button “OK, I’ll Authorize It”. Then, you must click the
"Confirm" button on the Flickr™ application on your eStarling TouchConnect.
If you ever wish to change or remove your Flickr™ account information from your eStarling
TouchConnect, you will need to press the “Remove Account” button when you enter the Flickr™
application. You will then have the option of inputting new Flickr™ account information.
eStarling TouchConnect User Manual
23
Facebook™
In order to synchronize the eStarling TouchConnect with your Facebook™ account, you must
first provide your authorization by clicking a link sent to the Gmail™ address of your frame. Next,
the link will bring you to a Facebook™ login screen. Once you login to your Facebook™
account, you will see a confirmation that you have authorized eStarling’s Facebook™
application. Then, you must click the "Confirm" button on the Facebook™ application on your
eStarling TouchConnect.
If you ever wish to change or remove your Facebook™ account information from your eStarling
TouchConnect, you will need to press the “Remove Account” button when you enter the
Facebook™ application. You will then have the option of inputting new Facebook™ account
information.
eStarling TouchConnect User Manual
24
Twitter™
On your eStarling TouchConnect you have the ability to update your Twitter™ status as well as
receive status updates from people or organizations that you want to follow.
(1) After acquiring a Twitter™ account, please enter the username and password of your
Twitter™ account on the digital keyboard. The digital keyboard will appear when you touch the
data field.
(2) Press the “OK” button to save the information within your frame.
To utilize the Twitter™ application, please press the “Message” button. You will automatically
receive status updates from people or organizations that you follow. If you would like to update
your status, just touch the data field at the top of the Twitter™ message screen. The digital
keyboard will appear when you touch the data field, you can now type what’s on your mind. To
complete the update, press the “Enter” button on the digital keyboard then press the “Update
status” button. Your status update will appear below the data field.
To scroll through multiple pages of status updates, you may use the “Back” and “Next” buttons
found in the bottom left-hand corner of the Twitter™ message screen.
If you ever wish to change or remove your Twitter™ account information from your eStarling
TouchConnect, you will need to touch the “Profile” button then press the “Remove Account”
button.. You will then have the option of inputting new Twitter™ account information.
To exit the Twitter™ application, please press the “Closeout” button found in the upper-right
corner of the application.
eStarling TouchConnect User Manual
25
Specifications
• Touchscreen interface for easy navigation
• Wi-Fi 802.11b/g/n (WEP64, WEP128, WPA1, WPA2) connectivity
• RJ45 wired connectivity
• 10.2” 16:9 800x480 digital LCD
• 2GB on-board flash memory
• SD media card support
• Over-the-air automatic firmware updates with application expansion
• Remote photo album via Gmail™
• Sync with social photo applications like Picasa™, Facebook™, and Flickr™
• Update your status and follow interesting people with the Twitter client
• Current weather conditions by zip code (USA) or WOEID
• Play emailed videos. It supports many popular video formats such as video formats used by
the iPhone™, Blackberry™, Android™, Sybian™ smartphones, and of course Windows
Mobile™ phones
• External AC Adapter (Input AC100-240V 50/60Hz, Output: 12V 2A)
• Wall mount capability
• Sturdy 4” metal stand
• Weight: 2.4 lbs.
• Dimensions: ~ 7 1/2” H x 11 1/8” W x 1 1/4” D
eStarling TouchConnect User Manual
26
Frequently Asked Questions
Q: I set up the eStarling TouchConnect; why won’t it turn on?
A: The AC adapter is not securely connected to the frame or the power button is not pushed in.
Q: I have a memory card in the eStarling TouchConnect; why can’t I view my photos?
A: First, make sure that the memory card is a Secure Digital™ card and not a memory card in
another format.
Q: I have a memory card in the eStarling TouchConnect; why can’t I view my photos that I sent
to the frame over the Internet?
A: Photos sent to the frame in “Internet Mode” can only be seen in “Internet Mode”.
Q: Does the eStarling TouchConnect have built-in memory?
A: Yes. It has 2GB of built-in flash memory.
Q: What photo formats are supported by the eStarling TouchConnect?
A: The eStarling TouchConnect supports jpg, jpeg, and bmp.
Q: Why can’t I play some of my video clips?
A: Video is not supported on the eStarling TouchConnect in “SD Mode”. Only videos sent to the
frame over the Internet are supported.
Q: I have a question, how can I get some help?
A: Please go to our self-help service center at http://estarling.zendesk.com/portal.
eStarling TouchConnect User Manual
27
Maintenance & Cleaning
Always follow these basic safety precautions when using your eStarling TouchConnect. This will
reduce the risk of fire, electric shock, and injury. Do not expose this frame to rain, moisture,
direct sunlight, or heat sources. Do not remove the cover. Keep the eStarling TouchConnect in
a well-ventilated area.
Refer all servicing to qualified personnel.
• The eStarling TouchConnect is for indoor use only.
• Do not block the ventilation holes on the lower back of the eStarling TouchConnect.
• Protect the AC adapter cord. Route power cords so that they are not likely to be walked on or
snagged by items placed on or against them. Please pay particular attention to the AC adapter’s
connection point to your eStarling TouchConnect.
• Only use the AC adapter included with the eStarling TouchConnect. Using any other power
adapter will void your warranty.
• Unplug the AC adapter from the outlet when the unit is not in use.
• Do not drop the eStarling TouchConnect or place it on an unstable surface.
• When removing the stand, you must lay the eStarling TouchConnect face down on a soft area
to prevent it from getting scratched, defaced, or broken.
•.Unplug the eStarling TouchConnect from the power outlet before cleaning. Do not use liquid
cleaners or aerosol cleaners.
• Use a clean, soft, lint-free cloth to remove dust and loose particles.
• If desired, apply an appropriate cleaning agent to a clean, soft, lint-free cloth and wipe
the appropriate surfaces.
eStarling TouchConnect User Manual
28
Limited Warranty
Warranty / Return Policy
The following eStarling Return Policies and Procedures apply only to eStarling hardware products.
eStarling Return Policies and Procedures:
1. Returns within first 30 days of purchase
2. Dead on Arrival (DOA) Returns
3. Warranty Returns
4. Out of Warranty (OOW) Returns
1. Returns within first 30 days of purchase
- Returns for products purchased at eStarling’s online store or an authorized online retailer
If you purchased your product directly from eStarling’s online store or an authorized online retailer, you may return it at your expense within 30 days
from shipment as long as it is in good condition. We will refund the purchase price of your product (including applicable taxes). Your original shipping
and handling costs will not be refunded.
You should contact our Customer Support Center at [email protected] to obtain a Return Material Authorization (RMA) number. Our
representations will help you through the process of returning your product. Products must be shipped to eStarling’s designated Returns Center using a
shipping method which can be tracked and packaged appropriately for safe shipping. You are responsible for one-way shipping charges. eStarling is not
responsible for Customer products received without an RMA number and may reject such products. Upon receipt at the designated eStarling Returns
Center, eStarling will refund the purchase price of your product (including applicable taxes).
2. Dead on Arrival (“DOA”) Returns
- DOA returns for products purchased at eStarling’s online store or an online retailer
If you purchased your product directly from eStarling’s online store or an authorized online retailer, and the product is DOA (Dead on Arrival), you may
return it at eStarling’s expense within 14 days from shipment. eStarling will either refund the purchase price of your product (including applicable taxes
and original shipping and handling costs) or replace your product.
You should contact our Customer Support Center at [email protected] to obtain a Return Material Authorization (RMA) number. Our
representatives will help you through the process of returning your product. Products must be shipped to eStarling’s designated Returns Center using a
shipping method which can be tracked and packaged appropriately for safe shipping. eStarling is not responsible for Customer products received
without an RMA number and may reject such products.
Upon receipt at the designated eStarling Returns Center, eStarling will either refund the purchase price of your product (including applicable taxes and
original shipping and handling costs) or replace your product with a new unit.
3. Warranty Returns
Regardless of where your eStarling product was originally purchased, and provided that you are the original end user customer, if your eStarling product
fails under warranty, you should contact us at [email protected] to validate the warranty failure and to obtain a Return Material Authorization
(RMA) number. Our representatives will help you through the process of returning your product for replacement. Please note that dated proof of original
purchase will be required. Products or parts must be shipped to eStarling’s designated Returns Center using a shipping method which can be tracked
and packaged appropriately for safe shipping. You are responsible for one-way shipping charges. eStarling is not responsible for Customer products
received without an RMA number and may reject such products.
Upon receipt at eStarling’s designated Returns Center, eStarling will service and return the original device within 5-7 business days. Repaired or
replacement products will be shipped back to you at eStarling’s expense.
4. Out of Warranty (OOW) Returns:
If your eStarling product fails outside the normal warranty period, or the standard warranty has been voided, you should contact us
at [email protected] to obtain a Return Material Authorization (RMA) number. OOW (Out of Warranty) Returns will be processed for a charge (see
table below for current OOW charges). Our representatives will help you through the process of returning your product for replacement. Products or
parts must be shipped to eStarling's designated Returns Center using a shipping method which can be tracked and packaged appropriately for safe
shipping. You are responsible for one-way shipping charges.
eStarling is not responsible for Customer products received without an RMA number and may reject such products.
Upon receipt at eStarling’s designated Returns Center, eStarling will service and return the original device within 10 business days. Repaired or
replacement products will be shipped back to you at eStarling's expense, as part of the OOW charge.
Product
Warranty
Repair Options
Charges In Warranty
Charges Out Of
Warranty
eStarling TouchConnect
1 year from date of
purchase
Repair & Return
No Charge
$129 (USD)
eStarling TouchConnect User Manual
29