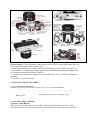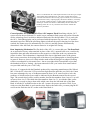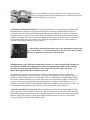
1
The Canon AE-1 was the first 35mm SLR
camera to be controlled solely via a built-in
Central Processing Unit (CPU) and made
SLR photography available to beginners and
amateurs at a reasonable prices - with a record
of over 5 million units been sold worldwide,
the success of which firmly established Canon
as the leader in camera innovations.
It revolutionized many of the concepts for future camera designs especially in the field of
electronic applications and mass produced technique with a lower cost of production with the
use of plastic injection molding, resulting in simpler assembly of parts. It also popularized and
made devices like Power Winder and electronic Speedlites a household name in the consumer
market. The camera was controlled entirely by electronics precision rather than by mechanical
functions - and depends solely on battery power for all of its functions. Despite defying the
mainstream camera design concept in the '70s, the AE-1 came through well and attained a
huge during its availability years. This was very much due to Canon's efforts in promoting the
camera - it offers very precise and stable timing of shutter speeds, which was also extended to
other areas like auto flash-synchronization speed when any dedicated Canon electronic
Speedlites is used. Although the technologies employed within the AE-1 looked very simple
when compared with today's modern SLR cameras, it has to be remembered that during its
era, the market was still dominated largely by those heavy, mechanically-controlled type of
cameras. Canon used these points to enhance the advantages of electronic applications in
camera designs - where in many areas, electronic cameras do offer much more precise timings
and other features that can never be matched by mechanical technologies.
However, the AE-1 was not in anyway a professional-grade SLR as compared to the Canon F1. It was generally regarded as a classic and top amateur SLR model due to the impact it has
created with its then innovative concept that went on to influence other future camera designs,
both Canon and other makes, of the industry as a whole. The camera was eventually replaced
by a newer model with added features, the AE-1 Program in 1981, following on the success of
Canon's semi-pro and top-of-the-line A-series camera, the multi-mode Canon A-1, which
made its debut in 1978.
Characteristics 1. Total Automatic System with a built-in CPU (Central Processing Unit), the
first 35mm SLR camera in the world to do so.
2. Shutter Speed Priority AE Camera Good for Fast Breaking Action. With Less Chance of
Camera Shake. 3. Compact and Lightweight Design Facilitating Mobility and Handling Ease.
4. Continuous Shooting with Power Winder A.
5. AE (Automatic Exposure) Computer Flash Unit, Speedlite 155A - world's first Dedicated
autoflash.
6. Full Use of Canon FD Lenses.
CANON AE-1's MAIN FEATURES
1. Very Little Battery Consumption.
The battery lasts the equivalent of 20,000 shutter releases or one year under normal use.
Silver Oxide Battery (6V)
Alkaline Manganese
Battery (6V)
Usable Batteries
Eveready (UCAR) No. 544 JIS 4G13, Mallory PX28
Eveready (UCAR No.537, Mallory 7K13
2. Convenient Finger Grip Bar.
3. Battery Check Button.
OK if the meter needle rests below the index. Without sufficient battery power, a safety
mechanism will prevent the shutter release. This button also serves to cancel the self-timer
operation.
4. Electromagnetic Shutter Release Button
Activated by a Very Smooth Touch. Two-step shutter button. Light metering is activated by
the halfway depression and shutter release by the further depression.
5. Immediate Response Metering. Light metering takes only 0.001 sec. at EV 12.
6. Shutter Speed Priority AE Camera.
High mobility. Less chance of camera shake. Effective for fast breaking action.
7. Compact and Lightweight Design.
590g (20-13/16 ozs.) body only. 790g (27-7/8 ozs.) with the 50mm f/1.8 S.C. Iens. 895g (319/16 ozs.) with the 50mm f/1.4 S.S.C. Iens.
8. Design Based on Human Engineering Technique.
Rounded back contours and large operational parts that fit to hand. Finger grip bar. Film
advance with 120° throw. One finger operation.
9. Other Features.
Interchangeable back cover.
Memo holder.
Backlight control switch.
Electronic self-timer.
But up to the mid-'70s, electronics control and applications
in SLR cameras were still limited, for example, where the
mechanical designs were largely responsible for much of the
operations. But the AE-1 was the first camera in the world
to incorporate a CPU (Central Processing Unit) which
enabled automatic exposure, memory transmission of
signals, display, regulation of time and completion signal
are all electronically controlled.
All these were packed in a economical price range - it is an entirely new kind of SLR camera
during that time. Canon AE-1 was massed produced with new manufacturing and assembling
techniques even though it had made its debut during an economic slump. The high degree of
automation was not been restricted only to the camera. It was extended to the various
accessories, all with the same standard of precision. The AE-1 was also the first camera to
offer a totally automated electronic photographic system. It takes its name, AE-1 (Automatic
Exposure-One), from this concept.
Application of Electronics is the Cornerstone of the Entire Design Automation in the AE1 was made possible by the application of the 'most advanced' available electronic
technologies during the seventies (Although it may sound pretty much outdated when
compared with today's electronics standard), and after a thorough analysis of all the
mechanisms and their operations. The important mechanical features made way for the
electronic ones, thus changing the very essence of the camera's design.
As a result, a miniature computer (CPU) was successfully incorporated in the AE-1 for the
first time in the world to compute, judge, control, display and regulate required information in certain ways, unmatched by mechanical mechanism especially where the precise timing of
the shutter speeds and electronic flash compatibility.
The (Integrated Injection Logic), as far as its application in photography is concerned, was the
most outstanding achievement in the field of electronics during the early and mid-'70s. An
LSI digital circuit with extremely high properties of accumulation, an operational amplifier, a
circuit with full use of an analog switch, a hyperbolic function resistance using both thick and
thin film technology, an analog digital converter, and the proper interfaces, together with their
constructions and arrangements in modular form, represent the technological breakthroughs in
camera design and made mass production possible, which in turn, made photography more
affordable to the general consumers.
Exceptional Reliability through Application of Electronics The Canon AE-1, since it
employed computer technology and its overall design was based on electronics, opened the
doors to a new age in the camera world. In order to make an inter-related package out of all
the inner mechanisms and to automate the assembly process, each and every part must be built
with a very high degree of precision.
And Canon extensively used computers to
automate the design of the modules as well as the assembly, manufacturing and finishing
processes. In a way, the AE-1 has influenced (and inspired) many other manufacturers to look
into the application of plastic materials in camera manufacturing to reduce costs of
production. Although the Canon AE-1 has shinny metallic finishing and even sounds like a
metal when you used your finger to knock on its shell, in reality, it was a clever use of a
production technique with an underlying coating of Iron Oxide beneath the plastic which gave
it such a similar metallic feel. But the key essential parts like the lens mount, had used metal
as the prime material. But undeniably, the modular construction of the camera allowed
acceleration in its production with the more uniformed quality control..
Flexible Substrate of the
(integrated Injection Logic) High grade of LSI technique used. Equivalent to three
Canon AE-1
chips of IC consisting of more than 1,000 elements.
By using new production methods and the adoption of highly advanced packaging techniques
in the manufacture of electronics circuitry, the vital parts were completely sealed to keep out
dust and humidity and reduce the effects of temperature. The IC and resistance circuits were
built as units. Not only was the wiring streamlined to increase efficiency, but also the new
modular joints and all other main parts were completely sealed to obtain the best possible
weather proofing (but it was not a water proof camera).
Interface Interface as a common boundary of mechanics and electronics. Three magnets: 1)
For camera function start, 2) For AE aperture control, 3) For second shutter curtain control
were used to enhance reliability and precision which provides a matching precision assured by
ball bearings. While combination of permanent magnet and electromagnet which use very
little battery consumption and the omission of holding mechanisms.
Shutter Priority Automatic exposure (AE) System Canon's earlier screw mount models, the
EX EE (1969) and EX AUTO (1972) have already offered Shutter-priority AE in their
exposure control system while the FD lenses, which also used the famed breech-lock mount
(but with auto-diaphragm) as found in the FL-type lenses, were introduced along with the
Canon F-1 in 1971. It was still too early to see an SLR model exploring the potential benefits
of what the 'new' and sophisticated breech lock mount system these FD lenses can offer.
The AE-1, which has a Shutter-priority AE system that can automatically decides the correct
diaphragm opening of the lens you are using according to the light the subject is reflecting,
based on the shutter speed that has been previously set. This is the meaning of shutter speed
priority. The pins and structures of all FD lenses allows the AE-1 to couple with the functions
of the Shutter speed priority AE.
Therefore, as you compose the picture, you can freely choose the shutter speed that
corresponded to the speed at which the subject is moving.
A Gentle Touch Activates the Shutter Button This unique shutter button activates a
complex of electronically controlled functions, a technological feat since such a design has
never been realized previously by the other manufacturers. As opposed to the conventional
mechanical systems, it serves as a switch to turn the electronic circuitry on or off, and
operates magnetically, in order to make the shutter release extremely fast and smooth.
The design of the shutter release button also uses the sequential electric supply ON and OFF.
Power is sequentially switched on-off only when the shutter button is depressed and this
minimized power consumption. Furthermore, it decreased harmful electric noises.
Immediate Response Metering From light metering to exposure setting, all the functions are
electronically controlled. With this astounding, revolutionary system, the very instant the
shutter button is pressed, the electronic brain (CPU) immediately computes the photographic
information and produces the- operating command. Light metering takes place at a speed
impossible to attain with other cameras. In EV 1 lighting conditions, light metering takes but
only 0.04 sec. With other features like exposure compensation button for an even more
precise control of AE photography, there were plenty of ways that can be used to handle
automatic exposures without the need to worry about inaccuracies in metering and exposure
timing. The shutter button activates light metering and shutter release in succession and
practically simultaneously.
Instantaneous response.
0.001 sec. at EV 12 (1/125 sec., f/5.6)
0.04 sec. at EV 1 (1 sec., f/1.4)
An Electronic Brain for Instantaneous Control For the first time in the world, this camera
adopts a system based on (Integrated Injection Logic) technology, the most advanced
electronic development applicable to photography during that time. The electronic brain
(CPU) controls all functions something no other similar class of camera offered during that
period.
Silicon Photocell and Logarithmic Amplifier In A Single IC The SPC (silicon photocell) is well known for its
outstanding photo-sensitive characteristics which yields greater responsiveness with greater linearity (straight
line characteristic) and a wider metering range.
The SPC cell, housed near the eyepiece, has a logarithmic amplifier and a special,
immediate response circuit, integrated into a single IC in order to obtain the speediest
responsiveness while at the same time ensuring remarkable overall durability.
Power-Saving Circuit The main parts were designed so as to require the minimum of energy
while a sequential command controls energy cut-off and supply. Thus, there is no unnecessary
battery consumption. A battery lasts the equivalent of 20,000 shutter releases (almost 556
rolls of 36-exposure film) in continuous photography, or one year under normal use.
Compact, Light weight Design for Great Handling Ease Although still consider bulkier
when compared with compact SLR cameras such as the Olympus OM-1, but within the Canon
line, the body dimensions have been reduced as compared with other models such as Canon
F-1, and the lightweight structure, with a special finger grip and rounded back contours,
provides great handling ease.
Automatic Film Winding with the Canon Power winder A
There is no doubt that AE-1 has helped Canon shoot to the top as a major
35mm SLR camera manufacturer, with some original ideas such as
automatic film advance devices using a power winder, a convenient and
economical accessory in photography. The Power Winder A, extremely
easy to attach, enables the AE-1 to photograph continuously at up to 2
frames per second. This feature is enhanced by the fact that actual
handling of the AE-1 is very much the same with or without this
accessory attached.
Canon Speedlite 155A, the World's First AE Computer Flash Benefiting with the CAT
system used in the professional F-1 model, a new automatic flash system was refined from the
earlier technology used, in which a dedicated flash unit, like the Speedlite 155A is used with
the AE-1, flash photography can be performed with the aperture ring set at the "A" mark for
automatic exposure. When the pilot lamp lights to indicate the proper charging level has been
reached, the shutter speed is automatically set (1/60 sec) and the aperture automatically
determined. After the flash, the camera returns to its original AE setting.
Data Imprinting Mechanism The film back of the AE-1 is a removable part. The Data Back
A, an optional accessory when attached in place of the AE-1's normal back cover, can directly
imprint the date and other information on the negative or slide film at the very moment the
picture is taken. This information is imprinted in the lower right hand corner of the picture
and is most convenient for keeping track of the dates of your photographs or classifying them
in general. However, there was a little mistake made when the design was adopted, nothing
relative to mechanical or electronic flaws - but an oversight which Canon didn't expect that
the databack will be so 'lasting' - the input numerals for the 'year' on the first control wheel
was provided until the year of 1987 only.
However, if compared with the Databack produced by competing manufacturers like Nikon's
MF-12 for the FE, where the LCD version has digits that lasts until the year 2019, the Canon
has some advantages by way of its Roman numerals from I to X, some used it to solve the
problem, of which current years could be indicated by the Roman numeral for the second
digit. The second wheel can be used for months, but also has numbers from 1 up to 31 as well
as letters from A to G. The third wheel has numbers from 0 to 31. As with the other earlier
databacks, you need to plug a short cable which came from the left-hand side of the Data
Back A into the PC terminal socket on the AE-1 camera for proper operation. Well, if you
wish to use the Data Back A and a non-hot shoe flash at the same time, you must plug the PC
cord from the flash into the PC socket on the Data Back A.
The advantage of having an interchangeable lens ability is the large collection of used
FD Lenses The theoretically long lasting and “wearless” breech-locked mount FD lenses are
one of the key outcome of the application in first rated electronics technology in the field of
optics. Their image sharpness and color reproduction abilities are of extremely high standard.
Canon offered a full array of interchangeable lenses ranging from the 7.5mm fisheye to the
1200mm super telephoto, totaling as many as 55 lenses including the special purpose lenses
up to the time when the whole line-up was slated for discontinuation. That was another reason
why the AE-1 was so successful commercially, as the general public was able to experience
the thrill and excitement of lens interchangeability in SLR photography. But as a new user to
SLR photography, if you have little intention to upgrade, the 'abandoned' FD lens-based SLR
camera like the AE-1, with the huge pool of resources available in the used market presents a
really attractive alternative if your budget is tight. But if you intend to grow with the system
and migrated to autofocus or action related photography in the future, I do have a little
reservation to invest into the manual focus FD system. But as I said, photography is not all
about autofocus and the medium is not as economical and regarded as an cheap 'hobby' as
compared with the early days of manual focus photography, the AE-1 still possesses some
charm that can be considered as a good and logical entry.
If you have owned or purchase a AE-1, these are few essential but relatively easy steps for
you to setup your camera to take pictures (Section one for the camera, section two when you
are using it with flash and lastly, with a auto film advance device like the dedicated Auto
Winder). If you intend to understand more about the details, please read through the whole
site for other related content to fully explore the potential this camera can offer you.
Basic Setup Steps for Camera Operations
1.Set the aperture ring of the lens to the"A" mark.
3. Load the film.
5. Look into the viewfinder Compose the picture and focus.
2. Load the battery.
4. Set the ASA film speed.
Select a shutter speed.
6. Advance film; Check exposure. Press the shutter button.
Photography with earlier flash unit 155A automatic Flash photography (Or any dedicated
flash units by Canon)
1. Load the batteries.
2. Set the ASA film speed
3. Mount the Speedlite 155A
4. Turn the main swittch5. Set the AUTO/MANUAL switch
(Or equivalent) onto the camera
6. Focus, compose and press the shutter button to take the picture.
Photography with the Canon Power Winder A
1. Remove the Battery Pack A.
2. Load the batteries into the Battery Pack A.
3. Attach the Battery Pack A to the Power Winder A.
4. Take off the winder coupler cover.
5. Attach the Power Winder A to the AE-1.
6. Turn the main switch on.
7. Focus and press the shutter button.
Preliminary Preparation for AE-1
Attaching the
Neckstrap
Attach the Canon AE-1's neckstrap by
threading it through the rings and adjusting it
to the desired length as indicated in the
photos. A case for a spare battery can be
attached to the neckstrap.
Handling the Lens Cap
The lens cap can be removed from the front of the lens after
pressing in the tabs on both sides of the cap. The rear dust
cover can be removed by turning the bayonet ring in the
direction of the arrow.
To attach the dust cover, align its slot with the positioning pin below the red dot of the
bayonet ring, and press it in. When the dust cover is removed the bayonet ring is locked.
1. Mounting the Lens onto the camera
Remove the body cap and mount the lens onto the camera. The lens is mounted by
aligning the red dot of the body with the red dot of the bayonet ring, and then
turning the bayonet ring clockwise, pressing gently until it locks into position.
Reverse the procedure to dismount the lens.
2. Setting the Aperture Ring to the "A" Mark
The AE-1 delivers perfect AE photography when the aperture ring is set for
automatic exposure. The "A" mark on the aperture ring should be set to the EE
position. Hold in the EE lock pin while turning the aperture ring to the "A" mark.
This can be done either before or after the lens is mounted on the camera.
3. Loading the Battery
This camera will not function without battery power. A 6V silver
oxide or alkaline battery is loaded into the battery chamber after
opening the battery chamber cover. It can be opened more easily by
using the viewfinder cover that is inserted into the accessory shoe.
Be careful to load the battery correctly with the "+" side up as indicated in the diagram. Load
the battery by inserting first the "-" contact in the battery chamber. The battery can be
unloaded in a similar way by pulling it out from the top. The battery can be loaded and
unloaded more easily when the lens is dismounted.
The battery should last for approximately one year under normal use.
Check on other section with specifications of the battery when the
camera is used in extremely cold conditions.
4: Checking the Battery
Since the AE-1 is an electronically controlled camera, the shutter will not function without
sufficient battery power. The battery requires checking in the following circumstances:
1.When a new battery is loaded.
2. When the shutter does not function.
3. When long exposures are frequently performed.
4. When the camera is used very frequently.
5. When the camera is used after it has been stored for a long period.
When the camera is used in extremely cold conditions.
Usable Batteries: Silver Oxide Battery (6V ) (Eveready (UCAR) No.544, JIS 4G
13, Mallory PX 28; Alkaline Manganese Battery (6V) (Eveready (UCAR) No.537,
Mallory 7K l 3)
How to Check the Battery The charge level of the battery is checked by pressing the battery
check button on the top of the camera Carefully watch the meter needle in the viewfinder.
Press the battery check button and if the meter needle in the viewfinder rests below
the index, power level is sufficient. If the meter needle rests above the index, the
power level is insufficient. If this is the case, replace the battery with a new one of
the prescribed type. When a new battery with full voltage is used, the meter needle
in the viewfinder indicates close to the 2.8 f/stop. When the battery power wanes, it
takes more time for the meter needle to stop fluttering.
Because of the special circuit, the meter needle's swing depends on the state of the battery.
The meter needle will rise as the battery power wanes until it reaches the f/5.6 position where
there is no longer any more power. Press the battery check button until the meter needle rests
still. When the battery is just about to fail, the meter needle in the viewfinder rests close to the
index.
5. Loading the Film The Canon AE-1 uses color or black and white film in standard 35mm
cartridges. Since this is a 25 years old camera, you can't expect it is as convenient as today's
modern SLR with nifty feature such as Auto DX coding , auto film advance and power
rewind. Most of this procedures have to handle them manually.
Opening the Back Cover To load a cartridge of film into the camera, first open the camera's
back cover. Pull up the rewind crank and the back cover will pop open. The back cover can be
securely closed simply by pressing it until it locks.
An optional accessory, Canon Data Back A, a recording device for
imprinting data such as the day, month and year, can be attached to the
AE-1 in place of the standard back cover.
How to Load the Film Note: ALWAYS avoid direct sunlight when loading or unloading the
film. Put the cartridge into the film cartridge chamber and press down while rotating the
rewind knob until it drops securely into position. The protruding part of the cartridge should
be on the bottom. Pull the film leader across and insert the end into one slot of the multi-slot
take-up spool.
Turn the film advance lever and wind the film around the take-up spool
making sure that the perforations of the film are engaged in the teeth of
the film transport sprocket.
Then, make sure that there is no film slack. In case there is, gently
turn the film rewind crank in the direction of the arrow to obtain
proper film tautness and the film advance lever to ensure that the
leader is wound fully on to the take-up spool before the camera back
is closed.
When loading the film into the camera do not touch the shutter curtain, the film rails or the
pressure plate. The shutter curtain is a most delicate and fragile part in the camera, a deformed
shutter curtain may result in a permanent damage and since the AE-1 may not have any
support in replacement parts from Canon, always handle loading and unloading of film roll
carefully.
Closing the Back Cover
Close the back cover until it snaps shut. Gently turn the film rewind crank clockwise in
the direction of the arrow to take up the film slack. Then, advance the film a couple of
times pressing the shutter button until the first exposure appears in the frame counter.
Checking Film Winding
Operate the film advance lever while watching the film rewind knob. If it rotates, the film
is properly loaded. If the rewind knob does not rotate, open the back cover and load the
film again from the start.
Setting the ISO Film Speed
After loading the film, set the ISO film speed according to the ISO speed
of the film in use.
To set the ISO, first push the film advance lever out to its 30° stand-off position away from
the camera body, then lift up the ISO ring around the shutter dial and rotate it in either
direction until the proper number is aligned with the green index mark. ISO is a numerical
rating of a film's sensitivity to light. A higher ISO number indicates a faster film which is
more sensitive to light. On the other hand, a lower ISO number indicates a slower film which
is less sensitive to light. The ISO rating recommended by the manufacturer is printed on the
film box, e.g., ISO 100.
The following ISO ratings can be set on the camera. Figures in
parentheses indicate intermediate film speeds.
ISO 25 | 32 | 40 | 50 | 64 | 80 | 100 | 125 | 160 | 200 | 250 | 320 | 400 |
500 | 640 | 800 | 1000 | 1250 | 1600 | 2000 | 2500 | 3200
Use of the Memo Holder The memo holder on the camera's back cover is useful for keeping
data like film speed, location, shooting.
For example, after tearing off the part of the film box which specifies the
type of the film being used, it can be inserted into the memo holder as a
constant reminder. Personally, I used the memo holder to put an ID-size
photo of my girlfriend.
Film Advance and Shutter Release Turn the film advance lever until it stops, so the film
will advance one frame all in one motion. The shutter will cock, and the diaphragm and mirror
will be ready for the next shutter release, while the frame counter advances simultaneously to
the next number. By pushing the film advance lever lightly with the tip of your thumb, it will
open to its 30 stand-off position away from the camera body for easy film advance. While the
film is advancing, the shutter will not be released.
Film winding can also be accomplished by advancing the lever in short
strokes.
Canon has developed the Power Winder A to be used with the AE-1 for automatic film
winding. It greatly increases the automation and mobility of the AE-1.
Shutter Button and Shutter Lock The shutter release button is designed to function as the
main switch of the camera to activate the AE meter and shutter operation. The shutter has a
magnetic release, so the meter can be read by pressing the shutter button halfway with light
pressure. By depressing it further, the shutter will be released.
The magnetic release shutter button enables faster metering for shooting in
succession than the mechanical release method does. There is also less
chance for camera shake.
When the shutter lock lever around the shutter release button is turned to the "L" position, the
shutter button will be locked to prevent unintentional shutter release. Keep the shutter release
button locked while carrying the camera to prevent film waste. Note: When the power level of
the battery is insufficient, a safety mechanism will keep the shutter from being released.
Frame Counter
The frame counter is an additive type which counts one frame
every time the film advance lever winds the film. When the
camera's back cover is opened, the frame counter automatically
resets itself to the "S" position.
The shutter release button is designed to function as the main switch of the camera to activate
the AE meter and shutter operation. The shutter has a magnetic release, so the meter can be
read by pressing the shutter button halfway with light pressure. By depressing it further, the
shutter will be released. The magnetic release shutter button enables faster metering for
shooting in succession than the mechanical release method does. There is also less chance for
camera shake. While rewinding film, the frame counter counts back the frame numbers. The
starting position "S", 0, and the even numbers 2 to 38 are displayed by the counter. Numbers
20 and 36 are marked in orange to call your attention to the end of film cartridges such as are
today commercially available. The frame counter cannot count higher than 38.
Operation for General Photography The AE-1 is an Automatic Exposure camera with a
shutter speed priority system which electronically controls the aperture opening for the given
shutter speed to ensure the optimum exposure. Canon's shutter speed priority system has been
adopted by this camera in the idea that a photograph is an instant snatched from elapsing time.
The shutter speed priority system is ideal for catching fast-moving subjects, especially at the
decisive moment. Even most of the models in Canon's EOS System of AF cameras have this
shooting mode a standard feature. Furthermore, the shutter speed priority system allows you
to control image blur at will and to emphasize the movement of the subject. For action or
other such situations, you can realize all photographic aspirations.
Setting the Shutter Speed The shutter dial controls the length of time that light is allowed to
reach the film. On the shutter speed dial, shutter speeds from 1/1000 to "B" are marked in
white, while the 2-second speed is marked in orange. Each shutter speed gradation is twice or
approximately twice the preceding speed, beginning with 1/1000 sec. (1000).
Thus, the light reaching the film at 1/250 second is half the light
reaching it at 1/125. The numbers on the shutter speed scale
represent the corresponding fraction of a second (125=1/125),
with the exception of 1 and 2 (marked in orange) which stand for
1 and 2 seconds respectively.
The "B" setting is for long exposures. At the "B" setting, the shutter remains open while the
shutter button is depressed and closes when it is not depressed. See page 48 for more details
concerning long exposures. To set the shutter speed, rotate the dial in either direction until the
desired number clicks into place next to the white index mark. An in-between shutter speed
cannot be set on the dial.
Rotated between "B" and "1000".
Shutter Speed
Brightness
(Seconds)
Indoor
1/30 sec to 1/60 sec
Outdoor
1/125 sec to 1/1000 sec
Mid-summer Beach Snow-covered
1/500 sec to 1/1000
Mountains
a) Selecting the Shutter Speed Shutter speed is determined in accordance with the brightness
of the scene and the speed with which the main subject is moving. You can use the above
table as a general guide to help you select an appropriate shutter speed when using a standard
50mm lens. For indoor photography, with no special illumination, choose 1/30 of a second
and 1/60 of a second in a brightly lit room.
For out door photography, select 1/125 second when cloudy and 1/250
second in sunshine. To take pictures in particularly bright sunshine such
as at a beach in midsummer or in snow-covered mountains, use shutter
speeds of 1/500 sec. or 1/1000 sec.
The above mentioned shutter speeds apply when using a standard 50mm lens, but it is
necessary to choose faster shutter speeds when using lenses of longer focal lengths because
they are more difficult to hold steady. It is generally said that the shutter speed figure should
be greater than 1 divided by the focal length of the lens in order to obtain sharp images. For
example, when using a 200mm telephoto lens, shutter speed. should be faster than 1/200
second, therefore the shutter speed in this particular case should be set at 1/250 sec. Image
blur can also arise if the camera is not properly held.
b) Reading the Exposure This camera incorporates a magnetic release system using an
electromagnetic switch to effectively perform instantaneous light metering. The shutter
release button activates light metering and exposure in succession and practically
simultaneously. This is a two-step shutter button. The exposure can be confirmed by the meter
needle inside the viewfinder by pressing the shutter button halfway. When the meter needle
inside the viewfinder stays within the proper range and the underexposure warning LED lamp
below the aperture scale inside the viewfinder does not blink, the exposure is correct.
When the underexposure warning lamp inside the viewfinder blinks, or when the meter needle
moves into the upper overexposure warning zone in red, the exposure is incorrect. When this
is the case, turn the shutter speed dial until the meter needle inside the viewfinder moves into
the proper exposure range. To confirm this, turn the shutter speed dial while looking into the
viewfinder and pressing the exposure pre-~ view switch at the same time. It is convenient to
turn the shutter speed dial with your forefinger in order to swiftly cope with the speed of fast
moving subjects. When using shutter speeds slower than 1/30 second, the camera should be
placed on a tripod to avoid the possibility of camera shake.
c) Viewing and Focusing Focusing is performed in the small round area in the center of the
viewfinder. The smaller central circle is a split-image focusing screen and around it is the
microprism ring. The split-image rangefinder ascertains that the image is "in focus" when the
image divided horizontally in half matches and becomes one complete image.
The microprism rangefinder presents a clear and steady image
when in focus. The microprism conveys a broken, shimmering
image when not accurately in focus.
It is also possible to focus with the matte screen outside the smaller central area. You can
focus with either of these focusing aids as you like, depending on the subject condition and
your preference.
Dioptric Adjustment Lenses Dioptric adjustment lenses can be attached by inserting them
from above into the grooves in the viewfinder eyepiece to compensate for the individual
eyesight. With them, near-sighted or far-sighted persons can perform photography without
glasses.
The built-in eyepiece lens of the AE-1 has -1 diopter. The following 10
kinds of dioptric adjustment lenses are optional accessories: +3, +2, +1.5,
+1, +0.5, 0, - 0.5, -2, - 3, - 4 (diopters).
Accessories such as an eyecup, dioptric adjustment lenses, angle finders, and magnifier can be attached to the
viewfinder eyepiece.
One way of selecting the correct dioptric adjustment lens for you is to select the one that is the
closest to your glasses in regard to number of diopters. But, we propose that, when you select
the most appropriate dioptric adjustment lens, you actually look into the viewfinder through it
after placing it over the eyepiece.
Note: Because the camera itself has -1 diopter, the diopters of the lenses are recorded as the real power when
attached to the camera, thus reflecting the power of the camera's viewfinder.
Angle Finder A2 and B The angle finder is a magnifying glass which can be attached from
above into the grooves of the viewfinder eyepiece. It rotates 90 degrees so that the image on
the viewfinder can be viewed directly from the side or above whenever it is inconvenient or
impossible to look directly through the eyepiece.
This is very helpful in copying, close-ups, macrophotography, and
photomicrography. There are two types, the A2 whose image is reversed
as in a mirror, and the more advanced Angle Finder B with the normal
camera image.
Magnifier S The Canon Magnifier S gives 2.5X magnification of the viewfinder center for
precision focusing in close-up work. The strength can be adjusted to your eyesight within the
range of +4 to -4 diopters.
The Magnifier S combined with its adapter can be inserted into the
grooves of the viewfinder eyepiece. The adapter of the Magnifier S is
hinged to allow the magnifier to swing upward from the eyepiece leaving
the whole screen image visible after focusing.
Holding the Camera Unlike the mechanical release system, the magnetic release system of
the Canon AE-1 electronically controls the shutter. The shutter button moves with a very light
touch and its travel is very short. The shutter will be released by lightly depressing the shutter
button so as to prevent camera shake. But, unsteady holding of the camera will cause camera
shake in spite of the magnetic release system. Therefore, be sure to hold the camera firmly.
Rest the camera on your left palm and grasp the lower part of the lens focusing ring between
your thumb and forefinger or middle finger. Hold the right end of the camera firmly, with
your right thumb behind the tip of the film advance lever and your right forefinger on the
shutter button, while the other fingers hold the camera's finger grip.
To reduce camera shake, press your left elbow strongly against your body and look into the
viewfinder steadying the camera against the forehead. The right arm should be relaxed while
holding the camera. When you use comparatively slow shutter speeds or when you use
telephoto lenses, it is advisable to lean against a wall, a tree trunk or some fixed object for a
steadier grip.
Adapter A for Tripod
When using a lens of considerable overall length, depending on the tripod being used, it
may be difficult to hold the adjustment in the case of accidental bumping of the lens. In
such cases, the Canon Adapter A for Tripod with a rubber matte should be placed
between the tripod and the camera for easier handling.
Composition Since the AE-1 has automatic exposure control with shutter priority, you can
concentrate on the actual picture you are going to take without worrying about exposure
differences that may occur with changing subjects. Viewing is performed through the lens,
and there is no difference between the viewfinder image and the image exposed on the film as
opposed to the image provided by a separate viewfinder which is affected by the parallax
between the viewfinder and the camera lens.
Releasing the Shutter The Canon AE-1's shutter button uses a magnetic release system. The
shutter button travel is very short and activated by a very gentle touch. When you press the
shutter button, try to squeeze the shutter button gently with your finger.
Avoid hitting or pressing the shutter button suddenly particularly when
using slow shutter speeds, otherwise blur may result.
At the moment of shooting, you should hold your breath while the shutter button is being
pressed.
Rewinding the Film When the film advance lever cannot travel all the way to the end of its
stroke, the frame counter tells you that you have reached the end of the film. You have to
rewind the film in its protective cartridge, before you can remove it from the camera.
You must not open the camera before rewinding the film. Since it is not
protected, any exposure to light will "fog" the film and cause a drastic
color shift and loss of picture image.
To rewind the film, press in the small rewind button on the bottom of the camera, unfold the
rewind crank and turn it in the direction of the arrow on top of the rewind knob. When the
frame counter has reached the "S" mark, you should stop rewinding. Then pull up the rewind
knob to open the camera back and lift the cartridge out.
If you stop rewinding the moment the frame counter has reached the "S" mark, the film will
not be completely rewound into the cartridge and the film leader may still be outside the
cartridge.
Double-Check Before Shooting If you hurry to release the shutter, you may make an
unexpected error due to carelessness. The following points should be double checked:
1) Is the aperture ring of the lens se to the "A" mark?
Press in the EE lock pin while turning the aperture ring to the "A" mark. This specific setting
is a requisite for beautiful color pictures with automatic exposure. If you fail to adjust the
aperture ring to this setting when appropriate, the correct automatic exposure will not be
obtained. When the aperture ring of the lens is not set to the "A" mark, the manual aperture
control "M" signal above the aperture scale in the viewfinder flash has on and off as a warning
that the aperture ring is not set at the "A" setting.
2) Did you set the film speed properly?
It is necessary to set the film speed properly according to the film in use in order to obtain the
correct exposure.
3) Is the film properly loaded?
You can use the rewind knob as an indicator that the perforations of the film are properly
engaged on the sprocket and the film is actually advancing. Every time you advance the film,
the rewind knob should turn.
Detailed Operation of the AE-1
A silicon photocell is used as the photosensitive element in the camera. If you compare the
silicon photocell (SPC) with other existing photo-sensitive elements, you will find it covers a
greater range of lighting situations and allows for greater accuracy. In order to provide the
AE-1 with the best possible magnetic release system, Canon developed a special circuit for
instantaneous light metering, Due to this innovation, even in place as dark as EV1 (at ISO
100, f/1.4, 1 sec.), metering can be performed in only 0.04 second.
Viewfinder Information
In keeping with Canon's standard of providing all
relevant information in an easily readable format,
all information is displayed on the right side of the
viewfinder. The diagram below indicates the
information provided and where it can be seen in
the viewfinder.
Meter Sensitivity Pattern
In a great variety of lighting situations, the carefully designed Central
Emphasis Metering system simplifies problems to ensure that the subject is
correctly exposed.
Metering Range
TTL metering is possible with a f/1.4 lens at ISO 100 from EV 1 (1 sec., f/1.4) to EV 18
(1/1000 sec.. f/16).
ASA Film Speed
25..50
..100
..200
..400
..800
..1600
..3200
Coupling Range
2 to 1/1000 sec
1 to 1/1000 sec
1/2 to 1/1000 sec
1/4 to 1/1000 sec
1/8 to 1/1000 sec
1/15 to 1/1000 sec
1/30 to 1/1000 sec
Shutter Speed and AE Coupling Range The shutter speed and AE coupling range are
indicated in the table. If any combination outside the coupling range is made, the coupling
range warning lamp will blink, as it does when warning of underexposure. Since the lamp
serves a dual function, check that the shutter speed IS within the coupling range before
assuming that the light level is too low.
Overexposure Warning Mark When the lighting of the subject is too bright, the meter
needle will rise into the red zones of the aperture scale. The red area is divided into two parts.
The top part is a warning for use with a lens having a minimum aperture of f/22, while the
bottom part is for use with a f/16 minimum aperture lens. When the meter needle enters the
red area, increase the shutter speed and correct the exposure.
Note: With some specific lenses like the FD 100mm f/4 Macro lens, which offers a minimum aperture of f/32,
if you want to photograph at its minimum aperture of f/32 and the meter needle points to the red area, do the
following: Increase the shutter speed until the meter needle indicates f/22 and then decrease the shutter speed by
one gradation so that the exposure will be correct.
Underexposure and Coupling Range Warning LED Lamp This lamp blinks on and off as
a warning of incorrect exposure. If you reduce the shutter speed by turning the shutter speed
dial so the underexposure warning lamp will stop blinking, the correct exposure will also be
obtained. Under dim light with a slow speed lens, there is a case when the meter needle will
point at the aperture scale inside the viewfinder although it will exceed the maximum aperture
of the lens. In this case, turn the shutter speed dial to a slower setting so that the
underexposure warning lamp stops blinking.
For example, when you use an f/2.8 lens and the meter needle exceeds the aperture scale of
f/2.8 inside the viewfinder, reduce the shutter speed until the lamp stops flashing. When the
shutter is set at 'B' (Bulb) and the shutter button is pressed halfway, this warning lamp will
also flash on and off.
Battery Check and Stopped-Down Metering Index Mark
This battery check index mark serves also as the stopped-down metering index
mark for use with Canon FL lenses and other similar manual lenses, when
exposure measurement is performed with a stopped-down diaphragm.
Manual Aperture Control "M" Signal (LED) When the aperture ring is not set at the "A"
mark, you cannot get the correct exposure in AE photography. When the aperture ring is set at
any position other than the "A" mark, the manual aperture control "M" signal will blink as a
warning. Also, when Canon FL lenses, Bellows or the like are used, this warning signal
flashes on and off when exposure measurement is performed.
Concerning the Exposure (Shutter Speed and Aperture Coupling) In order to obtain the
correct exposure, it is necessary to correctly match the shutter speed with the aperture. The
shutter speed and the aperture are the main factors in controlling the amount of light which is
allowed to strike the film, and when they change, the quality of the image upon the film also
changes.
1) Effects of Changing the Shutter Speed The explanations below are pertinent to
photography with fast moving subjects or when it is intended to convey the feeling of
movement in a photograph. If, as in example, a photo is taken at a shutter speed of 1/250 sec.
and above, the movement will be frozen. If, with the same subject, the photo is taken at a
speed of 1/60 sec. though the subject is somewhat blurred, movement is well expressed. It is
only a matter of aesthetics as to which of these photographs is the best. Depending on the
selection of the shutter speed, you can freely control the expression of movement.
2) Effects of Changing the Aperture Because this camera is an AE camera with shutter
speed priority, when you change the shutter speed, the aperture will also change. If you
change the speed by one gradation, the aperture also changes the equivalent of one gradation.
Aperture changes have an effect on the photographic expression as follows: The lens aperture
controls the zone of sharpness in the subject field which is observed in the viewfinder or
recorded on the film.
Aperture Priority Photography After having given careful thought to the results of aperture
adjustments, when the f/stop has been determined before shooting, press the exposure preview
switch while looking into the viewfinder. Then turn the shutter speed dial until the meter
needle on the right of the viewfinder reaches the f/stop desired.
Depth-of-Field When a certain subject is brought into focus, there is only a limited range in
the foreground and background of the subject which can be kept clearly in focus. This zone of
sharpness in the subject field is depth-of-field.
There are two methods of confirming the extent of the depth of the
field: by stopping down the lens diaphragm or by reading a value from
the depth-of-field scale on the lens.
Confirming the Depth-of-Field by: 1). Stopping-Down the Lens Diaphragm. Wind the film
and determine the aperture required for the subject by metering, and then set the f/stop by
turning the aperture ring after disengaging the aperture ring from the "A" mark. 2). Press the
stopped-down lever until it locks. Once locked, the depth-of-field can be checked by looking
into the viewfinder. Thus, the extent of the depth-of-field can be seen as the zone of sharpness
in the subject field observed on the screen. When the stoppeddown lever's release button is
pressed, full aperture metering will be restored.
3). After having turned the aperture ring to the maximum f/stop on the
lens, reset it to the "A" mark. Otherwise, you will not be able to obtain
the correct automatic exposure for the next shot.
Stopping-down of the FD lenses should only be done after advancing the film. Should you
not advance the film, the stopping-down of the lens diaphragm would only be possible
up to the previous exposures aperture. Also, when the aperture ring is set at the "A"
mark, the stopped-down lever cannot be pressed.
Generally, the depth-of-field will become deeper as the aperture becomes smaller, and
shallower as the aperture becomes larger. A shorter focal length as well as a greater subject
distance will also attain deeper zone of depth-of-field. Comparing an interchangeable 28mm
lens with a standard 50mm lens set at the same f/stop, the 28mm lens's depth-of-field will be
greater. And when the photographic distance changes, the depth-of-field changes, too. For
example, if the same subject is photographed from three and then from seven meters away, the
foreground and background of the subject will be deeper at the greater distance.
4) Depth-of-Field Scale on the Lens Most manual focus lenses has excellent depth-of-field
scale engraved on the lens barrel, shown as a series of f/numbers on each side of the distance
index mark opposite the distance scale. Focusing and depth-of-field are so closely interrelated
that the depth of-field scale is engraved together with the distance scale. You can tell the
extent of depth-of-field from the distance scale.
For example, if you use the camera with a standard 50mm lens that is
focused on a subject at medium distance, say 3m with the aperture set
at f/8, the depth-of-field extends from 2.4m to 4.5m. This tells you that
with the 50mm lens focused at 3m and the subject between 2.4m and
4.5m the film image will be reasonably sharp.
Using the Self-Timer Obvious uses for the self-timer are self-portraits and the inclusion of
the photographer in the picture. The self-timer, though, can also be used in place of a cable
release to release the shutter gently and smoothly in close range work like photomicrography
or copying. Push the electronic self-timer lever forward, then press the shutter button, and the
shutter will be released 10 seconds later. The camera memorizes the exposure value the very
instant the self-timer is activated by pressing the shutter button. While the self timer is in
operation, the self-timer lamp flashes on and off. After you finish taking a picture the selftimer lever should be reset to its original position. Otherwise, it will function again the next
time you press the shutter button.
Exposure will be automatically determined at the instant the shutter
button is pressed, and not when the picture is actually taken. Therefore',
avoid standing directly in front of the lens when you press the shutter
button as the AE control may miscalculate the proper exposure.
To prevent stray light from entering the viewfinder from the rear and possibly affecting the
meter reading, it is a good idea to cover the eyepiece with the viewfinder cover which is
inserted into the accessory shoe. This cover can be attached to the holder on the viewfinder
eyepiece. After doing so, press the shutter button.
Canceling the Self-Timer Operation If you should want to cancel the self timer operation
after having pressed the shutter button, depress the battery check button on the top side of the
camera. Then, the self-timer lamp stops blinking and the self-timer operation will be
cancelled. If the battery check button is not depressed and the self-timer lever is returned to its
original position, the shutter will be released.
Shooting Against the Light with the Backlight Control Switch In most cases, the Canon
AE-1's Central Emphasis Metering system will give correct exposure readings in AE
photography. However, you will occasionally encounter 'abnormal' or unfavorable lighting
situations in which normal AE photography would not provide a correct exposure reading of
the main subject. For example, in situation where your subject has strong light behind it or the
subject contrasts sharply with the background or the composition is such that it does not
appear in the center of the picture or the entire scene is either extremely bright such as a lightcolored subject in snow, a white wall or on a sunny beach.
In the above cases, it is necessary to modify the automatic exposure
reading that the camera automatically sets. If calculation of exposure
compensation is too complicated, the AE-1 has a convenient feature in
backlight exposure compensation button. You can correct the exposure
reading by pressing the backlight control switch which will increase the
exposure value by the equivalent of one and a half f/stops.
Long Exposures and "B" (Bulb) Setting
When you need shutter speeds slower than two seconds such as for shooting night scenes or
fireworks, set the shutter speed dial at "B". Then, the shutter will remain open as long as the
shutter button is pressed. In long exposures, it becomes essential to mount the camera on a
tripod and use a cable release preferably with a lock to prevent camera shake and attain best
results.
A cable release with a locking device can keep the shutter open even though
the operator leaves the cable release unattended. Unlock the cable release
when the shutter should be closed.
Warning: Since the electronic AE-1 does not operate any of its shutter settings mechanically,
photography using the "B" setting will accelerate battery consumption since it requires
continuous battery power. When necessary, the battery should be replaced with a new one
having a full charge.
Stopped-Down Metering
When the AE-1 is used with Canon FD lenses, photography can be performed with throughthe-lens (TTL) metering and with AE coupling. However, with the Canon FL lenses and most
earlier non-auto coupled accessories such as bellows, extension tubes, or a microscope
adapter, it is necessary to take a stopped-down meter reading.
Warning: The FD lenses with auto diaphragm mounted on the AE-1 should always be
used with full aperture metering. Using stopped-down metering with FD lenses on the
AE-1will give the wrong exposure. Skip this section if your optics are FD or New FDtype of lenses.
Stopping down the lens can be done by pushing the stopped-down lever until it locks. When
the lenses is stopped-down, press the shutter button halfway or depress the exposure preview
switch and adjust the aperture ring and/or shutter speed dial until the meter needle inside the
viewfinder is aligned with the stopped-down metering index mark. Press the shutter button
and the photograph will be perfectly exposed. If the lens should be mounted on the camera
with the stopped-down lever locked, correct exposure will not be obtained. In this case, a red
warning mark by the stopped-down coupling lever inside the camera body is visible. After
removing the lens, on the lower part of the camera body, just below the mirror, this stoppeddown coupling lever becomes visible, as does the red mark in the case described above.
Manual Aperture Control
When accessories requiring manual aperture control are used between the camera body and a
lens, lock the automatic aperture lever in the manual position before mounting the lens.
A) Lock for Manual Aperture Control (1) For manual aperture control, push the automatic
aperture lever counterclockwise until it stops and locks. When accessories such as extension
tubes are attached to a lens that has been set for manual control, the diaphragm blades of the
lens open or close as the aperture ring is turned. To revert from manual control, reset the
automatic aperture lever in its original position.
B) Lock for Manual Aperture Control (2)
There are some FD lenses with the manual lock lever requiring a different
procedure for manual control setting.
With these particular lenses, the automatic aperture lever must be turned fully
counterclockwise while the manual lock lever is brought to the "L" position. Once this has
been done, when the lens is mounted on the camera, the diaphragm blades will open or close
by turning the aperture ring. To revert from manual aperture control, reset the manual lock
lever at the position of the white dot.
C) Lock for Manual Aperture Control When Using the Macrophoto Coupler (3) In
close-up photography of high magnification with a lens reversed on the Macrophoto Coupler,
the automatic diaphragm mechanism is not coupled. You must, therefore, remember to close
down the diaphragm manually after having locked the automatic aperture lever in the manual
position as explained above in (1) and (2). Then, fix the Macrophoto Hood on the lens mount
by turning the bayonet ring.
When you are taking stopped-down meter readings, the manual
aperture control "M" signal above the aperture scale inside the
viewfinder flashes on and off only when the shutter release button is
depressed halfway.
Changing the Lens Earlier FD lenses (With inner chrome ring) incorporate a safety
mechanism to prevent the bayonet ring and the diaphragm blades from moving when the lens
is not mounted on the camera. To bypass this safety mechanism, press the lock pin in the top
recess of the bayonet mount while turning the bayonet ring. Once this safety mechanism has
thus been cancelled, you can see the diaphragm blades move when activated. Note: Later FD
lenses (those with the black ring) need not have to lock the chrome ring. Since FD lenses have
signal pins and levers which couple with the camera body, special care must be taken not to
damage them. One basic precaution is to always put the lens down facing down whenever you
must change lenses.
The following lenses cannot be used with the built-in meter because the extended rear part of
the lens will push in the lens speed adjustment pin on the camera body: FL 19mm f/3.5 FL
35mm f/2.5 FL 50mm f/1.8 FL 58mm f/1.2 R 35mm f/2.5 R 50mm f/1.8 R 100mm f/2.
Lens Signal Coupling Aperture Signal Lever
This lever transmits the actual f/stop to the exposure meter. It is coupled to the aperture ring
just the same as when the aperture ring is not set at the "A" mark.
Full Aperture Signal Pin This pin transmits the signal corresponding to the lens at the full
aperture opening.
Automatic Aperture Lever This lever closes down the aperture, coupled with the stoppeddown coupling lever.
EE Switch Pin
This pin protrudes when the aperture ring is locked at the "A" mark. In
this position, it transmits a signal for AE photography.
Reserved Pin
This pin is designed for use with accessories that may be developed in
the future.
Film Plane Indicator
This mark is engraved on the top of the camera between the film rewind crank and the
battery check button, just to the left of the pentaprism, to indicate the exact position of the
film plane. The distance scale on the lens shows subject distances measured from the film
plane indicator. This mark is not used in general photography, but in close-ups and
macrophotography it is often used to obtain the exact subject distance.
Scales on the Lens - Aperture Scale The aperture of the lens is the opening of the diaphragm
blades, like the iris of the human eye. It controls the amount of light passing through the lens
to the film surface.
The f/number is a numerical expression of the effective aperture. It is obtained by dividing the
focal length of the lens by the diameter of the effective aperture. When the f/number is set one
scale gradation higher, the lens allows in half the light it would at the previous gradation.
Intermediate settings of the aperture scale can be used, too. In some lenses, the f/number
setting one gradation higher than the first f/number setting does not necessarily allow only
half the amount of light of the previous setting through the lens to expose the film as is the
case at the other settings. This should be taken into consideration when necessary.
Distance Scale The distance scale is for distances measured from the film plane. This scale is
not generally used except for confirming the depth-of-field, performing guide number
calculations in flash photography, or photographing with infrared film. Read one-digit
distances in the middle of the number marked on the scale. Two-digit distances should be read
at the point in the middle of the two digits.
Depth-of-Field Scale You can determine the depth-of-field by checking the depth-of-field
scale and the distance scale on the lens barrel. Both are closely interrelated.
Infrared Index Mark The red dot infrared index mark engraved on the lens barrel is a
focusing correction index mark for infrared film. Because infrared light rays have longer
wavelengths, they focus on a plane slightly behind that of ordinary visible light rays.
Therefore, it is necessary to slightly modify the normal method of focusing the lens. After
focusing the same as usual, note the tiny red dot engraved on the lens barrel just to the right
of the distance index and turn the focusing ring slightly to align the focused distance with
this red dot.
For instance normally, when the focus is adjusted at 5m on the distance scale, you turn the
focusing ring slightly so that the 5 on the distance scale matches the red dot infrared index
mark. When photographing with infrared black and white film, visible light rays must be kept
out by means of a deep red filter (R1) over the lens. Set the aperture ring manually following
the film manufacturer's suggestion for exposure settings. However, this does not apply when
color infrared film is used' so please follow the directions of the specific instructions of the
film manufacturer when performing infrared color photography. The infrared index mark is
engraved in a position based upon the conclusion arrived at through experiments that the film
most sensitive to the 800m,u wavelength is to be used with a red filter. For example, the
Kodak Film IR135 and the Wratten Filter 37.
Speedlites, Accessories, Care, Maintenance and other issues.
The versatile circuitry of the Canon AE-1 allows it to perform fully
automatic flash photography with the Speedlite 155A especially designed
for this camera. It is not necessary to set the shutter speed or the aperture
on the camera as, up to now, flash photography required. When the 155A
is attached to the AE-1, set the aperture ring of the lens to the "A" mark
and the shutter speed dial to any position other than "B" (Bulb). With the
pilot lamp of the 155A lighting up, the 155Afunctions to automatically
adjust the camera's shutter speed to the X synchronization speed as well
as the aperture to the prescribed f/stop value.
After it flashes, the camera automatically switches over to the AE photography mode until the
pilot lamp lights up again during which period AE photography can be continued. A steady
support may be required if shutter speeds are slower than 1/30 of a second. Like ordinary flash
units, you can also perform flash photography by operating the aperture ring manually. When
you are using a Canon FL lens which does not allow full aperture metering, automatic flash
photography can be performed by setting the prescribed f/stop on the lens manually. In both
cases, the shutter speed is automatically adjusted to the X synchronization speed of 1/60 sec.
As the time of its introduction, there is a 'dedicated' flash unit in Speedlite 155A, which uses a
unique averaged light sensing system which keeps down the distribution of the reflected light
from the center, the influence of the background is greatly reduced. Thus, the 155A offers
more appropriate exposure than the present some other third party flash units do.
Moreover, when the main switch of the Speedlite 155A is turned off, the flash circuitry is
completely cut off and the AE-1 switches over to function as an AE camera even when the
155A is mounted on it. However, there are many flash units produced by Canon that followed
which can offer similar capabilities, so you don't have to purposely hunting specifically for
the 155A in the used market.
Flash Photography with the AE-1 Flash Synchronization: X Synchronization Speed
(1/60 sec.) 1. When the AE-1 is used with the Canon Speedlite 155A, the shutter speed is
automatically adjusted to the X synchronization speed at the time the pilot lamp lights up.
When the AE-1 is used with other flash units, the shutter speed should be manually set at 1/60
sec. 2. Flash Terminal: The AE-1 offers a choice of two kinds of flash terminals; one is a
directly coupled contact of the hot shoe type, and the other is of the B type terminal, as
determined by Japanese Industrial Standards (JIS) for use with flash units with a cord. When
both flash terminals are used, two flash units can be fired simultaneously. 3. Flash
Synchronization Range:
When the camera is used with a flash unit other than the Canon Speedlite 155A o any other
similar class Canon Speedlites, be sure to set the shutter speed at 1/60 sec or below and the
aperture manually to the aperture to the f stop prescribed for automatic flash photography or
to a proper f/stop as indicated by guide number calculation.
Canon Power Winder A Winder A2 The Canon AE-1 is a very compact, lightweight
camera whose main functions respond to the electronic circuitry built into the camera body. It
is possible to photograph just the same as in general photography even when the Canon Power
winder A is attached. The Canon Power Winder A is an automatic film winder which makes
the functions of automatic photography of the Canon AE-1 outstandingly effective. It can be
attached to any Canon AE-1 directly, without any other accessory or attachment. When you
attach the Power Winder A to the Canon AE-1 and press the shutter button, the film will be
immediately wound after being exposed.
Furthermore, with the Power Winder A you can catch
subjects' movements and changing expressions because
you are able to take continuous or single frame
photography at your pleasure. When you perform
continuous photography, the Power Winder A couples
with shutter speed from 1/60 to 1/1000 seconds while, in
single frame photography, any shutter speed can be used.
The Winder A has an upgrade later in Winder A2 (Introduced with the AE-1 Program in
1981) which can be used on the earlier Canon A-1 and all other models within the A series
(As well as the flagship model, Canon New F-1!). It is also compatible with the AE-1.
However, the AE-1 was not designed to use with the later Motor Drive MA, but the upgrade
AE-1 Program was able to share with the Motor Drive MA which primarily designed for the
Canon A-1.
Data Back A This is an interchangeable back cover with a built-in data imprinting
mechanism. It can imprint the day, month and year on the lower right hand corner of the
photograph at, the moment of the shutter's release, as well as other data to identify or classify
the pictures you take.
It has letters and Roman numerals for greater versatility and
convenience. Warning: (Make sure you understand the databack before you
make a purchase at the used market - the input dial of the original databack for
'Year' 'expired' around 1987).
Canon Bellows FL Older (And cheaper) FL bellow can be considered as accessory. This is an
adjustable bellows for high magnification photography. Magnification is adjusted within the
range of about 0.7 to 3 times the size of the subject when it is used in combination with a
standard lens.
The built-in semi-automatic aperture mechanism automatically closes the
diaphragm at the time of shooting and makes the Bellows FL almost as easy to use
as a fully automatic lens. Focusing is performed with a bright field of view. It has a
built-in strut to prevent blur. The Slide Duplicator FL for duplicating slides can be
attached to the end of the Bellows.
The use of a macro lens especially corrected for close-up photography is particularly
recommended for photography with the bellows (Majority of the newer accessories designed
for A-series bodies can be shared as well).
Accessories:
1. Angle Finders A2 and 13. Canon Release 30
B
14. Canon Release 50
2. Eyecup S
15. 55mm filters 58mm filters
3. Magnifier S
16. 58mm Close-up Lenses (240, 450, 1800)
4. Camera Holder F2
17. 55mm Close-up Lenses (240, 450)
5. Macrophoto Coupler 18. Copy Stand 4
FL55, 58
19. Bellows M
6. Lens Hood BS-55
20. Bellows F L
7. Microphoto Hood
21. Extension Tube M Set
8. Photomicro Unit F
22. Dioptric Adjustment Lenses for Eyesight
9. Slide Duplicator
Compensation (10 kinds)
10. Handy Stand F
23. Speedlite 155A
11. Gadget Back 4-type 24. Power Winder A (A2)
12. Gadget Back G-1
25. Data Back A
The camera is provided with the following (But don't expect these items will be as complete
when you acquired a AE-1 as used unit): Body: Soft Case, Viewfinder Cover, Silver Oxide
Battery, Eyecup 4S, Flash Terminal Cap, Camera Cover RF, Neckstrap 7, Spare Battery Case,
and Adapter A for Tripod. Lens: Lens Cap and Dust Cover.
Care and Storage of the Camera No matter how exceptional the camera may be, it will not
give you all it can unless it is taken care of properly. Please make sure to keep the camera
clean all the time. Acquire a blower brush, cleaning liquid, cleaning paper, silicone cloth, etc.
Dust on the lens or the viewfinder should first be blown off with a blower brush and then
wiped lightly with cleaning paper impregnated with cleaning liquid. After the camera has
been used on a beach or near the sea, clean it well because salt can affect its mechanisms. A
blower brush should also be used to clean the mirror box inside the camera body. If it should
require wiping, by all means, please take the camera to a Canon authorized distributor or any
qualified and reliable service centre. The film compartment has to be cleaned with a blower
because it easily collects film dust. If the dust contains sand, the film is easily scratched.
When cleaning the rail surface or the pressure plate, please use cleaning paper and cleaning
liquid. Be careful not to touch the shutter curtain when doing so.
Maintenance Keep the camera in a place with low humidity and no dust (Avoid storing them
in drawer or inside any container that has little ventilation). After removing the camera from
the case, take the battery out. When you are going to store the camera for a long time without
using it, the shutter release button must be activated now and then, to prevent mold and
mechanical trouble. Please avoid storing the camera in places such as mentioned below. 1.
Inside the trunk or rear window of a car because the temperature can rise to an extremely high
degree and this may give rise to trouble in the camera. 2. Places such as laboratories where
chemicals are around may cause rust or corrosion.
Note: When taking off the top cover of the soft case, turn the top cover to the bottom then
slide the cover straight up and pull it out of the hole as shown in the photo.
When the camera is used in very cold conditions: Battery performance is usually affected
by temperatures below zero C. It is always necessary to use a new battery for photography in
such extreme cold. Moreover, an extra battery should be taken along and kept warm by
placing it next to your body. The battery may not function well at low temperatures but it may
well work perfectly under normal conditions, so don't throw it away. In sudden changes of
temperature from hot to cold or vice versa, the viewfinder or this lens may get moist and fog.
Therefore, the camera should be exposed to the temperature change gradually. At least 30
minutes should be taken for a change of 10 degrees C. The camera has to be kept in a plastic
bag completely sealed and then taken out once it has been adjusted to the outside temperature
little by little.
Canon AE-1 – Specifications
Type: 35mm SLR (Single-Lens-Reflex) camera with electronically controlled AE (Automatic
Exposure) and focal plane shutter.
Picture Size: 24 x 36mm
Interchangeable Lenses: Canon FD series with full aperture metering and AE coupling.
Canon FL series with stopped-down metering.
Standard Lenses: Canon FD 55mm f/1.2 S.S.C; Canon FD 50mm f/1.4; S.S.C. Canon FD
50mm f/1.8 S.C. or the New FD 5omm f/1.2, New FD 50mm f/1.4 and the New FD 50mm
f/1.8.
Lens Mount: Canon Breech-Lock mount. Canon FD,
FL and R lenses can be used.
Viewfinder: Fixed eye-level pentaprism
Field of View: 93.5% vertical and 96% horizontal
coverage of the actual picture area.
Magnification: 1:0.86 at infinity with a standard
50mm lens.
Viewfinder Attachments: Angle Finder A2 and B, Magnifier S, Dioptric Adjustment Lens
(10 kinds), and Eyecup S.
Mirror: Instant-return, large reflector mirror with shock absorbing mechanism.
Viewfinder Information:
Split- image/microprism rangefinder, aperture scale with
meter needle and stopped-down metering index mark
which also serves as battery charge level check mark.
Besides, there are two red zones at the top of the aperture scale to warn of overexposure.
Below the aperture scale, a red warning LED lamp blinks to indicate underexposure. This
lamp also indicates that the selected shutter speed is outside the AE coupling range with
respect to the ASA of the film being used. Above the aperture scale, a manual aperture control
"M" signal (red LED) blinks as a warning that the aperture ring is not set at the "A" mark for
AE photography.
AE Mechanism: Shutter priority, electronically controlled AE metering system incorporating
two ICs and one LSI equipped with (Integrated Injection Logic)
Light Metering System: TTL (Through-the-Lens) Central Emphasis Metering method
employing a Silicon Photocell as photosensitive element.
Exposure Meter Coupling Range: With ISO 100 film, EV1 (f/1.4 at one second) to EV18
(f/16 at 1/1000 second).
Film Speed Range: ISO 25 to ISO 3200.
Exposure Correction: By pressing the backlight control switch, exposure is corrected by the
automatic opening of the diaphragm 1.5 stops more on the aperture scale than the actual
setting.
Exposure Preview: The meter needle will indicate in the viewfinder when the shutter release
button is depressed halfway or the exposure preview switch is depressed.
Shutter: Cloth focal plane shutter with four spindles. Shock and noise damping mechanisms
are incorporated. All shutter speeds are electronically controlled.
Shutter Speeds: 1 /1000, 1/500, 1/250, 1/125, 1/60, 1/30, 1/15, 1/8, 1/4, 1/2, 1, 2 (seconds)
and B. X synchronization is at 1/60 seconds.
Shutter Speed Dial: The shutter speed dial is on the same axis as the film advance lever. The
number 2 for two seconds is marked in orange; other numbers as well as X synchronization
are in white. There is a shutter dial guard to prevent unintentional movement of the dial. The
ISO dial is located underneath the shutter speed dial.
Shutter Release Button: It is a large, button type magnetic release switch. Depressing the
shutter release button halfway switches on the light metering circuit, while full depression
releases the shutter. The shutter release button has a locking device, besides a socket for the
cable release in the center.
Self-Timer: Electronically controlled self timer. After the self-timer lever is pushed forward,
the self-timer is activated by the shutter release button. The self-timer releases the shutter after
a time lag of 10 seconds. A self-timer lamp (red LED) blinks on and off to indicate when the
self-timer is in operation.
Stopping-Down the Lens Stopping-down the lens can be performed by pushing the stoppeddown lever after setting the aperture ring.
Power Source: One 6V silver oxide battery Eveready No.544, UCAR No.544 JIS 4G 13, or
Mallory PX28) or alkaline manganese battery (Eveready No.537, UCAR No.537, or Mallory
7K13). The battery lasts approximately one year under normal use.
Battery Check: Battery power level can be checked by the meter needle in the viewfinder
when the battery check button is pressed.
Flash Synchronization: X synchronization is at 1/60 second. M synchronization is at 1/30
second and below.
Flash Terminal: The accessory shoe has a direct flash contact and automatic flash control
contacts. On the front of the camera body is the flash terminal, JIS-B type for flash units with
a cord. It has a built-in protective rim to prevent electrical shock.
Automatic Flash: With the exclusive Canon Speedlite 155A, the shutter speed and aperture
are automatically set. The amount of light is automatically controlled for correct flash
exposure.
Back Cover: The camera's back cover has a memo holder for your convenience. The cover
can be removed for attaching the Canon Data Back A. To open, pull the rewind crank up.
Film Loading: Easy film loading with multislot take-up spool.
Winding Lever: Single stroke with 120° throw and 30° stand-off. The film can be wound
with several short strokes. The Canon Power Winder A also can be mounted for automatic
winding of the film.
Frame Counter: Additive type. Automatically resets when the back cover is opened. While
rewinding film, it counts back the frame numbers.
Film Rewinding: Performed by pressing the rewind button on the bottom and by using the
rewind crank on the top. The rewind button is automatically reset when the film is advanced
with the film advance lever.
Safety Devices:
* The shutter does not drain battery power when not released.
* The film cannot be wound while the shutter is in operation.
Size: 141 x 87 x 47.5mm (5-9/16" x 3-7/16"x 1-7/8") body only.
Weight: 590g (20-13/16 ozs.) body only. 790g (27-7/8" ozs.) with the 50mm
f/1.8 S.C. Iens. 895g (31-9/16 ozs.) with the 50mm f/1.4 S.S.C. Iens.
AE-1's exposure flow chart
Although looks complicating, but the AE-1 has a very modular construction.
There are five main modules in 1) Viewfinder Unit, 2) Shutter Unit, 3) Mirror Unit, 4) AE
Aperture Unit, 5) Automatic Diaphragm Unit
The key advantages of a modular construction are: streamline processing and assembly,
improved durability, better precision and most important of all, decreased cost of production.
But as earlier days of electronic cameras, most users regarded these as 'unrepairable'
components and differ from mechanical bodies which can look for replacement of individual
parts. Well, all modern electronic cameras are made this way now, even the most hardcore
users have accepted the fact...
The AE-1was designed from the ground up with five major units and twenty-five minor units.
They were centrally controlled by a microcomputer. The major advantage of automation in
the camera design and thus followed by manufacturing process is: by incorporating
electronics, the parts count in a camera will be greatly reduced as compared with an
mechanical camera, the AE-1, in this case, could be reduced by 300. The manufacturing of the
camera was also highly automated. This made it possible to produce a low-cost camera having
high-end features. The record sales of 5 million units attributed by a combination of variable
factors set by the AE-1 will be long remembered and chances of breaking by another model is
very slim.
Some technical info:
•
•
•
•
You can lock the stop-down lever at the stopped-down position when you're set to a
manual f/stop setting (Note: It can only be used at manual f stop settings). You can
then use the FL lenses with stopped-down metering. Suppose that your diaphragmsetting ring is at "A" and you decide to use the depth-of-field preview. You turn the
diaphragm-setting ring to a manual setting and push in the stop-down lever. But before
you return the diaphragm-setting ring to the "A" position, set the largest aperture.
Otherwise, the camera won't program the aperture automatically.
The backlight control button automatically opens up 1.5 f stop overexposure as
compensation for backlighted subject.
The self-timer function delays the shutter release for 10 seconds. During the selftimer
operation, the self-timer LED flashes on and off twice a second (2 Hz).
There are two warning LED's visible through the finder. If you're set to a manual
f/stop, the LED at the top of the aperture scale flashes on and off as you start
depressing the release button. The LED then illuminates the letter "M" for "manual. "
•
A second LED at the bottom of the aperture scale flashes on and off to warn of
underexposure. Both LED's flash at 4 Hz.
When you push the battery-test button, the needle should move to the battery-test mark
or below it. The battery-test mark also provides the stopped-down-metering mark
when you're using the FL lenses.
•
The front surface of the maximum-aperture correction pin should be 5.7mm (+0, 0.2mm) from the front surface of the lens-mounting ring. To make the adjustment, first
loosen the set screw in the center of the maximum-aperture correction pin. You can
then turn the maximum-aperture correction pin clockwise to increase the distance. To
decrease the distance, turn the maximum-aperture correction pin counterclockwise and
turn in the setscrew to hold the adjustment.
•
The flange-focal distance to 41.9mm between the front of the lens-mounting ring and
the film-guide rails or to 42.14mm between the lens mounting ring and the pressureplate rails.
Flash Photography with Canon A-1 There are four groups of flash can be used with Canon
SLR camera system. Since Canon only introduced TTL OTF (Through-the-Lens, Off-theFilm-Plane) feature very late in 1986 with the Canon T-90 and a dedicated TTL-flash in
Speedlite 300-TL , flash photography method was primarily using AE (Automatic Exposure)
flash system. Personally, I don't regard flash photography with Canon was their strongest
asset, but nevertheless, they did command the best of knowledge with automated flash system
since the days of the original Canon F-1's proprietary CAT Flash System introduced way back
during 1970. Another group is being flash for macro-photography with MacroLite flash units.
The last is to use with older flash bulbs.
Among the three electronic flash groups, the AE flash (Canon has
designed their flash with a word 'Speedlite' rather than flash unit, so
it is very easy to identify them from flash of other makes) has the
most sizes, 'varieties' and power output. There are further subdivided into shoe mount flash or handle flash which usually has a
higher power output (Rated by guide number). The most powerful
flash unit within the Canon flash group is a handle flash 577G
which has a very high guide number of 48 (ASA 100, m) or 80
(ASA 25, ft.) ! To take full advantage of all the A-l's electronics,
Canon has some dedicated flash units. One is the Speedlite l99A.
Those days, 'dedicated' flash still limiting to auto set the sync speed
to pre-set shutter speed or just providing a viewfinder flash ready
light. The 199A, in this case, when used with the Canon A-1 will
make flash photography completely automatic and electronic, this
unit employs an LSI and Canon claimed for first time such
advanced circuitry has been used in a flash. Once the 199A is
slipped onto the camera's hot shoe (and locked by the convenient
locking device), all you have to do is turn it on and set the auto
aperture on the flash.
.
There are three to choose from: f/2.8 f/5.6 and f/11 with ASA 100 film. Corresponding to
distances of 1.5 - 10.6m, 1 - 5.3m and 0.5 - 2.6m respectively should provide more than
acceptable result under most situations and more importantly, provided your subject is within
the distance range selected (apply to any flash units). You can also override the AE flash
feature by sliding the Auto/Manual switch to Manual and choose a shutter speed slower than
1/60 sec. to make the background more luminous and in balance with the foreground. Or, you
can get bounce flash effects by tilting the 199A's head upward to one of three positions: 60, 75
and 90 . Flash coverage of lenses as wide as 24mm is also possible by attaching the Wide
Adapter.
Other popular Canon flash units are not quite so
powerful but equally as reliable and automatic as the 199A are the Speedlites 188A,
177A, 155A and 133A.
All of these units are like the 199A in that they automatically change the shutter speed to 1/60 sec. and set the
camera to the automatic flash aperture you have set. There are two on the 188A, 177A and 155A (f/2.8 and f/5.6,
ASA100) and one on the 133A, f/4. Used with the Wide Adapter, the 188A and 177A give flash coverage of
28mm lens field. For flash other than having its contact on the flash feet or if you want to set up multiple flash
units, you can use the PC terminal as well.
And since all of these units couple perfectly with the A-l's circuitry, they can be used with the
Power Winder A2/A for automatic flash continuous shooting. However, since Canon advises
multiple exposures mode in not recommended to work in continuous mode for most of the A
series models, I am not so sure whether it applies in the flash AE mode as well for
stroboscopic effect.
A series Cameras with Canon Flash Units on Automatic Mode
Flash
models
199A,
577G,
533G
188A,
166A
177A,
155A
133A,
011A
Canon A-1
Canon AE- Program
Canon AE-1
Shutter speed and
aperture set
automatically. Viewfinder
Shutter speed and
Shutter speed and
shows flash ready. Special
aperture set
aperture set
procedure allows use of
automatically.
automatically.
1/30 to 30-second
exposures with automatic
features.
Shutter speed and
Shutter speed and
aperture set
Shutter speed and
aperture set
automatically. Viewfinder
aperture set
automatically. Viewfinder indicator shows flash
automatically.
shows flash ready.
ready and correct
exposure.
Shutter speed and
Shutter speed and
Shutter speed and
aperture set
aperture set
aperture set
automatically.
automatically.
automatically.
Shutter speed set
Shutter speed set
Shutter speed set
automatically. Aperture automatically. Aperture automatically. Aperture
set automatically to f4. If set automatically to f4. if set automatically to f4. If
film speed not ASA 80/100 film speed not ASA 80/100film speed is not ASA
or ASA 400, use manual or ASA 400, use manual 80/100 or ASA 400, use
mode.
mode.
manual mode.
Canon AV-1 and AL-1
Shutter speed set
automatically. You set
aperture.
Shutter speed set
automatically. You set
aperture.
Shutter speed set
automatically. You set
aperture.
speed set automatically.
You set aperture as
appropriate for film speed
Note: Although rarely used today, flash bulbs will work with Canon A-1, AE-1, AE-1 Program etc cameras which
are using a horizontal traveled focal plane shutter design. If you are using type FP, MF or M flash bulbs, 1/30 second
is the fastest shutter speed you can use. Naturally, with flash bulbs there is no automatic flash operation. Also check
sync speed with flash bulbs for models: Canon AE-1, AE-1 Program.
Can the Canon A-1 or for that matter, all the A and T series SLR models interchangeable to use with all the A, G and T
series flash units ? With the exception of the T90, all of Canon's A-series and T-series as well as the New F-1, will
automatically set their X-sync with any A-series, T-series (except 300TL) and G-series (533G & 577G) of Canon
Speedlites. Some has their own respective dedicated function, for an instance, AE-1 Program will automatically reverts to
Program Flash AE the moment the pilot lamp of your Speedlite 244T is ready.
Speedlite 577G
Guide Number: 48 (ASA 100, m) or 80 (ASA 25, ft.).
Recycling Time (on automatic): 0.2-18 sec. with alkalinemanganese batteries. 0.2-7 sec. with Ni-Cd batteries.
Number of Flashes (on automatic): 100-1,000 with alkalinemanganese batteries and 75-750 with Ni-Cd batteries allowing 30
sec. between each firing.
Flash Duration: 1/400-1/50,000 sec.
Auto Apertures: f/2.8, f/5.6 and f/11 at ASA 100,
Auto Coupling Ranges: 2.5-17m at red "A" (f/2.8, ASA 100)
without Adaptor. At green "A", 1.5-8.5m and at yellow "A", 14.3m without Adaptor.
The most powerful flash among all Canon Flash Coverage: For 35mm format, covers an angle of view of
Speedlites, with a guide number of 48
35mm lens With Wide Adaptor, adequate coverage for 20mm
(ASA 100, m) or 80 (ASA 25, ft.).
lens. With Tele Adapter, covers 100mm lens.
Bounce: Maximum upward tilt of 120° with detents at 0°, 60°, 75°, 90°, and 120°. 120° shift
to both left and right with detents at 0°, 60°, 75°, 90°, 105° and 120°.
Power Source: 6 C-size alkaline-manganese batteries or Ni-Cd Pack TP in the Transistor
Pack G.
Size: 99 (W) x 107 (D) x-245 (H)mm (2-7/8" x 4-1/4" x 9-5/8").
Weight: 600g (21-3/16 ozs.) without batteries.
Speedlite 533G
Guide Number: 36 (ASA 100, m) or 60 (ASA 25 ft.).
Recycling Time: 0.2-10 sec. with alkaline manganese batteries. 0.2-5.5 sec. with Ni-Cd
batteries.
Number of Flashes (on automatic): 120 - 1,200 with alkaline-manganese batteries and 55 555 with Ni-Cd batteries allowing 30 sec. between each firing.
Flash Duration: 1 /830-1 /50,000 sec.
Auto Apertures: f/2.8, f/5.6 and f/ 11 at ASA 100.
Auto Coupling Ranges: 2.5-12.8m at red "A" (f/2.8, ASA 100) without Adaptor. At green
"A", 1.5-6.4m and at yellow "A", 1-3.2m without Adaptor
Flash Coverage: Adequate for 35mm lens on a 35mm format. With Wide Adaptor, adequate
coverage for 20mm lens. With Tele Adaptor, covers 100mm lens.
Specifications for some popular shoe mount flash units by Canon
199A
188A
177A
166A
155A
133A
011A
Speedlite 199A Guide Number: 30 (ASA 100, m) or 50 (ASA 25, ft.).
Recycling Time: 0.2-10 sec. with alkaline batteries and 0.2-6 sec. with Ni-Cd batteries on
auto.
Number of Flashes: More than 100 with alkaline batteries and more than 50 with Ni-Cd
batteries on auto.
Flash Duration: 1/500-1/50000 sec.
Aperture Choices: f/2.8 (red), f/5.6 (green) and f/ll (yellow) at ASA 100, and manual.
Auto Coupling Ranges: 1.5-10.6m (1.5-6.3m with Wide Adaptor) at red "A". 1-5.3m (13.2m with Wide Adaptor) at green "A". 0.5-2.6m (0.5-1.6m with Wide Adaptor) at yellow
"A".
Flash Coverage: Covers 35mm lens. With Wide Adaptor covers 24mm lens.
Size: 79 (W; x 83 (D) x 116 (H)mm. (3-1/8" x 3-1/4" x 4-1/2").
Weight: 490g (1 lb. 1-5/16 ozs.) including batteries
Speedlite 188A Guide Number: 25 (ASA 100, m) or 41 (ASA 25, ft.).
Recycling Time: 0.5-8 sec with alkaline batteries and 0.5-6 sec. with Ni-Cd batteries on auto.
Number of Flashes: More than 200 with alkaline batteries and more than 70 with Ni-Cd
batteries on auto.
Flash Duration: 1/700-1/40000 sec.
Aperture Choices: f2.8 (red) and f5.6 (green) at ASA 100 and manual.
Auto Coupling Ranges: 1 0-9.Om (1.0-5.6m with Wide Adaptor) at red "A". 0 5-4.5m (0.52.8m with Wide Adaptor) at green "A".
Flash Coverage: Covers 35mm lens. With Wide Adaptor, covers 28mm lens.
Size: 68 (W) x 52 (D) x 103 (H)mm. (2-11/16" x 2-1/16" x 4-1/16").
Weight: 290g (10-1 /4 ozs.) including batteries.
Speedlite 177A Guide Number: 25 (ASA 100, m) or 41 (ASA 25, ft.).
Recycling Time: 0.5-8 sec. with alkaline batteries and 0.5-6 sec. with Ni-Cd batteries on auto.
Number of Flashes More than 200 with alkaline batteries and more than 70 with Ni-Cd
batteries on auto.
Flash Duration: 1/600-1/50000 sec.
Aperture Choices: f/2.8 (red) and f/5.6 (green) at ASA 100, and manual.
Auto Coupling Ranges: 1.0-9.Om (1.0-5.7m with Wide Adaptor) at red "A". 0.5-4.5m (0.52.8m with Wide Adaptor) at green "A"
Flash Coverage: Covers 35mm lens. With Wide Adaptor, covers 28mm lens.
Size: 72 (W) x 58 (D) x 107 (H)mm. (2-13/16" x 2-5/16" x 4-3/16").
Weight: 310g (10-15/16 ozs.) including batteries.
Speedlite 166A
Guide Number: 20 (ASA100, m) or 33 (ASA 25, ft)
Recycling Time: 0.5-7 sec. with alkaline batteries and 0.5-5 sec. with Ni-Cd batteries.
Number of Flashes: 250-2500 times with alkaline batteries and 80-830 times with Ni-Cd
batteries.
Flash Duration: 1/1000-1/50000 sec
Auto Apertures: f/2.8, f/5.6 at ASA 100.
Auto Coupling Range: 0.5 -7 m (1.6-22 ft.) at ASA 100
Flash Coverage: Covers 35mm lens.
Power Source: Four AA size alkaline or Ni-Cd batteries.
Size: 66 (W) x 49.5 (D) x 98 (H) mm (2-5/8" x 1-15/16" x 3-7/8").
Weight: 260g (9-3/16 ozs.) including batteries.
Speedlite 155A Guide Number: 17 (ASA 100, m) or 28 (ASA 25, ft.).
Recycling Time: 0.5-7 sec. with alkaline batteries and 0.5-5 sec. with Ni-Cd batteries on auto.
Number of Flashes: More than 300 with alkaline batteries and 90 with Ni-Cd batteries on
auto.
Flash Duration: 1/1000 - 1/50000 sec.
Aperture Choices: f/2.8 (red) and f/5.6 (green) at ASA 100, and manual.
Auto Coupling Ranges: 0.5-6m at red "A". 0.5-3m at green "A".
Flash Coverage: Covers 35mm lens.
Size: 70 (W) x 51 (D) x 105 (H)mm. (2-3/4" x 2" x 4-1/8").
Weight: 300g (10-9/16 ozs.) including batteries.
Speedlite 133A Guide Number: 16 (ASA 100, m) or 26 (ASA 25, ft.).
Recycling Time: 0.5-9 sec. with alkaline batteries and 0.5-6 sec with Ni-Cd batteries.
Number of Flashes: 100-1000 with alkaline batteries and 60-600 with Ni-Cd batteries.
Flash Duration: 1/700-100000 sec.
ASA Film Speed Switch: Two positions: ASA 80, 100 (green) and ASA 400 (orange).
Auto Coupling Ranges: 1.0 - 8.0m at orange "A". 0.5 - 4.0m at green "A".
Flash Coverage: Covers 35mm lens.
Size: 62 (W) x 37 (D) x 95 (H)mm (2-7/16" x 1-7/16" x 3-3/4")
Weight: 200g (7-1/16 ozs.) including batteries.