1
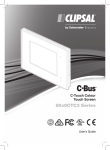
C-Bus Quick-Start Guide Clipsal© C-Bus™ Products Version A1, July 2008 ! DANGER HAZARD OF ELECTRIC SHOCK, EXPLOSION, OR ARC FLASH • Apply appropriate personal protective equipment (PPE) and follow safe electrical work practices. See NFPA 70E. • T . his equipment must be installed and serviced by qualified electrical personnel. • Turn off all electrical power supplying this equipment before working on or inside the equipment. • Always use a properly rated voltage sensing device to confirm that power is off. • Replace all devices, doors, and covers before turning on power to this equipment. Failure to follow these instructions will result in death or serious injury. Support and Training For product support of your C-Bus network, contact Square D Lighting Control Technical Support or the Square D Customer Information Center. Square D Lighting Control Technical Support Phone: 615-287-3400 (when connected, select Option 4, then Option 1). Support E-mail: [email protected] Training E-mail: [email protected] Website: www.squaredlightingcontrol.com Square D Customer Information Center Phone: 1-888-778-2733 ©2008 Schneider Electric. All Rights Reserved. MODELS AND DIMENSIONS 60M ENCLOSURE COLOR TOUCH SCREEN IN 15.4 in. MM IN MM IN MM 392 mm )2 2ECEIVER 40.6 in. 1031 mm Many cover-plate styles (Neo shown): sPAGES s3CENESANDSCHEDULES s3ECURITY s,OGICANDASTRONOMICALCLOCK s,IGHTSENSOR s)2RECEIVER 2EQUIRESSEPARATE60OWER3UPPLY $RAWSM!FROMNETWORK Five rows for mounting DIN-rail units. Each row can hold: sONE-UNIT sONE-UNITONE-UNIT sTHREE-UNITS BLACK & WHITE TOUCH SCREEN IN MM PRO DIMMER IN MM IN MM Many cover-plate styles (white shown): sPAGES s3CENESANDSCHEDULES s,OGICANDASTRONOMICALCLOCK s,IGHTSENSOR s)2RECEIVER $RAWSM!FROMNETWORK )2 2ECEIVER IN MM IN MM ON NORMAL FLASHING LOW VOLTAGE OFF NO CLOCK PRESENT Models (120 V): sCHANNEL ! sCHANNELS !EA sCHANNELS !EA 3OURCESM!TONETWORK ©2008 Schneider Electric. All Rights Reserved. Models and Dimensions (continued) NEO™ KEYPADS DIN-RAIL POWER SUPPLY IN 76 mm Unit IN C-Bus MM Power Supply Neo Keypad assemblies: sANDBUTTONMODELS s3CENECONTROL s/./&&TOGGLESDIMMERSANDTIMERS 2EQUIRESWALLBOXAPPROXINWIDE $RAWSM!FROMNETWORK s6AND6MODELS s6$# s3OURCESM!TONETWORK s- PC INTERFACE SATURN™ KEYPADS IN MM Unit / Comms C-Bus IN MM Saturn Keypad assemblies: sANDBUTTONMODELS s'LASSCOVERPLATE s3CENECONTROL s/./&&TOGGLESDIMMERSANDTIMERS 2EQUIRESWALLBOXAPPROXINWIDE $RAWSM!FROMNETWORK s-ODELS s23STANDARD s53" s%THERNET s$RAWSM!FROMTHENETWORK s- 0–10 V ANALOG OUTPUT DLT™ KEYPADS 3.0 in. 76 mm LOUNGE XXXXXX DINING 4.57 in. 116 mm XXXXXX PLAY CD XXXXXX RELAX XXXXXX NEXT 1 Dynamic Labeling Technology (DLT) in Saturn (shown) and Neo cover-plate models: s-ULTIPOINTSWITCHINGANDDIMMING s4WOPAGES s3CENECONTROL s#LOCKANDTIMERS $RAWSM!FROMNETWORK ©2008 Schneider Electric. All Rights Reserved. s6AND6MODELS sCHANNELS n6$#EA s$RAWSM!FROMNETWORK s- DECORATOR KEYPADS DIN-RAIL DIMMERS IN MM + 1 2 + + + + 1 2 + + + + } N L } + + L } + N } + 3 4 4 3 Unit C-Bus Dimmer IN C-Bus CONNECTIONS MM Neo (shown) and Saturn cover plates: sANDBUTTONMODELS s3CENECONTROL s/./&&TOGGLESDIMMERSANDTIMERS $RAWSM!FROMNETWORK Models (120 V) with or without on-board C-Bus network Power Supply: sCHANNELS !EA (12M) sCHANNELS !EA(12M) -ODELSWITHANETWORK0OWER3UPPLYSOURCE M!TOTHENETWORK Line-voltage supplies to the Control and 3WITCHINGSTAGESMUSTBEWIREDFROMTHESAME VOLTAGEPHASE 360° PIR OCCUPANCY SENSOR & MULTI-SENSOR DIN-RAIL RELAYS SAL CLIP N 2.83 in. L 1A 1B 1 Unit C-Bus 1 7 7 4.1 in. 2 2 8 8 3 4 5 9 10 11 10 11 3 9 C-Bus CONNECTIONS Indoor Occupancy Sensor or Multi-Sensor: s0ASSIVEINFRAREDRECEIVER0)2 s,IGHTLEVELSENSORFTCLnFULLSUN s2ANGEOFSQFTSQM sSECnHRTIMER s)2RECEIVER-ULTI3ENSORONLY $RAWSM!FROMNETWORK DIN UNIT DIMENSIONS 12M 65 mm 3.35 in. 8M 4M 4M C-Bus CONNECTIONS 85 mm 1M = 0.69 in. (17.5 mm) 4M = 2.83 in. (72 mm) 8M = 5.67 in. (144 mm) 12M = 8.46 in. (215 mm) ©2008 Schneider Electric. All Rights Reserved. 4 5 2B 3B 3A 4A 4B 8A 8B 9B 9A 10A 10B 5A 5B 6B 6A 11A 11B 12B 12A 6 6 12 12 Voltage Free Relay 103 mm 2.56 in. 2A USE COPPER WIRE ONLY 72 mm 4M 7A 7B Models (120 V or 277 V) with or without on-board C-Bus network Power Supply: sCHANNELS !EA- sCHANNELS !EA- sCHANNELS !EA- -ODELSWITHNETWORK0OWER3UPPLYSOURCE 200 mA to network. C-BuS NETWORK WIRING SCREW TERMINAL CONNECTORS To Positive C-Bus Terminal To Negative C-Bus Terminal C-Bus Positive (+): Blue & Orange PRO DIMMER G 120 V AC N C-Bus Negative (–): Blue-White & Orange-White Standard Cat-5 Twisted Pairs C-Bus Positive & Negative + Terminals – CAT-5 UTP Cable – + 90˚ INDOOR PIR OCCUPANCY SENSOR To Sensor Head RJ-45 CONNECTORS Positive C-Bus Screw Terminal LO O LO – RJ-45 with clip facing down + P O OF FIELD P VIEW Negative C-Bus Screw Terminal 12345678 Sensor Side of Sensor-Mounting Base 360˚ INDOOR PIR / MULTI-SENSOR C-Bus C-Bus Positive (+): Blue & Orange C-Bus C-Bus Negative (–): Blue-White & Orange-White } } C-Bus Cable Conductor Assignments Positive & Negative C-Bus Terminals Rj Pin 110° OUTDOOR PIR Sensor Mounting Base To Sensor Head Wiring Terminal Negative C-Bus Terminal – + – + Positive C-Bus Terminal ©2008 Schneider Electric. All Rights Reserved. C-Bus Network Connection Wire Color 1 Remote ON Green-White 2 Remote ON Green 3 C-Bus Neg (–) Orange-White 4 C-Bus Pos (+) Blue 5 C-Bus Neg (–) Blue-White 6 C-Bus Pos (+) Orange 7 Remote OFF Brown-White 8 Remote OFF Brown NEO & SATURN KEYPADS & INDOOR LIGHT-LEVEL SENSOR COLOR TOUCH SCREEN 5.3V - Back of Unit + C-Bus RJ-45 Negative C-Bus Terminal X 5A Positive C-Bus Terminal 5.3V C-Bus + X + 5A Power Back of Unit THIS WAY UP X X TYPICAL PANEL WIRING DECORATOR KEYPADS Loads X X X X X X Relay Unit ON 120V Negative C-Bus Terminal Load Center 60 M Enclosure Dimmer Unit ON 120V Back of Unit OFF + + OFF Positive C-Bus Terminal + DLT KEYPADS Negative C-Bus Terminal Positive C-Bus Terminal Load circuits pulled to enclosure Load neutrals terminate on neutral bar in enclosure Single feed from load center Neutral bar in load center TYPICAL DIN UNIT WIRING Loads A/L N G + + + 3 1 2 + + + X + } N L 2 + X X } L 1 + + + } N + + } Back of Unit X 3 4 4 Unit C-Bus RJ-45 BLACK & WHITE TOUCH SCREEN N L 1A 1B C-Bus 2A 2B 3B 3A 4A 4B 8A 8B 9B 9A 10A 10B 5A 5B 6B 6A 11A 11B 12B 12A USE COPPER WIRE ONLY 1 2 3 4 5 6 7 8 9 10 11 12 Unit C-Bus Voltage Free Relay 7A 7B C-Bus CONNECTIONS – + –+ A/L N G RJ-45 N L C-Bus C-Bus C-Bus USE COPPER WIRE ONLY C-Bus Unit 1 3 4 C-Bus 0-10V Analog Output C-Bus CONNECTIONS } Loads < 30 Ballasts = RJ-45 ©2008 Schneider Electric. All Rights Reserved. Loads X A/L N G } } Positive & Negative C-Bus Terminals X C-Bus C-Bus Back of Unit Dimmer C-Bus CONNECTIONS C-Bus X Adjusting sensors 90˚ INDOOR PIR ADJUSTMENT SCREW 110° OUTDOOR PIR ADJUSTMENT SCREWS VIEW Sensor Adjustment Screw Time Range Light-Level Sensor Adjustment Screws 360˚ OCCUPANCY SENSOR / MULTI-SENSOR ADJUSTMENT SCREWS Pot A: Light-Level Sensor for Occupancy Sensor and Multi-Sensor Pot B: PIR Range for Multi-Sensor Lens Cover Status Indicators OUTPUT UNIT STATUS INDICATORS Toggle/Channel Control/Local Override Buttons s,%$,IGHTLITCHANNEL/.,IGHTUNLITCHANNEL/&& s"UTTON0RESS-ANUALLYOVERRIDESCHANNELSTATUS s3TART,EARN-ODETOCONFIGUREAUNIT Override Buttons )FCHANNELSUNITSAREIN,OCAL/VERRIDEMODE s3HORTPRESS4OGGLESTHECHANNELUNITEG/&&TO/. s$OUBLEPRESS2ETURNSCONTROLOFCHANNELUNITTOTHE#"USNETWORK s,ONGPRESS2ETURNSCONTROLOFALLCHANNELSUNITSIN,OCAL/VERRIDE MODETOTHE#"USNETWORK UNIT:5NITSTATUSANDPOWER s/.LIT,INELEVELVOLTAGE s&LASHING,OCAL2EMOTE/VERRIDESTOGGLED/./&& s/&&UNLIT.OLINELEVELVOLTAGE 5NIT C-BUS:.ETWORKSTATUSATTHEUNIT s/.LIT#"US#LOCKACCEPTABLENETWORKPOWER n6$# s&LASHING-ARGINALNETWORKPOWERn6$# s/&&UNLIT.O#LOCKNO#"USPOWER ©2008 Schneider Electric. All Rights Reserved. #"US 4 ©2008 Schneider Electric. All Rights Reserved. Loads + – 1 DLT NEXT XXXXXX RELAX XXXXXX PLAY CD XXXXXX DINING XXXXXX LOUNGE C-Bus (+/–) 34 V DC Saturn Keypad ROOM Light-Level Sensor L PSA CLI 120 V AC Occupancy Sensor 1 DLT NEXT XXXXXX RELAX XXXXXX PLAY CD XXXXXX DINING XXXXXX LOUNGE 5 V DC Touch Screen Power Supply Color Touch Screen F 72° AUTO Thermostat Black & White Touch Screen C-Bus (+/–) 34 V DC Neo Keypad C-Bus (+/–) 34 V DC Saturn Keypad Decorator Keypad Decorator Keypad Cat-5 consolidation point, optional 60M Custom Enclosure AC Line C-Bus (+/–) 34 V DC TYPICAL C-BUS NETWORK LAYOUT AND COMPONENTS AC Line ON NORMAL FLASHING LOW VOLTAGE OFF NO CLOCK PRESENT Second load panel (if desired). Can be located in remote location. 24M Area Lighting Panel Loads PRO Dimmer Loads TYPICAL C-BuS NETWORK LAYOuT AND COMPONENTS PROJECT PLANNING AND EXECUTION If you are performing installation only, use the instructions in Step 6 below. 1. Study the building floor plans, lighting schedule, and panel schedule. Discuss requirements with customer. 2. Develop a Bill of Materials; order products. 3. C-Bus units must be configured to operate on the C-Bus network. For the units covered in this guide, you will need the C-Bus Toolkit and/or PICED software, available on the Square D Lighting Control website (http://www. squaredlightingcontrol.com/downloadcenter.cfm). 4. Install the software and create a Toolkit project for the installation; pre-configure the units on an off-site mini-network; and prepare to send the units to the site: • Create a temporary mini-network from a PC, PC Interface, Power Supply, and hardware Network Burden. • Temporarily attach each unit, in turn, to the mini-network and give it a unique Unit Address and Part Name. • Perform any other lighting-control configuration planned for the off-site configuration. • Save the information to the unit and to the Toolkit project database. • Write the Unit Address and Part Name on the unit, its box, and the site plan. 5. Send the units and plan to site for installation. 6. When you install a unit, record its location: remove the self-stick serial number label from the product box and place it on the site plan at the unit’s location. 7. Prepare detailed switching and control configurations in the Toolkit project database. 8. When the units have been installed, connect your laptop to the network via a PC Interface (standard or USB) or Ethernet Interface, and download the Toolkit project from the database to the C-Bus network. 9. Test the system’s functions and make any changes required. 10.Schedule a visit for about a month following occupation of the building to adjust its configuration. C-BUS UNITS Three main types of units: system units, input units, and output units • System units (e.g., a DIN-Rail Power Supply) enable certain network operations. • Input units (e.g., a Two-Button Neo Keypad) issue commands. • Output units (e.g., a Four-Channel Dimmer) execute commands from input units. C-BUS NETWORK PARAMETERS Maximum number of units on a network: 100 (@ 18 mA) When a network contains units that draw more than 18 mA, the maximum number of units will be less than 100. Maximum total length of Cat-5 UTP cable on a single network: 3281 ft (1 km) This is approximately three 1000 ft (305 m) boxes of Cat-5 UTP wire. ©2008 Schneider Electric. All Rights Reserved. C-Bus Network Parameters (continued) Maximum 34 V DC on the C-Bus cable: 2,000 mA (2 A) Each DIN Relay and DIN Dimmer with an on-board network Power Supply can supply 200 mA to the Bus. Where more than 10 DIN Relays and/or Dimmers are required on a network, the additional units should be the type without an on-board network Power Supply. Maximum number of Network Burdens: One (only one) The PCI, USB, Ethernet Network Interface, and Network Bridge come with a plug-in RJ-45 Hardware Burden. We recommend using the Hardware Burden. A software-enabled Network Burden is available on DIN units and Professional Dimmer units. (Software Burdens are disabled by default.) Minimum number of active System Clocks: One active, two more enabled System Clocks are available on any DIN unit or Professional Dimmer unit. Use the Toolkit software to enable a Clock, except on the PC Interface, where it is enabled by default. Recommended maximum three enabled Clocks at any time. Maximum number of networks than can be linked together: 255 Topologies: Single- and Multi-Network: Star, Daisy Chain, or Star-Daisy Chain combination. Maximum 6 Network Bridges (7 networks) on a Daisy Chain. C-BUS DATA CONNECTIONS C-Bus units can have RJ-45 style ports for any of four types of data: • C-Bus network • RS-232 Serial • USB • Ethernet Verify that you are connecting the correct cable at each port. Each cable carries a different type of signal, and incorrect connections could result in damage to the equipment, a computer, and/or the C-Bus network. CAUTION HAZARD OF IMPROPER OR UNSTABLE OPERATION • Verify that all connections to C-Bus units are being made to the correct port. • Only connect an RS-232 Serial cable to a port labeled RS-232; an Ethernet cable to a port labeled Ethernet; and a C-Bus network cable to a port labeled C-Bus. Failure to follow these instructions can result in improper C-Bus network operation, damage to the computer or C-Bus network equipment, or both. Network Connection Types • C-Bus: The C-Bus network consists of C-Bus units interconnected with Cat-5 UTP cable. C-Bus network connections are typically made to labeled RJ-45 ports at the bottom of the unit or to screw terminals. • RS-232 Serial: The standard PC Interface (SLC5500PCI) has two labeled RS232 Serial ports, enabling computerized monitoring and configuration of the network. RS-232 cable is shielded untwisted wire. ©2008 Schneider Electric. All Rights Reserved. Network Connection Types (continued) • USB: A second PC Interface model (SLC5500PCU) has one USB port for use with newer computers that lack a serial port. NOTE: Install USB drivers from the C-Bus Toolkit “File” menu. • Ethernet: The Ethernet Network Interface (SLC5500CN) has one labeled Ethernet port for connecting a computer to the C-Bus network. C-BUS CABLE Types Unshielded twisted pair Category 5 Local Area Network (Cat-5 UTP LAN) cable, maximum current 2 A. Cat-5E UTP and Cat-6 UTP are also acceptable. • Solid: typically used for long runs that are infrequently moved • Stranded: typically used for ‘patch leads,’ or connections that may be frequently connected/disconnected Connectors To Positive and Negative Terminals • Positive terminal: Blue and orange wires • Negative terminal: Blue-white and orange-white wires To terminate each wire pair, use bootlace ferrules or twist bare ends of wires together neatly (no frayed ends). Do not solder ends, it can cause cold flow and result in a bad connection. To a DIN Unit C-Bus (RJ-45) Port Use an RJ-45 type connector appropriate for the type of wire being used—solid and stranded Cat-5 have specific types of connectors and connection crimp tools. Proper connections require the correct connector and tool for each type of wire. Using the wrong combination tool/connector can crush the wire, causing a faulty connection that will be hard to diagnose. Remote Overrides The green, green-white, brown, and brown-white Cat-5 wires are available for “Remote Override” connections. Remote Overrides provide a manual override of C-Bus operations by locking an output unit’s channels ON or OFF. Remote Override wire pairs are connected to C-Bus negative via a mechanical switch. • Remote Override ON: Green and green-white wires • Remote Override OFF: Brown and brown-white wires MAXIMUM NUMBER OF SCENES &/OR GROUPS/KEYPAD Any one Neo or Saturn unit (including DLT variants) can have one Scene per button (maximum depends on the number of buttons). Each unit can use up to 40 Group Addresses total. Any one Scene can have up to 40 Group Addresses. Example: An 8-Button Neo Keypad can have 1 Scene with up to 40 Group Addresses, or 2 Scenes with 20 Group Addresses each, or any permutation consistent with the 8 Scene/40 Group Address rule. ©2008 Schneider Electric. All Rights Reserved. C-BUS NETWORK WIRING GUIDELINES These guidelines are consistent with Best Practices and provide the best immunity to noise. • Follow national and local electrical codes. Refer to the product’s installation bulletin for product-specific information on wiring, wire gauge, and so on. • In panels and enclosures, securely anchor and sleeve C-Bus network cable and anchor electrical power lines. This helps prevent contact between loose electrical power conductors and the C-Bus network wiring. • Wherever possible, consolidate multiple C-Bus network Cat-5 cables outside a panel or enclosure so that only one C-Bus cable is brought into the enclosure. • Insulate any consolidation of multiple C-Bus network cables in panels or enclosures so that there are no loose wires, no exposed terminal screws, etc. • If C-Bus network cable is run in parallel with electrical power lines (outside an enclosure), there must be at least 6 in. (152 mm) segregation between the two cables at all times. • If C-Bus network cable will cross an electrical power line, the crossing must be at a 90° angle. Also provide at least 2.5 in. (64 mm) separation between the two cables where they cross. • Limit the current on a C-Bus network to 2 A or less. • Limit the total length of Cat-5 cable on a single network to 3281 ft (1 km). MULTI-POINT SWITCHING/DIMMING/CONTROL • To control a light from two, four, or more switch locations, give the same Group Address to one or more buttons on each switch and the Relay or Dimmer. • To control multiple Relay or Dimmer channels from a single switch, give the various Relay and/or Dimmer channels the same Group Address as the switch. OUTPUT UNIT STATUS INDICATOR ACTIVITY For a description of the status indicators’ activity on other types of units, such as an input unit, see the other side of this guide or the unit’s installation bulletin. NOTE: The Unit and C-Bus indicators on output units only function when output units are connected to 120/277 V AC. Unit Indicates the status of the individual unit and whether it is receiving line-level voltage. • ON (lit): the unit is receiving line-level voltage. • Flashing: the Local or Remote Overrides have been toggled ON or OFF. • OFF (unlit): there is no line-level voltage. C-Bus Indicates the status of the C-Bus network at the unit: • ON (lit): there is a C-Bus Clock and an acceptable level of C-Bus network power (recommended range is 22–36 V DC). • Flashing: the line voltage on the C-Bus network is marginal (15–20 V DC). • OFF (unlit): no C-Bus System Clock or no C-Bus network power. ©2008 Schneider Electric. All Rights Reserved. Toggle/Local Override/Channel Control Buttons On output units (e.g., DIN-rail Dimmers and Relays), these buttons operate a unit’s output channels and LEDs, as long as the unit is connected to line voltage. Use them to verify that the power lines are installed correctly and that each channel switches the correct load(s). These buttons are multi-functional. Override Button Functions The Toggle’s Status Indicator LED shows the status (ON or OFF) of each channel on that output unit. 1. Light ON/lit, the channel is ON; light OFF/unlit, the channel is OFF. 2. A press on a Toggle/Local Override/Channel Control button manually overrides the current state of that channel. 3. Local Override/Channel Control buttons can be used to start Learn Mode and configure a unit. Override Button Operations When one or more channels or units are in Local Override mode, different button presses have different effects. • Short press: “Toggles” that channel/unit, e.g., from OFF to ON. • Double press: Returns control of that channel/unit to the C-Bus network. • Long press: All channels or units in Local Override mode are returned to control by the C-Bus network. VERIFYING NETWORK POWER The amount of current required for a C-Bus network depends on the current drawn by its C-Bus units. Typical C-Bus units draw 18–40 mA, and many networks require less than 2 A. See a unit’s illustration or installation bulletin to determine its current requirements. The steps below summarize how to calculate a network’s power requirements and verify that only 2 A will be supplied to the network. (The C-Bus Toolkit software will also calculate this for you.) STEP 1: Add up the current consumed by all the input, system support, and output units that draw power from the C-Bus network. Remember that the combined current consumed by all these units must not exceed 2 A. Unit Type No. Units Current Draw Total Current Draw USB PC Interface 1 32 mA 32 mA 4-Button Decorator Keypad 12 22 mA 264 mA 6-Button Saturn Keypad 5 22 mA 110 mA 8-Button Neo Keypad 3 22 mA 66 mA Light-Level Sensor 5 18 mA 90 mA Color Touch Screen 2 22 mA 44 mA Total Drawn ©2008 Schneider Electric. All Rights Reserved. 606 mA STEP 2: Add up the current provided to the network by C-Bus network Power Supplies (stand-alone and on-board) and verify that the amount is less than 2 A. Unit Type No. Units Current Sourced Total Current Sourced DIN Relay with on-board Power Supply 2 200 mA 400 mA Stand-alone Power Supply 1 350 mA 350 mA Total Sourced 750 mA (less than 2 A) STEP 3: Subtract the current required (Step 1) from the current provided (Step 2) to determine if the power will be sufficient for network operations. 750 mA (sourced) – 660 mA (needed) = 44 mA (extra) CONCLUSIONS: The current drawn and sourced are under 2 A, and there is more sourced than drawn, so no extra Power Supplies are needed. PIR SENSOR ADJUSTMENT Let the sensor stabilize for at least two minutes before adjusting it. Use the sensor-adjustment screw. It has a 270° range-of-motion, with stops at about 7 o’clock and 5 o’clock. At 7 o’clock the light-level threshold is 150 footcandles; at 5 o’clock the light-level threshold is 0 footcandles. Setting Action Load turns on day and night Turn screw counter-clockwise until notch points to 7 Load off when ambient light is sufficient Turn screw clockwise until notch points to 11 Load turns on at dusk Turn screw clockwise until notch points to 1 Load turns on at night Turn screw clockwise until notch points to 3 Adjustment Screw Disclaimer Electrical equipment should be installed, operated, serviced, and maintained only by qualified electrical maintenance personnel. Training provided by the Square D Company, in-person or in a manual, should not be viewed as sufficient instruction for those who are not otherwise qualified to install, operate, service, or maintain the equipment under consideration. Although reasonable care has been taken to provide accurate and authoritative information in presentations and documentation, no responsibility is assumed by Square D Company, its employees, or its agents, for any consequences arising out of the use of this material. ©2008 Schneider Electric. All Rights Reserved. POWER SUPPLY STATUS INDICATORS UNIT: Unit status and power s/.LIT.ORMALOPERATION s/&&UNLIT.O#"USCONNECTION Unit C-BUS:.ETWORKSTATUSATTHEUNIT s/.LIT!CCEPTABLENETWORKPOWERn6$# s&LASHING-ARGINALNETWORKPOWERn6$# s/&&UNLIT.O#LOCKNOEXTERNALPOWER #"US POWER3UPPLY ETHERNET NETWORK INTERFACE STATUS INDICATORS ETHERNET:#OMMUNICATIONSSTATUS s2%$SOLID.ORMALPOWERON s2%$FLASHING.OSERVERNOLINK s/2!.'%SOLID'OODLINK s/2!.'%'2.FLASHING!CTIVESESSION 12V Ethernet Ethernet C-BUS/UNIT/COMMS:.ETWORKANDUNITSTATUS s2%$SOLID.O#"USCONNECTION s2%$FLASHING.O#"USCONNECTNOCOMMSTO%THERNETSIDE s2%$/2!.'%FLASH-ARGINAL#"USPOWERn6$# s/2!.'%SOLID 'OOD#"USPOWERn6$# s/2!.'%'2.FLASHING!CTIVECOMMSTO%THERNETSIDE C-Bus/Unit /Comms Network Interface STANDARD & USB PC INTERFACE STATUS INDICATORS 3TANDARD0#) 23 23 UNIT/COMMS: Unit status and power s/.LIT.ORMAL#"USPOWER s&LASHING$ATATRANSFERINPROGRESS s/&&UNLIT.O#"USPOWER Unit / #OMMS #"US P# InterFaCe 53"0#) C-BUS:.ETWORKSTATUSATTHEUNIT s/.LIT#"US#LOCKACCEPTABLE #"USPOWERn6$# s&LASHING-ARGINAL#"USPOWER n6$# s/&&UNLIT.O#LOCKNO#"US power Unit / #OMMS #"US P# InterFaCe Schneider Electric - North American Operating Division 295 Tech Park Drive La Vergne, TN, 37086 Tel: 1-888-SquareD www.squaredlightingcontrol.com 1250SM0801A1 R07/08 ©2008 Schneider Electric. All Rights Reserved. Electrical equipment should be installed, operated, serviced, and maintained only by qualified personnel. No responsibility is assumed by Schneider Electric for any consequences arising out of the use of this material. Square D, the logo, Clipsal, Powerlink, C-Bus, and Neo are trademarks or registered trademarks of Schneider Electric and/or its affiliates in the United States and/or other countries.