1
M134-HDN720-001
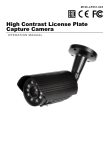
HD CCTV
Digital Video Camera
O PE R AT ION MANUAL
Thank you for choosing our high quality camera.
Before attempting to connect operate this unit, please read and follow these instructions.
CA UTION
These servicing instructions are for use by qualified service personnel only.
To reduce the risk of electric shock do not perform any servicing other than
that contained in the operating instructions unless you are qualified to do so.
Use Class 2 Power Supply Only
2
CONTENTS
1. CAUTIONS
2. IMPORTANT SAFETY INSTRUCTION
3. FEATURES
4. EQUIPMENT AND ACCESSORIES
5. INSTALLATION
6. DIMENSIONS
7. SPECIFICATION
8. OSD MANUAL
3
1. CAUTIONS
This device complies with Part 15 of the FCC Rules.
Operation is subject to the following two conditions;
1. This device may not cause harmful interference.
2. This device must accept any interference received, including interference
that may cause undesired operation.
Note
This equipment has been tested and found to comply with the limits for a Class A digital
device, pursuant to part 15 of the FCC Rules. These limits are designed to provide
reasonable protection against harmful interference when the equipment is operated
in a commercial environment. This equipment generates, uses, and can radiate radio
frequency energy and, if not installed and used in accordance with the instruction
manual, may cause harmful interference to radio communications. Operation of this
equipment in a residential area is likely to cause harmful interference in which case the
user will be required to correct the interference at his own expense.”
WARNING
This is a class A product. In a domestic environment this product may cause radio
interference in which case the user may be required to take adequate measures.
Caution
Any changes or modifications in construction of this device which are not expressly
approved by the party responsible for compliance could void the user’s authority to
operate the equipment.
1. A regulated DC12V 2A power supply is recommended for use with this camera
for the best picture and the most stable operation.
An unregulated power supply can cause damage to the camera.
When unregulated power supply is applied, product warranty will be out of subject.
2. It is recommended that the camera is used with a monitor that has a CCTV quality
75 video impedance level.
If your monitor is switched to high impedance then please adjust accordingly.
3. Do not attempt to disassemble the camera to gain access to the internal componets.
Refer servicing to your dealer.
4. Never face the camera towards the sun or any bright or reflective light, which may
cause smear on the picture and possible damage to the CCD.
5. Do not remove the serial sticker for the warranty service.
6. Do not expose the camera to rain or other types of liquid.
7. The apparatus must be connected to a mains socket-outlet with a protective earthing
connection.
4
1. CAUTIONS
Correct Disposal of This Product
(Waste Electrical & Electronic Equipment)
(Applicable in the European Union and other European countries with
separate collection systems)
This marking shown on the product or its literature, indicate that it should not
be disposed with other household wastes at the end of its working life. To
prevent possible harm to the environment or human health from uncontrolled
waste disposal, please separate this from other types of wastes and recycle it
responsibly to promote the sustainable reuse of material resources.
This product should not be mixed with other commercial wastes purchased this
product, or their local government office, for details of where and how they can
take item for environmentally safe recycling.
Business users should contact their supplier and check the terms and
conditions of the purchase contract.
Household users should contact either the retailer where they for disposal.
5
2. IMPORTANT SAFETY INSTRUCTION
1) Read these instructions.
2) Keep these instructions.
3) Heed all warnings.
4) Follow all instructions.
5) Do not use this apparatus near water.
6) Clean only with dry cloth.
7) Do not block any ventilation openings. Install in accordance
with the manufacturer’s instructions.
8) Do not install near any heat sources such as radiators, heat registers,
stoves, or other apparatus (including amplifiers) that produce heat.
9) Do not defeat the safety purpose of the polarized or grounding-type plug. A
polarized plug has two blades with one wider than the other. A grounding type
plug has two blades and a third grounding prong. The wide blade or the third
prong are provided for your safety. If the provided plug does not fit into your
outlet, consult an electrician for replacement of the obsolete outlet.
10) Protect the power cord from being walked on or pinched particularly at plugs,
convenience receptacles, and the point where they exit from the apparatus.
11) Only use attachments/accessories specified by the manufacturer.
12) Use only with the cart, stand, tripod, bracket, or table specified by
the manufacturer, or sold with the apparatus. When a cart is used,
use caution when moving the cart/apparatus combination to
avoid injury from tip-over.
13) Unplug this apparatus during lightning storms or when unused for long
periods of time.
14) Refer all servicing to qualified service personnel. Servicing is required when
the apparatus has been damaged in any way, such as power-supply cord
or plug is damaged, liquid has been spilled or objects have fallen into the
apparatus, the apparatus has been exposed to rain or moisture, does not
operate normally, or has been dropped.
6
3. FEATURES
• High Resolution
SONY 1/2.8” Progressive Color CMOS Image Sensor,
1920x1080
• Support various digital video output
720p30, 720p60, 720p25, 720p50,
1080i60, 1080i50,
1080p30, 1080p25
• Video Outputs
Primary HD-SDI (BNC)
Test/Setup TV Out (Test Point-adapter to BNC included), NTSC/PAL selectable.
• OSD menu for setup and configuration
• Support RS485 Communucation Protocol for Camera
Configuration Remote Control
• Lens Control : DC Iris.
• 45 Long Life IR illuminations for 0 Lux viewing performance
and range to 45m(150 feet).
• Provides True Day/Night Capability with Motorized IR Cut Filter.
• Power Source : DC 12V / AC24V.
• IP67 Weather Resistant.
• HDcctv Alliance Base Line Compliance
• The HDcctv Alliance states.
• Look for the unique HDcctv logo to be sure.
- 100m transmissions over even to be sure.
- Plug-and-Play interoperability with other compliant products.
- Forward compatibility with future versions of the standard.
- See www.hidefcctv.org for details.
7
4. EQUIPMENT AND ACCESSORIES
HD CCTV
D igi t a l Vi d e o C a mera
S ER VI C E V I D E O OU T P U T
T ES T C A B L E
L - WRENCH
O P E R A T I O N MA N U A L
S CR EW - 4 e a
8
5. INSTALLATION
• CAMERA MOUNTING POSITION
90˚TLIT
360˚PAN
360˚PAN
90˚TLIT
<Cable Concealed Thru Bracket>
9
5. INSTALLATION
• External Zoom & Focus Adjustable
The workmanship to adjust zoom and focus, opening
the window cap might cause the humidity problems
to the camera. The External Zoom and Focus
system with out state-of-the-art technology provides
easy camera installation without opening the window
cap to adjust zoom and focus the lens.
10
5. INSTALLATION
• Service Video Out & OSD Control
• OSD Control
Joystick
Up
Left
Right
Down
• Service video connector
• Power LED
• MONITOR CONNECTION
SDI
RECEIVER
DISPLAY
DEVICE
HD SDI IN
DC12V / AC24V REGULATED
POWER SUPPLY
RS485(+)
RS485(-)
TEST CABLE
Note: Face of connector with
color mark should face “up” when
inserting test cable.
When you install the camera, please seal the ends of cables to protect
the camera connections from humidity problems.
11
HANDHELD
MONITOR
6. DIMENSIONS
Unit(mm)
83
98.6
45-LED
PHOTO CELL
88.29
196
168.6
329
10
M15XP1.25
150
160
(2EA)
Ø110
12
7. SPECIFICATION
Image Device
Effective Pixels
Unit cell size
Video output mode
S ONY 1/2 .8” Pro g re s s iv e Co lo r CMO S I ma g e S e n s o r
20 9 6 (H) x 1 5 6 1 (V ) 6 0 f p s
2 . 5 u m (H) x 2 . 5 u m (V )
HD-S DI : 720p 3 0 , 7 2 0 p 6 0 , 7 2 0 p 2 5 , 7 2 0 p 5 0 ,
1080 i6 0 , 1 0 8 0 i5 0 ,
1080 p 3 0 , 1 0 8 0 p 2 5
TV Out : NTS C / P A L s e le c t a b le
Minimum illumination
0 Lux
IR LED
850nm, 45ea
IR Beam Range
Up to 45M (150 Feet)
S/N Ratio
Shutter speed
Ma x 5 0 d B
A u t o / Ma n u a l s e le c t a b le
Min. Exposure Time
Flickerless
True Day & Night
White Balance
1/10000 sec
O f f / 6 0 Hz (5 0 Hz ) s e le c t a b le
IR Cu t / P a s s F ilt e r c h a n g e
A TW / Ma n u a l / S p e c if ic Co lo r / P u s h
BLC
O n / O f f (b y O S D)
Lens
DC I RI S V a rif o c a l L e n s (I CR)
OSD Menu
Power Consumption
Yes
DC 1 2 V (± 1 0 % ) Ma x . 1 . 1 A
A C 2 4 V (± 1 0 % ) Ma x . 1 2 W
IP Rating
IP67
Weight
Conformity
Temperature/Humidity
(no condensing)
2000g
CE , FCC, HDc c t v A llia n c e B a s e -L in e Co mp lia n c e
Ope ra t io n : -1 0 ~ 5 0 / 2 0 ~ 8 0 %
S t o ra g e : -2 0 ~ 7 0 / 2 0 ~ 9 5 %
Specifications and designs are subject to change for improving the functionality of this product without notice.
13
8. OSD MANUAL
• Menu structure
- Main Menu
VIDEO
LENS
EXPOSURE
WHITE BALANCE
DAY & NIGHT
IMAGE
SYSTEM
- VIDEO OUT Menu
VIDEO
SDI RESOLUTION
1080P / 1080I / 720P
1080P
SDI FRAME RATE
1080i
720P
CDBS FORMAT
30HZ / 25HZ
60HZ / 50HZ
30HZ / 25HZ / 60HZ / 50HZ
NTSC / PAL
VIDEO APPLY
14
8. OSD MANUAL
- LENS Menu
LENS
LENS TYPE
DC IRIS (VIDEO IRIS)
IRIS VOLUME
0 ~ 50
- EXPOSURE Menu
EXPOSURE
SHUTTER
SHUTTER MODE
NORMAL AE
NORMAL AE / AE HOLD / MANUAL
AE PRIORITY
GAIN
NORMAL AE / GAIN / SHUTTER
GAIN LEVEL
0 DB / 1.2 DB / 3.31 DB
5.12 DB / 6.92 DB / 9.33 DB /
11.14 DB / 12.94 DB /
15.34 DB / 17.16 DB /
18.96 DB / 21.37 DB /
23.18 DB / 24 DB /
27.09 DB / 29.2 DB
SHUTTER
SHUTTER LEVEL
NORMAL
USER MODE
1~4
GAIN LEVEL
1 ~ 150
SHUTTER
LEVEL
1 ~ 160
FLICKERLESS
OFF / 50HZ / 60HZ
BRIGHTNESS
0 ~ 255
AGC
0 ~ 186
BLC
ON / OFF
WDR
ON / OFF
15
1 ~ 160
8. OSD MANUAL
- WHITE BALANCE Menu
WHITE BALANCE
WB MODE
ATW
ATW / MANUAL / SPECIFIC COLOR / PUSH
ATW MODE
INDOOR / OUTDOOR
R GAIN
0 ~ 255
B GAIN
0 ~ 255
TARGET TEMP
1500K / 1567K / 1641K / 1721K /
1810K / 1909K / 2019K / 2143K /
2283K / 2442K / 2625K / 2838K /
3088K / 3387K / 3750K / 4200K /
4773K / 5526K / 6563K / 8077K /
10500K / 15000K
MANUAL
SPECIFIC
COLOR
- DAY / NIGHT Menu
DAY & NIGHT
DAY & NIGHT
AUTO
AUTO / BW / COLOR
DELAY TIME
0 SEC ~ 10 SEC
DAY THRESHOLD
0 ~ 255
NIGHT THRESHOLD
0 ~ 255
16
8. OSD MANUAL
- IMAGE Menu
IMAGE
GAMMA
Y GAMMA
PRESET 0 ~ PRESET 3
C GAMMA
PRESET 0 ~ PRESET 3
SHARPNESS
0 ~31
CONTRAST
0 ~ 31
SATURATION
0 ~ 31
DNR
OFF / LOW / MIDDLE / HIGH
PRIVACY
ZONE SELECT
ZONE 0 ~ ZONE 14
MASK ON / OFF
ON / OFF
TRANSPARANT
0 / 0.5 / 0.75 / 1
COLOR
WHITE / BLACK / RED / GREEN / BLUE
YELLOW / CYAN / MAGENTA
POSITION
CONTROL
MIRROR
V SIZE
0 ~ 1080
H SIZE
0 ~ 1920
V POSITION
0 ~ 1080
H POSITION
0 ~ 1920
MOSAIC
ON / OFF
OFF / H FLIP / V FLIP / HV FLIP
17
8. OSD MANUAL
- SYSTEM Menu
SYSTEM
FIRMWARE VER
COMMUNICATION
CAMERA ID
NO. 0 ~ NO.255
BAUD RATE
2.4K / 4.8K / 9.6K
19.2K / 38.4K /57.6K
COMM APPLY
FOCUS MODE
ON / OFF
FACTORY RESET
18
8. OSD MANUAL
• Main Menu
MAIN MENU
+ VIDEO
+ LENS
+ EXPOSURE
+ WHITE BALANCE
+ DAY / NIGHT
+ IMAGE
+ SYSTEM
* EXIT
- VIDEO : Select SDI out format and TV out format.
- LENS : Select the IRIS type and adjust the IRIS control value.
- EXPOSURE : Adjust exposure control.
- WHITE BALANCE : Adjust white balance control.
- DAY / NIGHT : Day & Night control.
- IMAGE : Apply image processing effects.
- SYSTEM : System information & setting.
- EXIT : Close OSD Menu.
19
8. OSD MANUAL
• Video
VIDEO OUT
* SDI RESOLUTION
* SDI FRAME RATE
* CVBS FORMAT
1080p
30HZ
NTSC
+ VIDEO APPLY
- SDI RESOLUTION
Use the LEFT/RIGHT button to select the SDI
output video resolution - 720p, 1080i, 1080p
* Note : When the OSD menu is not displayed on video,
720p resolution can be selected by pressing the UP
button in 3 seconds. Similarly, 1080p resolution can be
selected by pressisng the DOWN button in 3 seconds.
* ESC
* EXIT
- SDI FRAME RATE
Use the LEFT/RIGHT button to select the SDI output video frame rate
SDI resolution
Available frame rate
1080p
30Hz, 25Hz
1080i
60Hz, 50Hz
720p
30Hz, 25Hz, 60Hz, 50Hz
- CVBS FORMAT
Use the LEFT/RIGHT button to select the TV out video format - NTSC, PAL
* Note : When the OSD menu is not displayed on video, NTSC video format can be selected by pressing
the LEFT button. Similarly, PAL video format can be selected by pressing the RIGHT button.
- VIDEO APPLY
Apply all video setting changed at once. Use the SET button to apply.
- ESC
Back to the prevois menu page.
• LENS
LENS
* LENS TYPE
* IRIS VOLUME
* ESC
* EXIT
DC IRIS
25
- LENS TYPE
Lens type for iris control.
- DC IRIS only
- IRIS VOLUME
Use the LEFT/RIGHT button to adjust the iris
volume level.
Iris volume control does not apply when the
LENS TYPE is set to MANUAL IRIS.
20
8. OSD MANUAL
• EXPOSURE
EXPOSURE
+
*
*
*
*
*
SHUTTER
FLICKERLESS
BRIGHRNESS
AGC
BLC
WDR
OFF
30
140
OFF
OFF
* ESC
* EXIT
- SHUTTER
Use the SET button to go to the SHUTTER sub menu.
- FLICKERLESS
Use the LEFT/RIGHT button to select the flickerless control
setting - OFF, 60Hz, 50Hz.
- BRIGHTNESS
Use the LEFT/RIGHT button to adjust the brightness reference level.
- AGC
Use the LEFT/RIGHT button to adjust the AGC max value
- BLC
Use the LEFT/RIGHT button to select ON/OFF the Back-Light
Compensation control.
- WDR
Use the LEFT/RIGHT button to select ON/OFF the Wide Dynamic
Range effect control.
21
8. OSD MANUAL
• SHUTTER (Sub Menu)
SHUTTER
* SHUTTER MODE
SHUTTER
NORMAL AE
* AE PRIORITY
NORMAL
* ESC
* EXIT
* SHUTTER MODE
* SHUTTER MODE
* AE PRIORITY
GAIN
* AE PRIORITY
* GAIN LEVEL
0 DB
* SHUTTER LEVEL
* ESC
* EXIT
SHUTTER
* SHUTTER MODE
NORMAL AE
SHUTTER
* ESC
* EXIT
SHUTTER
AE HOLD
* SHUTTER MODE
* USER MODE
MANUAL
1
* GAIN LEVEL
* SHUTTER LEVEL
* ESC
* EXIT
SHUTTER
NORMAL AE
20
50
* ESC
* EXIT
- SHUTTER MODE
Use the LEFT/RIGHT button to select shutter & gain control mode
- NORMAL AE, AE HOLD, MANUAL.
- AE PRIORITY
This menu can be accessed when the SHUTTER MODE is set to NORMAL AE.
Use the LEFT/RIGHT button to select the AE control priority setting.
- NORMAL, GAIN, SHUTTER.
- USER MODE
This menu can be accessed when the SHUTTER MODE is set to MANUAL.
Use the LEFT/RIGHT button to select the user mode(1~4) to save setting.
- GAIN LEVEL
In GAIN priority mode at NORMAL AE mode.
This menu can be accessed when the SHUTTER MODE is set to
NORMAL AE and AE PRIORITY is set to GAIN.
Use the LEFT/RIGHT button to select the Gain value setting.
- GAIN LEVEL
In MANUAL mode.
This menu can be accessed when the SHUTTER MODE is set to MANUAL.
Use the LEFT/RIGHT button to select the Gain level setting.
- SHUTTER LEVEL
This menu can be accessed when the SHUTTER MODE is set to MANUAL.
Use the LEFT/RIGHT button to select the Shutter level setting.
22
25
8. OSD MANUAL
• WHITE BALANCE
WHITE BALANCE
* ATW MODE
WHITE BALANCE
ATW
* WB MODE
* WB MODE
INDOOR
* ESC
* EXIT
* R GAIN
* B GAIN
3387K
* ESC
* EXIT
WHITE BALANCE
* WB MODE
SPECIFIC COLOR
* TARGET TEMP
WHITE BALANCE
MANUAL
* WB MODE
PUSH
48
64
* ESC
* EXIT
* ESC
* EXIT
- MODE
Use the LEFT/RIGHT button to select White balance modes
- ATW, MANUAL, SPECIFIC COLOR, PUSH
ATW
Auto trace white balance mode
MANUAL
Manual white balance mode
SPECIFIC COLOR
Manual setting with target color temperature
PUSH
White Balance Push mode to Auto AWB
- ATW MODE
This menu can be accessed when the WB MODE is set to ATW.
Use the LEFT/RIGHT button to select environment setting. - INDOOR, OUTDOOR
- TARGET TEMP
This menu can be accessed when the WB MODE is set to SPECIFIC COLOR.
Use the LEFT/RIGHT button to select target color temperature.
- R GAIN
This menu can be accessed when the WB MODE is set to MANUAL.
Use the LEFT/RIGHT button to adjust the Red Gain.
- B GAIN
This menu can be accessed when the WB MODE is set to MANUAL.
Use the LEFT/RIGHT button to adjust the Blue Gain.
23
8. OSD MANUAL
• Day / Night
DAY & NIGHT
* DAY & NIGHT
AUTO
* DELAY TIME
3 SEC
101
188
* DAY THRESHOLD
* NIGHT THRESHOLD
* ESC
* EXIT
DAY & NIGHT
DAY & NIGHT
COLOR
* DAY & NIGHT
* ESC
* EXIT
* DAY & NIGHT
BW
* ESC
* EXIT
- DAY & NIGHT:
Use the LEFT/RIGHT button to select Day & Night modes - AUTO, COLOR, BW
AUTO
Auto controlled by signal from CDS sensor. (CDS Type)
COLOR
Fixed Day State. Color Image.
BW
Fixed Night State. BW Image.
- DELAY TIME:
This menu can be accessed when the DAY & NIGHT is set to AUTO.
Use the LEFT/RIGHT button to select state change delay time.
- DAY THRESHOLD:
This menu can be accessed when the DAY & NIGHT is set to AUTO.
Use the LEFT/RIGHT button to select threshold value of change from
night state to day state.
- NIGHT THRESHOLD:
This menu can be accessed when the DAY & NIGHT is set to AUTO.
Use the LEFT/RIGHT button to select threshold value of change from
day state to night state.
24
8. OSD MANUAL
• IMAGE
IMAGE
+
*
*
*
*
+
*
GAMMA
SHARPNESS
CONTRAST
SATURATION
DNR
PRIVACY
MIRROR
7
17
18
OFF
OFF
* ESC
* EXIT
- GAMMA:
- SHARPNESS:
- CONTRAST:
- SATURATION:
- DNR:
- PRIVACY:
- MIRROR:
Use the SET button to go to the GAMMA sub menu.
Use the LEFT/RIGHT button to adjust the sharpness value.
Use the LEFT/RIGHT button to adjust the contrast value.
Use the LEFT/RIGHT button to adjust the saturation level.
Use the LEFT/RIGHT button to select the digital noise reduction
level. - OFF, LOW, MIDDLE, HIGH
Use the SET button to go to the PRIVACY MASK sub menu.
Use the SET button to select image flip modes.
- OFF, H FLIP, V FLIP and H/V FLIP.
• GAMMA (Sub Menu)
GAMMA
* Y GAMMA
* C GAMMA
RPESET 2
RPESET 3
* ESC
* EXIT
- Y GAMMA:
Use the LEFT/RIGHT button to select preset gamma setting for luma.
- C GAMMA: Use the LEFT/RIGHT button to select preset gamma setting for chroma.
25
8. OSD MANUAL
• PRIVACY MASK (Sub Menu)
PRIVACY MASK
*
*
*
*
ZONE SELECT
MASK ON / OFF
TRANSPARANT
COLOR
ZONE 0
OFF
0.5
WHITE
+ POSITION CONTROL
* ESC
* EXIT
- ZONE SELECT:
Use the LEFT/RIGHT button to select the mask
zone number to setting.
Use the LEFT/RIGHT button to select ON/OFF
the mask that is zone selected.
- TRANSPARENT:
Use the LEFT/RIGHT button to adjust the mask transparent
level.
- COLOR:
Use the LEFT/RIGHT button to select the mask color.
- POSITION CONTROL: Use the SET button to go to the mask position setting sub
menu
- MASK ON/OFF:
• PRIVACY MASK (Sub Menu)
PRIVACY MASK
*
*
*
*
*
V SIZE
H SIZE
V POSITION
H POSITION
MOSAIC
0
0
0
0
OFF
* ESC
* EXIT
- V SIZE:
- H SIZE:
- V POSITION:
- H POSITION:
- MOSAIC:
Use the LEFT/RIGHT button to adjust the mask vertical size.
Use the LEFT/RIGHT button to adjust the mask horizontal size.
Use the LEFT/RIGHT button to adjust the mask vertical position.
Use the LEFT/RIGHT button to adjust the mask horizontal position.
Use the LEFT/RIGHT button to select ON/OFF the mask mosaic
setting.
26
8. OSD MANUAL
• SYSTEM
SYSTEM
*
*
*
*
FIRMWARE
COMMUNICATION
FOCUS MODE
FACTORY RESET
0.2B.25
OFF
- FIRMWARE VER :
- COMMUNICATION:
* ESC
* EXIT
- FOCUS MODE:
- FACTORY RESET:
Information of camera’s
firmware version.
Use the SET
button to go to the
COMMUNICATION sub
menu.
In Focus mode, the iris becomes fully open, electronic shutter
controls the light level, and the TV out screen zooms into
the center in order to make focusing easier. When in Focus
Mode, the OSD menu is not displayed.
Use the SET button to action start of reset. Clear all setting
and initialize to factory setting.
• COMMUNICATION (Sub Manu)
- CAMERA ID :
COMMUNICATION
* CAMERA ID
* BAUD RATE
NO. 1
2.4K
* COMM APPLY
* ESC
* EXIT
• EXIT
SAVE & EXIT SETUP
EXIT WITHOUT SAVING
Use the LEFT/RIGHT button
to select the RS485 ID
Address.
- BAUD RATE : Use the LEFT/RIGHT button
to select the baudrate setting
for RS485 communication.
- COMM APPLY : Apply all communication
setting changed at once.
Use the SET button to apply.
This menu can be accessed when use the EXIT
action in all menu pages.
- SAVE & EXIT SETUP:
Save all current setting and Close OSD
menu. These setting are loaded and applied
automatically when the Camera is power on.
- EXIT WITHOUT SAVING:
Close OSD menu. Camera’s current setting is
not saved. Use the SET button to action.
27
Quick Setup Guide(HD CCTV CAMERA)
■ OSD Menu Button.
UP / 720p
LEFT / NTSC
RIGHT / PAL
DOWN / 1080p
- Video out Format Change (NTSC/PAL Selection)
Default(Factory default setting) video out format is NTSC.
Camera power on & Until push the SET button(While OSD menu is not displayed on
video), Can select NTSC/PAL video format output on VIDEO port - Push the LEFT
button to select NTSC format video out mode or Push the RIGHT button to select
PAL format video out mode.
*Warning : When HD-SDI out format is setted 1080P, NTSC/PAL video out
is not supported. While OSD menu is not displayed on video, Can select
1080P/720P format output on HD-SDI port - Push the UP button in 3 seconds
to select 720P format video out or Push the DOWN button in 3 seconds to
select 1080p format video out.
- OSD menu Display on Video
Push the SET button.
- Use the Focus mode
Can be found in SYSTEM menu section in OSD menu.
Use the LEFT/RIGHT button to select ON/OFF the Focus mode.
·Video output port
- HDcctv 1.0 OUTPUT (BNC) :
HD-SDI video out to HDcctv DVR or Other HDcctv Signal Equipment.
- VIDEO (BNC) :
NTSC or PAL video out to Hand-Held Test Equipment(TV Monitor).
·Focus Mode
In the Focus mode, the Iris becomes fully open and the TV out screen zooms into
the center in order to make focusing easier.
When turn on the Focus mode, the OSD menu display in turned off automatically
and when turn off the focus mode, the OSD menu display is back.


![[inetdoc.LINUX]](http://vs1.manualzilla.com/store/data/006320752_1-a5dc0c2518595df6f6d4df8e955edfdb-150x150.png)