1
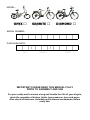
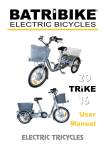
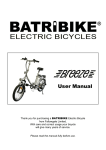
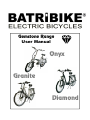
Gemstone Range
User Manual
Onyx
Granite
Diamond
MODEL:-
ONYX
□
GRANITE
□
DIAMOND
□
SERIAL NUMBER:-
PURCHASE DATE:-
/
DAY
/
MONTH
YEAR
IMPORTANT PLEASE READ THIS MANUAL FULLY
PRIOR TO ASSEMBLY AND USE
For your safety and to ensure a long and trouble free life of your bicycle,
check the operation of brakes, lights, tyre pressures, horn and gears.
Also check all fasteners, including quick release mechanisms, before
every ride.
Thank you for purchasing a BATRIBIKE Electric Bicycle
from Fallowgate Limited.
With care and correct usage your bicycle
will give many years of service.
Please read the manual fully before use.
Important
PLEASE CHARGE THE BATTERY
BEFORE FIRST USING THE BICYCLE.
Even though the battery indicator will show charge this cannot be
relied upon until the battery has had the initial full charge.
Contents
If you have purchased your BATRIBIKE Electric Bicycle ready built then
please move to STEP 3
STEP 1
Unpacking ...................................................... PAGE 4
STEP 2
Building .......................................................... PAGE 4
Tools Required:•
•
•
•
•
•
Philips Screwdriver
15 mm Spanner (Pedals & Front Wheel)
10 mm Spanner (Granite & Diamond Mudguard)
6 mm Hex Key (Granite & Diamond Handlebars)
5 mm Hex Key (Brake Levers)
3 mm Hex Key (Throttle & Light Switch)
STEP 3
Battery Charging ............................................ PAGE 6
Usage
....................................................................... PAGE 6
Service & Spares................................................................ PAGE 7
Warranty
....................................................................... Rear Cover
3
STEP 1 - Unpacking
Please allow adequate space for building the bicycle. You can use the flattened
box as a working area.
TAKE CARE—Removal of the bicycle from the box may require the assistance of another person. For the Granite and Diamond models the
stand should be extended and the bicycle placed on the floor for stability
ready for building.
The bicycle is protected by bubble-wrap and may be tied or tie-wrapped. Please
remove all packing material carefully and check the box for loose parts.
The front wheel on the Granite and Diamond models is attached to the side of
the main frame. Please take care when removing the packaging as the crank is
fitted through the spokes. Turn the crank slightly to allow easier removal. Take
care with the handlebars as they will be attached to the main frame by the cables only at this stage.
The battery is supplied locked into the frame and the keys are attached either to
the battery handle or to one of the cables on the front of the handlebars.
The charger and pedals are either packed separately in the box (Onyx) or taped
to the front forks. (Granite & Diamond)
Please dispose of the packing materials thoughtfully. The box can be recycled.
STEP 2 - Building
ONYX - Folding Model
The handlebars will need to be fitted to the handlebar tube. A locating groove is
designed into the tube to allow only one way of inserting the tube. Please ensure
that the cables are the correct side of the tube otherwise the cables will be
stretched and it will not be possible to fit the handlebars into the tube.
Lift up the tube and tighten the handlebar locking clamp into position.
Lift the rear of the cycle via the handle and rotate the front of the bicycle so that
the centre clamp is ready to fasten.
4
The centre clamp is fastened by lifting the lever to allow the bottom locating pin
to clip into the hole in the clamp. The quick release clamp is then swung into the
groove and tightened by moving the lever towards the frame. If it does not
tighten fully or is still loose after locking then the clamping pressure can be adjusted by the knurled nut. The clamp should be tight as it fits against the frame.
Fit the seat and adjust for height with the locking clamp. Adjust for clamping
pressure as necessary in the same manner as the main frame clamp.
Fit the pedals. Remember that the right hand pedal has a standard thread but
the left hand pedal has a reverse thread and must be tightened in the opposite
direction. A 15 mm spanner will be required.
Fit the wheel nut protectors, (grey cones supplied in the charger box) over the
wheel nuts.
Inflate the tyres to the correct pressure. (This is as stated on the wall of the tyre.
(Typically 40 to 60 psi)
Check that all of the levers etc on the handlebars are tightened and do not
swivel on the handlebars. Adjust as necessary using a Philips screwdriver or
small Hex key as appropriate. Take care not to over tighten.
Fit batteries, (not supplied), into the rear light if required. (2 AA cells) You will
need a small Philips screwdriver to remove the red lens.
GRANITE & DIAMOND
The handle bars will need fitting into the headstock. Remove the protective rubber boot from the end of the handlebar assembly and slide into the headstock.
Adjust so that the handlebars are correctly aligned to the front forks and tighten
with a large Hex key. Take care to ensure that the cable assemblies are the correct side of the handlebars and the handlebar assembly rotates freely.
Remove the plastic packing piece in the bottom of the front forks and offer up
the front wheel into the two locating slots. Take care to ensure that the disc for
the front brake locates between the 2 front disc pads. It will be easier if the
wheel nuts are loosened slightly to ease assembly. Ensure that the two shaped
locking washers are aligned into the slots with the tabs at the bottom and tighten
the wheel nuts. Take care that the inner nuts are not adjusted.
Remove the front light clamp with a 10 mm spanner and refit together with the
front mudguard. Remove the 2 screws which will hold the mudguard stays and
refit through the loops in the stays using a Philips screwdriver.
The pedals, seat, inflation of the tyres and fitting of the rear light batteries follow
the same procedure as per the ONYX model described above.
5
STEP 3 - Battery Charging
.Battery Charging.
The battery can be either charged on or off the bicycle but must be charged inside in dry conditions to avoid the risk of electrical shock. Only use the charger
supplied with the bicycle.
1)
2)
3)
Lift handle on battery
Ensure the power is turned off on the battery
Insert charger lead into socket on battery casing taking note of the position of locating lug.
4)
Insert 3 pin mains plug into mains socket & switch on at wall.
5)
There is an indicator light on the charger
CHARGE—Glows red when charging & green when charge is complete.
6)
When battery is charged firstly turn off the mains supply, unplug & then
remove the charging plug from the battery.
To ensure maximum battery life charge your battery after each ride & DO NOT
leave fully discharged
If your BATRIBIKE is not in use for an extended period, charge the battery
once a month to prevent deterioration
Usage
Your BATRIBIKE Electric Bicycle can be used as a normal pedal cycle by simply not switching on the battery.
To use under electric power switch on the battery by the red switch located under the handle of the battery. The Power Indicator on the handlebars will light to
show the remaining power in the battery. If the unit shows 2 LEDs or less it is
recommended that you charge the battery.
The Gemstone Range is equipped with Torque Sensor technology. This means
that as you put pressure on the pedals the system senses your efforts and provides a boost. Under normal riding on flat ground the amount of power put in by
the motor is low but as you reach an incline or turn into a head wind you naturally place more effort into the pedalling. The torque sensor adjusts the output to
match the conditions. This means that the assistance provided by the motor increases only when needed, thereby maximising range. (Estimated mileage will
vary with terrain but a 75kg rider should be able to travel 30 to 40 miles over
level ground with a fully charged battery).
6
There is also a twist throttle provided on the right handlebar grip. To use the
throttle start pedalling as normal and once you have reached the speed you wish
to travel then twist the throttle. After the throttle is used you can stop pedalling
and the motor speed will be maintained. Obviously, if the bicycle is used under
throttle only without pedal assist then the range will be substantially reduced.
The Gemstone Range is provided with 6 speed Shimano gears. To change
gear you can twist the handlebar mounted twist grip selector whilst pedalling.
Gear number 1 is low for hills and rough terrain and gear 6 is high for normal
road use.
Lights are provided on your BATRIBIKE bicycle. The front light takes its power
from the main battery and is switched on by the red switch on the right side of
the handlebars. Please ensure that it is not switched on by accident as this will
lessen the range you can travel.
The rear light is an LED unit and requires 2 AA batteries. You will require a small
Philips screwdriver to take off the red lens for battery replacement.
SAFETY FEATURE - The power for the rear light is kept separate from
the main power supply so that in the event that the battery is exhausted
you will still have a rear light for safety.
All other operation of your BATRIBIKE Electric Bicycle is as per a normal
pedal cycle.
Service & Spares
Remember to check all nuts and screws before and after the first ride. This will
need to be repeated after a week or so of riding and periodically to maintain safe
use of your BATRIBIKE bicycle.
Cables may also stretch a little during the first few uses. Brakes and gears may
need to be adjusted after the first few days to ensure correct operation. Refer to
your local cycle shop if you are not familiar with this operation.
Your BATRIBIKE bicycle uses standard cycle parts wherever possible. Items
such as tyres, tubes, lights, brake pads/blocks and cables may be obtained from
your local cycle shop or retailer.
Specialist parts such as the motor, battery, torque sensor or frame components
are only available from Fallowgate Limited or their authorised distributors.
Optional items such as Gel Seats, straight or extended handlebars etc are all
available to fit and most standard cycle accessories should fit the Gemstone
Range. Fallowgate Limited is happy to provide accessories to meet your needs.
7
Warranty
Please retain your receipt as this is your proof of purchase and entitlement to
Warranty.
•
The Frame of your new BATRIBIKE Gemstone Range is
guaranteed for 2 years from date of purchase.
•
Other main cycle parts have a warranty of 1 year
•
The battery is covered for 6 months as battery life is determined
by User care
•
In the event of warranty repairs becoming necessary you should return your
bicycle to Batribike at the address below, delivery & collection charges are not
redeemable under warranty.
Brake blocks/pads, tyres, lights and cables etc. are considered as consumables and replacements are available from BATRIBIKE or may be obtained
from your local cycle shop.
BATRIBIKE Electric Bicycles are exclusive to:Fallowgate Limited
Kellaway House
Marton Road
Sturton-by-Stow
Lincoln
LN1 2AH
Phone: 01427-787774
E-mail: [email protected]
————————— USER MANUAL GEMSTONE RANGE — ISSUE 4 — ©2009 Fallowgate Limited —————————