1
Radio / CD / MP3
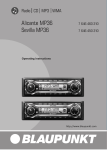
Key West MP35
Monterrey MP35
Syracuse MP35
7 645 280 510
7 645 485 510
7 645 480 510
Operating instructions
http://www.blaupunkt.com
Open here
2
ESPAÑOL
1
PORTUGUÊS
3
4
11
5
10
9
8
7
FRANÇAIS
2
6
12
3
ENGLISH
CONTROLS
1
2
3
4
5
6
7
8
9
:
;
<
4
Button to switch the unit on/off
and to mute the unit.
button to open and release
the control panel.
Volume control.
Short press: BND button, to select the FM memory bank
and the AM waveband, source
selection to radio mode.
Long press: TS, to start the
Travelstore function.
AUDIO button, to adjust the
bass, treble, balance and fader
settings and Sound Preset EQ.
Arrow buttons
Short press: MENU button, to
open the basic settings menu.
Long press: SCAN, to start scan
function.
X-Bass button to adjust the XBass function.
Keys 1 - 6
Short press: DIS button, to
display the time.
Long press: to change the display priority.
SRC button, to select the CD
(MP3), radio, CD changer or
AUX sources.
CD Eject button (which can
only be seen after flipping the
control panel).
Detachable control panel ............. 7
Theft protection ...................................
Detaching the control panel .................
Attaching the control panel ..................
Off timer .............................................
7
7
7
8
Switching on/off .......................... 8
Adjusting the volume ................... 9
Setting the power-on volume ............... 9
Instantaneous volume reduction (mute) ... 10
Telephone audio ................................. 10
Confirmation beep ............................. 10
Radio mode ............................... 11
Switching to radio mode ..................... 11
Setting the tuner ................................ 11
Selecting the frequency range/memory .. 11
Tuning into a station ........................... 11
Storing stations .................................. 12
Storing stations automatically
(Travelstore) ....................................... 12
Listening to preset stations ................. 12
Scanning receivable stations (SCAN) .... 12
Setting the display .............................. 13
CD mode ................................... 13
Switching to CD mode ....................... 13
Selecting tracks ................................. 14
Fast searching (audible) ..................... 14
Random play (MIX) ............................ 14
Scanning tracks (SCAN) .................... 14
Repeating tracks (REPEAT) ................ 14
Pausing playback (PAUSE) ................ 15
Changing the display .......................... 15
Displaying CD text ............................. 15
Ejecting a CD .................................... 15
MP3 mode ................................. 16
Preparing the MP3-CD ....................... 16
Switching to MP3 mode ..................... 17
Selecting a directory .......................... 17
Selecting tracks/files .......................... 17
Fast searching ................................... 17
Random track/file play (MIX) ............... 17
Scanning tracks/files (SCAN) ............. 17
Repeating individual track/file or
whole directories (REPEAT) ............... 18
Pausing playback (PAUSE) ................ 18
Setting the display .............................. 18
CD changer mode ..................... 19
Switching to CD changer mode .......... 19
Selecting a CD .................................. 19
Selecting tracks ................................. 19
Fast searching (audible) ..................... 19
Changing the display .......................... 20
Repeating individual tracks or
whole CDs (REPEAT) ........................ 20
Random play (MIX) ............................ 20
Scanning all tracks on all CDs
(SCAN) ............................................. 20
Pausing playback (PAUSE) ................ 20
CLOCK - Time ............................ 21
Briefly displaying the time ................... 21
Setting the time .................................. 21
Selecting 12/24-hour clock mode ....... 21
Displaying the time continuously when
the unit is off and the ignition is on ...... 21
Briefly displaying the time when the
unit is switched off ............................. 21
Tone and volume distribution
settings ...................................... 22
Adjusting the bass settings ................. 22
Adjusting the treble settings ................ 22
Setting the left/right volume
distribution (balance) .......................... 22
Setting the front/back volume
distribution (fader) .............................. 23
Selecting a preset sound effect
Equalizer (EQ) ................................... 23
X-BASS ...................................... 24
Setting the level display ............. 24
Adjusting the brightness ............ 25
Setting the colour of the
display illumination (Syracuse/
Monterrey MP35) ....................... 25
Setting the colour of the
display illumination
(Key West MP35) ....................... 26
Entering the power-on message .. 27
External audio sources .............. 27
Specifications ............................ 28
5
FRANÇAIS
6
6
6
6
ESPAÑOL
Road safety ........................................
Installation ..........................................
Accessories ........................................
International telephone information .......
PORTUGUÊS
Notes and accessories ................ 6
ENGLISH
CONTENTS
NOTES AND ACCESSORIES
Notes and accessories
Accessories
Thank you for deciding to purchase a
Blaupunkt product. We hope you enjoy
using this new piece of equipment.
Before using the device for the first time,
please read these instructions carefully. The Blaupunkt editors are constantly working on making the operating instructions clearer and easier to understand. However, if you still have any
questions on how to operate the unit
please contact your dealer or the telephone hotline for your country. You will
find the hotline telephone numbers printed at the back of this booklet.
Only use accessories approved by Blaupunkt.
Road safety
Amplifier / sub-out
(only Monterrey MP35)
The car radio provides connections for
connecting external amplifiers and a
subwoofer.
We recommend you use well-matched
products from the Blaupunkt or Velocity
product ranges.
Road safety has absolute priority. Only operate your car radio if the
road and traffic conditions allow you
to do so. Familiarise yourself with the
unit before setting off on your journey.
You should always be able to hear
police, fire and ambulance sirens in
good time from inside your vehicle.
For this reason, listen to your car
sound system at a moderate volume
level.
Installation
If you want to install your car radio yourself, please read the installation and
connection instructions that follow these
operating instructions.
6
Remote control
RC-12H is included. You can conveniently access the most important functions of your car radio from the steering
wheel via the optional RC08 or RC10.
You cannot switch the device on/off using the remote control.
Amplifier
All Blaupunkt and Velocity amplifiers can
be used.
CD changer
You can connect the following Blaupunkt
CD changers: CDC A 08, IDC A 09 and
CDC A03.
International telephone
information
If you have any questions regarding the
operation of your car radio or if you require further information, please do not
hesitate to call us!
The information hotline numbers are
printed on the last page of these instructions.
As a way of protecting your equipment
against theft, the unit is equipped with
a detachable control panel (release panel). Without this control panel, the car
radio is worthless to a thief.
Protect your equipment against theft by
taking the control panel with you every
time you leave your vehicle. Do not
leave the control panel in your vehicle not even in a hidden place.
The control panel has been designed
to be easily use.
Note:
● Never drop the control panel.
● Never expose the control panel to
direct sunlight or other heat sources.
● Avoid making direct skin contact
with the control panel’s contacts. If
necessary, clean the contacts with
a lint-free cloth and some alcohol.
●
●
Attaching the control panel
There are various ways of attaching the
control panel but the following method
is recommended:
➮ Hold the control panel at approximately right angles to the device.
➮ Slide the control panel into the
unit’s guides, located at the lower
left and right sides, until it clicks
into place.
➮ Push the control panel gently in upward direction until it clicks into its
place.
Detaching the control panel
➮ Press the
button 2.
The control panel locking mechanism
opens.
➮ Pull the control panel straight off
the unit, by holding the right hand
side of the control panel.
Notes:
2
1
Note:
● When attaching the control panel,
make sure you do not press on the
display.
If the unit was still switched on when
you removed the control panel, the unit
will automatically switch back on with
the last settings activated i.e. radio, CD
(MP3), CD changer or AUX when the
panel is reinserted.
7
FRANÇAIS
Theft protection
The unit may only switch off after a
few seconds, depending upon the
“OFF TIMER” setting in the MENU
as described later.
All current settings of the radio are
saved.
CD already inserted in the unit remains there.
ESPAÑOL
●
PORTUGUÊS
Detachable control panel
ENGLISH
DETACHABLE CONTROL PANEL
DETACHABLE CONTROL PANEL
SWITCHING ON/OFF
Off timer
Switching on/off
After opening the control panel, the unit
will switch off after a pre-adjusted time
between 0 to 30 seconds.
➮ Press the MENU button 7.
➮ Press the or button 6 repeatedly until “OFF TIMER” appears in
the display.
➮ Set the time using the or
buttons 6.
When you have finished making your
changes,
➮ press the MENU button 7 twice.
There are various ways of switching the
unit on/off:
Note:
● If the OFF TIMER is set to 0 second, the unit switches off immediately after opening the control panel.
Switching on/off using the vehicle
ignition
If the unit is correctly connected to the
vehicle’s ignition and it was not switched
off using ON/OFF button 1, it will
switch on/off simultaneously with the
ignition.
Switching on/off using the
detachable control panel
➮ Remove the control panel.
The unit switches off. A delay in switching off is expected if the “OFF TIMER”
setting is not “0”.
➮ Attach the control panel again.
The unit switches on. The last settings
(radio, CD (MP3), CD changer or AUX)
will be reactivated.
Switching on/off using button 1
➮ To switch the unit on, press button
1.
➮ To switch the unit off, press button
1 for longer than two seconds.
The unit switches off.
Note:
If you switch on the unit when the
ignition is off, the unit will switch off
automatically after one hour to prevent draining of the vehicle battery.
●
8
Switching on by inserting a CD
If the unit is switched off and there is no
CD inserted in the drive,
button 2.
➮ press the
The release panel opens.
➮ Gently insert the CD with the printed side uppermost into the drive
until you feel some resistance.
The CD will be drawn automatically into
the drive.
You must not hinder or assist the drive
as it draws in the CD.
➮ Gently close the control panel
whilst exerting a little pressure until
you feel it clicks into place.
The unit switches on. CD playback begins.
Adjusting the volume
Note:
● The unit will remain off if the ignition is off. To turn it on, press button 1 once.
The volume can be adjusted in steps
from 0 (mute) to 66 (maximum).
➮ To increase the volume, turn the
volume control 3 to the right.
➮ To decrease the volume, turn the
volume control 3 to the left.
ENGLISH
ADJUSTING THE VOLUME
FRANÇAIS
SWITCHING ON/OFF
Note:
● To protect your hearing, the maximum switch-on volume under the
“LAST VOL” setting is “38”. If the
volume was higher before the unit
was switched off and “LAST VOL”
has been selected, the volume will
be set at “38” the next time the radio is switched on.
When you have finished making your
changes,
➮ press the MENU button 7 twice.
9
PORTUGUÊS
You can set the unit’s default power-on
volume.
➮ Press the MENU button 7.
➮ Press the or button 6 repeatedly until “ON VOLUME” appears
in the display.
➮ Set the power-on volume using the
or buttons 6.
To help you adjusting the volume more
easily, the audible volume level will increase or decrease accordingly as you
make your changes.
If you select “LAST VOL”, the volume
played before the unit was last switched
off will be reactivated.
ESPAÑOL
Setting the power-on volume
ADJUSTING THE VOLUME
Instantaneous volume reduction
(mute)
This feature allows you to instantaneously reduce (mute) the volume to a level preset by you.
➮ Briefly press button 1.
“MUTE” appears in the display.
To restore the volume,
➮ press button 1 again.
Setting the mute level
You can set the unit’s mute volume level.
➮ Press the MENU button 7.
➮ Press the or button 6 repeatedly until “MUTE LVL” appears in
the display.
➮ Set the mute level using the and
buttons 6.
When you have finished making your
changes,
➮ press the MENU button 7 twice.
Telephone audio
If your car sound system is connected
to a mobile telephone, the sound system’s volume will be muted as soon as
you “pick up” the telephone. The telephone call is then heard over the car
sound system’s loudspeakers. This requires that the mobile telephone be connected to the car sound system as described in the installation instructions.
You will need a cable for this with the
following Blaupunkt number: 7 607 001
503.
You can set the volume at which you
want telephone calls to be initially heard.
➮ Press the MENU button 7.
10
or button 6 repeatedly until “TEL VOL” appears in the
display.
➮ Set your preferred volume level using the or button 6.
When you have finished making your
changes,
➮ press the MENU button 7 twice.
➮ Press the
Note:
● You can use the volume control 3
to adjust the volume of a telephone
call whilst the call is being heard.
● You can adjust the tone and volume distribution settings for telephone calls. For further details,
please read the chapter entitled
“Tone and volume distribution settings”. The settings can only be adjusted during a telephone call and
are stored for future telephone calls.
Confirmation beep
For some functions you will hear a confirmation beep if you keep a button
pressed for longer than two seconds.
For instance, after storing a radio station to a station button you will hear a
confirmation beep. The beep can be
switched on/off.
➮ Press the MENU button 7.
➮ Press the or button 6 repeatedly until “BEEP” appears in the
display.
➮ Use the or button 6 to switch
between the options.
“OFF” means beep off, “ON” means the
beep is switched on.
➮ Press the MENU button 7.
Setting the tuner
In order to guarantee the perfect functioning of the radio element, the unit
must be set for the region in which you
are located. You can choose between
Europe (EUROPE), America (USA),
Thailand (THAI) and South America
(S-AMERICA). The tuner comes from
the factory set for the region in which
the unit was sold. Should you encounter problems with radio reception,
please check this setting.
This set of instructions refers to the
“USA” setting.
➮ Switch off the device by pressing
button 1.
➮ Press and hold down the 1 and 5
buttons 9 at the same time and
switch on the device again with
button 1.
“TUNER” is displayed.
➮ Press the or buttons 6 within
the next 8 seconds and select your
tuner region.
Selecting the frequency range/
memory
This unit can receive programmes
broadcast over the FM and AM frequency ranges. There are three memory
banks for the FM range and one for the
AM range. Six stations can be stored in
each memory bank.
Selecting the FM memory bank or
the AM frequency range
respectively
➮ Press the BND•TS button 4 to
switch between the FM memory
banks (FM1, FM2 and FMT) and
the AM frequency range respectively.
Tuning into a station
There are various ways of tuning into a
station.
Automatic seek tuning
➮ Press the or button 6.
The unit tunes into the next receivable
station.
Setting the sensitivity for station
seek tuning
You can configure the radio to only tune
into stations with a strong reception or
to also tune into those with a weak reception.
11
FRANÇAIS
If you are listening to CD/MP3, CD
changer or AUX mode,
➮ press the BND•TS 4 button
or
➮ press the SRC button ; repeatedly until “FM” or “AM” (“MW”) appears in the display.
ESPAÑOL
Switching to radio mode
To save the setting,
➮ switch the device off and on again
or wait approx. 8 seconds. The radio starts with the last setting activated (radio, CD (MP3), CD changer or AUX).
PORTUGUÊS
Radio mode
ENGLISH
RADIO MODE
RADIO MODE
➮ Press the MENU button 7.
➮ Press the or button 6 repeatedly until “SENS HI” or “SENS LO”
appears in the display.
“SENS HI” means that the tuner is highly
sensitive. “SENS LO” means it is set to
the lower sensitivity setting.
➮ Set the required sensitivity using
the or button 6.
When you have finished making your
changes,
➮ press the MENU button 7.
Note:
● Different seek tuning sensitivities
can be set separately for FM and
AM respectively. To do so, activate
the relevant waveband.
Tuning into stations manually
You can also tune into stations manually.
➮ Press the or button 6.
Storing stations
Storing stations manually
➮ Select the required memory bank
(FM1, FM2 or FMT) or the AM frequency range.
➮ Tune into the station.
➮ Press one of the station buttons
1 - 6 9 for longer than 2 seconds
to store the station to that button.
12
Storing stations automatically
(Travelstore)
You can automatically store six stations
with the strongest reception in the region. The stations are stored in the FMT
or AM memory depending on the selected frequency range.
Note:
● Stations that were previously
stored in this memory are deleted
in the process.
➮ Press and hold the BND•TS button
4 until the seek tuning starts.
The station storing procedure begins.
“FM TSTORE” or “AM TSTORE” appears in the display. After the process
is completed, the station that is stored
in location 1 of the respective memory
bank will be played.
Listening to preset stations
➮ Select the memory bank in which
the station was stored.
➮ Press the preset station button
1 - 6 9 of the station you want to
listen to.
Scanning receivable stations
(SCAN)
You can briefly play all the receivable
stations by activating the scan function.
You can set the scanning time to between 5 and 30 seconds in the menu.
Setting the scantime
➮ Press the MENU button 7.
➮ Press the or button 6 repeatedly until “SCAN TIME” appears in
the display.
➮ Set the required scantime using
the or buttons 6.
When you have finished making your
changes,
➮ press the MENU button 7 twice.
Note:
● The set scantime also applies to
scanning in CD/MP3 and CD
changer mode.
Setting the display
You can choose to continuous display
one of the followings:
● Band and Time
● Band and Frequency
➮ Keep the DIS button : pressed
until the required display appears.
To ensure the system functions properly, only use CDs labelled with the compact disc logo. Problems might be experienced when trying to play copy-protected CDs. Blaupunkt cannot guarantee the proper functioning of copy-protected CDs!
Risk of damage to the CD
drive! Contoured CDs (shape CDs)
are not suitable for playback in this
unit.
We accept no liability for any damage to the CD drive or CD that may
occur as a result of the use of unsuitable CDs.
Switching to CD mode
If there is no CD inserted in the drive
and the unit is playing Radio, CD
Changer or AUX mode,
button 2.
➮ press the
The release panel opens.
➮ Gently insert CD with the printed
side uppermost into the drive until
you feel some resistance.
The CD is drawn into the drive automatically.
13
ENGLISH
You can use this unit to play standard
CDs, CD-Rs and CD-RWs with a diameter of either 5 or 3 inches.
Beside playing CDs containing audio
data, CDs containing MP3 files can also
be played on this device.
Descriptions of the “MP3 mode” can be
found after this chapter.
FRANÇAIS
Stopping SCAN and continuing
listening to a station
➮ Press the MENU button 7.
Scanning is stopped and the station that
was tuned into last will remain active.
CD mode
ESPAÑOL
Starting SCAN
➮ Keep the MENU button 7 pressed
until the scan process starts.
“SCAN” appears briefly in the display
followed by the current frequency (which
flashes).
CD MODE
PORTUGUÊS
RADIO MODE
CD MODE
You must not hinder or assist the drive
as it draws in the CD.
➮ Gently close the control panel
whilst exerting a little pressure until
you feel it clicks into place.
CD playback begins.
Note:
● The unit will remain off if the ignition is off. To turn it on and play the
inserted CD, press button 1 once.
If a CD is already inserted in the drive
and the unit is playing Radio, CD
Changer or AUX mode.
➮ Press the SRC button ; repeatedly until “CD” appears in the display.
Playback begins from the point at which
it was last interrupted.
Selecting tracks
Stopping MIX
➮ Press button 5 MIX 9 again.
“MIX OFF” appears briefly in the display and the MIX symbol disappears.
Scanning tracks (SCAN)
You can briefly play all the tracks on a
CD.
➮ Press the MENU button 7 for
longer than two seconds.
The next track will then be played for
scantime as set in the “Setting the scantime”.
Note:
● You can set the scantime. For further details, please read the section entitled “Setting the scantime”
in the “Radio mode” chapter.
Stopping SCAN and continuing
playback
➮ Press one of the arrow buttons 6
to select the next or previous track.
If you press the or button 6 once,
the current track will be played again
from the beginning.
➮ To stop scanning, press the MENU
button 7.
The current track will then continue to
be played.
Fast searching (audible)
Repeating tracks (REPEAT)
To fast search backwards or forwards,
buttons 6
➮ keep one of the
pressed until fast reversing / fast
forwarding begins.
➮ If you want to repeat a track, press
button 4 RPT 9.
“RPT TRCK” appears briefly in the display and the RPT symbol lights up. The
track is repeated until you deactivate
RPT.
Random play (MIX)
➮ Press button 5 MIX 9.
“MIX CD” appears briefly in the display
and the MIX symbol lights up. The next
randomly selected track will then be
played.
14
Cancelling repeat
➮ If you want to stop the repeat function, press button 4 RPT 9 again.
Cancelling pause
➮ Press button 3 9 while in
pause mode.
Playback is continued.
Changing the display
Two options are available:
● Track number and clock.
● Track number and playing time.
➮ Press the DIS button : for
longer than two seconds until the
required display appears.
Displaying CD text
Some CDs feature so-called CD text.
The CD text may include the name of
the performer, the album and the track
name.
You can have the CD text displayed as
running text at every change of track.
After the CD text has been displayed
once, the standard display (as described in the “Changing the display”
section) will be shown.
Ejecting a CD
➮ Press the
button 2.
The flip-release panel opens.
➮ Press the button < located beside the CD insertion slot.
➮ Remove the CD and close the control panel.
Notes:
An ejected CD will be reloaded into
the unit if not removed within 10
seconds to protect it from accidental damage.
● You may also eject a CD when the
unit is off, or when CD is not playing.
●
Switching CD text on/off
➮ Press the MENU button 7.
➮ Press the or button 6 repeatedly until “CD TEXT” appears on
the display.
15
FRANÇAIS
➮ Press button 3 9.
“PAUSE” appears in the display.
ESPAÑOL
Pausing playback (PAUSE)
➮ Switch on (“TEXT ON”) or off
(“TEXT OFF”) the CD text function
by pressing the or button 6.
When you have finished making your
changes,
➮ press the MENU button 7 twice.
PORTUGUÊS
“RPT OFF” appears briefly in the display and the RPT symbol disappears.
Normal playback is then continued.
ENGLISH
CD MODE
MP3 MODE
MP3 mode
You can also use this car radio for playing CD-Rs and CD-RWs containing
MP3 music files.
Preparing the MP3-CD
The various combinations of CD burners, CD burning software and CD blanks
may lead to problems arising with the
ability to play certain CDs. If problems
occur with your own burned CDs, you
should try another brand of CD blank or
choose another blank colour.
The format of the CD must be ISO 9660
Level 1 / Level 2 or Joliet. Other formats
cannot be played reliably.
You can create a maximum of 252 directories on a CD. Each of these directories can be accessed using this device.
Regardless of the number of directories
on a CD, a total of 999 files can be supported, with up to 255 files in one single
directory.
D01
Directories
D02
D03
T001
T002
T003
T004
T005
T001
T002
T003
T004
T005
T006
16
D04
T001
T002
T003
T004
T005
T006
T007
T008
T009
T010
T011
Tracks/files
Each directory can be named using a
PC. The directory name can be displayed in the device’s display. Name the
directories and files using your CD burner software. The software’s operating
instructions will provide details on how
to do this.
Note:
● When naming directories and files
you should avoid using special
characters.
If you like your files to be in the correct
order, you should use burner software
that places files in alphanumerical order. If your software does not provide
this feature, you can also sort the files
manually. To do so, you should place a
number (e.g. “001”, “002”, etc.) in front
of each file name - the leading zeros
must also be included.
MP3 tracks can contain addition information such as the artist, song and album names (ID3 tags). This device can
display ID3 tags if they are version 1.
When creating (encoding) MP3 files
from audio files, you should use bit rates
up to a maximum of 256 kbit/sec.
Only MP3 files with the “.MP3” file extension can be played on this device.
Note:
To ensure uninterrupted playback,
● Do not attempt to change the file
extension to “.MP3” of any files other than MP3 files and then attempt
to play them! These invalid MP3
files will not be selected during
MP3 playback.
Switching to MP3 mode
MP3 mode is activated in the same way
as normal CD mode. For further details,
please read the “Switching to CD mode”
section in the “CD mode” chapter.
Selecting a directory
To move up or down to another directory,
➮ press the or button 6 once
or several times.
Selecting tracks/files
To move up or down to another track/
file in the current directory,
➮ press the or button 6 once or
several times.
If you press the button 6 once, the
current track/file will be played again
from the beginning.
Fast searching
To fast search backwards or forwards,
➮ keep one of the or button 6
pressed until fast searching backwards/forwards begins.
To play the tracks/files in the current directory in random order,
➮ briefly press button 5 MIX 9.
“MIX DIR” appears in the display and
the MIX symbol lights up.
To play all the tracks/files on the inserted MP3-CD in random order,
➮ press button 5 MIX 9 longer than
2 seconds.
“MIX CD” appears in the display and the
MIX symbol lights up.
Cancelling MIX
To cancel MIX,
➮ briefly press button 5 MIX 9.
“MIX OFF” appears in the display and
the MIX symbol disappears.
Scanning tracks/files (SCAN)
You can briefly play all the tracks/files
on the CD.
➮ Press the MENU button 7 for
longer than 2 seconds.
“SCAN” appears alongside the blinking
track/file numbers during the scanning
process.
Note:
● You can set the scanning time
(scantime). For further details on
setting the scantime, please read
the “Setting the scantime” section
in the “Radio mode” chapter.
17
FRANÇAIS
Random track/file play (MIX)
ESPAÑOL
●
Do not use “mixed” CDs containing
both non-MP3 data and MP3 files.
The unit will only select MP3 files
during playback.
Do not use mix-mode CDs containing both audio tracks and MP3
files. While attempting to playback
such CDs, only audio tracks will be
selected.
PORTUGUÊS
●
ENGLISH
MP3 MODE
MP3 MODE
Stopping SCAN and continuing
playback
➮ Briefly press the MENU button 7.
The currently scanned track/file will then
continue to be played normally.
Repeating individual track/file or
whole directories (REPEAT)
To play the current track/file repeatedly,
➮ briefly press button 4 RPT 9.
“RPT TRCK” appears briefly in the display and RPT lights up.
To repeat the whole directory,
➮ press button 4 RPT 9 longer than
2 seconds.
“RPT DIR” appears briefly in the display.
Cancelling REPEAT
To stop the current track or current directory from being repeated,
➮ briefly press button 4 RPT 9.
“RPT OFF” appears briefly in the display and the RPT symbol disappears.
Pausing playback (PAUSE)
➮ Press button 3 9.
“PAUSE” appears in the display.
Cancelling pause
➮ Press button 3 9 while in
pause mode.
Playback is resumed.
18
Setting the display
Setting the standard display mode
While playing MP3 tracks/files, you can
choose to display one of the following
standard display modes:
● Track/file number and playing time
● Track/file number and clock time
● Directory number and track/file
number
● Directory number and clock time
● Directory number and playing time
The chosen display will be shown after
scrolling the MP3 texts at every change
of track/file.
To set the displays,
➮ press and hold down the DIS
button : for longer than two seconds to change the display mode.
Repeat this step until the desired
mode is shown.
Setting the MP3 scrolling texts
You can configure the display to scroll
one of the following options at every
change of MP3 track/file. After the scrolling texts have been displayed once, the
standard display (as described earlier)
will be shown. The available options are:
● Directory name (DIR NAME)
● File name (FILE NAME)
● Artist name (ARTIST)
● Song name (SONG NAME)
● Album name (ALBM NAME)
ENGLISH
Note:
● Information on handling CDs, inserting CDs and operating the CD
changer can be found in the operating instructions supplied with
your CD changer.
FRANÇAIS
CD changer mode
Switching to CD changer mode
➮ Press the SRC button ; repeatedly until “CHANGER” appears in
the display.
The CD Changer will resume playback
from where it was last played previously.
Selecting a CD
➮ To move up/ down from one CD to
another, press the or button
6 once or several times.
➮ An empty CD magazine slot will be
skipped in the CD selection process.
Selecting tracks
➮ To move up/ down from one track
to another on the current CD, press
the or button 6 once or several times.
Fast searching (audible)
To fast search backwards or forwards,
➮ keep one of the
buttons 6
pressed until fast reversing/fast forwarding begins.
19
ESPAÑOL
Note:
● Artist, song and album names are
part of the ID3 tag version 1 and
will not be shown if they are not
available on the MP3 files.
To configure the MP3 scrolling texts,
➮ Press the MENU button 7.
➮ Press or button 6 repeatedly
until “MP3 DISP” appears on the
display.
➮ Select the preferred option via the
or button 6.
➮ Press the MENU button 7 twice
to complete the setting.
CD CHANGER MODE
PORTUGUÊS
MP3 MODE
CD CHANGER MODE
Changing the display
5 options are available:
● Track number and play time
● Track number and clock
● CD number and track number
● CD number and clock
● CD number and play time
➮ Press the DIS button : once or
several times for longer than two
seconds until the required display
appears.
Repeating individual tracks or
whole CDs (REPEAT)
➮ If you wish to repeat the current track,
briefly press button 4 RPT 9.
“RPT TRCK” appears briefly and RPT
lights up in the display.
➮ If you wish to repeat the current
CD, press button 4 RPT 9 longer
than two seconds.
“RPT DISC” appears briefly and RPT
lights up in the display.
Cancelling repeat
➮ If you want to stop the repeat function for the current track or CD,
press button 4 RPT 9 briefly and
“RPT OFF” appears briefly in the
display and RPT disappears.
Random play (MIX)
➮ To play all the tracks on the current
CD in random order, briefly press
button 5 MIX 9.
“MIX CD” appears briefly and MIX lights
up in the display.
➮ To play the tracks on all the inserted CDs in random order, press but20
ton 5 MIX 9 longer than two seconds.
“MIX ALL” appears briefly and MIX lights
up in the display.
Stopping MIX
➮ Press button 5 MIX 9 briefly and
“MIX OFF” appears briefly in the
display and MIX disappears.
Scanning all tracks on all CDs
(SCAN)
➮ To briefly play all the tracks on all
inserted CDs in ascending order,
press the MENU button 7 for
longer than two seconds.
“TRK SCAN” appears briefly follows by
blinking the track number of the CD
track being scanned.
Stopping SCAN
➮ To stop scanning, briefly press the
MENU button 7.
The current track will then continue to
be played.
Note:
● You can set the scantime. For further details, please read the section entitled “Setting the scantime”
in the “Radio mode” chapter.
Pausing playback (PAUSE)
➮ Press button 3 9.
“PAUSE” appears in the display.
Cancelling pause
➮ Press button 3 9 while in
pause mode.
Playback is continued.
Setting the time
➮ To set the time, press the MENU
button 7.
➮ Press the or button 6 repeatedly until “CLOCK SET” appears in
the display.
➮ Press the button 6.
The time appears in the display. The
minutes flash on and off and can be
adjusted.
➮ Adjust the minutes using the or
button 6.
➮ Once you have set the minutes,
press the button 6. The hours
start flashing.
➮ Adjust the hours using the or
button 6.
When you have finished making your
changes,
➮ press the MENU button 7 twice.
Selecting 12/24-hour clock
mode
Displaying the time continuously
when the unit is off and the
ignition is on
“CLOCK ON” setting in the menu allows
you to display the time when the unit is
off and the vehicle ignition is on,
➮ press the MENU button 7.
➮ Press the or button 6 repeatedly until “CLOCK OFF” or
“CLOCK ON” appears in the display.
➮ Press the or button 6 to
switch between the ON/OFF settings.
When you have finished making your
changes,
➮ press the MENU button 7.
Briefly displaying the time when
the unit is switched off
To briefly display the time when the unit
is off,
➮ press the DIS button :.
The time is displayed for eight seconds.
➮ Press the MENU button 7.
➮ Press the or button 6 repeatedly until “12H MODE” or “24H
MODE” appears in the display.
➮ Press the or button 6 to
switch between the modes.
21
FRANÇAIS
➮ To display the time, briefly press
the DIS button :.
ESPAÑOL
Briefly displaying the time
When you have finished making your
changes,
➮ press the MENU button 7.
PORTUGUÊS
CLOCK - Time
ENGLISH
CLOCK - TIME
TONE AND VOLUME DISTRIBUTION SETTINGS
Tone and volume
distribution settings
You can adjust the tone settings (bass
and treble) separately for each source
(radio, CD (MP3), CD changer or AUX
and phone).
You can boost or cut the bass and treble in ± seven steps.
You can select one of four possible centre frequencies in order to further optimise the sound.
The change to the boost or cut of the
bass and treble relates to the particular
centre frequency that you selected.
The volume distribution settings (balance and fader) apply to all the audio
sources, though not to the telephone.
Adjusting the bass settings
Adjusting the bass boost/cut
➮ Press the AUDIO button 5.
“BASS” appears in the display.
➮ Press the or button 6 to adjust the bass.
Setting the bass centre frequency
You can choose between four centre
frequencies: 60 Hz, 80 Hz, 100 Hz and
120 Hz.
➮ Whilst the bass setting is being
displayed, press the or button
6 to choose between the four
possible centre frequencies.
When you have finished making your
changes,
➮ press the AUDIO button 5 twice.
22
Adjusting the treble settings
Adjusting the treble boost/cut
➮ Press the AUDIO button 5.
“BASS” appears in the display.
➮ Press the button 6 repeatedly
until “TREBLE” appears in the display.
➮ Press the or button 6 to adjust the treble.
Setting the treble centre frequency
You can choose between four centre
frequencies: 8 kHz, 10 kHz, 12 kHz and
15 kHz.
➮ Whilst the treble setting is being
displayed, press the or button
6 to choose between the four
possible centre frequencies.
When you have finished making your
changes,
➮ press the AUDIO button 5 twice.
Setting the left/right volume
distribution (balance)
➮ To set the left/right volume distribution (balance), press the AUDIO
button 5.
“BASS” appears in the display.
➮ Press the button 6 repeatedly
until “BAL” appears in the display.
➮ Press the or button 6 to
adjust the balance (right/left).
When you have finished making your
changes,
➮ press the AUDIO button 5.
FRANÇAIS
Note:
The selected preset sound effect is
applied to all audio sources.
●
ESPAÑOL
➮ To set the front/back volume distribution (fader), press the AUDIO
button 5.
“BASS” appears in the display.
➮ Press the button 6 repeatedly
until “FADER” appears in the display.
➮ Press the or button 6 to adjust the fader (front/back).
When you have finished making your
changes,
➮ press the AUDIO button 5.
If you want to deactivate the sound preset,
➮ choose “EQ OFF” from the available options.
➮ Press the AUDIO 5 button once
you have completed the setting.
PORTUGUÊS
Setting the front/back volume
distribution (fader)
ENGLISH
TONE AND VOLUME DISTRIBUTION SETTINGS
Selecting a preset sound effect
Equalizer (EQ)
You can select a preset sound effect for
the following styles of music:
● ROCK
● POP
● CLASSIC
The settings for these music styles have
already been programmed.
To select one of the sound presets,
➮ press the AUDIO 5 button.
“BASS” appears on the display.
➮ Press the button 6.
One of the sound effect options or “EQ
OFF” appears on the display.
➮ Press the or button 6 to
choose between the presets.
23
X-BASS
LEVEL DISPLAY
X-BASS
Setting the level display
X-Bass means increased bass at low
volumes.
You can set the X-Bass in steps ranging from OFF to three. Three means that
the X-Bass boost is set to maximum and
OFF means that X-Bass is switched off.
In addition, you can choose between a
centre frequency of 50 Hz or 100 Hz.
The level display briefly provides a symbolic display of the volume and the audio control settings whilst you are adjusting them.
When settings are not being made, the
level display indicates the music level
of the car radio.
You can switch the music level display
on/off in the menu.
➮ Press the MENU button 7.
“MENU” appears on the display.
➮ Press the or button 6 repeatedly until “PEAK LVL” appears on
the display.
➮ Press the or button 6 to
choose between “PEAK ON” and
“PEAK OFF”.
When you have finished making your
changes,
➮ press the MENU button 7 twice.
Note:
● The X-Bass setting applies to all
the sources (radio, CD (MP3), CD
changer/AUX and telephone).
➮ To set the X-BASS, press the
X-BASS button 8.
➮ Press the or button 6 to
choose between the possible settings.
Setting the X-BASS centre
frequency
You can choose between two centre frequencies of 50 Hz or 100 Hz.
➮ Press the X-BASS button 8.
➮ Press the or button 6.
➮ Press the or button 6 to
choose between the two possible
centre frequencies.
The X-Bass setting relates to the centre frequency that you selected.
➮ Press the X-BASS button 8 once
you have completed the setting.
24
Setting “DIM DAY” or “DIM NIGHT”
➮ Press the MENU button 7.
“MENU” appears in the display.
or button 6 repeatedly until “DIM DAY” or “DIM
NIGHT” appears in the display.
➮ Press the
or button 6 to
switch between the brightness levels.
When you have finished making your
changes,
➮ Press the
➮ press the MENU button 7 twice.
You can adjust the colour of the display
illumination to suit the illumination of
your vehicle cockpit. The primary colours red, green and blue (R-G-B) are
available for this.
Setting a colour for the display
illumination
➮ Press the MENU button 7.
➮ Press the or button 6 repeatedly until “DISP COL” appears in
the display.
➮ Press the
or
button 6.
The menu for setting the colours is displayed. “R”, “G” and “B” are displayed
with the current values (0 to 4). The “R”
setting flashes.
or button 6 repeatedly until the setting that you want
is displayed after “R”.
➮ Press the
or button 6 to
move the selection cursor to the
position after the other colours (“G”
or “B”).
➮ Press the
➮ Adjust the other colours to suit your
preferences.
When you have finished making your
changes,
➮ press the MENU button 7 twice.
The settings are saved.
25
ENGLISH
FRANÇAIS
The display brightness will change when
the headlights are turned on/off if your
car sound system is connected as described in the installation instructions
and your vehicle is equipped with the
appropriate connections. You can adjust the display brightness separately for
night and day in steps ranging from 1 9.
In addition, you can select the “AUTO
DIM” setting.
The “AUTO DIM” feature is used to adjust the car radio's illumination automatically to suit the set cockpit illumination.
Setting the colour of the
display illumination
(Syracuse/Monterrey MP35)
ESPAÑOL
Adjusting the brightness
(dimmer)
DISPLAY COLOUR
PORTUGUÊS
DISPLAY BRIGHTNESS
DISPLAY COLOUR
Selecting the colour of the
display illumination using the
colour scan (Syracuse /
Monterrey MP35)
You can select the colour of the display
illumination during the colour scan. The
display shows all the possible colour
variations that are available in the RGB
spectrum. The colour scan takes approx. 40 seconds.
➮ Press the MENU button 7.
➮ Press the or button 6
repeatedly until “COL SCAN”
appears in the display.
➮ Press the
or
button 6.
The colour scan starts. All the possible
colour variations that are available in the
RGB spectrum are shown in the display
one after another.
If you want to select the display illumination colour that is currently being
shown,
➮ press the MENU button 7.
The settings are saved.
If you want to cancel the colour scan
without setting a new colour,
➮ press the
or
button 6.
Note:
● If you do not press a button, the
colour scan will stop after cycling
through the colours once (approx.
40 seconds) and the previously
selected colour will be applied as
the setting again.
26
Setting the colour of the
display illumination
(Key West MP35)
You can adjust the colour of the display
illumination to suit the illumination of
your vehicle cockpit. The primary colours red and green (R-G) are available
for this.
Setting a colour for the display
illumination
➮ Press the MENU button 7.
➮ Press the or button 6 repeatedly until “DISP COL” appears in
the display.
➮ Press the
or
button 6.
The menu for mixing your own colour is
displayed. “R” and “G” are displayed
with the current values (0 to 4). The “R”
setting flashes.
or button 6 repeatedly until the setting that you want
is displayed after “R”.
➮ Press the
or button 6 to
move the selection cursor to the
position after the other colour (“G”).
➮ Press the
➮ Adjust the other colour to suit your
preferences.
When you have finished making your
changes,
➮ press the MENU button 7 twice.
The settings are saved.
➮ Press the MENU button 7.
➮ Press the or button 6 repeatedly until “ON MSG” appears in the
display.
➮ Press the
button 6.
The default text for the power-on message appears in the display. The input
marker flashes at the beginning of the
line.
Note:
● You can delete the entire line by
pressing and holding down the
or button 6 for longer than
two seconds.
To enter a different text,
➮ select a letter using the
or
but-
ton 6.
➮ Move the selection cursor using
the or button 6.
Once you have entered the message,
➮ press the MENU button 7 twice.
Instead of connecting a CD changer,
you can connect another audio source
equipped with a line output. The audio
source, for example, can be a portable
CD player, MiniDisc player or MP3 player.
The AUX input must be activated in the
menu.
If you want to connect an external audio source, you will need an adapter
cable. You can obtain this adapter cable (BP no.: 7 607 897 093) from your
authorised Blaupunkt dealer.
Switching the AUX input on/off
➮ Press the MENU button 7.
“MENU” appears in the display.
➮ Press the or button 6 repeatedly until “AUX OFF” or “AUX ON”
appears in the display.
➮ Press the or button 6 to
switch AUX on/off.
When you have finished making your
changes,
➮ press the MENU button 7.
Note:
● If the AUX input is switched on it
can be selected by pressing the
SRC button ; and it is shown as
“AUX INPUT” on the display.
The settings are saved.
27
ENGLISH
After you switch on your device, the
system displays a short message in the
display. The factory default setting is the
“BLAUPUNKT” text. Instead of this you
can enter your own text up to 9 characters long.
FRANÇAIS
External audio sources
ESPAÑOL
Entering the power-on
message
EXTERNAL AUDIO SOURCES
PORTUGUÊS
POWER-ON MESSAGE
SPECIFICATIONS
Specifications
Amplifier
Output power:
18W RMS x 4ch @ 14.4V @ 4ohm @ 1% THD
Tuner
Frequency ranges USA:
FM:
87.5 - 107.9 MHz (200 kHz step)
AM:
530 - 1710 kHz (10 kHz step)
Frequency ranges Europe:
FM:
87.5 - 108 MHz (100 kHz step auto/50 kHz manual)
AM:
531 - 1602 kHz (9 kHz step)
Frequency ranges Thailand:
FM:
87.5 - 108 MHz (50 kHz step auto/25 kHz step manual)
AM:
531 - 1602 kHz (9 kHz step)
Frequency ranges South America:
FM:
87.5 - 107.9 MHz (100 kHz step auto/50 kHz step manual)
AM:
530 - 1710 kHz (10 kHz step)
FM mono sensitivity:
17 dbf
FM frequency response:
35 - 16,000 Hz
CD
Frequency response:
20 - 20,000 Hz
Pre-amp out
4 channels:
2V
Input sensitivity
AUX input:
2 V / 6 kΩ
Subject to changes!
28
Service numbers / Numéros du service après-vente /
Números de servicio / Número de serviço
Country:
Phone:
Fax:
WWW:
http://www.blaupunkt.com
Germany
(D)
0180-5000225
05121-49 4002
Austria
Belgium
Denmark
Finland
France
Great Britain
Greece
Ireland
Italy
Luxembourg
Netherlands
Norway
Portugal
Spain
Sweden
Switzerland
(A)
(B)
(DK)
(FIN)
(F)
(GB)
(GR)
(IRL)
(I)
(L)
(NL)
(N)
(P)
(E)
(S)
(CH)
01-610 39 0
02-525 5444
44 898 360
09-435 991
01-4010 7007
01-89583 8880
210 94 27 337
01-4149400
02-369 62331
40 4078
023-565 6348
66-817 000
01-2185 00144
902 52 77 70
08-7501500
01-8471644
01-610 39 391
02-525 5263
44-898 644
09-435 99236
01-4010 7320
01-89583 8394
210 94 12 711
01-4598830
02-369 62464
40 2085
023-565 6331
66-817 157
01-2185 11111
902 52 77 70
08-7501810
01-8471650
Czech. Rep. (CZ)
Hungary
(H)
Poland
(PL)
02-6130 0441
01-333 9575
0800-118922
02-6130 0514
01-324 8756
022-8771260
Turkey
(TR)
0212-335 06 69
0212-346 00 40
USA
(USA) 800-2662528
708-6817188
Brasil
(Mercosur)
(BR)
+55-19 3745 2773
+55-19 3745 2769
Malaysia
(Asia Pacific) (MAL) +604-6382 474
+604-6413 640
Blaupunkt GmbH, Robert-Bosch-Straße 200, D-31139 Hildesheim
12/04 - CM/ASA