Download Miranda Imagestore 2 User manual

Transcript
Easysound Standalone
User Manual
02349-04
© Jun-2004
Software version 2.18
Miranda Technologies Ltd
Hithercroft Road
Wallingford
Oxfordshire, OX10 9DG,
UK
Tel:
+44 (0) 1491 820000
Fax:
+44 (0) 1491 820001
Email:
[email protected]
Web:
www.miranda.com
Preface
Easysound Stand-alone User Manual
Copyright © 1999 - 2004 Miranda Technologies Ltd. All rights are reserved
and, under the copyright laws, this manual may not be reproduced in any
form, in whole or in part, without the prior written consent of Miranda
Technologies Ltd.
Printed in the UK.
Miranda Technologies Ltd.
Hithercroft Rd.
Wallingford,
Oxfordshire. OX10 9DG.
Page 2
Miranda Technologies Ltd
Easysound Stand-alone User Manual
Preface
Preface
Warranty
Miranda Technologies Ltd offer a 24 months free parts and labour warranty
on Oxtel Series equipment from the date of the initial invoice, providing
there is no evidence of negligence, abuse or failure to reasonably follow
instructions given by the Company for its proper use.
During the warranty period, Miranda Technologies Ltd will replace or repair
at its cost, Oxtel Series equipment returned to the factory, carriage and duty
paid and insured by the sender.
Before returning any item for warranty repair, a valid returns authorisation
must be granted by Miranda Technologies Ltd.
All repaired goods will be delivered (as instructed) carriage and duty paid
and insured by the sender.
Any warranty, over and above that offered here, is the responsibility of the
local Miranda Sales Office or appointed Distributor.
Contact Information
For service, repair and warranty information and for returns authorisation
contact:
[email protected]
Miranda Technologies Ltd
Page 3
Preface
Easysound Stand-alone User Manual
Important Safety Notices
Injury Precautions
1. Use a proper power cable.
To avoid fire hazard, use only an appropriate power cable, which
complies with the following:
For mains connection use only a 10amp IEC inlet lead
meeting EN60320 or equivalent.
Connection to the mains supply should be via a circuit
breaker or by a mains plug which meets the relevant local standards in
the country of installation.
2. Avoid electrical overload.
To avoid electric shock or fire hazard, do not apply a voltage to a
terminal that is outside the range specified for that terminal.
3. Ground the product.
Easysound Standalone is grounded through the grounding conductor of
the power cable. To avoid electrical shock, the grounding conductor
must be connected to earth ground. Before making connections to the
input or output terminals of Easysound Standalone, ensure that the
product is properly grounded.
4. Do not operate without the covers.
To avoid electrical shock or fire hazard, do not operate Easysound
Standalone with its covers removed.
5. Use an appropriate fuse.
To avoid fire hazard, use only the fuse type and rating specified for
Easysound Standalone.
6. Do not operate in wet/damp conditions.
To avoid electrical shock, do not operate Easysound Standalone in wet
or damp conditions.
Page 4
Miranda Technologies Ltd
Easysound Stand-alone User Manual
Preface
7. Do not operate in an explosive atmosphere.
To avoid injury or fire hazard, do not operate Easysound Standalone in
an explosive atmosphere.
Product Damage Precautions
8. Provide proper ventilation.
To prevent Easysound Standalone overheating, provide proper
ventilation.
9. Do not operate with suspected failures.
If you suspect there is damage to Easysound Standalone, have it
inspected by qualified service personnel.
Certifications and Compliances
Easysound Standalone has CE approval and complies with the standards
detailed in EN50082-1:1992 and BS EN 60950:1992 Amd 3.
Easysound Standalone is fully Year 2000 millennium compliant.
Miranda Technologies Ltd
Page 5
Preface
Easysound Stand-alone User Manual
Scope of the Manual
The manual includes all the information required to install, configure and
operate Easysound Standalone unit using the front panel.
Associated Publications
Easysound User Manual
Imagestore User Manual
Oxtel Series Automation Protocol
Imagestore HDTV User Manual
Page 6
Part No. 01005
Part No. 02359
Part No. 01035
Part No. 02901
Miranda Technologies Ltd
Easysound Stand-alone User Manual
Preface
Symbols and Conventions
Front panel control of Easysound Standalone is achieved using four keys in
conjunction with prompts from the display.
Where reference is made to a key the legend of the key will be shown in
lowercase italics (escape or enter) or by the icons W and X.
The two-line display provides a range of prompts in response to key presses.
Where reference is made to an actual display prompt this will be shown
italicised, e.g. Audio.
Miranda Technologies Ltd
Page 7
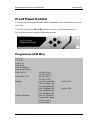
Preface
Easysound Stand-alone User Manual
International Addresses
Canada Headquarters
Miranda Technologies Inc.
3499 Douglas-B.-Floreani
Montréal. QC
Canada H4S 2C6
Tel:
+1 514 333 1772
Fax:
+1 514 333 9828
Email [email protected]
Web
www.miranda.com
UK Office
Miranda Technologies Ltd.
Hithercroft Road, Wallingford,
Oxfordshire, OX10 9DG
UK
Tel:
+44 (0) 1491 820000
Fax:
+44 (0) 1491 820001
Email [email protected]
Web
www.miranda.com
USA Office
Miranda MTI
35 Airport Road, Suite #250
Morristown.
NJ, USA 07960
Tel:
+1 973 683 0800
Fax:
+1 973 683 1157
Email [email protected]
Web
www.miranda.com
European Sales Centre
Miranda Europe
222-226 rue de Rosny
93100 Montreuil
France
Tel:
+33 (0) 1 55 86 87 88
Fax:
+33 (0) 1 55 86 00 29
Email [email protected]
Web
www.miranda.com
Asia Office
Miranda Asia KK
Mita Nexus Bldg. 2F
1-3-33 Mita, Minato-Ku
Tokyo, Japan 108-0073
Tel:
+81-3-5730-2988
Fax
+81-3-5730-2973
Support: +81-3-5730-2987
Email [email protected]
Web
www.miranda.com
Page 8
Miranda Technologies Ltd
Easysound Stand-alone User Manual
Table of Contents
Table of Contents
Preface
3
Warranty --------------------------------------------------------------------------- 3
Important Safety Notices -----------------------------------------------------Injury Precautions ------------------------------------------------------------Product Damage Precautions ---------------------------------------------Certifications and Compliances-------------------------------------------Scope of the Manual-----------------------------------------------------------Associated Publications ----------------------------------------------------Symbols and Conventions ----------------------------------------------------
4
4
5
5
6
6
7
International Addresses-------------------------------------------------------- 8
Table of Contents
Introduction
9
15
What is Easysound Standalone? -------------------------------------------15
Embedded and AES mixing--------------------------------------------------15
Extending an audio mixer ----------------------------------------------------15
Audio storage--------------------------------------------------------------------16
Easysound Standalone Inputs ----------------------------------------------16
Audio Mixer Matrix -----------------------------------------------------------16
Output Selection--------------------------------------------------------------17
Easyplay------------------------------------------------------------------------17
Audio playout------------------------------------------------------------------17
Audio Files ---------------------------------------------------------------------17
Getting Started
Miranda Technologies Ltd
19
Page 9
Table of Contents
Easysound Stand-alone User Manual
Applying Power ----------------------------------------------------------------- 19
Boot-Up Sequence------------------------------------------------------------- 19
Mechanical Bypass ------------------------------------------------------------ 19
Front Panel Display------------------------------------------------------------ 20
Front Panel Operations ------------------------------------------------------- 20
Controls ------------------------------------------------------------------------ 20
VFD Display ---------------------------------------------------------------- 20
Escape and Enter Keys-------------------------------------------------- 21
Left and Right Arrow Keys (W X) ------------------------------------- 21
Operating Modes------------------------------------------------------------- 21
Model mode configuration --------------------------------------------------- 22
Model mode
23
Set-up Audio commands ----------------------------------------------------- 24
Mode ---------------------------------------------------------------------------- 24
A Input/B Input (BGND Input) --------------------------------------------- 24
VO1 Input/VO2 Input -------------------------------------------------------- 26
VO1 Settings/VO2 Settings------------------------------------------------ 27
Embed OP Settings --------------------------------------------------------- 28
Effects Send------------------------------------------------------------------- 28
AB Mix mode --------------------------------------------------------------- 29
Signal path for AB Mix mode -------------------------------------- 29
Two Voice Overs mode-------------------------------------------------- 30
Signal path for Two Voice Overs mode ------------------------- 30
Data ----------------------------------------------------------------------------- 31
AB Mix mode --------------------------------------------------------------- 31
Two Voice Overs mode-------------------------------------------------- 31
Ignore PreSelect ------------------------------------------------------------- 32
Front Panel Control ------------------------------------------------------------ 33
Programme (A/B Mix) ------------------------------------------------------- 33
Front panel audio metering --------------------------------------------- 34
Preview (A/B Mix) Pair 1 /2 ------------------------------------------------ 34
Programme (Two Voice-Overs) ------------------------------------------ 35
Preview (Two Voice-Overs) Pair 1 /2 ----------------------------------- 35
Page 10
Miranda Technologies Ltd
Easysound Stand-alone User Manual
GPI File Mode
Table of Contents
37
General Purpose Interface ---------------------------------------------------37
Audio faders ---------------------------------------------------------------------38
AES 6 Channel Mode
39
Set-up Audio commands -----------------------------------------------------40
Mode ----------------------------------------------------------------------------40
AES O/P Settings ------------------------------------------------------------40
6 Channel VO Settings (VO mode only) --------------------------------41
Ignore PreSelect--------------------------------------------------------------42
Front Panel Controls-----------------------------------------------------------43
AES 6 Chan A/B Mix --------------------------------------------------------43
AES 6 Chan + VO------------------------------------------------------------43
Common Commands
45
Set inputs-------------------------------------------------------------------------45
Input A/B------------------------------------------------------------------------45
GPI inputs assign---------------------------------------------------------------45
AES Control port -------------------------------------------------------------45
Input to GPI --------------------------------------------------------------------46
Insert ----------------------------------------------------------------------------46
[AB Mixer] --------------------------------------------------------------46
[Audio] -------------------------------------------------------------------47
[Easyplay] --------------------------------------------------------------48
[Animation] -------------------------------------------------------------48
[General] ----------------------------------------------------------------49
[Fade rates] ------------------------------------------------------------51
Delete ---------------------------------------------------------------------------51
GPI Control of Audio Model Shuffle -------------------------------------51
Example:---------------------------------------------------------------------53
GPI Outputs Assign------------------------------------------------------------53
Insert ----------------------------------------------------------------------------54
Set-up Audio---------------------------------------------------------------------54
Miranda Technologies Ltd
Page 11
Table of Contents
Easysound Stand-alone User Manual
Faders Setup-------------------------------------------------------------------- 55
Audio A/B Mix ----------------------------------------------------------------- 56
Output Level------------------------------------------------------------------- 57
FTS Level ---------------------------------------------------------------------- 58
VO 1 Pair 1/2 Level---------------------------------------------------------- 58
VO 1 Pair 1/2 Pset ----------------------------------------------------------- 58
VO 1 Pair 1/2 Duck ---------------------------------------------------------- 58
VO 2 Pair 1/2 Level---------------------------------------------------------- 58
VO 2 Pair 1/2 Pset ----------------------------------------------------------- 58
VO 2 Pair 1/2 Duck ---------------------------------------------------------- 58
A/B Input Level --------------------------------------------------------------- 58
VO Input Level ---------------------------------------------------------------- 58
A/B Input Trim ---------------------------------------------------------------- 59
VO Input Trim ----------------------------------------------------------------- 59
File --------------------------------------------------------------------------------- 59
Configuration Save ---------------------------------------------------------- 59
Configuration Load ---------------------------------------------------------- 60
Diagnostics to FDD ---------------------------------------------------------- 60
Load System Codes--------------------------------------------------------- 60
Installing system codes -------------------------------------------------- 61
What are licence codes? ------------------------------------------------ 62
Example SYSCODES.TXT file ------------------------------------ 62
System Information ------------------------------------------------------------ 62
View Licence -------------------------------------------------------------------- 63
Set time-of-day ----------------------------------------------------------------- 63
System change No Yes ---------------------------------------------------- 64
625/525 Line ------------------------------------------------------------------ 64
Audio Control ----------------------------------------------------------------- 64
Select reference -------------------------------------------------------------- 64
Reference timing ------------------------------------------------------------- 65
Serial comms setup --------------------------------------------------------- 65
RCP Mirror--------------------------------------------------------------------- 65
Restart System --------------------------------------------------------------- 65
Clean Restart ----------------------------------------------------------------- 65
Configuration and Set Up
Page 12
67
Miranda Technologies Ltd
Easysound Stand-alone User Manual
Table of Contents
Ventilation ------------------------------------------------------------------------67
Power Requirements ----------------------------------------------------------67
Environment ---------------------------------------------------------------------67
Rear Panel Connections------------------------------------------------------67
Serial Remote Control-------------------------------------------------------69
Control Panel ---------------------------------------------------------------69
RS232 ------------------------------------------------------------------------70
RS422 ------------------------------------------------------------------------70
SDI Control Port --------------------------------------------------------------70
AES inputs ---------------------------------------------------------------------72
AES output---------------------------------------------------------------------73
AES GPI control --------------------------------------------------------------73
KBD and VGA Connections -----------------------------------------------75
Imagestore 2 / 3 connections----------------------------------------------75
Imagestore HDTV connections -------------------------------------------76
System Timing
77
Overview--------------------------------------------------------------------------77
Timing Adjustment -------------------------------------------------------------78
Measurement and Test Equipment ----------------------------------------78
SDI BGnd/A Reference -------------------------------------------------------78
Analogue Reference (Black and Burst) -----------------------------------79
Support
81
Product Support ----------------------------------------------------------------81
Warranty and Non-Warranty Repairs------------------------------------81
Obsolescence -----------------------------------------------------------------82
Upgrades -----------------------------------------------------------------------82
Service Visits ------------------------------------------------------------------82
Equipment Loans-------------------------------------------------------------82
Training -------------------------------------------------------------------------82
Web Page ----------------------------------------------------------------------83
Miranda Technologies Ltd
Page 13
Table of Contents
Easysound Stand-alone User Manual
Returns Procedure------------------------------------------------------------- 83
Transit Packaging------------------------------------------------------------ 83
Appendix 1
85
Product Specification---------------------------------------------------------- 85
SDI Inputs and Outputs----------------------------------------------------- 85
Analogue Reference Video Input ---------------------------------------- 85
Power Requirements-------------------------------------------------------- 85
Interfaces ---------------------------------------------------------------------- 86
Mechanical -------------------------------------------------------------------- 86
Page 14
Miranda Technologies Ltd
Easysound Stand-alone User Manual
Introduction
Introduction
What is Easysound Standalone?
Easysound Standalone adds a powerful digital audio mixing capability to
video mixing and channel branding equipment. It can also extend an existing
audio mixer to provide multi-group, multi-lingual mixing as well as
cinematic surround sound. It also provides:
♦
♦
♦
♦
♦
♦
full group A/B mixing plus full group voice-over
six AES/EBU stereo pair inputs and four AES/EBU stereo pair outputs
optional embedded audio mixing
automation control
optional audio storage and playout for up to 200 minutes of digital stereo
audio
front panel diagnostics
Embedded and AES mixing
Easysound Standalone can be integrated with video mixing and channel
branding equipment (including the entire Imagestore range) to provide full
group A/B mixing plus a full group voice-over or two stereo pair voice-overs.
The audio mixer is configured using the front panel display. From the front
panel you can change the group and adjust phase inversion, input level,
ducking and track shuffling.
Automation control is achieved, via the network (LAN), RS422 and RS232
interfaces as well as by programmable GPI’s and analogue faders.
Extending an audio mixer
Easysound Standalone adds audio support to Imagestore HDTV and can
extend the optional audio mixer integrated within Imagestore Solo,
Miranda Technologies Ltd
Page 15
Introduction
Easysound Stand-alone User Manual
Imagestore 2 and Imagestore 3, to handle multi-group, multi-lingual audio,
as well as cinematic multi-channel surround sound.
Audio storage
Up to 200 minutes of digital audio voice-overs can be stored and played out
with the Easyplay option for Easysound Standalone. The stored audio is
output as an AES/EBU stereo pair (as AES3), which can be mixed with any
of the other inputs to the mixer.
Easyplay provides 40 minutes of audio storage which can be increased to 200
minutes with the MEM-200A option. Audio files are loaded from a floppy
disk drive or over the Ethernet interface in 16-bit, 48KHz.WAV format using
Miranda’s Media Conversion Software.
Easysound Standalone Inputs
Easysound Standalone has six AES/EBU digital stereo audio inputs available
from a single rear-panel connector of the host unit.
The inputs are identified as AES IN 1 to AES IN 6. Pre-selection enables
you to choose the inputs where:
♦
♦
AES IN 1 and AES IN 2 may be replaced by embedded SDI digital audio
signals from the background or A input video stream
AES IN 5 and AES IN 6 may be replaced by embedded digital audio
signals from the embedded SDI digital audio signals from the B input
video stream.
Once you have chosen (pre-selected) the inputs, the six selected stereo pairs
(twelve discrete audio channels) are taken to an audio mixer.
Audio Mixer Matrix
Up to twelve (mono) or six (stereo) audio channels may be directed to the
audio mixer matrix. The audio mixer matrix is effectively a twelve-input,
eight-output, mixing matrix. A total of ninety-six fader controls are situated
with one at each matrix cross over point.
Page 16
Miranda Technologies Ltd
Easysound Stand-alone User Manual
Introduction
Output Selection
Easysound has four AES/EBU stereo output channels available from a single
rear-panel connector of the host unit. For further details see Rear panel
connections below.
The AES/EBU stereo outputs at AES OUT 3 and AES OUT 4 of the
AES/EBU will be re-embedded into the SDI Programme digital video output
stream.
Easyplay
Easyplay operates as a combined digital AES audio store and player (note
that the host unit must be fitted with an Easysound card and must be
connected via Ethernet to Miranda Technologies Ltd's Windows NT™ based
Media Distribution System). Audio files used with Easyplay must be 16-bit,
48kHz .WAV format or Miranda Technologies Ltd's own .OXW format.
The audio store can store up to 40 minutes (optionally 200 minutes) of digital
audio, which can be sub-divided into a number of audio files.
Audio playout
Easyplay has a single layer of audio insertion and the host unit's image keyer
triggers playout. The audio playout starts as soon as the audio file is brought
to air and makes a contribution to the programme output when voice over 1,
pair 1 is on. Audio playout continues until:
♦
♦
♦
the audio file ends
voice over 1 is faded down
the audio file is faded, cut or swapped from the programme output
Audio Files
Audio files used with Easyplay must be 16-bit, 48kHz .WAV format or
Miranda Technologies Ltd's own .OXW format. Miranda Technologies Ltd
Media Distribution System (MDS) software is able to create these .OXW files
from 16-bit, 48kHz stereo .WAV format files. The MDS can also edit these
files and create the necessary image to audio linking.
Miranda Technologies Ltd
Page 17
Introduction
Easysound Stand-alone User Manual
Easysound Strand-alone (Product code ESSA) is part of Miranda
Technologies Ltd's professional broadcast equipment range of products.
Page 18
Miranda Technologies Ltd
Easysound Stand-alone User Manual
Getting Started
Getting Started
Applying Power
Before applying power, ensure that the floppy disk drive does not contain a
disk.
Easysound Standalone does not have a power on/off switch and power is
applied immediately when the IEC plug is connected to mains power. The
product should be connected to the mains via an appropriate circuit breaker.
The 2RU version (ES2U-SA) has 2 IEC inlets as it has redundant power
supplies.
Boot-Up Sequence
Once power is applied Easysound-Standalone boots automatically and the
complete process takes about 50 seconds. The unit first checks to see if there
is a disk in the floppy drive and, if it finds one, it will attempt to boot from
that disk. Miranda Technologies Ltd issues specialised floppy disks for use as
part of the boot-up sequence when software upgrades are being implemented.
No other disk should ever be present in the floppy disk drive during the boot
sequence. The boot sequence is complete when the following top level "bootup" menu appears on the front panel VFD display.
Mechanical Bypass
In the event of power loss to the Easysound Standalone, or failure of an
internal power supply, the mechanical bypass option routes the serial digital
"background signal" directly to the programme output. This feature is an
emergency failsafe and is completely non-synchronous in operation. During
boot-up, the bypass is maintained until Easysound Standalone is fully
operational.
Miranda Technologies Ltd
Page 19
Getting Started
Easysound Stand-alone User Manual
Front Panel Display
Confirm that the front panel display is showing the boot menu (shown below)
and if not, press the escape key repeatedly until it is. Pressing the right arrow
key X will move the enclosing brackets from manual to set-up. With set-up
selected, press the enter key to display the Set-up menu.
Press the right arrow key Xuntil the words, system information appear on the
second line of the display. Repeatedly pressing the enter key will now cycle
the display through a list of the fitted options and a few system statistics.
When completed, press the escape key a few times until the boot-up menu
reappears.
Front Panel Operations
This section explains, the operation of the Easysound Standalone using the
front panel controls.
Controls
All of Easysound Standalone operational and configuration features can be
monitored and controlled from the front panel of the unit using the
pushbuttons and display. A simple menu-driven procedure provides access to
the operational, configuration and set-up options.
The front panel of Easysound Standalone contains a 3½ floppy disk drive,
four push-button control keys and a vacuum fluorescent display (VFD).
Local control of the unit is "menu driven" using a combination of the pushbutton keys together with options displayed on the VFD. The upper key of
the group is identified on the panel as the escape key and the bottom key is
identified as the enter key. Left and right keys W X are used to move a
cursor left and right accordingly to select menu options.
VFD Display
The alphanumeric VFD display is divided into two separate lines. The upper
row of characters indicating the function and the lower row indicating the
current selection and any optional configuration changes that are available.
Page 20
Miranda Technologies Ltd
Easysound Stand-alone User Manual
Getting Started
Where there are more options available than there is room for on the display,
the symbol < and the symbol > are used to indicate that other options exist to
the left and right respectively. Using the appropriate arrow key will reveal
those options.
Escape and Enter Keys
The enter key is used to proceed to a menu option closer to the boot-up
menu. Successive pressing of the key will bring the display to the start-up
menu. The escape key is used to accept the menu item currently shown as
selected by being enclosed in brackets.
Left and Right Arrow Keys (W X)
Left and right arrow keys W X may be used to cursor left and right
respectively along a displayed menu branch to select a function. When a
selection of parameters is offered, these keys may be used to select a
variable. Where a single value is displayed the left arrow key may be used to
reduce the displayed value and the right key may be used to increase it.
Operating Modes
The operation of Easysound Standalone is dependent on its operating mode
configuration. Features available in one mode may not be relevant in an
alternate mode. The modes are:
♦
♦
♦
Model mode
GPI File mode
AES 6 Channel mode
Miranda Technologies Ltd
Page 21
Getting Started
Easysound Stand-alone User Manual
Model mode configuration
To configure Easysound in model mode, from the front-panel select:
Set-up/System/Audio Control).
♦
♦
♦
highlight the mode using the left and right arrow keys W X
press enter
press escape
You are now ready to choose the available options in the selected mode.
Page 22
Miranda Technologies Ltd
Easysound Stand-alone User Manual
Model Mode
Model mode
The audio model provides the following two audio modes:
♦
♦
AB Mix mode
Two Voice Over mode
Note
that these two modes accommodate the majority of audio
configurations.
Miranda Technologies Ltd
Page 23
Model Mode
Easysound Stand-alone User Manual
In AB Mix mode, the A and B inputs are 4 channel groups (from 2 AES pairs
or 1 group embedded) and the VO input is 2 AES pairs.
In Two Voice Over mode, the BGND input and VO2 input are 4 channel
groups (from 2 AES pairs or 1 group embedded) and VO1 input is 2 AES
pairs.
Set-up Audio commands
To access the set up commands select Set-up/Set-up Audio.
Mode
Use this to switch between AB Mix and Two Voice Overs mode. To choose a
mode:
Select Set-up/Set-up Audio/Mode
♦
♦
♦
highlight the mode using the left and right arrow keys W X
press enter
press escape
You are now ready to choose the available options in the selected mode.
A Input/B Input (BGND Input)
Use the A Input and B Input menu to change the channel input parameters.
For example, you can adjust the channel levels, invert the phase and shuffle
the channels using the following options for the A Input and/or B Input (note
that BGND Input is used in Two Voice Over mode):
Page 24
Miranda Technologies Ltd
Easysound Stand-alone User Manual
Shuffle
Mute
Trim
Phase
Miranda Technologies Ltd
Model Mode
shuffle enables you to move mono channels
around within a group – and therefore perform
pair swaps
to choose the appropriate input channel (1, 2, 3 or
4) for the shuffle setting use < and >
The above display can be shown for each channel
(1 to 4) for each of the three group inputs.
mute enables you to mute pairs or groups
choose Pair 1 or Pair 2, press enter and then
choose Mute On or Mute Off
trim enables you to boost or attenuate individual
pairs in a range from –6dB to + 6dB (this is
particularly useful for quiet audio sources (note
that the adjustment of the input level occurs after
the trim))
choose Pair 1 or Pair 2, press enter and then
set/adjust the input trim using < and >
phase enables you to invert the phase of pairs or
groups
choose Pair 1 or Pair 2, press enter and then
choose normal or inverted
Page 25
Model Mode
Level
Input Source
Easysound Stand-alone User Manual
level enables you to adjust the input level for pairs
or groups in a range from –100dB to +28dB
choose Pair 1 or Pair 2, press enter and then
set/adjust the level using W and X keys
input source enables you to choose the incoming
audio from the AES streams or the audio
embedded with the video input (choose group 1, 2,
3 or 4 or AES)
VO1 Input/VO2 Input
Use the VO1 Input and VO2 Input menu to specify the following settings
(note that VO2 Input is not available in AB Mix):
Shuffle
Mute
Trim
Phase
Level
Input Source
Page 26
shuffle enables you to move mono channels
around within a group – and therefore perform
pair swaps
mute enables you to mute pairs or groups
choose Pair 1 or Pair 2, press enter and then
choose Mute On or Mute Off
trim enables you to boost or attenuate pairs in a
range from –6dB to +6dB
choose Pair 1 or Pair 2, press enter and then
set/adjust the input trim using W and X keys
phase enables you to invert the phase of pairs or
groups
choose Pair 1 or Pair 2, press enter and then
choose normal or inverted
level enables you to adjust the input levels for
pairs or groups in a range from –100dB to +28dB
choose Pair 1 or Pair 2, press enter and then
set/adjust the level using W and X keys
input source enables you to choose the incoming
audio from the AES streams or the audio
embedded with the video input (choose group 1, 2,
3 or 4 or AES) – note that the input source option
is only available for VO2 (VO1 can only be used
Miranda Technologies Ltd
Easysound Stand-alone User Manual
Model Mode
with AES and so the input source option is not
displayed)
VO1 Settings/VO2 Settings
Audio model mode enables you to insert voice-overs into your normal audio
programme. In A/B Mix mode you can insert two stereo pair voice-overs into
the mix. In Two Voice Over mode you can insert four stereo pair voice-overs
into the background or programme audio. Each voice-over has two
parameters which need to be set - duck level and VO level (these are
described below).
You use the following menu to specify the VO1 and VO2 settings (note that
VO2 Settings is not available in AB Mix mode):
Duck Preset
Voice Over Preset
Miranda Technologies Ltd
the duck preset enables you to adjust (dip) the
level of the background audio sound when the
voice over is on – the level is measured in dBs (for
example, when the voice over is on, the
background ducks by –12dB)
choose Pair 1 or Pair 2, press enter and then
set/adjust the duck preset using W and X keys
the voice over preset enables you to adjust the
level of the voice over audio when the voice over
is on (for example, when the voice over is on, the
voice over audio comes up to 0dB)
choose Pair 1 or Pair 2, press enter and then
set/adjust the VO preset using W and X keys
Page 27
Model Mode
Easysound Stand-alone User Manual
The above diagram shows the voice over parameters and how they affect the
actual audio levels.
Embed OP Settings
There are two outputs from the Easysound audio mixer:
♦
♦
programme (this is the main audio output)
preview (this enables you to monitor the various audio mixes and levels
before they go to air)
You use the Embed OP Settings menu to specify the following output settings
(note that this option requires the ESSD licence):
Output Level
Mute
Embed Settings
output level enables you to specify the output
levels for pairs or groups in a range from –100dB
to +28dB
choose Pair 1 or Pair 2, press enter and then
set/adjust the embed output gain using W and X
mute enables you to mute pairs or groups
choose Pair 1 or Pair, press enter then choose
Mute On or Mute Off
embed settings enables you to embed one of the
four audio groups in the output video (note that
the programme audio is always copied to AES
outputs 3 and 4)
choose the appropriate group (Group 1, Group 2,
Group 3 or Group 4) and press enter to embed the
settings for the chosen group
Effects Send
Effects Send allows you to select an audio path within Easysound Standalone
to route to an external special effects unit.
Use the Effects Send menu to select the following options:
Page 28
Miranda Technologies Ltd
Easysound Stand-alone User Manual
Model Mode
AB Mix mode
Fx Send Enable
Fx Send from
Fx Send Gain
Fx Return
Yes No. Enables the option
use the arrow keys W and X to selects the output
source i.e.
A Pair 1
A Pair 2
VO1 Pair 1
B Pair 1
B Pair 2
AB Mix Pair 1
AB Mix Pair 2
AB Pair 1 + VO1
AB Pair 2 + VO1
-100 < 0 > +28 Sets the gain of the output signal
Pair 1 Pair 2. Sets the return (input) path from
the external effects unit.
Signal path for AB Mix mode
Miranda Technologies Ltd
Page 29
Model Mode
Easysound Stand-alone User Manual
Two Voice Overs mode
Fx Send Enable
Fx Send from
Fx Send Gain
Fx Return
Yes No. Enables the option
use the arrow keys W and X to selects the output
source i.e.
BGND Pair 1
BGND Pair 2
VO1 Pair 1
VO2 Pair 1
VO2 Pair 2
BGND VO1 Pair 1
BGND VO2 Pair 1
BGND VO2 Pair 2
-100 < 0 > +28 Sets the gain of the output signal
Pair 1 Pair 2. Sets the return (input) path from
the external effects unit.
Signal path for Two Voice Overs mode
Page 30
Miranda Technologies Ltd
Easysound Stand-alone User Manual
Model Mode
Data
Selecting Data allows the Easysound to pass and cut a data stream (non audio
signal) carried in the AES path i.e. Dolby Digital® or Dolby E®. The signal
is passed through without applying any gain. When a video AB cut transition
is carried out the point at which the AES data is cut is dependant upon the
transition point.
Use the Data menu to select the following options:
AB Mix mode
Enable Data Path
Data Is Audio
Input Pair
Output Pair
Transition Point
Yes No. Enables the option
Yes No. Switches AUDIO_USE bit
use the arrow keys W and X to selects the input
pair source i.e.
A/B Pair 1
A/B Pair 2
VO1 Pair 1
VO1 Pair 2
Preview Pair 1
Preview Pair 2
Programme Pair 1
Programme Pair 2
0 < 50 > 100%. Sets the point at which the AES
data is cut relative the video AB cut
0 = start of transition
50 =mid transition (factory default)
100 = end of transition
Two Voice Overs mode
Enable Data Path
Data Is Audio
Input Pair
Miranda Technologies Ltd
Yes No. Enables the option
Yes No. Switches AUDIO_USE bit
use the arrow keys W and X to selects the input
pair source i.e.
BGND Pair 1
BGND Pair 2
VO1 Pair 1
Page 31
Model Mode
Output Pair
Transition Point
Easysound Stand-alone User Manual
VO1 Pair 2
VO2 Pair 1
VO2 Pair 2
Preview Pair 1
Preview Pair 2
Programme Pair 1
Programme Pair 2
0 < 50 > 100%. Sets the point at which the AES
data is cut relative the video AB cut
0 = start of transition
50 =mid transition (factory default)
100 = end of transition
Ignore PreSelect
PreSelect automation commands issued by Presmaster will affect both
Imagestore 2/3 and Easysound Standalone if connected to the same channel.
To allow independent control of the Imagestore for use with different audio
groups, select Ignore PreSelect from the ESSA front panel. This instructs the
ESSA to ignore PreSelect (SDI group/AES) and shuffle commands issued
from the controlling device i.e. Presmaster.
The settings are saved to the audio.cfg file.
Page 32
Miranda Technologies Ltd
Easysound Stand-alone User Manual
Model Mode
Front Panel Control
To access the front panel Model mode commands select Audio then press the
enter key.
Using the arrow keys W and X and the enter key select Programme or
Preview then select from the following options:
Programme (A/B Mix)
Cut to A
Cut to B
Fade to A
Fade to B
Fade to Silence
Fade from Silence
Fade Up VO
Fade Down VO
Easplay
Output Metering
Miranda Technologies Ltd
VO One Pair 1
VO One Pair 2
VO One Pair 1
VO One Pair 2
Load Foregnd Clip
Play Foregnd Clip
Stop Foregnd Clip
Load Midgnd Clip
Play Midgnd Clip
Stop Midgnd Clip
Preview (4 chans)
Program (4 chans)
Preview pair 1
Preview pair 2
(select file)
(select file)
Page 33
Model Mode
Set Rates
Easysound Stand-alone User Manual
Program pair 1
Program pair 2
Fade A/B
Fade to Silence
Voice Over
0 < 50 > 999 fields
0 < 50 > 999 fields
0 < 0 > 999 fields
Front panel audio metering
To display audio meters on the front panel select Output Metering then select
from the list the point use wish to meter. The output is un-calibrated and for
indication purposes only.
Preview (A/B Mix) Pair 1 /2
A Input
B Input
VO Input
A/B Mix
Preview Mix
Mix and VO
PGM Copy
Silence
Page 34
Miranda Technologies Ltd
Easysound Stand-alone User Manual
Model Mode
Programme (Two Voice-Overs)
Fade to Silence
Fade from Silence
Fade Up VO
Fade Down VO
Easplay
Set Rates
VO One Pair 1
VO One Pair 2
VO One Pair 1
VO One Pair 2
Load Foregnd Clip
Play Foregnd Clip
Stop Foregnd Clip
Load Midgnd Clip
Play Midgnd Clip
Stop Midgnd Clip
Fade A/B
Fade to Silence
Voice Over
(select file)
(select file)
0 < 50 > 999 fields
0 < 50 > 999 fields
0 < 0 > 999 fields
Preview (Two Voice-Overs) Pair 1 /2
BGND
Voice Over 1
Voice Over 2
BGND with VO’s
PGM Copy
Silence
Miranda Technologies Ltd
Page 35
Model Mode
Page 36
Easysound Stand-alone User Manual
Miranda Technologies Ltd
Easysound Stand-alone User Manual
GPI File Mode
GPI File Mode
To select GPI File mode go to Set-up/System/Audio Control then press the
enter key. Use the arrow keys W X to select GPI File mode then press enter.
Reboot the unit if instructed.
Note:
When in GPI File mode Easysound Standalone cannot be
controlled manually from the front panel.
General Purpose Interface
The nine GPI ports are identified as GPI 1 through GPI 9. The first seven
ports, GPI 1 through 7, may be configured as either input or output ports
whilst the remaining two, GPI 8 and GPI 9 may only be configured as inputs.
Any GPI, assigned to ‘input’, may have a macro associated with it that
contains up to 10 command lines. When triggered, the commands within the
macro execute sequentially. If the GPI is assigned as an ‘output’, it may only
have a single status associated with it.
To program the GPI’s refer to the Common Commands section of this
manual.
Miranda Technologies Ltd
Page 37
GPI File Mode
Easysound Stand-alone User Manual
Audio faders
Easysound Standalone includes 8 audio fader inputs on the AES Control Port
connector each of which you can adjust, invert or pickup independently. The
faders can be assigned to control specific functions from the Easysound .
A further 8 can be connected through the SDI Control port.
To program the Audio Faders refer to the Common Commands section of this
manual.
Page 38
Miranda Technologies Ltd
Easysound Stand-alone User Manual
AES 6 Channel Mode
AES 6 Channel Mode
To select AES 6 Channel mode go to Set-up/System/Audio Control then press
the enter key. Use the arrow keys W X to select AES 6 Channel then press
enter. Reboot the unit if instructed.
AES 6 Channel mode is intended for Presmaster and Imagestore installations
where full AB audio mixing of decoded base band 5:1programming is
required. The two base band 5:1 programmes (A and B) are connected to the
Easysound Standalone as AES inputs 1 through 3 (A) and AES inputs 4
through 6 (B). The mixed output is available on AES outputs 1 through 3.
AES output 4 is always silent. (For full connector details see the
Configuration and Set-up section of this manual.)
Connectivity between an Imagestore 2/3 and Easysound Standalone is via a
loop through RS422 lead (see illustration above). Simultaneous control of the
units is then achieved by Presmaster or Automation. For independent control
select Ignore Preselect from the front panel (see page 42).
Miranda Technologies Ltd
Page 39
AES 6 Channel Mode
Easysound Stand-alone User Manual
Set-up Audio commands
To access the set up commands select Set-up/Set-up Audio.
Mode
Use this to switch between AES 6 Chan AB Mix and AES 6 Chan + VO
mode. To choose a mode:
Select Set-up/Set-up Audio/Mode
♦
♦
♦
highlight the mode using the left and right arrow keys W X
press enter
press escape
You are now ready to choose the available options in the selected mode.
AES O/P Settings
You use the AES O/P Settings menu to specify the following output settings:
Output Gain
Mute
Page 40
output gain enables you to specify the output
levels for pairs or groups in a range from –100dB
to +28dB
mute enables you to mute the AES O/P,
press enter then choose Mute On or Mute Off
Miranda Technologies Ltd
Easysound Stand-alone User Manual
AES 6 Channel Mode
6 Channel VO Settings (VO mode only)
6 channel VO mode enables you to insert voice-overs into your normal audio
programme. In VO mode you can insert the three AES stereo pairs voiceovers into the background or programme audio.
Use the following menu to adjust the Duck level between –100 – 0dbs and
the Preset value to –100 - +28dbs.
Duck Preset
Voice Over Preset
the duck preset enables you to adjust (dip) the
level of the background audio sound when the
voice over is on – the level is measured in dBs (for
example, when the voice over is on, the
background ducks by –12dB)
choose 1&2 3&4 5&6, press enter and then
set/adjust the duck preset using W and X keys
the voice over preset enables you to adjust the
level of the voice over audio when the voice over
is on (for example, when the voice over is on, the
voice over audio comes up to 0dB)
press enter and then set/adjust the VO preset using
W and X keys
The above diagram shows the voice over parameters and how they affect the
actual audio levels.
Miranda Technologies Ltd
Page 41
AES 6 Channel Mode
Easysound Stand-alone User Manual
Ignore PreSelect
PreSelect automation commands issued by Presmaster will affect both
Imagestore 2/3 and Easysound Standalone if connected to the same channel.
To allow independent control of the Imagestore for use with different audio
groups, select Ignore PreSelect from the ESSA front panel. This instructs the
ESSA to ignore PreSelect (SDI group/AES) and shuffle commands issued
from the controlling device i.e. Presmaster.
The settings are saved to the audio.cfg file.
Page 42
Miranda Technologies Ltd
Easysound Stand-alone User Manual
AES 6 Channel Mode
Front Panel Controls
To access the front panel AES mode commands select Audio then press the
enter key.
Using the arrow keys W and X and the enter key index through the available
commands:
AES 6 Chan A/B Mix
Cut to A
Cut to B
Fade to A
Fade to B
Fade to Silence
Fade from Silence
Set Rates
Fade A/B
Fade to Silence
0 < 50 > 999 fields
0 < 50 > 999 fields
AES 6 Chan + VO
Fade to Silence
Fade from Silence
Fade up VO
Fade down VO
Set Rates
Miranda Technologies Ltd
Fade to Silence
Voice Over
0 < 50 > 999 fields
0 < 50 > 999 fields
Page 43
AES 6 Channel Mode
Page 44
Easysound Stand-alone User Manual
Miranda Technologies Ltd
Easysound Stand-alone User Manual
Common Commands
Common Commands
The following commands are common to all three modes and can be accessed
from the Set-up menu.
Set inputs
The Set inputs option allows you choose between Input A and Input B.
Input A/B
When the Input A or Input B option is displayed you can choose one of the
following:
♦
♦
SDI Video
Colour (Red 0-100%, Green 0-100% or Blue 0-100%)
GPI inputs assign
General Purpose Interface (GPI) ports may be used either to trigger the
execution of a series of Easysound Standalone internal pre-programmed
commands (input) or to monitor the status of the Easysound Standalone
(output).
AES Control port
The nine GPI ports are identified as GPI 1 through GPI 9. The first seven
ports, GPI 1 through 7, may be configured as either input or output ports
whilst the remaining two, GPI 8 and GPI 9 may only be configured as inputs.
Any GPI, assigned to ‘input’, may have a macro associated with it that
contains up to 10 command lines. When triggered, the commands within the
macro execute sequentially. If the GPI is assigned as an ‘output’, it may only
have a single status associated with it.
Miranda Technologies Ltd
Page 45
Common Commands
Easysound Stand-alone User Manual
Input to GPI
Where a GPI port is used as an input, the command macro is activated when
either, the connection is made (GPI X On) or switched off (GPI X Off)
relative to the GPI ground pin (pin 13) on the GPI 25way D type connector.
To start a macro associated with GPI 1 On, make connection between pins 25
(GPI0) and 13 (GPI GND)
To start a macro associated with GPI 1 Off, break connection between pins
25 (GPI0) and 13 (GPI GND)
For connector information refer to the diagram on page 65.
To assign GPIs you use the GPI Inputs Assign menu. Select one of the nine
GPI ports identified as GPI 1 to GPI 9 On or Off or one of the 9 audio GPI
ports identified as Audio GPI 1 to Audio GPI 9 On or Off.
All 9 GPI ports and all 9 audio GPI ports can be configured as input ports.
The menu then includes a sub list of GPI actions. Note that sub list entries are
enclosed in square brackets.
To display a sub list, press enter and then use the left and right arrow keys to
scroll through the list of entries. To select an entry, press enter. To go back to
the top-level list, press escape.
Insert
To insert a GPI input, choose GPI inputs assign/GPI x/Insert. To insert an
audio GPI input, choose GPI inputs assign/Audio GPI x/Insert. The following
options are available for both GPIs and Audio GPIs.
[AB Mixer]
cut A
cut B
toggle cut A/B
fade A
fade B
toggle fade A/B
set mix rate 0<->999
set mix type
Page 46
{X-fade/V-fade/Wipe L to R/Wipe R to L/Wipe T
to B/Wipe B to T}
Miranda Technologies Ltd
Easysound Stand-alone User Manual
Common Commands
[Audio]
Audio Fade to A
Audio Fade to B
Toggle AB Fade
Audio Cut to A
Audio Cut to B
Toggle AB Cut
Set AB A-F-V on
Set AB A-F-V off
Toggle AB A-F-V
Mute A On
Mute A Off
Mute VO On
Mute VO Off
Mute B On
Mute B Off
Output Fade Down
Output Fade Up
Toggle Output Fade
Output Cut Down
Output Cut Up
Toggle Output Cut
Set FTB A-F-V On
Set FTB A-F-V Off
Toggle FTB A-F-V
Fade VO 1 Pair 1 On
Fade VO 1 Pair 1 Off
Toggle Fade VO 1 PR1
Fade VO 1 Pair 2 On
Fade VO 1 Pair 2 Off
Toggle VO 1 PR2
Fade VO 2 Pair 1 On
Fade VO 2 Pair 1 Off
Toggle VO 2 PR1
Fade VO 2 Pair 2 On
Fade VO 2 Pair 2 Off
Toggle VO 2 PR2
Preview A Input
Miranda Technologies Ltd
Page 47
Common Commands
Preview B Input
Preview A/B Mix
Preview VO 1 Input
Preview VO Enabled
Preview Programme
Preview Silence
Preview Tone
Set FTS Rate n
Set VO 1 Rate n
Set VO 2 Rate n
A IP Shuf Chan 1
A IP Shuf Chan 2
A IP Shuf Chan 3
A IP Shuf Chan 4
VO IP Shuf Chan 1
VO IP Shuf Chan 2
VO IP Shuf Chan 3
VO IP Shuf Chan 4
B IP Shuf Chan 1
B IP Shuf Chan 2
B IP Shuf Chan 3
B IP Shuf Chan 4
A IP PR1 Source
A IP PR2 Source
B IP PR1 Source
B IP PR2 Source
Easysound Stand-alone User Manual
(where n = the fade rate of 0-999)
[Easyplay]
Load Clip Clip A n
Load Clip Clip B n
Play Clip A
Play Clip B
Stop Clip A
Stop Clip B
(where n = an audio clip from 0-4000)
[Animation]
run PVW anim
Page 48
Miranda Technologies Ltd
Easysound Stand-alone User Manual
Common Commands
[General]
BGND: SDI
BGND: colour
BGND: SDI/colour
enable fader 0
Audio A/B Mix: 0
Output Level: 1
FTS Level: 2
VO1 Pr l Level: 3
VO1 Pr 2 Level: 4
VO1 Pr 1 Pset: 5
VO1 Pr 2 Pset: 6
VO1 Pr 1 Duck: 7
VO1 Pr 2 Duck: 8
VO2 Pr 1 Level: 9
VO2 Pr 2 Level: 10
VO2 Pr 1 Pset: 11
VO2 Pr 2 Pset: 12
VO2 Pr 1 Duck: 13
VO2 Pr 2 Duck: 14
A Input Level: 15
B Input Level: 16
VO Input Level: 17
A Input Trim: 18
B Input Trim: 19
VO Input Trim: 20
disable fader
A/B Mixer: 0
Output Level: 1
FTS Level: 2
VO1 Pr l Level: 3
VO1 Pr 2 Level: 4
VO1 Pr 1 Pset: 5
VO1 Pr 2 Pset: 6
VO1 Pr 1 Duck: 7
VO1 Pr 2 Duck: 8
Miranda Technologies Ltd
set background input to SDI source
set background input to colour field generator
(colour according to configuration)
toggle background input between SDI source and
colour field generator
enable image fader
disable image fader
Page 49
Common Commands
Easysound Stand-alone User Manual
VO2 Pr 1 Level: 9
VO2 Pr 2 Level: 10
VO2 Pr 1 Pset: 11
VO2 Pr 2 Pset: 12
VO2 Pr 1 Duck: 13
VO2 Pr 2 Duck: 14
A Input Level: 15
B Input Level: 16
VO Input Level: 17
A Input Trim: 18
B Input Trim: 19
VO Input Trim: 20
en/dis fader
toggle condition of image fader
A/B Mixer: 0
Output Level: 1
FTS Level: 2
VO1 Pr l Level: 3
VO1 Pr 2 Level: 4
VO1 Pr 1 Pset: 5
VO1 Pr 2 Pset: 6
VO1 Pr 1 Duck: 7
VO1 Pr 2 Duck: 8
VO2 Pr 1 Level: 9
VO2 Pr 2 Level: 10
VO2 Pr 1 Pset: 11
VO2 Pr 2 Pset: 12
VO2 Pr 1 Duck: 13
VO2 Pr 2 Duck: 14
A Input Level: 15
B Input Level: 16
VO Input Level: 17
A Input Trim: 18
B Input Trim: 19
VO Input Trim: 20
delay n fields {0<->200} allows timing delays to be added in GPI macros
(note that when a delay is in progress, no other
GPI inputs will be serviced – you should therefore
take care when using delays and avoid long
delays)
Page 50
Miranda Technologies Ltd
Easysound Stand-alone User Manual
force bypass
remove bypass
Common Commands
bypasses the Easysound Standalone SDI video
processing using the mechanical bypass relay (if it
is fitted)
removes the bypass set using force bypass (see
above)
[Fade rates]
fade rate = n
FTB rate = n
set the FG keyer fade rate 0 -999 frames
set the FG keyer fade to black rate 0 -999 frames
Delete
To delete a GPI/Audio GPI input, choose Delete from the GPI Inputs Assign
menu. You can then choose to delete any of the options described above (AB
Mixer, Audio, Easyplay, Animation, General, Fade rates).
GPI Control of Audio Model Shuffle
Shuffle values allow mono input channels to be moved around within an
output group. In this way pair swaps, mono to stereo copies, and other audio
manipulations can be achieved.
Each output channel can take its input from one or many of the input
channels and each input can be copied to multiple output channels.
A familiar set-up is such:
Miranda Technologies Ltd
Page 51
Common Commands
Easysound Stand-alone User Manual
Audio shuffle parameters can now be changed by way of a GPI contact
closure.
Due to the number of permutations of this mechanism (≈64K), GPI’s macros
have been enabled to contain lists of single channel shuffle operations. This
can be achieved in the usual ‘GPI input assign’ method using the following
sub menus:
A
A
A
A
IP Shuf Chan 1
IP Shuf Chan 2
IP Shuf Chan 3
IP Shuf Chan 4
VO IP Shuf Chan 1
VO IP Shuf Chan 2
VO IP Shuf Chan 3
VO IP Shuf Chan 4
B
B
B
B
IP Shuf Chan 1
IP Shuf Chan 2
IP Shuf Chan 3
IP Shuf Chan 4
If entered, each of these options prompts the user to select a value between 0
and 15 to indicate which audio outputs will have a contribution from the
selected input. The following grids fully show the relationship between the
value selected (0-15) and the output channels the audio is copied to (OP1-4).
Page 52
Miranda Technologies Ltd
Easysound Stand-alone User Manual
Common Commands
0
1
2
3
4
5
6
7
OP 1
Off
On
Off
On
Off
On
Off
On
OP 2
Off
Off
On
On
Off
Off
On
On
OP 3
Off
Off
Off
Off
On
On
On
On
OP 4
Off
Off
Off
Off
Off
Off
Off
Off
8
9
10
11
12
13
14
15
OP 1
Off
On
Off
On
Off
On
Off
On
OP 2
Off
Off
On
On
Off
Off
On
On
OP 3
Off
Off
Off
Off
On
On
On
On
OP 4
On
On
On
On
On
On
On
On
Example:
Assigning a value of 15 to ‘VO IP Shuf Chan 1’ will copy the mono audio
feed coming into channel 1 of the voice over input to all 4 output channels.
GPI Outputs Assign
A GPI port may used as an output to trigger external devices and its active
status, (on), is defined by the output being internally pulled to ground by a
"Darlington" configured transistor such that an active low will be represented
by +0.7V. Lamps or relays attached to an output GPI may use the GPI +12V
supply (pin 8) but the maximum current drawn from this supply should not
exceed 500mA.Where a GPI output is used to drive a relay coil, reverse
voltage protection diodes should be incorporated into the circuitry to protect
the Easysound Standalone from voltage transients.
Only GPI 1 to GPI 7 may be assigned as a GPI Output but each GPI may
have a condition assigned whether it is set on or off, i.e. GPI Out x On or GPI
Out x Off .
Miranda Technologies Ltd
Page 53
Common Commands
Easysound Stand-alone User Manual
Insert
To insert a GPI output, choose GPI outputs assign/GPI x/. The following
options are then available:
NOT DEFINED
mixer at A
mixer at B
Audio AB mix at A
Audio AB mix at B
Audio follow AB on
Audio follow AB off
Audio FTS on
Audio FTS off
VO1 Pair1 off
VO1 Pair1 on
VO1 Pair2 off
VO1 Pair2 on
VO2 Pair1 off
VO2 Pair1 on
VO2 Pair2 off
VO2 Pair2 on
Audio follow FTB on
Audio follow FTB off
FTB at off
FTB at on
keyer at off
keyer at on
FTB fader disd
FTB fader enbld
keyer fader disd
keyer fader enbld
programme fade to black is turned off
programme fade to black is turned on
image in programme keyer is not to air
image in programme keyer is to air
fade to black fader is disabled
fade to black fader is enabled
main image fader is disabled
main image fader is enabled
Set-up Audio
See the various mode chapters.
Page 54
Miranda Technologies Ltd
Easysound Stand-alone User Manual
Common Commands
Faders Setup
Up to 8 external faders (potentiometers) may be connected thought the rear
panel AES Control Port of the Easysound Standalone and a further 8 through
the SDI Control port. These faders are used to manually control the rate at
which the Easysound Standalone will execute a command and will override
settings made through the front panel.
Analogue faders may be used to control fades and mixes. A resistive (linear)
potentiometer of at least 10KΩ should have its fixed terminals connected
between pin 7 (+5V) and pin 15 (Ground). The variable output of the pot
should connect to the appropriate fader input pin.
Screened cable should be used to connect the fader to the Easysound
Standalone and the screen of the cable should only be connected to ground at
the Easysound Standalone end of the cable to avoid earth loops, and to
restrict extraneous signal levels to less than 1 mV.
The Faders Setup menu includes the following options:
Audio A/B Mix
Output Level
FTS Level
VO 1 Pr 1 and Pr 2 Level
VO 1 Pr 1 and Pr 2 Pset
VO 1 Pr 1 and Pr 2 Duck
VO 2 Pr 1 and Pr 2 Level
VO 2 Pr 1 and Pr 2 Pset
VO 2 Pr 1 and Pr 2 Level
A and B Input Level
VO Input Level
A and B Input Trim
VO Input Trim
Each option is described in the following sections:
Miranda Technologies Ltd
Page 55
Common Commands
Easysound Stand-alone User Manual
Audio A/B Mix
When the appropriate fader is displayed (see list below), you can:
♦
♦
♦
press enter to enable or disable the fader
invert the polarity of the displayed fader
prevent sudden jumps caused by accidental fader movements by doing a
fader pickup (the fader must be moved through the current position
before you take control)
Unassigned
Vid_ADC 1
Vid_ADC 2
Vid_ADC 3
Vid_ADC 4
Vid_ADC 5
Vid_ADC 6
Vid_ADC 7
Vid_ADC 8
AudioMeter 1
AudioMeter 2
AudioMeter 3
AudioMeter 4
AudioMeter 5
AudioMeter 6
AudioMeter 7
AudioMeter 8
Aud_ADC 1
Aud_ADC 2
Aud_ADC 3
Aud_ADC 4
Aud_ADC 5
Aud_ADC 6
Aud_ADC 7
Aud_ADC 8
Video FG
Video FG FTB
Video MG
Video MG FTB
Page 56
no selection
enable no/yes, invert no/yes, enable pickup no/yes
Miranda Technologies Ltd
Easysound Stand-alone User Manual
Video AB
Audio AB
Common Commands
enable no/yes, invert no/yes, enable pickup no/yes
Output Level
When the appropriate fader is displayed (see list below), you can:
♦
♦
♦
press enter to enable or disable the fader
invert the polarity of the displayed fader
prevent sudden jumps caused by accidental fader movements by doing a
fader pickup (the fader must be moved through the current position
before you take control)
Unassigned
Vid_ADC 1
Vid_ADC 2
Vid_ADC 3
Vid_ADC 4
Vid_ADC 5
Vid_ADC 6
Vid_ADC 7
Vid_ADC 8
Aud_ADC 1
Aud_ADC 2
Aud_ADC 3
Aud_ADC 4
Aud_ADC 5
Aud_ADC 6
Aud_ADC 7
Aud_ADC 8
Video FG
Video FG FTB
Video MG
Video MG FTB
Video AB
Audio AB
Miranda Technologies Ltd
no selection
enable no/yes, invert no/yes, enable pickup no/yes
Page 57
Common Commands
Easysound Stand-alone User Manual
FTS Level
See Output Level above for a full list of options.
VO 1 Pair 1/2 Level
See Output Level above for a full list of options.
VO 1 Pair 1/2 Pset
See Output Level above for a full list of options.
VO 1 Pair 1/2 Duck
See Output Level above for a full list of options.
VO 2 Pair 1/2 Level
See Output Level above for a full list of options.
VO 2 Pair 1/2 Pset
See Output Level above for a full list of options.
VO 2 Pair 1/2 Duck
See Output Level above for a full list of options.
A/B Input Level
See Output Level above for a full list of options.
VO Input Level
See Output Level above for a full list of options.
Page 58
Miranda Technologies Ltd
Easysound Stand-alone User Manual
Common Commands
A/B Input Trim
See Output Level above for a full list of options.
VO Input Trim
See Output Level above for a full list of options.
File
The file facility allows you to save the Easysound Standalone configuration
to both a floppy disk and the unit's hard disk. The process saves all the GPI
assignments, the fader enable/disables, the mode setting and system
configuration and can be used to re-instate the settings. Files created by a
diagnostic save are sometimes requested by the Miranda Technologies Ltd
Customer Support staff to aid in resolving customer queries. The following
options are available from the File menu:
Configuration Save
This procedure requires a DOS formatted, 3½" floppy disk. Label the disk
"Easysound Standalone Configuration" and add the unit's serial number and
location of the unit plus the date.
This feature saves the current configuration to both the internal hard disk and
to a floppy disk that is in the front panel disk drive. Place the 3½" disk in the
front panel drive and select set-up from the start-up menu before pressing the
enter key. From the set-up menu, use the arrow keys W X to display the
option file in line two of the display and press the enter key to bring up the
file menu. Use the arrow keys W X to display the configuration save option
and press the enter key. After a few moments the display will respond with
the following message and the configuration disk will be saved.
Miranda Technologies Ltd
Page 59
Common Commands
Easysound Stand-alone User Manual
Configuration Load
This procedure uses a 3½" floppy disk, previously created using the
procedure described under "Configuration Save".
The feature loads the configuration from the floppy disk that is in the frontpanel disk drive and configures the Easysound Standalone to conform to the
settings on the disk. Place the configuration disk in the front-panel drive and
select set-up from the start-up menu before pressing the enter key. From the
set-up menu, use the arrow keys W X to display the option file in line two of
the display and press the enter key to bring up the file menu. Use the arrow
keys W X to display the configuration load option and press the enter key to
start the loading process.
After a few moments the display will respond with a series of messages as it
sequentially loads the configuration components.
Diagnostics to FDD
This procedure requires a DOS formatted, 3½" floppy disk. Label the disk
"Easysound Standalone Diagnostic" and add the serial number of the unit
together with the date.
The feature saves diagnostic data to the floppy disk that is in the front-panel
disk drive. The Miranda Technologies Ltd support team may request a copy
of this diagnostic data to assist in resolving customer queries. Place a DOS
formatted blank disk in the front panel drive and select set-up from the startup menu before pressing the enter key. From the set-up menu, use the arrow
keys W X to display the option file in line two of the display and press the
enter key to bring up the file menu. Use the arrow keys W X to display the
diagnostics to FDD option and press the enter key to start the saving process.
Load System Codes
The Load System Codes feature is used to provide for the entry of "licence"
codes that enable specific options. The Miranda Technologies Ltd support
team will provide full installation and operation instructions at the time of
issue of a licence. Licences are typically issued as files and may be provided
on a 3½" disk or via e-mail. If received by e-mail, transfer the file or files to a
Page 60
Miranda Technologies Ltd
Easysound Stand-alone User Manual
Common Commands
blank DOS formatted disk and place the disk in Easysound Standalone’s
FDD.
Installing system codes
To install system codes from a supplied floppy disk:
♦
♦
insert the floppy disk in the Easysound Standalone floppy drive
choose Load System Codes from the Setup/File front-panel menu
To install system codes from an email file (syscodes.txt):
♦
♦
♦
transfer the email file (syscodes.txt) to a blank DOS formatted floppy
disk
insert the floppy disk in the Easysound Standalone floppy drive
choose Load System Codes from the Setup/File front-panel menu
To create and install system codes:
♦
♦
♦
♦
create a file called syscodes.txt (using a text editor)
edit the file to include the required entry/entries from the list below and
then transfer the file to a floppy disk
insert the floppy disk in the Easysound Standalone floppy drive
choose Load System Codes from the Setup/File front-panel menu
The SYSCODES.TXT file can include one or more of the following entries:
IP_ADDRESS
sets up the machine’s IP address (for Ethernet
access via Miranda Technologies Ltd’s MDS
system)
SUBMASK
sets up the machine’s IP submask (for Ethernet
access via Miranda Technologies Ltd’s MDS
system) default = 255,255,0,0
HOSTNAME
sets up the machine’s host name – this name is
displayed on the root menu of the Oxtel RCP
panel and on the front-panel scrolling screen (note
that this command is not currently used for
Ethernet naming)
GATEWAY
set the machines gateway address,
default= 0 0 0 0
Miranda Technologies Ltd
Page 61
Common Commands
LICENCE*
Easysound Stand-alone User Manual
installs a licence code provided by Miranda
Technologies Ltd (a four-character ID such as
ENET)
clears an installed licence code off the machine
for IS3 systems only
LICENCE_CLR
MPEG IP ADDRESS
PASS_CAPTIONS
PASS_CAPTIONS: ON
PASS_CAPTIONS: OFF enables support for line 21 close captions
* A valid licence code can only be obtained from Miranda Technologies Ltd.
What are licence codes?
Licence codes are issued by Miranda Technologies Ltd to enable you to use
various software options. You can look at any installed licences using the onscreen information (see System Information/On-Screen Information in the
user manual). Licence codes are held on the main system PCB and are
typically linked to a specific machine serial number.
Example SYSCODES.TXT file
The following example of a SYSCODES.TXT file sets the IP, submask and
hostname and then installs a licence code:
IP_ADDRESS: 179.1.2.3
SUBMASK: 255.255.255.0
HOSTNAME: Logo_1
LICENCE: ASD4-EFGT-54YP-ZZQV-L9UW
System Information
The system information facility allows you to monitor the status of the fixed
settings and options of the unit.
Each time the enter key is pressed the following item of system information
will be displayed. The status information is looped and repeated pressing of
the enter key will result in the same information being re-displayed. Pressing
the escape key several times will return the display to the start-up menu.
♦
♦
Serial No
Output type (PGM+SDI or PVW=SDI)
Page 62
Miranda Technologies Ltd
Easysound Stand-alone User Manual
♦
♦
♦
♦
♦
♦
♦
♦
♦
♦
♦
♦
♦
♦
♦
♦
♦
♦
♦
Common Commands
IP Address (10.96xx)
CPU Memory (in Mb)
Hardware revisions (PCBx or CPLDx where x = the revision number)
Firmware filename (in the format essa0x.exo)
Easyplay Licence (Enabled)
Audio GPI file ID (Pass Embedded Audio)
Audio Board Hardware (ver a130)
Audio DSP Code (ver 3014)
Software build date (date and time)
Internal temp (in degrees centigrade)
-12V Supply (volts)
-5V Supply (volts)
+3.3V Supply (volts)
+5V Supply (volts)
+5V Analog Supply (volts)
+12V Supply (volts)
PLL Volts (volts)
Current time (date and time)
Running since (date and time)
View Licence
When the View Licence option is displayed, simply use the arrow keys to
switch between the installed licences.
Set time-of-day
When the Set time-of-day option is displayed you can display or adjust the
current setting of the internal battery-backed clock.
With the date and time first displayed, the month setting may be changed
using the left and right arrow keys W X. When adjusted correctly, press the
enter key to move to the day setting. The arrow keys W X are now used to
adjust the day and further presses of the enter key will allow changes to be
made to the year, hour, minutes and seconds in a similar manner.
Miranda Technologies Ltd
Page 63
Common Commands
Easysound Stand-alone User Manual
System
The System options allows you to re-configure the parameters described in
the following sections.
System change No Yes
When the System change No Yes option is displayed you can use the arrow
keys W X to select YES and then press the enter key to display the options
described below.
625/525 Line
The 625/525 setting must be set to the appropriate TV standard where PAL =
625 line and NTSC = 525 line. The current setting will be shown enclosed by
brackets. To change the setting, use the arrow keys to select the new setting
and press the enter key to apply it.
Audio Control
When the Audio Control option is displayed you can choose to restart (now
or later) one of the following items:
♦
♦
♦
GPI file
Model
AES 6 Channel
Select reference
To operate as part of a broadcast system, or to operate stand alone,
Easysound Standalone digital video frames must be synchronised to a
reference source.
Miranda Technologies Ltd recommends the use of a common analogue
"black and burst" reference source. Once the initial phase-lock has been set
up, phase locked loop circuits within Easysound Standalone automatically
maintain the synchronisation.
Page 64
Miranda Technologies Ltd
Easysound Stand-alone User Manual
Common Commands
The alternative to a common analogue reference source is to use the
background SDI signal as the source of timing. This may be more suitable
where the unit is used within a simple presentation system.
The current setting (Analogue (Black and Burst) or SDI Bgnd) is enclosed in
brackets. To change the setting, use the arrow keys W X to display the new
setting and press the enter key to apply it.
Reference timing
When the Reference timing option is displayed you can adjust the timing
from –7 lines 63.703uS to +7 lines 6.3 703uS.
Serial comms setup
When the Serial comms setup option is displayed you can view or change the
Protocol (RS-232 or RS 422) or baud rate (19200, 38400, 57600 or 115200).
The current setting is enclosed in brackets. To change the setting, use the
arrow keys W X so that the new setting is shown within the brackets and
press the enter key to apply the selection.
RCP Mirror
The RCP Mirror option enables you to disable or enable it.
Restart System
To re-boot the unit without removing the power (a warm re-boot), use the
arrow keys W X so that the brackets enclose the YES option and then press
enter again.
Clean Restart
The clean restart feature provides for the erasure of all configuration file
settings and returns Easysound Standalone to the original factory settings.
Video (and audio) GPI settings and all image files are retained.
To clean restart the unit, use the arrow keys W X so that the brackets enclose
the YES option and press enter again.
Miranda Technologies Ltd
Page 65
Common Commands
Page 66
Easysound Stand-alone User Manual
Miranda Technologies Ltd
Easysound Stand-alone User Manual
Configuration and Set Up
This section of the User Manual provides step by step description of the
setting up procedures required for integration of Easysound Standalone into a
broadcast system.
Ventilation
Easysound Standalone is ventilated through its side panels. It is essential that,
the ventilation holes in its sides remain clear of any obstruction.
Power Requirements
The unit uses a mains supply input circuit that auto-senses whether the
applied AC mains voltage is 110V or 240V and responds accordingly. The
unit is tolerant of both 50Hz and 60Hz AC supplies, and under normal
conditions, its power consumption will not exceed 50 watts.
A 20mm mains input fuse, rated at 2 Amp (slow blow) forms part of the
mains connection inlet and is accessible from the rear of the unit.
Environment
The Easysound Standalone will tolerate operating temperatures in the range
0°C to 40°C with humidity of between 20 and 80%, non-condensing. The
unit is more tolerant in storage and may be stored at temperatures ranging
from -10°C to 70°C.
Rear Panel Connections
Easysound Standalone can have up to nineteen rear panel connectors (four
are installed when the EasySound/EasyPlay option is fitted) and an earthbonding stud. A description of the purpose of each connector is given in the
following table.
Miranda Technologies Ltd
Page 67
Configuration and Set Up
Easysound Stand-alone User Manual
Identification
Connector Type
Usage
110-240V AC
IEC, with integral fuse
Mains supply.
PSU1,2 (2RU)
2x IEC plus fuses
GND
Stud
Earth Bonding (connect to rack
earth)
RS232
D-type, 9-way, female
RS-232 serial port for point-topoint automation.
RS422/485
D-type, 9-way, male
RS-422 serial port for
automation.
VGA
D-type, 9-way, male
Miranda Technologies Ltd
development use only
KBD
Keyboard connector
Miranda Technologies Ltd
development use only.
Ethernet
Twisted pair and
coaxial LAN
connectors
Access to Ethernet for media
transfers.
AUX
D-type, 9-way, male
Internal use only.
Control Panel
D-type, 9-way, female
Connection for Miranda
Technologies Ltd RCP-200E
orRCP-201.
AES Control
Port
D-type, 25 way, female
Connection for EasySound or
EasyPlay "GPI's and Faders". .
SDI Control
Port
D-type, 25-way ,
female
Connection for Imagestore
GPI's, Faders and timecode.
AES Output
D-type, 25-way, male
EasySound or EasyPlay audio
outputs.
AES Input
D-type, 25-way, male
EasySound or EasyPlay audio
inputs.
REF
BNC type, female
Connection for "black and
burst" analogue timing signal
PVW
BNC type, female
SDI (optionally analogue)
preview output.
Page 68
Miranda Technologies Ltd
Easysound Stand-alone User Manual
Configuration and Set Up
Identification
Connector Type
Usage
PGM
BNC type, female
SDI programme output
A-Copy
BNC type, female
Re-clocked, re-equalised copy
of BGnd/A input signal.
BGnd/A
BNC type, female
Background SDI video input.
B
BNC type, female
B input signal
Serial Remote Control
Easysound Standalone features three serial remote control ports identified as
"Control Panel", "RS232" and "RS422”
Control Panel
The "Control Panel", D-type, 9-way connection is used ONLY to connect
Miranda Technologies Ltd remote control panel Oxtel RCP and the pin
format is shown in the following table.
Pin
Control Panel (RCP)
1
GND
2
Data A -
3
Data B +
4
0V out
5
GND
6
GND
7
Data A +
8
Data B -
9
+12V Output
Miranda Technologies Ltd
Page 69
Configuration and Set Up
Easysound Stand-alone User Manual
RS232
Point to point, serial automation control can be achieved using the RS232
serial interface. The port conforms to the normal conventions for a standard
PC serial, D-type, 9-pin, port and the pin format is shown in the following
table.
Pin
RS232
2
Rx
3
Tx
5
GND
1, 4, 6 - 9
Not Used
RS422
Serial automation can be achieved using the RS422 serial interface. This port
conforms to the pin format shown in the following table.
Pin
RS422
1
Tx -
2
Tx +
3
Rx +
4
Rx -
5
GND
6- 9
Not Used
SDI Control Port
The SDI Control Port is used to connect external faders, GPI's and linear time
code. A full listing of the pin format for this connection is shown in the
following table.
Page 70
Miranda Technologies Ltd
Easysound Stand-alone User Manual
Configuration and Set Up
Pin
SDI Control Port Function
1
LTC input (+).
2
LTC gnd
3
analogue fader - spare (not used).
4
analogue fader - spare (not used).
5
analogue fader - spare (not used).
6
analogue fader - main FTB input.
7
analogue fader voltage source V+ output.
8
GPI voltage source +12V output.
9
GPI 8 input (user assigned).
10
GPI 6 input/output (user assigned).
11
GPI 4 input/output (user assigned).
12
GPI 2 input/output (user assigned).
13
GPI ground connection.
14
LTC input (-)
15
analogue fader ground return
16
analogue fader - transparency input
17
analogue fader - gain input
18
analogue fader - clip input
19
analogue fader - main fade input
20
not connected
21
GPI 9 input (user assigned).
22
GPI 7 input/output (user assigned).
23
GPI 5 input/output (user assigned).
Miranda Technologies Ltd
Page 71
Configuration and Set Up
Easysound Stand-alone User Manual
Pin
SDI Control Port Function
24
GPI 3 input/output (user assigned).
25
GPI 1 input/output (user assigned).
AES inputs
The AES input port is used to connect the six digital AES/EBU audio
channels identified as AES_IN_1 to AES_IN_6. Each input source should be
connected to the Easysound module over two wires using balanced
(differential) signals and a grounded shield. Signal and associated pin-out
connections are given in the following table.
Pin
Signal
Pin
Signal
1
AES_IN_3 (+)
14
AES_IN_3 (-)
2
GND
15
GND
3
AES_IN_4 (+)
16
AES_IN_4 (-)
4
GND
17
GND
5
AES_IN_1 (+)
18
AES_IN_1 (-)
6
GND
19
GND
7
AES_IN_2 (+)
20
AES_IN_2 (-)
8
GND
21
GND
9
AES_IN_5 (+)
22
AES_IN_5 (-)
10
GND
23
GND
11
AES_IN_6 (+)
24
AES_IN_6 (-)
12
GND
25
GND
13
No connection
Page 72
Comment
Voice over 1
Voice over 1
A input
A input
Voice over 2 or B input if
AB Mixer fitted
Voice over 2 or B input if
AB Mixer fitted
Miranda Technologies Ltd
Easysound Stand-alone User Manual
Configuration and Set Up
AES output
The AES output port provides access to four digital, AES audio channels,
identified as AES_OUT_1 to AES_OUT_4. Each self-clocking output is
available from the Easysound module over two wires using balanced
(differential) signals. Signal grounds are available for connection to cable
screens where required. The associated pin-out connections are given in the
following table.
Pin
Signal
Pin
Signal
Comment
1
AES_OUT_1 (+)
14
AES_OUT_1 (-)
Preview pair 1
2
GND
15
GND
3
AES_OUT_2 (+)
16
AES_OUT_2 (-)
4
GND
17
GND
5
AES_OUT_3 (+)
18
AES_OUT_3 (-)
6
GND
19
GND
7
AES_OUT_4 (+)
20
AES_OUT_4 (-)
8
GND
21
GND
9 - 12
13
No connection
22 - 25
Preview pair 2
PGM Pair 1
PGM Pair 2
No connection
+5v
AES GPI control
The AES control port provides access to the GPI features of Easysound and
Easyplay. The functions of the module can be controlled by the GPI input
and output ports once the ports have been configured. Level transitions from
external hardware on specific GPI input ports can be programmed to invoke
user-defined actions. Status conditions can be allocated to GPI output ports
and may be used externally. In addition to internal pseudo-faders, external
hardware faders may be connected to the appropriate AES control lines as
described later in this section. The pin-out allocations of the AES control port
are shown in the following table.
Miranda Technologies Ltd
Page 73
Configuration and Set Up
Easysound Stand-alone User Manual
AES GPI Control Function
GPI 1 (Input or Output)
25
GPI 2 (Input or Output)
12
GPI 3 (Input or Output)
24
GPI 4 (Input or Output)
11
GPI 5 (Input or Output)
23
GPI 6 (Input or Output)
10
GPI 7 (Input or Output)
22
GPI 8 (Input only)
9
GPI 9 (Input only)
21
GPI Voltage Source (+12V)
8
GPI Ground
13
Fader 1
19
Fader 2
6
Fader 3
18
Fader 4
5
Fader 5
17
Fader 6
4
Fader 7
16
Fader 8
3
Fader Voltage Source (V+)
7
Fader Ground Return
15
Not Used
Not Connected
Page 74
Pin
1, 2, 14
20
Miranda Technologies Ltd
Easysound Stand-alone User Manual
Configuration and Set Up
KBD and VGA Connections
Hardware interface listings deliberately exclude details of the unit's rear panel
"kbd" and "vga" connectors.
The "kbd" and "vga" connections are solely for use by the Miranda
Technologies Ltd development team and no user functions can be accessed
via these ports. Making any connection to these ports is a high-risk activity
that Miranda Technologies Ltd would strongly advise against.
Imagestore 2 / 3 connections
To connect an Easysound Standalone and an Imagestore 2, Solo, 2U or 3 to a
Presmaster use a RS422 loop through lead. The transmit lines from the ESSA
must NOT be connected.
Presmaster
Pin1
GND
Pin 2
RXPin 3
TX+
Pin 7
RX+
Pin 8
TX-
Miranda Technologies Ltd
Imagestore
Pin 5
GND
Pin 1
TXPin 3
RX+
Pin 2
TX+
Pin 4
RX-
ESSA
Pin 5
Pin 1
Pin 3
Pin 2
Pin 4
GND
N/C
RX+
N/C
RX-
Page 75
Configuration and Set Up
Easysound Stand-alone User Manual
Imagestore HDTV connections
To connect an Easysound Standalone to an Imagestore HDTV use a RS422
lead wired as follows.
Imagestore HDTV
Pin1
GND
Pin 8
TXPin 7
RX+
Pin 3
TX+
Pin 2
RX-
ESSA
Pin 5
Pin 1
Pin 3
Pin 2
Pin 4
GND
TXRX+
TX+
RX-
Connect the lead to the ‘RS422(B)’ port on the rear panel of the Imagestore
HDTV. Refer to the Imagestore HDTV User Manual to configure the port.
Presmaster can be connected directly to the Imagestore HDTV, which will
forward all the appropriate automation commands (Y0, Y8 and all j
commands) to the ESSA.
Page 76
Miranda Technologies Ltd
Easysound Stand-alone User Manual
System Timing
System Timing
This final part of the section describes the way in which signals applied to,
processed by and output from, Easysound Standalone are synchronised.
Propagation delays through the unit are discussed and the method used to
adjust and set this particular type of delay is detailed.
To obtain the highest standard of performance from the Miranda
Technologies Ltd Easysound Standalone it is highly recommended that the
user be acquainted with the concepts of synchronisation and timing. An
understanding of the timing relationships within the Miranda Technologies
Ltd Easysound Standalone and the equipment with which it interfaces,
enables the user to determine the optimum timing of the overall system.
Overview
Where signals from more than one source are to be processed, it is essential
that these signals are precisely synchronised and perfectly in-phase, prior to
processing. Within certain specified tolerances, described later, Easysound
Standalone is able to automatically re-synchronise the signals that are applied
to its three signal inputs.
As signals pass through Easysound Standalone, or any other equipment, they
are unavoidably subjected to a propagation delay. The value of the delay may
vary depending on the mode configuration of the unit. Rather than exhibiting
a non-quantifiable propagation delay, Easysound Standalone is provided with
a timing adjustment that enables the integrator or user to set a specifically
determined propagation delay through the unit. This timing adjustment may
be used to match an Easysound Standalone to the propagation delays of other
Easysound Standalones or of other broadcast equipment.
Miranda Technologies Ltd always recommends the use of a separate
analogue, "Black and Burst", reference signal for timing all the equipment
within a system. Where this method of timing is used, it is common for the
reference source to be located some distance from the Easysound Standalone
and it is possible that the synchronisation of the SDI input signals and the
"Black and Burst" reference may be displaced by several video "lines".
Where this preferred form of timing is chosen the Easysound Standalone
Miranda Technologies Ltd
Page 77
System Timing
Easysound Stand-alone User Manual
timing adjustment is given a second parameter to allow for the potential
"line" discrepancy.
Timing Adjustment
The timing adjustments available for Easysound Standalone do not affect the
automatic synchronisation of input and output signals. The set-up adjustment
simply controls the value of propagation delay through the Easysound
Standalone.
Where analogue reference is selected an additional parameter providing for a
line correction factor becomes available. The following paragraphs discuss
the adjustments in detail.
Measurement and Test Equipment
The timing adjustments for Easysound Standalone can be accurately set using
either a digital video signal analyser, or a good quality oscilloscope together
with a SDI digital to analogue converter. The following description describes
the use of an oscilloscope and converter to adjust the timing.
SDI BGnd/A Reference
When the SDI A/BGnd input signal has been chosen as a reference, the setup display offers an adjustment range where the value of propagation delay
the ranges from "0 lines and 12.025µS" to "0 lines and 63.899µS".
Once the requirement for propagation delay has been determined, the arrow
keys W X are used to set this desired value for Easysound Standalone and the
enter key is used to apply the selection. Where an oscilloscope and digital to
analogue converter is available, the analogue signal at the input and output
should be viewed simultaneously during the adjustment. By expanding the
traces on the oscilloscope, very accurate settings can be achieved.
Where the operation includes use of the B/Fill and/or Key inputs, these inputs
should be checked for their timing position with respect to the A/BGnd input.
Should either signal be early with respect to the A/BGnd input, the maximum
setting for propagation delay is effectively restricted by this period. Although
Page 78
Miranda Technologies Ltd
Easysound Stand-alone User Manual
System Timing
the Easysound Standalone will permit settings in excess of the maximum
permissible, the effective adjustment limit is reduced accordingly.
If either signal is late with respect to the A/BGnd input then the lower
propagation delay limit value is effectively increased accordingly. For
example, if Key is 5µS late and B/FILL is 5µS early, with respect to A/BGnd
then the valid adjustment range, with EasySound, is effectively reduced to "0
lines and 17.025µS" through "0 lines and 58.899µS".
Analogue Reference (Black and Burst)
Using the Black and Burst analogue input as reference, the timing and
synchronisation adjustment has to be given a much wider range. B&B signals
have typically been looped through a number of cascaded equipment and
extensive propagation delays are possible. The full range of the adjustment is
from "- 7 lines - 63.666µS" to "+7 lines + 63.444µS". When setting up
Easysound Standalone to operate with the B&B reference, that signal and an
analogue version of a PGM or PVW output signal should be viewed on two
traces of an oscilloscope. View the frame pulse of the each and adjust the
timing setting until the two frame pulses occur within the same line. With this
achieved, view both an analogue copy of the BGnd/A signal and an analogue
output signal. Adjust the propagation delay as described taking care not to
alter the "line" value.
Miranda Technologies Ltd
Page 79
System Timing
Page 80
Easysound Stand-alone User Manual
Miranda Technologies Ltd
Easysound Stand-alone User Manual
Support
Support
Product Support
Miranda Technologies Ltd's support desk exists to provide timely help and
advice to Miranda Technologies Ltd users and telephone support is available
for the entire life of the product. The support desk may be contacted using
any of the following methods.
Telephone: +(44) 1491 820222
(Monday to Friday, 0900-1730 (U.K. times))
Fax:
+(44) 1491 820002 (at all times)
E-mail:
[email protected] (at all times)
Where the query relates to a specific Easykey, make a note of the unit's serial
number (on the rear panel) and the software version (displayed on the front
panel at boot-up).
Warranty and Non-Warranty Repairs
Miranda Technologies Ltd provides all products that are sold new with a twoyear, return-to-base warranty. Products that are purchased as “ex-demo” may
have a limited warranty and reference should be made the original
acknowledgement of order or the Product Certificate for warranty details.
A repair service for warranty and non-warranty products provides a typical
turnaround time of ten working days. The procedure for returning a unit to
Miranda Technologies Ltd is given later in this section.
Miranda Technologies Ltd
Page 81
Support
Easysound Stand-alone User Manual
Obsolescence
Obsolete products will be supported for a minimum of 3 years from the date
of obsolescence. Miranda Technologies Ltd will continue to provide support
beyond this period, but will not replenish service stock and is therefore
unable to guarantee the availability of every component used.
Upgrades
Software upgrades are regularly available as part of a continuing commitment
to product improvement. Most software upgrades can be performed remotely
and customers are kept informed of software and hardware upgrades via
Release Notes that are e-mailed to the nominated contact.
Hardware upgrading is normally carried out at Miranda Technologies Ltd’s
factory and involves full re-testing and QA checks. Refurbishment can also
be performed where required but these are not covered by the standard
warranty.
Service Visits
On-site assistance from a Miranda Technologies Ltd Field Service Engineer
will be provided assuming adequate notice is given. Service visits are
normally chargeable and are not covered by the standard warranty.
Equipment Loans
A variety of loan agreements are possible and can be arranged with the
Engineering Support department through the helpdesk although it is not
always possible to fulfil loan requests at short notice.
Training
Customer training can be provided to match individual requirements.
Training can be carried out either at customer premises (preferred option) or
at Miranda Technologies Ltd’s facility in Oxfordshire where a dedicated
demonstration room is available.
Page 82
Miranda Technologies Ltd
Easysound Stand-alone User Manual
Support
Courses can be tailored for either technical or operational staff and these
courses can be ordered at the same time as the equipment or at any
subsequent time.
Web Page
Miranda Technologies Ltd’s web page can be found at www.miranda.com.
Returns Procedure
Should there be a need to return any Miranda Technologies Ltd product for
upgrade or repair, telephone the Helpdesk and request a "return number".
The helpdesk will ask for details of the return including the unit’s serial
number, reason for return and any fault information. Make sure that these
details are to hand when contacting the helpdesk.
Mark the “return number” clearly on any packaging as well as on the return
paperwork. Any subsequent correspondence should reference this “return
number”.
Transit Packaging
When returning equipment ensure that it is adequately packaged using good
quality materials. Particularly ensure that the unit is tightly packed within a
strong carton (preferably the original) and avoid common polythene or
polystyrene chips, since the product may contain static sensitive devices.
Some components, such as hard drives, may be susceptible to damage by
physical shock and caution is required when removing the equipment from
racks.
Units received at Miranda Technologies Ltd with obvious damage, not
described on the accompanying documentation, or not notified to Miranda
Technologies Ltd by the customer, are assumed damaged in transit and this is
chargeable. Customers are strongly advised to insure the equipment against
damage in transit when returning it to Miranda Technologies Ltd. Should a
unit be received from Miranda Technologies Ltd in a damaged state (either
new or repaired), this should be reported to both the courier and Miranda
Technologies Ltd immediately.
Miranda Technologies Ltd
Page 83
Support
Page 84
Easysound Stand-alone User Manual
Miranda Technologies Ltd
Easysound Stand-alone User Manual
Appendix 1
Appendix 1
Product Specification
SDI Inputs and Outputs
The Easysound Standalone’s SDI inputs accept serial digital video to EBU
(Tech. 3267-E) and SMPTE 259M standards, clocked at 270MHz, through
screened BNC connectors. There is a Return Loss greater than 15dB, over the
range 5MHz to 270MHz. Each input circuit is provided with automatic
adaptive equalisation circuitry suitable for cable lengths of up to 250 metres
(typical for Belden 8281 or equivalent coaxial cable).
Both SDI outputs are to the same data structure and physical standard as the
inputs and provide output amplitudes of 800mV (± 10%). Output circuits will
provide a signal whose transitions have a rise-time of between 0.4 and 1.2
nanoseconds. Each output is also fully equalised and regenerated.
Analogue Reference Video Input
Wherever possible, Easysound Standalone should be configured so that
reference timing for synchronisation is taken from an analogue reference
source to ensure uninterrupted output in the absence of a background signal.
Analogue signals such as PAL (625), NTSC (525), or component video with
embedded sync are all suitable.
Power Requirements
Easysound Standalone accepts power from a 90-132V or 180-264V, 60Hz or
50Hz, AC mains supply. The mains supply input fuse is a T2A (2 Amp Antisurge) and should always be replaced with a fuse of the same rating.
Miranda Technologies Ltd
Page 85
Appendix 1
Easysound Stand-alone User Manual
Interfaces
The Easysound Standalone employs five types of control and image
interfaces and a summary of these is given in the following table.
Interface Type
Description
RS422/RS232
Automation serial control interfaces.
Ethernet
Image Loading and Transfer (optional).
Panel
Serial Interface for Remote Control Panel.
GPI's
Nine GPI's with input and output macro editor.
Faders
Seven analogue fader inputs.
Mechanical
If the unit is contained within a 1RU chassis it will have the following
mechanical specification.
Height: 44mm (1.75")
Width:
482mm (19") with mounting ears, 442mm (16.75") without ears.
Depth:
444mm(17.55") with rear connectors, 423mm (16.75") without
connectors.
Weight: 7.0kg
If the unit is contained within a 2RU chassis it will have the following
mechanical specification.
Height: 88mm (3.46")
Width:
482mm (19") with mounting ears, 442mm (16.75") without ears.
Depth:
444mm(17.55") with rear connectors, 423mm (16.75") without
connectors.
Weight: 10.5kg (23.1lbs)
Cooling Forced air via internal fans
Page 86
Miranda Technologies Ltd